

Quick Facts:
- Genre: Car photography
- Best light: Golden hour or soft overcast, never harsh midday sun
- Static settings: f/8 to f/11, ISO 100, tripod
- Rolling shot settings: Shutter around 1/100s, tracking the car
- Lens: A 24-70mm covers most work; a 70-200mm adds compression
- Key accessory: A circular polarizer to control reflections
- Skill level: Beginner to advanced
- Best for: Enthusiasts, sellers, and anyone framing a car for the wall
10 min read
In This Guide
- What It Takes to Shoot Cars Well
- Car Photography Settings at a Glance
- Gear and Lenses
- Camera Settings for Sharp Shots
- Light and Time of Day
- Locations and Backgrounds
- Prep the Car Before You Shoot
- Static Shots: Angles and Detail
- Rolling Shots: Panning for Motion
- Night and City Car Photography
- Editing: Reflections and Paint
- Common Mistakes to Avoid
- Printing and Displaying Your Shots
- Final Verdict
- Frequently Asked Questions
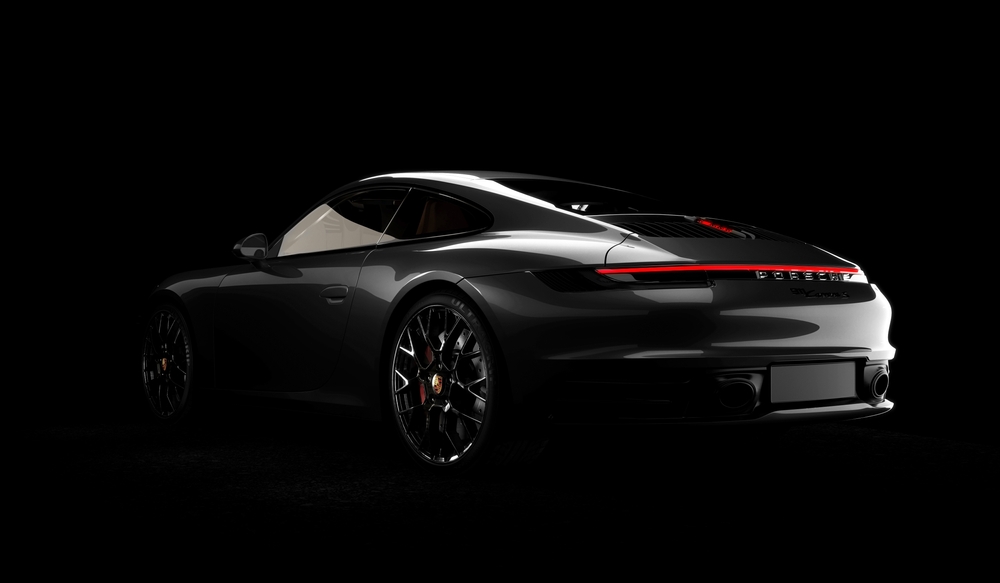
Car Photography: What It Takes to Shoot Cars Well

Car photography looks easy until you try it. A car is a giant curved mirror, so it reflects everything around it: the sky, the trees, the buildings, and often the photographer. Strong results come from controlling those reflections and shaping the light, not from owning the most expensive camera.
The genre splits into two main styles. Static shots capture a parked car with deliberate angles and clean detail, while rolling shots freeze the car in motion with a blurred background for a sense of speed. Each style needs different settings and a different mindset, yet both reward planning over luck.
This guide covers the gear, the exact settings, the light, and the locations for a car at its best. You will also learn how to track a moving car for motion shots, plus night, city, and editing techniques. Whether you shoot for fun, for a sale, or for a print on the wall, the same fundamentals of automotive photography apply.
Car Photography Settings at a Glance
Here is a quick reference to start from. Treat these as a baseline, then adjust for the car, the light, and the look you want.
| Scenario | Starting Settings |
|---|---|
| Static, full car sharp | f/8 to f/11, ISO 100, tripod, 1/125s or as needed |
| Detail shot (badge, wheel) | f/2.8 to f/4 for shallow depth, ISO 100 to 400 |
| Rolling shot (moving car) | Shutter 1/80 to 1/125s, continuous autofocus, burst mode |
| Night or city | Tripod, ISO 100 to 800, long exposure for light trails |
| Lens | 24-70mm for most shots, 70-200mm for compression |
| Filter | Circular polarizer to tame glare and reflections |
| File format | RAW |
Print your best shot
HD Metal Prints Built for Car Paint
Artbeat Studios prints on ChromaLuxe aluminum, so metallic paint, chrome, and reflections stay sharp and glossy. Custom sizes from 4×6 to 48×96 inches, starting around $32.
Gear and Lenses for Car Photography
Any modern camera with manual control handles cars well, so the body matters less than the glass and the support. A 24-70mm zoom covers wide establishing shots and tighter three-quarter angles, which makes it the most useful single lens. For compression and detail, a 70-200mm tightens the background and flatters the proportions of the car.
A wide-angle lens near 16-24mm adds drama for low, aggressive angles, though it stretches the nearest panel, so use it with care. A sturdy tripod steadies static and long-exposure work, while a circular polarizer cuts glare and lets you dial reflections in or out. For a deeper look at focal length, our guide on choosing the right lens helps you match glass to the shot.
Camera Settings for Sharp Car Photos
For a parked car, sharpness across the whole body matters most. Set an aperture of f/8 to f/11, keep ISO at 100, and mount the camera on a tripod. This combination holds the front bumper and the rear quarter in focus together. When you want a single detail to stand out, such as a badge or a headlight, open up to f/2.8 and let the background fall soft.
Focus deliberately and shoot RAW. Use single-point autofocus on the closest headlight for static shots, since it gives you control over the plane of focus. RAW files hold the extra color and highlight data you need to recover bright reflections later. For motion work, switch to continuous autofocus and a burst, a method our guide to techniques for freezing motion explains in depth.
Light and Time of Day

Light makes or breaks a car photo, because paint and chrome amplify whatever falls on them. Harsh midday sun creates hard hotspots and ugly reflections, so avoid it whenever you have a choice. Golden hour, the window after sunrise and before sunset, wraps the car in warm, soft light and long shadows.
Overcast skies are a quiet secret of automotive photography. A cloudy day acts like a giant softbox, which spreads even light across the panels and removes harsh glare. The soft, even light suits paint detail and color especially well. A polarizer earns its place here too, since it cuts the sky glare washing out paint color. For more on timing and warm light, see our tips on shooting at golden hour and apply them to a car.
Locations and Backgrounds
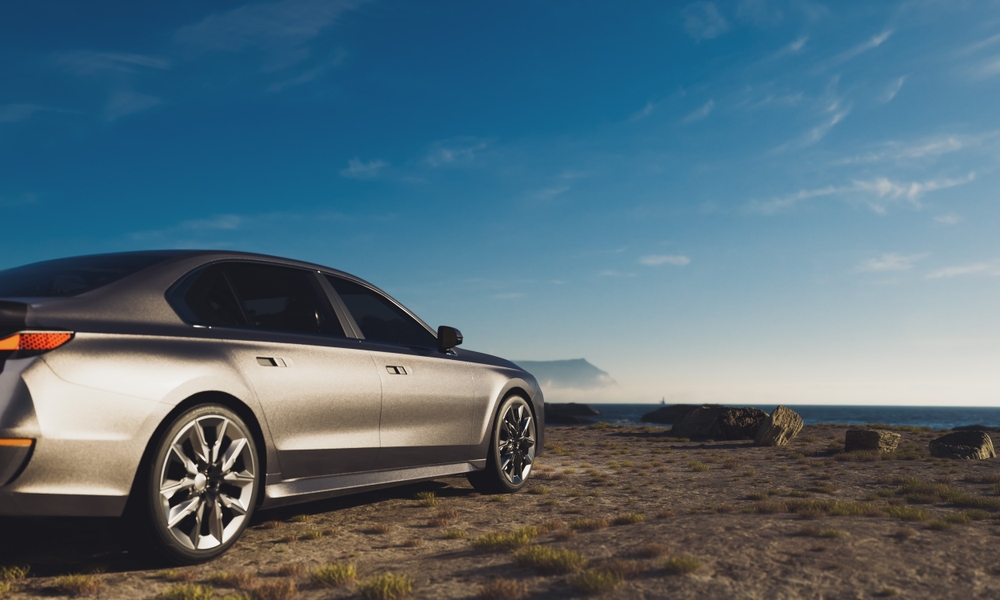
A clean background lets the car carry the frame. Cluttered parking lots, trash cans, and stray poles pull the eye away, so scout the spot before the car arrives. Open roads, empty parking structures, industrial walls, and waterfronts all give a car room to breathe.
Think about how the surroundings reflect into the paint. A row of trees throws green into a glossy hood, while a concrete garage keeps reflections neutral and moody. Position the car so the cleanest part of the scene lands in its largest reflective panels. Move a few feet in any direction, and the whole reflection changes.
Prep the Car Before You Shoot
A clean car is non-negotiable, because the camera magnifies every smudge. Wash and dry the body, then wipe the glass and clean the wheels and tires. Dust on a dark panel shows up as ugly specks under bright light, and editing them out later wastes hours. A quick detail before the shoot saves the cleanup. Wipe chrome and badges with a microfiber cloth, since fingerprints catch the light.
Pay attention to small details, since they break a frame fast. Tuck loose seatbelts out of view, close the fuel door, and straighten the wheels for a clean stance. A light coat of tire dressing adds a rich black to the rubber, which lifts the whole lower half of the car. Remove parking permits and air fresheners from the interior if you plan to shoot the cabin.
Finally, think about the plate. Some owners cover or blur the license plate for privacy, so ask first and plan the angle. A prepped car gives you a real head start before the first frame.
Static Shots: Angles and Detail

The classic hero angle is the front three-quarter view from a low position. Crouch until the camera sits near headlight height, then frame the car from slightly ahead. This angle shows the front and the side together and gives the car a planted, powerful stance. A profile shot and a rear three-quarter round out the core set.
Detail shots tell the rest of the story. Move in on the wheels, the badge, the grille, the stitching, and the gauges, and shoot each at a wide aperture for separation. Watch your own reflection in the paint and step out of the frame or shoot from an angle to hide yourself. A mix of wide hero shots and tight details builds a complete gallery of the car.
Vary your height as well. A shot from ground level makes the car loom large and aggressive, while a slightly elevated angle shows the roofline and the full body shape. Shoot wide for the scene, then step in for the details at each height. Two or three heights of the same angle give you options in editing.
Rolling Shots: Panning for Motion
A rolling shot sells speed by blurring the background while keeping the car sharp. The technique is panning: you track the moving car with the camera and fire during the smooth follow-through. Set the shutter near 1/100 second to start, lower it for more blur, and raise it if the car comes out soft.
Practice the motion before the car arrives. Plant your feet, swivel from the hips, and keep the car under the same focus point as it passes. Continuous autofocus and a burst raise your hit rate, since one frame in a series almost always lands sharp. For the safest pro look, mount the camera on a rig pole attached to the car, which keeps the body tack-sharp while the road streaks beneath. Our primer on shutter speed for motion shows how the numbers shape the blur.
Night and City Car Photography
Night work turns a car into a canvas of reflected light. Neon signs, shop windows, and streetlights pour color across the paint, so park the car where those sources wrap around it. Use a tripod, keep ISO low, and run a long exposure to record clean color and smooth light trails from passing traffic.
Light painting adds another layer. During a several-second exposure, sweep a handheld light or a phone torch along the body to draw highlights exactly where you want them. City reflections and wet pavement after rain double the drama. For more on shooting after dark, these low-light shooting tips apply directly to a car.
Editing: Reflections and Paint
Editing is where a good car photo becomes a great one. Start with the basics: set white balance for accurate paint color, then balance exposure so the highlights on the body hold detail. A RAW file gives you room to recover bright reflections without banding.
Next, clean the frame. Remove your own reflection, stray cones, and background distractions with the healing and clone tools. Dodge and burn to shape the curves of the body, which adds the three-dimensional pop you see in pro work. Keep color natural, since over-saturated paint looks fake fast. A light, careful pass beats a heavy one every time. Export at full resolution if you plan to print, since a metal print rewards every pixel of detail.
Common Car Photography Mistakes to Avoid
A few habits hold back otherwise good frames. The most common is harsh midday light, which throws hard hotspots across the paint. Shoot early or late instead, or wait for cloud cover. A busy background ranks a close second, since poles and signs steal attention from the car. Scout a clean spot before you start.
Reflections trip up many beginners too. Your own outline shows in the doors and hood, so move out of the mirror or hide in a shadow. Tilt the polarizer to manage glare without killing every reflection, because a dead, matte panel looks lifeless. Aim for control, not removal. Skipping a tripod is another quiet error, since handheld static frames drift soft and lose fine paint detail.
Over-editing is the final pitfall. Crushed shadows, neon paint, and heavy clarity scream amateur, so keep the look natural. A clean car, good light, and a careful edit beat any filter. Watch these mistakes, and your car photography improves overnight.
Printing and Displaying Your Shots

A strong car photo belongs on a wall, not buried in a phone. Cars are built around glossy paint, chrome, and reflection, which is exactly the look an HD metal print pushes further. On aluminum, metallic paint gains depth and the highlights gleam, so a clean hero shot turns into a statement piece.
Finish choice depends on the image, so match it to the car. A silver gloss finish deepens contrast and suits a bold, saturated paint color under dramatic light. A textured matte finish tames glare and reads softer, which flatters a moody studio or night shot. Judge the finish against the wall and the light where the print will hang.

Size is the final call. A wide panoramic rolling shot earns a large format, while a tight detail of a badge or a wheel works as a smaller accent. Because Artbeat cuts aluminum in-house, a custom metal print ships at any dimension up to 48×96 inches without an upcharge. Order the exact crop your composition needs.
Final Verdict
Great car photography rewards control more than gear. Manage the reflections, shape the light, and pick a clean background, and an ordinary car looks extraordinary. Start with the static fundamentals, then add motion shots once the basics feel automatic.
Light and timing pay off more than any lens upgrade. Shoot at golden hour or under soft overcast, use a polarizer, and the paint comes alive without heavy editing. For motion, practice tracking the car until a sharp body over a streaked road becomes repeatable rather than lucky.
Once you capture a frame you love, plan your next session around the light. Scout a clean location, prep the car, and shoot both a static hero and a rolling pass. Each outing sharpens your eye faster than any gear upgrade.
Ready to print?
Turn Your Best Car Shot Into Metal Wall Art
Vibrant, durable ChromaLuxe metal prints, backed by the Artbeat Studios quality guarantee against defects.
Frequently Asked Questions
What camera settings are best for car photography?
For a parked car, use f/8 to f/11, ISO 100, and a tripod so the whole body stays sharp. A single detail looks best at f/2.8 for shallow depth. A moving-car shot needs a shutter near 1/100 second while you pan with the car. Always shoot RAW.
What lens should I use to photograph cars?
A 24-70mm zoom handles most car photography, from wide scene-setters to three-quarter hero angles. A 70-200mm compresses the background and flatters proportions, while a 16-24mm wide lens adds drama at low angles. One versatile zoom covers a beginner kit well.
How do you take rolling shots of a car?
A rolling shot uses panning. You track the moving car with your camera, set the shutter near 1/80 to 1/125 second, and fire a burst during a smooth follow-through. Continuous autofocus helps. A rig pole mounted to the car keeps the body sharp while the road blurs.
What is the best time of day for automotive photography?
Golden hour, soon after sunrise or before sunset, gives warm, soft, directional light. A soft overcast day also works well, since clouds spread even light and reduce glare on the paint. Avoid harsh midday sun, which creates hotspots and hard reflections.
How do I avoid my reflection in the car?
A car is a mirror, so plan your position. Shoot from an angle to hide yourself in a darker part of the scene, use a longer lens to step back, or clone yourself out in editing. A polarizer also cuts the surface reflection showing you.