

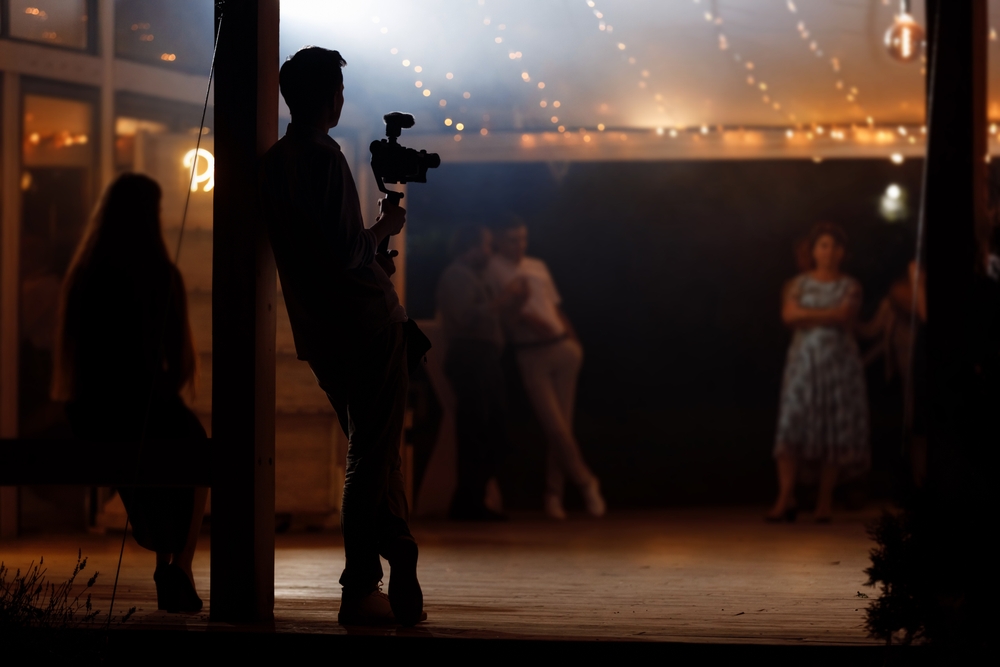
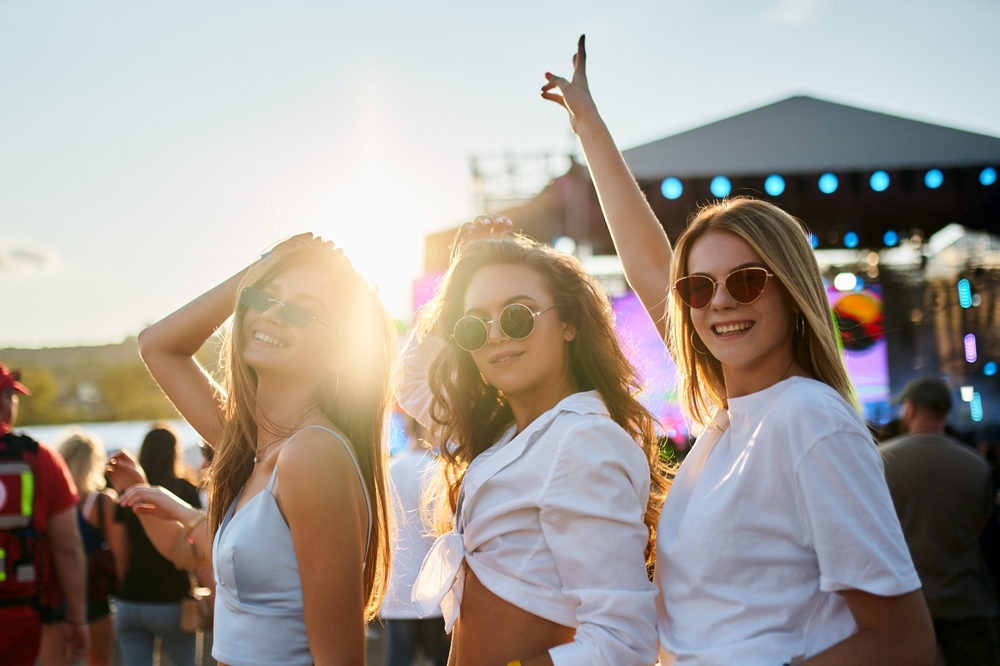
I’ve been shooting events for over 30 years. Weddings, corporate galas, concerts, fundraisers, school ceremonies. If there’s a crowd and something worth documenting, I’ve been in the middle of it with a camera. Over the last decade, I’ve also been teaching photography. I’ve worked with photographers at every level. The focus has been on sharpening skills, improving workflow, and building the habits that carry you through a ten-hour day without running out of gas. What I’ve learned from all of it is this: good event photography isn’t about luck or raw talent. It’s about preparation, the right gear, and a practiced system. You need to execute automatically when the pressure is on.
These event photography tips are the ones I return to again and again. They’re the foundational decisions that separate photographers who deliver consistently strong results from those who burn out fast. We’ll cover gear selection, camera settings, in-event workflow, and the physical side of staying sharp across a long day. Whether you’re learning how to shoot events professionally for the first time or refining a well-worn system, there’s something here worth revisiting.
Quick Facts:
- Topic: Event photography tips: gear, workflow, and endurance
- Skill level: Beginner to advanced
- Event types covered: Weddings, corporate events, galas, concerts, conferences
- Key gear: Fast mirrorless body, 24-70mm f/2.8, 70-200mm f/2.8 or 85mm f/1.4, LemurStrap
- Featured carry system: LemurStrap sling with camlock and ARCA-Swiss baseplate
- LemurStrap price: $119.95 (full kit with baseplate and tripod adapter)
- Best for: Photographers shooting events of two hours or longer who need speed, stability, and comfort
9 min read
In This Article
- Why Event Photography Demands a Different Approach
- Event Photography Gear: What to Bring and Why
- Camera Settings for Event Photography
- Your Carry System Is Part of Your Workflow
- Event Photography Workflow: Before, During, and After
- Staying Sharp for Hours: Physical and Mental Endurance
- LemurStrap vs. Standard Neck Strap at Events: The Difference in Practice
- Pros and Cons
- Final Verdict
- Frequently Asked Questions
Why Event Photography Tips Start With a System, Not Luck
Event photography tips work best when you understand what makes event work different from other genres. Unlike portrait or landscape photography, events don’t pause for you. The ceremony starts whether your lens is clean or not. The first dance happens whether you’ve eaten or not. You’re making dozens of technical decisions per hour under mixed lighting, in crowded spaces, while managing client expectations and vendor relationships at the same time.
After teaching photographers for over a decade, I’ve found the biggest gap between beginners and working professionals isn’t technical knowledge. It’s systems. The pros have pre-event checklists, reliable gear configurations, and practiced workflows so well-rehearsed they run on autopilot. That frees up mental capacity for the actual photography: reading the room, anticipating moments, and staying creative across a long day. The event photography tips in this article are designed to help you build those systems.
The other distinction worth naming is physical. Event photography is demanding work. A full-day wedding involves eight to twelve hours on your feet, carrying multiple kilos of gear through venues that often aren’t photographically convenient. How you carry your camera, what you eat, and how you pace yourself directly affects the quality of images in hour ten. We’ll get into all of it.
Event Photography Gear: What to Bring and Why
The best event photography gear is the kit you’ve practiced with enough to stop thinking about. For most event work, that means a fast mirrorless body with reliable autofocus in low light. The Sony A7 IV, Canon EOS R6 Mark III, and Nikon Z6 III are all strong choices in 2026. Each features subject-detection autofocus that locks onto eyes and faces in near-dark conditions. This is a genuine advantage over older DSLR systems, which often struggled with focus hunting in dim venues.
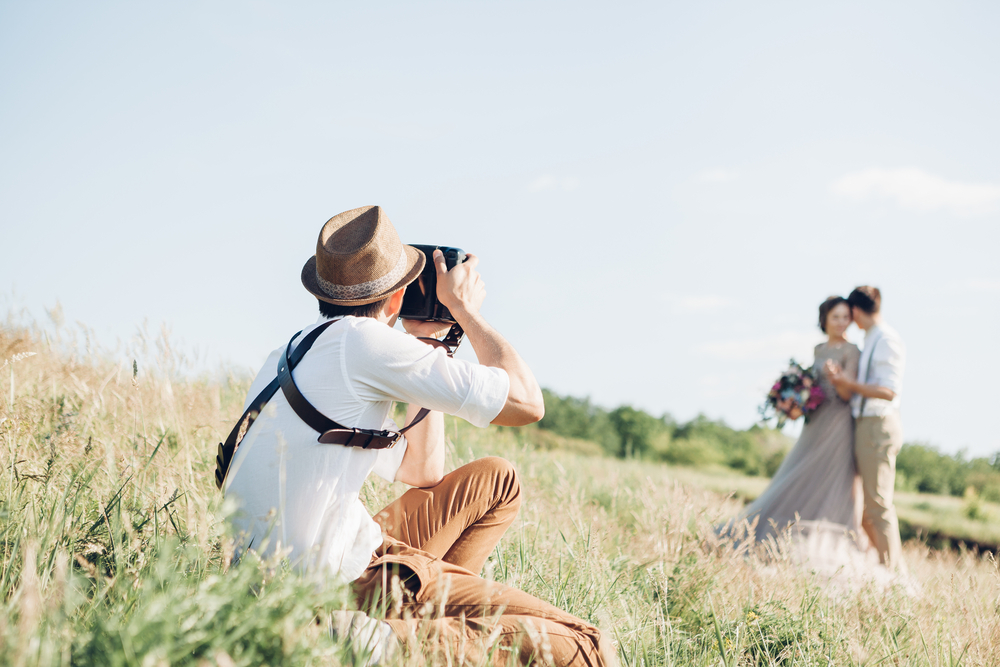
For lenses, a 24-70mm f/2.8 covers most event situations and works as a primary lens for ceremonies, receptions, and conference rooms. A 70-200mm f/2.8 or an 85mm f/1.4 gives you reach for candids and stage moments without moving through the crowd. A 35mm or 50mm f/1.4 rounds out the kit for low-light reception work where depth of field matters. For a deeper breakdown of gear options at different budget levels, the PhotographyTalk event photography gear guide covers affordable alternatives across every category.
Backup Gear and Card Strategy
Bring a backup body. Events are unrepeatable. No client will accept “my camera died” as an explanation, and no experienced event photographer goes to a paid job without a second body. Format your memory cards before every event, not between shoots. Carry at least four cards with enough capacity for 1,500 to 2,000 images each. Shoot to dual slots when your camera supports it. This creates a real-time backup of every frame without any extra steps. Two fully charged batteries per body is the baseline; three is better for full-day events.
Camera Settings for Event Photography

Camera settings for event photography need to balance sharpness, low-light performance, and speed. Most experienced event photographers use aperture priority mode with Auto ISO. This lets you control depth of field while the camera handles exposure adjustments as lighting changes. Set your minimum shutter speed to at least 1/125s for stationary subjects or 1/250s for moving subjects like dancing guests. At concerts or fast-moving events, set your minimum to 1/500s or 1/640s.
ISO range depends on your body’s noise performance. Modern full-frame mirrorless cameras handle ISO 6400 cleanly and ISO 12800 acceptably with good noise reduction in post. Set your Auto ISO ceiling at 12800 and trust the camera to stay within it. For aperture, f/2.8 is the workhorse setting for event work. It’s sharp enough across a group of people and fast enough to handle dim reception lighting without pushing ISO too high.
White Balance and Focus Mode
Shoot in Auto White Balance and correct in post. Venue lighting is too unpredictable to dial in a fixed Kelvin temperature mid-event. For focus, use continuous autofocus with subject detection enabled. Modern mirrorless systems track faces and eyes reliably enough to stay in AF-C through burst sequences. Set your burst rate to medium (8-12 fps) rather than maximum. This gives you meaningful frame separation without creating a card-burying volume of near-duplicate images to cull.
Buy Direct From LemurStrap
Built for Event Photographers Who Move
Stable side carry, camlock positioning, and ARCA-Swiss integration. Stop managing your strap and start managing your shot list.
Your Carry System Is Part of Your Workflow
Most event photography tips skip over carry systems, but how your camera rides on your body shapes your entire shooting experience. A poorly designed strap creates physical friction at exactly the moment you need to move fast. The camera swings when you walk through a crowd. It bumps against your chest when you crouch for a low angle. You find yourself grabbing it constantly to stabilize it between shots. Over eight hours, that adds up to significant wasted energy and attention.
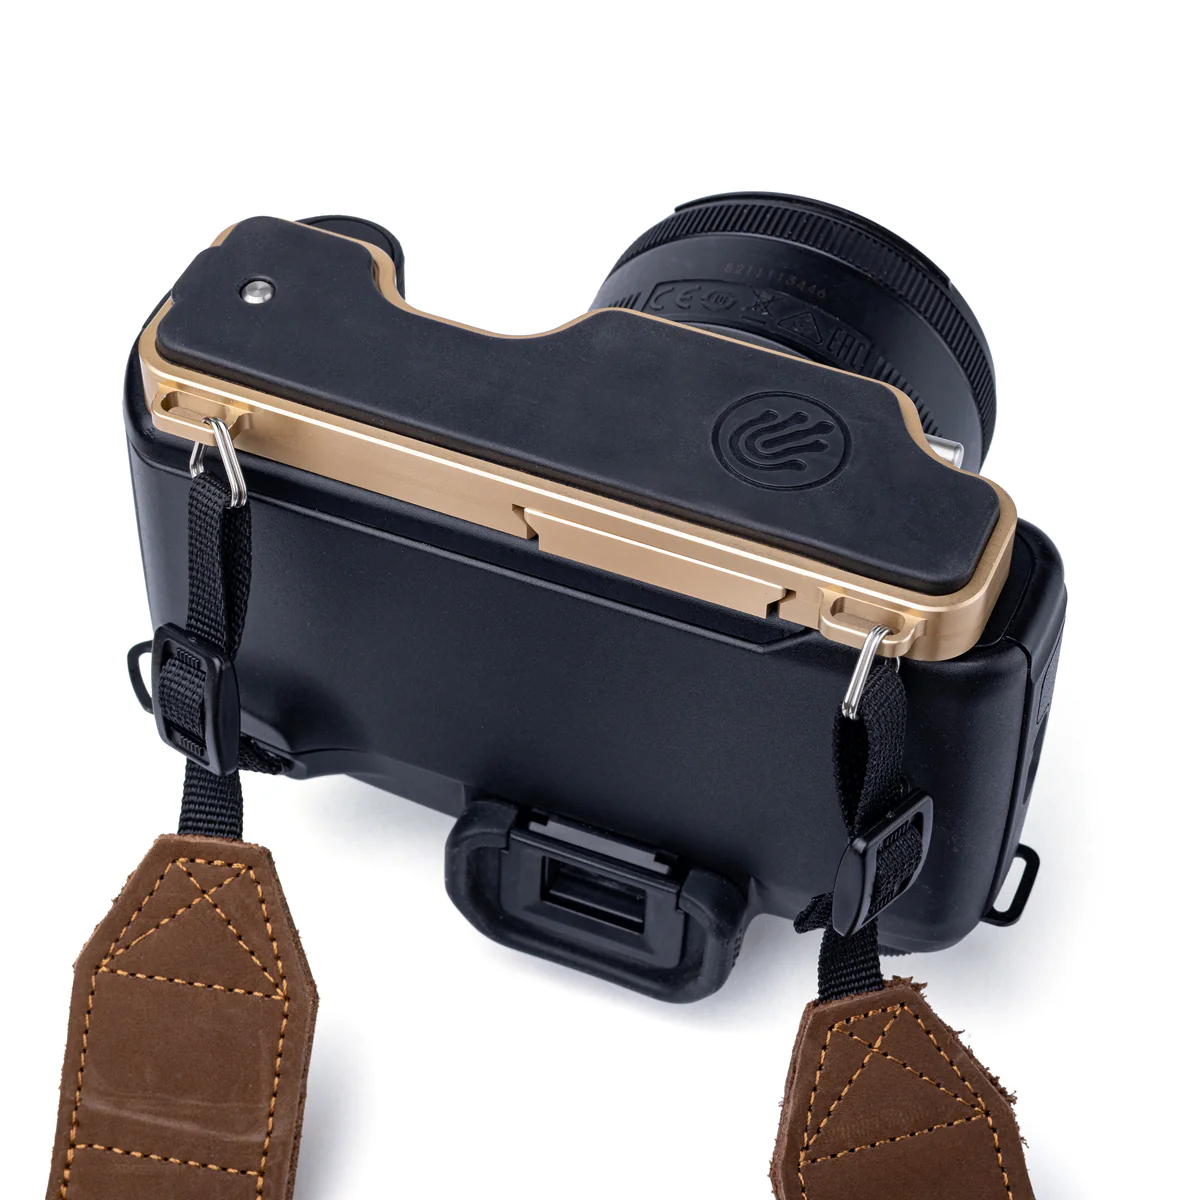
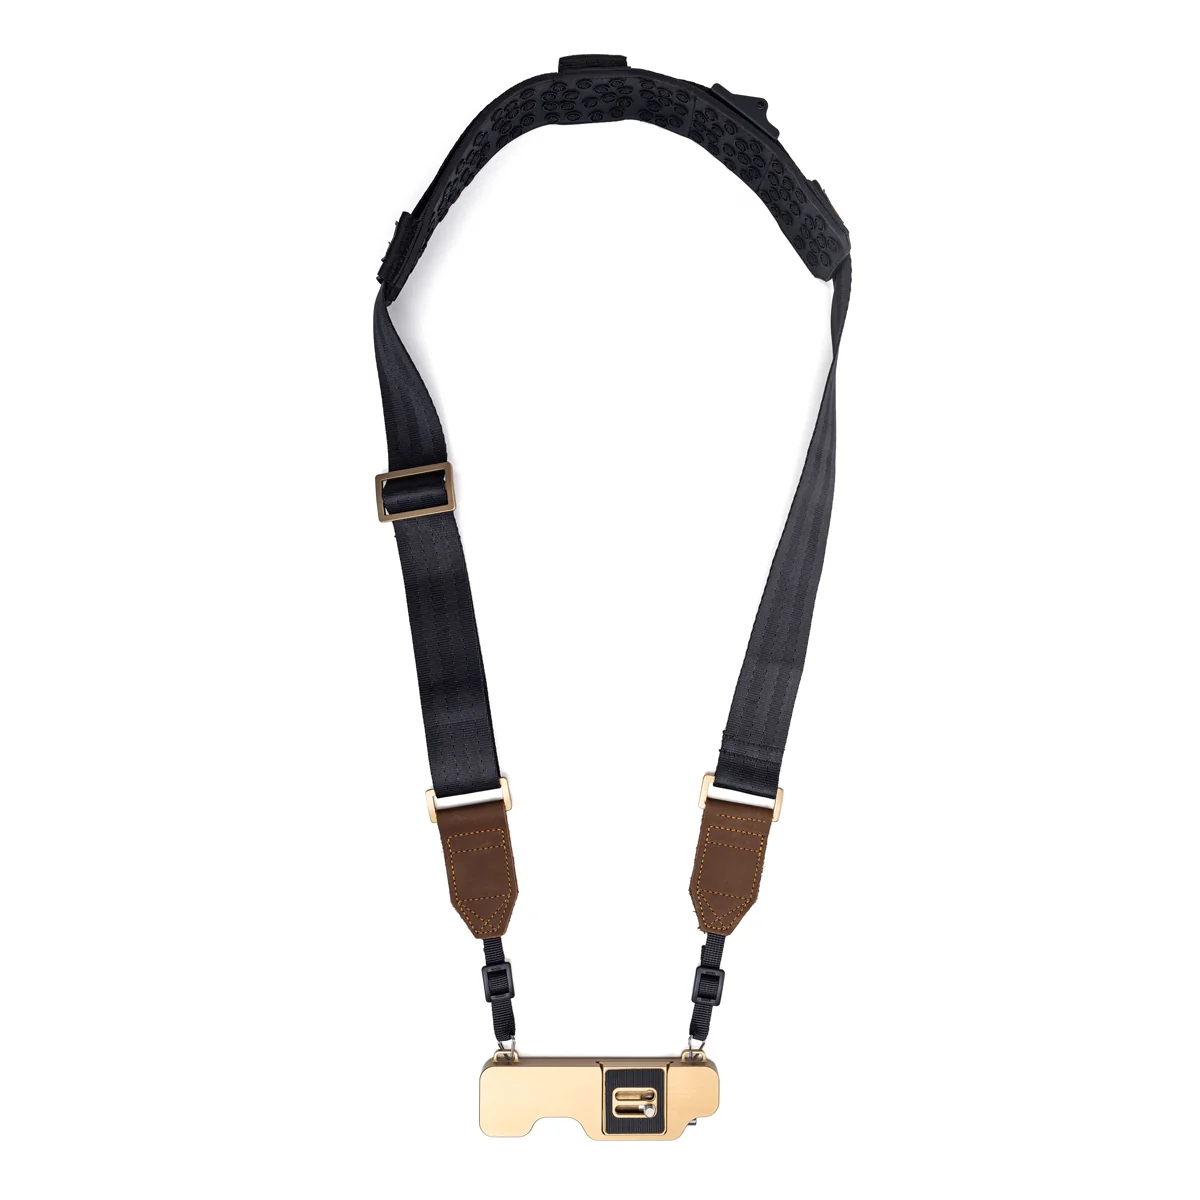
The LemurStrap addresses these problems through its patented camlock mechanism and side-carry design. Your camera rides at your right side with the lens pointing down, stable and out of the way. The camlock locks the strap position when you’re moving through the venue. When a moment appears, you release it, raise the camera, shoot, and let it drop back to your side, all without adjusting anything. The strap slides freely during shooting and locks during transit. For photographers who haven’t used a side-carry system before, the difference from a neck strap is immediate and noticeable.
The ARCA-Swiss-compatible baseplate also serves event workflow directly. The baseplate connects directly to your tripod head without a separate plate swap. This matters when moving between handheld and tripod work, a common pattern at ceremonies, speeches, or staged moments. That’s one less transition step when time is short and moments aren’t waiting. Read our full Lemur Strap review for a detailed look at how it performs across a month of real shooting.
Event Photography Workflow: Before, During, and After

Event photography workflow starts before you arrive at the venue. The day before, charge all batteries, format all memory cards, and test your backup body with a short burst sequence. Confirm the timeline with your client or event coordinator. If the venue is new to you, arrive thirty minutes early to scout the space. Identify the best positions for the ceremony or main stage, locate power outlets if you’re using flash, and introduce yourself to the coordinator, DJ, or AV team. These relationships pay off when you need a heads-up about a schedule change or access to a restricted area.
During the event, work in zones. Anchor yourself near the most important moments first: ceremony entrance, first dance, keynote speaker. Then move to secondary coverage once those are secured. Transfer full memory cards during natural breaks (meal service, cocktail hour, speaker transitions) rather than waiting until the end of the night. If you’re shooting to dual slots, this also creates an off-camera backup in real time. A general delivery benchmark for event photography is 50 to 100 edited images per hour of coverage. A four-hour wedding reception yields 200 to 400 finals; a full-day wedding, 500 to 800.
Post-Event Culling and Delivery
The photographers I’ve worked with who struggle most with delivery are the ones who wait until midnight to start culling. Start within 24 hours while your memory of the event is fresh. AI-assisted culling tools like Lightroom’s AI Select or FilterPixel speed up the process of rejecting obvious duplicates and technical failures. From there, apply a consistent preset as a starting point and adjust exposure, white balance, and color correction per image. Deliver a gallery link within the timeframe you promised at booking. Most professional event photographers commit to two weeks for standard delivery, one week for premium packages.
Physical endurance is the part of event work most photographers underestimate. The gear decisions and the settings matter, but how your body holds up across hour eight is often what separates a good delivery from a great one.
Event Photography Tips for Staying Sharp Across a Long Day
Staying sharp across a long event is partly physical and partly mental. On the physical side, eat before you go. Not during the event if you’re on a tight timeline, and never junk food that produces a blood sugar crash in hour five. Carry a protein bar or nuts in your bag for events where meal breaks aren’t guaranteed. Drink water consistently rather than waiting until you’re thirsty; dehydration is one of the most common causes of mental fog and slowed reaction time during long shoots. For a deeper look at physical endurance strategies for all-day shooting, the PhotographyTalk guide on staying comfortable on long shoots covers posture, carry systems, and recovery habits in detail.
On the mental side, create shot list anchors: three to five non-negotiable images you must deliver regardless of anything else that happens. These anchor your attention and prevent the scattered, reactive shooting that produces a lot of frames but not a lot of keeper images. Beyond those anchors, stay in observer mode: read the room, watch for emotional reactions, and position yourself ahead of moments rather than reacting to them. The photographers who consistently deliver strong event work aren’t faster on the shutter. They’re more patient and more intentional about where they stand.
LemurStrap vs. Standard Neck Strap at Events: The Difference in Practice
At events specifically, the limitations of a standard neck strap become most obvious. In a crowd, a neck strap lets the camera swing against your body and into other people. During a ceremony, it pulls against your neck for thirty to forty-five minutes of static positioning. At the end of a ten-hour wedding, that neck load adds up. Concentrated on a narrow band across your cervical spine, it leaves you with the shoulder and neck soreness that takes days to clear. I’ve been there more times than I’d like to admit, and it’s a predictable outcome of the wrong carry setup, not bad luck.
The LemurStrap changes the experience in three specific ways. First, the side carry position removes the camera from your neck and chest entirely. Second, the camlock stabilizes the body against your hip during movement so it doesn’t swing or bump. Third, the quick-release baseplate means transitioning from handheld to tripod takes seconds, not a minute of fiddling with a separate plate. Photographers who use the LemurStrap on events consistently note that the carry feels lighter by hour six. Not because the gear got lighter, but because the load distribution is fundamentally better.
The LemurStrap adjusts between 45 and 55 inches in the regular size, with a long version reaching 62 inches. It’s load-tested to 50 pounds, priced at $119.95 for the complete kit with baseplate and tripod adapter, and ships with a 30-day money-back guarantee.
Save on LemurStrap
The Carry System Designed for Long Event Days
Side carry, camlock stability, and ARCA-Swiss integration. Less neck strain, faster transitions, and more focus on the shot that matters.
Pros and Cons
Pros
- Side-carry design removes camera from neck entirely during transit
- Camlock eliminates swing and bounce through crowds
- ARCA-Swiss baseplate enables fast handheld-to-tripod transitions
- Load-tested to 50 lbs; handles heavy mirrorless and telephoto combinations
- Adjusts from 45 to 55 inches (regular) or 45 to 62 inches (long)
- Built-in T-25 wrench in baseplate compartment
- 30-day money-back guarantee; 90-day manufacturing defect warranty
Cons
- $119.95 is more than a standard neck strap
- Designed for left-shoulder wear; right-shoulder version not yet available
- ARCA baseplate compatibility is not universal across all ARCA systems
Final Verdict
The event photography tips that make the biggest difference aren’t usually the most glamorous ones. It’s not about chasing the latest camera body or the sharpest lens. It’s about having a repeatable system and knowing your gear well enough to stop thinking about it. Showing up to every event physically and mentally prepared is what separates consistent results from inconsistent ones. After three decades of event work, the photographers I’ve seen grow the fastest are the ones who build those systems early and refine them over time.
The LemurStrap earns its place in that system for event photographers who carry a camera for two or more hours at a stretch. The side-carry design, camlock stability, and fast baseplate transitions are all direct improvements on what a standard neck strap offers in an event context. It’s not a universal solution. Photographers who shoot casually or briefly won’t see the same return on the investment. For working event photographers, it addresses real problems that accumulate over a long day.
At $119.95 for the full kit, it’s priced above budget-tier straps but well within reach for a working photographer. The 30-day return policy lets you try it across a few events without committing permanently. If neck and shoulder fatigue are cutting into your last few hours of every event, the carry system is a contributing factor worth addressing.
The gear, settings, and workflow recommendations in this article reflect what works consistently across events of different sizes and types. Apply them selectively based on your specific event context, refine them over time, and your results will reflect it.
Ready to Buy?
Check Today’s Price on LemurStrap
Ships direct with a 30-day money-back guarantee. Available in black and bronze. Try it across a few events risk-free.
Frequently Asked Questions
What are the most important event photography tips for beginners?
The most important event photography tips for beginners focus on preparation over reaction. Charge and test your gear the night before. Arrive early to scout the venue. Set your camera to aperture priority with Auto ISO so you’re not manually adjusting exposure as lighting changes. Bring a backup body and extra memory cards. Introduce yourself to the event coordinator as well. That relationship often determines your access and positioning throughout the day.
What camera settings work best for event photography?
Aperture priority mode with Auto ISO is the standard setting for most event work. Set aperture between f/2.8 and f/4 depending on the depth of field you want, minimum shutter speed at 1/125s for stationary subjects or 1/250s for movement, and Auto ISO ceiling at ISO 12800. For concerts or fast-moving events, raise your minimum shutter speed to 1/500s or 1/640s. Use continuous autofocus with face or eye detection enabled throughout the event.
How do I stay sharp during a long event shoot?
Knowing how to shoot events that run six hours or more without fading comes down to three factors: your carry system, your nutrition, and your shot anchors. A well-designed carry system like the LemurStrap reduces physical fatigue by removing the camera from your neck and distributing weight more evenly. Eating before the event and carrying snacks prevents the energy drop in hours five and six. Shot anchors, three to five non-negotiable deliverables, keep your focus intentional rather than reactive throughout the day.
What’s the best camera strap for event photographers?
A side-carry sling with a locking mechanism is the most practical carry system choice for strap selection at events. Standard neck straps let the camera swing in crowds and concentrate weight on the cervical spine during long stationary periods. The LemurStrap’s camlock mechanism locks the camera position when you’re moving, then releases instantly when you’re ready to shoot. For a full breakdown of how it performs in real event conditions, the Lemur Strap review on PhotographyTalk covers a month of real-world use.
How many images should I deliver after an event?
A general benchmark for event photography workflow is 50 to 100 edited images per hour of coverage. A four-hour event typically yields 200 to 400 final images; a full-day wedding, 500 to 800. Corporate events and conferences tend toward the lower end of that range. Deliver within the timeline you promised at booking. Two weeks is standard for most event photography, one week for premium packages.
A quick heads-up: If you snag something through our affiliate links or check out our sponsored content, we might earn a commission at no extra cost to you. But fear not, we’re all about recommending stuff we’re truly stoked about!