

There’s nothing quite like standing in front of a breathtaking scene—towering mountains, crashing waves, golden light. As photographers, we often capture these moments hoping to preserve that sense of awe. But transforming a digital file into a stunning landscape print requires more than a good eye.
Making a print that truly does justice to the landscape means thinking intentionally from the moment you set up your shot. It’s about camera technique, editing precision, and knowing how to work with the right print lab. After years of trial and error, I’ve found a process that consistently delivers results—especially when using a trusted lab like Lumaprints, whose canvas print quality is second to none.
If you want to see your landscape photography proudly displayed on a wall with rich color and sharp detail, this guide will walk you through everything you need to know—from field techniques to final output.
Table of Contents
- Start with the End in Mind: Shooting for Landscape Prints
- Use the Right Gear for Print-Worthy Landscape Images
- Master Exposure and Dynamic Range in the Field
- Focus on Sharpness and Depth of Field
- Post-Processing with Landscape Prints in Mind
- Choosing the Right Paper and Print Method
- Working With a Print Lab Like Lumaprints
- Framing and Display Tips to Elevate Your Landscape Prints
- FAQ
Start with the End in Mind: Shooting for Landscape Prints

Photo by GaudiLab via Shutterstock
Creating stunning landscape prints begins before you ever press the shutter. If you know your goal is to produce a high-quality print, your approach in the field changes.
Choose scenes with strong compositional elements. Simplicity often works best in print—clear leading lines, prominent subjects, and uncluttered edges help the eye navigate the image. Consider how negative space and sky details will translate on large paper or canvas.
Think big. If you plan to make a 20×30” or larger landscape print, you’ll want to capture the maximum detail possible. This means using a tripod, nailing focus, and paying close attention to dynamic range.
You’re not just taking a photo—you’re designing an image for the wall. Treat it that way from the beginning.
Use the Right Gear for Print-Worthy Landscape Images
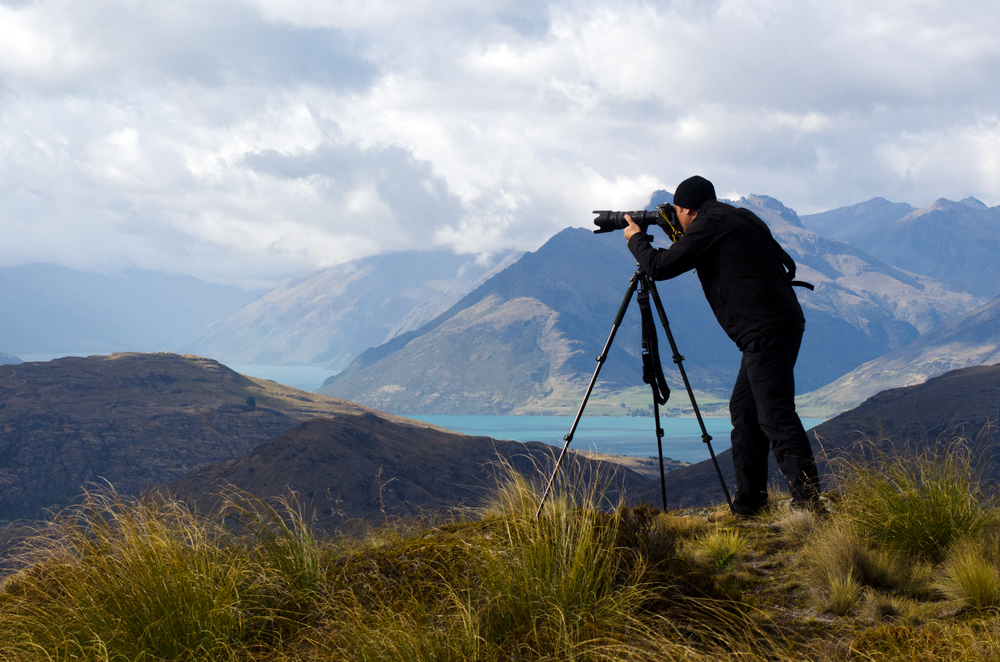
Photo by ChameleonsEye via Shutterstock
Not all gear is created equal when your goal is gallery-quality landscape prints. Start with a high-resolution camera—something with at least 24MP, though 30MP or more is ideal for larger prints. This gives you the detail and flexibility you need during editing and printing.
Use sharp, high-quality lenses. Landscape photographers often reach for wide-angle lenses, but don’t overlook longer focal lengths to isolate interesting parts of a scene. Either way, corner-to-corner sharpness is critical when printing big.
A sturdy tripod is non-negotiable. Even with image stabilization, a tripod ensures the tack-sharp images that high-quality landscape prints demand. Add filters like ND, GND, and polarizers to better control exposure and contrast.
Capture RAW files to preserve full detail and dynamic range. This gives you maximum flexibility during post-processing and print prep.
Master Exposure and Dynamic Range in the Field

Photo by Wirestock Creators via Shutterstock
One of the biggest challenges in landscape photography is managing light. The best landscape prints come from images that preserve both highlight and shadow detail.
Use your histogram to expose to the right (ETTR) without clipping highlights. This helps capture more tonal information in the shadows, which is vital for maintaining texture and detail.
In scenes with wide dynamic range—like sunrises or backlit mountains—bracketing exposures and blending them later can yield far better results than a single shot. HDR techniques are powerful when done with subtlety.
Remember, once you blow out your highlights or crush your shadows beyond recovery, it’s nearly impossible to get them back—and your final print will suffer.
Focus on Sharpness and Depth of Field
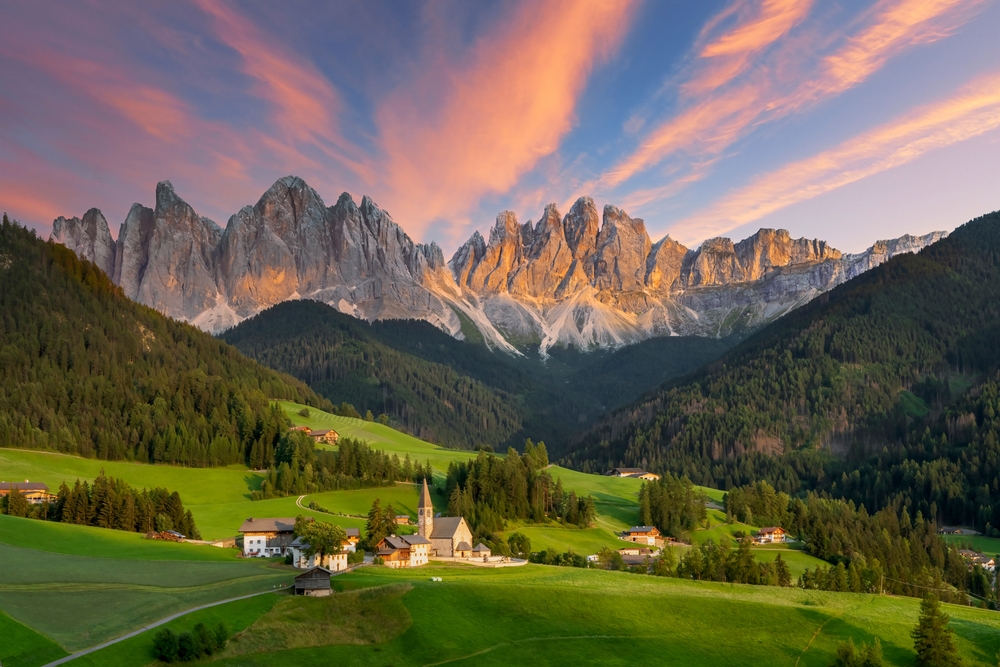
Photo by prochasson frederic via Shutterstock
Prints magnify imperfections, so ensuring perfect focus is critical. Use manual focus or focus magnification when needed. Don’t rely solely on autofocus, especially in low light.
Pick your aperture carefully. Somewhere between f/8 and f/11 is often the sweet spot for landscape lenses, offering optimal sharpness without too much diffraction. Avoid shooting at f/22 unless necessary.
For extreme depth, use focus stacking. This technique blends multiple images focused at different distances, ensuring foreground and background are equally sharp—ideal for large landscape prints.
Zoom in and inspect edges and corners while editing. What looks fine on screen may not hold up at 24” wide.
Post-Processing with Landscape Prints in Mind

Photo by BublikHaus via Shutterstock
Editing for print is different from editing for Instagram. Aim for realism and balance. Boost contrast and vibrancy gently—avoid over-processing, as exaggerated effects will be more obvious on large landscape prints.
Soft-proof your images if your editing software supports it. This simulates how the final print will appear based on your printer’s color profile and paper type. Calibrate your monitor for accurate results.
Convert to Adobe RGB color space (or whatever your lab recommends) and export at 300 DPI for high-resolution printing. Save in TIFF format for optimal quality unless your lab requests JPEG.
Double-check sharpening. Web exports often include aggressive sharpening, but prints require a different approach. Apply only what’s needed to maintain crisp edges and fine detail.
Choosing the Right Paper and Print Method
Paper choice matters. It affects color, contrast, and mood. Glossy finishes enhance vibrancy, while matte paper offers a soft, elegant feel. Canvas offers a unique texture and a more painterly aesthetic.
I often recommend Lumaprints for canvas-based landscape prints. Their canvas is thick, archival-grade, and acid-free, ensuring your image won’t yellow over time. The color reproduction is vivid and consistent—perfect for bold skies, golden light, and rich greens.
They offer giclée printing with eco-solvent inkjet technology, providing long-lasting results with stunning color accuracy. With size options up to 52×300” (rolled) and a variety of stretching depths, you can find a perfect fit for any display space.
You can also choose from image wrap, mirror wrap, or solid-border wrap—giving you control over how your image wraps around the sides of the canvas for maximum visual impact.
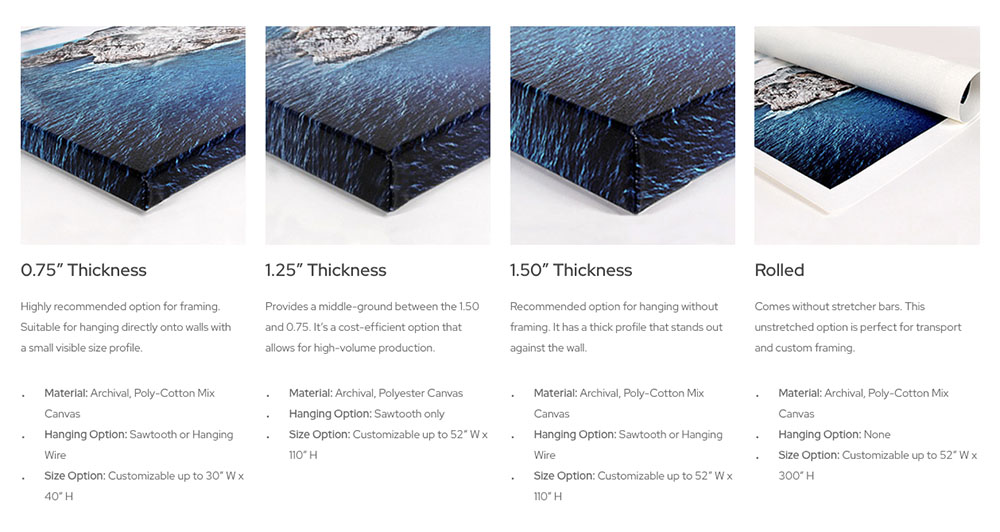
Working With a Print Lab Like Lumaprints
While you can print at home, professional results are easiest to achieve with a trusted lab. I’ve worked with Lumaprints for several years now, and the results have been incredible every time. See the results our own Alex Schult got in the video above when he ordered a Lumaprints canvas print a couple of years ago.
Their turnaround is fast—standard production in 2–3 business days, with same-day options available. Their use of solid wood stretcher bars ensures the canvas won’t warp, and the beveled sides help the canvas sit beautifully on the wall.
When ordering, you’ll choose from thickness options like 0.75”, 1.25”, or 1.50”, depending on your framing preference. I typically go with the 1.50” for bold, standalone wall displays—it has a strong visual presence and doesn’t require a frame.
Communicate clearly with the lab when ordering. Mention your color preferences, border options, and make sure the file format and resolution match their requirements. Lumaprints is great about working with photographers to ensure everything is just right.
Framing and Display Tips to Elevate Your Landscape Prints
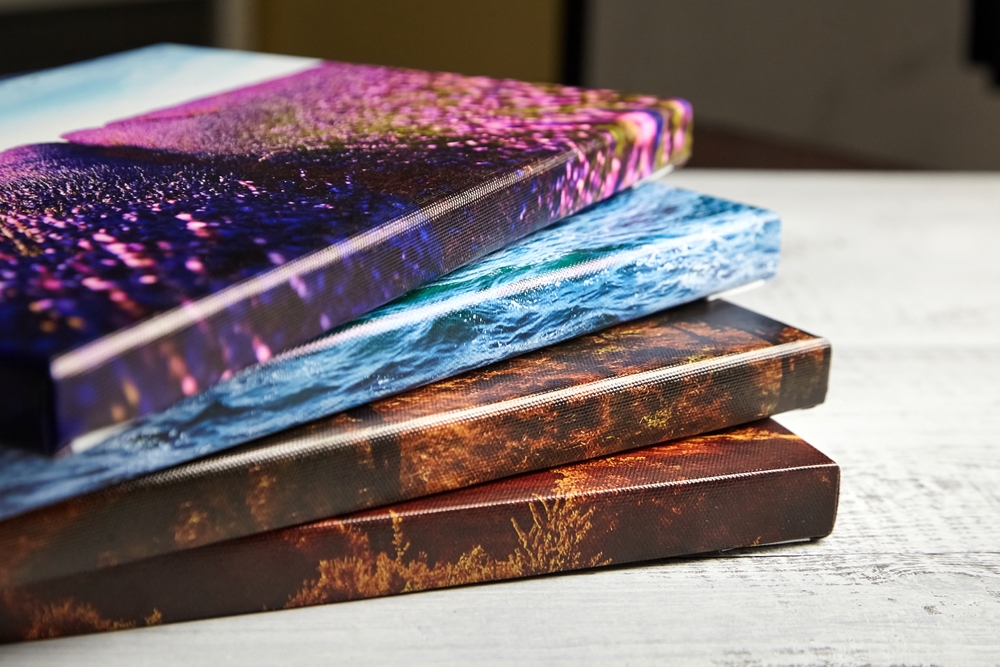
Photo by Mike_O via Shutterstock
Once your print is in hand, consider how it will be displayed. If you’re using a 0.75” canvas, you might want to frame it. For deeper wraps like 1.50”, hanging without a frame gives a modern gallery look. You can also order a framed canvas from Lumaprints and skip framing it yourself altogether!
Lighting matters as well. Use soft, indirect lighting or museum-grade picture lights to avoid glare and enhance detail. Position your landscape prints at eye level—generally around 57–60 inches from the floor to the center of the image.
Spacing matters in multi-print displays, too. Allow for breathing room between pieces to avoid clutter and maintain visual impact.
Handle prints with care during installation. Canvas can be scratched or dented easily. Clean your hands or wear gloves to keep oils and dust away.
In other words, creating beautiful landscape prints is more than just clicking the shutter—it’s a thoughtful process from composition to final presentation. With the right gear, good editing habits, and a trusted print lab like Lumaprints, you can turn your favorite scenes into lasting works of art.
Don’t let your best landscape shots stay hidden on a hard drive. Bring them to life with a professional print and enjoy your photography in its most tangible, rewarding form!
FAQ
Photo by Natalja Petuhova via Shutterstock
What resolution do I need for large landscape prints?
300 DPI is ideal. For a 20×30” print, that means your image should be 6000×9000 pixels. However, you can print a bit lower if viewed from a distance.
Should I use glossy, matte, or canvas for landscapes?
It depends on your style. Glossy enhances color, matte is subtle and elegant, and canvas adds texture. I often use canvas from Lumaprints for its durability and classic look.
What’s the best file format to send to a print lab?
TIFF is preferred for quality, but many labs—including Lumaprints—also accept high-res JPEGs. Always check their file guidelines.
Can I print from my smartphone?
You can, but smartphone images usually lack the resolution for large prints. Aim for smaller canvas sizes (like 8×10”) unless you’re using a high-res camera phone.
How do I choose the right wrap option?
If your image has important edge details, go with mirror or solid-color wrap. For a classic look, image wrap works beautifully—especially on thicker canvases.
Friendly disclaimer: Our articles may contain affiliate links that support us without costing you more, and sometimes we spice things up with sponsored content—but only for products we truly stand behind!
Learn More:
- The Importance of Sharp Focus for Print Detail
- 5 Reasons Why Print-on-Demand Services Should Be Part of Your Photography Business Plan
Hero photo by Standret via Shutterstock