3 Beginner Smartphone Photography Tips

For quite a few years now, smartphones have essentially played the role of introductory camera, in the process, killing off a good chunk of the point-and-shoot market.
That means that more people than ever are using their phones as their primary camera.
That also means that it's more important than ever to understand how to use your smartphone camera to get the best possible pictures.
Here's a few critical smartphone photography tips to help you on your way.
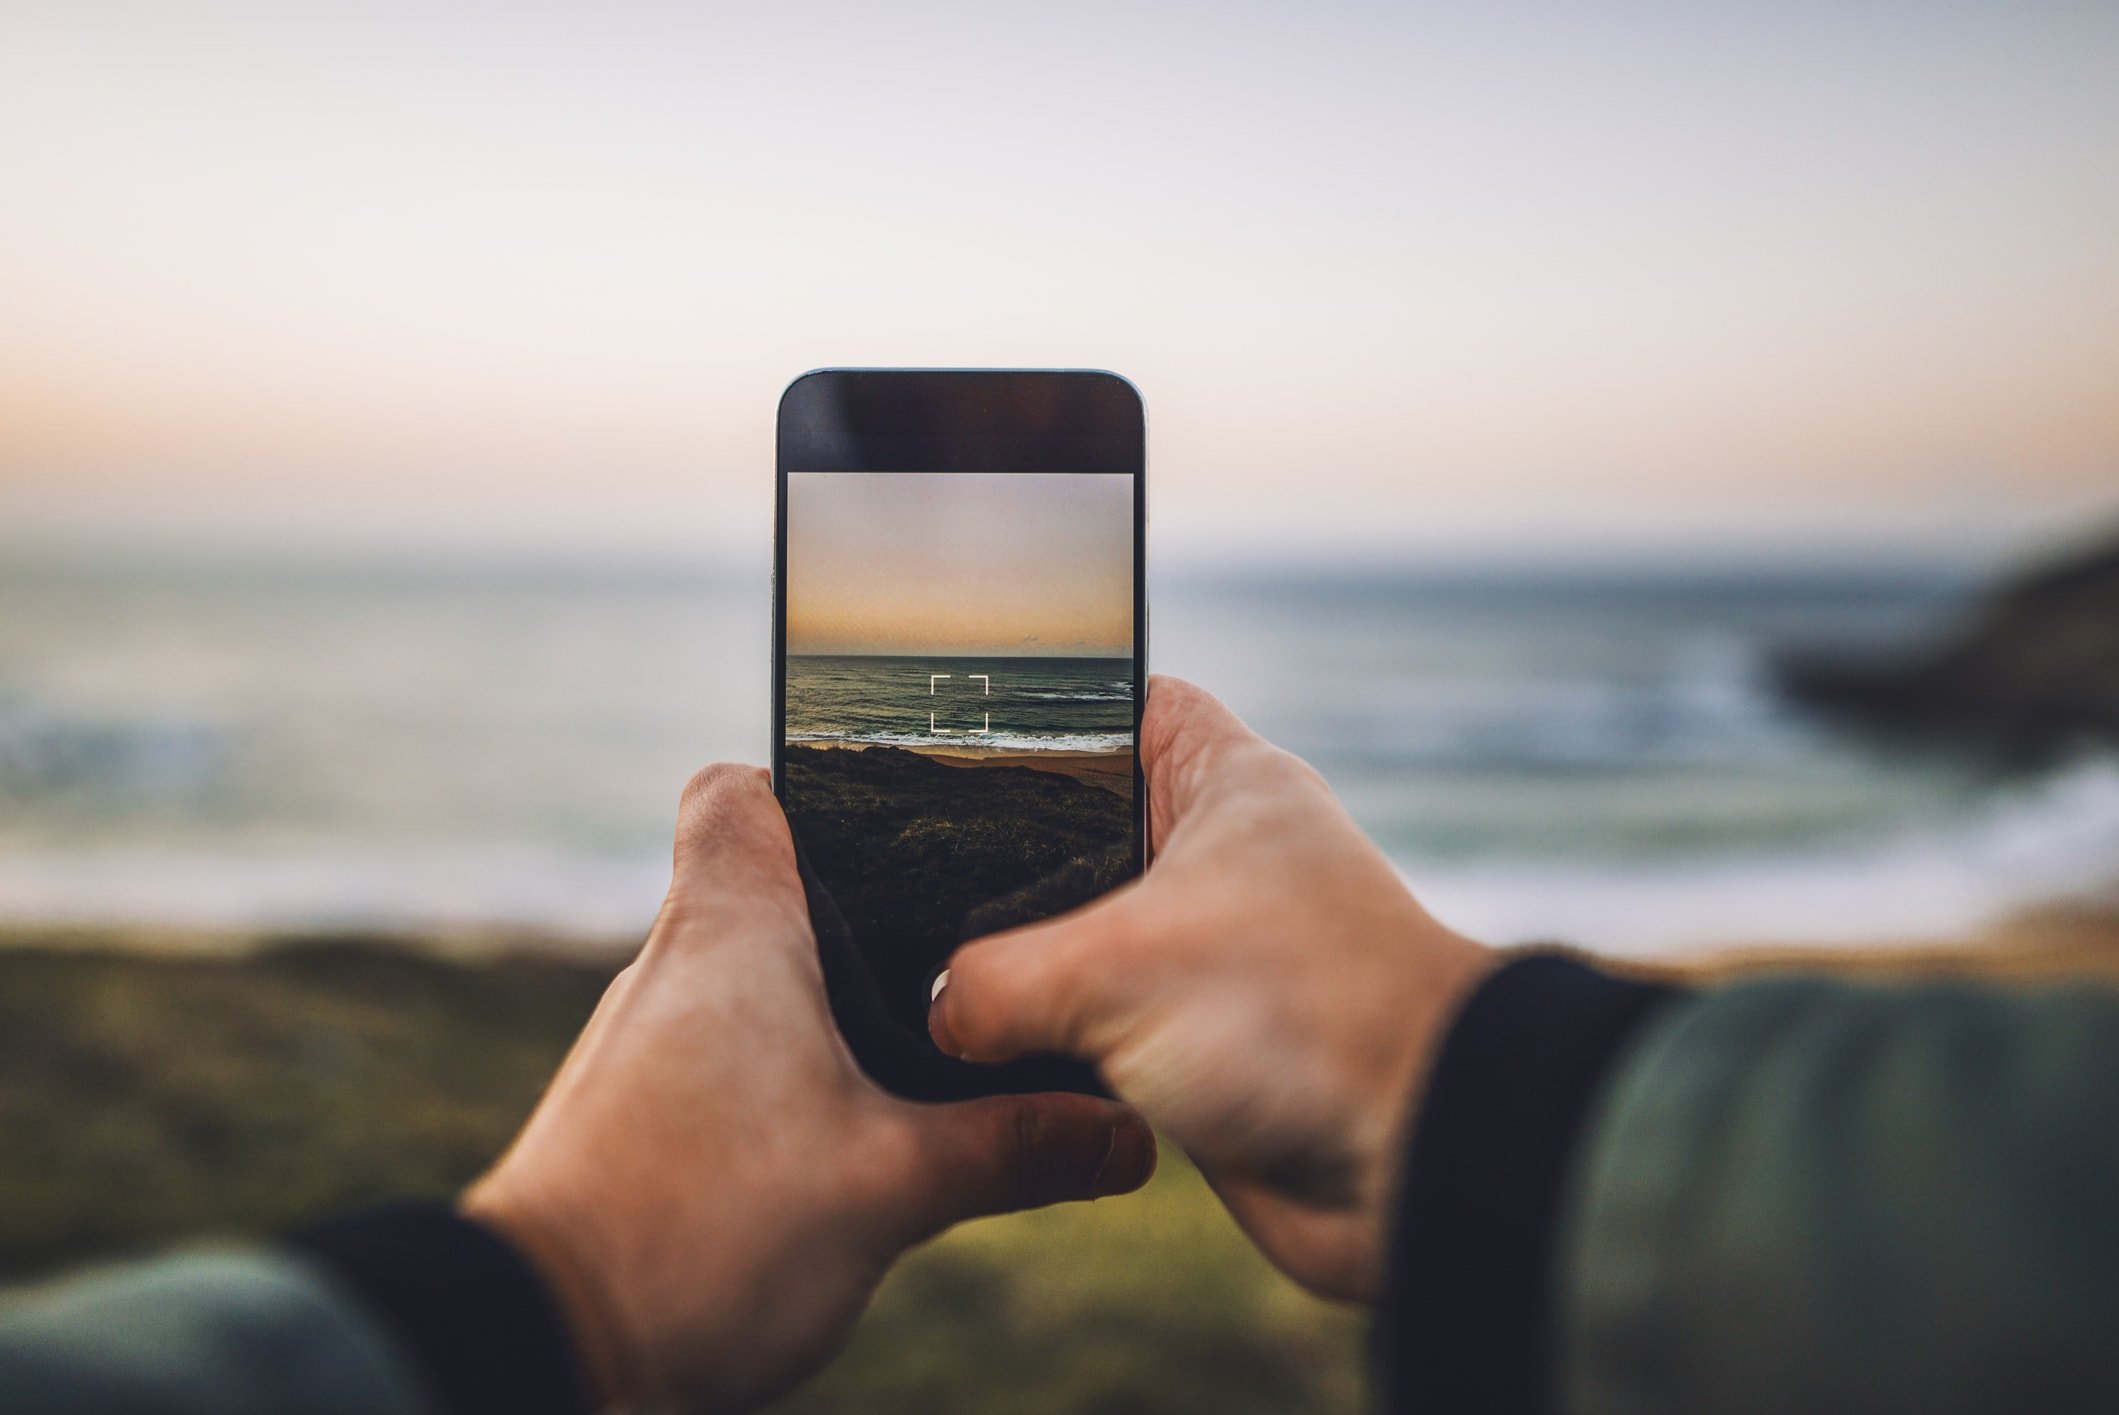
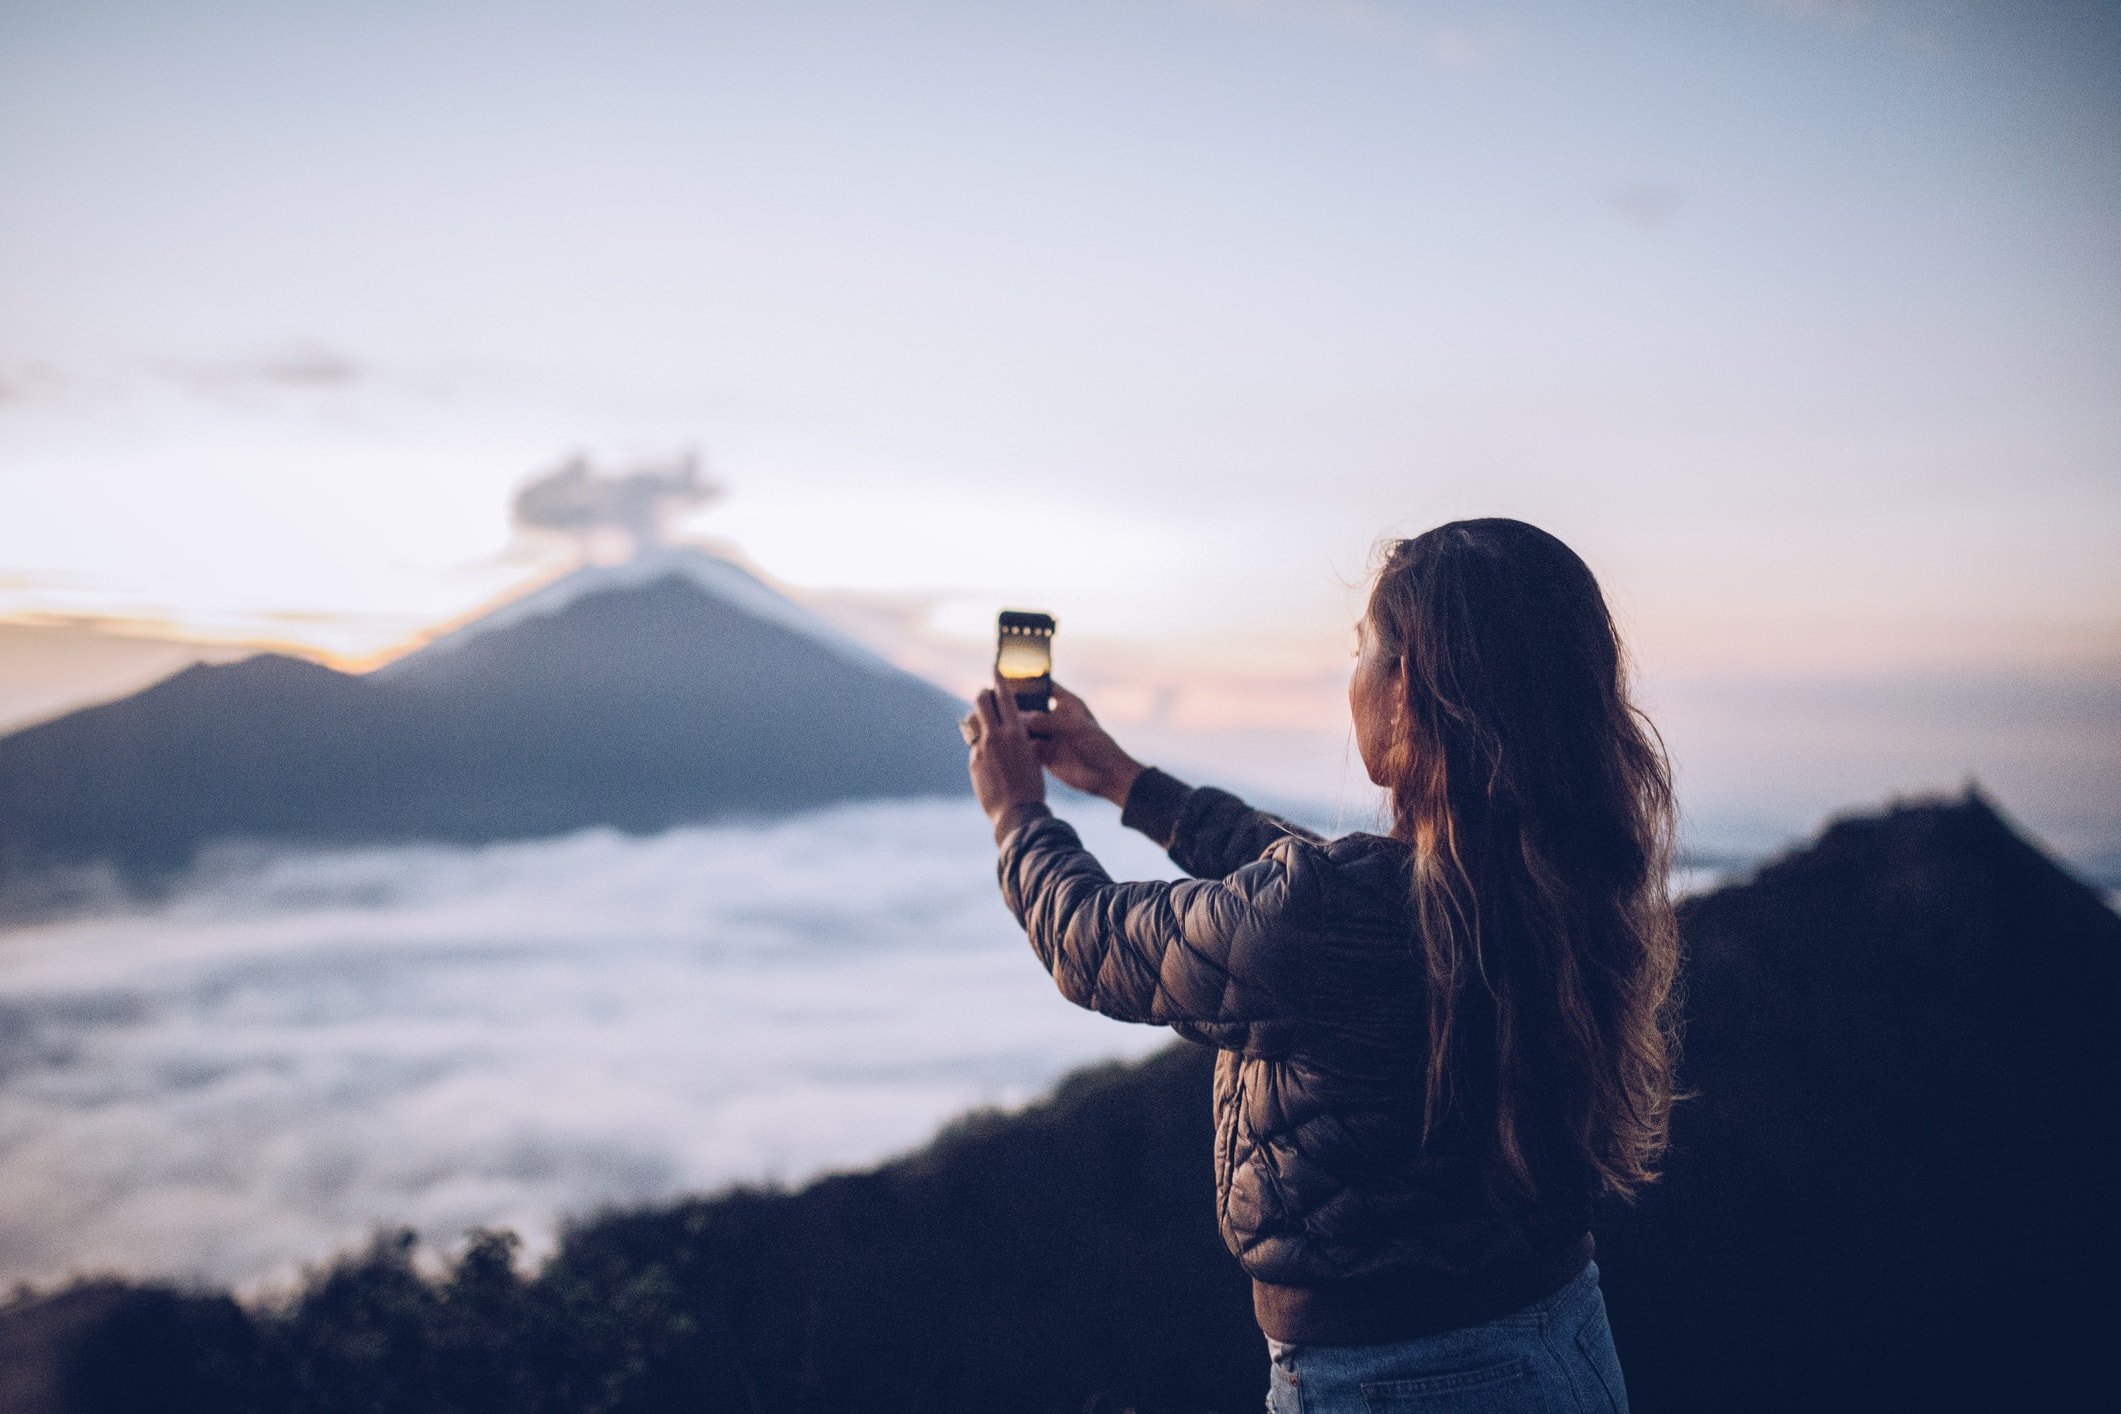
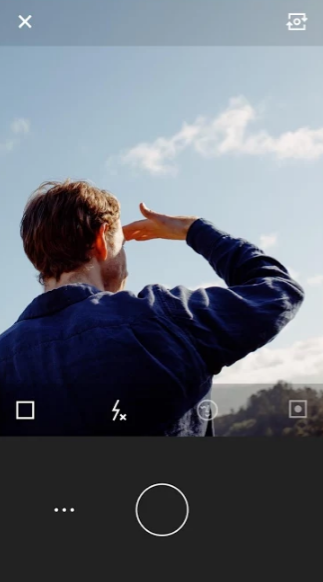
Try Landscape Orientation
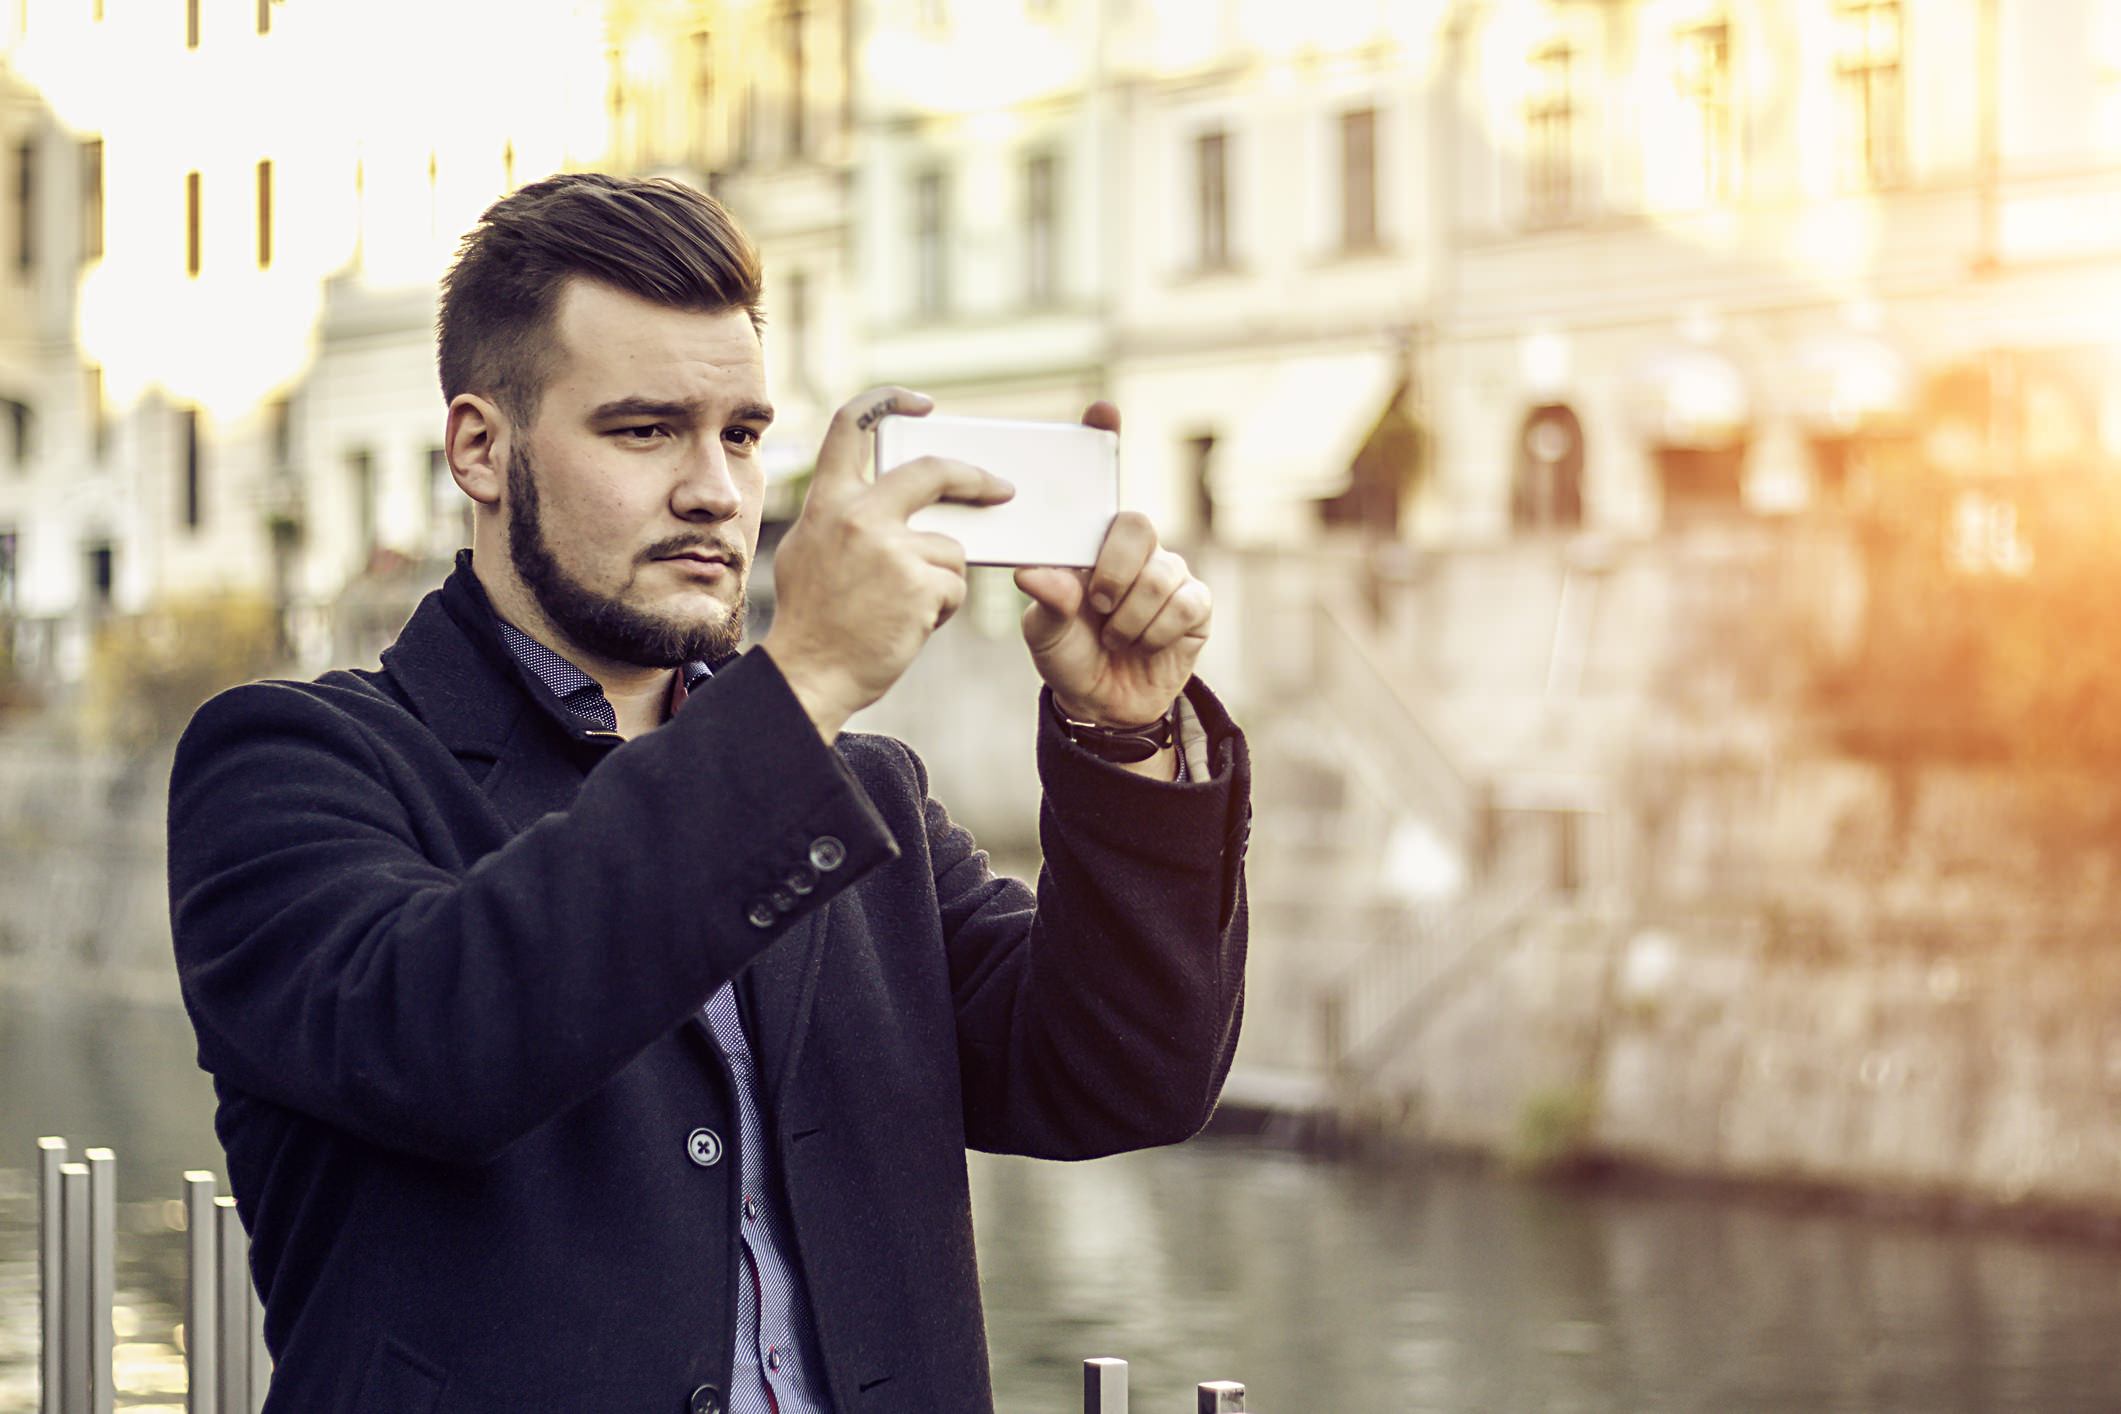
Because phones are taller than they are wide, it's simply easier to hold them in vertical orientation.
That means that a lot of beginner smartphone photographers neglect the landscape format that's so pleasing to so many subjects, particularly landscapes.
Beyond that, viewing images on a computer screen or a TV is a better experience if the image was taken in landscape format.
Otherwise, you lose about 40 percent of the image area when you shoot in vertical format, and when you view it on a widescreen, you get those ugly black bars on either side of the shot.
So, a good rule of thumb is to default the phone's position to the horizontal.
Only when you're taking photos of something tall - like a waterfall, a building, a tree, and the like - or a full body portrait, should you keep your phone in vertical format.
Learn More:
Get Geared Up
Though smartphones are certainly equipped with better cameras today than ever before, just like traditional cameras, you can still help your phone take better images by adding essential gear.
For me, there are two add-ons that are must-haves for smartphone photographers: a lens and a tripod.
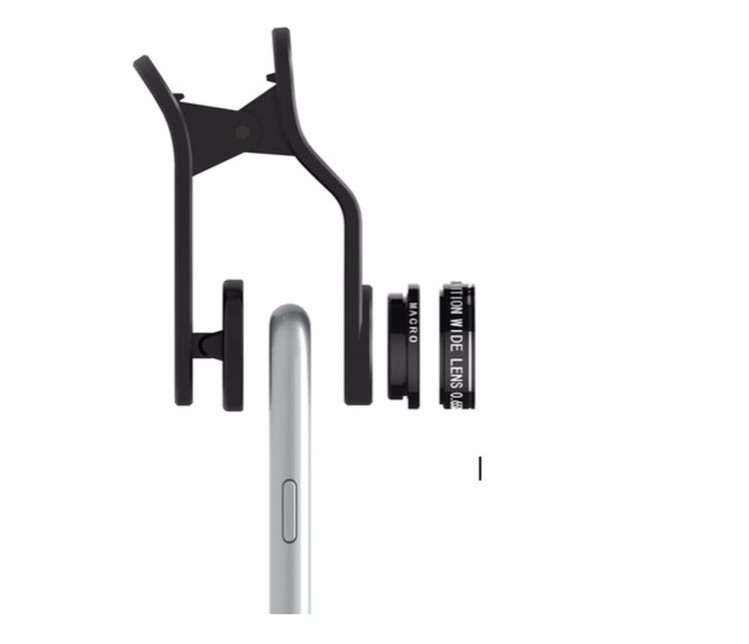
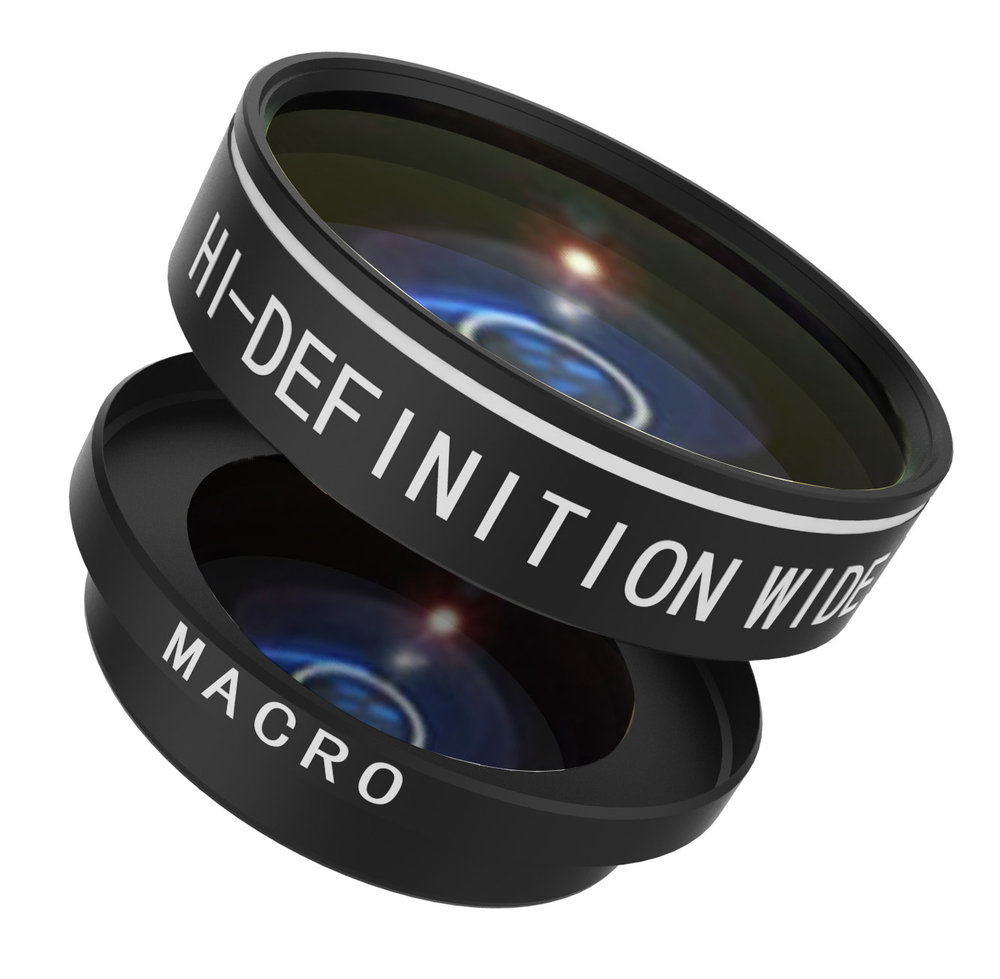
Smartphone Lenses

With regard to lenses, you can change the field of view of your phone's lens to accommodate anything from wide-angle to macro and even to fisheye.
That, in turn, gives you many more creative possibilities for generating unique images with your phone.
But not all smartphone lenses are made equally...
I prefer lenses like the one shown above by Kenko.
Why?
For starters, it clips onto my phone, so it's incredibly easy to use.
Just clip it on, and you're ready to go! No messing around with weird attachments or complicated cases.
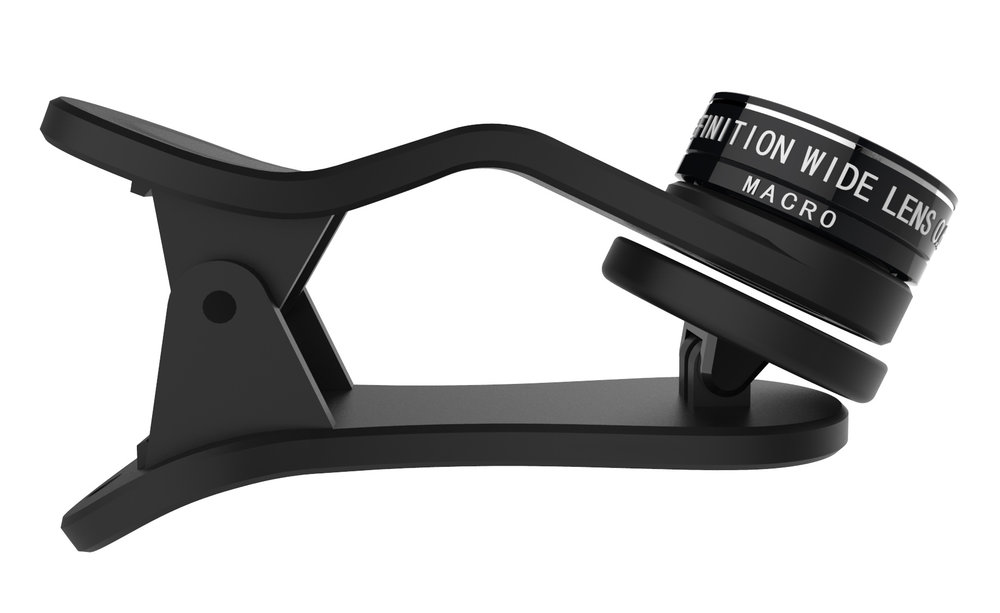
Secondly, it's made from fine-processed glass that offers the utmost in image quality.
In other words, I get clear, sharp images with this lens with excellent colors and contrast.
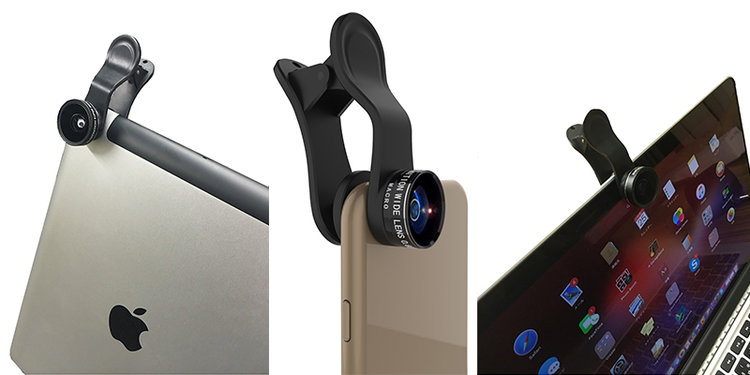
I also like the variety of clip-on lenses that Kenko offers.
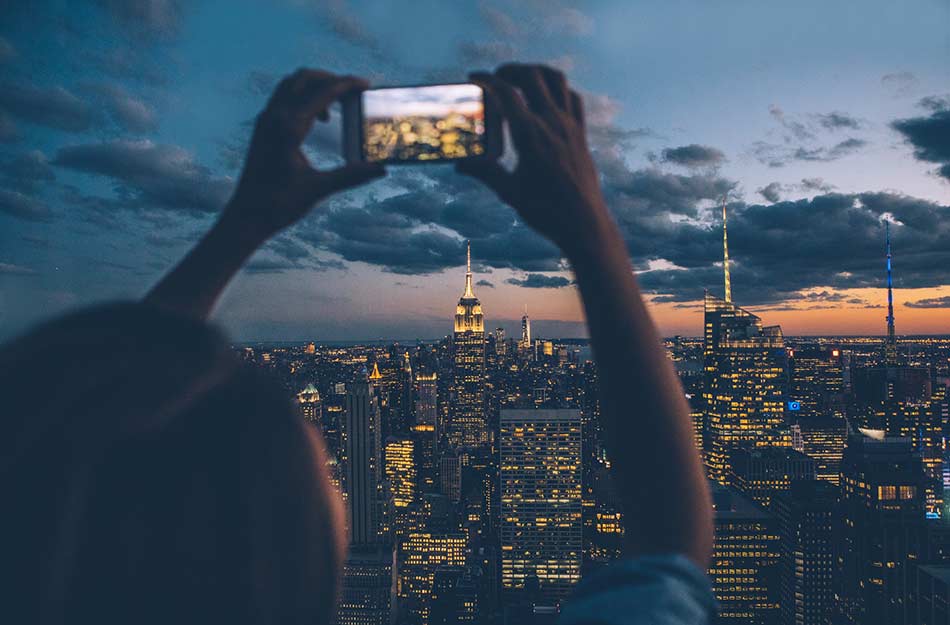
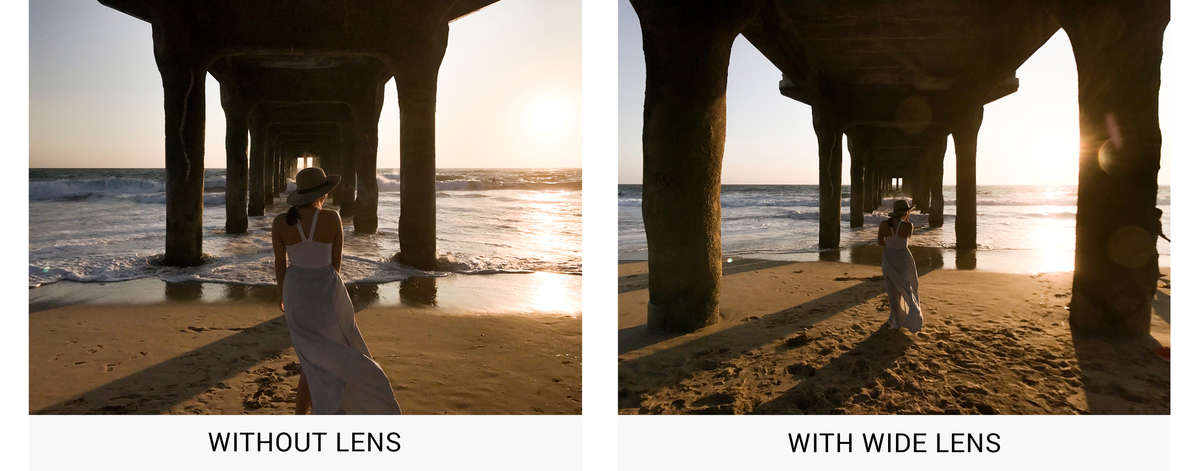
The macro/wide-angle lens offers a .65x wide-angle view that's ideal for getting photos of large landscapes. You can also use it to photograph large groups of people with a 120-degree field of view.

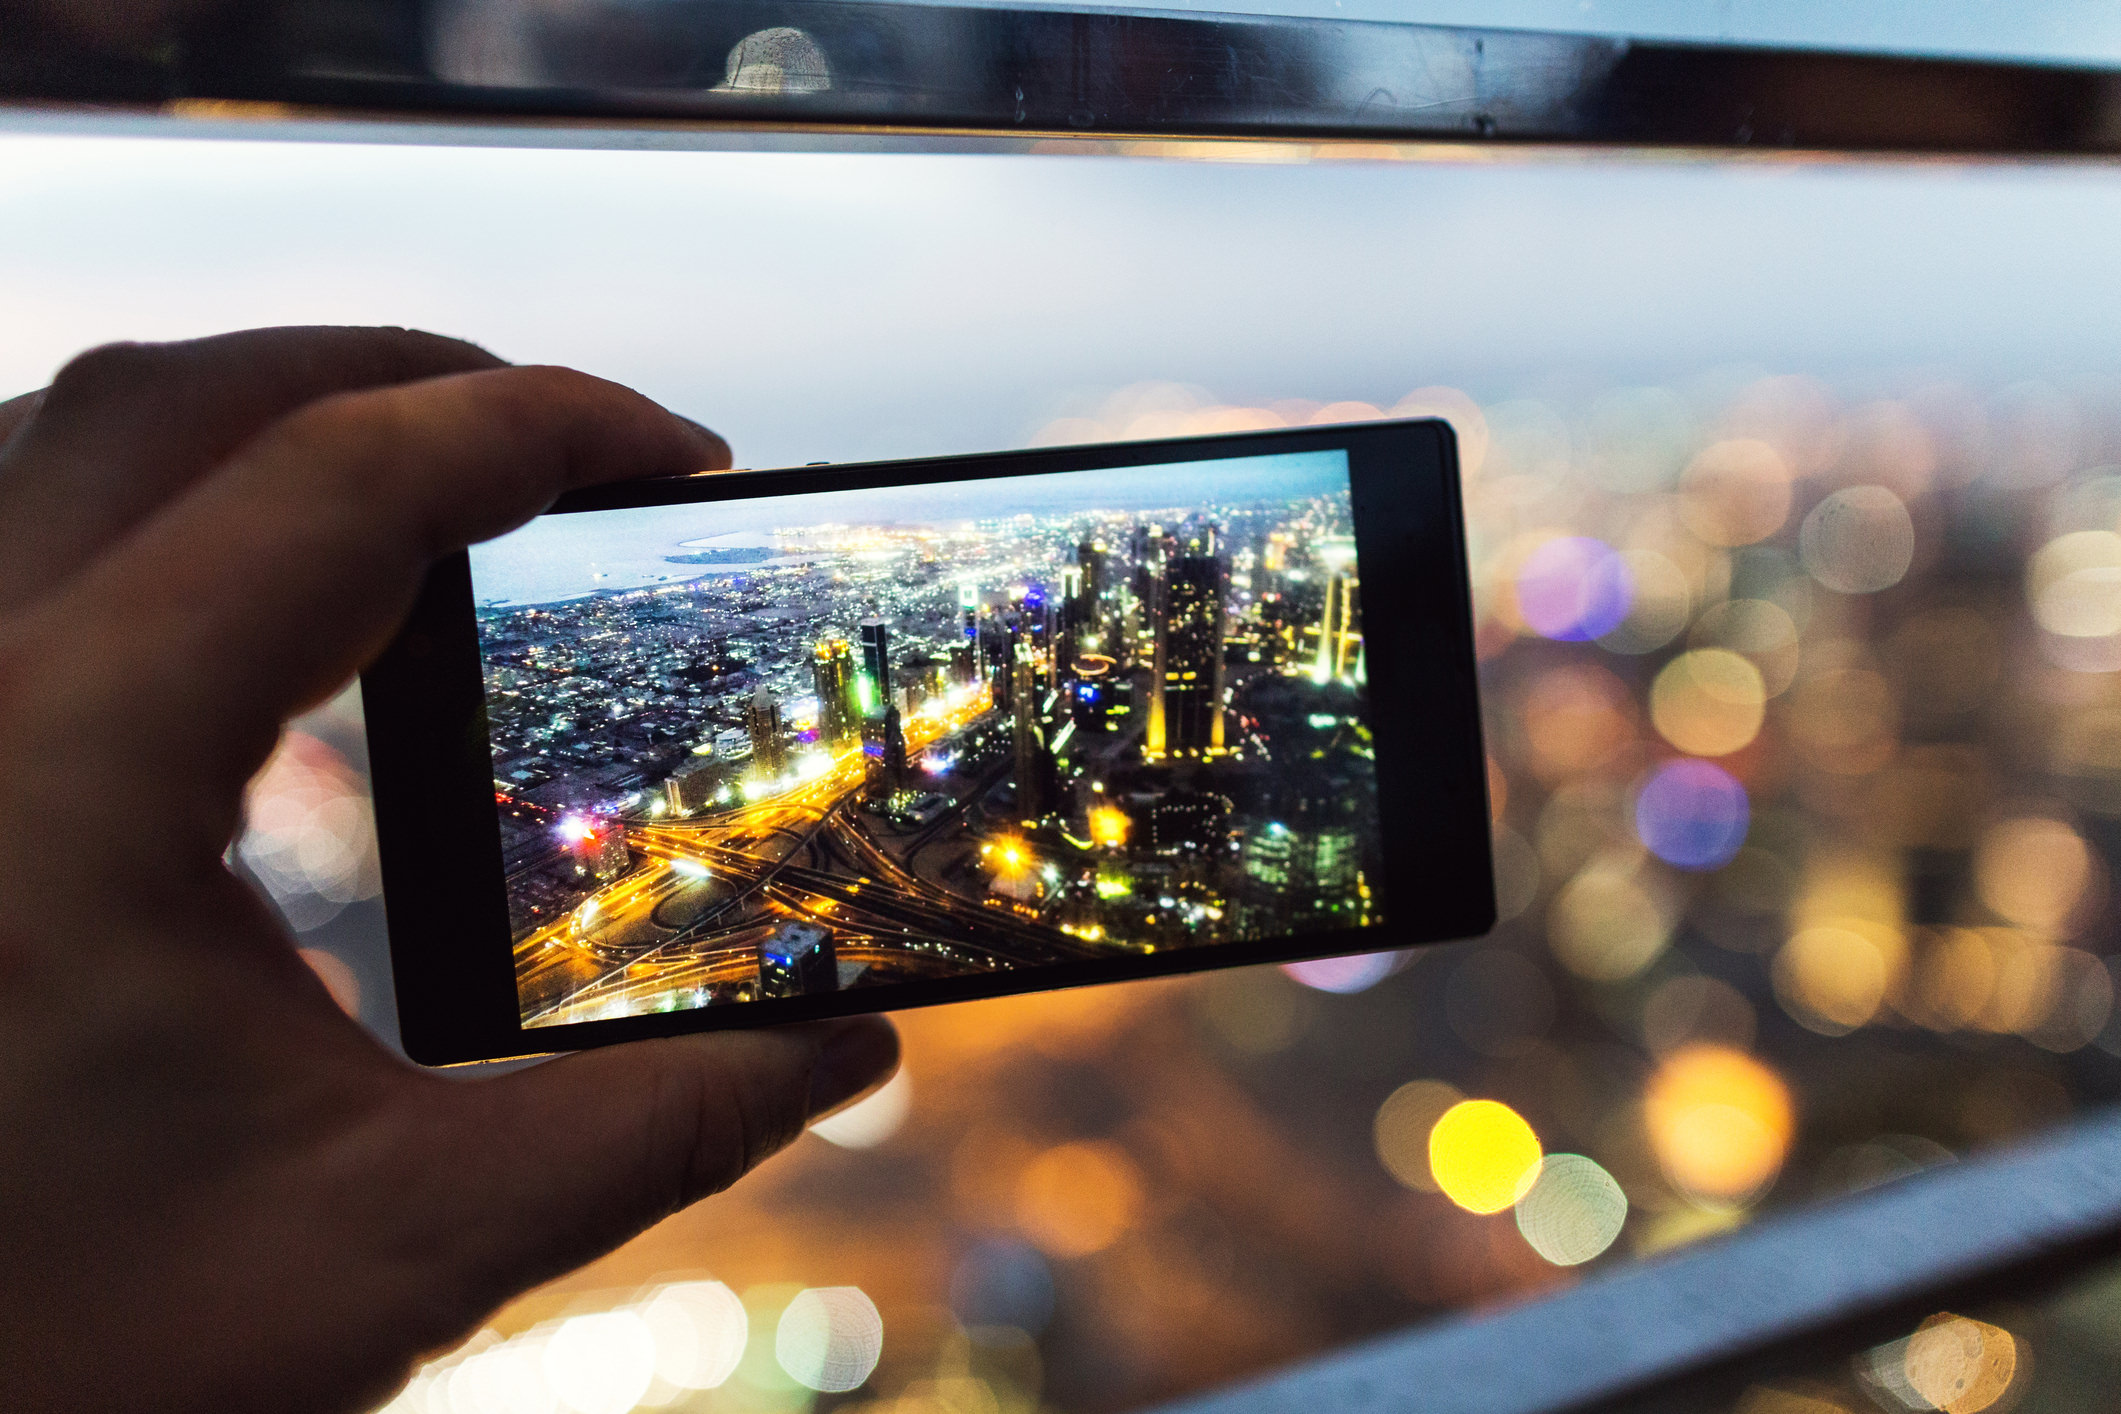
If you need an ever wider angle of view, try a .4x super wide-angle lens.
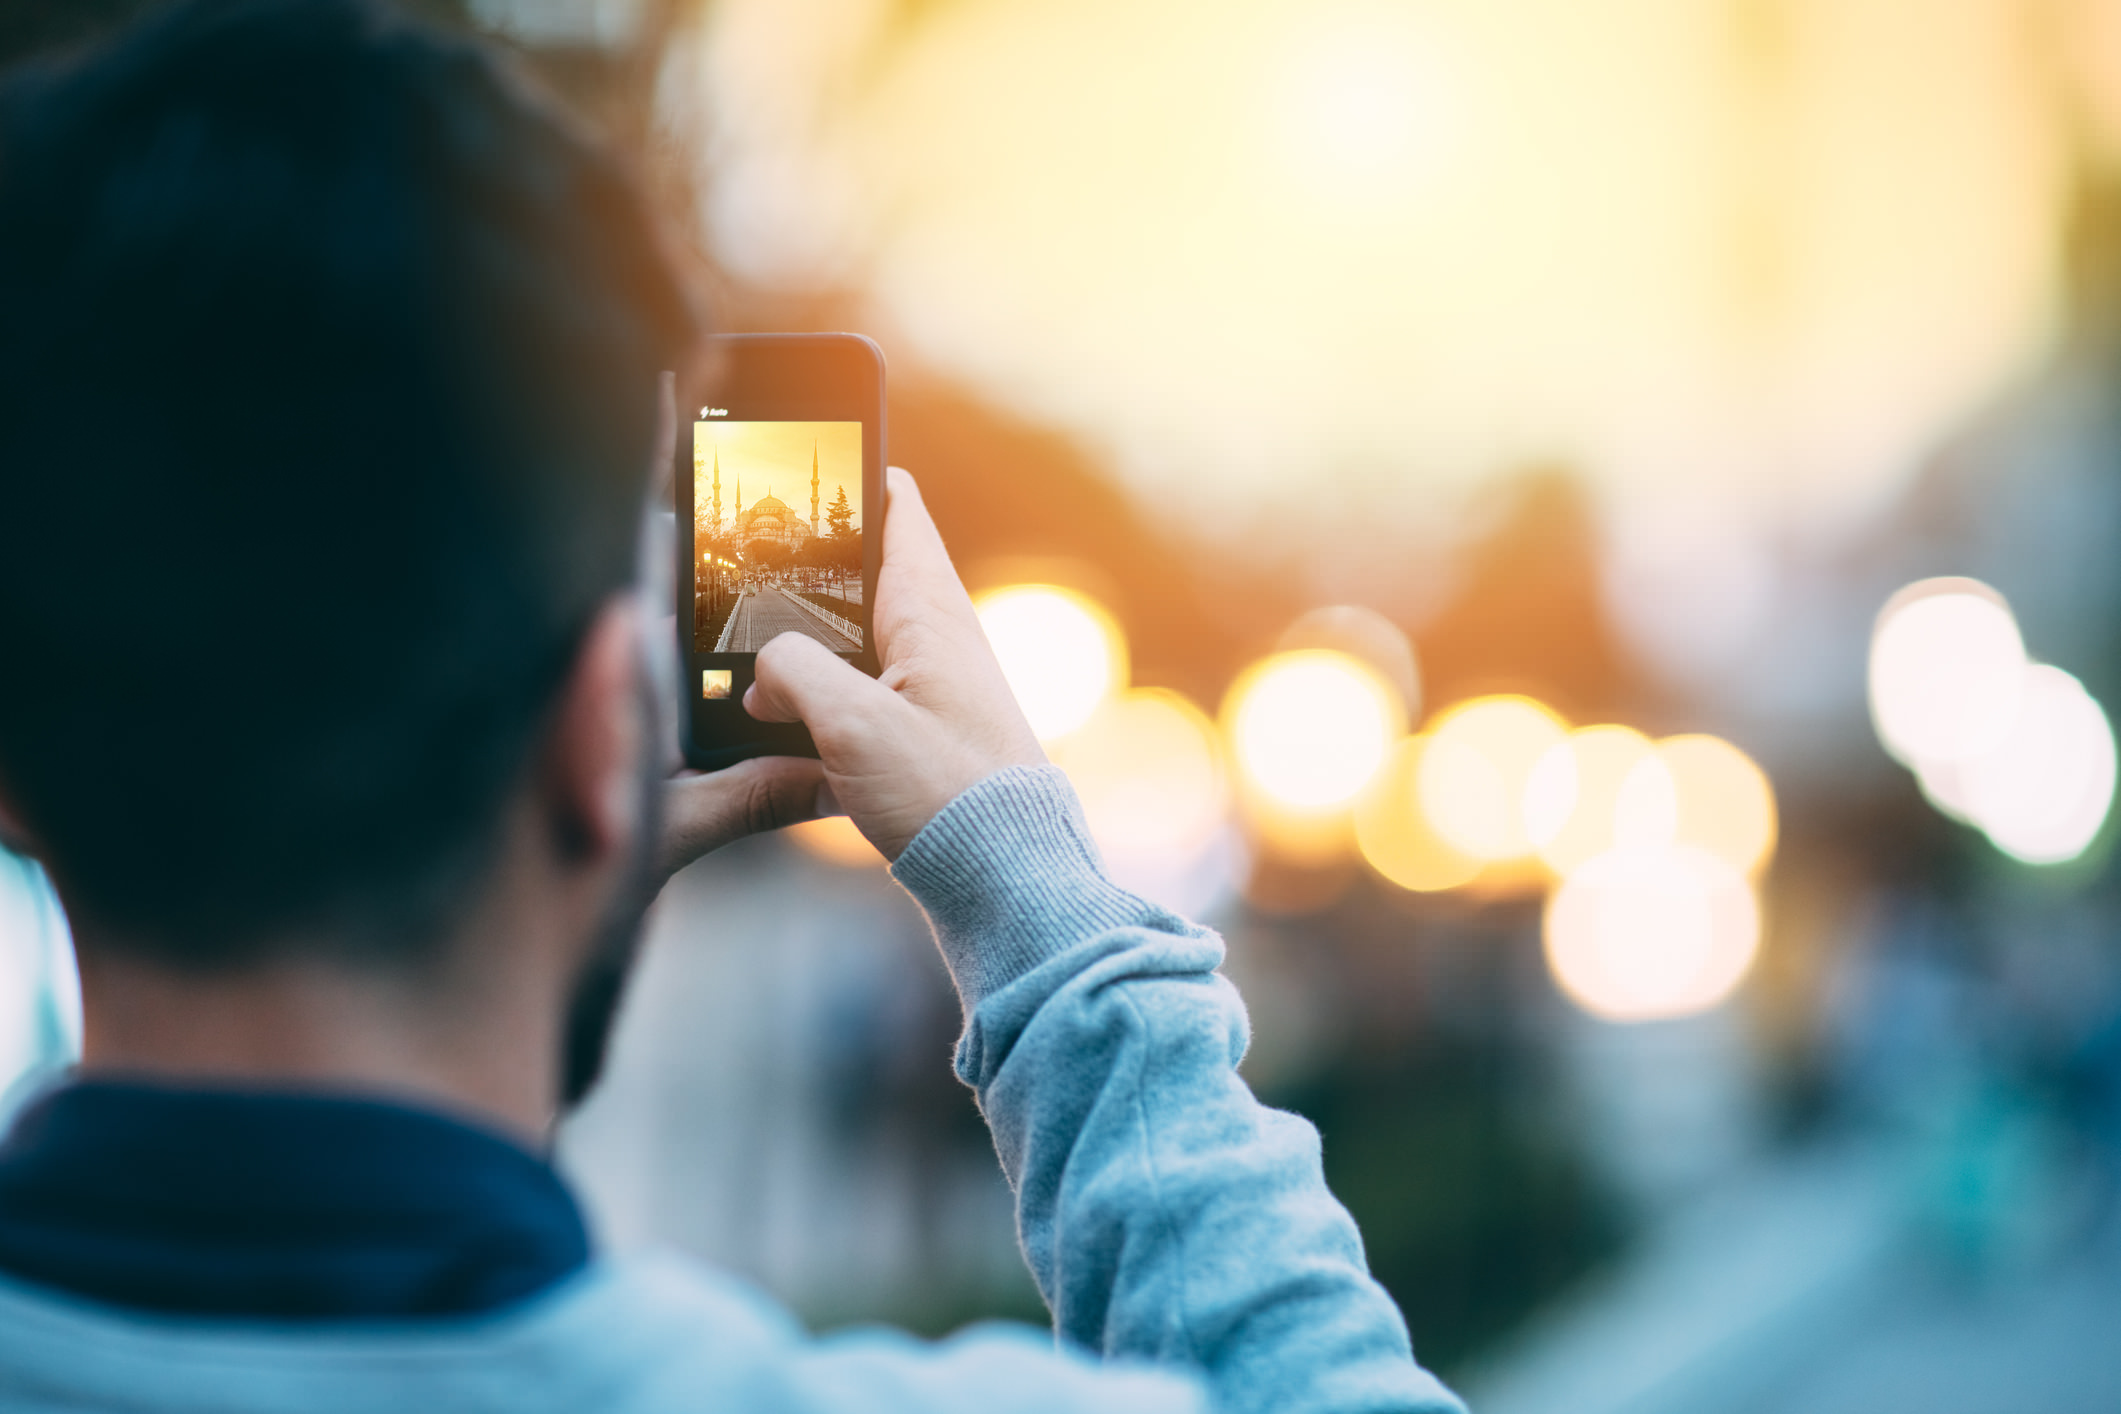
With a 165-degree field of view, this lens is perfectly suited for capturing all the scenery and drama of a landscape. You can even get up close to a subject, but still incorporate its surroundings, as seen in the image above.
You can also try a 180-degree fisheye lens if you want to create images that have an ultra-unique look to them.
The point is that your smartphone has a decent camera with a decent lens, but with a set of add-on lenses, you can expand the camera's capabilities and pursue more creative images.
What's not to like about that?
Learn More:
- Get the Specs and Pricing on Kenko Smartphone Lenses
- How to Take Better Portraits With Your Smartphone
Using a Tripod With a Smartphone

It might sound strange to use a tripod with your smartphone, but trust me when I say that it can make all the difference in the world.
One of the biggest enemies to the quality of a photo - whether you take it with a smartphone or a more traditional camera - is blurriness due to camera shake.
Naturally, one of the best ways to minimize camera shake and maximize the sharpness of your images is to use a tripod.
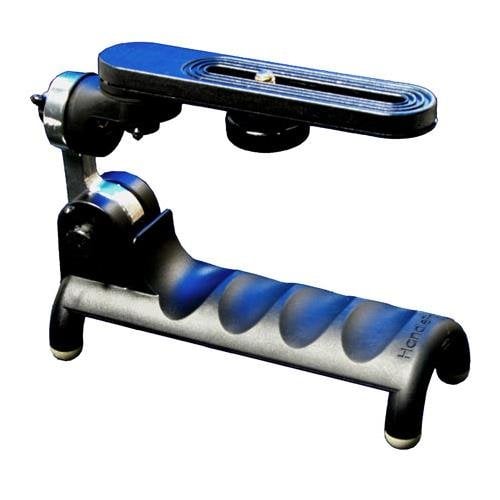
Of course, you don't want to lug around a giant tripod if you're shooting with your mobile phone, so getting something like the Vanguard VS-82 (shown above) is a good bet.
This little guy weighs less than a pound, and folded up, it can fit in a purse or small bag, or even your pocket.
It's got a two-way pan head that swivels 360-degrees, and it's non-slip rubber feet ensure it's got a good grip no matter if it's on a perfectly flat table or an angled surface.
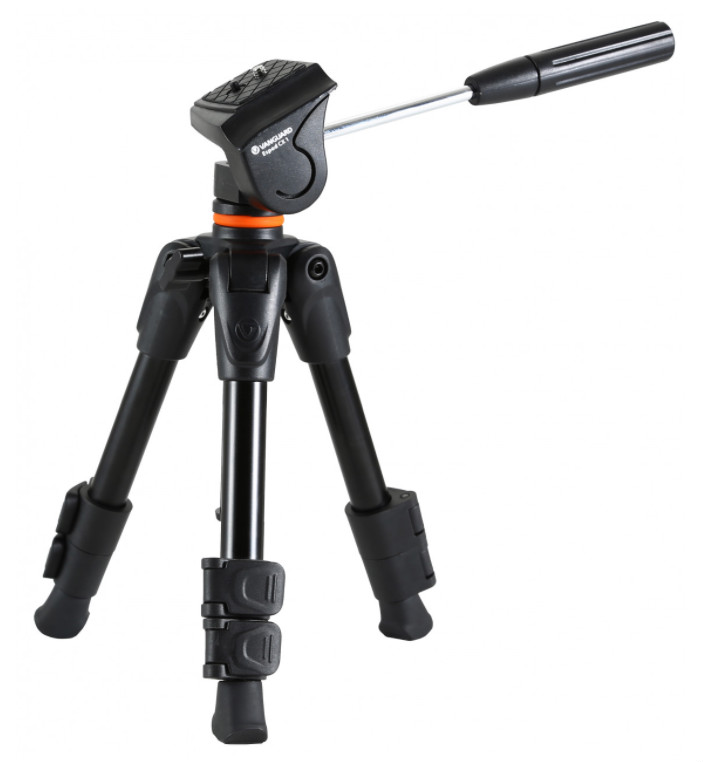
If you need something that's a little larger, the Vanguard Espod CX-1 (shown above) is an ideal choice.
It weighs a little more than the VS-82 (by about a half pound), but with three-section legs, it offers more height (up to nearly 23-inches).
Like the VS-82, the Espod CX-1 has a two-way pan head with 360-degree movement and anti-slip rubber feet for stability.
It folds down to less than 11.5-inches, so it won't exactly fit in your pocket.
However, it's still ultra-portable and an excellent solution for mobile photographers.
All you need is to get a tripod adapter for your specific phone, and you'll be good to go!
Learn More:
- Get the Specs and Pricing on the Vanguard VS-82 Tripod
- Get the Specs and Pricing on the Vanguard Espod CX-1 Tripod
Take a TON of Photos

A great way to improve your mobile photography skills is to actually take a lot of photos.
And I mean a lot of photos. There's no reason not too!
The more photos you take, the more you will develop your creative eye.
Additionally, the more photos you take, the better you'll be able to recognize features like good lighting that will only improve your photos.
What's more, your phone probably has a good deal of storage, and it's not like it's hard to swipe through your photos and delete the ones that didn't quite turn out.
You have your phone with you all the time anyway, right? Why not capitalize on every opportunity you can to improve your photography?
Learn More:
- How to Stabilize Your Camera for Sharper Images
- Doing Just This One Thing Will Improve Your Photography
That's just the tip of the iceberg regarding smartphone photography tips.
For more insights into how you can improve your mobile photography, check out the video above by Serge Ramelli.
We Recommend
4 Hacks for Stepping Up Your iPhone Photography Game
iPhone Hacks For Photography
There is no doubt that the iPhone in your pocket is a great camera. That's especially true if you happen to use the iPhone X...
But as we all know, it's not just the gear you use that influences the quality of the photos you take.
That is, you have to do a little work to maximize how your iPhone photos look.
Here's a few iPhone photography hacks that are surefire ways to get the awesome photos you're after.
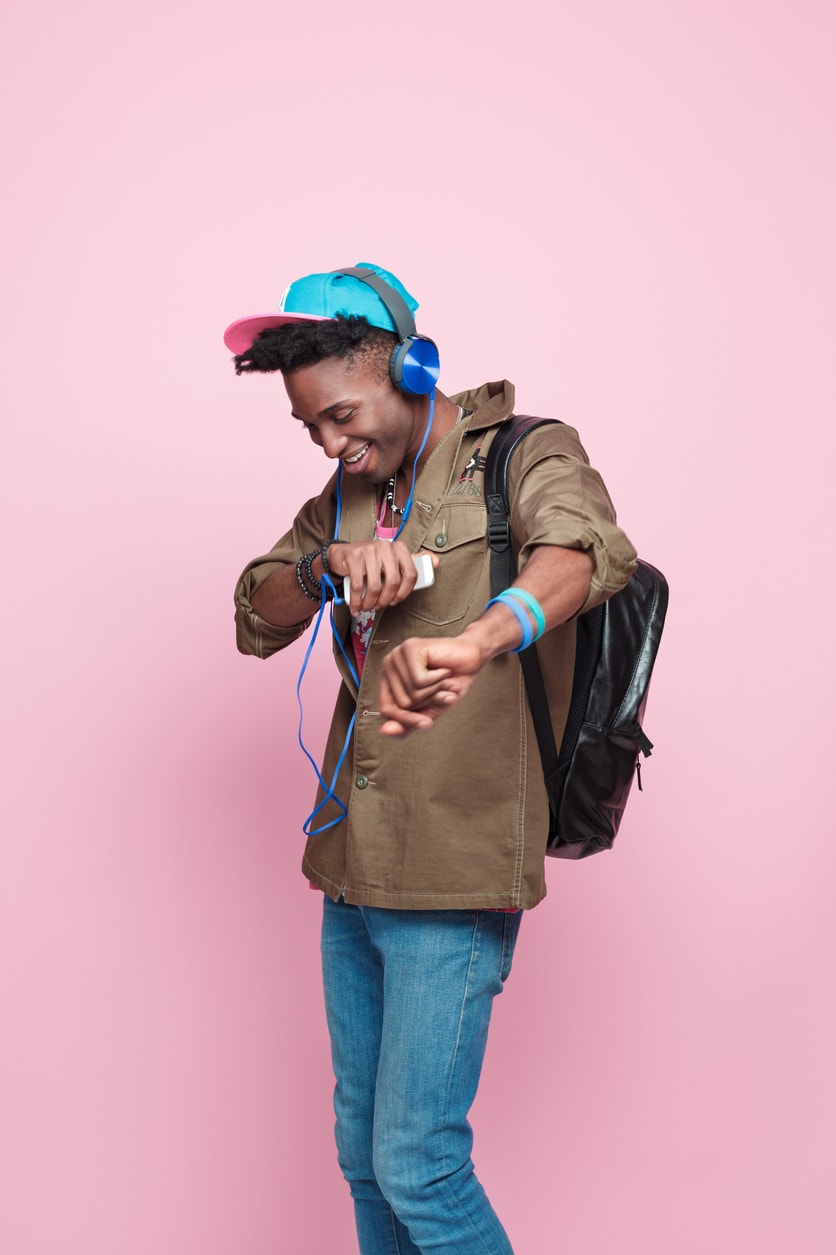
Add Movement

Adding an element of movement to your photos immediately makes them more dynamic and interesting.
Think about it - if you're taking a portrait and the model is simply standing there, looking straight at the camera, it's a little bit of a boring shot, right?
By adding movement, though, you have a mechanism by which you can create something a little more unique.
Whether you achieve that by using a slow shutter, having the model move around to get movement in their hair, adding a fan to cause their clothing to move, or some other trick, the results can be pretty awesome!
Learn More:
- iPhone Photography Tricks You Don't Want to Miss
- How to Find the Best Angles for Your Smartphone Photos

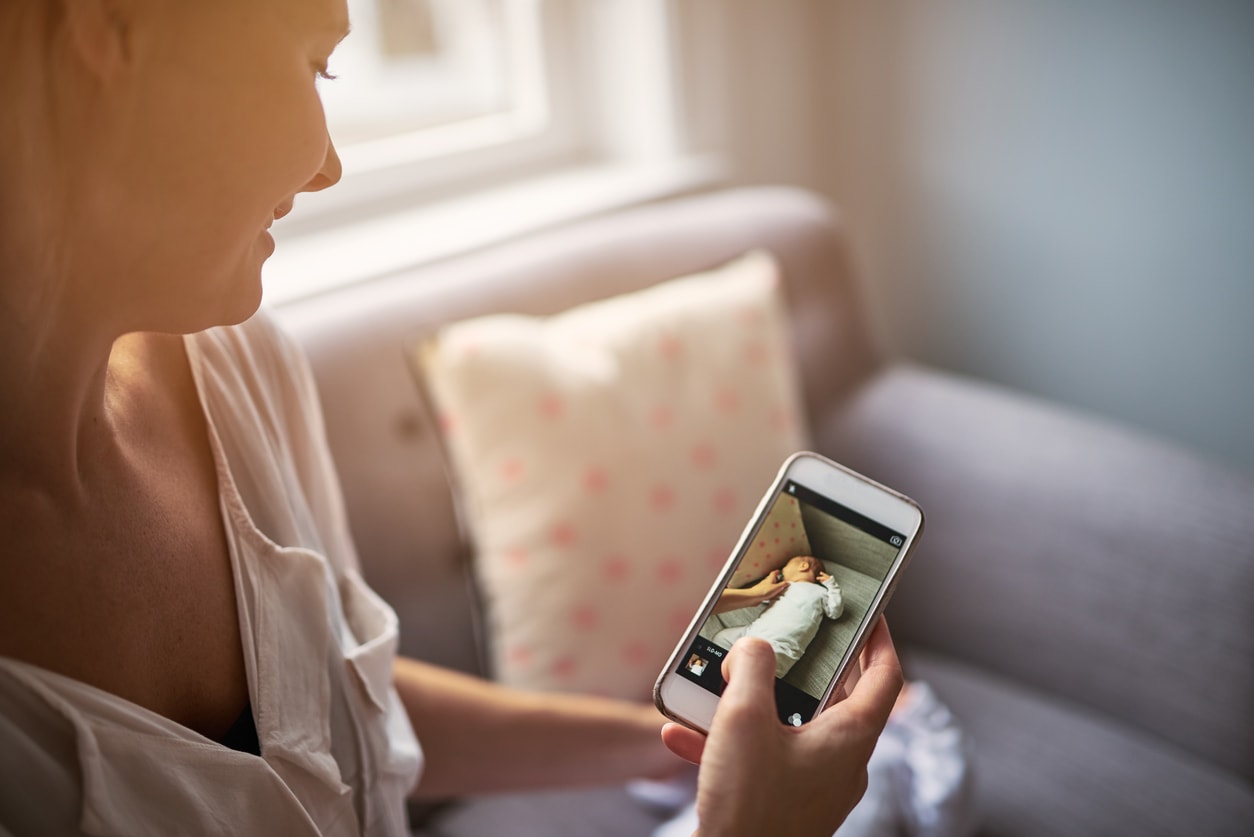
Review Live Mode Frames

What's nice about Live Mode is that you get a string of possible still frames with each shot.
That means that if the initial key frame isn't to your liking, you can make a selection from any of the other key frames in the sequence.
If you aren't sure how to do this, select a Live Photo from your library (or take a new one) and press Edit in the upper right-hand corner of the screen.
On the next screen, move the white box at the bottom of the screen from left to right to find the precise frame that works best, and then select "Make Key Photo."
It's a super easy way to improve your photos without having to take another shot!
Use Exposure Compensation
Just like on your mirrorless camera or DSLR, your iPhone has an exposure compensation feature that makes getting the best shots much simpler.
You've no doubt taken a photo at some point that was a little too dark or too bright, but was otherwise a pretty good shot.
The solution to this problem is a simple one - just slide your finger up or down on the phone's screen.
With your iPhone camera turned on, simply tap the screen to bring up the yellow focus box. When you do that, you'll see a sun symbol immediately to the right.
Slide your finger upward from the sun symbol to lighten the image; slide it downward to darken it.
Now, this trick isn't going to solve all your lighting problems, but it will definitely help you out if you find yourself shooting in lighting conditions that aren't quite ideal.
Learn how to manually adjust the exposure on your iPhone in the video above by Anson Alexander.
Learn More:
- Want Amazing Landscape Photography With Your iPhone? Try These Mobile Photography Tips
- How to Take Good Photos With a Smartphone
Expand the Possibilities With an iPhone Lens

I've written before about how impressed I am with my iPhone X camera and its native lenses.
But despite how good they are, the hardware in my phone has its limitations...
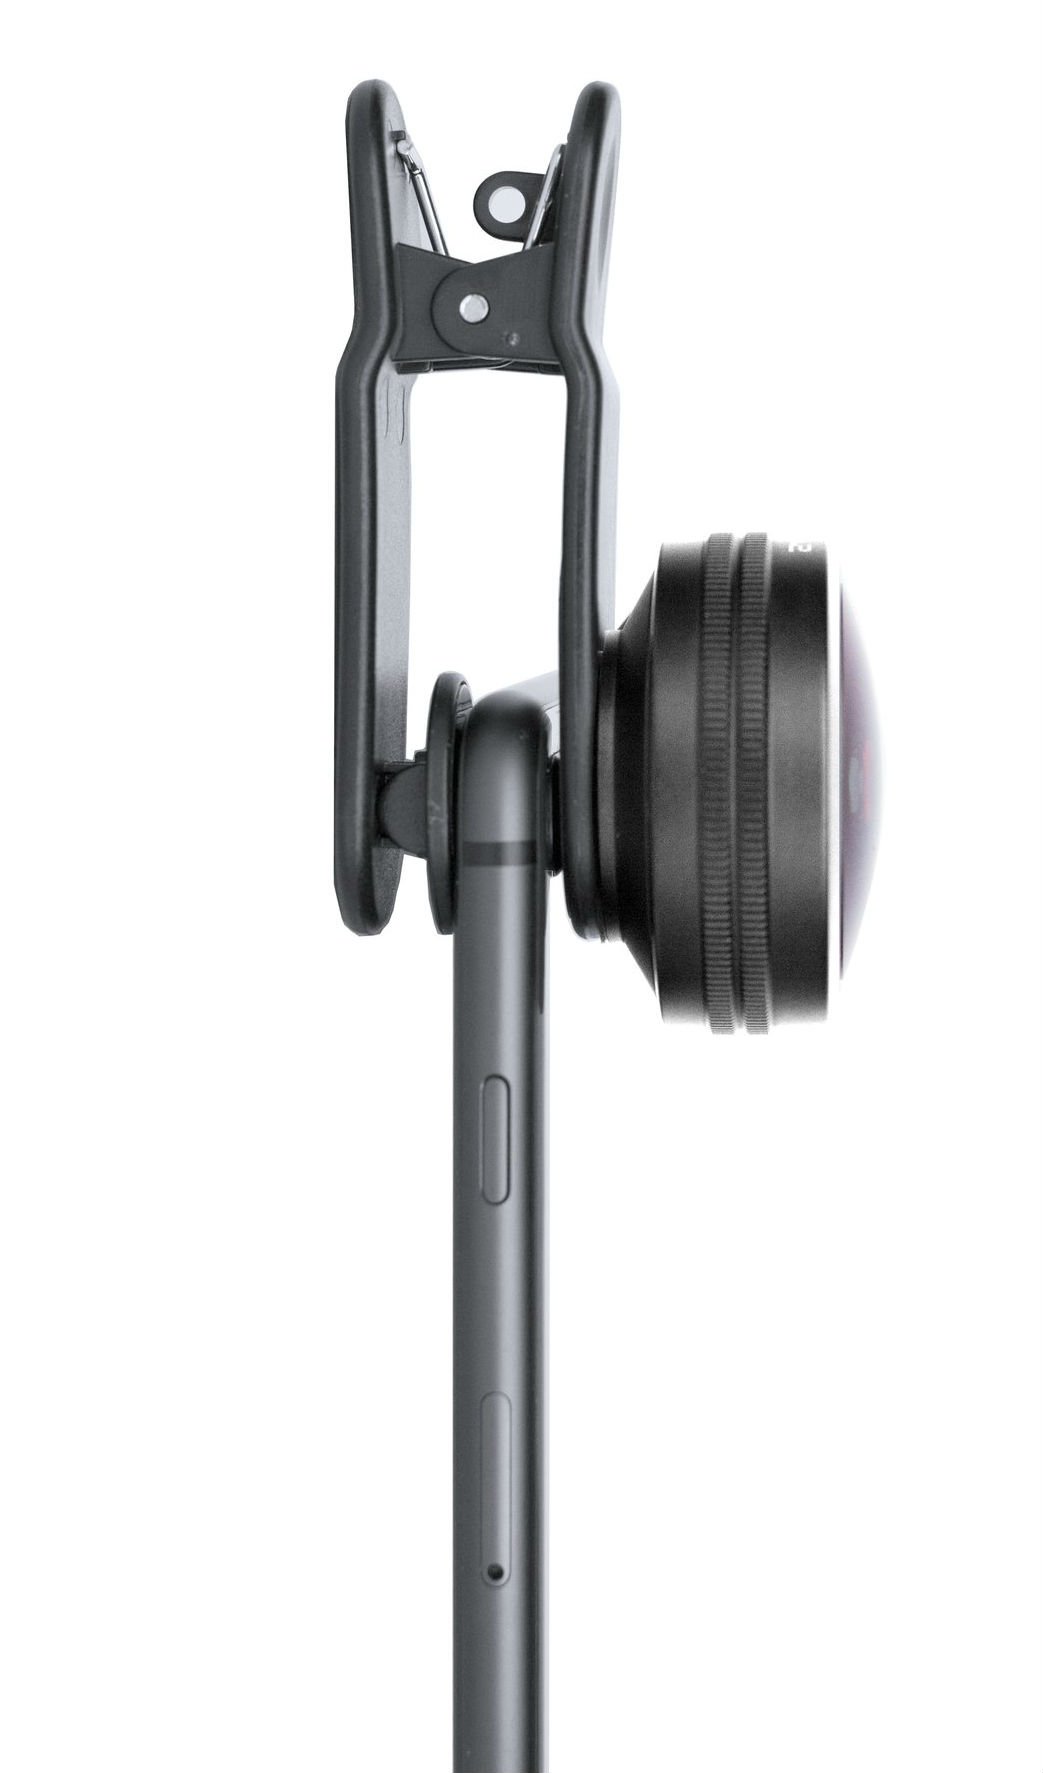
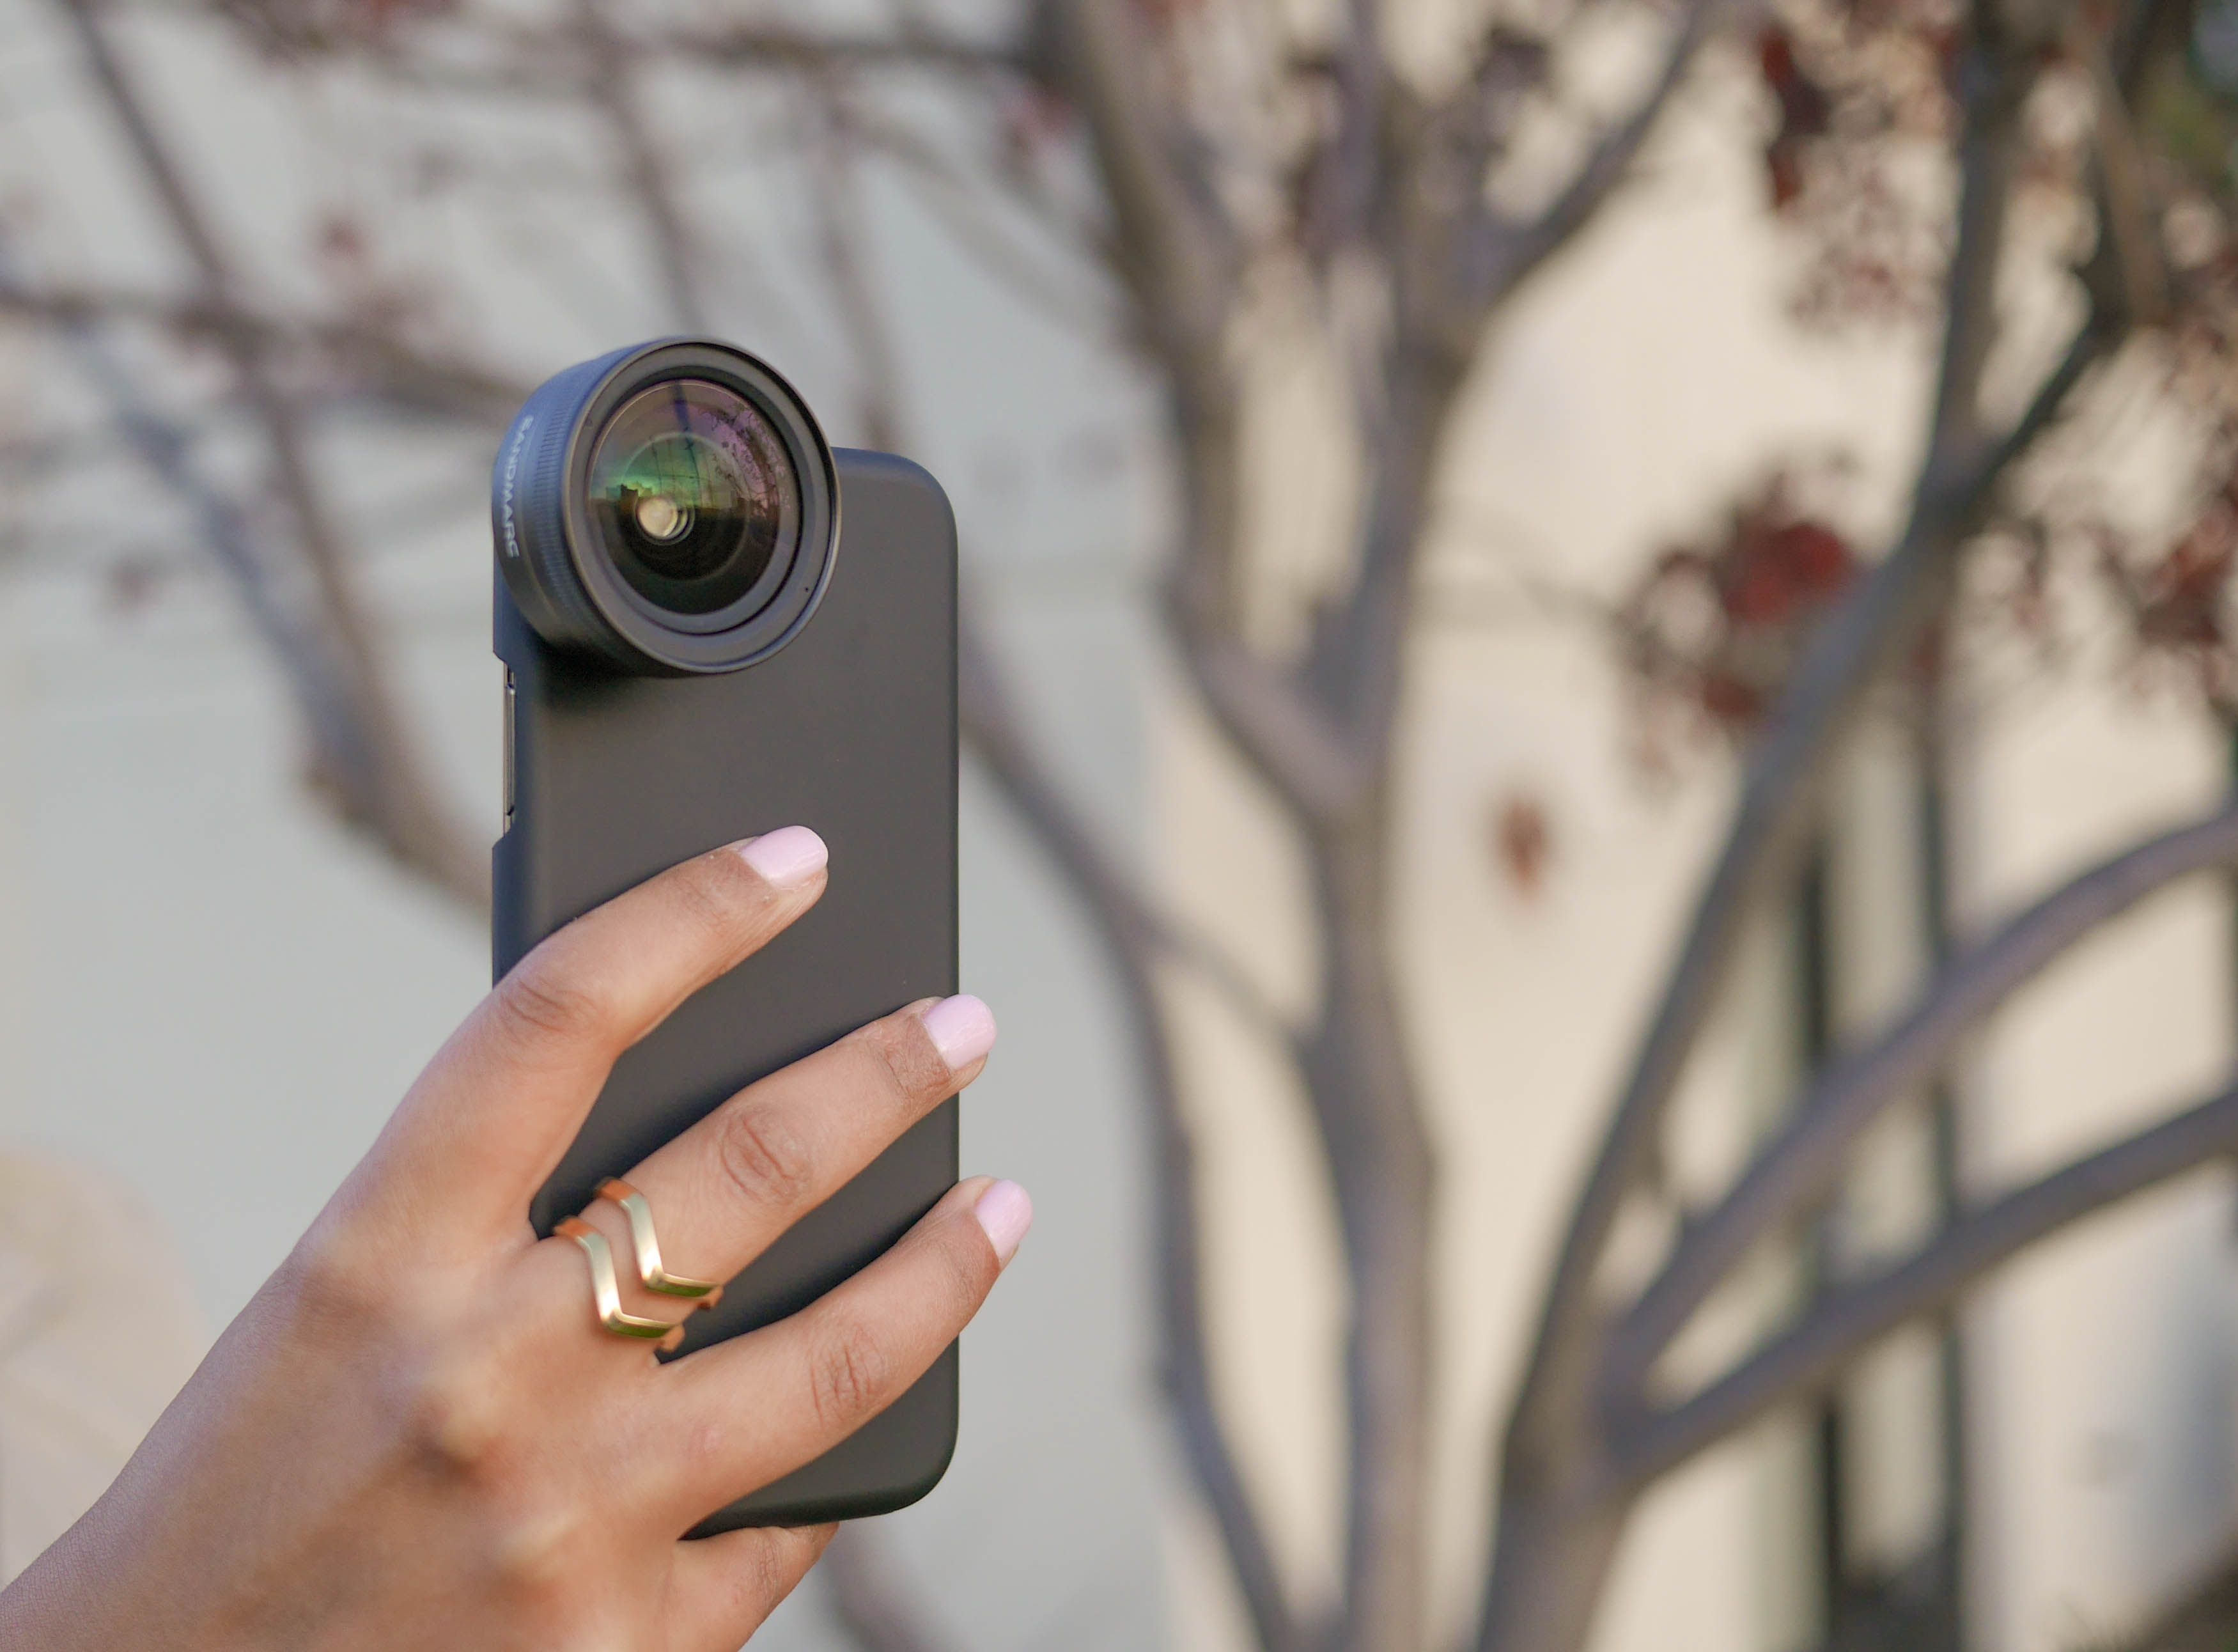
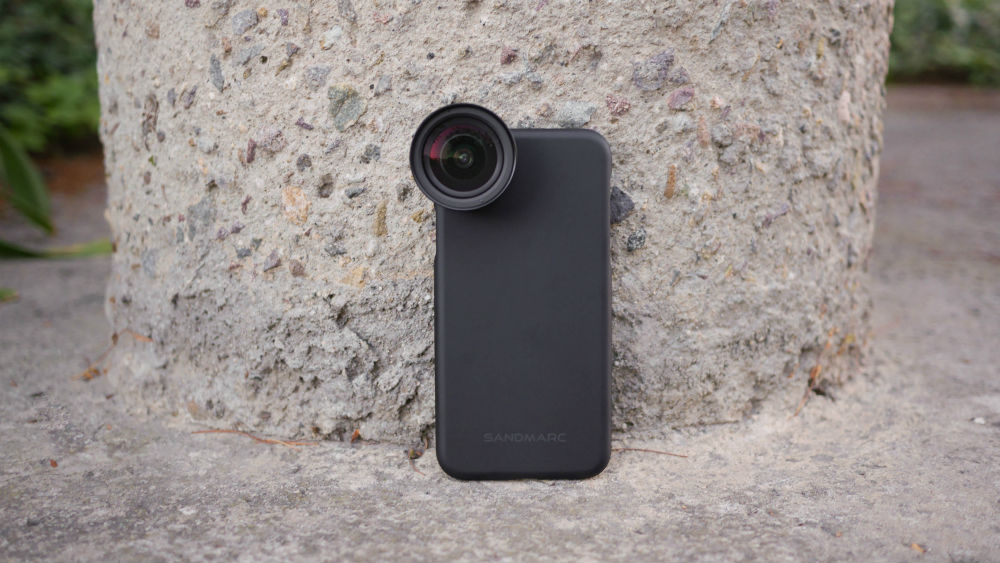
That's why I often shoot with SANDMARC iPhone lenses - to expand my creative possibilities and take better photos.
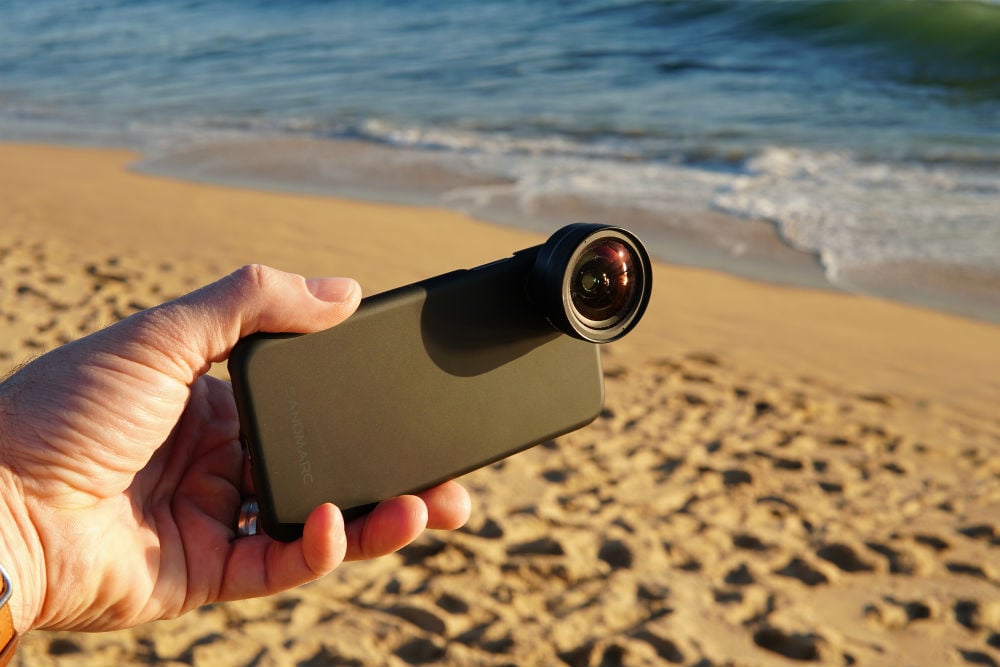
I think what I like most about these lenses is that they're so easy to use.
There's two ways to attach these lenses to your phone - just clip it over the native lens or use the ultra-thin case mount as shown above.
Either way, the lens fits perfectly onto your phone without worry of light leaks, aberrations, or other image degradation.
Not only that, but since these lenses are crafted from premium multi-coated optics, you get crisp, clear images with an improved range of view. What's not to like about that?
I've used these lenses for landscapes, portraits, and even macro scenes, and I have yet to be disappointed.
The clarity and focus are superb, as are the colors and the contrast that these lenses are able to capture.
I've used other smartphone lenses in the past, and they don't even come close to getting the kind of results I get with my SANDMARC lenses.
If you're wondering how to take better iPhone photos, getting outfitted with high-quality lenses is a great first step.
Add in the other iphone photography tips I've outlined above, and you've got an easy roadmap to follow for taking improved photos with your phone.
We Recommend
7 Smartphone Photography Tips for Shooting Like a Pro

It's hard to believe that about 10 years ago I was rocking a flip phone that had those buttons you had to press three times to get to a certain letter when texting.
Heck, I remember when I was adamantly opposed to texting because it took way too long.
My, how things have changed...
Now, I use my smartphone every single day to take photos. In fact, it's my go-to camera for quick snaps.
And though smartphones aren't to the level of traditional digital cameras (yet...), they make pretty darn good cameras.
Our friends over at the Cooperative of Photography (COOPH) recognize the power of mobile photography, and recently released a video on just that subject.
They offer up seven tips for shooting like a pro with your phone in the video above.
For a commentary on each tip, check out the article below!
Pros Shoot Manual
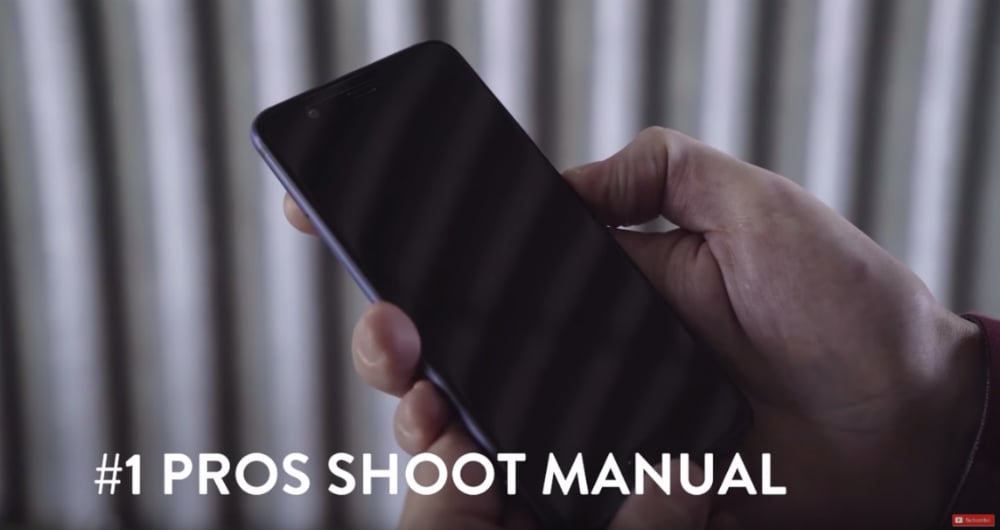
YouTube Screenshot/COOPH
That flip phone I had all those years ago certainly didn't have manual controls, but many of today's phones do.
And even if your phone's camera doesn't have native manual controls to adjust things like aperture, shutter speed, and ISO, you can download any number of apps that offer those controls.
Heck, there's even apps like VSCO Cam that allow you to shoot in RAW!
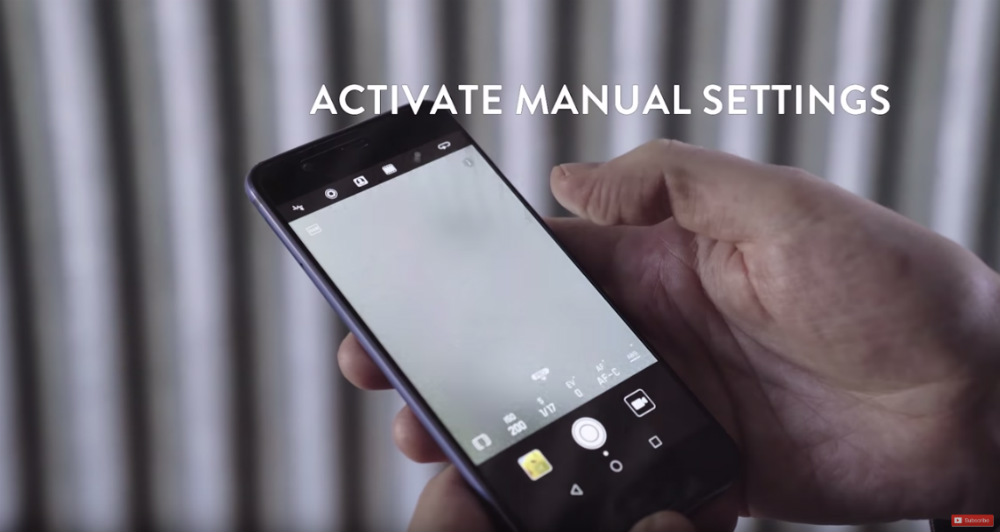
YouTube Screenshot/COOPH
If you want to step up your smartphone photography game, the first thing you need to do is get out of auto and take control of what the camera is doing.
Not only will that allow you to tailor the camera's settings to the specific shooting situation, but it will also help you be more creative with what you photograph and how you photograph it.
Learn More:
- Simple Tips and Tricks for Better Smartphone Photography
- The Exposure Triangle Explained in Plain English
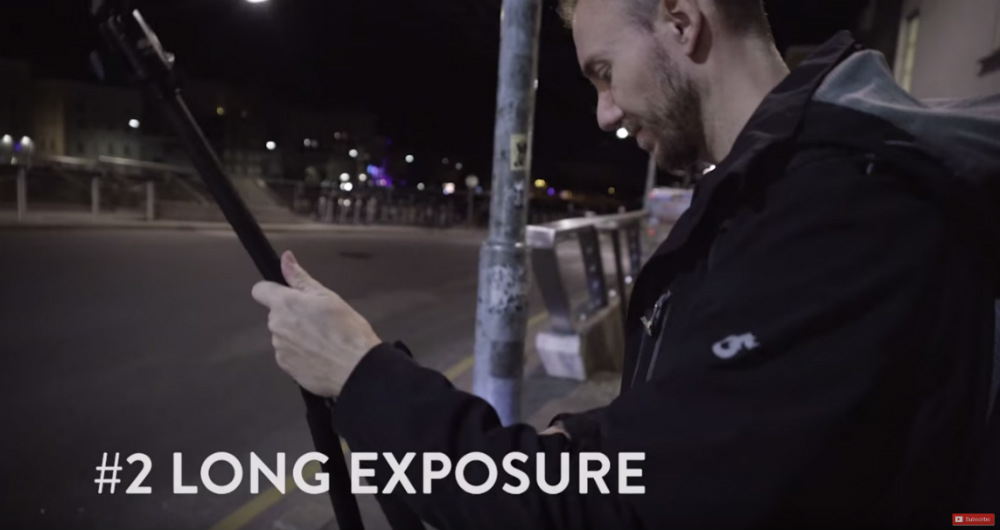
Take Long Exposures
YouTube Screenshot/COOPH
Traditional still photos are just too easy, right?
If you want to create something with your smartphone that'll really wow people, tackle long exposure photography.
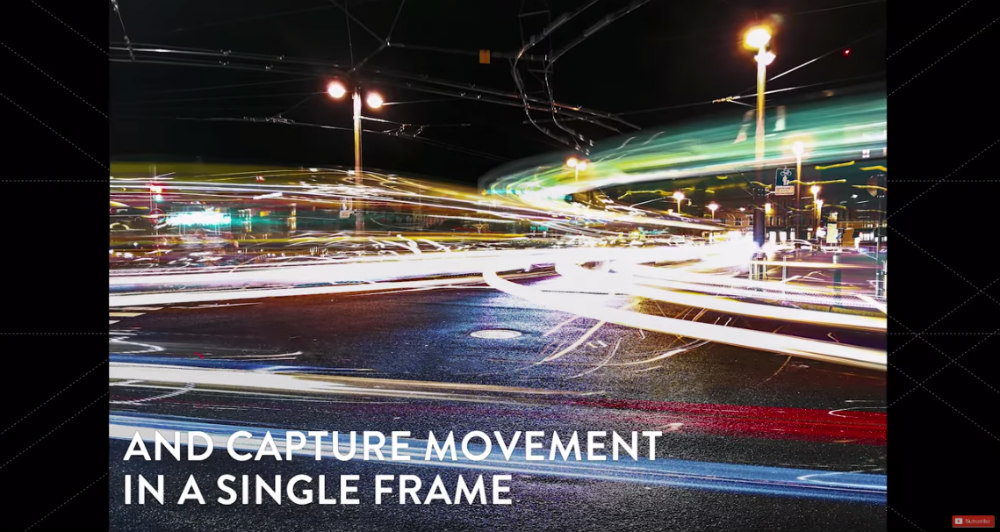
Using your smartphone camera's manual controls, slow down the shutter so you can get awesome blurry movement of passing objects, like the cars seen in the screenshot below.
YouTube Screenshot/COOPH
Of course, you'll need to play around with the specific shutter speed you use as the length of the shutter will depend on the speed of the object.
You'll also need to stabilize your camera with a tripod. Otherwise, your long exposures will just be a big, blurry mess.
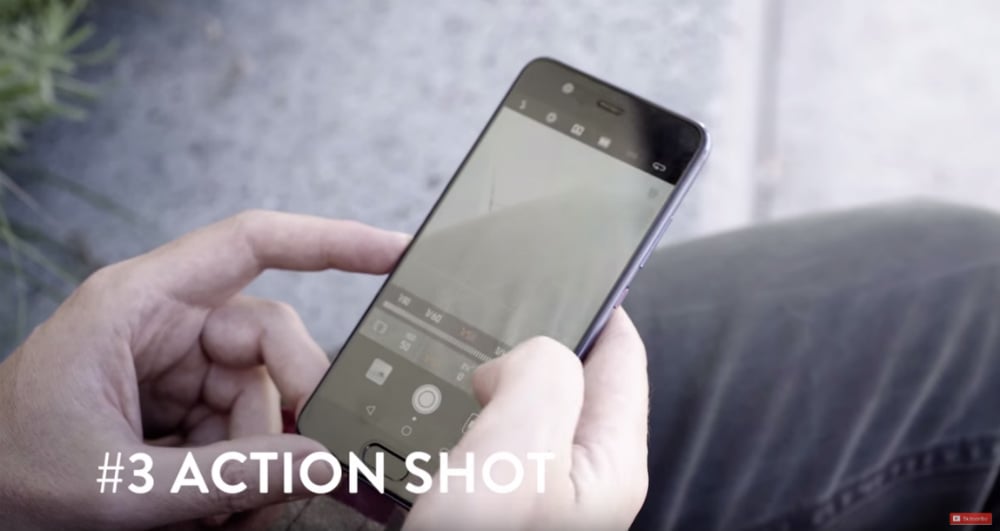
Take Action Shots
YouTube Screenshot/COOPH
Of course, the inverse of taking a long exposure with beautifully blurred features is to take an action shot in which the movement of the subject is frozen in time.
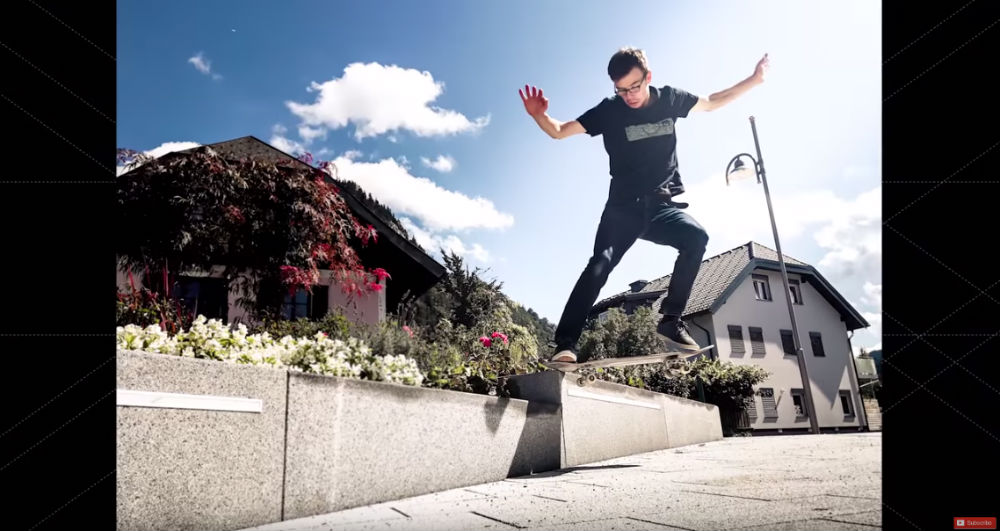
To do so, you'll need to revisit the camera's manual controls and select a fast shutter speed. Again, the speed you need to use will depend on the speed of the subject when you snap the photo.
Just experiment a little with the shots until you get the desired result.
YouTube Screenshot/COOPH
Bear in mind, however, that the faster the shutter speed, the less light that reaches the camera's sensor.
That means you need to reserve your fast action shots for times when there is plenty of light. Shooting on a sunny afternoon should do the trick.
If you want to shoot earlier or later in the day and find that your phone's camera just can't muster a fast enough shutter speed, try increasing the ISO to make the sensor more sensitive to light.
Learn More:
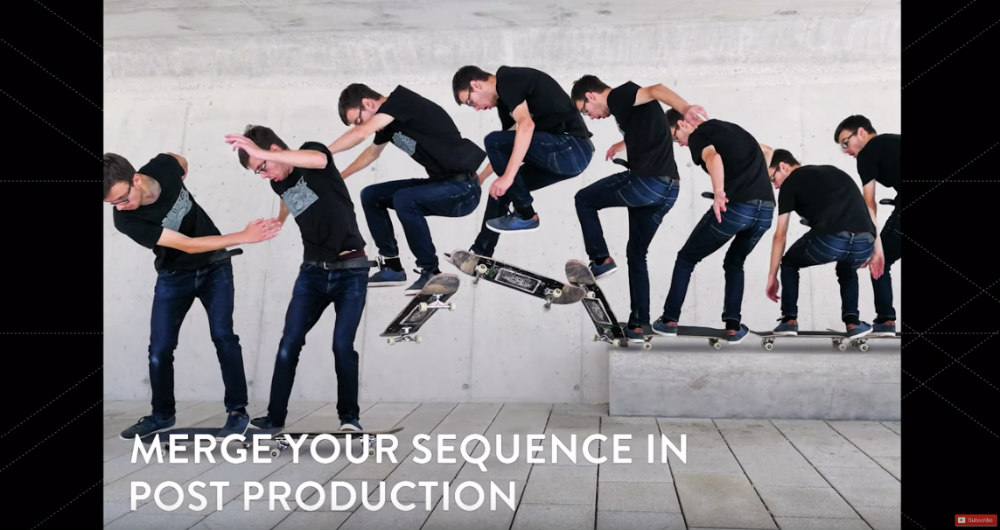
Try a Sequence of Shots

YouTube Screenshot/COOPH
Just like a regular camera, most smartphone cameras have a burst mode that allows you to take a sequence of shots in rapid-fire action.
The trick to getting a successful sequence is to mount your phone on a tripod, so it has a stable base for the sequence of pictures.
Then, frame up the shot, remembering to compose it in a way that the movement that occurs during the sequence has enough room in the frame.
YouTube Screenshot/COOPH
Once you have your sequence of shots, you can merge them together into a single image, as seen in the screenshot above.
The result is far more eye-catching than a normal old still photo, isn't it?
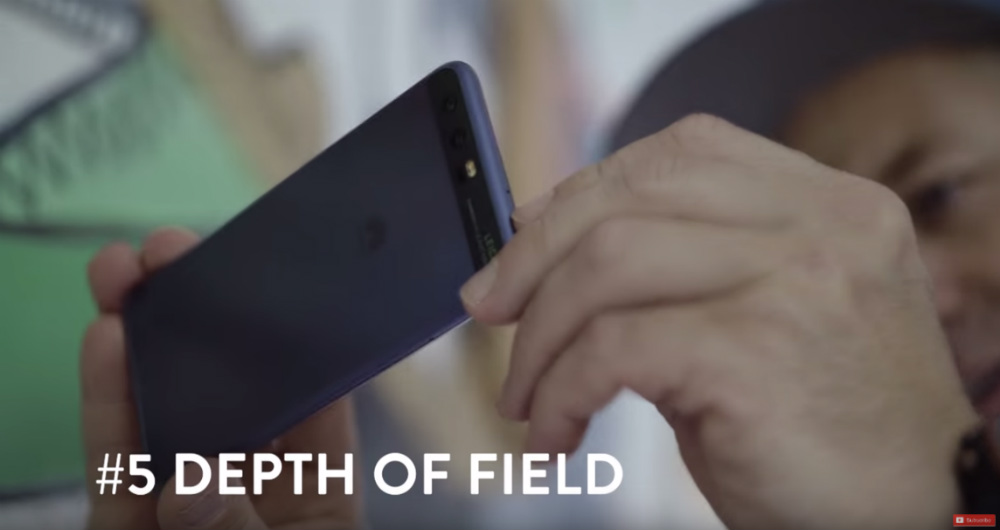
Depth of Field
YouTube Screenshot/COOPH
Depth of field refers to the area of a photo that's in sharp focus.
There are several ways to manipulate how big or small the depth of field is, with the aperture being one of them.
The larger the aperture (the smaller the f-stop) you use, the shallower the depth of field will be. That enables you to get nice blurry backgrounds like you see in the screenshot below.

YouTube Screenshot/COOPH
Another trick to help minimize the depth of field is to get close to the subject.
In the case of the image above, the photographer got up close to the wall on the right, which keeps it in sharp focus.
That also means that the background will be out-of-focus, resulting in an image that's hard to believe it was taken with a phone!
Just be sure you tap the screen to focus on the subject while you're at it, so you're sure the subject is sharply in focus.
Learn More:
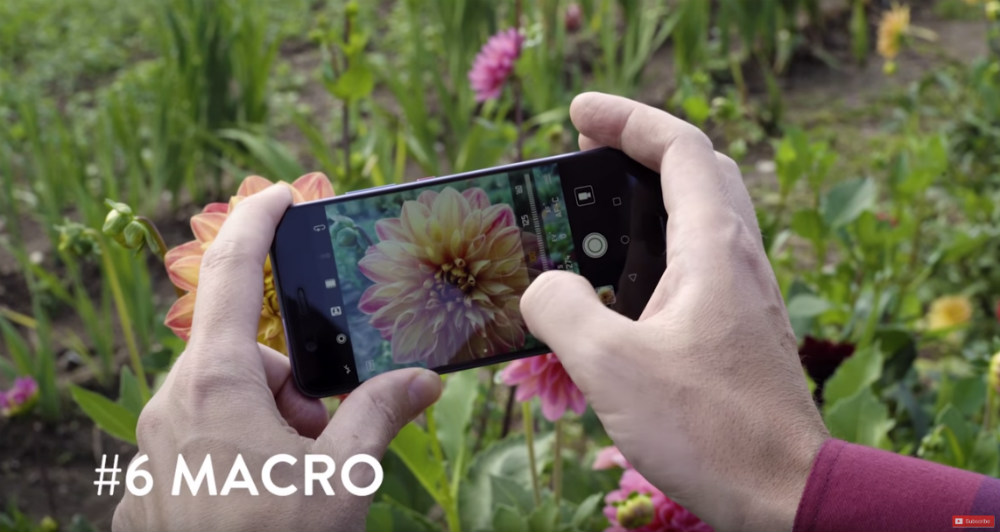
Give Macro a Try
YouTube Screenshot/COOPH
With all the special lenses and accessories you need to take macro photos with a traditional camera, it might be hard to believe that you can take great macro shots with nothing but your phone.
But it's really just a matter of a few practical details...
Get up close to the subject, for starters. Then tap the screen to set the focus on the subject.

YouTube Screenshot/COOPH
When you frame macro shots, don't be afraid to get creative.
You might try filling the frame with the subject. You might even fill the frame so much that you have to crop some of the subject out.
Just beware that when you crop the shot that you crop with purpose - don't crop a little, crop a lot. Otherwise, it might look like the way you framed the shot was by mistake.
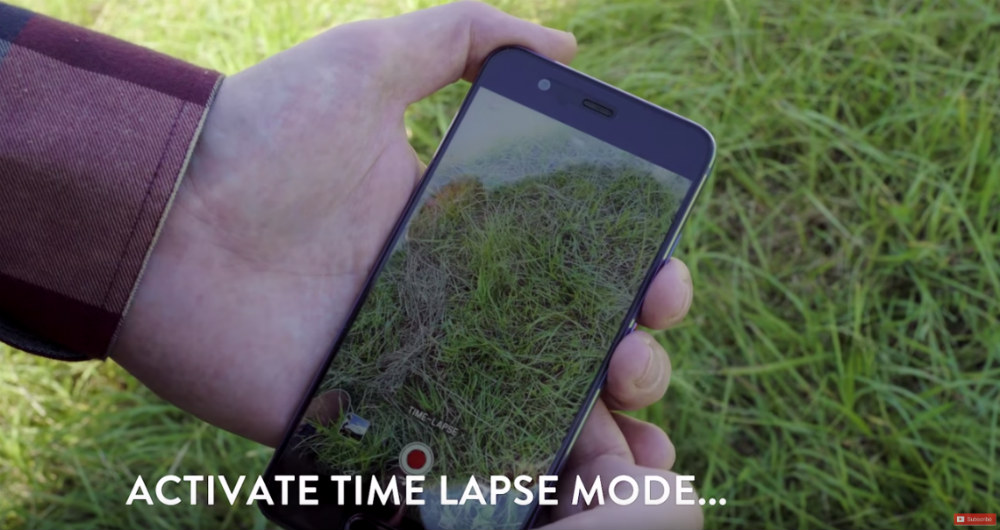
Make a Time Lapse Video

YouTube Screenshot/COOPH
Today's phones also have a handy time lapse function that allows you to get super creative and create awesome videos.
Again, you'll need to mount your phone to a tripod so it's stable for each frame of the time lapse.
Then frame the shot such that you have something that's both static and something that's moving. That way you get a nice contrast between the two.
YouTube Screenshot/COOPH
Then all you do is set the time lapse mode to fire away, and your phone will do the rest!
A fun trick to do is to blend the frames together in post-production, which accentuates the fact that the static object is still and that the moving objects in the shot are on the move.
It's a pretty sweet look that you can see in the video at the start of this article.
And there you have it - seven easy smartphone photography tips that allow you to create images that are sure to impress!
Learn More:
We Recommend
An Ideal Smartphone Photography Kit
As our smartphones become increasingly good cameras, it makes sense to start thinking about the accessories you can use to enhance their power.
One Google search of "smartphone photography accessories," and you'll see just how many gadgets and gizmos you can buy for your smartphone.
Some, of course, are more style than substance. Others are complete rip offs.
Yet other smartphone photography accessories are worth their weight in gold, and will actually help you improve the versatility of your smartphone as a camera and the quality of the photos you take, all at the same time.
Here are a few of my favorite accessories for my smartphone.
Kenko Clip Lenses
Not all lenses for smartphones are made alike...
Some don't make good contact with the smartphone camera, meaning you get fuzzy, out of focus results.
Others require you to buy a special phone case so that the lens can attach to it.
Again, this often gets you subpar results because of the lack of a good fit between the phone's lens and the add-on lens.
That's not the case with Kenko's clip lenses, like the wide angle/macro lens shown above.
As the name indicates, these lenses clip directly onto your phone or another mobile device.
That means that not only is there a tight seal between the two lenses, but they are also incredibly easy to use.
When it comes time to take a quick photo, that ease of use and quickness of installation of the Kenko lens is invaluable.
What's more, Kenko's lenses are well built, using processed glass that renders images clear and sharp.
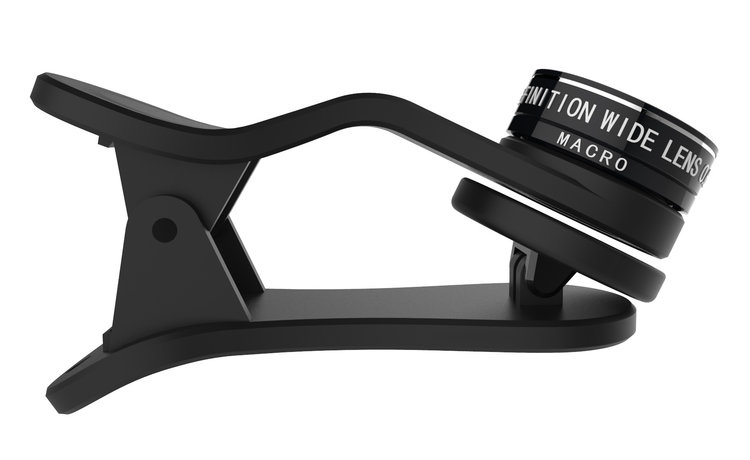
It's a versatile lens, too.
With both optical elements attached, it's a 120-degree wide-angle lens ideal for group portraits and landscapes.
Unscrew the top element, though, and you get a macro lens for up-close work.
The lens can even be used as a stand to prop up your phone or tablet.
In other words, don't just get any old smartphone camera lens. Invest in something that gives you the ability to shoot like a pro, with a lens that's versatile for different photo applications and is made to last.
Kenko even makes super-wide, fisheye, and telephoto smartphone lenses to give you that much more variety in terms of how you use your phone to take photos.
Learn more about Kenko smartphone camera lenses.
iBlazr 2 Wireless Flash
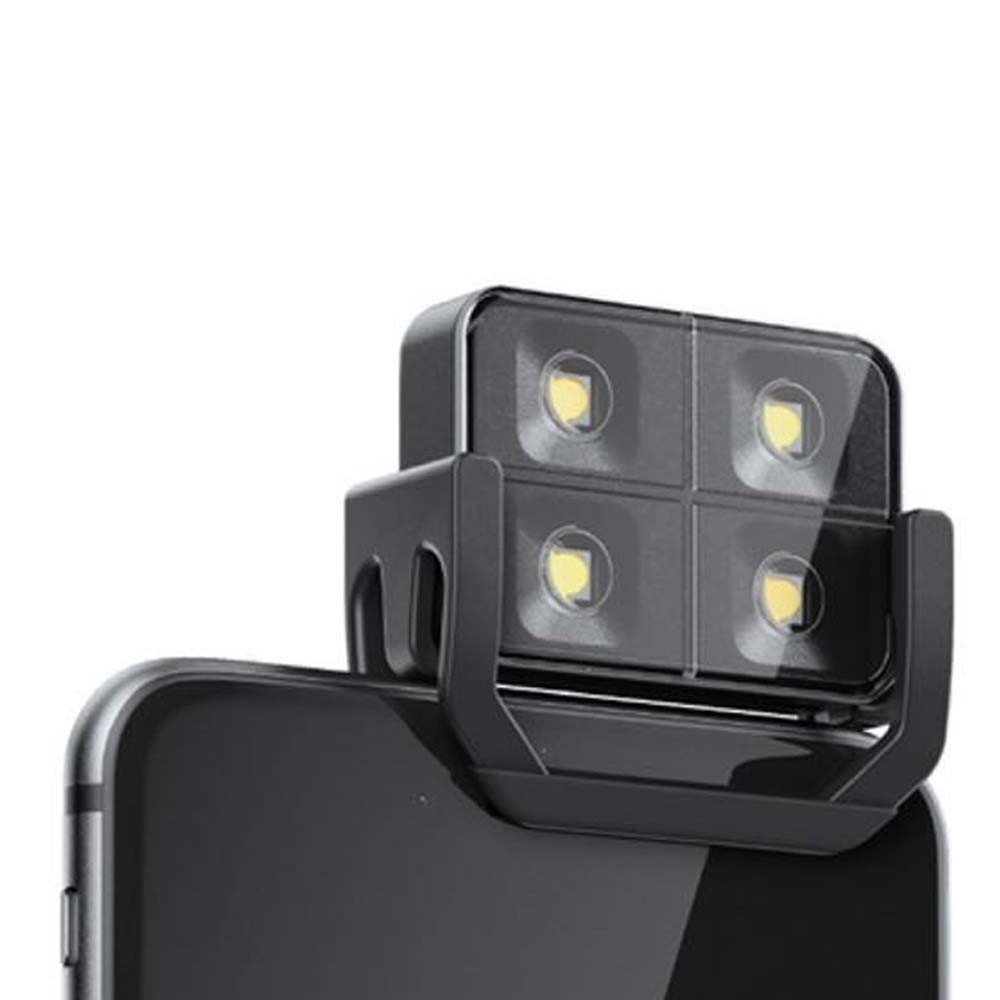
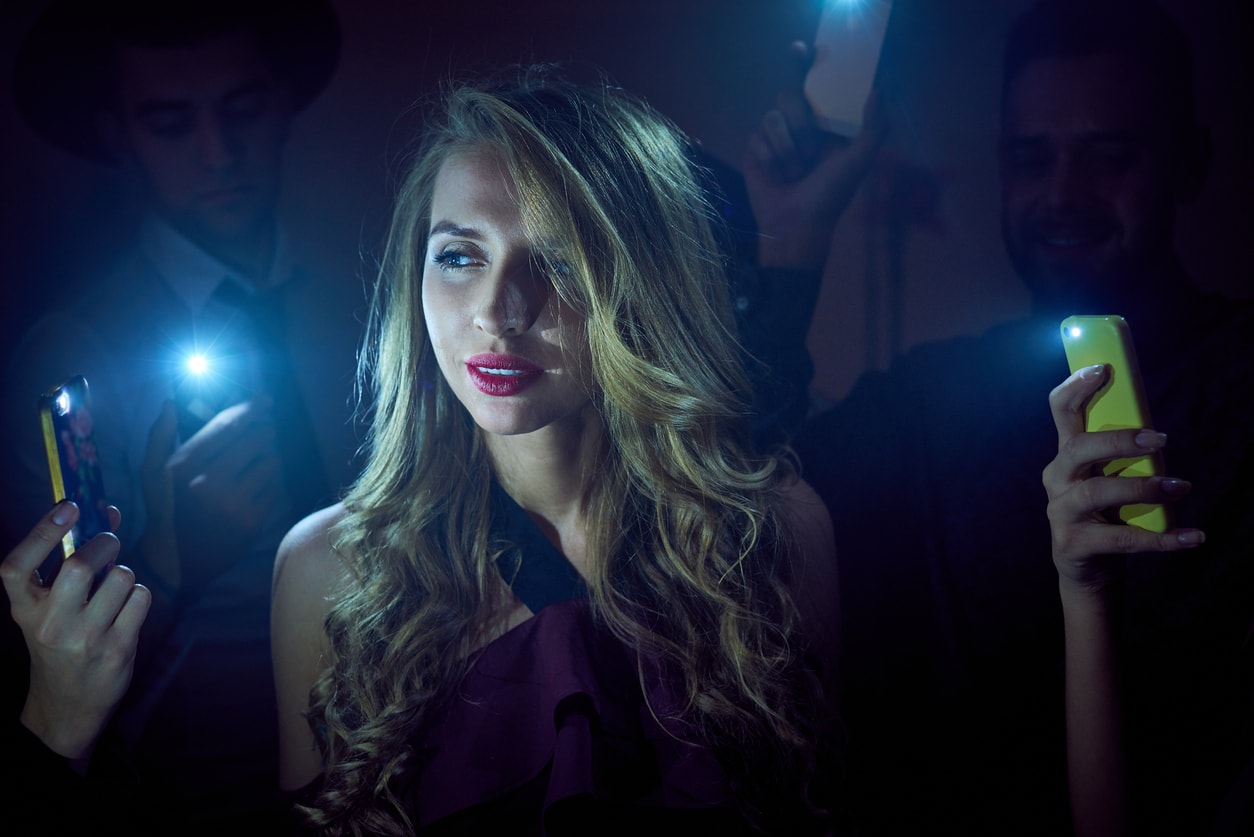
In case you haven't noticed, one of the worst features of your smartphone is the quality of the flash.
Fortunately, you can add a flash to your phone that emits bright, even lighting for improved photos in dim lighting.
The iBlazr 2 Wireless Flash has four LEDs that are color temperature adjustable from 3200K to 5600K.
That means you can warm up or cool down the lighting to suit your specific needs or tastes.
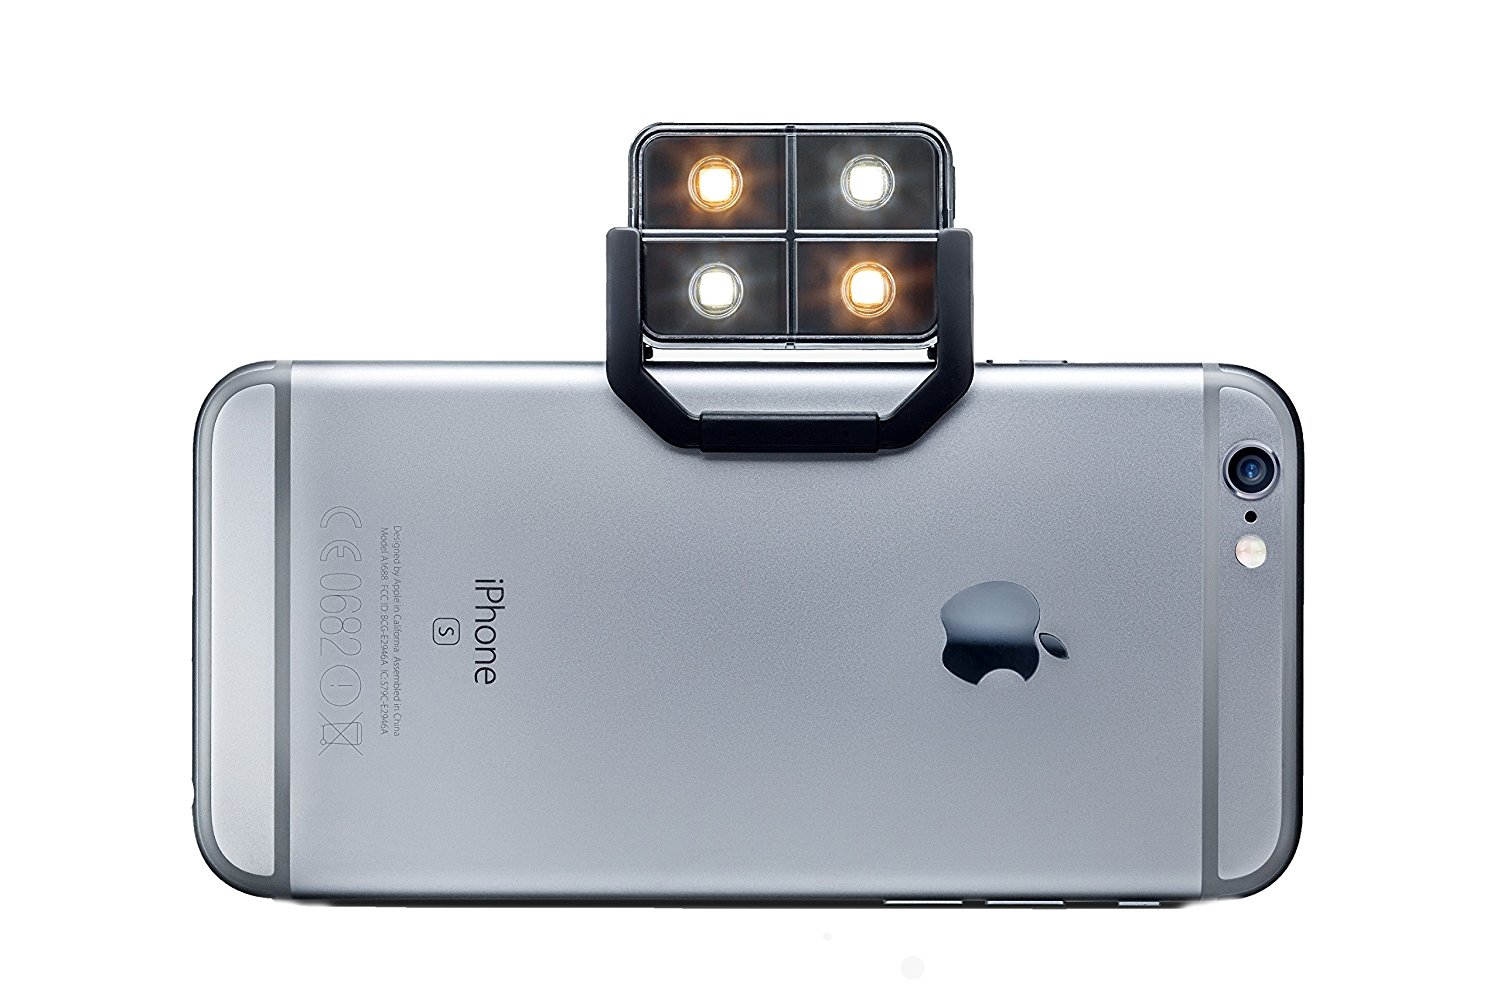
Better still, the iBlazr 2 syncs wirelessly with your phone's camera app via Bluetooth 4.0, so there's no wires or need to use your phone's headphone port for power.
Speaking of syncing, you can sync up to 10 iBlazr 2 flashes to really shine a light on your subject.
Night photography has never been so easy with a smartphone!
Learn more about the iBlazr 2 Wireless Flash.
Manfrotto PIXI Smart Tripod
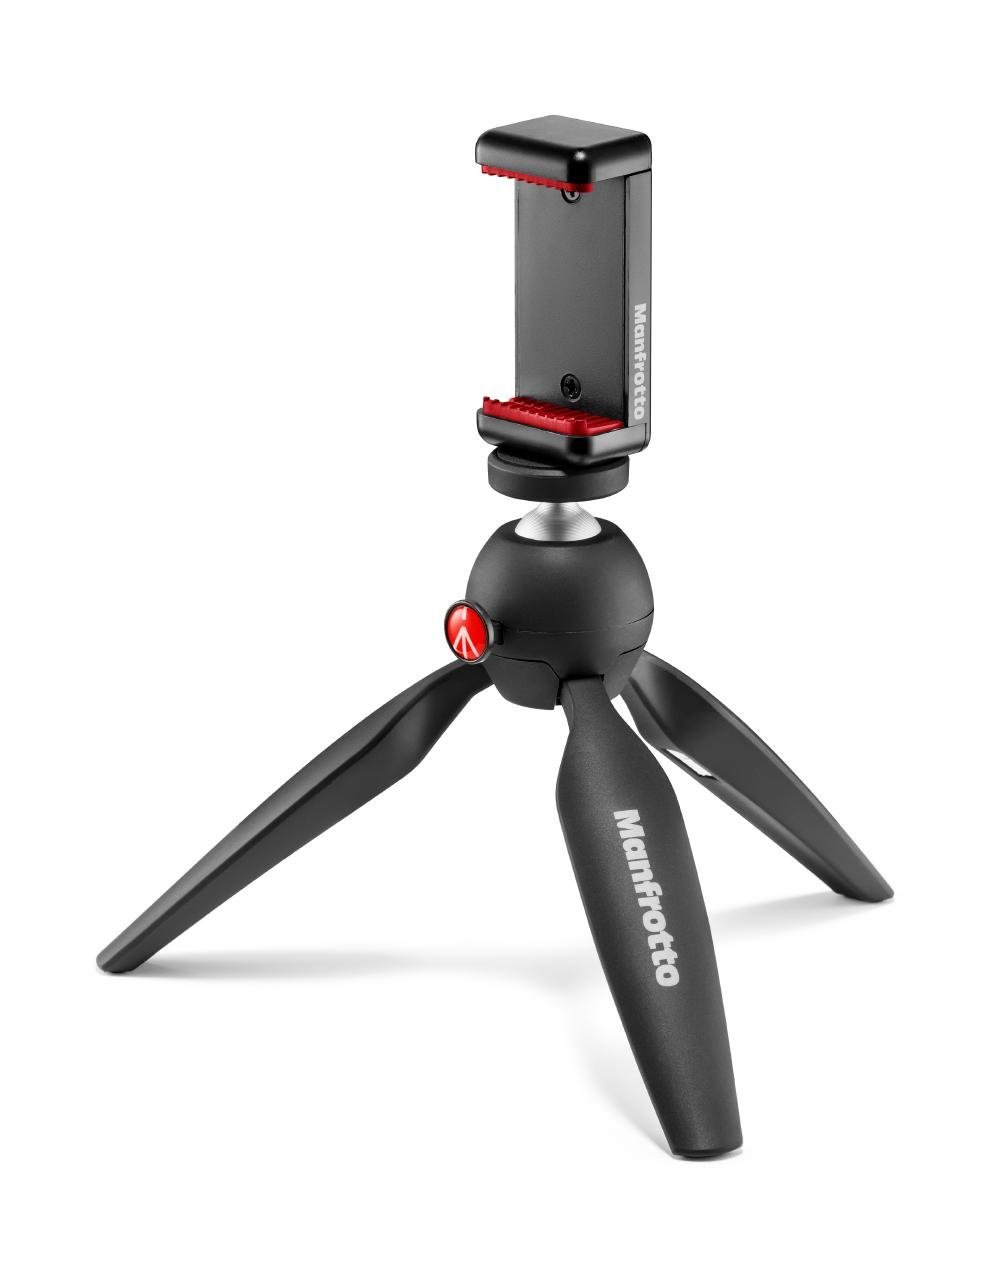
Using your smartphone as a full-blown camera means you need to be able to stabilize it when the situation calls for it.
The Manfrotto PIXI Smart Mini Tripod allows you to do just that.
On the one hand, you can use it as a rock-solid tripod so you can get sharper photos.
On the other hand, you can also use the PIXI as a handheld grip, again, giving you the ability to take improved photos because of better stability and grip on your phone.
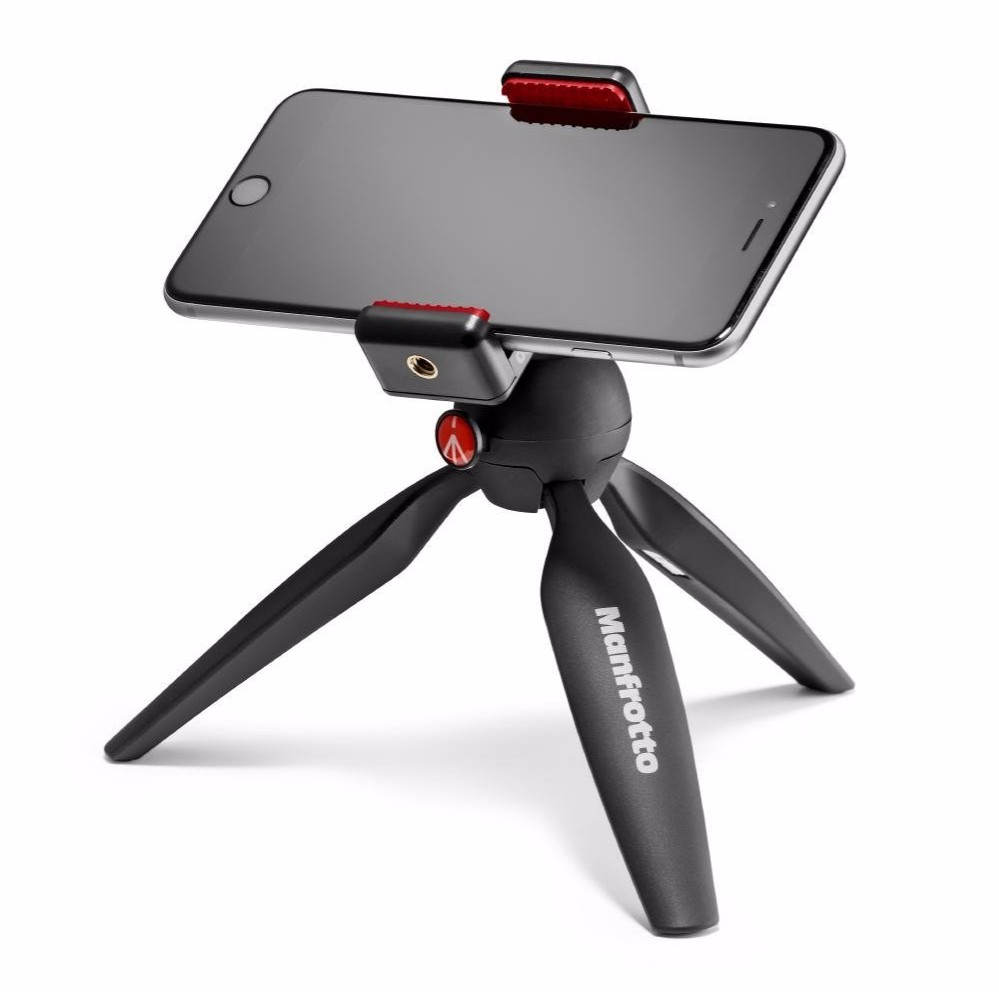
The PIXI has a universal clip to accommodate a wide range of phones, too, so when you upgrade your phone, you don't have to worry about compatibility issues with PIXI.
It's also small and portable - just like your phone - so you can bring it along with you in your pocket when it comes time to head out to take photos.
Small, sturdy, versatile. Those are good qualities to have in a smartphone accessory.
Learn more about the Manfrotto PIXI Smart Mini Tripod.
Prynt
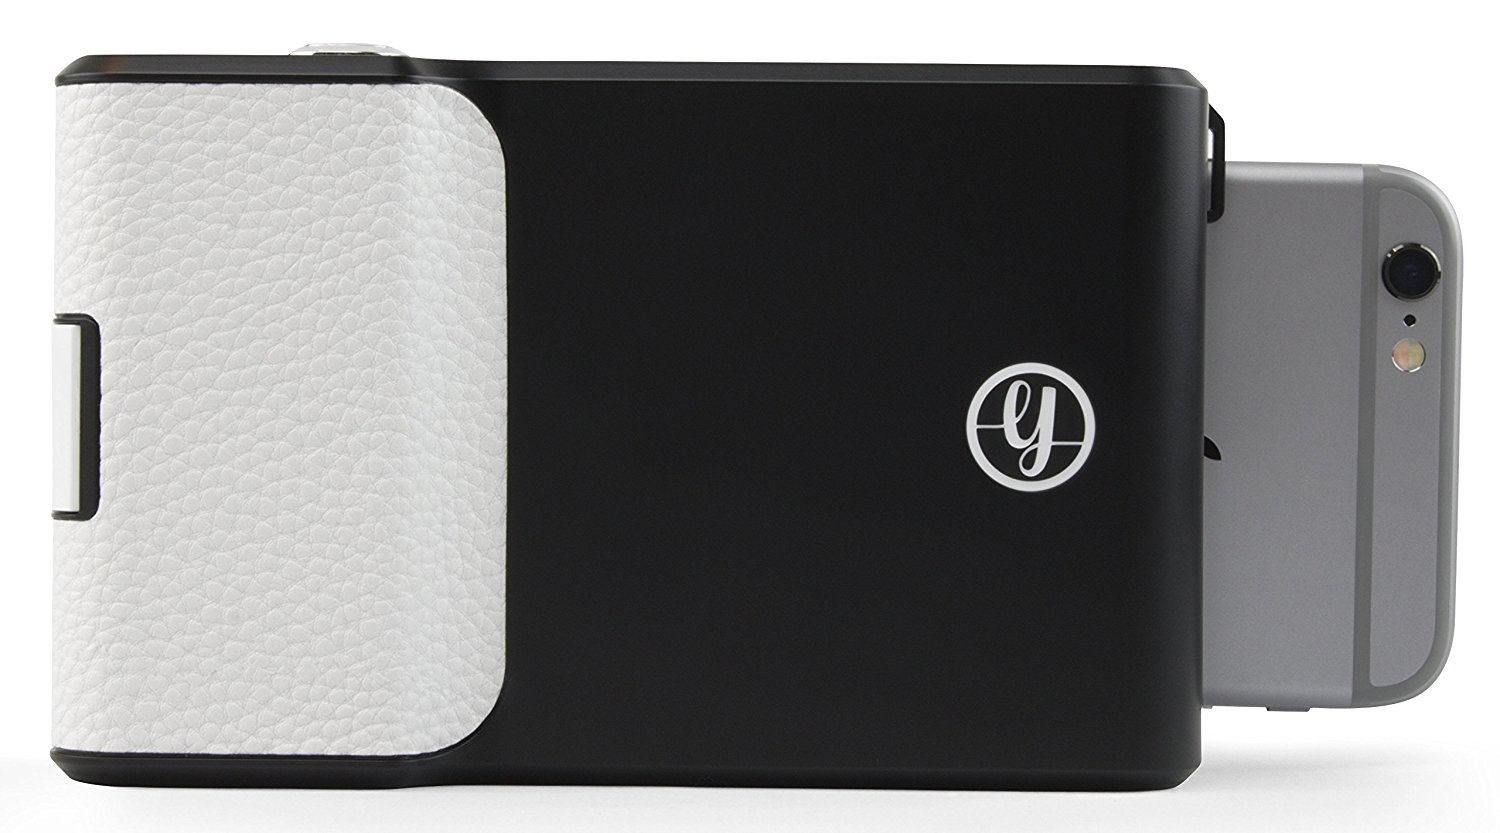
The final component of an ideal smartphone photography kit is a device that allows you to actually print out the photos you take.
Prynt, which is available for various iPhone models, allows you to do just that.
What's great about Prynt is that you can either print old photos you have stored on your phone or you can use it to print out new photos instantly.
There's no ink needed, either, which is great from a cleanliness standpoint.
Instead, Prynt uses ZINK (zero ink) sticker paper. Just peel off the backing and turn your photos into a sticker.
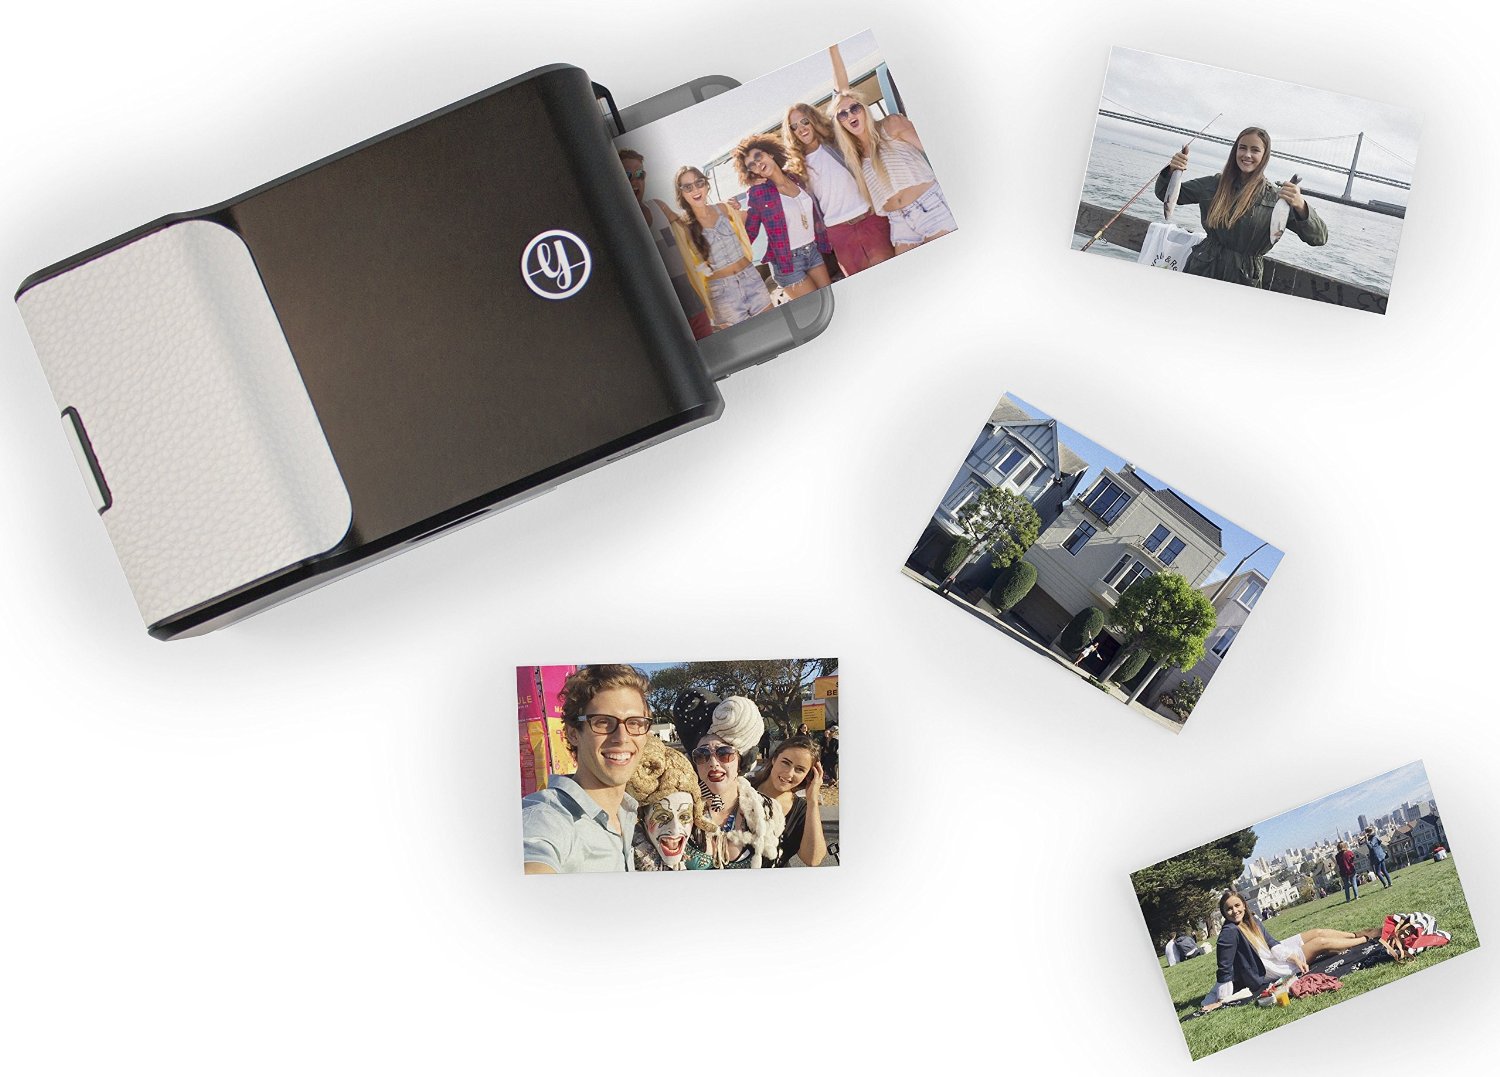
This gadget also comes with a companion app that allows you to preview and edit your photos using custom filters and frames.
And it's got another neat trick up its sleeve...
Each Prynt sticker has a video embedded inside of it.
Just hand your Prynt to a friend, and they can use their Prynt app to see the video. Cool huh?
If you're looking for a way to make your smartphone photography a bit more fun, Prynt is it!
Final Thoughts
There's no reason why you can't use your smartphone as your primary camera.
With the advancements we've seen the last few years in smartphone lenses, camera apps, and accessories, there is more to make excellent smartphone photos a reality than ever before.
If you're seeking to build an ideal smartphone photography kit, look no further than the accessories I've outlined above and watch your mobile photography come to life!
We Recommend
Best Smartphone Camera Accessories 2021
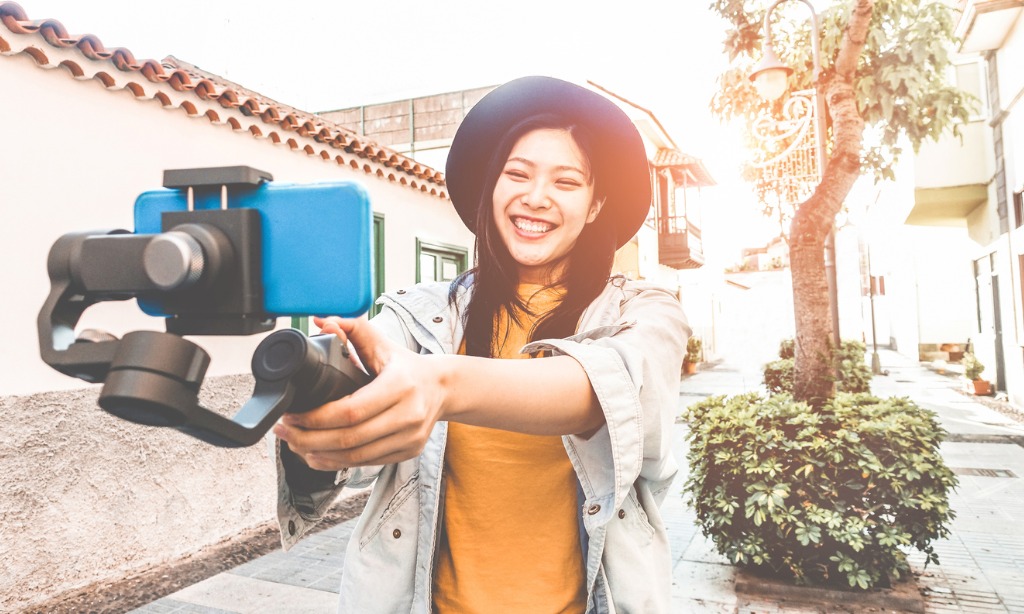
photo byDisobeyArt via iStock
Best Smartphone Camera Accessories
There are thousands of smartphone camera tools available on the market today, and most of them are...not good. Between hundreds of options for selfie sticks, LED lights and smartphone lenses, it can be difficult to choose the best smartphone camera accessories for you.
In order to build this list, we only chose the best smartphone camera accessories that are actually affordable (under $50) so you don’t have to break the bank to outfit your phone.
We also made sure that you could build an entire smartphone photography kit if you purchase everything on this list.
Let’s get to it!
Xenvo Pro Lens Kit
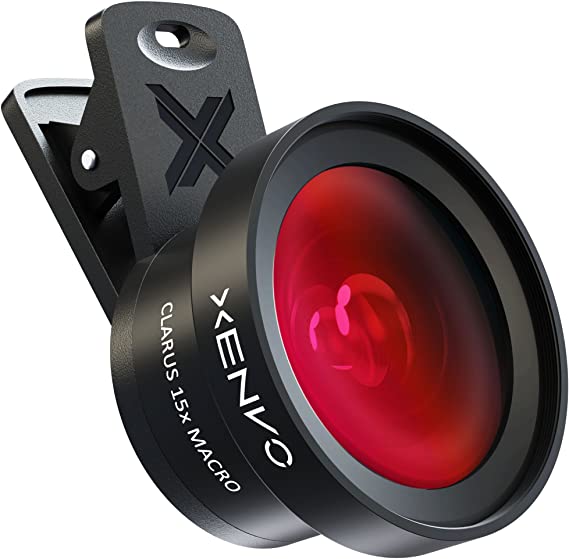
It was really important for all the members of our staff that all of our best smartphone camera accessories worked for a wide array of smartphones (we have Android users and iPhone users and are in a bitter battle over it). As such, The Xenvo Pro Lens Kit works for them all, whether your smartphone features a single or dual camera.
This smartphone photography kit comes with a wide-angle lens, which allows you to capture more of the scene, whether you’re photographing your incredible travels or simply want a great selfie.
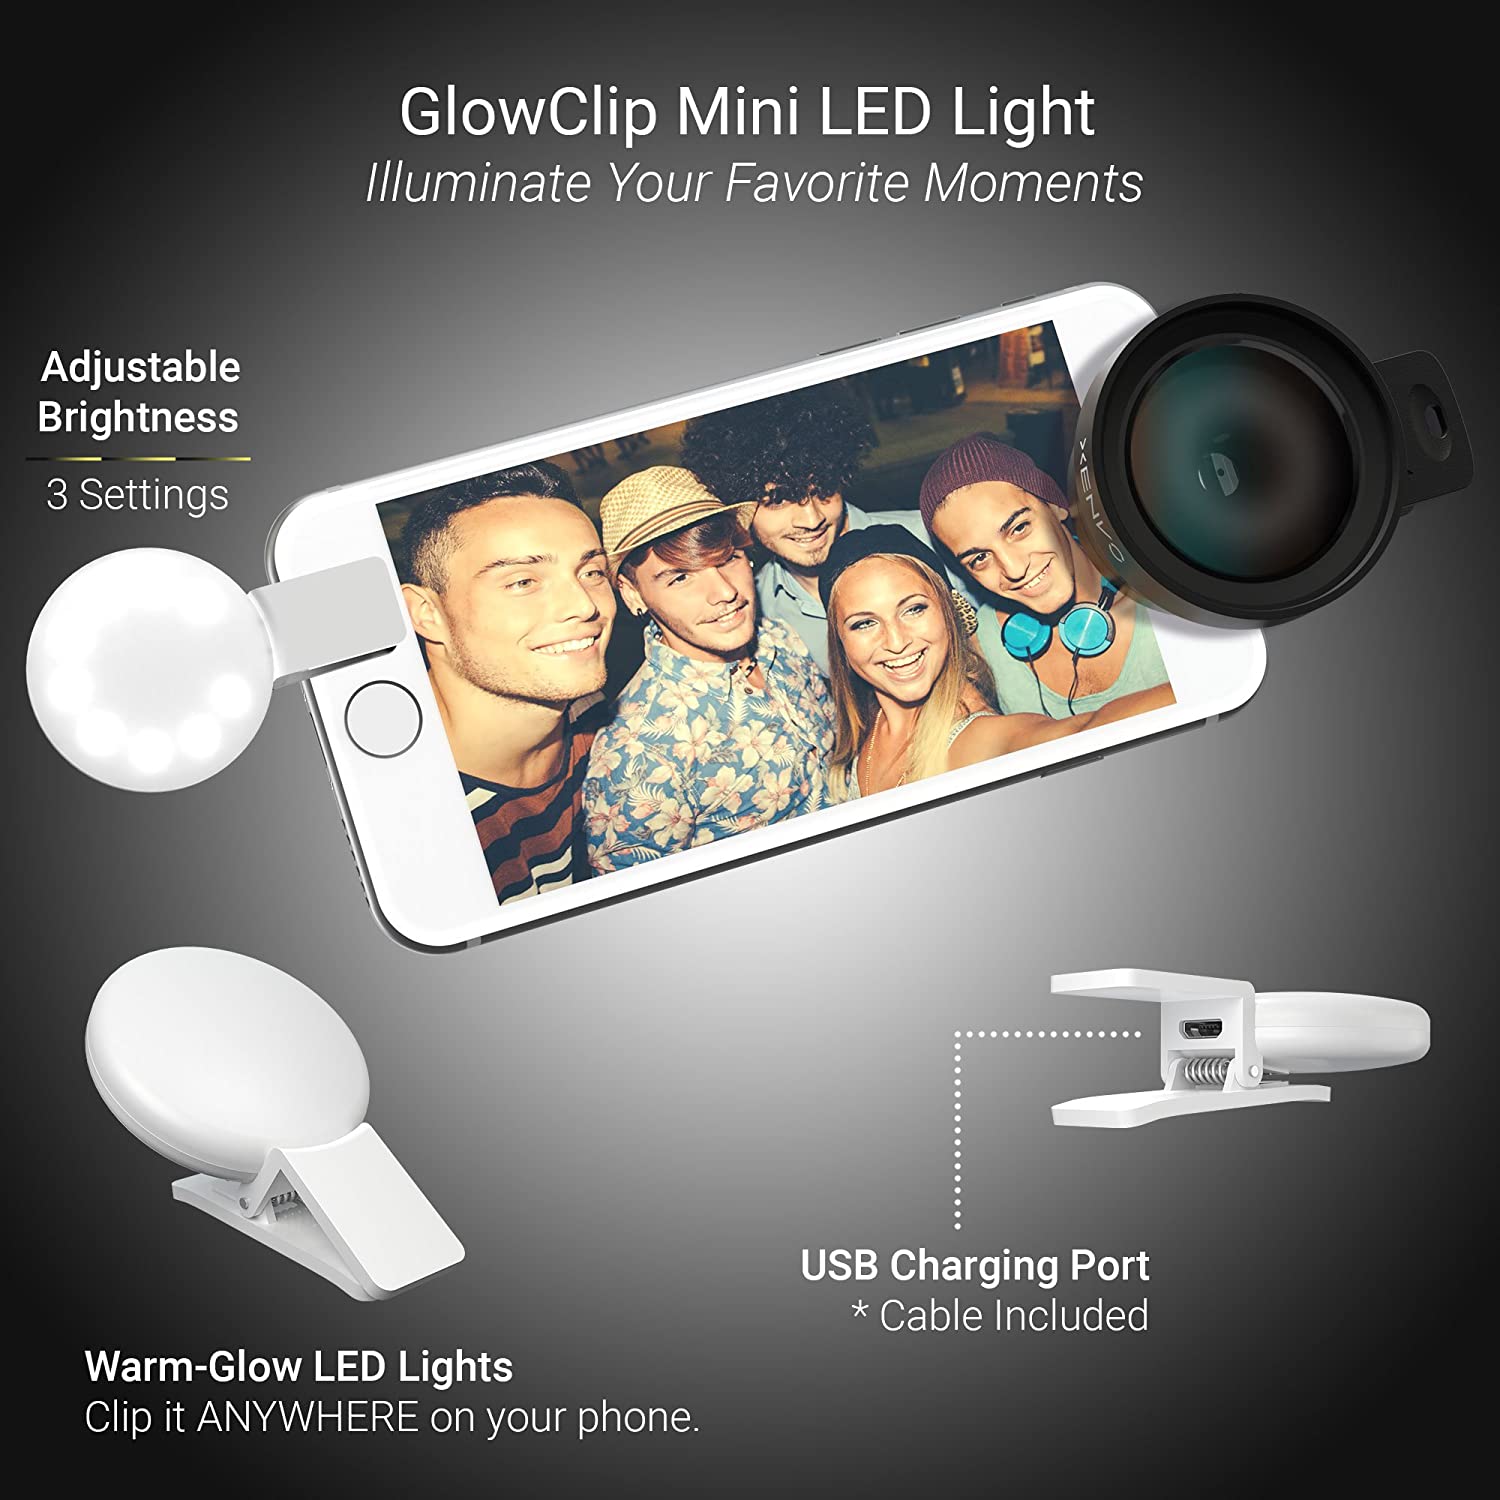
It also comes with a macro lens and an LED light with three settings that you can charge while it's on your phone.
And, you’ll never want to purchase mobile photography equipment without a carrying case, which the Xenvo Pro Lens Kit also offers.
Overall, for under $50, you’ll never find a better smartphone photography kit (did we mention it comes with a lifetime guarantee?).
The Xenvo Pro Lens Kit is available for $40 on Amazon.
Recommended Photography Reading
- National Geographic Photo Basics: The Ultimate Beginner's Guide to Great Photography
- Photography: The Definitive Visual History
- Read This if You Want to Take Great Photographs
DJI Osmo Pocket

Smartphones are great for on-the-go videography, but if you want to maximize the quality of the videos you shoot, you might think about a stabilized handheld camera. The DJI Osmo Pocket is an excellent option.
The Osmo Pocket, which is $346 on Amazon, offers three axes of stabilization so you can capture video with beautiful, smooth, cinematic action.
It has the capability of shooting 4K video at 60fps as well as 12-megapixel still images. There are multiple creative modes to help you make even more impressive videos, including Motionlapse, NightShot, Story Mode, and ActiveTrack.
Best of all, you can connect the DJI Osmo Pocket to your phone for easy viewing, sharing, and expanded creative options.
But carrying your Osmo Pocket and your phone at the same time can be a little cumbersome. That’s where the E-Image PH-04 comes into play…
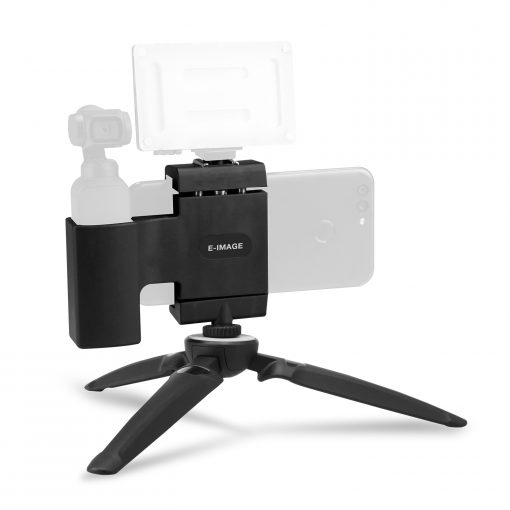
As you can see above, this little device holds your DJI Osmo Pocket and your smartphone so you can use both devices with just one hand.
The Osmo simply slides into the cradle while the smartphone holder clamps down onto your phone for secure mounting.
The holder has a cold shoe mount and a ¼”-20 thread so you can add accessories like a microphone or a light. You can even mount the holder on a light stand or you can mount it to the mini tripod that comes with the holder.
The PH-04 mount is available from Ikan for $19.99.
Ubeesize Phone Tripod
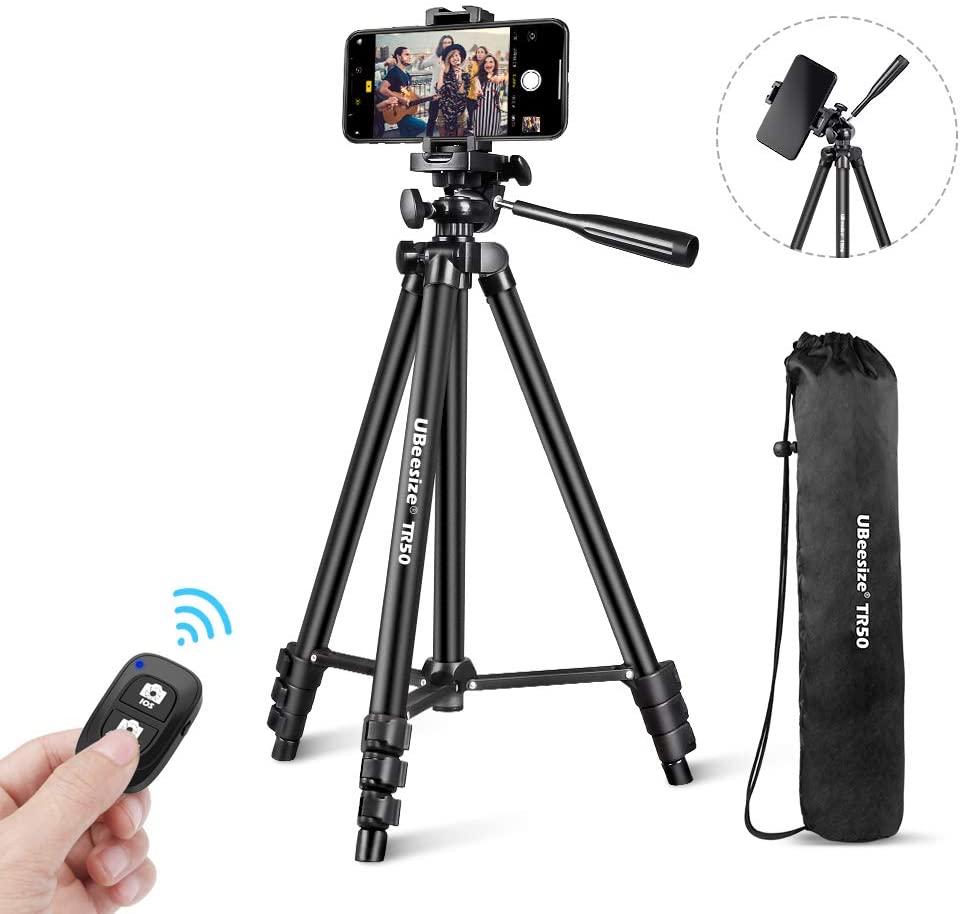
Now that you have your smartphone photography kit, you still need a tripod to ensure all of your photos that aren’t selfies are just as incredible.
The Ubeesize Phone Tripod is the closest thing to a professional tripod as you can get. It can hold up to 2.2 lbs of mobile photography equipment, which is enough for even the largest of phones, and stands between 16” and 50”.
It’s incredibly lightweight at just over 1 lb, so you can bring it everywhere with you. It’s also one of our best smartphone camera accessories because it can extend to 3.94”, which means you won’t need to remove your phone’s case to use it.
The Ubeesize Phone Tripod is available for $30.
Ubeesize 10” LED Lighting Ring
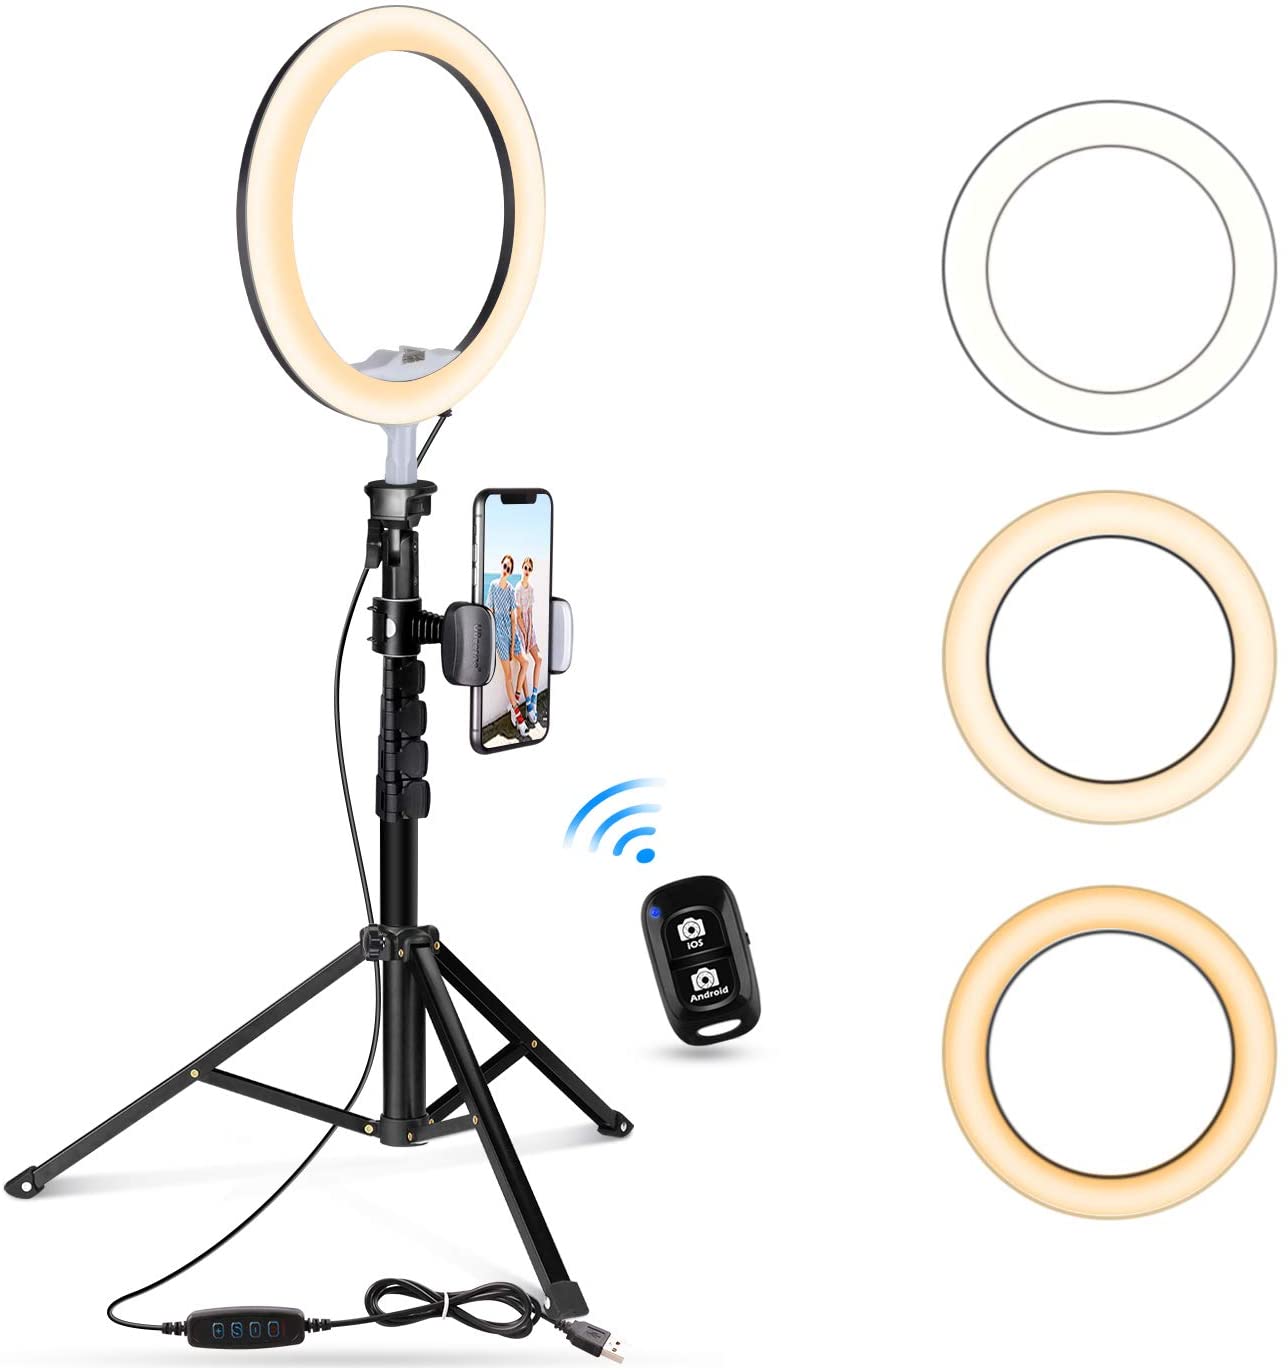
Ubeesize is killing it in the best smartphone camera accessories department.
Their 10” LED Lighting Ring is one of the more expensive best smartphone camera accessories we picked out at $50, but it is worth every penny.
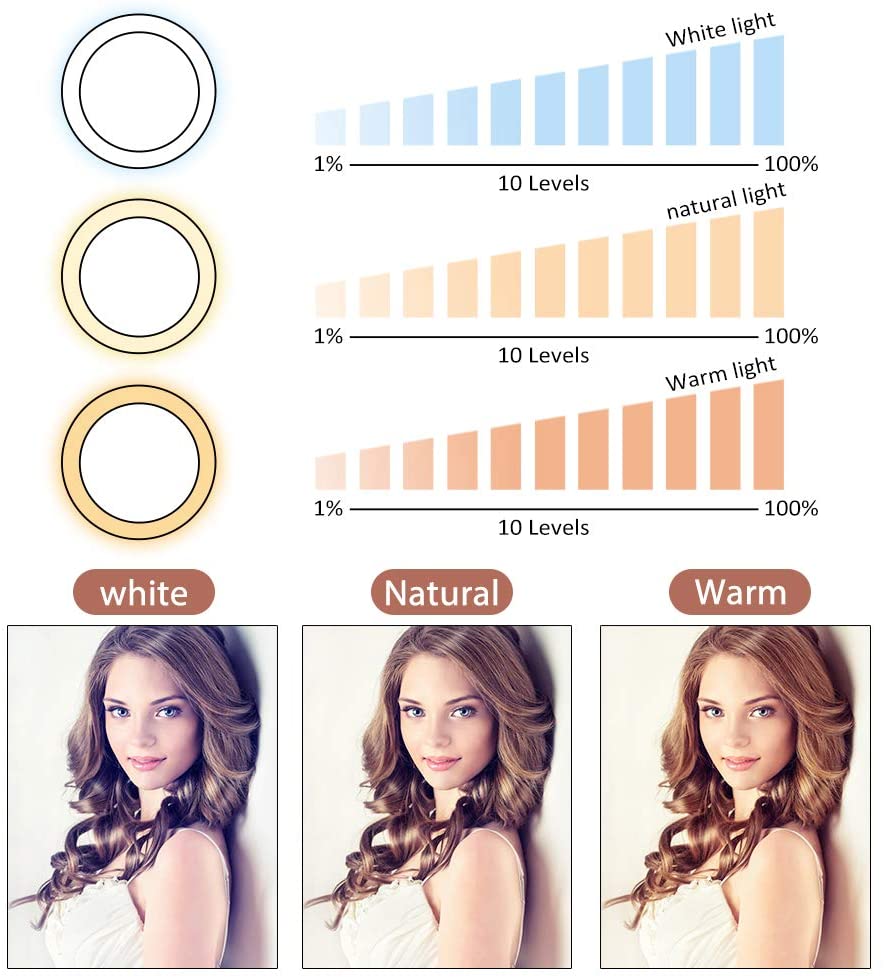
This LED lighting ring features white, natural, and warm lighting, so your selfies have the exact feel you want them to.
The light is also 100% dimmable and extends from 17.5” to 51”. You can also rotate this light 360 degrees.
And, as the rest of our best smartphone camera accessories, this LED light fits almost every smartphone on the market.
Lastly, it features a bluetooth remote so you can shoot hands-free.
It’s available for $50 on Amazon.
Learn More:
Tile Pro

Okay, the Tile isn’t necessarily an essential part of your mobile photography equipment kit, until you don’t have one.
The Tile Pro is a way for you to find your smartphone if you ever lose it, or if it ever gets stolen. It’s a small GPS tracker that you can stick onto the back of your phone case. The Tile comes with an app so you can locate your phone if you ever lose it.
But, importantly, each Tile works with the others. So if you have two Tiles, you can simply press the one you keep in your wallet and it will make your phone ring so you can find it in your car, house, or luggage.
For just $35, this is the cheapest way to keep your peace of mind about the most important piece of your smartphone photography kit… your smartphone.
Anker Car Charger
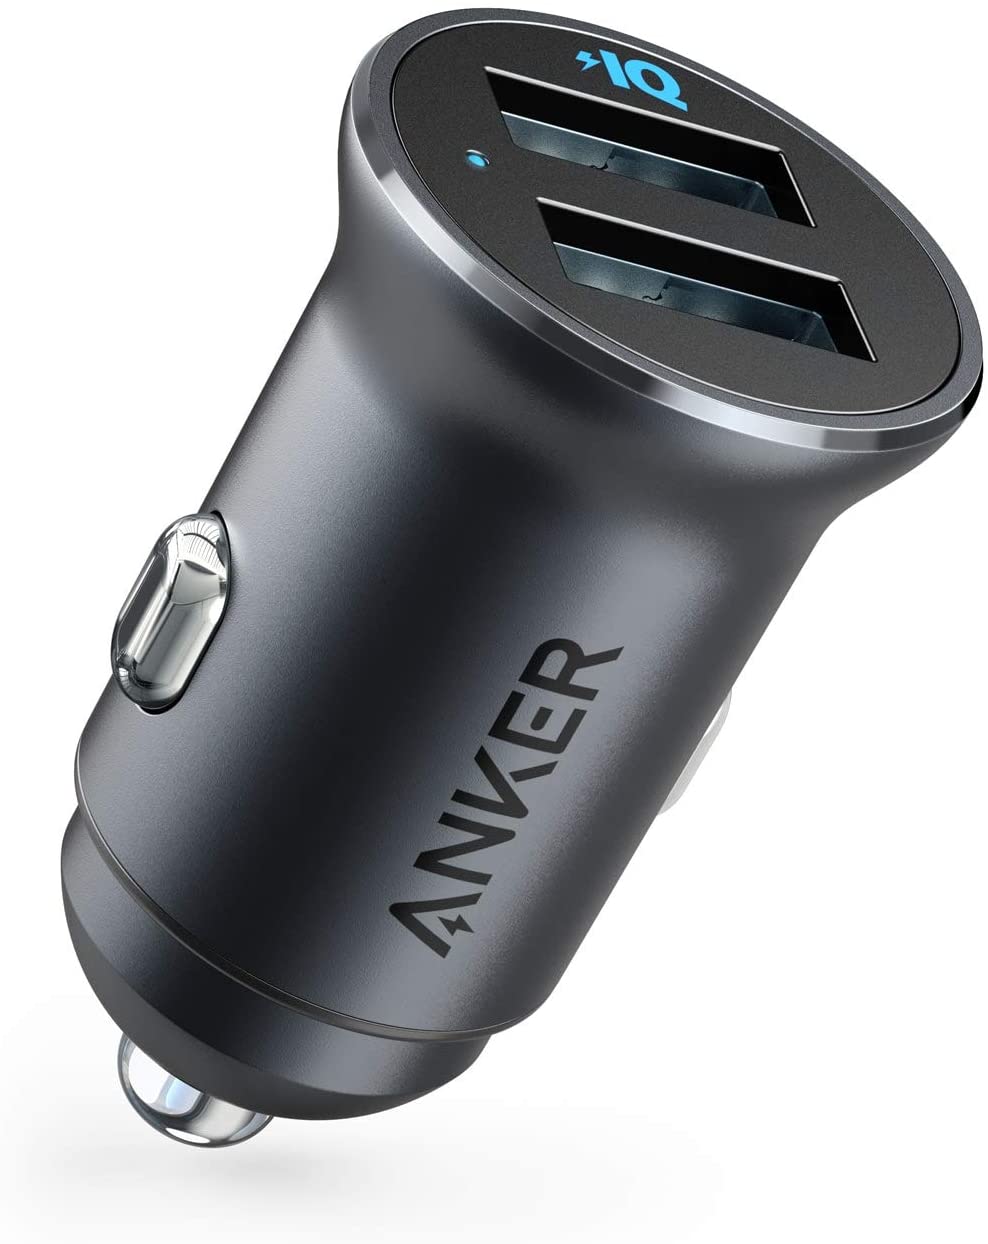
If you’ve ever purchased a cheap car charger, then you know how frustrating it is when your charger refuses to charge your phone anymore.
You can stop this problem with the Anker Car Charger. It’s one of our best smartphone camera accessories because it’s only $10, and yet it features 2 simultaneous charging outlets that output enough power to actually charge 2 phones at once.
It can even fully charge the latest iPhones in just 2 hours flat!
Bonus: LifePrint Portable Printer
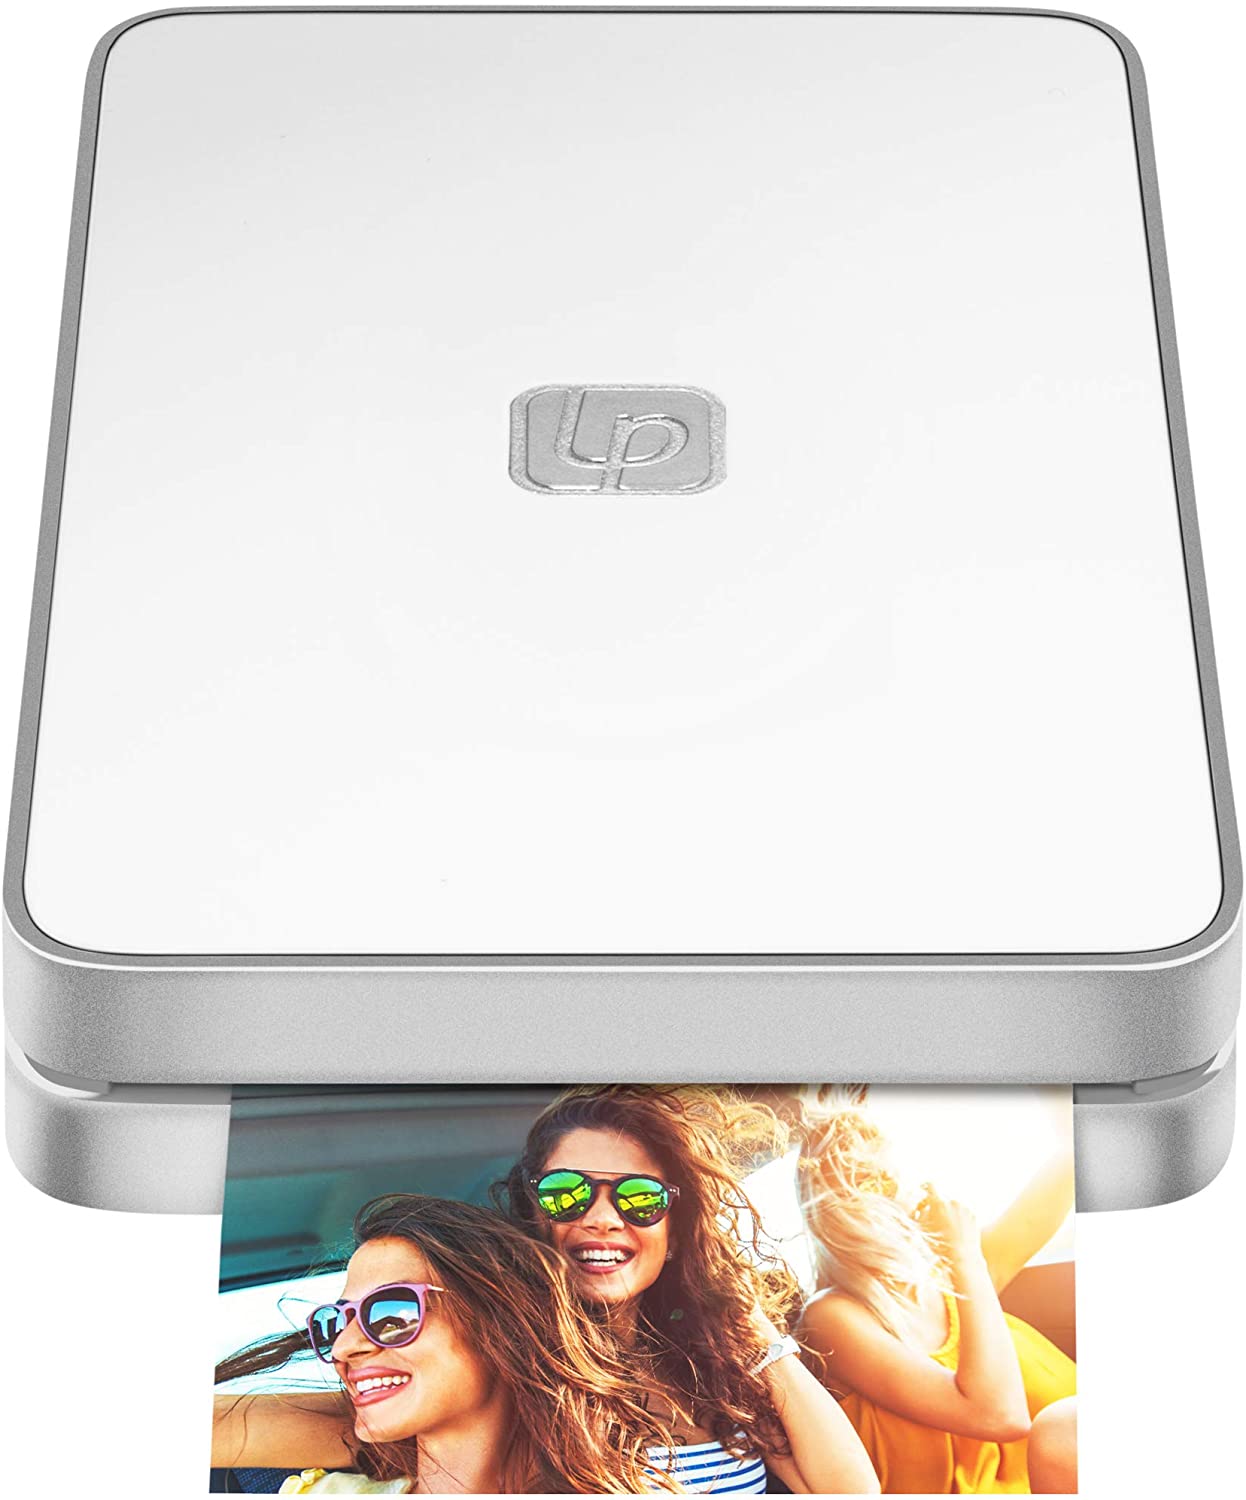
Okay, this printer technically breaks our $50 budget, at $60. But, we allowed it because there is no better way to turn your smartphone into a classic Polaroid camera.
The LifePrint Portable Printer fits in your pocket and can print photos directly from your smartphone or from your social media accounts, so you can fill your room with fun memories.
All LifePrints also come with an app that allows you to directly print photos on your friends’ printers. It’s a great way to use your mobile photography equipment to keep in touch with friends from all over the world.
You can also purchase sticky paper for your LifePrint Portable Printer so you can print stickers.
You can purchase the LifePrint Portable Printer on Amazon for $60 new, or you can purchase a used version beginning at $35.
Learn More:
We Recommend
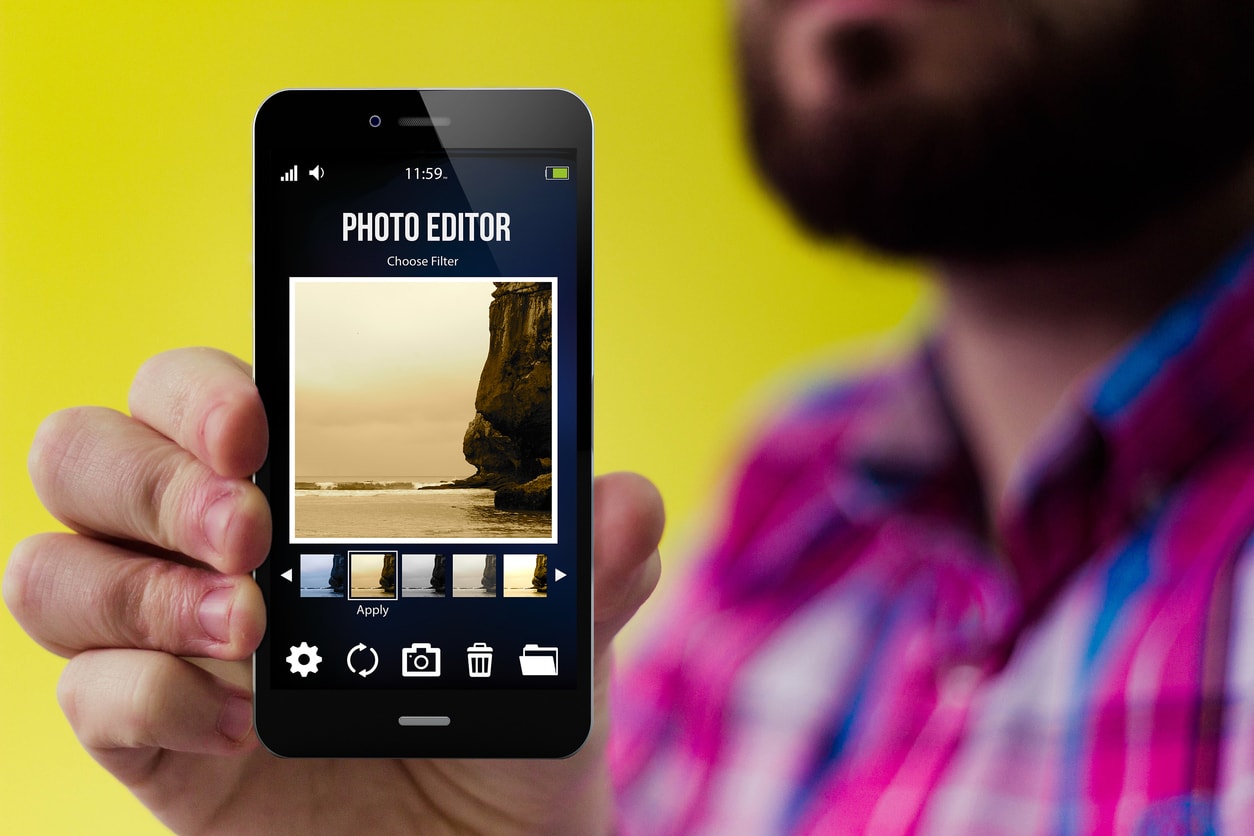
Convenient and Powerful Photo Editing From Your Smartphone
Whether you own a dedicated camera or not – the smartphone provides a convenient and more than capable tool to capture those fleeting photographic moments. This same mobile-anywhere, anytime experience also applies to your photo editing. No longer are you restricted to your desktop editing program or need to dedicate a block of time to edit that growing library of images.
For most, the images straight out of their phone are satisfactory to record a scene or memory. However, you the photo enthusiast – you want more!
You can start applying editing workflows and techniques using mobile apps already at your disposal. To avoid the many gimmicky photo editing apps for smartphones, check the date of the latest version, ratings, and reviews. A great selection of powerful photo editing apps available on both Android and iOS devices include Adobe Lightroom CC, Polarr Photo Editor, Retouch, A Color Story, and Snapseed.
In this article, you will learn some smartphone photography tips and the best features and techniques using the free, versatile, and powerful Snapseed app by Google (iOS or Android). This app is a popular choice amongst mobile photographers – available for both Android and iOS devices. Originally released in June 2011 by Nik Software, Snapseed was acquired by Google in 2012. Version 2.0 was released in April 2015 and the latest complete interface overhaul occurred in September 2017.
Snapseed Settings
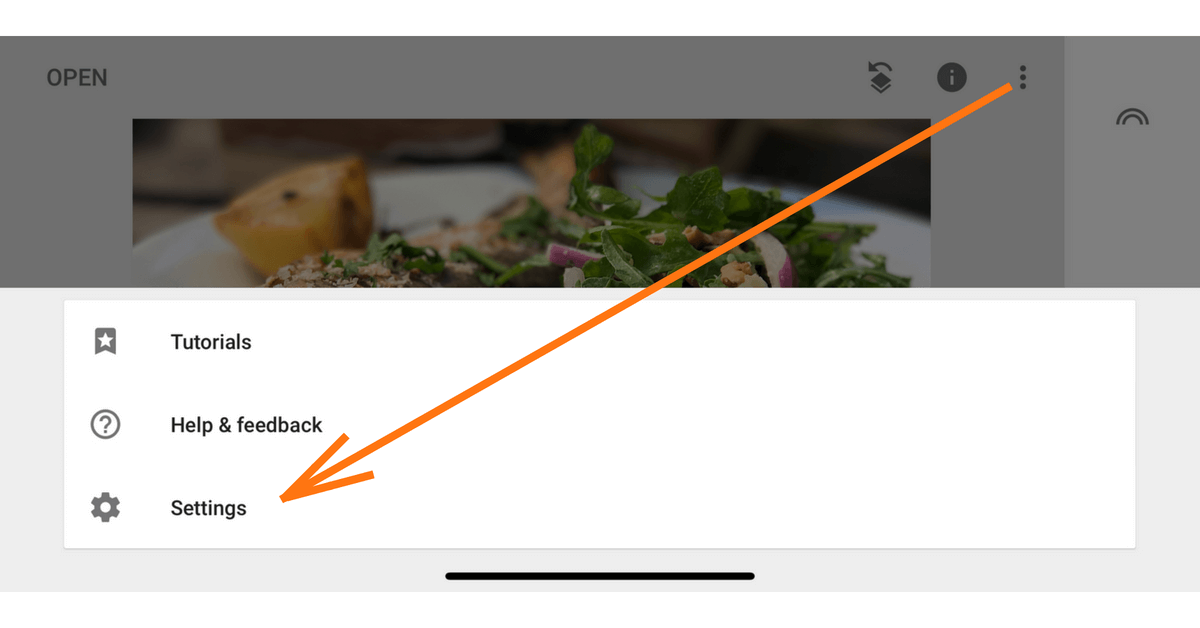
The first step after installing any new camera replacement or photo editing app is to become familiar with the settings.
The three dot overflow icon in Snapseed accesses several settings options.
The main one to change is the default Format and Quality from JPEG 95% to either 100% or PNG file format. The Android version also has the option to change the app appearance to a dark theme. This can look great as a background against your images.
Learn More:
Tools in Snapseed
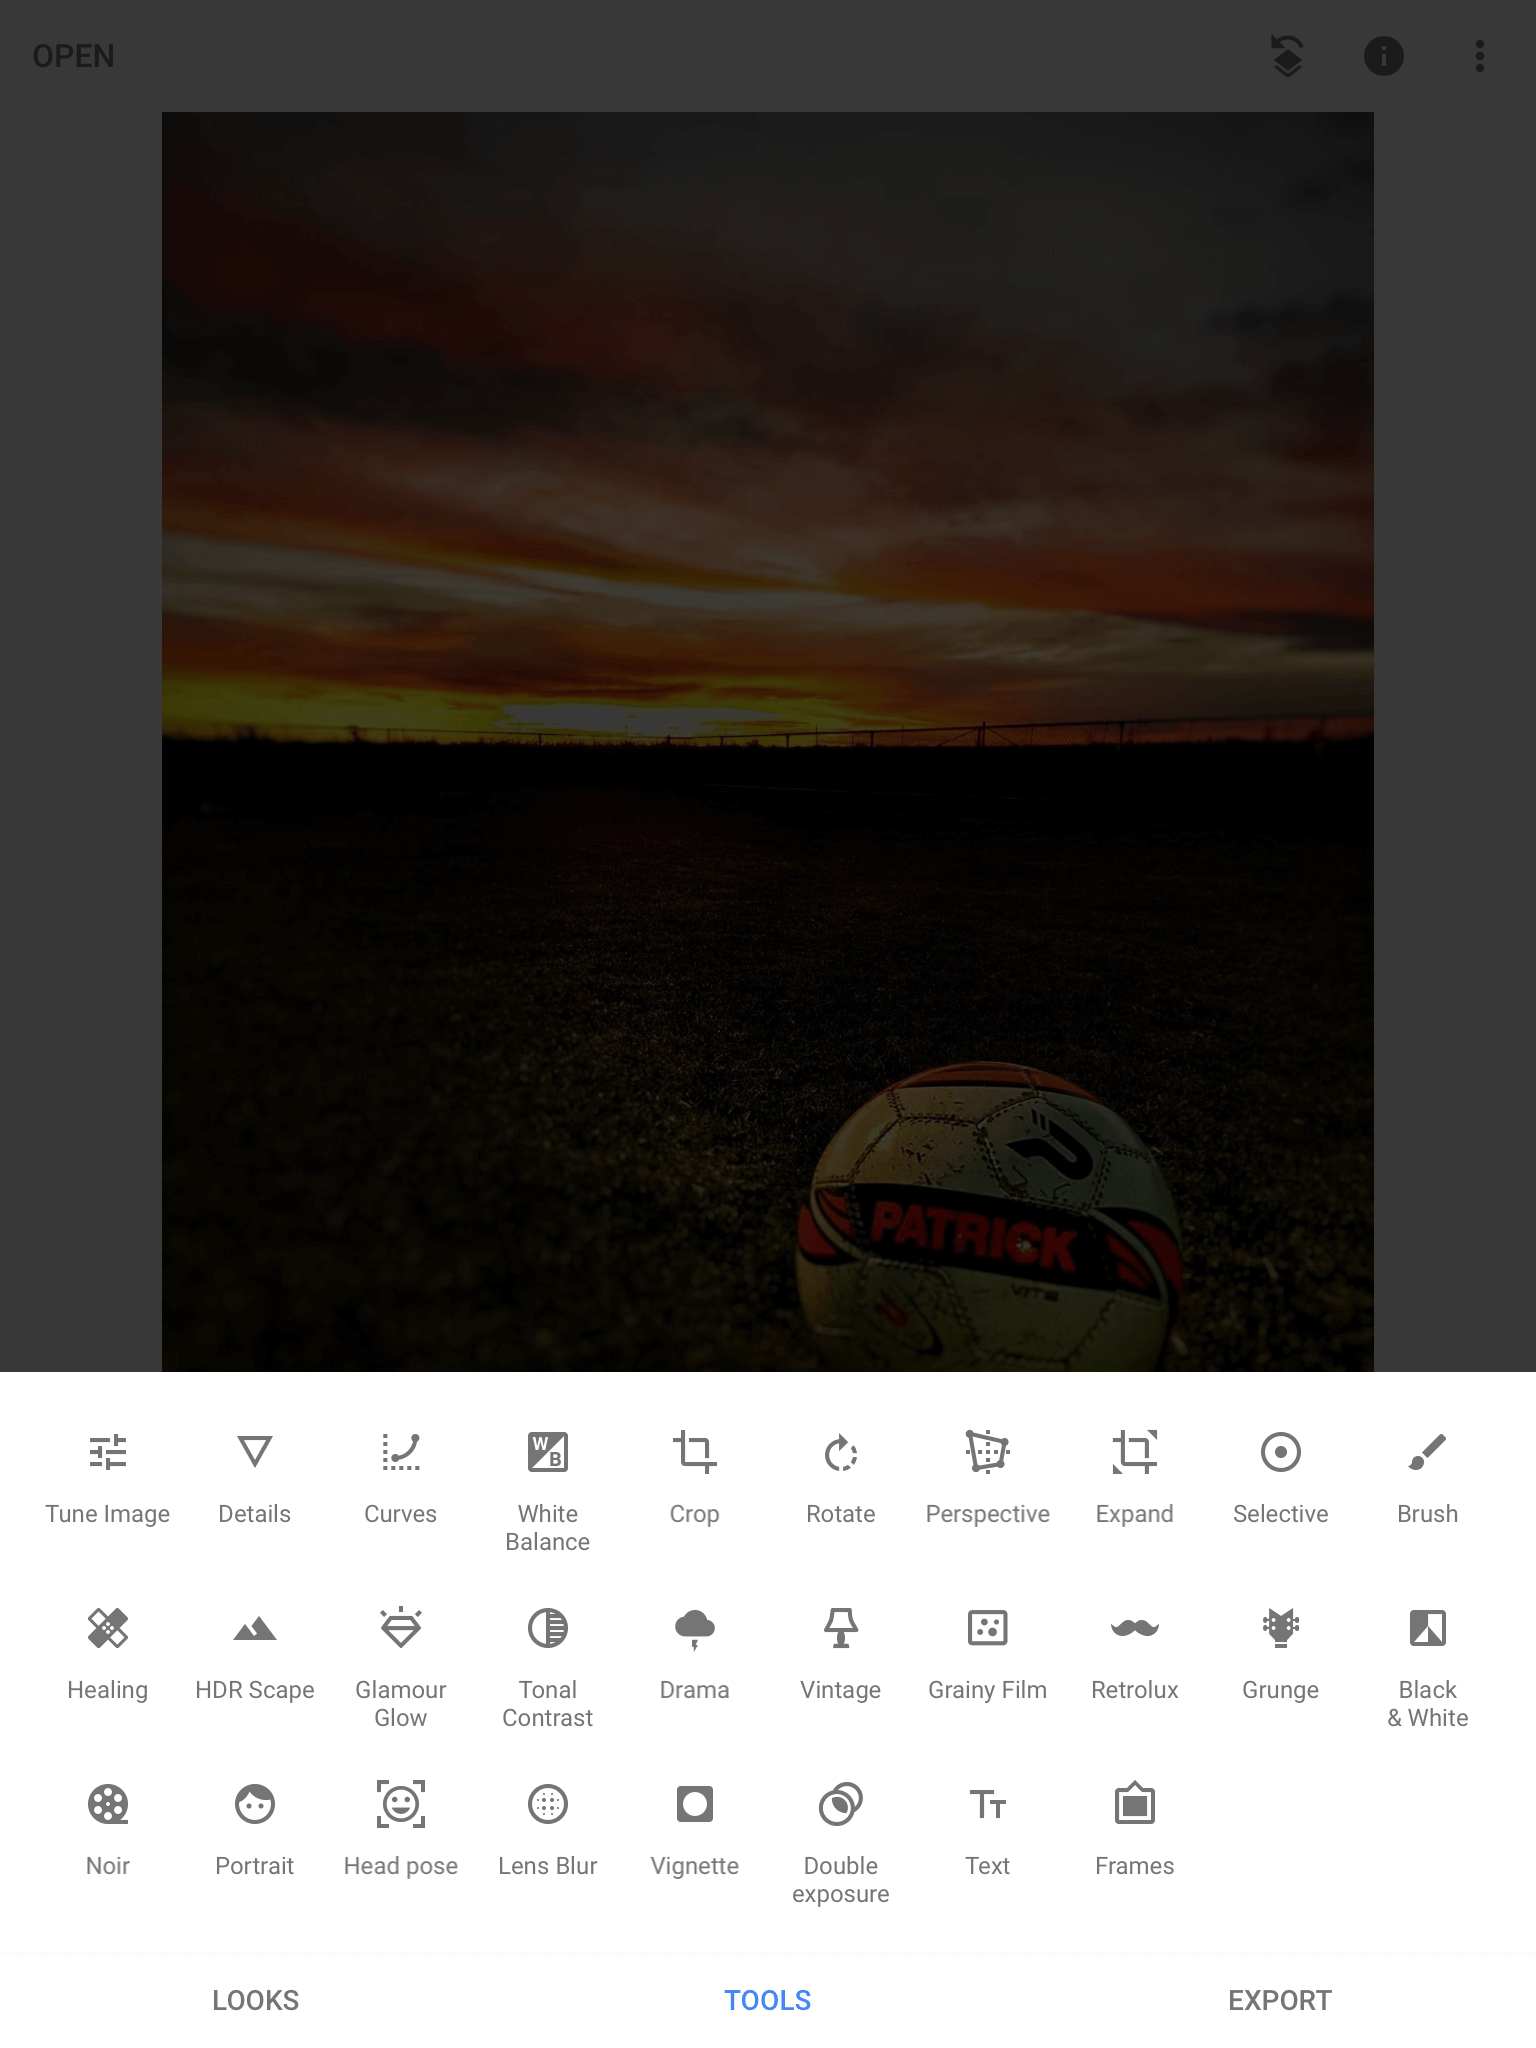
This whole section of Snapseed provides a range of global (whole image) and local (specific area) adjustment options and a number of filter-like effects to change the look and mood of an image.
What makes Snapseed so intuitive and easy to use is the capability to swipe up and down to switch between adjustments and then left and right to increase/decrease the effect. Below are some of the most noteworthy features.
Editor's Tip: Need some extra cash in your pocket? Earn passive income by joining our #1 recommended affiliate program.
Perspective
Straightening your image should be the first step before cropping to your desired aspect and composition. Within the Perspective tool, there is a Rotate option to straighten your image.
Other options include: Tilt, Scale, and Freeform.
Tilt changes the angle from which the photo appears to have been captured. Scale will either stretch or compress at the vertical or horizontal axis. Using the Freeform mode, simply drag a corner in different directions to correct or further warp the lens distortion typical of a wide-angle smartphone lens.
Tune Image
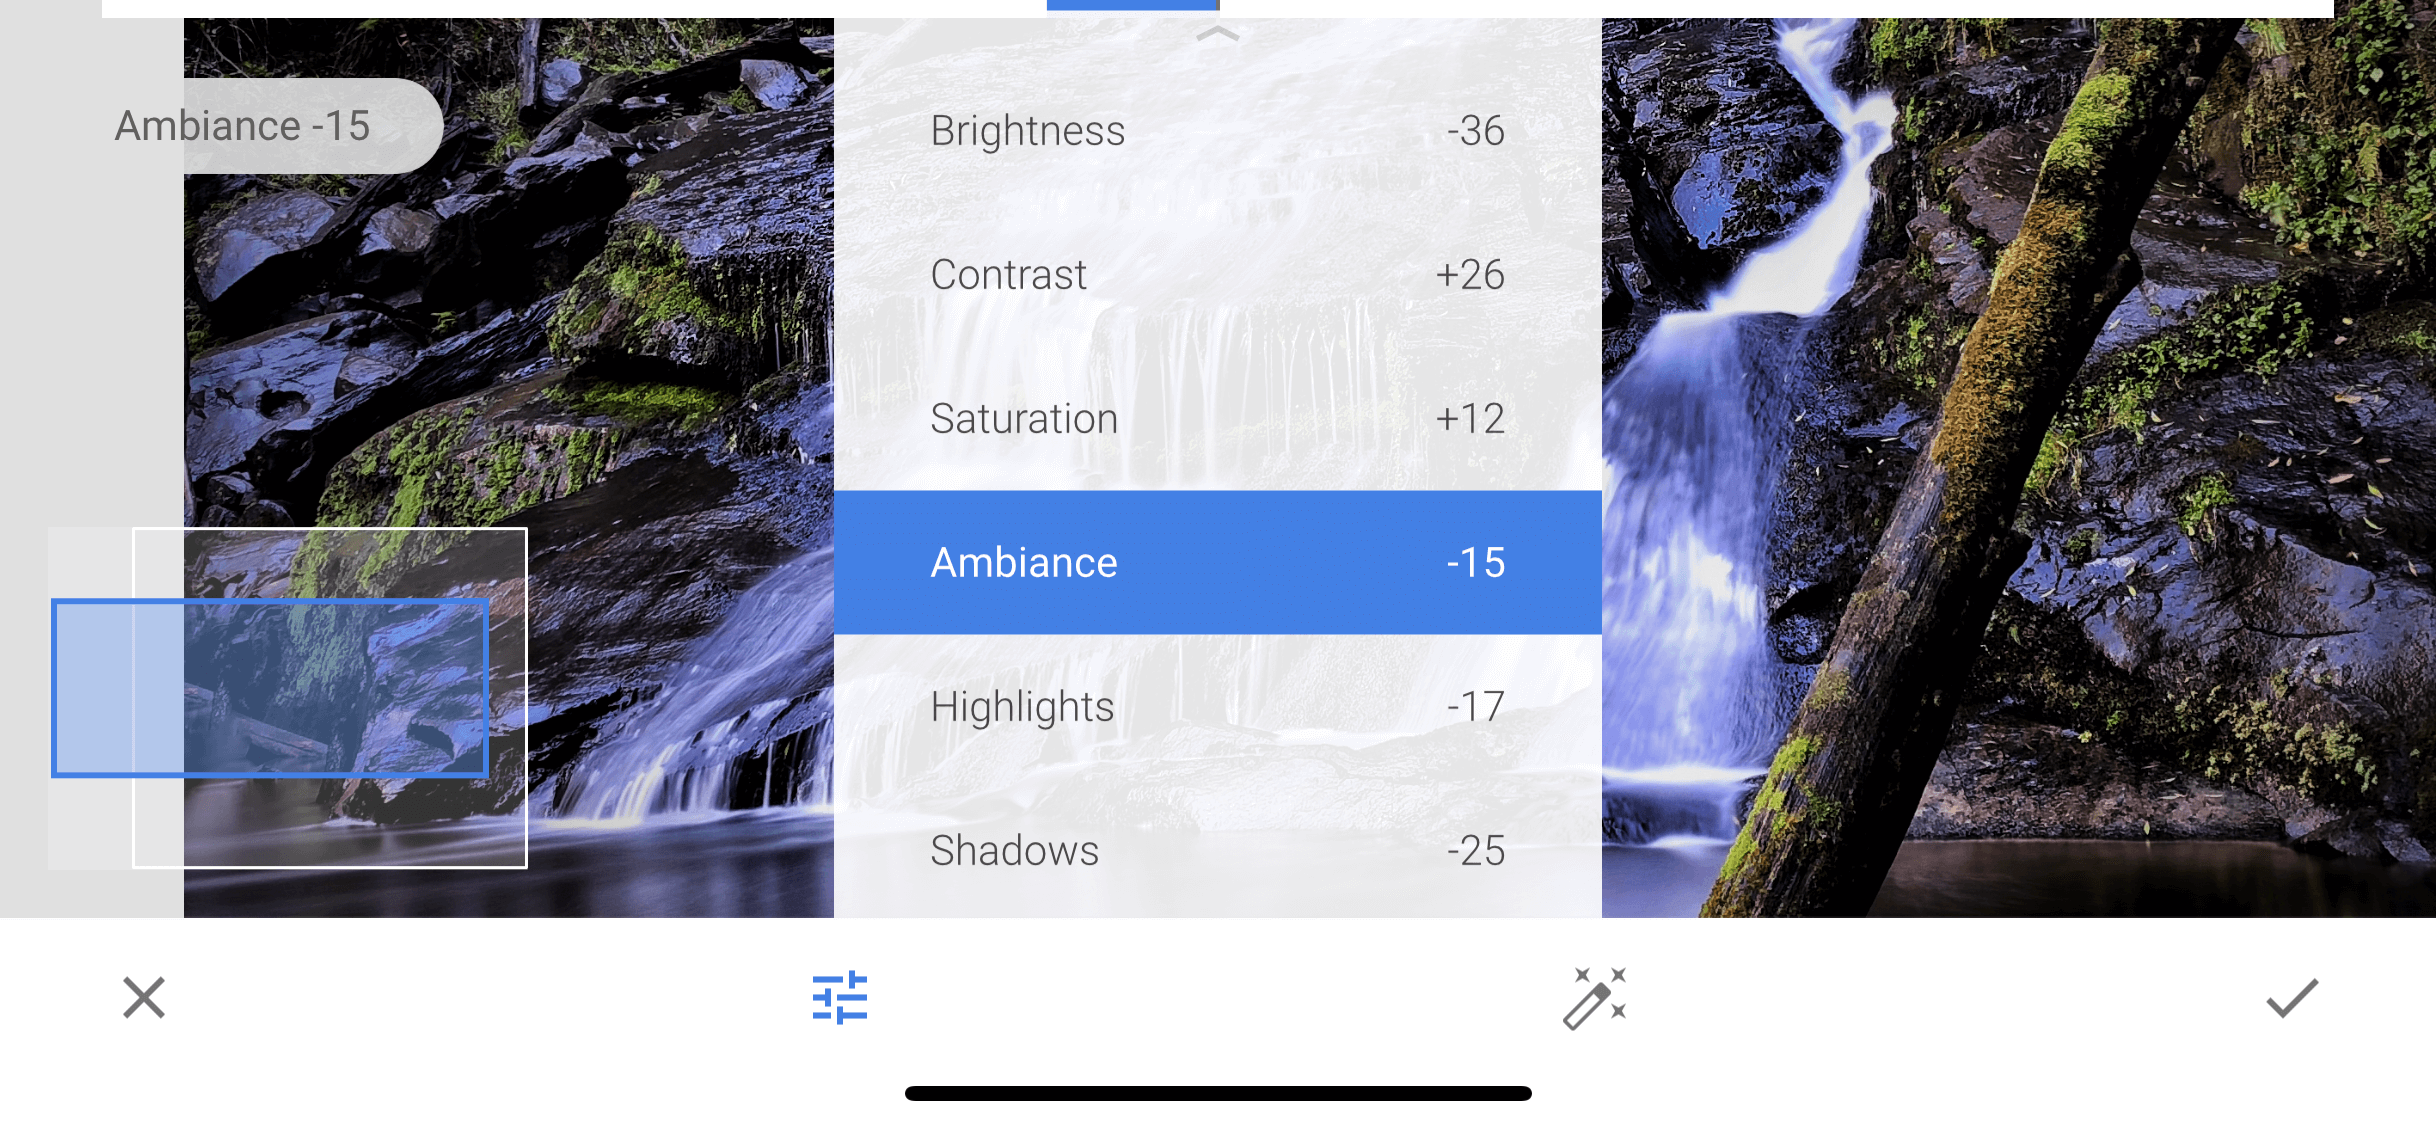
You will be familiar with a number of these adjustments, including Brightness, Contrast, Saturation, and Shadows.
Unlike most smartphone in-built photo editors, you can actually reduce the brightness in the highlight areas of the image. This works really well to bring back the details in clouds and other bright areas of the image that have not become completely white.
Curves

This feature was one of the most recent feature additions, indicating that Google has identified the more serious photo enthusiast as their target audience.
You have lots of options within Curves, including presets to assist those who do not want/need to know how curves work. These are a quick way to discover a look you may not have considered – then tap anywhere on the line and drag in different directions and see the changes in the live view.
The addition of color channels and luminance curves provides much more scope for color correction and color adjustments in the highlights and shadows.
Learn More:
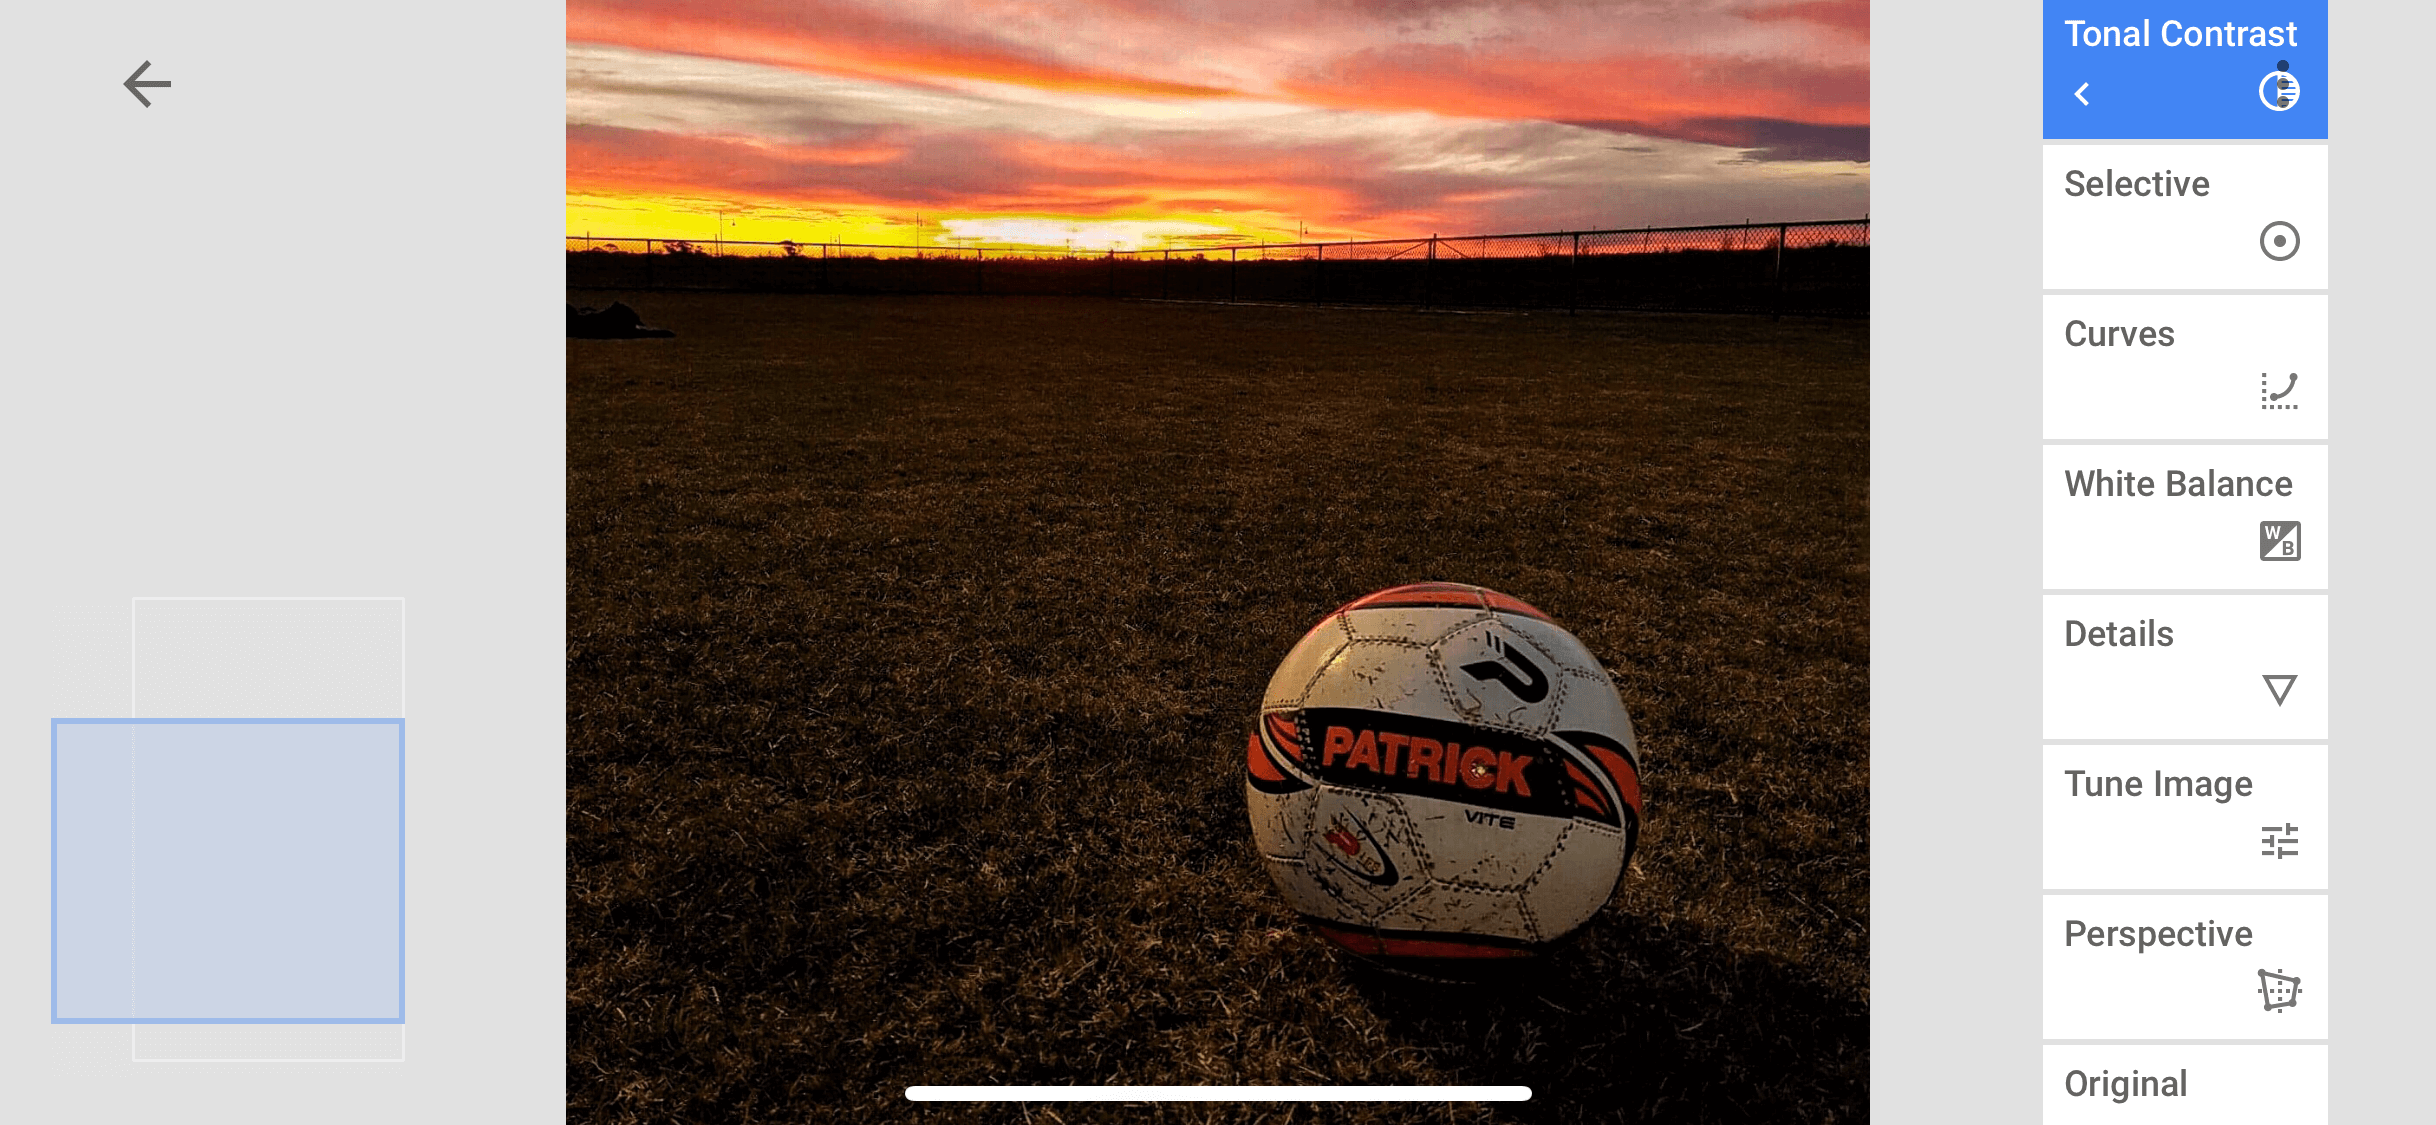
Tonal Contrast
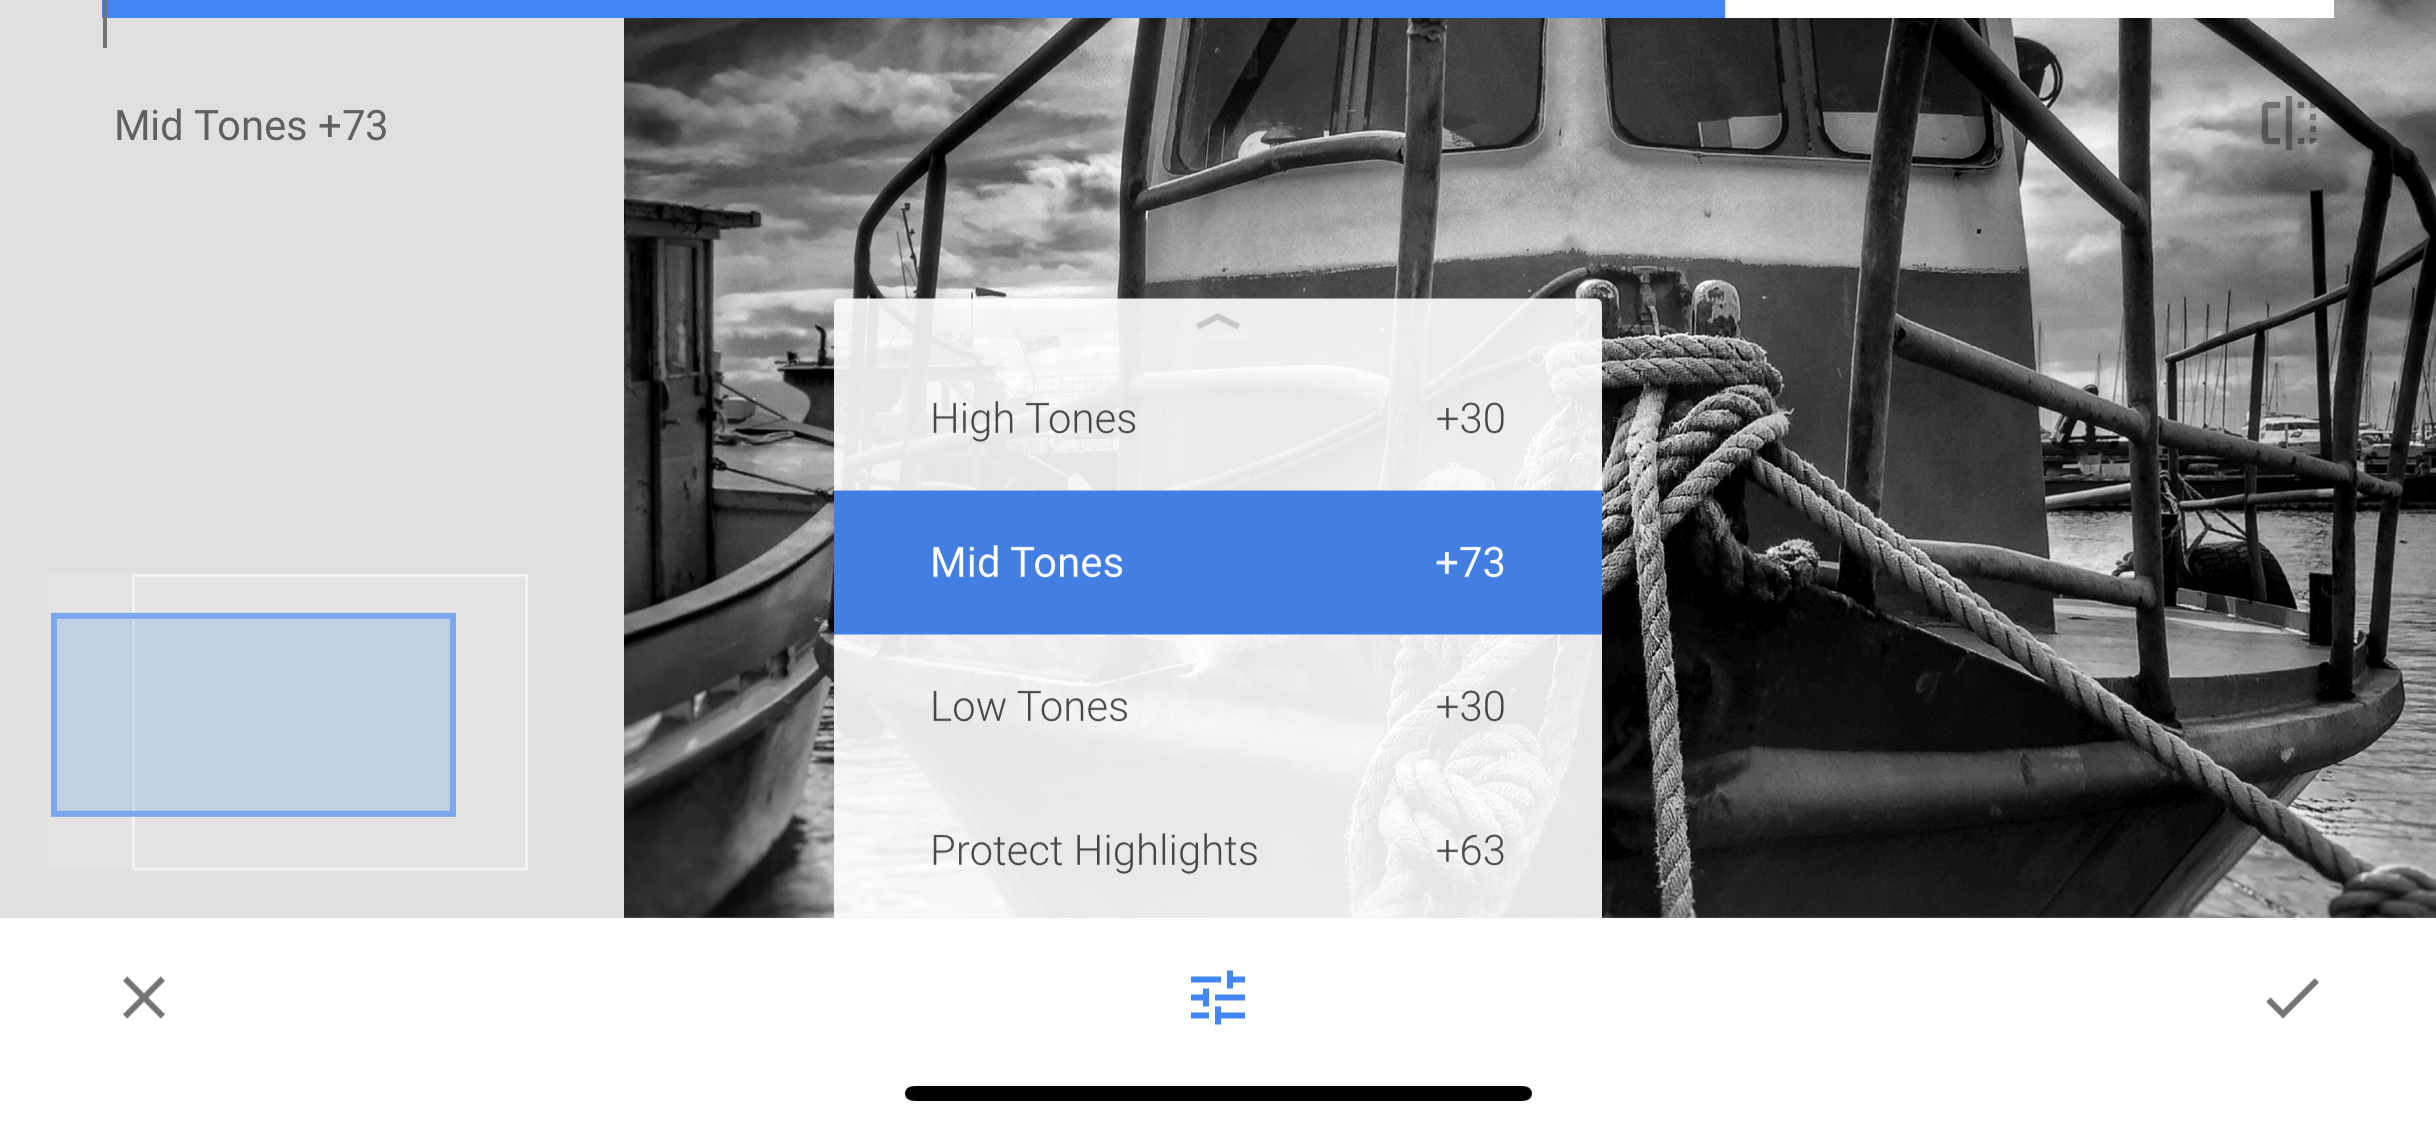
This is a quick feature that allows you to selectively apply extra definition to highlights, mid tones, and shadows within the image.
This is great for images that really benefit from adding texture and sharpening.
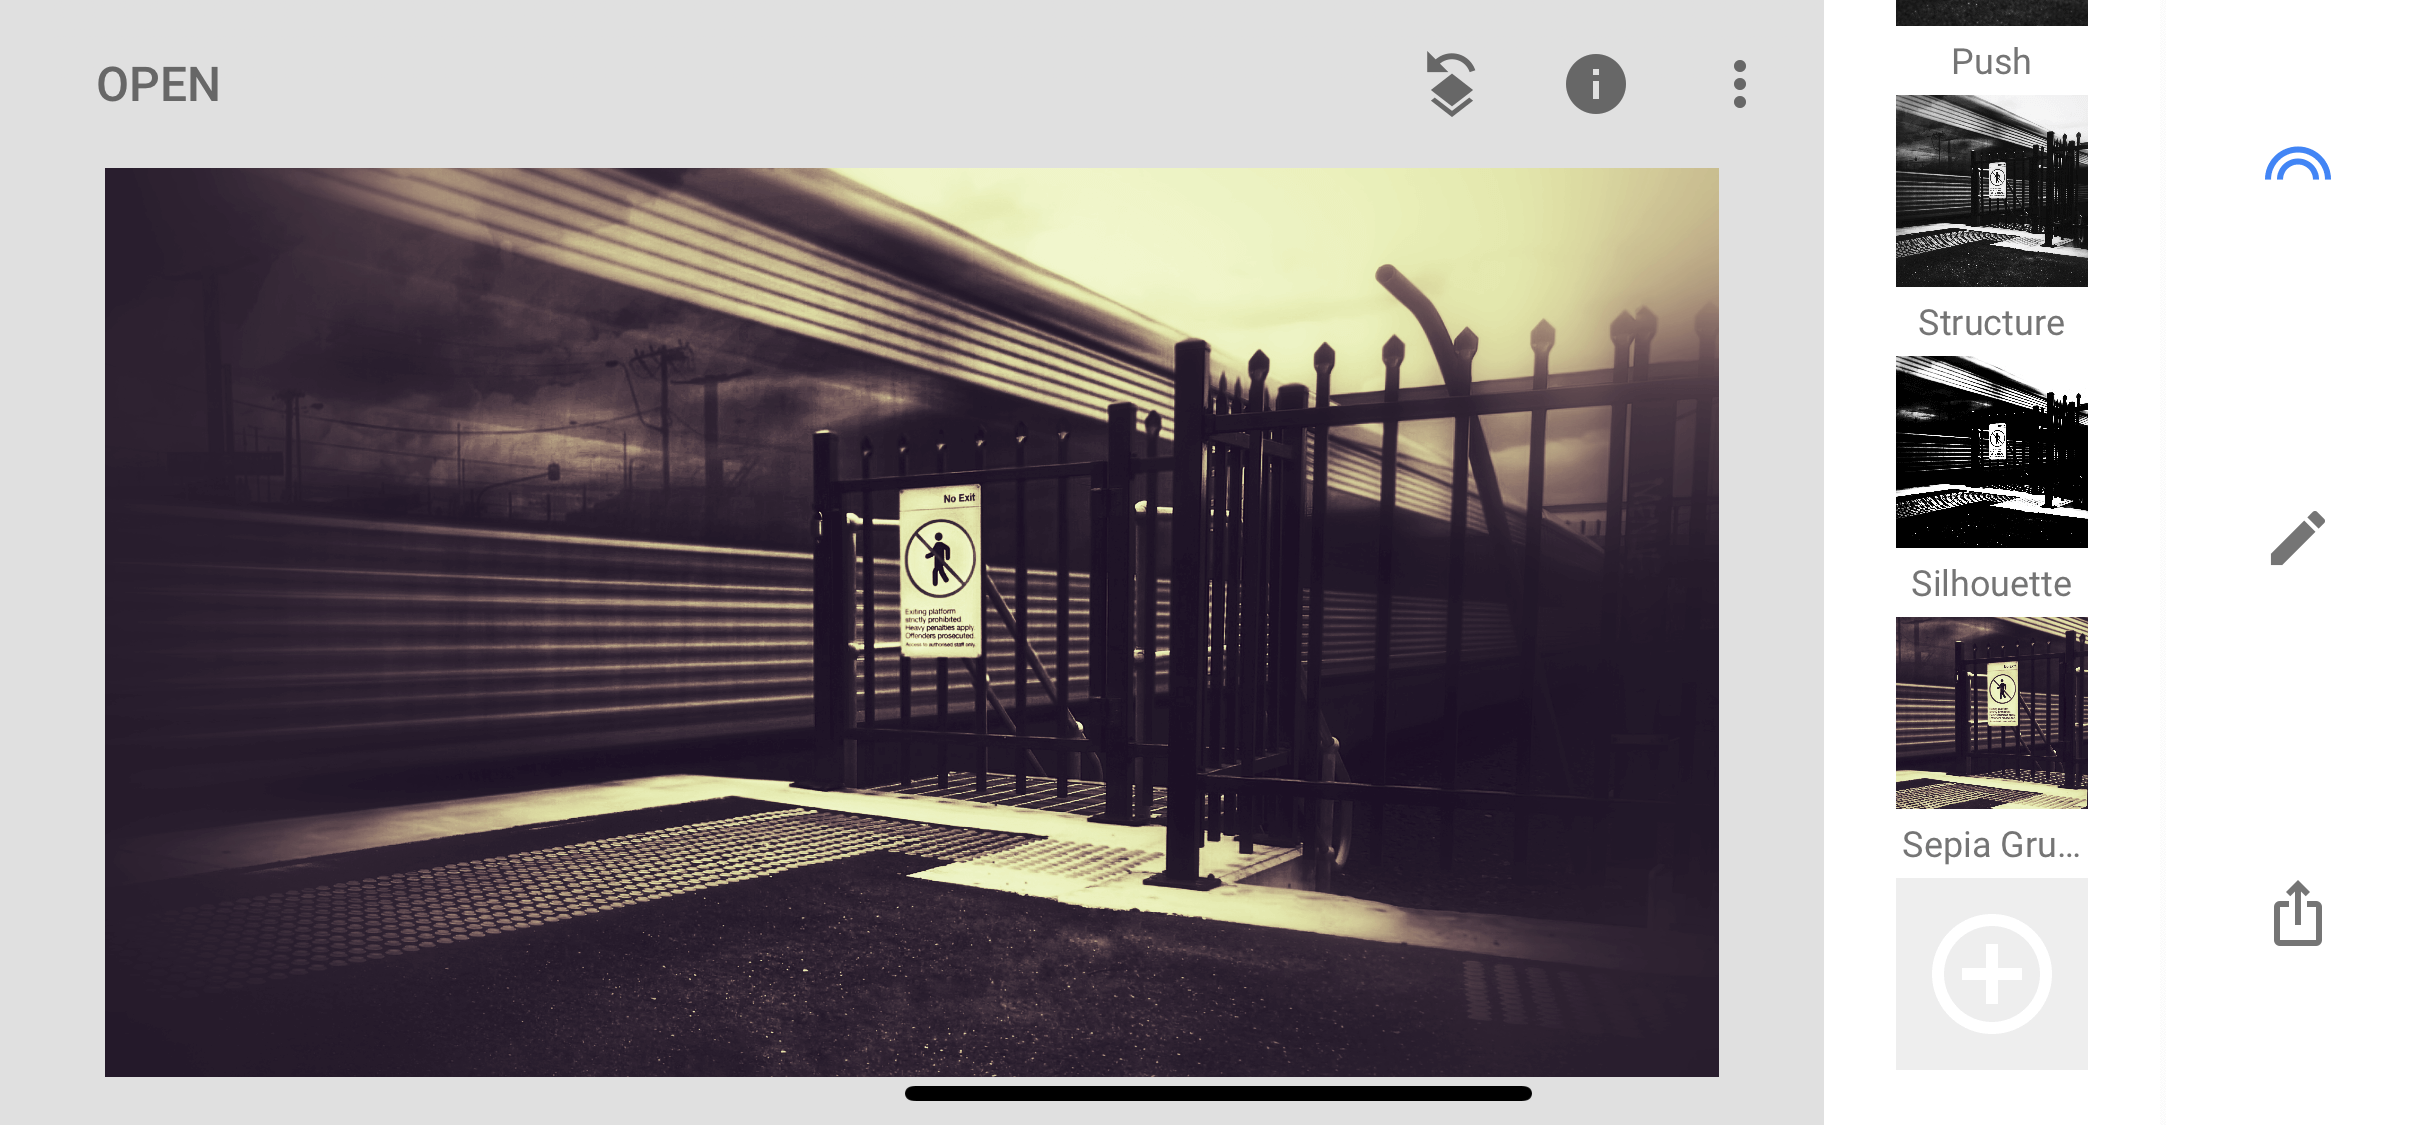
Details
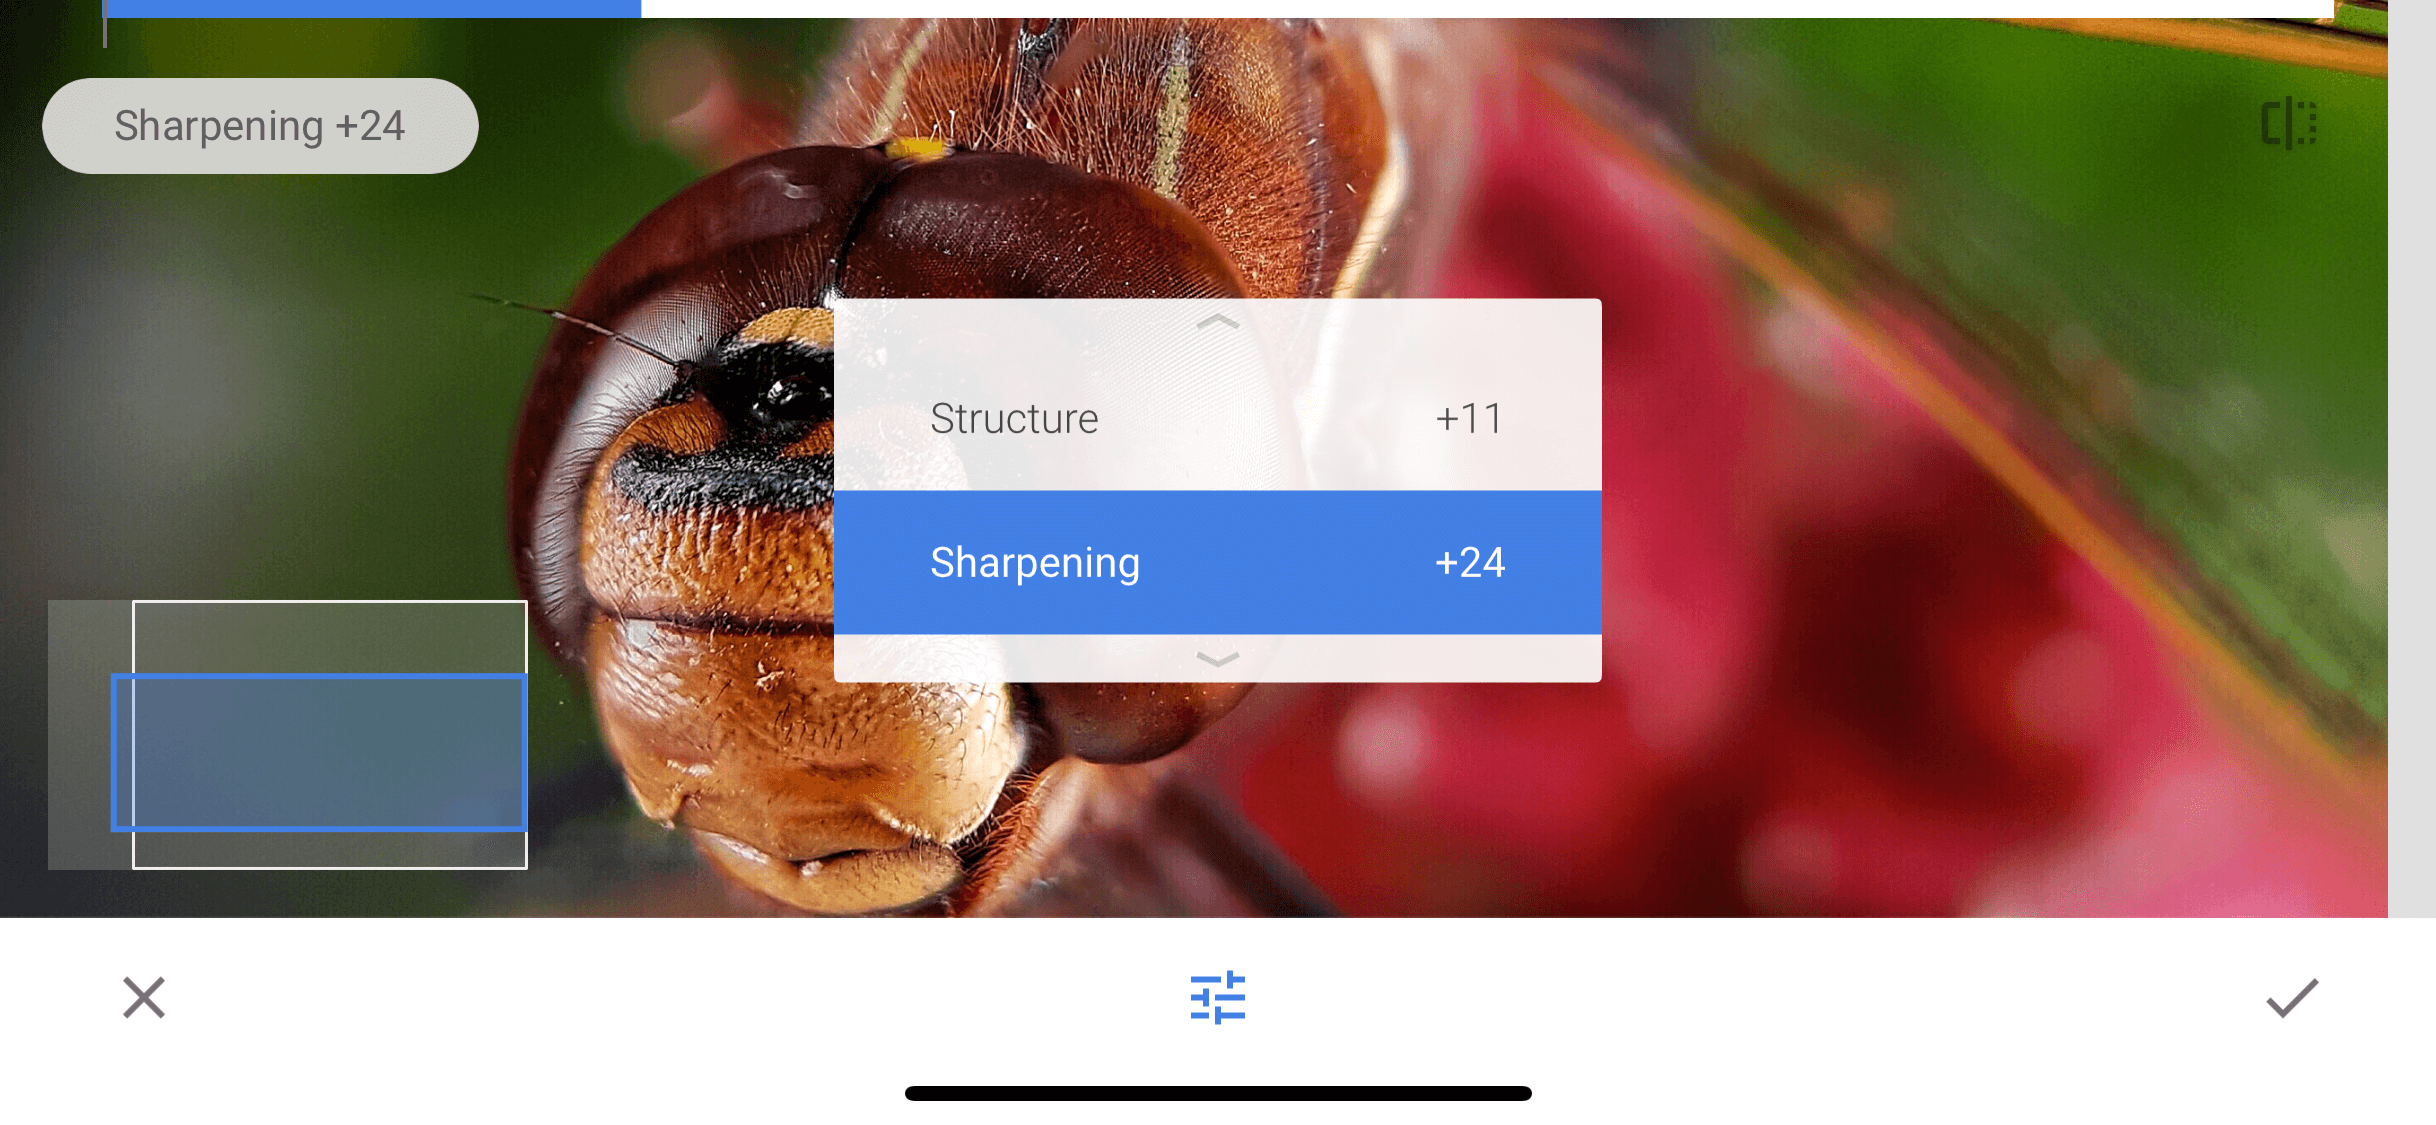
There are two options to sharpen your image: Structure and Sharpening.
The second option, Sharpening, will indiscriminately sharpen every pixel in the image. Structure dramatically sharpens content in the image that has contrast, creating quite a grungy look.
Selective

One of the best local adjustment tools is the Selective feature.
Simply tap the screen to drop a pin, then pinch and zoom to increase/decrease the range of nearby pixels of similar tone and color.
Next, swipe up and down to access the adjustment for Brightness, Contrast, Saturation or Structure.
Lastly, swipe left and right to adjust the strength of the adjustment to the selected area.
This feature is much more accurate than the Brush tool that is a quick finger painting tool to apply Brightness, Temperature, and Saturation.
Editor's Tip: Taking great photos means you need to know how to use your gear. Learn how to read the markings on your lens.
Healing
Want to remove a distracting object within your photo? Pinch and zoom in and swipe over an area of the image to replace with the surrounding content.
This is known as content aware fill. It is aware of the surrounding content and fills in the area that you swipe.
Learn More:
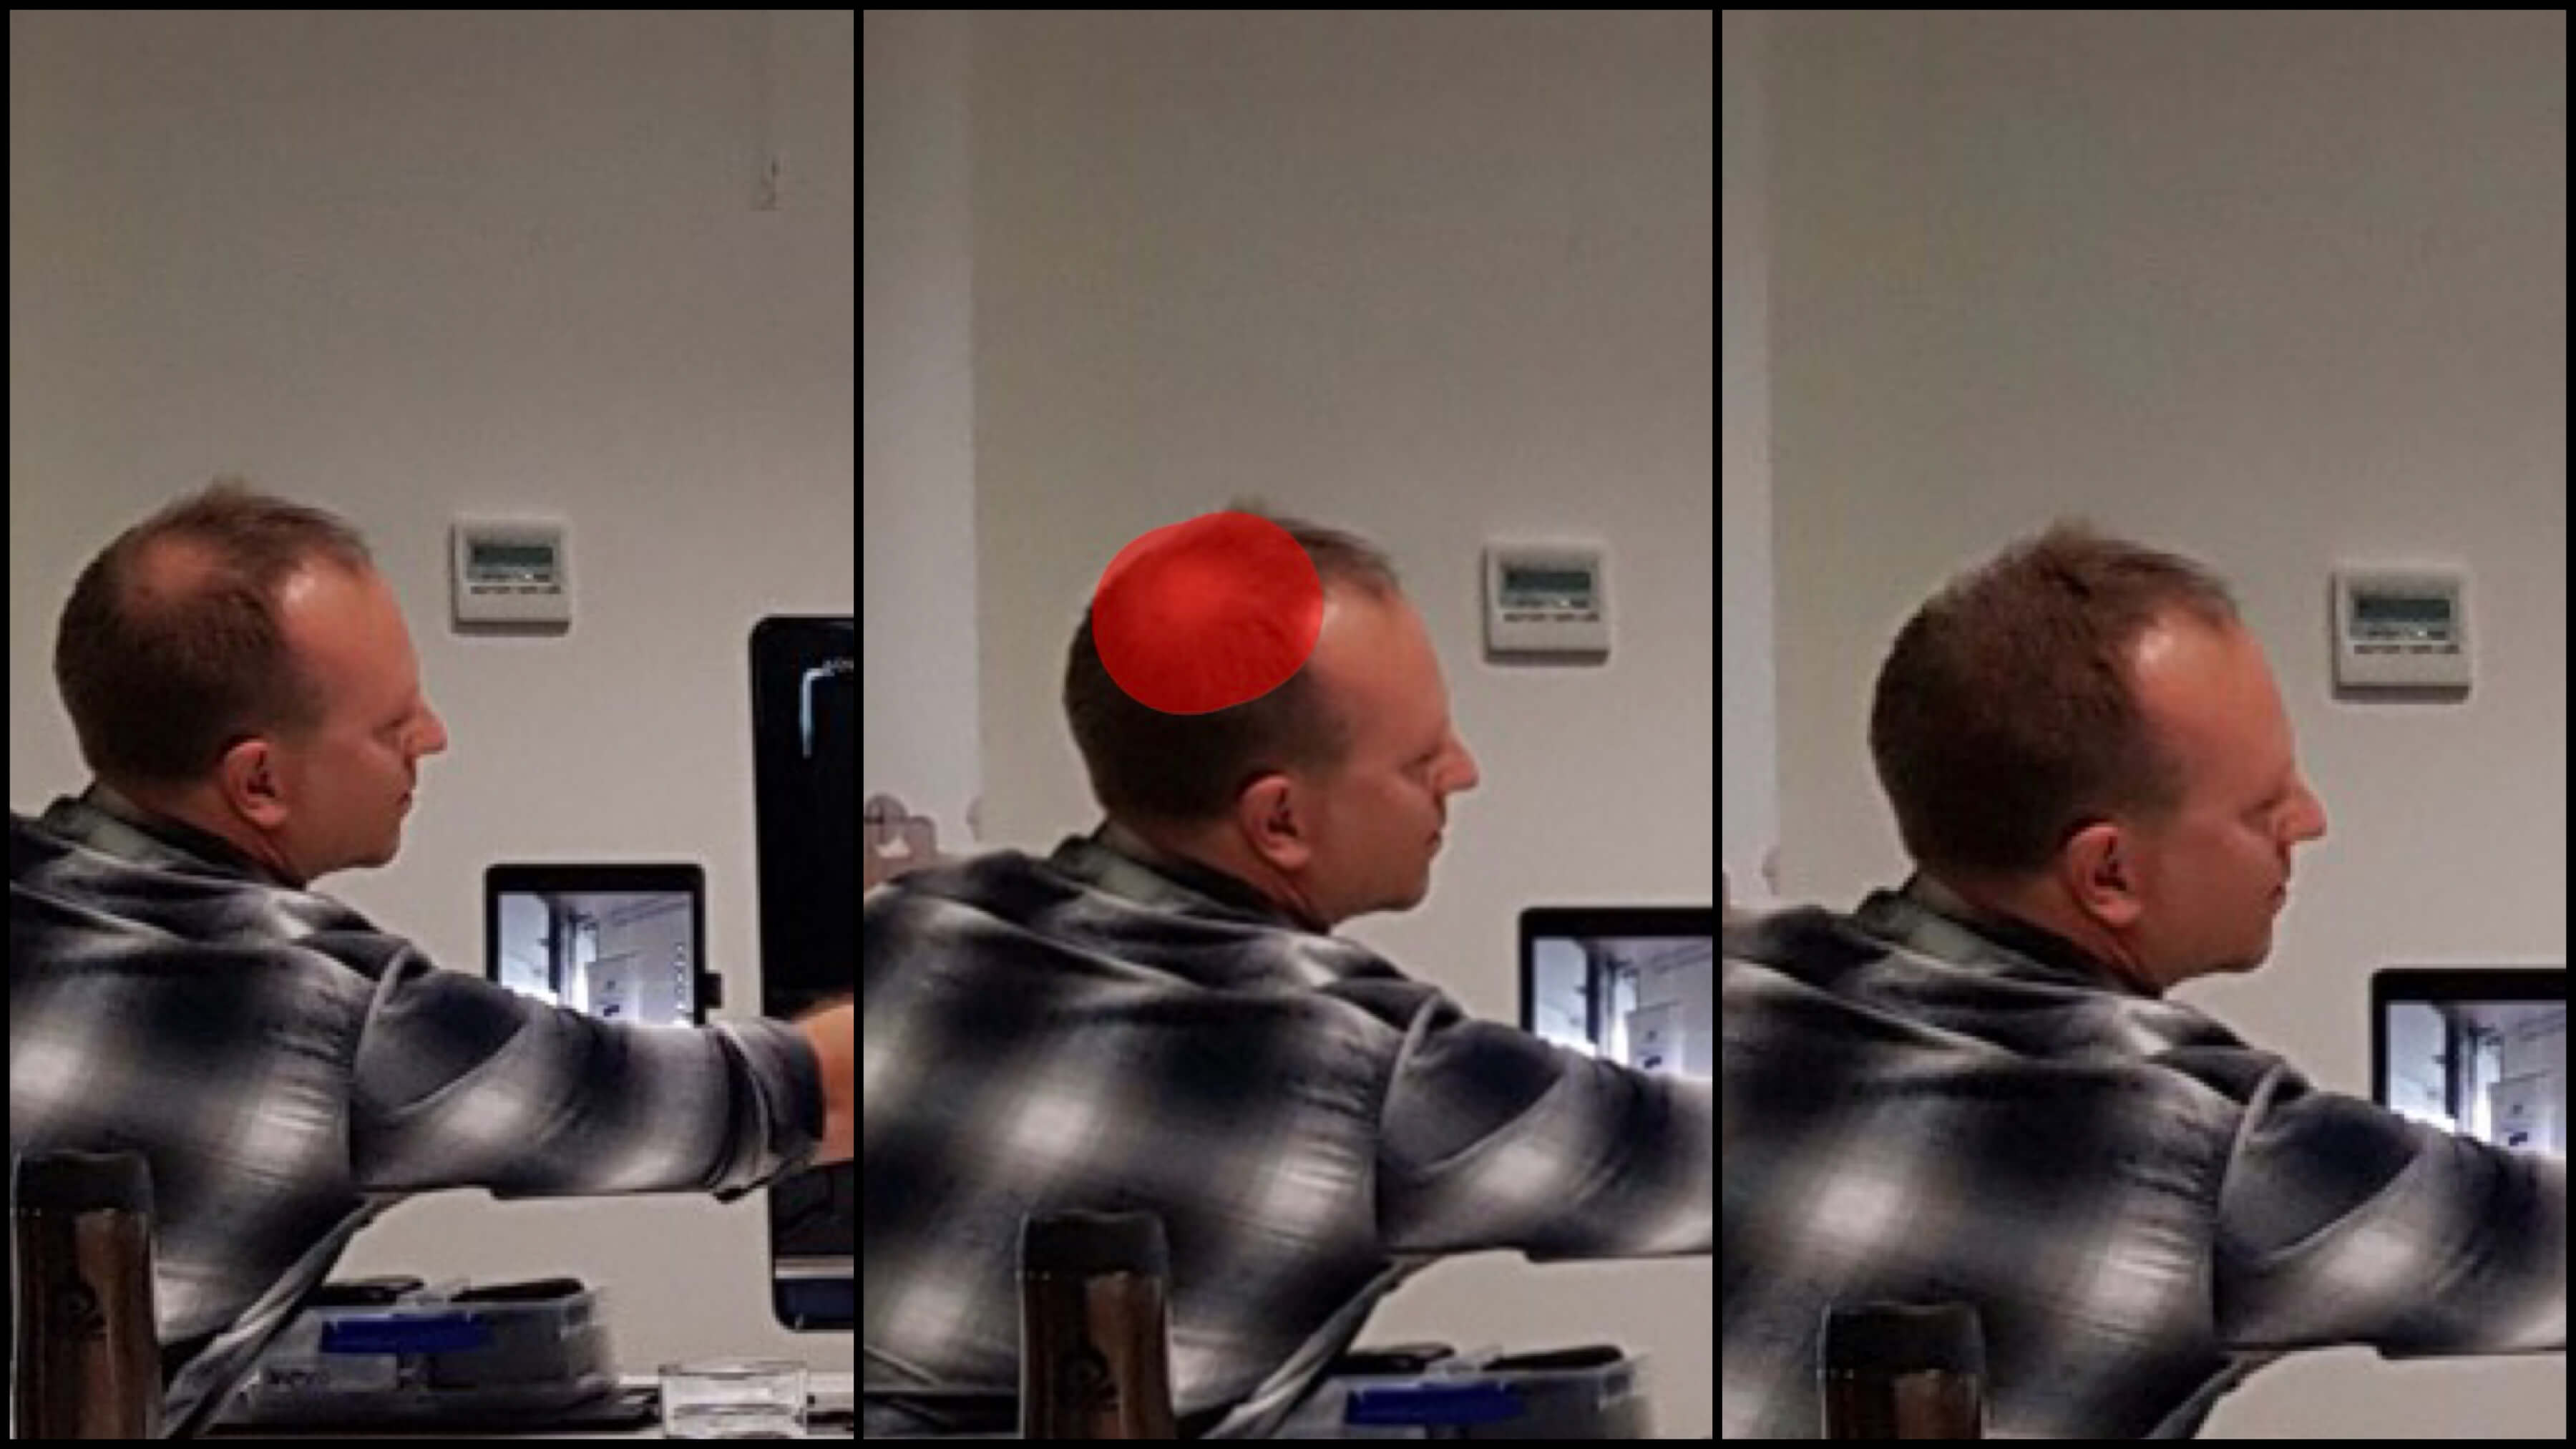
Portrait
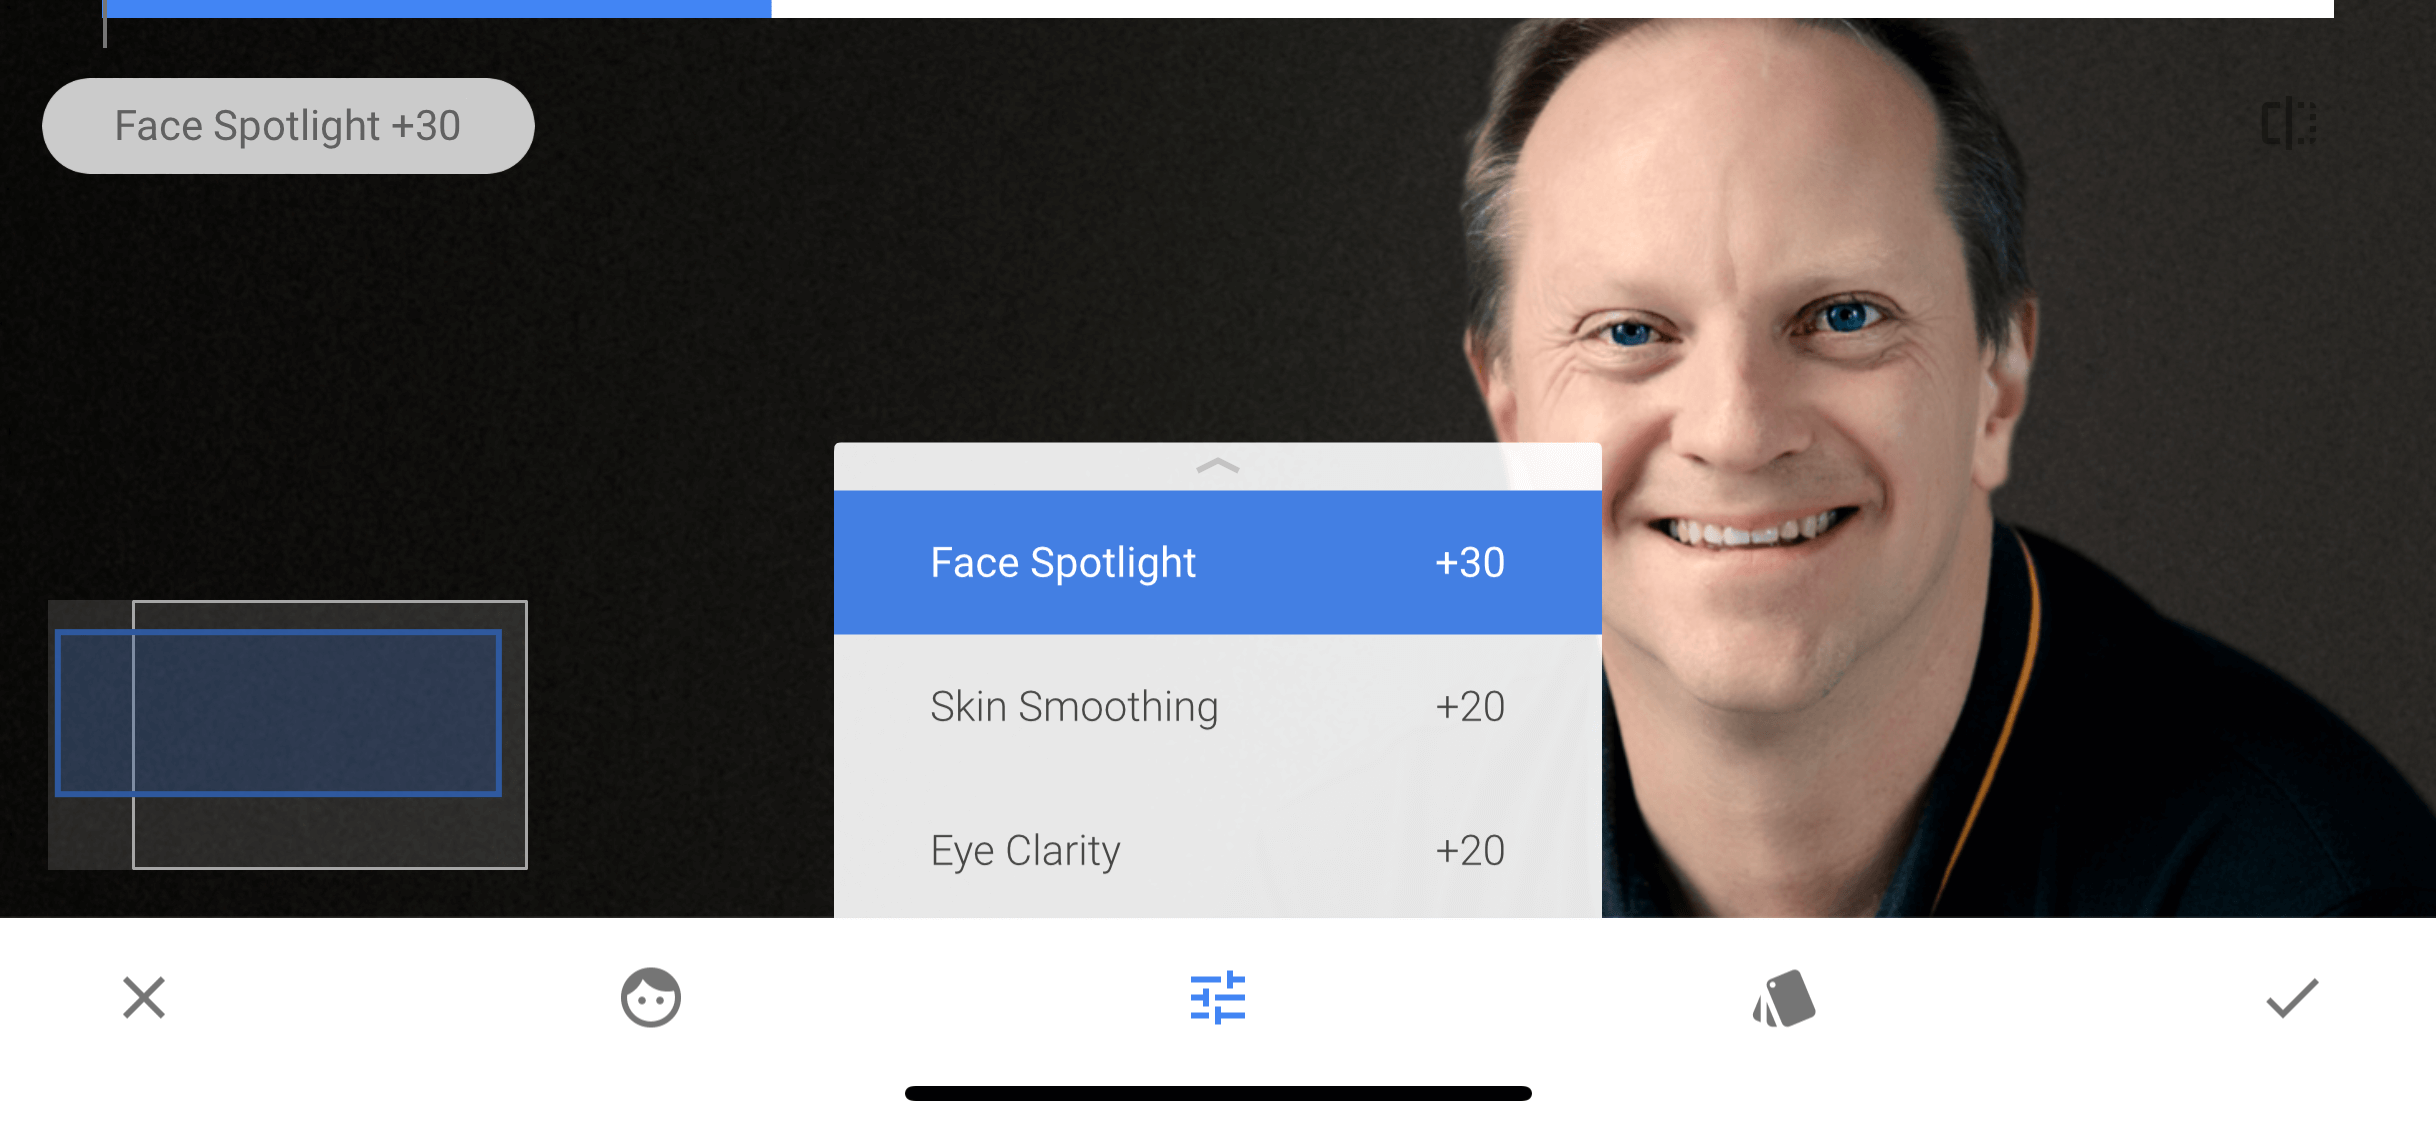
If you do not have a smartphone that offers a beauty mode or studio lighting feature – this feature has a Face Spotlight, Skin Smoothing, and Eye Clarity tools.
Not sure which tool to use? There are presets available that make up a combination of each tool.
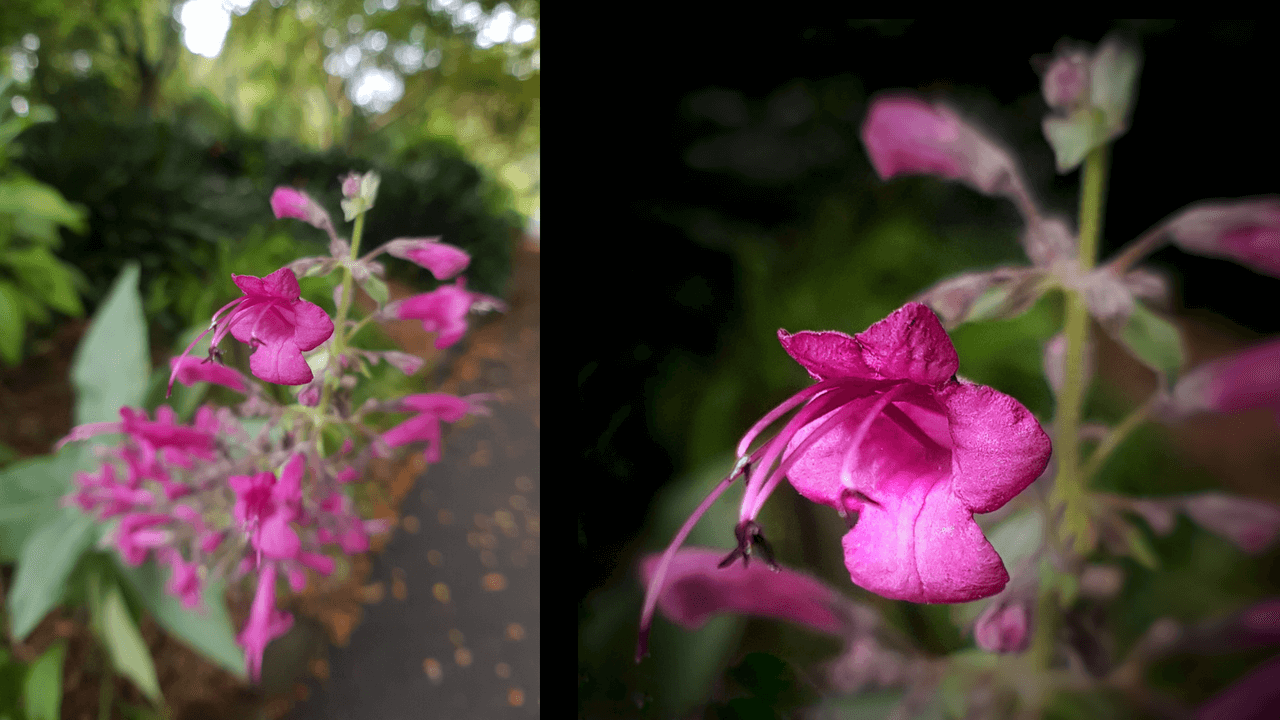
Lens Blur
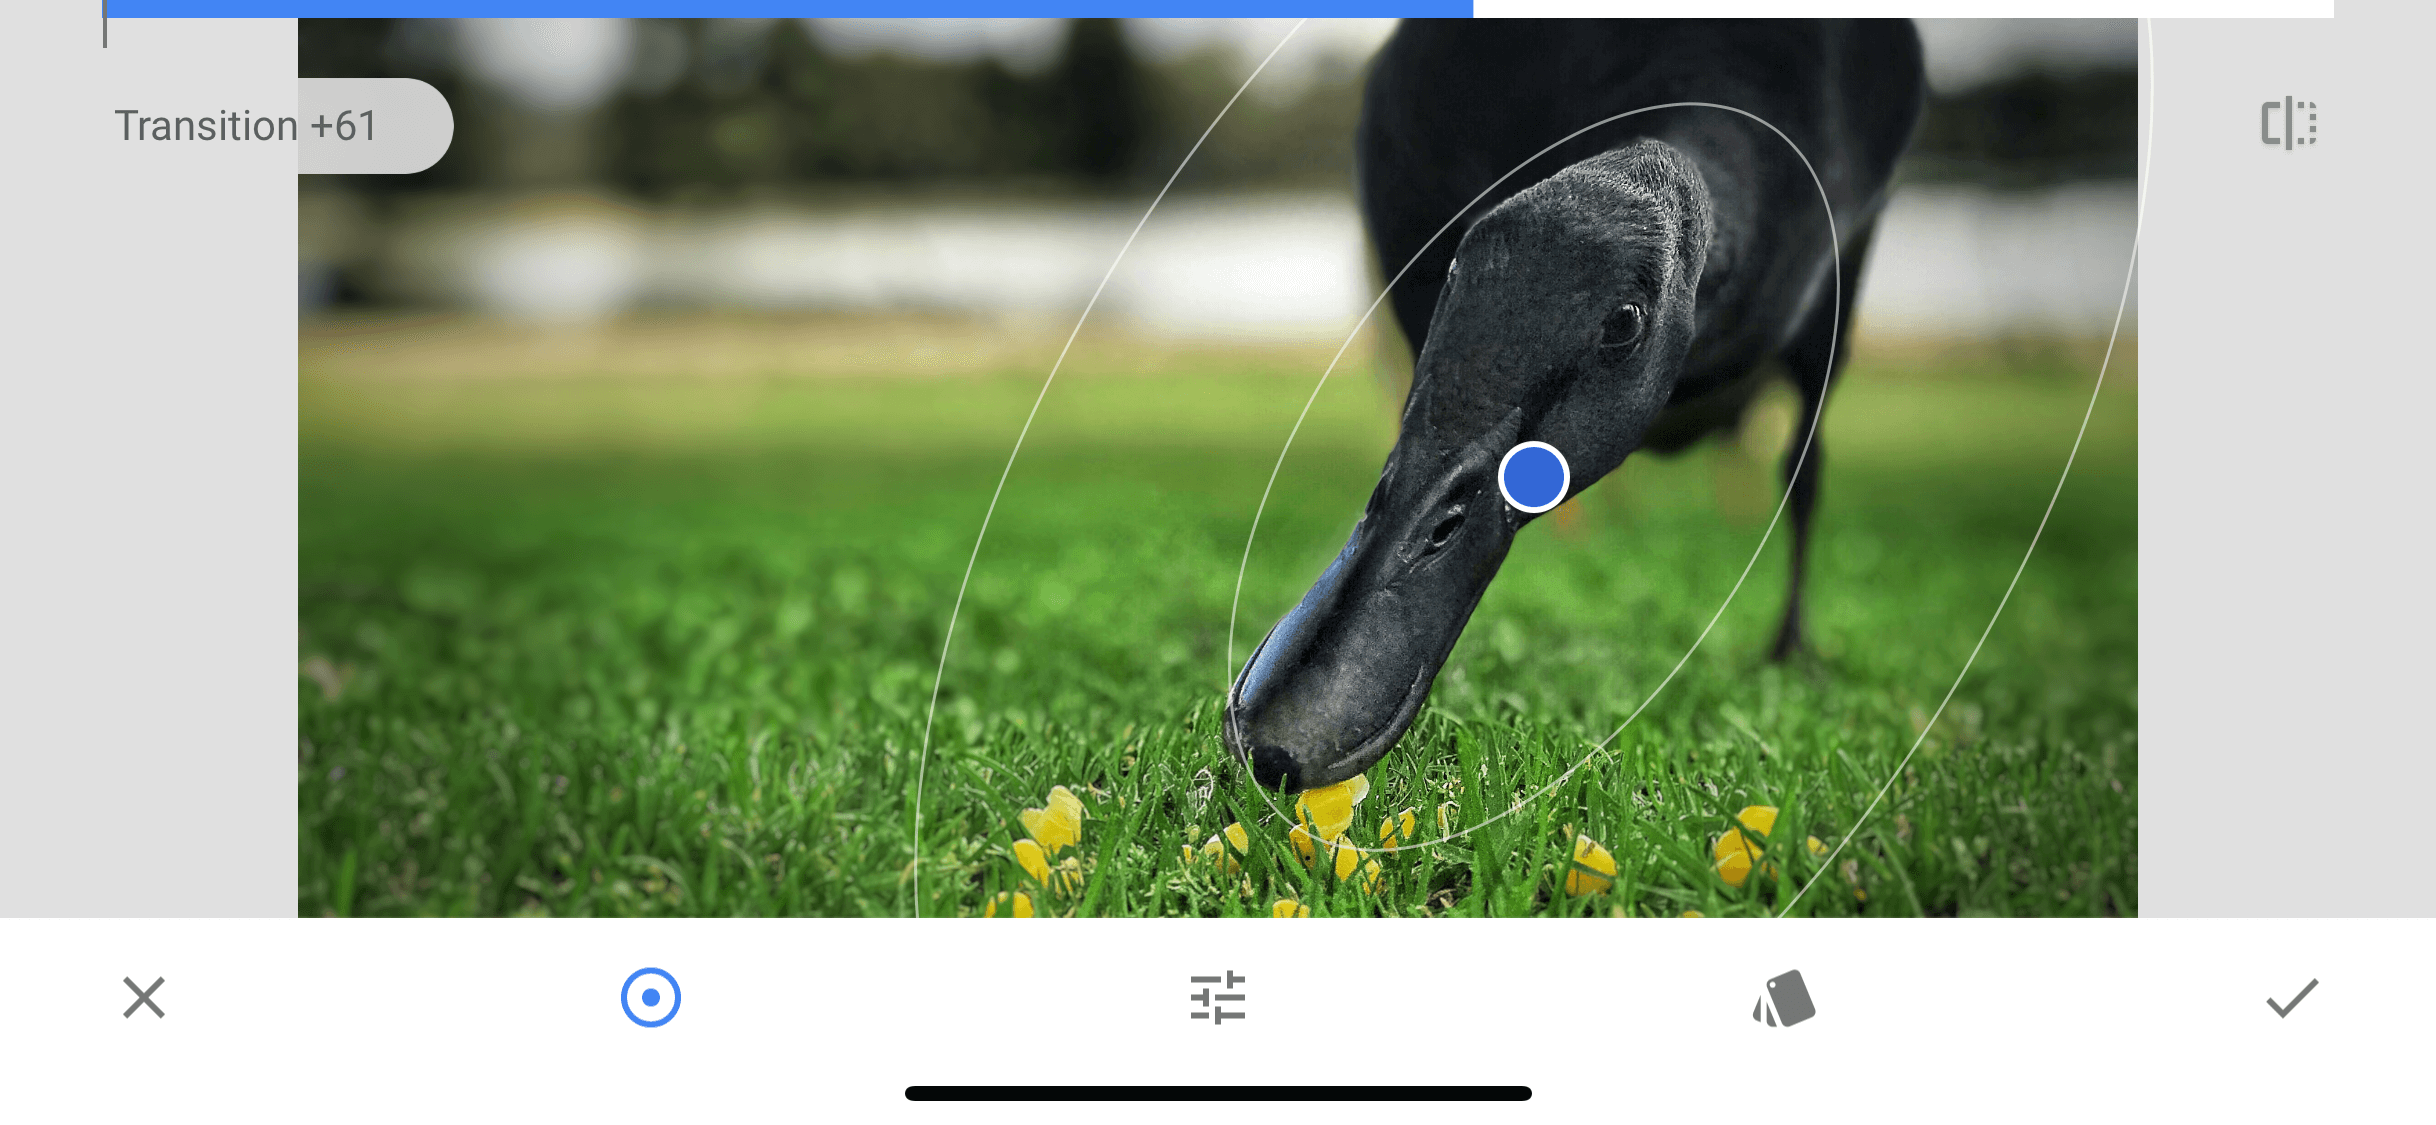
As you know, blurring the background can make the in-focus subject jump off the screen and remove the viewer’s attention away from a busy distracting background.
The Lens Blur tool has a circular Elliptical and straight line Linear option. You can adjust the transition distance from in focus to the desired strength of the blur.
In addition, the Lens Blur has a Vignetting option to darken or lighten the corners and edges.
Editor's Tip: Not sure where to go for your next photography adventure? Find out why Monument Valley is a photographer's paradise.
Stacks
This feature is similar to layers that you will find in desktop editing programs. You have the ability to go back and fine tune or delete a previous edit in the workflow.
Access is via the icon that looks like two squares laying on top of each other on the top right of the screen. Next, tap on View Edits to reveal each adjustment that has been applied after tapping the check mark.
Where this feature really excels is the masking function. Tap on the adjustment to reveal the bin, masking (paintbrush), and adjustment icon. Masking allows you to specifically choose where and how much of the edit to apply to the image.
Tools like White Balance, Curves, HDR Scape, and Black and White are fantastic tools that do not need to be limited to being a global adjustment. You can mask exactly where you want the enhancement to be applied.
Looks and Styles in Snapseed

Referred to as Looks on iOS devices or Styles on Android devices, you do not have an end image in mind before starting the edit. These filters can provide a preview of different image versions that are achievable – as a starting point to your edit or as inspiration.
If you like a filter and would like to tweak it to your taste, tap on the stacks icon to reveal each step as the filter was generated. Tap on each adjustment to tweak the adjustments to your preference.
Create Your Own Filter
Once you have edited an image – you can save this workflow as your very own filter!
Now when you capture a series of photos, you can apply the same edits to all your images. You can share your editing workflow with others as well!
Tap the stacks icon, then QR look, then Create QR look. Next, within Snapseed – open an image, tap on the Stacks icon then scan QR look. This will apply the exact same edits to the opened image.
Learn More:
Summary
If you are new to photo editing or want to preview different editing results, then the filters located in Looks (Android) and Styles (iOS devices) can be a great place to start and apply a quick edit.
The next step is to have a quick general editing workflow to streamline and a quick six-step editing workflow with a consistent use of Perspective, Crop, Tune Image, Details, and Healing, then Lens Blur to finish off the image.
Snapseed is a powerful mobile photo editing tool that can be used for simple and quick edits to more advanced local adjustments using the layers (Stacks) and masking.
About the Writer:
After 20 years in photography, Mike James is now a mobile purist providing in-person and online training, including a free smartphone photography course at https://smartphonephotographytraining.com/getstarted
We Recommend
Dead Simple Tips for Taking Better Smartphone Photos
With the camera technology that's now included in smartphones, it makes sense to use your smartphone as your everyday camera.
And while today's smartphone cameras are much more capable devices, ultimately, how you use your smartphone as a camera is what matters most.
With that in mind, here's a few simple smartphone photography tricks that will have a big impact on the quality of the photos you take.
Go Easy on the Editing

Sometimes, simplicity is best when it comes to photography.
That's certainly true of how you compose the shot, but it's also true of how you edit the photos you take.
Post-processing isn't intended to be a huge undertaking that is required to try to correct all the mistakes you made when you took the shot.
Rather, editing your images should be fairly straightforward, with minor touch-ups and adjustments to bring out the quality of the shot.
In other words, overedited images just look strained, and, well, overedited!
Tons of noise, unnatural colors, contrast that's visibly off, and other factors are dead giveaways that the original shot was a tough one to work with.
Instead, strive to get everything as close to perfect as possible when you take the photo, and then use apps like VSCO or Snapseed (for iOS or Android) to fine-tune the details.
Learn More:
- As a Photographer, These are the 13 Apps I Wouldn't Leave the House Without
- Explore Photography Post-Processing Tips
Get Better Lighting
The built-in flash on your smartphone is, in a word, terrible.
Light from the built-in flash is white, harsh, and washes out the subject while casting deep shadows in the shot as well.
It's not a good look...
But just like with a DSLR or mirrorless camera, you can use an external flash to get better, more pleasing light.
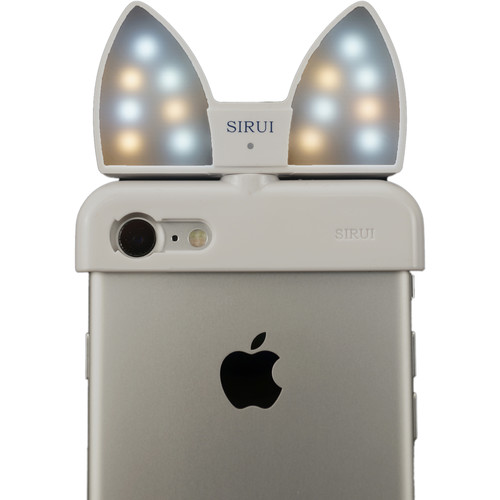
Sirui's Mobile Phone Light-Compensating Lamp helps fill in the shadows with pleasing light without washing out the subject.
The LED lamp includes eight cool color-toned lights and six warm color-toned lights with color temperature and brightness controls that help you customize the light output for your specific subject.
For example, if shooting a portrait indoors under incandescent lighting, which tends to be yellow in tone, you can use the lamp's cool lights to compensate, giving the shot more light and a corrected white balance as well.
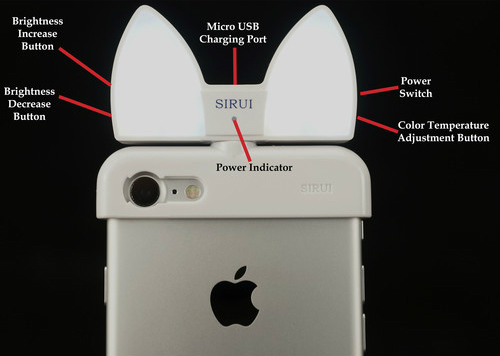
The light attaches to your phone with Sirui lens adapter, which means you can use the light in conjunction with a Sirui add-on smartphone photography lens.
The light has an hour of battery life for extended shooting, and a micro USB charging port for quick charging, too.
Learn More:
- Get the Specs and Pricing on the Sirui Mobile Phone Light-Compensating Lamp
- Mobile Photography Tricks You Can't Miss
Fill the Frame
When you're in the process of composing your smartphone photos, don't just stand back far away from the subject.
Instead, put the quality of today's smartphone camera lenses to good use by filling the frame with the subject.
Not only does filling the frame give viewers a more intimate look at the subject, but it also allows you to offer a different perspective that the viewer might not have seen before.
What's more, since you're closer to the subject, you can highlight details that might otherwise go unnoticed...
A texture here, a pattern there, perhaps a color or even the way the light plays off a certain area of the shot.
In the end, creating better smartphone photos starts with what you do in-camera, so working on your compositional techniques will take you far.
Add to that the right gear and a commitment to improving your post-processing skills, and you have a recipe for creating much-improved smartphone photos, no matter the subject.
We Recommend
Essential Mobile Photography Tips
I'll just come right out and say it: of all my cameras, my iPhone is the one that gets the most usage.
It's my go-to daily camera because it's always there with me, it's easy to use, and in a lot of situations, it takes pretty good photos.
That doesn't mean that I never take my Nikon D810 out for a spin or leave my Sony a6300 at home all the time.
I'm just saying that with the massive improvements in mobile phone cameras over the years, it just makes sense to use my phone more often than not.
Since most of us are in that same boat of using our phones as our primary cameras, I thought it would behoove me to share a few tips and tricks for getting better results with mobile photography.
Invest in Some Apps
Just like your "real" camera needs some accessories to extend its capabilities, so too does your smartphone.
Getting apps for controlling the camera and giving you increased processing capabilities is task number one.
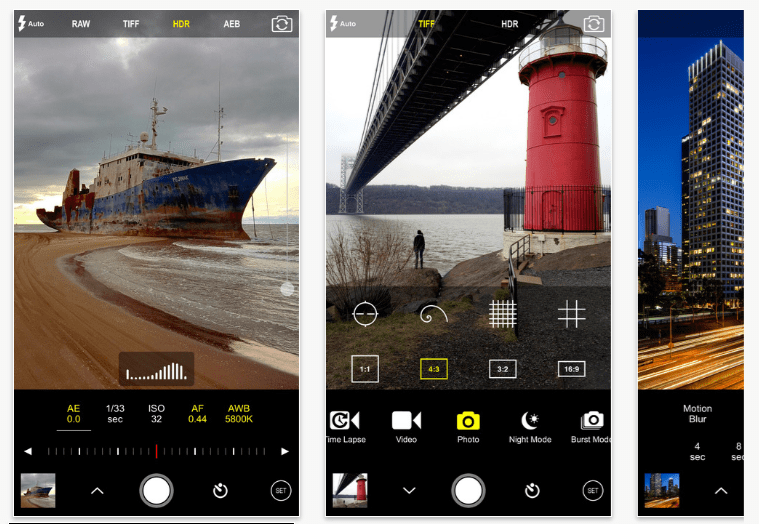
When it comes to controlling the camera, iOS users might look into ProCam 4 (shown above), which gives you full manual controls to manipulate shutter speed and ISO. You can also control white balance, bracket exposures, and shoot in RAW, assuming you have a new enough iOS device.
ProCam 4 isn't available for Android phones, but a similar app is Proshot, which also gives you exposure controls, RAW shooting, focus assist, and a host of other handy features.

Once you take your photos, you need apps to process them, and few are better than VSCO Cam.
Available for Android and iOS devices, VSCO has an incredible array of post-processing features, from some of the best filters available today to pinpoint controls over things like exposure, sharpness, tint, shadows and highlights, temperature, and saturation.
VSCO's controls are well-organized and easy to use - adjust the intensity of a filter by using a slider. The same goes for making adjustments to the items listed above.
In other words, it's dead simple to add some pizzazz to your photos with VSCO Cam. It's even got its own little community so you can share your photos with other VSCO lovers.
Invest in Some Hardware Too
Just like you need to give your DSLR or mirrorless camera a stable base to get a better photo, your smartphone benefits from a stable base too.
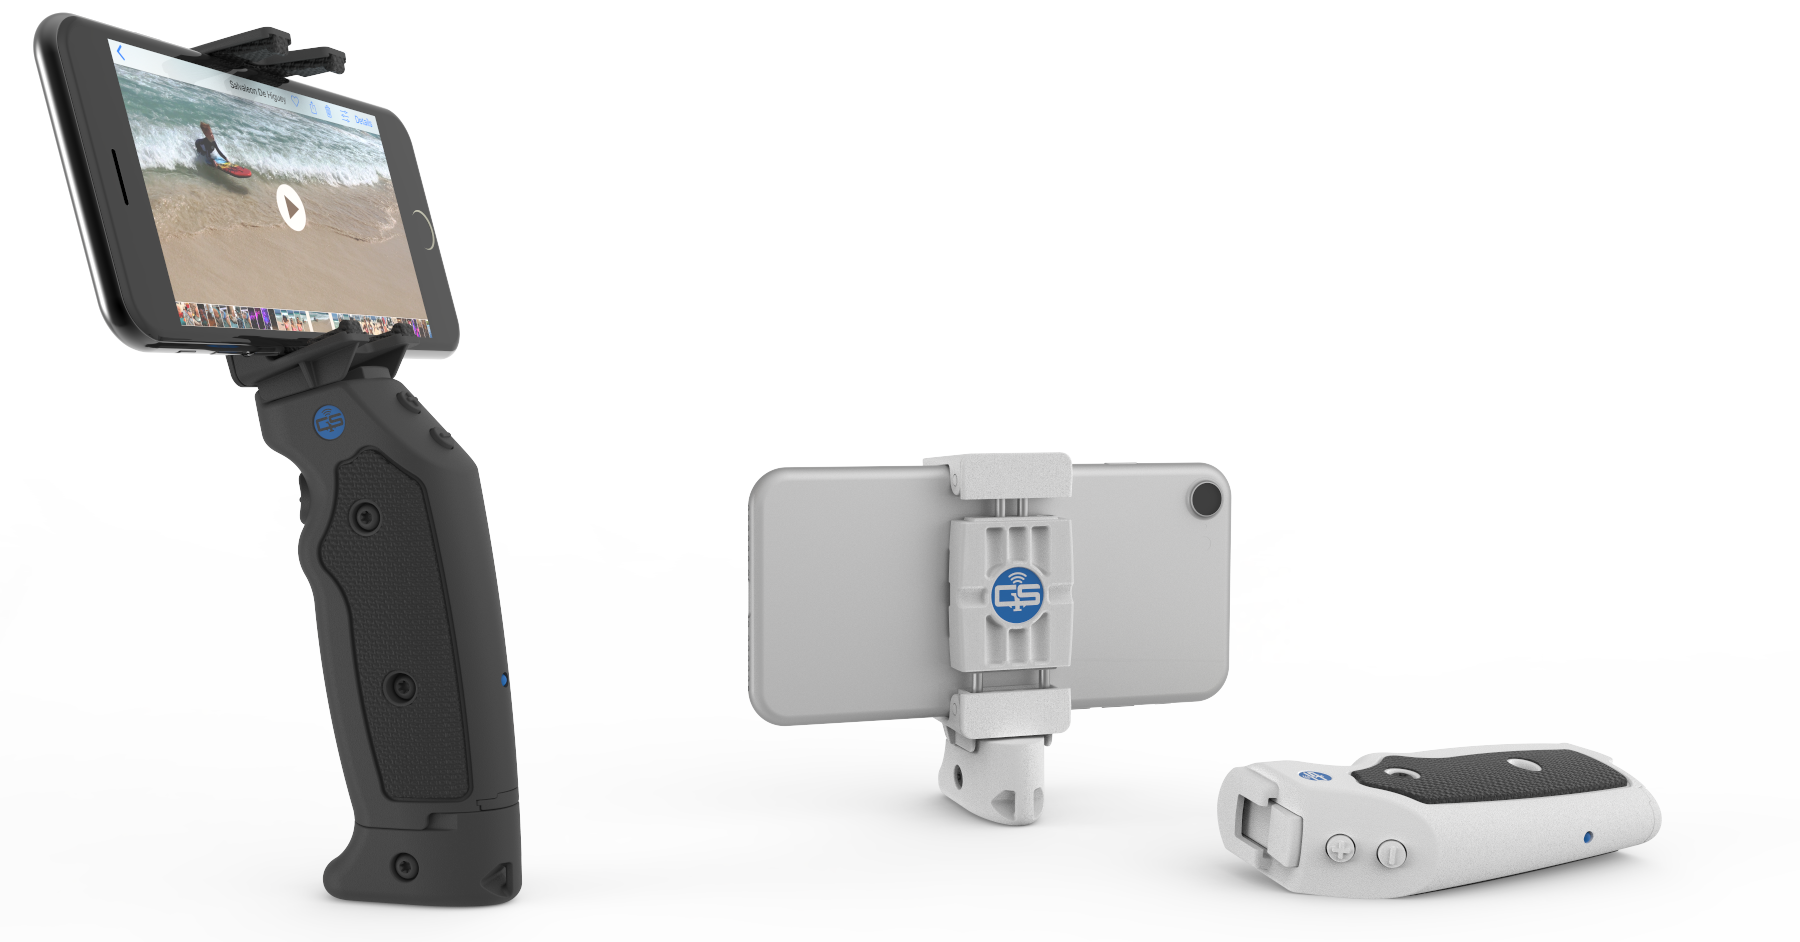
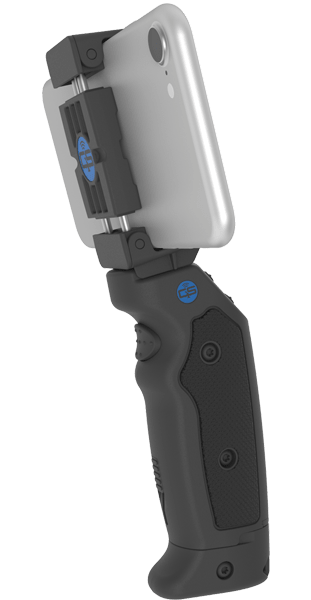
That's where Grip & Shoot comes in...
The beauty of this little gadget is that it allows you to actually hold the phone steady because you have a grip to hang onto.
That means no more hanging onto your phone with both arms extended away from your body.
But it's not just about having a solid grip. Grip & Shoot also makes triggering your shutter easier.
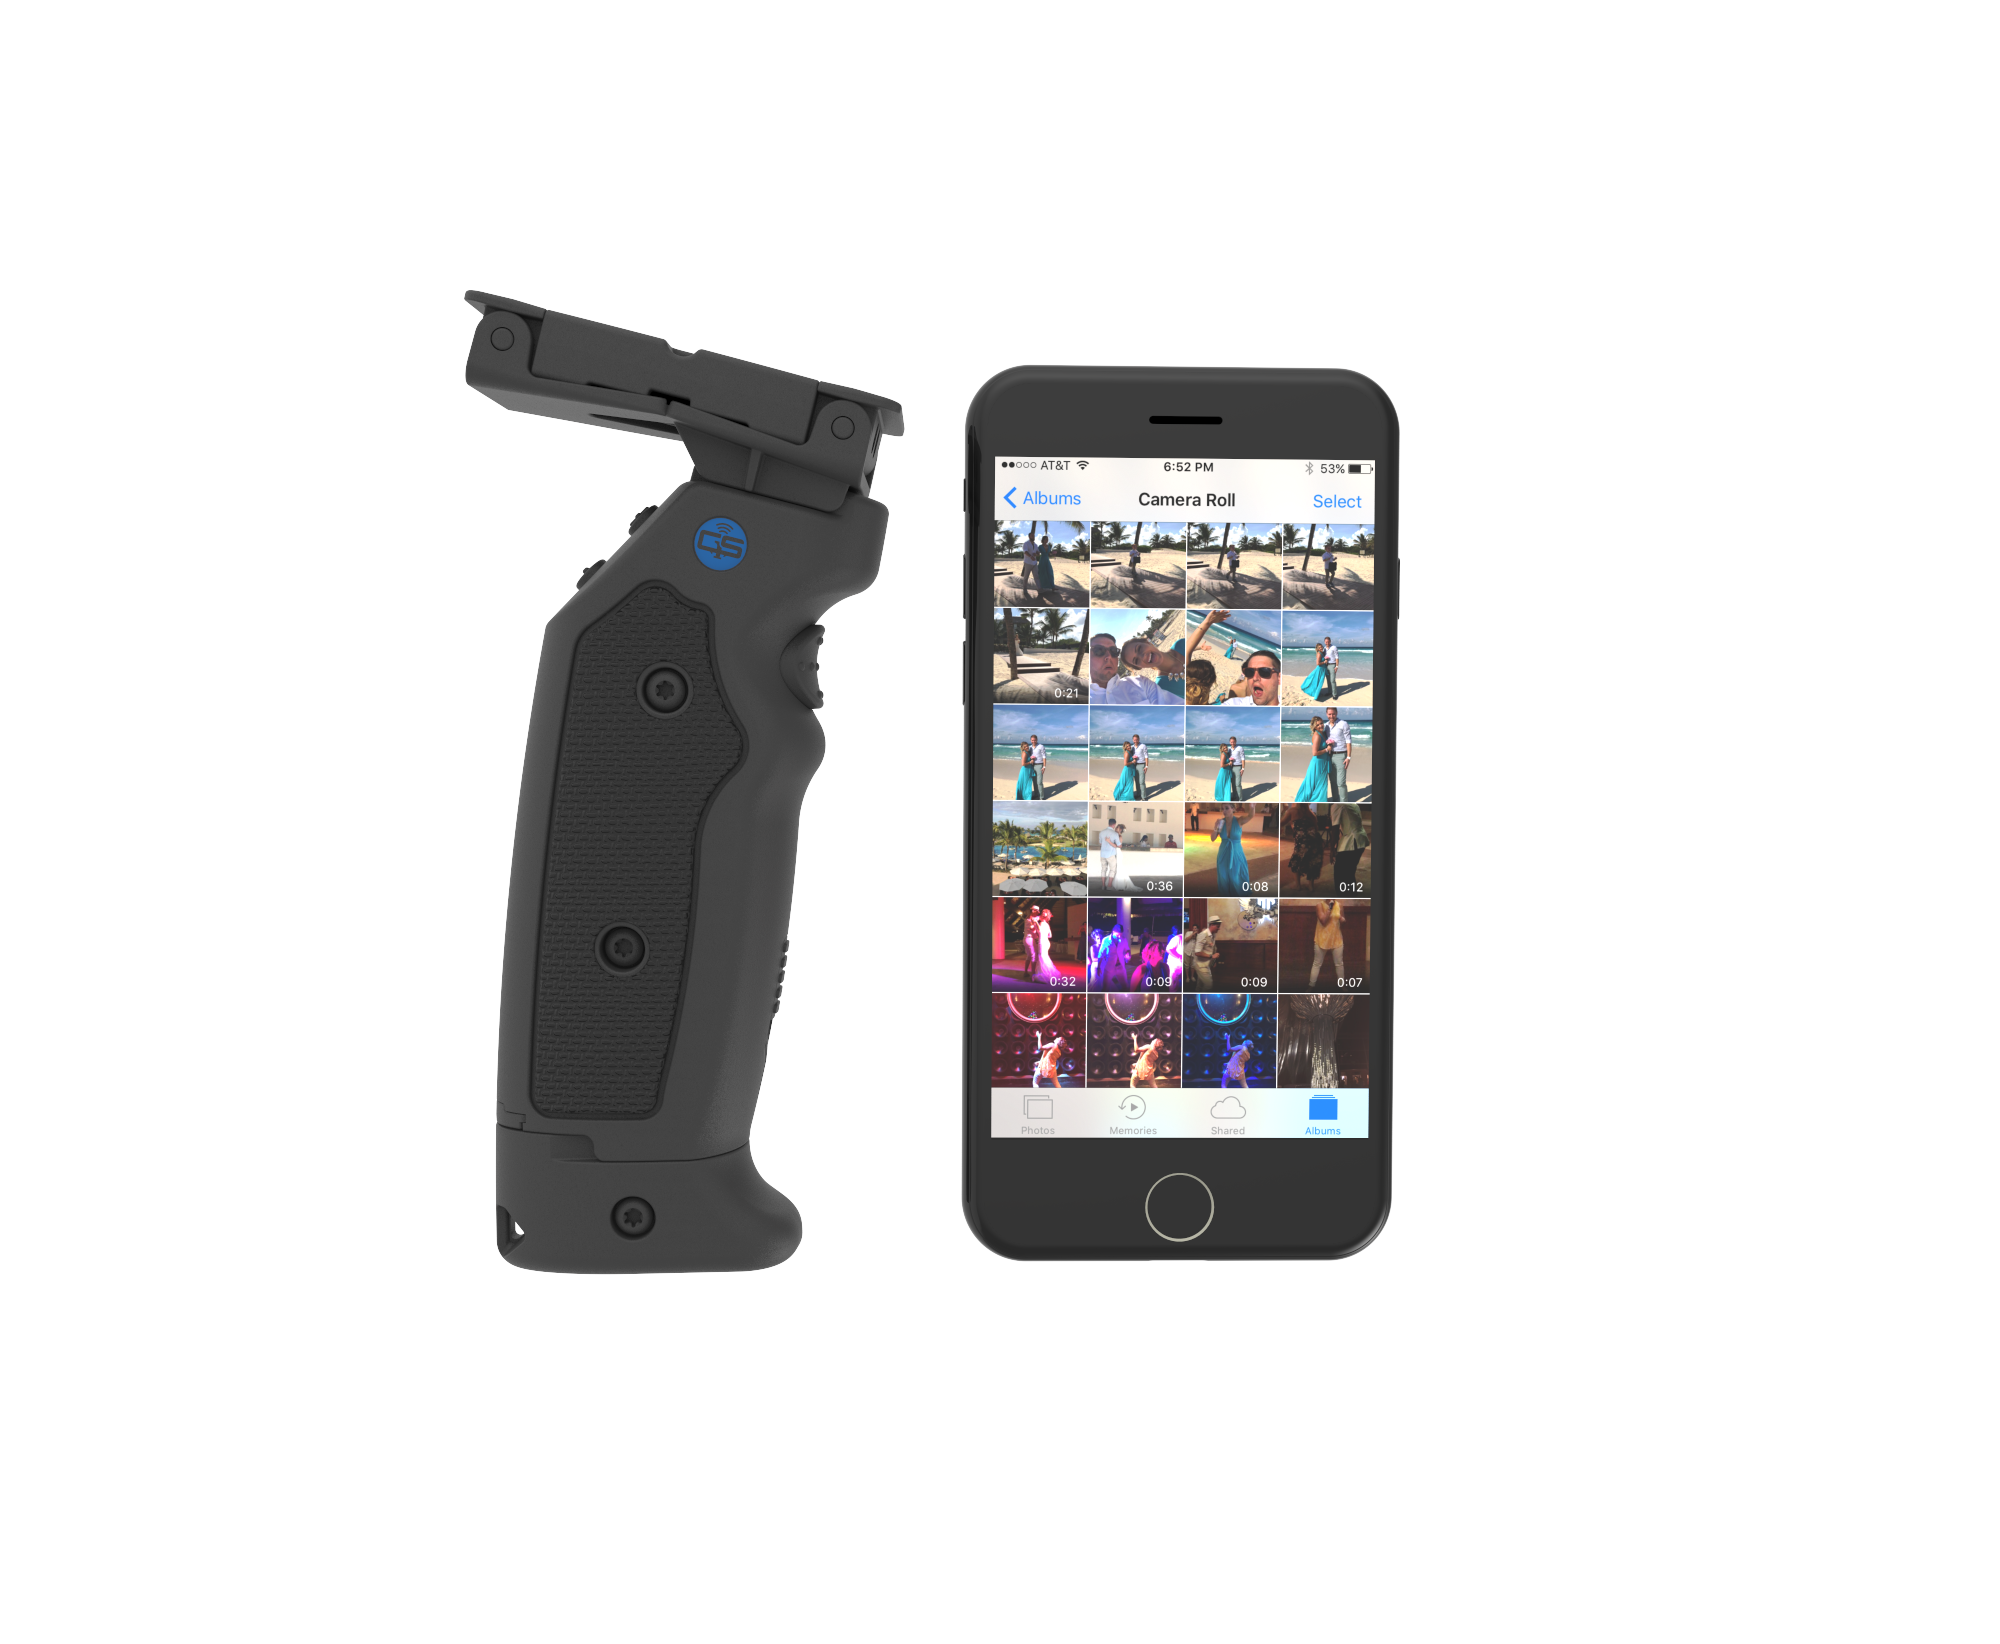
Think about it - you're usually holding the phone with both hands to steady it, and have to manipulate your fingers to tap the shutter button on the screen, right?
With Grip & Shoot, you can fire the shutter with the integrated trigger on the handle.
There's other buttons on Grip & Shoot too, and they're programmable. If you have a little coding knowledge, you can make them control whatever you like!
Even better, the Grip & Shoot has a detachable grip. That means you can put your phone on a tripod, take the grip with you, and be in a group shot or take a selfie from up to 100 feet away with Bluetooth connectivity. It's also Android and iOS compatible.
Talk about a great way to take a better smartphone photo!
Learn more about Grip & Shoot.
Use Common Rules of Composition
Just because you're using your phone doesn't mean that the traditional rules of photography composition don't still apply.
That means using the Rule of Thirds to create a more balanced and interesting shot.
When taking a portrait, that also means watching the background to make sure it isn't distracting. Minimize crazy colors, look for branches that appear to stick out of your subject's head, and be wary of areas of light and shadow that might interfere with the viewer's ability to connect with the subject.
When taking photos of landscapes, include foreground interest to draw viewers into the shot. Also strive to have a strong subject that acts as an anchor point of interest that grabs the viewer's attention.
No matter the subject, it's also necessary to think purposefully about the perspective from which you shoot.
Get low to emphasize foreground interest and the size of the subject. Get up high to show the scale of the scene and make your subject look smaller.
The key is to not simply point and shoot. Instead, take a few seconds to examine the subject matter and think about ways you can capture it in an image that's unique and interesting.
Pay Attention to Light
Lighting is crucial for a number of reasons.
On the one hand, smartphone cameras just don't have the same ability to manage light and shadow as well as traditional cameras. You don't have the luxury of changing the aperture or lens to get a different take on the scene, so you have to work with what the light gives you.
On the other hand, no matter what camera you use, it's important to consider the type of lighting you have available.
When it comes to natural light, it's much warmer and softer near sunrise and sunset. The result is images that are usually more pleasing to view with less contrast and fewer harsh shadows.
Light in the early morning and late evening is also highly directional. That is, it comes into the scene at a low angle, producing beautiful, long shadows that create tons of visual interest.
If you want the most impact, look for this kind of lighting when shooting with your mobile phone.
Add Your Own Interest
Sometimes you have all the right gear, a great composition, and wonderful lighting, but the scene still lacks interest at the level you want.
That's when it's time to add your own interest.
This could be as simple as being patient and waiting for something to happen - a bird landing in the scene in front of you, for example.
If you're taking a portrait, you might take things into your own hands and add a prop to add a pop of color or texture to the shot.
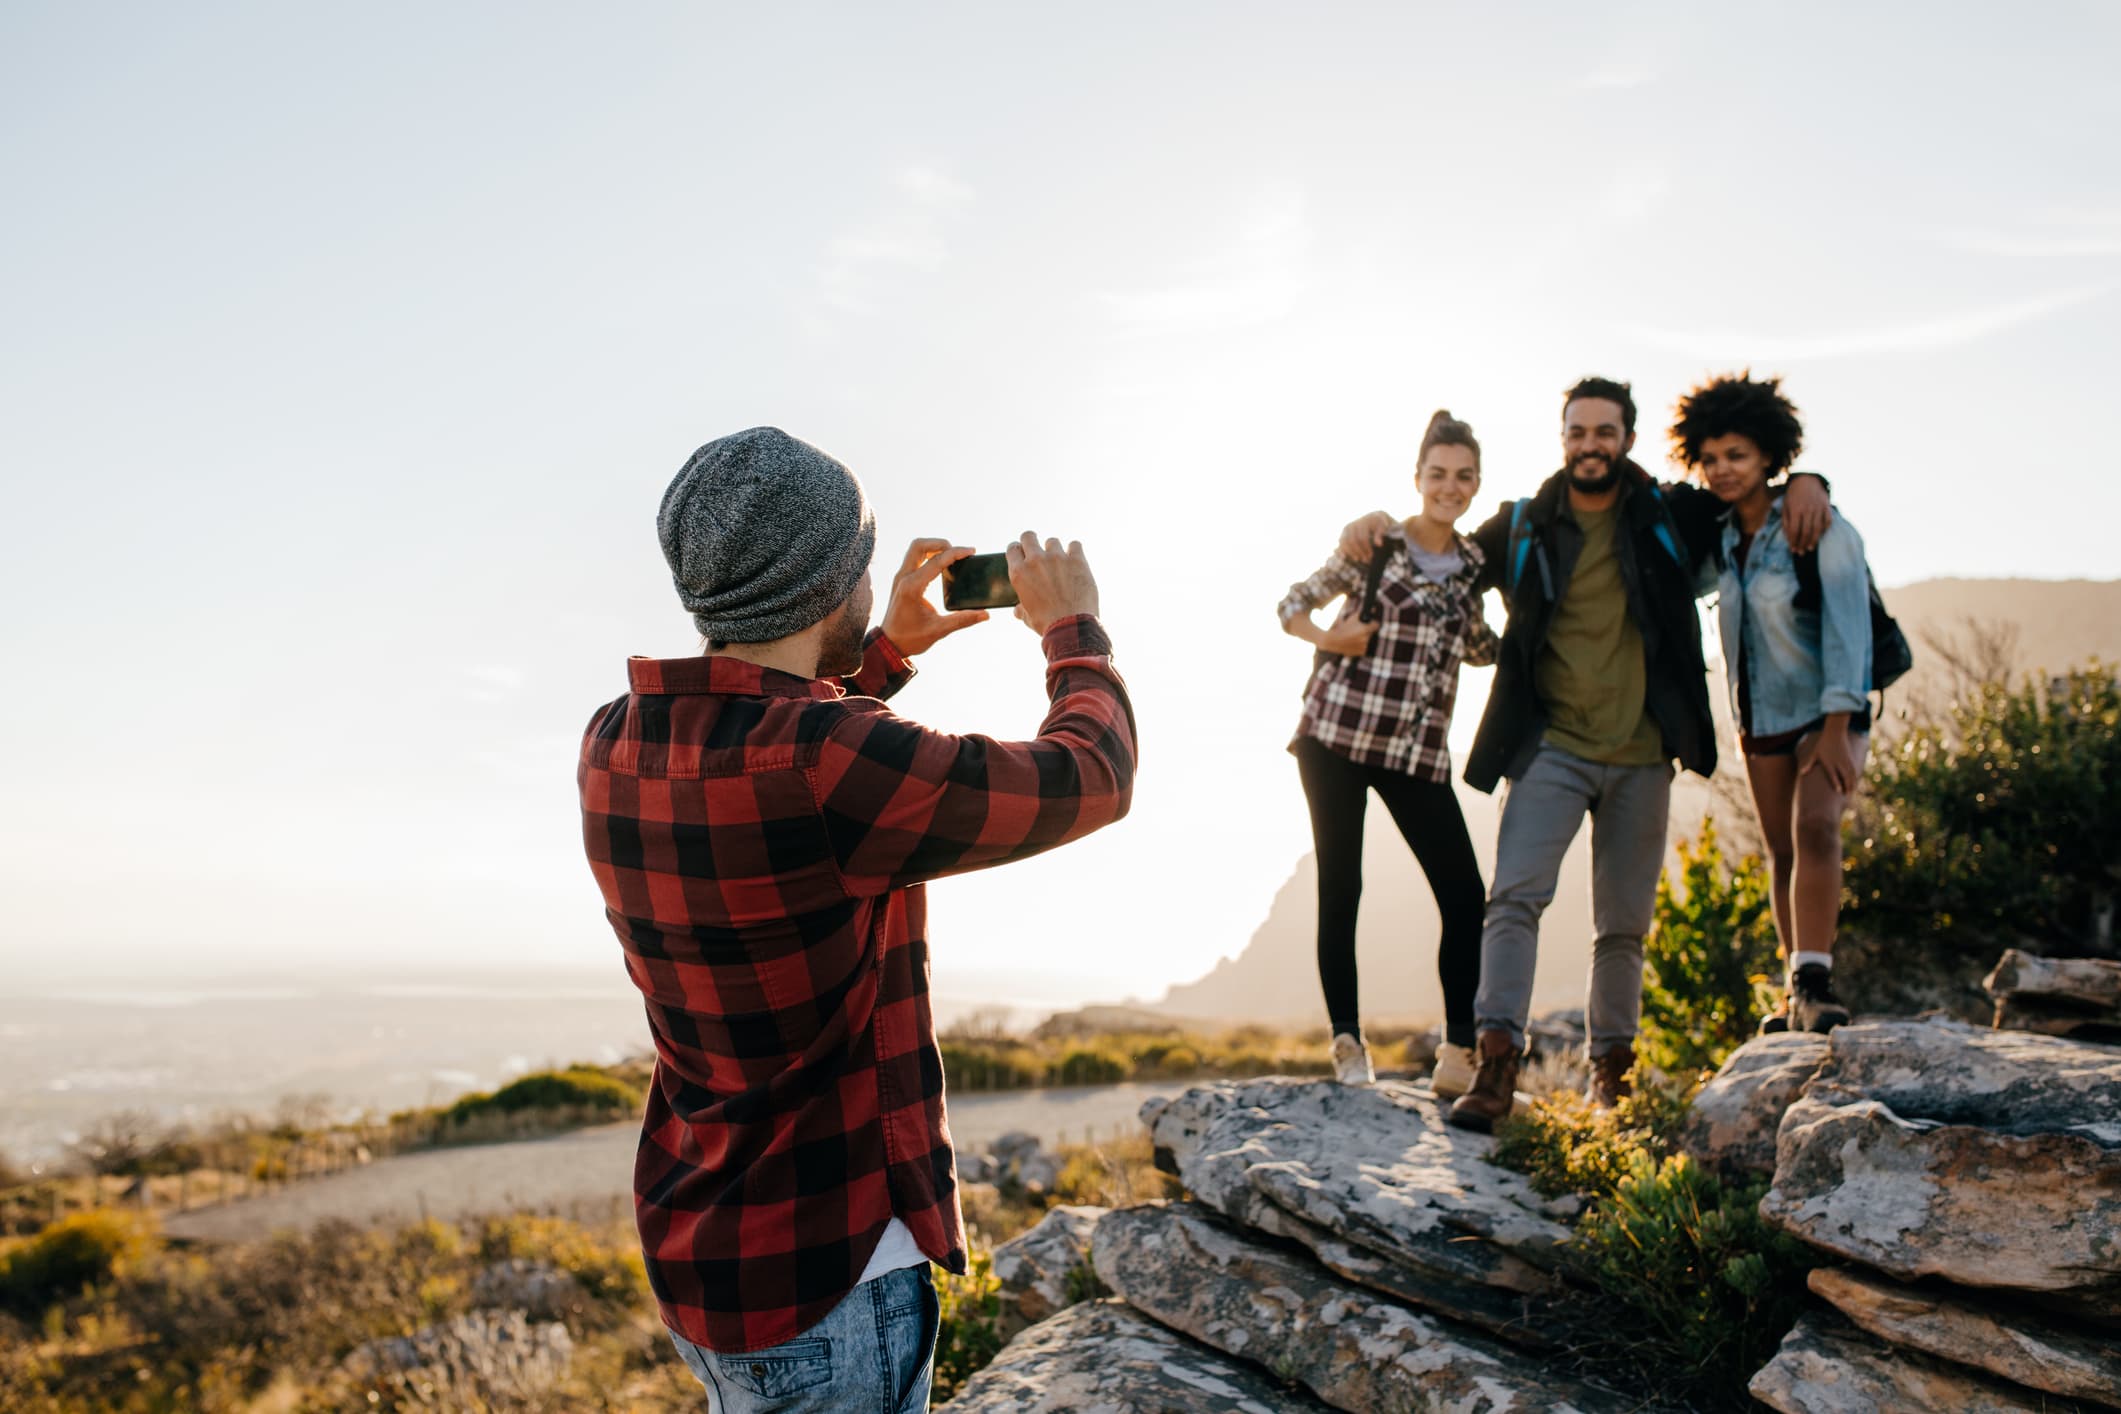
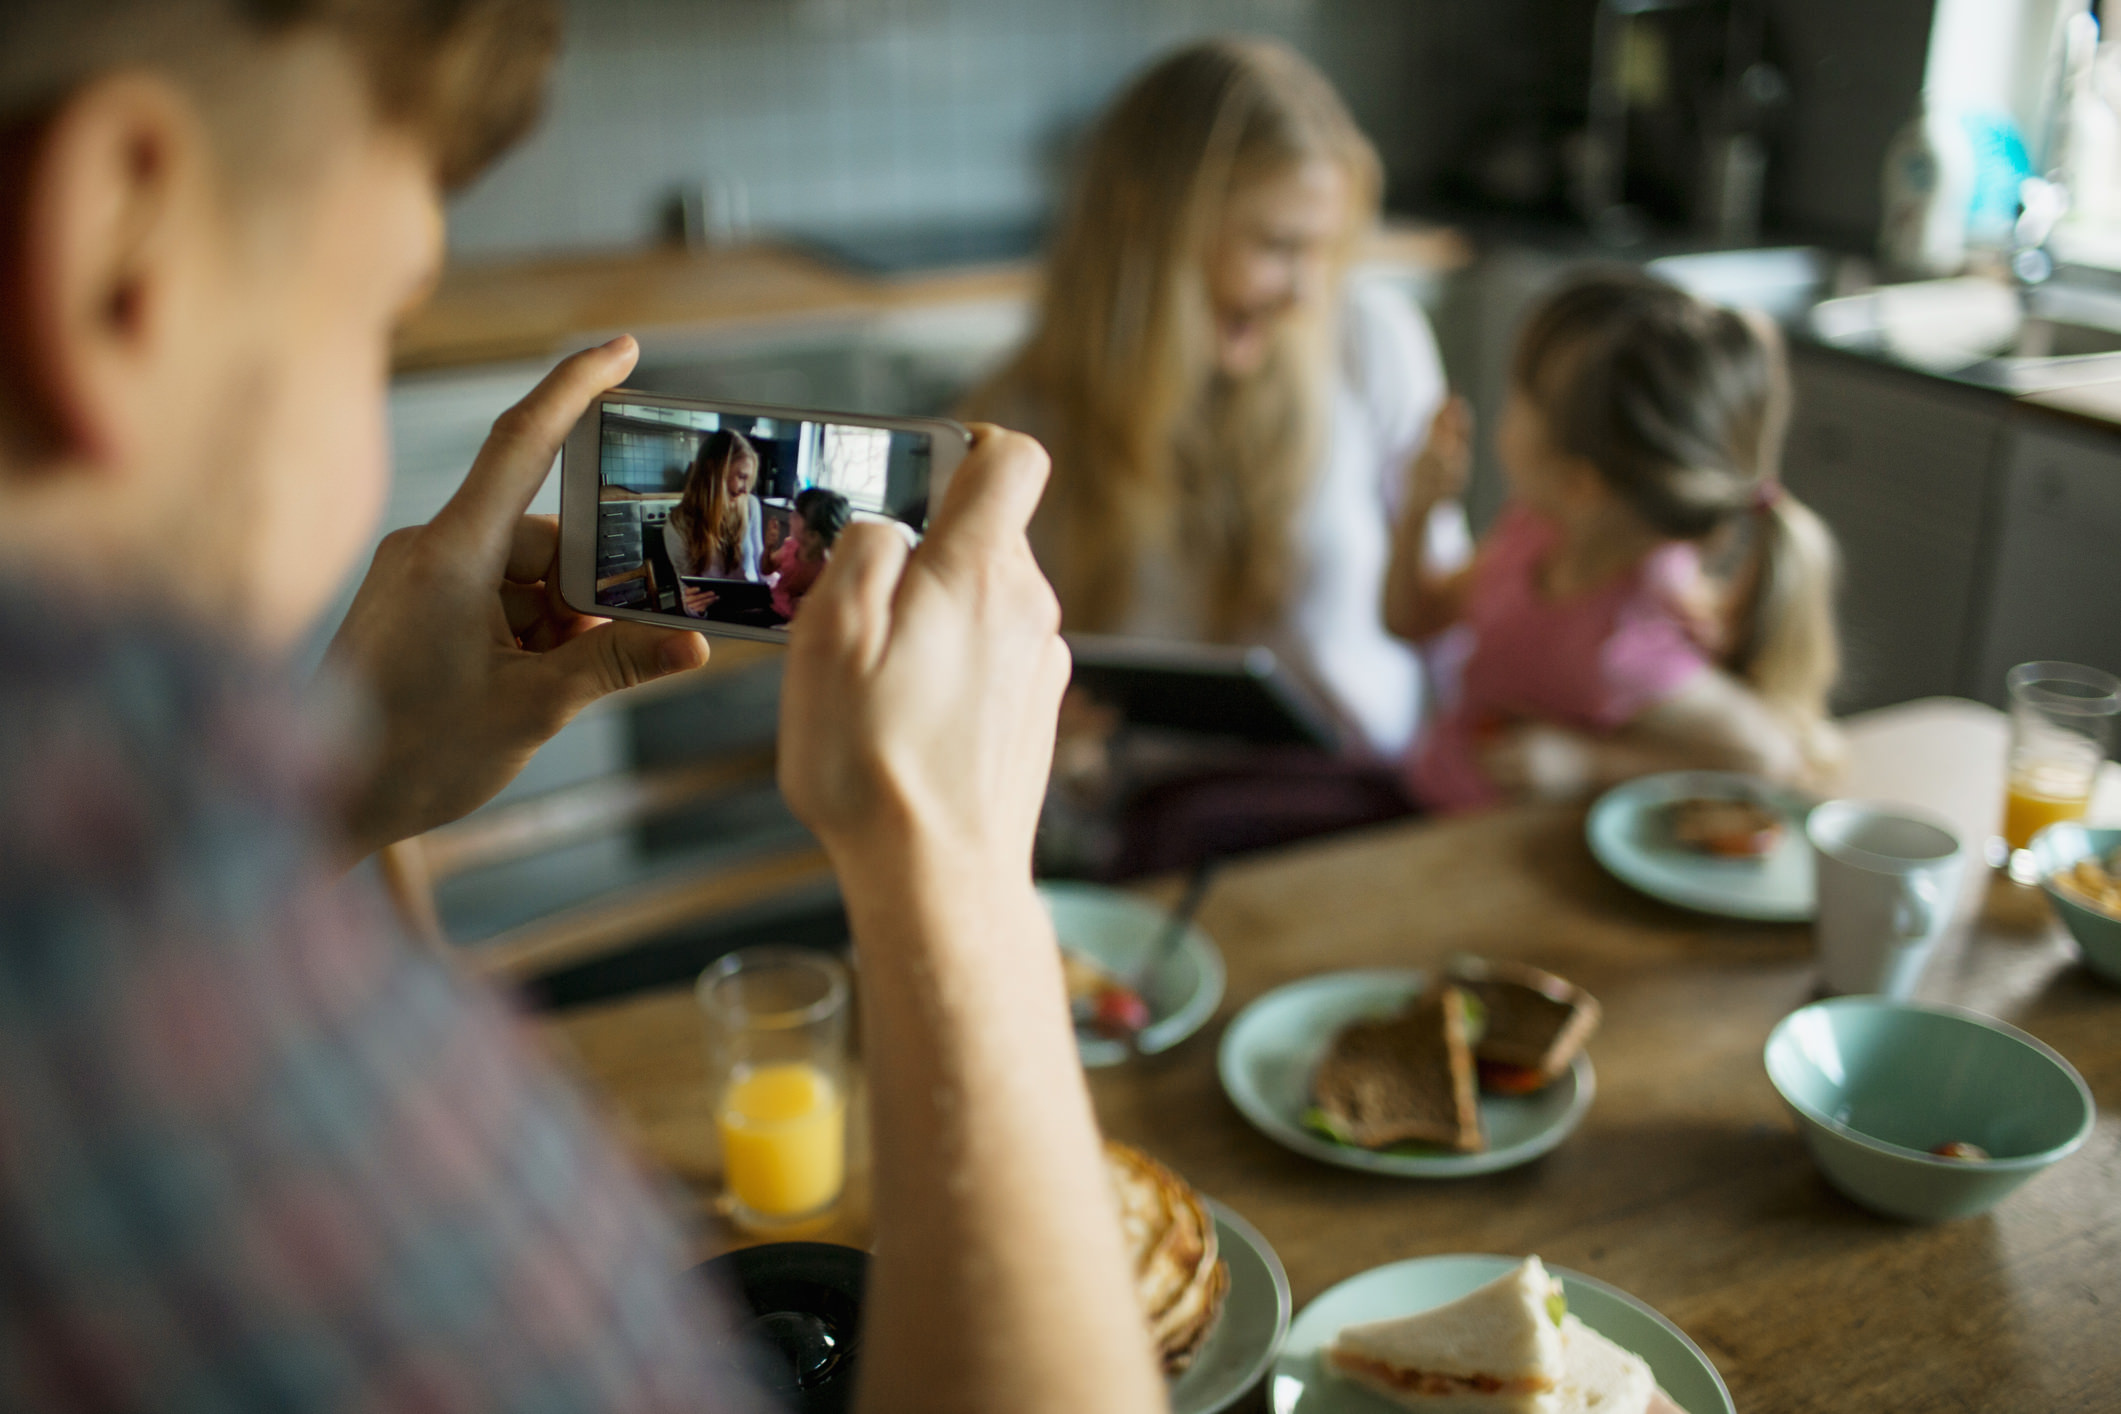
Another impactful trick is to incorporate a person into the shot. If you're photographing a landscape, have a friend stand or sit in the frame (or do it yourself). Doing so immediately adds interest to an otherwise boring landscape.
If you're taking a portrait, adding another person to the shot adds an interesting dynamic, as seen in the image above. Make your subjects laugh or interact with one another, and you'll see what I mean!
Work At It

It's easy to get lazy when shooting with your phone because it's so easy to use.
But if you want the best smartphone photos, move around, look for different perspectives, and challenge yourself to frame more interesting shots.
Also keep shooting.
This is especially important when taking portraits because it's often in between the "real" takes that your subject is most relaxed. That enables you to get a more genuine portrait.
The point is that you should constantly be thinking, moving, and working to get a better photo. Don't fall into the trap of just standing there, phone at arm's length, taking photos (or shooting out the window of the car, either).
Get familiar with these tips, get the necessary gear, and you'll be set to see a massive improvement in your smartphone photos!
We Recommend
How to Find the Best Angles for Your Smartphone Photos

Though it doesn't get as much attention as the rule of thirds or lighting or getting the focus just right, the angle from which you take photos is an important thing to think about.
That's because from one angle of view, a subject might look boring, but from another angle of view, it might look fantastic.
As a result, when thinking of how to take better photos with a smartphone, one of the first things you need to work on is the angle from which you photograph the subject.
Here's a few smartphone photography techniques that will help you find the perfect angle.
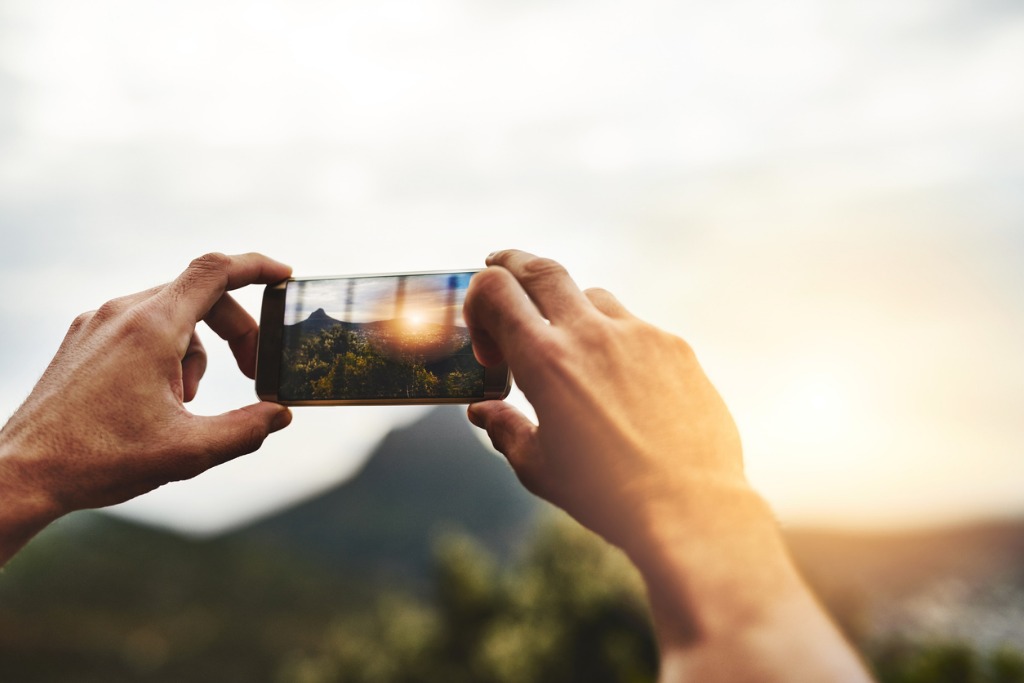
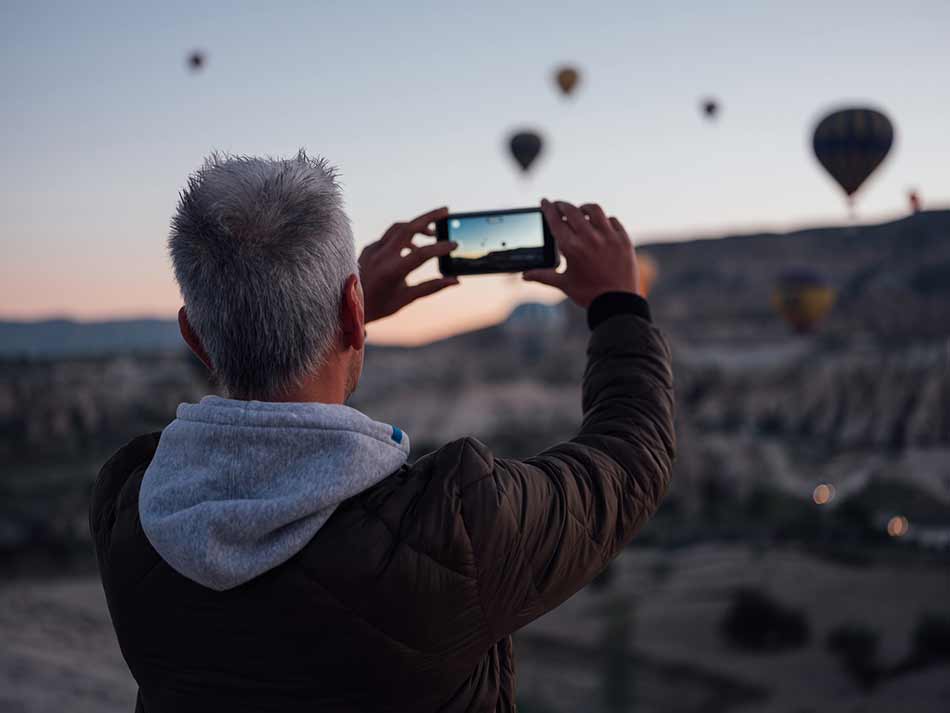
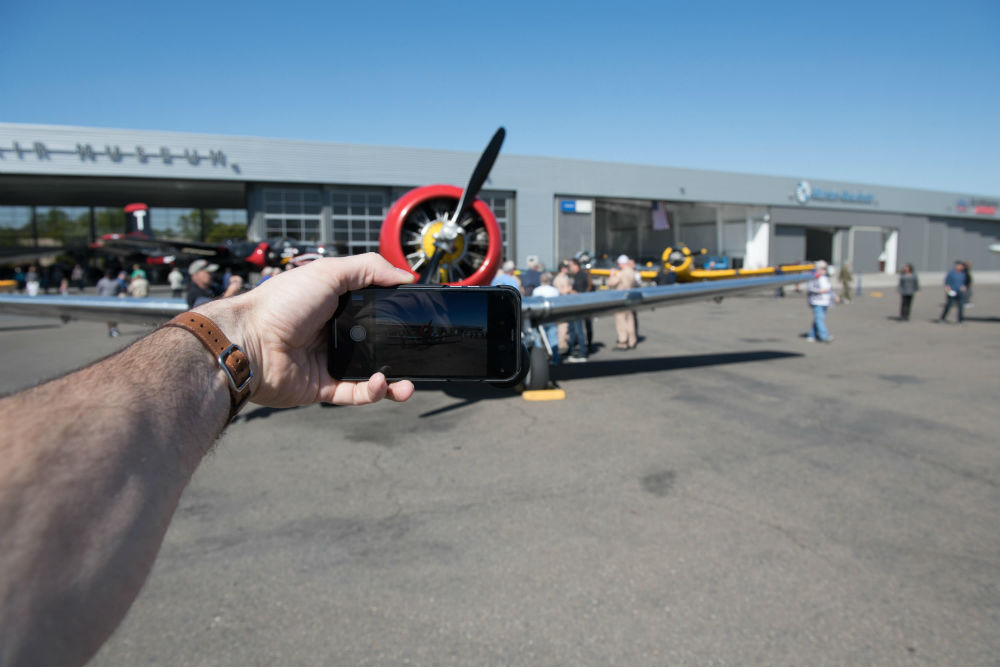
Consider the Height of the Camera
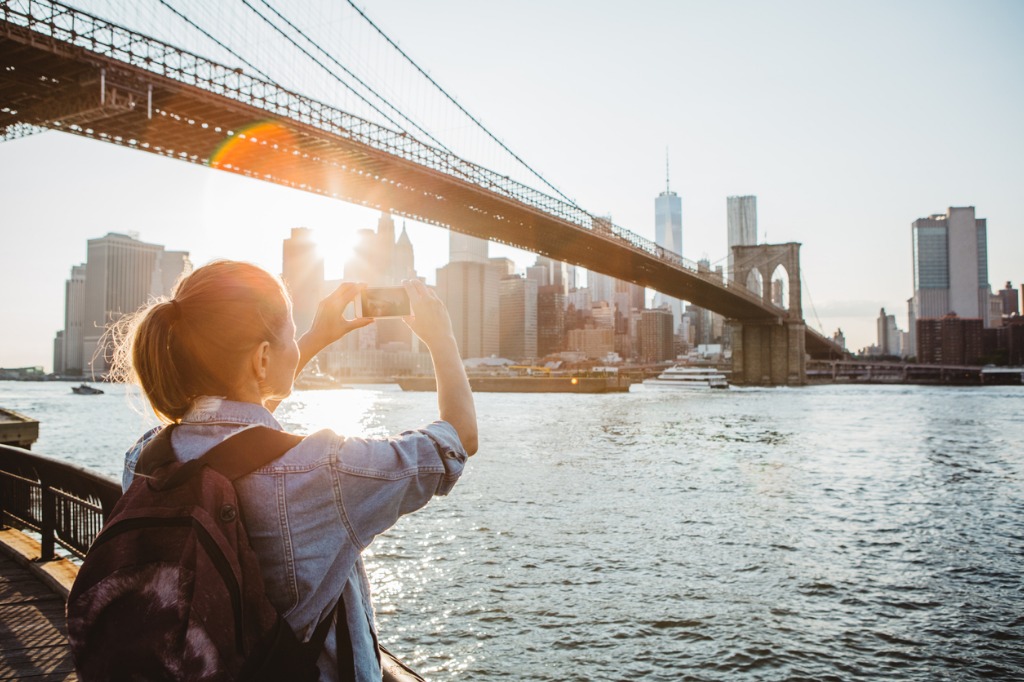
When you think of someone taking a photo with their smartphone, what comes to mind is probably something like what's shown in the image above - the person holding their phone at around eye level and at arm's length.
And while in some instances taking a photo from your own eye level can result in an interesting shot, more often than not, varying the height will help you find more pleasing and unique angles.

By getting down low or below the subject and shooting upward, for example, you can focus the viewer's attention on a particular feature of the subject.
In the shot above, using a low shooting angle allowed the photographer to highlight the interesting arches in the towers of the Brooklyn Bridge.
Not only that, the patterns created by the bridge's cables become a unique element to the shot, as do the beautiful colors of the sky above.
Compared to the first photo, this one is far more unique, and was achieved, in part, by simply changing the angle of view.
Learn More:

Do a 360-Degree Tour of the Subject

Another iPhone photography tip to bear in mind is that you need to walk around your subject (to the extent possible) to find the most pleasing angle from which to shoot.
Granted, some subjects - like a mountain or a waterfall - are going to be difficult to walk around.
But if you're photographing a person, a flower, or some other small subject, it's easy to take a few seconds to move to the left and right to see which perspective is the best.

Not only does moving around the subject help you find the subject's best angle, but it also allows you to work out the best background.
For example, if you begin by shooting photos from the front of the subject and find that the background is too distracting, you can simply move to the left or right to try to find a better background view.
Combined with varying the height from which you take your photos, this will help you maximize the quality of the shot by making the subject stand out the best in the photo.
Learn More:
- iPhone Photography Tricks You Don't Want to Miss
- Simple iPhone Photography Composition Tricks That Have Tons of Impact
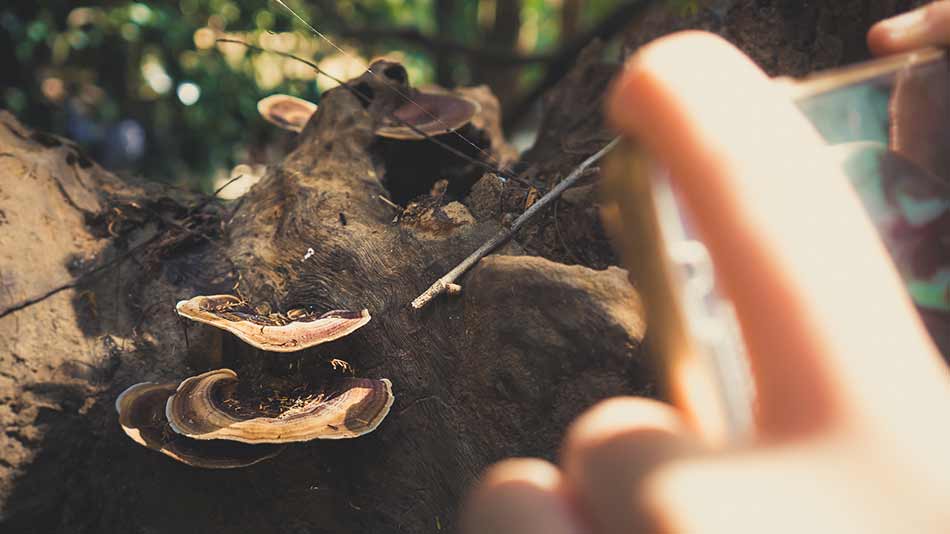
Try Getting Close to the Subject

In addition to varying the angle from which you shoot in terms of height and your position related to the subject, getting in close is another way that you can vary the angle for more interesting smartphone photos.
For example, if you're taking a photo of a field of flowers, it can end up being a really nice shot.
But that's precisely the type of photo that most people take...
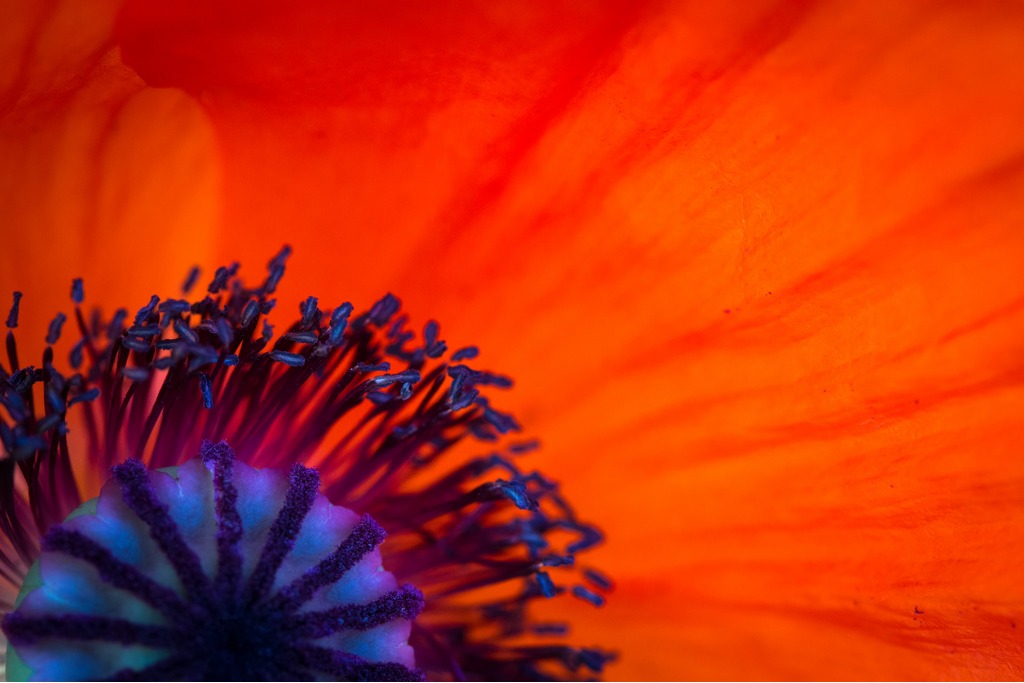
Instead, get up close to the subject with your phone and see what you can do to highlight the smaller details of the scene.
Focus on a petal, for example, and make its shape, color, or texture the focus of the shot.
If there's a bee or ladybug crawling on the flower, make that the subject.
The point is that by changing the distance from which you're shooting, you can find an array of new and interesting subjects to catch the viewer's eye.
Learn More:
- Take Control of Your iPhone Camera With These Mobile Photography Tricks
- iPhone Photography Tricks Straight From the Experts
How to Take Better Photos With a Smartphone
Varying the angle from which you shoot will do wonders for your smartphone photography.
But another thing to consider is how you can help your phone be better equipped for better photos.
I've been shooting with SANDMARC iPhone lenses for my iPhone X the last few months, and they have proven to be a very worthy investment on my part.
For starters, having a wider selection of lenses in my SANDMARC Kit (wide-angle, macro, and fisheye) than what my phone has natively expands my ability to be creative.
Beyond that, though, I appreciate the fact that these lenses are so well made.
These things aren't cheap with low-grade optics that degrade the quality of my iPhone photos...
Instead, SANDMARC uses precision-engineered glass that has multi-element optics with multi-coatings. That means minimal distortion and maximal sharpness.
These lenses are easy to use, too - you can simply clip them onto your phone or you can use them together with SANDMARC's ultra-thin phone case mount.
As far as smartphone photography techniques go, it's hard to go wrong with doing a little work and varying the angle and distance from which you photograph your subject.
But if you pair that with high-quality smartphone lenses, there's really nothing to stop you from taking awesome smartphone photos!
See how you can step up your smartphone photography game with new lenses in the video above by SANDMARC.
We Recommend
How to Step Up Your Mobile Photography Game
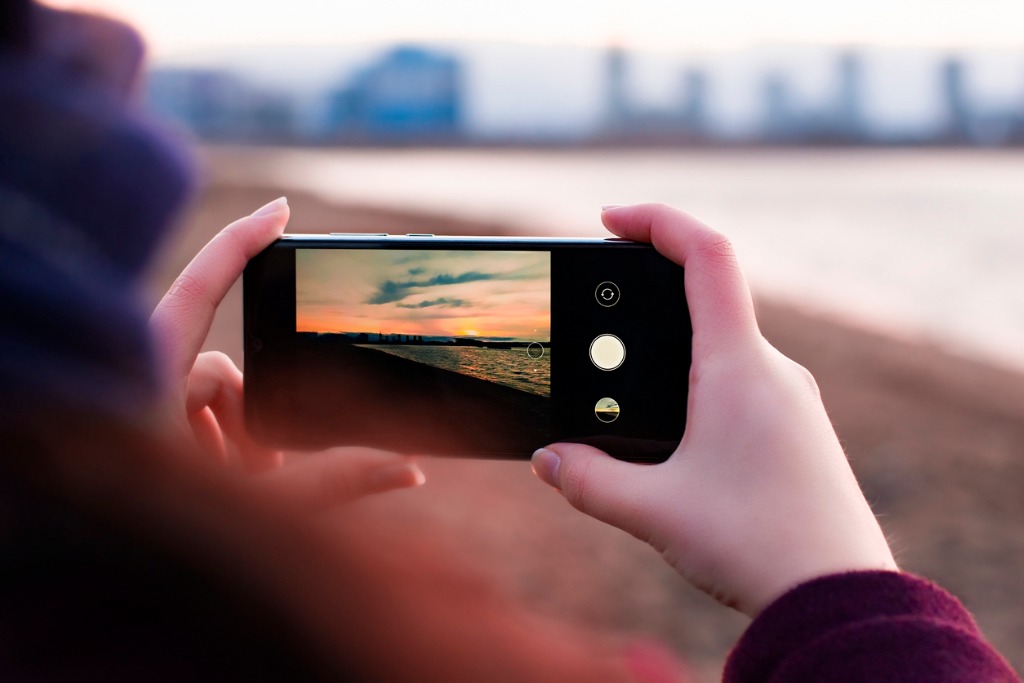
photo byIrina Gutyryak via iStock
We have had a ton of people asking us to write more articles about mobile photography. As professional photographers, we recognize that cameras are getting better and better at keeping up with more traditional photography equipment and we also recognize that mobile photography is simply more attainable for a lot of people.
So, we decided to cover a YouTube video by Drew Tooley, who specializes in mobile photography. The video covers multiple mobile photography tips, and unlike a lot of mobile photography videos out there, it isn’t specific to iphone photography, so anyone with a smartphone will find it useful.
Clean Your Lens
photo byYakobchukOlena via iStock
I get that this isn’t the only tip you’ll need to learn how to take good photos with a phone, but it’s a pretty basic one that you should never skip.
While writing this article, I took a quick look at the lens of my iphone and I think it’s very possible that I have leftover jelly on it from my lunch. I’m sure if you do the same, you would be pretty shocked at what you find.
We take our phones with us absolutely everywhere. We stuff them in our pockets, we put them on our desks while we are at work, and I know that at least a few of you are using your phones even while you’re in the shower or using the bathroom.
They are absolutely bound to get gross.
The easiest way to clean your lens is with a lens cloth, which costs less than a couple dollars. If you don’t have a lens cloth handy, then you can even just wipe it off on your shirt.
Your mobile photography game just won’t be as good with a dirty lens.
Use the Grid System
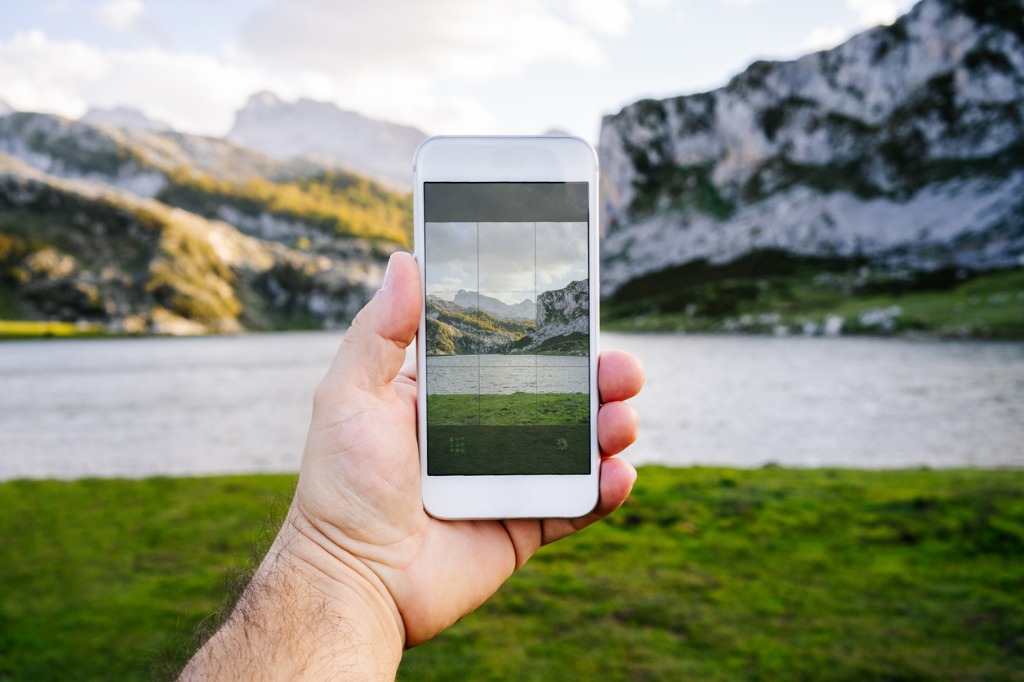
photo byDani_Fotografo via iStock
I find that a lot of mobile photography tips for beginners will suggest that you use a certain setting on your phone and then not walk you through how to get to that setting.
I don’t believe in that.
So, in order to use a grid system, you need to head to your settings, scroll down to your camera, and then toggle the “grid” button under your camera settings to turn it on or off.
So, what does the grid system do for your mobile photography exactly? It helps you to follow the rule of thirds by placing lines over your screen. It also helps you to keep all of your mobile photography level, even without a tripod.
Learn More:
Set Your Exposure
photo bymartin-dm via iStock
This is one of the smartphone photography tips that will change a little bit if you’re an Android user. I’m going to walk you through how to set your exposure if you are using an iPhone for your mobile photography.
You just have to open up your camera, push and hold down on your screen, and then you’ll see a little bar which will let you slide your exposure level either up or down.
This will help you adjust the exposure based on the conditions in which you’re shooting, which will help you get a well-exposed image.
Zoom With Your Feet

photo byStefanieDegner via iStock
As good as mobile photography is in 2021, it still isn’t foolproof. This is especially true for the zoom function…
If you can prevent it, don’t zoom in with your smartphone at all. Instead opt to get physically closer to your subject and fill the frame.
The digital zooms on smartphones are terrible, and if you zoom using that method, your photos will be very grainy. So, moving with your feet and getting physically closer to your subject is a much better option.
Use an App to Shoot RAW Images
There are a ton of smartphone photography apps available now. Some of them are much better than others. Try and find one of these apps that will allow you to shoot RAW images.
RAW images are much easier to edit, which means your cell phone photography will look even better when you shoot with them.
Drew recommended Adobe Lightroom (iOS, Android), which you can get for a monthly subscription. Other apps that let you shoot in RAW include Camera X for Android, Darkroom for iPhone, or VSCO for either Android or iPhone.
While Drew’s video may have seemed quite simple, all of these tips are actually going to drastically change the types of photos you can take with your smartphone. Having a clean lens, shooting in a RAW format, and basically just learning how to make your smartphone camera do what you want it to do, instead of what it wants to do for itself, takes very little time, but makes all the difference.
Learn More:
We Recommend
How to Take Better Portraits With Your Smartphone

If you're like me, you use your smartphone as much for photography as you do to talk or text.
It's the nature of the beast these days...
And where not that long ago photos taken with your smartphone left a lot to be desired in the quality and resolution department, that's no longer the case.
Today's smartphones are packed with photography features that help us all take better photos.
It's just a matter of using those features - and add-on accessories - to take those photos to yet another level.
Here's a few things to keep in mind that will help you take better portraits with your mobile phone.
Get a Lens

Your phone's lens isn't bad, but with an add-on lens, it could be even better.
By that I mean that with an add-on lens like the Kenko Real Pro 0.65x Wide/Macro lens shown above, you get far more versatility out of your phone for taking photos.
On the one hand, a wide-angle lens is ideal for taking photos of groups of people - your friends at the beach, your family at a backyard BBQ, and so forth.

Additionally, with a wide-angle lens, you can take selfies that actually incorporate more of your surroundings in the frame.
On the other hand, a wide-angle view is great for landscapes and cityscapes too.
But because this lens is a two-in-one, you can take awesome macro shots with it as well.
Just focus in on a small detail - a person's hands, for example - and take a unique and unexpected portrait

When looking for an add-on lens for your phone, you want to get something that's got a good design and uses quality materials.
What I like about the Kenko lens is that it clips onto my phone. I don't need a special phone case. There's no weird mounts for the lens to screw into.
Instead, I just clip it on and start taking photos - it's as easy as that!
Kenko is also known worldwide for its quality materials, in this case, the fine-processed glass that make up the optical elements.
With other lenses, you have to worry about image degradation, but that's just not the case here.
Taking great portraits certainly depends on a lot of factors - your creative eye, your ability to communicate with the model, and the lighting, to name a few.
But as I've learned, by having the appropriate gear - and gear that's well made and easy to use - the quality of my smartphone portraits has benefitted greatly.
Learn More:
- Get the specs and prices on Kenko Clip-On Smartphone Lenses
- Shoot Like a Pro With These Mobile Photography Tips
- 4 Fun Posing Tips for Portraits of Girls
Learn to Communicate
Unless you're using your phone for street photography, you should constantly be giving your model feedback regarding what they're doing.
That means giving them direction about how they're posed, how they're smiling (or not smiling!), what they're doing with their hands, and so forth. After all, the portrait above didn't make itself - the photographer directed the model on how he should pose.
Additionally, tell them what your goal is - do you want them to look excited or sad? Pensive or angry? Should they sit or stand, look at the camera or off-camera?
The more communicative you are, the better your model will understand what they need to do so you can get the shot you want.
Granted, if you're making a portrait of a baby or a dog, the lines of communication will be somewhat limited.
But that shouldn't stop you from giving them feedback in any way you can (i.e. baby talk for a baby or a treat for your dog when he's done what you want).
In the end, even saying things like "Yes, that's it!" or "You look beautiful!" are enough to give the model more confidence to continue doing what they're doing.
But if you just stand there behind your phone and offer nothing in the way of communication, you'll likely find that your model has no idea what to do - and your photos will suffer for it.
Learn More:
Make Manual Adjustments
As powerful as today's smartphone cameras might be, they still have their limitations (thus the need for an add-on lens!).
That's why camera apps are a necessary addition to your smartphone.
By using something like VSCO Cam, you not only get an incredible suite of editing tools, but you also get more sophisticated camera controls.
For example, you can shoot in RAW, adjust exposure compensation and white balance, and even set the shutter speed and ISO as well.
That last one - ISO - is extremely important because many native smartphone cameras will automatically adjust the ISO as the lighting conditions change. That's why photos in dim lighting are often so grainy, but as seen above, with VSCO, they aren't.
By taking those controls away from your phone and putting them in your hands, you're more likely to get the kind of portraits that make you say "WOW" as opposed to the ones that make you say "What went wrong?"
Learn More:
If you want even more great portrait photography tips for smartphones, check out the video below by Amanda Margareth:
We Recommend
How to Take Good Photos With a Smartphone
It's no secret that the cameras in our mobile phones are better than ever.
Yet, cell phones still have some limitations that prevent them from being as good of cameras as a traditional DSLR or mirrorless system.
That doesn't mean that you can't take fantastic photos with your phone, though...
In this tutorial, you'll learn practical tips for how to take good photos with a smartphone.
Alter Your Perspective
One of the worst things you can do when taking photos with your mobile phone is to stand up straight and take your photos from your eye level.
That's what everyone does, and that makes your photos super boring.
To spice things up, move around your subject and work hard to find the best angles from which to take photos.

That might mean sitting down, kneeling down, or even lying down on the ground and shooting upward. You might also look for a way to get a higher vantage point and shoot down towards your subject.
Either way, a low or high perspective will be much more interesting for people to view than the typical eye-level shot.
Learn More:
- Essential Tips for Better Photos With Your iPhone X
- iPhone Photography Tips Straight From the Experts
Get Creative

It's easy to say "get creative" if you want to learn how to take good photos with a smartphone...
But at the end of the day, finding your voice as a photographer means finding your photography style and trying new things.
Whether that's shooting through something as seen above, playing around with new and interesting ways to process your photos, or something in between, the more time you spend trying to find ways to make your photos stand out, the better your images will be.
And remember - since your phone is, well, mobile, take the convenience that that brings to experiment with all kinds of subjects.
Photograph people on the street, find interesting textures on buildings as you walk through the city, get out into a landscape and take up-close shots of small details. The possibilities are endless!
In the video above, COOPH offers up even more ideas for getting creative and learning how to take good cell phone pictures.
Equip Your Phone With Better Lenses
Clearly, one of the greatest benefits of camera phones is that they are so small, lightweight, and easy to use.
But given their small form factor, it's not like Apple, Samsung, and other phone manufacturers can squeeze a nice, big lens into the phone.
That's where SANDMARC comes in...
I have a set of SANDMARC lenses for my iPhone X, and I can tell you that they are really, really good lenses.
When you unbox these lenses and pick them up for the first time, you can tell just by the feel of them that they are built with a keen eye for quality.
Not only are the lens housings well-built, but the lenses themselves have premium multi-coated optics, which means you get sharp and clear photos.
What's more, these lenses produce minimal ghosting, flare, and other aberrations - that's not something all mobile phone lenses can say.
I also really appreciate the variety of lenses that SANDMARC offers.
I have a wide-angle lens that provides 2x the field of view, which I use all the time since I typically photograph landscapes.
But I also have a macro lens for those occasions that I want to get up close and personal to my subject, as well as a fisheye lens (shown below) that has helped me see things in a completely new light and helped me become a more creative photographer.
So, not only are these lenses impeccably made, they can also help you get into a better photography groove. What's not to like about that?!
In the end, if you want to learn how to be a good photographer with a phone, you need to put in the time and effort, just like you would need to do if you were shooting with a DSLR or mirrorless camera.
But if you find ways to be a little more creative, spend some time thinking about how the perspective from which you shoot impacts the look of your shots, and invest in some high-quality mobile photography accessories, I think you'll find that you're well on your way to taking much-improved photos with your smartphone.
Learn More:
We Recommend
How to Take Minimalist Photos With Your Phone

Photo by a_Taiga via iStock
The great thing about modern smartphones is that they are packed with incredible features that make them excellent cameras for beginners (and enthusiasts and professionals as well!).
In fact, you can do a great deal with your smartphone in terms of photography, from capturing people to landscapes and everything in between.
One of my favorite photographic pursuits is minimalism. I love how clean and simple minimalist photos are. It's a challenge, too - there's so much "noise" out there and so many details that we can include in our images, so it's a nice change of pace to try to eliminate all that clutter and produce a simplified, yet powerful image.
And, as you guessed it, you can tackle minimalist photos with your phone.
In the video above, the fine folks at COOPH give you six easy-to-implement strategies for taking minimalist photos with your phone.
The tips they provide are both practical and creative in nature.
For example, you can use your phone's macro mode to take beautiful close-ups of just about any object. They use water spots on a glass shower door and the tire of a car as examples of subjects you can use to create an interesting macro photo.
And that's just the start!
Watch the complete video above for more creative smartphone tips or visit the COOPH website.
Learn More:
We Recommend
Look Ma', no Hands! Hands-Free Video with your Smart Phone
Have you ever wished you could record something you were doing, but needed both of your hands to get that something done? You're not the only one. With action cameras like GoPro available, that isn't awfully hard to do, but what if you could just use the smart phone you already have?
These days, almost everyone's carrying a smartphone and the latest models record video with exceptional quality. With that capability available, why not just use the device you've always got with you anyway? Maybe because you don't really want to duct tape it to your forehead?
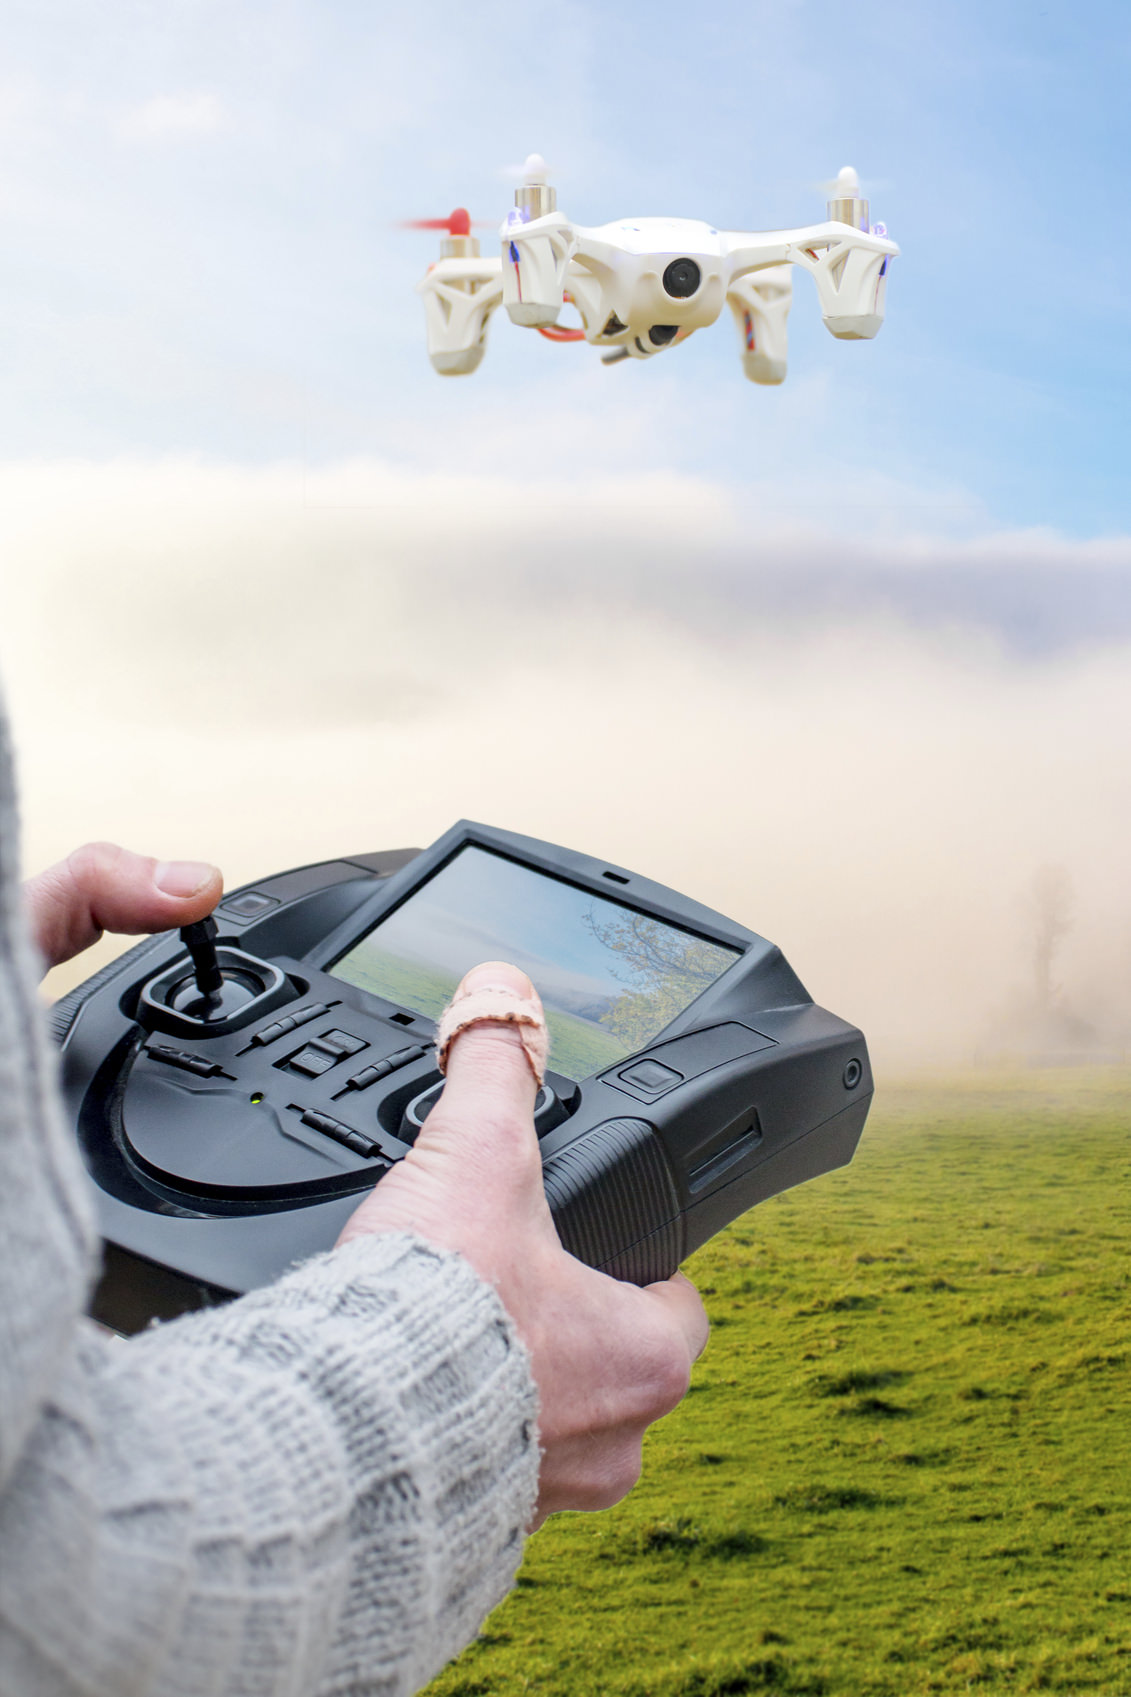
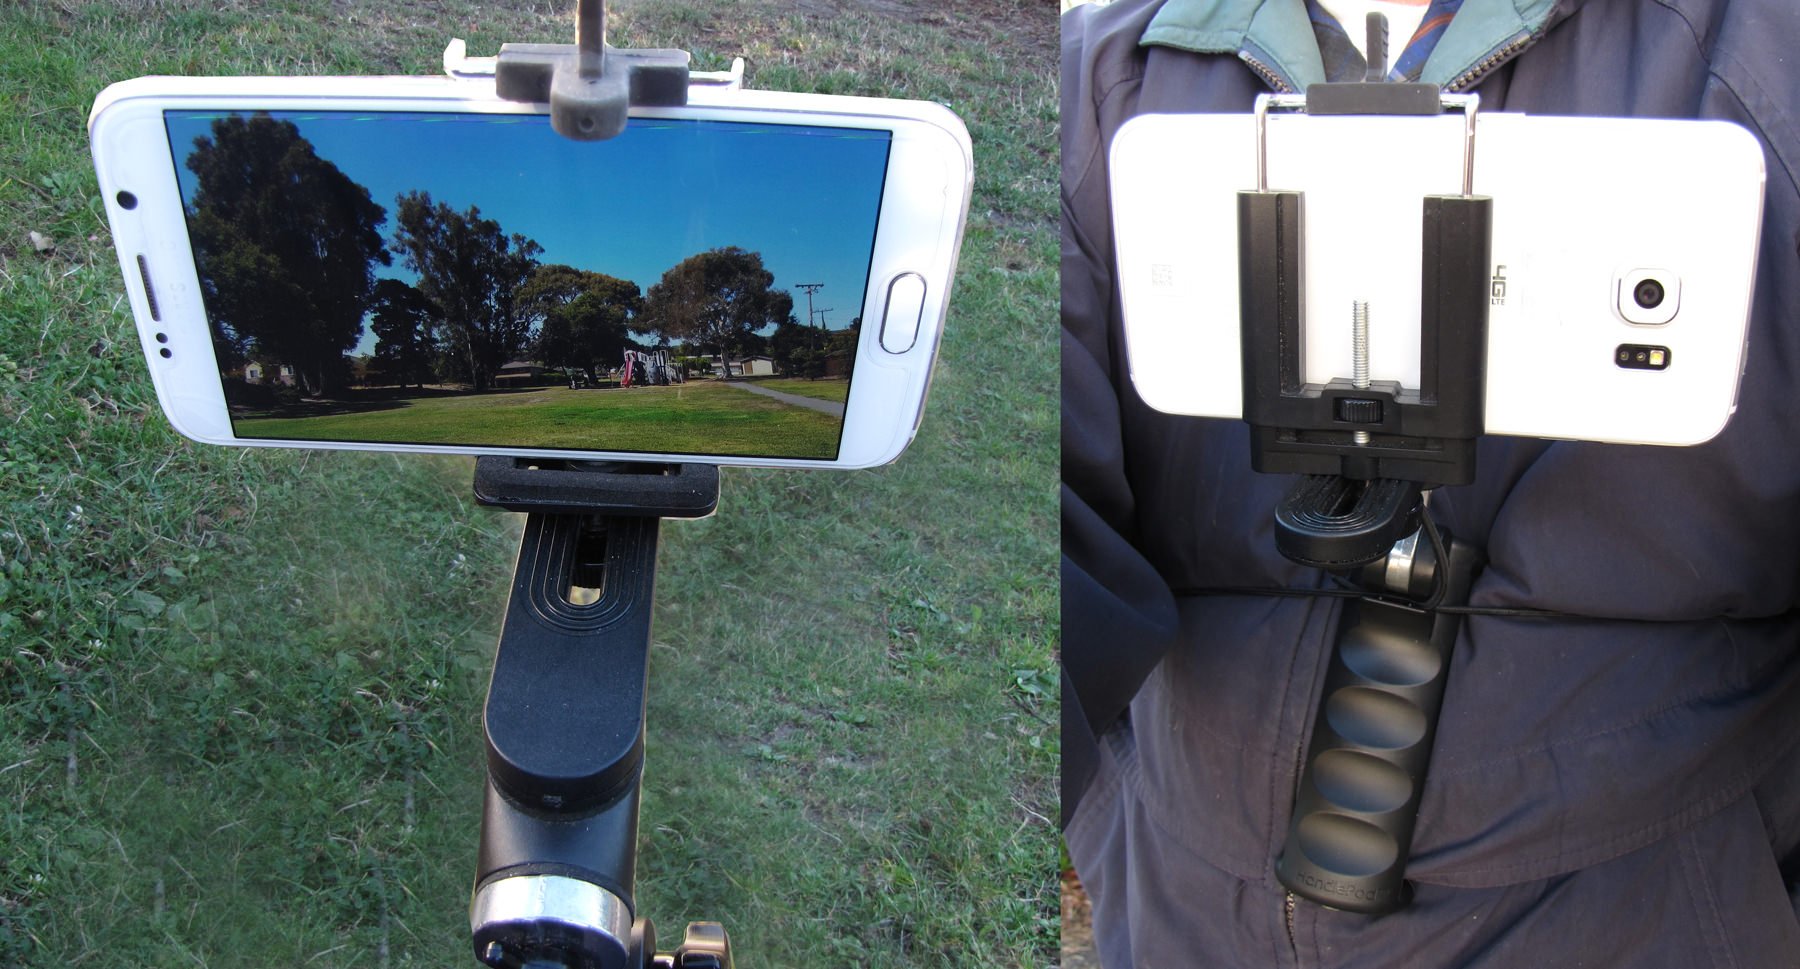
Well, we're happy to report that there's a solution that's not nearly as drastic and it won't cost you nearly as much as you might think, either. Thanks to one of the newest innovations around, you can easily, comfortably and securely strap your phone to your chest, at the perfect height to record what's directly in front of you and it will move right along with you.
For example, let's say you want to record the maiden flight of that awesome drone you just bought. Both of your hands are going to be busy with the transmitter, but if you've got that phone mounted as we just described, you can record all the action yourself and still control the flight. Here's an article that shows you how, using exactly that scenario.
Handlepod is the unique new tripod alternative that makes this possible and it does much more, too. When you need to stabilize your phone, compact camera, camcorder or DSLR but don't have a tripod on hand, this device gives you a surprising number of options, from hand-held to secured to almost any object with the included elastic cord. You can use the contoured grip and solid rubber-tipped feet to hold it against a support with your hand, too.
One of Handlepod's most outstanding features is its portability. It's small and lightweight enough to carry in your camera bag, car console or anywhere you might want to have it for those times when you don't have the tripod. Heck, you might even find you like it more than the tripod! Visit the website today to get all the details!
We Recommend
Mastering Mobile Photography and Getting the Most Out of Your Photos

There's a lot of focus these days on the quality of full-fledged cameras like mirrorless and DSLRs.
And though today's cameras are more feature-packed and powerful than ever, so too is the camera you have in your pocket.
If you ask me, we're living in the golden age of photography due to the simple fact that just about all of us have a very worthy camera attached to our smartphones.
Though some photographers balk at the idea of using their phone to take photos for anything other than posting on social media, the fact remains that the photos my iPhone produces today are far superior in terms of quality than the ones I created back in the day with my first film camera.
Perhaps that's comparing apples to oranges, but the fact remains that mobile photography is not just a passing fad, and, if anything, it's just getting better and better with every new phone and photography app that's released.
With that being said, just because our phone cameras are easy to use doesn't mean that taking a high-quality photo with your phone is a matter of just pointing and shooting.
Instead, mastering mobile photography and getting the most out of your smartphone photos requires the same kind of practice and skill development that's required when using a "real" camera.
With that in mind, let's explore a few tips and tricks that you can use to take your mobile photography to the next level.
Watch the Lighting
Photography is all about light, and if you can learn to identify what the light is doing and what you need to do to best utilize the light that's available, your smartphone photos will be the better for it.
I'm assuming that most of you already know that the best light of the day occurs during Golden Hour - about an hour after sunrise and an hour before sunset.
Golden Hour is ideal because the light at that time of the day is very soft and very warm.
Those are good lighting qualities for any photography subject, but particularly for portraits.
The problem, of course, is that you can't always drop what you're doing and wait for the sun to set to take a photo. That defeats the purpose of having a camera readily available to you at a moment's notice right there in your pocket.
Instead, if you can learn about light, you can take measures to maximize its impact.
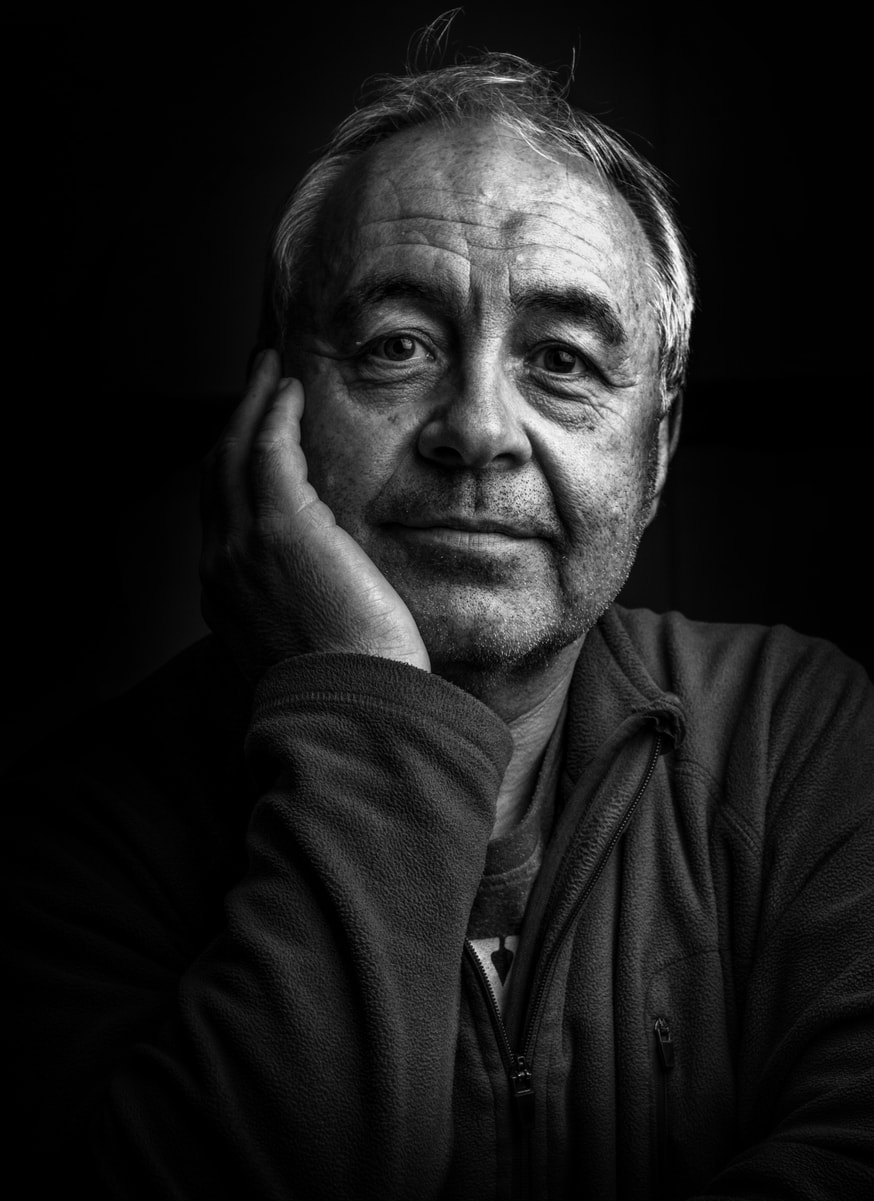
For example, if you're taking photos during the middle of the day under harsh lighting conditions, one option is to convert your photos to black and white.
This can be advantageous because midday lighting often creates very bright highlights and harsh shadows.
While those sorts of features tend to not look that great in a color photo, in a black and white photo, that large contrast, or dynamic range, can be highly beneficial.
Black and white photos benefit from bright whites, dark blacks, and midtone grays because of the lack of color. That means that all that contrast helps add visual impact to a black and white photo.
So, the next time you're shooting during the day, look for ways in which the light creates highlights and shadows and play those up in the photos you take for an eye-catching result.
Get Geared Up
Just like with a more traditional camera, it's possible to take good photos with just your smartphone.
But, like a solid tripod or a camera remote helps you take better photos with a DSLR, add-on accessories for your phone help you elevate the photos you take as well.
Having the right tools is crucial no matter what kind of camera you use, and fortunately, there are innovative and useful products out there to help you maximize the utility of your phone as a camera.
One such product is Grip & Shoot.
Grip & Shoot is a multi-functional smartphone tool that makes better photos possible. How?
That's easy...
Not only does is serve as a solid grip for holding your smartphone nice and steady for clear, sharp photos, but it also gives you wireless control over your phone.
That means you don't have to press the screen to fire the shutter but can instead do so from the integrated trigger on the Grip & Shoot.
This is advantageous for a number of reasons, not the least of which there will be fewer fingerprints and smudges on your phone screen so you can actually see what you're photographing!
That also means that you can use Grip & Shoot's other programmable buttons to zoom in, zoom out, start and stop video...you name it...all with simple, smooth, and comfortable actions as you hold the device in your hand. See Grip & Shoot in action in the video below:
This little gadget even has an open API, so developers are free to program Grip & Shoot's buttons to tackle just about any task.
But Grip & Shoot isn't just a fancy handle for your phone. It's also a remote control for your phone.
Just remove the stand from Grip & Shoot, and you can mount your phone to any tripod. Then, using the grip portion of Grip & Shoot, you can fire your camera's shutter from over 100 feet away using Bluetooth 4.0.
Better still, Grip & Shoot works with iOS and Android phones, with easy controlling via the Grip & Shoot App. Plus, it's a tiny gadget that you can easily fit in your pocket, so you won't be weighed down by heavy gear. That's not a bad deal!
Change Your Perspective

One of the many advantages of shooting with your smartphone is that you can shoot unencumbered.
There's no heavy camera body or big lens to worry about. No huge tripod to constantly set up and take down. It's just you, your phone, some small and lightweight accessories, and you're ready to rock!
Since you can work lean and mean, there's no excuse not to give viewers a unique take on traditional subjects.
A great way to do that is to change the perspective from which you shoot your photos.

With your smartphone, you can get ultra-low, and lay down on the ground to create a shot that's truly a worm's eye view.
With such a large, beautiful screen to act as your viewfinder, you can also stretch your arms above your head and take a shot from a perspective that's higher than the normal eye level.
The point is that everyone has seen the Eiffel Tower from the usual perspective. We all know what Yosemite Falls looks like from the popular viewpoint. It's familiar to see a portrait of a kid with the kid looking up at the camera.
With such a small, easy-to-maneuver camera, you should throw convention out the window and seek to shake things up a bit. Get down low. Get up high. Take photos looking straight up into the air or straight down. Kneel, sit, or lay on the ground. Just change the view you give people, and your photos will have much more impact that leaves a lasting impression.
Putting It All Together
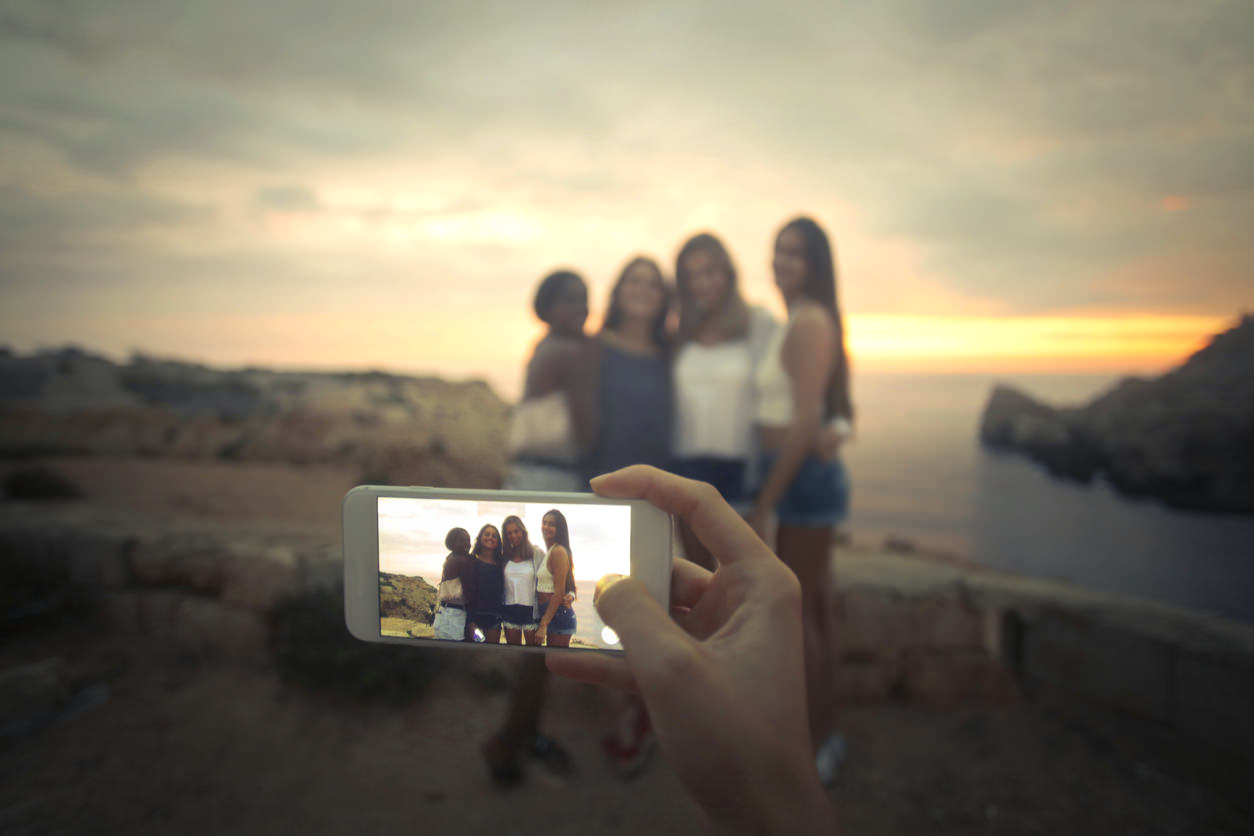
Obviously, this isn't an exhaustive list of what you can do to take control of your smartphone to create the most compelling photos.
But these tips will certainly get you started off on the right foot with a solid foundation of compositional and technical support.
On the composition front, paying attention to lighting and giving your viewers a unique perspective will help you create images that are eye-catching and leave viewers wanting more.
By outfitting yourself with gear like the Grip & Shoot, you can more easily take advantage of great lighting and unique perspectives as well.
Add to that the seemingly unending supply of camera apps and post-processing apps for your phone, and you've got the makings for a powerful toolkit to take your mobile photography to the next level!
We Recommend
Mobile Photography Gadgets That Will Help You Step Up Your Game
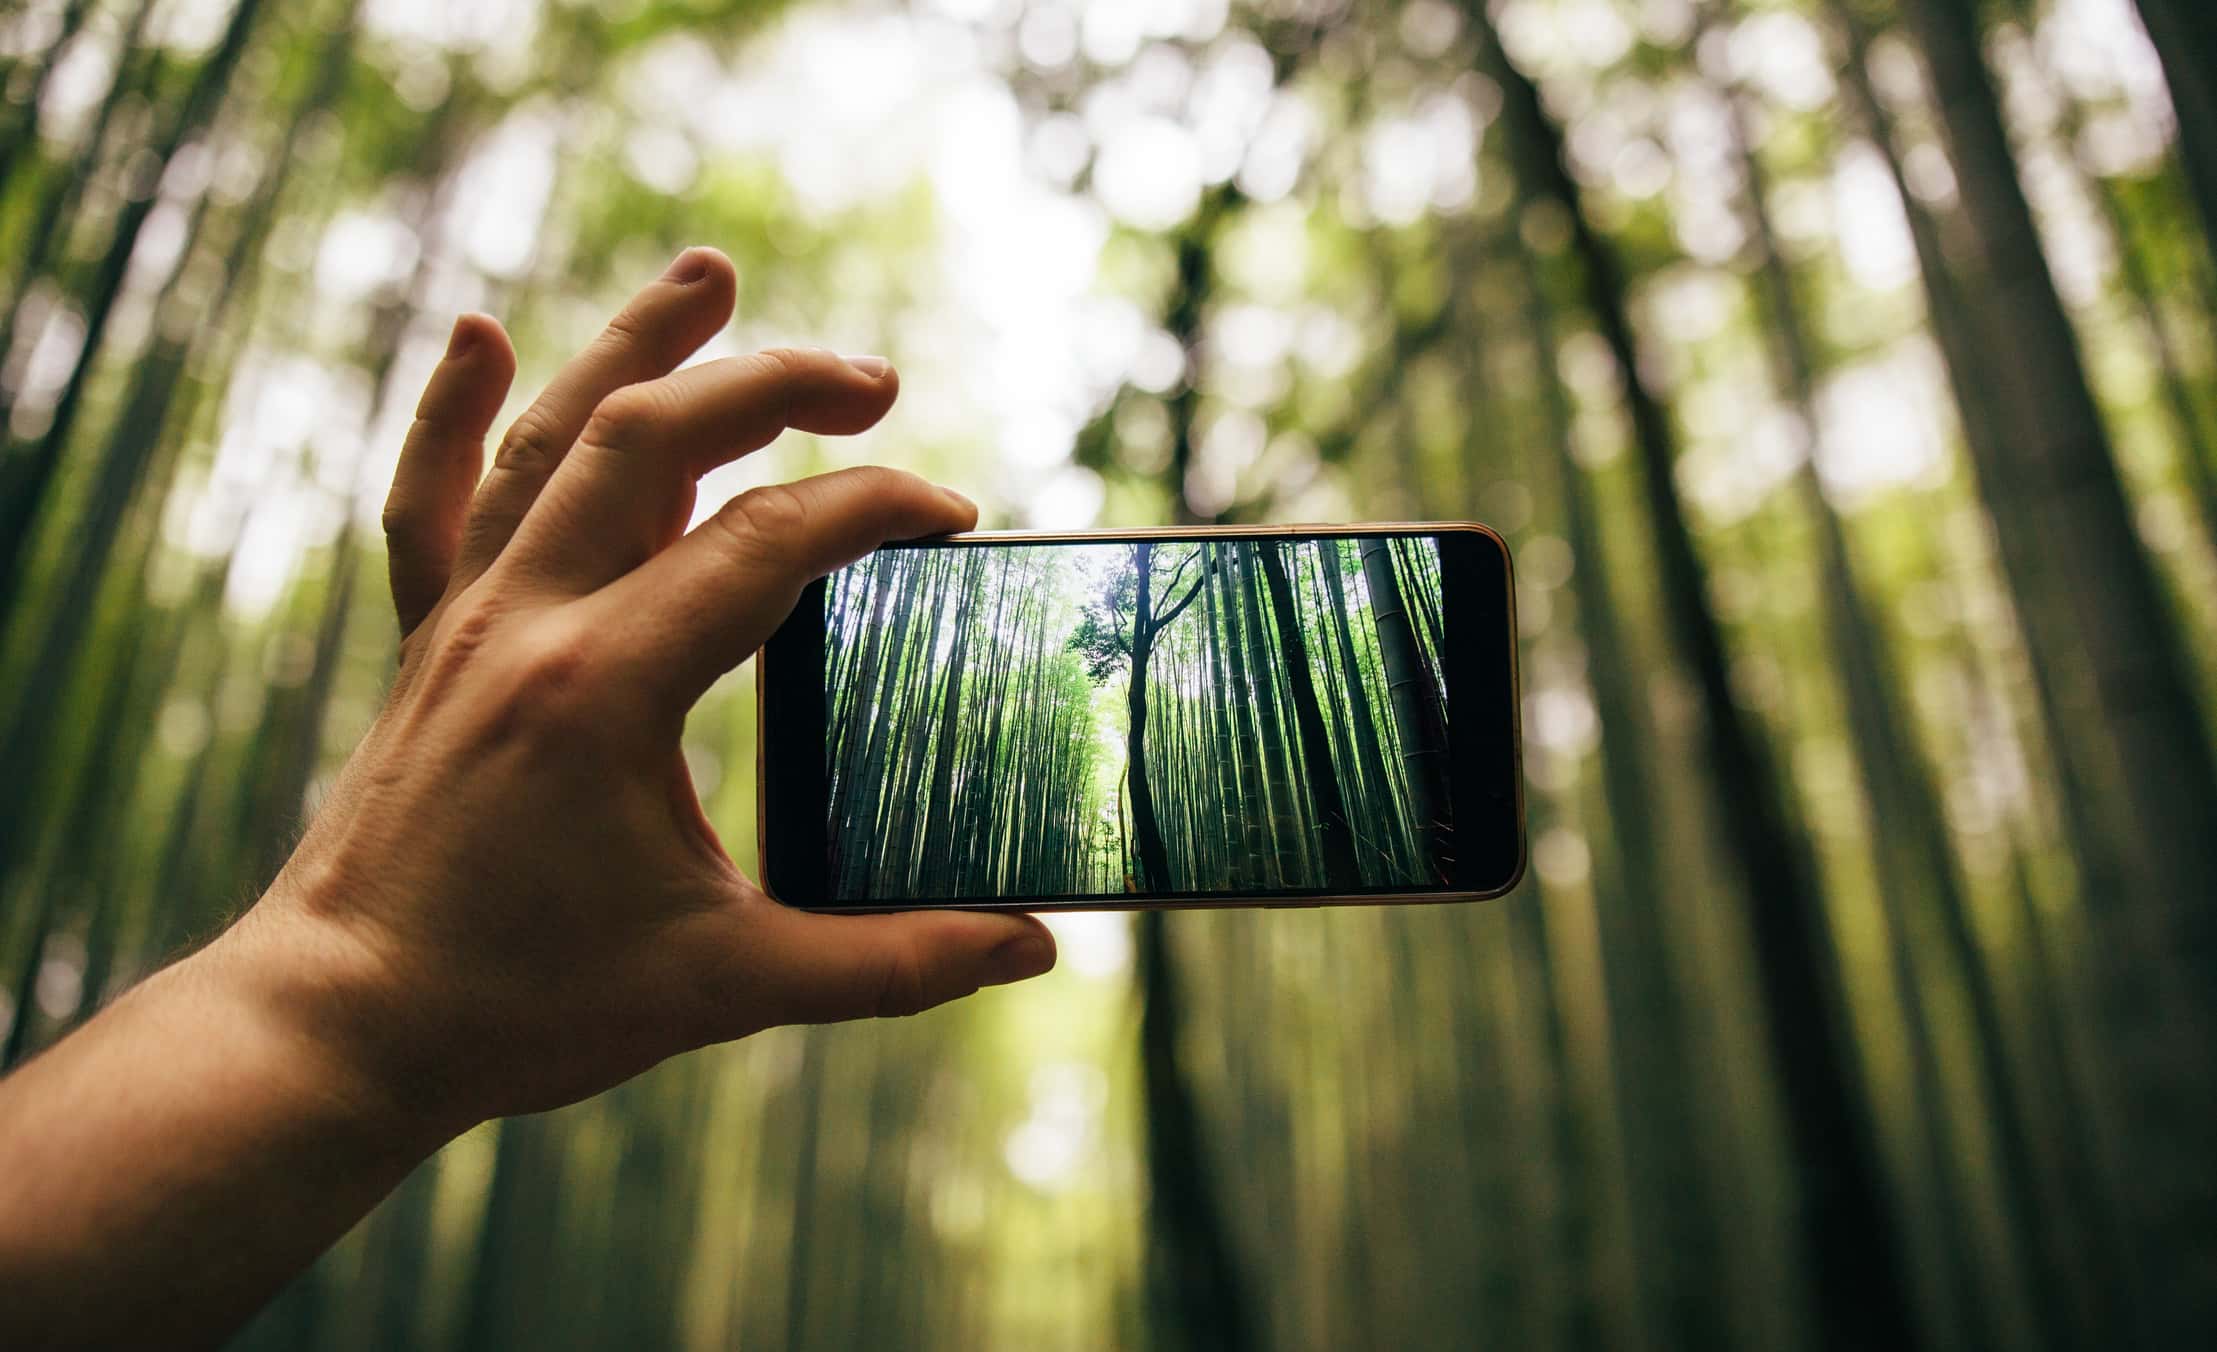
If you were asked what the best thing is about shooting photos with your phone, what would you say?
For me, it's hands-down the ease and convenience of mobile photography.
Some photographers think that mobile phones aren't real cameras and that mobile photography is the lazy man's version of actual photography.
But I beg to differ, especially in light of the fact that our phones are more capable than ever, with tons of apps and gadgets available to extend their functionalities even further.
If you want to step up your mobile photography game, consider the following gadgets and gizmos as must-have items.
Sirui Mobile Phone Lenses
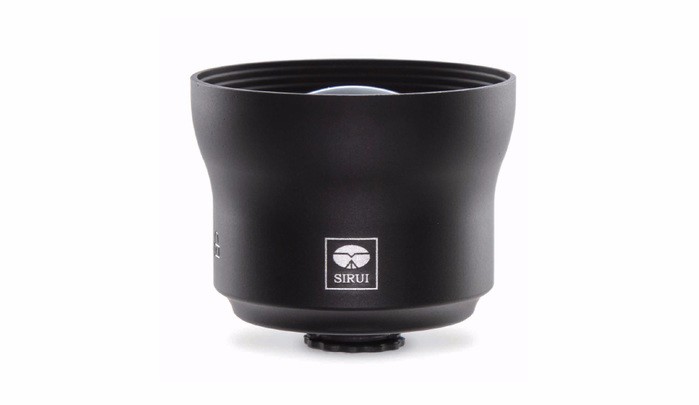
If I have one complaint about the lens on my smartphone, it's that it's wide-angle and has a terrible zoom.
That isn't a problem for things like landscape photography when wide-angle is usually what I want anyway.
But when I want to take a portrait, it's nice to have a bit more focal length so I can fill the frame with my subject without having to be right up in their face.
That's where the Sirui 60mm Portrait Lens comes in.

Where some mobile phone lenses degrade the quality of the images you take, the Sirui 60mm Portrait Lens enhances the look of your photos.
That's because each lens is constructed with glass that's got high light transmission, precise color rendition, and an anti-reflection coating to minimize glare.
What's more, these lenses have reduced distortion and minimal vignetting, which gets you 4K quality still images from your phone.

One look at the previous two images - the first with a regular smartphone lens and the second with the Sirui 60mm Portrait Lens - and you can see just how much closer you can get to the subject!
If portraiture isn't your thing, Sirui has you covered. Get an 18mm wide-angle lens and a 170-degree fisheye lens to complete the set of three.
Sirui even has a circular polarizing filter for their wide-angle lens, so you can get shots with less glare, minimized haze, and clouds that pop on a more saturated sky.
With these lenses, you can take a wider variety of photos of different subjects, and do so with the confidence that your images will be clear, sharp, and have excellent colors.
Learn more about Sirui Mobile Phone Lenses and Accessories.
Glif Smartphone Tripod Mount
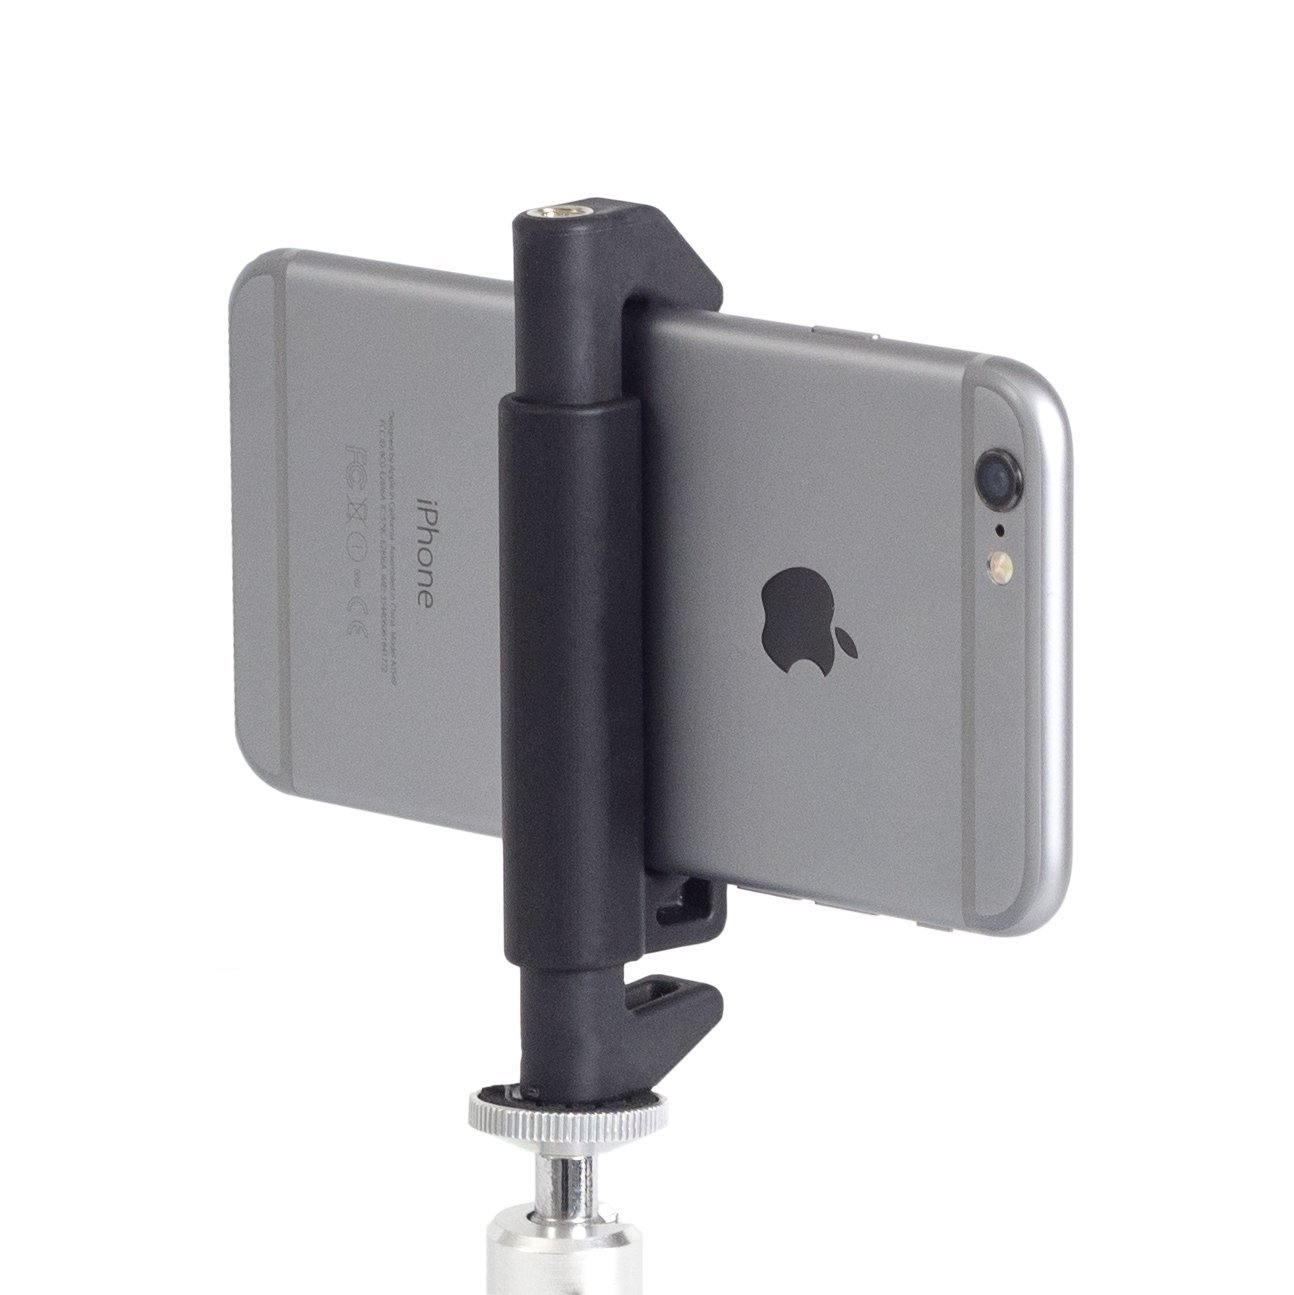
Having a way to stabilize your camera isn't just a good idea for your DSLR or mirrorless system. It's also a great idea for your smartphone.
You can avoid blurry and out-of-focus images by mounting your phone on a tripod, which you can easily do with the Glif Smartphone Tripod Mount.
With a 1/4"-20 tripod thread, Glif is compatible with most standard tripods.
What's more, it's adjustable jaws accommodate most phones, even with the case on.
Unlike some adjustable phone grips, Glif uses a hex key for fine-tuning the size of the grip, that way you're sure your phone is nice and snug and won't fall out.
Learn more about the Glif Smartphone Tripod Mount.
Muku Shuttr Remote
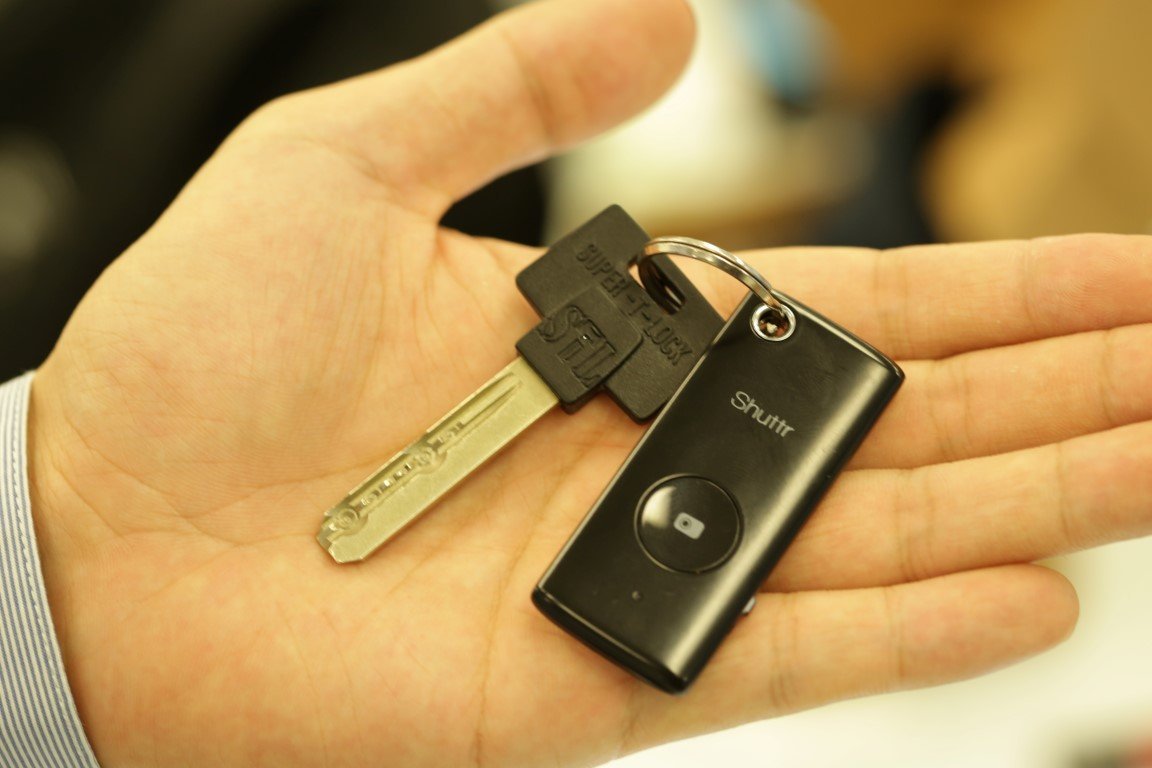
If you use your smartphone with a tripod, you'll need a means of triggering the shutter, too.
The Muku Shuttr Remote is a good choice because it's small, compact, and easy to carry. In fact, with a keychain attachment, you can easily have it in your pocket with your keys.
The remote has a range of about 30 feet, giving you tons of flexibility in terms of the photos you take. Get great group shots, take selfies from afar, or simply use the remote in conjunction with a tripod to get stable and steady shots.
Also included with the remote is a phone stand that allows you to prop up your phone when you don't have your tripod handy.
There's a microfiber cloth for cleaning your phone's lens, too, which is a nice addition that will help keep smudges and dirt at bay.
Learn more about the Muku Shuttr Remote.
FujiFilm Instax Share Smartphone Printer
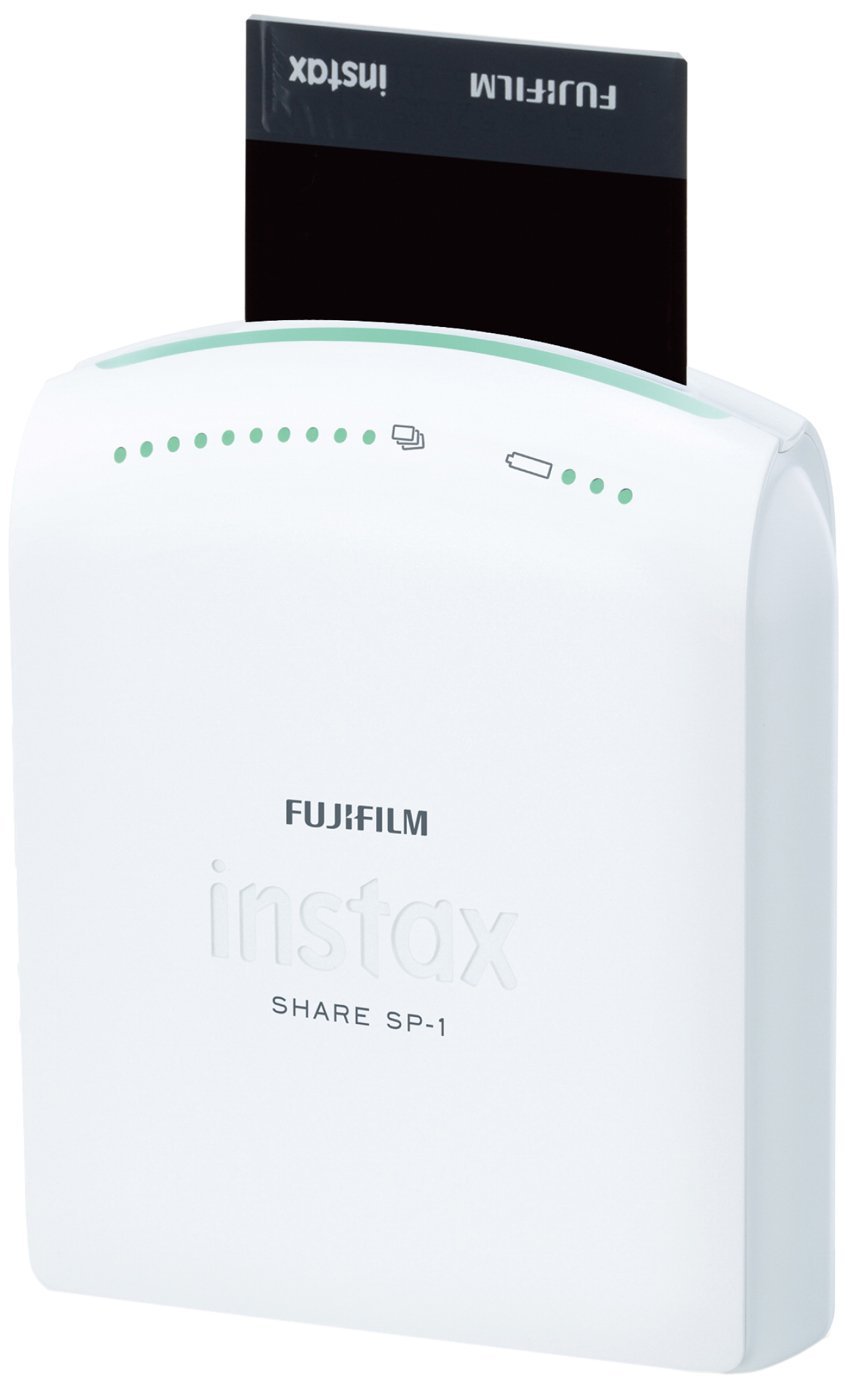
I'm going to go out on a limb here and assume that you have a ton of photos on your phone that you haven't downloaded, let alone printed.
I know I do...
That's where a smartphone printer like the FujiFilm Instax comes in handy.
It's a small, portable printer that's app-enabled, which allows you to print 10 snapshots at a time.
Better still, you can use the printer to make prints of new photos or ones from years ago you still have on your phone.
Just turn the printer on, start the app on your phone, and choose which photos you want to print out.
You get several options to edit your photos, but the printer handles much of the adjustments, including cropping, rotating, or enlarging the photos to fit the size of the print.
There's even the option to add borders or text to your photos for a little extra creativity.
Learn more about the FujiFilm Instax Share Smartphone Printer.
Putting It All Together
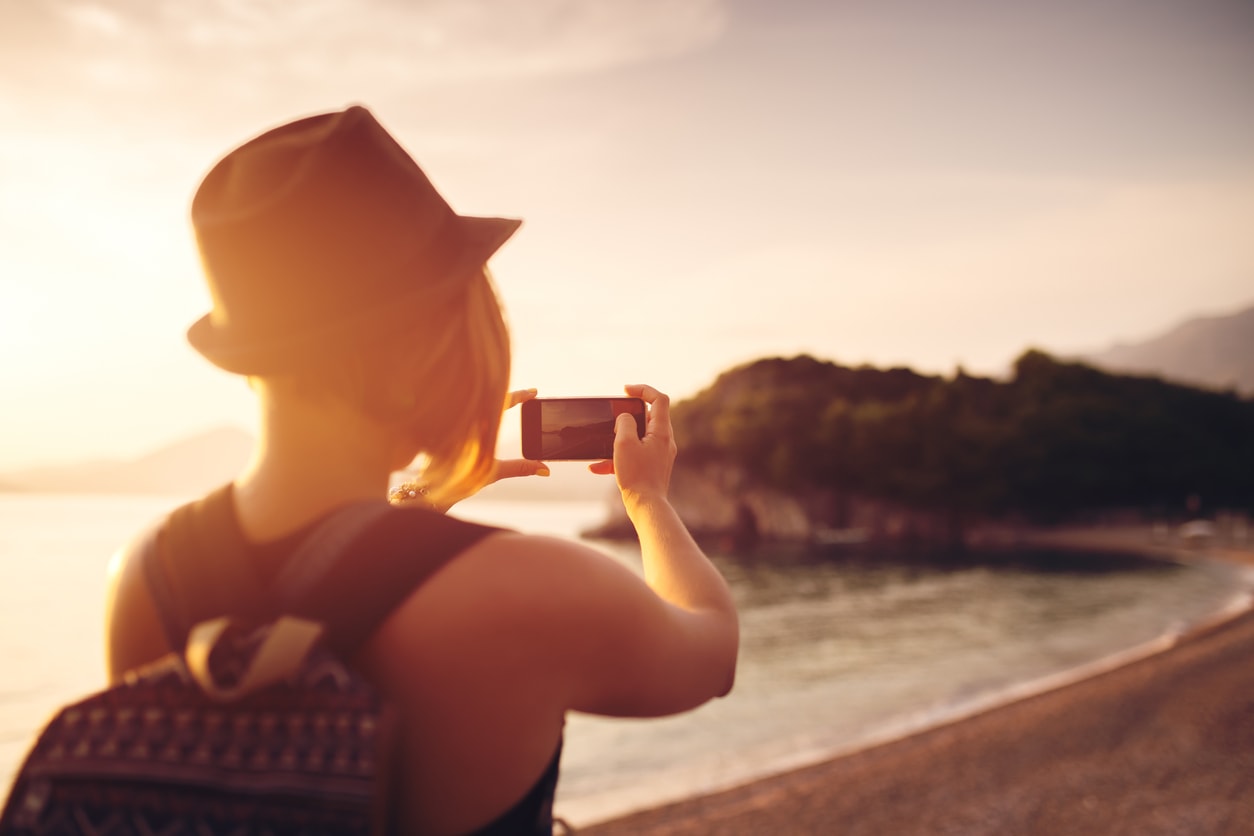
When it comes to taking better photos with your smartphone, there's a lot to consider.
Just like a DSLR or a mirrorless camera, there's considerations to make about composition, framing, lighting, and so forth.
But there's also the technical and practical aspects of photography to consider, like having the ability to capture different types of images with an array of lenses, getting sharp photos with a tripod and a remote, and having an easy way to make prints of the photos you take.
The accessories outlined above allow you to tackle each aspect of the process of photography, from taking great photos to making prints.
Armed with these gadgets, you'll be able to take better photos that make people wonder, "How'd you do that with your phone?!"
We Recommend
Mobile Photography Ideas You Should Try Today

That camera you have in your pocket - you know, the one attached to your phone?
That little guy is a powerful tool that you can use to practice all sorts of photography pursuits.
As I've mentioned in the past, your smartphone, though not nearly as functional or feature-packed as a "traditional" camera, is nonetheless an excellent tool for you to learn the ins and outs of photography.
That includes taking portraits, photographing landscapes, using it for travel photography, and documenting everyday life.
The ease with which you can use a smartphone and the convenience they provide as a result of their small stature and simple controls means that you can take photos just about anywhere and anytime.
What better way to hone your photography skills than by taking a LOT of photos? And what better tool to do that than a smartphone?
Though there's a lot to consider when creating a photo - composition, lighting, and post-processing just to name a few - there's something else to think about that has a tremendous impact on your photos.
That factor is the subject matter.
Let's take a look at a few ideas to get your creative juices flowing!
Portraits

Since your smartphone is so easily maneuverable, you can use it to take portraits that defy traditional convention.
That means you can get ultra low to the ground to take a portrait like the one above, in which your subject is actually the reflection of your subject.
When you create a photo like this, it helps to add some structure to the shot. Otherwise, all you really have is a murky puddle occupying the frame.
In this case, the linear lines created by the bricks in the path add depth and dimension to the shot. That depth is only enhanced by the low-slung point of view.

Another atypical portrait to try with your smartphone is like the one above.
Sure, it's a selfie, but it's atypical in that it's a group portrait shot from the top-down.
This perspective is great for group close-ups that has a more playful and lively vibe, something that's certainly helped by the vivid colors in the photo above.
Again, this type of shot is possible because of the maneuverability of your smartphone - it's simply easier to take a shot like this with your phone than it is with a DSLR or even a mirrorless camera.
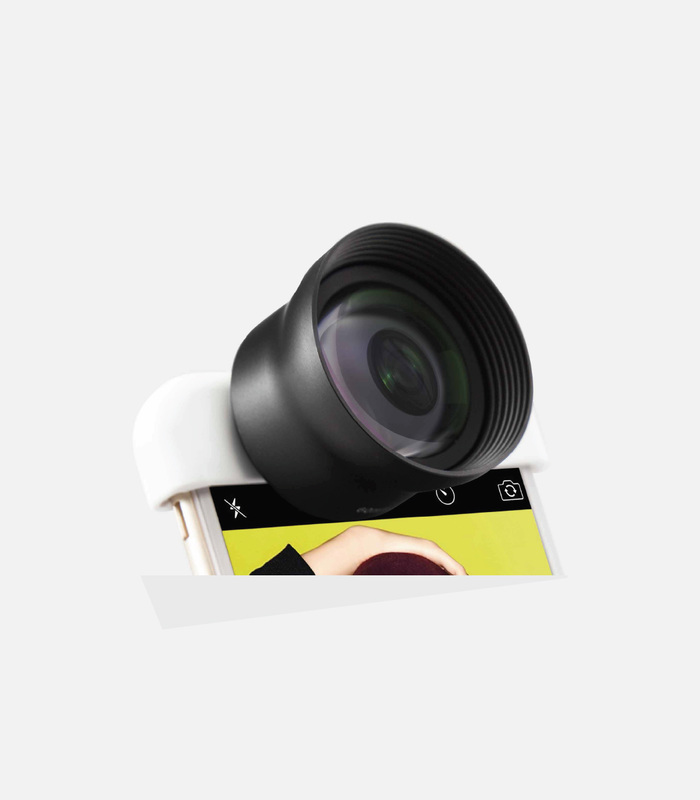
When taking portraits with your smartphone, you can improve the quality of the images you take by using a high-quality add-on lens.
Sirui makes a 60mm portrait lens that, when paired with your phone, will give you enhanced capabilities for framing stunning portraits.
Unlike many add-on smartphone lenses, the Sirui portrait lens has minimal distortion and vignetting. What's more, this lens helps you get closer to your subject by about 2x, but without sacrificing image quality.
That means you can get creative with your smartphone portrait photography, bring your subjects to life, and do so with an easy-to-use lens from Sirui.
Landscapes

One of the most interesting ways to photograph landscapes these days (if you ask me, anyway), is from the air.
I see a lot of surprisingly good photos taken with smartphones from the window seat of an airplane, like the one above.
Your phone is ideally suited for this type of landscape photography because you can easily contort your body into shooting position in your cramped airline seat.
What's more, since the built-in lens has a wide field of view, you can get that nice frame within a frame effect that's seen above that gives some depth to the shot.

Another aerial photography option that's all the rage these days is drone photography.
Though many drones come with their own cameras, some allow you to use your smartphone as the camera, assuming you're comfortable with your phone flying around.
But as you can see in the image above, the possibilities for getting a jaw-dropping landscape shot are virtually endless when photographing the landscape from above. Talk about a seldom scene perspective!
Of course, a taking a good old-fashioned landscape photo with your smartphone is totally in the realm of possibility too...

In that case, aSirui 18mm wide-angle smartphone lens allows you to get more of the scene in the shot than you can with your phone's built-in lens.
And like the portrait lens discussed above, you don't have to worry about vignetting, distortion, or reduced image quality.
Instead, what you get is a lens that has 4K professional imaging quality that offers you clear, precise results.
That means all you have to do is undertake an adventure finding the ideal landscape, pop your Sirui lens onto your phone, and start shooting!
Travel Photography

When it comes to traveling, there are tons of possibilities for subject matter with your smartphone.
Again, with such a small device, you can find interesting perspectives on the scenery around you and during the activities that you undertake.
I'm guessing that you're like me, and if you're kayaking in the ocean, you aren't going to want to hang your Sony a7R II over the edge of the boat, let alone take it out on the water.
But, you can easily throw your phone in a waterproof case and document your day on the water with ease.
Another travel-related application for your smartphone is getting shots of busy locations.

Whether it's traveling through an airport, visiting a local market, or walking the streets of a busy city, your smartphone is an ideal camera because it's discreet and you can easily snap photos, even in a crowded environment.
And, like mentioned above, adding a lens only helps you get improved photos.
When traveling, take along a Sirui portrait lens and a Sirui wide-angle lens, that way you can play with the perspective and angle of view of the images you create. See the full lineup of Sirui lenses in action in the video below by techandTOOLS:
Putting It All Together
As noted in the introduction, there are plenty of elements that go into a high-quality photo.
The compositional choices you make certainly influence how viewers receive your image. The technical qualities of the image are important too, like having the subject in focus and the shot framed in a pleasing manner.
But as you can see in the sample images above, a lot of the impact of your photos simply has to do with the subject matter and how you portray it.
It doesn't get much easier than shooting with a camera phone and a well-crafted smartphone lens. Take the opportunities that open up to you by being able to take photos quickly and easily, experiment with the subject matter, the framing, the composition, and the like, and you'll be surprised at the quality of the photos you can create.
We Recommend
Mobile Photography Mistakes You Need to Avoid at All Costs
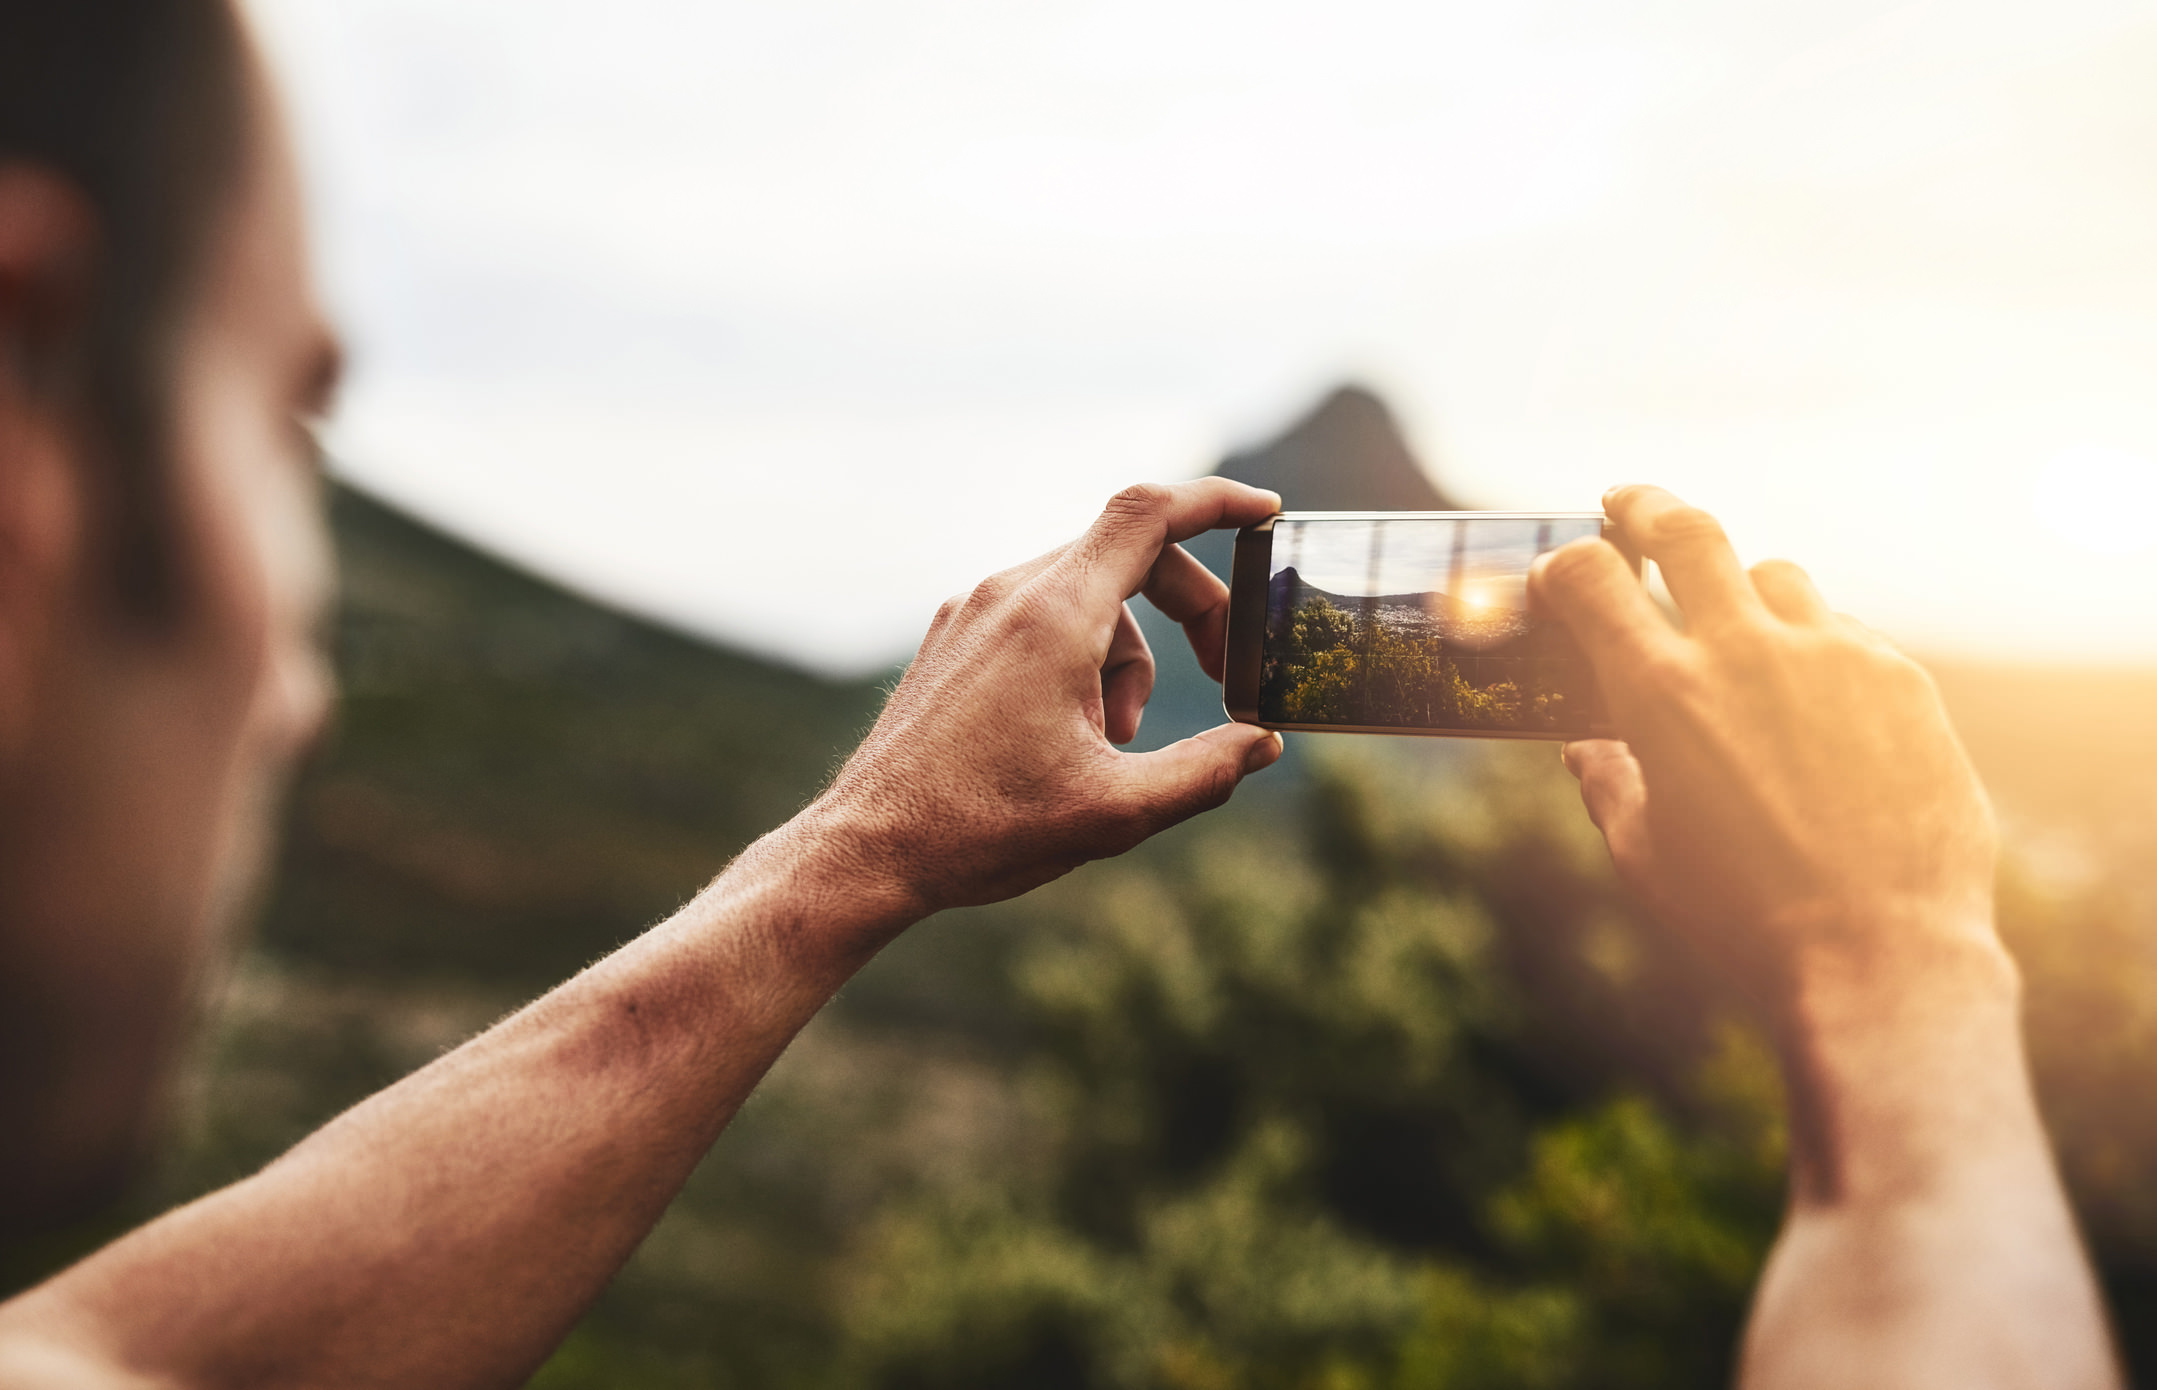
There is no doubt that the cameras on today's phones are a massive step up from what they were even five years ago.
It's made mobile photography something that anyone can undertake, with easy access to a camera and a whole slew of apps that make taking and editing photos a much easier and faster process.
But don't think that using your smartphone as a camera means that there aren't a few pitfalls to avoid.
Just like you need to take some precautions with your regular camera, you need to be careful how you use your smartphone camera as well. Otherwise, you could end up with photos that aren't quite up to your liking.
Consider the following mistakes as crucial to avoid if you want to maximize the impact of your smartphone photos.
Mistake #1: Using the Zoom

When you take photos with a traditional camera like a DSLR, the lens attached to it physically moves to zoom in on the subject. Even point and shoot cameras have an optical zoom that makes the lens longer such that you can get closer to the action.
Your smartphone, however, does not have a lens that zooms in. To get a zoom effect, they have a digital zoom that you can use by pinching your fingers on the phone's screen and moving your fingers outward, thereby zooming in on the subject.
The problem with digital zoom is that you aren't actually zooming in at all.
Instead, digital zoom should be characterized as cropping. Essentially, all the phone does is take the input from your fingers to crop the image before it's actually taken.
And if you've ever used digital zoom on your phone, you know why it's a mistake.
The quality of the resulting image is terrible, with a pixelated look that will ruin the shot, no matter how great its other features are.
To get around this, you can do one of two things that will get you a better final result. First, you can move closer to the subject, thereby making it appear larger in the frame. Of course, getting closer isn't always an option.
In that case, the other thing you can do is simply wait to crop the photo in post-processing. Digital zoom is just cropping anyway, so why not wait until you process the image, that way you have all the pixels of the original image to work with.
Mistake #2: Not Cleaning the Lens
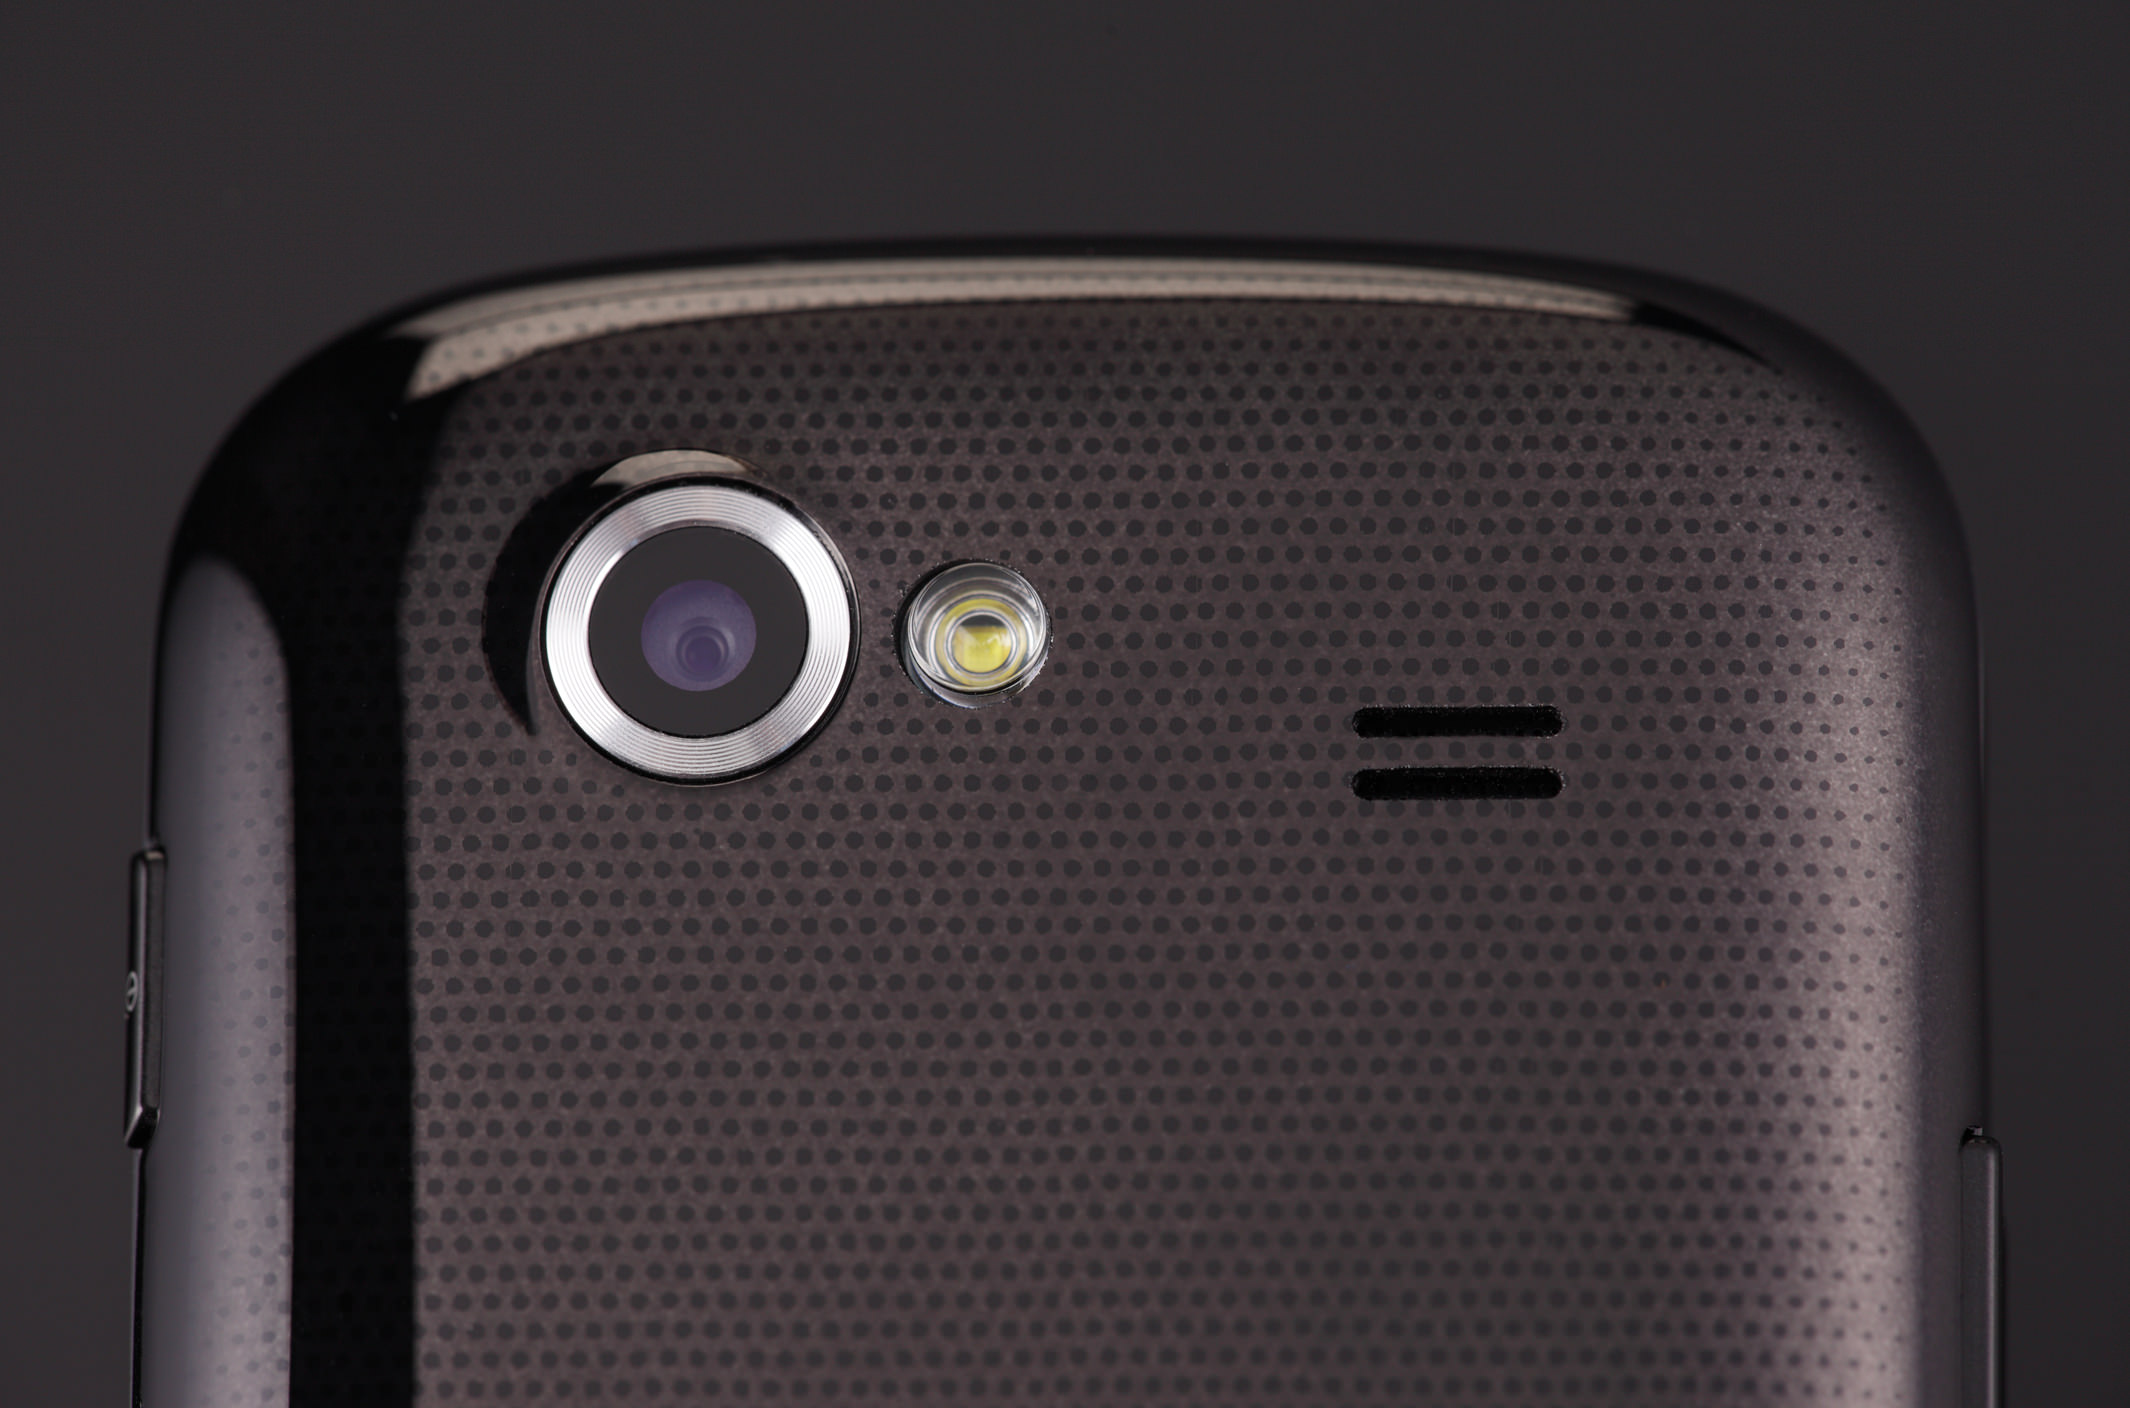
I know that I'm guilty of this more than any other photography mistake.
Part of the reason is that it's just so convenient to take out your phone and fire off a few shots - often, I get in a hurry to get "the shot" and neglect to clean the lens.
I'd never do that with my "real" camera, so it's frustrating that I forget to do that with my phone.
I think part of the reason I forget is that it's hard to see any dust specs or other undesirable contaminants when I review the images on my phone screen.
After all, my screen isn't exactly clean either. Who's is?
Nevertheless, just like you don't want dust and smudges ruining the photos you take with your DSLR or mirrorless camera, you don't want those contaminants ruining an otherwise beautiful shot you get with your smartphone.

Something that helps resolve this issue (and the zooming mistake discussed earlier) is to use an aftermarket smartphone lens.
Hear me out on this...
When I use my big cameras, I make a habit of giving the front element a good wipe down when I mount the lens. It's second nature to me now so I don't even think about it anymore.
By using an add-on lens like the Sirui 60mm Portrait Lens, I follow the same routine - I mount it to my phone and clean the front element to ensure I've got a crystal clear window to the world, just like I do with my big cameras.
There's just something about having a lens in your hand with some substance to it that triggers that muscle memory to grab my lens cloth and make sure the glass is spotless.
Taken with a built-in smartphone lens
Taken with a Sirui 60mm Portrait Lens
What's more, since the Sirui portrait lens is 60mm, you can get closer photos without having to rely on your phone's terrible digital zoom. Just look at the two photos above to see just what a difference it makes having an add-on lens to get you closer to the action.
You can also see how the Sirui lens gives you excellent color rendition and sharpness - which isn't something all aftermarket smartphone lenses can claim.
In fact, this lens has 4K professional imaging quality with reduced vignetting and distortion, as well as a multilayer anti-reflection coating to boot.
That means you get sharp, bright, color-accurate images, assuming you remember to clean your lens before each use! Plus, Sirui's lenses aren't just well made, but they are also budget-friendly.
It's hard to beat that!
Mistake #3: Going Without a Tripod
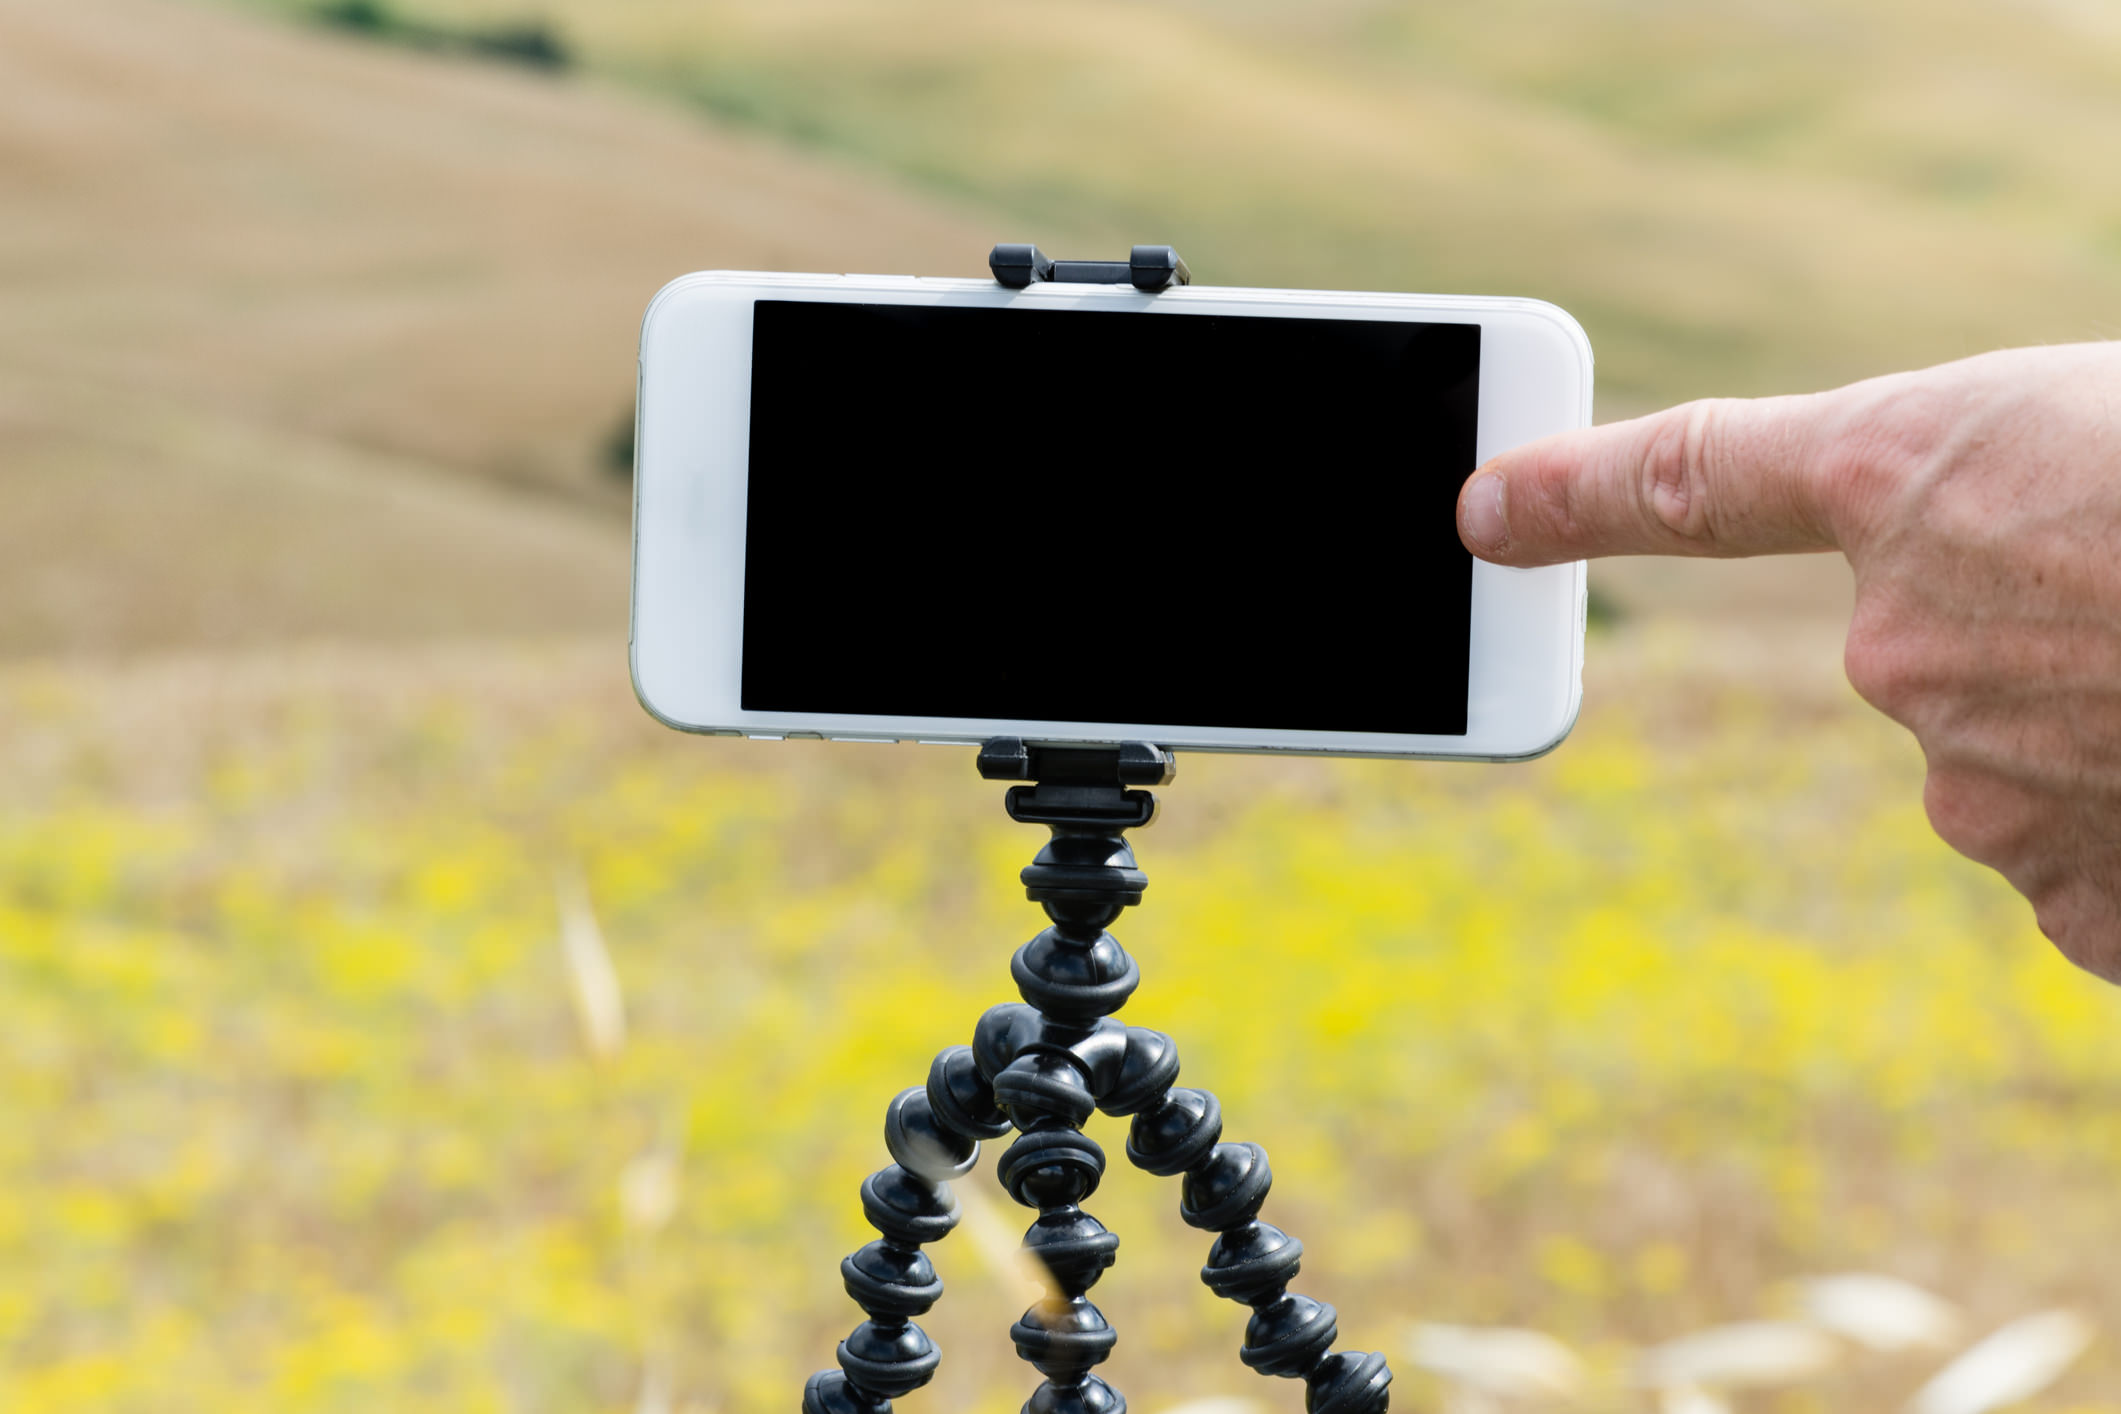
A lot of people (myself included) don't typically use a tripod with their smartphone.
When you think about it, it kind of goes against what using a smartphone for photography is all about - shooting fast and quick without carrying around a bunch of accessories.
But just like with any camera, smartphones are susceptible to camera shake, and much like you don't want to ruin your shots by using digital zoom, you also don't want to ruin them by having blurry photos.
You can find tripod attachments for virtually any kind of phone these days that make them compatible with the tripod you already have.
If you don't have a tripod and don't want to invest in a full-sized model, there's lots of choices that work great with smartphones (and larger cameras, too) like a HandlePod or GorillaPod. See THiNK Media TV's video below for a rundown of some other top-notch smartphone tripod options:
Aside from giving your smartphone a more stable base to get sharp still photos, a smartphone tripod will also help you expand your creative pursuits into things like long exposure photography and time-lapse videos, both of which can be done right from your phone, and depending on the model you have, might not even require that you download an app.
Preventing yourself from enjoying all the different avenues of photography you can pursue with a tripod-mounted smartphone is a huge mistake, especially considering how little these tripod alternatives cost.
In the end, we all want to take photos that we're proud of. That's true whether we use a smartphone or a full frame DSLR.
If you want to improve the quality of your photos, it's a matter of avoiding your phone's zoom feature, getting outfitted with a high-quality aftermarket lens, and getting a tripod to give your phone a stable base from which to work.
It's really that simple!
We Recommend
Quick Tips to Jump Start Your Mobile Photography Game
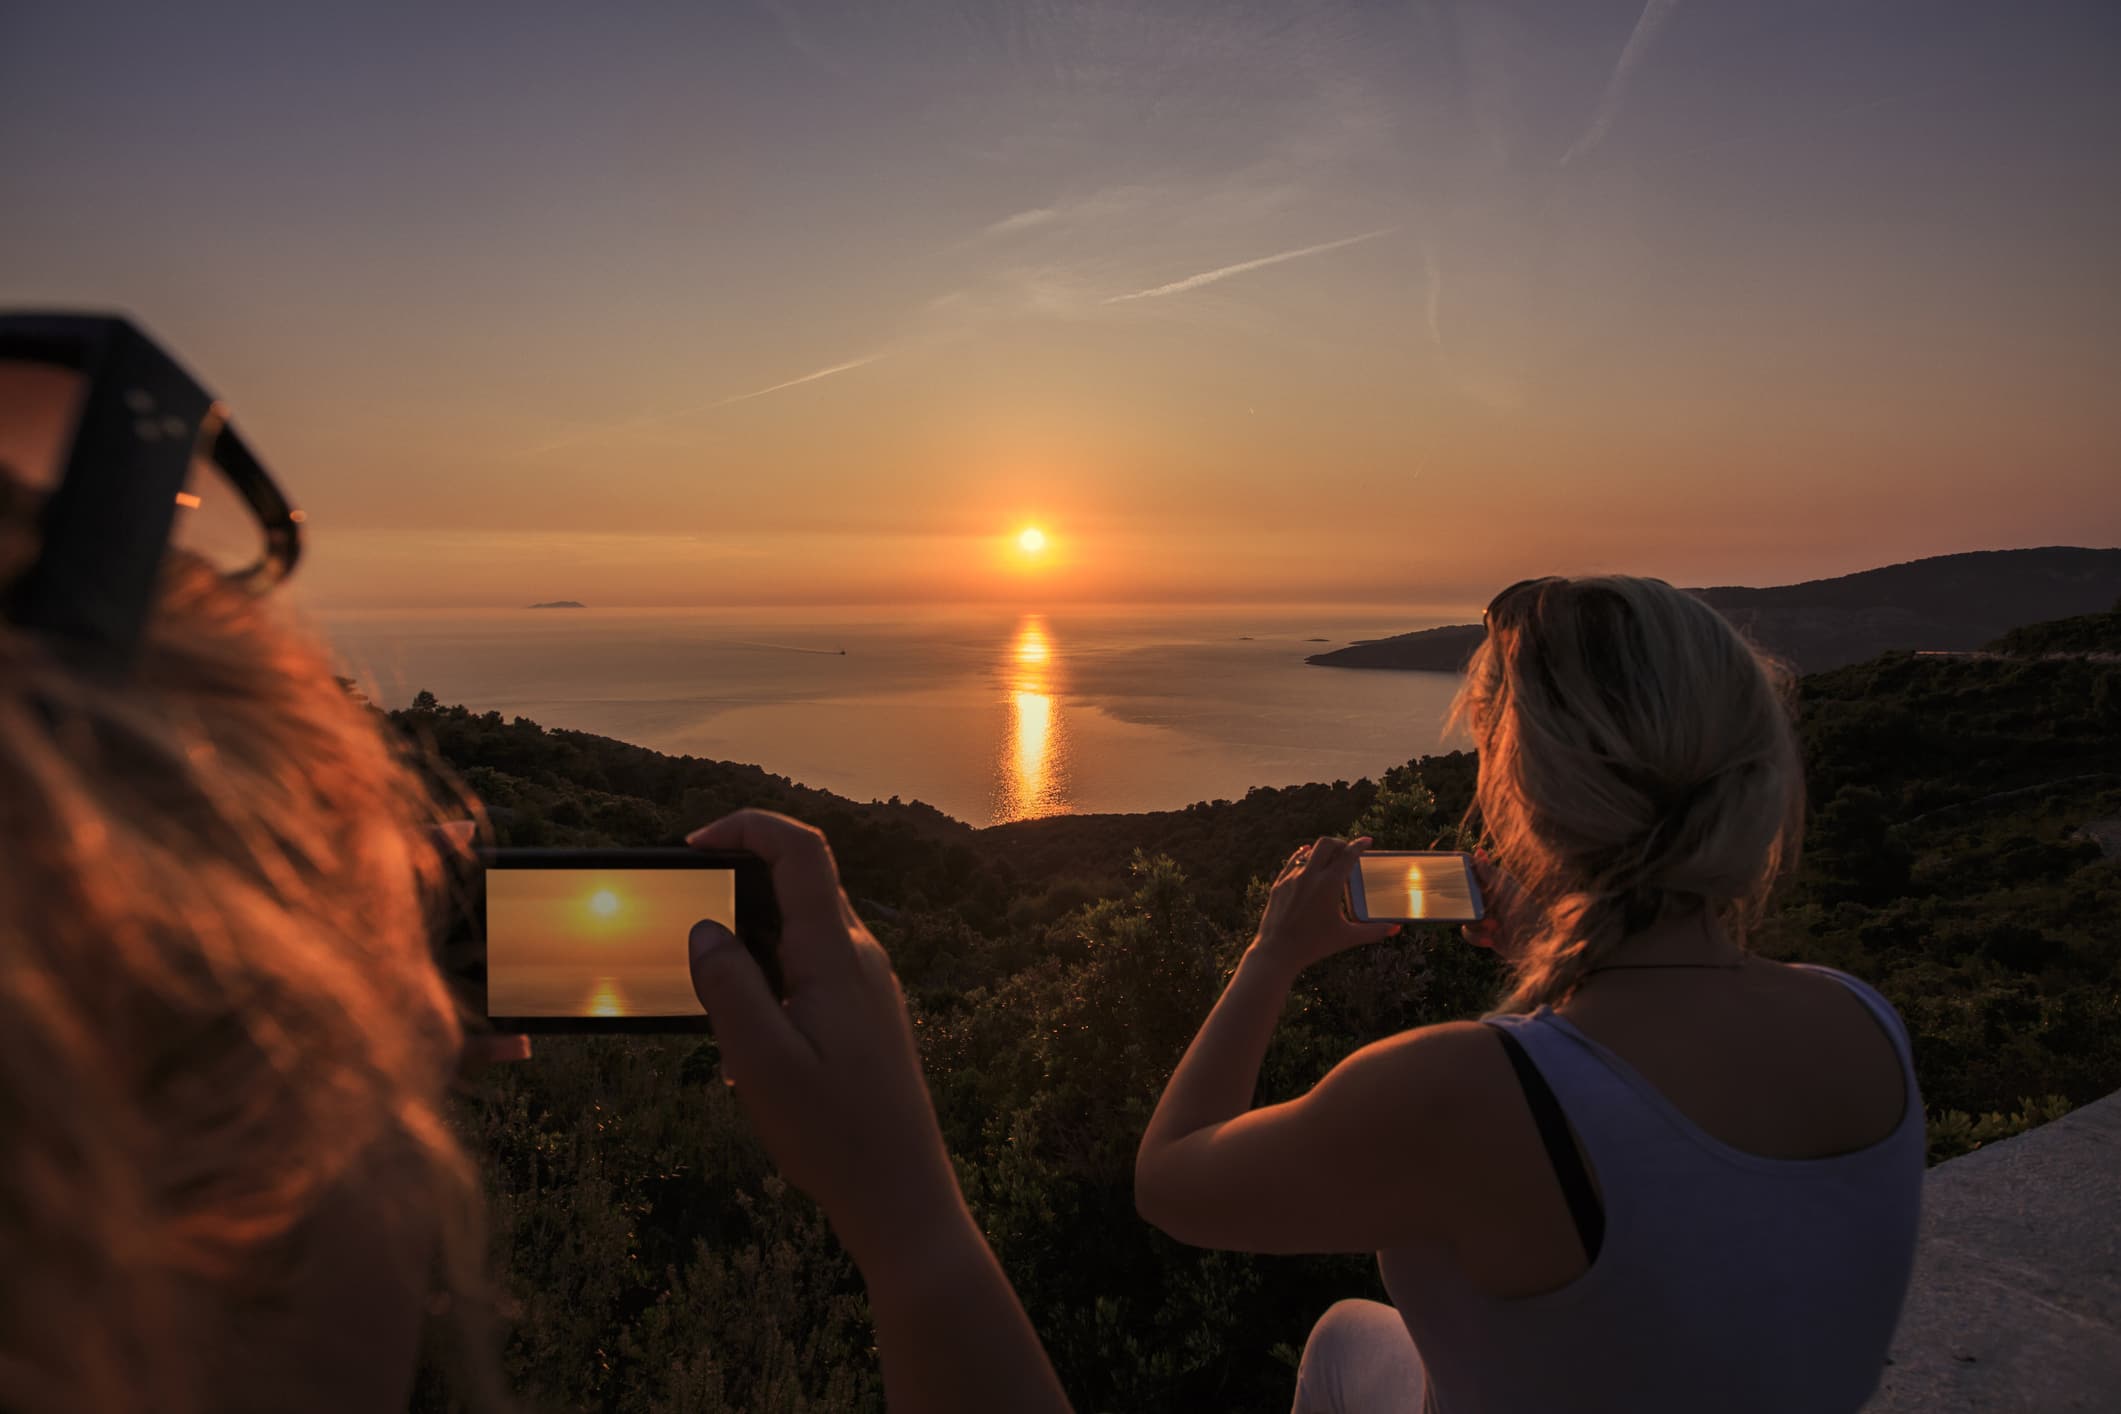
With mobile phones increasingly having better and more capable cameras, more photographers are turning to them to take more of their photos.
But smartphone photography isn't just about pointing, tapping, and shooting...
Instead, you still need to approach mobile photography like you would with a traditional camera.
With that in mind, here's a few quick tips to help you get better photos with your smartphone.
Use the HDR Feature
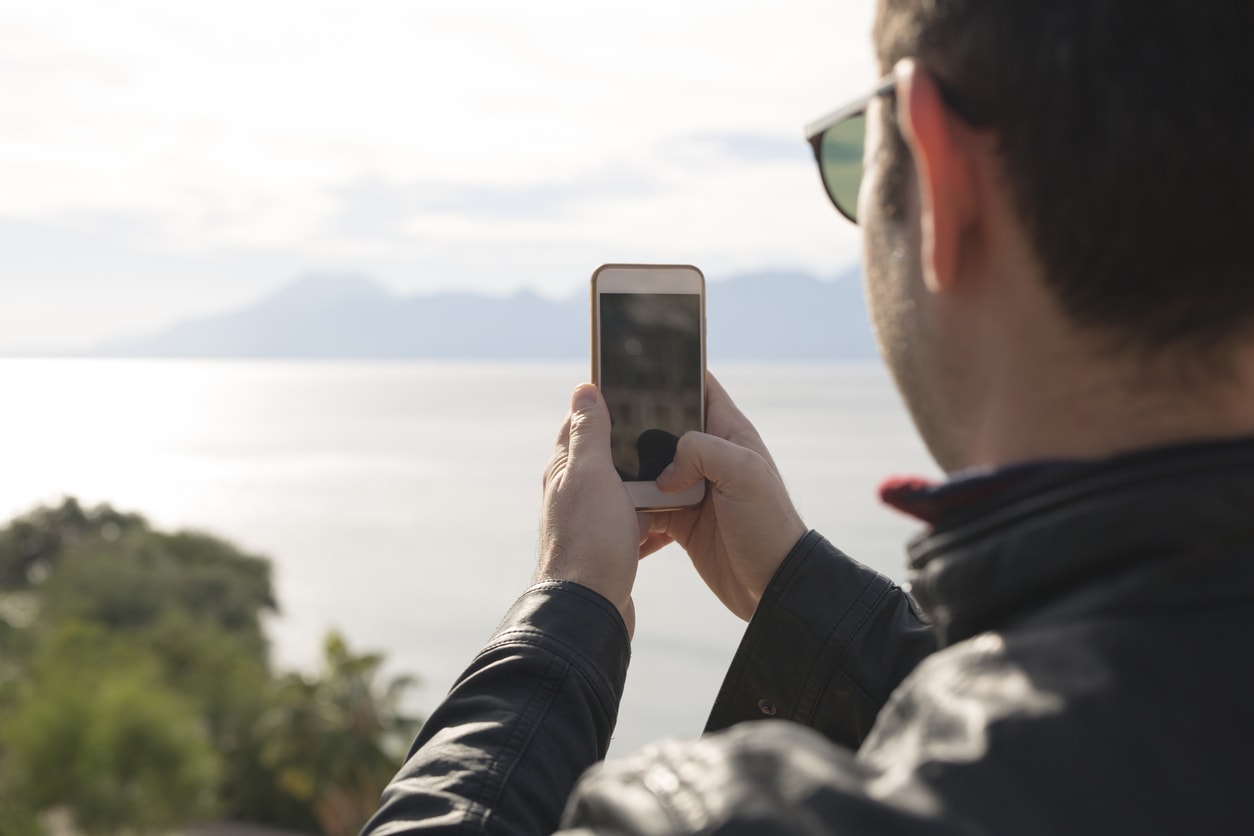
Not that long ago, the HDR feature on mobile phones was terrible - if the phone even had that feature.
That's not the case today.
Though the HDR function on my phone can't match the one on my Nikon D850, it's still a respectable performer.
That's good for me because I can't always grab shots with my phone in perfect lighting.
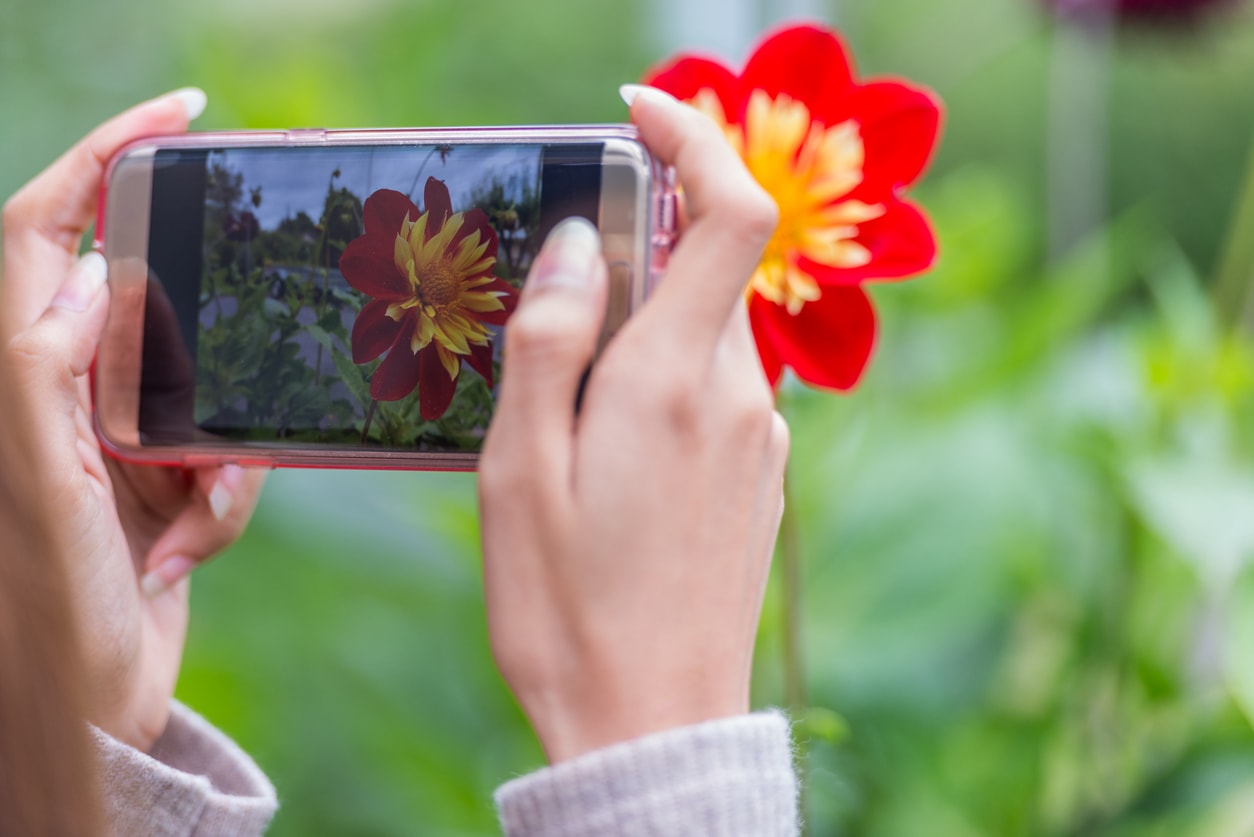
Instead, when the light is extremely bright, I use the HDR feature on my phone, and you can too.
What HDR will do is take several shots and blend them together, resulting in a final image that's better-exposed.
That unappealing harsh lighting with bright highlights and dark shadows will be negated with the HDR shot that preserves the detail throughout the dynamic range.
Learn More:
Get a Good Set of Lenses
Yes, you read that right...
Not only are there plenty of lenses that you can buy to use with your mobile phone, but there's some really good ones, too.
Kenko has a set of smartphone lenses that certainly fit the bill.
They simply clip onto your phone - so they're not just easy to use, but they also create a nice, tight seal with the phone's lens to minimize light leaks.
You can choose between four lenses - a wide-angle/macro combination, a super-wide angle, a telephoto, and a fisheye lens.
Each has its own virtues, but the common feature among them is the sheer quality of the construction.
That's particularly true of the lens glass, which is finely processed so that your images are sharp, clear, and have minimal aberrations.
And, as noted above, these lenses simply clip onto your phone's built-in lens.
That means it's a quick and easy solution to getting better photos with your phone.
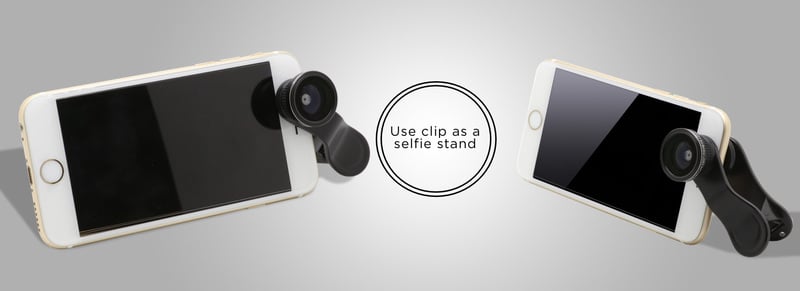
As if that's not enough, these lenses can also be used as kickstands for your phone.
That gives you the capability of setting your phone's timer and getting in front of the lens for some self-portraits or group shots.
Editor's Tip: Get Kenko’s latest updates and access to promos for discounted gear. Click here to sign up.
And by using the kickstand feature and your camera's timer, you can also get sharper photos because without touching the camera, there's no possibility of camera shake causing your images to be blurry.
From landscapes to portraits to macro photography and just about everything in between, these clip-on lenses by Kenko can help you elevate your smartphone photography game.
Learn More:
- Get the Specs and Pricing on Kenko Smartphone Lenses
- Must-Have Tips for Landscape Photography With a Smartphone
Use Manual Controls
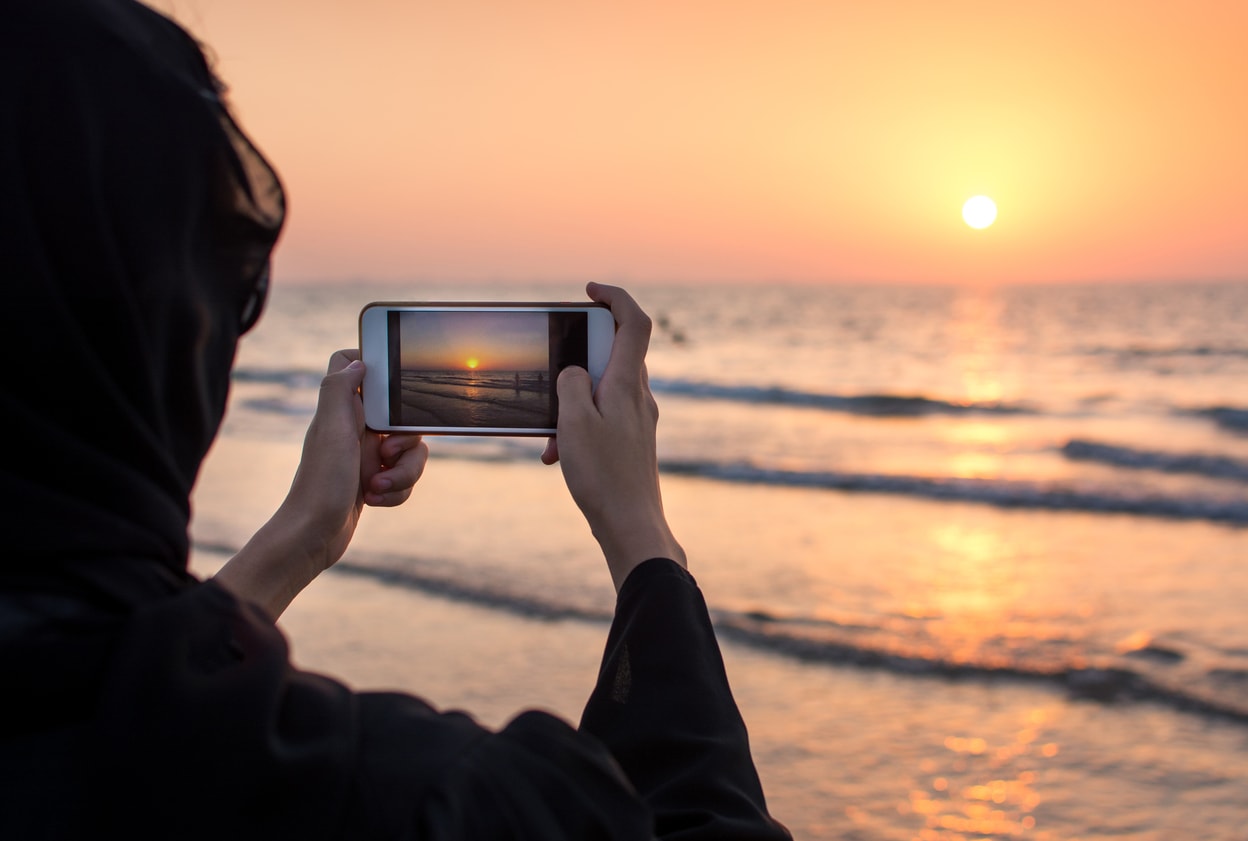
Just like with a traditional camera, the more control you take over how the camera functions, the more likely you are to get photos that are the quality that you want.
By taking control over things like aperture, shutter speed, and ISO, you can fine-tune how your smartphone images look and feel.
Just a few years ago, manual controls on a smartphone camera didn't exist.
But now, many smartphone cameras have manual controls built right in.
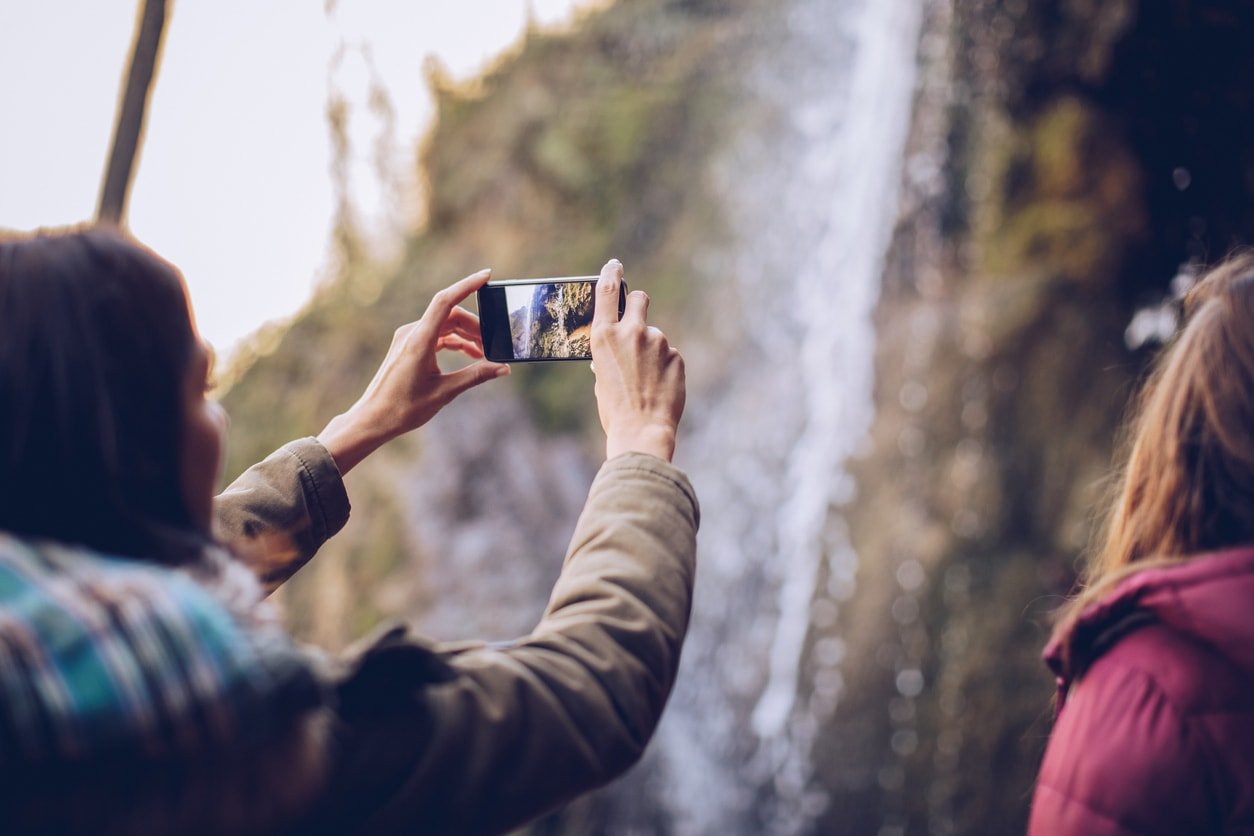
If your phone's camera doesn't have manual controls, you can download any number of apps, like VSCO, that do give you that control.
VSCO and many other apps also offer other expandable controls, like shooting in RAW, white balance adjustments, and controls for contrast, saturation, sharpness, and so on.
Many apps, again, like VSCO, give you a host of filters as well, which allows you to further create your artistic vision by adding grunge effects, color effects, and black and white effects. See a few of VSCO's advanced controls in the video below by Emil Pakarklis:
Our mobile phone cameras aren't quite there yet in terms of becoming the only camera we need, but they're on their way, that's for sure.
That means that future phones in our pockets will have even more bells and whistles that help us take better photos than ever.
But you don't have to wait for the future to arrive. By using the tips outlined here, you can begin maximizing the potential of your smartphone photos!
Learn More:
- As a Photographer, These are 13 Free Apps I Wouldn't Leave the House Without
- An Ideal Smartphone Photography Kit
We Recommend
Simple iPhone Photography Composition Tricks That Have Tons of Impact

One of the best things about using a smartphone as a camera is that it's so convenient.
That convenience means that you can take more pictures, more easily, more of the time. All that practice will turn you into a better photographer.
Of course, it's helpful if you have a few iPhone photography tips up your sleeve to maximize the results you get when taking photos with your phone.
Editor's Tip: Learn how to take better photos with your iPhone.
iPhone Photography Composition Tip: Find Contrast

The human eye loves contrast; it's just in our nature.
By capitalizing on that fact, you can create photos with your iPhone that have much more visual appeal.
When looking for contrast, don't just think in terms of dark and light colors.
Instead, seek out complementary colors, like blue and orange or red and green.
Since these colors are on opposite sides of the color wheel, they maximize contrast for our eyes to enjoy.
Learn More:
Maximize the Quality of Your iPhone Photos by Utilizing Negative Space

If you ask me, the most under-utilized photography composition trick is using negative space.
By incorporating negative space into your smartphone photos, you are able to create images that have a much more simple appearance.
That simplicity is often a great way to communicate a feeling of calm or serenity in the photo.
In the image above, you can see this trick at work.
With the empty sky above the boy, you can more easily understand how he must feel - the freedom he's experiencing running through this field under a big, bright sky.
Learn More:
- Why You Need Lens Filters for Your iPhone
- Take Control of Your iPhone Camera With These Mobile Photography Tricks
Use Lines and Textures to Improve Your iPhone Photography Composition

As with any other camera, incorporating lines and textures into your smartphone photos will help strengthen the composition.
Much like contrasting colors, our eyes are naturally drawn to textures and lines (and patterns, for that matter), so using those elements to draw more attention to the subject only makes sense.
In landscape photography, for example, a leading line can be used to help connect the foreground, midground, and background, all the while "pointing" the viewer's attention to the main subject.
You can see this concept in action in the image above, where the pathway directs our eyes deeper into the photo toward the mountains in the background.
And notice how the lines created by the pathway aren't overt - they don't need to be to still have the visual power needed to accomplish the task of directing our attention toward the background.
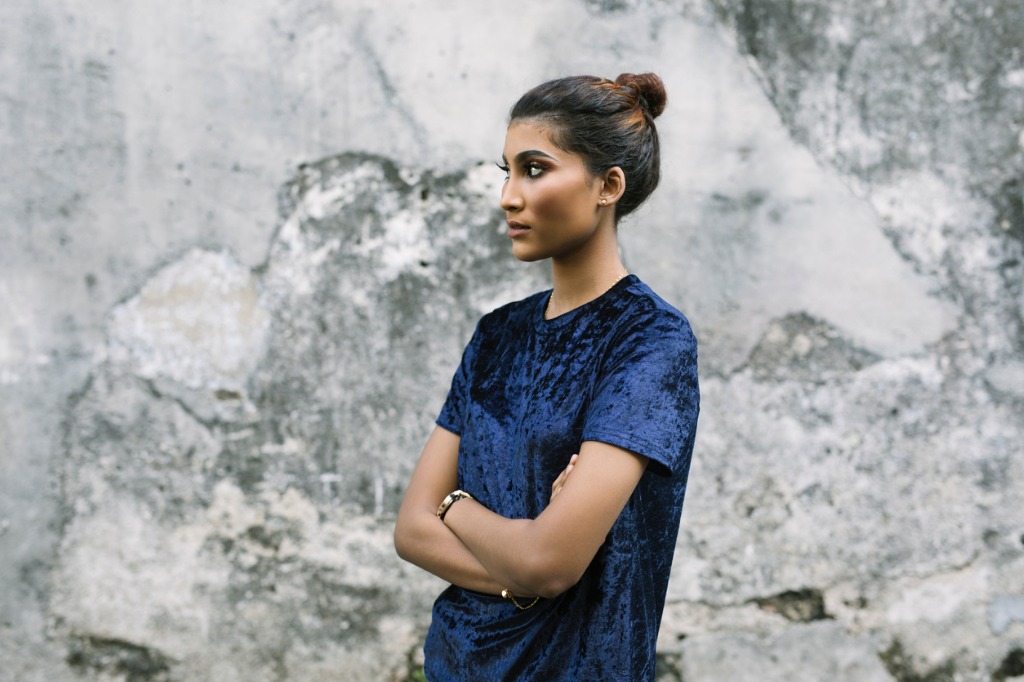
Finding a way to incorporate textures into your photos is another great way to improve the visual interest of the shot.
In the example above, you can see how eye-catching the highly texturized background is.
But also notice how the texture of the wall isn't overwhelming - it simply adds depth and dimension to this portrait that makes it a more interesting image.
When using lines or textures, the goal isn't to make them the star of the photo.
Instead, find ways to incorporate these elements in a way that enhances the quality of the image and draws more attention to the subject.
Learn More:
- Want Amazing Landscape Photography With Your iPhone? Try These Mobile Photography Tips
- Drone Photography Tutorial: How to Take Killer Photos
Bonus Tip: Outfit Your iPhone With Lenses for Even Better Results
There's a saying in photography that it's not the gear that makes great photos, it's the person behind the lens.
Well, that might be true, but outfitting your phone with better lenses sure can't hurt.
I've been shooting with SANDMARC lenses on my iPhone X the last couple of months, and I have to say, the difference they make in the quality of my smartphone photos is astonishing.
That's due in large part to the quality of the optics of these lenses.

Whether I'm shooting with the wide-angle lens (shown above), my macro lens, or fisheye lens, I get results that are tack-sharp because of the premium multi-coated optics.
Additionally, because these lenses are so well put together, there's minimal aberrations, so I don't have to worry about my photos suffering from flare or ghosting.
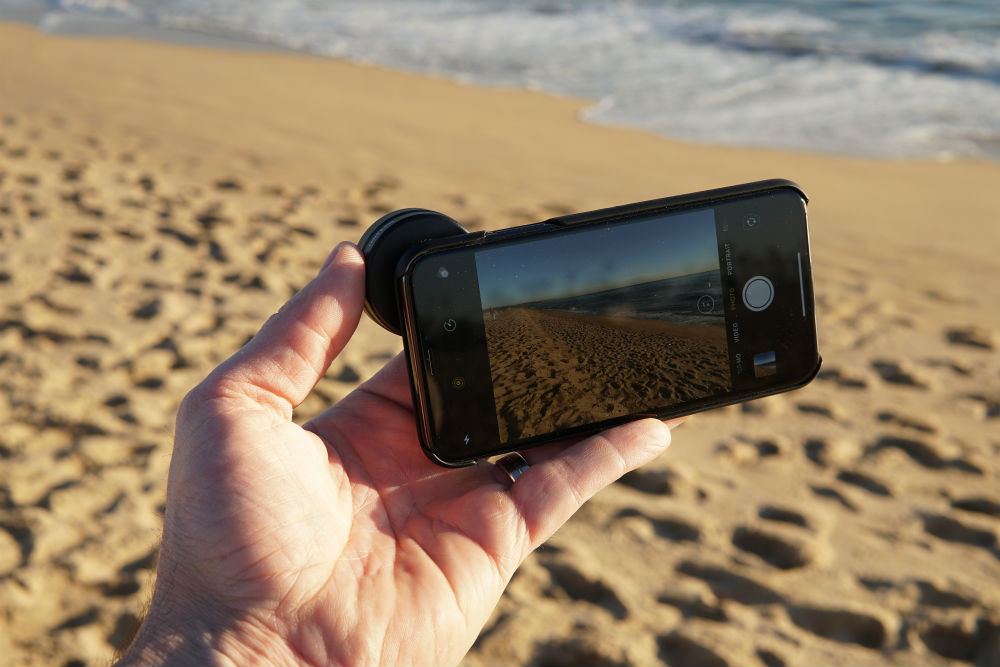
And though I appreciate the advances that Apple has made to the iPhone's lenses as of late, they still can't compete with the quality that my SANDMARC lenses provide.
What's more, with my lenses, I can shoot a wide variety of shots - wide-angle, macro, and fisheye.
With all that variety, I can be more creative with my photos and get results that would otherwise be impossible to get with my phone.
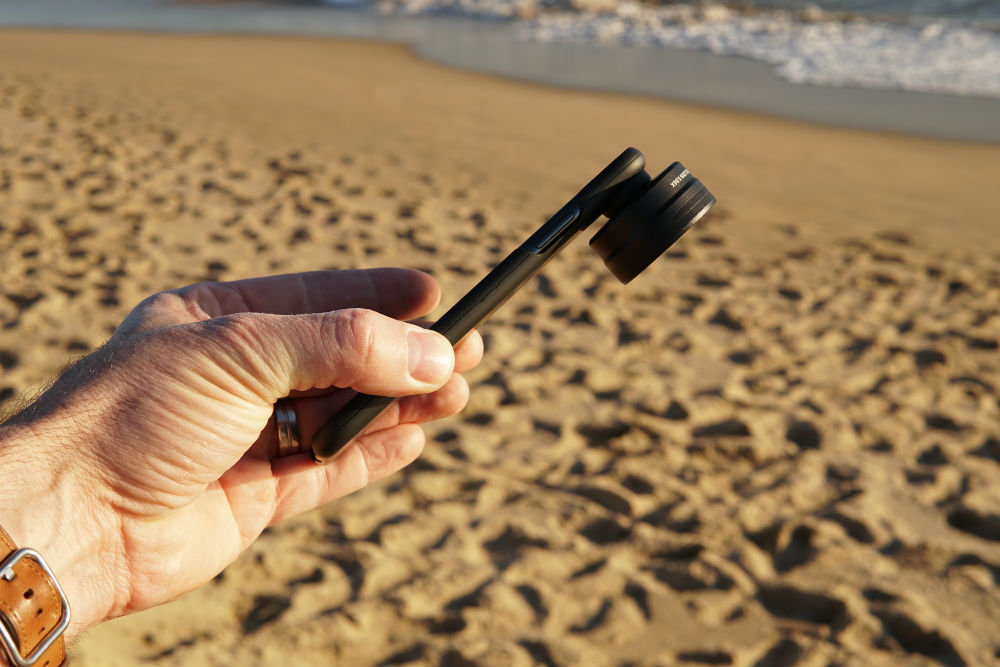
I appreciate the fact that these lenses are so easy to use, too.
I can just clip them onto my phone for quick shots or I can use the included slim case (as shown above).
Either way, I know that by using these lenses and a few simple iPhone photography composition tricks, I can up my photography game with my iPhone.
Learn More:
We Recommend
Simple Tips and Tricks for Better Smartphone Photography
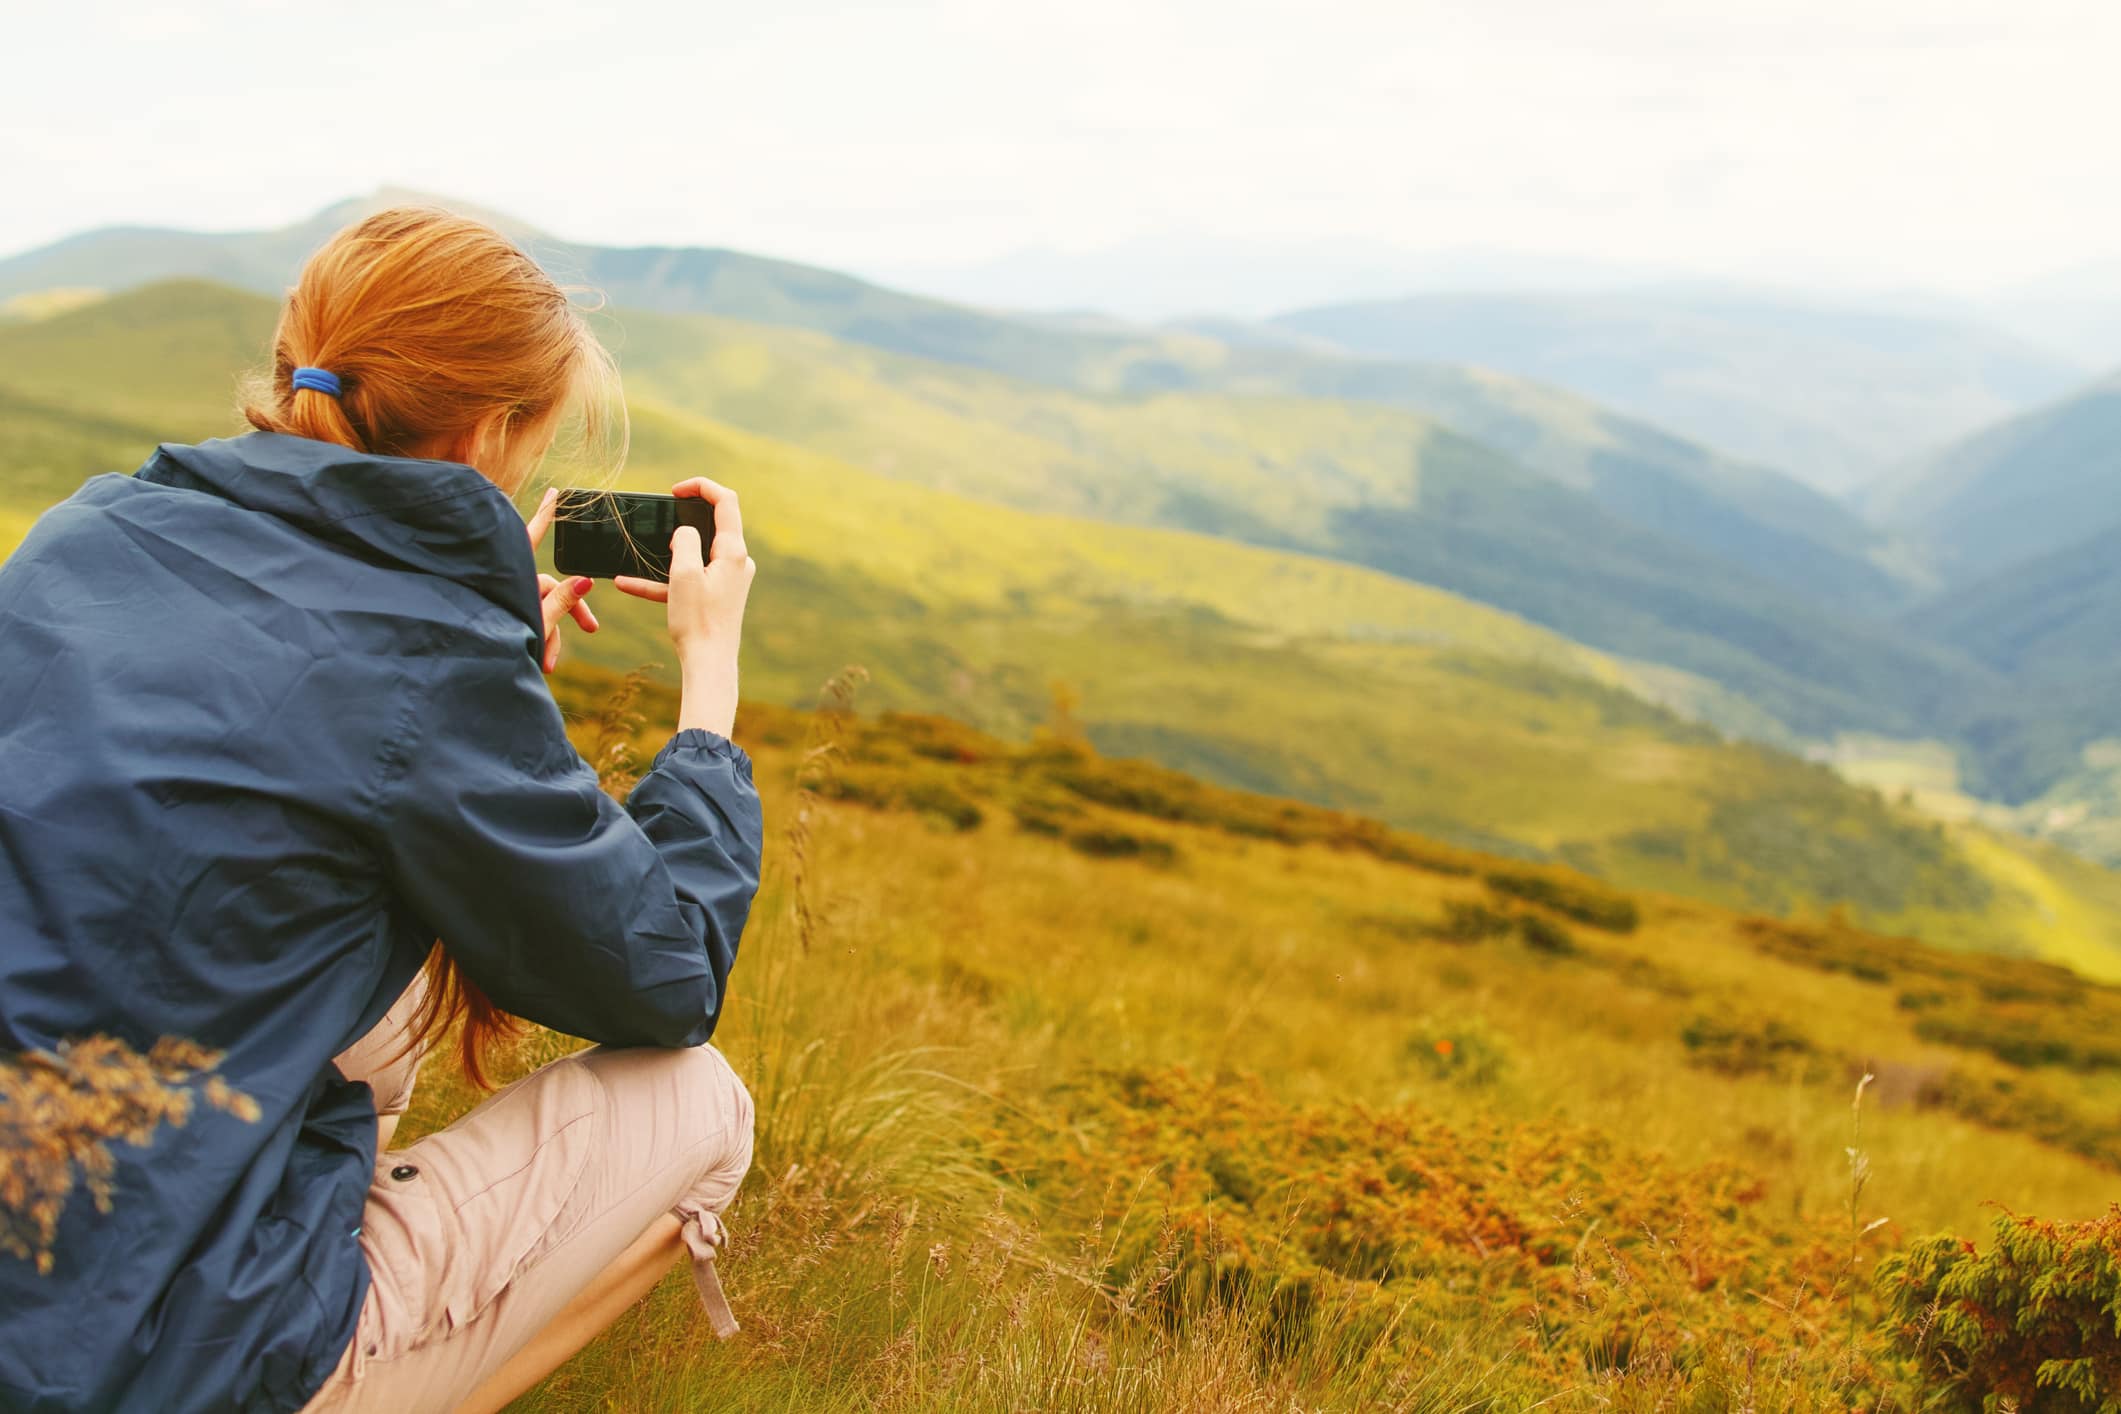
I remember the days when carrying a camera meant having a big 35mm SLR body, a couple of hefty lenses, a bunch of rolls of film, and a big tripod - to name a few things - in a bag slung over your shoulder.
Today, though, we're spoiled in that we've got powerful cameras right in our pockets.
That's nice for a lot of reasons, not the least of which is being able to carry a lot less gear!
It's also nice because having a camera on us at all times enables us to practice our craft more often, and as they say, practice makes perfect.
So, as you practice your photography skills with your mobile phone, keep the following tips and tricks in mind to help you create even better photos.
Gear Tip: Add a Lens
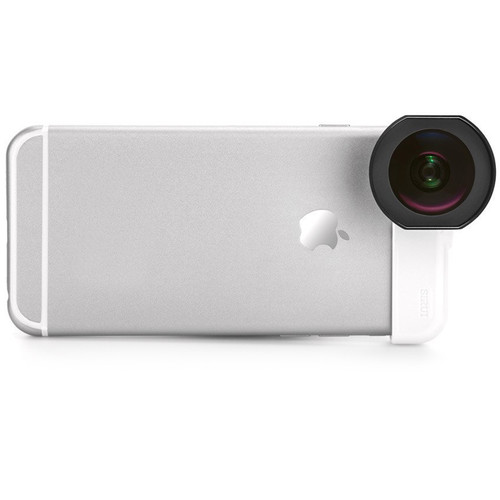
If you really want to expand your phone's capabilities as a camera, you need to get an add-on lens.
Better still, why not get a series of lenses, each for a different purpose?
For example, I shoot with Sirui's line of smartphone lenses, which includes a portrait lens, a wide-angle lens, and a fisheye lens.
As you might imagine, having these lenses at my disposal gives me many more opportunities to create interesting smartphone images.
The 60mm portrait lens shown above is an ideal focal length for portraits.
It gives you just the right perspective for getting frame-filling portraits of friends and family, but without being right up in their face.
At 18mm, the Sirui wide-angle lens is perfect for capturing wide subjects like street scenes, landscapes, and even large group portraits.
In other words, it's a much more versatile focal length than what your camera's native lens offers.

Of course, if I want to get really creative, I just use the 170-degree fisheye lens shown above.
It allows me to create images that distort reality and give viewers an interesting take on a traditional subject, as you can see in the image above.
And the best part?
All of Sirui's mobile phone lenses are built to the highest standards of quality.
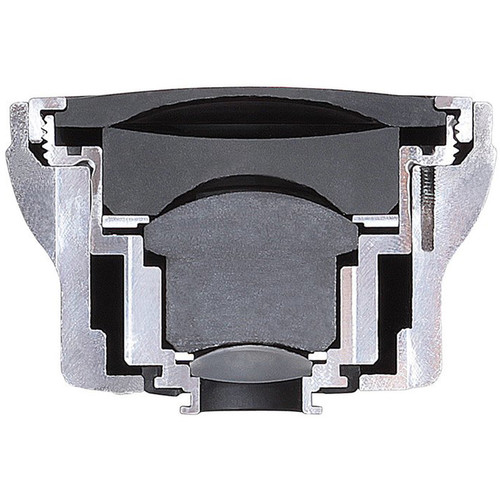
That means they have multiple layers of anti-reflection coatings to ensure easy light transmission without any glare.
And unlike lesser smartphone lenses, these bad boys have excellent color rendition, minimal vignetting, and little distortion.
They're inexpensive, too, so you can really step up your smartphone photography game without spending a ton of money.
What's not to like about that?!
Learn More:
Composition Trick: Fill the Frame

As I noted above, it's nice to have various lenses to help you frame up interesting shots of your subjects.
But it's also prudent to use your lenses (native or add-on) to get close to your subject.
And I don't just mean pretty close, either. I mean really close.

When you hang back and take a photo with your smartphone a good distance from the subject, it will appear pretty small.
There's times when that's warranted (i.e. landscape photography), but sprinkle in a few close-up shots amongst your wide photos to give viewers a look at some of the details that get lost when you take a photo of a larger scene.
Whether your subject is your kid or your dad, a flower or an interesting sculpture, getting in close and highlighting its details can make for one heck of a compelling image.
Don't zoom, either! Smartphones have great cameras, but the digital zoom is awful.
Instead, "zoom with your feet" and get close to your subject, fill the viewfinder, and snap away.
Learn More:
- Mobile Photography 101: Introduction to Smartphone Photography
- How to Take Speciality Photos With Your Smartphone
Processing Tip: There's an App for That

Visiting the App Store or Google Play to find a photo editing app can be overwhelming, to say the least.
There are thousands of options out there, some of which are extremely good, others that aren't.
If you're looking for a powerful editing experience that offers you a lot of options for creating dynamic photos, give one of the following apps a good, long look...
VSCO
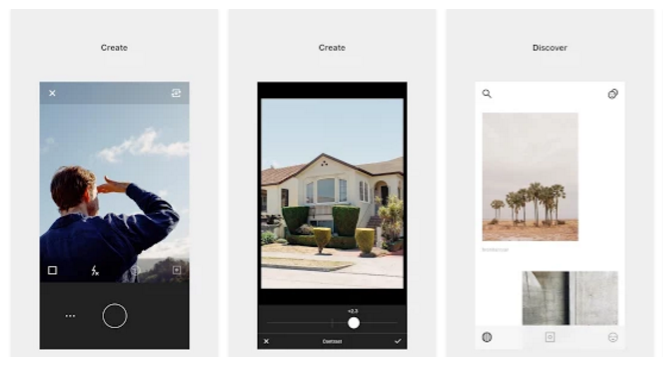
VSCO is one of the most popular smartphone image editing apps, and for good reason.
It comes loaded for bear with tons of presets - some free, some paid - that range from crisp and clean to black and white to gritty in their appearance.
VSCO gives you the ability to work on just about any aspect of a photo, too, from tint and contrast to saturation and highlights.
It even has an integrated camera app that allows you to shoot in RAW.
Get VSCO on the App Store and Google Play.
Snapseed
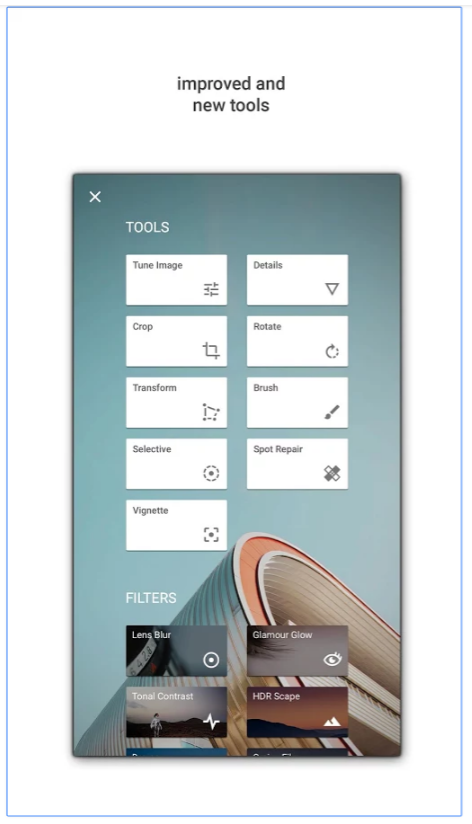
A few years ago, Google acquired Snapseed. With Google's backing, it's become one heck of a photo editor.
It comes with 26 advanced tools and filters - brushes, healing, and HDR among them - that gives you wide latitude in creating better smartphone photos.
You can stack your edits, too, similar to Photoshop.
With finely tuned controls, you can easily manipulate the strength of the edits you make for a precise editing experience.
Like VSCO, you can also open and edit RAW files.
Add in a tool that allows you to edit just the faces that appear in a shot, and you've got a great editor for manipulating portraits.
Get Snapseed in the App Store and on Google Play.
Learn More:
We Recommend
Smartphone Lens Buying Guide
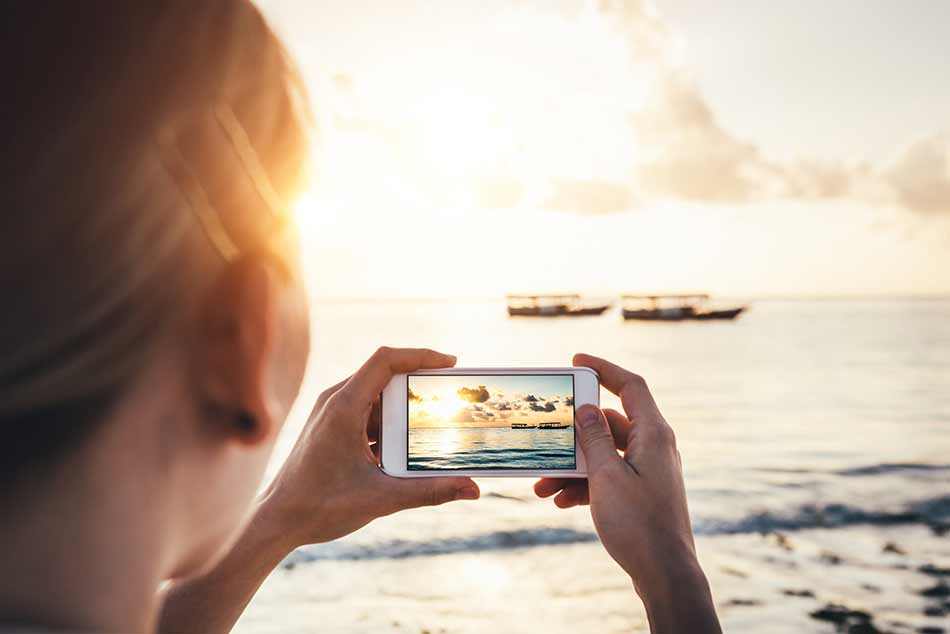
Thinking about picking up a cell phone camera lens?
Before you do, doing some research on the best smartphone camera lens is well worth it.
Let's be honest - there's a lot of smartphone lenses on the market today, and most of them are not good at all. That's why you need to do your due diligence.
In this smartphone lens buying guide, I offer up a few features to look for that will help ensure you get the highest quality smartphone lens.
Editor's Note: For illustrative purposes, I use SANDMARC iPhone lenses as examples in this article. I've used these lenses for months and can personally attest to their quality and performance.
Is the Phone Camera Lens Well Constructed?
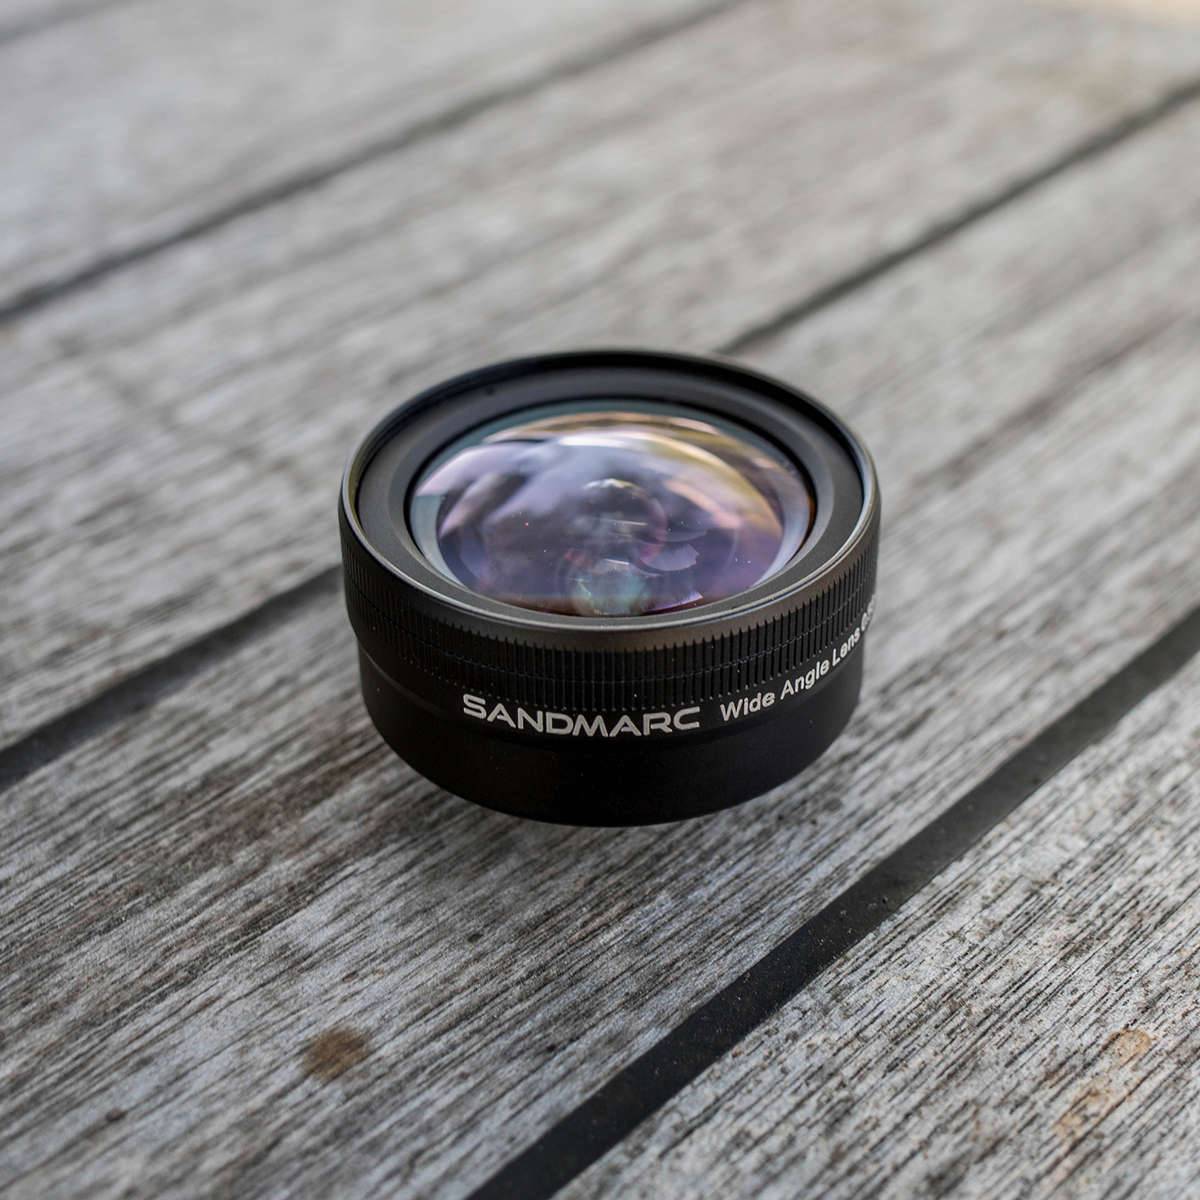
Clearly, one of the most important features to look for in a smartphone camera lens is the quality of construction.
As I noted above, quality is something that's lacking in many (if not most) smartphone lenses.
The best quality lenses have multiple elements that have multiple coatings.
What this does is ensure that images are as clear and crisp as possible.

What's more, this multi-coated and multi-element arrangement is ideal for eliminating distortion.
The result? Clean, beautiful images that are sharp, detailed, and full of contrast!
Just take a look at the photo above, which I took with my iPhone X and my SANDMARC wide-angle lens.
Notice the wider-than-normal field of view thanks to the lens. Also notice the total lack of distortion thanks to the SANDMARC lens. Not bad, right?
Learn More:
- 4 Hacks for Stepping Up Your iPhone Photography Game
- Essential Tips for Better Photos With Your iPhone X
Is the Cell Phone Camera Lens Easy to Use?
Years ago when cell phone camera lenses first became a thing, I bought a telephoto lens for my iPhone 4.
The lens screwed into a lens case, which in itself wasn't difficult to do.
However, when I went to use the lens, the weight of it pulled the case away from the phone enough to create a gap between the telephoto lens and the native iPhone lens.

In other words, if I wanted to get a clear shot (and I use "clear" loosely...), I had to hold the telephoto lens in place with one hand while trying to compose and shoot the photo with the other.
Needless to say, I didn't get any good photos out of that lens.
Fast forward to today, and using phone camera lenses is a breeze. Just check out the video above to see what I mean...
My SANDMARC lenses attach to my iPhone X in two easy ways - by clipping it onto my phone or by using an ultra-slim case mount.
I know what you're thinking, too...
How could either mounting method actually work well enough to get good shots?
I'm not an engineer or designer, so I can't actually answer that question. All I know is that it works and works very well!
Unlike the first lens and case I used way back when, my SANDMARC case keeps the lenses right where they need to be.
On top of that, it's the thinnest case mount in the world, so the chances are that you won't even notice a difference as you carry your phone around in your pocket.
What's not to like about that?
Is the Smartphone Camera Lens Versatile?
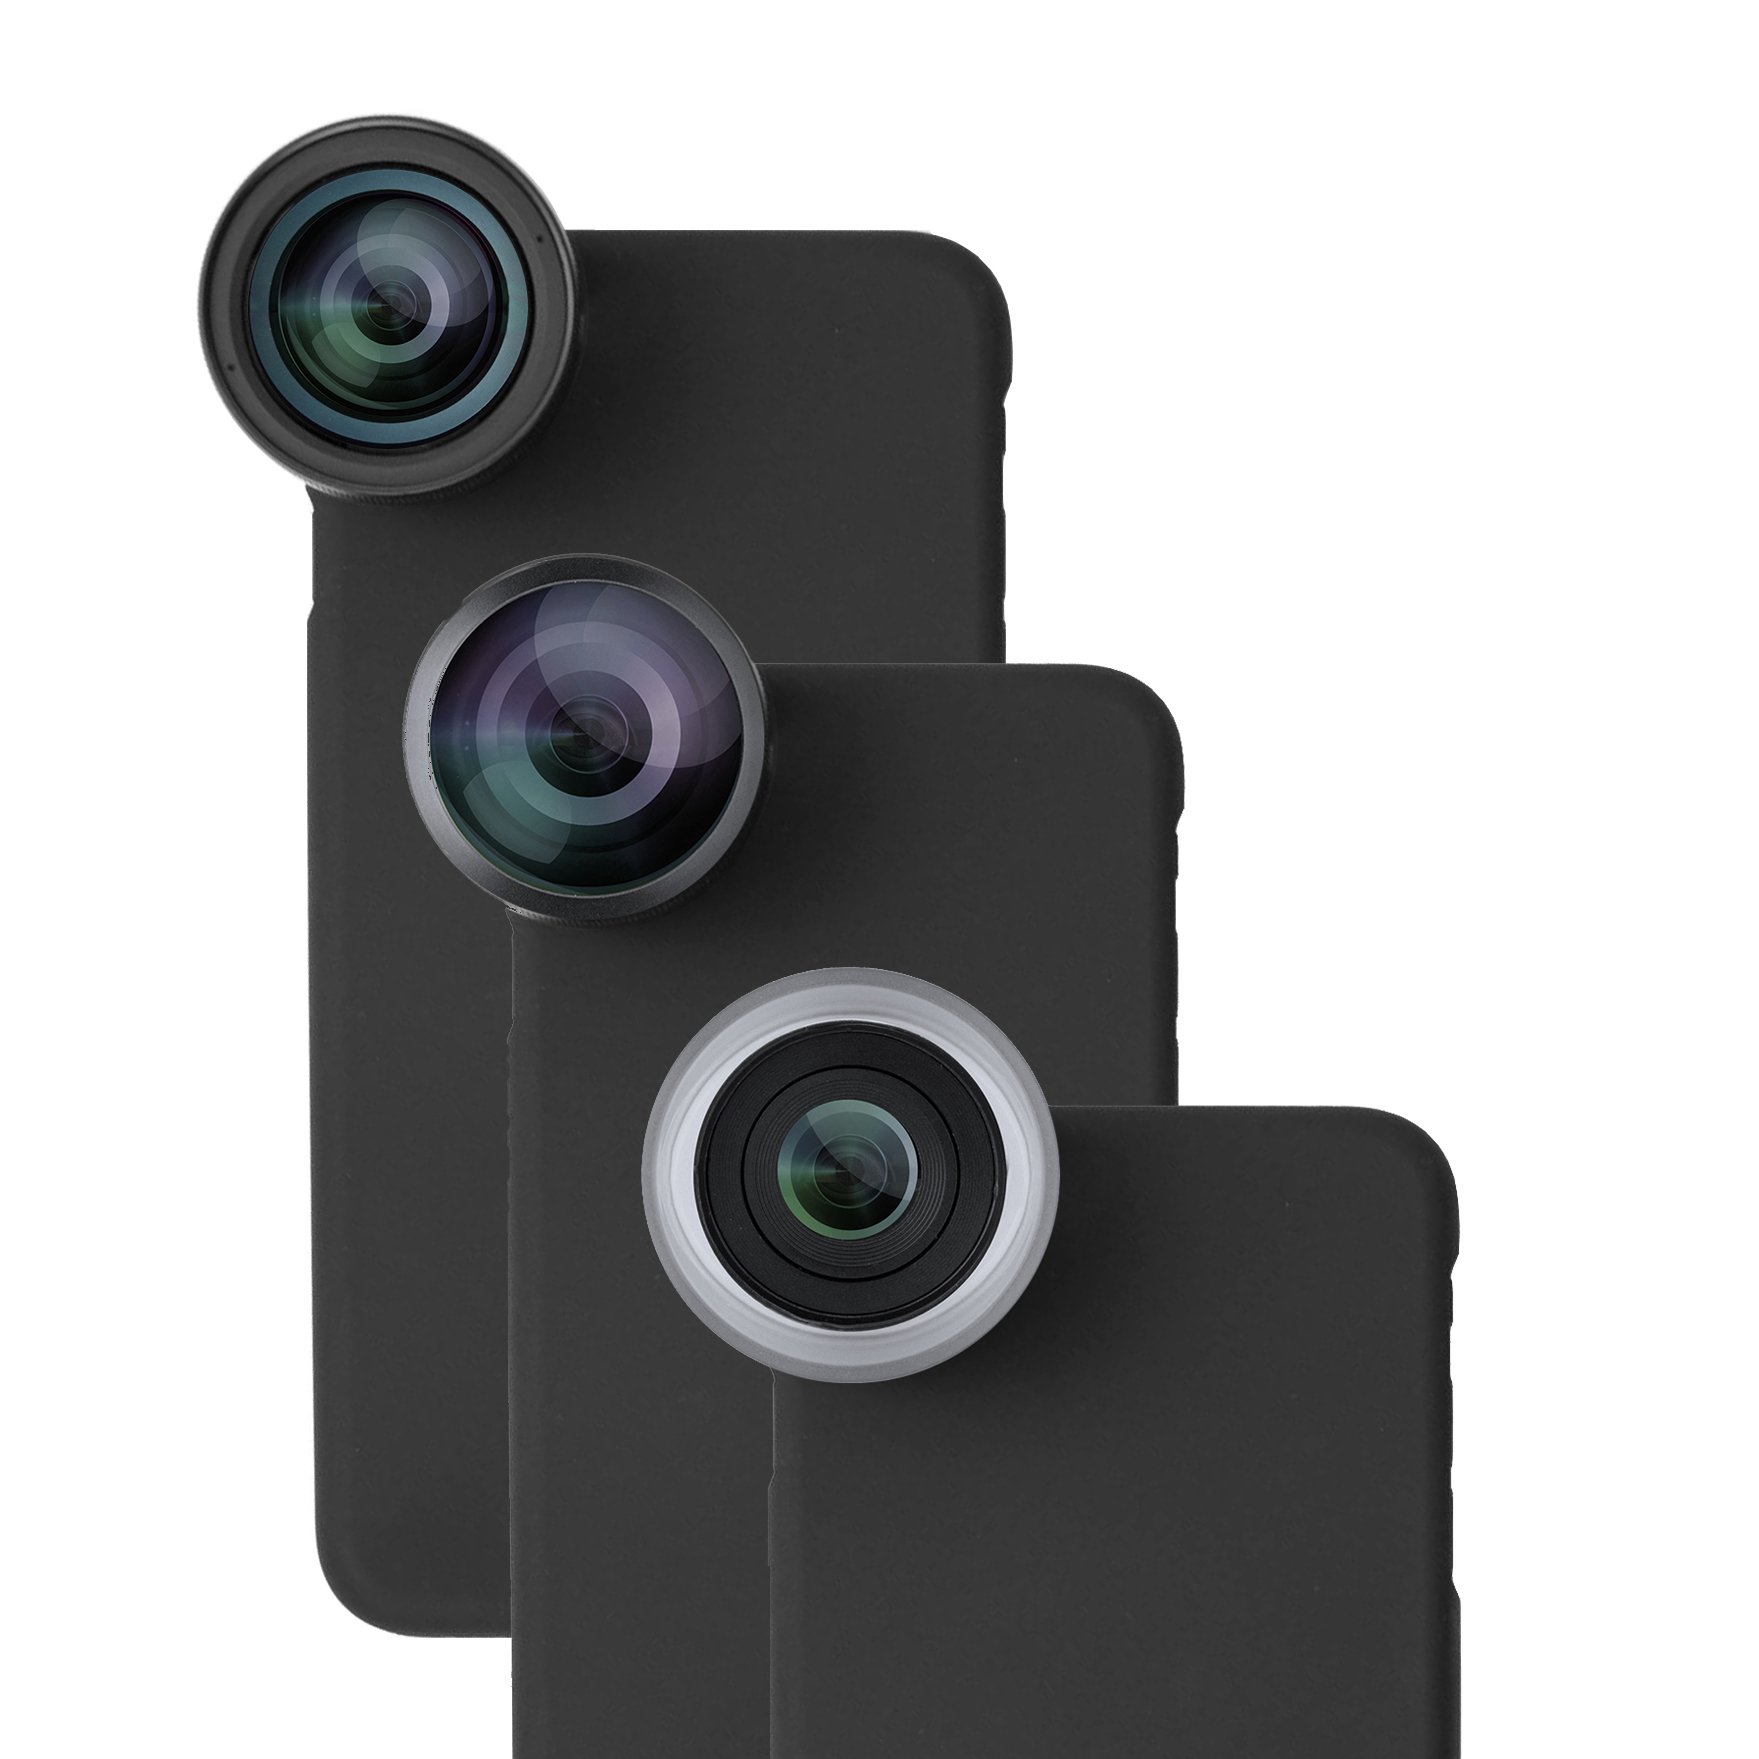
Though some smartphone lens manufacturers are one-trick ponies, others offer tons of variety to help you improve your photos.
And that's precisely what SANDMARC has done...
I picked up their Photography Edition Kit (shown above), which includes a wide-angle lens, a macro lens, and a fisheye lens.
I definitely use the wide-angle lens the most, simply because I shoot a ton of landscapes.
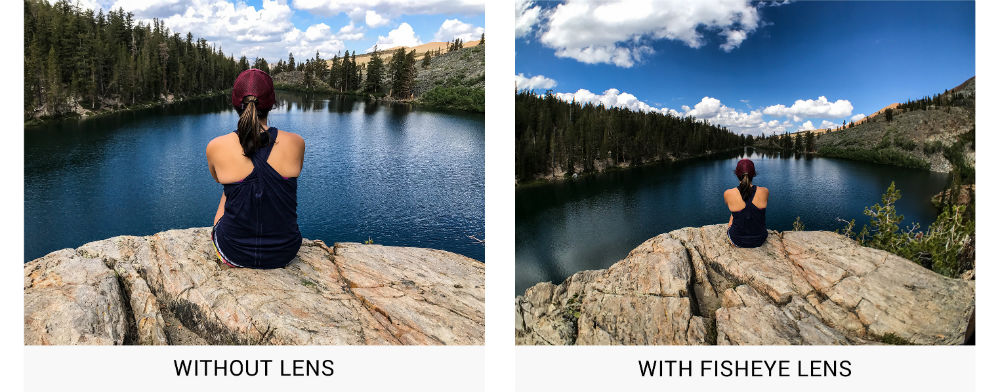
But having the macro and fisheye lenses has helped me get out of my comfort zone and try different types of photography that, historically, I've avoided.
The 10mm fisheye lens offers 0.2x magnification that's been fun to use for urban scenes while the 25mm macro lens has 10x magnification that I use for getting up-close and personal with flowers, insects, and even my son's toys.
As far as the wide-angle lens goes, at 16mm with a 0.56x magnification, it's the ideal focal length for the landscapes I seek out every weekend.
Like I said earlier, not all smartphone lenses are made equal, so buyer beware when you start shopping.
But based on my personal experience, you can't go wrong with SANDMARC iPhone lenses. They're beautifully made, easy to use, incredibly versatile, and have helped me find new and interesting ways to photograph the world around me.
If that's not a ringing endorsement for these being the best smartphone camera lenses, I don't know what is!
Learn More:
- Simple iPhone Photography Composition Tricks That Have Tons of Impact
- How to Take Good Photos With a Smartphone
We Recommend
Take Control of Your iPhone Camera With These Mobile Photography Tricks
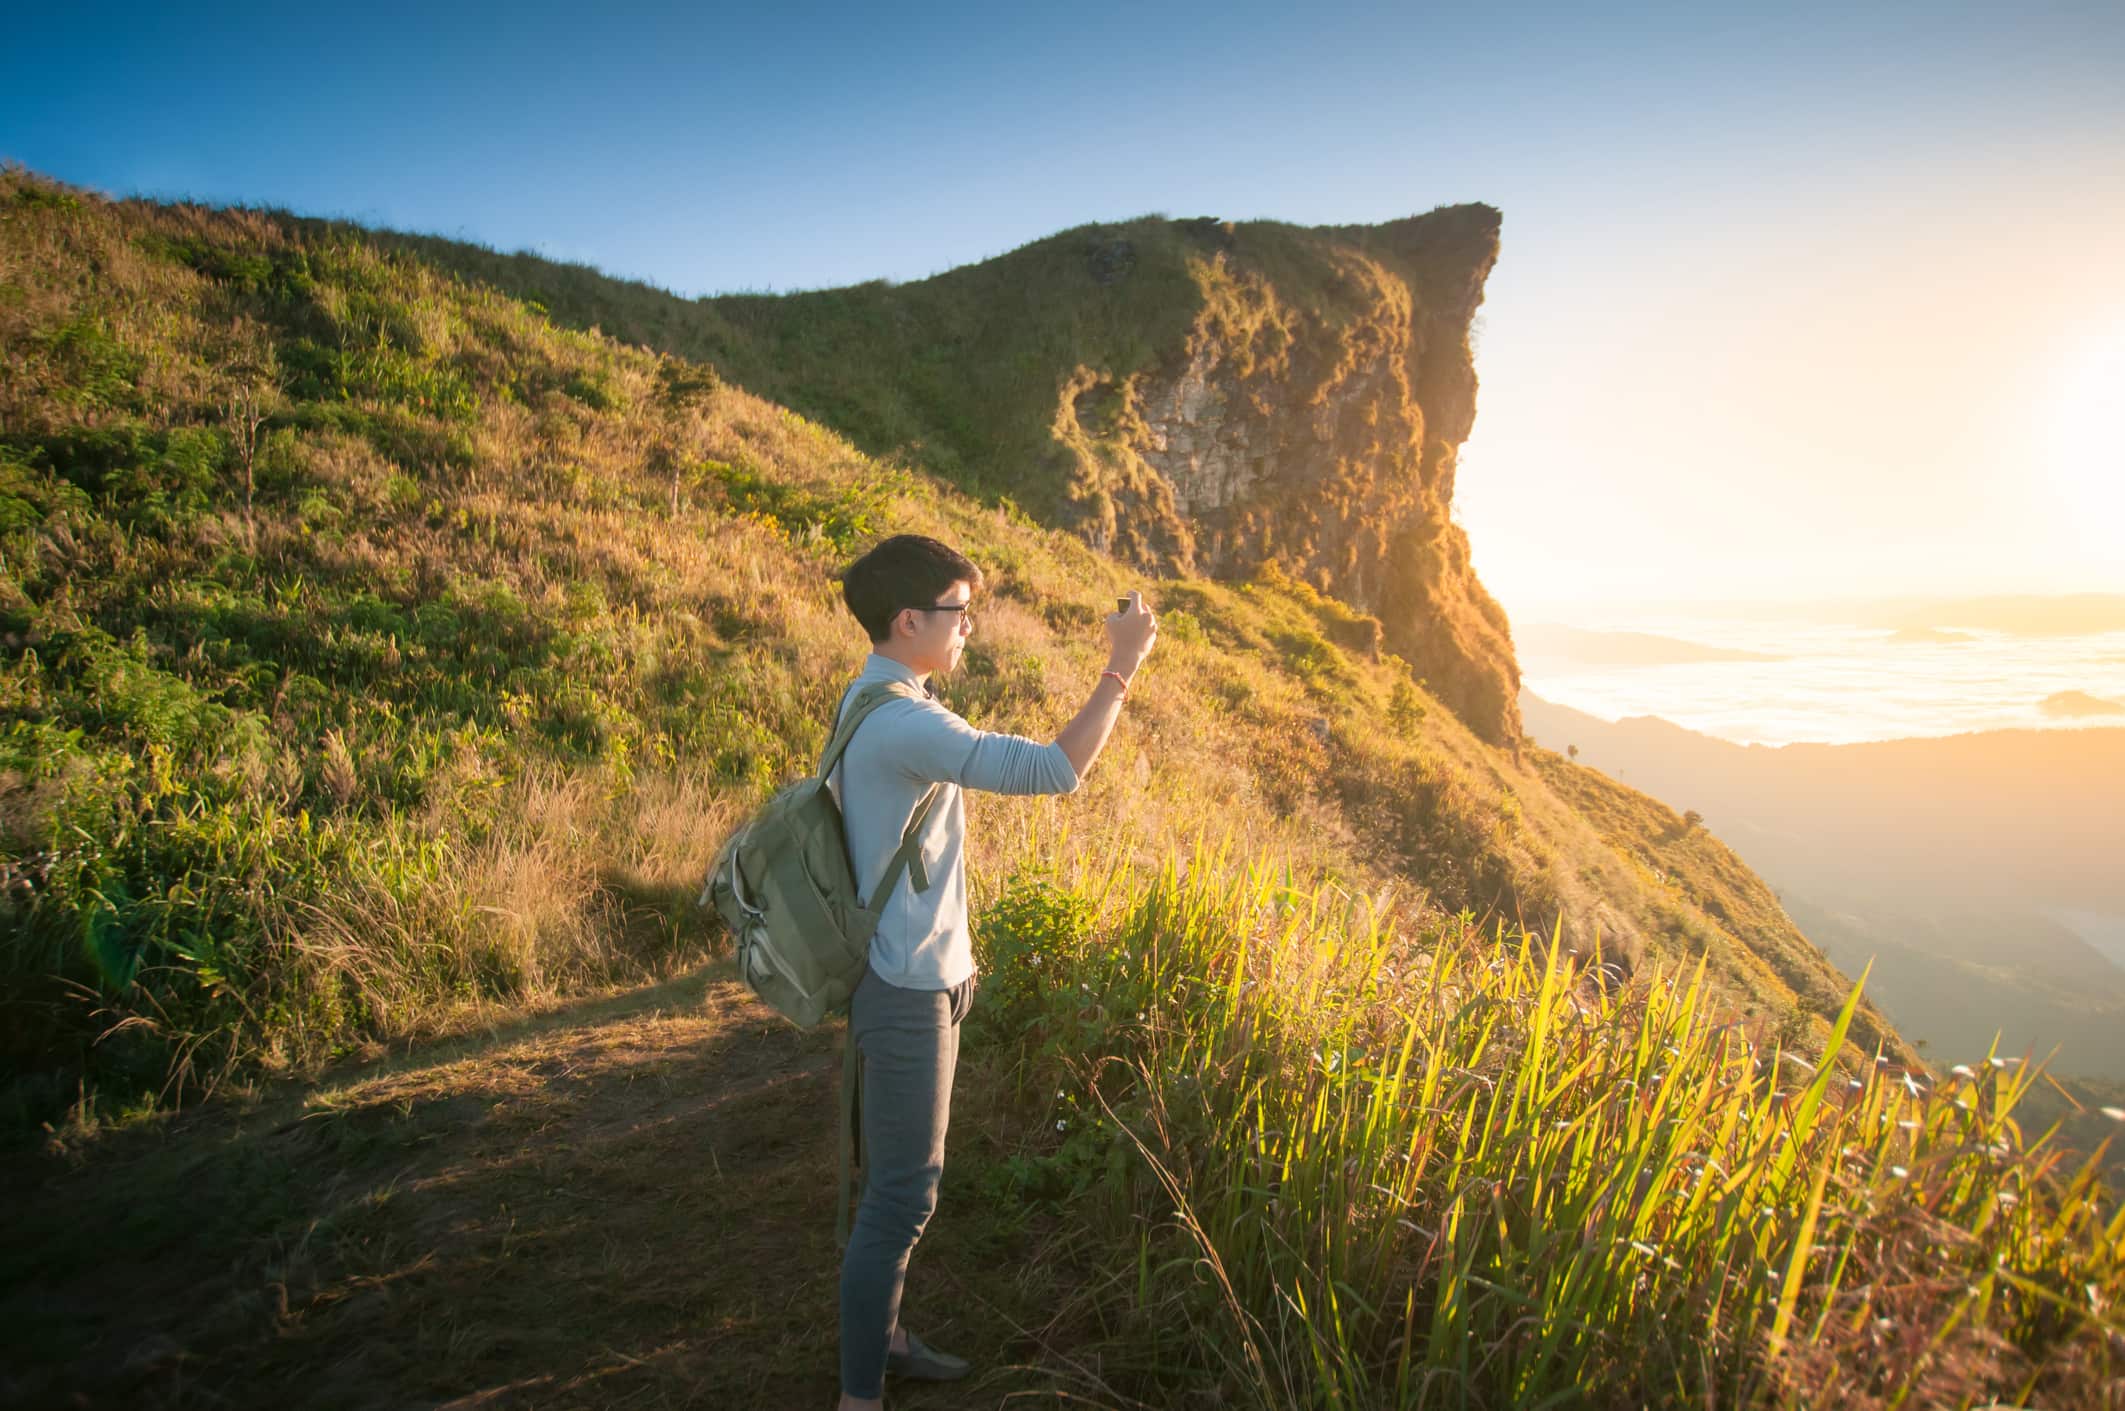
I've had an iPhone X for several months now, and I have to say that I'm impressed with its performance as an everyday camera.
Is it as good as my Nikon D850? No...
But it's certainly got tons of features that enable me to take some pretty nice photos.
Here's a few tips for taking control of your iPhone to get improved results.
Adjust the Exposure

If you're new to the iPhone universe (or simply didn't know already), you can adjust the exposure with just one tap of your phone's screen.
Simply tap the phone's screen as you would to focus the shot, but then swipe your finger up to brighten the image or down to darken it.
It's not as effective as manipulating the exposure in post-processing, but if you need a quick adjustment in-camera, it works quite well.
Learn More:
- iPhone Photography Tips: 5 Tricks to Master Landscapes With Your iPhone
- 5 New Things in Photoshop CC 2018 That You Must Know
Use Focus Lock
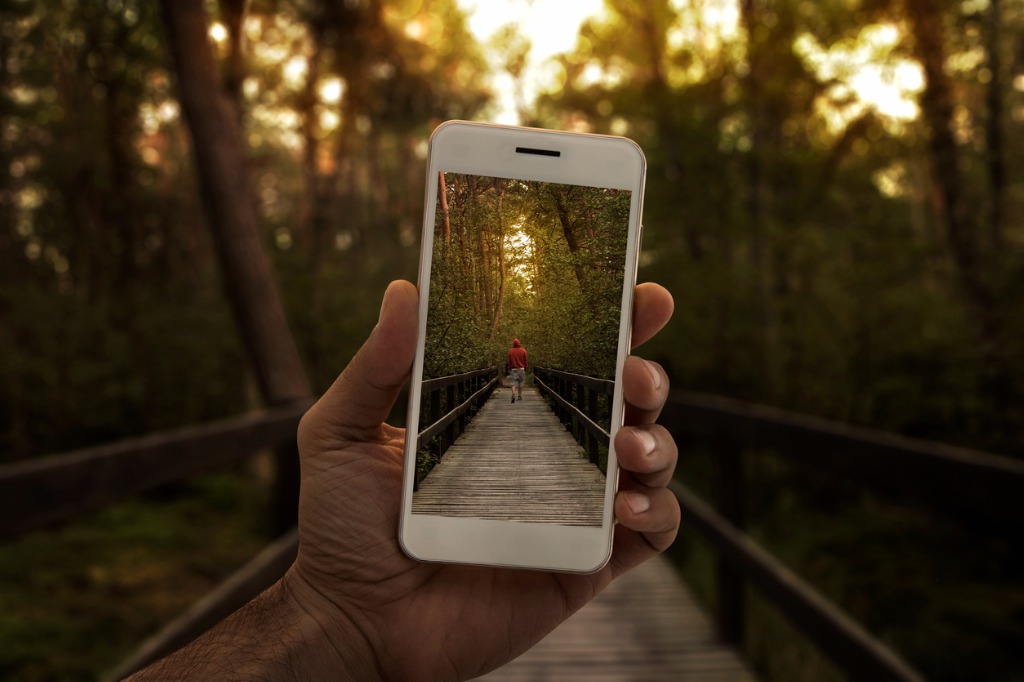
One of the biggest problems with so many images is that they simply aren't in focus.
There are plenty of reasons why a photo might be blurry - a shutter speed that's too slow for a moving subject, an aperture that generates a depth of field that's too shallow, and camera shake among them.
Another culprit of blurry photos is simply not having the focus right.
On an iPhone, you can easily correct this problem.
Instead of tapping to focus like normal, tap and hold to lock the focus. Once you do that, a yellow bar will appear that says "AE/AF Lock."
At that point, you can move the camera around, and your iPhone's camera will retain focus on the intended subject.
Get Better Lenses
I appreciate that my iPhone X has improved cameras and lenses (including dual front-facing cameras with wide-angle and telephoto capabilities).
But just like the kit lens on your DSLR doesn't perform as well as an upgraded lens, the iPhone's native lenses can benefit from better glass, too.
That's where iPhone lenses by SANDMARC come in.
I've played around with these lenses for a few weeks now, and to say that I'm impressed is an understatement.
In years past, I've tried lenses with prior iterations of the iPhone, and I was left wanting in the performance department.
Some of those lenses had complicated case mounts that were difficult to use (and ugly, too). Others had poor quality glass that degraded the quality of the photos I took.
SANDMARC has solved both of those problems, though.
These lenses can be used in one of two ways - as a clip-on lens or attached to a case.
But don't think that this case is like those big, ugly, complicated ones from the past. In fact, SANDMARC's iPhone case is the slimmest case mount in the world.
Not only that, but the lenses themselves offer superior performance.

I took the photo above with my iPhone's native wide-angle lens.
Then I clipped my SANDMARC wide-angle lens to my phone and took the photo below.
As you can see, there's a big difference in the field of view. That's thanks to the 2x field of view you get with the SANDMARC wide-angle lens.

With an effective focal length of 16mm and a magnification of 0.56x, it's the ideal iPhone lens for capturing gorgeous landscapes.
And the use of premium multi-coated optics means that with these lenses, you'll get clear, sharp, crisp images.
What's not to like about that?!
Learn More:
- Get the Specs and Pricing on the SANDMARC Wide-Angle iPhone Lens
- Essential Tips for Better Photos With Your iPhone X
Use HDR

If you ask me, one of the best features of the iPhone X is its improved HDR capabilities.
Since I shoot a lot of landscapes, I appreciate that my phone does such a good job of overcoming dark landscapes and bright skies with the HDR function.
Essentially, the phone takes several shots, each at a different exposure level, then blends them together into one HDR image.
It's extremely helpful in many situations, particularly when there's tons of shadows, like sunrise or sunset.
So, for improved results, remember to shoot in HDR, lock the focus, and adjust the exposure. Add in some great iPhone lenses, and you have a recipe for success!
We Recommend
The Best Smartphone Photography Tips for 2021
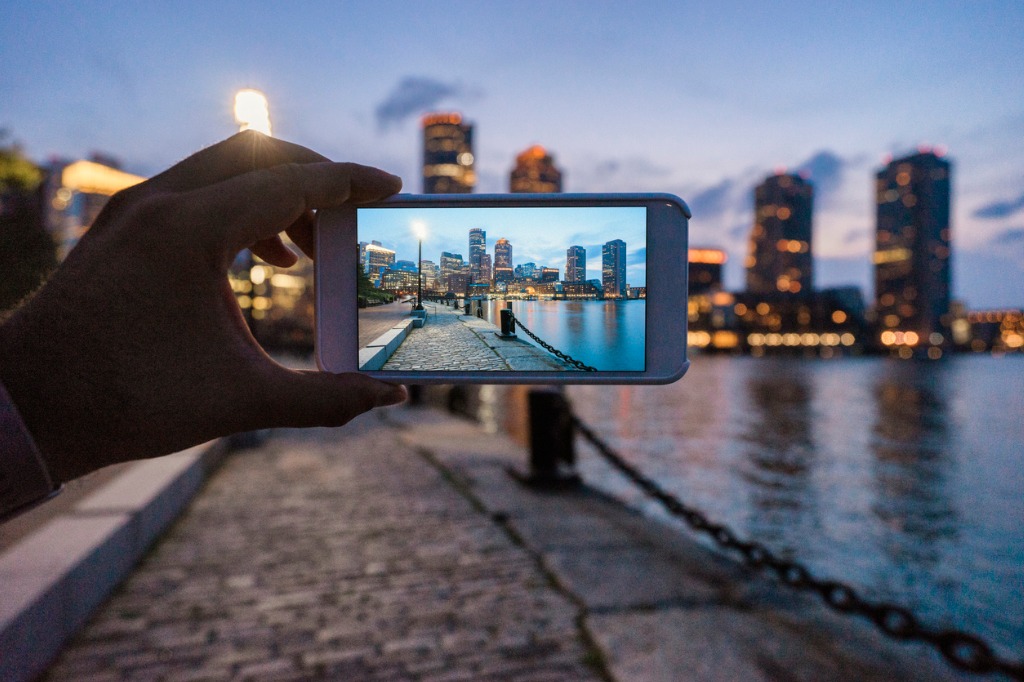
photo byFilippoBacci via iStock
The best camera for an unexpected photographic opportunity is the one you actually have on you. More often than not, that camera is our ever ready smartphone that we are rarely without. Smartphone photography can be serious photography too.
If you want to know good iPhone photography or Android smartphone photography tips that can have you producing high quality images with just a little extra preparation, read on. Developing good smartphone photography habits and knowing what smartphone photography accessories can make capturing good images easier are a couple of thoughts we’ll discuss.
Keep It Clean

photo bymiodrag ignjatovic via iStock
Our smartphones go through hell on a typical day, don’t they? They get carried around in a pocket, purse, or in our grimy hands. That tends to result in lots of fingerprints, dirt, and greasy fingerprints on our phones. If we see that on the screen, there is a good chance it’s the same story on the lens, too.
The solution is to clean up the lens before taking a picture. A good habit to have is to have a microfiber lens cleaning cloth with us. They are small and can be folded to fit in a purse, jeans pocket, maybe even a wallet. Hopefully we don’t use our microfiber cloth to sop up soda spills or check the oil in our car.
Another way to keep a smartphone cleaner is to not let it get dirty in the first place. A case that folds shut and covers the phone is one idea, a pouch style case will also work, though both styles of case will slow us down a little bit when we want to quickly use our phone.
Steady Goes It!

Many of the newest phones we use for smartphone photography have some pretty advanced features and functions, including the ability to use slow shutter speeds for long exposures. If we use these slower shutter speeds, we should prop up our smartphone somehow. Holding the phone out at arm’s length provides a pretty unsteady platform.
One of the best new smartphone photography accessories is the OctoPad camera mount from Octopus Camera. Instead of a tripod, clamp, or suction cup, the OctoPad is a weighted pad with a rubberized bottom pad and a ball and socket head on top. It can be placed on any surface up to a 45 degree angle for a steady way to hold a smartphone or accessories like an LED light or microphone.
Learn More:
- Best iPhone 11 Accessories of 2020
- Tricks For Shooting B-Roll Solo
- Photography Gear For Traveling Solo
Shoot Horizontal and Vertical
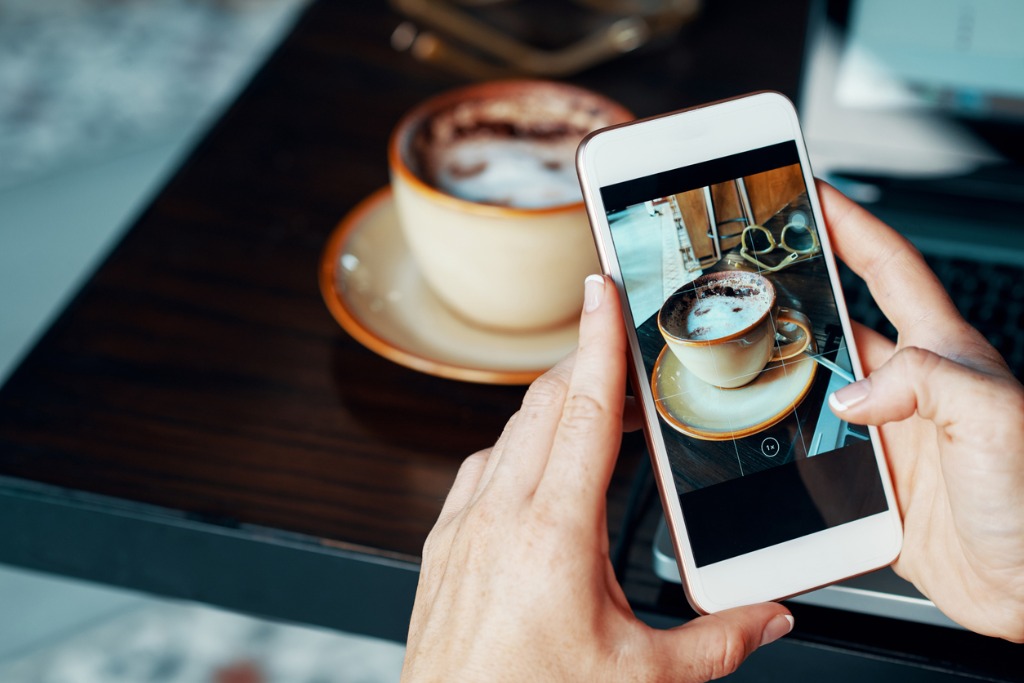
photo byDragonImages via iStock
The orientation of the camera can sometimes make the difference from a decent picture to an outstanding photograph. Too often we only use our smartphones for smartphone photography in portrait orientation because that’s how we usually use the phone for everything else.
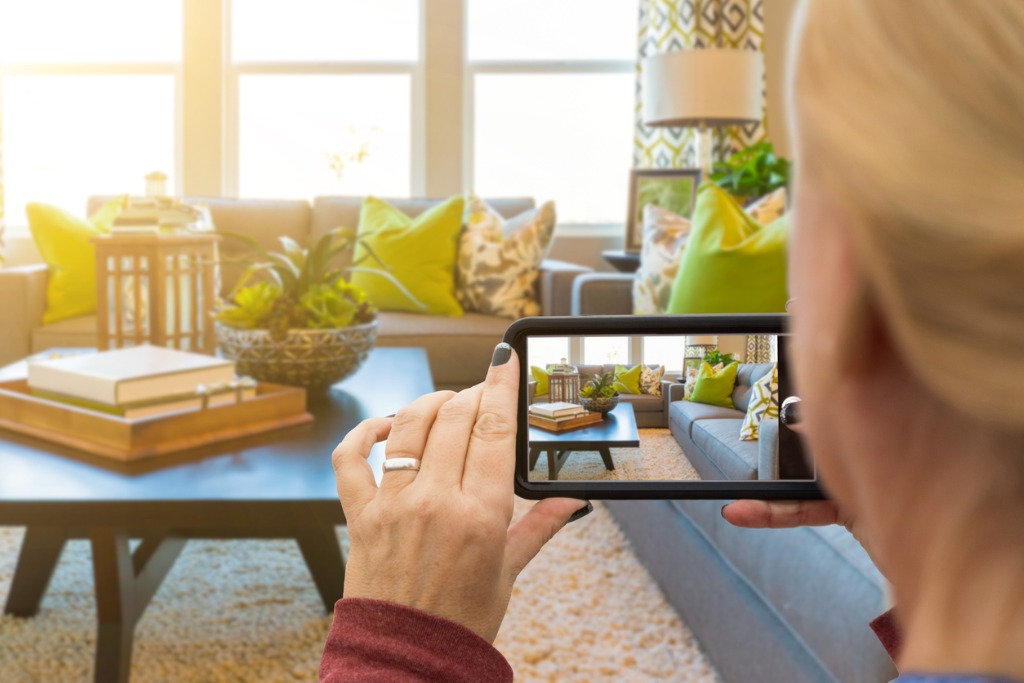
photo byFeverpitched via iStock
But some subjects are better rendered in landscape orientation which means turning the phone horizontally. An advantage for using landscape orientation with some subjects is that certain social media platforms are more friendly to showing the full image in landscape than in portrait.
I’m not sure why the square format social media functions work that way, but some of them do. For Instagram, it’s the little <> symbol in the bottom left corner when in the crop tool of setting up the post.
Shoot Video In Landscape
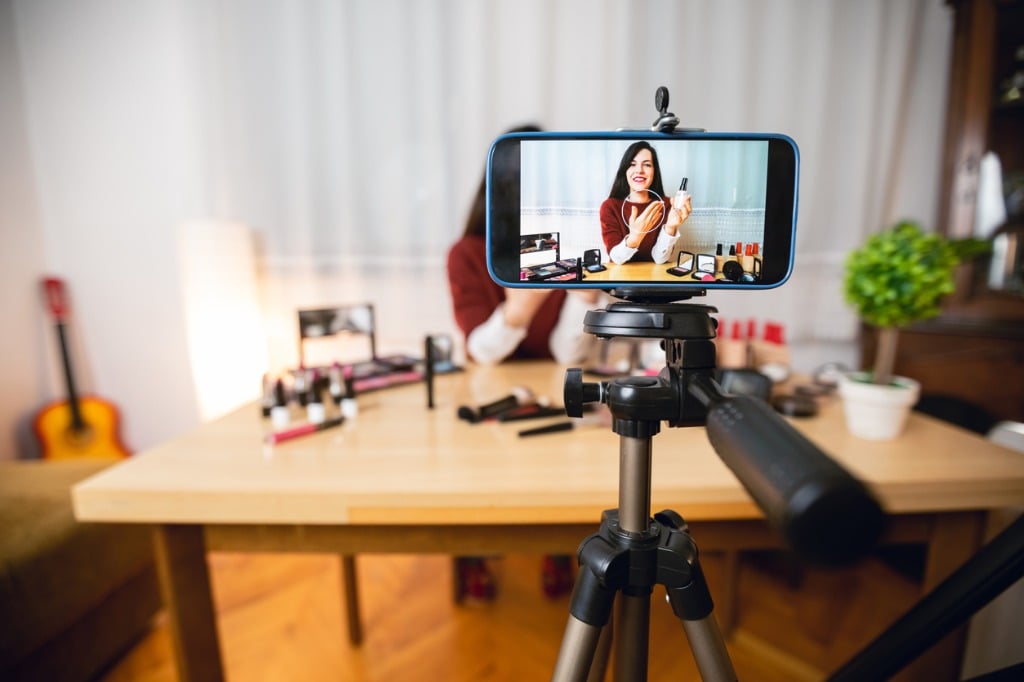
photo byurbazon via iStock
While the still images we take in smartphone photography may sometimes work out better in portrait orientation, video rarely does. The reason is because of how we’re used to viewing video footage, on a TV screen or a monitor with a similar aspect ratio.
Whenever you see at the scene recording footage on the news of a developing story, you will notice how they edit the footage so that it is formatted to these aspect ratios and orientation.
Our smartphone videos will look more professional overall if we get into this one small habit of only recording video in horizontal or landscape orientation instead of vertical or portrait orientation. Even though our still images can be either way or even square, our TV raised subconscious expects video to look like TV.
Stay On the Grid
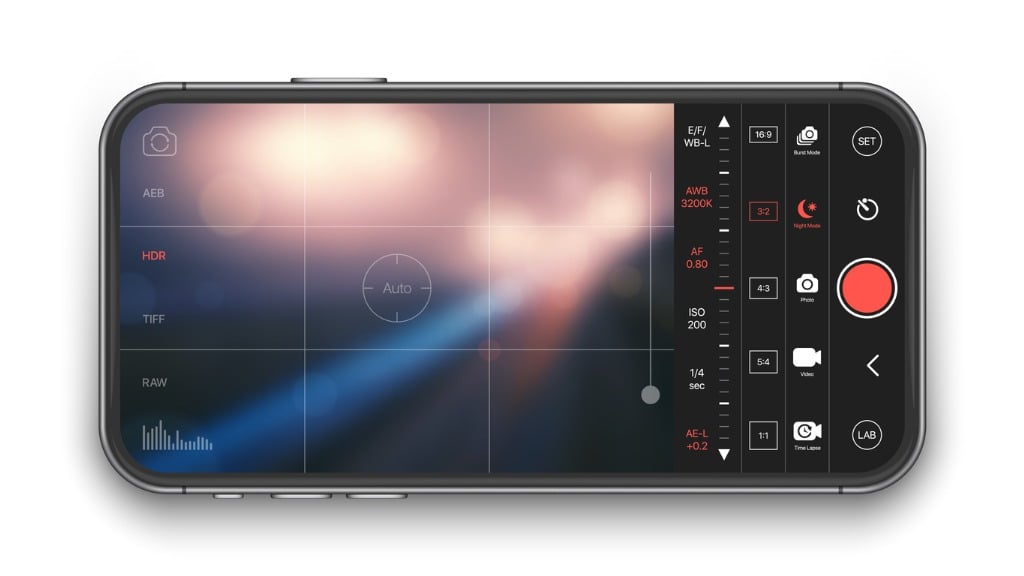
Photo by YAMONSTRO via iStock
If you’re a smartphone user, you probably rarely think of going “off the grid” in the way a survivalist might mean it. But we do tend to often think off the grid in regards to our smartphone photography by not using this fantastic composition tool built in to almost all smartphone camera apps, the framing grid.
The grid available for our smartphone photography is a neat tool that helps us out with framing and composition to keep things balanced in the image. Using the grid, we can either tell how centered or uncentered our subject is, or we can use the grid itself to make use of the Rules of Thirds composition guideline.
I have my smartphone camera app settings adjusted to where the grid shows up on my viewscreen as a default. Depending on your particular smartphone, you may need to find it in the menu and turn it on when you’re considering any serious smartphone photography.
It IS a Serious Photography Tool
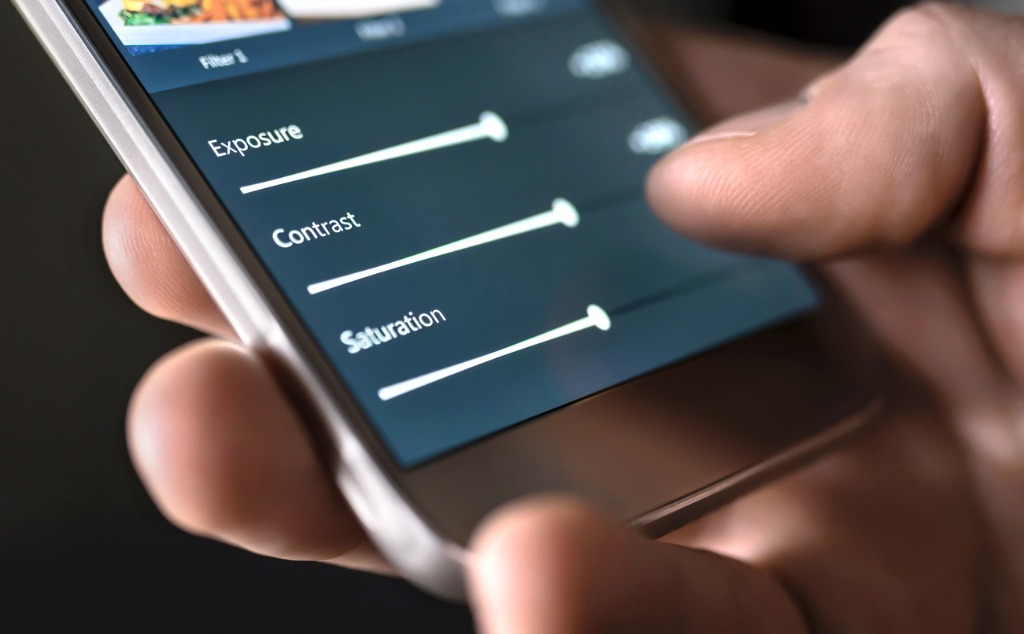
photo byTero Vesalainen via iStock
Smartphone and iPhone photography can be very high quality if we take the time to develop a couple of good habits and lose some bad ones. Since we almost always have our smartphones on us, it is often the best camera for the job by means of being the camera available at that moment.
Now if only that UFO would actually land and drop off Bigfoot and Elvis so I can get a good picture, then I would be happy.
Learn More:
- No Tripod? No Problem! Use One Of These Alternatives
- Quick Tips For Great Self-Portraits
- How To Pack Light For a Photography Trip
We Recommend
Why You Need Lens Filters for Your iPhone
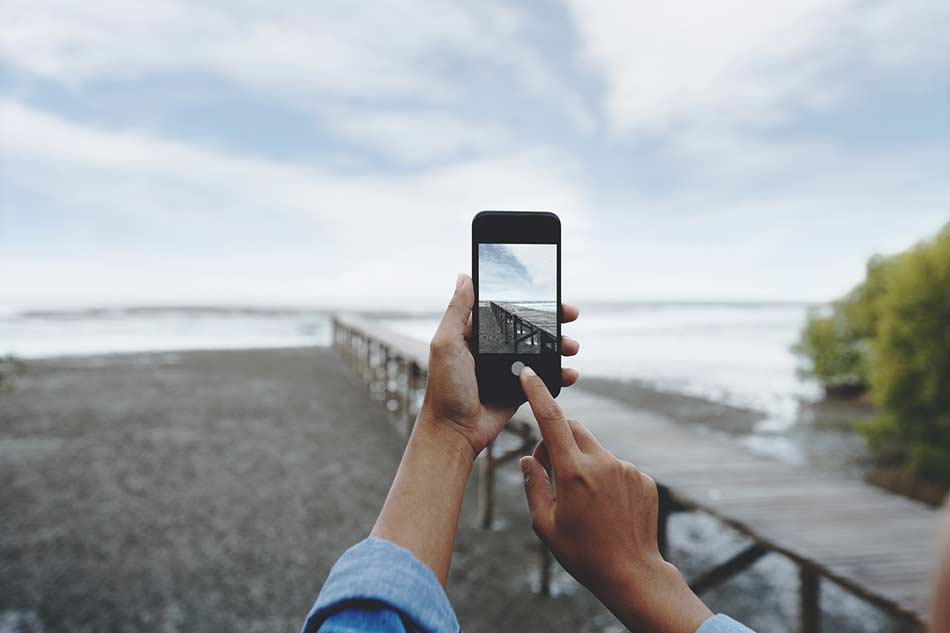
Here's the deal...
I have several excellent cameras, including a Nikon D850.
But my everyday camera is my iPhone, and I know I'm not the only one who defers to my iPhone for day-to-day photo-taking.
iPhones (and other smartphones, too) have really good cameras and functionalities that keep getting better and better with each new phone model that comes out.
And to go along with those great phone cameras is an ever-increasing array of iPhone camera add ons like lenses and filters.
Let's have a look at iPhone lens filters and explore how they can positively impact your mobile photography.
Your iPhone Lens Deserves an iPhone Filter
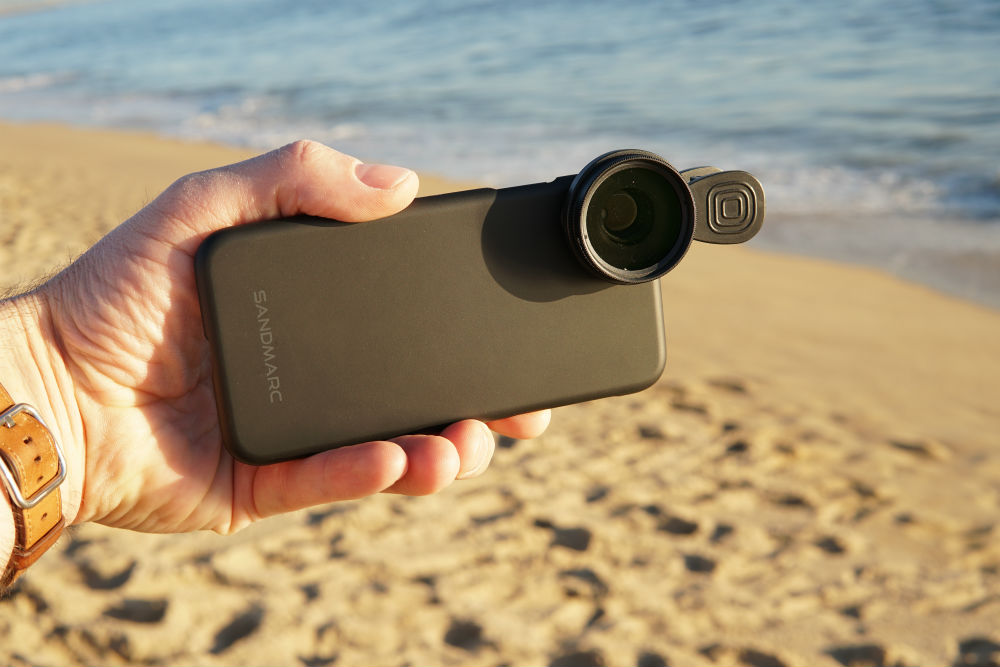
I've written before about the virtues of using a lens to improve the iPhone camera.
In short, add-on lenses these days are far, far superior to what they used to be. In fact, some companies craft iPhone lenses that have precision engineered glass and multi-element optics like you'd find on a traditional camera lens.
That means that you get sharper, clearer images with no distortion, vignetting, and other artifacts that can ruin your photos.
But guess what? There's also lens filters for your phone, and that's excellent news for those of us that primarily shoot with an iPhone.
Learn More:
- Essential Tips for Better Photos With Your iPhone X
- Take Control of Your iPhone Camera With These Mobile Photography Tricks
Introducing the iPhone Drama Polarizing Filter
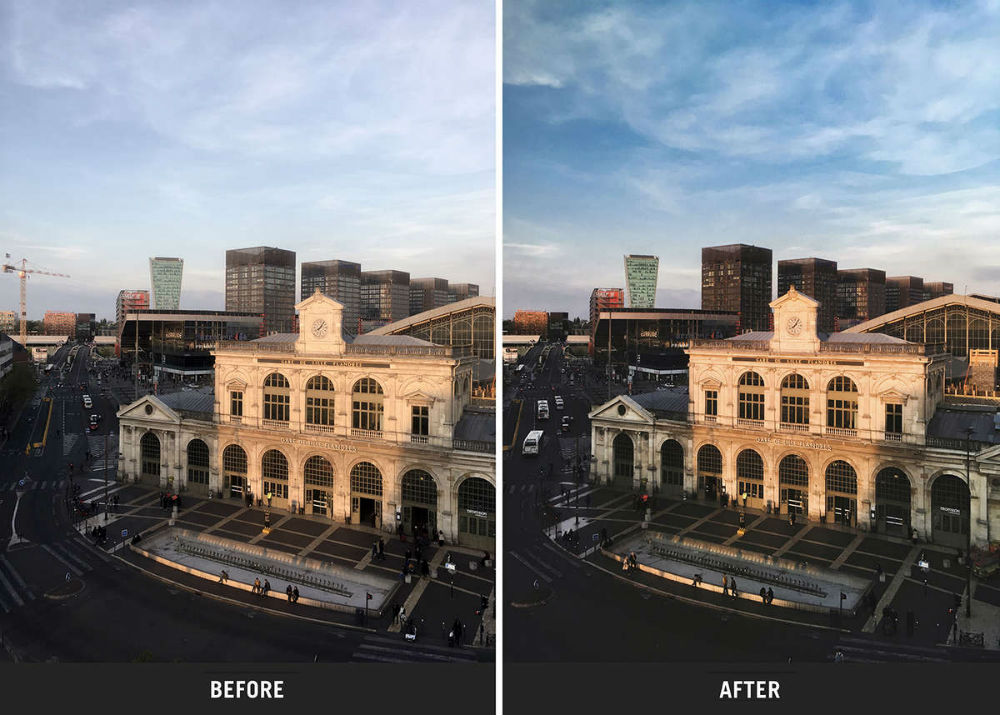 Photo by @dzzdzz012. "After" photo shot with SANDMARC Drama Filter & iPhone. (Unedited)
SANDMARC has developed a drama polarizing filter and a set of neutral density filters for iPhone to go along with their line of iPhone lenses.
These things do exactly what you'd expect them to do, too.
The drama polarizing filter improves the dynamic range in your iPhone photos, resulting in skies that pop with deeper blues and whiter clouds, as seen above.
 Photo by @geodes_. "After" photo shot with SANDMARC Drama Filter & iPhone. (Unedited)
Polarizing filters also minimize glare off of non-metallic surfaces like water.
That means that you can actually take a photo and see into the water, giving your images more depth and visual interest.
Polarizers also minimize atmospheric haze, so if you're photographing a landscape with far-off features like a mountain range, it'll appear cleaner and more crisp without the interference of haze in the shot.
What's not to like about that?
Create Cinematic Feeling Photos and Videos with a Neutral Density Filter
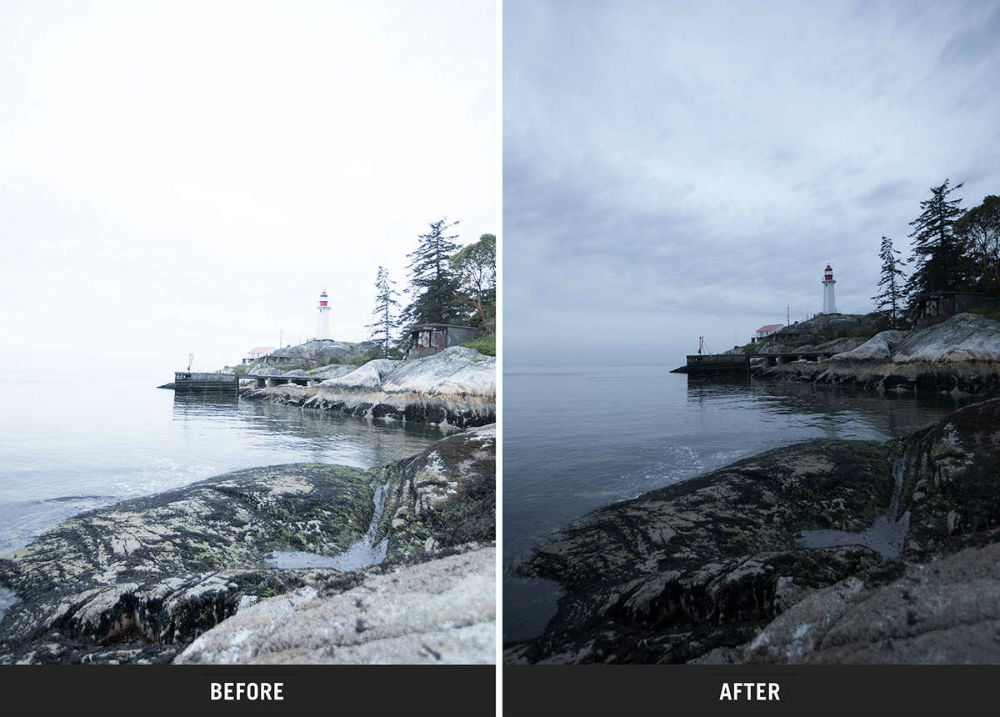 Photo by @itskcho. Shot using SANDMARC Scape Filter & iPhone 6S Plus. (Unedited)
Neutral density filters provide several benefits for iPhone shooters, whether you use your phone for still images, videos, or both.
Like the polarizing filter described above, the SANDMARC Scape ND filters improve the dynamic range in your images.
These ND filters accomplish this by preventing blown out highlights.
That's because ND filters block out light to varying degrees, bringing the highlights down to a manageable level. Recovering detail in highlighted areas gives your photos more depth and visual impact.
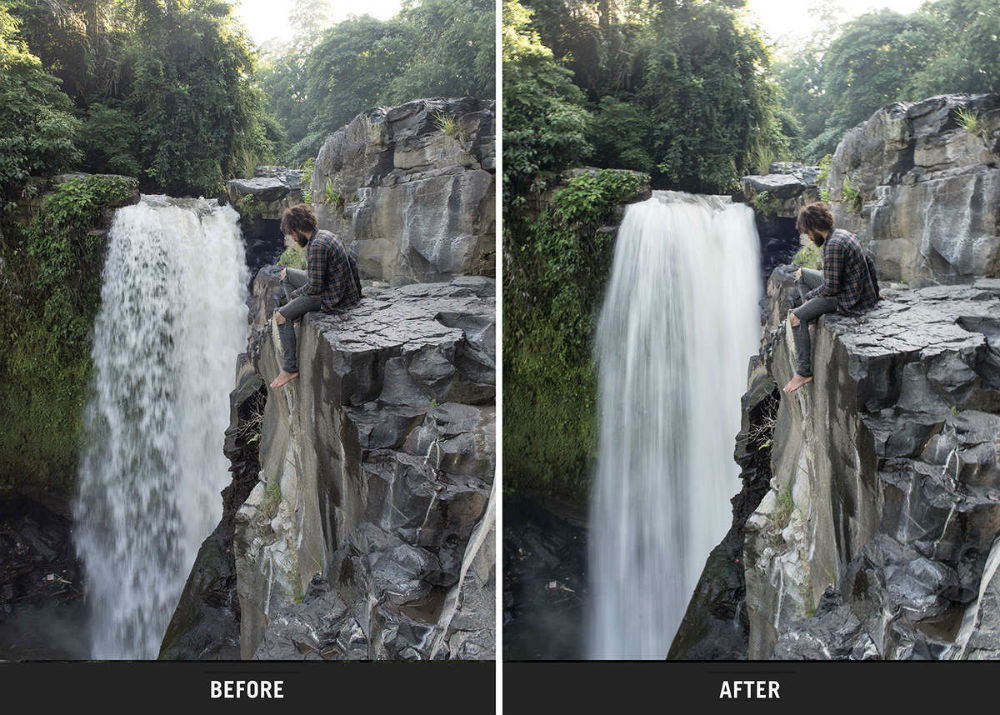 Photo by @philngyn. "After" photo shot using Scape ND 16 Filter & iPhone. (Unedited)
And since ND filters block out light, you can use them on sunny days to extend your shutter speed for long exposure photography.
The beautiful blur that can be achieved with even just a few seconds of exposure can turn normal scenes into dreamy, ethereal wonderlands.
In other words, having a set of ND filters for your iPhone expands your capabilities of getting great shots while also allowing you to push your creativity into realms that might otherwise not be possible with an iPhone.
Not bad, right?
Learn More:
- iPhone Photography Tricks You Don't Want to Miss
- Want Amazing Landscape Photography With Your iPhone? Try These Mobile Photography Tips
Don't Skimp on Your Lenses or Filters
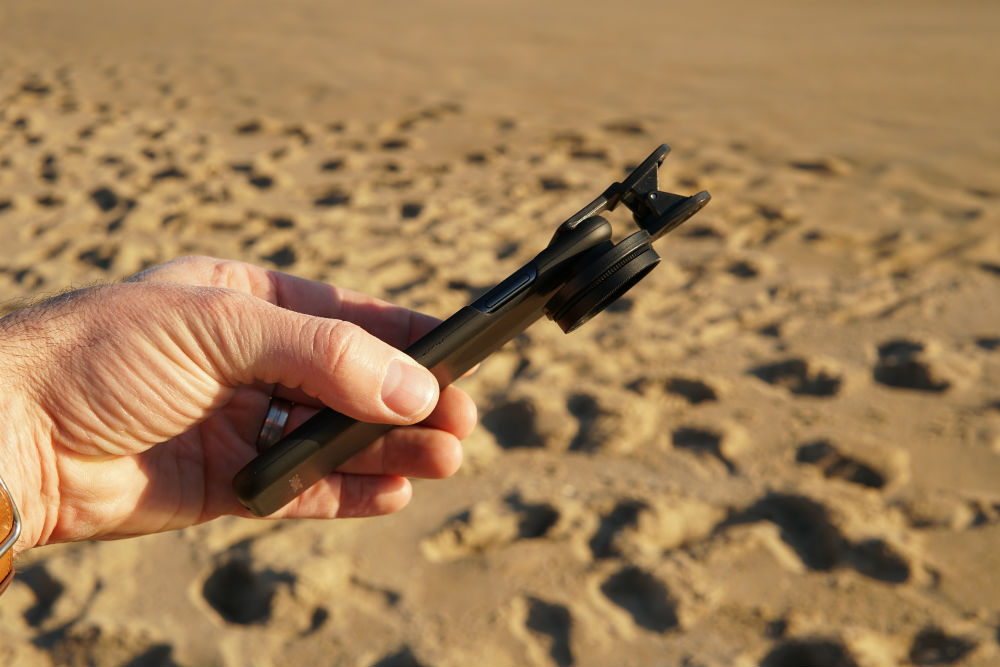
I've used SANDMARC lenses and filters as examples in this article because they are hands-down the best iPhone lenses and lens filters for your iPhone that I've ever used.
The combination of these lenses and filters has dramatically increased the capabilities of my iPhone camera, and my photos have benefitted as such.
As I noted earlier, that's due in part to the quality of construction and the materials used to make these lenses and filters.
There's no cheap, plastic housings or low-grade glass here - just high-quality products you'd expect from a high-quality lens.
SANDMARC cut their teeth creating products for GoPro and DJI, and they've used that experience to craft the best photography accessories for iPhone that you'll find today.
Trust me on this - if you want to improve your mobile photography and reduce the amount of time you spend editing your photos, pre-order the drama polarizing filter and the Scape ND filter kit today!