


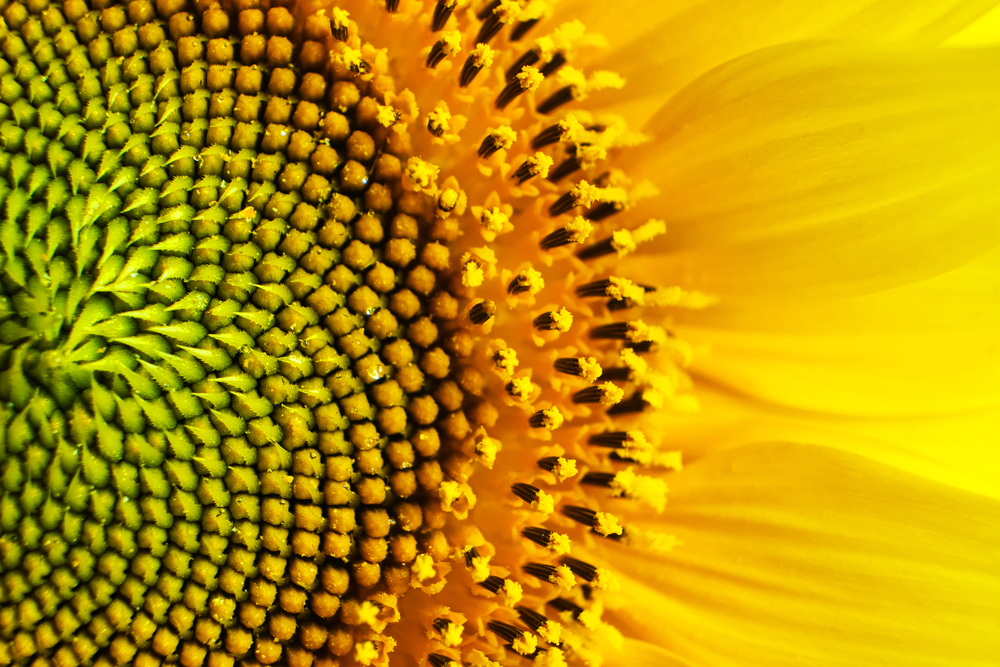
I’ve been a photographer for 30 years and a photography writer for 15. In those 15 years, I’ve written thousands of tutorials for photographers at every level. Macro photography for beginners comes up pretty frequently, and for good reason. Macro is one of the most rewarding disciplines in photography. The barrier to entry feels high, but the actual techniques are learnable in an afternoon. Understanding macro photography isn’t the challenge. Knowing where to start without spending hundreds of dollars on gear you don’t yet know how to use is.
This guide is the starting point I wish I’d had when I first picked up a dedicated macro lens three decades ago. It covers what macro photography is, how to choose your first macro gear, which settings to use, and how to approach subjects and composition. The practical field techniques separating sharp macro images from blurry, flat ones are all here. Whether you’re shooting insects in your backyard or the texture of everyday objects, the fundamentals here apply to all of it.
Quick Facts:
- Topic: Macro photography for beginners: gear, settings, technique, subjects
- Skill level: Absolute beginner to intermediate
- Essential gear: Macro lens (100mm recommended), tripod, remote shutter release
- Budget entry point: Extension tubes ($25–$60) or a dedicated 100mm macro lens ($400–$700)
- Key settings: f/8–f/16, ISO 100–400, manual focus, live view
- Best subjects: Flowers, insects, water droplets, textures, everyday objects
- Biggest challenge: Depth of field and camera shake at high magnification
- Best time to shoot: Early morning: soft light, low wind, dew on subjects
9 min read
In This Article
- What Is Macro Photography?
- Key Specs at a Glance
- Macro Photography Gear: What You Actually Need
- Camera Settings for Macro Photography
- Depth of Field: The Central Challenge
- Focusing Technique for Sharp Macro Images
- Lighting for Macro Photography
- Best Subjects for Beginner Macro Photographers
- Composition in Macro Photography
- Macro Lens vs. Extension Tubes vs. Close-Up Filters
- Pros and Cons of Macro Photography
- Final Verdict
- Frequently Asked Questions
What Is Macro Photography?

Macro photography is the practice of photographing small subjects at life-size or greater magnification, revealing detail invisible to the naked eye. In technical terms, true macro photography achieves a reproduction ratio of at least 1:1. This means the subject appears on the camera sensor at the same size or larger than it is in real life. A 1:1 ratio on a full-frame sensor produces an image of a subject no larger than 36x24mm. At true macro, a penny fills the frame. At 2:1, the subject appears twice life-size on the sensor.
For beginners, the technical definition matters less than the practical one: macro photography is about getting close enough to reveal detail invisible to the naked eye. Consider what macro reveals: the stamen of a flower, the compound eye of a bee, the grain of weathered wood. These subjects are all around you. Macro photography for beginners starts with recognizing these subjects are everywhere and learning the techniques to capture them. The discipline rewards patience and deliberate technique far more than expensive gear.
Key Specs at a Glance
| Factor | Details |
|---|---|
| Magnification ratio | 1:1 (life-size) is true macro; 1:2 (half life-size) is close-up |
| Best starter lens | 100mm f/2.8 macro; working distance keeps you far enough not to disturb subjects |
| Budget alternative | Extension tubes ($25–$60) convert any lens to close-focusing capability |
| Aperture | f/8–f/16 for outdoor; f/16–f/22 with flash; avoid wide-open apertures at 1:1 |
| Shutter speed | 1/250s or faster for live subjects; tripod + remote for static subjects |
| ISO | 100–400 outdoors; 400–800 with supplemental lighting |
| Focus method | Manual focus via live view; rack-and-sway technique for field shooting |
| Tripod | Essential for static subjects; a focusing rail adds precision |
Print Your Best Macro Shots
Macro Images Look Stunning as Large-Format Prints
Pictorem’s metal, acrylic, and canvas prints reproduce fine macro detail with exceptional sharpness and color depth. Free shipping to USA and Canada.
Macro Photography Gear: What You Actually Need

The most common beginner mistake in macro photography is buying gear before understanding what the different options do. There are three main routes: a dedicated macro lens, extension tubes, and close-up filters. Each has a different cost, capability, and learning curve.
A dedicated macro lens is the best long-term investment in this genre. The most versatile choice for beginners is a 100mm f/2.8 macro lens or the equivalent for your camera system. At 100mm, the working distance between lens and subject at 1:1 is approximately 12 to 16 inches depending on the specific lens. This working distance matters enormously when photographing insects and other living subjects. A 50mm macro lens achieves 1:1 at roughly 5 to 6 inches from the subject. This is close enough to disturb or frighten away most insects before the shot is made. The 100mm focal length keeps you far enough away to work without disrupting the scene.
Extension tubes are the budget entry point and genuinely useful, not a compromise. These hollow tubes attach between your camera body and any existing lens, physically shifting the lens farther from the sensor and reducing the minimum focusing distance. A set of three tubes in different lengths costs between $25 and $60 and converts any lens you already own into a close-focusing lens. The limitation is loss of infinity focus. With extension tubes installed, the lens focuses only in a limited close range, not at normal distances. However, for photographers wanting to explore macro before committing to a dedicated lens, extension tubes are the right starting point.
Close-up filters, also called close-up diopters, screw onto the front of your lens and work like reading glasses for your camera. They’re inexpensive and add no length to the lens, but optical quality varies significantly between budget and premium diopters. For serious macro work, a dedicated lens or extension tubes produce sharper results. Close-up filters are useful for travel (small, light, no loss of autofocus), but for deliberate macro practice, they’re the weakest option of the three.
Camera Settings for Macro Photography
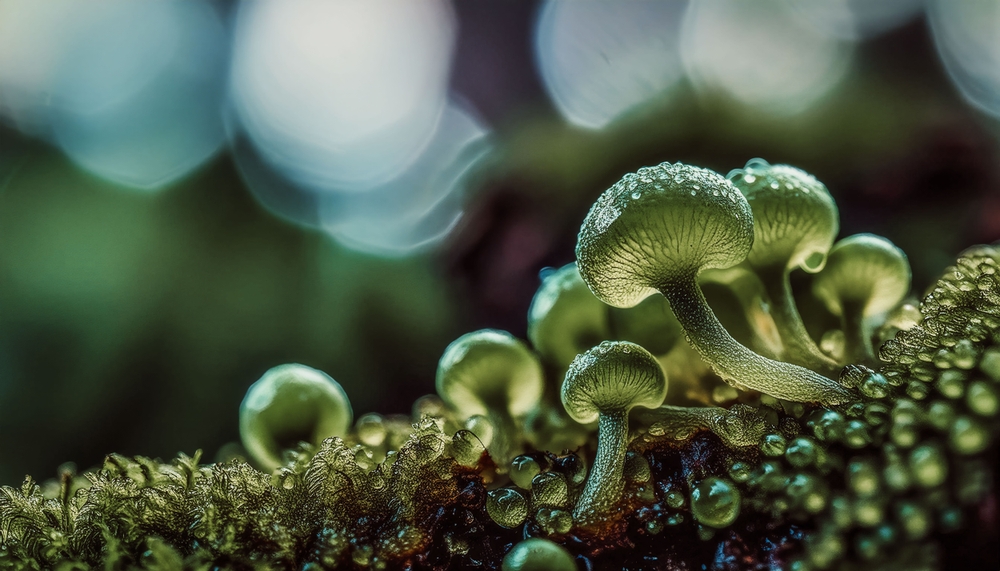
Getting macro photography settings right is where most beginners struggle initially. The struggle almost always comes from one source: unexpected softness in images. The image looks focused on the camera’s LCD. When viewed at full size on screen, however, the subject is soft. This happens because depth of field in macro photography is measured in millimeters, not feet, and the camera settings need to reflect this reality.
Start with aperture. For outdoor natural light macro, f/8 to f/11 is a productive starting range. Wide-open apertures like f/2.8 or f/4 produce beautiful bokeh but leave so little of the subject in focus at 1:1 magnification. Sometimes as little as 1 to 2mm of depth of field makes the result look accidental rather than intentional. Stopping down to f/11 or f/16 increases depth of field and gives you a more usable slice of sharpness across the subject. The tradeoff is longer exposure times, which is why tripods are important for static subjects and fast shutter speeds matter for moving ones.
For shutter speed, the approach splits by subject type. Static subjects on a tripod give you full control: use a remote shutter release or the camera’s self-timer to eliminate camera shake at the moment of exposure. For living subjects, you need a minimum of 1/250 second to freeze subject movement at macro distances, and 1/500 second or faster for active insects. Keep ISO as low as the light allows (100 to 400 outdoors). Raise it only when the alternative is motion blur from a too-slow shutter speed. Always shoot in RAW format; the flexibility in post-processing for exposure and white balance is essential when working in variable outdoor light.
Depth of Field: The Central Challenge

Depth of field in macro photography is unlike anything you’ve experienced in other genres. At a 1:1 magnification ratio, shooting at f/8 on a full-frame camera produces a depth of field of roughly 1 to 2mm. At f/16, it increases to approximately 3 to 4mm. To put this in context: the eye of a honeybee is about 1mm across. A sharp eye with a soft antenna directly behind it is not a failure of technique; it’s physics. Understanding this upfront prevents frustration and shapes how you approach composition.
There are two practical responses to the depth-of-field challenge. First, position your camera so the plane of focus runs parallel to the most important part of the subject. For a butterfly resting with wings flat, position the camera so the film plane is parallel to the wing surface. This puts the entire wing in focus simultaneously. For a bee on a flower, decide which part of the bee you want sharp and align the camera accordingly. Second, use focus stacking for static subjects requiring greater depth. Focus stacking combines multiple exposures at incrementally different focus distances into a single image with greater apparent depth of field. Software like Helicon Focus or Adobe Photoshop handles the compositing. For flowers and objects, focus stacking produces results impossible to achieve in a single frame.
Focusing Technique for Sharp Macro Images
Autofocus is largely unreliable for macro photography, particularly at high magnification. The camera’s AF system hunts constantly at close distances. By the time it locks, the moment has often changed. Most experienced macro photographers use manual focus as the primary technique, and specifically, the rack-and-sway method for field shooting.
The rack-and-sway technique works by pre-focusing the lens at approximately the desired magnification, then rocking the camera forward and backward slightly while watching the subject. When the critical element of the subject, like the eye of an insect or the stamen of a flower, comes into sharp focus, press the shutter. This approach is faster than turning the focus ring at macro distances, where tiny movements translate to large changes in the focus plane. For tripod work with static subjects, use live view at maximum magnification (8x to 10x on the rear LCD). Turn the focus ring slowly until the critical element is as sharp as possible. This method reveals focus accuracy invisible in the normal live view display.
Lighting for Macro Photography

Natural light is the most accessible starting point for macro beginners, and early morning delivers the best version of it. Specifically, the hour after sunrise produces soft, directional light with a warm color temperature and low wind speeds. For outdoor nature subjects, morning dew adds visual interest to flowers and leaves. Additionally, insects are slower-moving in cool early morning temperatures, making them more cooperative subjects.
Overcast days are also underrated for macro photography. Specifically, clouds act as a giant diffusion panel, converting harsh directional sunlight into soft, even light with minimal shadows. For flowers and textures, overcast light often produces cleaner results than direct sun, which creates harsh specular highlights on petals and shiny surfaces. Direct midday sun is the most challenging lighting condition for macro. Specifically, it brings high contrast, hard shadows, and warm colors in the highlights. Working in open shade or using a white card to bounce light into shadows improves results significantly when midday shooting is necessary.
For controlled indoor macro, an LED ring light or a macro flash significantly expands creative options. A ring light mounts on the lens and provides circular, shadow-free illumination useful for revealing surface texture. A macro twin flash mounts two small flash heads on either side of the lens. It allows lighting ratios and is the professional choice for insect and product macro work. Both options cost between $100 and $350 for entry-level units performing well for beginners.
Ready to Display Your Work?
Macro Prints on Metal or Acrylic at Pictorem
Macro images, with their vivid color and extreme detail, are among the most striking subjects for large-format metal and acrylic prints. 30-day satisfaction guarantee.
Best Subjects for Beginner Macro Photographers

The best starting subjects for macro photography for beginners are stationary, accessible, and visually rewarding. Flowers top the list for good reason: they’re available almost anywhere and they don’t move unless the wind does. Their structure, including petals, stamens, and pollen, provides natural leading lines and visual hierarchy. Spend an afternoon in your garden or a local park with a macro lens and you’ll come home with dozens of usable images. Start with larger flowers (roses, sunflowers, dahlias) before moving to smaller, more compositionally challenging subjects.
Insects are the more challenging and more rewarding subject class. Bees, beetles, damselflies, and butterflies are popular macro subjects. Their compound eyes, wing venation, and body texture reveal extraordinary detail at 1:1. The early morning approach gives the best access: insects are cold-blooded and sluggish in cool temperatures. Look for sleeping bees on flowers at dawn. They hold position long enough for careful framing, making them ideal subjects. As skill and patience grow, pursuing faster-moving subjects like hoverflies and wasps pushes technique further.
Beyond nature subjects, everyday objects produce compelling macro images. Water droplets, rusted metal texture, coins, electronics components, fabric weave, spice powders, and coffee grounds all work well in a controlled indoor setup. These subjects are infinitely patient and available at any hour. Additionally, they allow unlimited experimentation with lighting without the pressure of a living subject. For beginners learning technique rather than hunting subjects, indoor still-life macro is the right training ground.
Composition in Macro Photography

Macro photography composition follows the same foundational rules as all photography. However, the shallow depth of field adds a layer of intentionality not required at other focal lengths. Because so little of the image is sharp, the decision of what to place in the focus plane is also a compositional decision. Placing the sharpest point at a rule-of-thirds intersection produces more visually interesting images than centering the focal point. Centered compositions do work for symmetrical subjects like the face-on view of a flower.
Background management is critical in macro composition in a way beginners often underestimate. In a wide-angle landscape, a distracting background element 100 feet away is barely visible. In macro, a leaf or stem 3 inches behind the subject renders as a visible shape in the bokeh. If its color or brightness competes with the subject, it undermines the image. Before pressing the shutter, look at the entire frame. Evaluate the background at the corners. Check for bright spots, which draw the eye away from the subject. Adjust position or angle until the background supports rather than competes.
Leading lines work powerfully in macro composition. The curve of a petal, the stem of a flower, the edge of a wing guide the viewer’s eye toward the sharpest focal point. Specifically, look for natural lines in your subjects and position the camera to use them intentionally. Additionally, shooting from the subject’s level rather than above it produces more intimate, engaging macro images. A shot of a beetle from directly above is a record shot. The same beetle photographed from eye level, however, becomes a portrait.
Macro Lens vs. Extension Tubes vs. Close-Up Filters
| Option | Cost | Max Magnification | Best For |
|---|---|---|---|
| Dedicated macro lens (100mm) | $400–$700 | 1:1 true macro | Best all-around; works as portrait lens too |
| Extension tubes (set of 3) | $25–$60 | Varies by tube + lens combo | Beginners exploring macro on a budget |
| Close-up filters (diopters) | $15–$100 | Half life-size to life-size (varies) | Travel; lightweight option |
| Reversed lens | $10–$20 (reverse adapter) | Up to 4:1 or greater | Extreme magnification; very challenging to use |
Pros and Cons of Macro Photography
Pros
- Subjects are everywhere: flowers, insects, and textures require no travel to find
- A 100mm macro lens doubles as an excellent portrait lens, making it one of the most versatile single-lens investments in photography
- Reveals a world invisible to the naked eye, making familiar subjects genuinely new and visually interesting
- Deeply rewards patience and deliberate technique over speed and gear volume
- Extension tubes provide a low-cost entry point for beginners uncertain about the discipline
- Indoor still-life macro allows unlimited practice at any hour without weather or subject dependence
Cons
- Shallow depth of field requires significant practice to use intentionally rather than accidentally
- Camera shake at high magnification is amplified compared to normal shooting; a tripod is often necessary
- Living subjects like insects require patience and early morning sessions for best results
- Good natural light is time-dependent; supplemental lighting requires additional investment
- Focus stacking for deep-focus results requires software and a workflow commitment beyond basic editing
Final Verdict
Macro photography for beginners is more accessible than it looks from the outside. It is also more technically demanding than it looks from the inside. The initial learning curve is real. Depth of field is measured in millimeters, not feet. Focus technique differs fundamentally from all other genres. Lighting has narrow windows and subjects require patience. However, every one of these challenges is learnable. Each one rewards the effort with images beginners are genuinely proud of.
The practical recommendation after 30 years of shooting and 15 years of writing about this discipline is clear. Start with extension tubes on a lens you already own. Practice on flowers and household objects until focus technique feels reliable, then invest in a 100mm dedicated macro lens when the work justifies it. The 100mm macro earns its keep across multiple genres. As a macro lens it’s the best all-around focal length. For portraits it’s excellent. In the field as a short telephoto, it’s useful across a range of subjects. Buying one does not lock you into macro-only shooting.
When images are worth displaying, and with macro they often are, Pictorem’s large-format metal and acrylic prints are the natural destination. The detail and color at 1:1 magnification produces images unlike anything from standard focal lengths. Macro images, with their extreme detail, vivid color, and compressed background, are among the most visually striking subjects available for wall art. The detail in a well-made macro print at 24×36 inches stops people in a way a landscape or portrait of the same size rarely does.
Ready to Buy?
Print Your Best Macro Images at Pictorem
Free shipping across North America. 30-day satisfaction guarantee on every print. Metal and acrylic surfaces bring macro detail to life.
Frequently Asked Questions
What is the best lens for macro photography beginners?
A 100mm f/2.8 macro lens is the best first macro lens for most beginners. The 100mm focal length provides enough working distance from the subject (approximately 12 to 16 inches at 1:1) to avoid disturbing insects and other living subjects. It also doubles as an excellent portrait lens, making it one of the most versatile single investments in photography. For those not yet ready to invest in a dedicated macro lens, extension tubes cost between $25 and $60. They convert any existing lens to close-focusing capability.
What camera settings should I use for macro photography?
Start with f/8 to f/11 for outdoor natural light macro photography: this provides usable depth of field while keeping shutter speeds manageable. Set ISO to 100 to 400 in good light. For static subjects on a tripod, use a remote shutter release and live view at maximum magnification to confirm focus before shooting. For moving subjects like insects, raise the shutter speed to at least 1/250 second and increase ISO as needed to maintain it. Always shoot in RAW format.
Why are my macro photos always blurry?
Blur in macro photography typically comes from one of three sources: camera shake, subject movement, or missed focus. Camera shake is eliminated with a tripod and remote shutter release for static subjects, or with a shutter speed of 1/250 second or faster for handheld shooting. Subject movement requires fast shutter speeds and early morning timing when insects and flowers are less active. Missed focus is the most common cause. At 1:1 magnification, depth of field measures in millimeters, so focus must be precise. Switch to manual focus and use live view at 8x to 10x magnification to confirm sharpness on the critical part of the subject.
Do I need a tripod for macro photography?
A tripod is essential for static subjects and highly beneficial for most macro work. At high magnification, vibration from handholding transmits directly into blur. For flower photography, textures, and still life, a tripod with a remote shutter release produces noticeably sharper results than handheld technique. For active insect photography, handholding is often necessary because the subject moves faster than a tripod allows. In those situations, a fast shutter speed and solid handheld technique compensate for the lack of a tripod.
What subjects are best for macro photography beginners?
Flowers are the best starting subject for beginners because they’re accessible, stationary, visually rewarding, and require no special timing or conditions. Start with larger flowers before moving to smaller, more compositionally challenging ones. Household objects like water droplets, fabric texture, coins, spice powders, and coffee grounds are also equally useful. They allow unlimited practice in controlled indoor conditions at any hour. Once technique feels reliable on static subjects, insects provide a more challenging and rewarding next step.
What is focus stacking in macro photography?
Focus stacking is a technique for increasing apparent depth of field beyond what a single exposure achieves at high magnification. Multiple exposures are made at incrementally different focus distances, then combined using software like Helicon Focus, Zerene Stacker, or Adobe Photoshop. The software aligns the images and selects the sharpest portion of each frame, producing a composite with far greater depth of field than any single image provides. Focus stacking is most useful for flower photography, still-life macro, and any subject where complete sharpness across the entire subject is the goal.
Friendly disclaimer: Our articles may contain affiliate links that support us without costing you more, and sometimes we spice things up with sponsored content—but only for products we truly stand behind!

