


I’ve spent decades working at waterfalls and on coastlines. One thing I’ve learned, often by watching other photographers discover it the hard way, is that mist and spray are a fundamentally different problem from rain. When it rains, you take cover or reach for a sleeve. When you’re standing twenty feet from an active waterfall, the moisture is in the air itself. It surrounds the camera continuously and settles on the front element between every exposure.
The same is true at low-tide rocky coastlines when waves break over the rocks below your tripod and send salt spray across your lens. Over the years I’ve watched many photographers at these locations. The gear management workflow makes the difference between a productive session and a frustrating one.
Waterfall and coastal photography rewards photographers who prepare specifically for the conditions they’ll face. These environments are what make waterfall and coastal photography so compelling. No dry-weather landscape location replicates their images. Silk-smooth water falling over mossy rock, waves backlit by golden hour light, and turbulent surf compressed into glowing mist bands , all exclusive to these conditions.
Getting those images requires managing moisture at the front element and protecting the camera body through sessions that often last hours. All of this must happen without losing access to the controls needed for exposure and composition on the fly. This guide covers the technique, settings, and gear protection workflow that makes waterfall and coastal photography consistently productive sessions.
Quick Facts:
- Topic: Waterfall and coastal photography: technique, settings, and gear protection
- Primary moisture challenge: Continuous mist and salt spray, not intermittent rain
- Waterfall shutter speed (silk effect): 0.5s to 4s depending on flow volume
- Coastal long exposure: 1s to 30s depending on wave speed and ND filter strength
- ND filter range: 3-stop to 10-stop for bright conditions
- ISO: 100 for long exposures; base ISO whenever possible
- Gear protection: Camera Canopy mounts to hot shoe, both hands free for tripod adjustments
- Camera Canopy price: Original $119; Mini for mirrorless $89
- Best for: Landscape, seascape, long exposure, and nature photographers
9 min read
In This Guide
- Mist and Spray vs. Rain: Why These Environments Are Different
- Waterfall Photography: Settings and Technique
- Coastal Photography: Tides, Light, and Long Exposure
- Managing the Front Element: The Most Important Habit in Wet Environments
- Camera and Lens Protection for Waterfall and Coastal Work
- Salt Water vs. Fresh Water: Why Coastal Exposure Is More Damaging
- Pros and Cons
- Final Verdict
- Frequently Asked Questions
Mist and Spray vs. Rain: Why These Environments Are Different
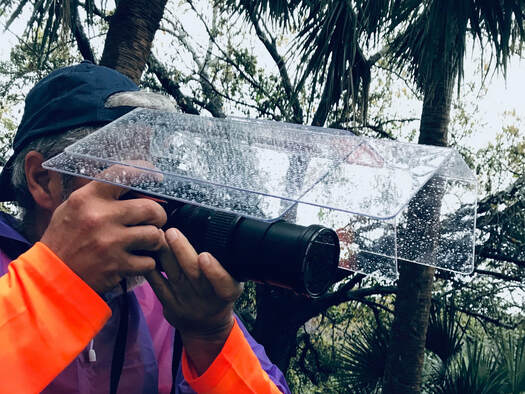
Rain falls in discrete drops from above. Most rain protection systems are designed around this fact: cover the top of the camera and lens, and you’re protected from the primary moisture vector. Waterfall mist and coastal spray don’t behave this way. Waterfall mist is aerosolized water suspended in the air around the falls. Unlike rain, it doesn’t fall from the sky. This mist drifts horizontally and wraps around obstacles. It settles on every exposed surface: the front of your lens, the viewfinder eyepiece, tripod legs, and the lens hood interior. Standing fifty feet from an active waterfall often produces the same moisture buildup on your lens as standing directly beside it.
Coastal spray presents a similar problem from below rather than horizontally. When waves break against rocks and jetties, spray travels upward and outward. At shooting positions close to the water, foreground rock formations and wave motion are the reward. Spray reaches the front element from angles that overhead protection doesn’t address at these distances. This is why the lens management workflow at waterfall and coastal locations is more demanding than rain management during typical outdoor photography. The moisture is omnidirectional and continuous rather than intermittent and directional.
Waterfall Photography: Settings and Technique
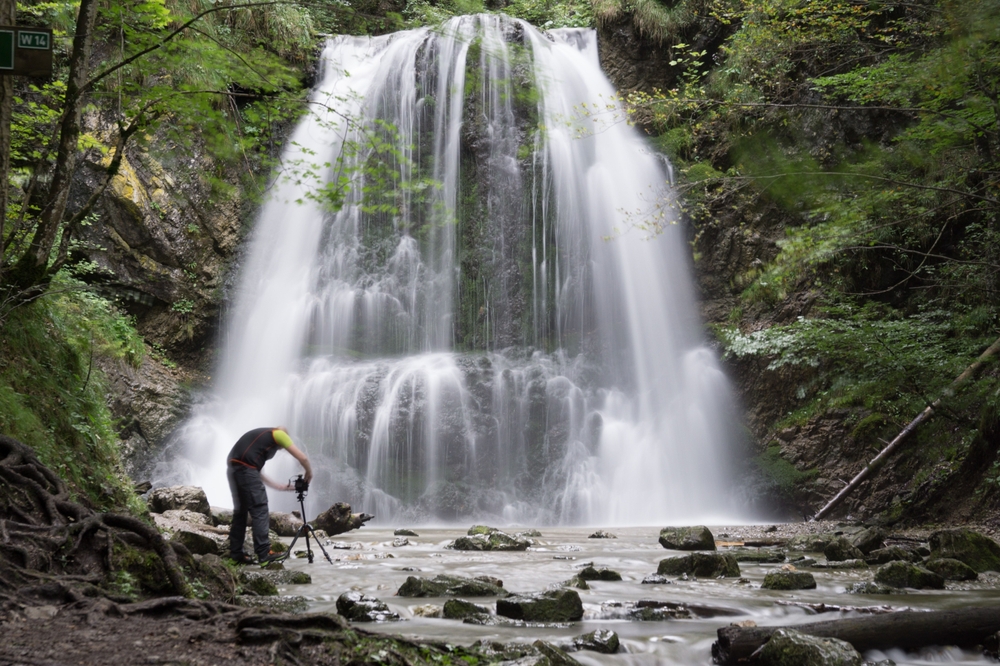
The defining technical choice in waterfall photography is shutter speed. Slow shutter speeds, typically 0.5s to 4s, blur falling water into smooth, silky streaks that reveal movement and direction without showing individual droplets. Fast shutter speeds, 1/500s and above, freeze the individual threads of water and reveal the texture and structure of the falls. Both approaches are valid, and the choice depends on the character of the waterfall and the story you want the image to tell.
Slow Shutter: The Silk Effect
The silk effect works best at waterfalls with strong, consistent flow and clean separation between falling water and the surrounding rock. At 1s to 2s, the motion blur is pronounced but the path of the water remains readable. Below 0.5s, the effect reads as motion rather than silk. Above 4s, high-volume waterfalls produce a flat, featureless white band where the water was. The sweet spot varies by waterfall and conditions. Bracketing across 0.5s, 1s, 2s, and 4s at the same location gives you options in post.
Achieving slow shutter speeds in typical daylight requires an ND filter. A 3-stop ND extends a 1/60s base exposure to 0.5s. The 6-stop ND extends it to 4s. For bright midday conditions, a 10-stop ND brings 1/1000s down to 1s, giving long exposure control even in harsh light. The ND filter adds one more surface that accumulates mist and spray. Keeping a microfiber cloth accessible for the filter face as well as the front element is part of the workflow.
Fast Shutter: Freezing the Water
Frozen waterfall images are often more dramatic at powerful, high-volume falls where the visual texture of turbulent water is the subject. At 1/1000s or faster, individual ropes and sheets of water falling from a large cascade show a complexity and energy that silk-blur images obscure. For this style, shoot wide open at your lens’s lowest aperture and push ISO to 400 to 1600 depending on light. Prioritize a shutter speed fast enough to stop all water motion.
Composition at Waterfalls
Position your tripod to include foreground elements: wet rocks, mossy surfaces, pooling water, or channels leading the eye toward the base of the falls. These foreground elements anchor the composition and provide scale reference for the waterfall’s height. Without foreground reference, a waterfall often reads as smaller than its actual dimensions. Shooting from a lower angle, with the tripod legs spread wide and the camera close to water level, produces the strongest foreground integration. This lower position also reduces your distance from the spray zone at the base of the falls. Active front-element management throughout the session becomes especially important from this angle.
Coastal Photography: Tides, Light, and Long Exposure
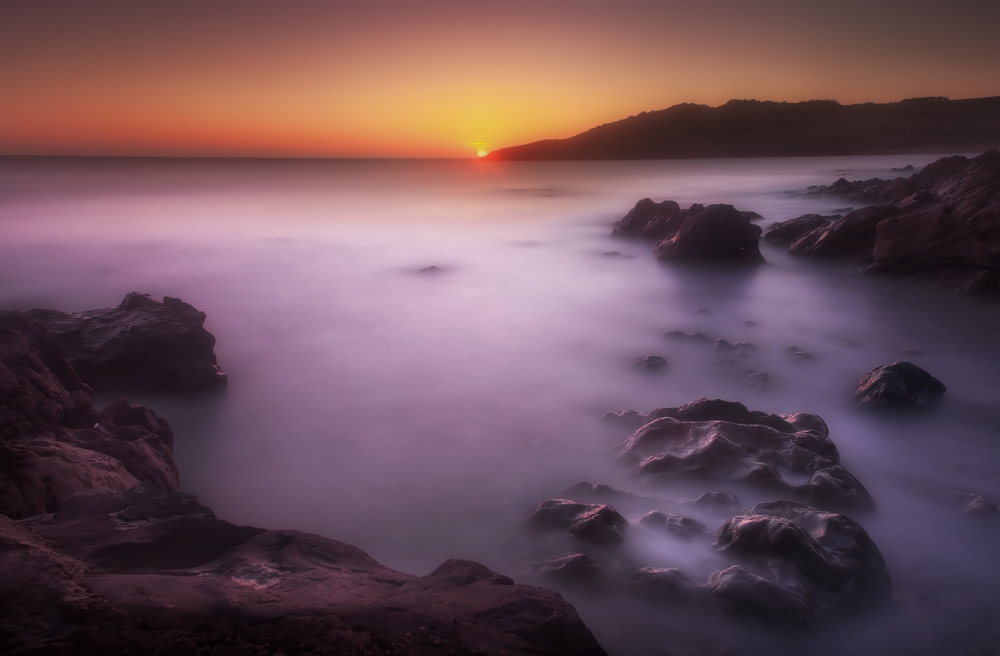
Coastal photography depends more on timing than on technique. The best coastal images, particularly seascapes with wave motion over foreground rock formations, happen at specific tide stages, in specific light. Understanding how these variables intersect determines whether you come home with compelling images or technically correct photographs of an uninspiring scene.
Tide Timing and Shooting Position
The optimal tide stage for most coastal photography is the low-to-mid incoming tide for waterfall and coastal photography. At low tide, the foreground rock formations are fully exposed, revealing texture, pools, and reef structures that disappear under the water as the tide rises. As the tide comes in, waves interact with these exposed features, producing motion and spray that adds energy to the frame. The risk increases with the tide. Incoming water creates increasingly frequent and powerful spray events. At one hour before high tide, rock formations that were safe at low tide frequently receive wash-overs that threaten both photographer and equipment. Check tide tables before every coastal session. Leave your position before the tide reaches the active spray zone around your tripod.
Light at the Coast
Golden hour at the coast produces backlit wave faces, rim-lit spray, and warm reflected light on wet rock surfaces. These are among the most visually rich conditions in landscape photography. Shooting toward the sun during golden hour, with breaking waves between camera and light source, produces backlit spray that appears almost luminescent against darker sky or shadow. This composition style requires positioning yourself with the sun behind the breaking water. Lower shooting angles and greater spray exposure follow from that position. The trade-off in image quality is worth the additional gear management effort.
Long Exposure at the Coast
Long exposures at the coast transform breaking waves into flowing, fog-like bands of motion around the foreground rocks. A 2s to 10s exposure, depending on wave period, converts turbulent surf into smooth, glowing sweeps of white that frame the rocks without obscuring them. Exposures in this range during daylight typically require a 6-stop to 10-stop ND filter. During blue hour (the 20 to 40 minutes after sunset), ambient light drops enough to achieve 2s to 5s exposures without filtration on many camera systems. Blue hour coastal photography also carries lower spray risk than golden hour. You’re not shooting into backlit spray from close range.
Buy Direct From Camera Canopy
Both Hands Free at the Tripod
The Camera Canopy mounts to your hot shoe and shields your camera from above while you manage tripod position, ND filters, and front-element wipes. No sleeves blocking your access.
Managing the Front Element: The Most Important Habit in Wet Environments
The front element of your lens is the single most mission-critical surface in waterfall and coastal photography. One drop of spray on the front glass, invisible in the viewfinder, ruins an otherwise technically perfect long exposure. At active waterfall locations, the mist settles on the lens continuously. Checking and wiping the front element before every exposure is not optional. It is the foundational workflow step that makes every other technique matter.
The Wipe Sequence
Keep at least two microfiber cloths immediately accessible. Never let them sit at the bottom of your bag. One dedicated cloth for the front element, dry and clean. One for the filter if you’re using an ND. Before composing each shot, remove the lens cap and check the glass in the available light. If moisture is present, fold the microfiber to a clean section and wipe in a single circular motion from center outward. Immediately replace the lens cap or check the resulting frame. At high-mist locations, the front element fogs again within 10 to 20 seconds of wiping. Develop a rhythm: wipe the element, cap, release on a 2-second timer, check the frame, wipe before the next shot.
The lens hood extends the time between wipes by deflecting some mist before it reaches the front element. At waterfalls, where mist comes from a specific direction, orienting the hood to face the primary mist source provides additional protection. At open coastal locations with omnidirectional spray, the hood is less effective but still reduces the rate of accumulation on the glass. Use a UV filter to protect the front element from the physical contact of frequent wiping. Replacing a $30 UV filter costs far less than replacing the front element of a lens.
Camera and Lens Protection for Waterfall and Coastal Work
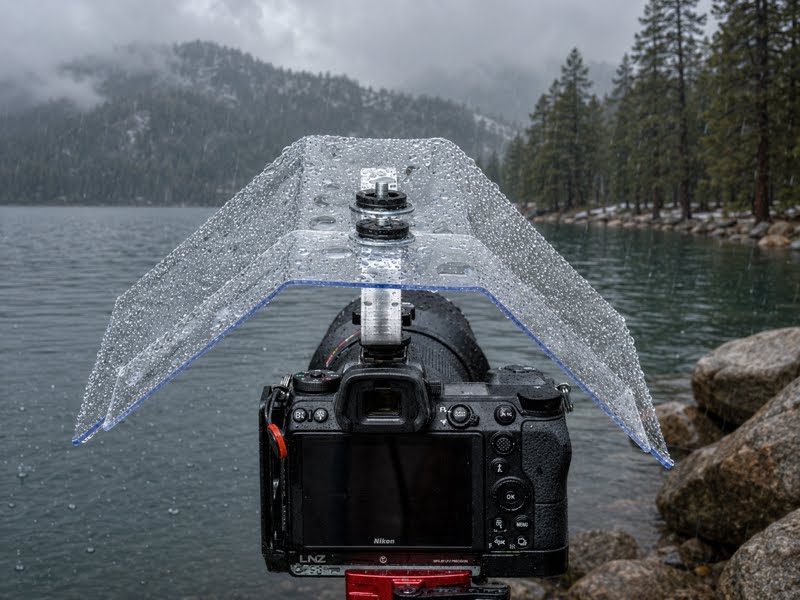
The gear protection challenge in waterfall and coastal photography is more complex than standard rain protection. Overhead coverage alone doesn’t solve the problem. The requirement is protection from a primary moisture source while keeping both hands free. Managing the tripod, adjusting composition, changing ND filters, and wiping the front element all happen continuously during the session.
Why Standard Rain Sleeves Fall Short
Rain sleeves enclose the camera in a fabric or plastic sleeve. At most waterfall locations, this creates two problems. First, the sleeve adds friction to every camera interaction during the session. At a waterfall where you’re making multiple long exposures over an hour, constant sleeve management becomes a significant workflow burden. Sleeves designed for overhead rain don’t address horizontal mist and spray adequately. They wrap around the camera but leave the front of the lens at the end of the sleeve opening exposed to drifting mist from the waterfall.
At coastal locations, the spray-from-below scenario creates an additional problem for enclosed sleeves. Spray striking the underside of the sleeve and wicking upward reaches the camera body through the front opening. The sleeve provides no advantage against this spray vector. In fact, the sleeve only protects the top of the camera from overhead rain and does little for the omni-directional moisture environment of an active coastal shoot.
The Camera Canopy Solution for These Environments
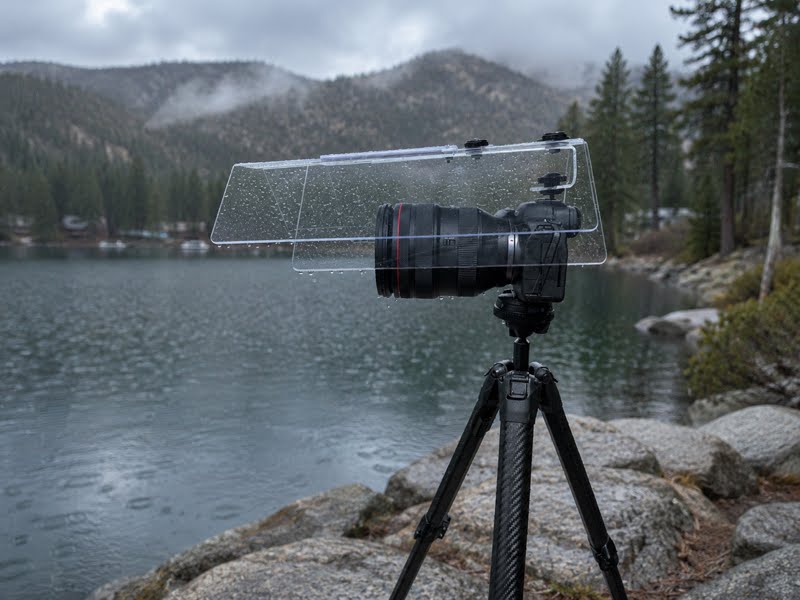
The original Camera Canopy rain shield takes a different approach. Mounted to the hot shoe, it positions a clear acrylic canopy above the camera body and lens rather than around it. This keeps both hands free for tripod adjustments, ND filter changes, and front-element wipes throughout the session. The transparent acrylic keeps the LCD, top controls, and viewfinder fully visible without removing the cover.
The hands-free design is particularly valuable for long exposure work at waterfalls. Managing a tripod through multiple long exposures while checking composition, adjusting the ball head, and wiping the front element requires full bilateral hand access. A sleeve that requires repositioning each time you adjust the camera significantly slows this workflow. With the Camera Canopy in place, the camera stays protected throughout. Your hands move freely between the tripod controls, remote shutter release, ND filter, and microfiber cloth.
Mirrorless photographers using wide-angle to standard lenses for landscape work will find the Mini Camera Canopy for mirrorless the better fit. At $89 versus $119 for the original, it provides the same overhead hot-shoe protection in a lighter format suited to smaller mirrorless bodies. Both include the rear tripod shield, which provides additional coverage of the LCD and battery area during long static sessions at a fixed tripod position. See the real-world Camera Canopy reviews from landscape and nature photographers who’ve used it in these exact conditions.
Mirrorless Landscape Shooter?
The Mini Camera Canopy Is Your Field Partner
Lighter than the original, purpose-built for mirrorless. Same hot-shoe mount, same hands-free overhead protection. At $89 plus shipping.
Salt Water vs. Fresh Water in Waterfall and Coastal Photography
Fresh water at a waterfall damages camera equipment when it reaches internal components. The damage is primarily physical: short circuits, corrosion at electrical contacts, and moisture trapped against the sensor. Salt water at coastal locations causes all of the same damage and adds a chemical dimension that makes coastal exposure significantly more serious.
Salt residue left by evaporated spray is hygroscopic. It continues drawing moisture from the air long after the original exposure has dried. A camera body splashed with salt spray and not cleaned afterward attracts moisture from ambient humidity indefinitely. This ongoing moisture exposure accelerates corrosion at electrical contacts, gaskets, and circuit board solder points. A single fresh-water exposure doesn’t cause the same effect. Thorough cleaning after every coastal session is not optional. After every waterfall and coastal photography session, wipe all external surfaces with a lightly dampened cloth, paying particular attention to the hot shoe, battery compartment, lens mount, and any port covers. Dry the body completely before storing it.
For gear protection, preventing initial salt spray exposure is more important at coastal locations than at freshwater waterfalls. At a waterfall, some mist reaching the camera body is manageable if the critical components stay dry. At the coast, a salt spray event that reaches the hot shoe or battery compartment creates a cleaning obligation that, if skipped, leads to progressive corrosion. The Camera Canopy’s overhead shield keeps spray off the top of the camera body. It specifically protects the hot shoe and top controls where salt ingress is most likely during a coastal session.
Pros and Cons of Waterfall and Coastal Photography
Pros
- Waterfall and coastal photography long exposures produce images unavailable in any other landscape genre: silk-smooth water motion against static rock
- Coastal golden hour creates backlit wave faces and rim-lit spray that reward photographers willing to manage spray exposure
- Overcast light at waterfalls eliminates harsh shadows in the shadowed gorges where most waterfalls are found
- Long exposure coastal work during blue hour reduces spray risk while still providing compelling wave motion images
- These environments are among the most rewarding in landscape photography precisely because the conditions demand preparation
Cons
- Continuous mist at waterfalls requires front-element wipes before every exposure , sessions become gear-management exercises as much as creative ones
- Salt spray at coastal locations is more damaging than fresh water and requires thorough post-session cleaning to prevent progressive corrosion
- ND filter stacking at waterfalls adds additional glass surfaces that accumulate mist and require their own cleaning protocol
- Tide timing and golden hour windows are narrow , missing the optimal conditions by 30 minutes often means waiting for the next session
- Standard rain sleeves don’t adequately address horizontal mist and upward spray from waves
Final Verdict

Waterfall and coastal photography rank among the most technically demanding environments in landscape photography. The moisture challenge in waterfall and coastal photography isn’t the settings or the difficulty of the composition. It’s the ongoing gear management required to execute sessions that produce technically clean images in conditions where moisture is omnipresent. The photographers I’ve worked with who produce consistently strong work at these locations share one characteristic. They’ve built a systematic workflow that integrates front-element checks, body protection, and session timing into every session automatically.
Building that workflow for waterfall and coastal photography requires the right gear foundation. A camera protection system that requires two hands to manage creates friction at exactly the wrong moments. Adjusting the tripod, changing the ND filter, and wiping the lens all demand free hands. The Camera Canopy’s hot-shoe design eliminates that friction. The camera body stays protected throughout the session, and your hands stay free for everything the session requires.
DSLR and mirrorless photographers using standard to medium telephoto lenses at waterfalls and the coast will find the original Camera Canopy at $119 the appropriate choice. Mirrorless shooters with smaller wide-angle or standard lens setups should start with the Mini Camera Canopy at $89. Both mount in seconds for waterfall and coastal photography, and both include the rear shield and carry bag, and both allow the systematic front-element management workflow that these environments demand.
Ready to Buy?
Check Today’s Price on Camera Canopy
Made in the USA. Ships with rear tripod shield, lens cleaning cloth, and weather-resistant carry bag. Mount it, go shoot.
Frequently Asked Questions
How do I protect my camera for waterfall and coastal photography?
Waterfall protection requires addressing mist from multiple directions, not rain alone from above. Start with a lens hood to partially block mist from reaching the front element. Keep microfiber cloths immediately accessible and wipe the front glass before every exposure. For body protection, a hot-shoe mounted rain shield like the Camera Canopy provides overhead coverage while keeping both hands free for tripod management and lens wipes. Weather-sealed bodies provide additional margin but should not replace active body protection in heavy mist environments.
What shutter speed should I use for waterfall photography?
For the silk or milky water effect, use 0.5s to 4s depending on the volume and speed of the waterfall. High-volume falls with fast-moving water produce the silk effect at 0.5s to 1s. Lower-volume or gentler falls need 2s to 4s to produce the same smooth appearance. To freeze the water and show individual threads and droplets, use 1/500s or faster. Bracket across multiple shutter speeds at each waterfall to identify the optimal setting for those specific conditions.
Do I need ND filters for waterfall photography?
ND filters are essential for waterfall photography in daylight conditions. Without filtration, achieving 0.5s to 4s shutter speeds in bright light requires stopping down to f/16 or smaller. This introduces diffraction and reduces sharpness. With a 6-stop ND filter, you achieve the same long exposures at f/8 to f/11 where modern lenses are sharpest. Variable NDs offer flexibility but introduce color cast with some manufacturers. For consistently clean results, fixed 6-stop or 10-stop NDs from reputable manufacturers are preferable for most waterfall situations.
Is salt spray worse for cameras than fresh water spray?
Salt spray causes more serious and longer-lasting damage than fresh water. Salt is hygroscopic, meaning it continues drawing moisture from the air after the initial exposure has dried. A camera splashed with salt spray that isn’t thoroughly cleaned afterward continues attracting ambient humidity, which accelerates corrosion at electrical contacts, gaskets, and internal components progressively over time. After every coastal session, wipe all external surfaces with a lightly dampened cloth, paying particular attention to the hot shoe, lens mount, battery compartment, and port covers. Dry the body completely before storage.
What time of day is best for waterfall and coastal photography?
Golden hour, the 30 to 60 minutes after sunrise and before sunset, produces the richest coastal light. Warm backlit waves, rim-lit spray, and golden reflections on wet rock surfaces all peak in this window. Blue hour, the 20 to 40 minutes following sunset, provides lower-contrast light that suits long exposure work with reduced spray risk. Midday coastal shooting produces flat, harsh light and should generally be avoided unless clouds provide diffused overcast conditions. Tide timing is as important as time of day: the low-to-mid incoming tide typically exposes the best foreground features while still providing active wave motion around them.
Can I shoot waterfalls in the rain?
Waterfalls in rainfall produce the most dramatic and photogenic conditions. Rain increases water volume and flow, making the falls more powerful. It also saturates surrounding vegetation, intensifying the greens in the background and foreground. Overcast skies from rain clouds eliminate the harsh shadows and bright highlights in waterfall gorges that make bright-day shooting difficult. The moisture management demands increase significantly in rain, since you’re managing both mist from the falls and precipitation from above. A hot-shoe mounted rain shield like the Camera Canopy handles both moisture vectors while keeping your hands free.
What is the best camera protection for waterfall and coastal photography?
The best protection for waterfall and coastal photography addresses the specific spray-from-below problem that rain sleeves miss. A hot-shoe mounted rigid canopy like the Camera Canopy provides overhead protection while leaving both hands free for tripod management. This matters at the coast because sessions involve frequent repositioning of the tripod as the tide changes. ND filter adjustments and front-element wipes happen continuously alongside. Any protection system that restricts hand access adds friction to all of these tasks. Weather sealing on the camera body provides additional margin, but the Camera Canopy’s overhead shield specifically protects the hot shoe and top body controls where salt ingress is most likely.
A quick heads-up: If you snag something through our affiliate links or check out our sponsored content, we might earn a commission at no extra cost to you. But fear not, we’re all about recommending stuff we’re truly stoked about!

