


Quick Facts:
- Topic: Why autofocus hunts in low light, and how to help it lock focus.
- Skill level: Beginner to intermediate.
- Time required: A few seconds per shot, once you know the techniques.
- Tools needed: Assist light, headlamp, or a small video light.
- Difficulty: Easy, no new gear required.
- Cost: $0 with a built-in assist light; $20 to $60 for an add-on light.
- Best for: Indoor events, night photography, and astrophotography.
8 min read
In This Guide
- Why Autofocus Hunts in Low Light.
- Why Autofocus Needs Contrast to Lock On.
- Choosing the Right Focus Point in Low Light.
- How AF-Assist Light Helps (and When It Doesn’t).
- Manual Focus: Your Backup When Autofocus Gives Up.
- Add Temporary Illumination to Help Autofocus Lock.
- Autofocus Hunting vs. Motion Blur: Know the Difference.
- Why Autofocus Hunts in Low Light: What to Try First.
- FAQ.
Why Autofocus Hunts in Low Light
Why won’t my camera focus once the room goes dark? Contrast runs out before autofocus does. Autofocus hunts back and forth instead of locking in low light. Your sensor loses the contrast it needs to grab onto. This is normal camera behavior, not a sign of a broken camera. Once you understand what autofocus needs to lock focus, you then supply it. Contrast, focus point choice, assist light, focusing by hand, or a moment of borrowed light all work.
Most photographers already know how to focus a camera properly in daylight. Edges and color changes give the AF system plenty to work with. Low light removes those cues one by one, so the same daylight habits stop working at dusk. Indoor events, night photography, and astrophotography especially push autofocus hardest. Dim, low-contrast, or single-tone scenes give the sensor almost nothing to lock onto. The fixes below work across brands and price points. They help you focus in the dark, from an entry-level DSLR to a full-frame mirrorless body.
What You’ll Need
Tools
- Assist light, built into your camera or an external flash.
- Headlamp with a dim red-light mode, for ground scanning and night vision.
- Clip-on LED video light or phone flashlight, for temporary illumination.
- Tripod, to hold the camera steady while you check focus by hand.
Materials
- A high-contrast reference point nearby, such as a distant porch light or star.
- Gaffer tape or a lens marking pen, to mark a dialed-in focus position.
Autofocus Low-Light Ratings at a Glance
| Specification | Details |
|---|---|
| AF low-light rating, Canon R6 Mark II | Rated down to roughly EV -6.5 with a fast lens attached, per Canon’s spec sheet |
| AF low-light rating, Sony a6700 | Rated down to roughly EV -3, per Sony’s spec sheet |
| AF low-light rating, Nikon Z50II | Rated down to roughly EV -9 in low-light AF mode, per Nikon’s spec sheet |
| Typical assist-light range | Roughly 10 to 20 feet for many built-in and flash-based lights, though exact range varies by device |
| Live view focus magnification | Up to about 15x on most mirrorless cameras, exact steps vary by brand |
Why Autofocus Needs Contrast to Lock On
Every autofocus system hunts for the same thing: an edge where light and dark meet. This holds true for both phase-detection and contrast-detection autofocus. The sensor compares neighboring pixels. When it finds a sharp jump in brightness, it treats the jump as an edge worth locking onto. For example, flat walls, smooth skies, and dim rooms leave the sensor with almost nothing to measure. Meanwhile, the lens racks back and forth as the AF system keeps searching.
Camera makers publish this limit as an EV rating, the lowest light level the AF system still locks onto reliably. The Canon R6 Mark II holds focus down to roughly EV -6.5 with a fast lens attached. This is a scene lit by little more than starlight or a single candle. Below this rating, the AF system runs out of contrast to measure. This holds true no matter how many focus points the camera offers.
Choosing the Right Focus Point in Low Light
Wide-area or automatic AF modes let the camera pick a focus point on its own. In low light, the camera often chooses wrong. Switch to single-point AF instead. Aim the active point directly at the highest-contrast part of your scene: a window edge, a candle flame, or a friend’s eye against a darker background. This single change fixes a large share of low-light hunting on its own. A stubborn scene sometimes still needs one of the fixes below.
Once the point locks, use AF lock to hold focus, then recompose before you press the shutter fully. Back button focus makes this workflow faster, since it separates focusing from the shutter button entirely. Press the back button once to lock focus on the high-contrast point. Then release it, recompose, and shoot without the camera hunting again on the next half-press. Moreover, many photographers leave back button focus turned on for every subject, not only for low light.
How AF-Assist Light Helps (and When It Doesn’t)
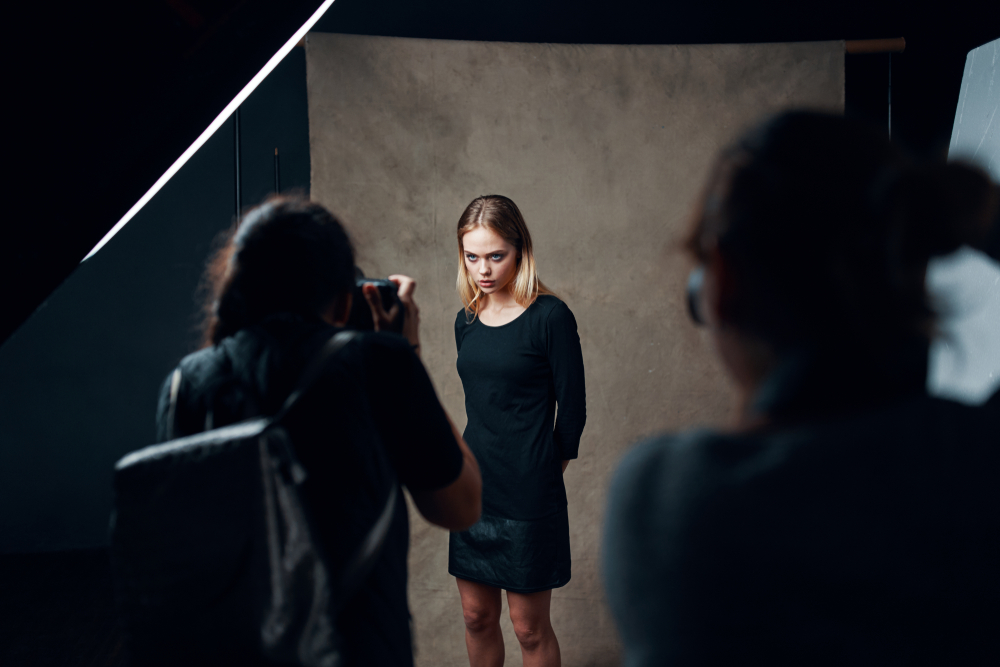
Single-point AF and back button focus solve most low-light hunting, but some scenes are too dark for any focus point to find an edge. An assist light steps in. Most cameras and external flashes include a built-in AF-assist light. It is a beam or pattern projected onto your subject so the sensor has an edge to read. Point the light at your subject and half-press the shutter. The beam gives autofocus a manufactured edge in a scene with none. Range runs short, roughly 10 to 20 feet for many built-in and flash-based lights, though it varies by device. The assist light works best for portraits, product shots, and close indoor subjects.
It switches off automatically in several common situations: continuous autofocus mode, silent shutter mode, and video recording. A visible beam would show up in the footage or annoy nearby subjects, so cameras disable it there. Sony bodies, for example, also disable the assist beam in certain scene modes, including Landscape, Sports Action, and Night Scene. Check your camera’s AF settings menu if the light seems to disappear. It is often a mode conflict, not a hardware fault. The beam is also conspicuous at weddings and theater performances, where a visible flash draws unwanted attention.

NEEWER 76Ws Marco Ring Flash Compatible with Nikon Cameras, 1-1/128 Output, GN15 5600K TTL Flash Light w Front/Rear Curtain Sync, Color Gels, Lens Adapters for Macro Photography Lighting, RF1-N
Dedicated external flash with AF-assist capability adds portable focusing help beyond your camera's built-in light.
- Built-in AF-assist beam
- TTL metering on compatible cameras
- GN15 at ISO 100
- Affordable external flash
- Assist light range limited to ~20 feet
- Requires hot shoe connection
Manual Focus: Your Backup When Autofocus Gives Up
When you need to focus in the dark and autofocus taps out, switch to manual focus and take over the job yourself. Turn on live view and zoom the display up to about 15x on your subject. Then turn the focus ring until edges snap sharp on the screen. This technique works for portraits lit by a single lamp. It also works for pinpoint star focus at night, since both scenes give autofocus almost nothing to grab onto.
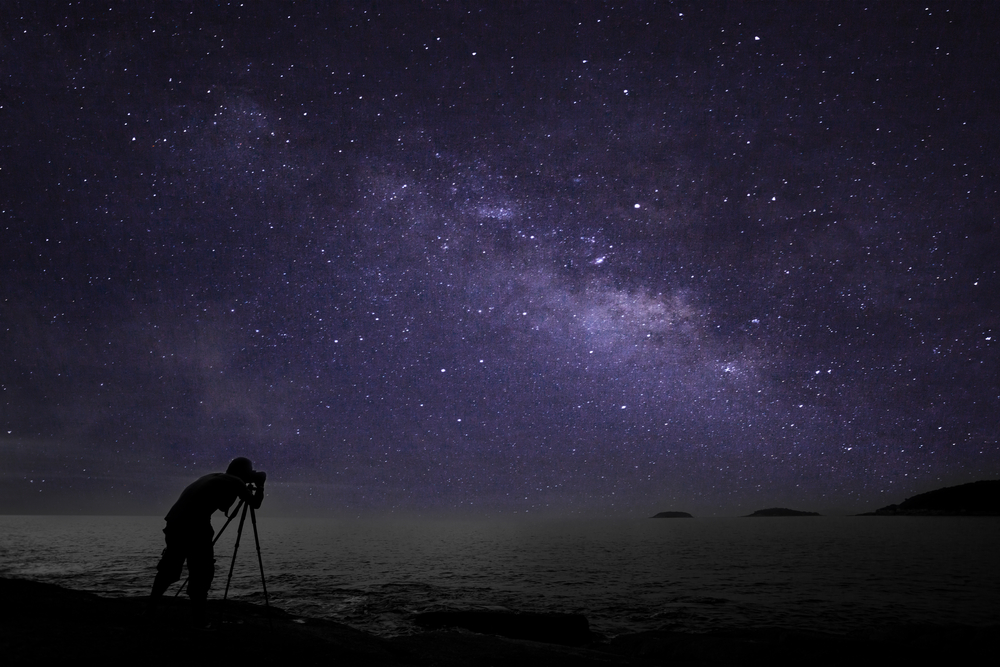
Focus peaking, a setting on most mirrorless cameras, outlines sharp edges in a bright color on the live view screen. You see focus lock without squinting at a tiny preview. If your lens has a hard infinity stop, turn the ring fully toward it. This gets you close for distant subjects like stars or a skyline. Few modern lenses stop precisely at true infinity, though. Fine-tune from the stop with live view zoom rather than trusting the marking alone.
Add Temporary Illumination to Help Autofocus Lock
When focus points, assist beams, and manual technique still fall short, borrow light instead. Point a phone flashlight, a headlamp, or a small video light at your subject for a second. Let the AF lock, then switch off the light before you press the shutter fully. This trick works for portraits, product shots, and any static subject close enough for a handheld light to reach.
Safety note: Sweep a red-light headlamp across the ground before you move at night, on trails, near cliffs, or around water. This helps you spot trip hazards before you step on them. Save the white flashlight for focusing only, then switch back to red light right away. This protects your own night vision and shows courtesy toward astrophotographers or other shooters nearby.
For distant subjects, focus on any bright point at a similar distance instead. A streetlight, a porch light, or the moon all work. Swing the framing back to your intended subject without refocusing. Photographers shooting concerts or stage events often pre-focus on a performer during a bright cue. They hold the focus lock through darker parts of the song.
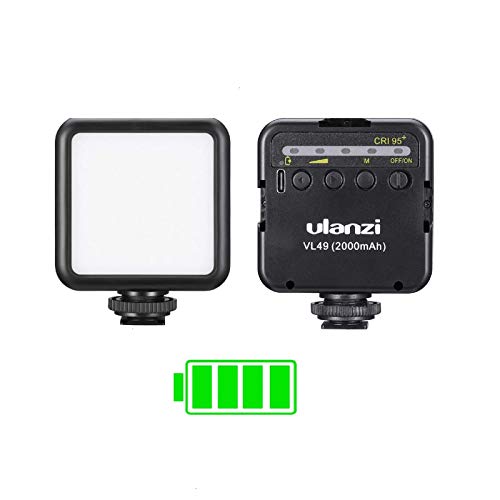
Ulanzi VL49 LED Video Light, 2000mAh Rechargeable On-Camera Fill Light, 5500K Portable Mini Photography Lighting for iPhone Vlogging, DSLR Camera, Tripod, TikTok, Selfie Video Shooting
Compact on-camera LED light small enough for travel but powerful enough to give autofocus a reference point for manual focus checks.
- Pocket-sized and lightweight (130g)
- 2000mAh rechargeable battery
- 120° beam angle
- Cold shoe mount included
- Smaller output than panel lights
- Battery life under 30 minutes at full brightness
Autofocus Hunting vs. Motion Blur: Know the Difference
Not every blurry low-light photo comes from autofocus failure. Motion blur causes a similar look, softness without a clear point of sharpness. The cause and the fix differ completely, though. Autofocus hunting shows up as the lens visibly racking back and forth before the shot. Sometimes nothing in the frame reads sharp, not even the background.
Motion blur happens after focus locks. It shows up when your shutter speed runs too slow for a moving subject or a shaking hand. A photo affected by motion blur often has a sharp background and a smeared subject. Sometimes the whole frame shows a general streak in the direction of movement. Raise your shutter speed or add stabilization to fix motion blur. None of the autofocus techniques above help here, since the focus point was correct all along.
From experience: I’ve shot Nikon DSLRs and mirrorless bodies, four generations of Sony APS-C cameras, and now Canon’s R6 Mark II and R5. Autofocus hunting in low light shows up on every system I’ve owned. Older contrast-detection-heavy bodies struggle hardest in the dark. Newer phase-detection sensors with subject tracking recover focus faster, though none of them fix a low-contrast scene alone. Single-point AF and a quick assist light have solved more low-light shots for me than any camera upgrade.
Why Autofocus Hunts in Low Light: What to Try First
Why won’t my camera focus in low light? Contrast runs out before your camera does. Every fix above supplies contrast a different way. A focus point aimed at an edge, an assist beam, a focus check by hand, or a moment of borrowed light all work.
Start with the simplest fix for your situation. Indoors or at a portrait distance, switch to single-point AF and aim it at the highest-contrast part of your subject. Back button focus keeps the lock steady while you recompose. If autofocus still hunts past this point, reach for a flashlight, headlamp, or your camera’s built-in assist light.
Distant subjects call for a different approach. Stars, skylines, and a stage performer far from the light all need focusing by hand. Use live view magnification or focus peaking. None of these techniques need a firmware update or a new camera body. They use settings already built into the camera you own.
Expect low light to remain the hardest test for any autofocus system, regardless of price or generation. Practice each technique before you need it under pressure. Try it at a wedding reception, a concert, or a night under the stars. The technique becomes automatic when the moment matters most.

BORUIT BR01 Headlamp with Red White Light - AAA Battery Powered
Dedicated headlamp with red mode preserves night vision while providing focus assist light when needed for manual focusing.
- Red and white light modes
- 28-36 hour runtime on batteries
- 4 brightness levels
- Waterproof design
- AAA battery-powered (requires carrying spares)
- Heavier than some alternatives
FAQ
Why does autofocus hunt more at night than during the day?
Autofocus hunts more at night because contrast drops along with the light. The AF system needs a visible edge between light and dark areas to lock onto. Nighttime scenes often give it flat, even darkness instead.
Why won’t my camera focus on my subject at all?
Your camera likely lacks enough contrast on the subject itself, even when the surrounding scene has some light. Aim a single AF point at a higher-contrast area near the same distance. An eye or the edge of clothing both work well. Skip flat patches of skin or fabric.
How do I focus in the dark without a flashlight?
Switch off autofocus and use live view instead. Zoom in up to about 15x on any edge visible in the dark. Then turn the focus ring until it snaps sharp. Focus peaking highlights the sharp edge in color, making the process easier without extra light.
What is an assist light and do I need one?
An assist light is a small beam your camera or flash projects onto a subject. It gives autofocus something to focus on. Most built-in flashes and many camera bodies already include one, so check your settings menu before buying anything. Only add a separate light if you regularly shoot beyond its 10-to-20-foot range.
Why does my camera keep refocusing when I press the shutter?
Continuous autofocus mode keeps searching for focus for as long as you hold the shutter halfway. This shows up as hunting in low light. Switch to single-shot AF for static subjects, so the camera locks once and stops searching.

