


I’ve been in the photography industry for decades, and low light photography has been part of my workflow since the film era, when managing grain in dim environments required deliberate exposure discipline long before digital noise reduction existed. Over the years, I’ve developed a reliable system for shooting in low light without flash, whether in candlelit restaurants, forests at dusk, or city streets long after sunset.
Available light photography is one of the most rewarding disciplines in the field because it forces you to work with ambient light rather than override it. Ambient light in low conditions, whether tungsten, streetlight, candlelight, or the last remains of blue hour, carries a mood and color character flash eliminates instantly. Learning to shoot in these conditions requires understanding three fundamental controls: aperture, shutter speed, and ISO. It also requires knowing when and how to stabilize the camera, how to focus in dim conditions, and how to process low light files without destroying the atmosphere in the image. This guide walks through all of it in practical terms.
Quick Facts:
- Topic: Photographing in low light without flash
- Skill level: Beginner to intermediate
- Gear required: Any camera; fast lens and tripod strongly recommended
- Key controls: Aperture, shutter speed, ISO, stabilization
- Featured product: Artbeat Studios Canvas Prints
- Canvas surfaces: Giclée, Metallic, Matte
- Best for: Photographers who want to shoot atmospheric available-light images and print them at display quality
8 min read
In This Article
- Low Light Photography Overview: Why Available Light Beats Flash
- Aperture: Open Wide and Let the Light In
- ISO: Managing Sensitivity and Noise
- Shutter Speed: Freezing Action vs. Long Exposure
- Stabilization: Tripods, IBIS, and Improvised Support
- Focusing in Low Light: Manual and AF Techniques
- Processing Low Light Files: Noise, Tone, and Color
- Why Artbeat Studios Canvas Prints Suit Low Light Photography
- Pros and Cons
- Final Verdict
- Frequently Asked Questions
Low Light Photography Overview: Why Available Light Beats Flash
Low light photography is the practice of shooting in dim ambient conditions without introducing artificial lighting. A flash or strobe would solve the exposure problem instantly, but at a cost: the moment the flash fires, the scene’s existing light becomes background noise. Candlelight disappears. The warm glow of a tungsten interior flattens to neutral. The mood the scene took hours of fading daylight to produce vanishes in a fraction of a second. Available light photography preserves all of it.
The technical challenge of low light photography is managing the exposure triangle, aperture, ISO, and shutter speed, in conditions where all three settings push toward their limits simultaneously. Wide aperture admits more light but reduces depth of field. High ISO amplifies the signal but introduces noise. Slow shutter speed collects more light but risks motion blur. Learning to balance these three controls in low light conditions is what separates photographers producing atmospheric available-light images from those who reach for flash out of habit rather than choice.
Aperture: Open Wide and Let the Light In
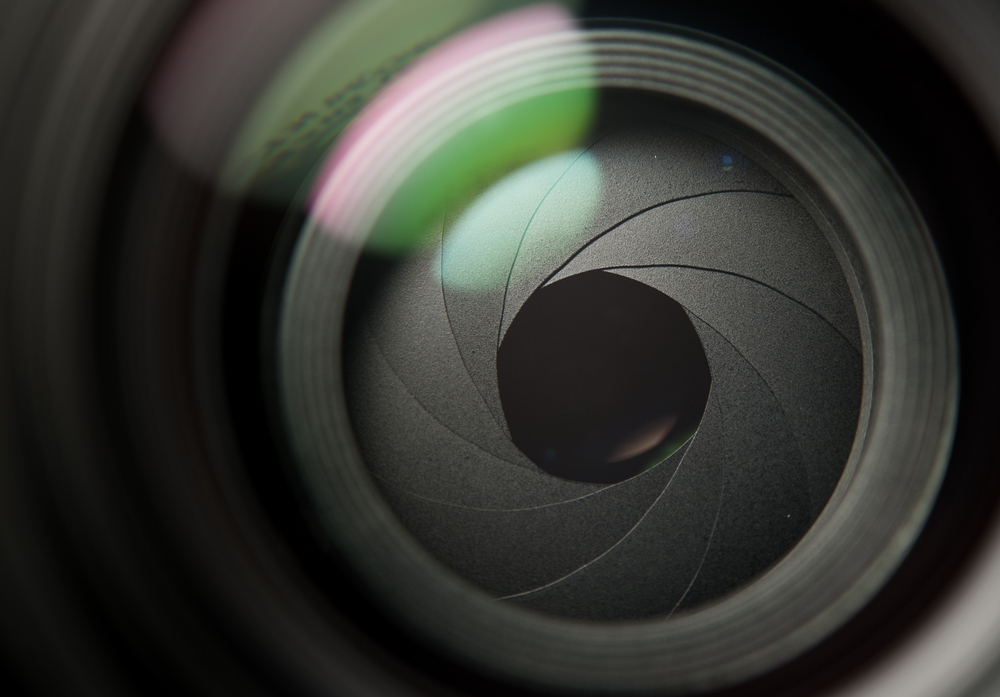
Aperture is the first control to adjust in low light photography. A wide aperture, numerically expressed as a low f-number, admits significantly more light than a narrow aperture. The relationship is quadratic: moving from f/4 to f/2.8 doubles the light entering the lens. Moving from f/2.8 to f/2.0 doubles it again. A fast prime lens at f/1.8 admits four times the light of the same scene shot at f/3.5 with a kit zoom.
For low light photography, a maximum aperture of f/2.8 or wider is the practical standard. The 50mm f/1.8 prime is the most cost-effective option in almost every camera system and one of the most useful purchases a photographer serious about available light work makes. The 35mm f/1.8 is equally strong and provides a wider field of view suited to environmental portraits and interior scenes. For zoom lens users, a 24-70mm f/2.8 or 70-200mm f/2.8 covers most situations at a workable aperture, though the cost is significantly higher than a fast prime.
Worth noting is the depth of field trade-off at wide apertures. At f/1.8 in a dim restaurant, the depth of field on a portrait subject sitting 5 feet away is approximately 2.5 inches. Eyes and nose are often both in focus while the ears go soft. Stopping down slightly to f/2.2 or f/2.5 increases depth of field to a more manageable range without sacrificing much light. In practice, most low light portrait work lands between f/1.8 and f/2.8 depending on the subject distance and the depth of field required.
ISO: Managing Sensitivity and Noise
ISO amplifies the camera sensor’s response to light. Higher ISO values produce brighter images in low light conditions but introduce digital noise, which appears as grain-like speckling across the image, particularly in smooth tonal areas like skin and sky. Managing ISO in low light photography means finding the highest usable ISO for the specific camera at the specific output size.
Modern full-frame mirrorless and DSLR cameras perform well at ISO 3200 to 6400 for print output. Many current bodies, including the Sony A7 series, Nikon Z series, and Canon R series, produce acceptable print-quality files at ISO 6400 and usable files at ISO 12800 with noise reduction. Crop sensor cameras generally perform 1 to 1.5 stops behind full-frame at equivalent settings, putting the practical ceiling closer to ISO 1600 to 3200 for print-quality results. Smartphone cameras have improved significantly and many produce usable files at ISO 800 to 1600 in low light with computational processing.
The key principle for ISO in photography without flash is to prioritize aperture and shutter speed first, then raise ISO to compensate for whatever light remains unavailable. Start at ISO 800, evaluate the exposure, and raise in stops (1600, 3200, 6400) until the exposure is correct. Never raise ISO beyond what the output demands. If the final use is a social media crop at small size, ISO 12800 is acceptable on most modern cameras. If the goal is a large canvas print, staying at or below ISO 3200 on a full-frame body produces significantly cleaner results.
Print Your Low Light Work
Artbeat Studios Canvas Prints
Giclée, Metallic, and Matte canvas surfaces. Epson UltraChrome 9-color inks. Hand-stretched pine frames. Free shipping over $150.
Shutter Speed: Freezing Action vs. Long Exposure

Shutter speed in low light photography creates a choice between two outcomes: freezing motion or embracing it. A fast enough shutter speed to freeze a moving subject in low light requires either a wide aperture or a high ISO. A slow shutter speed collects more light without raising ISO, but renders any movement in the scene as blur. Both approaches produce intentional results when used deliberately.
Minimum Shutter Speed for Handheld Work
The traditional minimum shutter speed rule for handheld shooting is 1/focal length. For a 50mm lens, the minimum handheld speed is 1/50 second. For a 200mm lens, it’s 1/200 second. In practice, with modern image stabilization, photographers extend these limits by 2 to 4 stops. A 50mm lens with in-body image stabilization (IBIS) is reasonably stable at 1/10 to 1/15 second in many situations. Without stabilization, 1/focal length remains a reliable lower limit for subjects in low light photography.
Long Exposure: Night Photography Tips for Static Scenes
For static subjects, empty streets, cityscapes, still life, architecture, shutter speeds from 1 second to several minutes collect light without flash and produce clean, low-noise images at low ISO. Long exposure low light photography requires a tripod and a remote shutter release to eliminate camera shake during the exposure. The guide to long exposure night photography covers the specific techniques for extended exposures in detail. For canvas prints for photographers printing long exposure work, images shot at ISO 100 to 400 on a tripod produce exceptionally clean files, making them among the best low light images to print at large format.
Stabilization: Tripods, IBIS, and Improvised Support
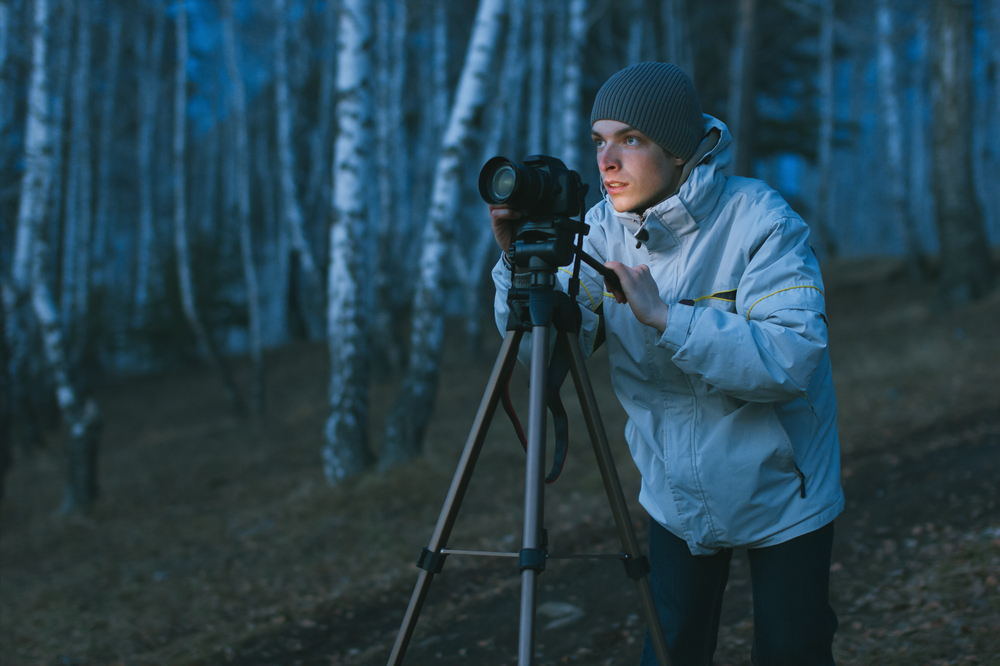
Stabilization changes what’s possible in photography without flash more than any other single factor. A camera on a solid tripod at ISO 100, f/8, and a 15-second shutter speed produces a cleaner and sharper image than any handheld shot at ISO 6400, regardless of lens speed or body performance.
For static subjects in low light, a tripod is the definitive solution and worth prioritizing over a faster lens or a newer camera body if the budget is limited. A quality tripod from brands like Joby, Manfrotto, or Gitzo holds the camera absolutely still for any exposure duration. Ball head or pan-tilt head mounts allow precise composition adjustment once the tripod is set. Pairing both with a remote shutter release, wired or wireless, eliminates the vibration of pressing the shutter button manually. These three items together produce the conditions for the cleanest possible low light images at any ISO.
For handheld work in low light, in-body image stabilization (IBIS) in modern mirrorless cameras makes a significant practical difference. Systems like Sony’s OSS, Nikon’s VR, and Canon’s IBIS provide between 5 and 8 stops of stabilization compensation in optimal conditions. In real-world low light photography, 3 to 4 stops of practical benefit is consistent, extending handheld shooting from 1/50 second to 1/6 second on a 50mm lens. When no tripod is available, improvised supports, tabletops, window ledges, walls, fence posts, stabilize the camera for slow exposures with less equipment than a tripod requires.
Focusing in Low Light: Manual and AF Techniques
Autofocus systems depend on contrast and light to lock focus. These night photography tips apply equally to any low light interior situation where AF struggles. In low light conditions, AF performance degrades and missed focus is a frequent cause of otherwise well-exposed low light images being unusable. Understanding how to support or replace autofocus in dim conditions is a practical necessity for available light shooting.
The fastest autofocus support technique in low light is the AF assist beam, available on most cameras either from a built-in transmitter or from an external unit in the hot shoe. This beam projects a pattern onto the subject, giving the AF system the contrast it needs to focus, then turns off during the exposure. Range is the limitation: most assist beams are effective to around 10 feet. In situations where the beam is impractical (wildlife, stage performance), manual focus with live view magnification is the most reliable approach.
Manual focus in low light on a mirrorless or DSLR with live view: magnify to 100% on the subject’s eyes or the intended focus point, adjust the focus ring until sharp, then return to full view to compose. This process takes 5 to 10 seconds and produces precise focus in conditions where AF fails entirely. For moving subjects in low light, pre-focus on the expected position and use continuous shooting as the subject moves into the focus plane. Depth of field at moderate apertures (f/2.8 to f/4) provides enough range to capture a moving subject passing through the focused zone without requiring continuous AF tracking.
Processing Low Light Files: Noise, Tone, and Color

Low light photography files require specific processing approaches because the challenge of shooting in dim conditions continues into post. High ISO introduces noise; long exposures introduce fixed-pattern noise; low light scenes often have color casts from artificial light sources; and the narrow tonal range of a dark scene requires careful shadow and highlight management to preserve atmosphere without losing detail.
Noise Reduction Without Destroying Detail
Noise reduction in Lightroom (the Denoise AI tool or the Detail panel’s Luminance and Color sliders) and in Photoshop (Camera Raw or Reduce Noise filter) works by smoothing tonal variations the software identifies as noise. Over-smoothing is the main risk, destroying fine detail and producing a plastic appearance in skin, fabric, and texture. The approach: apply noise reduction to a point where noise is reduced but fine detail remains visible, then use local masking to apply stronger reduction only in featureless areas (sky, smooth walls, backgrounds) while protecting texture and edge areas.
Preserving Atmosphere in Low Light Edits
The most common low light editing mistake is lifting shadows to a level eliminating the scene’s darkness. A candlelit portrait should have deep shadows. A street scene at night should have pools of light separated by darkness. Lightening shadows to recover every detail in a low light image often produces a flat, overprocessed result losing the atmosphere the available light created. Instead, lift shadows selectively using local adjustment brushes or radial filters, brightening the subject while leaving the surrounding darkness intact. This preserves the ratio of light to dark the original scene contained, which is precisely what makes low light photography compelling in the first place.
Color management in low light photography often involves mixed light sources. Indoor scenes lit by tungsten lamps alongside window light contain two color temperatures simultaneously. In Lightroom, the Color Mixer panel addresses individual color channels. Warming the orange channel (tungsten regions) while cooling the blue channel (window light) balances mixed light without requiring complex masking. Studying how black and white photography amplifies mood and contrast is also worthwhile for low light work, converting a difficult mixed-light scene to monochrome removes the color management challenge entirely while often producing a more atmospheric result.
Why Artbeat Studios Canvas Prints Suit Low Light Photography

After six years of testing Artbeat Studios prints alongside dozens of other companies, I’ve found their canvas consistently handles the tonal characteristics of low light photography better than most labs I’ve evaluated. Low light images carry a specific tonal signature: deep shadows, selective highlights, warm color casts, and a compressed dynamic range. On canvas, these qualities produce results with a painterly warmth other substrates don’t match.
Artbeat Studios canvas prints use Epson UltraChrome 9-color eco-solvent inks on a 400 GSM poly-cotton blend, producing a wider color gamut than standard 4-color printing. For low light images where the color story depends on warm amber tungsten, cool blue ambient, or the green-tinged glow of streetlights, the 9-color ink system reproduces these nuanced color relationships more faithfully than a standard CMYK process. The three canvas surface options, Giclée Canvas for classic fine art warmth, Metallic Canvas for luminous semi-gloss depth, and Matte Canvas for glare-free viewing, give photographers a surface choice matching the image’s mood. Atmospheric, warm-toned low light images often suit Giclée or Metallic canvas best. High-contrast moody black and white low light work prints exceptionally well on the Matte surface.
Beyond color, the canvas texture itself is an asset for low light photography prints. The woven surface adds a subtle warmth and depth to prints with large tonal gradients, exactly the tonal character low light images produce. Smartphone low light photography specifically benefits from this: the canvas texture softens any residual noise in high-ISO files in a way matte paper or metal substrates do not, producing a more finished presentation at display scale. I’ve sent smartphone low light images to Artbeat Studios and received canvas prints I’ve displayed alongside DSLR work without visual inconsistency. For more on how smartphone low light photography translates to print, the guide to smartphone photography at night covers the process from capture through print delivery.
Canvas prints for photographers displaying low light work at scale benefit from Artbeat Studios hand-stretching over pine wood stretcher bars, arriving ready to hang. Canvas prints for photographers ordering display-sized pieces (16×20 and above) benefit from free shipping on orders over $150. Custom sizes are cut in-house in Santa Ana, California at the time of each order.
Ready to Print Your Low Light Work?
Order Artbeat Studios Canvas Today
Three surfaces matched to your image’s mood. 9-color ink system. Hand-stretched pine. Free shipping over $150.
Pros and Cons
Pros
- Available light photography preserves the mood, color, and atmosphere flash destroys
- Wide aperture primes are inexpensive relative to zoom lenses and dramatically improve low light capability
- Tripod and remote shutter produce clean low ISO images in any lighting condition for static subjects
- Modern mirrorless cameras with IBIS extend handheld low light shooting well beyond previous limits
- Artbeat Studios’ 9-color ink system reproduces the nuanced color relationships of mixed-light scenes accurately
- Canvas texture complements low light image tonal character and softens high-ISO noise at display scale
Cons
- High ISO files require careful noise reduction; over-processing produces plasticky results
- Autofocus fails in extremely dark conditions; manual focus with live view magnification takes practice
- Long exposures require a tripod and remote shutter, which adds setup time and equipment weight
- Wide aperture depth of field is shallow; missed focus in low light is a common issue early on
Final Verdict
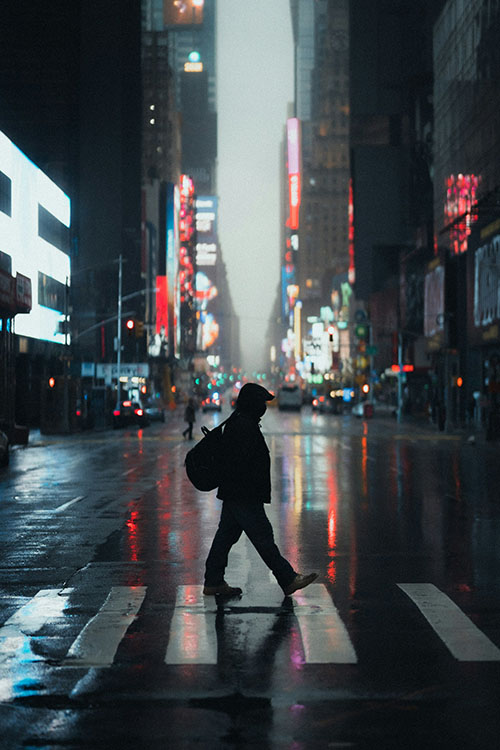
Low light photography without flash is a discipline worth mastering precisely because of what it demands. Mastering it requires understanding the exposure triangle deeply enough to balance three competing priorities in real time, a stabilization strategy suited to the subject, a focus approach suited to the light level, and a processing workflow preserving the atmosphere the available light created rather than editing it away. Each of these skills improves with deliberate practice, and the compounding effect over months of shooting in low light conditions is significant.
After decades in this industry and six years of systematic print evaluation, I’ve seen the results of this kind of shooting at display scale across many substrates. Artbeat Studios canvas consistently handles the warmth, tonal depth, and atmospheric color of low light photography better than most alternatives I’ve tested. The 9-color ink system, the three surface options, and the hand-stretched pine construction produce a finished piece where the mood of the original scene survives translation to print. If you’re producing low light photography and want it displayed at the scale it deserves, Artbeat Studios canvas is where to take it.
Ready to Buy?
Check Today’s Price on Artbeat Studios Canvas
Free shipping over $150. Three canvas surfaces. Custom sizes from 8×8″. Hand-stretched pine. In-house Santa Ana, CA production.
Frequently Asked Questions
What aperture should I use for low light photography?
As wide as the lens allows while maintaining acceptable depth of field for the subject. f/1.8 to f/2.8 is the practical working range for most available light shooting in dim conditions. At f/1.8, depth of field is quite shallow and precise focus is required. At f/2.8, depth of field is more forgiving and the exposure is still two full stops brighter than f/5.6. Fast prime lenses (50mm f/1.8, 35mm f/1.8, 85mm f/1.8) are the most cost-effective tools for available light work.
How high should I set my ISO for indoor low light photography?
Start at ISO 800 and raise in stops until the exposure is correct, then evaluate the noise level for the intended output. For large canvas prints on a full-frame camera, staying at or below ISO 3200 produces cleaner results. For smaller prints or social media output, ISO 6400 to 12800 is acceptable on most modern cameras with noise reduction applied in post. Crop sensor cameras produce best results below ISO 1600 for print-quality files.
Do I need a tripod for low light photography?
For moving subjects in low light, a tripod is optional, you’ll need a fast enough shutter speed to freeze motion regardless, which means a tripod won’t help much. For static subjects, a tripod is one of the most impactful tools available. At ISO 100, f/8, and a 10-second exposure on a solid tripod, the image is cleaner and sharper than any handheld shot possible regardless of camera or lens. If budget is a constraint, a tripod investment produces more low light improvement per dollar than a faster lens or a newer body.
How do I focus in low light without flash?
For nearby subjects, use the camera’s AF assist beam if available. Beyond 10 feet where the assist beam doesn’t reach, switch to manual focus with live view magnification: zoom to 100% on the intended focus point, adjust the focus ring until sharp, then return to full view to compose and shoot. With moving subjects, pre-focus on the expected position and use continuous shooting as the subject moves through the focused zone.
How do I reduce noise in low light photography in post-processing?
In Lightroom, use the Denoise AI tool (Lightroom Classic 2023 and later) for the most effective single-step noise reduction. For manual control, use the Detail panel: Luminance slider between 30 and 60 for grain-like noise, Color slider at 25 to 35 for color speckle. Apply masking to protect textured areas from over-smoothing. In Photoshop, Filter > Noise > Reduce Noise with a Strength of 6 to 8 and Preserve Details at 30 to 50 percent produces similar results. Avoid over-processing: some luminance noise in a low light image is preferable to the plasticky smoothing aggressive noise reduction produces.
Why does canvas suit low light photography prints?
Canvas texture adds warmth and painterly depth to prints with large tonal gradients, which is the tonal signature most low light images carry. The woven surface also softens residual noise in high-ISO files at display scale in a way paper and metal substrates do not, producing a more finished result without requiring more aggressive noise reduction in post. For atmospheric, warm-toned low light images, Giclée or Metallic canvas surfaces from Artbeat Studios are a strong choice. For high-contrast black and white low light work, the Matte surface preserves tonal precision without glare.
Our articles might have affiliate links and the occasional sponsored content, but don’t sweat it – if you buy something, we get a little kickback at no extra cost to you, and we only hype products we truly believe in!

