

I’ve spent more than twenty years behind a camera. Most of it went toward chasing light across landscapes, from the Pacific coast to the high desert. Contrast is the reason some of those frames hang on a wall. Others sit forgotten on a hard drive. It is the first thing I check on every histogram, before framing, before color, before anything else.
For more than a decade, I’ve also written tutorials and how-to guides for beginners. The goal stays the same in every one: close the gap between a snapshot and a photograph worth printing. Contrast comes up in nearly every lesson. Once a photographer understands it, exposure decisions, editing choices, and print orders start making sense together. This guide covers what contrast in photography means and the different forms it takes. It also covers why the medium you print on decides whether your work survives past the screen.
Quick Facts:
- Topic: Contrast in photography
- Skill level: Beginner to intermediate
- Main types: Tonal, color, and micro-contrast
- Measured by: The histogram and dynamic range
- Where it gets decided twice: Behind the camera and again at the print
- Best editing tool: Contrast, clarity, and curves sliders
- Best print medium for high contrast: Glossy or semi-gloss metal
10 min read
In This Guide
- Contrast in Photography Overview
- Types of Contrast at a Glance
- Tonal Contrast: Light Against Shadow
- Color Contrast: How Hues Compete
- Dynamic Range and Your Camera’s Ceiling
- Contrast at the Print
- Adding or Taming Contrast in Editing
- Tonal vs. Color Contrast: Which Matters More?
- Pros and Cons of Shooting High Contrast
- Final Verdict
- Frequently Asked Questions
Contrast in Photography Overview: Why It Shapes Every Image

Contrast in photography describes the difference between the brightest and darkest parts of an image, along with the separation between competing colors. A high-contrast frame has deep shadows next to bright highlights, so the eye reads it as bold and graphic. A low-contrast frame blends those tones together instead, so the eye reads it as soft and quiet. Neither approach is right or wrong on its own. Contrast is a decision a photographer makes, whether they realize it or not.
Beginners often think contrast is only a slider in Lightroom. It starts long before editing, at the moment light hits the scene. Midday sun creates hard-edged shadows and strong tonal contrast. Overcast sky flattens everything into gentle grays instead. Choosing when to shoot, and how to meter for it, sets the ceiling for what editing recovers later.
The payoff for understanding contrast shows up everywhere in a body of work. Portrait photographers use it to sculpt a face with light. Landscape photographers use it to separate a mountain ridge from a pale sky. Street photographers lean on it for graphic, high-impact black and white frames. Once a photographer sees contrast as a tool instead of an accident, composition and editing both improve together.
There is a second decision point most guides skip: the print. A file with rich tonal separation on screen loses much of it fast on the wrong paper or the wrong lab’s process. The print stage gets its own section later in this guide, since it changes how much of your editing work a viewer sees.
Types of Contrast at a Glance
| Contrast Type | What It Measures |
|---|---|
| Tonal contrast | Difference between the brightest and darkest tones in a frame |
| Color contrast | Relationship between hues, especially complementary pairs on the color wheel |
| Micro-contrast | Local tonal separation inside small details, such as skin texture or foliage |
| Dynamic range | How wide a span of tones the camera sensor or print medium holds without clipping |
| Print contrast | How much of the edited tonal range survives on the finished print surface |
See Your Work in Gallery Quality
Print the Contrast You Worked to Create
Vivid Metal Prints holds tonal range and color separation other mediums flatten out.
Tonal Contrast: Light Against Shadow
Tonal contrast is the type most photographers picture first. It is the gap between the brightest highlight and the darkest shadow in a frame. This gap shows up most clearly in black and white work, where color no longer competes for attention. A black and white street photo with deep shadow blocks and a bright sidewalk reads as bold and confident. A high-contrast subject like fireworks makes the effect even easier to see, since bright bursts sit against a nearly black sky. Strip away most of the gap, and the scene reads as flat and hazy instead.
Weather and time of day set the starting point for tonal contrast. Direct midday sun produces hard shadows and bright highlights, giving a naturally high-contrast base. Overcast light wraps a scene in even, diffused illumination instead. This base suits portraits or soft product shots well. Neither condition is a mistake. Each simply hands you a different starting file to shape with editing later.
Color Contrast: How Hues Compete and Cooperate
Color contrast comes from the relationship between hues rather than brightness. Complementary colors sit opposite each other on the color wheel, such as orange and blue or red and green. These pairs create the strongest color contrast. A red barn against a green field pulls the eye immediately. This holds true even in flat, overcast light with almost no tonal contrast.
Photographers often combine both types on purpose. A backlit orange sunset behind a cool blue mountain range stacks color contrast on top of tonal contrast. The result is an image with real punch. A monochromatic scene works differently, such as fog rolling through a pine forest. It relies almost entirely on tonal contrast, since color barely varies. Recognizing which type drives a scene helps with subject placement. It also guides how hard to push saturation later.
Dynamic Range and Your Camera’s Ceiling
Dynamic range is the span of tones a camera sensor captures in a single exposure. It is the range held without losing detail in the brightest highlights or the darkest shadows. Modern full-frame sensors typically capture 13 to 15 stops of dynamic range at base ISO. Smartphone sensors usually top out closer to 10 stops before relying on computational blending instead. A wider range gives you more freedom to push tonal contrast during editing without clipping detail.
Astrophotography pushes this idea to its limit. A Milky Way frame needs enough dynamic range to hold detail in both the bright galactic core and the near-black sky around it. Blowing out either end ruins the shot. Shooting in RAW instead of JPEG protects the widest possible dynamic range. JPEG compression discards tonal information the camera originally recorded. Dynamic range, not skill, is often the limiting factor when your images consistently lose shadow or highlight detail.
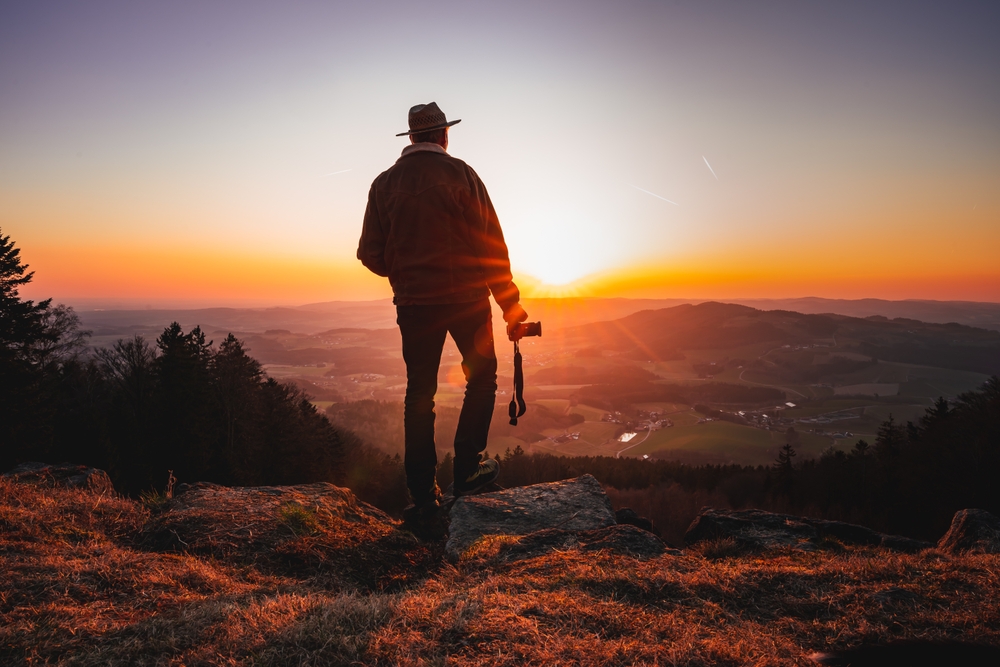
Contrast at the Print: Where the Second Decision Happens
![]()
Most contrast guides stop at the editing stage. Contrast gets decided a second time, however, the moment a file leaves the screen. Paper absorbs ink into its fibers, softening blacks and muting the saturation you built in Lightroom or Capture One. Canvas weave adds texture on top of it, breaking up fine tonal separation further. A print made on the wrong medium quietly erodes the contrast you spent an hour dialing in.
Metal handles this differently, since the image sits inside a coated surface instead of soaking into fibers. Dye-sublimation infuses the photo directly into a polymer coating bonded to aluminum. Blacks stay dense and highlights stay clean this way, instead of softening the way they do on matte paper. This surface difference matters most for a high-contrast black and white frame or a bold color landscape. It is often the reason a print looks close to the file rather than noticeably flatter. See how metal prints hold contrast and detail compared to paper and canvas for more on this gap.
Finish choice matters here too. A glossy or semi-gloss metal surface pushes contrast and color punch further. It suits fireworks, cityscapes, or graphic black and white work well. A satin finish softens contrast and glare instead. It suits gentler portraits or misty landscapes where the mood needs preserving rather than sharpening.
Adding or Taming Contrast in Post-Processing
Editing software gives you three main tools for shaping contrast. These are the basic contrast slider, the curves panel, and clarity or texture sliders for micro-contrast. The contrast slider raises highlights and lowers shadows in a single global move, quick but blunt. Curves work differently and let you target specific tonal zones. This way, you raise contrast in the midtones while protecting shadow detail, a technique most professional editors reach for first.
Clarity and texture sliders adjust micro-contrast instead of overall tonal range. Pushing clarity too far on a portrait exaggerates skin texture and pores. Use it with restraint on people. Apply it more freely on landscapes, architecture, or macro subjects where fine detail benefits from extra edge definition. Small adjustments beat aggressive ones every time. A histogram check after every edit keeps you from clipping highlights or crushing shadows past the point of recovery.
Save on Your Next Print
Turn High-Contrast Shots Into Wall Art
Five finishes and a dynamic range built for bold light, deep shadow, and everything between.
Tonal Contrast vs. Color Contrast: Which Matters More?
Tonal contrast and color contrast solve different problems, so the right priority depends on the subject. For black and white photography, tonal contrast is the entire toolkit, since color has already left the equation. A street photographer or fine art black and white shooter should treat tonal separation as the top priority. This starts from the first frame.
Color photographers benefit from thinking about both at once. A sunset landscape or a vibrant flower macro often relies on color contrast to grab attention first. Tonal contrast reinforces depth second. Portrait photographers usually favor gentler tonal contrast paired with selective color contrast instead, such as a warm skin tone against a cool background. Neither element gets pushed to an extreme.
Let your genre guide your default settings if you shoot mostly one style. Landscape and architecture photographers gain the most from studying tonal contrast and dynamic range together. Portrait and product photographers gain more from studying color relationships and complementary pairings on the color wheel instead.
Pros and Cons of Shooting High Contrast
Pros
- Creates bold, graphic images which stand out in a portfolio or feed
- Strengthens black and white photography, where color offers no help
- Draws the eye directly to the subject through separation from the background
- Prints well on reflective mediums like glossy or semi-gloss metal
- Works especially well for architecture, street, and fireworks photography
- Requires fewer editing steps than rescuing a flat, low-contrast file
Cons
- Pushed too far, it clips shadow and highlight detail permanently
- Often unflattering for close-up portraits, since it exaggerates skin texture
- Loses subtlety in soft, painterly, or foggy scenes
- Demands more from your camera’s dynamic range in mixed lighting
- Needs a print medium with matching dynamic range, or the effect flattens out
Final Verdict

Contrast rewards photographers who treat it as a decision instead of an accident. Landscape, architecture, street, and fireworks photographers benefit most from leaning into strong tonal and color contrast. It is the element viewers respond to first in those genres. Build the habit of checking your histogram before and after every edit. It pays off across your entire portfolio, not only individual shots.
Portrait, wedding, and soft product photographers should approach high contrast with more restraint. Skin, fabric, and delicate textures tend to look their best with gentler tonal separation. Selective use of color contrast works better than a maximum-punch approach. Matching your editing and your print medium to a quieter mood matters more than chasing drama. This holds true whenever your subject calls for it.
The print stage deserves the same attention as the edit. A high-contrast file printed on the wrong surface loses the exact quality you built into it. The right surface protects it instead. Reflective, glossy-leaning mediums like metal support bold, high-contrast work, while matte, fiber-based papers support gentler, low-contrast pieces.
Printing on a medium built for wide dynamic range makes the difference visible the moment the piece hangs on the wall. This matters most if your recent work leans toward bold color, deep blacks, or dramatic black and white frames. A matte fine art paper often serves gentler work better instead, if you shoot mostly soft, low-contrast portraits or painterly landscapes.
Ready to Buy?
Check Out Vivid Metal Prints Today
Order a proof, pick a finish, and see your contrast the way you shot it.
Frequently Asked Questions
What is contrast in photography?
Contrast in photography refers to the difference between the brightest and darkest tones in an image. It also covers the separation between competing colors. High contrast produces bold, graphic images with deep shadows and bright highlights. Low contrast produces softer, more even-toned results instead.
How do you add contrast in photography?
Start behind the camera by shooting in direct, harder light rather than flat overcast conditions. This sets a naturally higher tonal range. In editing, raise the contrast slider, steepen an S-curve in the curves panel, or increase clarity for local micro-contrast. Small, targeted adjustments protect detail better than one large global move.
What is the difference between tonal contrast and color contrast?
Tonal contrast measures the gap between light and dark areas of a photo. Color contrast measures the relationship between different hues instead, especially complementary pairs on the color wheel. A black and white image relies entirely on tonal contrast, while a color image often uses both at once.
Does contrast affect print quality?
Yes. A print medium’s dynamic range and surface finish decide how much of your edited contrast survives. This gets decided once the file leaves the screen. Matte paper absorbs ink into its fibers and softens blacks. A coated surface like dye-sublimation metal keeps blacks dense and highlights clean instead, preserving more of the original tonal separation.
What is micro-contrast?
Micro-contrast is the local tonal separation inside fine details, such as individual grass blades, skin texture, or fabric weave. Editing tools like clarity and texture sliders adjust micro-contrast. They do this without changing the overall exposure or global tonal range of the image.
Why do black and white photos need more contrast?
Removing color takes away one of the main tools a photographer uses to separate a subject from its background. Tonal contrast has to carry the job alone as a result. A black and white image often reads as flat or muddy without enough tonal separation. This holds true even if the original color file looked well balanced.
Just so you know, some of the cool stuff we mention comes with affiliate links, meaning we earn a commission if you buy (no extra charge to you!). Plus, we occasionally feature sponsored content, but rest assured, we only shout out products we genuinely stand behind