

How to Photograph Jewelry at Home: Complete Guide to Stunning DIY Shots
Quick Verdict: Learning how to photograph jewelry at home requires three things: soft, diffused lighting (a $35 light box or a window plus white foam board), a macro-capable lens or smartphone attachment, and a clean white or gradient background. With these basics, you shoot Etsy-quality images in under an hour. This guide covers every step from setting up your first DIY jewelry photography setup to camera settings, styling, and common mistakes.
Last updated: March 2026 | 10 min read
In This Guide
- Why Home Jewelry Photography Matters for Sellers
- Essential Gear to Photograph Jewelry at Home
- How to Photograph Jewelry at Home: Lighting Setup
- Choosing the Right Background and Surface
- Camera Settings for Sharp Jewelry Shots
- Smartphone Jewelry Photography Tips
- Styling and Positioning Your Pieces
- Tips by Jewelry Type: Rings, Necklaces, Earrings, and Watches
- How to Reduce Reflections and Glare
- Post-Processing Without Over-Editing
- 10 Mistakes When You Photograph Jewelry at Home (and How to Fix Them)
- Light Box vs Natural Light: Which Setup Wins?
- Pros and Cons of DIY Home Jewelry Photography
- Final Verdict
- Frequently Asked Questions
Why Home Jewelry Photography Matters for Sellers
Knowing how to photograph jewelry at home is the single most valuable skill for anyone selling on Etsy, Shopify, or Amazon Handmade. Etsy’s seller research indicates listings with professional-quality photos receive significantly more clicks than those with amateur shots, with some sellers reporting 2-3x higher engagement. Yet most jewelry makers still photograph pieces on a kitchen counter with overhead fluorescent lighting, resulting in dull metals, blown-out gemstones, and color-inaccurate images.
Professional jewelry photography studios charge $25-$75 per image. For a seller with 50 products, each needing 5-7 photos, the cost reaches $6,250-$26,250. A home setup, by contrast, costs $50-$200 in one-time gear purchases and produces unlimited images. For this reason, mastering a DIY jewelry photography setup pays for itself within your first product listing.
This guide walks you through every step of home jewelry photography lighting, camera settings, styling techniques, and post-processing. If you are new to product photography, this is the best place to start for jewelry specifically. Whether you shoot with a DSLR, mirrorless camera, or smartphone (see our camera basics for beginners guide if you are starting from scratch), these jewelry photography tips apply to your workflow. By the end, you will produce images sharp enough for e-commerce platforms, social media, and print catalogs.
Essential Gear to Photograph Jewelry at Home
| Gear | Budget Option | Pro Option | Price Range |
|---|---|---|---|
| Light Source | Window + white foam board | LED light box (24″) | $0-$50 |
| Camera | Smartphone (iPhone 14+/Pixel 7+) | Mirrorless with macro lens | $0-$600 |
| Tripod | Tabletop mini tripod | Full tripod with geared head | $15-$150 |
| Background | White poster board (curved) | Seamless gradient backdrop | $2-$25 |
| Macro Capability | Clip-on phone macro lens | Dedicated 100mm macro lens | $10-$500 |
| Extras | Museum wax, lint roller | Jewelry stands, putty, mannequin busts | $5-$30 |
Your total investment for a basic DIY jewelry photography setup starts at roughly $30 if you already own a smartphone. Notably, the most important piece of gear is not the camera. Instead, it is your lighting. A $35 light box with built-in LEDs produces more consistent results than a $2,000 camera with poor lighting.
Featured on Amazon
XJADQW 24″ Photography Light Box
112 LED lights with CRI 95+ color accuracy. Includes 3 color backdrops and adjustable brightness. Perfect for rings, necklaces, and small product shots.
How to Photograph Jewelry at Home: Lighting Setup
Lighting makes or breaks jewelry photography. Specifically, metal surfaces reflect every light source in the room, and gemstones either sparkle or go flat based entirely on how light hits them. The goal of home jewelry photography lighting is soft, even illumination from multiple angles with minimal hard shadows and controlled reflections.

Natural Light Method (Free)
When learning how to photograph jewellery at home with natural light, position a table next to a large north-facing window. Notably, north light stays consistent throughout the day because it never receives direct sun. Place your jewelry on a white surface, then position a white foam board opposite the window to bounce light back onto the shadow side of the piece. This simple two-source setup (window plus bounce card) eliminates harsh shadows while maintaining natural color accuracy.
Avoid direct sunlight at all costs. Specifically, direct sun creates specular highlights on metal surfaces (bright white spots with no detail) and throws hard shadows under raised settings like prongs and bezels. If your window gets direct sun, hang a white bedsheet or tracing paper over the glass to diffuse it. The diffusion softens highlights by roughly 2-3 stops, turning point-source sun into broad, wrap-around light.
Light Box Method ($35-$50)
A photography light box is a collapsible cube with built-in LED strips and translucent white walls. You place your jewellery inside, and as a result, the box diffuses light evenly from every angle. For jewelry product photography, a 12″-16″ box handles rings, earrings, and bracelets. A 24″ box accommodates larger pieces like necklace displays and watch boxes.
When shopping for a light box on Amazon, look for CRI (Color Rendering Index) ratings above 90. In particular, CRI measures how accurately the LEDs reproduce colors compared to natural daylight. A light box with CRI 95+ ensures your gold reads as warm gold and your silver reads as cool silver. In contrast, boxes below CRI 85 give metals a greenish or pinkish cast.
Choosing the Right Background and Surface
White backgrounds dominate e-commerce jewelry photography because they match Etsy, Amazon, and Shopify listing standards. However, the type of white matters. A flat white surface creates a visible horizon line where the surface meets the background. By contrast, a curved white “sweep” (a piece of poster board bent from horizontal to vertical) eliminates this line, producing a seamless gradient called an infinity curve.
For lifestyle shots, consider using natural materials like marble tiles ($3-$5 from a home improvement store), linen fabric, or slate. Consequently, these textured backgrounds add context without competing with the jewelry for attention. Above all, ensure the background does not reflect into the metal surfaces. Matte finishes work better than glossy surfaces for this reason.
Camera Settings for Sharp Jewelry Shots
Sharp macro jewelry photography requires three specific settings. First, set your aperture between f/8 and f/16. This narrow aperture gives you the depth of field needed to keep an entire ring in focus from the front edge of the stone to the back of the band. At f/2.8, only a sliver of the ring will be sharp while the rest falls to blur.
Second, keep your ISO as low as possible: ISO 100 or 200. Because jewelry surfaces amplify noise (especially polished metal), even moderate ISO values create visible grain in shadow areas. Third, use a shutter speed between 1/30 and 1/125 second with a tripod. The tripod is essential here because handheld shooting at these settings introduces motion blur at macro distances where even 1mm of movement shows in the final image.
White Balance and Color Accuracy
Auto white balance often shifts metal tones toward unnatural colors. Instead, set a custom white balance using a gray card before your shoot. Place the 18% gray card where your jewelry will sit, fill the frame, and set the custom white balance reading. This step takes 30 seconds and ensures your gold, silver, and rose gold tones are accurate throughout the entire shoot. Alternatively, shoot in RAW format and adjust white balance during post-processing with zero quality loss.
Smartphone Jewelry Photography Tips
Modern smartphones produce jewelry images good enough for e-commerce when you follow a few specific jewelry photography tips. The iPhone 15 Pro and newer, Pixel 8 Pro, and Samsung Galaxy S24 Ultra all include macro shooting modes built into the camera app. These modes focus as close as 2cm from the subject, capturing detail comparable to entry-level macro lenses on dedicated cameras.
For phones without a built-in macro mode, a $15-$40 clip-on macro lens attachment works well. Notably, Neewer and Xenvo both make popular options available on Amazon. Clip the lens over your phone’s primary camera (not the ultrawide), and you gain 10x-15x magnification. At this distance, you see individual prong details, stone facets, and hallmark stamps.
Phone-Specific Settings
Lock your exposure and focus by tapping and holding on the jewelry piece. On iPhone, this activates AE/AF Lock, preventing the camera from hunting for focus between shots. Similarly, on Android, long-press the focus point to lock it. Turn off HDR mode for product shots since HDR processing often softens fine details and introduces halo effects around shiny edges. Also, shoot at maximum resolution and avoid digital zoom, which degrades detail significantly.
Phone White Balance and RAW Shooting
Phones auto-correct white balance aggressively, often shifting gold tones toward yellow or silver toward blue. To override this, use a third-party camera app like Lightroom Mobile (free), Halide (iOS), or Open Camera (Android). These apps let you set a manual white balance value or lock it to a gray card reading, similar to a dedicated camera. Many newer phones also support RAW capture (DNG format) through these apps, giving you full control over color correction during editing without quality loss. Specifically, iPhone 15 Pro shoots ProRAW at 48MP, and Pixel 8 Pro saves RAW files natively through its camera settings menu. These tools make it easier to learn how to photograph jewelry at home using only your phone.
Featured on Amazon
Tabletop Tripod + Phone Macro Lens Kit
Get a stable mini tripod and clip-on macro lens for under $30. Sharper jewelry shots from your phone in minutes.
Styling and Positioning Your Pieces
Once you know how to photograph jewelry at home, your next step is styling. How you position jewelry in the frame affects perceived value. A ring lying flat on a surface looks carelessly placed. However, a ring propped at a 15-20 degree angle, held in place with a small ball of museum wax (also called jeweler’s putty), looks intentional and professional. Museum wax is invisible in photos, holds pieces securely, and removes cleanly without residue.
For necklaces, drape them in a loose S-curve or U-shape rather than laying them straight. In contrast, straight chains look rigid and unnatural. An S-curve creates visual flow and shows the chain’s movement and texture. Earrings photograph best in pairs, positioned slightly overlapping or at matching angles on a small acrylic display stand. Watches should display the time at 10:10, which is the standard positioning used by every major watch brand because it frames the logo and creates a symmetrical visual.
Tips by Jewelry Type: Rings, Necklaces, Earrings, and Watches
Rings
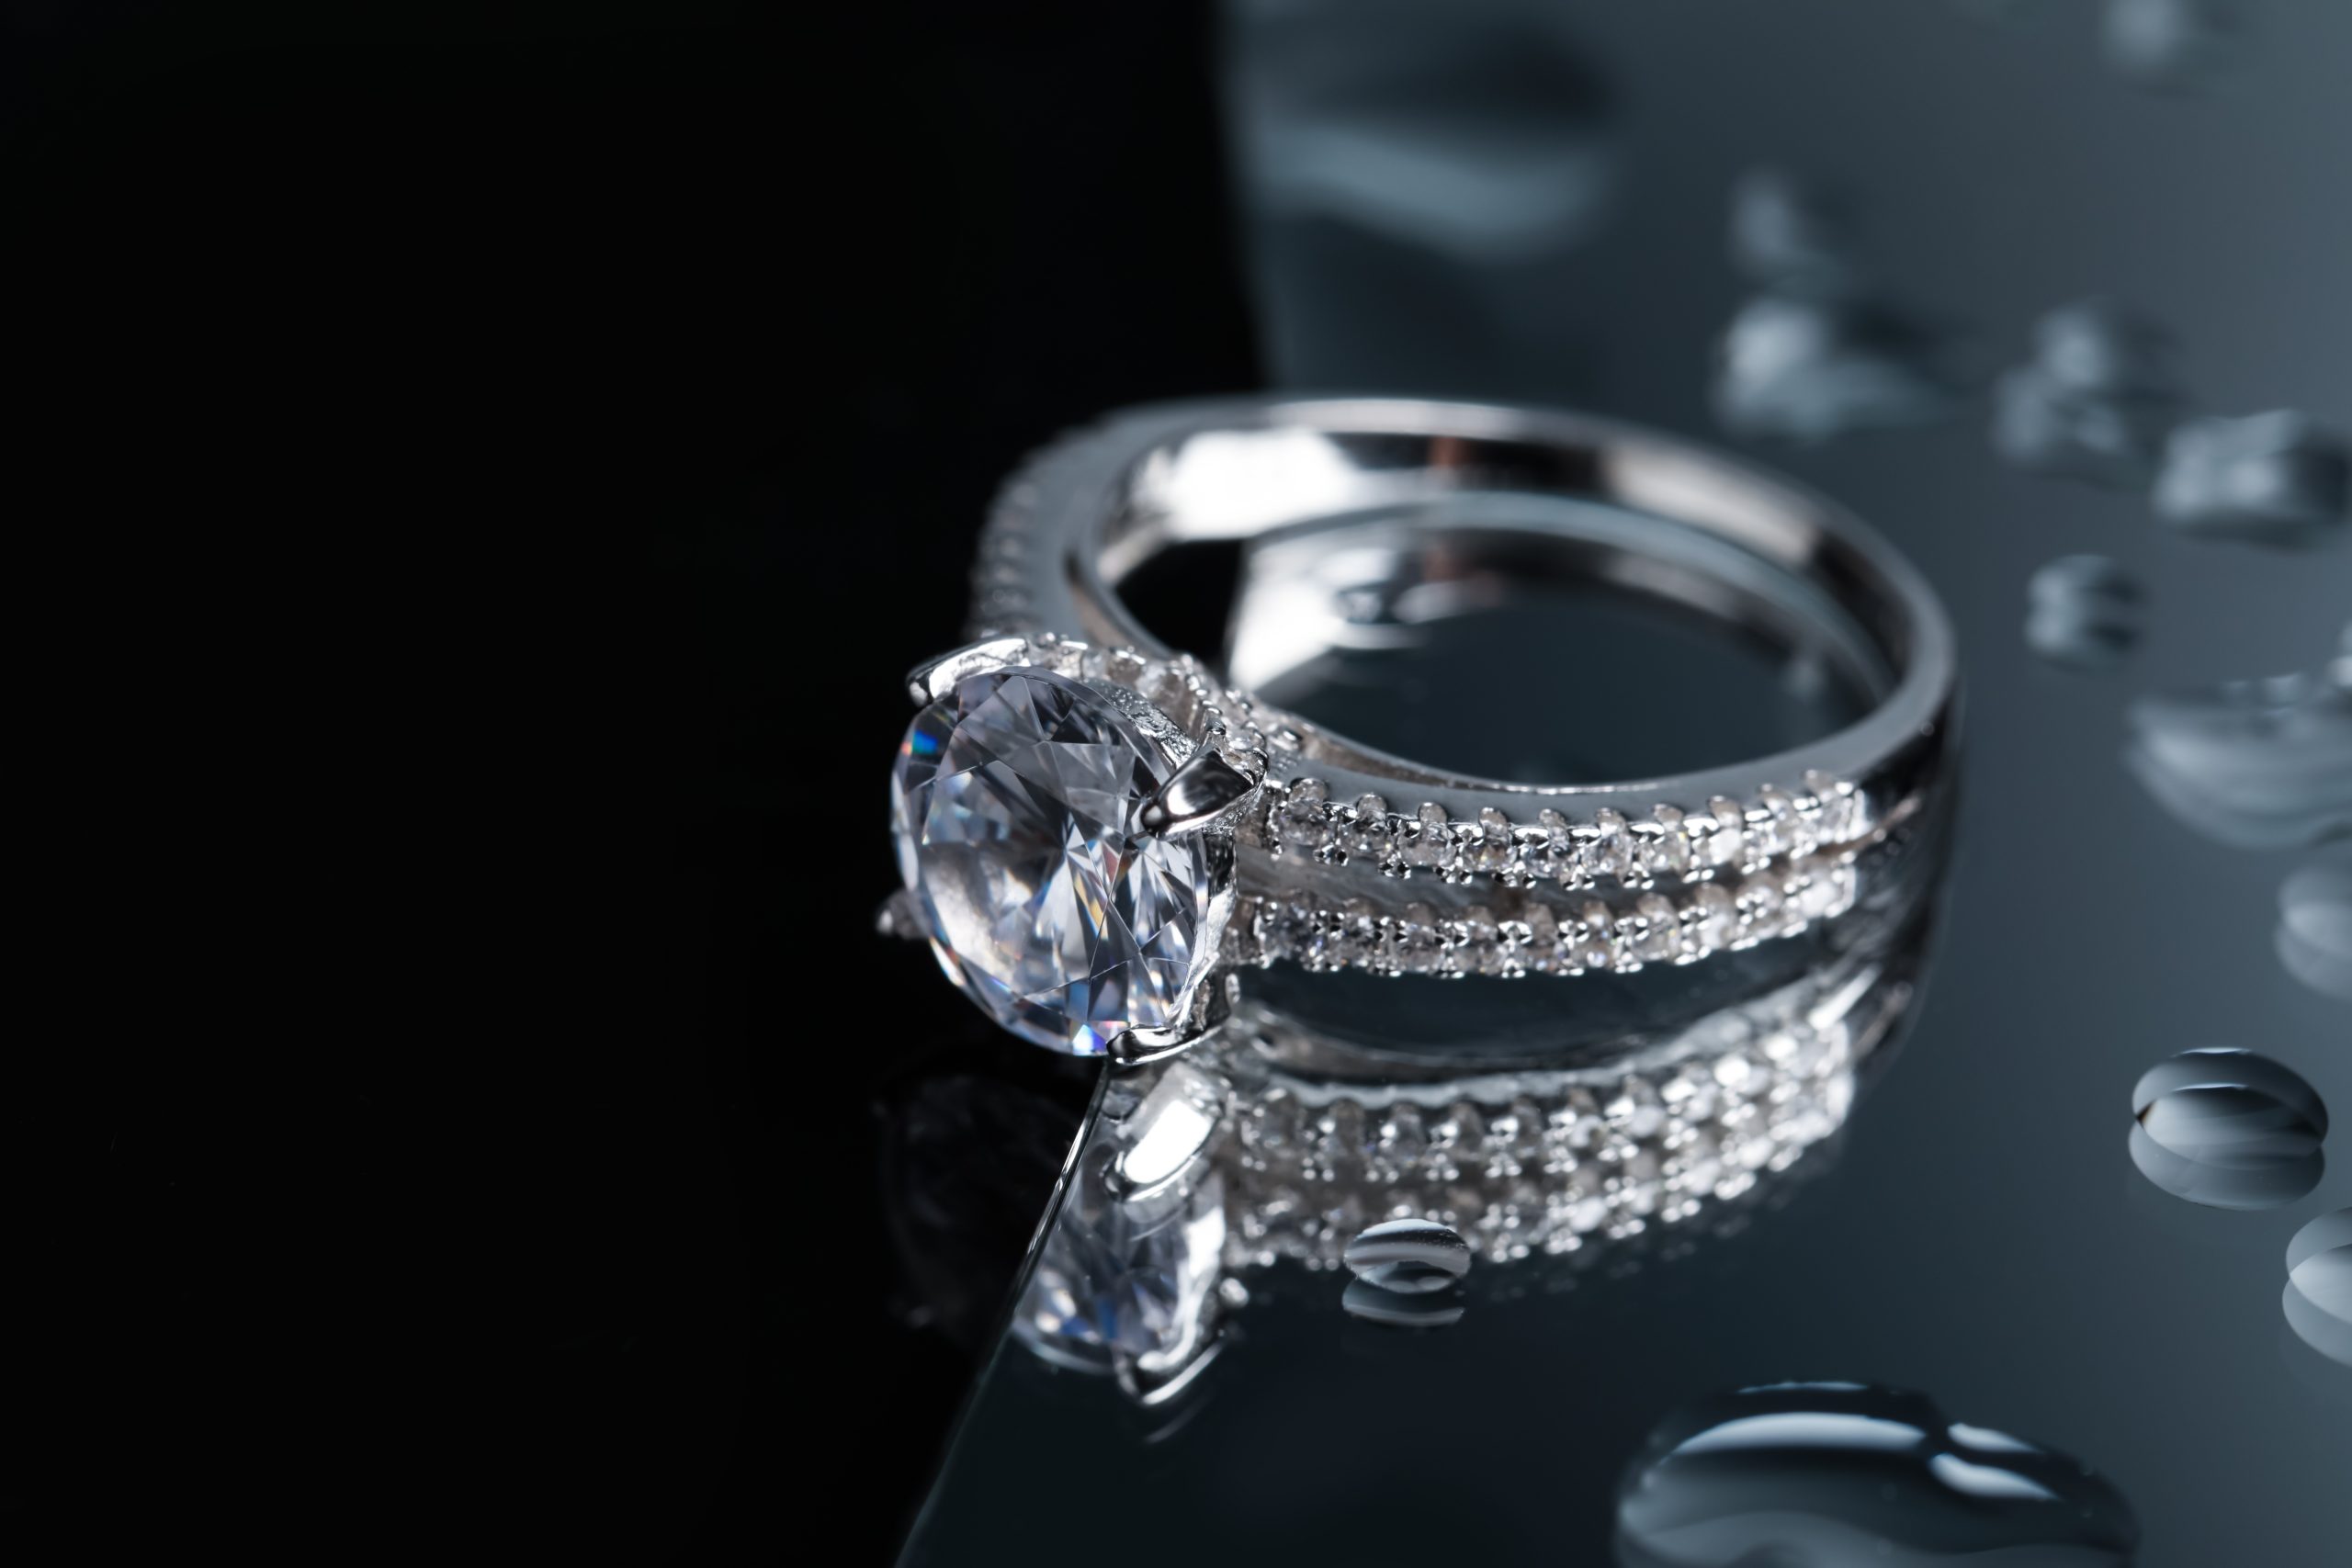
Photograph rings from at least three angles: straight-on face view (showing the stone), a 45-degree three-quarter view (showing depth and band design), and a side profile (showing setting height). Use museum wax inside the band to prop the ring at a slight forward tilt. For engagement rings and diamond pieces, position one light source slightly behind and above the stone. This backlighting creates the fire and brilliance buyers expect to see.
Necklaces and Pendants
Flat-lay necklace shots require patience with chain positioning. Use a toothpick or tweezers to arrange each link without leaving fingerprints. For pendant necklaces, consider a mannequin bust ($12-$20 on Amazon) to show how the piece hangs at different chain lengths. Alternatively, photograph the pendant alone in macro detail, then shoot the full necklace draped on a styled surface for context.
Earrings
Always photograph earrings as a matched pair. Place them at identical angles on a white surface or hang them from a display card. For drop earrings and dangles, a flat surface shot loses the design’s movement. Instead, hang them from a thin wire or earring stand positioned against a white background. The suspended position shows the full length and how they move with natural light.
Watches
Watch photography demands precision. Set the time to 10:10 (industry standard), then clean the crystal with a microfiber cloth to remove every fingerprint and dust particle. Use a watch cushion or small roll of tape inside the bracelet to hold the watch upright. Position your main light at 45 degrees above and to the left of the dial. This angle illuminates the dial markings while creating subtle shadows around the case edges, giving the watch dimensionality.
How to Reduce Reflections and Glare
Reflections are the biggest challenge when you photograph jewelry at home. Because polished metal acts like a mirror, it reflects your camera, your hands, your ceiling, and every object in the room. The solution is controlling what the metal “sees.” In a light box, the white diffusion panels replace all room reflections with clean, even white light. This is why a $35 light box outperforms a $500 lighting kit placed in an open room.
For natural light setups, surround the piece with white foam boards on three sides (left, right, and behind), creating a mini “light tent.” As a result, white bounce cards replace dark room reflections with soft white fill. If you still see camera or tripod reflections, shoot through a hole cut in a white foam board. The board blocks the camera’s dark body from reflecting in the metal surface.
Dealing with Gemstone Glare
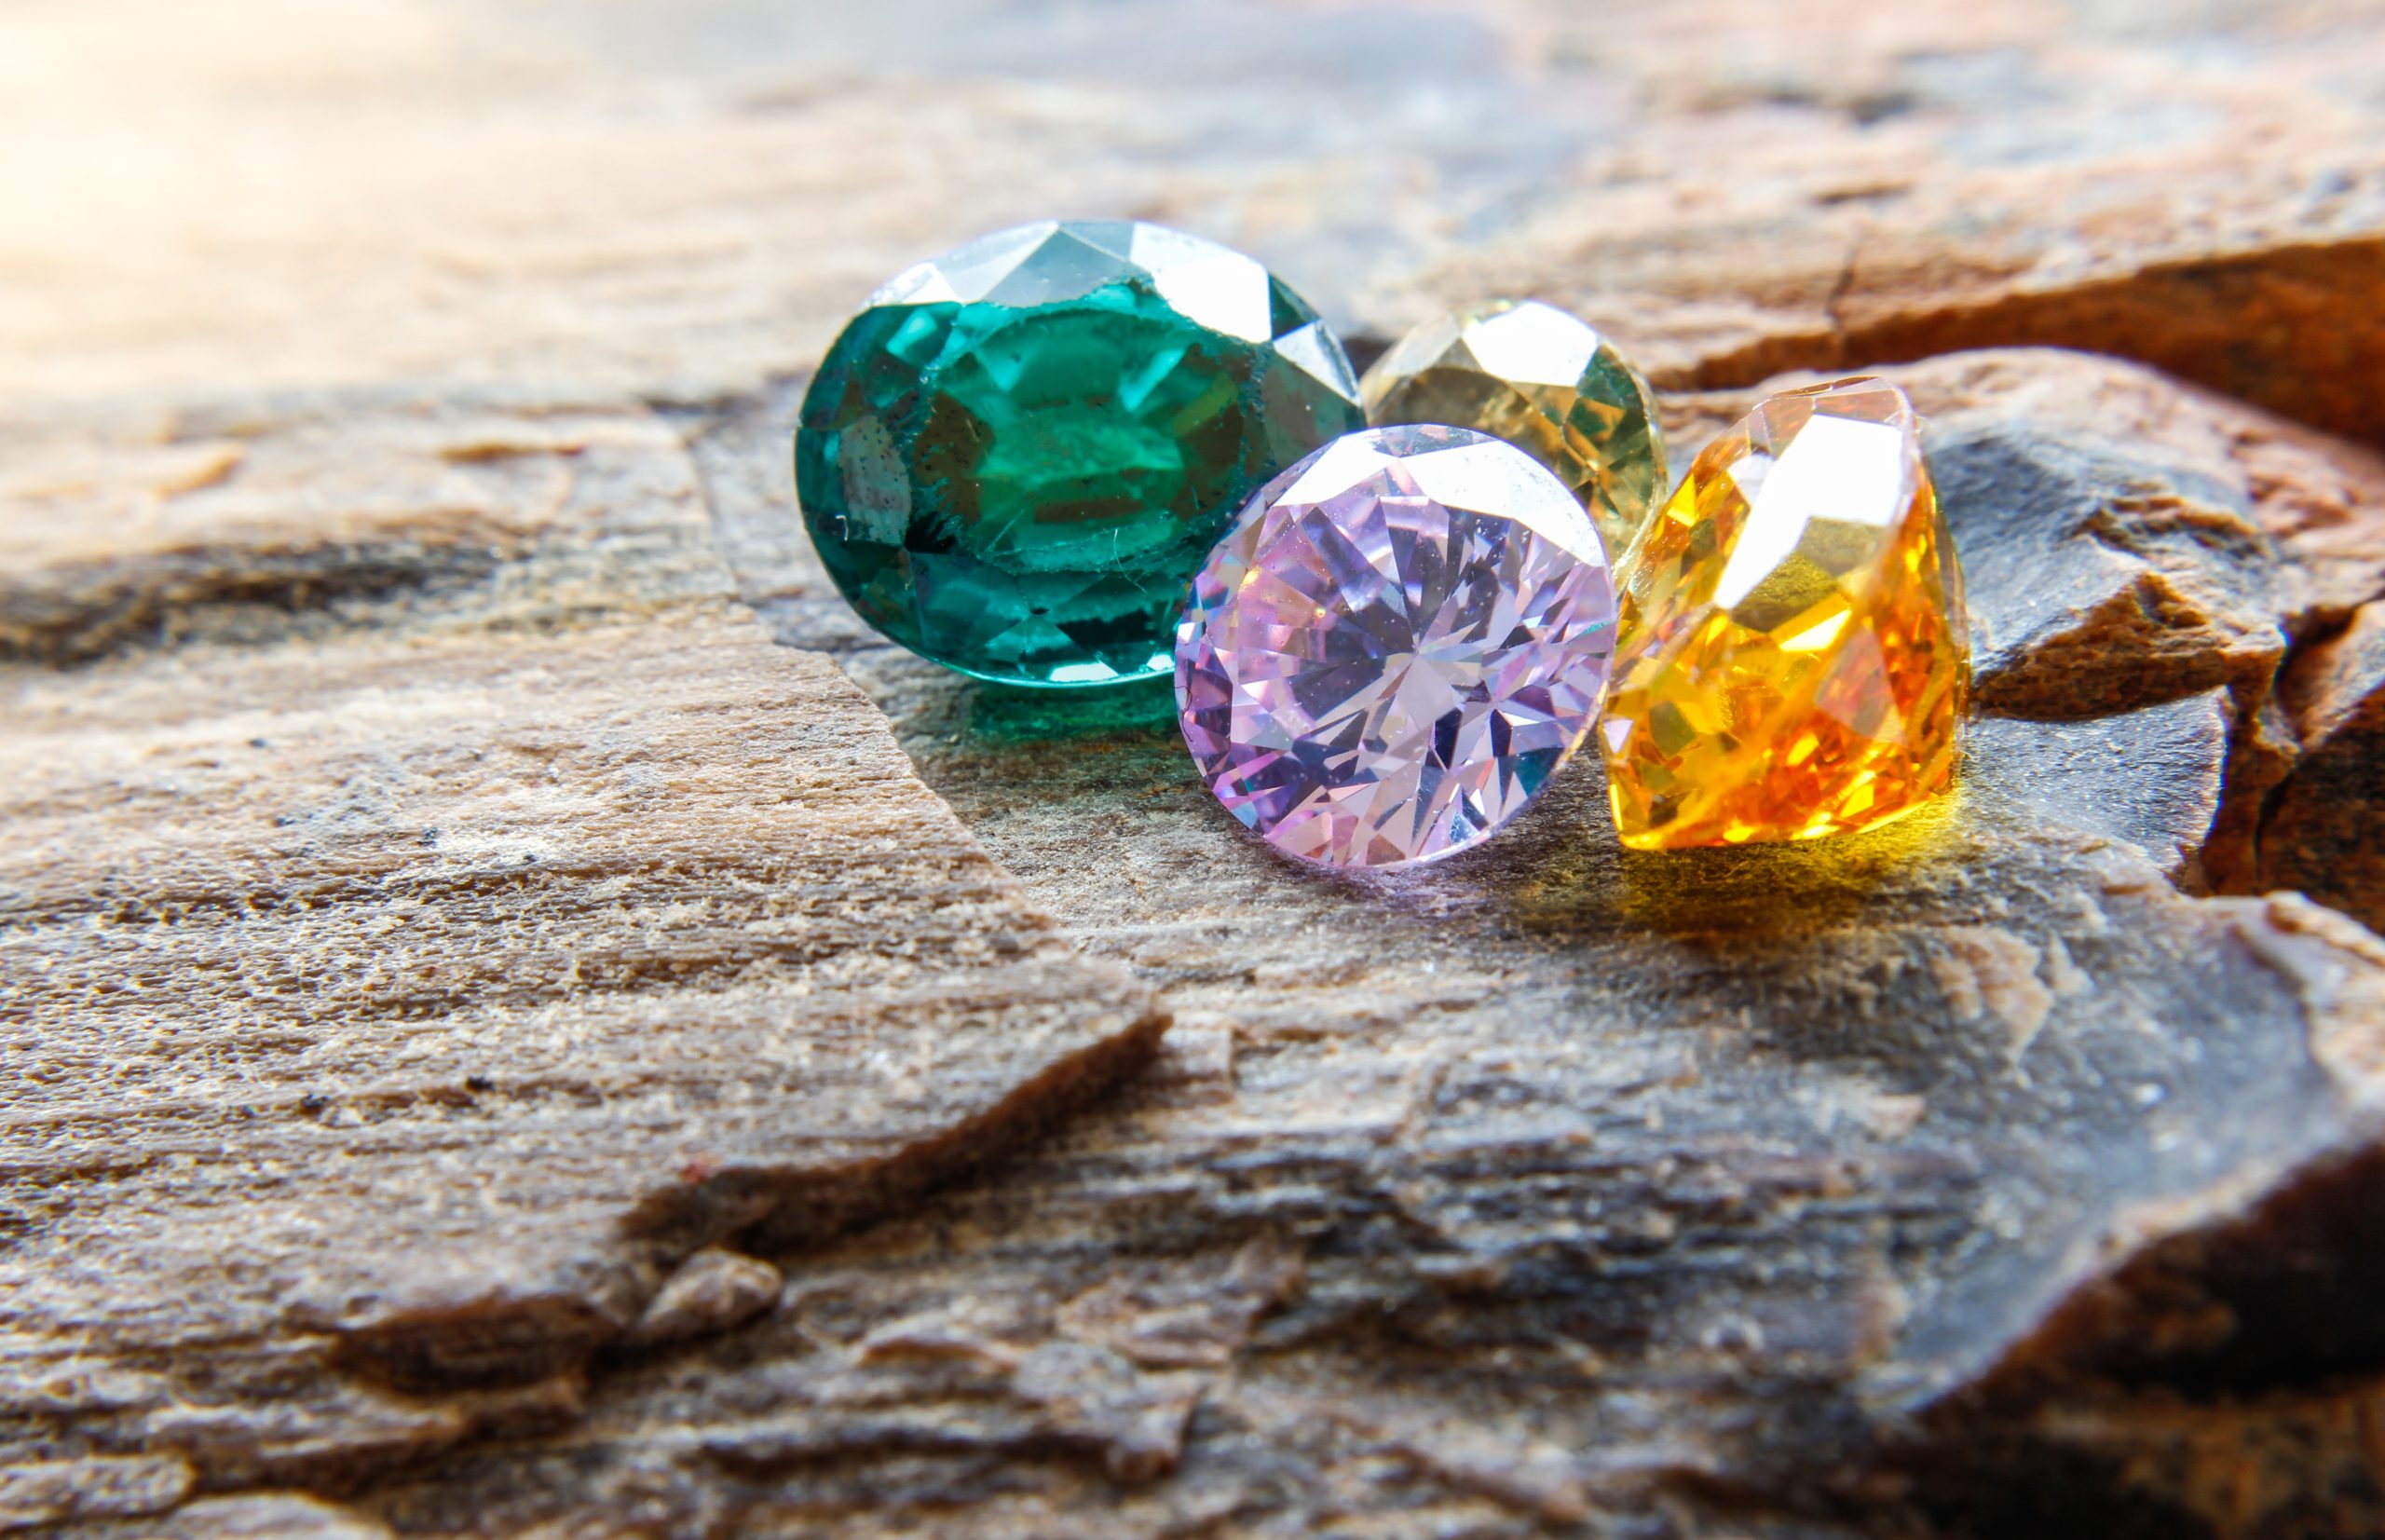
Gemstones need a balance between sparkle and detail. Too much direct light washes out the stone’s color, while too little light makes it look dull. Position one small, focused light source at approximately 45 degrees above the stone to create targeted brilliance without flooding the entire surface. Then use diffused ambient light around the sides to fill in the stone’s body color. A circular polarizing filter on your lens also helps reduce surface glare on translucent stones like amethyst and aquamarine.

Post-Processing Without Over-Editing
After you photograph jewelry at home, the goal of editing is correction, not transformation. Specifically, heavy editing destroys buyer trust because the product they receive will never match an over-processed image. Start with white balance correction (the gray card reading from your shoot makes this simple), then adjust exposure so the white background reads as pure white (RGB 240-250, not 255 which clips to blow-out).
Next, increase clarity by 10-20 points in Lightroom or Camera RAW to enhance fine texture detail on metal surfaces. Avoid pushing clarity beyond 25 since it introduces halo artifacts around edges. For sharpening, use the Unsharp Mask at Amount 80-120, Radius 0.8-1.2, Threshold 2-4. These values sharpen the jewelry without amplifying background noise. Finally, spot-heal any dust particles, fingerprints, or scratches visible on the metal.
10 Mistakes When You Photograph Jewelry at Home (and How to Fix Them)
| Mistake | Why It Happens | How to Fix |
|---|---|---|
| Blurry images | Handheld shooting at macro distance | Use a tripod and remote shutter release |
| Yellow/green color cast | Incorrect white balance or low-CRI lights | Custom white balance with gray card; use CRI 90+ LEDs |
| Dark, underexposed metal | Camera meter reads bright background, underexposes jewelry | Add +1 to +1.5 stops exposure compensation |
| Visible fingerprints | Handling pieces with bare hands | Wear cotton gloves; clean with microfiber before each shot |
| Camera reflection in metal | Uncontrolled room reflections | Surround with white boards; shoot through a hole in white card |
| Background not pure white | Underexposed background or gray paper | Increase light on background; adjust in post to RGB 240-250 |
| Inconsistent style across listings | Changing setup between shoots | Mark tripod and light positions with tape; save camera presets |
| Dust and lint on background | Static cling on white surfaces | Lint roller before each shot; use compressed air |
| Flat, lifeless stones | Too much diffused light, no directional source | Add one small directional light at 45 degrees above stone |
| Over-processed images | Excessive clarity, saturation, or HDR in editing | Limit clarity to +20; use targeted adjustments instead of global |
Light Box vs Natural Light: Which Setup Wins?
A light box gives you consistency. Every shot looks identical because the lighting environment does not change. You shoot at 9pm or 6am and get the same result. For sellers listing 20-50 pieces per week, this consistency speeds up your workflow and keeps your store visually cohesive. Consequently, light boxes are the better choice for high-volume jewelry product photography.
Natural window light, on the other hand, gives you richer, warmer tones and more pleasing specular highlights on gemstones. The gradual light falloff from a large window creates depth and dimensionality a small light box struggles to replicate. However, natural light is unpredictable. Cloud cover changes your exposure every few minutes, and you lose your light source entirely after sunset. Therefore, natural light works best for portfolio pieces, hero images, and lifestyle shots where you shoot fewer pieces per session with more time per image.
The ideal approach for anyone learning how to photograph jewelry at home combines both. Use a light box for your standard white-background e-commerce shots (the bulk of your listings), then set up a window-lit station for styled lifestyle images. This two-setup approach covers every platform requirement from Etsy’s clean product shots to Instagram’s warm editorial aesthetic.
Pros and Cons of DIY Home Jewelry Photography
Pros
- Total setup cost of $30-$200 versus $25-$75 per image at a professional studio
- Shoot on your schedule, including evenings and weekends, with a light box setup
- Full creative control over styling, angles, and background choices
- Consistent results across all product listings when you mark and save your positions
- Immediate reshoot capability if a piece sells and you need updated photos
- Build a photography skill you apply to other product categories over time
Cons
- Learning curve of 5-10 practice sessions before images reach professional quality
- Time investment of 15-30 minutes per piece once your setup is dialed in
- Limited to small items; large sculptures and displays need bigger setups
- Macro photography requires patience since depth of field is razor-thin at close distances
- Post-processing adds 5-10 minutes per image for white balance and cleanup
Final Verdict
Learning how to photograph jewelry at home is one of the highest-ROI skills for any jewelry seller. A $35 light box, a $15 tabletop tripod, and your existing smartphone or camera produce images comparable to a professional studio at a fraction of the ongoing cost. The key is controlling your light (soft and diffused, always), using a tripod (zero exceptions for macro jewelry photography), and keeping your backgrounds simple and clean.
Start with a light box and white background for your standard e-commerce shots. This setup takes 10 minutes to assemble and produces consistent results across your entire product catalog. As your skills develop, add a natural light station by a window for lifestyle and editorial images. Over time, invest in a dedicated macro lens for extreme detail shots of stone settings and metalwork.
For sellers on Etsy, Amazon Handmade, or Shopify, improved product photos typically lead to measurably higher click-through rates and conversion rates. Consequently, professional-quality jewelry product photography sets your listings apart in crowded search results. Your setup does not need to be expensive; it needs to be intentional.
Begin with the basic DIY jewelry photography setup described in this guide, shoot 10-20 practice pieces, and compare your results to top-selling listings in your category. Within a few sessions, you will see a noticeable difference in image quality, and more importantly, your buyers will too.
Featured on Amazon
Build Your Home Jewelry Studio
Browse light boxes, tabletop tripods, and macro lens attachments for your home jewelry studio. Everything under $50.
Frequently Asked Questions
How do you photograph jewelry with a phone?
Use your phone’s built-in macro mode (available on iPhone 15 Pro+, Pixel 8 Pro, Galaxy S24 Ultra) or attach a $10-$20 clip-on macro lens. Place the jewelry in a light box or near a window with white bounce cards. Lock focus by tapping and holding the screen. Shoot at maximum resolution with HDR turned off, and use a mini tripod to eliminate motion blur.
What lighting do you need to photograph jewelry?
Soft, diffused lighting is essential for home jewelry photography lighting. A north-facing window with a white foam board reflector is the free option. For consistent results regardless of time or weather, a light box with CRI 90+ LEDs (starting at $35 on Amazon) is the better investment. Avoid direct, undiffused light sources since they create harsh reflections on metal and blow out gemstone detail.
What background should I use for jewelry photography?
White is the standard for e-commerce platforms (Etsy, Amazon, Shopify). Use a curved white poster board to create a seamless infinity sweep with no visible horizon line. For lifestyle shots, marble tiles, linen fabric, or slate surfaces add texture and context. Ensure all backgrounds have a matte finish to avoid secondary reflections in polished metal surfaces.
How do you reduce reflections when photographing jewelry?
Surround the piece with white foam boards on three sides to replace dark room reflections with clean white fill. A light box does this automatically. If your camera or tripod still reflects in the metal, shoot through a small hole cut in a white card. For gemstone glare, use a circular polarizing filter on your lens and position your main light at 45 degrees above the stone.
What camera settings work best for jewelry photography?
To photograph jewelry at home with sharp results, set aperture between f/8 and f/16 for maximum depth of field. Keep ISO at 100-200 to minimize noise on reflective surfaces. Use a shutter speed of 1/30 to 1/125 second with a tripod. Set custom white balance with a gray card before shooting. Shoot in RAW format for the most flexibility during post-processing.
How do I set up a DIY jewelry photography studio?
Your basic home jewelry studio requires a light box or window-lit table, a tabletop tripod, a white background sweep, and museum wax for positioning pieces. Total cost starts at $30. Set up in a room with minimal ambient light to control your environment. Mark your tripod and light positions with tape so you replicate the exact setup for every shoot session.