

Quick Verdict: A complete new camera setup takes 30 to 45 minutes and prevents the most common beginner mistakes before they happen. The order matters: battery first, firmware before menu customization, strap swap before the first photo walk. Skip this work and you skip the foundation for every shot you take afterward.
Last updated: April 2026 | 8 min read
In This Guide
- Why a Complete New Camera Setup Matters
- Setup Facts at a Glance
- Step 1: Charge the Battery Fully
- Step 2: Format the Memory Card In-Camera
- Step 3: Update the Firmware
- Step 4: Swap the Boxed Strap
- Step 5: Set Your File Format
- Step 6: Configure Back-Button Focus
- Step 7: Dial In the Viewfinder Diopter
- Step 8: Customize the Buttons
- Step 9: Set Auto ISO With a Shutter Floor
- Step 10: Test Everything at Home First
- Common New Camera Setup Mistakes
- Final Thoughts
- Frequently Asked Questions
Why a Complete New Camera Setup Matters
Your new camera setup determines whether the first shoot feels effortless or like a fight against the gear. Most beginners pull the camera out of the box, hang the boxed strap around their neck, snap a handful of frames, and then spend the next month wondering why nothing looks the way they hoped. Spend 30 to 45 minutes upfront and the first shoot feels different from the first frame on.
The order in this new camera setup guide matters. First, the battery, because a half-charged body strains during initial diagnostics. Then firmware, because updates frequently reset menus to defaults. Next, a proper carry system before the first walk, because shoulder fatigue compounds across hours. Afterward, the focus, exposure, and menu choices follow naturally. Each step removes a friction point before it shows up in your shots. Most steps take under five minutes, and none of them require advanced knowledge or expensive accessories.
If you opened the box today, work through this beginner camera setup checklist before you head out. The result is a camera you trust in the field instead of one you fight against. For deeper background on shooting fundamentals once setup is done, see our camera basics for beginners guide. The first camera tips below are sequenced for a reason.
Setup Facts at a Glance
| Setup Item | Recommendation |
|---|---|
| Battery charge time from new | 1 to 3 hours |
| Memory card minimum for stills | U3 SD card |
| Memory card for 20+ fps burst | V60 SD or CFexpress Type B |
| Firmware update time | 5 to 10 minutes |
| Spare batteries to order | 2 minimum, 3 for video |
| Auto ISO max (full frame) | 6400 |
| Auto ISO max (crop sensor) | 3200 |
| Total setup time | 30 to 45 minutes |
Step 1: Charge the Battery Fully
Setup starts with power. New batteries ship partially charged. Plug the battery into its charger and walk away for one to three hours until the charger light turns solid. Skip the temptation to shoot the first ten frames at 40 percent power. A half-charged battery on a brand-new body wakes every diagnostic and settings load on first power-up, draining the cell faster than expected.
While the battery charges, order a spare. One battery is not enough for any real shoot. Two is the minimum. For video work or long sessions, three is safer. OEM batteries from Canon, Nikon, Sony, or Panasonic hold their charge longer than third-party knockoffs and protect your warranty if something goes wrong inside the body.
For video shooters, a USB-C power bank with PD output keeps the camera running on a single session for hours. Most modern mirrorless bodies accept charge over USB-C while shooting, so a small 10,000 mAh power bank becomes a safety net during long events or hikes.
Step 2: Format the Memory Card In-Camera
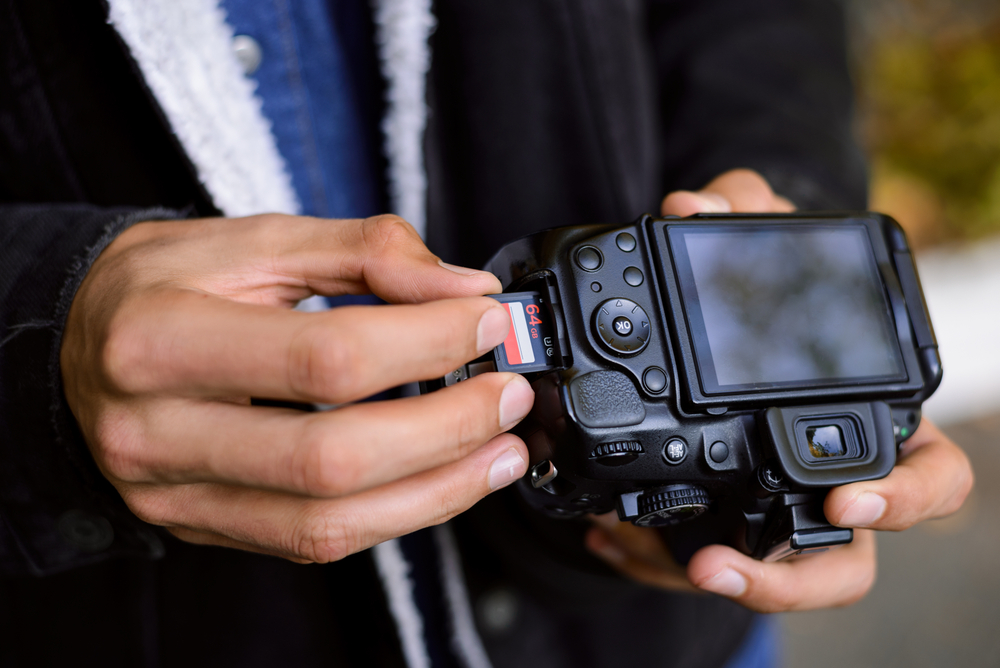
Never format an SD or CFexpress card on your computer. Always format inside the camera body you plan to use it with. In-camera formatting writes the file structure the processor expects, preventing write errors, missing thumbnails, and corrupted RAW files later in the workflow.
Check the card speed before the first shoot. With single-shot stills, a U3 SD card handles almost anything. Burst shooters running 20 frames per second or higher should step up to a V60 SD card or a CFexpress Type B card, depending on what their body accepts. For 4K video, V60 is plenty. Stepping into 6K or high-bitrate RAW video, V90 or CFexpress B keeps the buffer clean during long takes.
Buy two cards on day one. One stays in the camera. The other lives in your bag as a backup. A sudden card failure during a wedding, a hike, or a paid shoot is the single most common reason photographers lose work.
Step 3: Update the Firmware
Cameras often sit in a warehouse for six months or longer before reaching you. Therefore, the firmware shipped on the body is rarely the current version. Manufacturers push updates for autofocus improvements, bug fixes, and new feature rollouts. Skip this step and you shoot on old code while better code sits ready on the manufacturer website.
Go to the manufacturer support page, find your exact model, download the firmware file to a freshly formatted card, insert it into the camera, and follow the on-screen prompts. The process takes five to ten minutes. Do this before you start customizing menus, because a firmware update sometimes resets your settings to defaults.
Step 4: Swap the Boxed Strap
After a Nikon D90, D700, D800, D850, Z7, a Sony A7R and A7S, a Panasonic GH5, and Canon R5, R6, R6 Mark II, and another R5, I have one consistent habit. The boxed strap goes into a drawer before the first battery finishes charging. Twelve cameras, twelve unused straps. Manufacturers treat the strap as branding real estate, and your neck pays the price within the first hour.
Boxed straps share three problems. First, the nylon is thin and digs into your neck after thirty minutes of carry. Second, the triangle rings and leather keepers slow down body swaps and rattle against the camera body. Third, the printed brand logos turn you into a walking advertisement for whatever company sold you the camera.
For the last few months I have been carrying my Canon R5 on a Lemur Strap, and it changed how I shoot. The wide webbing distributes weight across my shoulder, and a seatbelt-style quick-release lets me draw the camera fast. A locking mechanism keeps the body pressed against my side instead of swinging while I walk. None of the three boxed-strap problems apply. I covered a full one-month test on PhotographyTalk’s YouTube channel:
Plenty of solid alternatives exist. Peak Design’s Slide and Slide Lite work well for travel shooters. Ona makes leather straps with a more classic aesthetic. Whatever strap you pick, swap it before first shoot. Our deeper Lemur Strap review covers comfort, build, and real-world carry feel in detail.
As Reviewed on PhotographyTalk
The Lemur Strap
Wide webbing, seatbelt-style quick-release, and a locking mechanism built for photographers who hike, travel, and shoot all day. Free shipping on orders over $150.
Step 5: Set Your File Format
Out of the box, most cameras default to JPEG. Switch to RAW, or RAW + JPEG if you want instant previews while learning editing. RAW files hold every piece of data the sensor captured, giving you room to recover shadows, fix white balance, and push exposure in post without breaking the image.
To switch on a Canon R-series body, press Menu, open the red Shoot tab, and select Image quality. Choose RAW or RAW + JPEG (Large/Fine). On Sony Alpha bodies, Menu, then the Shoot section, then File Format. Nikon Z bodies have Image quality available directly through the i menu. Save the change, then take a test frame to confirm the file extension shows .CR3, .ARW, or .NEF on the rear playback.
JPEGs are compressed and baked. What you shoot is what you keep. For a beginner, RAW is the safer choice because it tolerates the exposure mistakes you will make in your first month. The tradeoff is file size, which is why a second card matters from day one.
Step 6: Configure Back-Button Focus
Beginners often blame their focus system when the real issue is muscle memory. By default, a half-press of the shutter triggers autofocus. This works until you want to recompose a shot, or until a subject walks through your frame and steals focus mid-press. Back-button focus moves the autofocus trigger to a dedicated button on the rear of the camera, usually labeled AF-ON.
To set it up on a Canon R-series body, open Menu, scroll to the orange Custom Functions tab, disable AF activation on the shutter half-press, then assign AF Start to the AF-ON button. Sony Alpha bodies offer the same swap under Custom Key, and Nikon Z bodies handle it through Custom Controls.
Once configured, the shutter only fires the photo. The rear button focuses. You decide when to focus and when to shoot, independently. Most sports, wildlife, and event photographers use this feature. After one afternoon of practice, going back to half-press feels wrong.
Step 7: Dial In the Viewfinder Diopter

The small wheel next to the viewfinder is the diopter. Almost no beginner touches it, which is why new photographers complain their photos look soft. The issue is rarely the lens. Instead, the viewfinder is out of focus for the user’s eyes.
Point the camera at a blank wall, hold the shutter halfway to activate the autofocus overlay, then turn the diopter wheel until the focus points and info bar look razor sharp. Now what you see through the finder matches what the sensor sees. Correct diopter calibration prevents soft framing caused by eye strain rather than camera failure.
Step 8: Customize the Buttons
Most modern cameras offer multiple customizable buttons, usually four or more on mid-range bodies and up. Stock assignments often go to features you will never use. Therefore, remap them early, before muscle memory locks in around the defaults.
Four starter assignments worth making on day one:
- ISO on a front dial or Fn button. You will reach for ISO constantly as light changes. A dedicated control beats diving into a menu every time.
- White balance on a rear button. This saves you from shooting an entire indoor event on Tungsten after walking outdoors at sunset.
- AF area selection on a joystick click. Switching between single-point, zone, and wide-area focus on the fly is the difference between getting the shot and missing it.
- Focus zoom on a lens-ring assignable button. This confirms critical focus at 10x before you press the shutter. Especially useful for macro, portrait, and tripod work.
Here is a concrete walkthrough on a Canon R6. Press the Menu button, open the orange Custom Controls tab, scroll to the AE Lock button, and select ISO Speed Setting from the list. Now your right thumb sits on ISO control without touching the top dial. Repeat the process for any camera by finding the Custom Buttons or Function Buttons menu under your manufacturer’s menu system.
For mirrorless bodies with custom modes (C1, C2, C3), set one for daylight, one for low light, and one for action or video, depending on what you shoot most. Flipping to a preset is faster than changing five settings under pressure.
Step 9: Set Auto ISO With a Shutter Floor
Auto ISO gets a bad reputation with new photographers because they leave it uncapped. Set a maximum ISO, with 3200 on crop sensors and 6400 on full frame as safe starting points, and then a minimum shutter speed floor. The floor keeps the camera at or above your set shutter speed, even if it means raising ISO higher.
For handheld shooting with a 50mm lens, a floor of 1/100s prevents motion blur from your hands. Once you mount a 200mm lens, raise the floor to 1/250s or faster. With this setup in place, you control aperture for depth of field and let the camera handle the rest while you focus on composition. For a deeper look at the exposure side of this, see our beginner shutter speed guide.
Step 10: Test Everything at Home First
Shoot fifty frames around your house before taking the camera anywhere important. Photograph a window, a pet, a coffee cup, a houseplant. Then pull the card, transfer the files to your computer, open them in your editor of choice, and confirm the full workflow runs end to end.
Too many beginners drive two hours to a sunset shoot only to find their card reader does not fit the new card, their editing software does not read the new RAW format, or their cloud backup configuration breaks on first upload. The home test catches all of it. Therefore, fix the pipeline before you care about the photos.
Common New Camera Setup Mistakes

Even with the right steps in front of them, new photographers stumble in predictable ways during the first hour with a new body. Specifically, four mistakes account for most of the wasted time before first shoot.
First, formatting the card on a computer instead of in-camera. This corrupts the file structure and creates write errors weeks later. Second, leaving the boxed strap on. The thin nylon causes shoulder pain within hours. Third, ignoring the diopter and blaming the lens for soft photos. Fourth, leaving Auto ISO uncapped, which produces grainy frames in low light because the camera pushes ISO past 25600 trying to maintain shutter speed.
Each mistake takes longer to undo than to prevent. A complete new camera setup at the start eliminates all four before they steal a single shoot. Treat this as your camera setup checklist and the first month of ownership feels different.
Final Thoughts
A new camera setup is not glamorous work. Skip it and you waste the most expensive part of the kit on day one. Spend 30 to 45 minutes upfront, in the order this camera setup checklist presents, and the camera starts repaying the time across thousands of future shots.
If you act on only one item from this beginner camera setup list today, swap the boxed strap. The strap is the single accessory you wear for the entire shoot, and the wrong one turns photo days into endurance tests. While the other nine steps matter, the strap is the only one your body feels every minute the camera is on.
Once new camera setup is done, focus on practice. Shoot a personal project, work through the exposure triangle, and review your own files weekly. For a structured starting point, our beginner photography kit guide covers the supporting gear worth adding next. These first camera tips compound over time.
Frequently Asked Questions
How long should a new camera setup take?
Plan for 30 to 45 minutes once the battery is charged. Most steps run under five minutes each. Firmware updates and diopter calibration are the two longest items, but neither requires technical skill.
Do I need to format an SD card before first use?
Yes. Always format inside the camera body, not on your computer. In-camera formatting writes the proper file structure for the camera’s processor and prevents write errors and corrupted RAW files later.
Should I update camera firmware on day one?
Yes. Cameras often sit in inventory for six months or longer, so the shipped firmware is usually outdated. Update before customizing menus, because firmware updates sometimes reset settings.
Is back-button focus worth setting up as a beginner?
Yes. One afternoon of practice and the muscle memory locks in. The setup separates focusing from shooting, which prevents missed shots when subjects move through your frame mid-press.
What ISO should I cap Auto ISO at?
For full frame cameras, 6400 is a safe starting point. With crop sensors, 3200 holds image quality without grainy output. Pair the cap with a shutter speed floor of 1/100s for handheld shooting at 50mm.
Why should I replace the boxed camera strap right away?
Boxed straps are thin, slow to swap, and covered in brand logos. They cause shoulder fatigue within an hour. A wider strap with a quick-release system, similar to the Lemur Strap, distributes weight properly and speeds up body swaps.