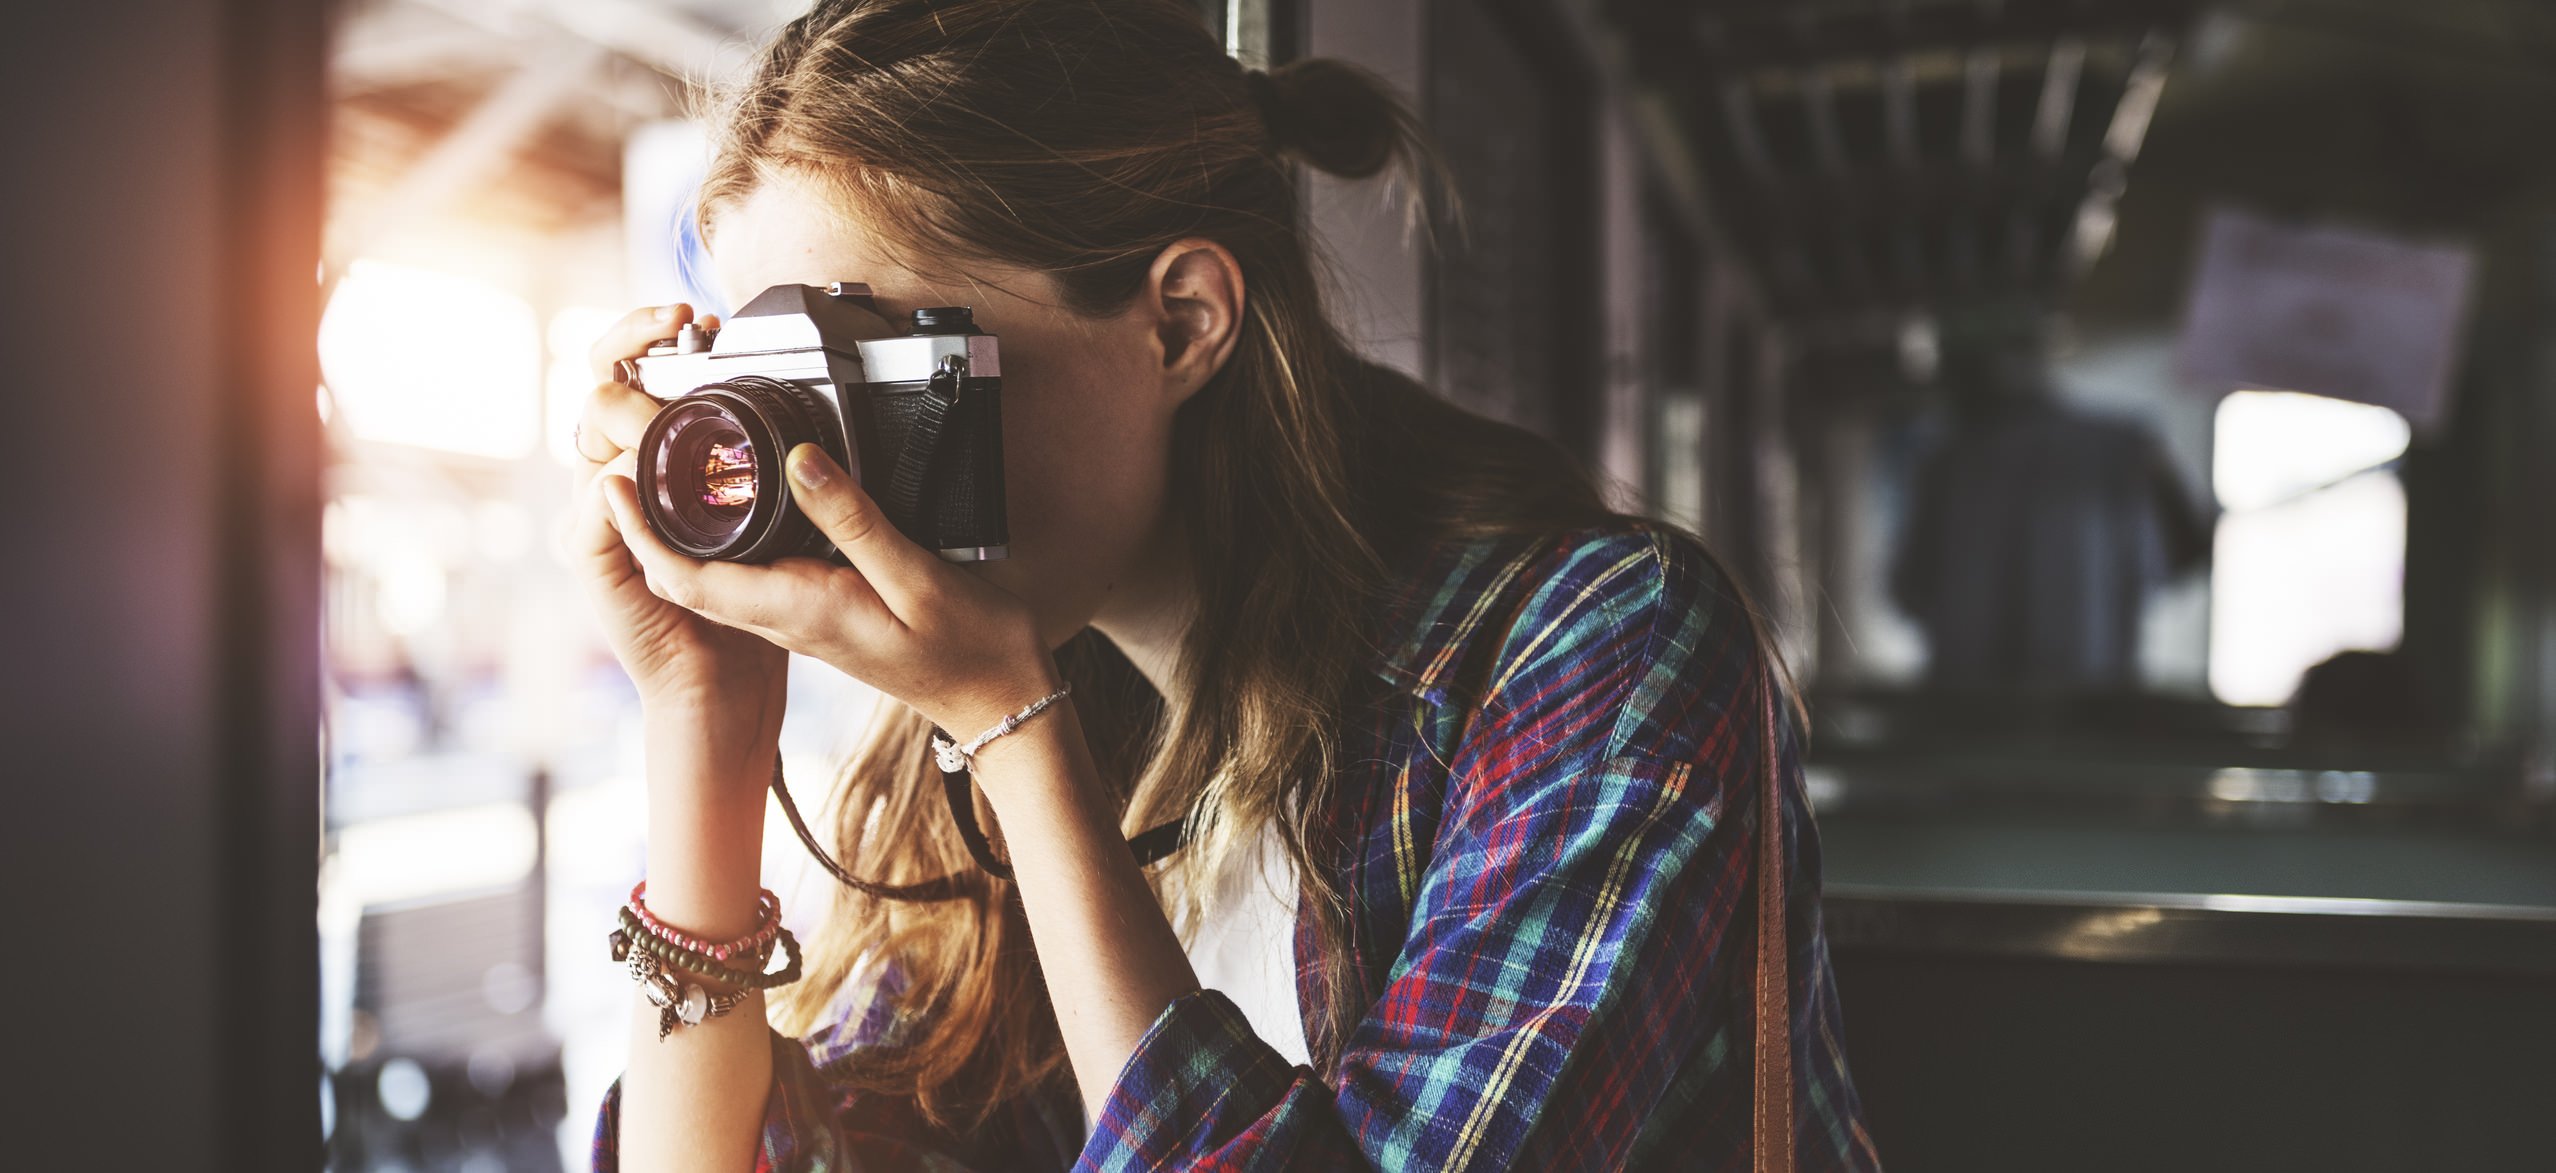
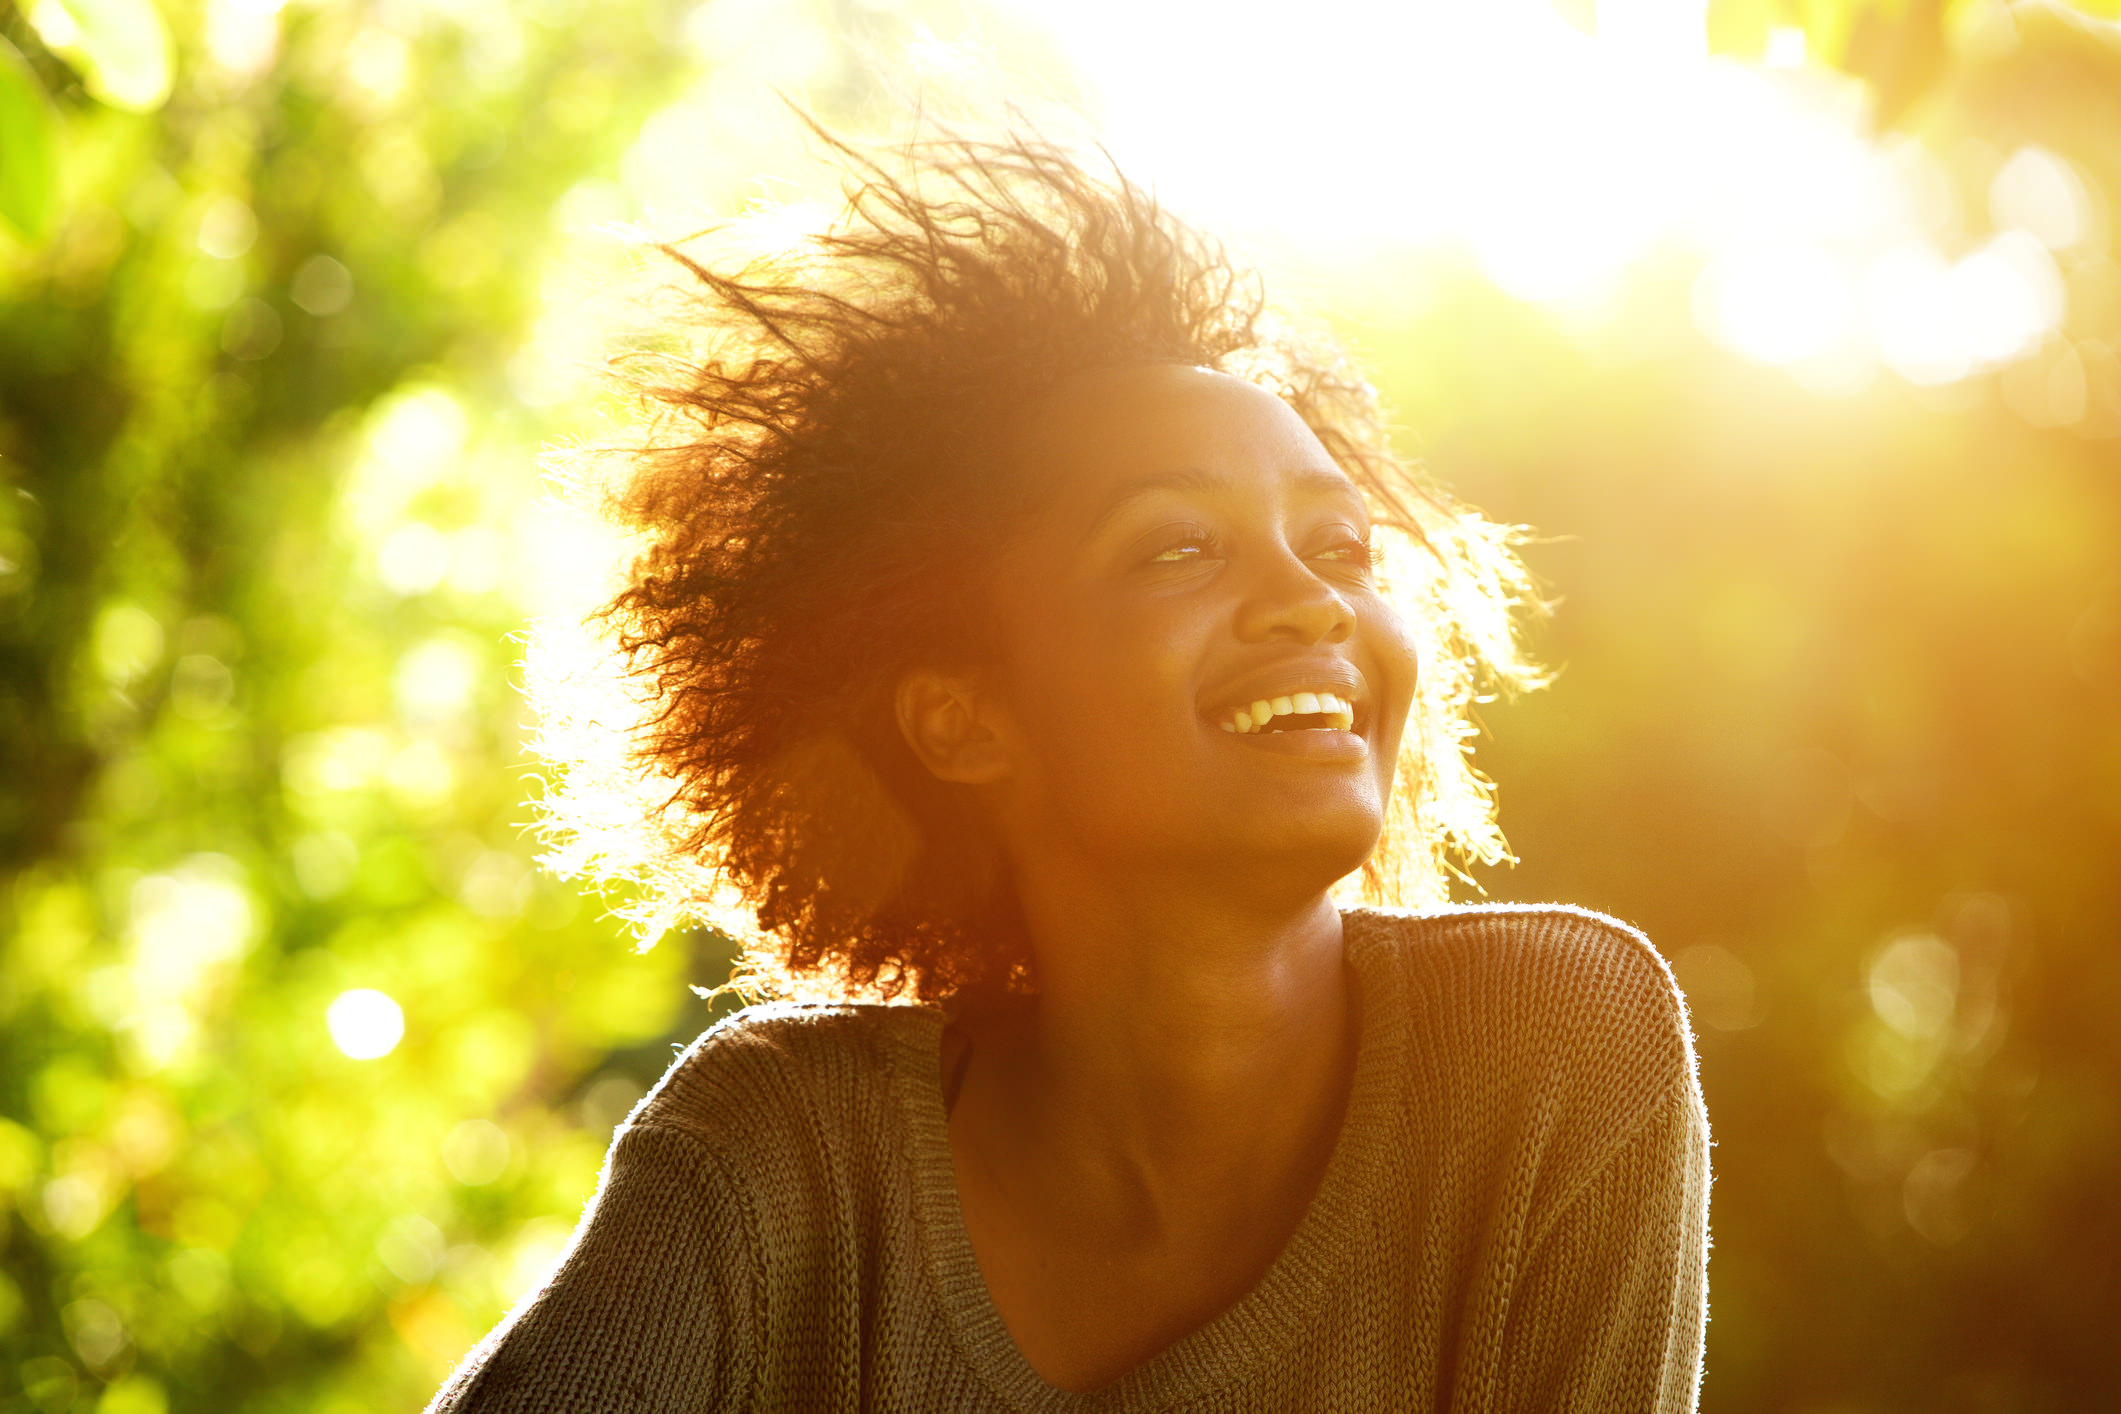
12 Simple But Impactful Tips for New Photographers

So, you finally jumped into photography? Good for you!
As you’ll surely find as you get more and more involved in photography, it’s a fun hobby and one that will bring you endless joy.
You’ll also find out that it can get a little overwhelming…
By that I mean that there’s just a lot to learn. From composition and lighting to camera gear and learning how to use it, you’ve got a lot on your plate.
With that in mind, I put together this list of tips that I found helpful when I started my photography journey. Some of these are things I discovered on my own through silly mistakes. Others were passed on to me from more experienced photographers.
And now, I’m passing them onto you!
Work With the Camera You’ve Got
The lure of new gear is hard to resist for any photographer.
But the desire to have a big, bad camera is especially strong for newbies. It makes sense, though - for many beginner photographers, there is a mistaken belief that a new camera will result in better photos.
Sure, a new camera is convenient.
But at the end of the day, it’s not the camera that’s responsible for things like composition or framing or choosing a compelling subject.
That stuff is up to you!
So, instead of buying a brand new camera, get some practice with the one you’ve got first. The more photos you take, the more skills you’ll develop. Once you outgrow your current camera, then you can think about an upgrade.
Never Leave the House Without Your Camera
Now that we’ve settled the do-I-need-a-new-camera-or-not debate, let’s focus on another camera-related tip that’s sure to help you improve:
Your camera should be attached to you at the hip.
These days, your smartphone has a camera that’s more than good enough for taking casual photos to practice your compositional skills, so use it!
Great photo opportunities can happen at any moment. Your kid might make a funny face at dinner, the lighting as the sun sets during your commute home from work might cast beautiful shadows across the landscape, or the morning walk with the dog might greet you with dew-covered grass.
The point is that by having your camera with you at all times, you can capitalize on the opportunities you’re given to create a beautiful photo. And the more you practice, the better you’ll become at composition, lighting, and the other photography essentials.
What’s more, the more you practice, the better your creative eye will be. You’ll find that with time, you’ll begin to see things like light and shadow or color and texture in a way that allows you to highlight them in a photo.
You Need a Tripod
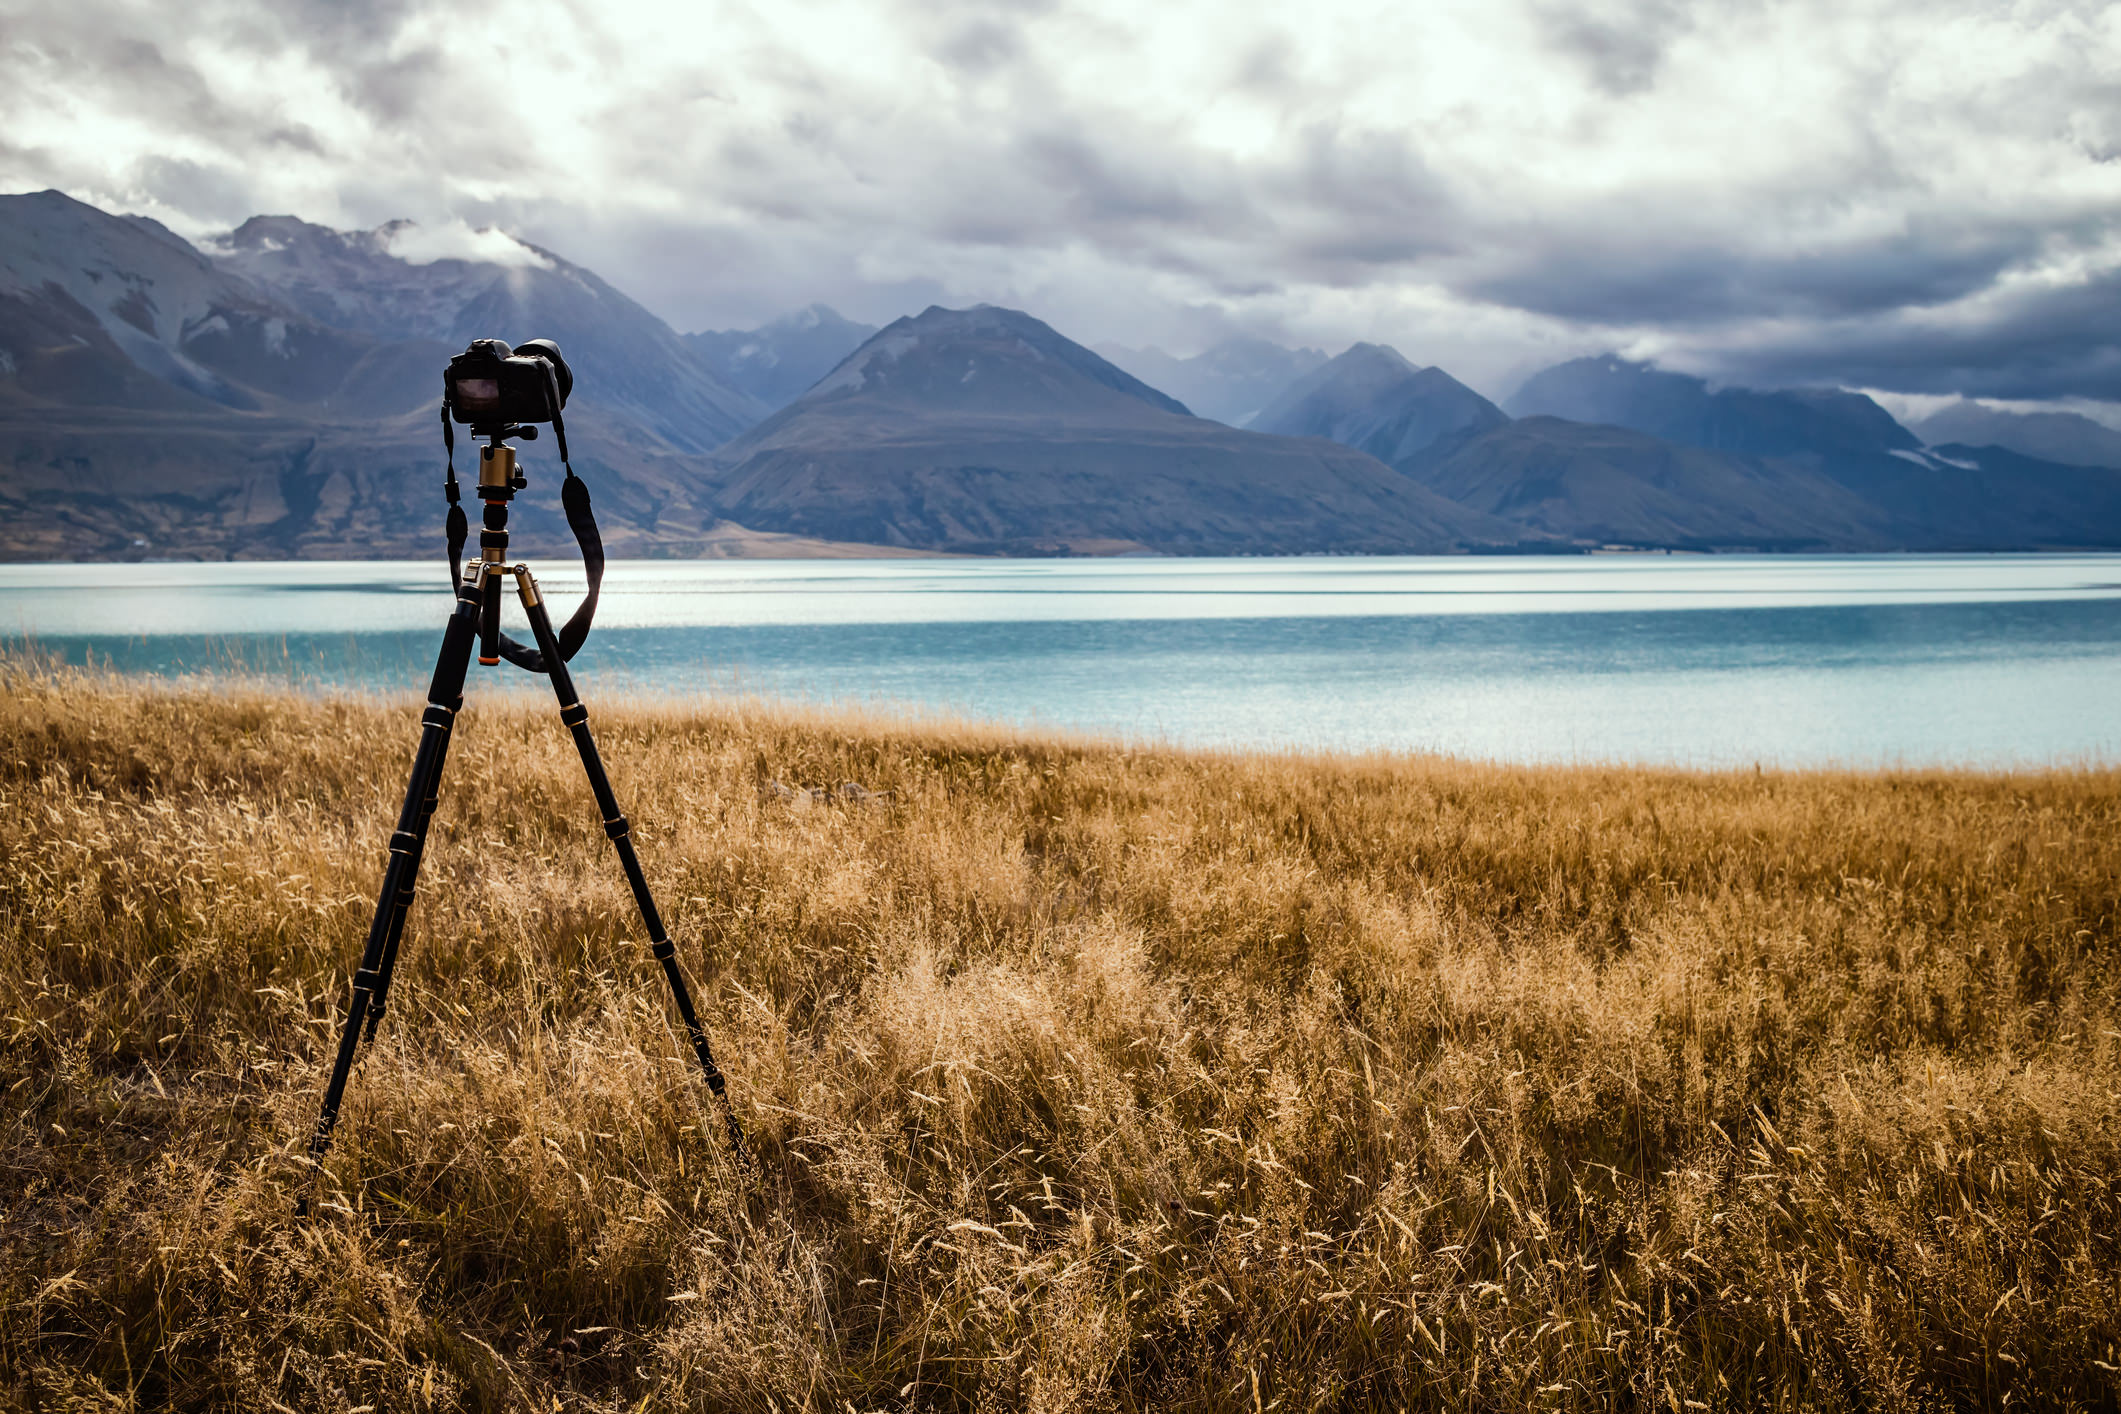
You can go without getting a brand spanking new camera, but something you can’t go without is a tripod.
Here’s why…
Even though we’re conditioned to simply hold our cameras in our hands, sometimes, it’s not the best move to do so. Why?
Sharpness.
The simple fact of the matter is that not everyone has the steadiest of hands. What’s more, not every situation you shoot in will allow for a shutter speed that’s fast enough to negate the natural movement of your body as you hold a camera.
The solution is a solid tripod.
Now, there are hundreds of tripods out there, and as a beginning photographer, it can be a bit daunting trying to sort through all the makes, models, and sizes that are available.
But here’s the secret: get something that’s good quality, won’t bust your budget, and that’s gotten great online reviews.
You can easily spend hundreds and hundreds of dollars on a top-notch carbon fiber tripod, but at this point, that’s not a necessity. Instead, opt for something like the Vanguard Alta Pro 263ab 100 aluminum tripod.
Aluminum isn’t the lightest material, but for a beginner, the extra weight is worth dealing with in favor of the added stability with solid legs that will keep your camera safe, secure, and stable. You can use just one finger to lock the center column on this particular model, making setup a breeze. It’s a top seller on Amazon and gets great ratings as well. What’s not to like about that?
Master the Rule of Thirds, and Then Break It
A more common photography rule you will not find.
The rule of thirds is likely the first compositional rule that most photographers learn, and it is likely the one that is used most often over the course of a photographer’s career.
If you aren’t familiar with the rule, here’s a quick definition:
By breaking the image up into nine equal quadrants (think of a tic-tac-toe board), you have a guideline for placing important elements in the shot to maximize their visual impact. Place them either along one of the two horizontal grid lines or one of the vertical grid lines. Better still, place interesting elements at one of the four intersection points where those lines meet.
In the video above, Joshua Cripps of Professional Photography Tips gives us a quick overview of the rule of thirds, where it came from, how to use it, and when to break the rule. Follow along as he demonstrates why it’s an important rule to learn and provides visual evidence of how to use it effectively.
Use Automatic Features When Possible
As a new photographer, you’ve got a lot to think about…
You need to frame the shot such that it complements the subject.
You have to worry about compositional considerations like using the rule of thirds or incorporating foreground interest.
You also have to master the art of the well-exposed photograph.
There’s enough on your plate already, so simplify things as much as you can by using some of your camera’s automatic modes.
For example, let the camera control the focus and the white balance. Better still, use one of your camera’s semi-automatic shooting modes, like aperture priority, which allows you to choose the aperture and ISO settings and the camera chooses an appropriate shutter speed (more on that and other semi-automatic modes later on).
Using automatic functions like these allows you to concentrate more on getting the shot and developing the skills listed above. Then, once you feel comfortable, you can start adding in other camera settings to manipulate on your own.
Make a Shot List

Keeping track of all the ideas you have for photos or the locations at which you want to shoot has never been easier.
Just use the notes feature on your phone or download a note-taking app, and keep all your photography ideas in one, convenient place. And, like mentioned above, since many smartphones have pretty good cameras, that means you have your shot list and your camera in one place!
The beauty of a shot list is twofold. First, it acts as a guide for your creativity, encouraging you to think of all the places and things you’d like to capture in an image. Second, it allows you to have a feeling of accomplishment as you knock items off your list. Sunset at the beach? Check! A backlit portrait? Check!
Beyond that, a shot list can help you stretch your boundaries and work towards loftier photography goals. Perhaps right now you aren’t in possession of all the skills you need to tackle astrophotography, but put it on your shot list and work towards that goal. After all, it’s that creative pursuit - identifying what we want to do and then working to achieve it - that will help you become a better photographer.
Get Cozy With Camera Modes
Your camera has some very handy semi-automatic shooting modes that make getting a well-exposed image a little bit easier for the beginner.
These modes are a step up from shooting in fully automatic, but are still simple enough to use that you can concentrate on things like composition and framing.
In the video above, Gizmodo offers up a very helpful yet concise overview of three popular camera modes - program, aperture priority, and shutter priority. Complete with examples and fun visuals, this video will get you familiarized with each setting so you can utilize them to take improved photos.
Here’s a quick rundown of what each mode does:
- Aperture priority - allows you to pick the aperture and ISO value, but the camera picks a shutter speed to match. This is a good setting to use if you take portraits or photos of still subjects.
- Shutter priority - allows you to control shutter speed and ISO, but the camera selects the aperture for you. This is a good setting for instances in which you want to blur or freeze movement.
- Program - gives you control over ISO while the camera selects the appropriate aperture and shutter speed. However, you can override the camera’s selection at any time (which you can’t do in aperture or shutter priority modes). This is a good setting for instances in which there is harsh lighting and the ISO needs to be controlled.
It might seem scary to get out of auto mode, but trust me...getting out of auto mode and expanding your skillset will do you much more good in the long run!
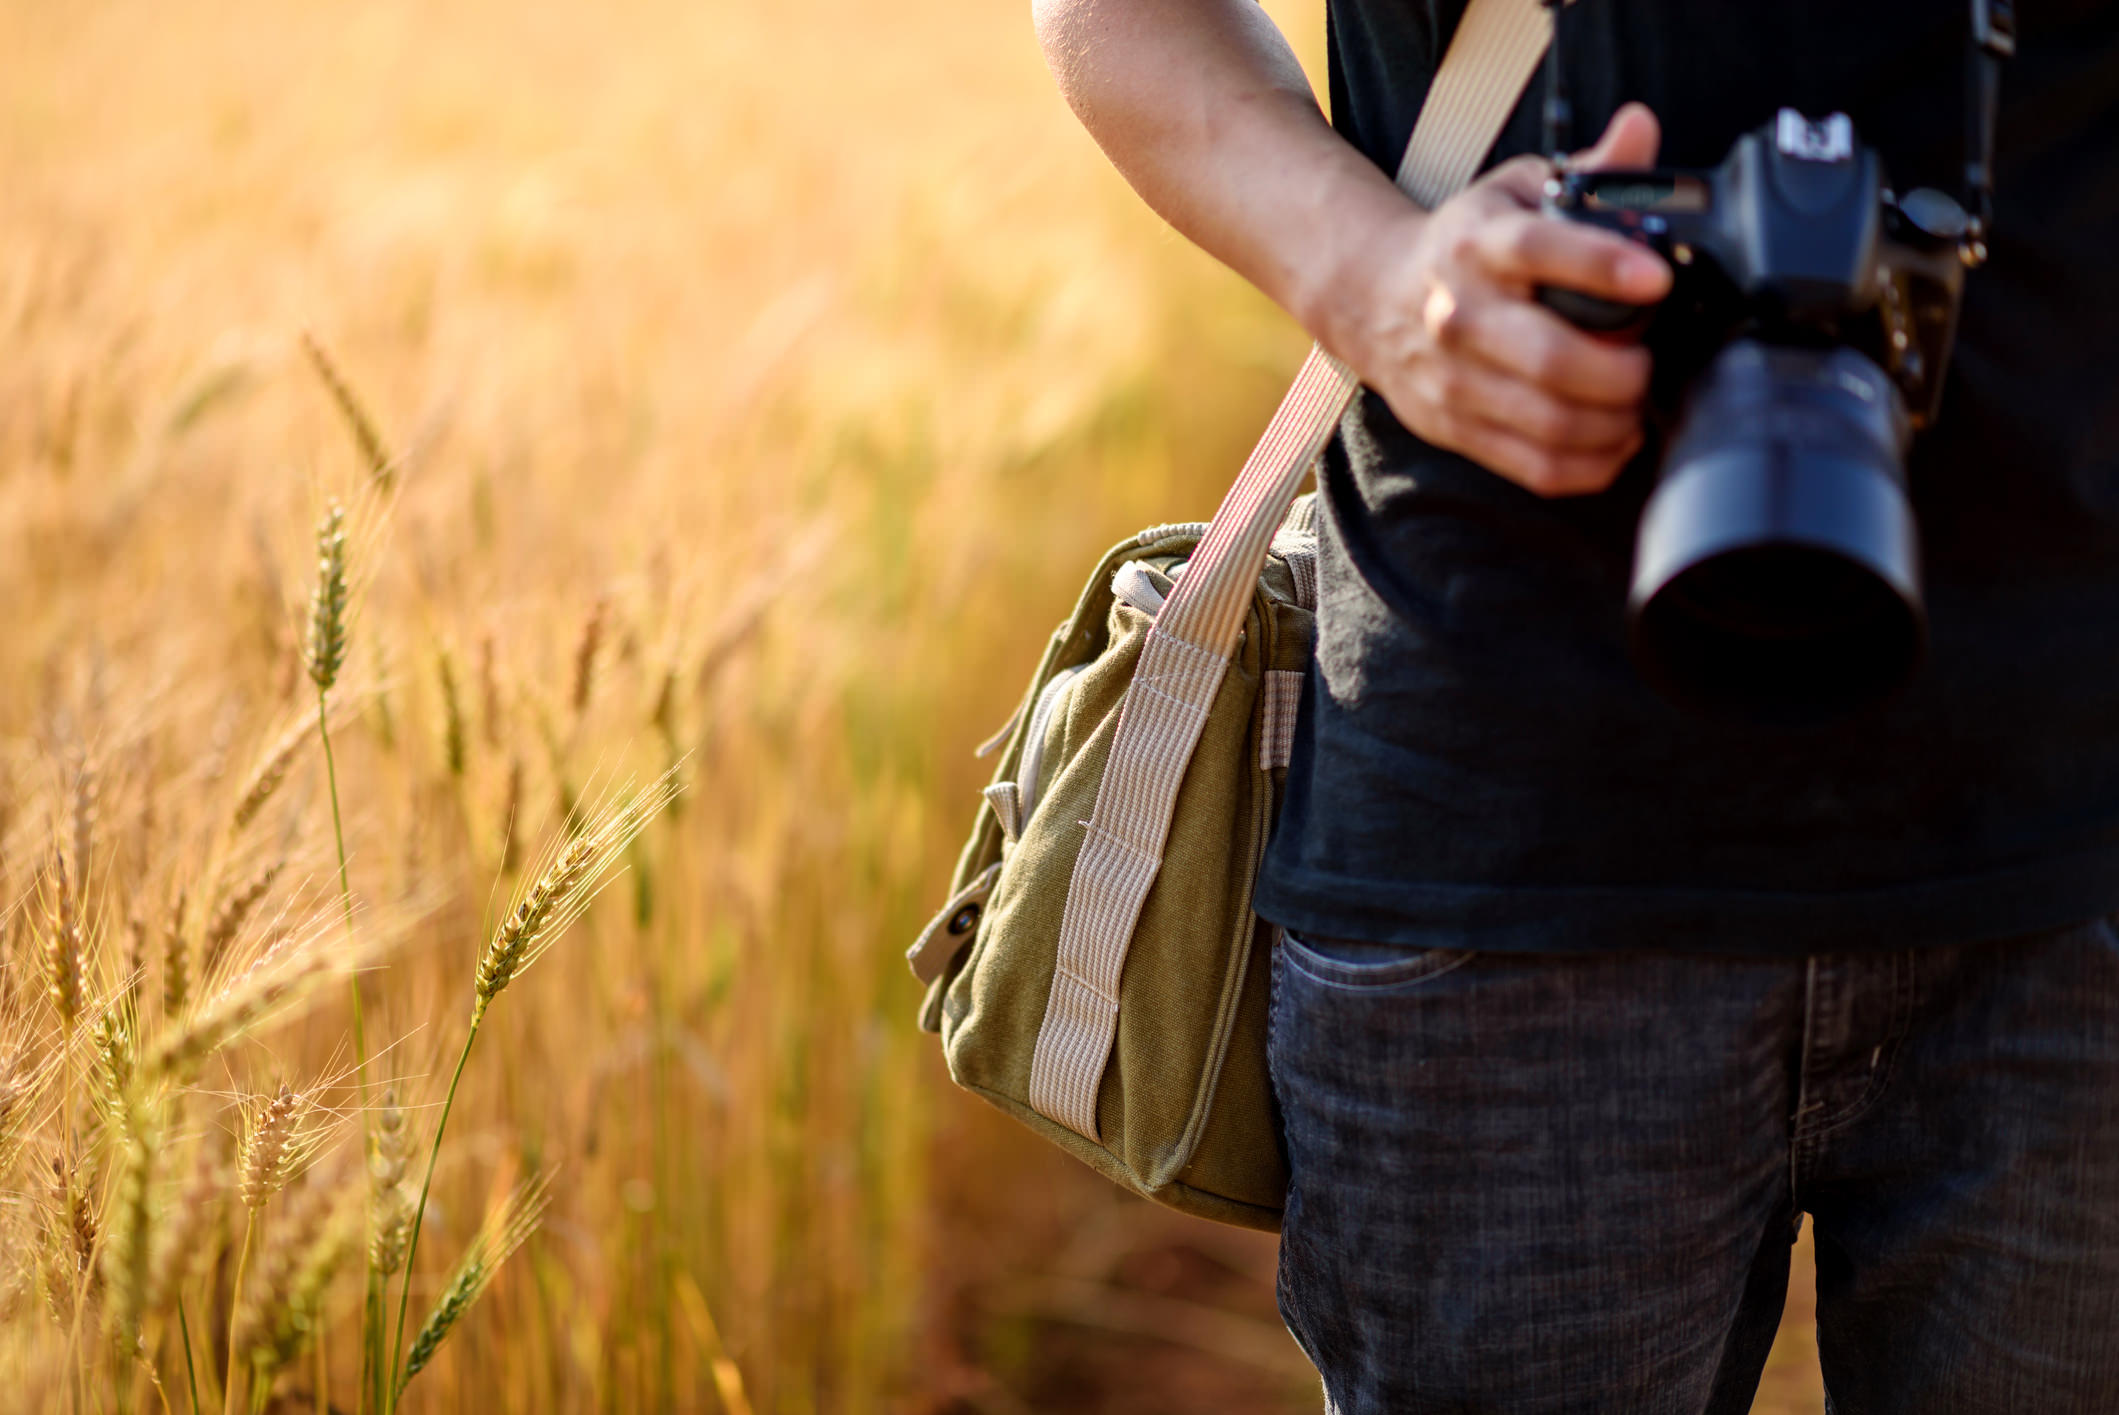
Get a Decent Camera Bag
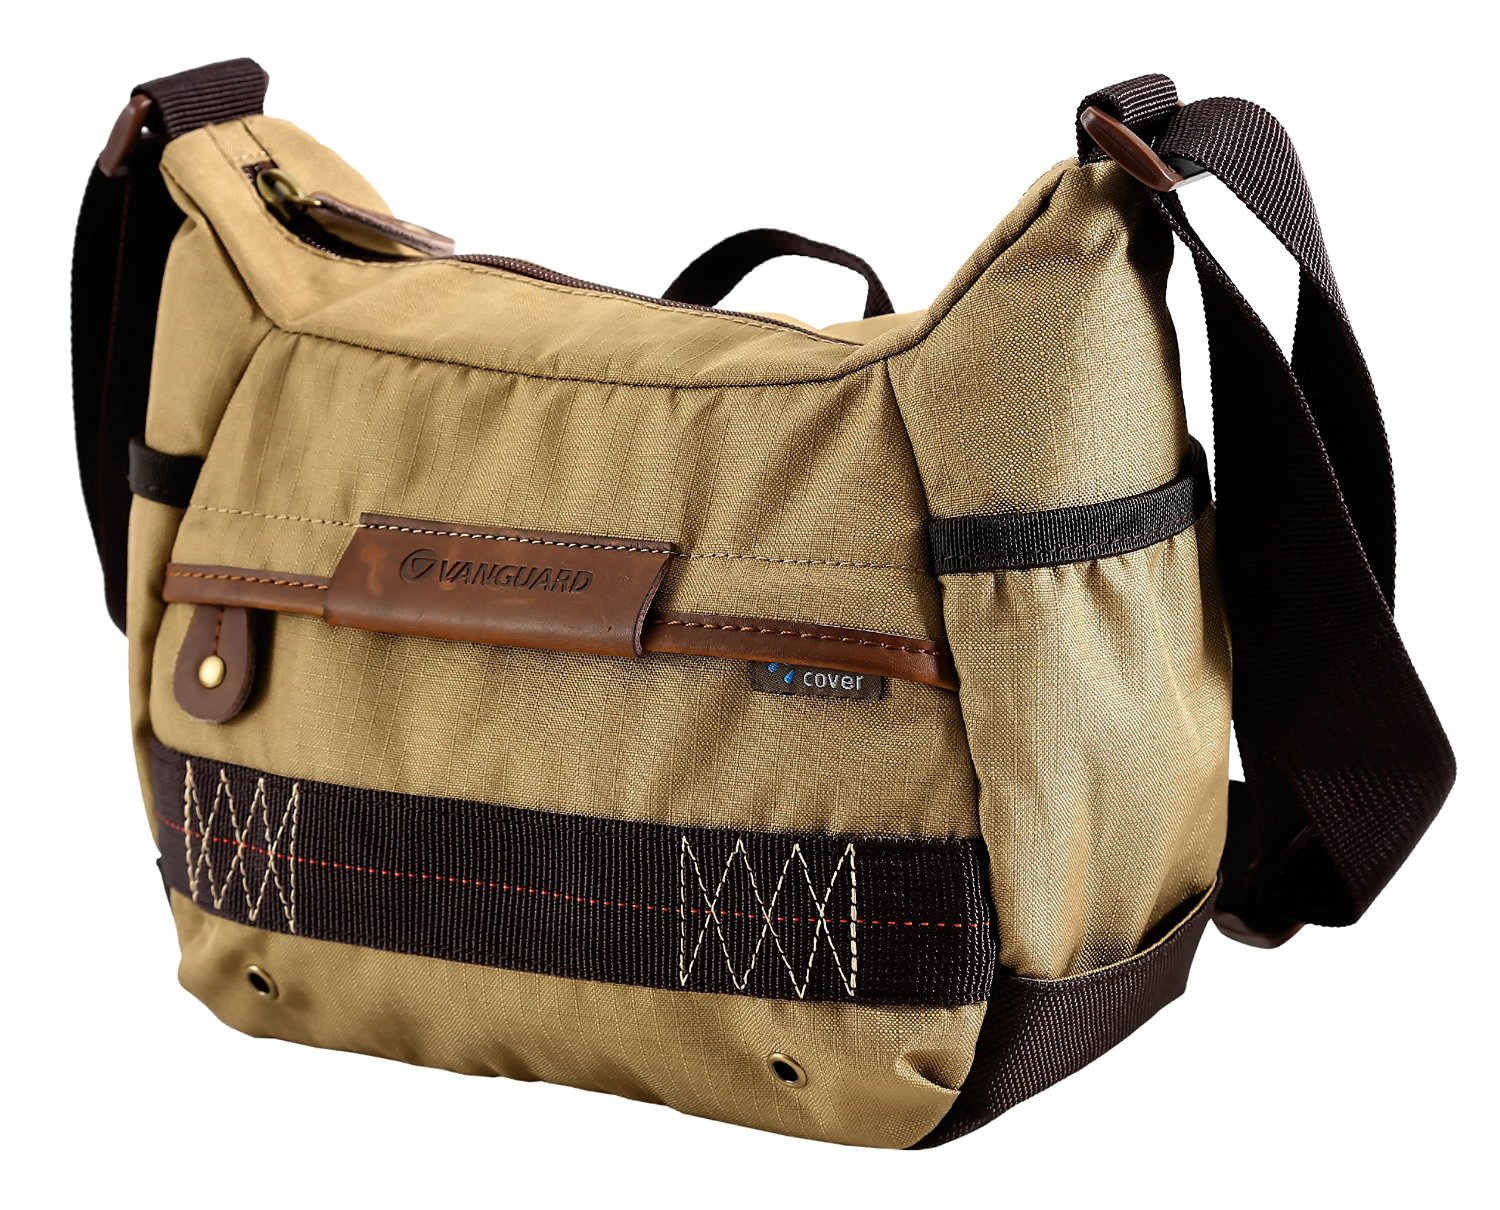
Even if you don’t have much more gear than a camera, a single lens, and a tripod, you shouldn’t carry it around in your hands or a regular bag.
Why?
One slip and fall and your expensive gear could require expensive repairs or replacement.
Because of that, camera bags aren’t some fashion accessory that’s an option. They are necessities that help protect your gear from the bumps and bruises that come along the way.
What’s more, a quality bag like the Vanguard Havana 21 Shoulder Bag is inexpensive, yet built well to stand the test of time. It can accommodate a DSLR, a couple of lenses and a flash, filters, extra batteries, and other accessories, as well as a small tablet and your personal items like your phone and car keys.
Furthermore, if you get the right camera bag, it’s something that can grow with you as you acquire new gear and tackle more and more photography adventures. And, while you’re on those adventures, a proper camera bag will keep your gear neatly organized and safe from dust, rain, and other contaminants that can wreak havoc on your photography equipment.
Get Inspired by Others

When you’re just starting out in photography, it can be hard to identify what you like in terms of genre or stylistic choices.
For that matter, it can be hard just deciding what things to photograph!
That’s where inspiration comes in.
By checking out the work of others, you can tap into a vast reservoir of creativity in the photography community. And it’s simple to do, too.
Spend some time on photo sharing sites like Flickr, Instagram, and 500px. Have a look at the photos uploaded to the PhotographyTalk galleries and check out our Inspirational Photos of the Day. Heck, you can do a simple Google Images search for certain types of photos to get your creative juices flowing.
The goal here is to develop your creative eye and help you begin to form your personal photography aesthetic, not simply copy what other people are doing.
A good exercise is to take a look at a few dozen photos, and as you find ones you like, bookmark them in your browser. Then, go back through the images you liked and examine each one for the specific features that caught your eye, looking for commonalities between the photos.
Doing so helps you begin that journey of figuring out what speaks to you as a photographer. So, if you find that most of the images you prefer are portraits, you know that portraiture is where you might want to begin. If you see that your favorite photos use very dim lighting, you know that that style of portraiture is where you should focus your attention.
Get a Reflector and Learn to Use It
One of the biggest problems that beginning photographers face is how to wrestle more control over the lighting in their photos.
There’s often too much reliance on harsh lighting, like what you get when shooting outdoors at noon, or using direct, artificial lighting like the built-in camera flash, which often doesn’t do a very good job of illuminating the subject anyway, as Jared Polin of FroKnowsPhoto explains in the video above.
The solution to this problem is to get a reflector.
Fortunately, reflector kits are inexpensive, coming in packs that include four or five different colors that can warm up or cool down the color of the image or even reduce or add shadows.
The point is that a reflector opens up all kinds of possibilities for improved photos. For example, instead of having a portrait subject face the sun and squint, you can instead have them face away from the sun and use a reflector to bounce light back onto their face.
Doing so means that you can get even, soft light onto your subject that results in a more pleasing image. Check out Jared’s video above to see what I mean.
Keep Learning
Photography, like any other artform, is rife with opportunities to learn.
Even the greats like Ansel Adams continued to perfect their skills right up until the very end of their career. Use that as inspiration to commit yourself to continual learning.
The best part is that learning photography skills has really never been so easy!
You’ve taken the first step by checking out this article. There are plenty more free photography articles from PhotographyTalk as well!
YouTube is another fantastic, free resource with a wealth of tutorials on all manner of photography subjects. From landscapes to portraits, mastering exposure to getting familiar with camera settings, if you have a question about photography, the chances are very good that you can find a YouTube video on the subject.
In fact, here’s a great beginner photography video from Nico at CamCrunch that details the three camera settings responsible for exposure: aperture, ISO, and shutter speed.
Don’t Be Afraid of Making a Mistake
Something that we all struggle with from time to time is making mistakes.
When it comes to photography, getting the exposure settings wrong or messing up the composition is certainly frustrating.
But, if you look at it as a learning opportunity, those mistakes become the gateway to being a better photographer.
With that in mind, pursue photography with unabashed joy. Take photos of whatever you want. Experiment with your camera settings. Try new subject matter and learn new techniques. And, as you perform these tasks, worry less about creating a perfect photo and concern yourself more with the experience and what you can learn from it.
Once you throw off the shackles of trying to create the perfect photo, you’ll likely find that you make fewer mistakes anyway! Besides, your photos represent who you are as an individual and an artist, so in the end, there’s no right or wrong answer - just your take on the world as you see it with your camera.
We Recommend
4 Photography Lighting Types You Need to Know
Lighting for photography is an essential skill and equipment choice for many serious photographers and virtually all professional photographers. Photographers use various photography lighting types to fulfill lighting needs.
As you’re becoming more and more comfortable with all aspects of photography, you’ll appreciate studio lighting tips that can also be used in ‘on location’ situations. This is especially true for photographers who enjoy capturing portraits and other forms of people photography.
Let’s consider some of the photography lighting types, what they’re used for, and a little bit about how to use them.
Table of Contents:
- Photography Lighting Types Overview
- Photography Lighting Types - On-Camera Flash
- Photography Lighting Types - Off-Camera Flash
- Photography Lighting Types - Studio Strobes
- Photography Lighting Types - LED Studio Lights
- Photography Lighting Types - Light Modifiers
- Other Recommended Photography Gear
Photography Lighting Types Overview
Photo by Anatolii Kovalov via iStock
It seems there are as many subdivisions of photography lighting types as there are types of cameras. Ask photographers to list the photography lighting types they know about, and you will get a wide range of answers.
I can see why there could be so many different thoughts since there are many types and styles of photographers. Plus, photographers like to use gear and tips that make sense for what they do. We also prefer to use equipment that we are familiar with.
For my thoughts, I would like to separate the photography lighting types into four categories: On-Camera Flash, Off-Camera Flash, Studio Strobes, and LED Studio Lights.
Photography Lighting Types - On-Camera Flash
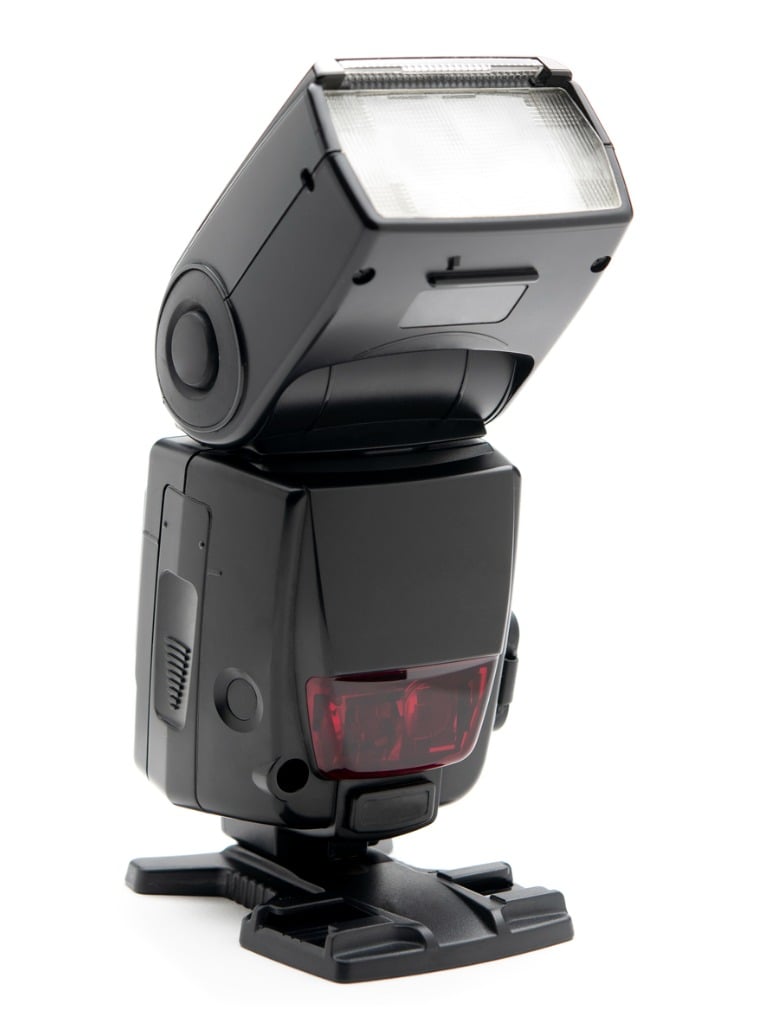
Photo by LeventKonuk via iStock
Probably the single most common of the photography lighting types we think of in general photography is On-Camera Flash.
On-camera flash is the perfect description for this first of my photography lighting types since it’s a flashgun or flash unit directly attached to the camera. Many cameras have a small built-in flash at the top center of the camera body, but I’m referring to the type of flash that fits into the camera's hot shoe.
These separate flash units are more powerful, more capable, and more adjustable than the built-in flashes. Many of these tie in directly with camera exposure meters, making calculations simple, even in complicated exposure situations, such as blending flash and ambient light.
A lot of the better units for these photography lighting types are sophisticated pieces of camera gear, being able to zoom the pattern in and out to fit the field of view of various lenses, can swivel and tilt for bouncing flash off of other surfaces, and some can even assist with camera AF systems.
Photography Lighting Types - Off-Camera Flash
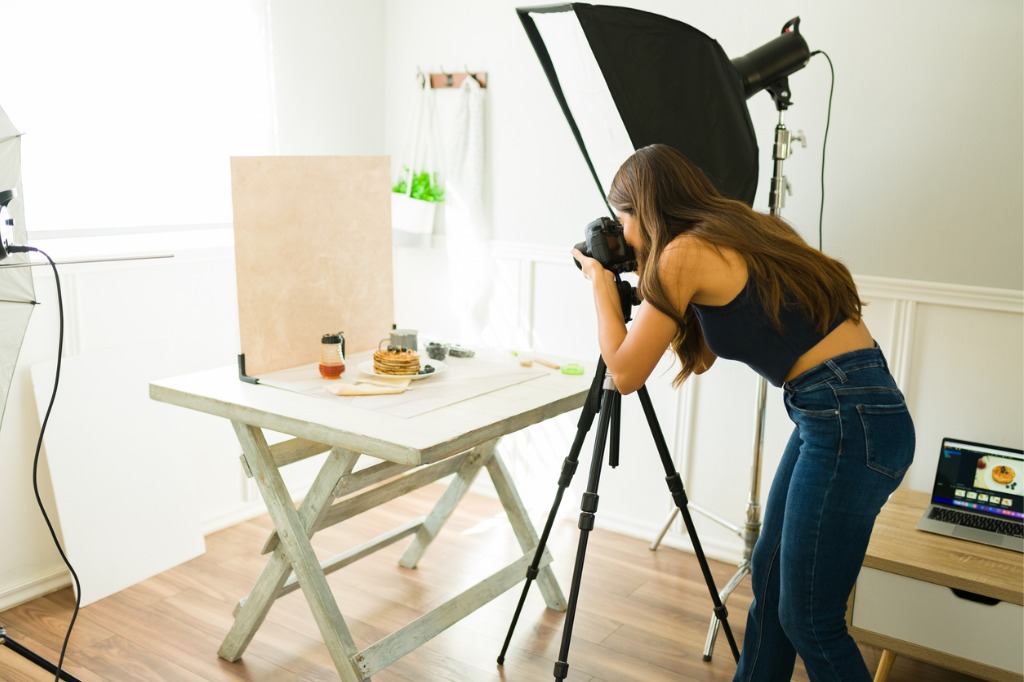
Photo by Antonio_Diaz via iStock
Off-Camera Flash, as one of our photography lighting types, can refer to merely moving the flashgun listed above off the camera onto a bracket attached to the camera or separately mounting it on a light stand or auxiliary mount.
Off-camera flash can be mixed with on-camera flash, or we can set up several flash units in a configuration for whatever style of photography we’re trying to capture.
You will need to have the off-camera flashes ‘slaved’ together somehow to ensure their simultaneous firing. Still, most modern flash guns have that capability built in or are controllable by a master unit.
Photography Lighting Types - Studio Strobes
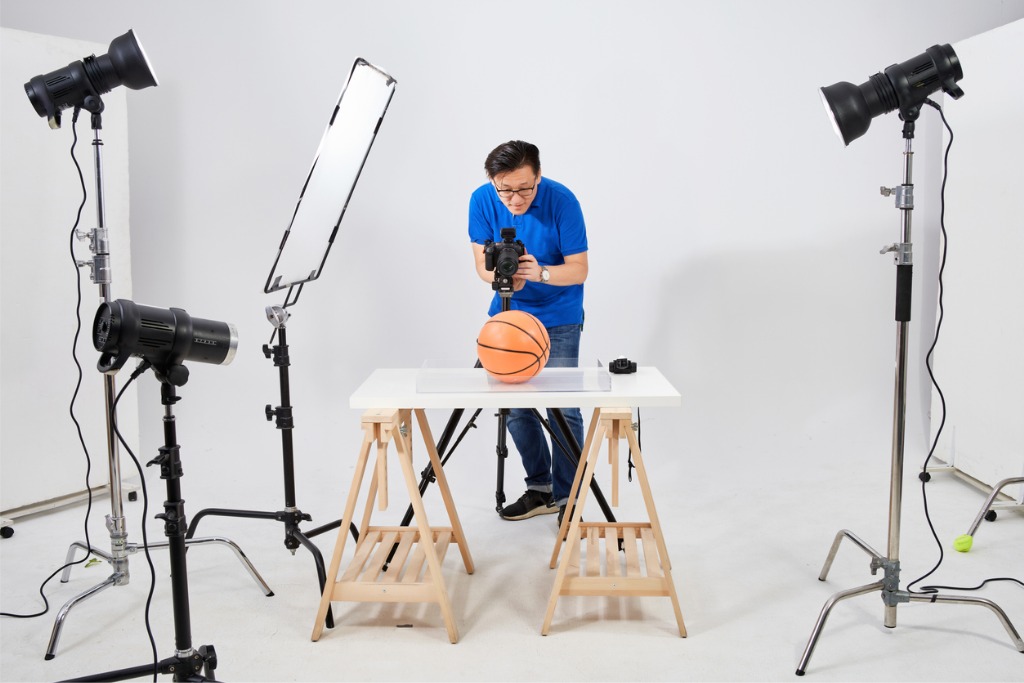
Photo by shisheng ling via iStock
As photography lighting types, some might lump together Studio Strobes and other off-camera flash. I like to separate them from each other in my thoughts because studio strobes, as a rule, are more powerful, recycle faster, and emit a very high-quality light.
Some studio strobes are made up of a power supply to which the flash heads are attached, while others are self-contained, with the power supply contained in the same unit as the flash head. I prefer the self-contained style of studio strobes since they allow for a wide range of uses and mixing and matching.
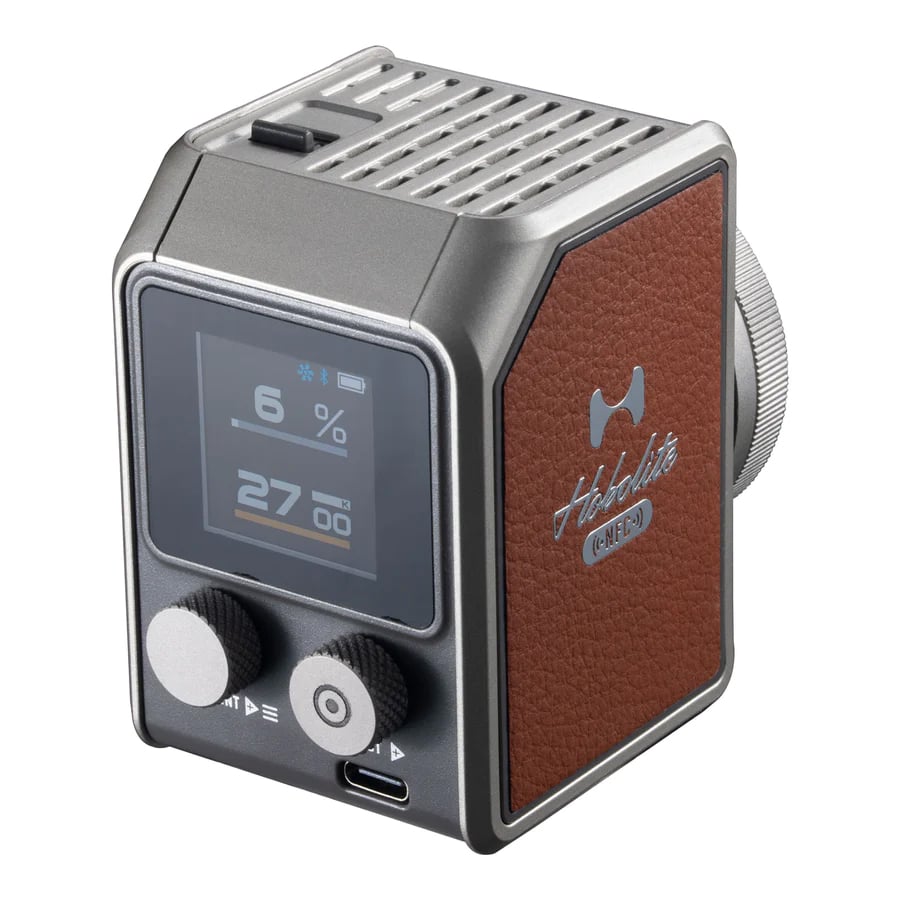
Photography Lighting Types - LED Studio Lights
The style of photography lighting I use the most is LED Studio Lights.
LED lights are one of the best things around for photographic lighting. They are continuous lights, emit a very high quality, true color light, are cool in operation, and can be used for both still photography and videography.
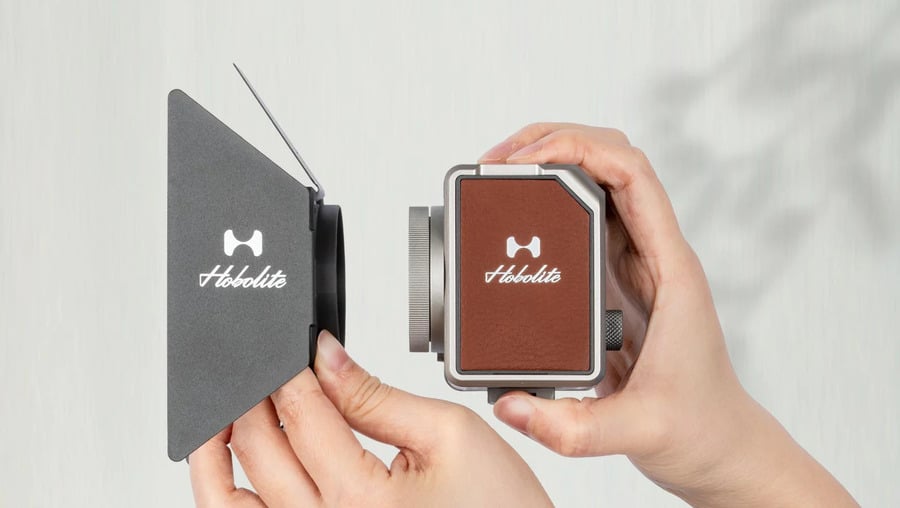
I’ll highlight what I enjoy about these photography lighting types by showcasing one of my new favorite LED lighting units, the Hobolite Micro LED studio light.

Micro is one of the smallest truly professional studio lighting units around and is full of features that advanced photographers need and want. It’s made by Hobolite, a maker of premium, professional quality LED lighting.
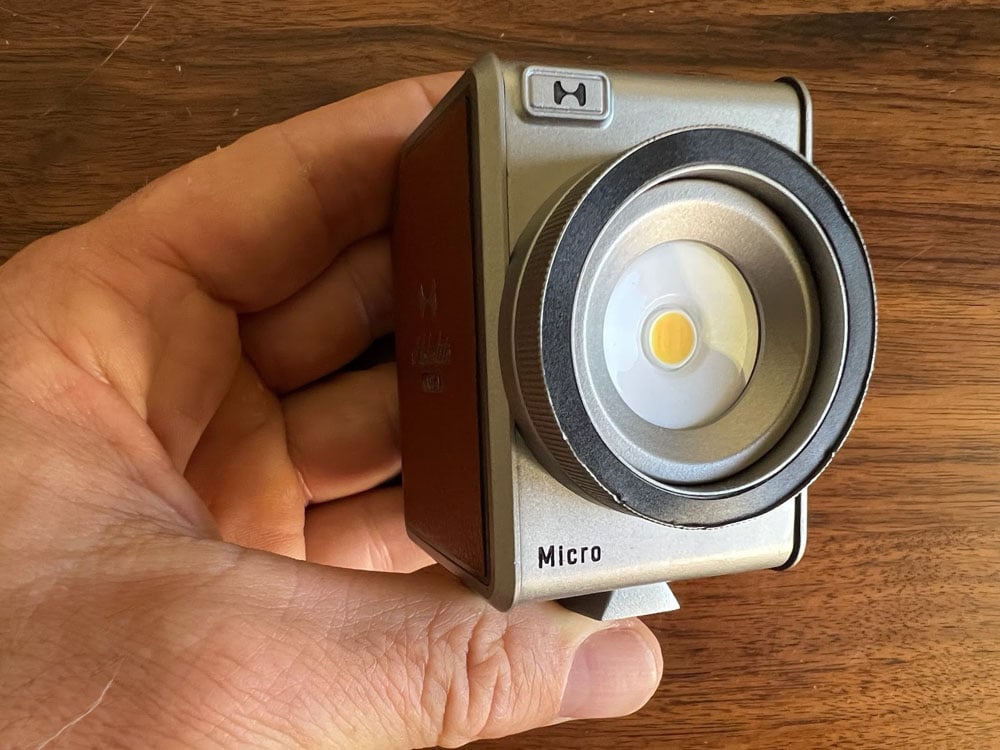
Hobolite Micro is a small, completely self-contained studio-style LED light powered by DC, with two different styles of rechargeable batteries, making it also portable. It has supercool operation and extremely consistent light output with the LED bulbs. Light quality is also beautiful, with a CRI of 96+ and excellent color rendition covering 2700K to 6500K.
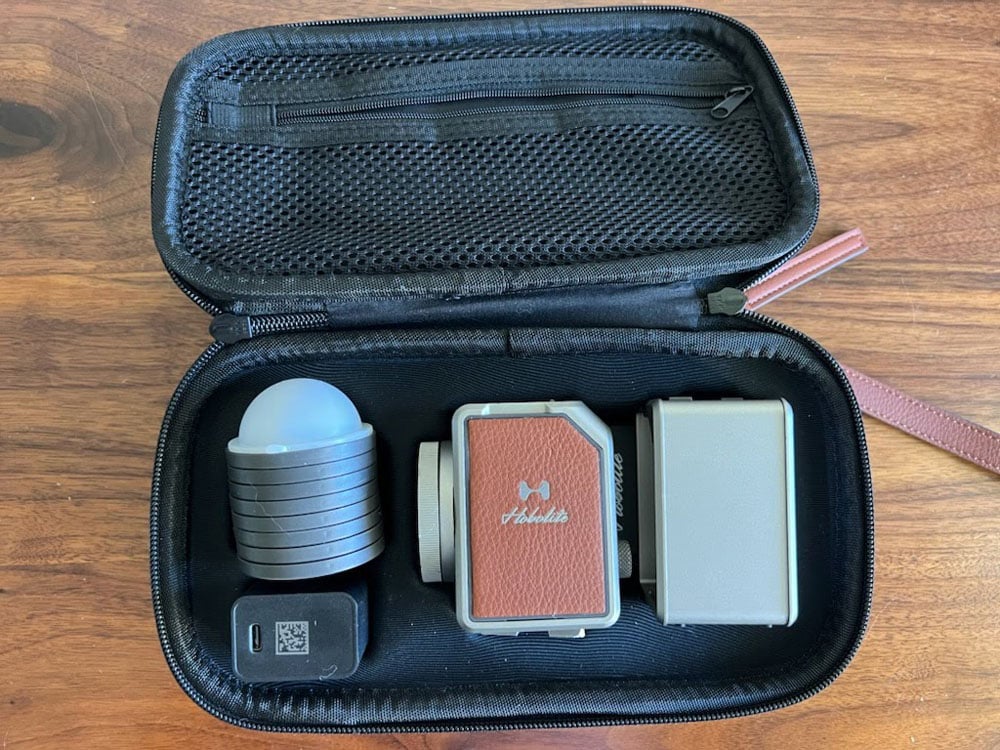
The Micro is so compact it can actually fit into a generously sized pocket. It’s simple to carry two or three to a location photoshoot, turning that remote location into your own photo studio.
I’ve really taken a shine to these compact LED lights. Check out this video review I did after using them for a couple of months:
Since these are continuous lights, I can also use them for video production. Another nice feature is that I can control them by means of an app on any smartphone. These are lightweight, too, weighing just a hair over half a pound.
Photography Lighting Types - Light Modifiers
I like to include Light Modifiers in my round-up of photography lighting types because of the extra versatility and control they provide for a serious photographer or videographer.
Hobolite Micro, though extremely compact, has a full range of light modifiers that fit by means of a magnetic mounting system. This ingenious magnetic mount design allows for quick and effortless attachment or detachment of accessories with one hand in under a second.
Magnet mount accessories include barn doors, a diffuser dome, a fresnel lens, and color filter gels. This is one of the most complete systems of all of the compact, portable, and high-quality photography lighting types for all sorts of on-the-go or studio production of videography and still photography.
These four types of lighting for photography will help you control any situation, allowing you to create interesting videos and beautiful still photography.
Other Recommended Photography Gear
Heads up: Clicking on our affiliate links and exploring our sponsored content helps us at no extra cost to you, and we only recommend gear we're absolutely crazy about!
Learn More:
- What To Look for In Professional Photography Lighting
- The Hobolite Micro Is the Portable Light You've Been Waiting For
- 6 Things to Know About the Hobolite Mini
We Recommend
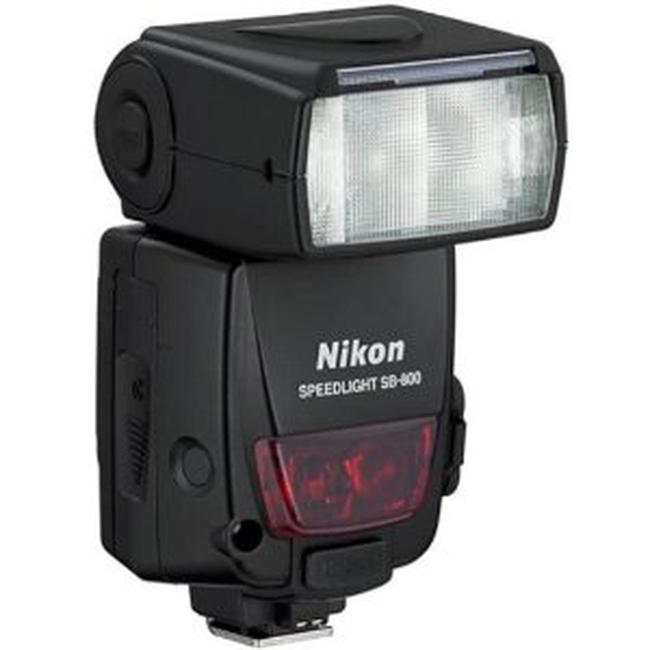
4 Reasons Why You Need a Flash Gun
Our cameras have excellent high ISO quality, amazing anti-shake stabilization technology, and many have a small built-in flash already, but there are several reasons why you need a flash gun that is separate and external.
One of the biggest reasons why you need a speedlight is to provide good exposure in dimmer light conditions. Besides exposure concerns, lighting quality is another consideration for why you need a flash gun. Add in balanced fill flash and remote triggering of studio strobes and we have 4 advantages of a flash gun for many photographers.
What Is a Flash Gun Used For?
photo bygorodenkoff via iStock
What is a flash gun used for? An almost no-brainer explanation for many of us concerning why you need a flash gun or speedlight, an external flash, is to provide adequate illumination for dimly lit scenes.
Though our camera may have wonderful high ISO image quality and an image stabilization function that makes us feel like Superman for rock steady hand held pics, in some situations that simply isn’t enough.
An external mounted flash provides more illumination power than the small built-in flash our camera may have, and these speedlights often aren’t much bigger than a kid’s juice box. Some are larger, offering bounce and swivel capability in addition to greater power yet still able to fit in our camera’s hot shoe.
Lighting Up a Scene
photo byAdventure_Photo via iStock
An example of a picture taking situation which might benefit from an external flash is an event held indoors. Most of the time, a larger event, such as a company function or party, will be held in a larger space than our office lobby or our own living room.
The lighting may not be very even throughout the venue, some areas being well lit and others not. The distances in some shots could be well beyond the range of the tiny flash in our camera, so we supplement our gear with an external speed light.
By the way, as we consider why you need a flash gun, you’ll notice I also sometimes say speedlight, strobe, or flash without the gun at the end. It’s all describing the same general piece of equipment, so the terms get used interchangeably by manufacturers, other photographers, and myself.
Providing Quality Illumination

photo bygreenleaf123 via iStock
Another consideration for using flash that is sometimes more important than the illumination level itself is the quality of light. Light quality may include color balance, directionality, and how hard or soft a light source is.
Going back to the example of the large event we’re shooting (though all of these points apply equally well to a wide variety of picture taking situations), the direction of the light might be
mostly from above, which doesn’t lend itself to be flattering for people pictures. Using an external flash gun lets us control the direction of our illumination.
The color temperature of a scene, indoors or out, could be warm, cool, or fluctuate as we move around to different areas. Flash units are balanced for Daylight (usually described as 5600K) or very close to it, so we can confidently either leave our camera white balance on auto or set it ourselves for Daylight or Flash if our camera has a specific setting for that.
We also have a lot of control when using an external flash gun over how hard or soft the light is. On its own, a speedlight acts like a point light source meaning the light will be harder. If we want a softer light, we can use the diffusers that are included with many flash guns or add a larger one. We can also bounce the flash off of a nearby surface such as a ceiling or wall if our flash has that feature.
Learn More:
Using Balanced Fill Flash
photo byferrantraite via iStock
A great example of why you need a flash gun is for balanced fill flash. Suppose you’re capturing portraits outdoors, but you really want to avoid the deep shadow and high contrast that direct sunlight often gives, we can add a flash to provide fill light for balance.
The amount of light produced by the flash gun factors in with ambient light levels and subject distance to provide a natural appearance and lighten up the dark shadows, which also fixes contrat concerns.
That’s a lot of calculating when adjusting everything manually, which is one of the reasons I really enjoy modern cameras with autofocus and through the lens (TTL) flash metering. In fact, for a lot of situations I find myself shooting, I actually prefer to take advantage of this automation for fill flash. Not only is it super quick and very easy, it often gives me better results than when I calculate it for myself.
Remotely Trigger Studio Strobes
photo byozgurdonmaz via iStock
There are many ways to get the same results with these tips, this is the one that I started using when using very budget friendly external studio strobes for product and portrait photography. Some newer studio strobes have a variety of methods that can be used and wireless slave triggering with a control device is also an option.
But, when setting up a studio with very budget friendly studio strobes that support optical slave triggering, this method has worked for me and for many others.
Here’s how I do it: Set up my lighting configuration. Calculate exposure and test it with a sample image (easy to do digitally, no more Polaroid backs!). Mount my flash gun with the head swiveled around and maybe up a bit. Set my on camera flash at the lowest possible power setting.
What happens is I have no cords or wires to trip over and I can use my camera hand held or on a tripod to get the images I want. Since my flash is on its lowest setting and pointing away from the subject, I generally don’t have to consider its effect on the exposure.
As I said, this a budget friendly tip, there are many flash units and strobe systems that are far more sophisticated. One of my newer acquisitions of studio strobes uses my camera TTL automation via a wireless triggering system and controller that is amazingly accurate. But it definity is higher priced than what simpler studio strobes cost.
Is an External Flash Worth It?
The last part of that tip opens up the question of is an external flash worth it? Well, that all depends on each situation.
Many external flash units are low priced while others end up costing as much as good lenses. The differences are usually in features and power. A small, lower cost speedlight won’t usually be able to tilt and swivel much and are generally lower powered than larger flashes.
Plus, some manufacturer flash units are parts of complete systems and may be very sophisticated in capabilities and usage. Those types will cost more, as it is with so much of our photography gear.
One way to save some money for high end camera gear is to buy used from a reputable retailer. Here is an online store I've used a lot and recommend to others, MPB.com. Their pages of used flash guns and accessories are always full of great equipment at awesome prices.
The bottom line of why you need a flash gun is that you may be able to improve many photographic situations with an external flash and any investment like that is definitely worth it.
Learn More:
We Recommend
4 Tips for Making More Professional Videos
Making professional videos is open to anyone with good video gear and the ability to light and edit well. Additionally, many professional video techniques can be done with video lighting and other videography gear that are reasonably priced and easy to use.
Let’s look at four tips for making more professional videos that include video techniques and videography gear.
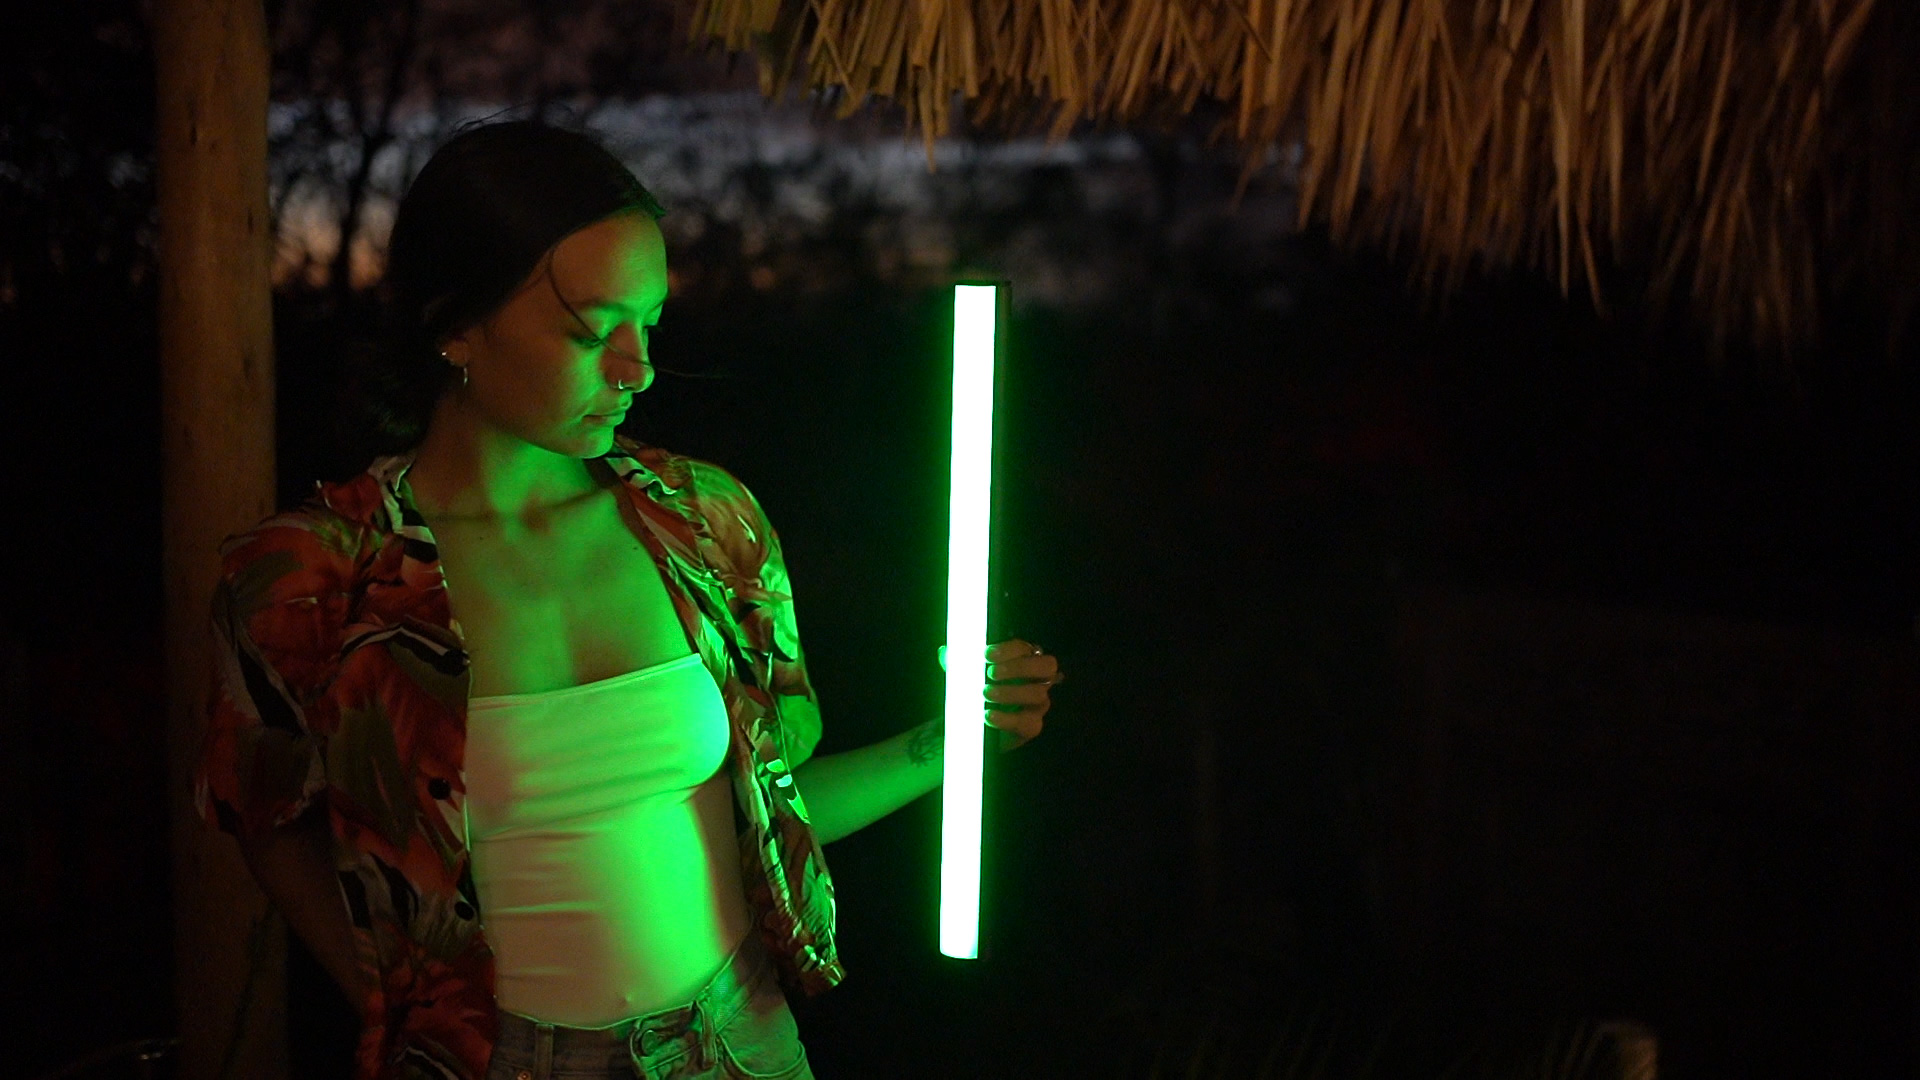
Editor’s note: If you’re in need of quality lighting gear for your video work, check out TEKE Reactive and Animated DMX Lighting System. This innovative and affordable lighting system is essentially a personal lighting assistant you can use to create Hollywood style lighting effects for your videos.
How to Create More Professional Videos: A Steady Platform
Photo by izusek via iStock
A common denominator separating video that looks professional versus amateur video is how steady the camera is during filming. While you may not need to always have your camera on a video tripod, finding a way to smooth out any motion and keep the camera still will greatly improve your videos.
A video tripod with a fluid head can be used in many situations you’ll be filming. If you are filming interviews, instructional videos, or a promotional video, it's a good video technique to use one.
Other options are camera cages, stabilizing grips, gimbals, or practicing video techniques for hand held shoots such as propping up against a wall or fence and limiting camera movement such as pans and tilts while the camera is hand held.
How to Create More Professional Videos: Good Video Lighting
A few of the things to consider for choosing your lights for video are the quality of the light output, how convenient the video lights are, and how simple and easy they are to use.
There is no rule in videography stating that decent videography gear is required to be bulky, expensive, and hard to use. In fact, for beginning videographers or experienced photographers moving into video production, having access to easy-to-use video gear and video lighting makes it more likely they’ll be used for good results.
A few of the features to take into account are the CRI of the light output, the convenience of setting up the video lighting, and being simple enough to use to allow for the techniques of professional videos.
I’ve had the recent privilege of testing out new lights for video by TEKE. TheTEKE Reactive and Animated DMX Lighting System meets all the criteria listed above (and then some) and adds in the benefit of being very reasonably priced.
The CRI or Color Rendering Index, which is a measure of how well the video lights deliver color accuracy, is 90+ for these lights, so the light quality is high. You get flicker-free, full-spectrum addressable RGBW light with an adjustable color temperature of 2700-6500K for your convenience. Combined with up to 1400 lumens of output, you get high-quality and very bright lighting for whatever video work you have to do.
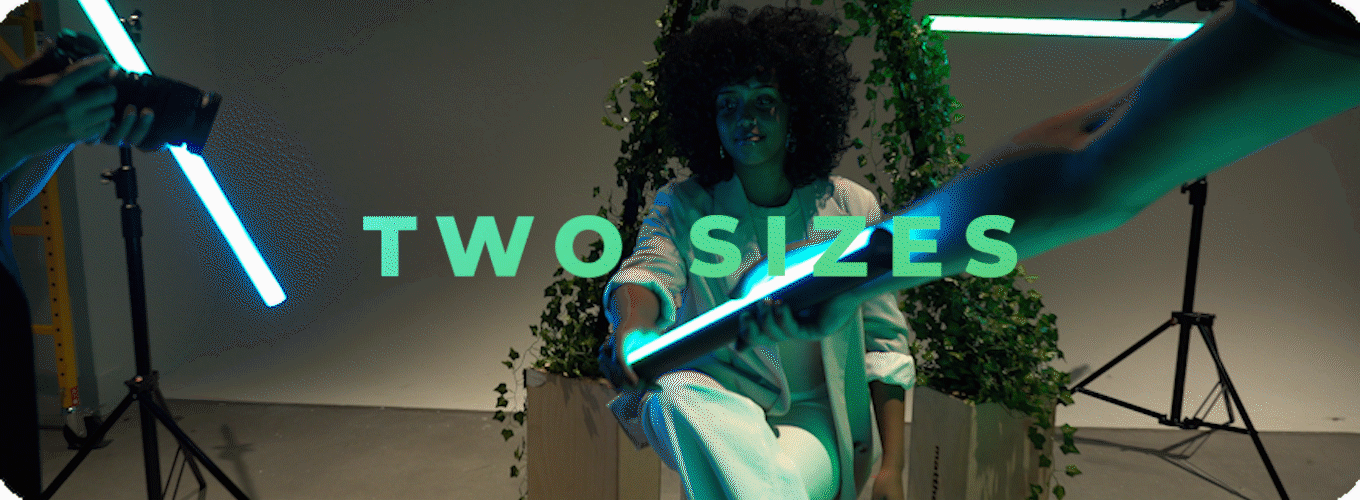
They come in two sizes (20-inch and 40-inch) and have mounting points for light stands as well, meaning they can be handheld or mounted to serve whatever purpose you need. They can even be connected together if need be.
A huge feature is being DMX controllable and having that control available through a smartphone app. DMX allows videographers to set up multiple lights and control them all together. DMX also lets you pre-program changes and add in audio and special effects.

For instance, these lights are sound reactive, so if you need lights that pulse to the beat of music, this is your answer! You can also instantly apply animated effects, movie looks, and dynamic moods right from your smartphone or computer.
You can also create gorgeous animated gradient effects to give your videos dynamic, eye-catching lighting that will elevate the quality of your finished product.
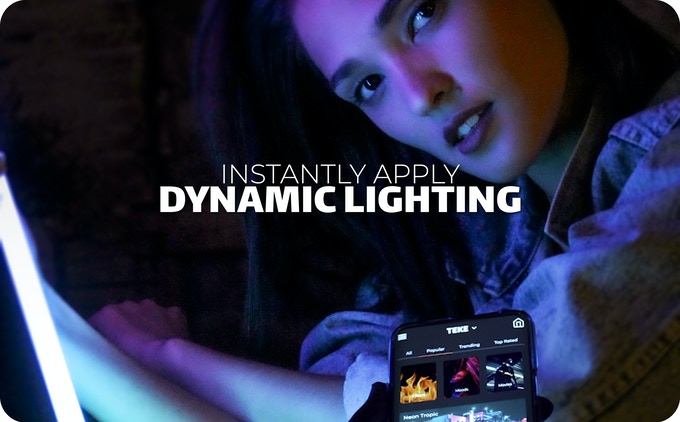
TEKE has devised a lighting system that’s extremely easy to use. Smartphone control means you can access an ever-growing library of lighting effects that allow you to utilize presets that give your videos a professional look.
What’s more, you can create custom effects and color palettes instantly by uploading a video clip or a photograph for the app to reference. Just place the selection points where you like and TEKE will copy the color temperature, hue, shade, and brightness for the selected pixels and save them automatically. It just doesn’t get any easier!
Be sure to take advantage of some of our previous lighting tutorials since great video lighting for professional videos is a mix of high quality lights for video coupled with video techniques for using them properly.
Learn More:
- Features to Look for in Video Lighting
- Elevate Your Creativity With Your Own Personal Lighting Assistant
How to Create More Professional Videos: Record Great Audio
Photo by omgimages via iStock
The difference between capturing great video and good enough video sometimes comes down to how good the audio is recorded. As with your video recording mode quality, you want to set your camera or recorder to the best mode available if possible.
Higher quality recording for the audio or visual recording aspect makes large files which take up more room and often require longer editing and processing time, but the end result is what we’re aiming for - more professional videos.
Simple and easy-to-use video gear such as a shotgun mic on camera or lavalier mics on the subjects will capture much better sound than the built-in mics of our cameras. If you’re ambitious, you can also record audio separately and combine during editing, which is how many professional productions do things.
How to Create More Professional Videos: Spend Time Editing
Photo by DGLimages via iStock
#StraightOutOfCamera is a hashtag you won’t find on professional videos or professional still images. The reason is because higher quality image, video, or audio files will require processing to end up in a file type that can be shared. Also, no matter how perfectly you arrange everything, there will always be some tweak that can enhance professional videos and still images.
Therefore, learning editing skills is a vitally important part of our video techniques. You aren’t required to be a member of the American Cinema Editors (the A.C.E. you see in movie credits), but having and knowing how to use a good editing program will greatly improve your finished videos.
Don’t try to rush the editing, either. That’ll just give you a headache. Eye strain from lower resolution monitors will also give you headaches but there are severalvery good new monitors for video editing that won’t break the bank.
Professional Quality Videos Can Be Yours
Making more professional videos takes a little more time, some initial costs for good videography gear, and a lot of putting into practice professional video techniques.
You can make your videos look more professional by shooting on a steady platform such as a video tripod, using high-quality lights for video like thenew lights from TEKE, recording great audio with external mics, and spending time editing with the right program on high-resolution monitors.
Learn More:
We Recommend
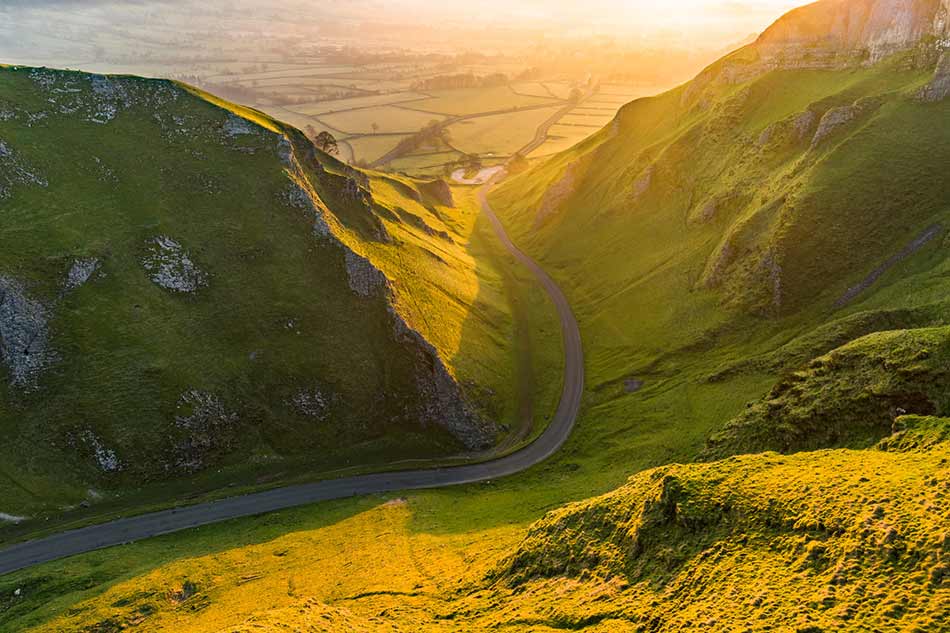
5 Creative Ways to Use Golden Hour Lighting
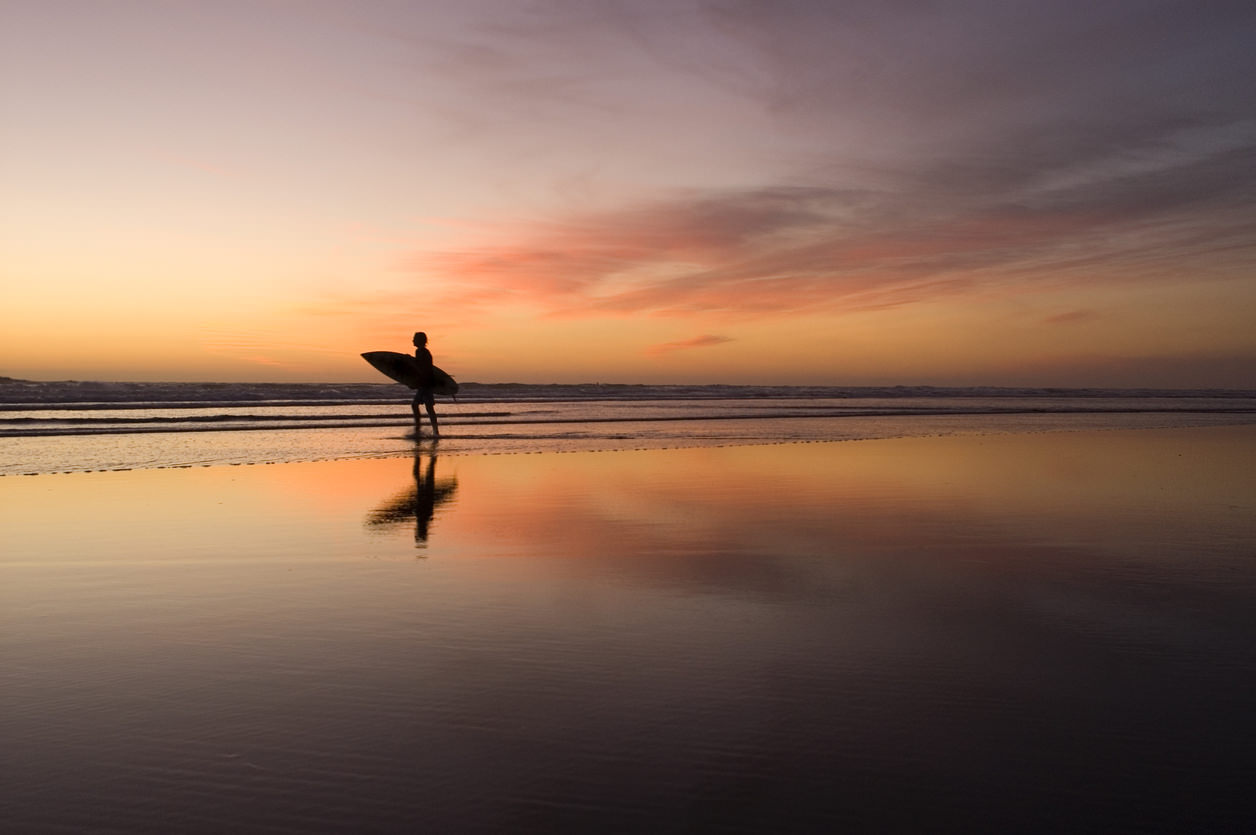
What is Golden Hour Photography?
When you think of golden hour, you probably think of that gorgeous, soft, warm lighting at sunset.
That kind of light is ideal for all sorts of photography subjects, from landscapes to cityscapes to portraits, and everything in between.
If I had to guess, I'd say that most often, golden hour lighting is used to create silhouettes like the one seen above.
And though there's nothing wrong with doing that, it isn't the only option at your disposal when golden hour is concerned.
What Time Is Golden Hour?
Just so we're all on the same page, golden hour refers to the period of about an hour after sunrise and an hour before sunset during which the sun is very low in the sky.
That positioning means the sun's rays have to travel through more of the earth's atmosphere, making the sunlight very soft and very warm.
Those characteristics are great because the lack of shadows makes golden hour an ideal time for perfect portraits because the lighting is so diffuse. It's also an ideal time for landscapes because the warmth of the light gives the scene a gorgeous glow, as you can see in the image above.
What's more, the dynamic range at golden hour is much narrower. That is, there aren't a lot of very dark or very bright light values, so your camera is more able to handle the range of light values to get you a great-looking shot, at least from an exposure point of view.
Let's look more closely at five ways you can use golden hour lighting to your creative advantage.
Learn More:
Silhouettes
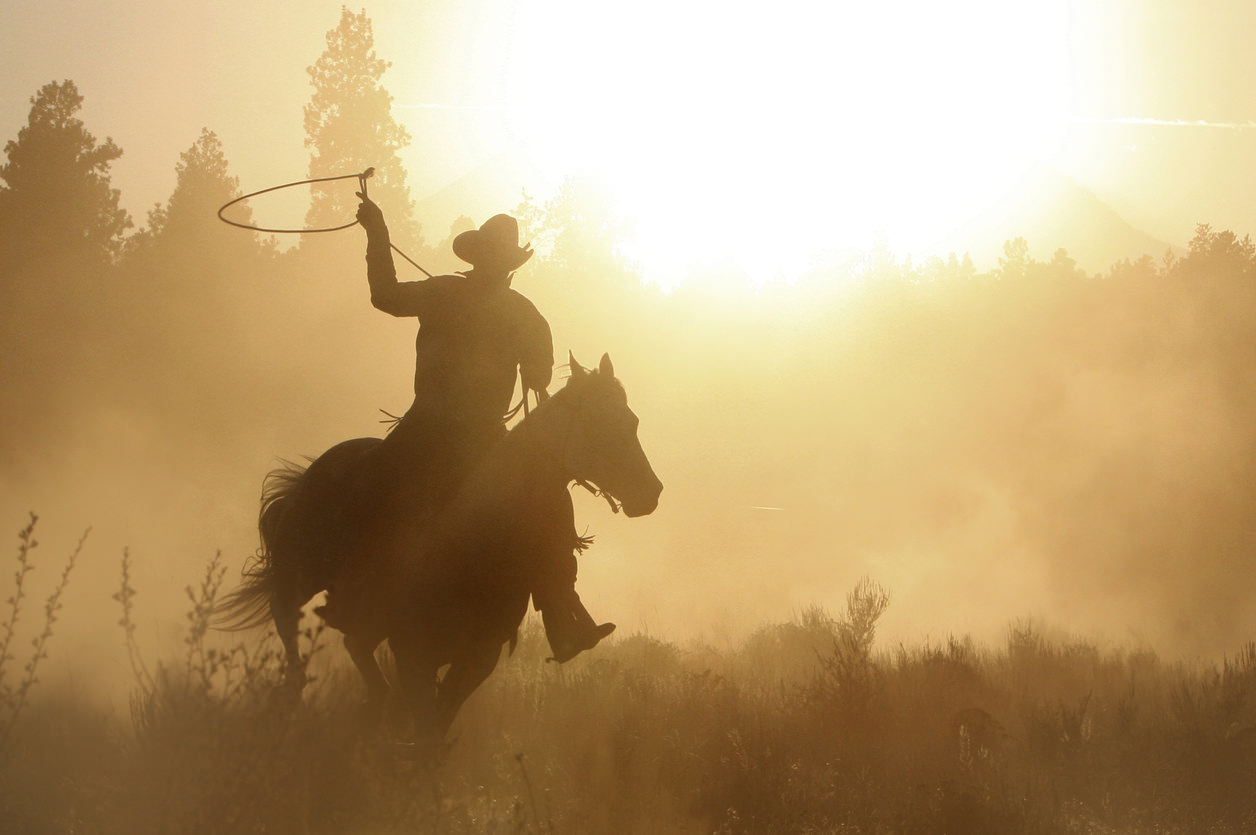
As I noted earlier, silhouettes seem to be the most popular application of golden hour light, at least where portraiture is concerned.
Silhouettes can vary quite a bit, from a subject that's completely darkened with no detail to one that's barely darkened with much detail that's still visible.
The common thread, however, is that all silhouettes benefit from a brighter background, as you can see in the image above.
That's why silhouettes are so easy to make during golden hour because the sun is low in the sky, making it easier for you to place your subject directly in front of its bright light.
Backlighting

Like a silhouette, backlighting involves having the rising or setting sun behind the subject.
However, rather than casting the subject as a silhouette, you use backlighting to create an image that's well-exposed for the subject's, with a dreamy, bright background that has almost a hazy look to it.
As you can see in the image above, the boy and his puppy have plenty of detail such that you can easily make out their faces. Yet the background has that characteristic bright, golden, hazy look that's so pleasing at sunrise, or in this case, sunset.
See how backlighting can enhance a portrait and get suggested camera settings for backlit portraits in the video below by Irene Rudnyk:
Learn More:
Frontlighting
Another option is to reverse your positioning, put the sun at your back, and use golden hour lighting to frontlight the subject.
Because golden hour lighting is so soft, this often results in very pleasing portraits because the subject doesn't have to squint, even though they're looking toward the rising or setting sun.
What's more, frontlighting minimizes shadows, so there's a nice, even, and warm light illuminating the subject.
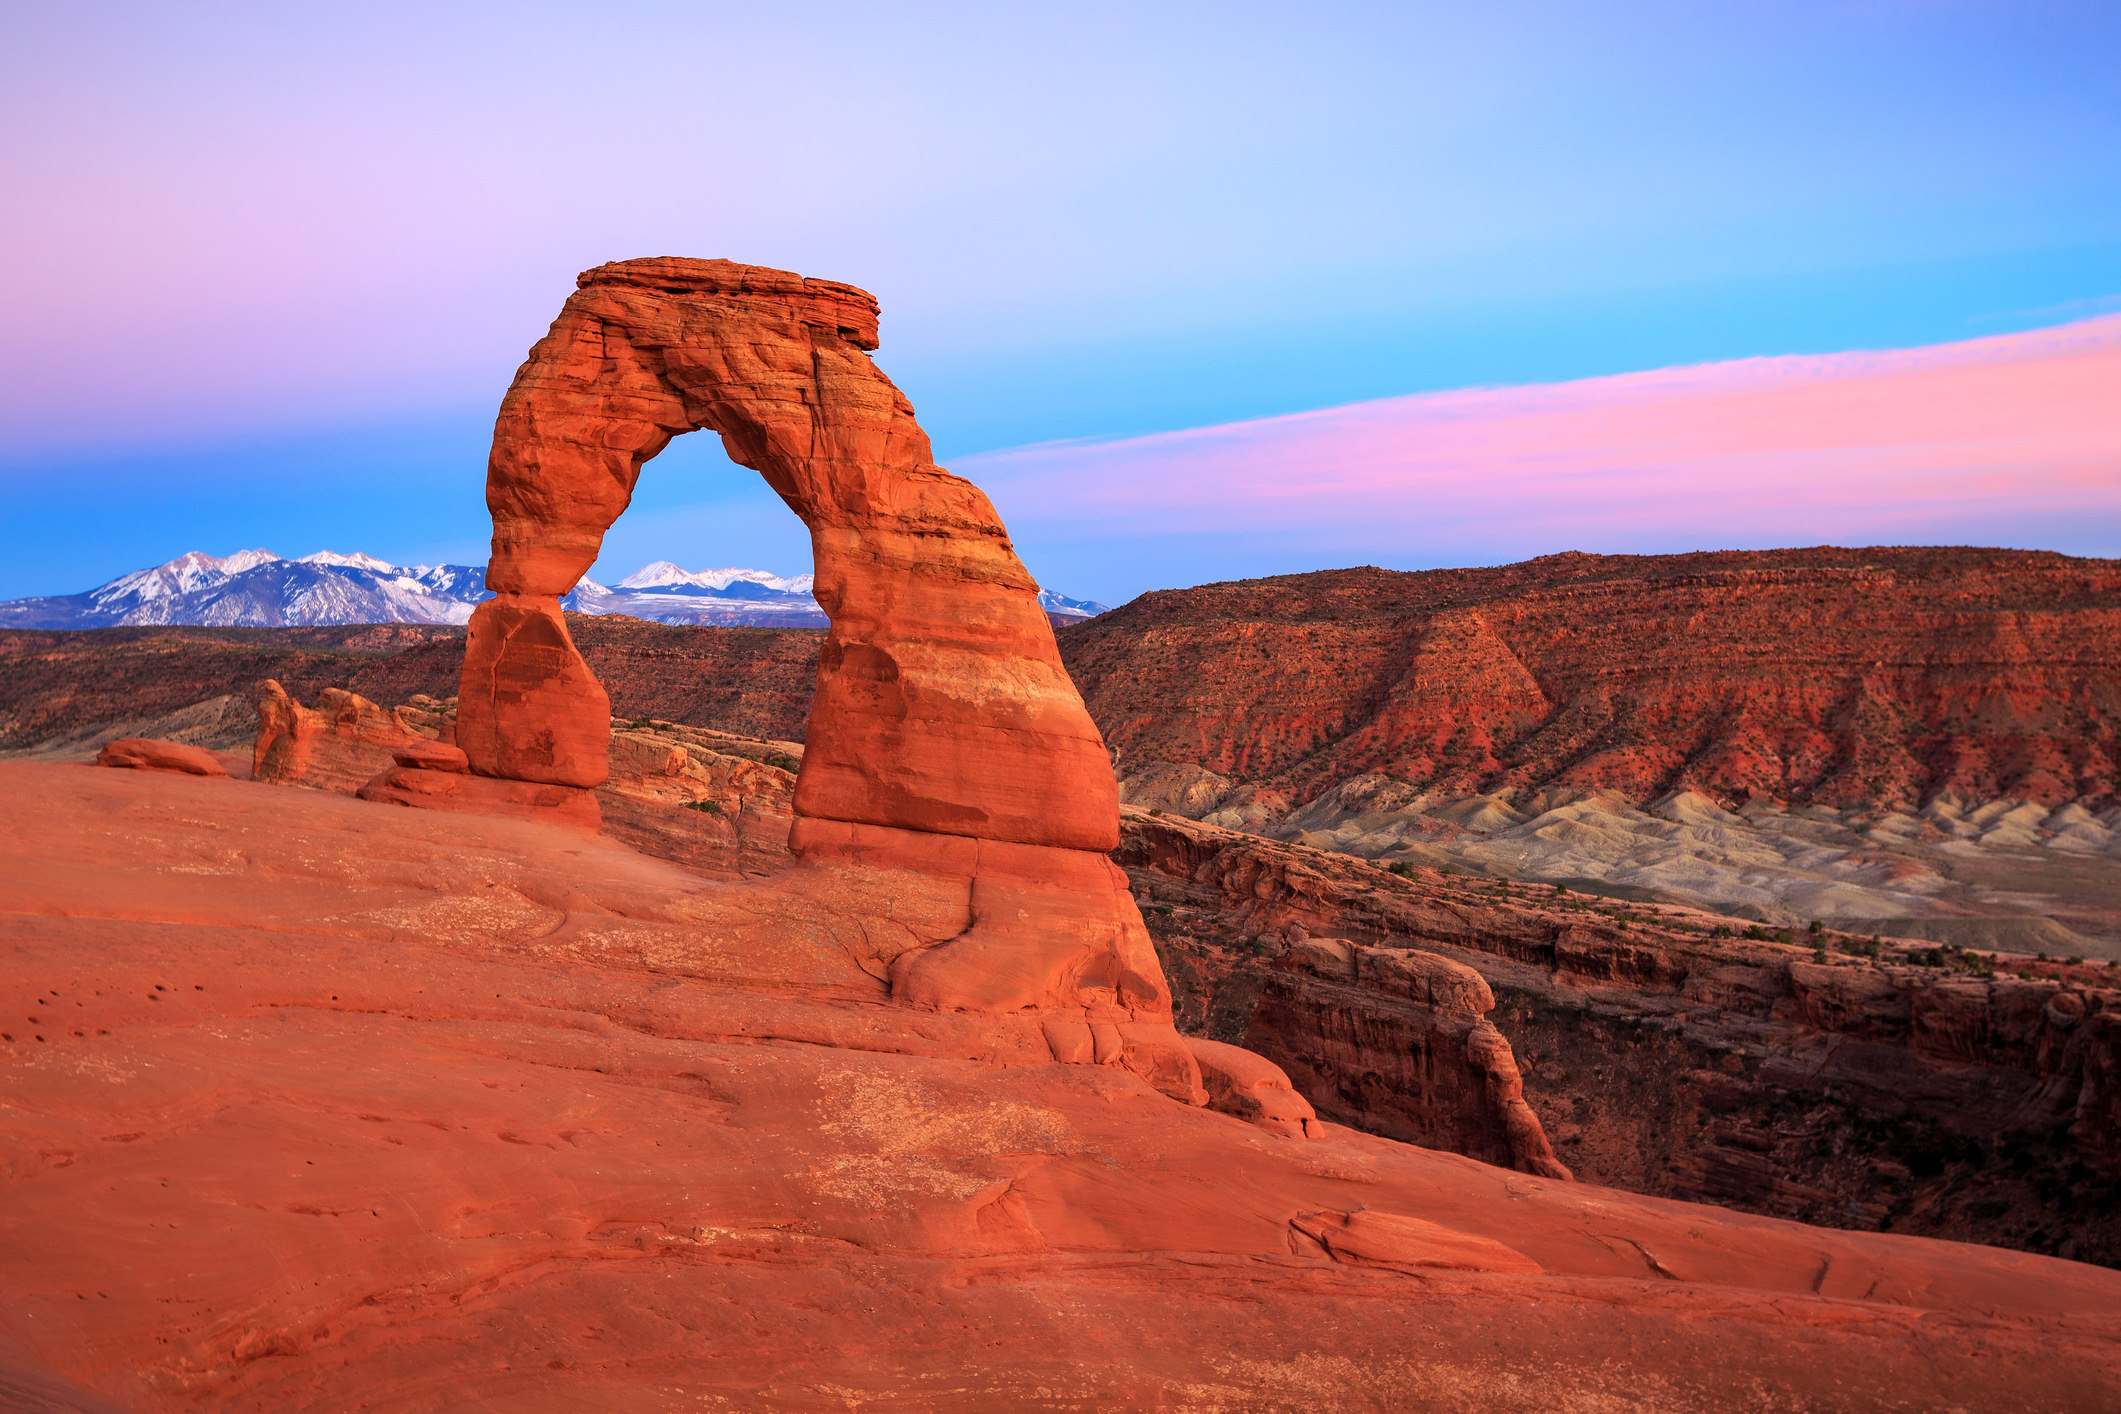
This gorgeously even lighting is great for landscapes too.
As you can see in the image above, putting the sun behind the shooter allowed the photographer to capture the warm glow of the sun falling across the landscape.
What's more, a key consideration to make when photographing at sunrise or sunset is to turn around.
Instead of always shooting toward the sun, look behind you to see what details and colors are revealed in a frontlit situation.
Adding Sun Flare
In many situations, you take measures to minimize or eliminate sun flare. That might be by using a lens hood or something as simple as holding your hand outward to block the sun from directly entering your lens.
However, during golden hour, sun flare can add an interesting creative element to portraits, landscapes, and other popular subject matter.
As you can see in the image above, the subtle sun flare adds a bit of depth to the shot. This was achieved by strategically positioning the camera such that the portrait subjects partially blocked the direct sun from entering the lens.
Learn more about creating lens flares in the video below by Devin Graham:
Learn More:
Rim Lighting
Similar to backlighting, rim lighting is used when the sun is behind the subject, and it's rays are used to create a halo effect around the subject.
To really enhance this effect, it's best to place your subject in front of a darker background. That will help the light pop as it creates that halo effect you're looking for.
In the image above, you can see how the light from the sun in the background illuminates the woman's hair.
Notice how the dark greens in the background help enhance this effect, just like I noted earlier.
Also of note is that to achieve this effect, move your positioning to capitalize on the lighting. That is, don't assume that the first position from which you shoot will produce the best rim lighting results.
Instead, move up, down, left, and right to find the best rim lighting.
Getting the Best Golden Hour Photos

No matter which type of golden hour photo you take, there are a few steps that will enhance the results you get:
- Give yourself plenty of time. Factor in time to get to the shoot location as well as time to get your gear setup. You want to be ready to go with time to spare before golden hour begins.
- Check the weather. If there will be significant cloud cover, you won't be able to get the same kind of results as discussed in this article.
- Use the shade or cloudy white balance setting. Both settings add a little bit of warmth to the image and will enhance the warm tones of the sunrise or sunset.
- Don't stop shooting. Golden hour light changes from one moment to the next. Just because you think you've capitalized on the best light doesn't mean better light isn't a couple of minutes away.
- Underexpose your images. It's much easier to brighten your images in post-processing than to darken them. If anything, slightly underexpose and work on bringing back that detail in post.
As we've seen here, golden hour presents a wide array of opportunities for getting all sorts of beautiful photos, from portraits to landscapes and everything in between.
Bear these tips and techniques in mind, grab your camera, and go out and shoot to see what sort of results you can get!
Learn More:
We Recommend
6 Classic Portrait Photography Lighting Setups

Portrait Photography Lighting
Taking a high-quality portrait isn't just a matter of having a nice camera, a good lens, and a pretty model.
If only it were that easy!
Instead, there are all sorts of other considerations to make.
You have to think about the setting of the photo shoot and how it might help (or hinder) your ability to create a nice portrait.
There's the background to worry about, too: Is it too busy? Does it distract the viewer's eye? Is it too plain and boring?
Of course, one crucial aspect of portrait photography hasn't been listed yet...
Lighting.
But there's more to lighting a portrait than simply having light. You need to think about the pattern of light as well.
In this tutorial, we take a look at six classic lighting patterns, each of which can help you create a distinctive portrait.
A Quick Definition

Before we dive into the six different options for lighting patterns, we need to come to an agreement regarding what a lighting pattern is in the first place.
If we're going for a quick and easy definition, a lighting pattern can be described as the manner in which light interacts with a model's facial features to create areas of light and shadow.
The key feature that differentiates each pattern is the shape of the shadow that's created on the model's face. In each instance, the shapes of those shadows are unique and completely change the look and feel of the portrait depending on which one is used.
There are two styles of lighting of which to be aware - short and broad.
There are also four patterns of lighting you need to be familiar with: butterfly, split, loop, and Rembrandt.
Let's examine each in more detail.
Learn More:
Short Lighting

When using short lighting, the light source is used to cast a shadow on the side of the model's face that's nearest the camera, as seen in the image above.
In this case, the model has turned her face toward the light source, which is to her right.
As a result, her right cheek is illuminated while her left cheek is in shadow.
That large area of shadowing on her left cheek is the hallmark of short lighting - with this lighting style, the largest area of the face will appear in shadow.
A great way to achieve this look is to use an off-camera hot-shoe flash mounted to a tripod.
For the image above, the flash would be positioned to the model's right. However, because the light needs to be softened, it's a good idea to soften that light with a diffuser.
Broad Lighting

Unlike short lighting, broad lighting is a style of lighting that results in the shadow appearing on the model's far cheek, as seen above.
You can see how the subject is now looking away from the light, which is positioned to her right, our left.
As a result of this, there is a large area of light on the right side of her face and a shadowed area on the left side of her face.
Note as well that with broad lighting, the area that's illuminated is typically larger and the shadowed area is usually smaller than if narrow lighting is used, though that isn't always the case.
Broad lighting also has the effect of widening a subject's face. This makes it a useful tool when photographing people that have an especially slim face.
But just as was seen in the example of short lighting previously, in broad lighting, the light is still very soft and diffused.
Butterfly Lighting

When you look at the portrait above, you can see why butterfly lighting is named as such.
If you look closely, there is a butterfly-shaped shadow under the model's nose.
This is achieved by positioning the primary light above and behind the camera, such that it is placed directly above the photographer.
With the light falling on the model from slightly above, the butterfly shadow appears under her nose, with some shadows present under her chin as well. But because the light is also positioned directly in front of her, most other shadows are minimized for a clean, even look.
This type of lighting style is typically used for glamor and fashion portraits. It's also a popular option for older models because the frontlighting helps to minimize the appearance of wrinkles.
Learn More:
Split Lighting

Split lighting is named as such because the lighting splits the face into two equal sides, one illuminated and the other in shadow.
This lighting pattern is typically used to created portraits that are dramatic with a lot of depth, like the one seen above.
Split lighting is easy to set up - just put the light at a 90-degree angle to the subject. In the case of the image above, the light is 90-degrees to the model's right.
When placing the light, be sure to think about how the model's face is structured. To be true split lighting, the eye on the shadowed side of the face should actually be illuminated.
However, not everyone's nose allows for this. Try turning the model's head more toward the light, but if the light illuminates more than the eye on the shadowed side (i.e., their cheek), split lighting in its purest form won't work with that particular model.
The beauty of split lighting is that you can simply use natural lighting to get a great effect. Even if it's slightly overcast out, there should be enough sunlight if you position the model at a 90-degree angle to the sun to get enough shadowing on the far side of their face to get a nice split lighting effect.
Loop Lighting

When using loop lighting, you'll notice small shadows from the model's nose on his or her cheek.
To create these shadows, the light source is placed just above eye level and at around 45-degrees from the camera.
In the image above, you can see how the shadow from her nose extends onto her left cheek. However, note that the shadow from her nose does not touch the shadow created by her cheek.
By keeping the nose shadow small, you create the nice loop-sized area of light on the model's upper cheek.
Naturally, since everyone has a different nose and cheek structure, you'll have to play with the angle of light and the manner in which the model is posed to get the precise loop lighting you want.
To get this type of look, try an outdoor photo shoot in which the sun is behind your subject, and your subject is in the shade. Then, use a reflector to bounce light onto the subject's faces from a slightly higher position than their eyes. Remember also to try to maintain the positioning of the reflector at a 45-degree angle to the camera.
Learn More:
Rembrandt Lighting

Rembrandt lighting involves a triangle of light on the model's cheek.
This is similar in look to loop lighting, but in this case, the shadow of the nose and the shadow of the cheek touch to create the triangle of light you see on the model's left cheek above.
When setting up a Rembrandt lighting pattern, pay close attention to the eye on the shadowed side of the face as it actually needs to catch the light. If it doesn't, the eye will look deep and dark, and that's not a good look!
To setup Rembrandt lighting, place the light source above the model's head such that the shadow of their nose comes downward toward their cheek. Manipulate the model's pose until you see the hallmark triangle of light on the off-side of their face.
Like other lighting patterns, Rembrandt lighting is not ideally suited for everyone. For example, models with very high cheekbones of very small noses typically won't work for this particular pattern of lighting.
Get a quick overview of most of these lighting patterns and see them in action in the video below from Ed Verosky:
Important Reminders
Like just about everything else in photography, when it comes to using these lighting patterns and styles, there are exceptions to the rule.
If you can't achieve the precise look as prescribed by these lighting schemes, that's okay!
Be willing to experiment with the placement of the light source, the angle to which your model is looking at the light, and the angle from which you take the portrait.

Nothing says you have to replicate these lighting patterns exactly. In the end, what's important is that you have these lighting patterns and styles at your disposal; if you have to tweak them to meet your needs, do so!
Many of the best photographs in the world were taken by breaking or bending one rule or another. Don't be afraid to be a rule breaker as well. Your photos can benefit from that just as much as they can from following the rules.
Furthermore, remember that you can use just about any type of lighting to achieve any of these looks.
As noted throughout the article, natural lighting, natural lighting plus reflectors, and diffused light are all options for many of the lighting schemes discussed above.
All that's left now is for you to experiment with each one!
Learn More:
- Best Camera Settings for Portrait Photography
- These Three Tricks Will Help You Create a Beautiful Portrait
We Recommend
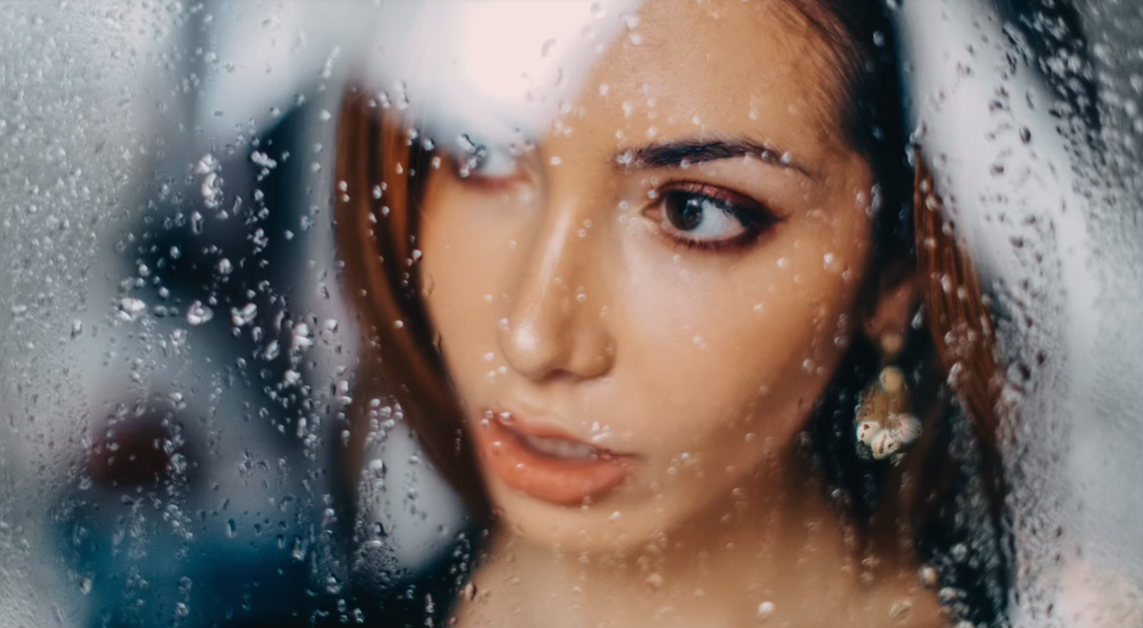
6 Creative Photography Tricks You Can Try at Home
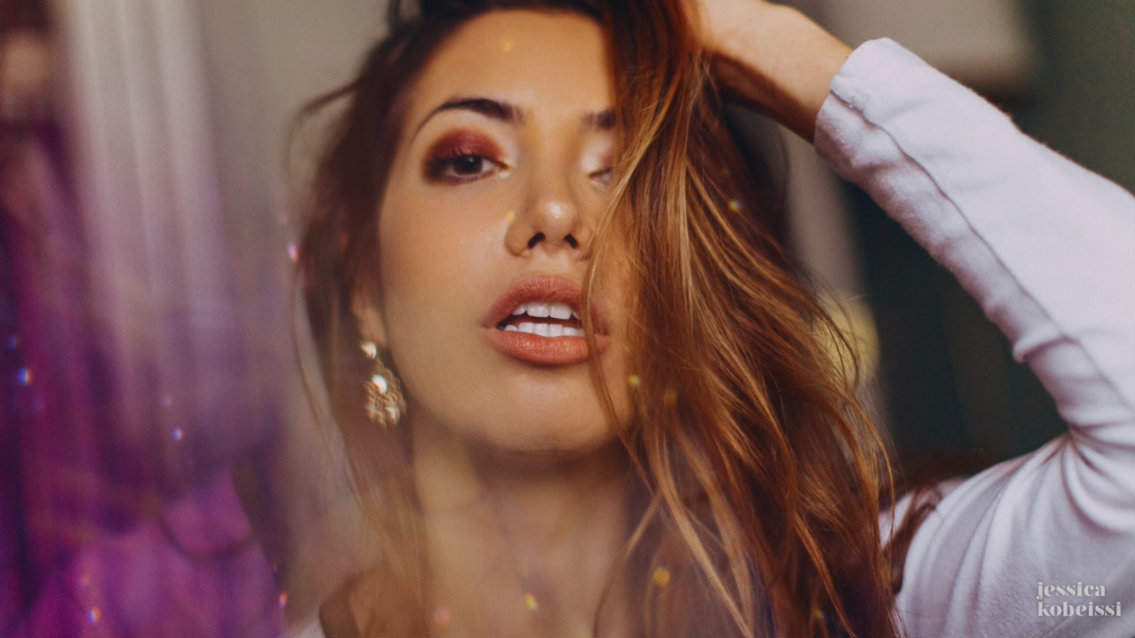
 YouTube Screenshot/Jessica Kobeissi
I'm sure you're like me and know what it's like to get into a creative rut.
It's the worst feeling because it can be so incredibly frustrating - and hard to get out of.
But sometimes all you need is a few simple tips for inspiration to get your creative juices flowing again. Learn more about creative photography ideas at home on our website PhotographyTalk.com.
The video above is all about easy, at-home photography tricks to help you get more creative photos.
In it, Jessica Kobeissi shows just how simple it is to make something that's unique and unusual.
Give the video a quick view, and for details on each trick, see below.
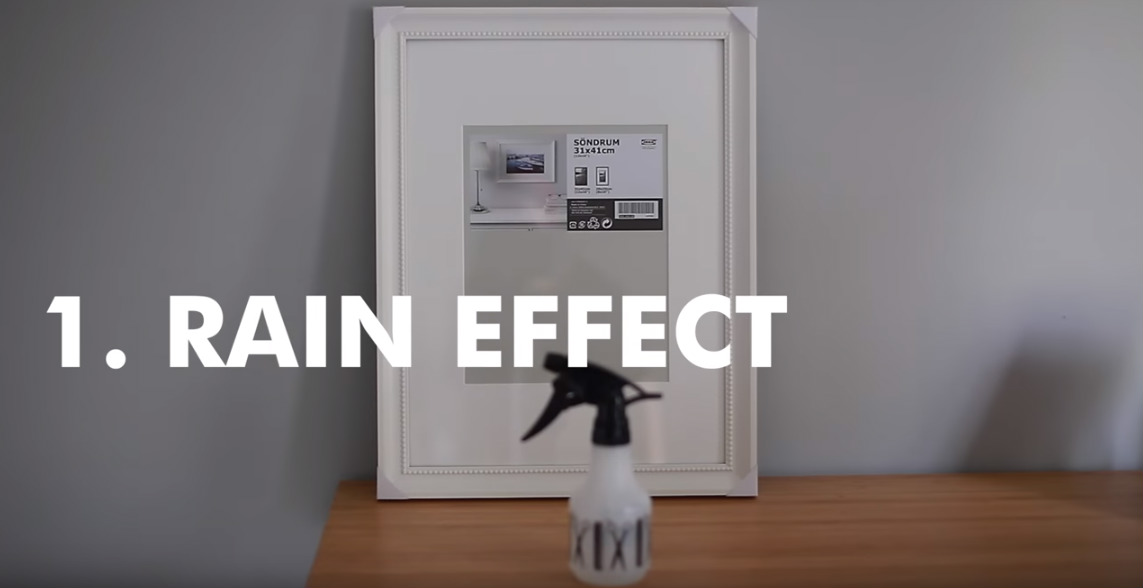
Rain Effect
 YouTube Screenshot/Jessica Kobeissi
It's easy to make it rain with your camera...
Just grab a spray bottle, fill it with water, and find an empty picture frame.
Remove the back of the frame, secure the glass in place, and spray the front with the water bottle.
YouTube Screenshot/Jessica Kobeissi
As you can see, the effect is quick eye-catching!
You'd never know by looking at this photo that it was staged using nothing more than an old photo frame and a spray bottle!
Editor's Tip: Get even more creative photos by upping your post-processing game. Try Luminar and its AI-powered tools today.
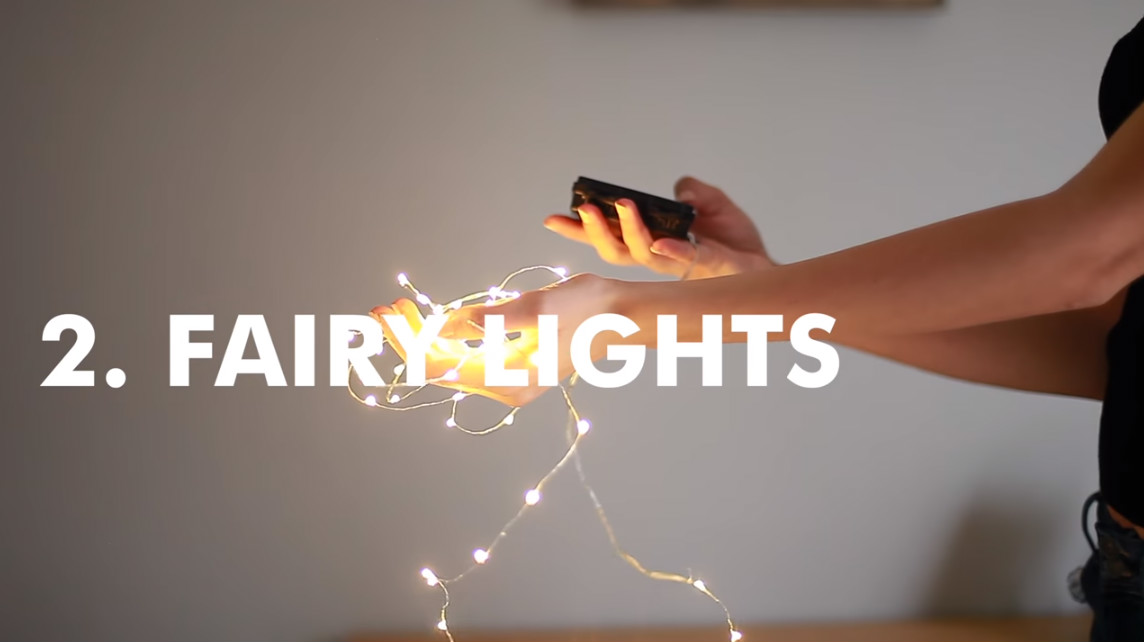
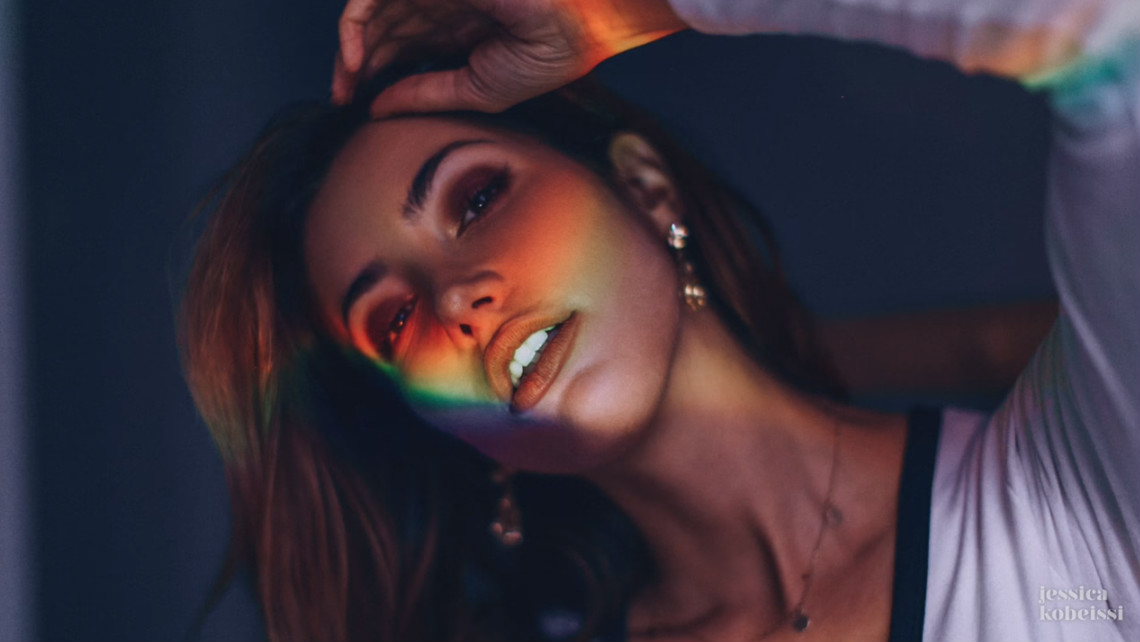
Fairy Lights
 YouTube Screenshot/Jessica Kobeissi
That old strand of lights you have in your garage isn't just for holiday decorations...
It can also be used to add interesting lighting effects to your photos!
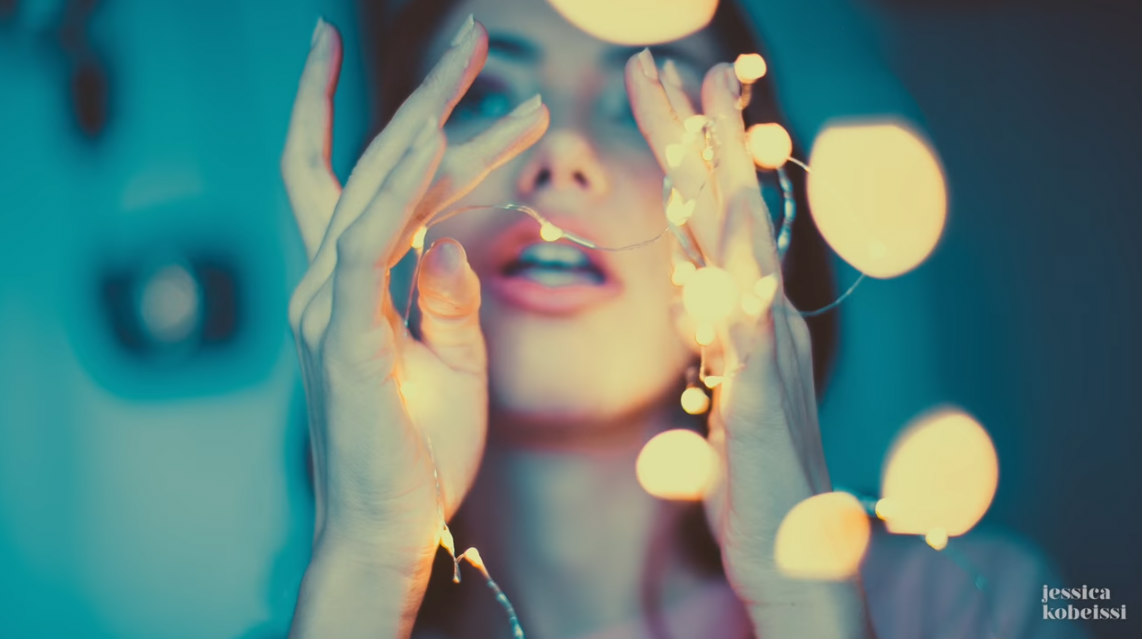 YouTube Screenshot/Jessica Kobeissi
As you can see in the screenshot above, adding the fairy lights to this portrait adds gorgeous blobs of light that make the photo more unique.
Just have the model hold the lights in front of their face, or for a more depth-inducing effect, have the model hold one end of the lights while you hold the other.
By placing the lights in the field of view of your lens, you can get gorgeous bokeh effects that elevate your portraits to the next level.
Lace Tablecloth
 YouTube Screenshot/Jessica Kobeissi
Lights aren't the only household item you can use to add interesting effects to your photos.
If you have a lace tablecloth handy, just have the model hold it up in front of their face as you take the photo.
 YouTube Screenshot/Jessica Kobeissi
The sheer quality of the lace means that you still get a nice view of the model.
But if the tablecloth has interesting designs on it, like the one in the screenshot above, you get beautiful, three-dimensional effects that make the photo something extra special. You can also view another post about photo ideas at home.
Prism
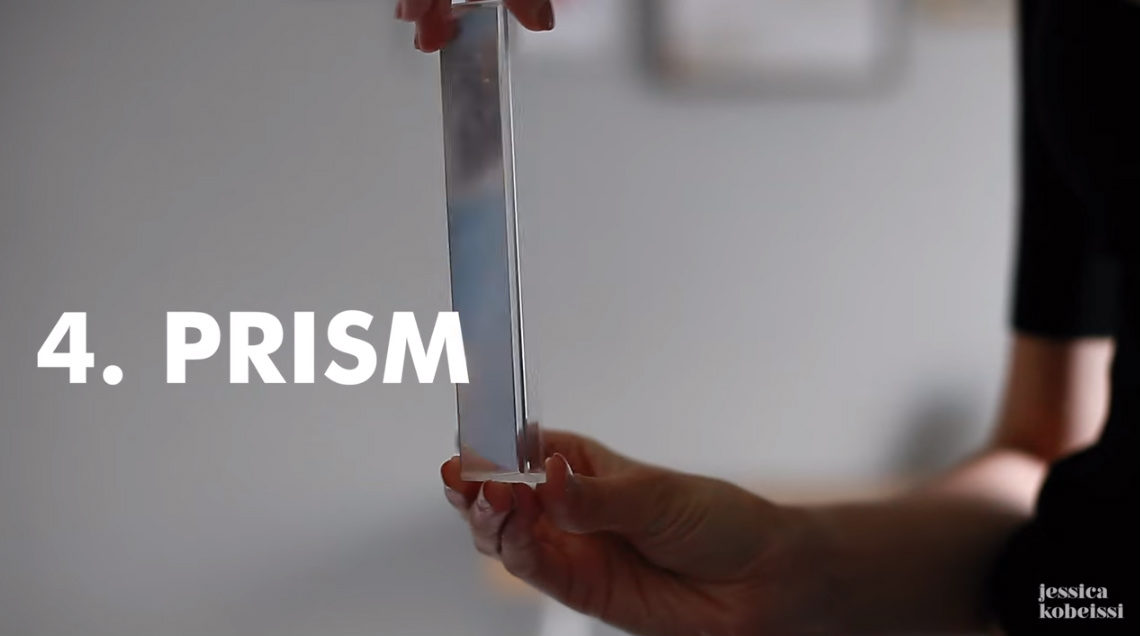 YouTube Screenshot/Jessica Kobeissi
A prism is another simple object that can have complex effects on the photos you create.
Since it refracts light, it will add beautiful light effects to your images, as seen below.
 YouTube Screenshot/Jessica Kobeissi
Just hold the prism in front of your lens as you shoot.
Move the prism left, right, up, and down, and adjust its distance from the lens to change the effects it creates.
The key is to play around to see what works best for your creative vision.
Editor's Tip: Once you have your photo taken and processed, it's time to turn it into wall-worthy art. See what your photos look like as fine art.
Chandelier Crystal
 YouTube Screenshot/Jessica Kobeissi
Like a prism, a chandelier crystal is a fun and easy tool to use to add visual effects to your photos.
Again, since it refracts light, holding the crystal in front of your lens generates beautiful effects.
 YouTube Screenshot/Jessica Kobeissi
As you can see in the image above, holding the crystal on the bottom left side of the frame adds a touch of whimsy to this shot.
It also gives this portrait a little more depth and uniqueness that help it stand out. And all it took was a simple crystal!
CD Rainbow
 YouTube Screenshot/Jessica Kobeissi
I know some younger photographers might be wondering what a CD is, but it's a round thing we used to use to save stuff like photos.
The bottom of the CD reflects light, and when it does, it creates a rainbow.
 YouTube Screenshot/Jessica Kobeissi
Like the other objects on this list, it's easy to use a CD to get this effect.
Turn on your phone's flashlight, shine it on the CD, and hold both in front of your camera lens (you'll need to put your camera on a tripod and use its timer).
Then, work the angles of the light and the CD until you get the desired effect where you want it.
As you can see in the image above, it's another way to create a photo that's more visually interesting.
And with that, you have six super easy photography tricks to use to improve your photography!
We Recommend
A Beginner Photographer’s Guide to Understanding the Sunny 16 Rule
So, you've taken the time to learn how your camera works and finally feel comfortable giving manual mode a try, or at least more advanced modes like aperture priority or shutter priority mode.
The problem is, the photos you take when shooting in manual are all out of whack when it comes to exposure.
When you take photos in the daylight, your images are overexposed.
When it gets cloudy, your photos are underexposed.
And when it snows, you don't dare try shooting in manual mode.
Sound familiar?
If so, you're definitely not alone.
Many photographers - beginners, hobbyists, and enthusiasts alike - struggle to master shooting in varied lighting conditions, even after learning how to get out of fully automatic mode.
So what gives?
Really, all you need is a rule of thumb to help guide you in the decisions you make regarding your aperture, shutter speed, and ISO.
That rule of thumb is the Sunny 16 Rule.
The Sunny 16 Rule Defined

The Sunny 16 Rule states that on a sunny day, set your aperture to f/16, and then set the shutter speed and ISO values to the inverse of one another. So, if the ISO is set to 200, the shutter speed would be 1/200 seconds. If the ISO is set to 100, the shutter speed would be 1/100 seconds.
You get the point.
But why does it work?
Essentially, the Sunny 16 Rule works because it takes into account how aperture, shutter speed, and ISO work together to get a good exposure. That is, if you make a change in one of these settings, a change is required in another setting to maintain a good exposure.
That means that if the aperture is constant - in this case, f/16 - a change in ISO one way requires a change in the shutter speed the other way.
For example, if you increase the shutter speed from 1/200 seconds to 1/400 seconds, you reduce the duration of light that hits the camera's sensor by one-half. Without an adjustment to the ISO, the image would be too dark. That's why a corresponding move from ISO 200 to ISO 400 (which doubles the sensitivity of the sensor to light) helps you maintain a proper exposure.
This works for any of the exposure settings, too.
So, if you choose an ISO value of 200 and it remains constant, you have to adjust the aperture and shutter speed accordingly to maintain a well-exposed image. Check the chart below to see what I mean:
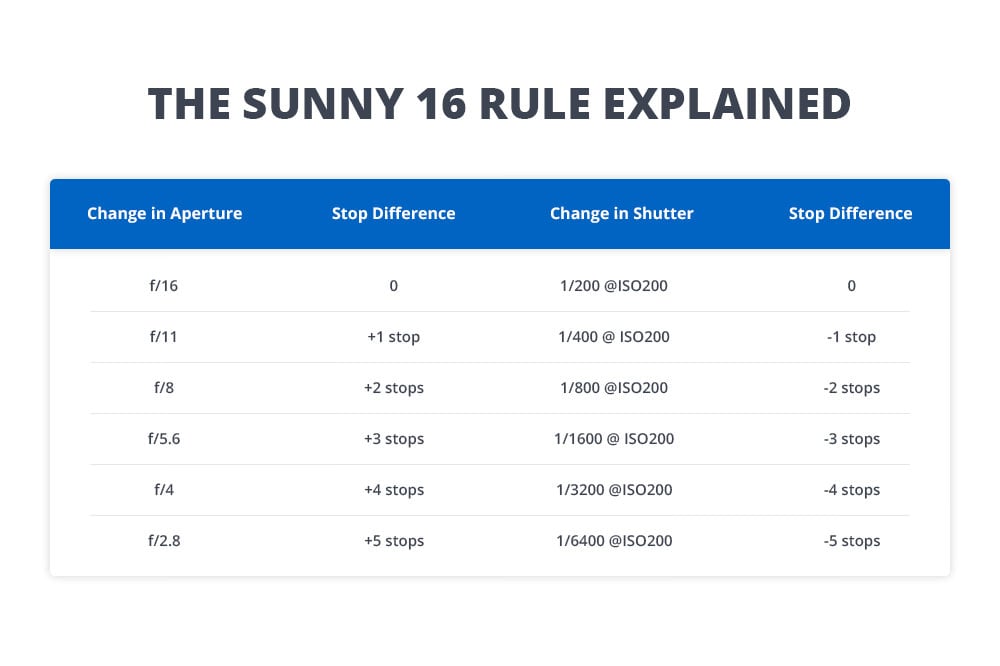
Note how in each scenario above that the ISO remains constant at ISO 200. Note as well that moving from f/16 to f/11 is +1 stop. That means you're doubling the amount of light entering the lens.
To prevent overexposure, you have to speed up the shutter speed to account for that extra light as a result of the larger aperture. That means that doubling the shutter speed from 1/200 seconds to 1/400 seconds is required.
That means that the exposure you got at f/16, ISO 200, and a shutter speed of 1/200 seconds will be the same as you get at f/11, ISO 200, and a shutter speed of 1/400 seconds.
Remembering this relationship - that a change in one of the three exposure factors requires an equal, opposite change in another, will help you make needed adjustments to account for all types of lighting conditions.
Other Applications of This Rule

There are several variations of the Sunny 16 Rule that help you identify the starting point for your exposure settings in a variety of lighting situations, as seen above. Let's explore each in more detail.
The Slightly Overcast f/11 Rule
When there's a few clouds in the sky, the amount of light available for your photos will be reduced. That necessitates using a slightly larger aperture than you would when it's sunny out, thus the movement from f/16 to f/11.
As we worked out in the previous section, using the same starting settings as the f/16 rule - an aperture of f/16, an ISO of 200, and a shutter speed of 1/200 seconds, we can determine what to do to keep a good exposure when a few clouds roll in:
Again, since f/11 represents +1 stop from f/16, you'll need to adjust another exposure setting by -1 to maintain exposure. That means changing the shutter speed from 1/200 seconds to 1/400 seconds.
When slightly overcast, start with the following settings:
- Aperture: f/11
- ISO: 200
- Shutter Speed: 1/400
The Overcast f/8 Rule
When even more clouds roll in, and more sunlight is blocked, you'll need to add +2 stops of exposure by moving from the sunny f/16 setting to f/8.
Again, because we've increased the amount of light entering the lens by two stops, we have to balance that out with -2 stops of shutter speed. That means changing the original sunny shutter speed from 1/200 seconds to 1/800 seconds.
When overcast, start with the following settings:
- Aperture: f/8
- ISO: 200
- Shutter Speed: 1/800
The Heavy Overcast f/5.6 Rule
On days when there just isn't much sun at all, you need to open the aperture even more, this time, from the sunny f/16 setting to f/5.6.
But since that move is adding +3 stops of exposure to the image, you have to compensate by dialing in -3 stops of shutter speed. In that case, you'd change from the sunny 1/200 second shutter speed to a new shutter speed of 1/1600 seconds.
When heavily overcast, start with the following settings:
- Aperture: f/5.6
- ISO: 200
- Shutter Speed: 1/1600
The Sunset f/4 Rule

When photographing sunsets, you need to open the aperture even more due to the fading light of the day. Change your original sunny f/16 setting to f/4, which is +4 stops. Compensate by changing your shutter speed by -4 stops to 1/3200 seconds. Doing so should result in an image that's just as well-exposed as if you used f/16, ISO 200, and a shutter speed of 1/200 seconds on a bright, sunny day.
When at sunset, use the following settings:
- Aperture: f/4
- ISO: 200
- Shutter Speed: 1/3200
Keep a Few Things in Mind
First and foremost, the Sunny 16 and its associated rules are just a starting point - they do not guarantee that the settings they recommend will get you a well-exposed photo each and every time.
What they will do, however, is get you started off on the right foot. With a few minor adjustments, you can more quickly and easily find the exposure settings that work for each unique lighting condition that you encounter.
Perhaps even more important is that the Sunny 16 and its associated rules account for incident light rather than reflected light.
The difference between the two is vital: incident light is a measure of the actual light of the scene, whereas reflected light (which your camera's meter measures) is the value of light that's being reflected.
This is important because if your subject is very bright, your meter might think the image needs to be darkened more than it should. Conversely, if the subject is dark, the meter might try to add too much exposure.
The Sunny 16 rule gets around this, though, meaning that you can often do a better job of measuring the light of a scene by using these rules than you can if you leave metering up to your camera.
Lastly, keep in mind that the Sunny 16 Rule works best for bright, even light. What's more, each of these rules is advantageous for scenes that are lit from the front or the side. That's because frontlighting and sidelighting can be tough on camera meters, so using these rules can get you closer to an ideal exposure.
Now it's time for you to give the Sunny 16 Rule a try! Before you do, if you need an in-depth overview of exposure, camera settings, and the Sunny 16 Rule, check out the video below by L. David Likes:
We Recommend
A Few Mistakes Beginner Photographers Need to Avoid

Photography is a fun hobby (and a great job for some people). But it certainly isn’t something that you can just jump into and have tons of success. In addition to having patience and giving yourself time to practice essential skills, you need to first learn the basics of photography from what settings to use to how to process your images in Photoshop, Lightroom, or similar programs.
The video below from Photography Overnight delves into some of these essential topics, and explore a few crucial mistakes that beginning photographers tend to make. From making changes to white balance to understanding lighting and everything in between, this video will give you solid tips for avoiding some of the pitfalls that trip up beginner photographers.
Amazon Recommendations
- Understanding RAW Photography
- The Complete Portrait Manual (Popular Photography): 200+ Tips and Techniques for Shooting Perfect Photos of People
- Picture Perfect Posing: Practicing the Art of Posing for Photographers and Models
We Recommend
Bad Lighting? No Problem! Take Better Portraits in Under Two Minutes

We’ve all been there - a friend, family member or stranger poses for the camera, but the image is ruined by bad lighting.
How can that be fixed?
David Bergman of Adorama TV has a few ideas that will help you read the light and make the most of what you’ve got, even when the lighting isn’t quite up to snuff.
The best part is that his techniques only take a couple of minutes to learn, so you can improve your photos without investing tons of time.
Check out David’s tips in the video below!
Amazon Recommendations
Canon EOS 5D Mark III 22.3 MP Full Frame Camera
Canon EF 24-105mm f/4 L IS USM Lens for Canon EOS SLR Cameras
Portraiture Unplugged: Natural Light Photography
We Recommend
Basic Portrait Lighting Principles

photo bysilverkblack via iStock
One of the most important skills to have as a photographer of any kind is the ability to understand the different attributes of light.
From the direction of light to the quality of its tone, the color of light to its luminosity, there are many factors to consider when framing up your shots.
These factors are especially important when creating portraits, as they can quite literally make or break the shot.
With that in mind, let's have a look at a few basic portrait lighting principles you need to understand in order to make better portraits.
Learn to Work With Harsh Lighting

photo by skyNext via iStock
One look at outdoor portraits on Instagram or Flickr will reveal millions of portraits taken at golden hour.
Golden hour is a great time for portraits because light is soft, warm, and falls evenly across the scene, which gives portraits an elegant look.
But it’s not always possible to shoot portraits during golden hour, so learning to work with harsh lighting that you find throughout the day is a must.

photo by skyNext via iStock
The difference between soft and harsh lighting is simple - soft light has soft shadows and a gentle transition from shadowed areas to highlighted areas, like in the first image above. Harsh lighting, however, has an abrupt transition with very hard lines of shadow, as shown in the image immediately above.
You don’t have to be outside to make use of harsh lighting, either.
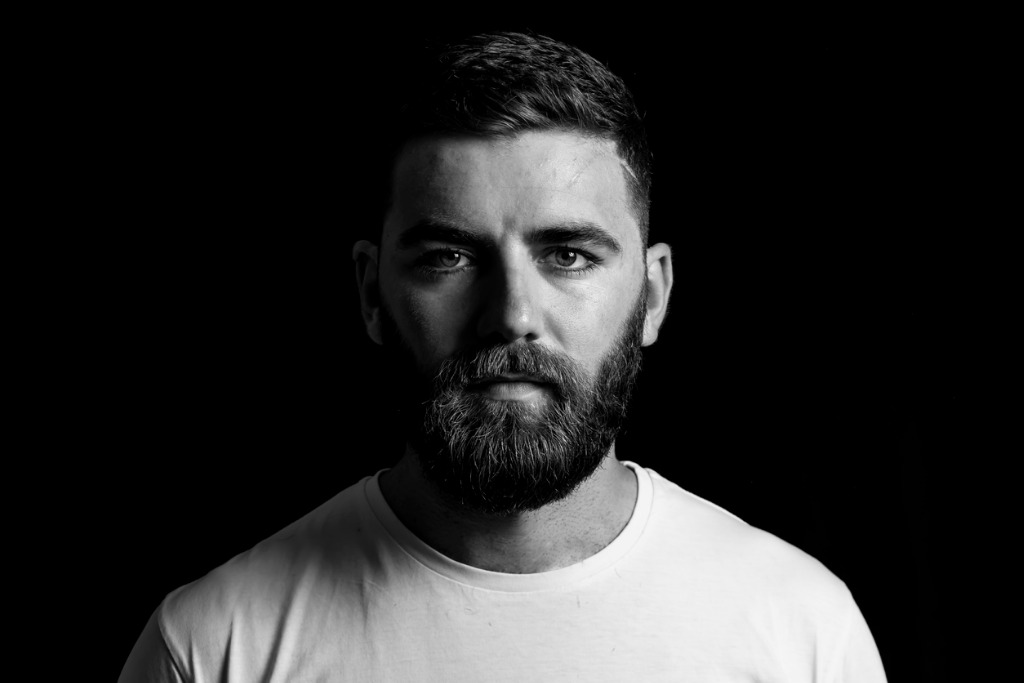
Photo by ViewFramer via iStock
In this example, a single, bright light is used to create extremes of brightness and shadow to create a more compelling black and white portrait.
Since black and white images rely on things like contrast for visual interest in the absence of color, using harsh light to create black and white images is a great option.
Learn More:
Learn How to Use Artificial Lighting

When some people read the term “artificial lighting,” they might shudder with thoughts of buying expensive lights, light stands, diffusers, softboxes, and other bulky photography lighting gear.
And while that’s certainly an option, if you aren’t a professional portrait photographer, you don’t need all that gear, nor do you need to spend that much money.
There are a ton of small, easy-to-use lights for photography that allow you to sculpt and shape light for portraits.
Take the Hakutatz RGB+AW LED Light shown above and below as a great example.
Editor's Note: The Hakutatz Kickstarter campaign was a huge success! Their Amazon store will be open and ready for orders in early December.
This light is small enough to fit in your pocket, yet allows you to get ultra creative with the way you light portraits.
For example, you can add colored light to the portrait using the light’s array of RGB LEDs.
If you want to warm up a portrait, you can use the amber LEDs to wash the subject is beautiful amber-toned light. There’s even white LEDs if you want that harder, edgier feel discussed earlier.

What’s more, lights like this can be used as a fill light (to soften shadows in the presence of harsh lighting), as a backlight to help separate the subject from the background, or even as a key light, which is the primary light used to illuminate the subject and highlight their form.
There are many ways you can use a single light to create a compelling portrait, too.

But the advantage of having a light like the Hakutatz RGB+AW LED is that you can use multiple lights at the same time to create more complex lighting scenarios.
With the accompanying smartphone app, you can control one or more lights and dial in the precise color temperature, RGB color, and even special effects you might like to use.
In other words, learning how to use smart lights like this enables you to craft the precise look you want in your portraits and unleash your full creativity at the same time.
What’s not to like about that?!
See the possibilities you can create for portrait lighting with the Hakutatz RGB+AW LED Light.
Learn Common Lighting Setups

photo by FilippoBacci via iStock
If you really want to step up your portrait photography game, it’s important that you learn the basic lighting setups used in portrait photography.
These setups go beyond simply having a single key light or using an LED light like the Hakutatz discussed above to separate the subject from the background.
Instead, the lighting setups shown above (and outlined below) enable you to create different looks in your portraits by manipulating how the light interacts with the model’s face.
- Short lighting involves casting a delicate shadow on the side of the model’s face nearest the camera by having the model look toward the light source.
- Broad lighting involves casting a delicate shadow on the side of the model’s face away from the camera by having the model look away from the light source.
- Butterfly lighting is created when the light source is in front of the model and above their eye level, which creates a butterfly-shaped shadow under their nose.
- Split lighting divides the model’s face into two equal sides - one that’s illuminated and one that’s in shadow - by placing the light source 90-degrees to one side of the model.
- Loop lighting creates gentle shadows while keeping most of their face in light by positioning the light source just above eye level at about a 45-degree angle from the camera.
- Rembrandt lighting results in a similar pattern as split lighting, with one side of the model’s face in light and the other in shadow. However, this lighting pattern creates a triangle-shaped area of light on the shadowed side of the face by positioning the light above eye level and casting the nose’s shadow onto the far cheek.
You can learn more about common lighting setups in this detailed tutorial.

photo by utkamandarinka via iStock
Whether you adapt your portraits to harsh lighting, learn to use artificial lighting, or incorporate classic lighting setups, you’ll find that your ability to create beautiful portraits will be much-improved.
Give each of these methods a try and see what works best for your workflow. Even better, practice each one and then incorporate them all into how you take portraits. I think you’ll be pleased with the results!
Learn More
- 5 Photography Tips That Will Make You a Better Photographer
- Quick and Simple Portrait Photography Tips
We Recommend
Beginner Flash Photography Tutorial
photo byTom Merton via iStock
Beginner photographers tend to have many questions about flash photography settings and how to use a flash. That’s good, because flash photography has a bunch of variables about flash modes, types of flash units, when to use a flash, how to use a flash, and other flash photography basics.
Our beginner flash photography tutorial presented here will guide you in how to use a flash, flash modes, general and special flash photography settings, and what to look for when first choosing a speedlight for beginners.
Why You Need a Flash
photo byinnovatedcaptures via iStock
A flash or speedlight is an essential part of our camera gear, so much so that many of our cameras from entry level to professional caliber have a small flash built in. While these small speedlights are great to have, they are extremely limited in range and features.
An external flash or speedlight for beginners will increase the useful flash range and offer extra features that are beneficial for beginner to intermediate photographers.
As the first part of our beginner flash photography tutorial, let’s examine why we need flash in the first place. There are many good reasons but two top reasons are low light conditions and reducing deep shadows.
photo byFilippoBacci via iStock
Our cameras have outstanding ability to give us correct exposure and stable shutter speeds for hand holding the camera in many lower light situations, but sometimes that image would simply look better with added light from a speelight. In bright light such as a portrait in midday sunlight, deep shadows may appear under a person’s nose, chin, or brow ridge that an added flash can lessen or eliminate.
There are other situations where a flash is beneficial, but for our beginner flash photography tutorial, we’ll concentrate on these.
What to Look For When Buying a Flash
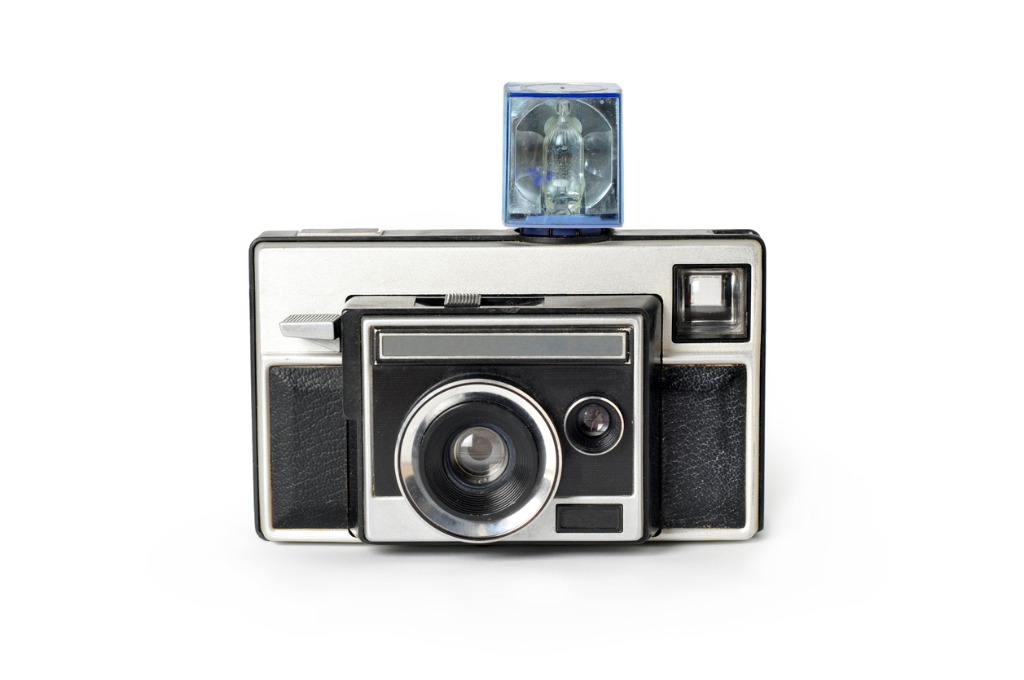
photo bystephanie phillips via iStock
In part two of our beginner flash photography tutorial, we’ll help you find a speedlight for beginners. Among other considerations, there are two huge factors to be considered for your first flash, power and automation compatibility.
Let’s look at automation compatibility first. For most photographers, the days of putting together a cheap manual flash to use with fully manual settings and exposure and distance calculations are long gone. Along with autofocus, flash exposure automation is one of the best features to have evolved with modern technology. Even seasoned, experienced, and professional photographers have embraced these two photographic technologies.
However, the way flashes and cameras communicate electronically with each other for this automation is not universal. A speedlight designed specifically for a Canon DSLR will not work properly with a Sony or Nikon for instance. The incompatible electronics could actually damage the camera.
photo bySergey_Peterman via iStock
You aren’t required to only purchase a Canon flash for your Canon camera though, or Nikon for Nikon, or other brands. But you do need to make sure they are compatible. Similar to how you can buy a Sigma, Tokina, or Zeiss lens for your Canon camera in the Canon EF mount. Most of the brands call this having dedication for a certain camera line or model.
Many of the camera manufacturers have several speedlights at different price points, including reasonably priced flashes perfectly matched to an entry level camera, so you aren’t locked into either buying an expensive camera brand flash or a 3rd party flash for cost effectiveness. Lots of options for a great first speedlight for beginners.
Learn More:
- The Biggest Misconceptions About Flash Photography
- How to Take Control of Your Off-Camera Flash
- Guide Numbers
Guide Numbers
photo byGavh via iStock
Another huge factor to consider for purchasing a flash unit is the power output. Flash power is usually referred to by the Guide Number or GN, a number that is determined by measurable standards and is consistent across brands and formats. A GN 50 flash for a Panasonic MFT format camera puts out the same lighting power as a GN 50 flash for a Fujifilm medium format camera. The larger the number, the more powerful the flash.
Using Guide Numbers was one of the flash photography basics for exposure calculations, now we see it mostly as an indicator of power for comparison. When comparing flashes, though, be sure the GN is based on the same standards. GNs can be measured in meters versus feet or at different ISOs, just make sure you’re comparing apples to apples when shopping.
Flash Modes and Camera Modes
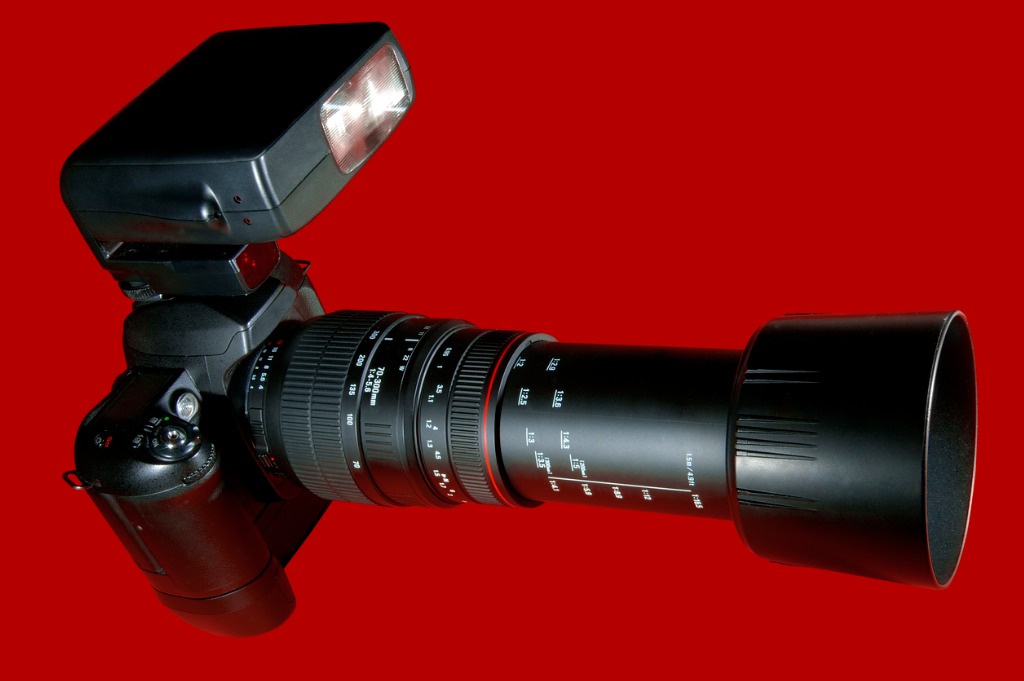
photo bybasslinegfx via iStock
Our flash photography tutorial continues with a look at how camera modes and flash modes work together to make your flash exposures. Camera modes that affect flash exposure are the automatic, semi automatic, and manual modes for the settings of lens aperture and shutter speeds, plus the autofocus modes.
While it’s easy to see how camera exposure modes will affect flash photography exposures, it may not be readily evident how focus modes fit in here. The reason is because flash to subject distance is a primary part of the calculation for proper flash exposure.
Flash to subject distance readings helps determine just ahead of the actual exposure what shutter speed and f-stop or lens aperture are going to be, with the ISO setting being a part of the calculation, and then during the exposure itself, the flash and camera adjust exactly how light the flash will put out. These flash photography settings all happen virtually instantaneously when we are using the automatic modes.
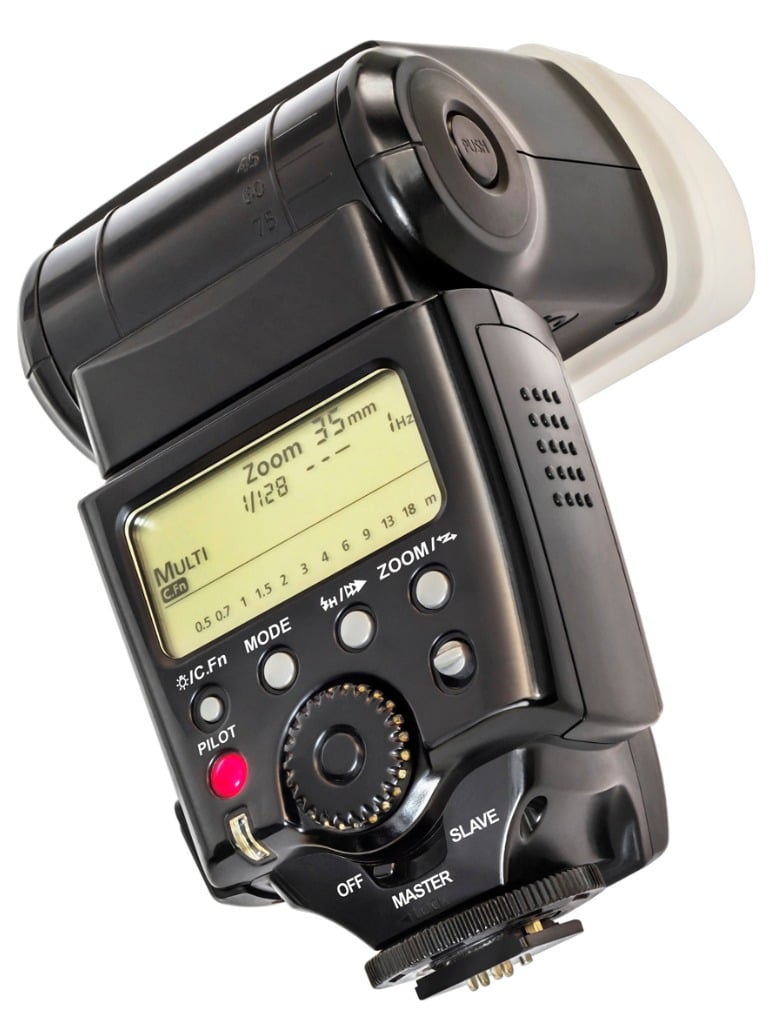
photo byMubera Boskov via iStock
In order to have all of this automation work for us, we may have to adjust dials, knobs, and switches or delve into the camera or flash menu. For the simplest method, turn on AF, any of the modes, and then use P, A, or S camera exposure automation mode. Finally, make sure your flash is set to TTL auto, which may be labeled somewhat differently depending on brand. Check your instructions or online for the specifics of your gear.
Many of the cameras and speedlights also allow a huge variety of semi auto and fully automatic modes, too. If in manual modes, be sure not to exceed the maximum flash shutter speed of your camera, which is usually well marked and is most likely to be 1/60th, 1/125th, or 1/250th of a second.
Again, double check your instructions to be certain of this speed as you won’t get full images if the speed is too fast in manual. This has to do with the way shutter curtains or blades move across the sensor or film to make an exposure. The highest flash synchronization speed is the fastest speed that exposes the entire frame at once.
When and How to Use a Flash
photo byJenae Spriensma via iStock
The final part of this beginner flash photography tutorial will cover some flash photography basics of when and how to use a flash. We’ll hit the most important parts of various situations, please look at some of our other tutorials that dive deep into the methods, techniques, or situations that interest you the most.
- Dim Light - Probably the most common reason we use flash in everyday photography is when the light level gets too low for us to hold the camera still enough or too low for us to clearly discern the main subject. Fully automatic mode is fine, though you may want to adjust the lens aperture yourself for depth of field control.
- Outdoor Portraits - Direct sunlight is a great light source but it can be harsh for portraits. Turning the subject in a direction that the Sun is directly lighting their face and then using the flash for fill delivers amazingly pleasant facial expressions with good exposure and detail. Choosing your aperture for depth of field or selective focus and allowing the flash automation balance the light levels is a good method for this.
- Indoor Mixed Light - Whether photographing people indoors or capturing images of the area such as for real estate, indoor settings often have multiple types of lights ranging from cool to warm. Using flash will tame the various color temperatures by basing exposure primarily on the flash output.
- Directional Light - Directional light, especially from the wrong direction, can negatively affect our images. This is similar to outdoor portraits with fill flash but we’ll expand and include any situation indoors or out where highly directional light is involved. Offices and public places with overhead lighting can be imaged properly with good shadow detail or shadow elimination by using flash.
Advanced Flash Techniques Are Within Your Grasp
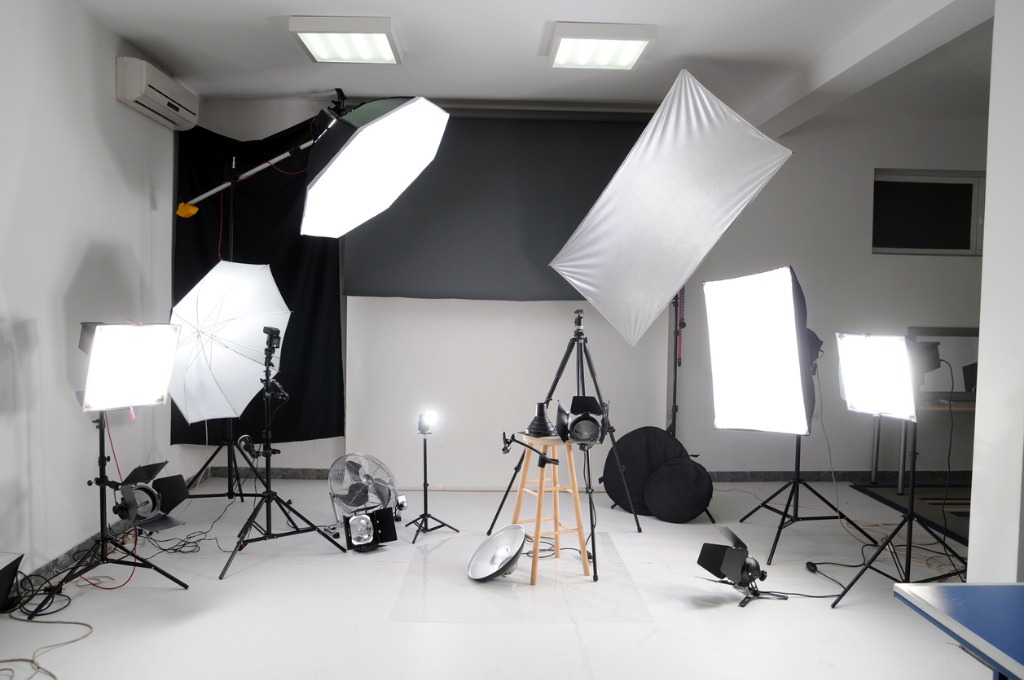
photo byGizmo via iStock
This beginner flash photography tutorial has hopefully helped you overcome any reasons for hesitation of using flash in your photography. There are many ways to use flash that employ these simple techniques plus one or two extra things to consider as a photographer.
Thankfully, modern flash photography is a lot easier to do correctly than ever before, opening us up to applying our creativity while achieving correct flash exposures.
Learn More:
We Recommend
Beginner Photography Tip: Crucial Mistakes You Need to Avoid
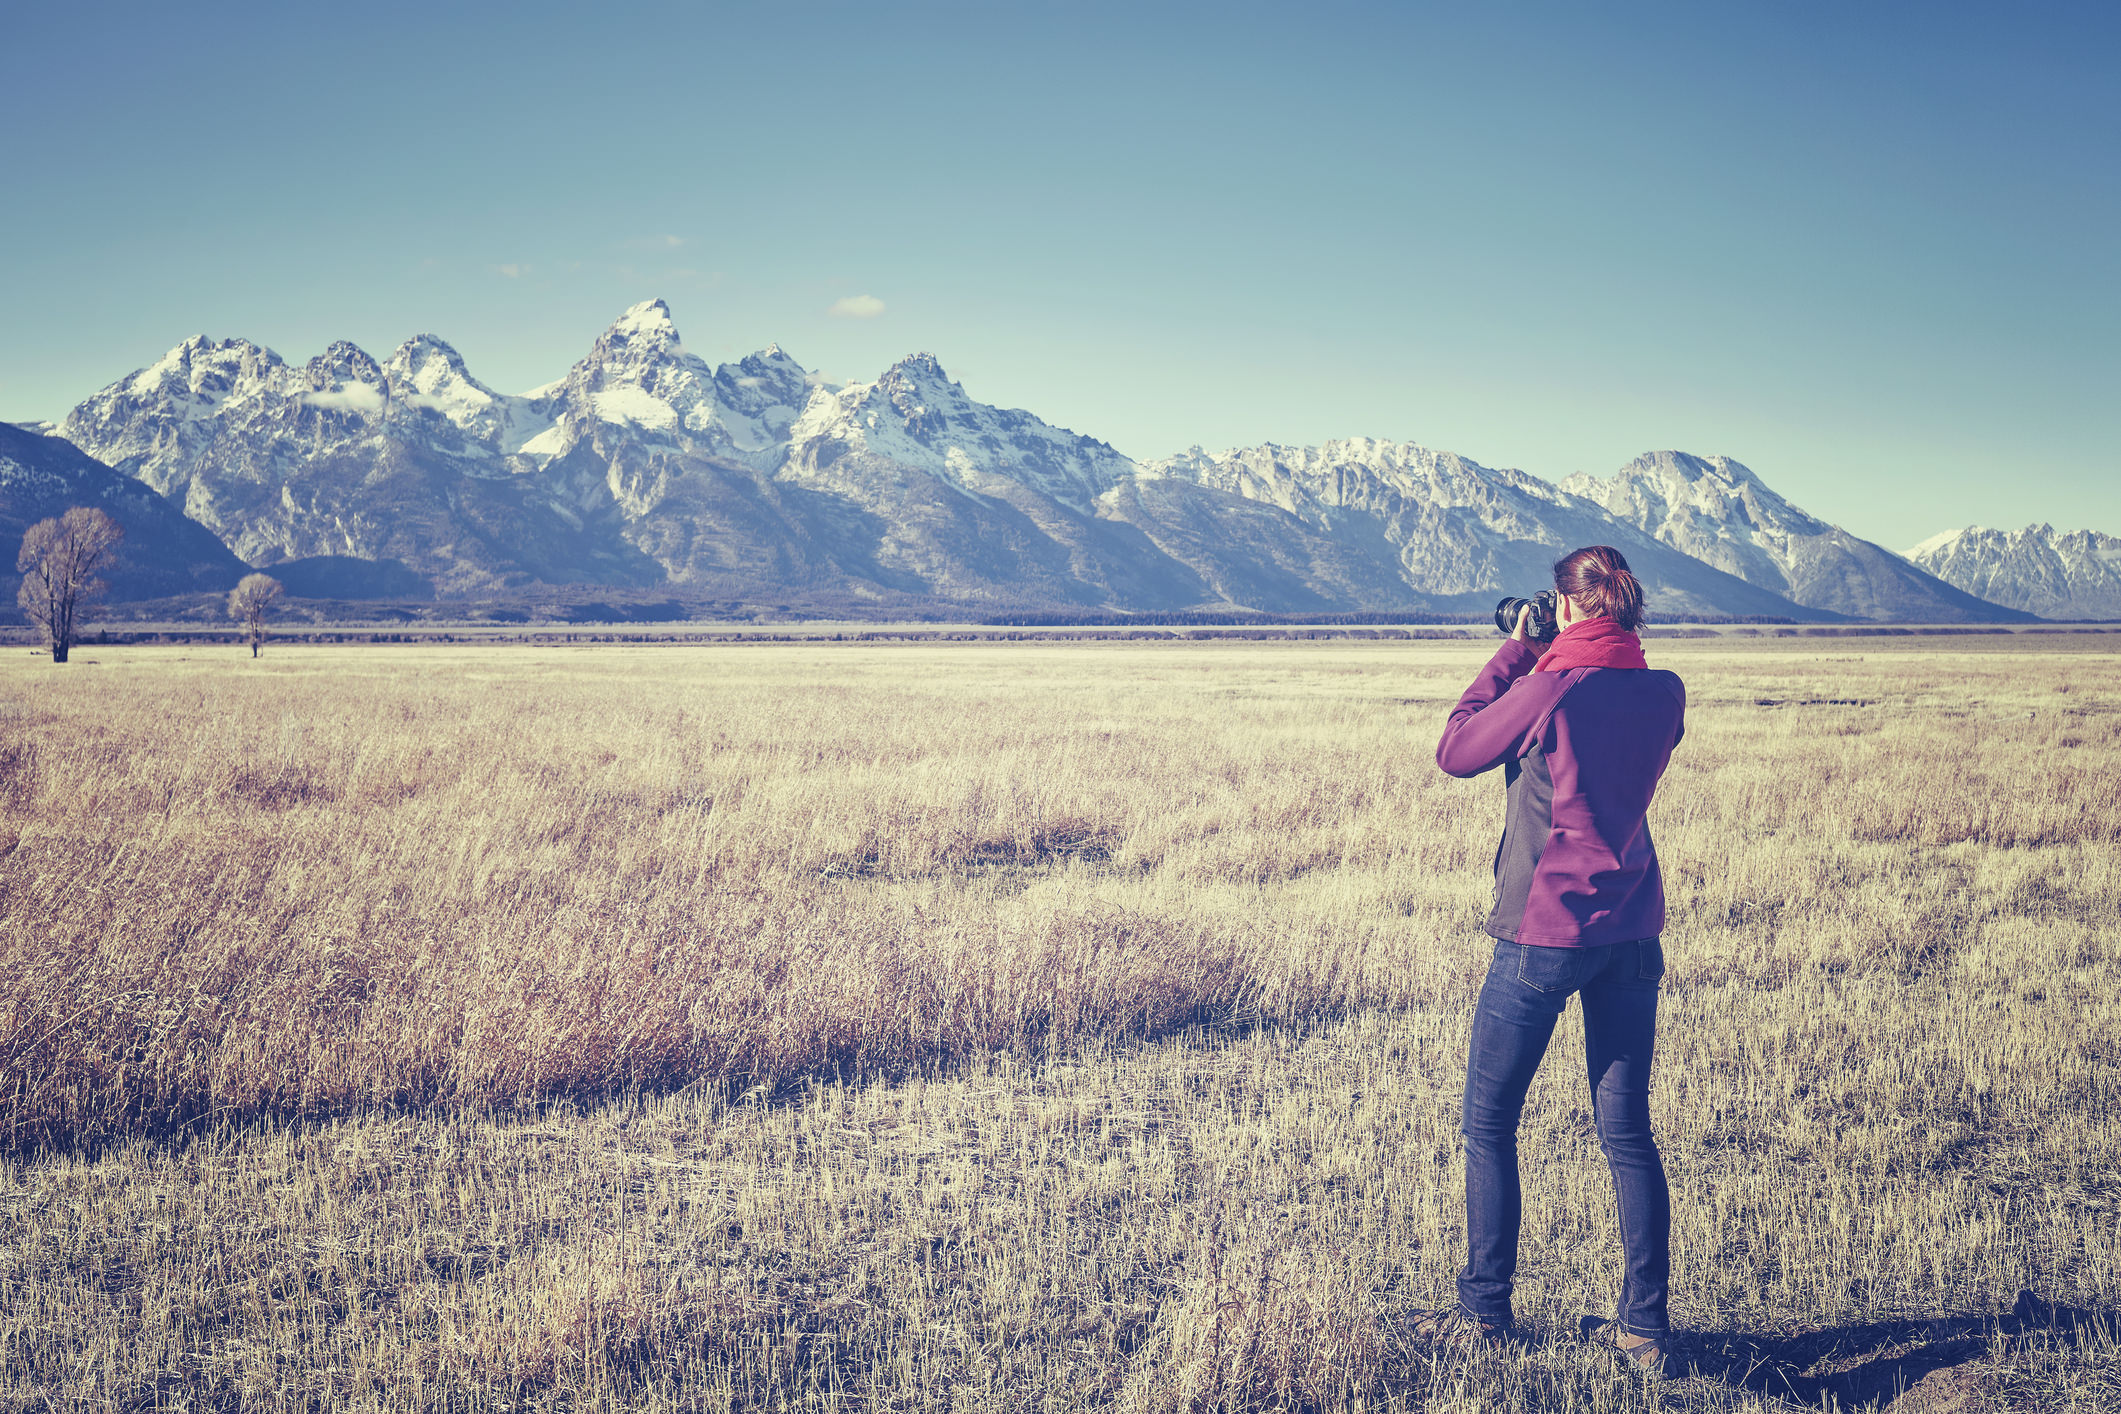
It's been awhile since I was a beginning photographer...
But I remember the trials and tribulations very well!
Photography is such a rewarding exercise, but man, it can be frustrating.
Even though I've moved on to greener photography pastures, I feel your pain if you're just starting out!
There's SO much to learn about photography at the outset.
You have to learn about the best cameras and find the best lenses for the types of photos you want to take, and then you have to learn how to use that gear.
You have to master technical aspects of photography like understanding exposure, but only after you get the individual details down, like what aperture, shutter speed, and ISO are (and what they do).
There's the creative aspect too - all those different tips for composition that help you create a better-looking photo.
It's a lot to learn, and that's why there's so many opportunities for making mistakes when you're just starting out.
And though those mistakes can be frustrating as all get out, they are an opportunity for you to learn even more about photography.
With that in mind, let's examine three common mistakes that beginner photographers make and learn how to avoid them.
Mistake #1: Blowing Out the Highlights
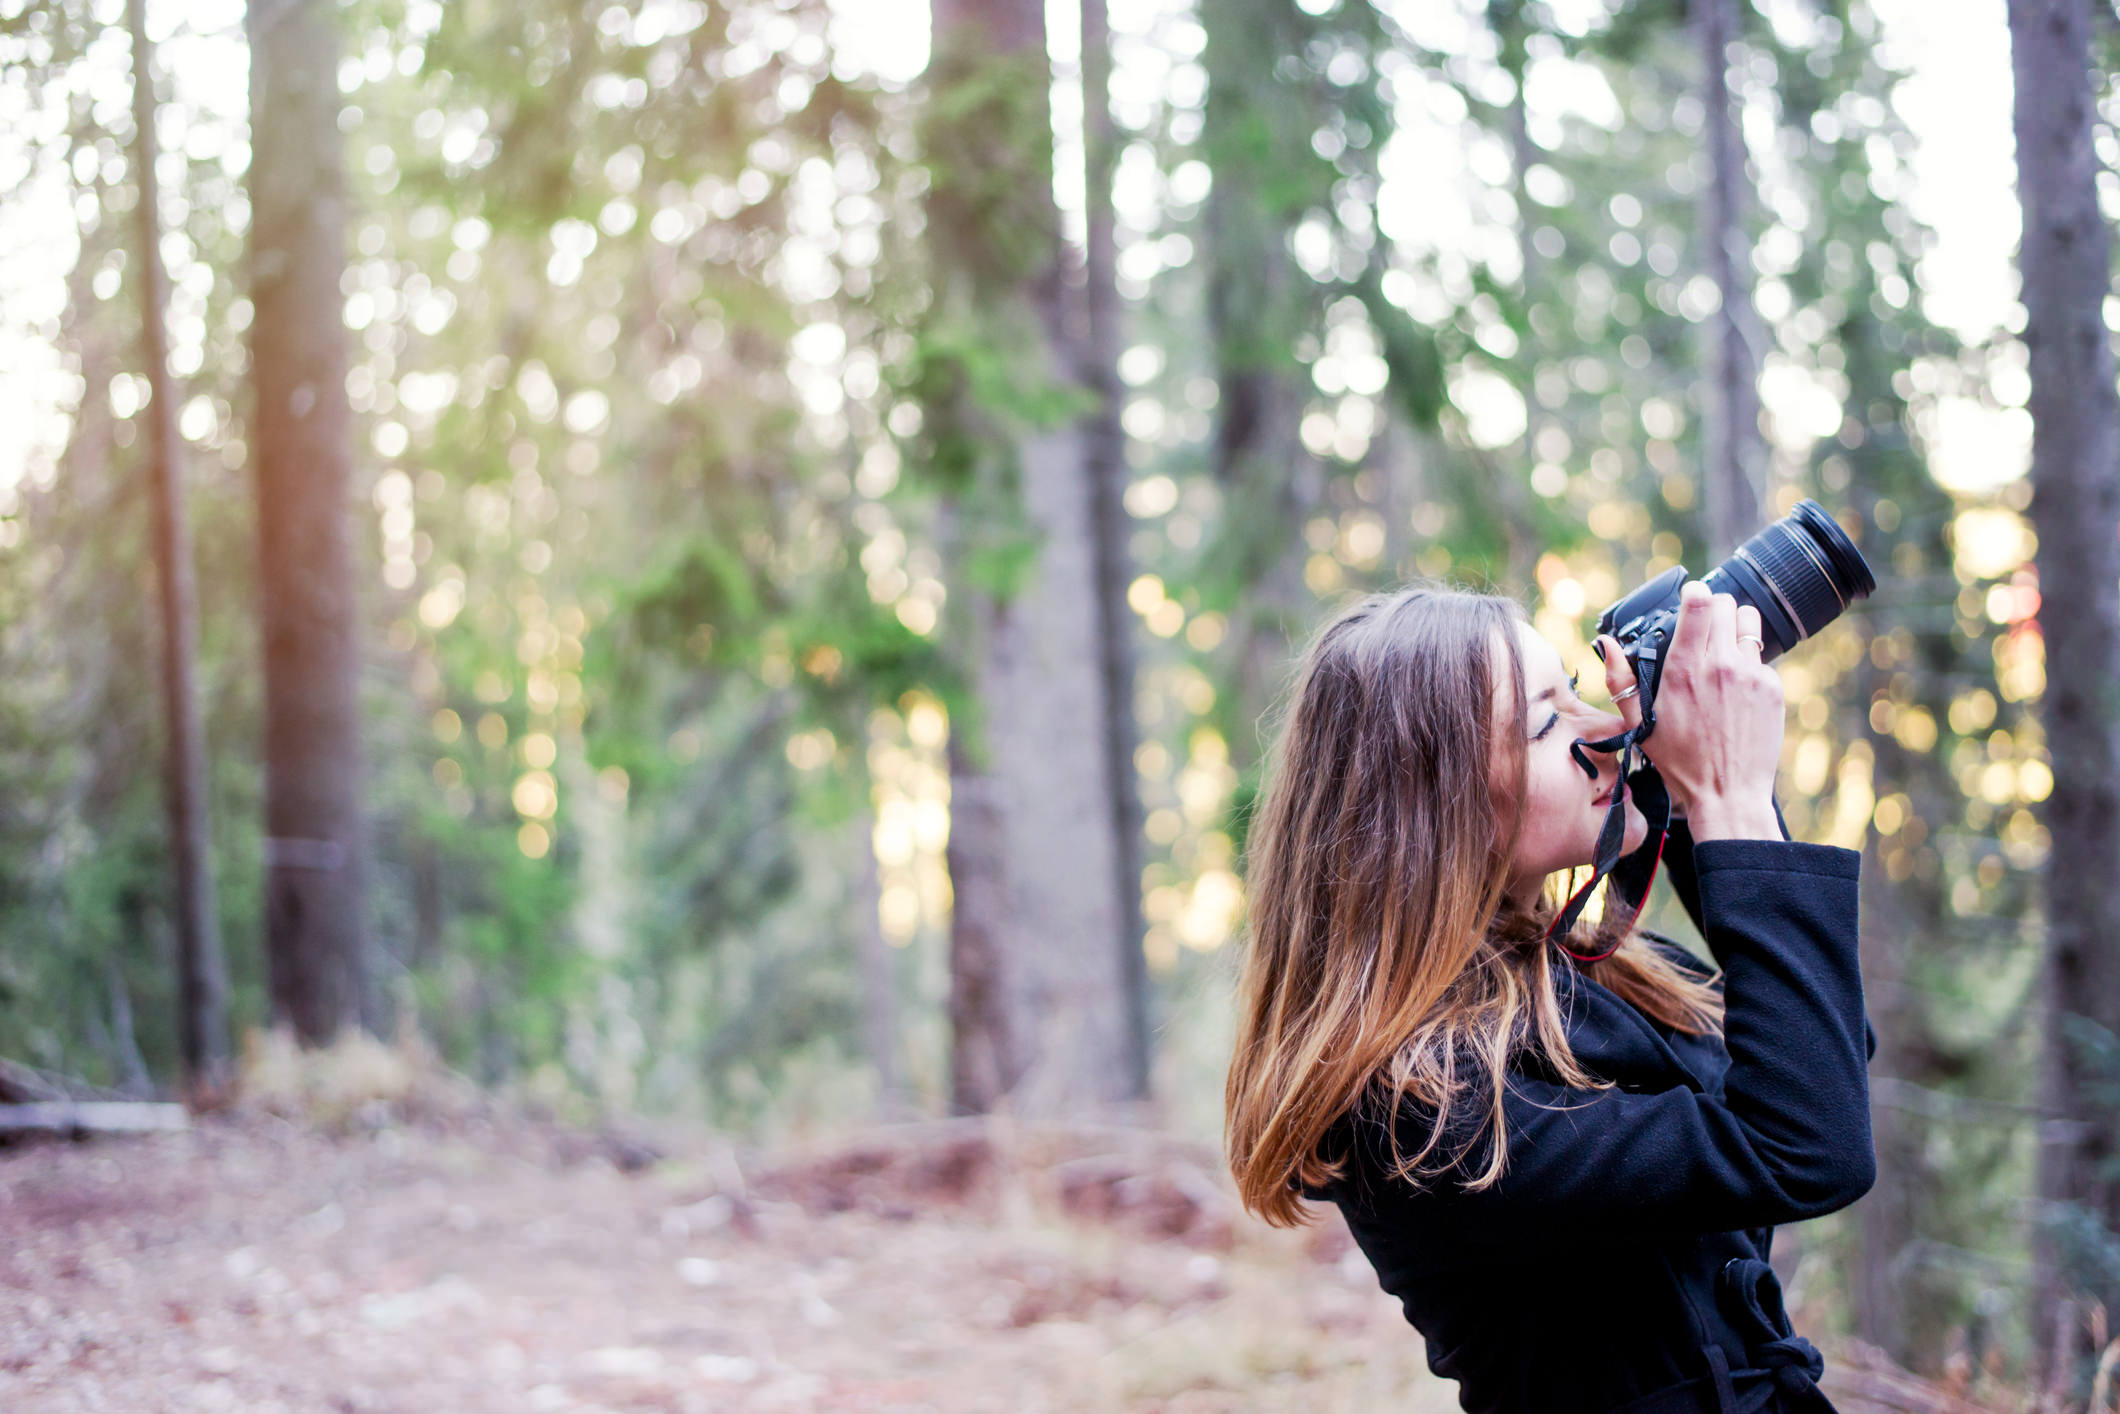
If you've never heard the term "blowing out the highlights," it's a very simple concept to understand.
When you blow out the highlights, details in the bright areas of a photo are lost. That means that those bright areas appear as white blobs instead of having details for the eye to see.
Looking at the image above, you can see the blown out highlights in the areas of sky peeking through the trees.
In this case, the blown out highlights aren't as big of a deal, simply because they are in the background which is heavily blurred.
However, because the areas of sky are so bright, they distract the eye from the subject - the woman shooting photos in the foreground.
The question is, how do you prevent blown out highlights?
That's easy...expose for the highlights!

When you're photographing a subject against a bright background, simply expose the image based on the brightest area of the scene.
What that does is allow you to retain the detail in the bright areas of the shot, thus avoiding blown out highlights.
Then, in post-processing, you can bring up the darker areas of the shot to ensure that the subject is well exposed too.
The reason this works is because it's much easier to bring out the details in a dark area of a photo than it is to bring out details in a bright area.
So, the next time you're faced with a situation in which there's a lot of brightness, simply set your focus point on a bright area, adjust your exposure settings until you see a centered meter reading, and refocus on your subject without changing the exposure.
The resulting image will be underexposed, but you'll be able to rectify that once you get it into your post-processing program.
Mistake #2: Getting Stuck With Posing

Something that you often see in a beginning photographer's portraits is that they are often heavily posed.
And though there's nothing wrong with a formally posed shot, posing can become a crutch that leads to photos that aren't nearly as exciting or as genuine as they should be.
Take the image above as a perfect example of this.
It's a nice portrait, one that is composed well, lit well, and processed well.
However, there's just not a lot of life to the photo, even though each member of the family is smiling and appears to like one another.
Now compare that image with the one below.
In this case, the family portrait has much more life to it.
The action of running towards the camera adds some excitement to the shot, and the fact that the family seems oblivious that the shot has been taken makes this a much more genuine image.
This is done by directing your subjects rather than posing them.
By telling the family to run towards the camera, the photographer elicited a natural response that translates well in a photograph - everyone is happy, active, and interacting with one another.
But you don't have to tell them to run or jump to get a great shot.
Play music, crack a joke, ask them to think about their favorite memory. Any of these strategies will help the subjects relax and give you much more feeling and emotion to capture in your portraits.
Mistake #3: Not Taking Lighting Into Account
Lighting is the most important aspect of photography.
Yet many beginning photographers don't take the lighting into account when they take a photo.
By that I mean, a lot of beginners just start firing the shutter at whatever their subject might be without thinking about how the lighting in the scene impacts the shot.
When taking photos outdoors, you have to consider the type of light the sun is giving off at that point in time.
For example, if you're shooting under the midday sun, you'll find that the light is very bright, has a fairly cool color temperature, and produces very harsh shadows.
That's not a recipe for a very good photo, as you can see above. Note how every person in the shot is squinting, and how the intense midday lighting has washed out their skin, as well as cast harsh shadows.
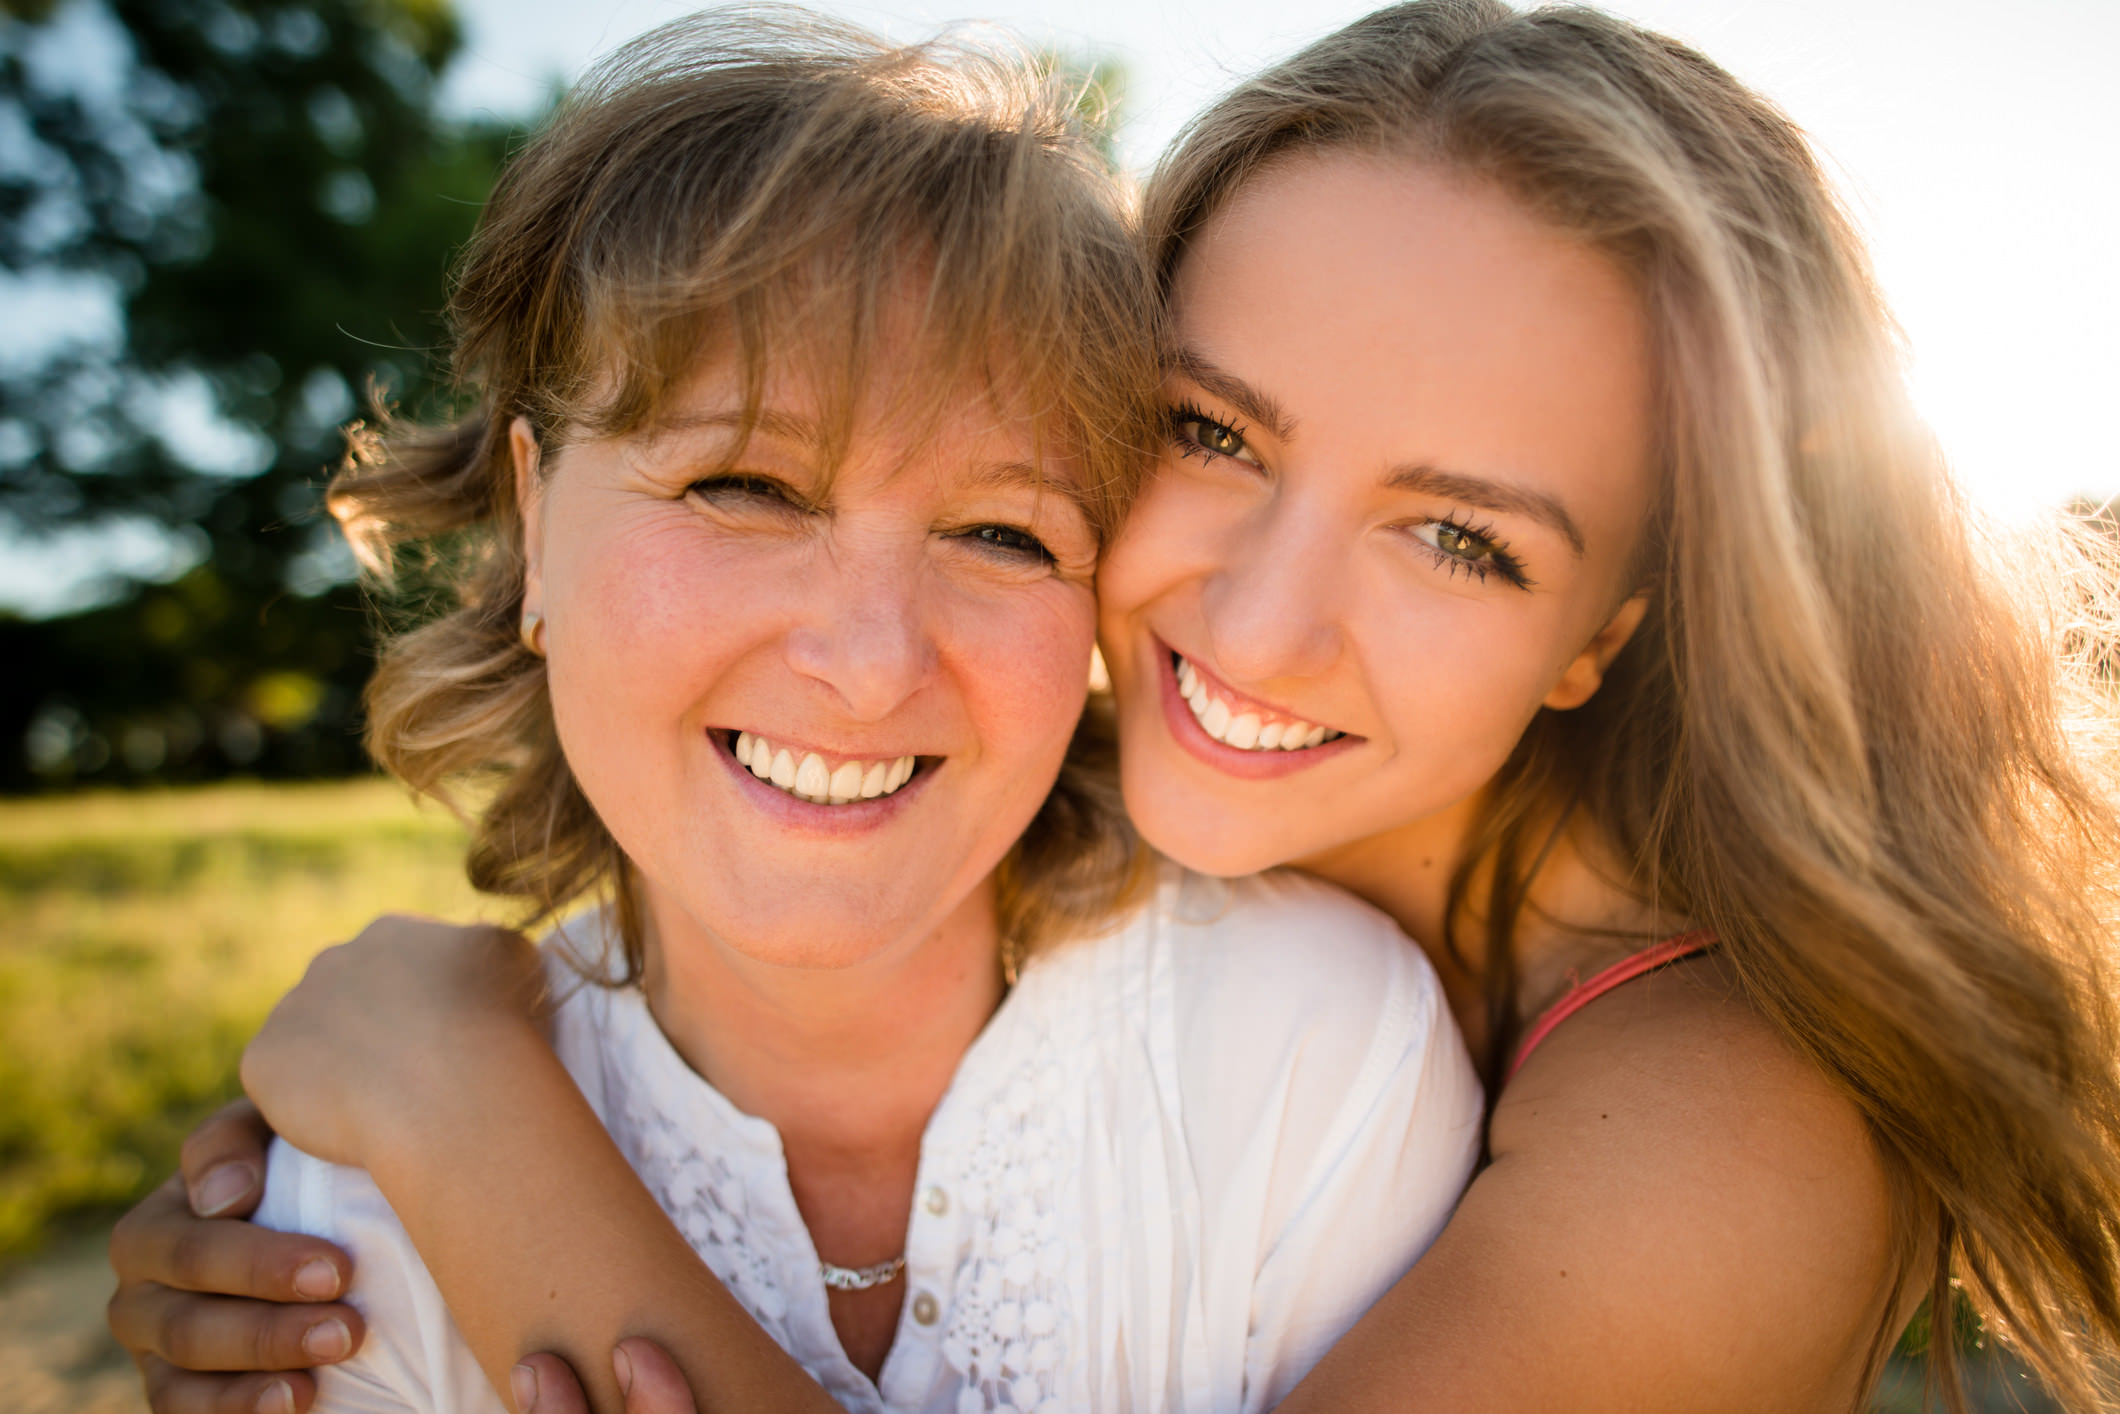
Instead, a much better type of natural lighting occurs after sunrise and before sunset during Golden Hour.
The lighting at this time of day is much softer, and the color temperature is much warmer too.
Looking at the image above, you can see a stark difference in the quality of light between that photo and the one that precedes it.
The harsh shadows are gone, the image is warmed up, and it's a much more pleasing photo to view.
If you can't wait until Golden Hour to take your photos, simply find some shade.
By placing your subject in the shade, you can take advantage of softer lighting without worry of heavy shadows to distract the viewer's attention.
For even more detailed instruction about how to avoid these beginner photography mistakes, have a look at the video below by Mango Street:
We Recommend
Can’t Wait for Golden Hour? No Problem, Just Fake It!

We all know that Golden Hour light is just about the best light you can use for portrait photography. The problem, of course, is that it’s not always possible to get up at the crack of dawn or hang around until just before sunset to take the portraits you need.
But, as Mark Wallace of AdoramaTV explains in the video below, you don’t have to wait for Golden Hour because you can just fake it! All you really need are a few essentials: a flash, orange gel, and a variable neutral density filter, and you’ll be able to replicate the warm, soft glow of golden hour light each and every time. Have a look at the video and see just how easy it is!
Amazon Recommendations
- Heliopan 46mm Variable Gray Neutral Density Filter
- Profoto OCF Color Gel Starter Kit
- Profoto B2 250 AirTTL To-Go kit
We Recommend
Christmas Photography Tips
 Image Credit: martin-dm via iStock
You've got the tree nicely decorated, the gifts wrapped, and your family in their matching ugly Christmas sweaters...
Now all that's left to do is take a few memorable photos.
Ugly sweaters aside, if you want your Christmas photos to go off without a hitch, follow these Christmas photography tips.
From family portraits to photos of Christmas lights, this quick set of Christmas photography tips will get you headed in the right direction.
Let's get started!
Recommended Gear for Christmas Photos
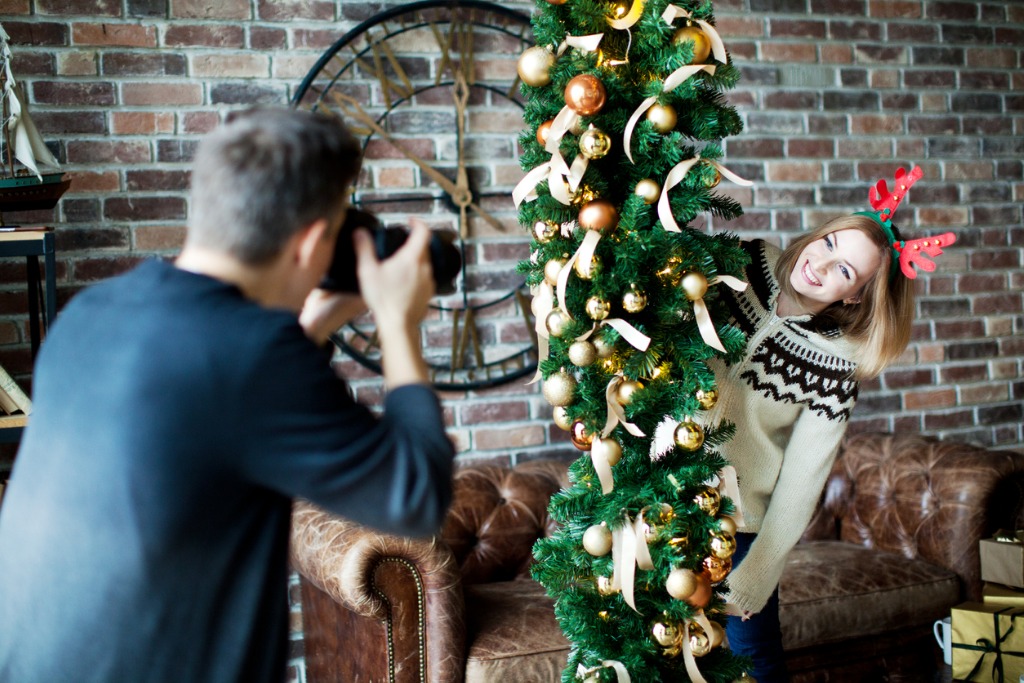 Image Credit: yulkapopkova via iStock
You can take great Christmas photos with any camera - smartphones included.
Having said that, as capable as smartphones are as cameras, having a DSLR or mirrorless system with interchangeable lenses will likely help you be more successful in getting photos of the festivities.
This doesn't mean you need a $3,500.00 camera body, though...
An entry-level DSLR with manual exposure controls and RAW shooting capabilities will give you all the control you need.
 Image Credit: SolStock via iStock
Pair your camera with a solid zoom lens, perhaps something like a 24-70mm.
What's great about a zoom lens like this is that you have a wide range of focal lengths, so you can take group photos at 24mm, fill the frame at 70mm, and have plenty of room to work in between.
Since many Christmas photos are taken indoors in low-light situations, a tripod and remote shutter release are also a good idea to have, that way you can slow the shutter (more on that below) as needed to brighten the exposure without risking camera shake.
Quick Tip: Whatever you do, don't use the pop-up flash on your camera. The light from a pop-up flash is extremely harsh, will wash out many skin tones, and cause harsh shadows. Instead, try using a hot-shoe speedlite like this one that has an articulating head, that way you can bounce the light off a wall or ceiling to soften it.
Recommended Camera Settings for Christmas Photos
 Image Credit: monkeybusinessimages via iStock
I think it goes without saying that there is no magic set of camera settings that will get every single person the best Christmas Day photos.
Having said that, there are some starting points that will help you find your way.
Camera Settings for Indoor Portraits
 Image Credit: ViDi Studio via iStock
Fortunately, there is usually a little more ambient light indoors during the holidays thanks to all the Christmas lights. However, you'll likely find that your camera still needs help to get a properly-exposed indoor portraits, which usually means boosting the ISO. Try the following settings as a starting point for indoor portraits:
- Exposure Mode: Aperture Priority (A or Av on your camera's dial)
- Drive Mode: Continuous
- Focus Mode: Single autofocus
- Metering Mode: Spot
- Aperture: f/5.6
- ISO: 400
- Shutter Speed: Will be set by the camera
By shooting in aperture priority mode, you control the camera's aperture and ISO while the camera controls the shutter speed. This is advantageous because it allows you to have more control over the exposure but without having to worry about all three settings.
If you start out at these settings and find that your images are too dark, try opening the aperture (say, from f/5.6 to f/4).
You'll find that as you open the aperture, that the depth of field is reduced, which can produce beautiful background blur.
Camera Settings for Outdoor Portraits
 Image Credit: AleksandarNakic via iStock
Getting the camera settings just right for outdoor portraits at Christmastime can be a challenge, to be sure.
In some instances, you might be taking photos at dusk. In others, it might be at midday. Some of you might have snow on the ground for your photos while others might be at the beach.
Again, there's no single set of camera settings that will work in every situation, so use the following as a starting point and work from there:
- Shooting Mode: Aperture Priority
- Drive Mode: Continuous
- Focus Mode: Single autofocus
- Metering Mode: Spot
- Aperture: f/2.8 (or the lowest available aperture setting)
- ISO: 200
Notice how in this instance, using the widest aperture possible is recommended. Again, this is to get that nice background blur that will help set your subjects apart from the background in an outdoor photo shoot.
For a few more tips and tricks for great Christmas portraits, be sure to check out the video above by Moose Winans.
Learn More:
Camera Settings for Christmas Light Photography
 Image Credit: JamesBrey via iStock
Your loved ones aren't the only subjects you'll want to photograph at Christmas - what about all those beautiful Christmas lights?!
Give these settings a shot as a good starting point for capturing all that beauty:
- Shooting Mode: Manual
- Drive Mode: Single Shot
- Focus Mode: Single autofocus
- Metering Mode: Matrix
- Aperture: f/2.8 (or the lowest available aperture setting)
- ISO: 400
- Shutter Speed: 1/50th sec
Contrary to our first two examples of portraits, when shooting Christmas lights, it's recommended to shoot in manual mode. Not sure how to do that? Check out this detailed guide.
The key setting here is the shutter speed. If at 1/50th sec the image is too dark, slow it down to 1/25th sec. On the other hand, if the image is too light, speed it up to 1/100th sec.
Getting the ideal shot of Christmas lights will require a little bit of work, but if you start with these settings, you'll be in a good position to get pleasing photos!
Quick Tip: Be careful of setting your shutter speed too low. If there are lights that blink, a slow shutter speed runs the risk of blurring the lights.
Composition Tips for Christmas Photos
 Image Credit: Steve Debenport via iStock
One of the most common mistakes that people make when photographing Christmas is taking a shooting position that's too far away (or zooming out too far).
Instead, challenge yourself to fill the frame with the subject for a more detailed and intimate shot, like the one shown above.
Another top tip is to really focus on having a central, strong subject in each image.
This can be difficult to do given all the lights and decorations associated with Christmas.
But no matter if you're photographing people, Christmas lights, or something in between, your shot needs to have something that stands out and grabs people's attention.
 Image Credit: morrowlight via iStock
When taking outdoor photos, try incorporating tried-and-true landscape photography tips like leading lines to add depth to the shot.
Additionally, bring in foreground elements - plants or decorations, for example - to add dimension to your photos.
When composing your photos - whether indoors or out - pay particular attention to how you frame the shot.
Ensure that all people in the image are fully there - no chopped off heads or knees!
 Image Credit: monkeybusinessimages via iStock
Lastly, since Christmas is all about love and family and friends, strive to capture moments that highlight the relationships between people.
Sure, it's fun to get shots of kids' faces as they open their gifts, but 10 years down the road, the more important shot to you will be the one of your child hugging your spouse or your siblings sharing a laugh.
Focus on those fleeting, yet meaningful moments, and you'll have Christmas photos that you cherish for years to come!
We Recommend
Don’t Shoot Into the Sun: Debunking an Old Photographer’s Tale

It’s a “rule” I’ve heard countless times over the years…
Don’t shoot into the sun.
Now, this isn’t to discount the dangers of aiming your camera directly at the sun. Just like your eyes, your camera can be damaged with all that light coming right down the barrel for a long period of time.
But from a compositional standpoint, the notion that you should never have the sun in the frame is just plain bogus!
When it comes down to it, the capabilities we have with our cameras and post-processing software makes photos that include the sun not only possible, but rife with possibilities for a gorgeous photo.
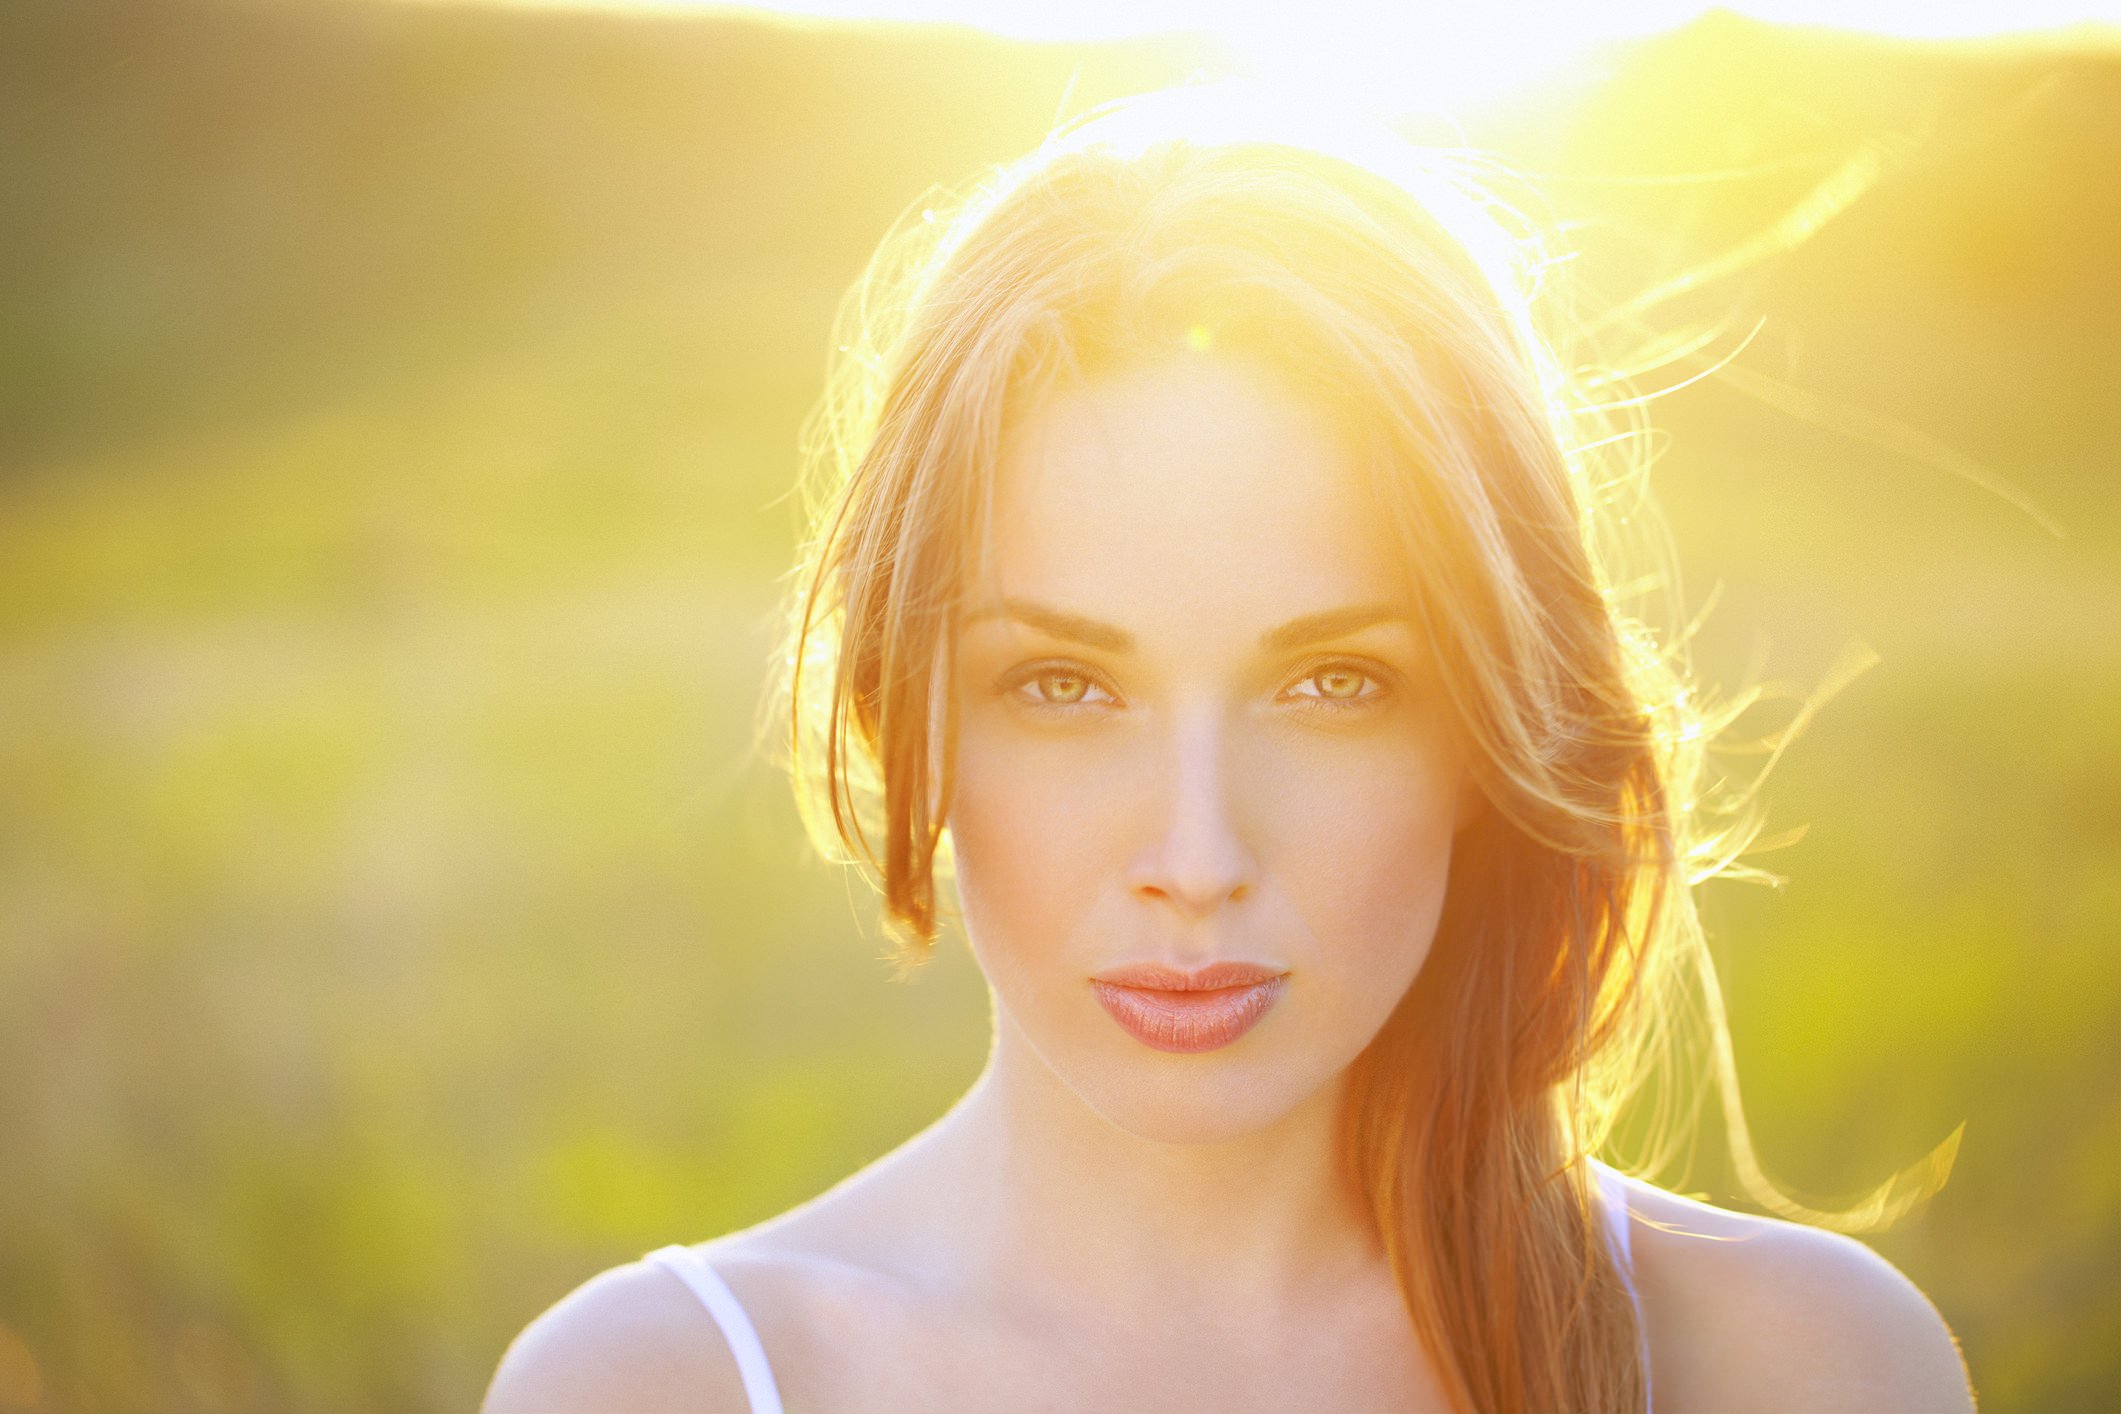
You can create a beautiful backlit portrait, like the one above, that accentuates the shape of the subject, but also includes that beautiful, soft, warm light of the setting sun. Photography is all about lighting, so why not include a burst of it as a background element?
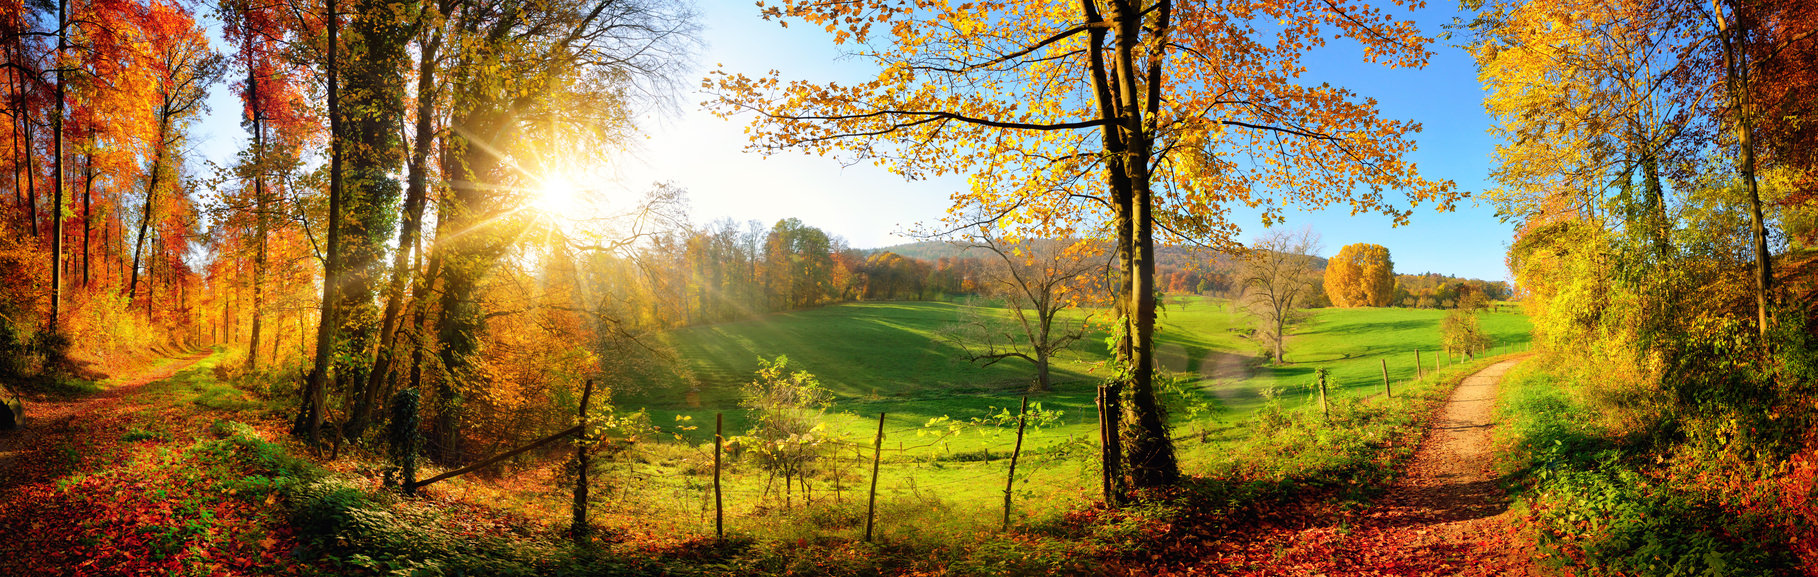
There are opportunities for including the sun in your landscape shots as well. Consider the photo above as a prime example of this. The sun is nearly in full view, with its beams radiating outward that gives this image added visual interest.
What’s more, having the sun directly in the frame gives us a sense of its energy and warmth, which is mirrored in the brightness of the green grass and in the light filtering through the autumn leaves. Just imagine this photo had the sun been behind the photographer - it just wouldn’t be the same!
In the video below, Jimmy McIntyre offers up a few more reasons why shooting into the sun isn’t a bad thing at all, and outlines how the problems it presents (like flare) can be fixed in Photoshop. Follow along as he breaks down some truly spectacular sun-filled images to drive home the point that shooting into the sun isn’t taboo any longer.
Amazon Recommendations
- Adobe Creative Cloud Photography plan (Photoshop CC + Lightroom)
- Adobe Photoshop CC Classroom in a Book
- How Do I Do That in Photoshop?: The Quickest Ways to Do the Things You Want to Do, Right Now!
We Recommend
Easy Portrait Lighting Tips for Beginner Photographers
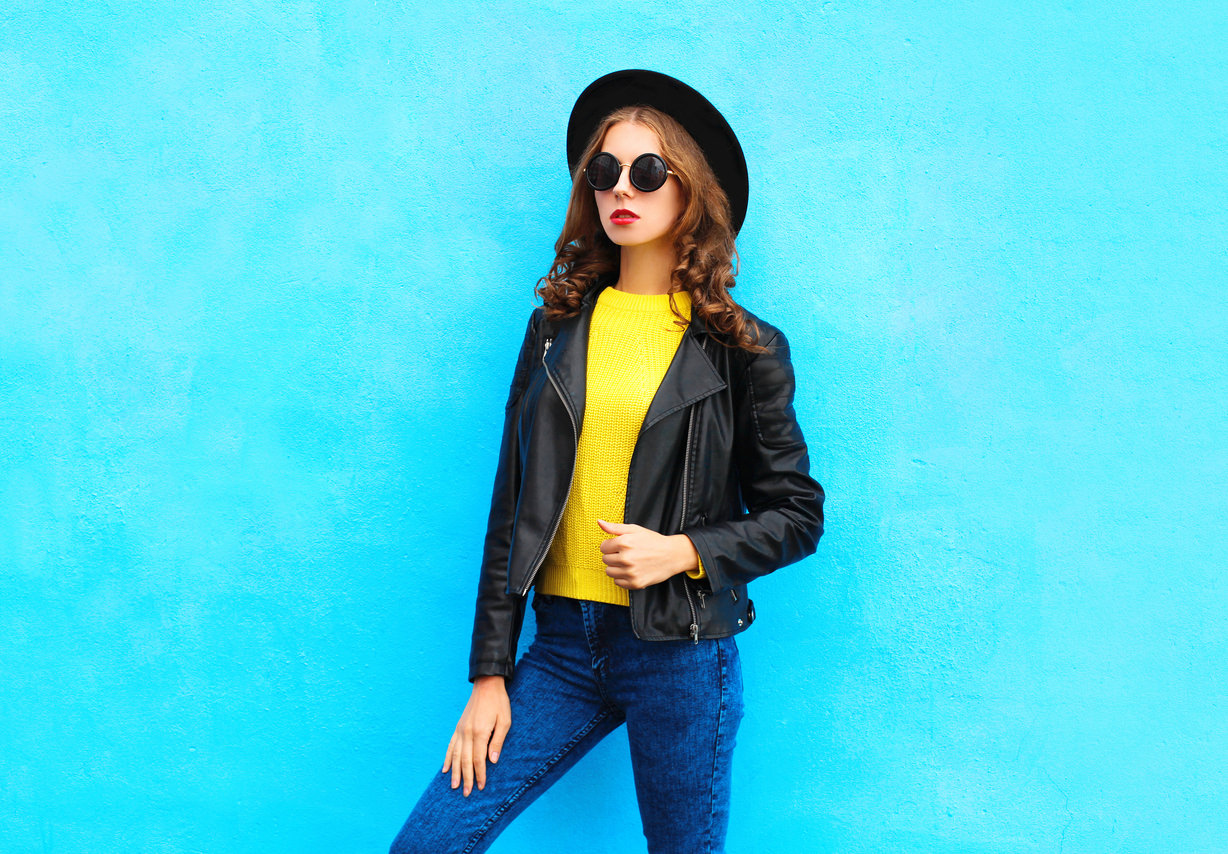
If you ask me, one of the toughest parts of being a beginning photographer is lighting.
And I'm not just talking about using complex artificial lighting setups either...
Even just using simple natural lighting can be a daunting task, too.
The task then, is to figure out how to use light to your advantage, that way you create the most compelling portraits.
Here's three critical portrait photography lighting tips that will help you do just that.
Avoid Bright Highlights

When you have bright highlights in your portraits - and I mean really bright highlights - they are referred to as "blown out."
This means not just that the highlights are incredibly bright but that they also have no detail.
The problem with this is twofold:
First, these ultra-bright areas of the photo will draw the viewer's attention. That means they aren't looking at the portrait subject but instead the distracting blobs of white in the background, as demonstrated in the image above.
Second, since these bright highlighted areas have no detail, they really serve no purpose in the shot. Again, that makes them a distraction and makes the viewer think that they were an unintentional addition to the shot.
So, how do you avoid blown out highlights to get a pleasing result like the image above?
In the field, you can do a number of things...
Seek out a shady area so you aren't shooting in direct sunlight. If that's not an option, use a diffuser to place your portrait subject in the shade.
Another option is to place your subject between your camera and the sun. This is especially useful for sunrise or sunset photos when the sun is low on the horizon.
You can also address blown out highlights in post-processing.
Check the video above by Rob Pullen to learn how to tone down very bright skin tones in a portrait.
Beware of Heavy Shadows, Too

Of course, it's not just bright highlights you need to be careful of, it's also heavy shadows.
When creating a portrait, you want to avoid shadows falling on your subject, particularly on his or her face.
That's because just like bright highlights are a distraction, so too are shadows on the subject's face.
In looking at the image above, note how one side of the woman's face is relatively bright while the other side of her face is in shadow.
In this case, that uneven lighting highlights the woman's nose and grin lines.
Instead, you want the lighting in your images to be even, helping you to focus on the subject's face without distracting shadows.
In looking at the image above, you can see the difference that even lighting makes versus the uneven lighting in the previous photo.
Here, the woman benefits from soft, even lighting that allows us to see her face without any distractions.
As a result, we can see details like her eyes and eyelashes, cheeks, and freckles without having to fight through areas of light and dark.
This type of look is achieved with natural lighting or large studio lights - never the on-camera flash.
Much like before, the way to avoid deep shadows is to take measures to even out the light.
Shooting in a shadowed area, on an overcast day, or using a diffuser to even out the light are all viable options when making an outdoor portrait.
You can also use a reflector to bounce light onto your portrait subject's face to fill in shadowed areas.
Learn how to use diffusers and reflectors in the video above by Tony and Chelsea Northrup.
Make the Subject the Brightest Thing in the Portrait
Another way to ensure that viewers focus on the portrait subject and not something else is to make the subject the brightest element of the photo.
Again, as noted earlier, our eyes are naturally drawn to bright things.
As such, you can use that predisposition to draw more attention to the subject.
In the image above, the man's face is nicely lit, and his brightly colored sweater helps draw our attention to him.
That brightness doesn't have to be in your face, either.
In looking at the image above, the model is the brightest part of the photo in part because of her dress and in part because of the dark background behind her.
Additionally, her skin tones are bright, but not overly bright to be a distraction.
You can use post-processing programs like Photoshop or Lightroom to help enhance the brightness of your subject relative to the surrounding scene.
For an in-depth look at a portrait photography editing workflow in Lightroom, have a look at the video above from Prime Photography.
Final Thoughts

The three tips outlined here will help you get better lighting for your portraits for more pleasing results.
It's not a comprehensive list, that's for sure. That would be a much, much longer article!
Instead, these are simple tricks you can use as a beginner photographer to improve the portraits you take.
It's important to note, however, that these tips aren't something to be applied at all times, in every situation, or with every subject.
As with so much in photography, these rules are meant to be broken.
Take the image above, for example.
Though it's a good rule of thumb to make your subject the brightest thing in the shot, as you can see, the man is actually the darkest thing in the shot.
However, our eyes are still drawn directly to him because his dark suit and skin tone contrasts so well with the bright background.
In other words, the level of contrast is ideal for separating the man from the background, which helps us zero in on him in the image.
For now, though, focus on mastering these three tips, and once you feel comfortable with them, go about seeing how you can break these rules to get better portraits.
We Recommend
Effortless Lighting for Gorgeous Photography
Photography lighting is a key part of making gorgeous images. The term for our craft itself literally means drawing with light so being able to light subjects properly is vital for creating excellent images.
Some photographers of all levels of skill and experience have told me that they wish there was photography lighting that was high-quality, easy to use, and within their budget. We found lights for photography that fit these criteria, theTEKE Reactive and Animated DMX Lighting System.
Here’s a quick look at some of the features that make this new lighting system so exciting for photographers and videographers.
Extreme Portability

TEKE lights are great as portable portrait lights and also double as excellent video lights. The TEKE lights are available in two different sizes, 20-inch and 40-inch, both of which have an end to end sliding mount which can be fitted to light stands, extension arms, or tripod heads.
They’re also battery powered for true portability. The rechargeable lithium-ion battery is built into each light and has up to a 4-hour run time.
Whether you need lights for a fashion shoot, travel photography, or something in between, these lights are just what the doctor ordered from a portability standpoint.
Highly Versatile
TEKE Reactive and Animated DMX Lighting System can be used for video lighting, portrait lighting, small product photography, real estate photography, and just about any other reason you find yourself needing lights for photography.
Part of what makes these lights so versatile is their high CRI (Color Rendition Index) which means you can use them in any situation where you might want high-quality, accurate color lighting.
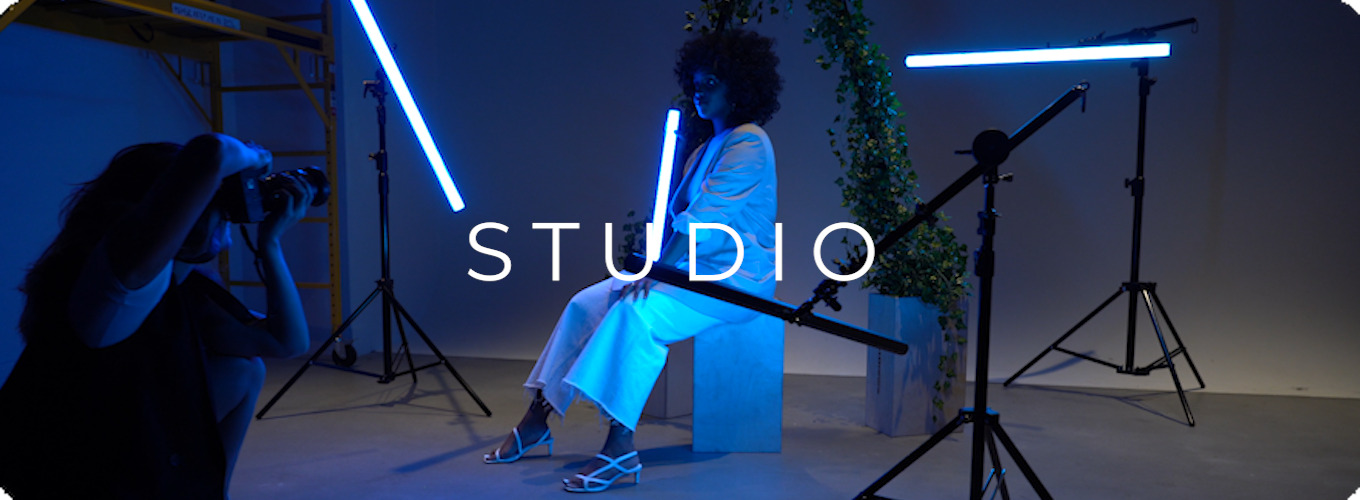
They can be hand held, mounted to a light stand, or mounted to a tripod. They can be controlled individually or together, can be connected together, and you can use animated color gradients to add a unique lighting style to your images.
And that’s just the start! Typical photography lighting might offer the versatility of adjustable brightness or RGB colors. But in the case of TEKE, you get so much more.
Learn More:
- This New Lighting System Will Take Your Photos and Videos to the Next Level
- Portrait Lighting Made Easy
High Lumens
To be usable as portrait lights and video lights, the lights should have some good power behind them. The 20-inch version has an ultra-bright 700 lumen output while the 40-inch TEKE has 1400 lumens.
Coupled with the 90+ CRI, the brightness makes these portable portrait lights a good option for photography lighting of various photographic subjects.
Custom Color Palettes
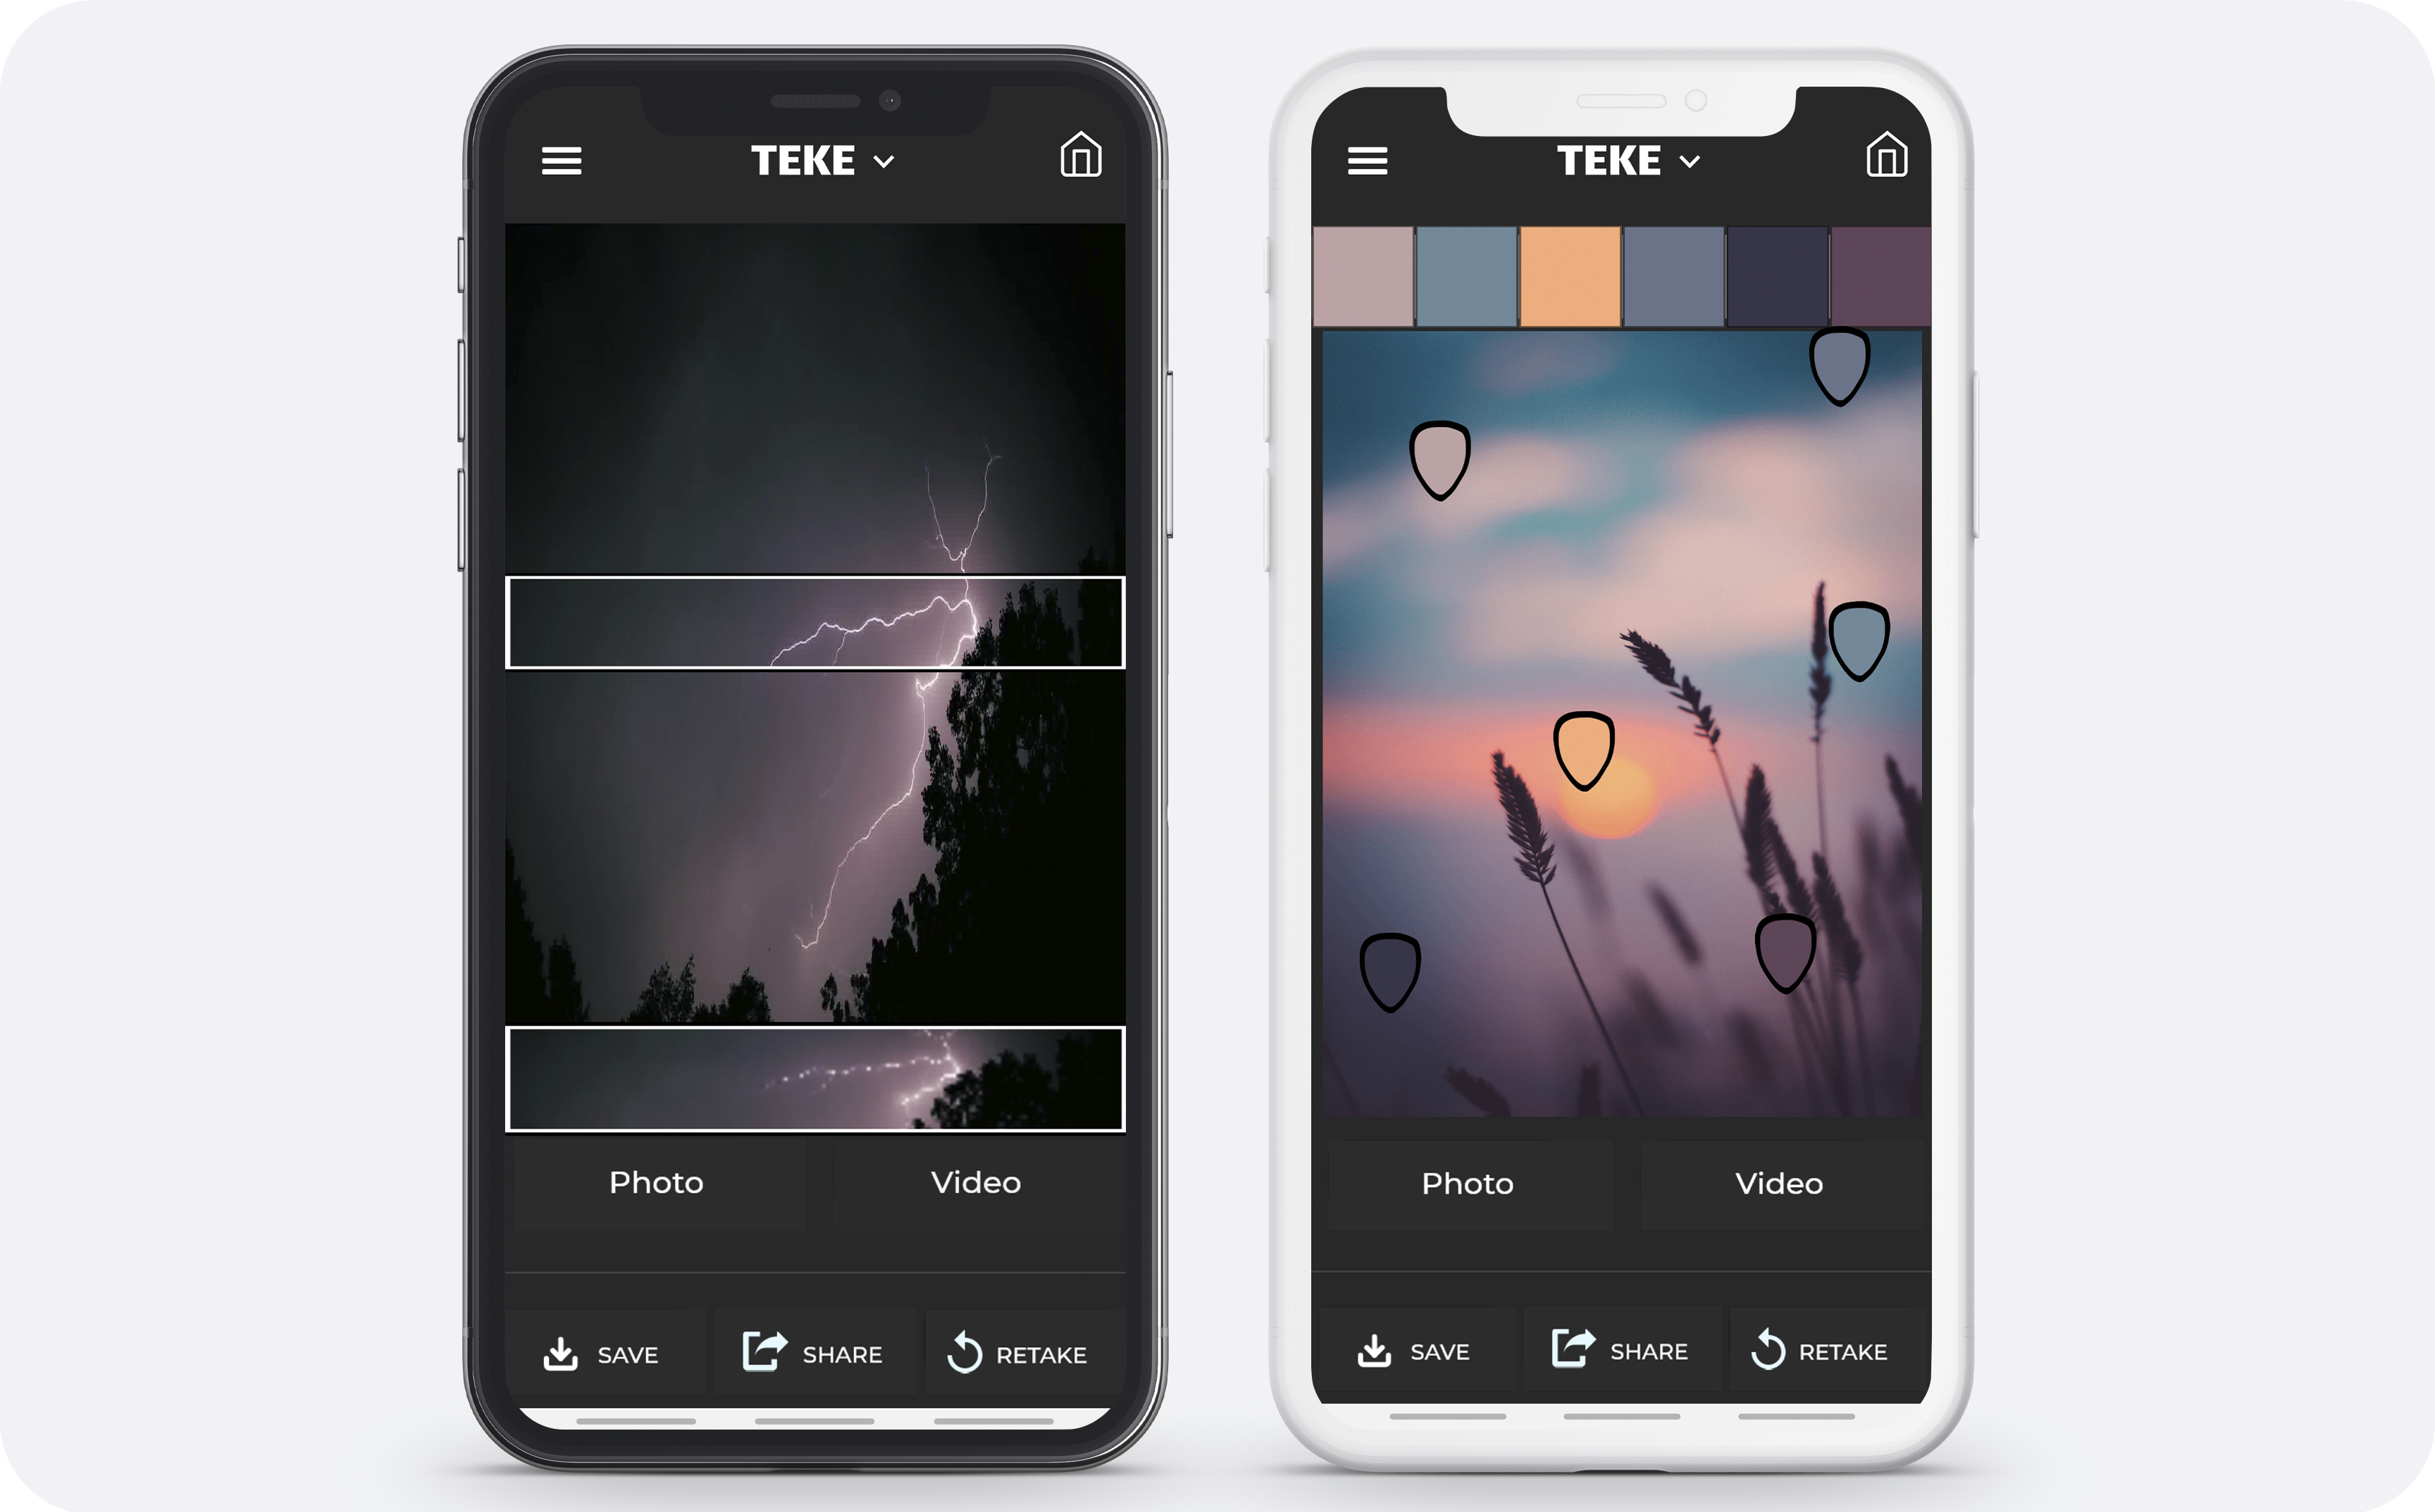
Brightness is one quality for versatile portrait lighting, the ability to adjust color is another. This is especially important when balancing color temperature to mix with bright ambient lighting such as outdoors in sunlight or under bright indoor lighting.
A custom color palette can also be used to enhance believable background color, to create moods, or for a variety of special effects in your images. And if this sounds complicated to do, TEKE makes it super easy.
Simply upload a photo or video, adjust the selection points to the colors you want to use, and the app will take it from there, copying the color temperature, shade, hue, and brightness of the selected pixels.
Smartphone App Control
The TEKE Reactive and Animated DMX Lighting System has a smartphone app that controls all the various functions this light has, making them very easy-to-use portrait lights.
Quickly set the mood for the shot with dynamic, animated lighting. You can create and save lighting setups, palettes, and animated effects for future use as well. Add in synchronized DMX lighting effects, pulsing gradients, effects, moods, and movie looks, and you have a wealth of capabilities right at your fingertips.
The smartphone app also opens up the capability to use the next two features.
Reactive to Sound
You can set these lights up to come on, turn off, change color, or change brightness in response to sound cues. This opens up a wide range of possibilities for fun portrait lighting or for video productions. This is especially true given that you have access to a library of sound reactive effects. Again, it’s a matter of a few taps on your phone’s screen to set the mood with sound-reactive lighting.
DMX Enabled
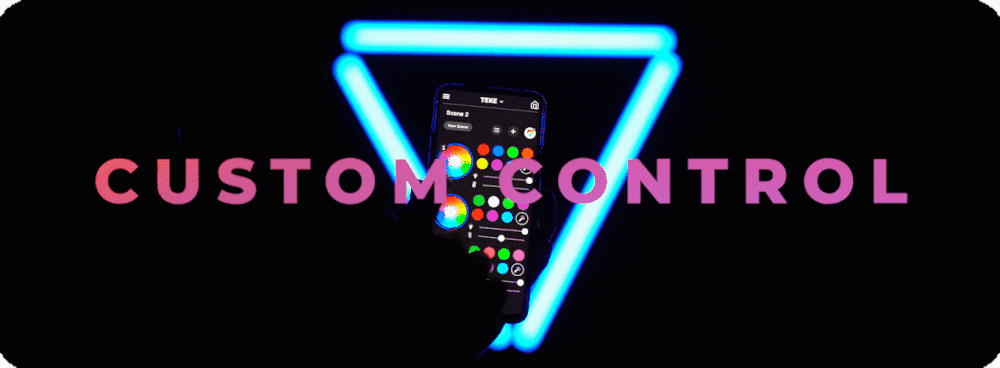
DMX is a huge feature for modern photography and videography. It is a mix of remote control and preprogramming that works with photography lighting, audio components, and special effects for either portrait lighting or video production. The TEKE Reactive and Animated DMX Lighting System has DMX control for professional dynamic lighting environments that puts technology used on Hollywood productions right in the palm of your hand (and at a fraction of the price!).
It’s Like Having Your Own Personal Lighting Assistant!
Thanks to the smartphone app, rechargeable battery for true portability, custom color palette, high CRI, ultra bright output and DMX control, it’s like having your own personal lighting assistant for your photo shoots.
Wi-fi DMX control gives the TEKE light an edge in distance and reliability over other smartphone apps reliant on Bluetooth or IR line of site. This means you have even greater flexibility to create gorgeous lighting for your shots.
Reasonable Price
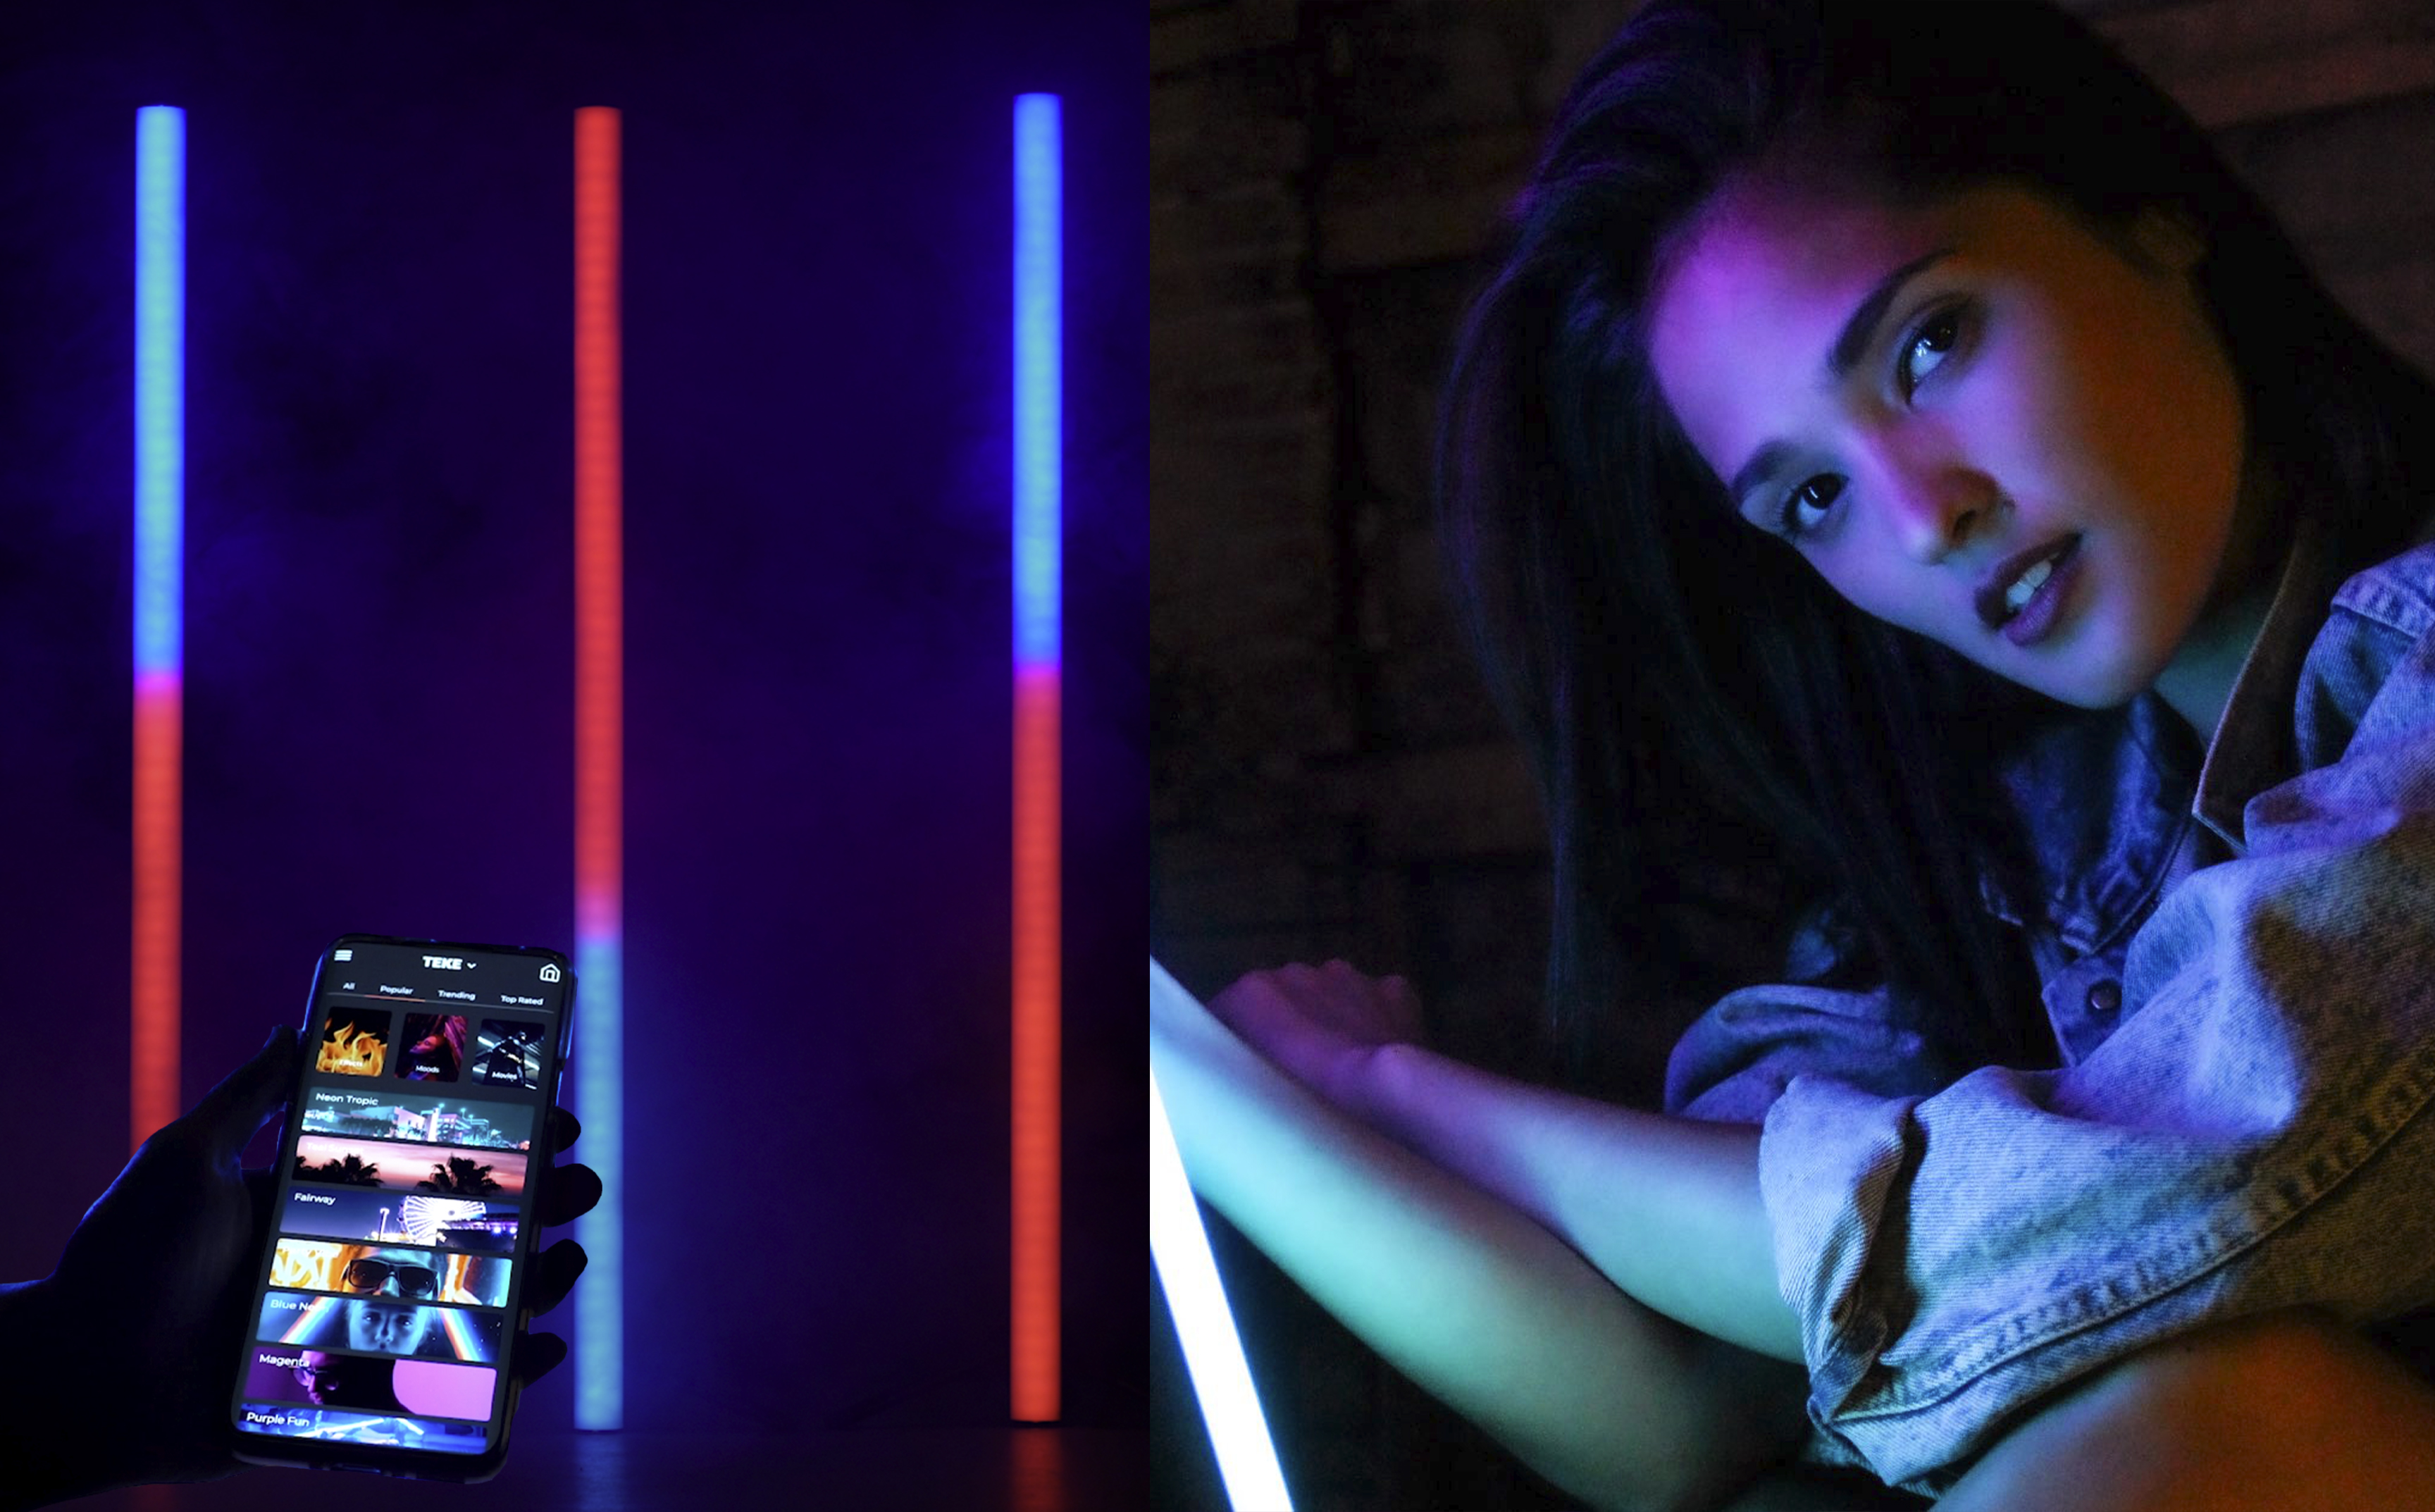
Given all that the TEKE Reactive and Animated DMX Lighting System can do for your photography lighting, it is surprisingly low in price. The TEKE Kickstarter campaign will let you get on the deals quicker than the general public so go check it out and see what level you want to join.
When I find something really useful, beneficial, and well priced for photography gear, I like to share the news and the opportunity. This photography lighting system has great features, is high quality, easy to use, and very nicely priced for all it does.
A good system for photography lighting will open up creativity, increase our photographic reliability, and provide us with a means to create gorgeous photography without difficulty. The TEKE Reactive and Animated DMX Lighting System is just such a system usable for still photography and videography and with advanced features seldom found in lighting for a reasonable price.
Learn More:
- Features to Look for in Video Lighting
- Elevate Your Creativity With Your Own Personal Lighting Assistant
We Recommend
Essential Mobile Photography Tips
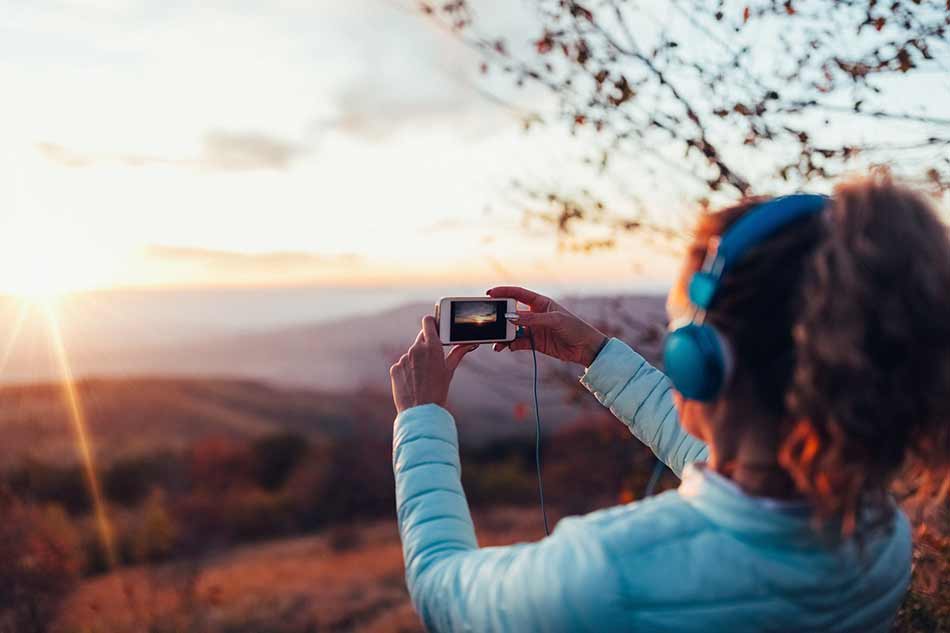
I'll just come right out and say it: of all my cameras, my iPhone is the one that gets the most usage.
It's my go-to daily camera because it's always there with me, it's easy to use, and in a lot of situations, it takes pretty good photos.
That doesn't mean that I never take my Nikon D810 out for a spin or leave my Sony a6300 at home all the time.
I'm just saying that with the massive improvements in mobile phone cameras over the years, it just makes sense to use my phone more often than not.
Since most of us are in that same boat of using our phones as our primary cameras, I thought it would behoove me to share a few tips and tricks for getting better results with mobile photography.
Invest in Some Apps
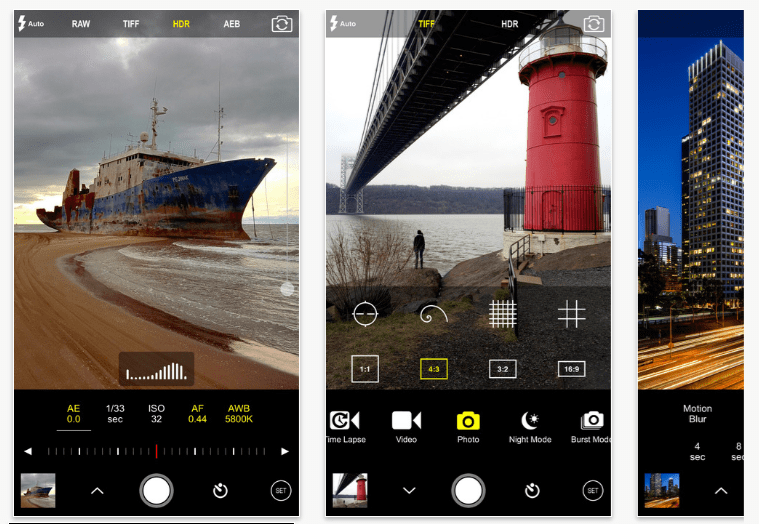
Just like your "real" camera needs some accessories to extend its capabilities, so too does your smartphone.
Getting apps for controlling the camera and giving you increased processing capabilities is task number one.
When it comes to controlling the camera, iOS users might look into ProCam 4 (shown above), which gives you full manual controls to manipulate shutter speed and ISO. You can also control white balance, bracket exposures, and shoot in RAW, assuming you have a new enough iOS device.
ProCam 4 isn't available for Android phones, but a similar app is Proshot, which also gives you exposure controls, RAW shooting, focus assist, and a host of other handy features.

Once you take your photos, you need apps to process them, and few are better than VSCO Cam.
Available for Android and iOS devices, VSCO has an incredible array of post-processing features, from some of the best filters available today to pinpoint controls over things like exposure, sharpness, tint, shadows and highlights, temperature, and saturation.
VSCO's controls are well-organized and easy to use - adjust the intensity of a filter by using a slider. The same goes for making adjustments to the items listed above.
In other words, it's dead simple to add some pizzazz to your photos with VSCO Cam. It's even got its own little community so you can share your photos with other VSCO lovers.
Invest in Some Hardware Too
Just like you need to give your DSLR or mirrorless camera a stable base to get a better photo, your smartphone benefits from a stable base too.
That's where Grip & Shoot comes in...
The beauty of this little gadget is that it allows you to actually hold the phone steady because you have a grip to hang onto.
That means no more hanging onto your phone with both arms extended away from your body.
But it's not just about having a solid grip. Grip & Shoot also makes triggering your shutter easier.
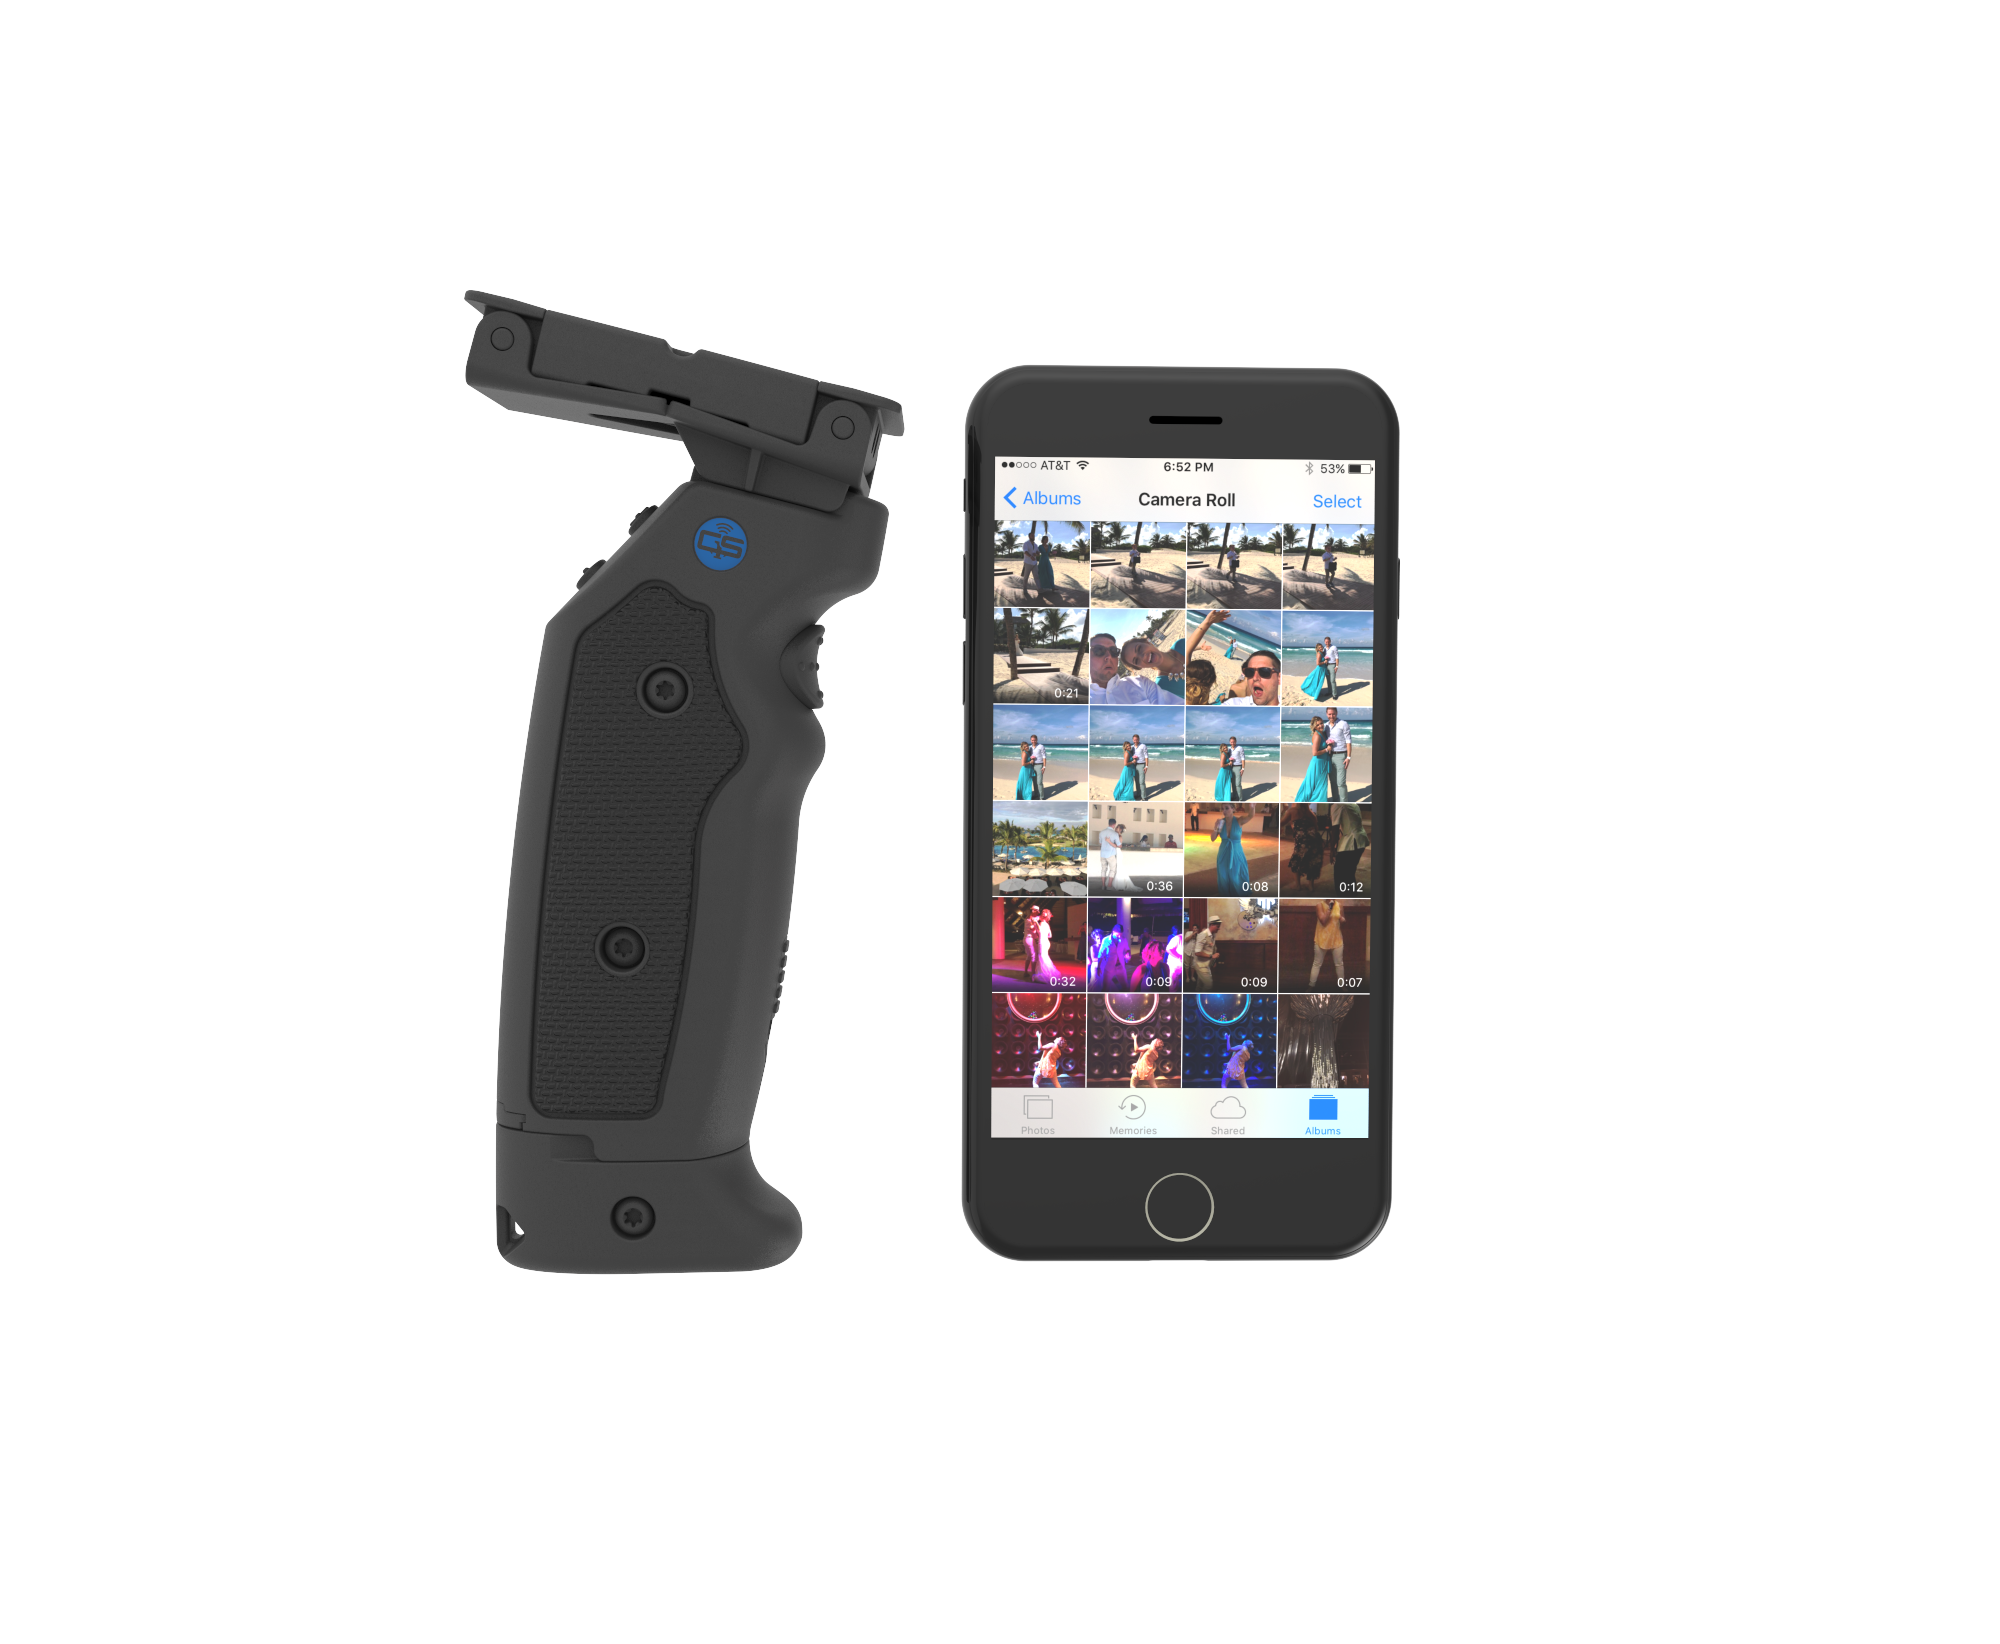
Think about it - you're usually holding the phone with both hands to steady it, and have to manipulate your fingers to tap the shutter button on the screen, right?
With Grip & Shoot, you can fire the shutter with the integrated trigger on the handle.
There's other buttons on Grip & Shoot too, and they're programmable. If you have a little coding knowledge, you can make them control whatever you like!
Even better, the Grip & Shoot has a detachable grip. That means you can put your phone on a tripod, take the grip with you, and be in a group shot or take a selfie from up to 100 feet away with Bluetooth connectivity. It's also Android and iOS compatible.
Talk about a great way to take a better smartphone photo!
Learn more about Grip & Shoot.
Use Common Rules of Composition
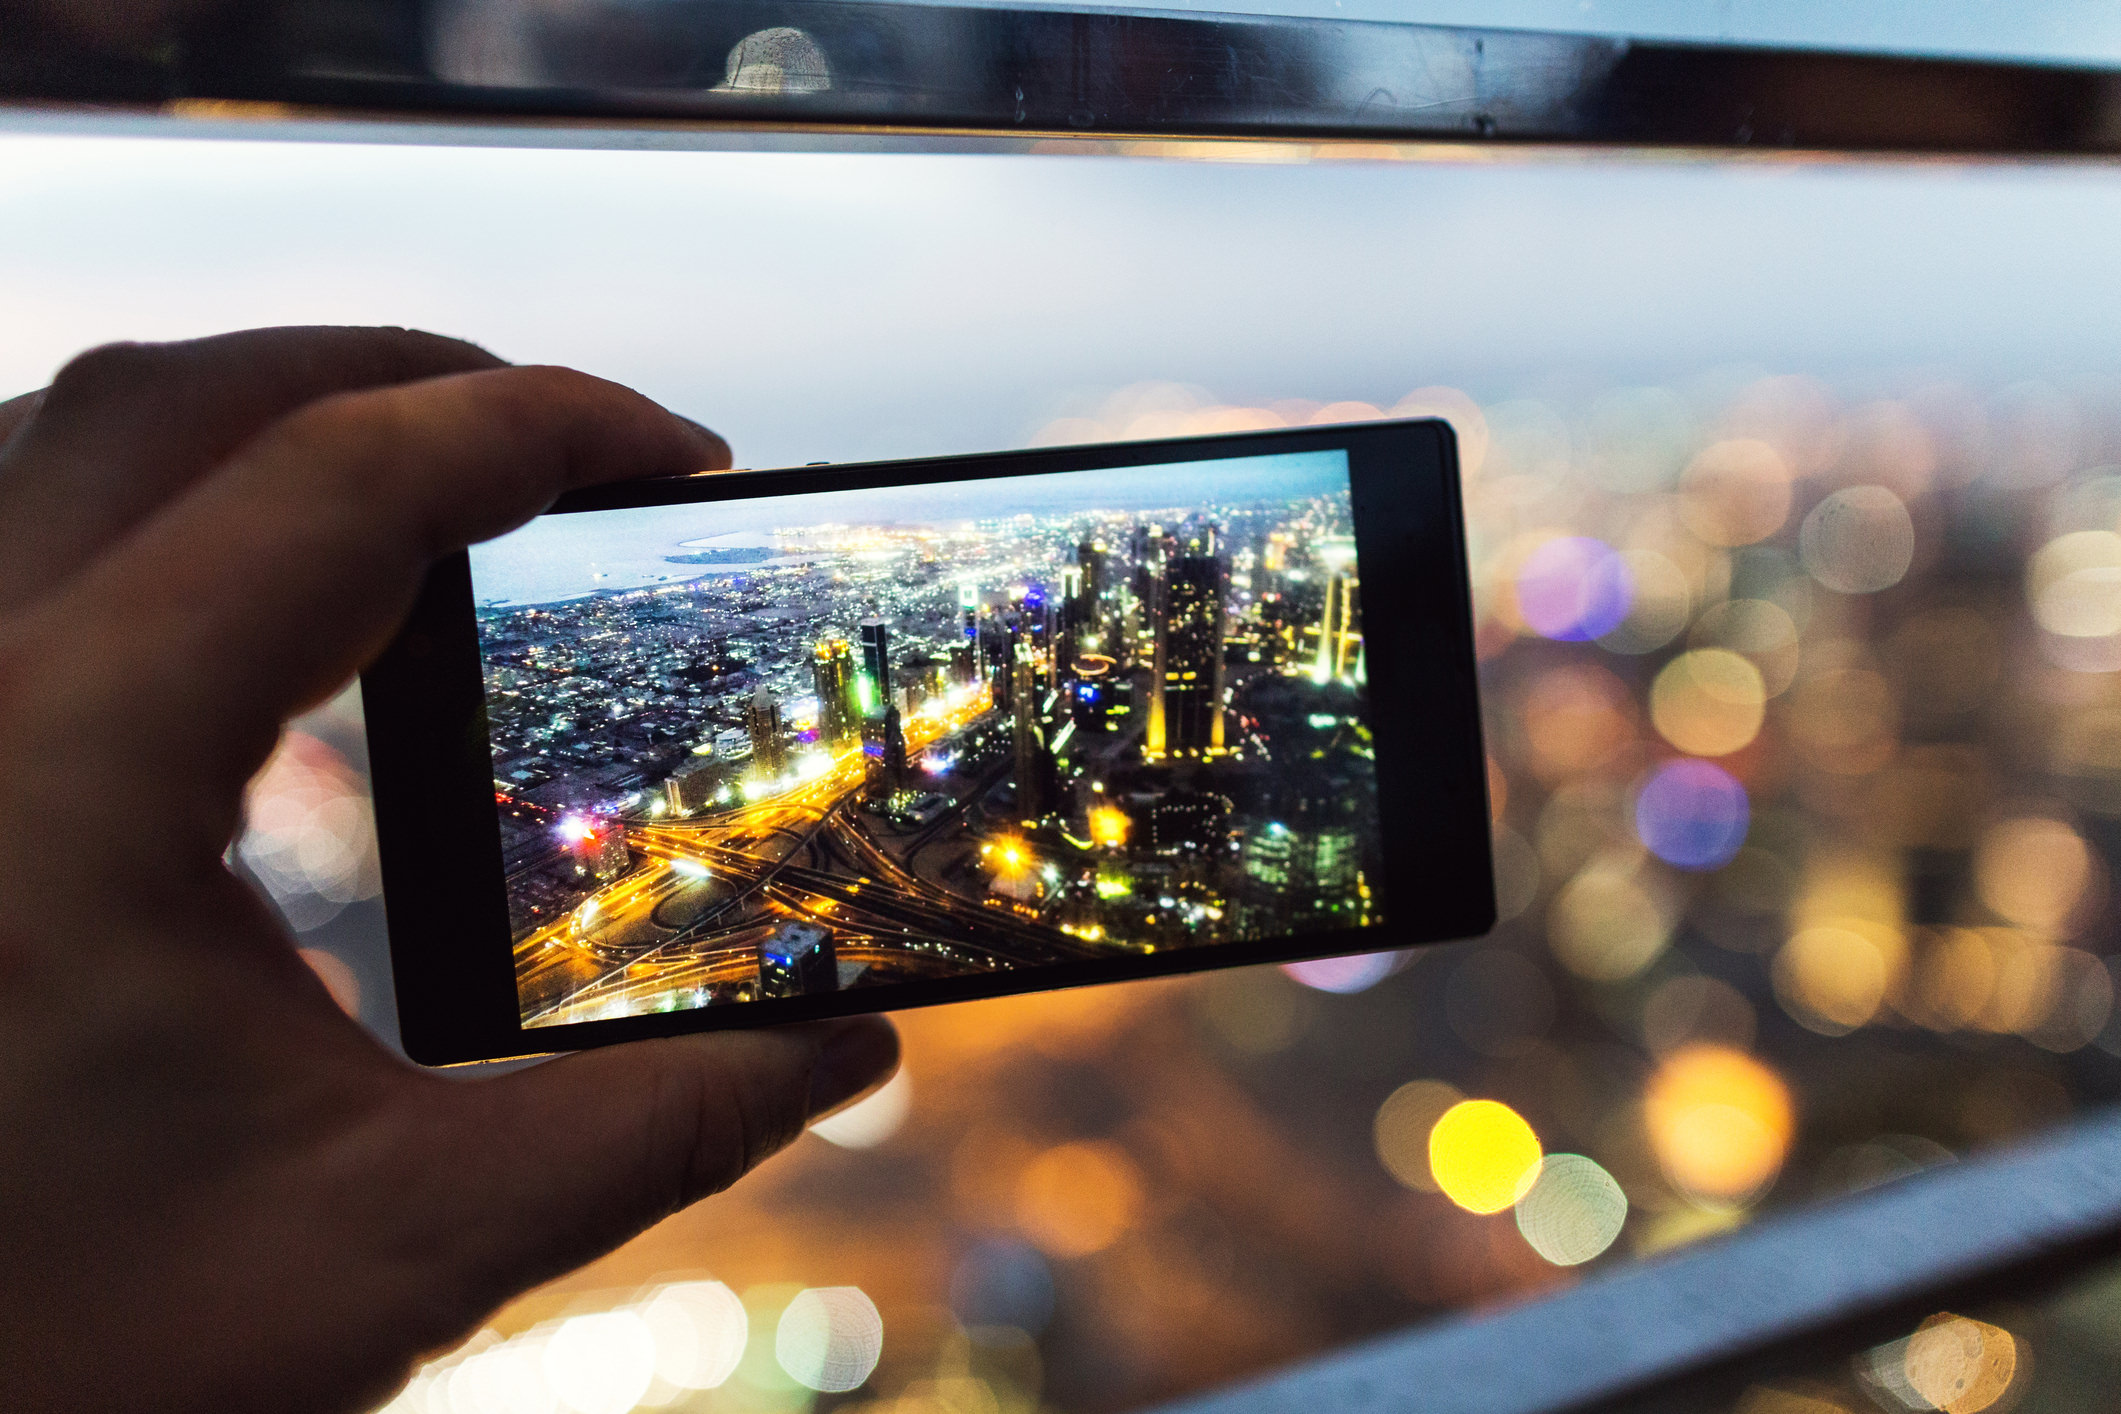
Just because you're using your phone doesn't mean that the traditional rules of photography composition don't still apply.
That means using the Rule of Thirds to create a more balanced and interesting shot.
When taking a portrait, that also means watching the background to make sure it isn't distracting. Minimize crazy colors, look for branches that appear to stick out of your subject's head, and be wary of areas of light and shadow that might interfere with the viewer's ability to connect with the subject.
When taking photos of landscapes, include foreground interest to draw viewers into the shot. Also strive to have a strong subject that acts as an anchor point of interest that grabs the viewer's attention.
No matter the subject, it's also necessary to think purposefully about the perspective from which you shoot.
Get low to emphasize foreground interest and the size of the subject. Get up high to show the scale of the scene and make your subject look smaller.
The key is to not simply point and shoot. Instead, take a few seconds to examine the subject matter and think about ways you can capture it in an image that's unique and interesting.
Pay Attention to Light
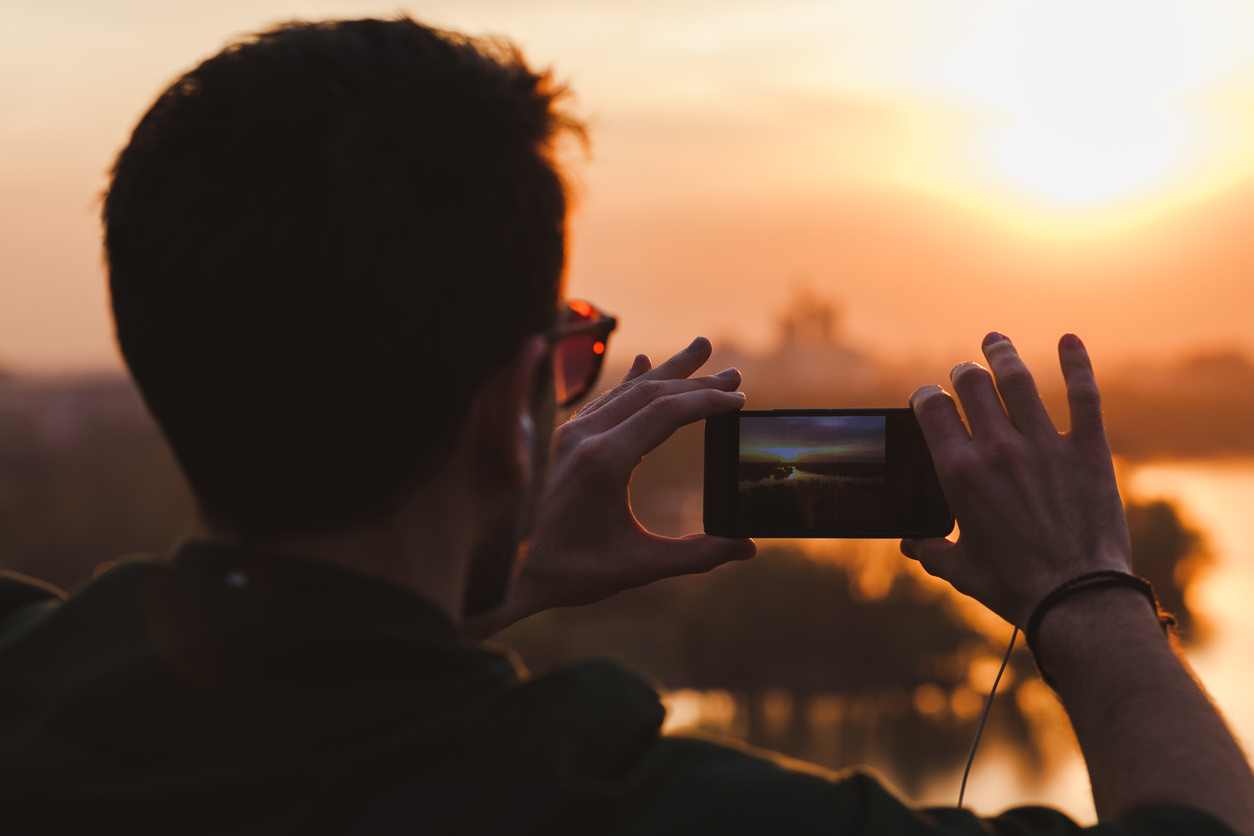
Lighting is crucial for a number of reasons.
On the one hand, smartphone cameras just don't have the same ability to manage light and shadow as well as traditional cameras. You don't have the luxury of changing the aperture or lens to get a different take on the scene, so you have to work with what the light gives you.
On the other hand, no matter what camera you use, it's important to consider the type of lighting you have available.
When it comes to natural light, it's much warmer and softer near sunrise and sunset. The result is images that are usually more pleasing to view with less contrast and fewer harsh shadows.
Light in the early morning and late evening is also highly directional. That is, it comes into the scene at a low angle, producing beautiful, long shadows that create tons of visual interest.
If you want the most impact, look for this kind of lighting when shooting with your mobile phone.
Add Your Own Interest
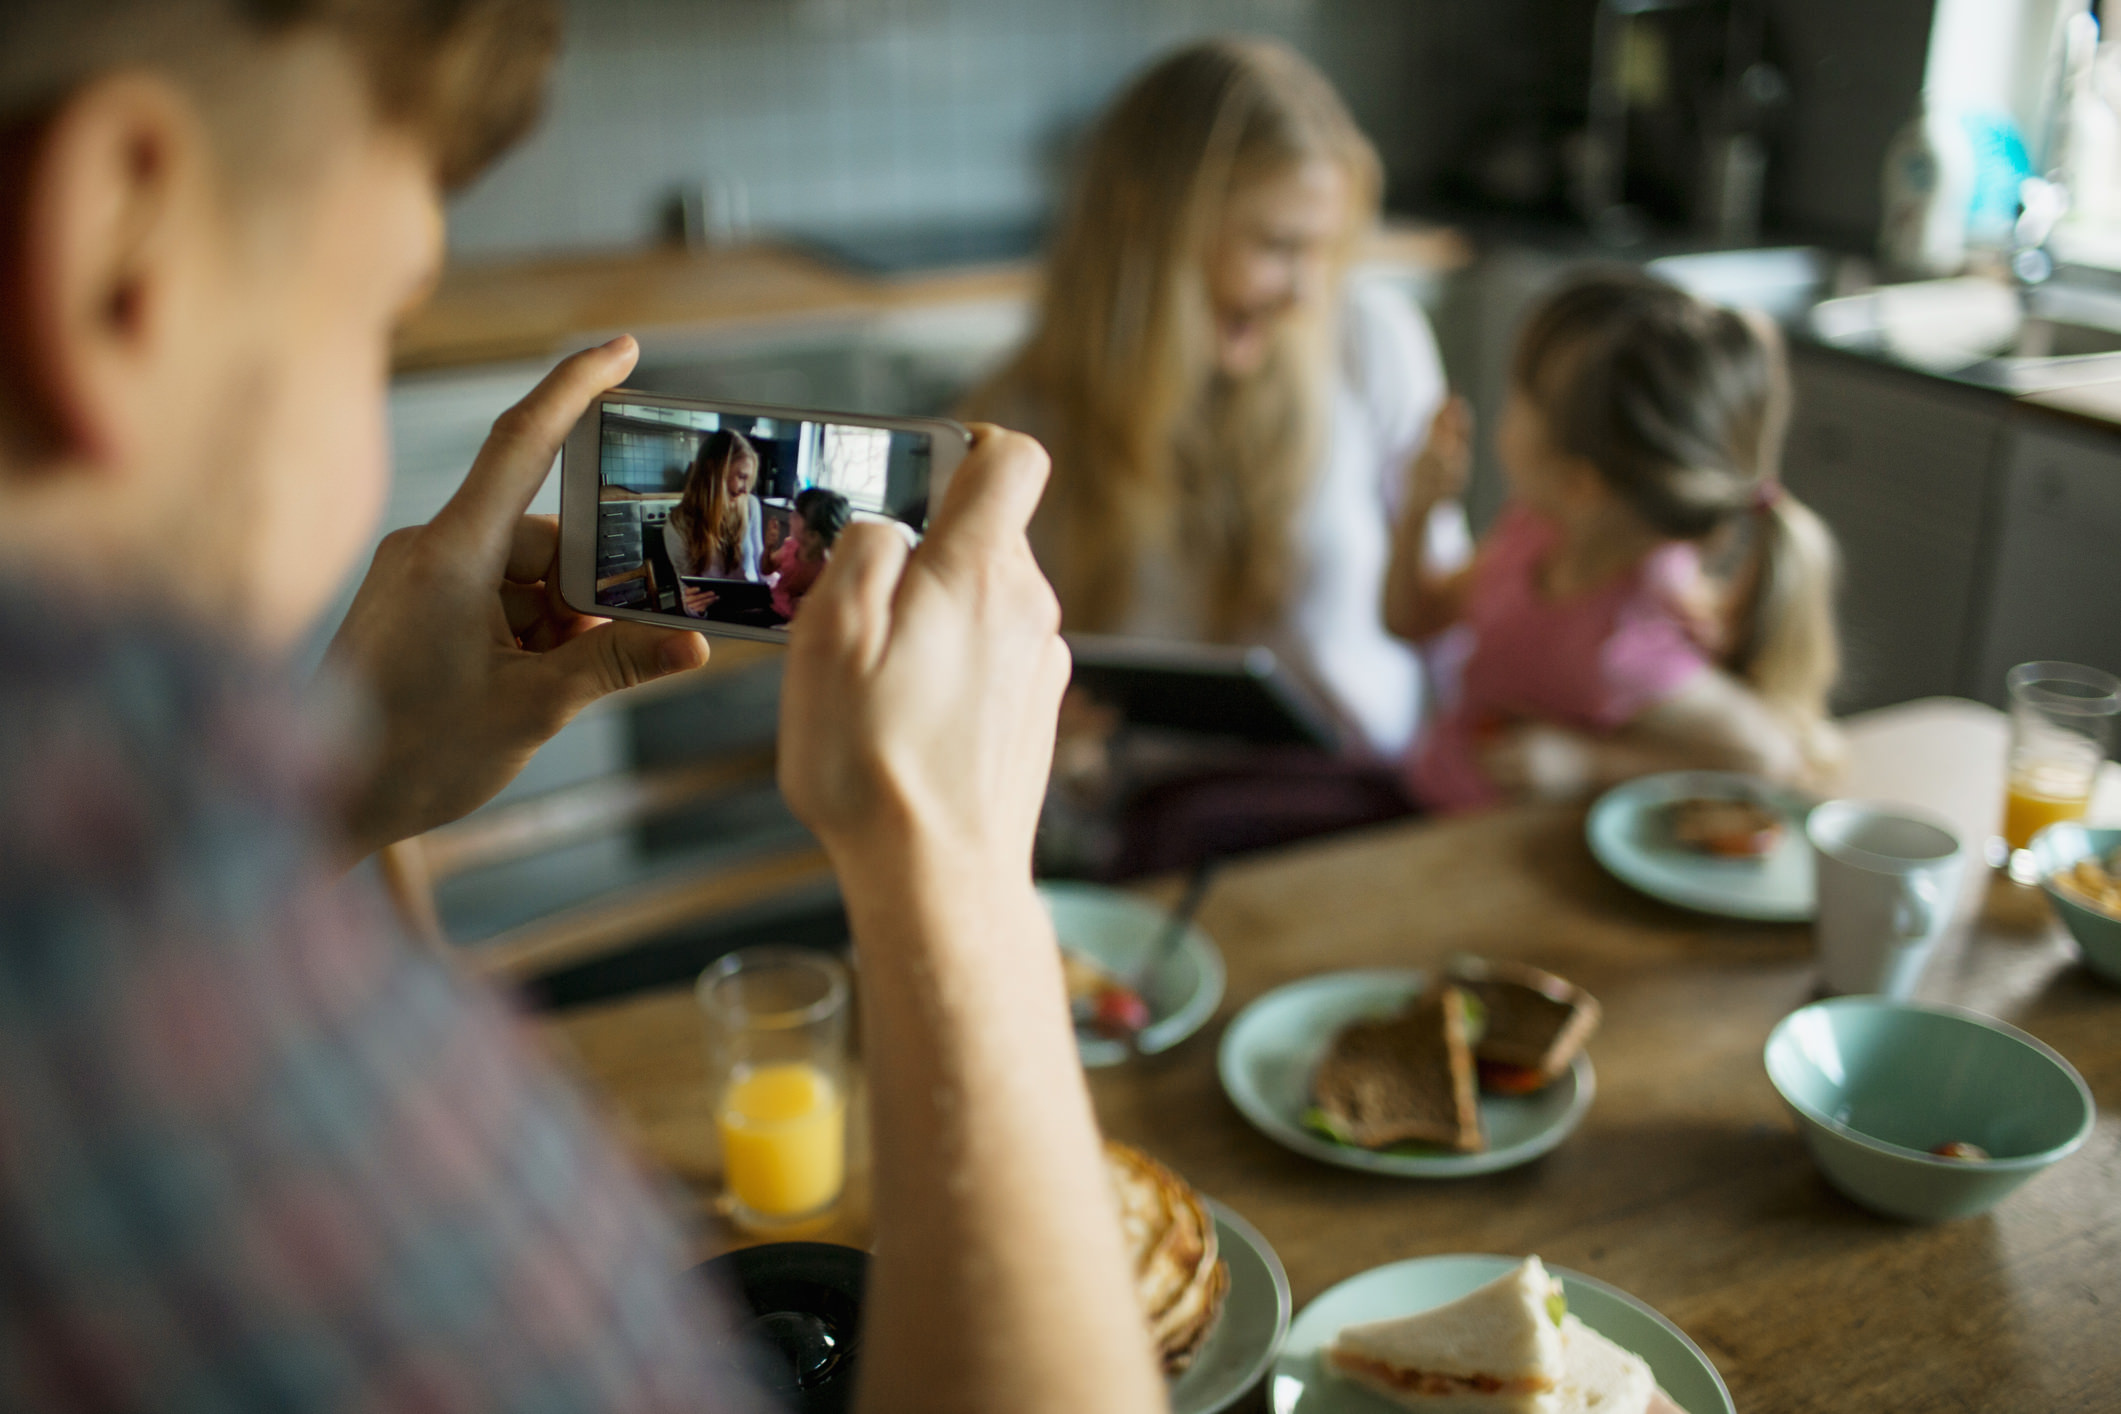
Sometimes you have all the right gear, a great composition, and wonderful lighting, but the scene still lacks interest at the level you want.
That's when it's time to add your own interest.
This could be as simple as being patient and waiting for something to happen - a bird landing in the scene in front of you, for example.
If you're taking a portrait, you might take things into your own hands and add a prop to add a pop of color or texture to the shot.
Another impactful trick is to incorporate a person into the shot. If you're photographing a landscape, have a friend stand or sit in the frame (or do it yourself). Doing so immediately adds interest to an otherwise boring landscape.
If you're taking a portrait, adding another person to the shot adds an interesting dynamic, as seen in the image above. Make your subjects laugh or interact with one another, and you'll see what I mean!
Work At It
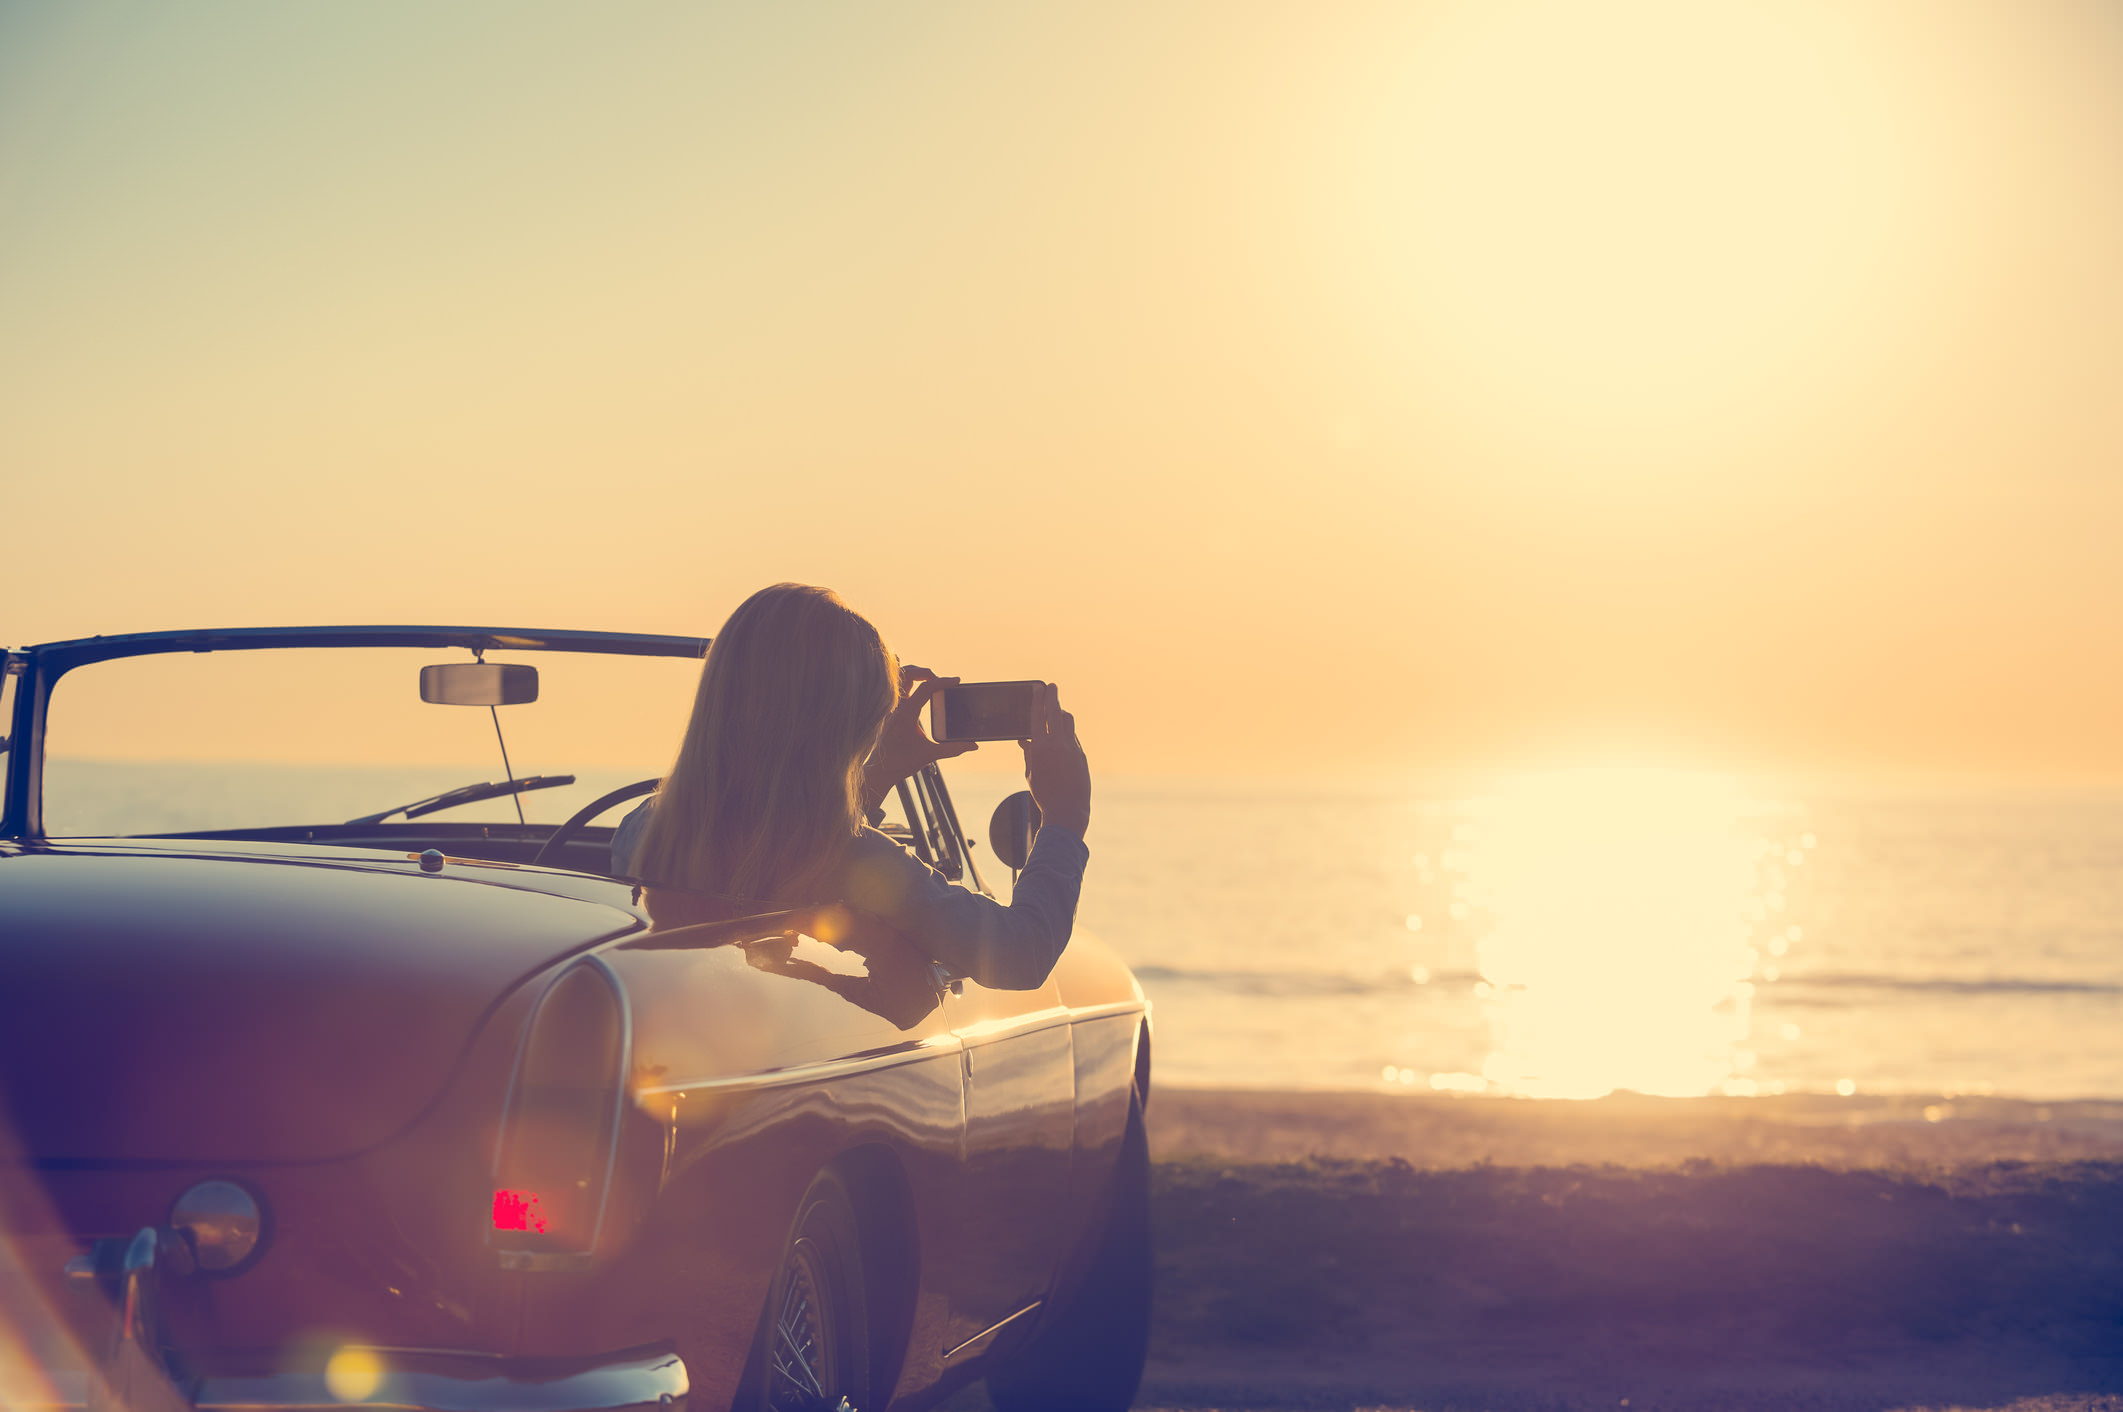
It's easy to get lazy when shooting with your phone because it's so easy to use.
But if you want the best smartphone photos, move around, look for different perspectives, and challenge yourself to frame more interesting shots.
Also keep shooting.
This is especially important when taking portraits because it's often in between the "real" takes that your subject is most relaxed. That enables you to get a more genuine portrait.
The point is that you should constantly be thinking, moving, and working to get a better photo. Don't fall into the trap of just standing there, phone at arm's length, taking photos (or shooting out the window of the car, either).
Get familiar with these tips, get the necessary gear, and you'll be set to see a massive improvement in your smartphone photos!
We Recommend
Essential Portrait Lighting Tips
 Photo by CoffeeAndMilk via iStock
Creating beautiful portraits depends on your ability to accomplish a variety of tasks - how you compose and frame the shot, the separation of the subject from the background, and, of course, the lighting that's used.
Not all light is made equal, and the manner in which you use lighting to illuminate the model will greatly influence how the final image looks.
In this quick tutorial, you'll learn a few techniques for manipulating lighting in a way that will enhance your portraits.
Let's get started!
Good Light Means Having Good Shadows
 Photo by VikaValter via iStock
In some portrait photography situations, you might strive to reduce shadows, like in a headshot.
In a headshot, shadows can be distracting. The point of a headshot is to be a clean, professional look.
But in other kinds of portraits, like the one shown above, shadows can actually greatly increase the visual appeal of the image. The interplay of the areas of light and shadow in this shot are hugely dramatic, are they not?!
It's important not to go crazy with shadows - they can be too much of a good thing - but experimenting with the placement of your lighting to create interesting shadows can be a fun and challenging exercise that helps you develop your creative eye.
 Photo by momcilog via iStock
Shadows balance out bright light while also giving your photos a much greater sense of depth and dimension.
As a result, the portrait will seem more three-dimensional and much more lifelike.
The image above is a great example of this - the woman's shadow on the wall makes this portrait much more interesting to look at while also providing some of that depth you want.
Learn More:
Understand How to Use Light to Get Just the Right Look
 Photo by HRAUN via iStock
Where you place artificial lighting will influence where the shadows fall in the shot. As discussed above, this can have an important impact on the overall look and feel of the portrait.
The positioning of the light also determines the kind of light you have to work with - frontlighting, backlighting, or sidelighting.
Where the light source is in relation to the model will have a significant impact on the results you get.
 Photo by izusek via iStock
For example, using frontlighting, in which the light source is directly in front of the model, helps illuminate the details of the person's face.
Shadows are minimized as well, because the shadows are cast behind them. This is often the kind of lighting used for headshots.
Frontlighting is quite easy to use - just place the light source a few feet in front of the model (at least to start...experimenting with distance is a good thing). There's one caveat, though - frontlighting can be a little flat and boring.
 Photo by Umkehrer via iStock
Sidelighting, on the other hand, results from light emanating from the right or left of the model.
With the light falling across the model's face and body, shadows appear, which as I noted before, increased the depth and dimension in the photo.
Sidelighting is therefore more dramatic than frontlighting, but it's just as easy to use. But, sidelighting doesn't have to be as dramatic as shown above. In the image below, much softer sidelighting was used, yet there is still a lot of dimension in the model's face thanks the presence of shadows.
 Photo by JacobVanHouten via iStock
Just have the model turn away from the light source or position the light source to one side or the other (it doesn't have to be at a 90-degree angle, so, again, experiment!).
Just take care in noticing where shadows are falling. If the shadows become a distraction, adjust the positioning of the model or the light source to manage the appearance of distracting shadows.
Backlighting is yet another option, but is the most difficult to pull off.
Since the light is behind the subject, the camera is bombarded with light. If you aren't careful, this can result in a silhouette (which can be quite fetching), but if that's not the look you want, you'll have to make some adjustments.
In the video above by Gavin Hoey, learn how to master the camera settings for a backlit portrait using just a single light source.
Invest in a Light That Expands Your Creative Possibilities
There are a lot of photographers that market themselves as "natural light photographers," and that's great, and most of them are truly masters at what they do.
But for some natural light photographers, it's a bit of a cop out because I've known a few natural light photographers over the years that use natural light because they're afraid of artificial light.
Yes, using artificial lighting can be trickier, but understanding how to create light and manipulate it to your needs is a skill worth having.
Back in the day when I was learning photography, using artificial lighting meant a scene in which there were light stands and diffusers and flashguns that had to be used.
But today, there are lights that are small, portable, offer tons of customization options, and are easy to use.
For example, I've been testing the Hakutatz RGB+AW LED light (shown above and below) for a few weeks now, and it is one of the handiest lights I've ever used.
Editor's Note: The Hakutatz Kickstarter campaign was a huge success! Their Amazon store will be open and ready for orders in early December.
Not only can you take advantage of crisp white light, warm amber light, and millions of RGB colors, but you can also change the color temperature of the light and use special effects to get truly unique results.
The accompanying smartphone app makes changing the light's settings a breeze, too.
Perhaps best of all, these lights can be used for frontlighting, sidelighting, and backlighting, and you can control multiple lights using the smartphone app.
Often, learning a new skill in photography takes a lot of time and practice. I'm not saying that you can master portrait lighting in a single afternoon, but armed with tools like the Hakutatz RGB+AW LED light, it's certainly an easier task!
Learn More:
We Recommend
Features to Look for in Video Lighting
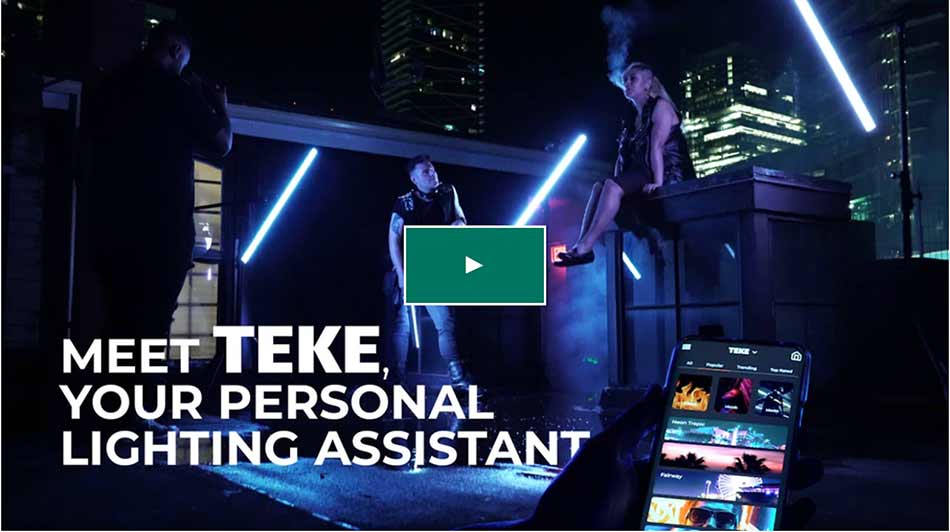
All video lights are pretty much the same, right?
Wrong…
Video lighting comes in an array of shapes, sizes, qualities of light, types of light, features, and so forth. Some offer far greater flexibility than others. Some offer a much lower price tag, too.
Just like there is a lot of variation in the features and functionality of cameras, so too is there a lot of variation in what you can get in a video light.
If you’re looking for a lighting setup for your video productions, let this be a quick and easy guide to help you find the right lighting for you.
Editor’s Note: To illustrate some of the features you should look for in video lighting, I use the TEKE Reactive and Animated DMX Lighting System as a prime example.
Quality and Type of Light
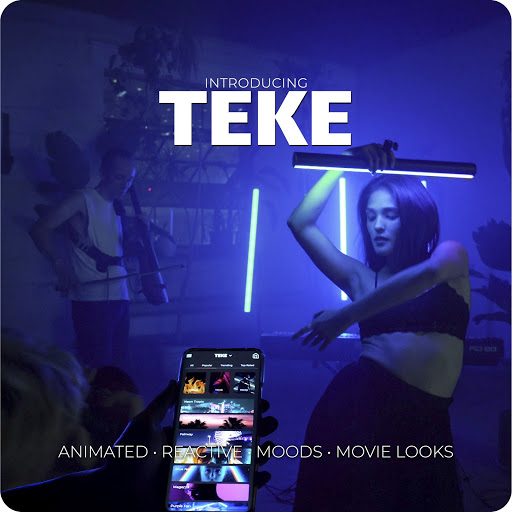
When you’re in need of lighting to get the scene just right in your video, you want something that offers the quality and type of light to help you fulfill your vision for the scene.
This means you need to examine specifications like lumens and CRI, as well as the type of light that’s offered.
For example, the TEKE Reactive and Animated DMX Lighting System offers ultra-bright performance with 700 and 1400 lumens. With that kind of light output, you can truly highlight the details of the scene you’re filming.
What’s more, this light offers 90+ CRI, flicker-free light for your videos. For the uninitiated, CRI stands for Color Rendering Index, and is a measure of how accurately a light can reproduce a light source, like the sun. Lights with a 90+ CRI are considered to be at the top of the heap.
Having different color options is a nice bonus, too. Some lights have a fixed color temperature, like 5000K while others offer various temperatures of white or amber light. Still others, like TEKE, offer even more options - like full-spectrum RGBW and an adjustable color temperature of 2700K-6500K - so you get virtually limitless flicker-free color options for your videos.

Regarding the type of light, many are controlled by Bluetooth, which gives you wireless performance. However, Bluetooth has its limits in terms of signal strength and distance. That’s why I prefer lights that have DMX connectivity. It’s a much stronger signal over farther distances, which means you can worry less about the connectivity of your lights and more about what’s happening in front of the lens.
Convenience and Ease of Use
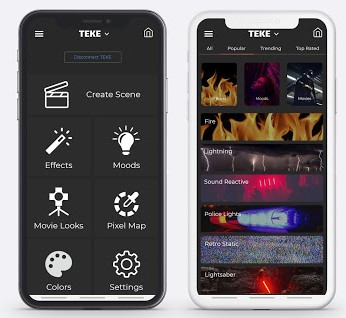
The lighting you use for your videos can make or break the final result. But you don’t want to sacrifice convenience and ease of use for quality of light.
Some lights manage to find the ideal balance of the two and offer the lighting you need while keeping things simple.
To use TEKE as an example again, you benefit from smartphone control that makes it as simple as a tap of the screen to change the light’s settings.

Adjust the color, choose different lighting styles, add animated effects, or select from a variety of lighting presets, all right from your phone. You can even create your own presets for later use and create custom color palettes based off of photos or videos you upload to the app. You basically have your own personal lighting assistant in the palm of your hand to help you achieve your creative goals.
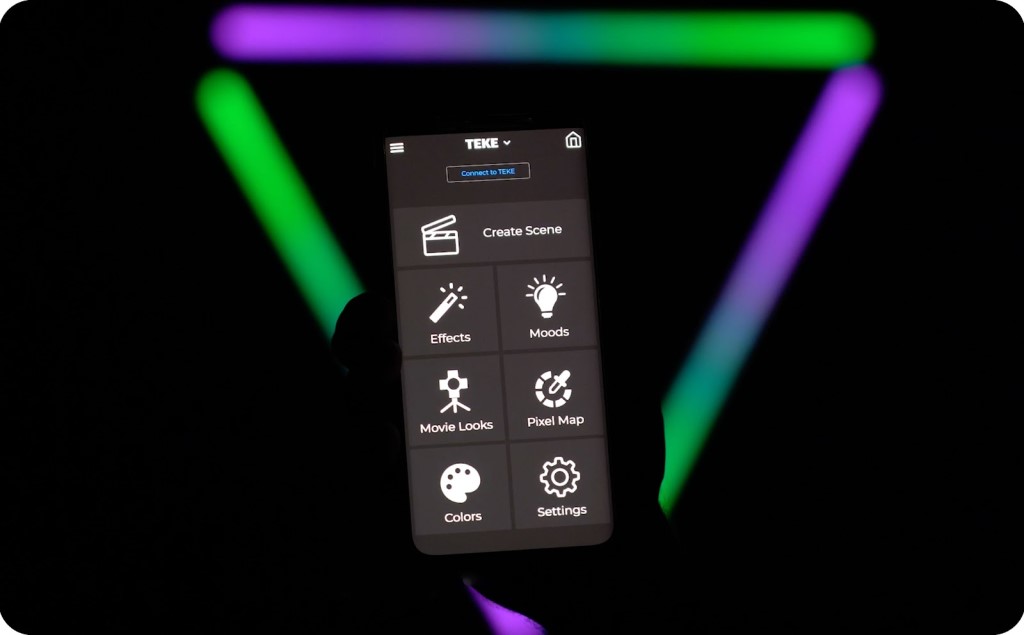
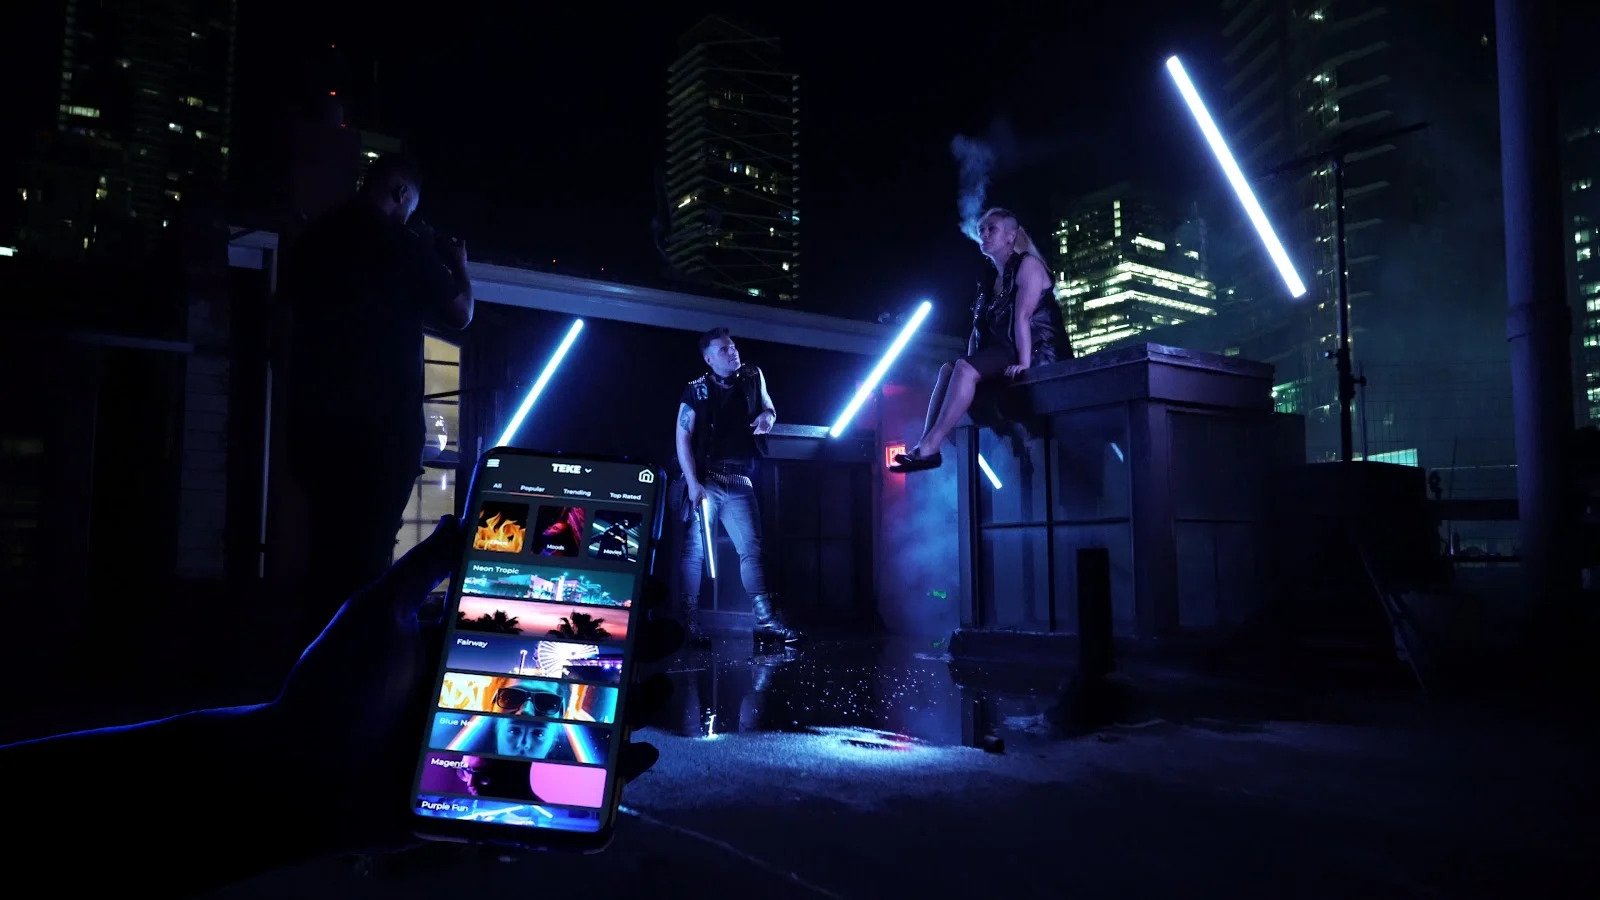
Also on the convenience front is having the ability to bring multiple lights into the scene if need be. If you use traditional lights, this might involve having several light stands at different locations with cables running all over the place, which isn’t very convenient.
However, if you use wireless lights, you get the freedom of placing them wherever you need without worrying about who’s going to trip over your light stands and cables. Some lights, like TEKE, even give you the option of connecting multiple lights together, all controlled simultaneously by the smartphone app.
Plus, the DMX technology I mentioned before unlocks additional features like pixel mapping and synchronized complex gradient animations. This is truly Hollywood-level stuff!
Sizing Options and Accessories
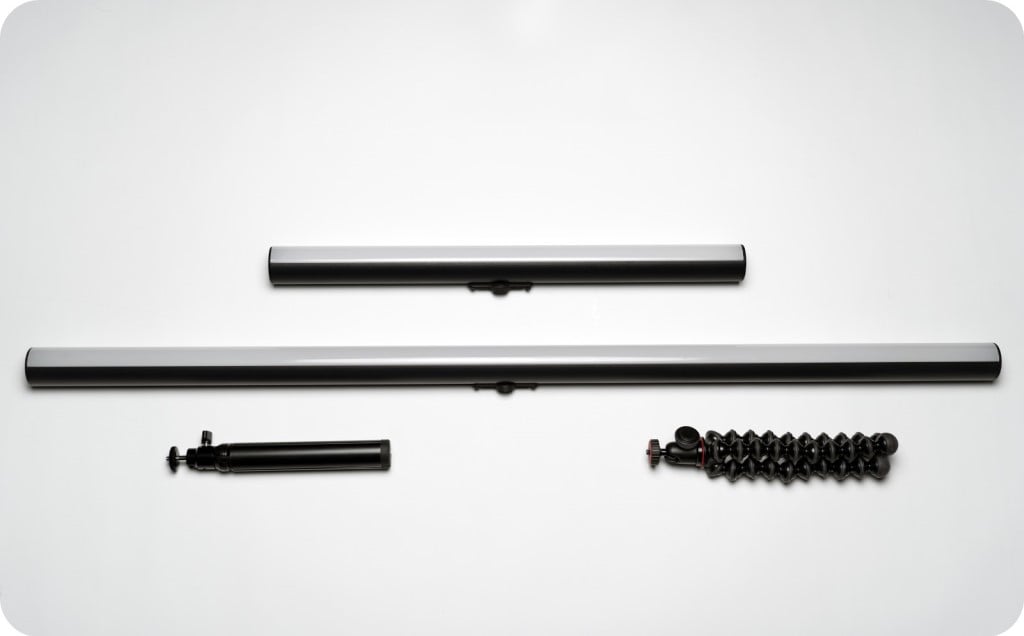
Sometimes your video shoot calls for a small hand-held light to get just the look you want. Other times you need a larger, brighter light mounted on a tripod.
When looking for video lighting, be sure that the lights you like offer different sizes and accessories, that way you can tailor the lighting to any video situation.
TEKE comes in a 20-inch option while TEKE Pro offers 40-inches. Again, you can connect these lights together for greater lighting flexibility.
What’s more, companies like TEKE have a host of accessories that take the functionality of their lights to the next level. From mini tripods to swivel ball-heads to quick-charging adapters, you can accessories to your heart’s content to fill out your lighting kit just how you need.
Durability
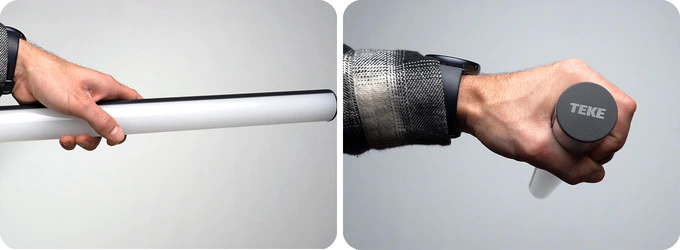
Whether you spend $150 on video lighting or $1,500 on video lighting, you want the lights you invest in to give you long-lasting durability. This isn’t just to protect your monetary investment, either. Having durable lighting means you can plan video shoots without worrying if your lights will work or not.
To use TEKE as an example, these lights have a weather-resistant aluminum housing that enables you to use them in a wide range of environmental conditions. If the scene calls for a little rain, TEKE can handle it!
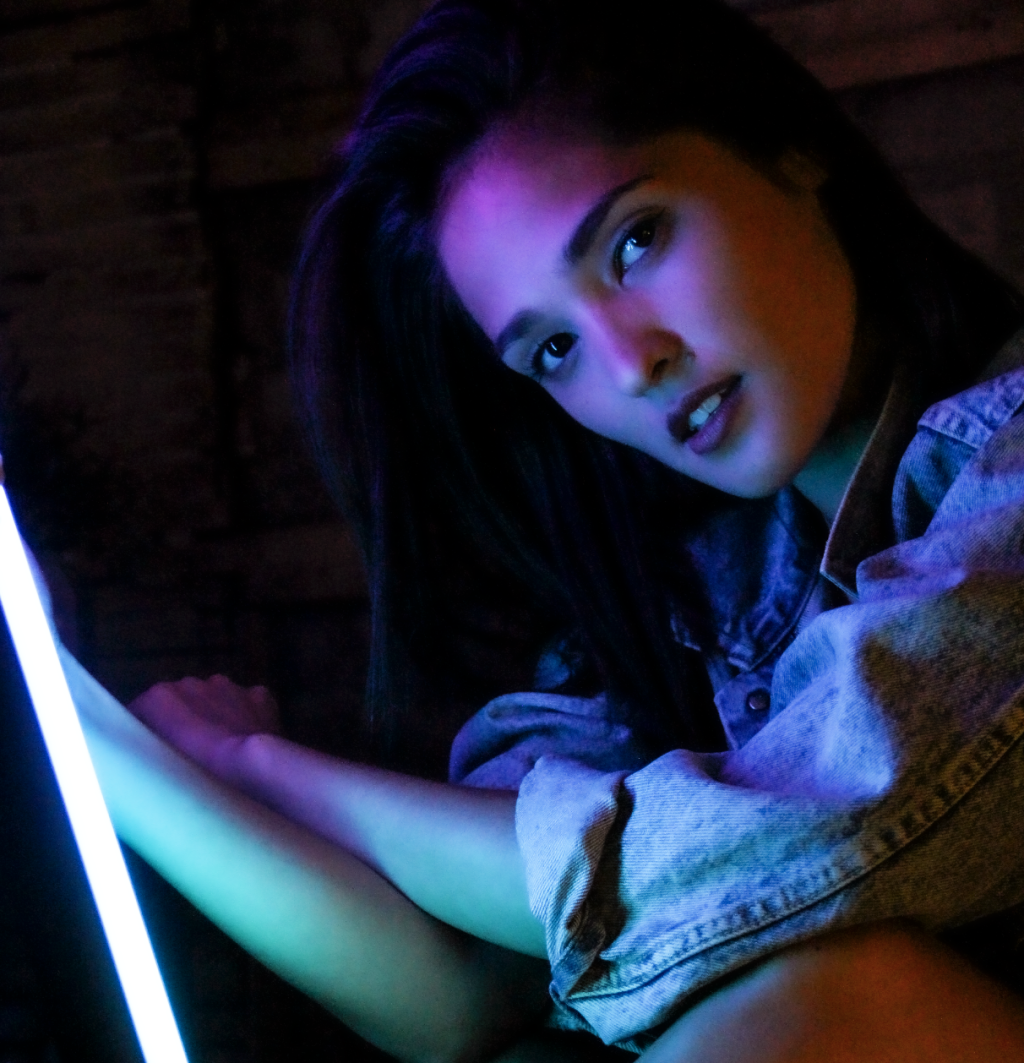
Granted, you don’t want to abuse whatever lights you buy, but having the peace of mind that they’re well-built and weather-resistant is definitely a bonus.
Also on the durability front is the battery life the light has. Some lights give you just an hour or two on max power, but others, like TEKE, give you four hours of runtime at full brightness. So not only are these lights controlled wirelessly, but they also give you hours and hours of battery-powered lighting.
Charging is easy, too. Just plug them into a Type-C charging cable to juice them up. You can even use these lights while they charge!
Price
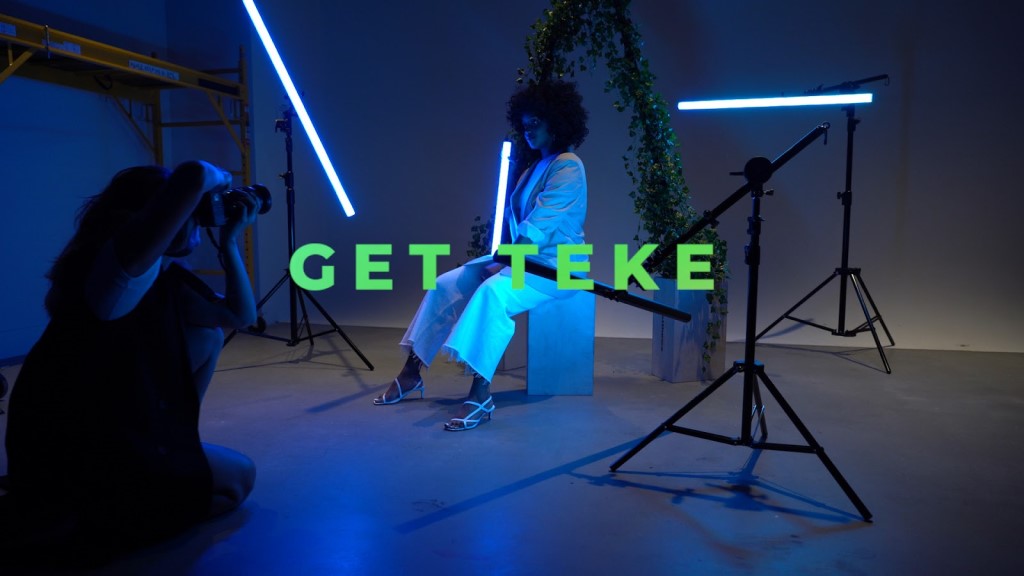
For many people, one of the most important factors when considering what gear to buy is the price. This is especially true today as many of us have to tighten our belts due to the pandemic.
But prioritizing price doesn’t mean you have to sacrifice on all the other features listed above. Some lights, like TEKE, give you all the features and functionality you need without making your wallet scream in pain.
TEKE, the 20-inch version, starts at just $139, while TEKE Pro, the 40-inch version, starts at $169. You get an awful lot of firepower for that price!
But don’t take my word for it. Visit the TEKE Kickstarter (which has blown past the goal!) to learn more about this incredible, feature-packed video light.
We Recommend
Flash vs. Ambient Lighting: Which is Better for Portraits?
It’s often said that natural lighting is the best kind of light for portraits. In particular, overcast skies provide excellent lighting because it’s even, soft, and diffuse - you don’t have to fight a lot of shadows or a dynamic range that’s too large. What’s more, all you have to do is set your camera settings and fire away, so it’s quite easy to use as well.
However, flashes have come a long way and are making a case for themselves in a head-to-head matchup against ambient lighting. Modern flashes are fast, smaller than ever, more powerful than ever, and in many cases are wireless too, making them easy to use for portraits.
There are plenty of other pros and cons to flash and ambient lighting. Watch the video below as Gavin Hoey of Adorama TV explores these options for lighting for portraits.
Amazon Recommendations
- Flashpoint StreakLight 360 Ws Creative Collection
- Glow ParaPop 38" Portable Softbox
- Flashpoint 9' AutoStand
We Recommend
Fun (and Functional) Gadgets You’ll Want for Your Canon or Nikon Camera

Hey Canon and Nikon lovers, are you itching to add a new toy to your kit?
There are tons and tons of incredible camera accessories out there, but not all of them are worth your time or money. We’ve done the heavy lifting for you and found three innovative, functional, and fun tools that will help you maximize the power of your Canon or Nikon system and take your photography to a whole other level. PhotographyTalk.com has an interesting article about Nikon Vs Canon camera, check it out.
Check these things out!
Pulse by Alpine Labs

Whether you like to shoot stills, long exposures, videos, or time-lapses, Pulse by Alpine Labs has got you covered. This little gadget is the ultimate camera remote if we’ve ever seen one. It allows you to operate your Canon or Nikon camera remotely from your smartphone. Just plug it into your DSLR or mirrorless camera, mount it on top of your camera using the hot-shoe mount, and take wireless control of your rig.
Pulse gives you the ability to adjust a whole host of camera settings - ISO, aperture, and shutter speed among them. Create stunning still images with remote shutter release, record video at the touch of a button, and create basic or advanced time-lapses, all from Pulse’s intuitive and easy-to-use smartphone app. You can even control multiple Pulse-enabled cameras from your phone, giving you the chance to do some professional-level, multi-camera work!
Pulse has a 24-hour battery life so that you can tackle jobs of any size. It’s compatible with iOS and Android devices and will work with more than 60 Canon and Nikon cameras. And, at just 1.5 oz and measuring just 40mm x 60mm, it’s easy to transport. Heck, just put it in your pocket and off you go!
Canon MR-14EX II Macro Ring Lite

If macro photography is your thing, you know that getting close to the subject and illuminating it with clean, even light is essential to capturing the details of smaller worlds around us. When tight spaces preclude natural or typical artificial lighting from illuminating the scene, the ideal answer is to add lights to the end of your lens.
You can do that with the Canon MR-14EX II Macro Ring Lite. This ring light outperforms your camera’s built in flash because the pop-up flash on your camera is often too harsh and doesn’t provide the even coverage you need for close-up work. The Macro Ring Lite actually has two flash tubes that are independently adjustable, so you have an even greater level of creative control when tackling your next macro subject. Just attach the light to the end of your Canon lens (several are supported), attach the master unit to the camera’s hot-shoe, plug it into your camera, and you’re ready to roll!
Zacuto Z-Finder Pro 2.5x

Regardless of whether you create stills or videos with your Canon or Nikon camera, the Zacuto Z-Finder Pro 2.5x will become a necessary accessory when you shoot. The Z-Finder Pro makes shooting handheld or on a tripod easier because it turns your camera’s 3” LCD display into a large viewfinder for much easier focusing. Even when shooting outdoors in bright, mid-day sun, the Z-Finder Pro still gives you a crystal clear magnified image to inspect the details of your shot.
The large eyecup makes it comfortable to view your screen, the protective lens covers prevent fogging, and the dioptre is fully adjustable up to -4.75, so you can be sure to focus sharply even if you’re quite nearsighted. Just attach the Z-Finder to your camera using the included Gorilla Baseplate and mounting frame, and you’re ready to take images and videos with better sharpness than ever before!
We Recommend
Getting Started in Photography: ISO, Shutter Speed, and Aperture Explained
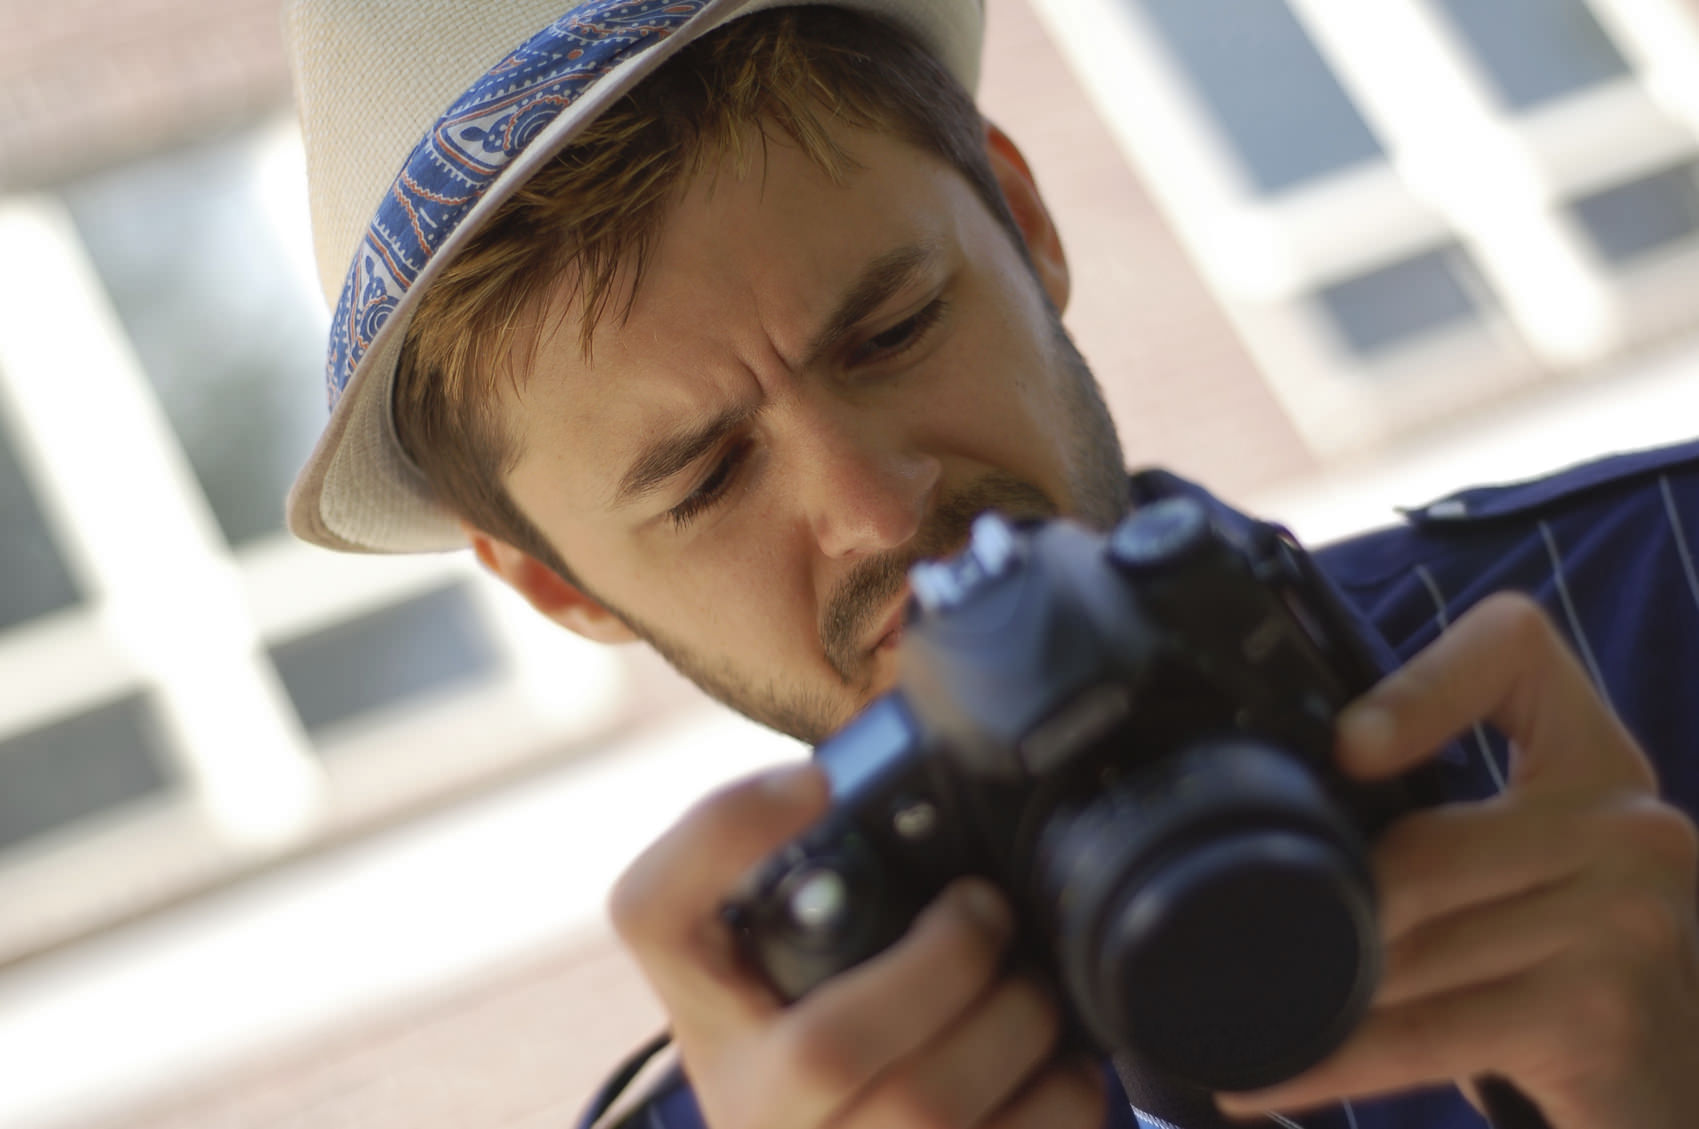
Maybe you’ve dabbled in photography but haven’t really dedicated yourself to learning the ins and outs of taking a high-quality photo. Maybe you used to take photos all the time, but are just getting back into it after a long hiatus. You might even take a lot of photos, but don’t really understand the fundamentals of things like exposure.
Whichever group you fall into, there’s certainly room for growth as it pertains to building a strong foundation of photography knowledge. After all, without understanding the basics like ISO, shutter speed, and aperture, it’s going to be hard to take the kind of photos you want to take.
In the video below the guys at Tek Syndicate take us on a quick tour of these fundamentals of exposure. Get in-depth definitions of each and learn how each setting impacts the photos you take!
Amazon Recommendations
- Nikon D750 FX-format Digital SLR Camera Body
- Understanding Exposure, Fourth Edition: How to Shoot Great Photographs with Any Camera
- Mastering Aperture, Shutter Speed, ISO and Exposure: How They Interact and Affect Each Other
We Recommend
Godox AD100 Pro First Impressions
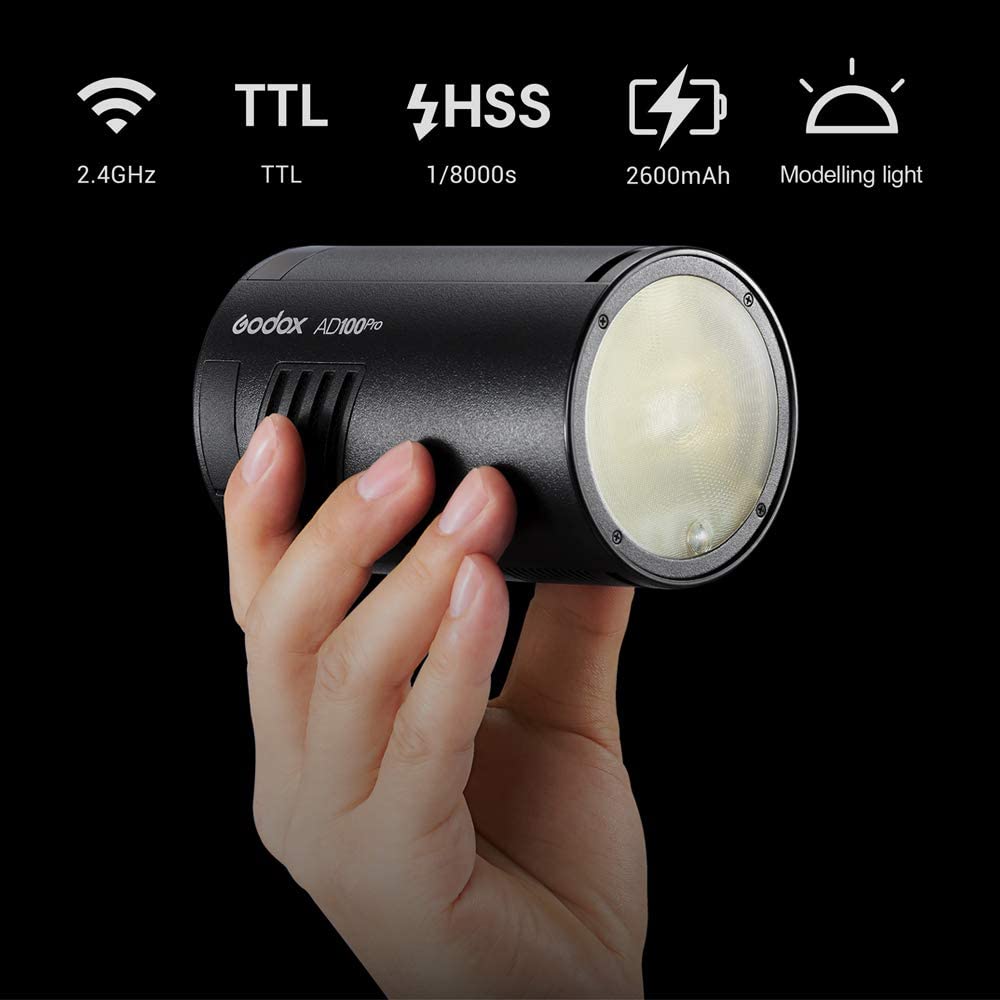
Professional flash units are amazingly easy to use with the newest cameras. Strobes from the camera makers and other manufacturers sync seamlessly with camera automation, can be controlled wirelessly, and can be combined for multi-light configurations. The Godox AD100 Pro is a prime example of how fantastic current flash units can be.
Godox AD100 Pro Specs
Godox AD100 Pro is the newest small strobe from Godox in the AD line up, part of their Witstro Strobes collection of portable on or off camera flash units. The main claims to fame of this flash are its 100 W/S rating, TTL capability, and wireless control.
From the Godox website, here are the rest of its official specs:
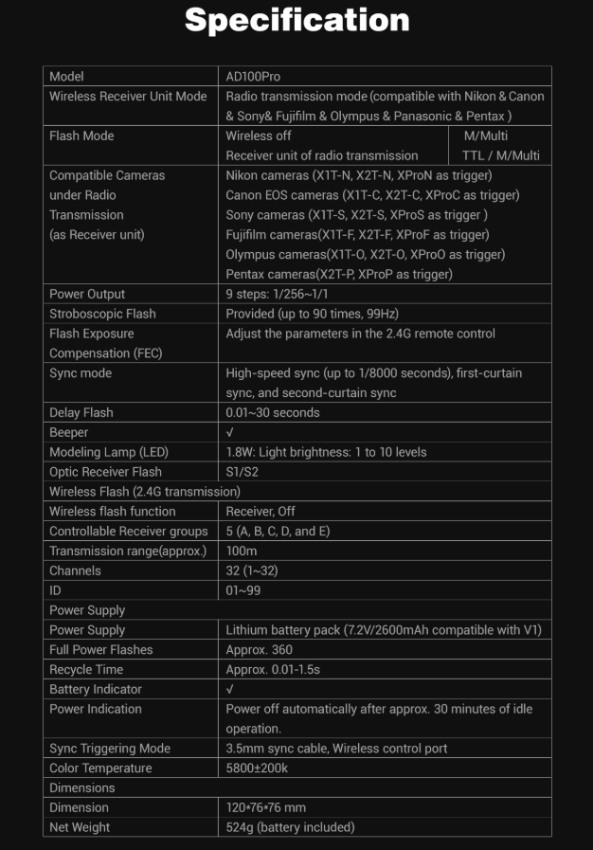
I like to look at the raw specs and turn them into features, what the Godox AD100 Pro specs mean for me.
Godox AD100 Pro Features
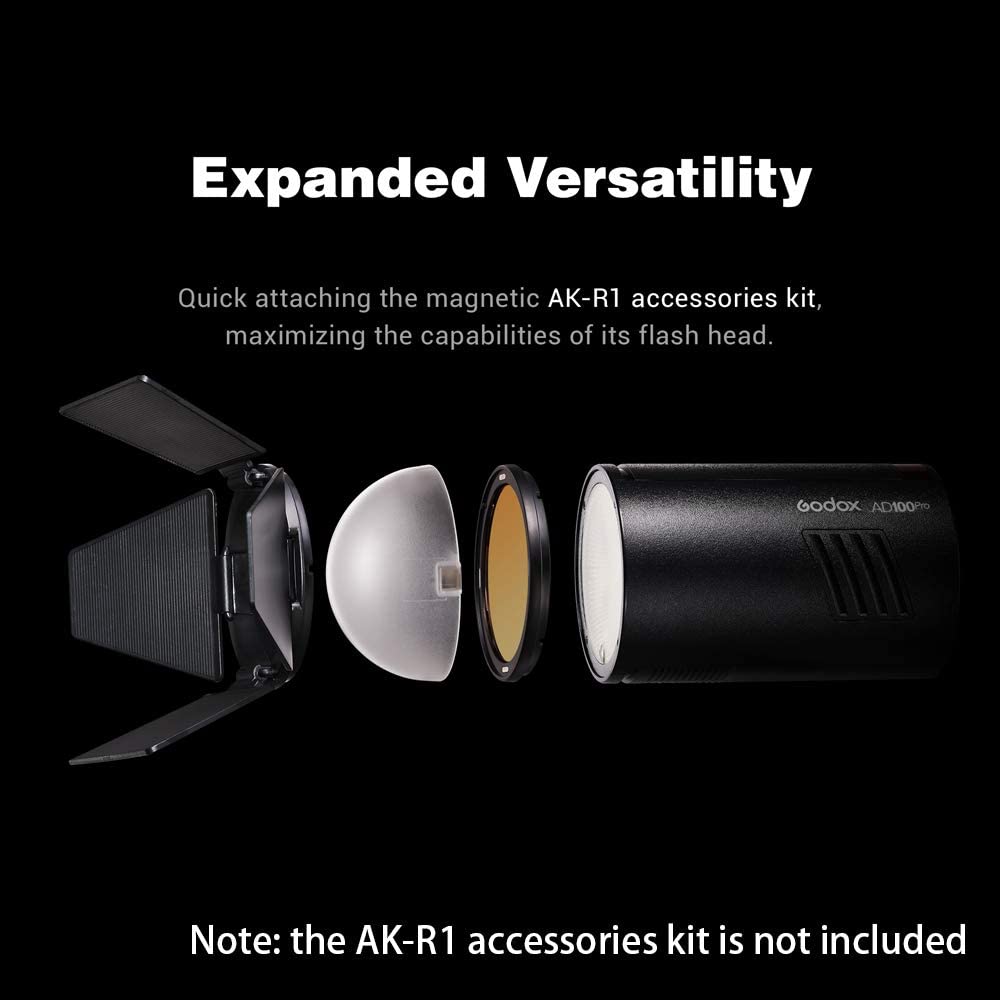
100 W/S power rating means it has enough power to be a single light for some uses but most photographers will probably mix it with another strobe or two for versatility in lighting configurations.
Wireless TTL control is an amazing feature that many professional photographers rely on for accurate flash exposures even when using multiple lights in an advanced lighting configuration.
Wireless control in general is a boon for using multiple strobes, the Godox AD 100 Pro being able to mix power ratios and TTL control from the camera itself means photographers can quickly adjust for different lighting without having to resort to a lot of complex computations or reviewing multiple test shots for correct exposure.
The Godox AD100 Pro is compatible with the Godox X1, X2, and XPro wireless triggers which allows full integration with Nikon, Canon, Sony, Fujifilm, Olympus, and Pentax digital cameras, both mirrorless and DSLR.
It is quite small, too, about the size of a 12 oz beverage can (choose your favorite tasty beverage to picture here). The weight of the flash unit almost doubles when you add in the V1 style rechargeable lithium battery. This battery is good for about 360 full power flashes.
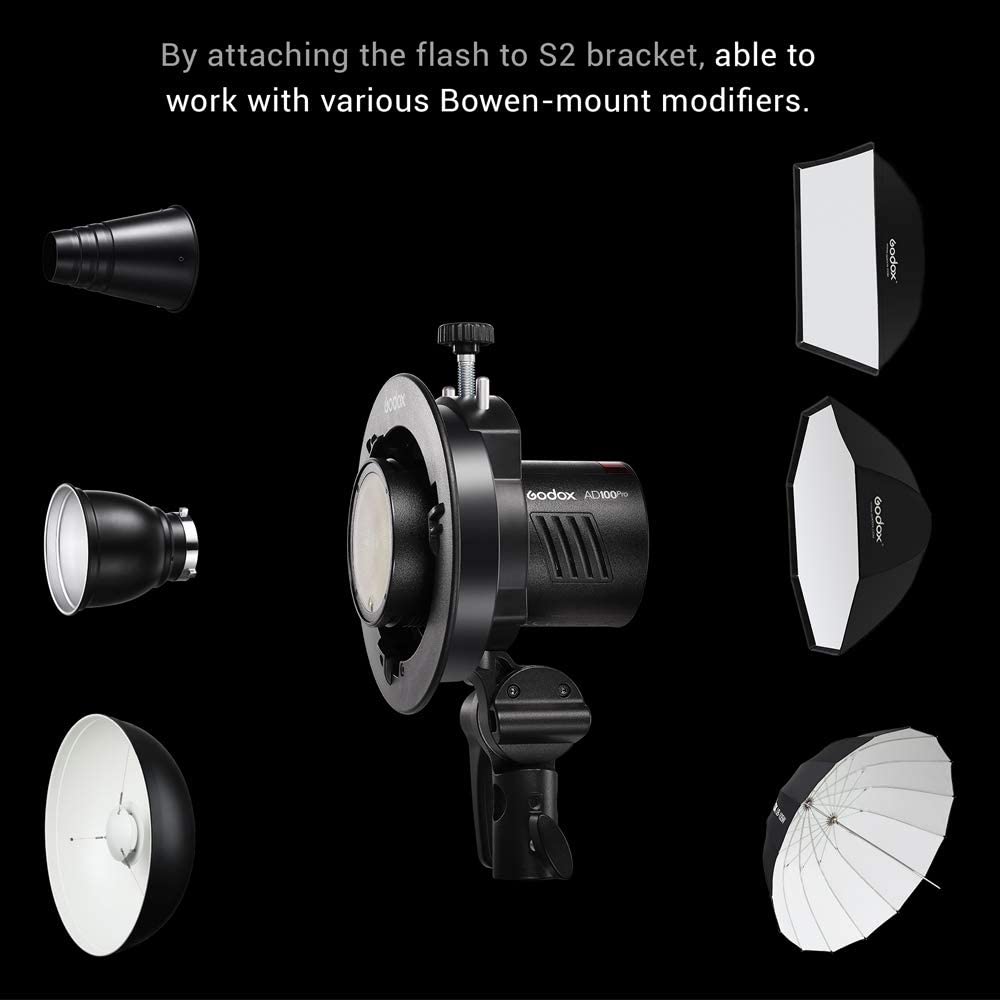
The Godox AD100 Pro has various light modifiers that can be attached, the magnetic AK-R1 accessories kit and the S2 bracket that allows use of Bowens mount modifiers such as a softbox, various umbrellas, snoots, grids, and barn doors.
These accessories add size and weight but give a whole lot of versatility to this tiny strobe. The AD-E2 bracket lets you mount the Godox AD100 Pro to a light stand or another style bracket for all sorts of extra versatility.
Godox AD100 Pro Uses
So, what can you use a small, wirelessly controlled, TTL capable, battery powered strobe to do anyways? The real question is what can’t it do?
Well, while 100 W/S isn’t bad power output for such a small, lightweight strobe, it does limit using it as a single flash. Plus, it has no shoe mount for direct attachment to a camera, you need a cord, a wireless trigger, or a master strobe unit to control it.
Its best use is as a part of a multi-light configuration, but it should also be very usable as an off camera single flash unit for wedding photography, other events, or location portraiture such as an environmental portrait session. There are a variety of brackets it can be used with and it has dual mounting slots to adapt to your specific set up.
Pros and Cons

The Godox AD100 Pro is an interesting new strobe, and it has a lot of possibilities open for photographers needing a small, TTL strobe.
Pros:
- Very compact, about the size of a 12 ounce soda can or a basic kit lens. With the battery it’s about the same weight as a soft drink can, too.
- Wireless TTL control. It can’t be stressed enough how versatile this feature makes the AD100 Pro. It matches up with almost all the brands in popular use now and can be leveraged into other new brands.
- 100 W/S is pretty impressive for such a small strobe. It fits in well with multi-light configurations and can be used as a single flash, too.
- Long life rechargeable lithium battery powers up to 360 full discharges. The battery is quick and easy to change, so you can keep a couple on hand all charged up.
- Attaches to magnetic Godox light modifiers or to Bowens mount accessories with an optional bracket.
- Godox AD100 Pro price is firmly in the Pro column since it is about the same price as a medium aperture auxiliary zoom lens or a fast prime lens like a Nifty Fifty. It is actually a little less than many of the camera manufacturer's pro style dedicated flash units.
Cons:
- 100 W/S isn’t bad for a tiny flash but it does limit using the Godox AD100 Pro as a single strobe for situations needing a powerful strobe.
- The strobe requires a trigger, cord, or a master strobe in order to be fully integrated into the camera’s TTL automation.
- Color balance is optimized for 5600K daylight but there is a bit of inconsistency from unit to unit, at least in early tests. Godox will most likely get that under better control but it isn’t very noticeable for many applications, though it may be evident in multi-light set ups.
- This tiny strobe can get a little hot very quickly when under heavy use but the built in cooling fan helps dissipate a lot of that heat.
- It’s modeling light is a welcome feature but it’s a little underpowered compared to competitor strobes modeling lights which allow for dual use as a video light.
Final Thoughts
Godox has a winner with this small and extremely versatile strobe. Its price is very budget friendly and the wide range of accessories opens up many possible uses in the field and in the studio. Wireless TTL control for multiple camera brands adds to the appeal of the Godox AD100 Pro for professional or other serious photographers.
As for me, I’ll use this handy little light as a spotlight in my home office positioned above my head for my YouTube videos. So far, it has performed like a champ in this application which only speaks to its versatility!
We Recommend
Gorgeous Natural Light Portraits Made Easy - Even in Harsh Lighting

If you’ve ever read a tutorial on natural light portraiture, you know that they suggest shooting early or late in the day to capitalize on soft, warm, and gorgeous Golden Hour lighting.
The problem with that approach is that not everyone wants to work early or late in the day. Not every client can oblige those times either.
So, what’s the solution? Shoot during the middle of the day!
Even though noontime lighting is harsh and generally ugly, that doesn’t mean that you can’t still create stunning natural light portraits. You just need to learn a few tricks, something that Craig Beckta offers in the video below. Follow along as he shows us how to use diffusers, reflectors, and other methods to soften midday light for portraiture work.
Amazon Recommendations
How to Backlight Your Photos Using Photoshop
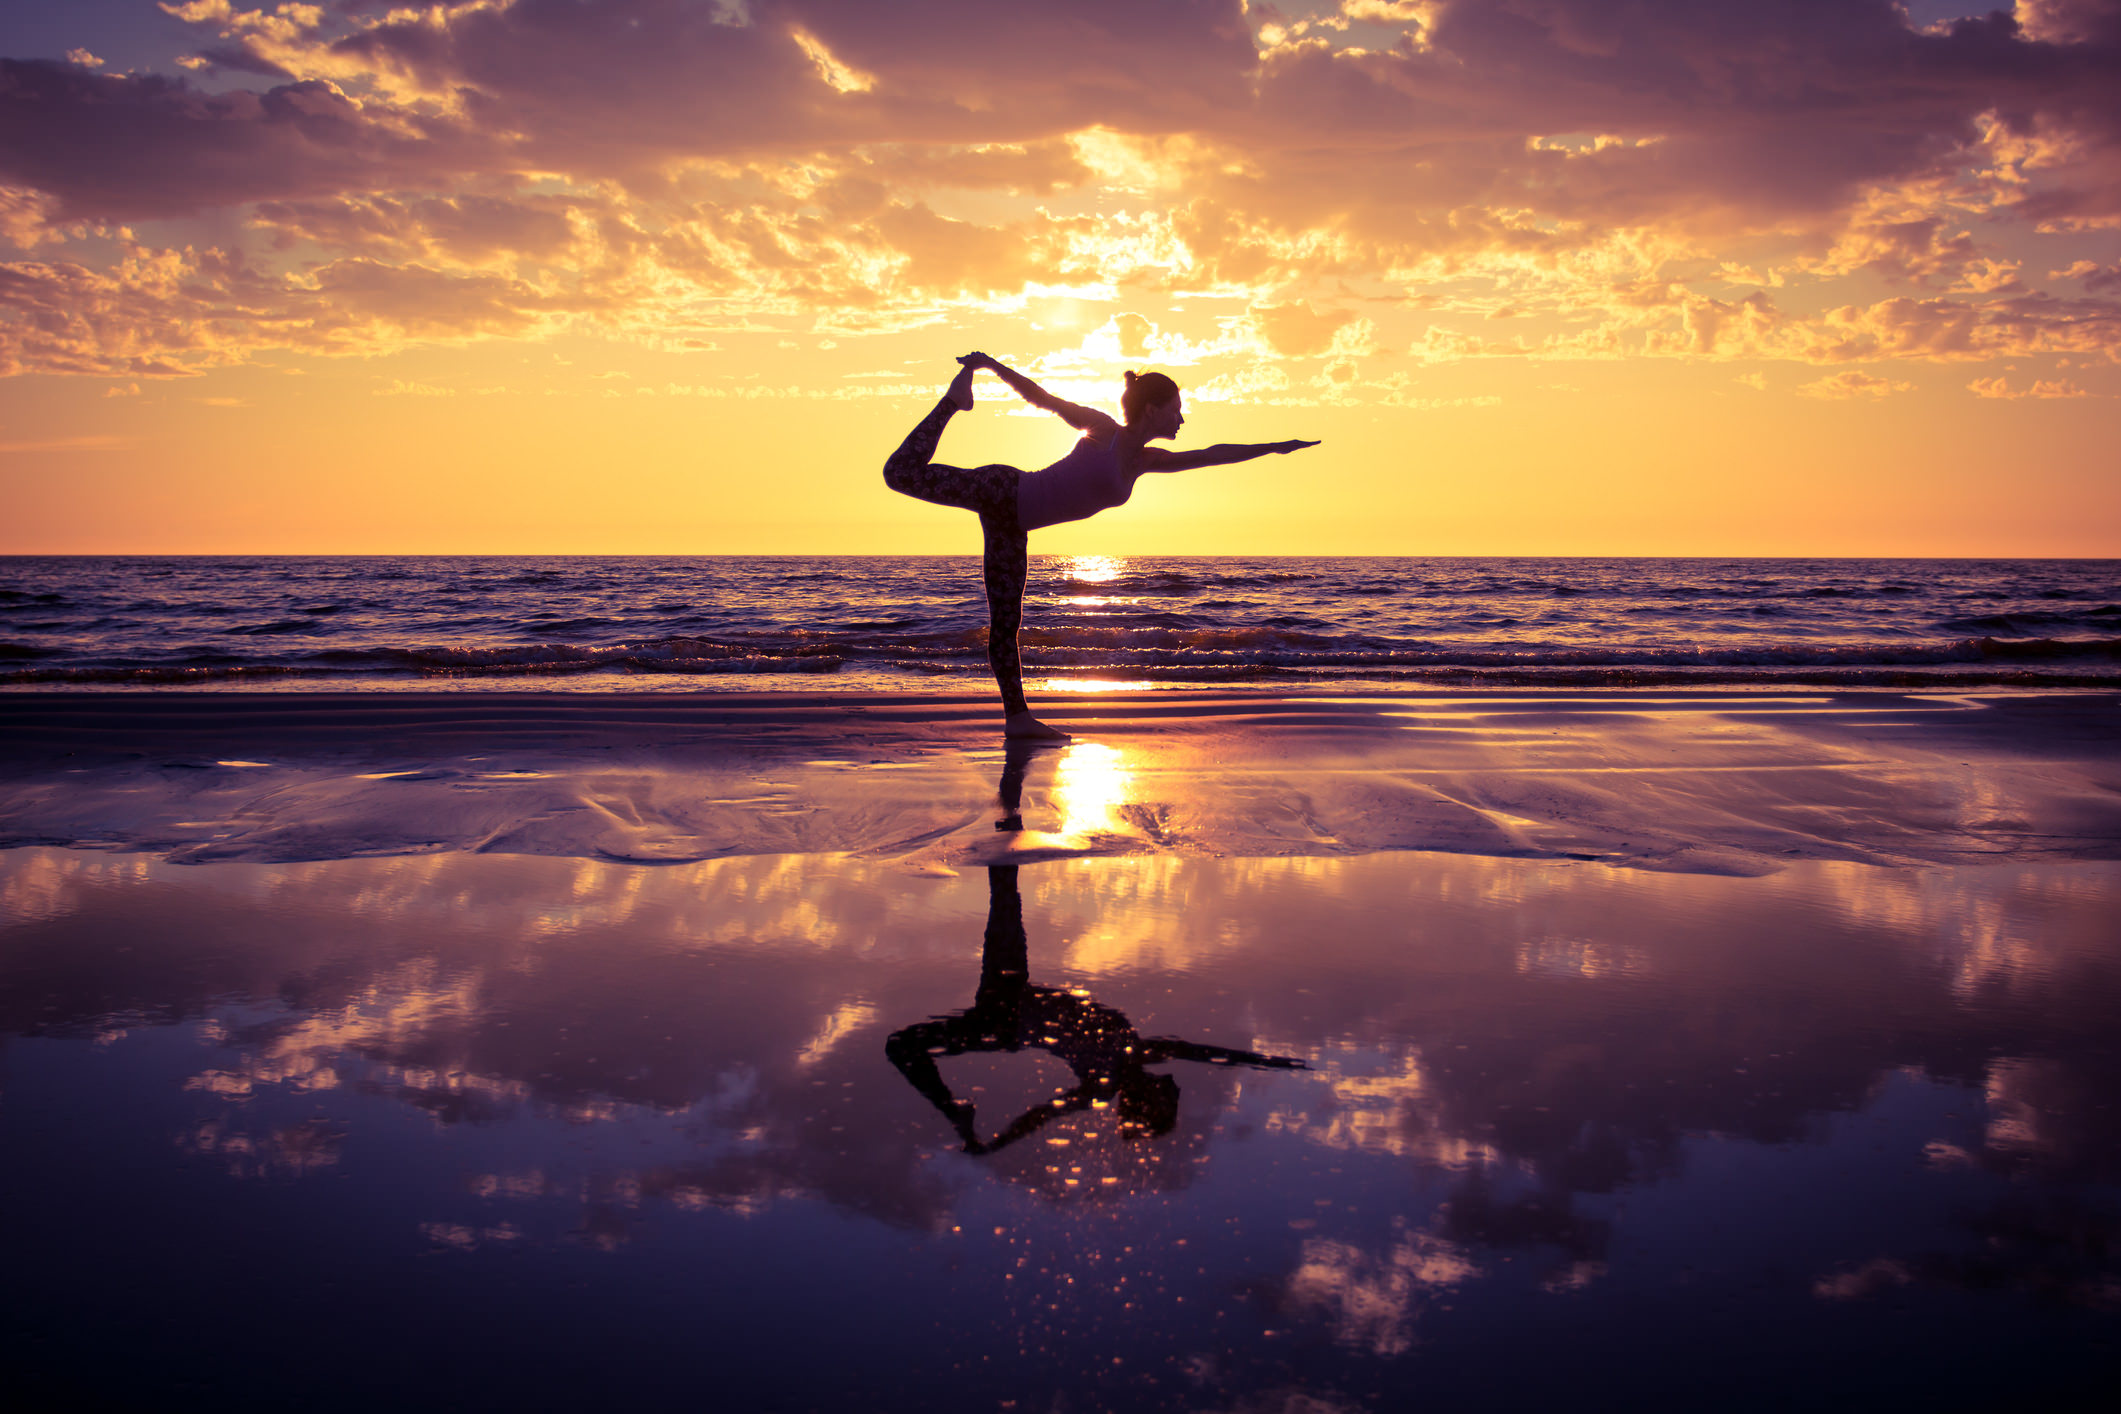
Backlighting can be one of the most beautiful forms of lighting for any scene.
It's especially eye-catching for portraits.
And while natural light for backlighting purposes is especially nice, you might not always get the look that you want.
Like so many other things in photography, mastering backlighting takes time and practice.
It also requires an understanding of a few technical and compositional tips to maximize your success.
With that in mind, let's explore a few things you need to know to put natural backlighting to work for you. Then we'll look into how to boost the interest of backlighting in Photoshop.
Backlighting: The Pros and Cons
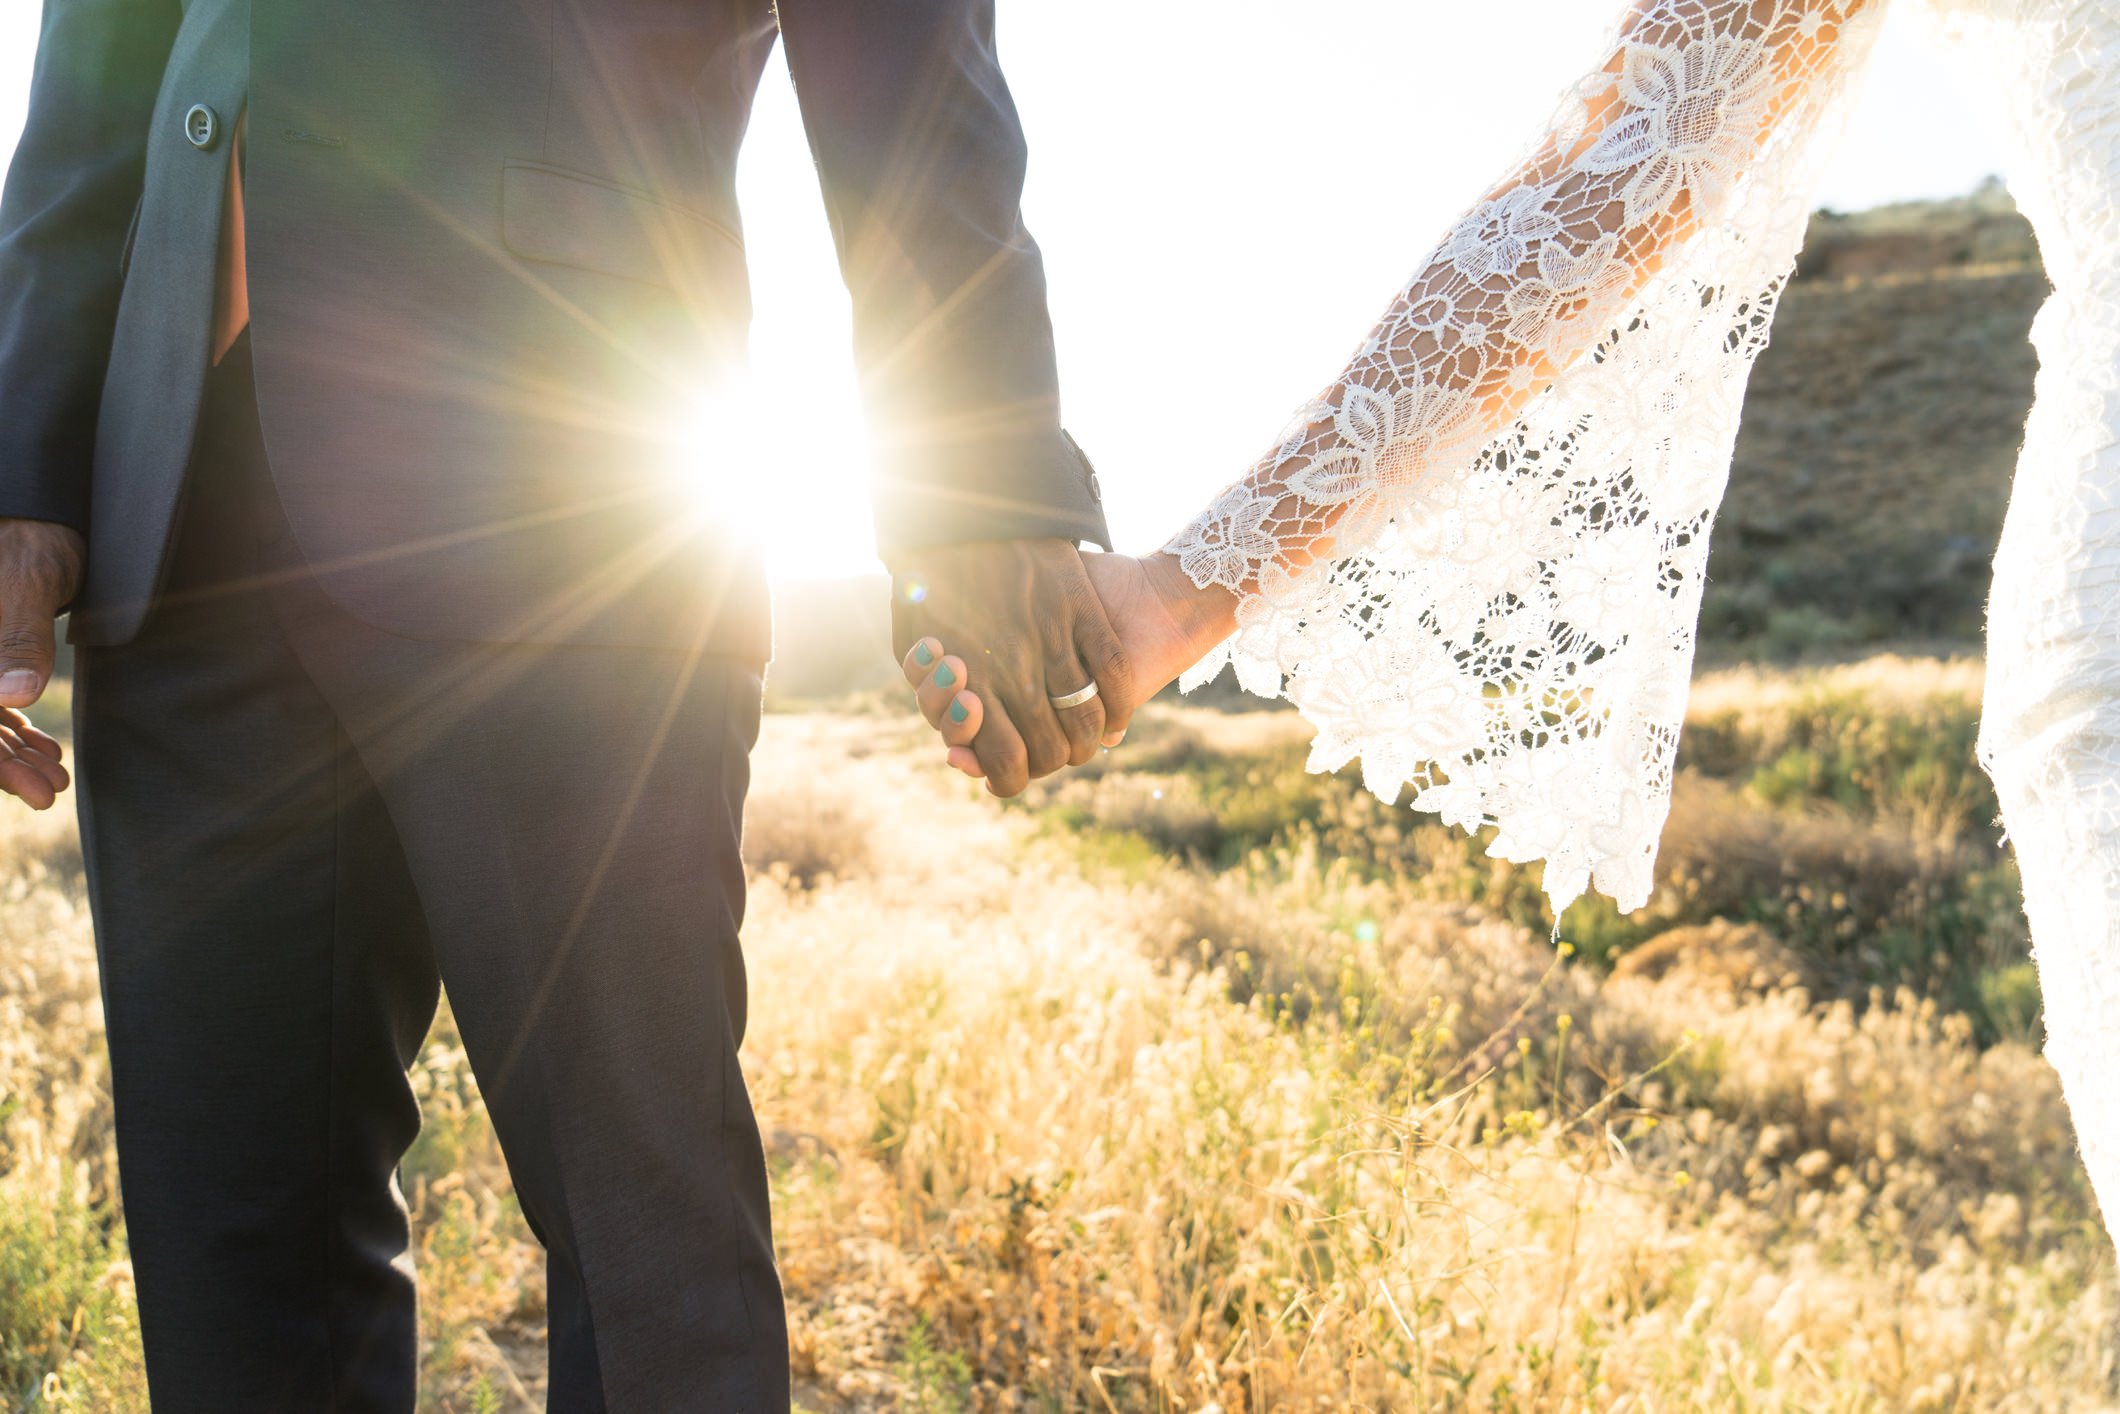
Just as a refresher, backlighting occurs when the light source emanates from behind the subject, as seen in the image above.
There are a few pros and cons to using this type of lighting:
Pros
- Backlighting can create highly dramatic scenes.
- Backlighting increases contrast between the background and the subject because the background is full of warm light and the subject is often darker (i.e. silhouetted).
- Backlighting is conducive to telling interesting stories about the subject and their relationship to their surroundings.
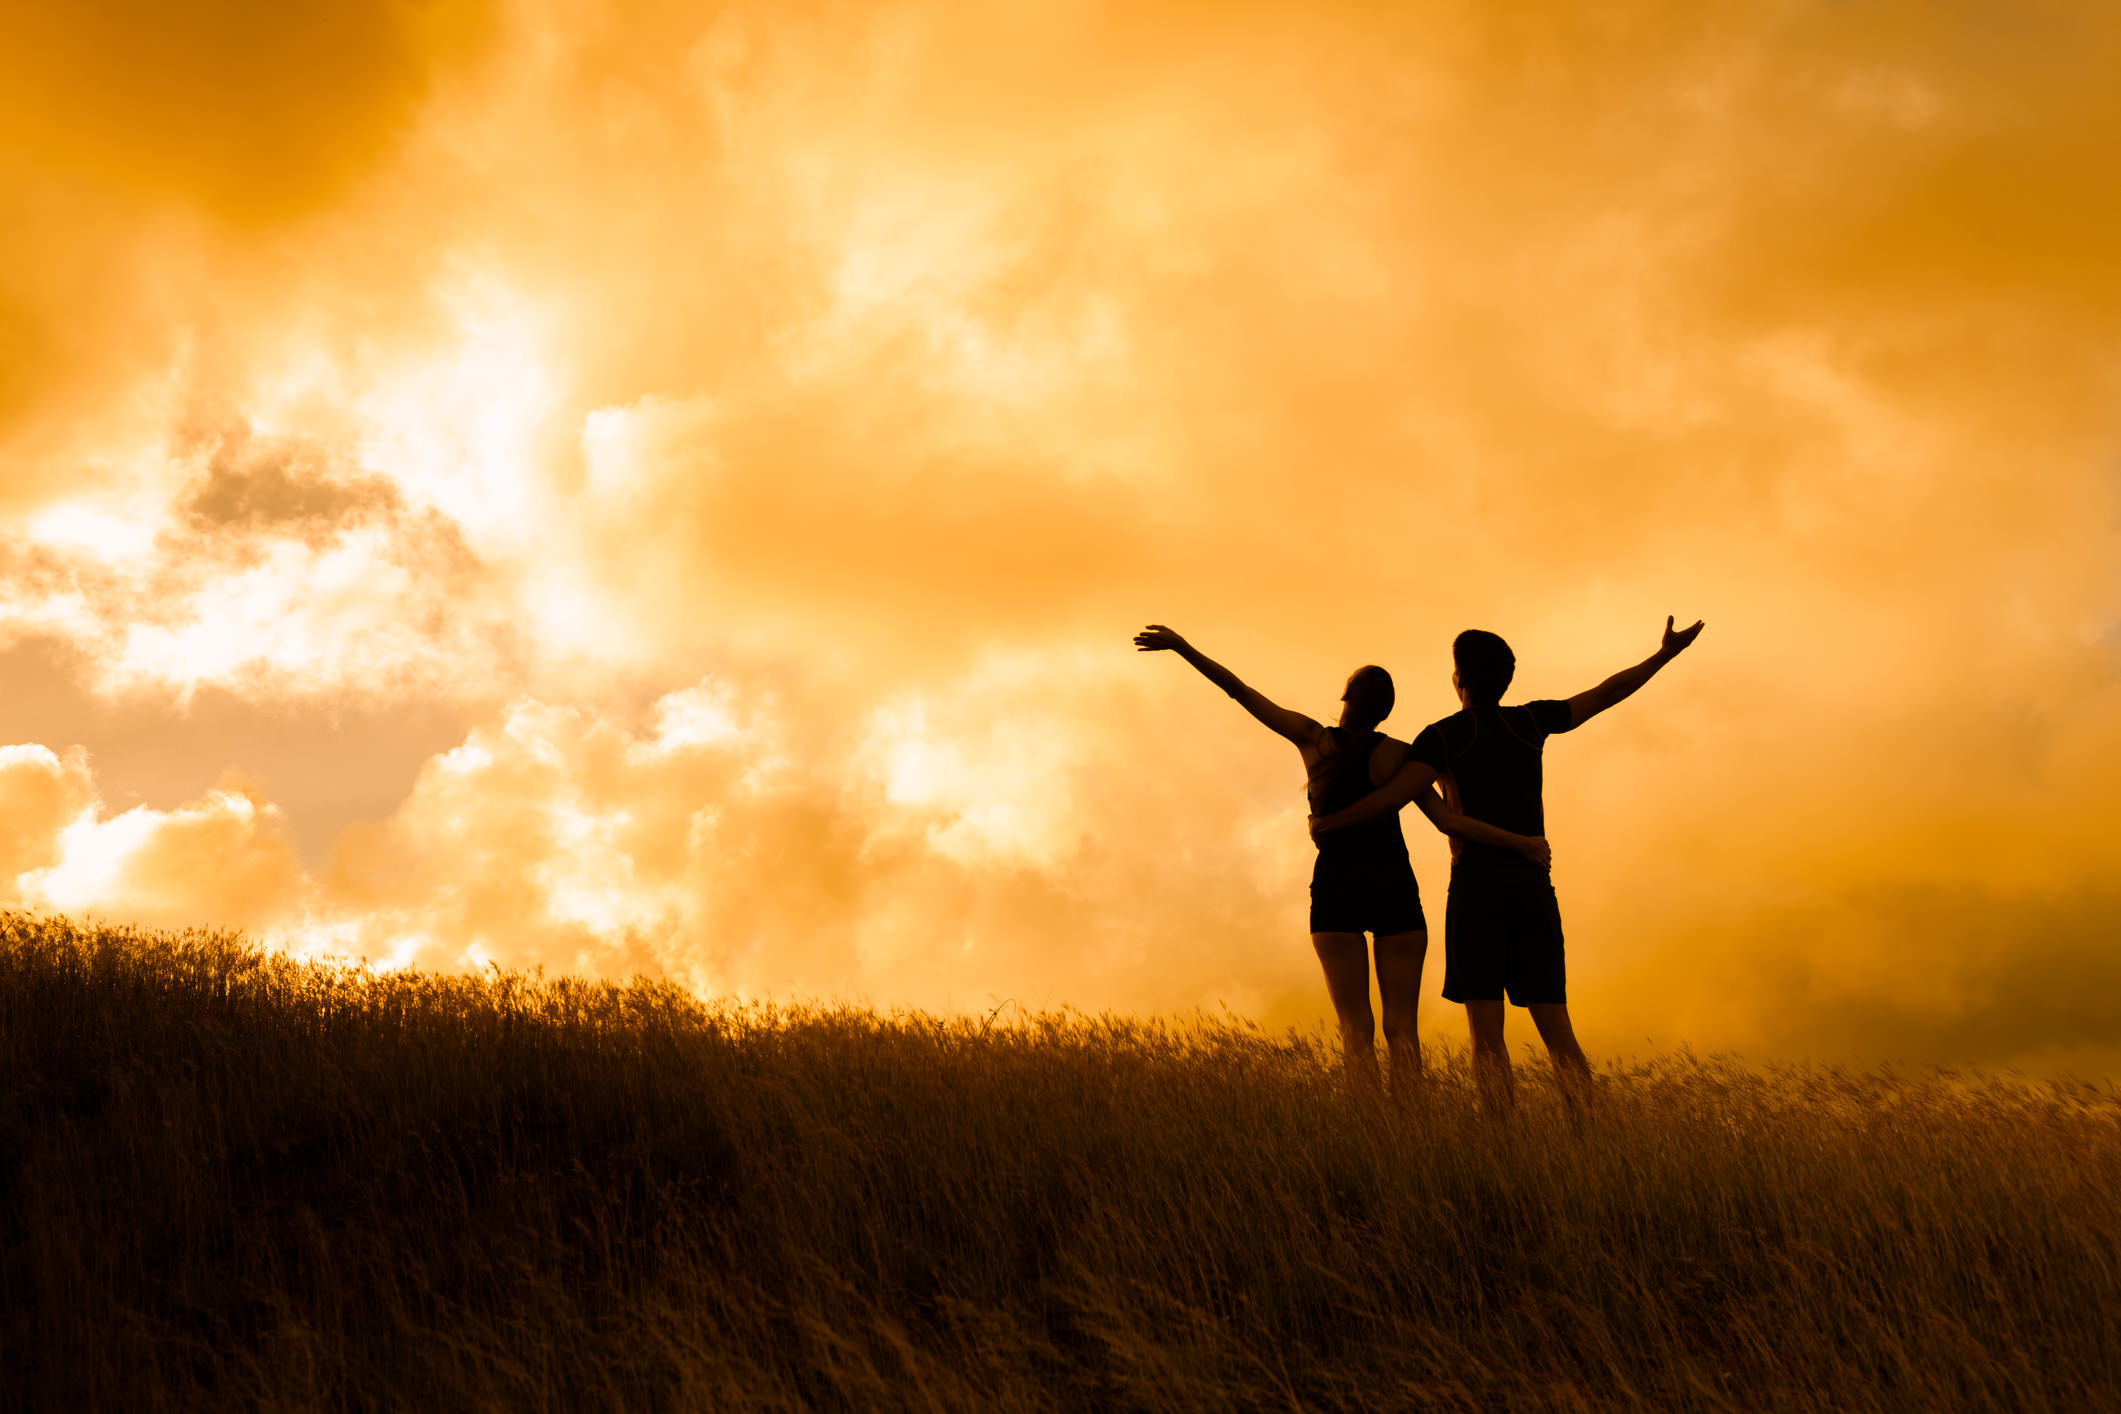
Cons
- Backlit scenes are notoriously difficult to master because of the wide dynamic range that results from a bright background and a dark foreground, as seen in the silhouetted image above.
- Lens flare can be an issue.
- The "right" amount of backlighting is a hard balance to achieve.
Nevertheless, the benefits of using backlighting often outweigh the challenges that come with it. It's just a matter of taking a measured approach that will give you the best opportunity to take advantage of such beautiful lighting.
The Camera Settings

If you want to make the most of natural backlighting, I suggest you work with the following settings:
- Shoot in manual mode, so that you have complete control over your exposure settings.
- Use a large aperture to minimize depth of field. Anything under f/5.6 should do the trick.
- Use spot metering to take a meter reading off of your subject's face. To get a more accurate reading, shield your lens from the sun with your hand.
- Focus on your model's eyes, again, shielding your lens from the sun with your hand to help your camera get an accurate focus point. Your camera's autofocus will likely not work very well (or at all) in this situation, so manual focus is the way to go.
- Shoot in RAW, that way you have maximum ability to work on the image's features (i.e. exposure, white balance, highlights) in post-processing.
With these basic camera settings, you'll be in a better position to capture the beauty of both your model and the light that's illuminating the scene from behind. Naturally, the aperture, shutter speed, and ISO settings will depend on the intensity of the light of your specific shooting situation, so to nail those down, simply take a few practice shots.
Take Advantage of Golden Hour

I know this is probably a real "duh" moment, but Golden Hour is the best time to make use of backlighting, simply because it's warm tones are so soft and inviting.
What's more, since the light during Golden Hour is filtered through more of the atmosphere, it's rays are less intense, meaning you have a better chance of balancing the bright background with your subject's face, which will be in shadow. Put simply, the dynamic range at Golden Hour is much more easily tamed than if you were to shoot, say, one or two hours earlier in the evening.
Having said that, each instance of Golden Hour is a little different. Some evenings, the sun's rays might be diminished even further due to cloud cover. On other evenings, the sun's rays might be more intense without the benefit of clouds to lessen their impact.
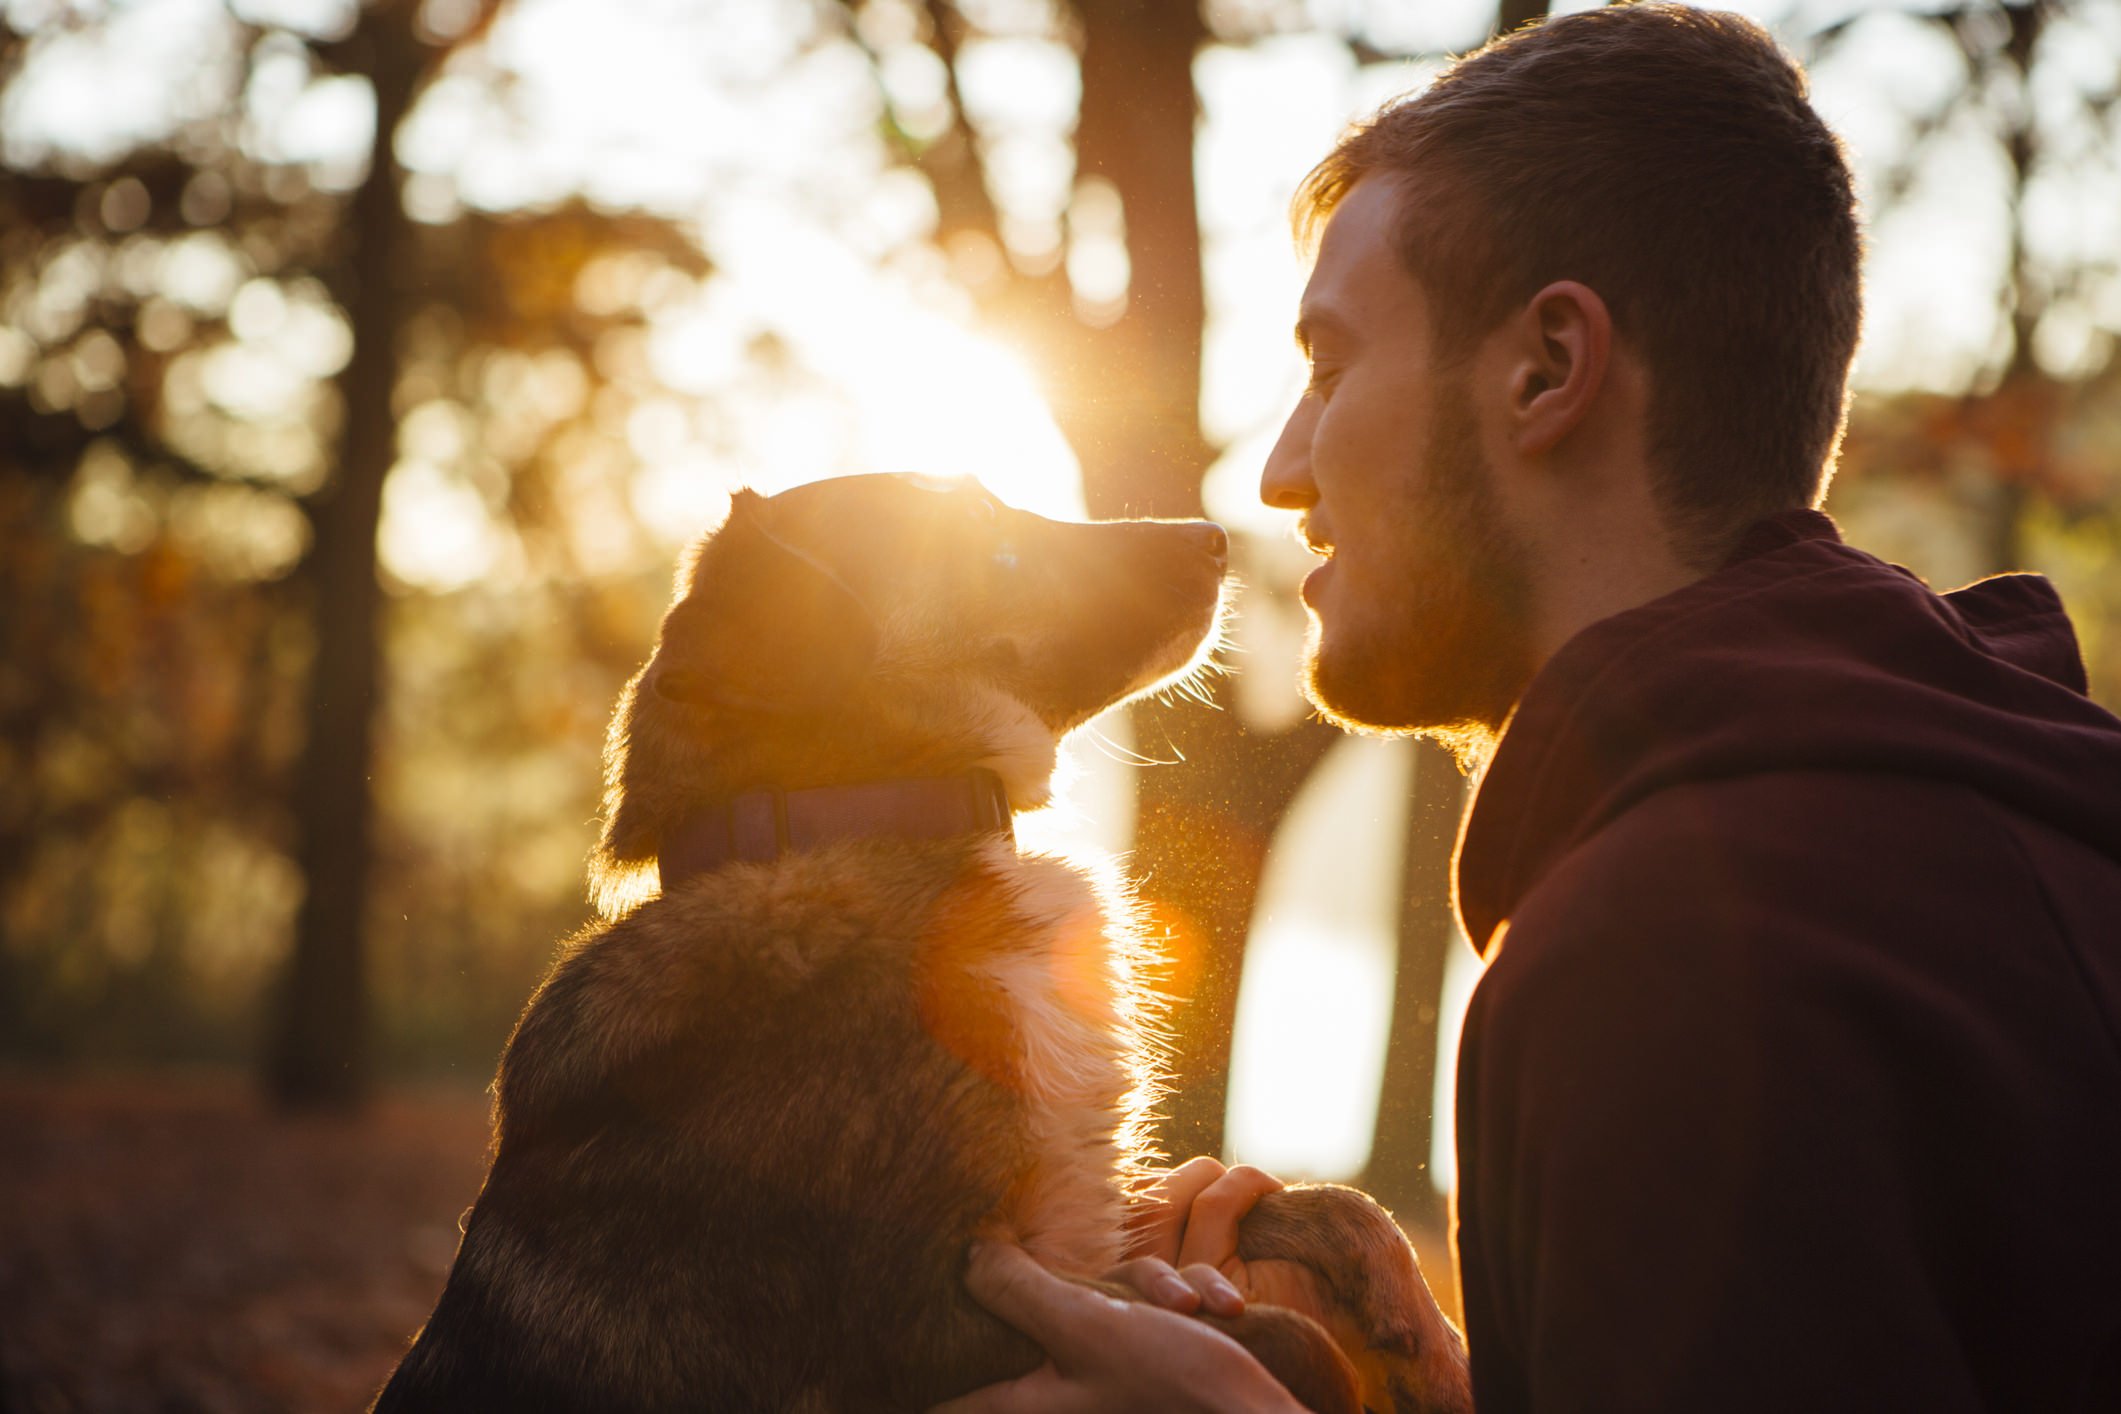
When this occurs, it's a good idea to filter the sun through something like the canopy of a tree or simply frame the sun out of the image. Again, that helps reduce the dynamic range such that you avoid blown out highlights from the backlighting and underexposed facial features of your subject.
Another option is to place the sun directly behind the subject. This gives the shot a bit of a different vibe because it will create almost a glow around the subject and it will require that you frame a closer view of the subject's face as well.
Shield Your Lens
Obviously, a major concern when shooting a backlit image is the abundance of direct light coming right down the barrel of the lens.
Some of the tricks mentioned in the previous section about filtering out some of that light will help avoid damaging your lens.
However, it's advisable to take further measures just to be on the safe side.
Typically, shooting with a lens hood will help eliminate much of that direct light, such the sun doesn't damage your gear. A lens hood is also helpful for reducing lens flare if that's not a creative element you want to include in the shot.
Another trick is to simply block the sun's direct rays with your non-shooting hand.
This takes a lot of practice and finesse from a couple of different standpoints. First, you have to master the art of holding your camera steady with one hand (unless you're shooting with a tripod, of course). Second, you have to become adept at blocking the light without your hand finding its way into the frame.
This might sound like an easy process, but in practice, it's not. Trust me - I have a pretty big collection of backlit photos with my hand making an appearance in the corner of the shot.
Don't Be Afraid of Fill Lighting
Despite your best efforts, you might still find that your subject's face is still a bit too dark to get the look you want.
In that scenario, don't be afraid to fill the scene with light either with some artificial lighting or by using a reflector.
Reflectors are inexpensive and highly effective for bringing a little more illumination to a backlit subject's face, as seen in the image above.
The difficulty with reflectors is that they require a helper to hold them (because you can't very well hold your camera and a reflector at the same time.
If you're in a pinch and don't have someone that can assist you, just bring along a white sheet and spread it out on the ground in front of your subject.
Generally speaking, the sheet will bounce enough light back onto your subject to get the fill effect you need, or at the very least will fill in the shadows so that you can more easily edit the photo in post-processing.
Enhancing Backlighting in Photoshop
Despite all your best efforts, using the tips and tricks above still might not be enough to get the results you want for your backlit photos.
However, they will help you get closer to that ideal shot.
Even if they aren't perfect, taking recourse to improve the results you get in the field means you'll have more to work with once you get home to process the photos.
In the video above, Irene Rudnyk walks us through the process of editing a backlit photo, beginning with the RAW file and making the necessary adjustments such that the final result is a breathtaking backlit portrait.
Follow along as she shares her workflow step-by-step. It's an easy process to follow and replicate, with gorgeous photos as a result!
We Recommend
How to Build the Ultimate Small Photography Lighting Kit
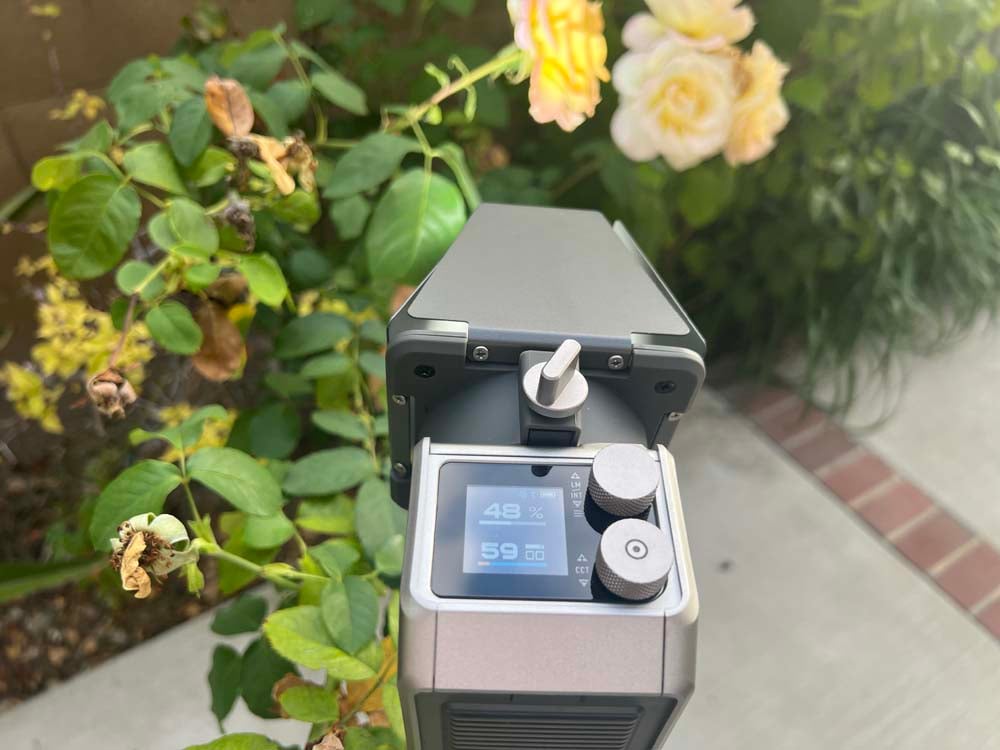
Every photographer knows how important it is to have a good lighting kit. Unfortunately, though, standard photography lighting equipment is bulky and heavy. If you typically shoot in a studio, that’s not a problem, but what do you do if you are an on-the-go photographer or travel a lot? Do you really want to always be lugging around a giant kit?
That’s where a small photography lighting kit comes in, and this article will teach you how to build the perfect one! We’ll cover all the lighting essentials, from ultra-compact lights and stands to long-lasting portable batteries and a foldable softbox.
Additionally, we’ll share a handful of lighting photography tips that will enhance your photography skills and help you make the most of your small lighting kit. Now, without further ado, join us to discover how to build the ultimate small photography lighting kit!
Table of Contents
- Photography Lighting Kit Essentials: Compact Lights
- Photography Lighting Kit Essentials: Mini Tripod Light Stand
- Photography Lighting Kit Essentials: LiteDock
- Photography Lighting Kit Essentials: Portable Power Source
- Photography Lighting Kit Essentials: Foldable Softbox
- Final Thoughts on Building a Photography Lighting Kit
- Recommended Photography Gear
Photography Lighting Kit Essentials: Compact Lights
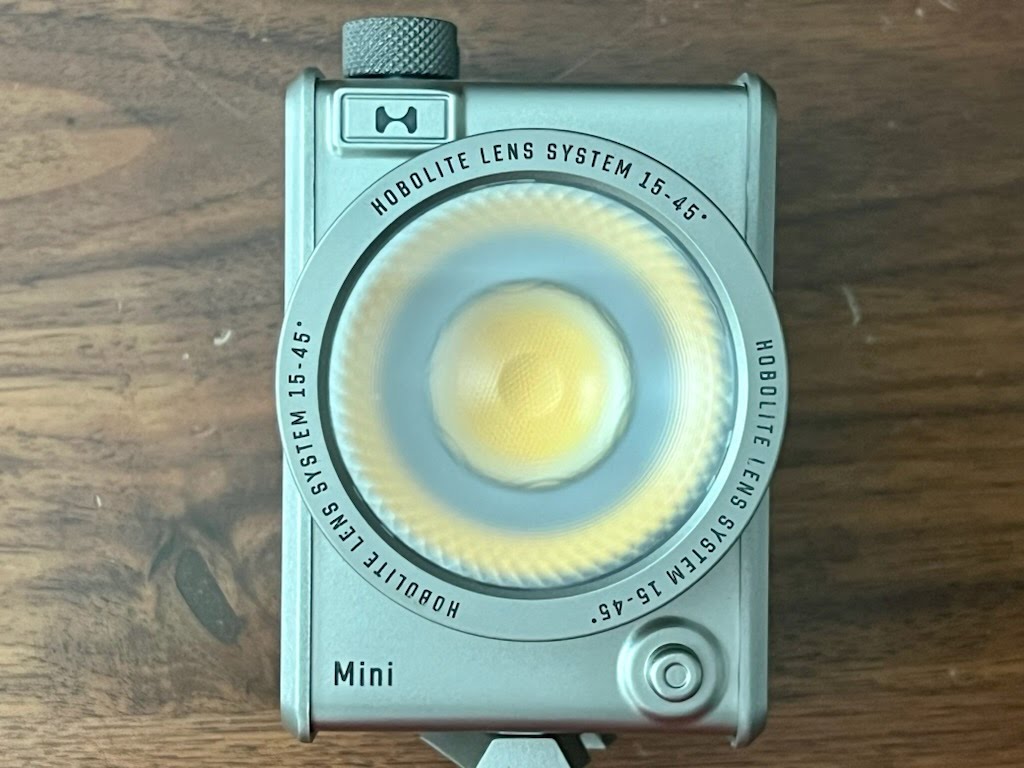
The core element of any lighting kit is the lights themselves. With that in mind, the best small light for photography and videography is the Hobolite Mini. It’s a super compact and versatile 20W bi-color LED light ideal for all shooting situations. Furthermore, it has an adjustable lens (15°-45°), an integrated battery, and weighs only one pound.
On top of that, its beautiful vintage design will turn heads and make it the talk of any set. For people who often work outdoors, we recommend its sister, the Hobolite Mini X. It boasts all the same professional specs and features as the original light but with a more durable body that’s weather-resistant and built to withstand extreme temperatures.
When buying either light, you can choose between the “Standard Kit” or the “Creator Kit.” The Standard kit comes with a power adapter and type C cable, while the Creator Kit also includes a desktop tripod, v-mount cold shoe adapter, v-mount ball head adapter, and mini barn doors.
Check out the video above on our PhotographyTalk YouTube Channel for a real-world review of the Hobilite Mini.
Photography Lighting Kit Essentials: Mini Tripod Light Stand
Once you have your light, you need something to hold it—enter the CF 210 mini light stand. It’s an ultra-lightweight carbon fiber stand designed specifically for the Hobolite Mini (although it is compatible with other lights). Moreover, it’s collapsible and comes with a comfortable carrying bag.
The CF 210 light stand weighs only 1 kg (2.2 lbs) and is 48.8cm (1.6 ft) long when fully collapsed. When deployed, it has a maximum height of 210 cm (6.9 ft). The height flexibility allows you to play around with different angles and types of light.
Learn More:
- Transforming Your Photos With Proper Photography Lighting
- 4 Photography Lighting Types You Need to Know

Photography Lighting Kit Essentials: LiteDock
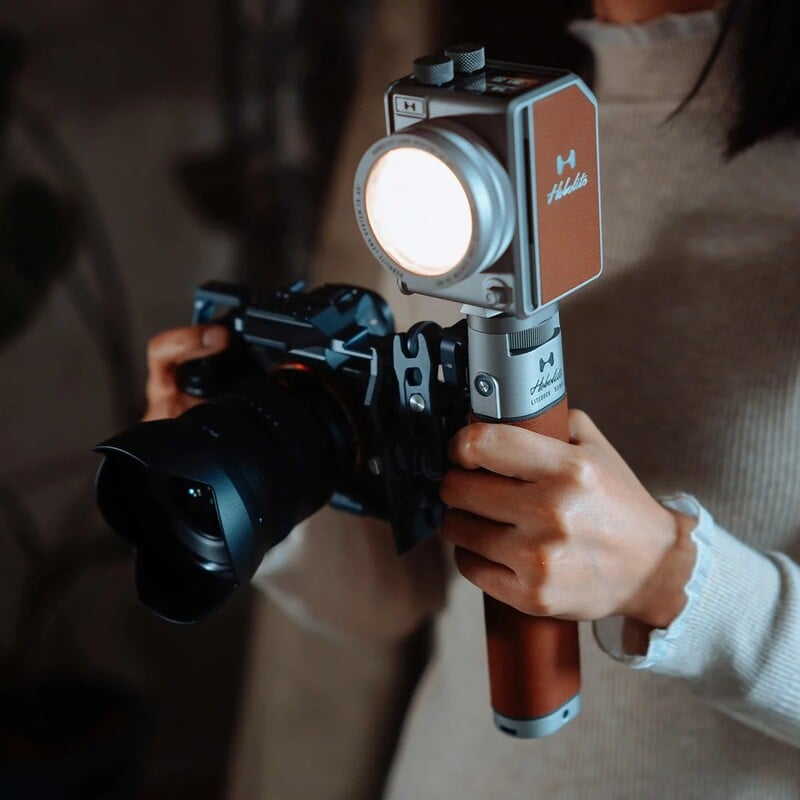
Whereas the CF 210 mini light stand lets you set up static light sources, the LiteDock is an on-the-go light stand. You can mount your light on it and use it independently in the background or foreground or pair it with your camera. When paired with your camera, it creates a one-of-a-kind lighting setup ideal for action/adventure photographers and vloggers.
The LiteDock is made from aluminum and faux leather and features a built-in battery. It also has two Type C ports to power multiple lights simultaneously. We recommend pairing the Hobolite Mini X with the more durable LiteDock X if you often work in harsh environments.
Photography Lighting Kit Essentials: Portable Power Source
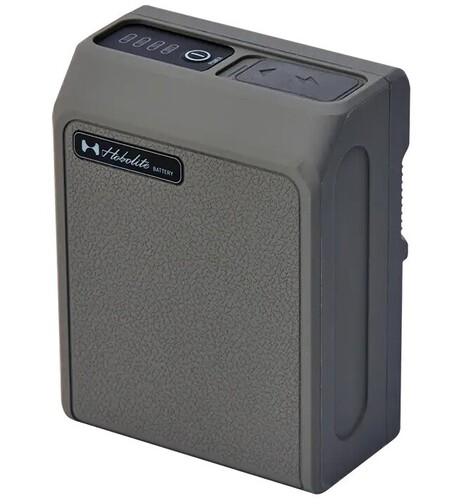
One of the biggest reasons to build a small photography lighting kit is the independence it grants you. You can shoot where you want, whenever you want, with studio-quality lighting. This often means you are working for extended periods in locations without electricity. If that’s the case, you must invest in trustworthy and reliable rechargeable batteries.
We use these 95WH V-mount DC batteries by Hobolite. They are small 14.8V 6.4Ah batteries that last for hours. Each battery can power multiple devices simultaneously and has four LED indicator lights displaying the current battery life. In addition, with a type C charging port, you can quickly recharge the battery from a car or external power bank at any time.
Photography Lighting Kit Essentials: Foldable Softbox
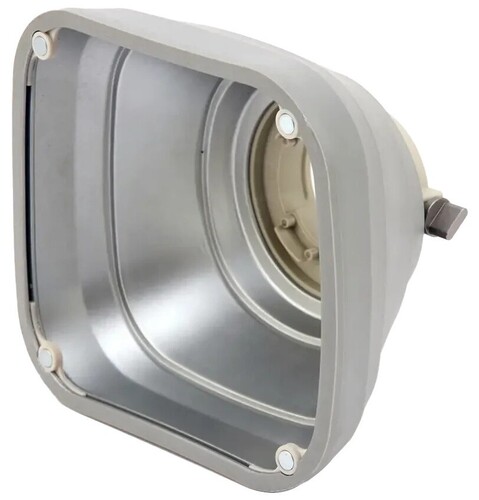
A softbox is another key piece of equipment to include in your small photography lighting kit. Softboxes diffuse light from artificial light sources, creating a gentler, more visually appealing mood. Make sure to get a softbox that matches your light, though. If it doesn’t fit your light perfectly, it can easily fall off or create unwanted light and dark spots in your scene.
You need this mini foldable softbox for the Hobolite Mini or the Hobolite Mini X. It collapses flat for easy packing and includes four extra color filters (red, blue, green, and yellow). While you will probably use the standard soft diffuser most of the time, the colored filters can add a unique layer of creativity to your photos and videos.
Final Thoughts on Building a Photography Lighting Kit
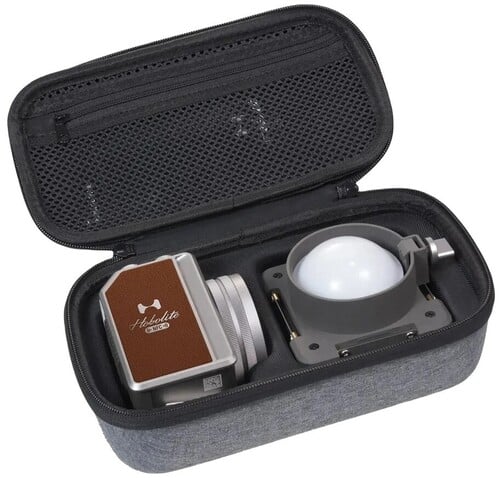
While having a small lighting photography kit is an asset for any photographer or videographer, it’s especially important for on-the-go content creators. These include travel and landscape photographers, vloggers, and documentary filmmakers. Not only will a lightweight kit improve the quality of your content, but it will also make traveling easier and prevent injuries.
Lastly, once you’ve built your small photography lighting kit, here are some lighting tips to help you achieve the best results:
- Use a combination of natural and artificial light.
- Understand different lighting types and techniques (and when to use them).
- Know the best times to shoot outside (blue and golden hour).
- Avoid harsh shadows and overexposed images (artificial light and lens filters help).
- Don’t be afraid to edit your photos in post-production if they don’t come out perfectly.
Recommended Photography Gear
Disclaimer: A quick heads-up: If you snag something through our affiliate links or check out our sponsored content, we might earn a commission at no extra cost to you. But fear not, we're all about recommending stuff we're truly stoked about!
Learn More:
- The Hobolite Mini Review: Beauty, Brains, and Brawn in a Compact Light
- 4 Smartphone Photography Accessories to Level Up Your Game in 2024
We Recommend
How to Create a Home Photography Studio in 6 Easy Steps
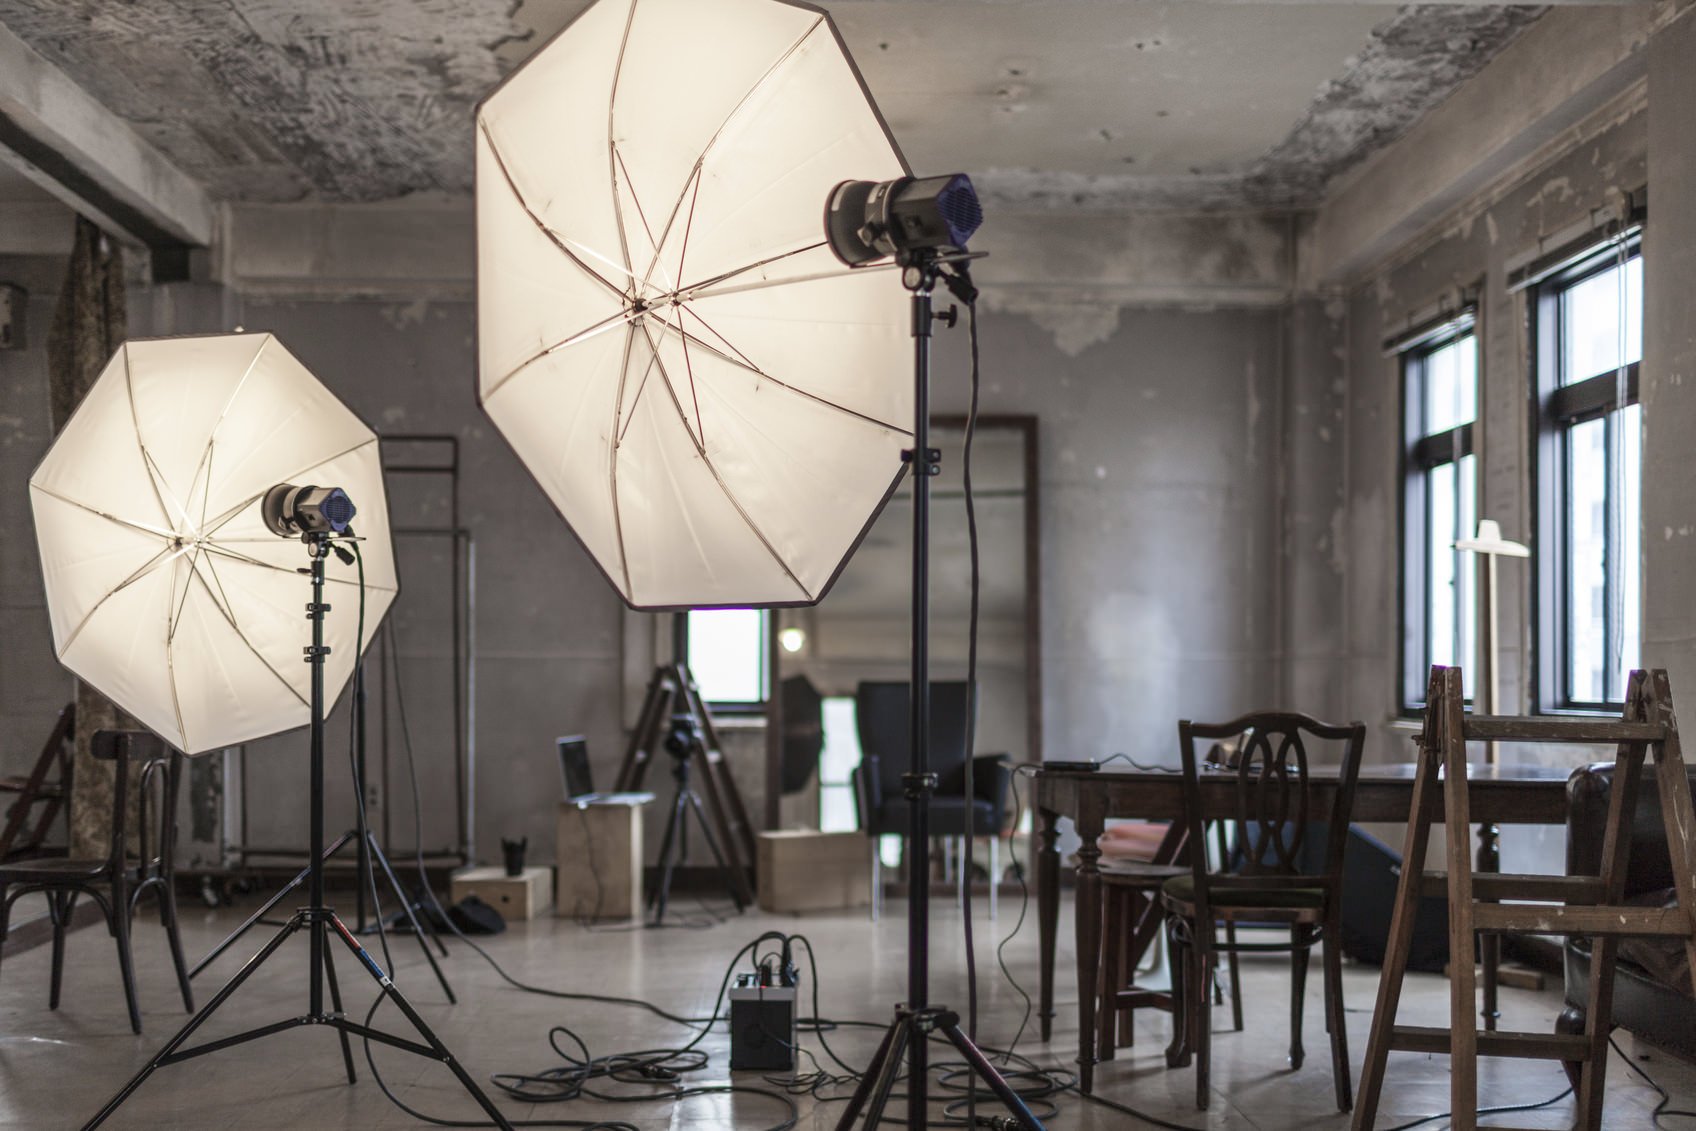
If you’re ready to jump into photography as a business but aren’t quite ready to fork over tons of money to rent a studio space, don’t worry! You can set up a professional-level studio right in your home in just a few steps. From creating a solid backdrop to controlling natural lighting to setting up artificial lighting for portraits, this tutorial gives you all the instructions you need from start to finish. Learn more about photography ideas at home on our website PhotographyTalk.com.

In the video below, Jay P. Morgan from The Slanted Lens gives us insight into all the essential tasks of setting up a home studio. Follow along as he offers up critical advice you’ll need to get your photography studio up and running!
We Recommend
How to Pose Men for Portraits
Male Portrait - How To Pose?
I'm a man, and though I don't speak for all men, I can tell you that most of us are not comfortable in front of the camera.
That uncomfortable feeling shows in our portraits, where we look awkward, have a strained smile on our face, and generally feel like a noob.
But, as with everything in photography, there are plenty of solutions to your man photo poses problems.
Mango Street offers up some killer male portrait photography tips in the video above.
Be sure to watch the video in full to see each tip in action, and read about each tip in the summary below.
Try Emphasizing His Jawline
When posing a man, you might consider ways to make the image a little more masculine, and a great way to do that is to highlight his jawline. Learn more about poses for guys on our website PhotographyTalk.com.
The jawline is nice and angular and is a harsher feature that lends to the masculinity of the shot.
To emphasize the jawline, have the model turn to his left or right, so you have a better view of the jawline, as seen above.
To enhance the view even further, find bright, direct natural light or use artificial lighting to cast a shadow of his jawline onto his neck.
Again, doing so enhances the angularity of his jaw and results in a portrait that's pleasing to view and masculine at the same time.
Learn More:
Give Him Something to Do With His Hands
This is a great tip for any portrait subject, not just for men!
The most awkward thing about portraits is when people don't know what to do with their hands. Usually, that means the go-to is for the hands and arms to dangle next to our bodies.
For an improved look, have your male model do something with his hands.

He can clasp them together as seen above, cross his chest and place his hand on the opposite shoulder, brush his hair out of his face, or frame his face by stroking his beard. You can also view another post about best poses for photography.
Note how these aren't vigorous or intense actions, either.
Simply instructing him to put his hands somewhere can immediately minimize the awkwardness of the shot, resulting in a far more visually appealing portrait.
Keep the Posture Relaxed
I realize that those stiff-as-a-board formal types of portraits are a necessity sometimes, but if you want to get a high-quality portrait of a man, opting for something that's relaxed will get you much better results.
Whether it's leaning forward on a railing, leaning back on a wall, sitting down or even laying down, having your male subject in a comfortable posture will make him more likely to be relaxed in the portrait.
When sitting down, have him lean forward, perhaps even putting his elbows on his knees. When standing, have him cross one foot in front of the other, or even one arm across his body to his opposite shoulder to keep things nice and loose.

Another interesting tip is to have him pretend that one arm is heavier than the other and that it's dragging his body down on one side.
As you can see in the image above, by having him emphasize the weight of his left shoulder, it has the look that he's in motion, in the middle of shifting his positioning. That results in a nicely relaxed posture, don't you think?
Bonus Tip For Man Portrait: Use the Surroundings and Props to Your Advantage
Obviously, the location you choose to shoot a portrait of a man will have a significant impact on the overall visual appeal of the image.
Like was pointed out in the first tip, finding ways to add strong angles adds a masculine touch to the shot. You can also check another post about poses for boys.
Looking at the image above, note how the two staircases create interesting lines that help direct our eye to the subject.
Also notice how the grittiness of the background helps in creating a more edgy shot that matches this model's look.
The peeling paint and the texture of the iron rails is a nice addition to create a portrait that's relaxed and masculine, but eye-catching and visually appealing at the same time.
What's more, you can also use props to help your male subject get away from having awkward arms and hands.
But the key is to use props in a way that they blend in with the shot.
In the image above, the skateboard is the perfect prop as it fits in with the environment in which the image was taken.
What's more, the skateboard looks like a natural fit for this particular man, giving the image a laid-back vibe.
The point here is that getting a great portrait of a man is possible, it might just require a little extra work.
And though many of us are bad at asking for directions, if you provide your male subjects with clear, straightforward directions for what you want them to do, you'll probably find that you have some pretty compelling shots as a result!
We Recommend
How to Take Better Portraits With One Simple Trick
I've always been a landscape photography guy.
There's just something about being outdoors and photographing nature's beauty that gets me fired up.
But over the years, I've gotten a little complacent and haven't branched out as much into other genres as I'd like.
That's changing, though, because I've challenged myself to learn how to take better portraits this year.
If you're ready to take more portraits like me, here's a quick tip from Jessica Kobeissi to help you get started:
Since I'm easing my way into portraiture by shooting with natural light, the video above has proven extremely helpful to me to get the most out of the lighting I encounter.
As Jessica notes, when you're outdoors, especially during the middle of the day, it's essential that you find shade.
If you don't, the harsh sun will wash out your model's skin, cause them to squint, and cast harsh shadows as well.
In other words, that kind of light doesn't make for great portraits.
Editor's Tip: Finish your portrait off with a stunning canvas print.
However, just because you're shooting in the shade doesn't automatically mean that you can shoot whichever way you like.
That means that you and your model need to work together to find the best spot in the shade to get the best portrait photography results.
Now, this might sound difficult, but as you see in Jessica's video, it really just boils down to some experimentation and practice.
The key is to try shooting your portraits in a variety of spots because one area of shade might be quite dark while another might be relatively light.
Learn More:
- Advanced Portrait Photography Tips That Will Immediately Make Your Photos Better
- Easy Natural Light Portrait Photography Tips
- How to Take Better Portraits With Your Smartphone
Case Study: How to Take Better Portraits in the Shade
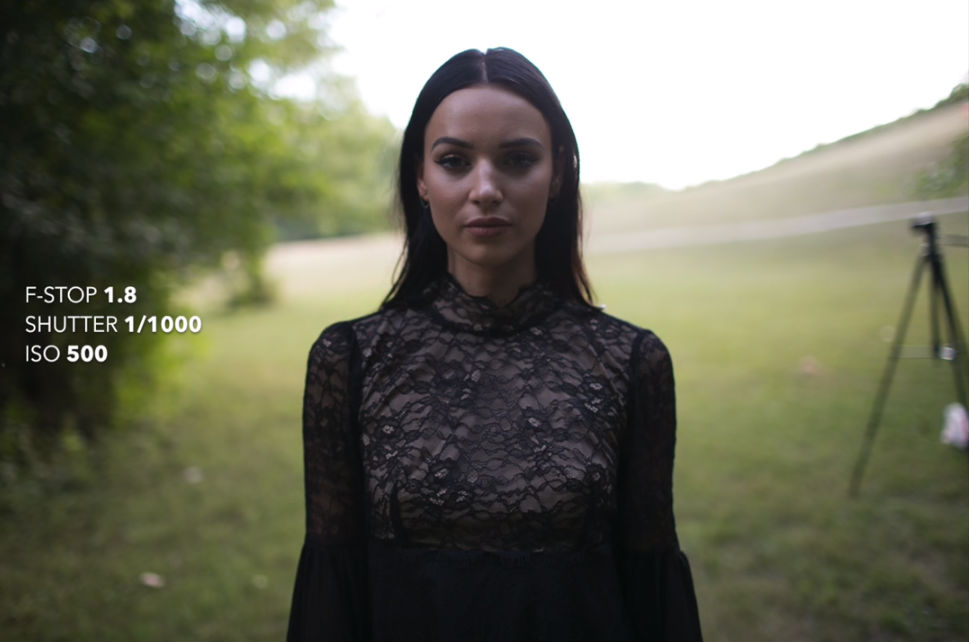 YouTube Screenshot/Jessica Kobeissi
Likewise, it's important to consider the directionality of the light in the shady area.
Even though light is highly diffuse in shady areas, there is still a dimension of directionality that can influence how the light interacts with the model's face.
If you look at the screenshot above, you can see that when the model is turned toward a darker shaded area, her face is also darker.
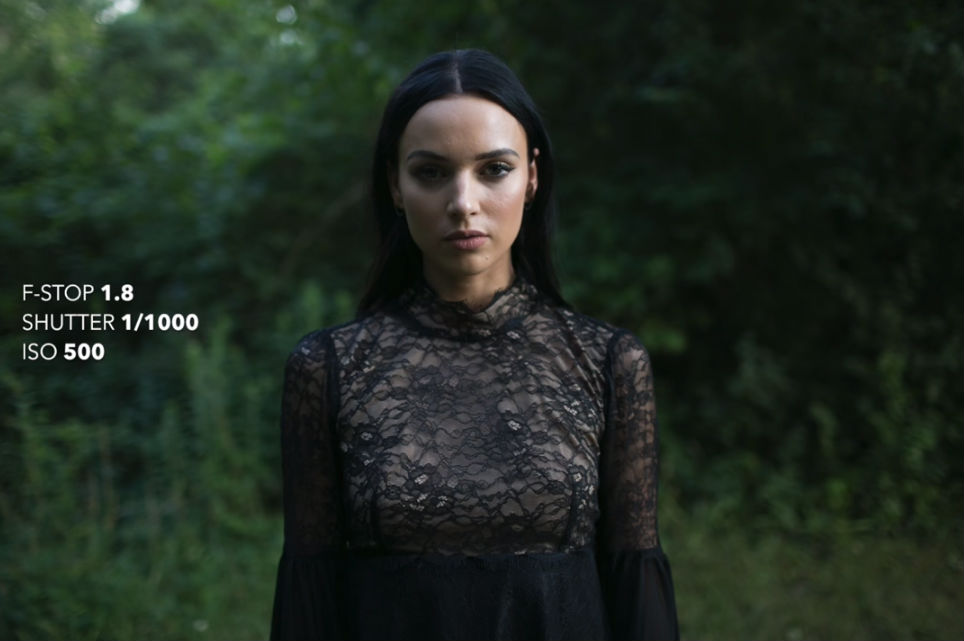 YouTube Screenshot/Jessica Kobeissi
But by turning 90-degrees and facing a little more towards the bright sky, you can see how much brighter the light is on the left side of the model's face.
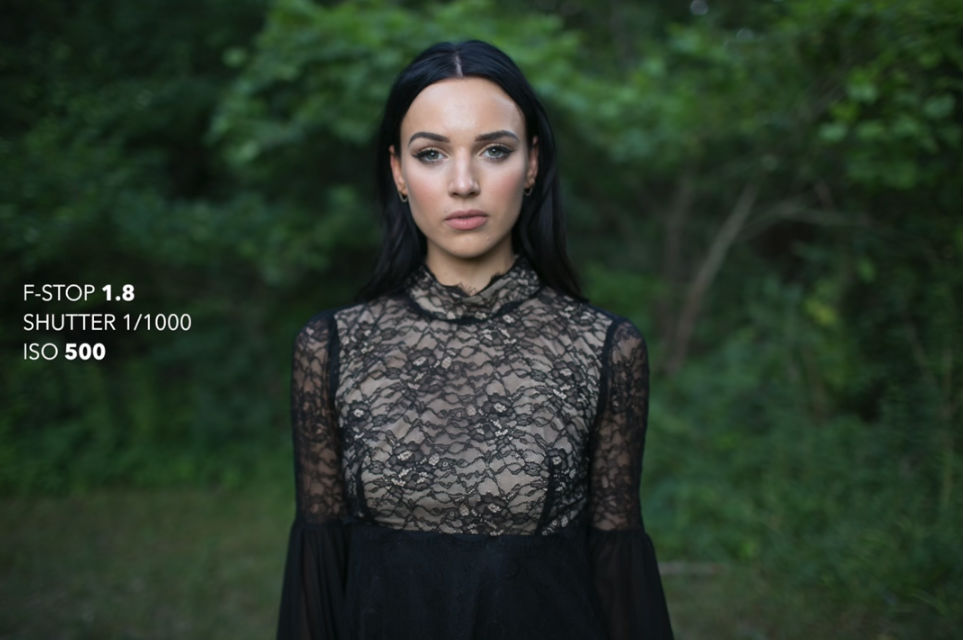 YouTube Screenshot/Jessica Kobeissi
You can actually see the difference in how the light interacts with the model's face by having them continue to rotate around in the same spot.
Above, you can see how turning 90-degrees and staying in the same spot in the shade changes the look of the shot.
This positioning with the model facing towards the sky results in much better lighting for the portrait - it illuminates her face nice and evenly, with no harsh shadows. Now that's how to take a good portrait!
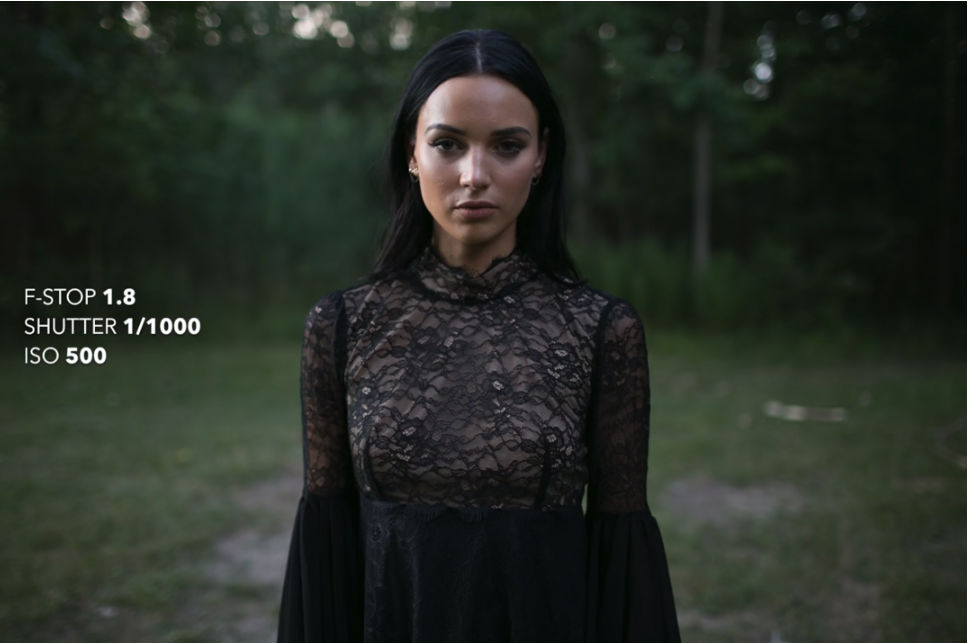 YouTube Screenshot/Jessica Kobeissi
And again, turning 90-degrees gets you a totally different look.
Remember, these four images are of the same model in the exact same spot under the shade of the same trees.
Yet, each image looks different and has a different vibe. Crazy, right?
When it comes to how to take portrait photos, pay attention to the light, and you can create not just one awesome shot, but several!
Editor's Tip: Earn money with our #1 affiliate program.
It's also worth noting how the background of the shot plays into the quality of the image.
The third image above isn't just the best of the bunch because of the quality of the light falling on the model's face. The background is also the most pleasing.
The dark green tones of the foliage contrast nicely with the skin tone of the model, and the fact that there is more variation of green, with some lighter tones to offset the darker ones, makes for a more dynamic background.
It's All About Patience
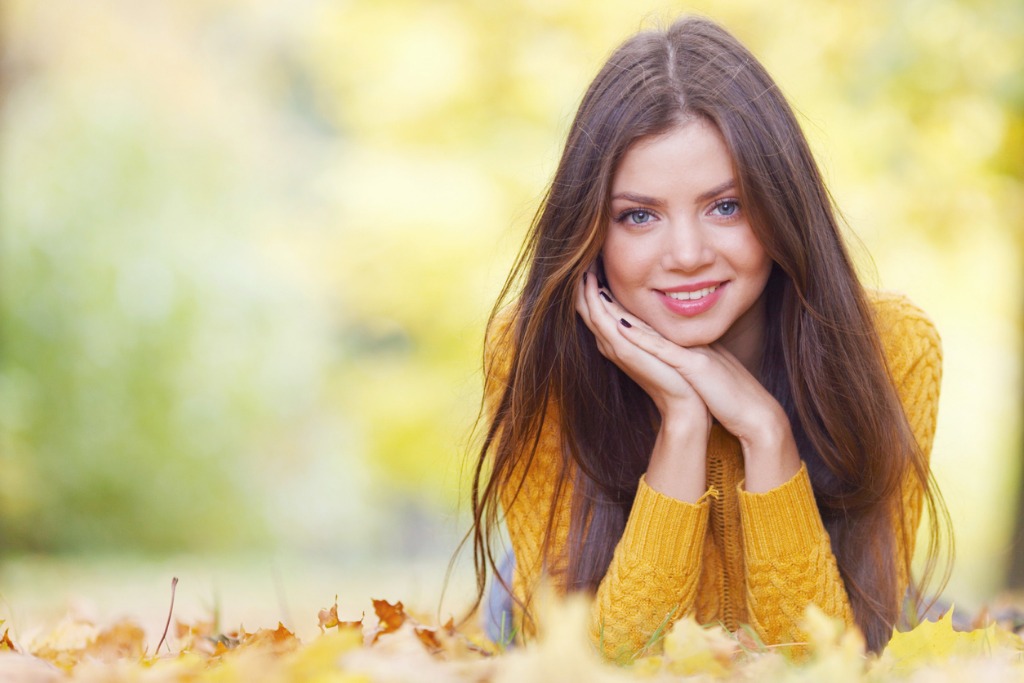
As I noted above, what I take away from this is that you can't simply expect the light to be great if you're in the shade.
Instead, to get the most out of your natural light portraits, spend a few minutes (a few seconds, even!) to move around, move your model around, and find the best light. It's that kind of patience that is required when learning how to take portraits.
Just that one factor can make an incredible difference in your portraits, and make the difference between getting "the shot" and getting a photo that ends up in the trash bin.
Learn More:
- 9 Can’t-Miss Portrait Photography Tips That Will Help You Create Better Portraits Today
- How to Take Better Portraits in 6 Steps
We Recommend
How to Use Natural Lighting for Portraiture
No matter how fancy your lighting setup is for portraits, it just can’t match the type of soft, warm lighting you can get by using the good ol’ sun.
Of course, using natural lighting means that there is a lot of extra work involved in terms of where you shoot, when you shoot, how you position the model, and how you position yourself as well.
But, just because there’s more work involved doesn’t mean that it’s hard to use natural lighting! In the video below, Jessica Kobeissi walks us through how to use natural lighting for portraits, step by step. From posing to composition and everything in between, find out just what you need to do to get incredible outdoor portraits!
Amazon Recommendations
- Canon EF 35mm f/1.4L USM Wide Angle Lens for Canon SLR Cameras
- Canon EF 50mm f/1.2 L USM Lens for Canon Digital SLR Cameras
- The Luminous Portrait: Capture the Beauty of Natural Light for Glowing, Flattering Photographs
We Recommend
It’s All in the Details: How to Train Your Photographer’s Eye
It’s easy to be presented with a scene and take in the totality of it rather than focusing on the details. We see the landscape before us, not the vignettes that comprise it. We see the group of people we’re photographing, not the individual faces - at least not at first.
Though the saying goes that “the devil is in the details,” in photography, it’s the details that have all the power. After all, it’s our individual characteristics that make portraits unique. It’s the colors, textures, and individual elements in a landscape that make it photo-worthy. If you want to learn how to see photo-worthy scenes details-first, here’s how…

Look for Patterns, Textures, and Forms
If something has a repeating pattern, like the columns of a building, textural details like cobblestones on an old street, or interesting shapes, like the cables of a suspension bridge, it’s a good place to start your photography journey. All of these elements are immediately interesting to the eye - they pull you into the shot because of their dynamic appearance.
Take the image above as an ideal example of this. Just by looking at it, you likely immediately understand that it’s the Golden Gate Bridge. But this detail-oriented shot gives us fresh perspective on the bridge. Rather than the typical shot taken from far off, showing the bridge in relation to the surrounding environment, this image is a little more unique because it focuses on the texture of the suspension cables. What’s more, the perspective of the shot - looking straight up - makes it still more unique.

By focusing on the details of the bridge first, you develop a better appreciation of what makes this bridge so beautiful. Then, when taking more traditional shots of the bridge like the one above, you’re more apt to notice how those details add to the shot. In this case, the linear lines of the suspension cables and the stark order of their repeating pattern contrasts nicely against the soft features of the surrounding environment.
Find the Light

Of all the details that make up a great photo, light is the most important. As such, whenever you’re ready to snap a photo, follow the light. Whether that’s Golden Hour, when the lighting is at its softest and warmest, seeking opportunities to filter light in unusual ways, or looking for interesting shadows cast by features in the scene you’re photographing, work to use the light in your favor.
For example, if you’re out shooting in harsh, mid-day lighting, which is typically not that pleasing when it comes to photography, endeavor to filter that light somehow. In the image above, the tree canopy successfully minimizes the light, allowing the photographer to illuminate the gorgeous color of the leaves from behind. The harshness of the lighting in this situation actually worked in the photographer’s favor because the detail of the leaves would have been lost had the sun not been positioned where it is.
No matter where you’re shooting, whether indoors or out, daytime or nighttime, train yourself to look for details of light, shadow, contrast, and the like, and how lighting interacts with your primary subject. That kind of detail will help you create a more visually engaging photo.
Contrast is Where It’s At

When you hear “contrast,” you probably think of it in terms of color or lighting. And though contrasting colors and contrasting areas of light and shadow are certainly worthy details to try to incorporate into your images, don’t just stop there. There are many other types of contrasts that add depth, dimension, and interest to a shot: rounded vs. straight lines, a silhouette against a bright sky, solid objects against fluid objects, and an element of motion in a still shot come immediately to mind.
In looking at the image above, you can clearly see contrast makes for a more interesting image. The stationary objects in the scene, like the buildings and stoplights, contrast nicely with the blurred movement of the passing buses. Just imagine this image if the busses had been stationary. Would it have been as interesting? Certainly not.
Remember - contrast is essential in photography because it gives the image a more three-dimensional feeling. Including these kinds of details in your photos, along with patterns, textures, shapes, and lighting, will generate much more interesting images that captivate viewers on a whole other level. So, seek out details the next time you’re out shooting, and see how your images can improve!
We Recommend
Lighting Outdoor Portraits: A Quick Guide

There’s just something about an outdoor portrait that catches the eye in a way that an indoor, studio portrait cannot. Maybe it’s all the life, color, and textures inherent in landscapes. Maybe it’s the nice natural lighting that makes the person glow. Maybe it’s a combination of both!
When taking any kind of portrait, lighting is essential. But when you take your portrait outside, there are plenty of lighting options other than the plain old sun. Let’s review a few ways that you can light your portrait subject and create a gorgeous outdoor portrait.
Natural Lighting
Obviously, natural lighting is the easiest approach to lighting your outdoor portraits. The benefit of natural lighting, especially during Golden Hour, is that the light is soft and warm, and gives your portrait subject a nice glow that’s hard to duplicate with artificial lighting. What’s more, during Golden Hour, it’s easier for your subject to look towards the light without squinting. The soft evening light is also conducive to creating very minimal shadows. There’s just enough shadowing to indicate depth, but not so much that it causes harsh contrasts on the subject’s face.
To maximize natural lighting, experiment with the placement of the model. Take some shots with them facing the setting sun and others facing away. Try some shots with sidelighting too just to see how it turns out. It's helpful to understand the differences between warm and cool light as well.
Natural Lighting Plus a Reflector
A great way to enhance natural lighting is to use a reflector. Typically found in 5-in-1 packages, reflectors bounce ambient light toward the subject, helping to fill in shadowed areas and provide you with more even lighting for the shot. They are useful regardless of the time of day, but especially during mid-day shoots when harsh shadowing can ruin your portraits.
Using a reflector is simple. Place it on the opposite side of the model as the sun, such that it can bounce light onto the shaded side of the models face. The effect the reflector has will depend on it’s color:
-
White produces very soft light and must be held relatively close to the model to have much of an effect. White is also useful for diffusing light and might be held above the model to provide shade from the intense sun.
-
Gold produces very strong light that is warm. Because the light bouncing off the gold reflector is so intense, it’s a good idea to hold it further away from the model, lest you make them look like they have a cheap spray tan. Note in the image above that the model’s face has a warm glow to it, but that it isn’t too intense. This is because the gold reflector was placed at an appropriate distance.
-
Silver is a good choice for situations in which there is little natural light because the light reflected by silver is quite intense. If shooting in bright sunlight, hold the silver reflector a greater distance away. Also consider holding it at an angle such that it isn’t reflecting directly onto the model’s face.
-
Black is an anti-reflector that that helps increase shadows. If your model is facing the sun and the lighting is too even, a black reflector can be used to reduce light on one side, which, in turn, casts gentle shadows on one side of the model’s face.
-
Translucent is used as a diffuser, much like the white reflector when held above the model to shade his or her face. The translucent reflector has the same effect, softening the natural light of the sun.
Like working with natural lighting alone, using a reflector is easy - you can see the effect it has immediately and take action like repositioning the reflector if need be. Reflectors are also quite inexpensive. The problem is that you often need an assistant to hold them in the right positioning.
Natural Lighting Plus Artificial Lighting
For more complex lighting, you can use both natural and artificial light sources. For example, if it’s a cloudy day and the ambient light isn’t sufficient for the shoot, you might use an external flashgun to add some illumination to your model’s face. For even more powerful lighting, a studio flash on battery power might be used to complement the existing natural lighting.
When using an external flash, you’ll need to be able to fire it remotely, which is often done via a radio system. When trying to pair artificial and natural lighting, it’s important to start out on lower power, such that the flash lighting doesn’t overwhelm the natural lighting. If so, the resulting image may have harsh shadows and negate the nice, soft natural lighting you have available to you. Think of your artificial lighting as being fill lights - they aren’t intended to blast light upon your subject, but instead to cast even, supplemental light on the scene.
Obviously, the benefit of using artificial lighting is that you can cater the lighting to your needs or wants. Artificial lighting can also complement natural lighting quite nicely, for an even, warm light on your subject. But using flashguns or studio lights is not only more expensive, but it’s a more time-consuming process as well.
Each of these lighting scenarios has their benefits and detriments. Just experiment with natural lighting, natural lighting and a reflector, and natural lighting and artificial lighting to see which setup suits your work the best. Whichever method you try, you can be sure that your outdoor portraits will have improved lighting and more of a visual impact.
We Recommend
Master the Art of Drone Photography: Part 1

If you have a drone - and these days, who doesn’t - you understand the trials and tribulations as well as the joys of using an aerial vehicle for photography.
But to think that taking photos from above is the same as it is from your handheld camera is a total misconception. There are the photographic considerations, including subject matter and camera settings. There are also the issues related to the responsible, safe, and legal use of drones.
In the first part of our two-part series on drone photography, we explore legal and privacy issues, as well as topics related to safely flying your drone.
Legal Issues

As drones have become ever more popular, more and more laws have been passed governing their use. Since consumer-based drones are still relatively new, governments worldwide are scrambling to devise rules that pertain to when, where, and how drones can be used, and by whom.
At the center of it all is the common sense use of your drone. Naturally, flying it near buildings, over your neighbor’s backyard, or near airports will do nothing but get you in a heap of trouble. Additionally, flying your drone over something that could be damaged or destroyed should the drone crash is a simple matter of using your head and your wits. In short, if you’re about to fly your drone somewhere and you have doubts about the appropriateness of it, don’t do it!

In the United States, the Federal Aviation Administration has issued a broad spectrum of rules of which you need to be intimately familiar before you take your first flight. The FAA’s Unmanned Aircraft Systems website is the go-to place for the latest in terms of news, regulations, instructions on how to register your drone, and procedures for flying. Other entities, like states, and cities, may have their own set of rules as well. These regulations also vary from country to country, so it’s best practice to check with local authorities before sending your drone up into the sky.
Another excellent resource is the Know Before You Fly Campaign. With guidelines for responsible flying, resources for drone enthusiasts, and much more, it is worth a visit if drone photography is in your future.
Practice Makes Perfect

Once you’ve explored the legalities of flying a drone, it’s time to practice.
It goes without saying that you will need to examine a practice area to ensure that it is safe and legal to fly there. A wide-open area would be an ideal spot, such as an empty field in a rural area. Granted, not everyone that has a drone has the luxury of an open field nearby, so this is another common sense moment. Choose a location that is as open as possible and affords you sweeping views so you can maintain eye contact with your drone at all times. Above all else, ensure that your practice location has nothing that can be damaged and no people that can be hurt. If it crashes, you want to deal with a broken drone at the worst, not a destroyed car windshield or a hurt bystander.
You’ll also want to check the weather to be sure you’re taking to the skies in the best possible conditions. The less wind, the better, for obvious reasons. You will have enough to worry about just trying to master the controls of the drone; you don’t need a breezy day to add more stress to the situation!
Beware of the Battery

Many drones are equipped with a feature that, in case of an emergency, it will return to its launch point automatically. This is great for both you and the drone if something goes awry.
However, if you don’t keep an eye on the battery levels of your drone, it will land wherever it pleases, which can be inconvenient at best and downright destructive at worst. It’s far too easy to get caught up in the process of flying, and once you add taking photos, there is an awful lot to command your attention.
As such, you will need to develop a system for checking your battery life. Set a reminder on your phone. Have a friend time your flight and call out how many minutes of battery life are left. Try to launch the drone as close to the area you want to photograph as possible. These are simple steps, but they could very well save you lots of trouble should your drone run out of juice.
Understanding the factors that reduce battery life is essential as well. The more camera weight it has to carry, the less time your drone will be able to fly. Windy conditions and cold weather have a deleterious impact on battery life as well. Be prepared to cut your flight time in these conditions by as much as half!
Final Thoughts

There is far more to know about flying a drone for photography purposes, so be sure to check the resources provided in this article before you attempt to tackle drone photography. As noted above, it’s mostly about using common sense and being informed about what you can and cannot do with your drone. Be responsible, check local regulations, and take the time to learn how to fly your drone safely before you attempt to add photography to the mix.
We Recommend
Newborn Photography Tips You Can Do At Home
 Belly Beautiful by Karen Marie
If you've got a newborn at home and want to take professional-looking photos yourself, there's a few things you can do to improve the quality of the images you take.
From paying attention to lighting, considering what your baby is wearing, and choosing pleasing angles, these tips are as easy as they get, yet can have a huge impact on how your little one looks in the photo. Learn more about photography ideas at home on our website PhotographyTalk.com.
Have a look at these tips and see how much you can improve your photos of your new bundle of joy!
Find Good Light
 Moonstruck Portraits
Good light is one of the hallmarks of any photo.
But amateur photographers usually don't have a full portrait studio lighting setup at their disposal.
So, what do you do?
One of the simplest solutions is to place your baby near a window and utilize the natural light streaming through to light the portrait.
This is especially effective if the light is diffused by a sheer curtain (or even a white sheet will do).
This kind of light is soft and even with no shadowing, as seen in the image above. That means that your newborn will be the star of the photo without any distracting highlights or shadows!
Spruce Up the Shot With Adorable Clothes and Accessories
 Bianca Hubble Photography
You only have a few months to document your child as a baby, so why not go all out and accessorize your newborn photos with gorgeous newborn clothing and accessories?
By accessorize, I don't mean create a wonderland of baby stuff in the shot.
Instead, I mean something like the image above.
Notice how the basket in which the baby is laying helps frame her, bringing our eyes directly to her.
There's tons of layers here as well that give this photo greater interest - the texture of the baby's wrap, the basket, and the rug underneath the basket, all of which gives the photo greater depth.
 Campbell Kamine Photography
You can also add a little something to your newborn photos by the way they're dressed.
In the image above, the baby's wrap adds tons of vibrant colors that give the photo life and zest.
The crown atop her head does the same, giving an elegance to the shot that makes it more unique than your everyday snapshots of your baby.
Notice as well how the rug extends from one edge of the frame to the other, giving the photo an incredible amount of texture to delight the eye.
Choose Pleasing Angles
 Susy Martinez Photography
Ok, so obviously any angle of your sweet baby will be pleasing. It's the cutest baby ever, right?!
That being said, if you experiment with the angles from which you take the photos, you open up more opportunities to highlight your baby in different ways.
For example, in the image above, the low angle of the shot offers a perfect view of the baby's sweet face.
Additionally, it allowed the photographer to pose the baby in a way that shows how tiny and delicate it is by tucking his arms and legs underneath him.
This image is simple in its composition and styling, making the shot all about the baby and nothing more.
 Abba Color Photography
Though this shot is from a familiar view from directly above the baby, the photographer helped make it more special by adding in the wardrobe and accessories I noted earlier.
The floral crown and wrap, for example, add a punch of color to the photo, while the texture of the blanket adds additional visual interest.
But notice how these elements are "supporting cast members." In other words, though they make for a more interesting photo, the baby is still the focal point of the shot.
When taking a photo of your baby from directly above, try framing the photo with the baby right in the middle of the frame, as was done in this case.
That will help keep the baby front and center in the shot, even if you add in interesting colors, textures, and other elements to make the photo a little more visually interesting.
Final Thoughts
 Bianca Hubble Photography
The tips I've outlined above aren't groundbreaking or complicated by any stretch of the imagination.
But, as you can see in the sample images, these tricks can have a profound impact on how the photos of your baby turn out.
Great photography doesn't have to be hard to do - you just need to know where to begin and how to execute the shot!
About Sew Trendy
This is a company that photographers absolutely need to be in touch with. Their gowns, crowns, and other high-quality accessories (like those shown in the images above) are just what you need for maternity photos, photos of newborns, and mommy and me sessions. These accessories not only make your clients look and feel great, but they also add a depth of detail and interest to your photos that elevate the images to an entirely other level. What started out with just a few people manufacturing these eye-catching items is a growing business that provides accessories to photographers worldwide. Help your clients look and feel their best by partnering with Sew Trendy Accessories.
We Recommend
Night Photography Camera Settings Made Easy
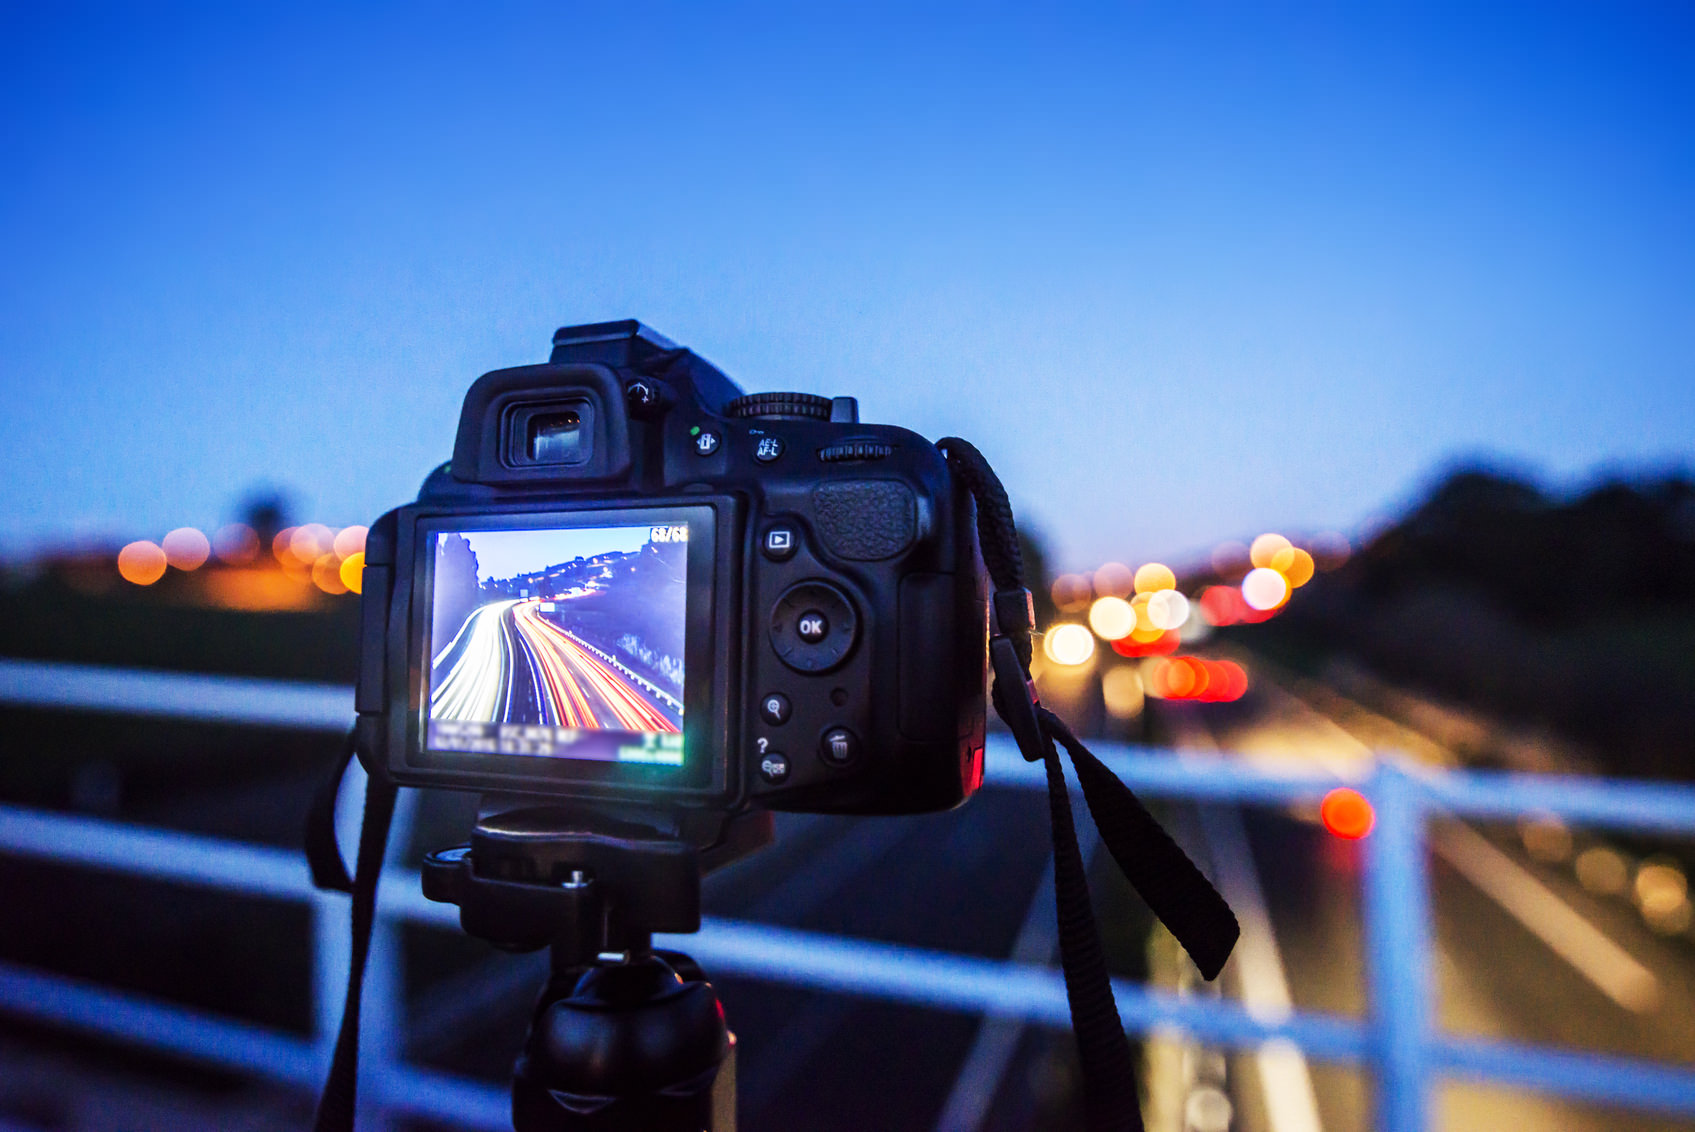
Learning how to take great photos during the daytime can be a significant challenge that requires a lot of time, patience, and practice to perfect. Photography at night is even more difficult, so you can imagine the time, patience, and practice that it takes to take quality images once the sun goes down.
To help you get out at night and create wonderful nighttime images like the one above, give these quick and easy steps a try!
Gear Up

It probably goes without saying, but if you want to take nighttime photos, the extended shutter speeds require that you mount your camera on a tripod. Handshake is never your friend, so having a stable base is absolutely essential. If you’ll be shooting in windy conditions, take along a backpack or a strong bag and fill it with rocks and hang it from the tripod’s center column hook for added stability.
You’ll also want a remote shutter release so you can trigger the shutter without actually having to touch the camera. There are many different types of shutter releases, but for nighttime shooting, the most useful are those that also serve as a timer. This gives you the capability of setting the interval during which the shutter is open to longer than what the camera allows, which is usually just 30 seconds. Extending the length of the shutter speed to a minute, 90 seconds, or longer, means your camera can collect much more light without you having to push your ISO too high. The result is a well-exposed image without excessive noise.
Camera Settings
Naturally, the shutter speed that you use and the length of the timer you dial in will change from one shoot location to the next depending on the available lighting. But some camera settings will remain the same regardless of the subject matter. This includes shooting in RAW, using manual mode, and dialing in a low ISO.
Shoot in RAW
The recommendation to shoot in RAW format is probably a lot like a broken record at this point. The benefits of shooting in RAW are just too many not to do it! With no compression, more pixel information, and an abundance of post-processing options, your final product will be better if you shoot in RAW versus shooting in JPEG. Adjust exposure, white balance, saturation, sharpness, and so on and so forth, all without impacting the original data. And, since memory cards can hold a vast amount of data these days, you needn’t worry about the large size of RAW files.
Shoot in Manual Mode
There is no fallback for shooting at night - manual mode is the way to get it done! Your camera may struggle mightily to get the exposure right, so relying on your own two eyes and your understanding of the exposure settings on your camera will be your best bet.
To get an idea of what the settings need to be for a proper exposure, do the following experiment:
-
Set your camera to ISO 6400.
-
Dial in whatever aperture you’d like to use.
-
Set the shutter speed to one second.
-
Take a sample image
What this does is give you an image that is essentially the same as a 1-minute exposure at ISO 100, a 30-second exposure at ISO 200, and so on. If your image is too bright, try reducing the shutter speed to 30 seconds. Doing so changes the scenario to being equivalent to a 30-second exposure at ISO 100, a 15-second exposure at ISO 200, and so on.
Once you find the right shutter speed at ISO 6400, you can then dial in it’s equivalent at ISO 100 or 200 to create an image with far less noise. The other benefit of using this trick is that you don’t have to take tons of long exposure images as you try to find the right settings. You’ll be out there for long enough in the dead of night creating long exposure photos, so you probably don’t want to extend that time by taking dozens of test shots at 30-second and one-minute intervals.
Keep the ISO Low
As we just mentioned, keeping the ISO low is critical because it allows you to keep digital noise at a minimum. Use the ISO trick discussed in the previous section to help you determine an appropriate shutter-to-ISO ratio, then use that formula to dial in the correct settings at a lower ISO.
For nighttime photography, an ISO of 100 or 200 would be ideal. At those settings, you will be able to keep the image free of noise in the darker and shadowed areas of the image. At times, though, you might find that you can’t go below ISO 400. Today’s cameras do a good job of minimizing noise at ISO 400, and in some cases even higher, so you should be able to get a good image even if pushing the ISO to 400 or above.
Final Thoughts

Whether you want to shoot images of a nighttime city skyline, the night sky, or something in between, these quick tips will help you nail down the right settings to get you a well-exposed image. Although shooting in RAW takes up more space on your memory card, you should have plenty of room given the sizes of cards available today. Likewise, while shooting in manual mode requires more work on your part, the resulting images will be better for it. Keep the ISO low as well, and with practice, you will find that you can create stunning nighttime images.
We Recommend
One-Light Portrait Lighting Techniques That Will Make Your Images Pop

One of the things that make a professional photographer’s images more impactful than those that everyday joes take is the lighting. The pros understand where to place the light, how to angle the light for the greatest impact, how strong the light should be, and so on.
They probably have all the gear that allows them to perfect the lighting as well!
But that doesn’t mean that you have to invest in thousands of dollars of equipment to get a great one-light portrait setup. In fact, you can get pro-level results by using little more than just a single studio strobe or a speedlight. In the video below, Craig Beckta clues us into exactly how that’s done with easy to follow, step-by-step instructions, including how to position the light, how to direct the light, and how to improve the quality of the light as well.
Check out the video below for great tips from Craig and see how easy it is to improve your portraits!
Amazon Recommendations
We Recommend
Portrait Lighting Tip: How to Use a Table Lamp to Light Your Portraits
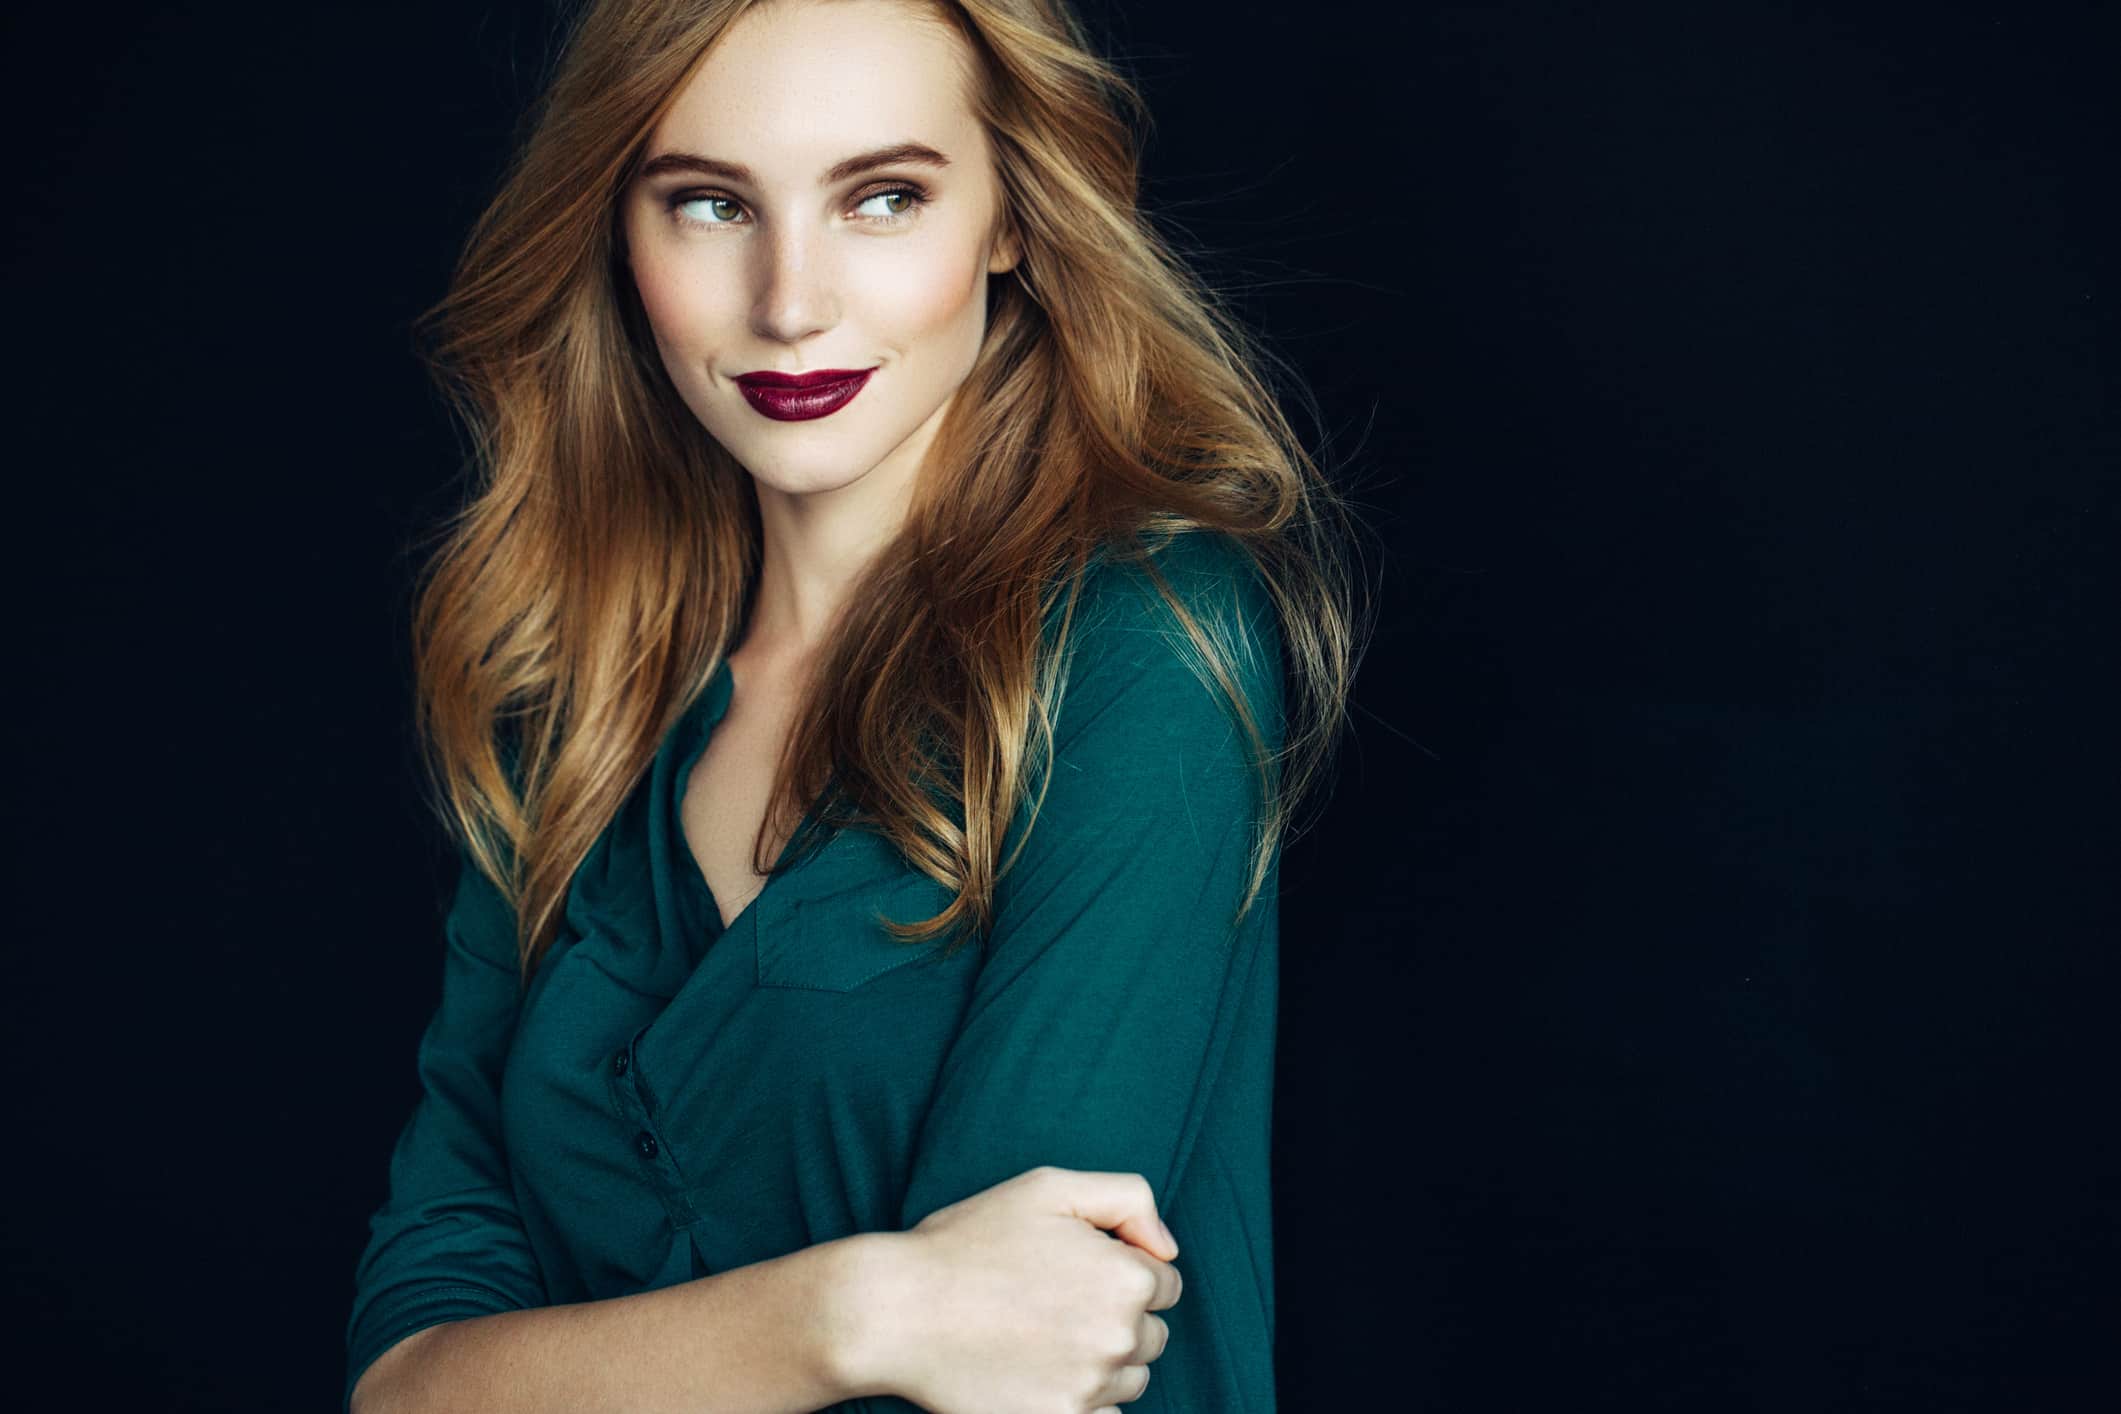
If you think you need an elaborate, professional lighting setup to take eye-catching portraits, you're wrong.
In fact, you don't even need a flashgun or strobe. You can create dynamic, beautiful portrait lighting with little more than a table lamp.
If you aren't quite convinced, have a look at the video above by Irene Rudnyk.
In it, you'll see Irene work with this normal, everyday light source to get stunning portrait results.
For more insights and lighting tips, read on!
Work the Angles (of the Lighting and Your Shooting Position)
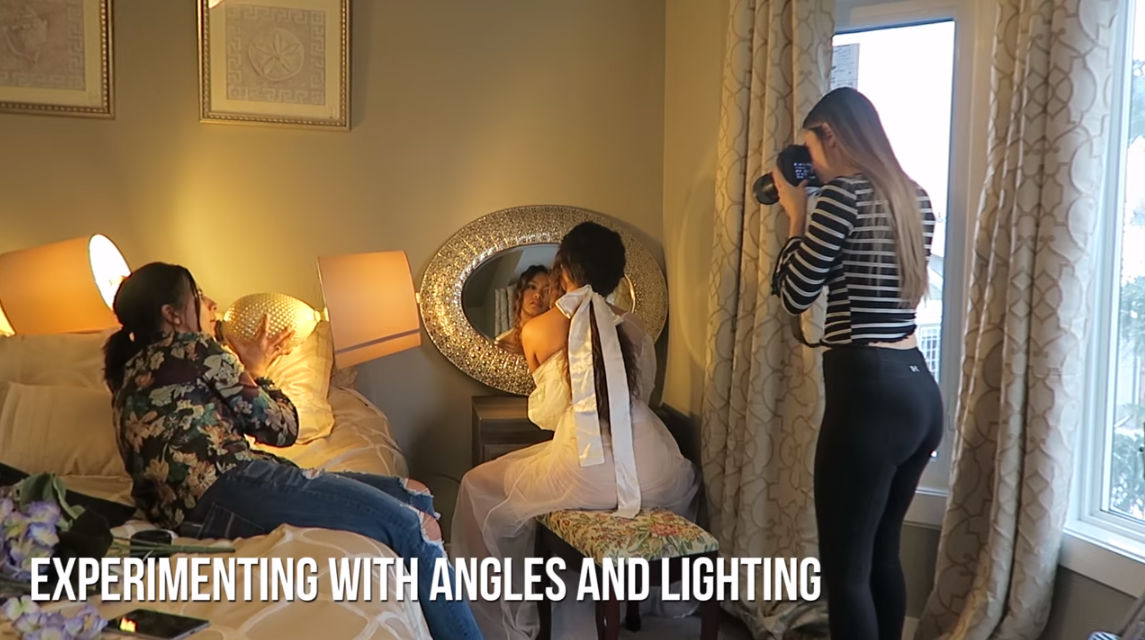 YouTube Screenshot/Irene Rudnyk
The key to getting the most out of incandescent lighting from a table lamp is to continually adjust the angle of light until you find that magic spot where you get the lighting just right.
As you can see in the screenshot above, doing this requires a helping hand - someone to maneuver the table lamp to direct its light as you maneuver yourself around the model to find a pleasing angle of view from the shot.
Just as with any other light source, when you use a table lamp, its directionality plays an important role in the success of the image.
As shown above, having the light aimed at the model from the side will help create some interesting highlights and shadows for a more dynamic photo.
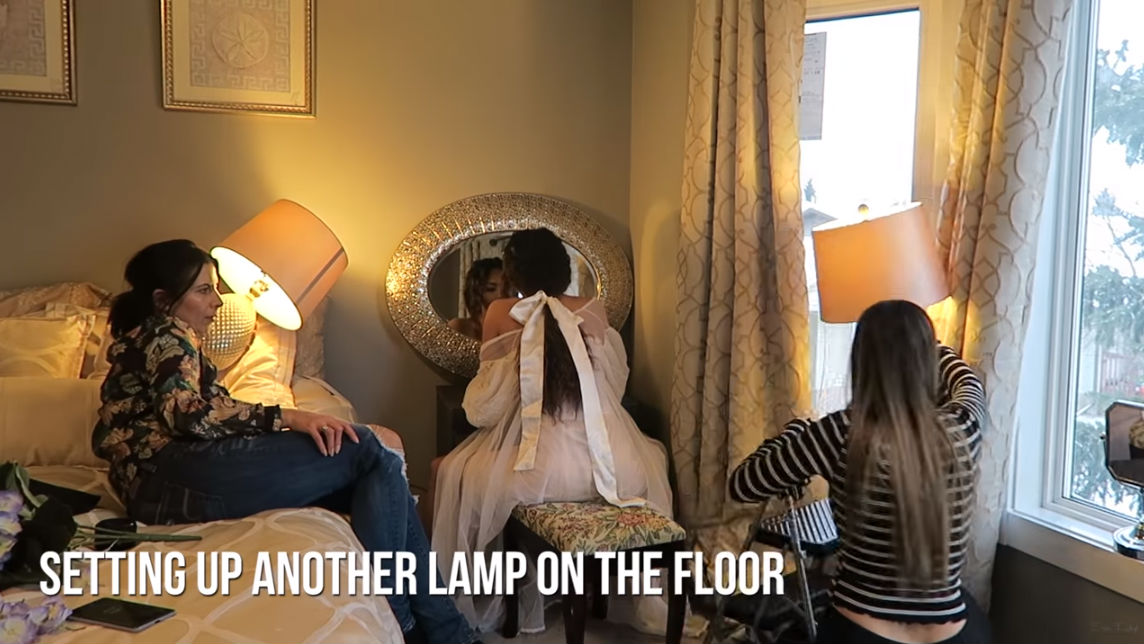 YouTube Screenshot/Irene Rudnyk
In this screenshot, notice how Irene has added a second table lamp, this time behind the model.
Laying on its side, the light is directed by the lampshade toward the back of the model, which serves the purpose of illuminating her hair.
Combined with the first lamp illuminating the scene from the model's left (and the ambient light from the window on the right), you get a rather complex lighting scene that provides tons of visual interest.
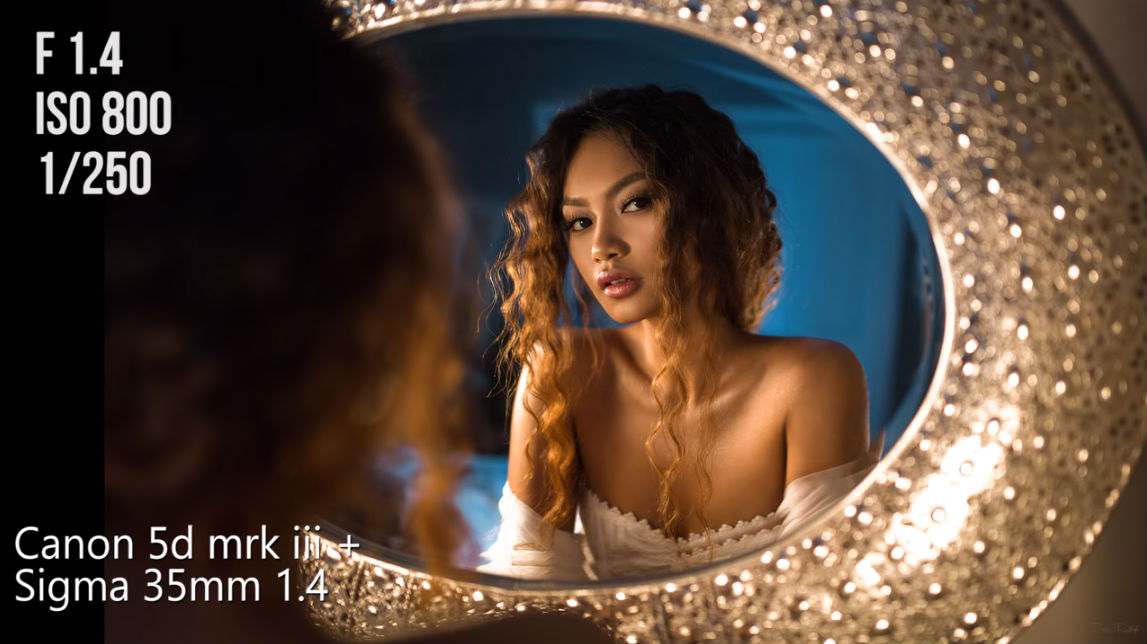 YouTube Screenshot/Irene Rudnyk
As you can see in the final shot, working the lighting and shooting angles resulted in a very good photo.
You'd have never guessed it was primarily lit with two table lamps, would you?!
Learn More:
The Background Matters
As Irene noted in the video, and as you can see in the sample images she shows throughout, the background of the image is vitally important, no matter the light source you use.
Think of the background as the stage upon which you create the shot, not unlike the set in the background of a play.
It needs to be pleasing to the eye, but not compete with the subject, either.
It needs to be well designed, but without being too flashy.
When looking for a portrait background, you need to consider not just how it looks and the vibe it will provide your portraits, but you also need to consider how its constructed.
The backdrops pictured above and below by Click Props are crafted of 550gsm vinyl.
If you don't know what that means, it simply means that they're tough as nails and will stand up to years and years of use.
And since they're constructed of vinyl, they're easy to clean as well. Just wipe them down, let them dry, and you're good to go.
Don't think that backgrounds are prohibitively expensive, either.
Click Props makes backdrops affordable without sacrificing on quality of materials, construction, or design.
That means you can add a gorgeous background to your photography kit without breaking the bank. And with hundreds of fresh, modern designs, you have your pick of backdrops that will help you create better portraits.
Learn More:
Mix and Match Light
 YouTube Screenshot/Irene Rudnyk
As you work to find the magic combination of lighting from a simple table lamp, don't discount the notion of mixing and matching light.
Adding natural light to the mix can brighten up the image and allow you to use your table lamp as fill light.
In the screenshot above, you can see how the shot is being set up. The natural light from the window backlights the scene, while the lamp is used such that its light illuminates the model's face.
A second lamp in the background provides ambient light to warm up the shot and provide a little more light on the model's face and upper body.
 YouTube Screenshot/Irene Rudnyk
Again, as you can see, simply working with the positioning of the table lamps and combining their light with natural light has resulted in a compelling photo.
Whether you use a lamp as the primary light source or as a secondary light source, it gives off more than enough light for you to work with, particularly if you use a lens that has a large aperture to grab all that light.
It takes some practice (and a good background), but with time, you can master the art of using table lamps to get beautiful, pleasing light in your portraits.
Learn More:
We Recommend
Portrait Photography Techniques for Gorgeous Photos
 Kayla Couch Photography
What separates the quality of photos taken by the pros and the quality of photos taken by amateurs is actually a lot less than you might think.
In fact, you could probably boil it down to a few critical areas of photography - composition, lighting, and gear.
Sure, those are very broad categories, but there are a few tips within each one that can help you improve your portrait photography techniques to get awesome portraits.
Here's three dead simple, yet highly effective portrait photography tricks to try.
Shoot Through Something
 Lori Dorman & Co Photography
One of the challenges of photography is to create images that feel as though they have depth.
To do that, you can shoot through things to provide that much-needed dimension.
In the image above, for example, the photographer took the shot through various plants and branches.
As you can see, not only does that give the image the feeling of dimensionality, but it also allowed for the introduction of some interesting colors, shapes and textures in the foreground.
 Abba Color Photography
Shooting through something doesn't have to be as obvious, though.
In this example, the photographer took a low shooting position to incorporate some of the leafy elements in the foreground.
In this case, these leaves provide depth because of their blurriness - it's an indication of a shallow depth of field.
Either way, having foreground elements like these is a surefire way to create a more interesting portrait.
Learn More:
Use a Long Lens
 Happy Acres Photography
Many amateur photographers shoot portraits with a kit lens, like a 18-55mm or a prime lens like a 50mm.
And while there's nothing wrong with shooting portraits with these lenses - especially a 50mm on a crop sensor camera - there is something to be said for the way a portrait looks when taken with an even longer lens, like an 85mm or even a 200mm.
Standard lenses like a 50mm offer a familiar view of the subject, so there's nothing surprising about how the image looks.
But as you can see in the example above, using a longer lens offers gorgeous compression, incredible bokeh, and provides a flattering look that has less distortion of facial features, like the forehead and nose.
Additionally, the longer your lens, the further away from the subject you have to be, and oftentimes that extra distance helps the subject relax for their portrait. This is one of the portrait photography basics you need to know to take better photos!
Editor's Tip: Earn extra money by joining our #1 referral program.
Portrait Photography Technique: Look for Backlighting
 Paulina Martinez Photography
A final portrait photography trick you can use to create more compelling photos is to use backlighting as your light source.
Whether it's the sun (as in the image above) or an artificial light source, backlighting offers a unique look to your portraits.
On the one hand, backlighting often lightens up the background to create a light, airy feel in the shot, like the one shown above.
 Abba Color Photography
On the other hand, backlighting can also act like rim lighting, which illuminates your subject's hair and figure to give the shot more dimensionality.
Great portraits are all about great light, so the more you strive to find the best lighting, the better your images will look!
Combined with using the right gear and trying unique compositional tricks like shooting through something, you have a recipe for taking portraits that look more professional.
Learn More:
About Sew Trendy
This is a company that photographers absolutely need to be in touch with. Their gowns, crowns, and other high-quality accessories are just what you need for maternity photos, photos of newborns, and mommy and me sessions. These accessories not only make your clients look and feel great, but they also add a depth of detail and interest to your photos that elevate the images to an entirely other level. What started out with just a few people manufacturing these eye-catching items is a growing business that provides accessories to photographers worldwide. Help your clients look and feel their best by partnering with Sew Trendy Accessories.
We Recommend
Pro Tips For Instantly Improving Your Photography
If you survey professional photographers and ask them what separates the pros from the amateurs, you'll get a lot of different, yet equally important answers.
But if you combine all their answers into a few categories, the chances are that they will fall pretty neatly into just a few areas.
That includes an understanding of camera settings, composition, lighting, and business principles.
There are other things that make pros different than amateurs, but for our purposes, I'd like to focus on two of the four items listed above: composition and lighting.
I want to focus on these because they are probably the easiest topics for a beginner to master.
Why?
It really just comes down to developing your creative eye, and all that takes is a bit of practice.
With that in mind, let's have a look at a few composition and lighting tips that can have an immediate, positive impact on the photos you take.
Horizons Should Be Level

Having a horizon that's perfectly level is of the utmost importance whether you shoot landscapes, portraits, or something in between.
That's because a horizon that's rising or falling can completely ruin an otherwise great image.
In fact, you can get the framing just right, have excellent Golden Hour lighting to work with, and the most gorgeous subject, but if the horizon isn't level, guess what viewers will notice more than anything else?
That's right...the crooked horizon.
Tell me the crooked horizon isn't the first thing you noticed about the image above...
There's really no excuse for having a crooked horizon, either.
Many tripods have a built-in level, and many cameras even have a level you can use in Live View (or at least the rule of thirds grid) that gives you a straight line against which you can level the horizon.
It's an easy fix in post-processing, too, so avoid that rookie mistake and get those horizons straight before sharing your photos.
See how easy it is to fix a crooked horizon in the video below by Steve Perry:
Be Careful How You Crop
When you crop a portrait, avoid cropping through a person's joints at all costs.
That means everything from elbows and wrists to knees and ankles shouldn't be anywhere near the edge of the frame.
When you crop through someone's joints, it gives the illusion that their arms, hands, legs or feet don't extend beyond the edge of the frame.
Look at the image below, and you'll see what I mean:

You don't want your portrait subjects to look like they've lost a hand or a foot, do you?
Again, this is a rookie mistake that you'd never see a professional photographer commit.
If you want to take your images to the next level, be wary of where and how you crop your portraits.
That means avoid cropping through joints and choose instead to crop at mid-arm, across the stomach, or at mid-thigh, just as a few examples. You can even just include the person's whole body in the shot!
Don't Just Rely on the Rule of Thirds

Don't get me wrong - the Rule of Thirds is a fantastic way to learn basic photography composition.
But if you use the rule of thirds for every single photo you take, guess what?
They'll all look the same, and eventually, that's going to get boring.
So, spice things up and break the rule by avoiding the center of the frame (as was done above) or by placing your subject smack in the middle of the frame.
With a placement in the middle, you can create a different look that's symmetrical from left to right or top to bottom that's a nice change of pace.
You might also consider dividing your image into four equal quadrants and putting your primary subject in one of them.
Again, this gives you another unique way to compose your shot that makes the photo more interesting (and will probably impress your friends, too!).
Tungsten Lighting = Bad, Natural Light = Good

Tungsten lighting is the kind that's emitted from typical household light bulbs, and it's not flattering for your photos.
Even if you know how to adjust the white balance to remove the color cast that results from tungsten lighting, there is a better, easier option...
That's to use natural light if at all possible.
For example, if you're taking photos indoors, simply move your subject to a nearby window or door.
That will give you more than enough light to get a well-exposed image, and that light will be much more flattering than what you get from a light bulb, as you can see in the image above.
What's more, you can adjust the harshness or softness of natural light by moving your subject nearer to or further away from a window, or you can merely pull the shades or hang a plain white sheet to diffuse the light.
Compose to Communicate
A lot of beginner photographers start taking photos without really thinking about what they want to communicate with the images they create.
Instead, it's sort of a spray and pray approach, with a whole lot of shutter pressing in the hopes that one or two of the hundreds of photos taken will be good.
Ask any pro, however, and they'll tell you that photography is about telling a story.
That's true whether you're photographing a person or a dog, a building or a mountain.
You want to evoke a feeling. You want viewers to experience an emotion.
One way to do that is to think about how you compose your shots.
By that I mean that rather than running from one shot to the next, give your compositions some thought.
Look at the scene and see how the light interacts with your subject and think about how you might change your position to make that light a more prominent feature in the image.
Consider different points of view too - how getting down really low to take a shot might make your subject look powerful and imposing, or how getting up really high and taking a photo looking down on your subject might help the viewer feel like they're flying.
The point is that composition is much more than just considering where you put the subject in the frame. It's about telling a story about that subject with the image you create.
Your Focus, Processing, and Sources of Inspiration Matter Too
In addition to the compositional and lighting tips outlined above, you should also consider how you focus your shots, how you process your shots, and where you draw inspiration from as critical factors in making your photos more like pro shots and less like amateur ones.
To get more details on these and other tips that will instantly elevate your photos, check out the video below, "10 Tips to Instantly Take Your Photos from Basic to Boss," by Mango Street Lab:
We Recommend
Shutter Speed Explained for the Beginning Photographer
Shutter Speed Importance In Photography
One of the obstacles that beginning photographers face is understanding exposure controls - that is, aperture, shutter speed, and ISO.
Not only do you need to develop working knowledge of each individually, but you also need to understand how they work together to create a well-exposed photo.
But understanding how these settings work together is a more advanced topic for another article. In the meantime, let the following serve as a basic introduction to these three settings:
- Aperture controls the amount of light entering a lens and is responsible for depth of field, or the extent of the image that's in sharp focus.
- Shutter speed controls how long your camera's sensor is exposed to light and is responsible for the appearance of motion in the photo.
- ISO determines how sensitive your camera's sensor is to light while also being responsible for how much digital noise appears in the image.
In this article, we focus specifically on shutter speed to develop an enhanced understanding of what it is, what it does, and how to control it.
What Is Shutter Speed?

Shutter speed simply refers to the amount of time that the camera's shutter is open. The longer the shutter is open, the more light that passes through to the camera's sensor. Conversely, the shorter the shutter is open, the less light that's able to pass through.
An easy way to understand shutter speed is to liken it to your eyelids. For example, if you shut your eyes, then open them for 1/2 second without blinking, then shut them again, you've essentially created a 1/2 second exposure for your eyes. That is, for that 1/2 second, light was able to pass through to your retinas.
The same thing happens with your camera, lens, and shutter. A 1/2 second shutter speed means that when you press the shutter button, the shutter opens for 1/2 second, allows light to pass through to the camera's sensor, and then closes again.
The length of that action is determined either by your camera or you, depending on the camera mode you're using. We'll get into that more in a bit.
How Shutter Speed is Measured
Shutter Speed is most commonly measured in fractions of a second, like 1/200 seconds or 1/1000 seconds. Some high-end cameras offer shutter speeds as fast as 1/8000 seconds.
But, shutter speeds can extend to much longer times, generally up to 30 seconds on most cameras. That time can be extended further into minutes or even hours by using what's called Bulb Mode, which is denoted with a B in your camera's menu system and gives you many creative options for using shutter speed.
Bulb Mode keeps the shutter open so long as the shutter is pressed down. Naturally, it would be impossible to keep your finger on the shutter button for a minutes-long or hours-long exposure, so when in need of exceptionally long shutter speeds, photographers use a shutter release that allows them to lock the shutter in the open position without having to actually hold the shutter button down.
The manner in which shutter speed is indicated on your camera depends. For example, if the shutter speed is a fraction of a second, most cameras only show the denominator, so if you're shooting at a shutter speed of 1/500 seconds, you'll only see 500 in the viewfinder. If the shutter speed is one second or longer, it's often followed by a double quotation mark, like so: 1", meaning your shutter is open for one second.
Check the video above by Kingston Technology for a quick review of shutter speed.
Shutter Speed and Motion
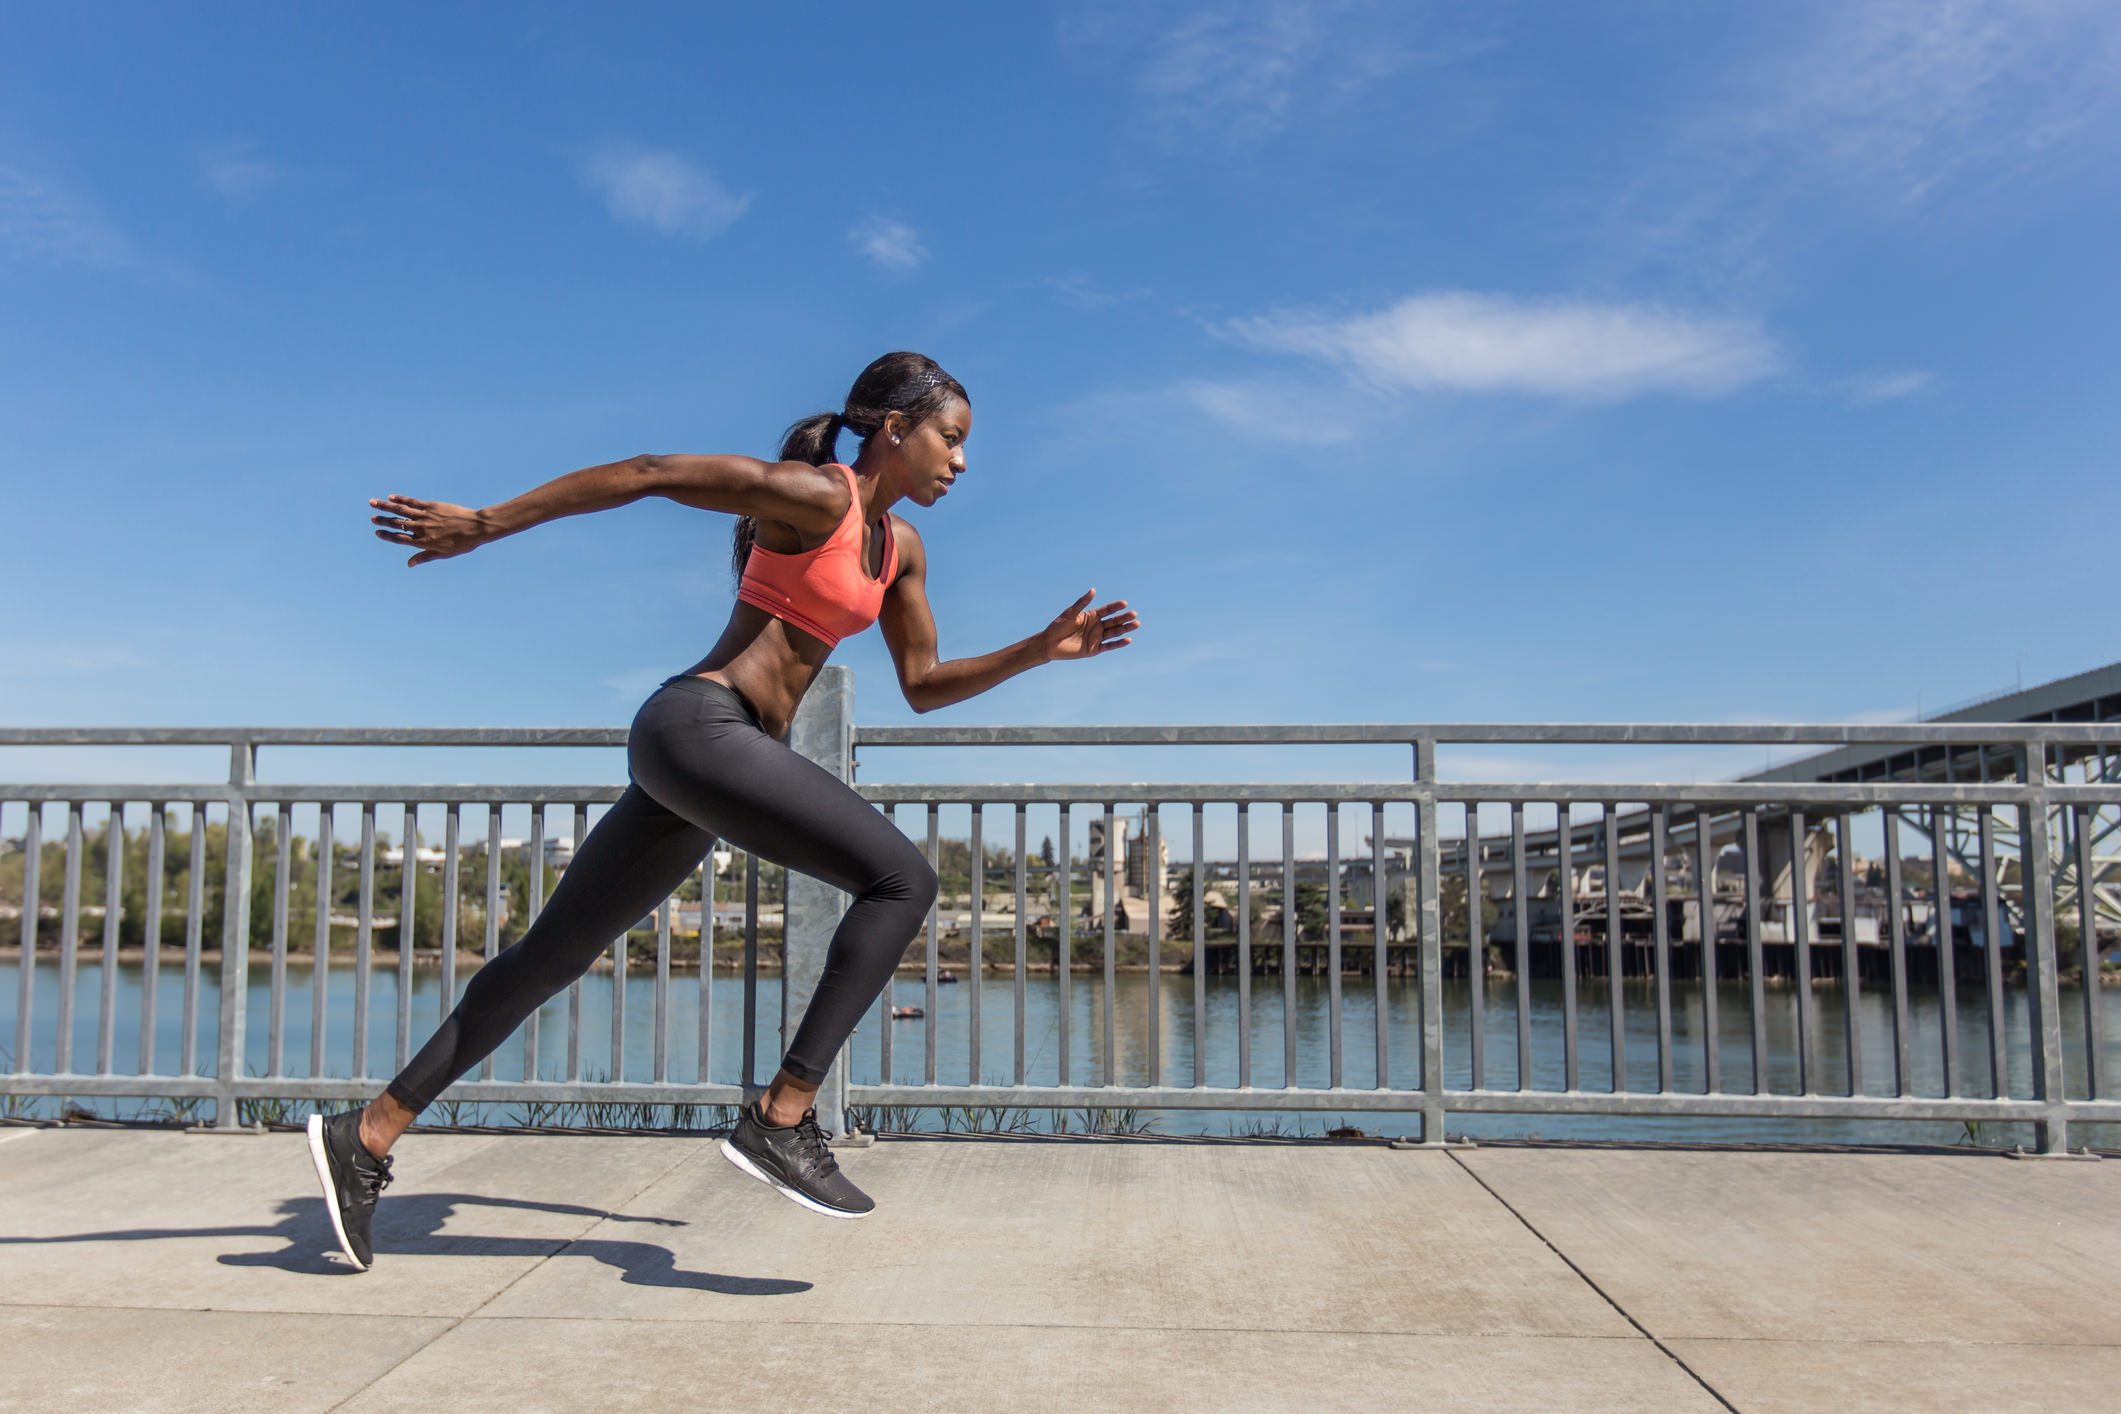
As noted earlier, shutter speed doesn't just control how long light is allowed to pass through the lens to your camera's sensor; it's also responsible for the appearance of motion in your photos.
Fast Shutter Speed
Naturally, if you want to freeze the motion of a moving object, you need to use a shutter speed that's as fast or faster than whatever motion is occurring.
For example, to make the runner in the photo above appear frozen in time, the photographer used a fast shutter speed, say, 1/1000 seconds.
It's important to note that the direction of the motion in relation to the camera position will influence the needed shutter speed. Here, since the runner is perpendicular to the camera, a faster shutter speed is needed. However, had the photographer been positioned in front of the runner with her coming toward the camera, a slower shutter speed, say, 1/500 seconds, could be used.
The distance you are from the subject also impacts the speed that's needed to freeze motion. The closer you are, the faster the shutter speed is required because the subject's motion in the frame is more pronounced. This is true of the focal length of the lens you use as well - you can use a slower shutter speed with a wide-angle lens than you can with a telephoto lens, again, because the subject's size in the frame is more pronounced when using a telephoto lens.
Here's a few suggested shutter speeds for freezing the movement of different subjects:
- A person walking at a normal pace: 1/125-1/150 seconds
- A person running: 1/500-1/1000 seconds
- An animal running: 1/500-1/2000 seconds
- A bird in flight: 1/800-1/2000 seconds
- A moving vehicle: 1/500-1/8000 seconds
Of course, blurring motion requires a slower shutter speed to get the kind of movement you see in the image above.
In this case, a shutter speed of just 1 second might be enough to get the light trails seen in the image above. For slower moving subjects, like a person walking, you might need a shutter speed of 5-10 seconds or longer to get blurred movement.
Therein lies one of the difficulties with creatively using shutter speed: the speed of the subject will, in part, dictate what shutter speed you need to ensure that the subject is either frozen or blurred. That means you'll often need some trial and error to get the right shutter speed for the visual effect you want.
Another issue with slower shutter speeds is that you cannot effectively hold the camera in your hand and get a clear, sharp photo like the one above. That means you'll need to use a tripod to stabilize your camera. A general rule of thumb is that once your shutter speed slows to about 1/60 seconds, you'll need to support the camera with something other than your hands.
Shutter Priority Mode: A Quick Explanation
Shutter priority mode (indicated at T or TV on your camera's mode dial) is a semi-automatic shooting mode that prioritizes shutter speed over the other two exposure settings (aperture and ISO).
That means that when you select this mode, you get to determine what shutter speed the camera will use (as well as the ISO), and that shutter speed will remain constant until you change it.
Even better, the camera will select an aperture value that works with the shutter speed you select to get a well-exposed image. So, you get increased creative control over your images but you don't have to be overwhelmed with choosing all three exposure settings for the shot. That makes shutter priority mode a good way to begin taking more control over your camera settings without diving straight into using fully manual mode.
For example, let's say you want to create an image like the one above in which you freeze the movement of a dog running towards you. Let's assume that a shutter speed of 1/1000 seconds is required. So, you simply turn your camera's mode dial to T or TV, dial in a 1/1000 second shutter speed, ensure the ISO is at 100 or 200, and frame up the shot. When you press the shutter button, the camera will determine the aperture that's needed to get a well-exposed image given the shutter speed and ISO settings that you've selected.
If that still sounds a bit scary, check out the video below by Mike Browne in which he takes us step-by-step through the process of using shutter priority mode:
Like all things in photography, becoming adept at using shutter speed to your advantage will require that you practice using it - a lot.
To do so, try a simple exercise in which you photograph the same moving subject using varying shutter speeds in shutter priority mode.
For example, set up your camera on a tripod facing the sidewalk in front of your house. Have a friend or family member run by as you take their photo at varying shutter speeds. Start with something like 1/1000 seconds, then work your way down to a very slow shutter speed, like 1 second.
Review the series of images, noting how the motion of your subject becomes increasingly blurred as the shutter speed is extended.
That sort of exercise will also give you a chance to work with ISO as well, because you'll likely need to make adjustments to it to maintain a proper exposure as you change the shutter speed, much like Mike had to do in the video above.
We Recommend
Simple Tips for Taking Better Self-Portraits
We spend an awful lot of time learning how to take portraits of our friends, family, and even our pets.
In fact, there are scads of portrait tutorials on our website that cover all aspects of composition, lighting, framing, posing, and so forth.
But, you know what photographers often don’t learn how to do?
Take self-portraits!
And we’re not talking selfies with your phone either…
Just like any other portrait, there’s an art and a science to creating an eye-catching self-portrait. But, because we become our own subject, it’s a tougher task. Not just because we have to alternate back and forth between being behind the camera and in front of it either…
Plenty of photographers just make terrible subjects! After all, we like being behind the lens, not in front of it, right?
Nonetheless, having some self-portrait skills won’t kill you, and it might just help you create better portraits of other people as well.
In the video below, Tommy Reynolds gives us a quick five-minute overview of how to take a self-portrait. Follow along and get some great tips that should help you overcome the selfie blues and create a portrait of yourself that really shines!
Amazon Recommendations
- Canon EOS 5D Mark III 22.3 MP Full Frame CMOS with 1080p Full-HD Video Mode Digital SLR Camera
- Canon EF 16-35mm f/2.8L ll USM Zoom Lens
- PRO Digital Camera Remote Controller for Canon EOS 5D Mark III
We Recommend
Simple Yet Effective Composition Tips That Have Tons of Impact
I remember the first camera I got, and all I wanted to do was bolt outside and start taking pictures that I just knew would be jaw-droppingly beautiful.
But, if you've been into photography for any amount of time, you know just how much time, effort, and patience it takes to become skilled at this craft.
It's just not as simple as pointing your camera at something and pressing the shutter button...
But taking better photos also doesn't have to be a hugely involved process, either. After all, we're all busy and we all want better results sooner rather than later.
With that in mind, here are a few tips and tricks that will help you compose more compelling images that will be more like the ones the pros take and less like the first photos I took back in the day when I was too impatient to learn a few tricks of the trade.
Fill the Frame
One of the hallmarks of a photo taken by a beginner is that there's simply too much going on.
That is, rather than bringing the viewer's attention directly to the primary subject, there's foreground or background elements competing for attention.
Filling the frame helps rectify that problem.
Look at the image above, and note how filling the frame means there's nothing to take your eye off the baby.
What's more, because we have such an up-close view, the portrait feels much more intimate with the baby's facial features on full display.
But filling the frame isn't limited to portraiture. You can use if for landscapes, street photography, wildlife photos...you name it.
At its heart, filling the frame is about eliminating what's not important so that you can focus on creating an image of what is important. By doing that, you create an image with much more emotional and visual impact that takes it to another level.
Exaggerate the Subject's Importance
Once you've figured out what your photo is really about, it's time to make the subject shine by making it an even more important element in the shot.
For example, when photographing a landscape, incorporate elements that give a sense of scale to the space. In the image above, the inclusion of a human figure allows us to better understand the sheer breadth and depth of the waterfall, as well as the volume of water that's involved.
You can also exaggerate the subject's importance by using contrast. In this case, the darker form of the man contrasts nicely with the brightness of the water. Again, this helps the viewer's eye move directly to the human figure, which is the most important element of the shot.
What's more, you can use your angle of view to bring greater attention to certain aspects of the photo.
In the image above, the steep angle of view emphasizes the height of the trees. For a different effect, you can get very low to the ground to bring greater attention to details like the texture of a plant or rocks. Looking down on a subject from above is another unique perspective that helps convey the importance of the subject.
The point is that the vast majority of photos are taken from a standing position and at a normal eye level. By simply changing your positioning, you can create a more compelling photo that viewers find far more visually pleasing.
Give Your Images Depth
One of the struggles with photography is that you're trying to represent a three-dimensional scene in a two-dimensional medium, such that it still has that three-dimensional feel.
One way that you can do that is to incorporate compositional elements that help you create more depth and dimension in your photos.
For example, including an element in the foreground often gives the image depth while also helping define the space. In the image above, the elk's positioning in the foreground helps us understand just how far away the mountains in the background actually are.
What's more, that foreground-background connection helps this photo tell a better story about this elk - that it's living in a vast wilderness, seemingly left to survive all on its own.
Including foreground interest is especially beneficial in landscape photos, like the one above.
Here, the rocks along the bottom of the frame invite your eye into the shot by delighting it with various colors and textures.
Because the photo was taken with a wide-angle lens, you also feel as though you're standing right there along the shore.
Together, foreground interest and a wide-angle lens help create a more dynamic photo in situations like the one pictured above.
It's All About the Lighting
It's no secret that photography is all about lighting.
It's likely also no secret that some lighting is better than others.
When it comes to the best lighting, many photographers favor natural light over artificial light. There's plenty of reasons for this, but primary among them is that the quality of natural light is often better.
But even within the realm of natural lighting, there is a continuum of quality.
Light at mid-day tends to be very bright and very harsh, qualities that generally don't produce good photos.
However, light at the beginning and end of the day - Golden Hour - is soft, warm, and will help you create drama-filled photos like the one above.
But waiting until sunrise or sunset isn't always in the cards. In that case, moving into the shade, like under a tree, or waiting for cloud cover to help filter out some of that harsh mid-day lighting will do your photos wonders. That's because shady or cloudy conditions have much softer, more even light that's flattering for many subjects, especially portraits.
For even more detail about these tricks (and a few other ones too) check out the video below by Joshua Cripps:
We Recommend
This New Lighting System Will Take Your Photos and Videos to the Next Level
Whether you primarily shoot still images or videos (or you’re like me and do both), you no doubt understand the value of good lighting.
But sometimes good lighting is hard to come by. And quite often good lighting isn’t cheap.
That’s all changed, though…
The TEKE Reactive and Animated DMX Lighting System launched today on Kickstarter, and it is the affordable lighting system you’ve been looking for. More than that, it’s the customizable, wireless, easy-to-use lighting system you’ve been looking for!
Let’s dive into the details so you can better understand how TEKE can elevate the quality of your work.
TEKE Gives You Flexible Options
Need to add some background mood lighting for a portrait? Done!
Want to enhance a video with animated effects? No problem!

Are you shooting a music video and want the lighting to react to the beat? You got it!

TEKE has the technology to do all these things and more, all wrapped in two conveniently-sized packages (20-inch or 40-inch options).
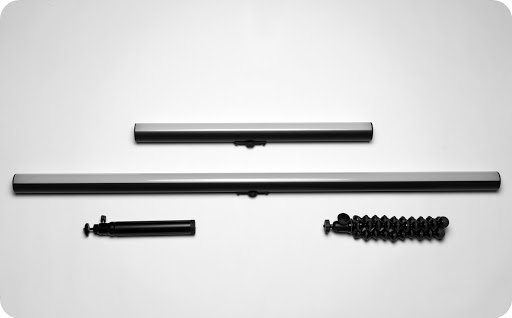
Regardless of which size you select, you’ll get industry standard DMX Art-Net lighting just like what’s used in professional music videos, Hollywood movies, commercials, and stage performances. All in the palm of your hand, no less. Not bad, right?!
TEKE is Highly Customizable
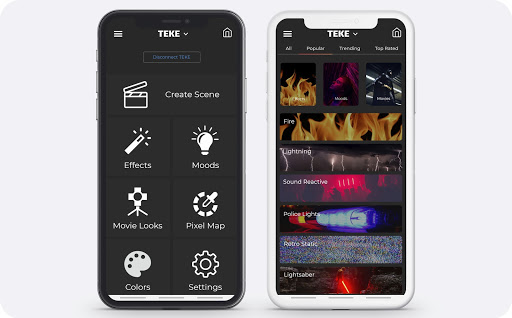
It’s a bummer when you have to alter your creative vision because you don’t have the tools to do what you’ve envisioned. Instead, the tools you have in your camera bag should provide you the means to freely create images and videos as you’ve imagined them.

TEKE helps in this endeavor by giving you loads of customization options. You can create lighting setups, special effects, and color palettes to your heart’s desire and save them for use later on.
The companion smartphone app allows you to create and apply these effects, moods, and movie looks instantly and wirelessly. It truly doesn’t get any easier than that.
To expand your creative possibilities, browse the TEKE Library for dynamic lighting styles and animated effects that you can apply instantly. You can choose from presets like traffic, lightning, police lights, and many more. And no matter which one you choose, you simply tap your phone and the preset is activated.
TEKE Makes Creating Custom Lighting Easy
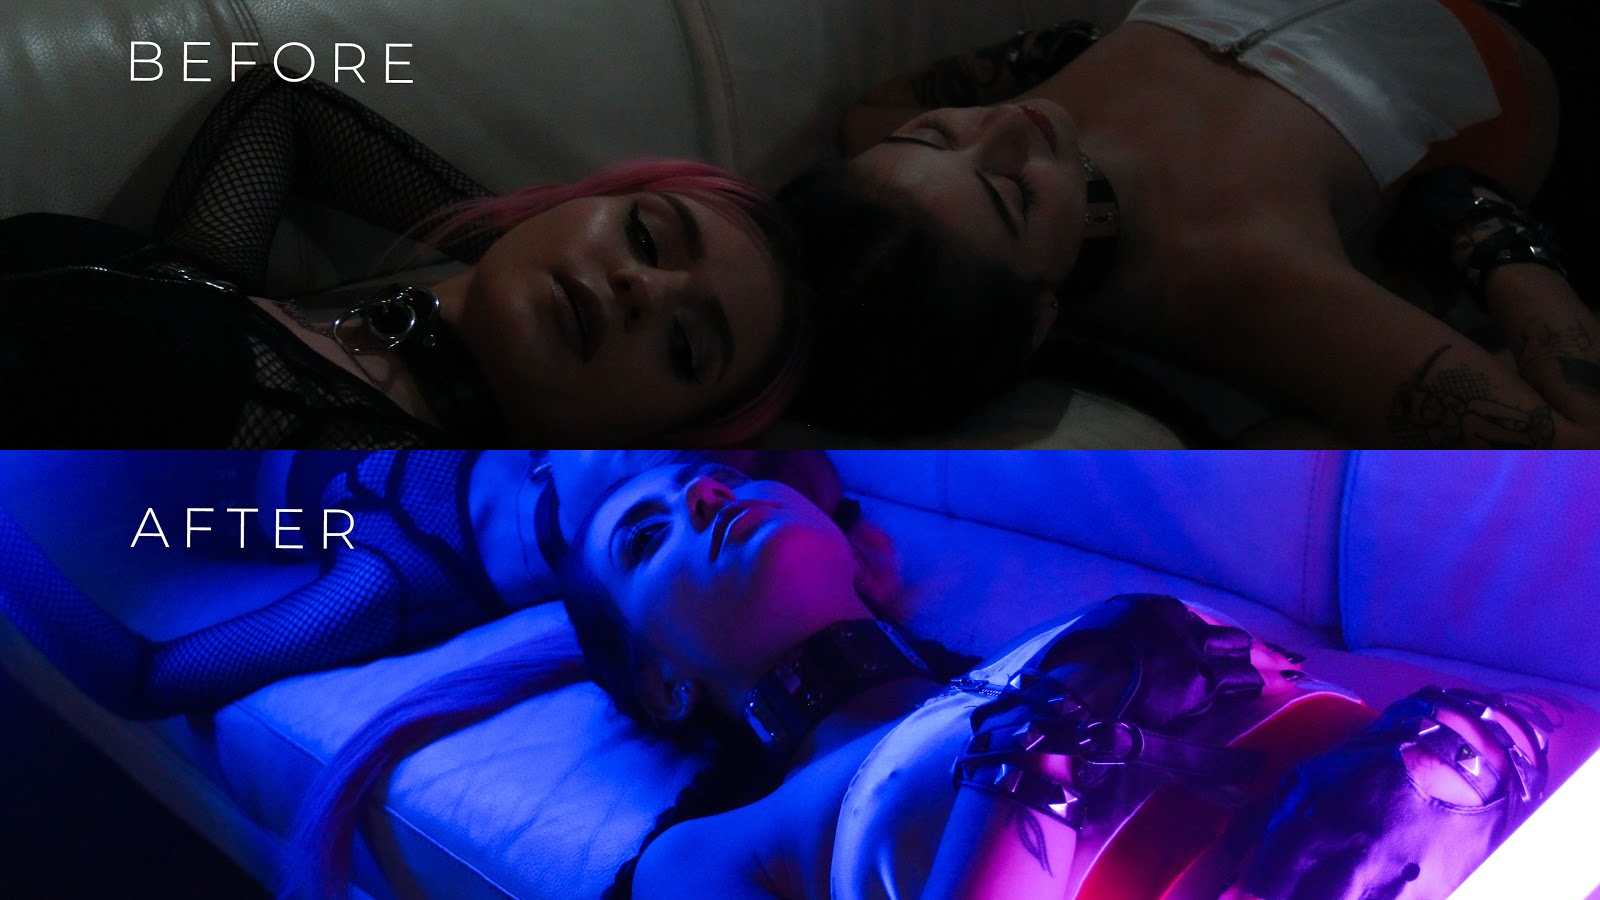
Aside from the obvious ease-of-use of being smartphone controlled, TEKE also gives you tools that allow you to create effects and color palettes quickly and easily.
For example, you can upload a video clip or a photograph as a reference for a color palette that you like. Just adjust the selection points and TEKE will automatically copy the shade, hue, temperature, and brightness of the selected pixels.

This means that in just a few seconds you can create a custom color palette - there’s no coding to be done or complicated software to use.
Likewise, TEKE is completely wireless and has a five-hour battery runtime (at 100% brightness!). You can even connect multiple lights together if need be and charge the lights while they’re in use.
Plus, TEKE’s DMX technology gives you improved signal strength and increased distance as compared to Bluetooth-controlled lights.
You have enough to worry about when it comes to creating compelling images and videos, so having something like TEKE, which is essentially a personal lighting assistant, can make all the difference in getting the shots you need quickly.
TEKE is For Amateurs and Pros Alike
Putting TEKE’s impressive list of features aside, what is perhaps most compelling about this light is that it offers professional-quality lighting without breaking your budget. This makes it an ideal addition to an amateur or professional’s kit.

These lights are bright, super sleek, hand-holdable, and easy to use. They offer 100 percent flicker-free dimming, have a 90+ CRI, and offer full spectrum addressable RGBW. Add in an adjustable color temperature of 2700-6500K, 700 or 1400 lumens of illumination, and a price that starts at less than $140 USD, and you have the makings of the next great lighting system for photographers and videographers!
Join the TEKE party today by visiting their Kickstarter page.
We Recommend
Top 10 Photography Lighting Facts Beginner Photographers Need to Know
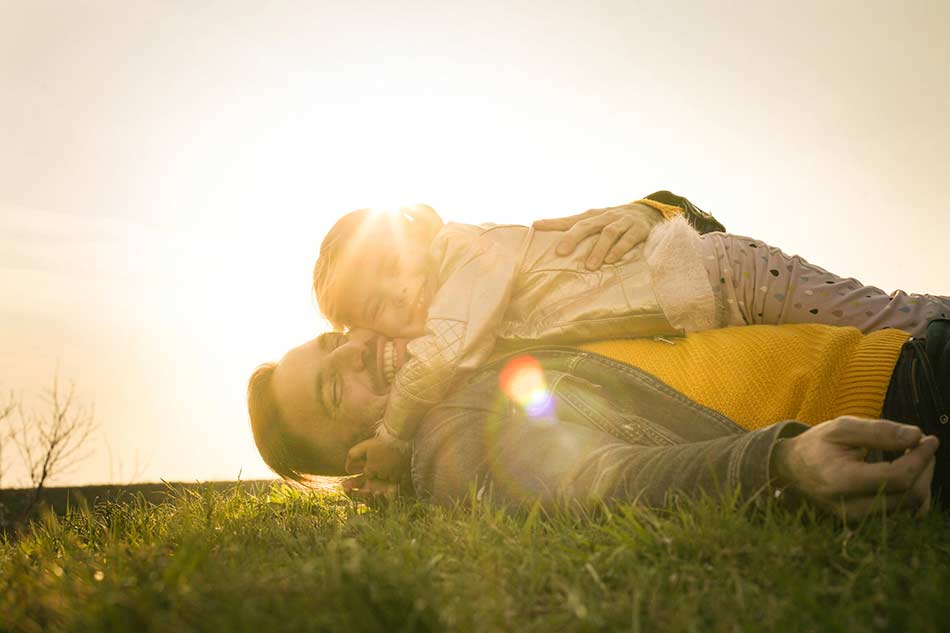
Understanding Photography Lighting
When it comes to creating any type of photo - a portrait, a landscape, a macro scene, and everything in between, lighting is the most important factor.
But as you've probably discovered, lighting is also one of the most difficult aspects of getting a high-quality photo.
In some cases, the lighting is too bright and harsh.
On other occasions, it's too dim and dark.
You might not know how to use continuous lighting to your advantage.
Using a flash or a strobe might be a little confusing as well.
So, there's lots to learn, to be sure!
Let's get started learning more about lighting with these 10 essential lighting facts.
Light Has Color
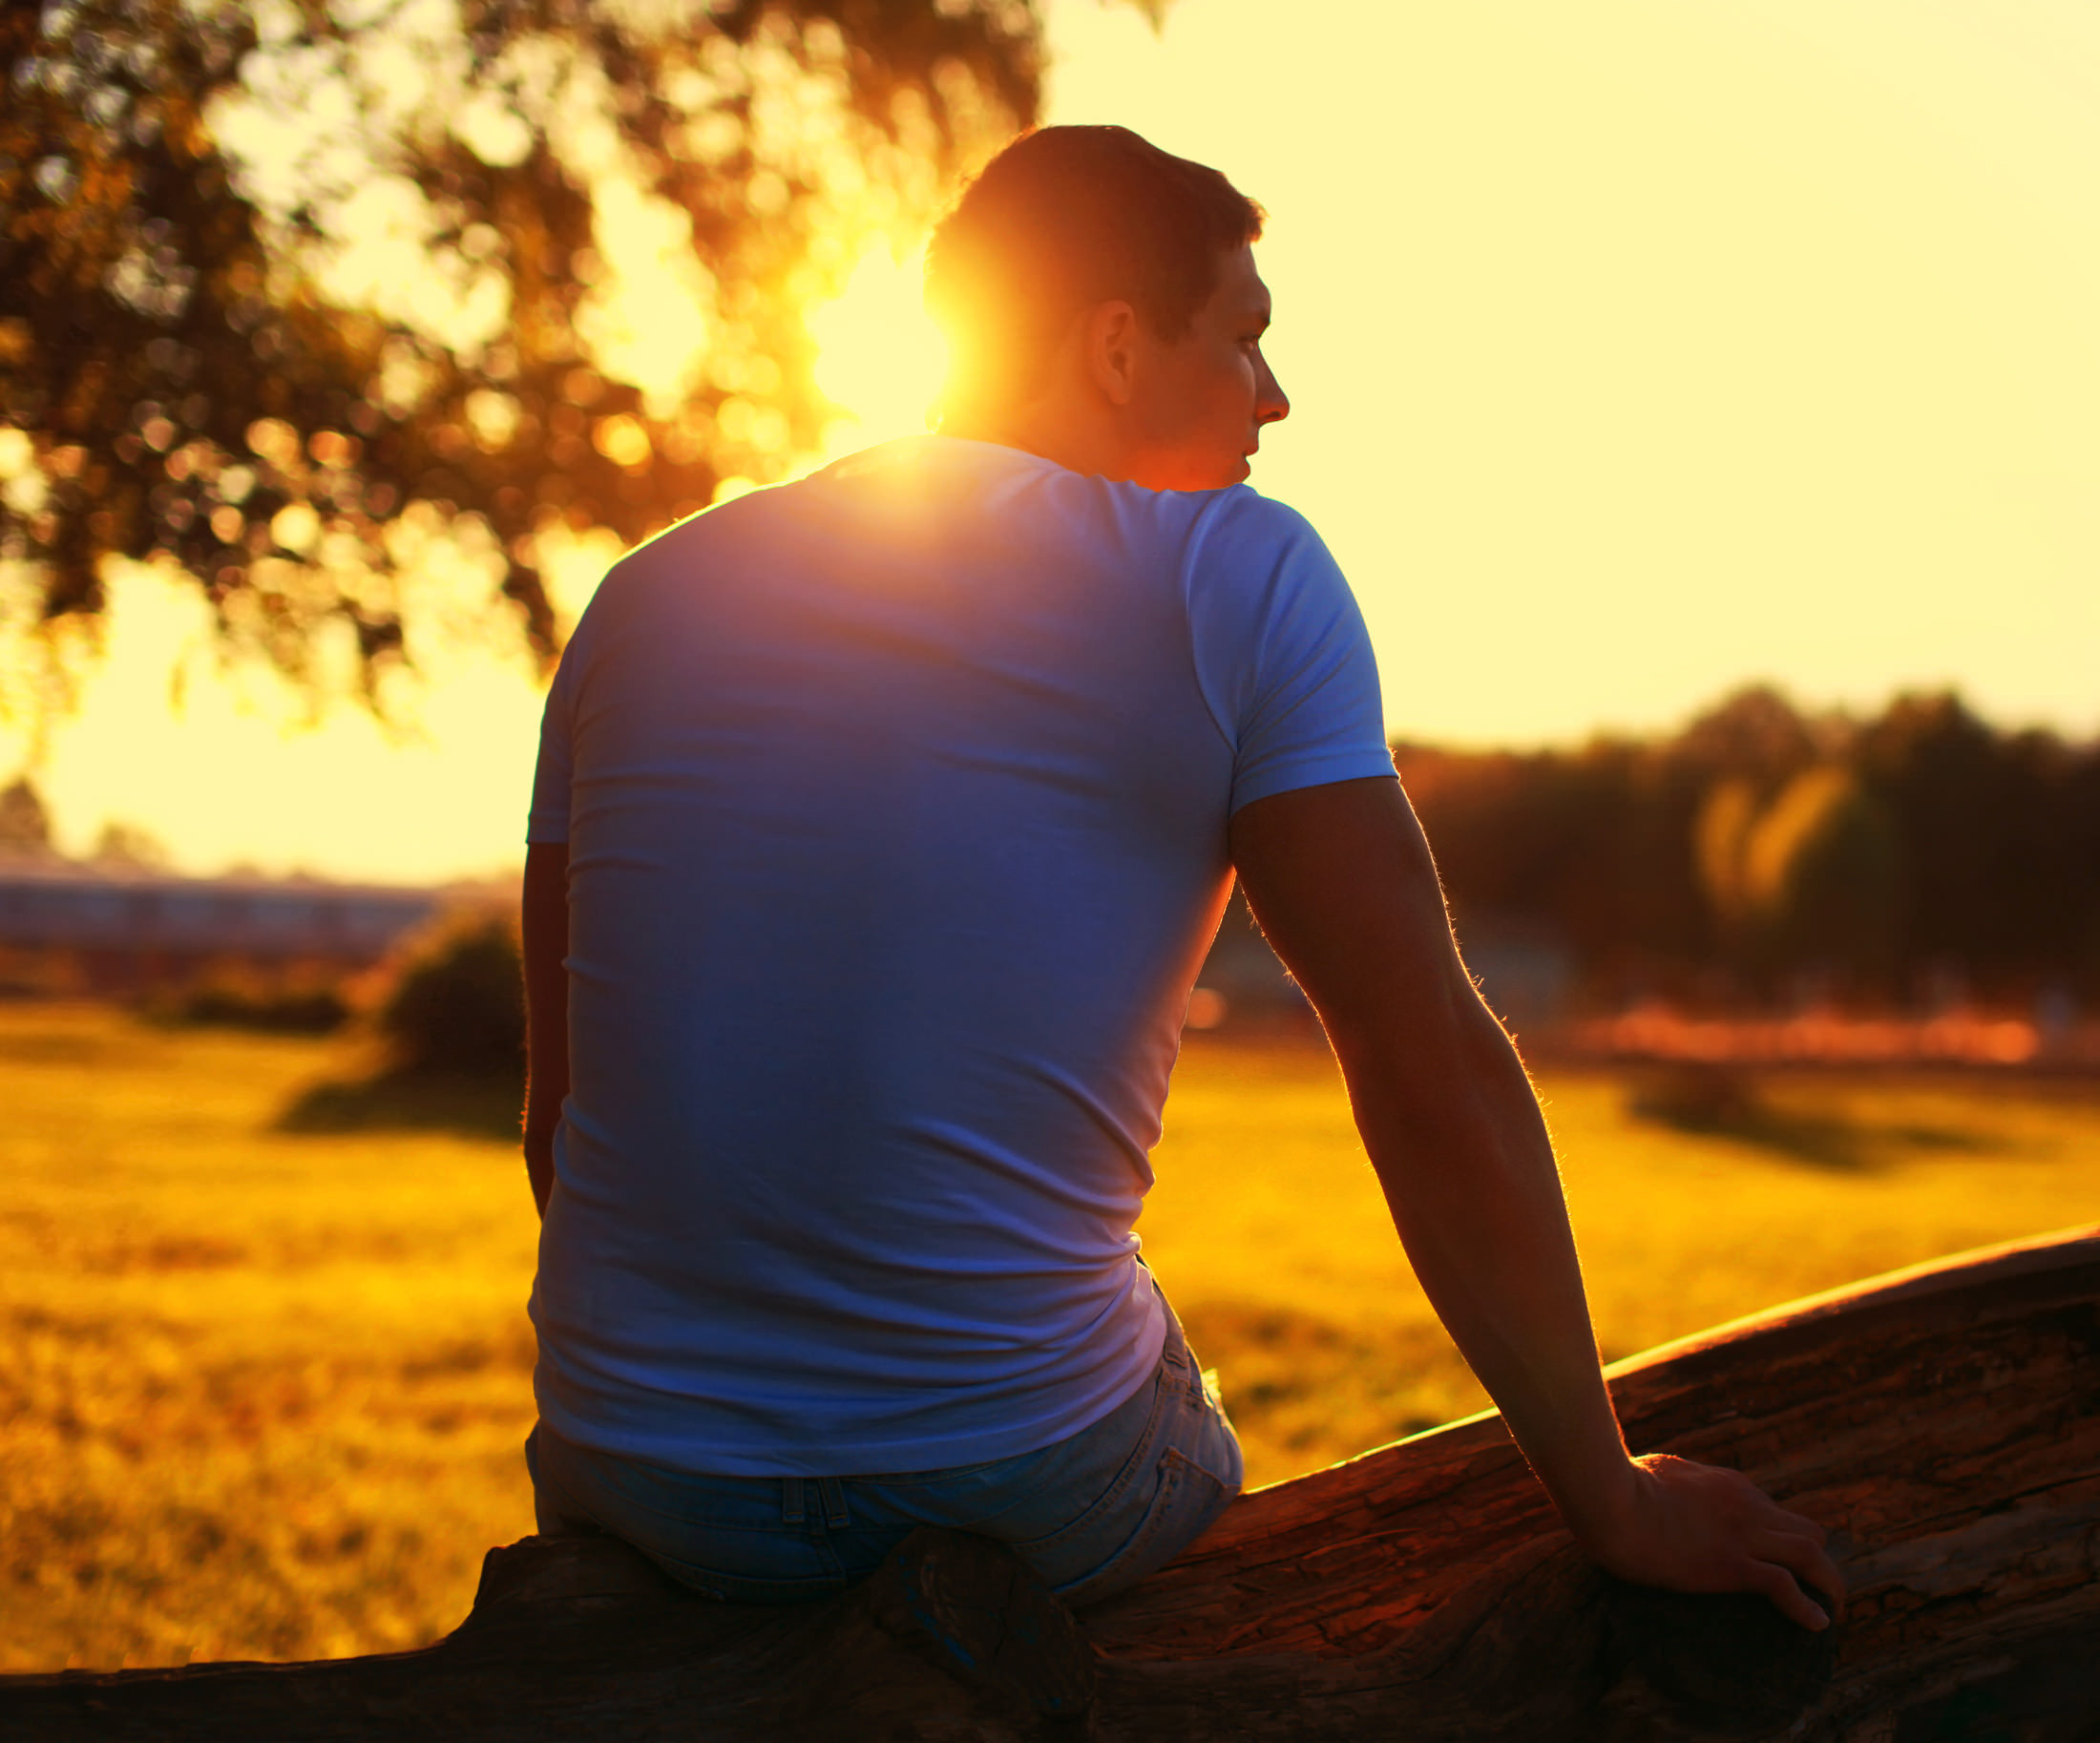
All light has color, or more specifically, a color temperature.
Our eyes are very skilled at seamlessly detecting these variations in color and adjusting our vision such that it usually goes unnoticed.
Unfortunately, the same can't be said of the sensor in your camera.
Your camera's sensor records the color of light as it sees it - that is unless you tell it otherwise.
For example, in the image above, the light is very "warm," with a golden tone to it that's common after sunrise and before sunset during Golden Hour.
Conversely, light during the middle of the day has a much cooler tone, with an almost blueish appearance and indoor tungsten lighting is very yellow.
You can control for these color casts by using the white balance controls on your camera to neutralize those colors. Learn how to do that by watching the in-depth video below by Mike Browne:
Distance Makes Your Lighting Dimmer

This sounds like a no-brainer, but it's still worth mentioning.
The further your subject is from a light source, the dimmer the lighting will be.
In fact, light falls off very quickly as it's moved away - at a rate of the square of the distance.
That means that if the light source is moved twice as far away, you get just one-fourth of the light you originally had.
If you find that the lighting is just too dim for what you need to do, either move the light closer to your subject or move the subject closer to the light.
Alternatively, you can use dim lighting as just one creative way to use lighting, as was done in the image above.
The Fall Off of Light Helps Define the Background

The manner in which the distance to a light source impacts its brightness doesn't just impact the subject. It also impacts the background.
For example, if your light source is very near your subject, they will be more brightly lit, but the background will be much more in shadow.
Conversely, if you move the light source further away from your subject, the subject will be more dimly lit, but the background will be brighter.
So, if you want to create an image in which the background is unseen, keep the lighting close to your subject.
However, if you want to show the relationship between the subject and the background, move your light source further away from the subject, as was done in the image above.
If the Lighting is Too Harsh, Broaden the Light Source

Let's say you're taking a portrait and find that there are harsh shadows on your subject's face.
This might occur because the subject is too near a bare source, like a flash or even a window through which the sun is shining.
An easy way to rectify this is to choose a broader light source, or one that is diffused in some way.
When a broader light source is used, the light hits the subject from more directions. That helps fill in shadows and provide a much more even lighting for the subject.
Looking at the image above, you can see how the lighting on the mom and her child is very even and broad.
This was accomplished by diffusing the intensity of the sunlight of the window by moving the subjects deeper into the house. This has the effect of broadening the light, making it much more pleasing for the portrait.
So, if you find the lighting to be too harsh, do what you can to diffuse the light - if indoors, pull the curtains to soften the light. If outdoors, seek shade or shoot on a cloudy day.
Speaking of Diffusion...It's Your Friend!

Diffusion is certainly your friend when you need to improve the lighting for your photos.
When diffusion occurs, the lighting source is scattered, making it more even.
So, when using a flash, the bare flash emits extremely intense, harsh lighting, which is often not flattering.
However, add a gadget like the 3D Flex Flash NEST, and you get soft, diffused lighting that results in a far more pleasing image.
The NEST works because its honeycomb lid allows plenty of light through, but scatters it around the scene for both indoor and outdoor usage.
All you have to do is slide it onto your hot-shoe mounted flash and you're ready to go! There's no complicated mounting brackets, no straps, and no velcro. It literally just slides right on!
The NEST even has a removable lid so if you need to increase the lighting to bounce it off the ceiling, for example, you can quickly and easily do that.
This gadget is also flexible - you can fold it flat for easy storage - and durable too, because it's 3D printed with a single piece of plastic.
If you need to diffuse light from your flash, there's not an easier way to do it than with the 3D Flex Flash NEST.
Bounced Light is Better Light

Another way to diffuse intense light is to bounce it off another surface.
For example, if lighting a portrait with a single flash, aiming the flash directly at your subject will result in intense and harsh light.
As noted above, you can diffuse that light by filtering it through a gadget like the NEST.
Another option you can try is to bounce the light.
3D Flex Flash has another handy lighting tool called the WYNG that does just that.
Like the NEST, the WYNG simply slides onto your hot-shoe mounted flash.
Once in place, the lightweight and flexible WYNG reflects light forward and bounces it off walls, ceilings, and the like, while also eliminating those ugly, harsh shadows. You can turn your flash 180-degrees for an even softer lighting effect.
And like the NEST, the WYNG is made of a single piece of 3D printed plastic, so it's strong and durable, yet flexible and easily stored in your camera bag.
Don't let bad lighting get in the way of your photos anymore. Add a WYNG to your kit so you can get the soft, reflected light you need for the most impactful photos. See the WYNG and the NEST in action in the video below:
Frontlighting Minimizes Shadows

If your goal is to minimize shadows, frontlighting is the way to go.
Frontlighting occurs when the light source shines directly onto the subject, like a flash in a portrait photography studio.
While frontlighting minimizes shadows, it also minimizes texture, which is often advantageous when creating portraits of older individuals that might want the appearance of wrinkles to be minimized.
As you can see in the image above, there are no shadows on the man's face because of the bright, even frontlighting that was used.
On the downside, frontlighting is quite flat, with very little dimension as a result of the absence of shadowing.
Just bear those qualities in mind when deciding how to light your subject.
Sidelighting Adds Drama

When light enters a scene from the side, it adds long shadows that give the image the depth and dimension that frontlighting lacks.
This is a popular type of lighting for landscapes, as it gives the image a more three-dimensional look.
It can also be used effectively for portraits with a more artistic flair, like the image above.
You can see how the light entering the scene from our left gives this image an incredible amount of drama, especially compared to the frontlit portrait example in the previous section.
If you're looking for lighting that gives your image tons of visual impact, try sidelighting.
Backlighting Reduces Detail, But Can Still Be Dramatic

When a portrait is backlit, the lighting source is behind the subject, shining directly towards your camera.
In the portrait world, this often results in a silhouette like the one shown above.
Note how backlighting minimizes detail of the subject, but there's still enough detail to determine that the subject is a man seated on a bench with his head in his hands.
But, despite not having all the detail you'd otherwise have if the scene were frontlit or lit from the side, this image still has tons of drama because of the shadows in the scene.
You can vary the effect of the silhouette, too. For a darker silhouette, expose for a brighter part of the sky. For more details in the subject, expose for a darker part of the scene. You can even use Photoshop to backlight your portraits!
Use Shadows to Create Volume

As noted above, sidelighting and backlighting often produce more dramatic images because of the inclusion of shadows.
That's because shadows create volume in the scene, which gives it a more three-dimensional look.
With that volume, your images - whether they are landscapes, portraits, or something in between - will have more visual impact.
That means that if you want to give your photos added punch, try lighting them from the side, from behind, or even from above or below.
The shadows that result from those lighting schemes, as you can see in the image above, can be quite pleasing.
And with that, you've got ten facts about lighting that will help you create more impactful portraits.
Give each of these tips a try and see how they change the quality of the photographs you create!
We Recommend
Transforming Your Photos with Proper Photography Lighting
Light. It’s the most essential element of all photography and something many photographers, especially beginners, don’t know enough about. It’s our goal to change that!
In this article, we’ll teach you how to quickly and easily transform your photos with proper photography lighting. We’ll explore topics ranging from the best times to shoot photos and using natural lighting to experimenting with artificial light and avoiding harsh lighting elements like shadows and overexposure.
With that in mind, it’s time to dive in and discover how to use lighting to your advantage as a photographer to create breathtaking images!
Table of Contents
- Golden Hour and Blue Hour Photography for Landscapes
- Using Natural Light to Your Advantage for Portraits
- Experimenting with Artificial Photography Lighting
- Avoiding Harsh Shadows and Overexposure in Photography Lighting
- Final Thoughts on Lighting for Photography
- Recommended Photography Gear
Golden Hour and Blue Hour Photography for Landscapes
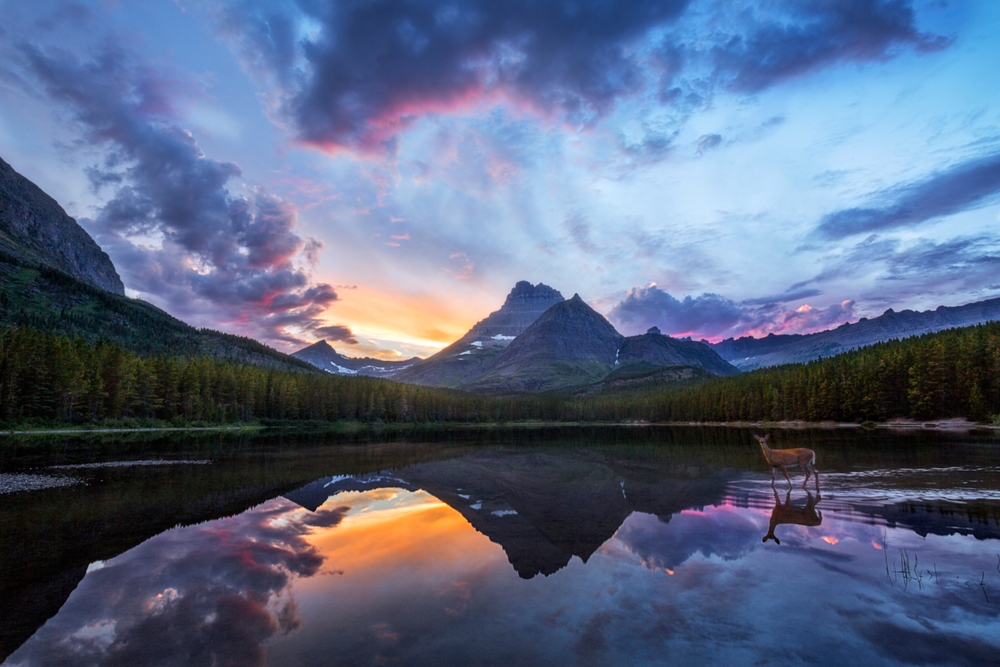
Photo by Jon Farmer via iStock
When taking photos outdoors, the two best times of day to shoot are golden hour and blue hour. While this is true for all genres of photography, it’s particularly true for landscape images like mountains and sunsets. Golden hour is the hour right before sunset, and blue hour is the hour directly after sunrise.
Golden hour and blue hour are the best times for landscape photography because of the light's softness and the sun's location. This combination leads to visually appealing images and minimizes overexposed photos. They are also good times to practice creative photography techniques like silhouettes, sun flares, and backlighting.
Using Natural Light to Your Advantage for Portraits
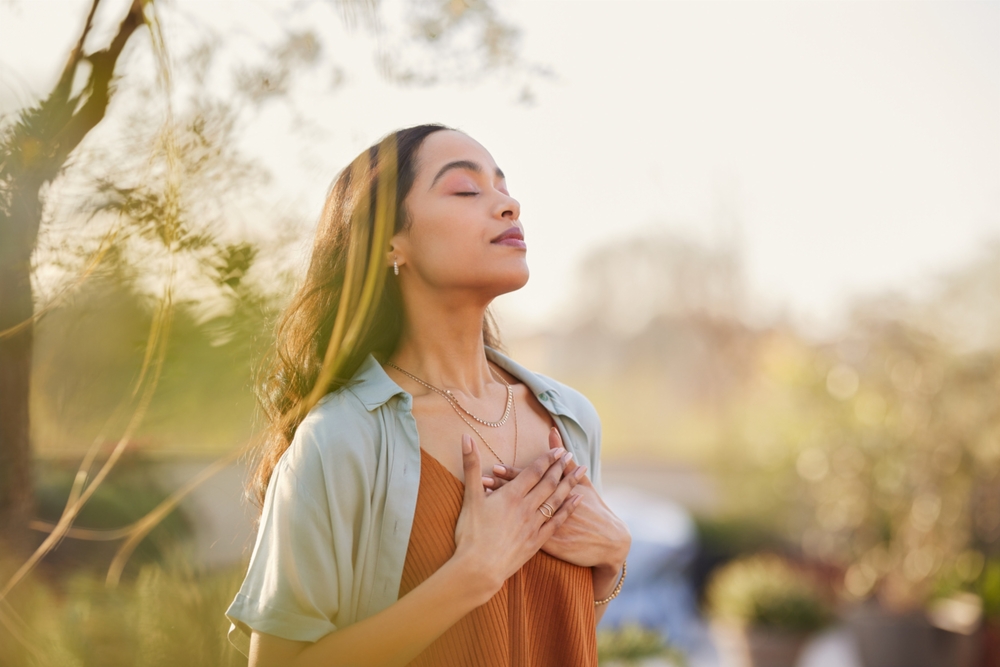
Photo by Ridofranz via iStock
Many photographers prefer shooting portrait photography indoors, where you can control and adjust the light, but our favorite portraits are often those shot outside. The main reason? Natural lighting. It gives portraits a natural look while providing a beautiful glow that illuminates faces and makes smiles pop.
To best use natural light to your advantage in portrait photography, we recommend having your subjects look towards the sun. Natural front light reduces unwanted shadow while highlighting the curvatures and features of the face.
You can also create unique effects like lens flares using backlighting. However, please be aware that backlight is more unpredictable and harder to master.
Learn More:
- 4 Smartphone Photography Accessories to Level Up Your Game in 2024
- What to Look for in a Photography Lighting Kit
Experimenting with Artificial Photography Lighting
In contrast to natural light, you have artificial light. Artificial lighting is ideal for situations with poor or no natural light. Common examples of when photographers use artificial light sources include inside photography studios, at night, or outdoors in the middle of the day to produce desired lighting effects.

Professional photographers usually have professional lighting kits. They produce spectacular results but are also big, heavy, difficult to transport, and expensive. That’s why we prefer a high-quality portable photography light like the one-of-a-kind Avant by Hobolite for beginners and experienced on-the-go photographers instead.
Signature features of the Avant include its compact size, rechargeable battery, exceptional color accuracy, and affordable price. Moreover, it comes with a carrying case and a wide range of accessories that allow you to perfectly customize your lighting to best match any shooting scenario.
If that wasn’t enough, its retro design makes it incredibly classy and will undoubtedly impress your friends and other photographers at your next photo shoot. To learn more about the Hobolite Avant, check out our hands-on review on the PhotographyTalk YouTube Channel after four months of working with it.
Avoiding Harsh Shadows and Overexposure in Photography Lighting
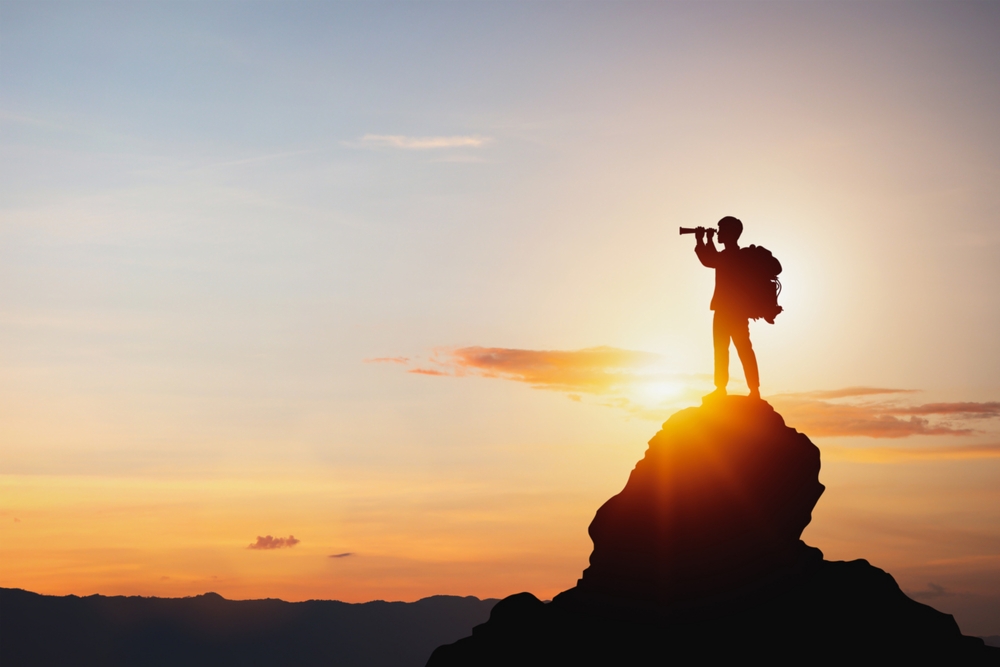
Photo by Midnight Studio via iStock
Finally, two of the biggest problems (and most avoidable) photographers encounter regarding light are harsh shadows and overexposed images. The best way to avoid harsh shadows is to use front lighting. You can do this with natural light (if possible) or by using an artificial light such as the Avant. Overhead lighting also works if utilized correctly.
On the other hand, to avoid capturing overexposed photos, you want to avoid shooting in the middle of the day when the sun is high in the sky. That said, we know that sometimes, taking pictures during the middle of the day is inevitable. If that’s your case, you have three options.
The first is to use artificial light to recreate a scene. The second is to use lens filters like ND filters or polarizing filters. And the third is to shoot in manual mode so you can try to change the exposure setting to compensate for the bad lighting.
Final Thoughts on Lighting for Photography
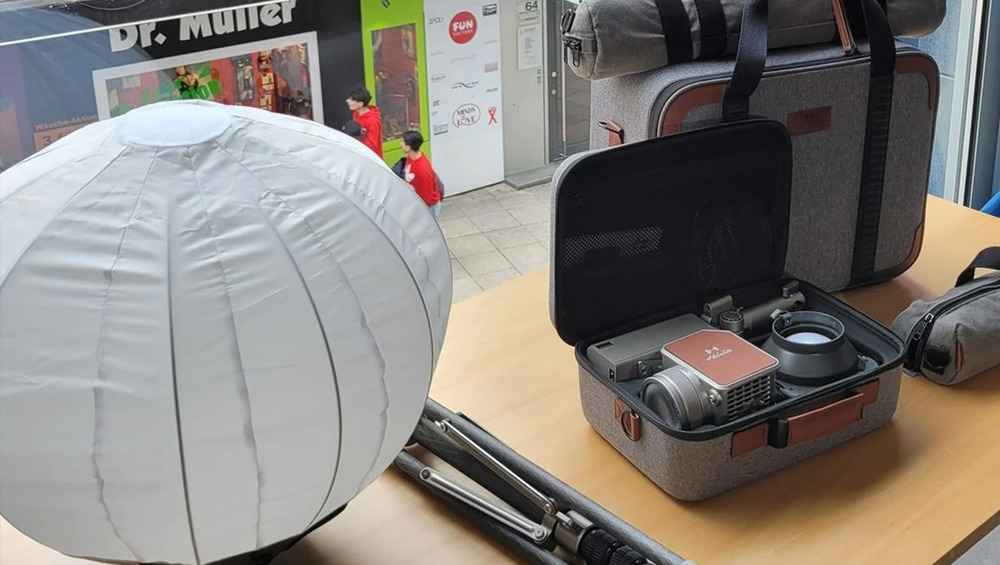
Now that you know how to transform your photos with proper photography lighting, what are you waiting for? Grab your camera and start practicing! And remember, even if you are shooting outside, the light might be subpar, so it’s always a good idea to carry portable photography lighting equipment like the Avant by Hobolite.
For more photography lighting tips and tricks, check out the list below:
- Play around with different types of lighting (indirect, backlight, soft light, etc.).
- Take a photography course to learn more about photography lighting.
- Understand color temperatures and how they affect images.
- Invest in other photography lighting equipment like flashes, shades, and a light meter.
- Shoot in manual mode to get high-quality photos even if the light isn’t perfect.
Recommended Photography Gear
Heads up: Clicking on our affiliate links and exploring our sponsored content helps us at no extra cost to you, and we only recommend gear we're absolutely crazy about!
Learn More:
We Recommend
Understanding Histograms
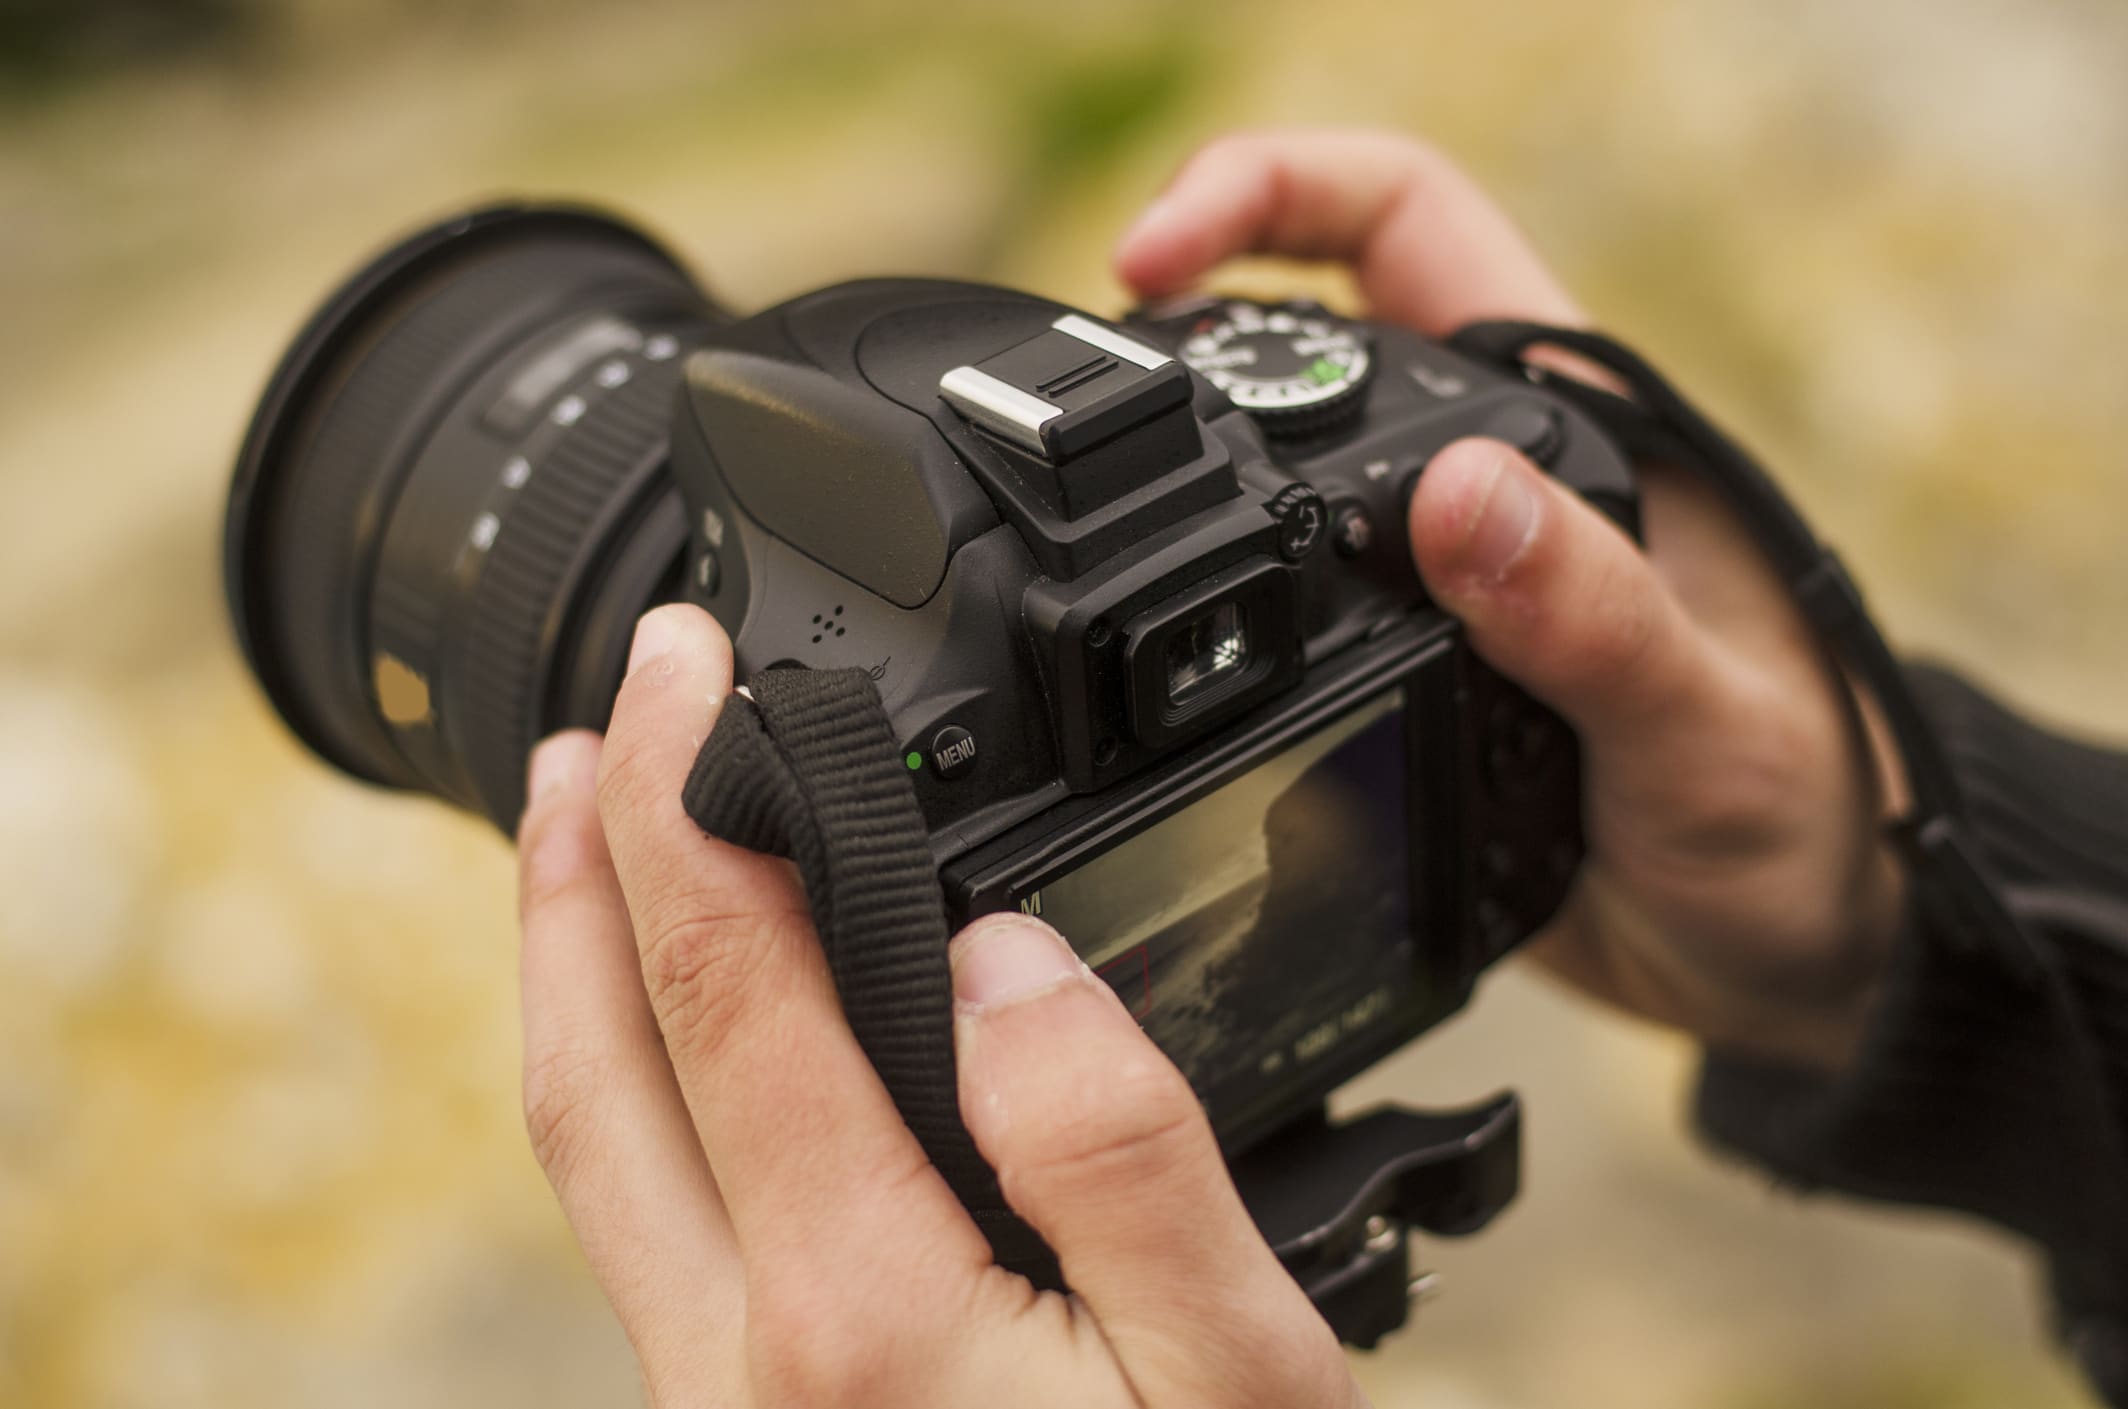
Coming home after a long day of shooting and finding out that you have a bunch of either overexposed or underexposed pictures has got to be the most frustrating feeling for any photographer.
At that point, you probably feel like chucking your memory card straight into the trash is a better option, rather than painfully looking through your ruined pictures and seeing if there is anything left to salvage.
But of course you don’t do that. You take a deep breath, re-open the folder with your destroyed photographs, and begin looking for a way to fix this. That’s the life of a photographer.
But it doesn’t have to be.
Let us introduce you to histograms - the tool that most new (and some old) photographers ignore.
What are Histograms?
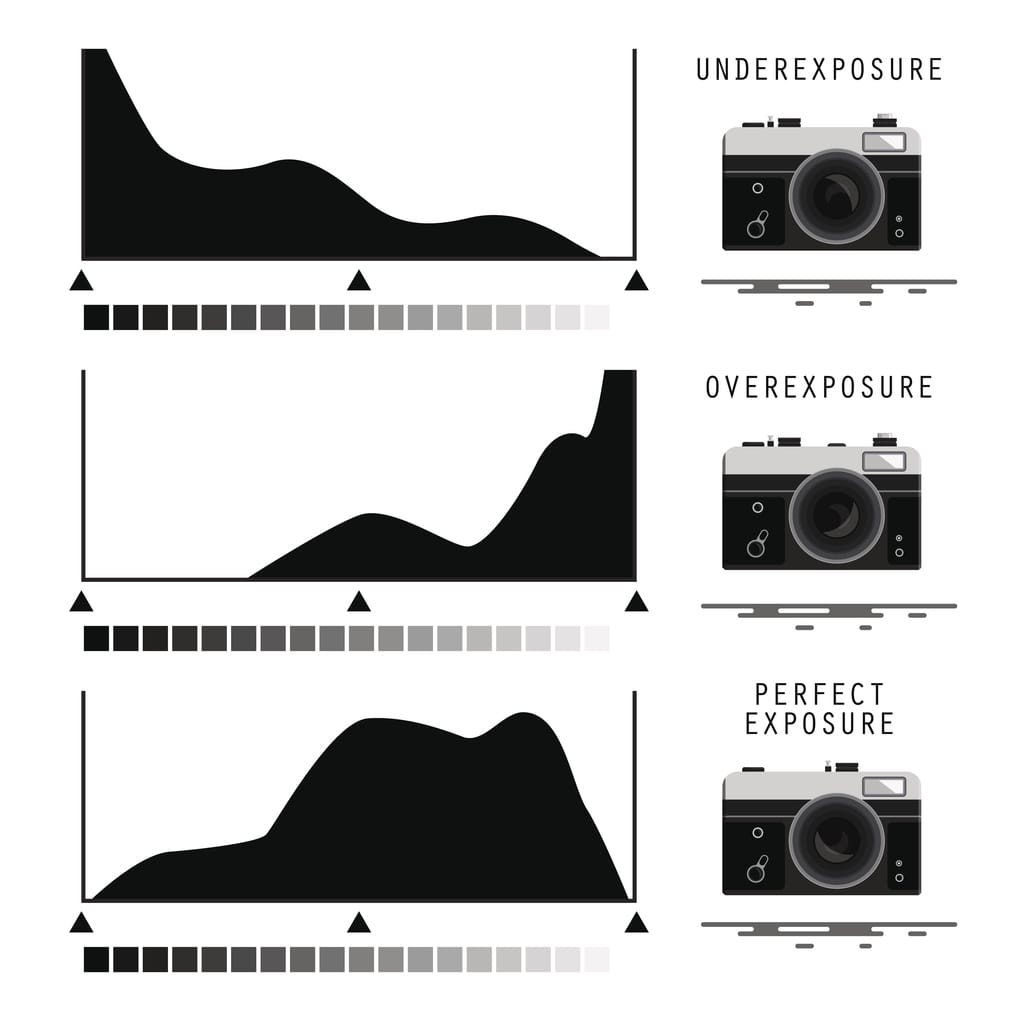
A histogram is an intimidating looking graph that shows how many pixels are exposed in the image you just captured. When used correctly, it can help you to set the correct exposure and get a beautifully lit shot. Sort of like light meters, but not quite.
While the built in light meter will help to set your settings to have optimal exposure while you shoot, you need to learn how to read and understand histograms - they are the best way to check if the picture is well exposed after you shoot it, as you can see above.
Learn More:

So How Do You Read Histograms?

Histograms read the tonal values of your pictures and display the results in a graph. On the far left of the graph, you have the black tons, and on far right are your whites. Everything in between are midtones.
When you glance at your histogram, you want to see a nice bell shape starting just before left edge and ending just before the right edge.
If the line is touching any of the sides, it means that you are either losing detail in your shadows or your highlights (depending on the side). When you see this happening, you can use exposure compensation to correct your exposure and take another shot.
Understanding and Using Exposure Compensation
When your histogram is too far left, set your exposure compensation to +0.5. This should bring the shadows up a tiny bit and save your detail from being lost.
If it is still touching the side, you can either go further with exposure compensation or adjust your shutter speed and aperture.
When the lines are touching the far right side, try setting exposure compensation to -0.5.
Get more details about using exposure compensation in the video above by Matt Granger.
Learn More:
Exposing to the Right
A popular technique when using histograms to shoot is purposefully exposing your images so that you have more information on the right side of your graph. This way you overexpose the image, but not so much that the highlights are blown out and detail in shadows can be brought back in post production.
Although it sounds great in theory, there are some downsides to this technique.
When bringing back lost detail from the shadows, you introduce more noise into your picture, and in most cases, this is not a good look to have.

Even if it is what you were going for, it is better to introduce noise in post production instead, and have a crispy clear original image.
In fact, when you use histograms, the best practice is to have most of your information in the midtones. This way you have all the detail that your camera can capture and more creative freedom when editing the pictures.
Be Mindful of What You are Shooting
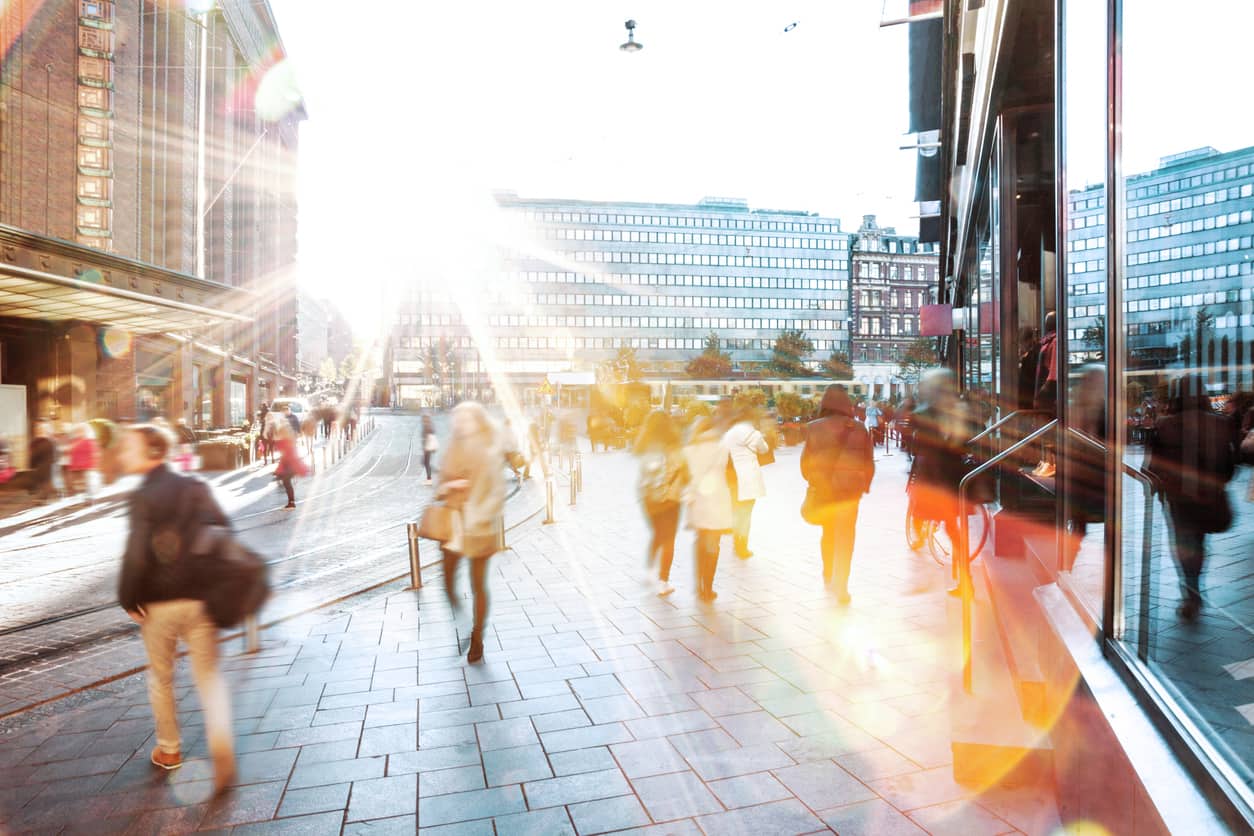
Reading histograms and preventing them from being clipped (cut off on either end) at all costs is a good technique, but what if the scene can be improved with some clipping?
Part of being a good photographer is the ability to always be mindful of your subject and what surrounds it.
So if you are shooting a very brightly lit scene, like the one shown above, there will obviously be more details in the highlights.
For example, when you shoot in the studio with white backdrop, you always aim to overexpose the background to achieve that pure white. On the histogram, this would show as clipping and you might be tempted to correct your exposure, but doing that would actually ruin the lighting of the scene.
See what I mean?
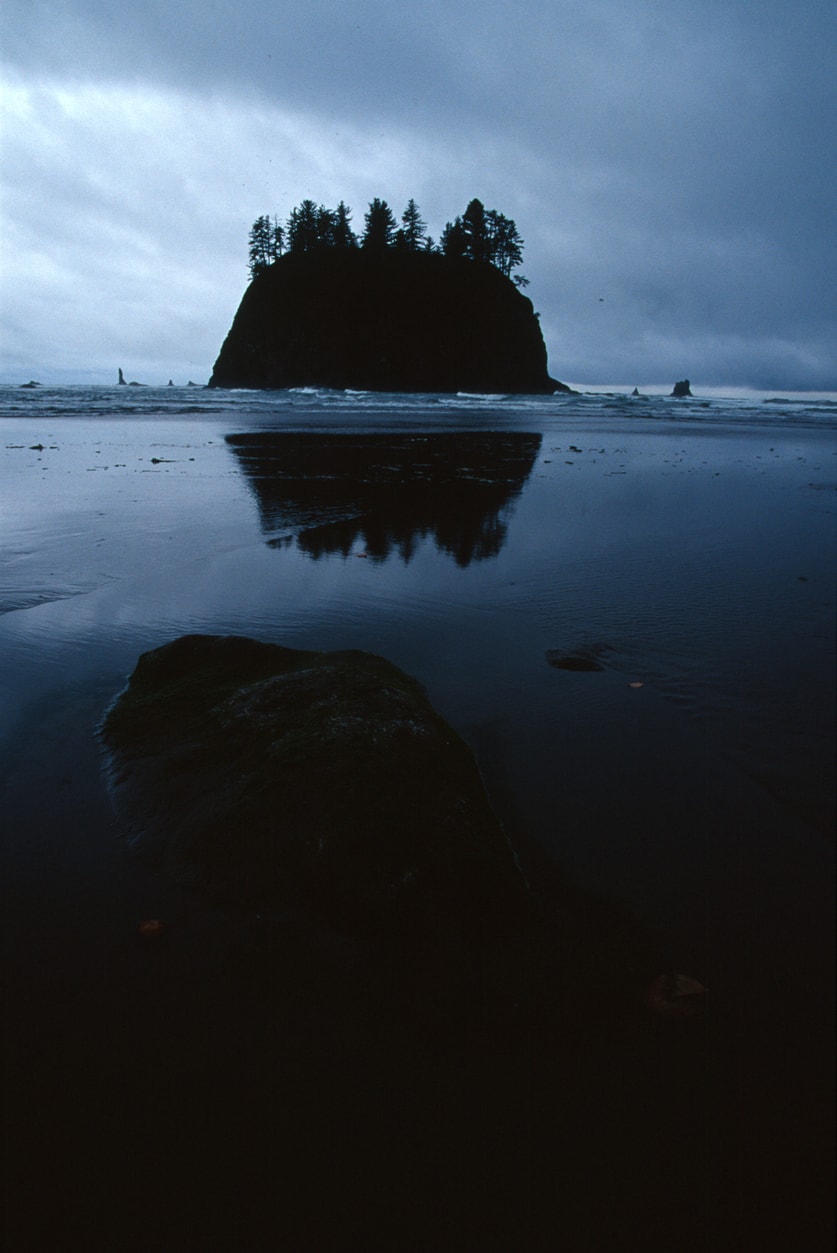
At night, or in low light conditions, you will have a lot of information in your shadows.
Again, on the histogram it would show up way to the left, and while it might look bad at first glance, in reality, this is the result that you should be going for.
Learn More:
All of the Pros, None of the Cons
Histograms are an essential tool for learning and understanding how your camera works and how to shoot with different lighting.
In fact, histograms are so important in photography that you will have them displayed in Lightroom and Photoshop by default since they are just as important when editing as they are when shooting.
Over time, every photographer develops their own way of taking pictures. Some use histograms only as reference when setting up, some glance at them after each shot, and others don’t use them at all. There is no right or wrong here really, as long as you are achieving the results that you want.
However, it is crucial to at least have a clear understanding of this tool’s purpose and use. Should you be using it, though? It’s entirely up to you.
Learn more about histograms in the video above by Tony and Chelsea Northrup.
We Recommend
Unlock the Secrets to Incredible Long Exposures With These Simple Tricks

Long exposure images are incredibly compelling - they capture movement and create an interesting visual, while also looking really complicated to create.
But what many beginning photographers don’t realize is that creating long exposure photographs actually isn’t all that hard. In fact, even if you’ve never taken a single long exposure in your life, it will only take about seven minutes for you to learn how to do it.
Just check out the video below from Josh Katz, who takes you through his quick and simple process for making stunning long exposure images, and you’ll be creating images like the one above in no time!
We Recommend
Want to Take Your Photography to the Next Level? Here’s How…
Becoming a better photographer is a goal shared by anyone that picks up a camera. Doing so usually involves a lot of discussion about taking your photos “to the next level.”
But what does that mean?
In a very real sense, taking your photos to the next level means adding drama to captivate the viewer. That often requires that you think outside the box and approach photography in a completely different way than you ever have before.
In the following video, Benjamin Von Wong and the Cooperative of Photography set out to help you get a better understanding of how you can add drama and depth to your images. It’s well worth a look and just might give you the inspiration you need to take your boring photos to being something spectacular.
Amazon Recommendations
- Sony a7R Full-Frame Mirrorless Digital Camera - Body Only
- Broncolor Siros 400 S Monolight with WiFi and RFS2.1 Receiver
- LimoStudio Photo Video Studio Light Kit - Includes Chromakey Studio Background Screen
We Recommend
Wedding Photography Lighting Tips That Will Make Your Photos Shine
How often do you hear the phrase, “photography is all about lighting?”
Probably a lot, right?
And rightfully so...lighting is a crucial element of any photograph, whether the photo is of a person, a building, a plant, an animal, and so on.
The difficulty with lighting, though, is when you either have little or no control over it and when you’re in a high-stress shooting situation.
Both of those difficulties certainly apply to wedding photography!
But, just because it’s a difficult shooting situation doesn’t mean that you can’t do yourself some favors in the lighting department the next time you shoot a wedding.
From bouncing the light from a speedlight off of another surface to placing backlights just so to create a stunning, dynamic photo, there’s a lot to think about and consider as you plan your wedding photo shoots.
In this video, wedding photographer Ryan Brenizer gives us some critical tips for improving the lighting for wedding photography. Follow along as he offers detailed instructions that should result in more interesting photos that are sure to impress your clients!
Amazon Recommendations
Yongnuo Professional Flash Speedlight
Wedding Photography: A Step by Step Guide to Capturing the Big Day
The Wedding Photography Checklist
We Recommend
What Does ISO Mean in Photography? A Beginner’s Guide
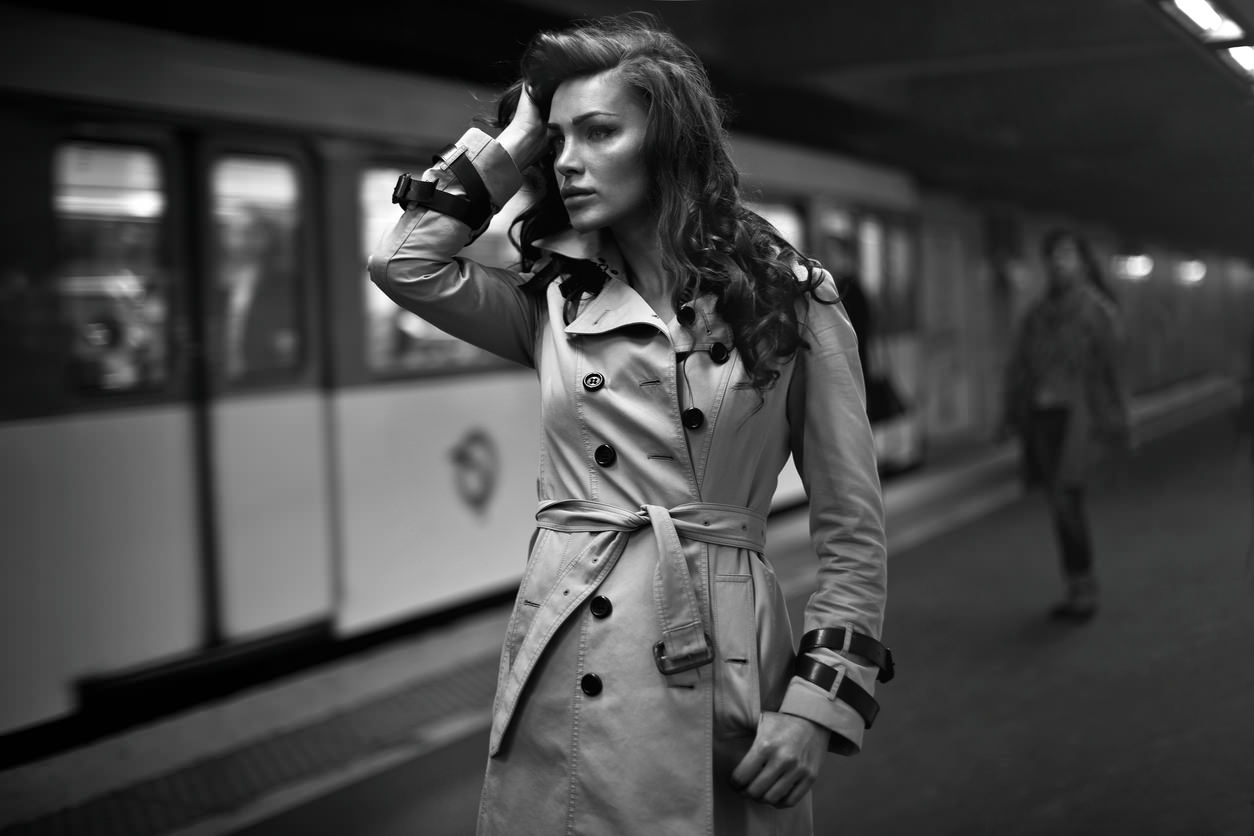
ISO Meaning In Photography
For beginning photographers, one of the hardest parts of learning photography is figuring out all those exposure settings.
You know...aperture, shutter speed, and ISO.
We've done a guide for aperture and depth of field and explained shutter speed too.
If you haven't already brushed up on those concepts, just visit those articles hyperlinked above.
In the meantime, it's time to venture into the world of ISO and learn what it does and how it can impact the look and feel of your images.
WHAT IS ISO IN PHOTOGRAPHY?
Back in the film days, ISO was often referred to as ASA, and it referred to the level of sensitivity of film to light.
The scale on which that sensitivity was measured was 100, 200, 400, and so on, with a lower number indicating a lesser sensitivity to light.
So, if you picked up a roll of ISO 100 film, you understood that due to its relative insensitivity to light that it would be most useful for photos taken in bright lighting conditions. You also understood that a roll of ISO 400 film was better suited for lower lighting conditions, like taking photos indoors.
When digital photography came about, the manner in which ISO was measured stayed the same.
That means that when you dial in an ISO setting on your camera, 100 is still less sensitive than 200 which is less sensitive than 400, and so on.
The biggest difference, however, is that where in the film days ISO referred to the physical qualities of the film you used, it now refers to an electronic process inside your camera.
Nevertheless, the concept is still the same - ISO controls the sensitivity of your camera's sensor to light.
For a great introduction to ISO, check out the video above by Sydney Portraits.
A Quick Scenario: Brightening Your Images
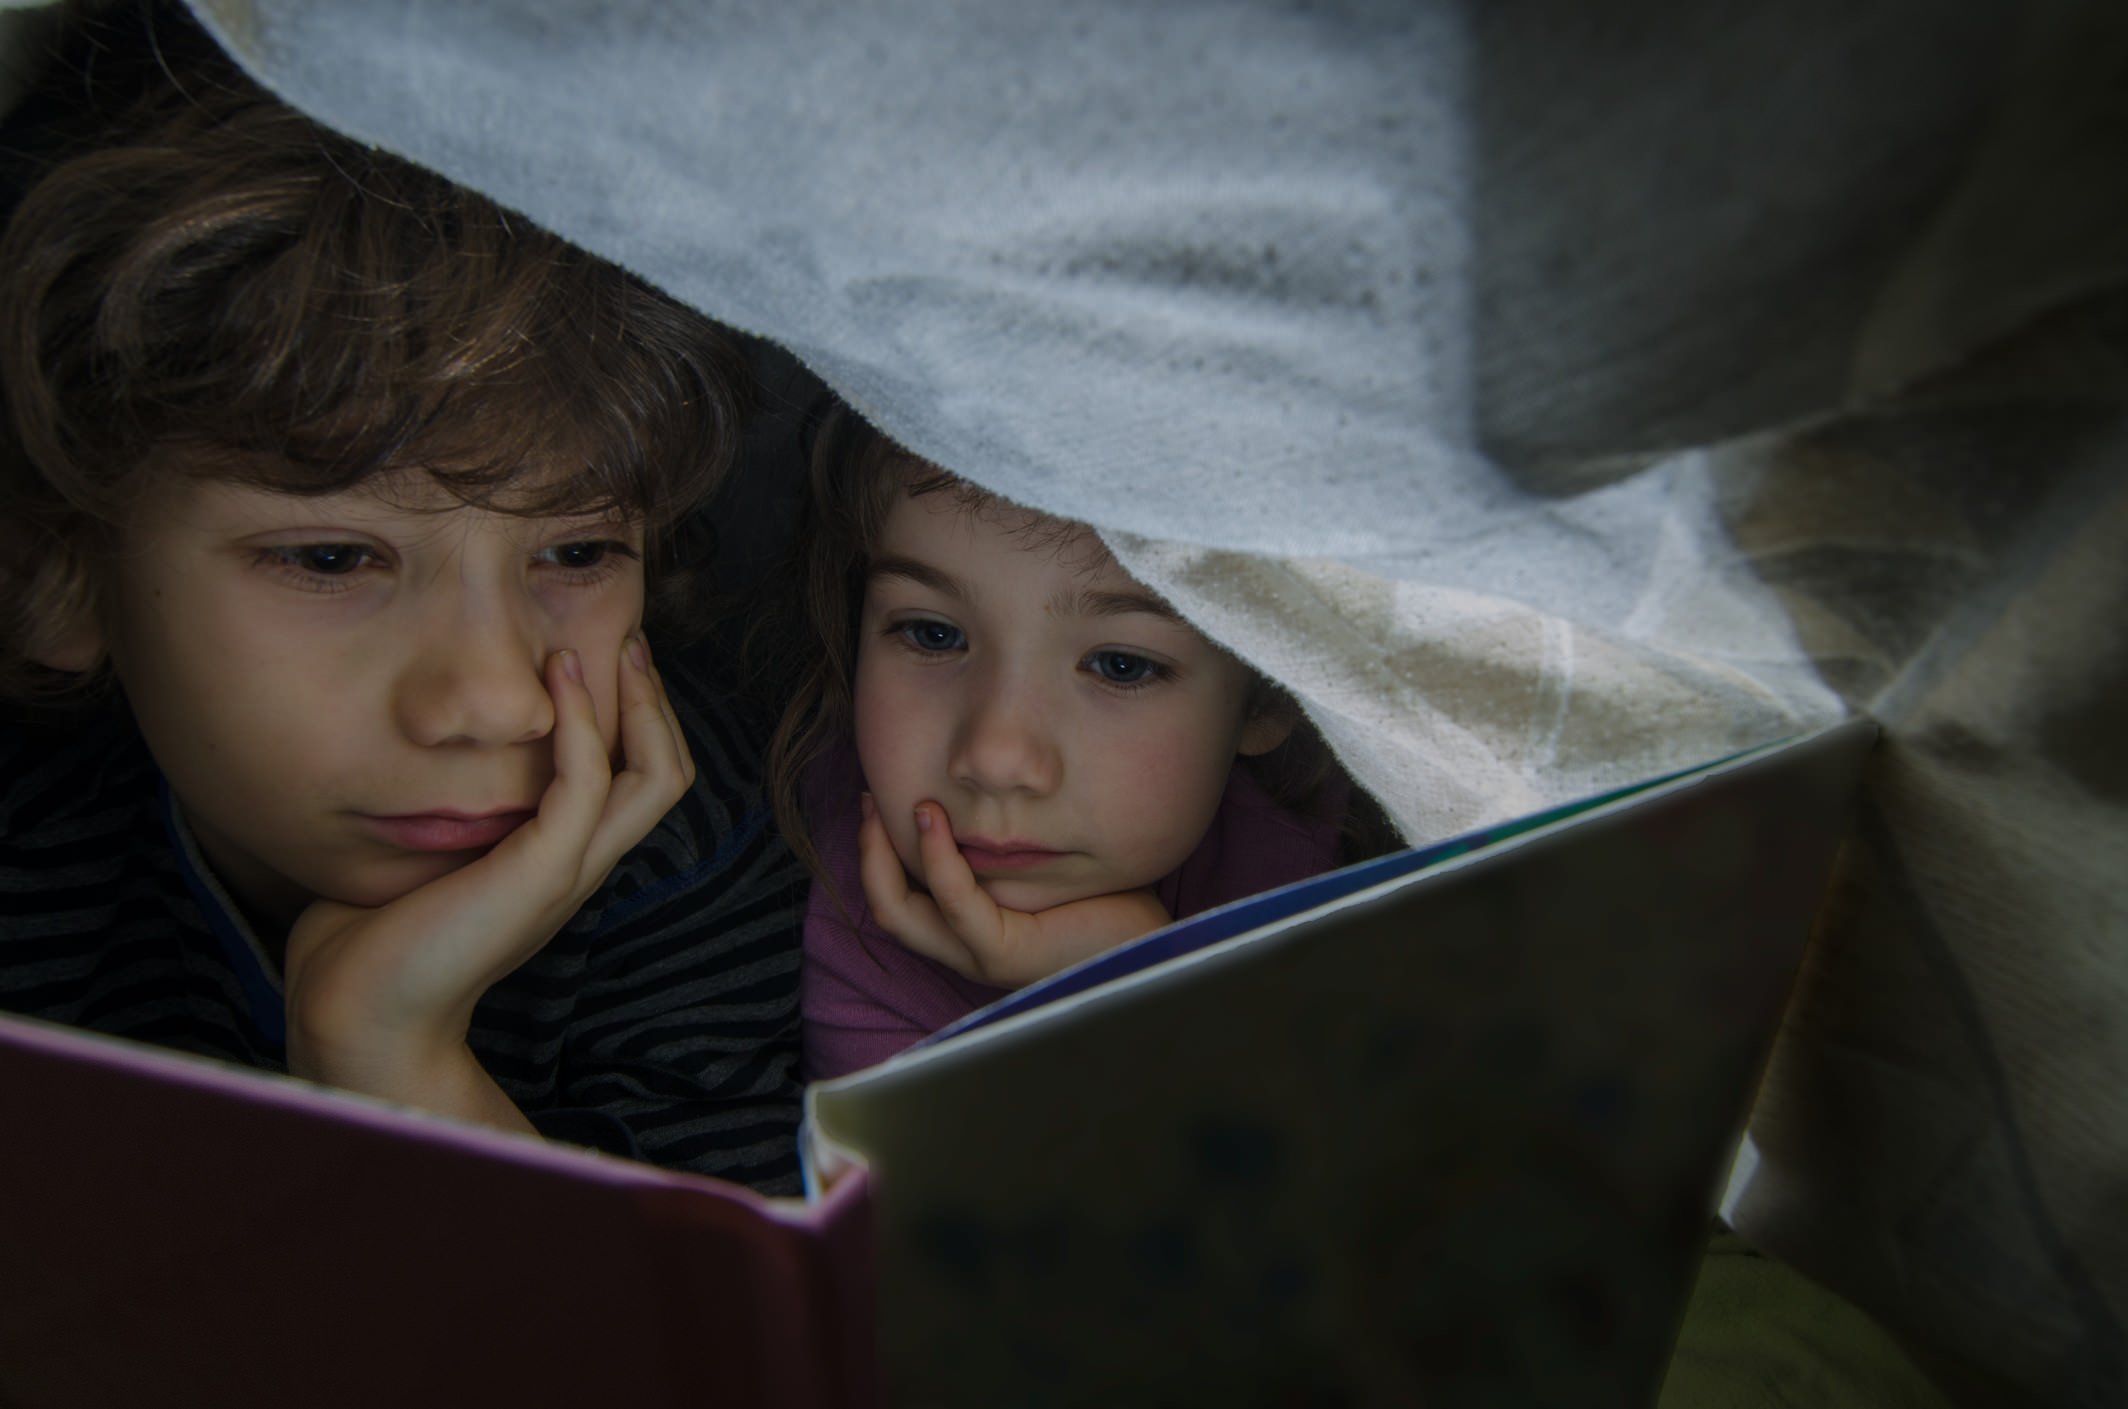
Let's say that you're indoors taking photos of your kids and that you're shooting in aperture priority mode.
But let's say that you find that the images you're taking are just a little too dark and you want them brightened up.
That's where ISO comes in.
On many cameras, there's an ISO button on the top or the back of the camera body that allows you to quickly select a new ISO.
So, for example, if your indoor images are too dark when shooting at ISO 200, you can switch to ISO 400 to brighten the image.
This works because, with every movement of the ISO value upward, you double the sensitivity of the sensor to light. Of course, the inverse is true as well - with every movement of the ISO value downward, you halve the sensitivity of the sensor to light.
A Quick Scenario: Getting a Larger Depth of Field
If you're in aperture priority mode and you want a larger depth of field, ISO once again comes in handy.
For example, let's say you want to create an image like the one above in which everything from the foreground to the background is in sharp focus.
The problem is that in low lighting conditions, choosing a smaller aperture means you restrict the light entering the lens. Doing so in aperture priority mode means that the camera will select a shutter speed to maintain a good exposure.
So, if there's not a lot of light, that means the camera will select a very slow shutter speed which could end up being too slow to get a crisp, sharp image if you're holding the camera in your hand.
Again, ISO can come to the rescue.
If you can't get the aperture small enough for the desired depth of field without getting a shutter speed that's too slow, simply increase the ISO.
The increased sensitivity will compensate for the smaller aperture and allow you to shoot with a shutter speed that's fast enough for you to hold the camera as well.
A Quick Scenario: Getting a Faster Shutter Speed
Assume that you're at an indoor event photographing your child play a sport and that you're shooting in shutter priority mode.
Sports benefit from faster shutter speeds because you can freeze the movement of your subject, even if they are moving very quickly.
However, sometimes the lighting indoors isn't sufficient for a shutter speed that allows you to freeze movement.
Again, that's where ISO comes in.
Let's say you try taking a photo like the one above, but the movement of the girl's arm as she serves the ball is blurry with a shutter speed of 1/250th of a second.
To freeze that movement, you might need to dial in a shutter speed of 1/500th of a second.
The problem is that the change from 1/250th to 1/500th of a second halves the time the shutter is open. That means you need to compensate for that loss of light somehow.
You can do that by bumping up the ISO - if you're using ISO 400, changing it to ISO 800 would do the trick.
A Quick Scenario: Shooting in Full Auto Mode
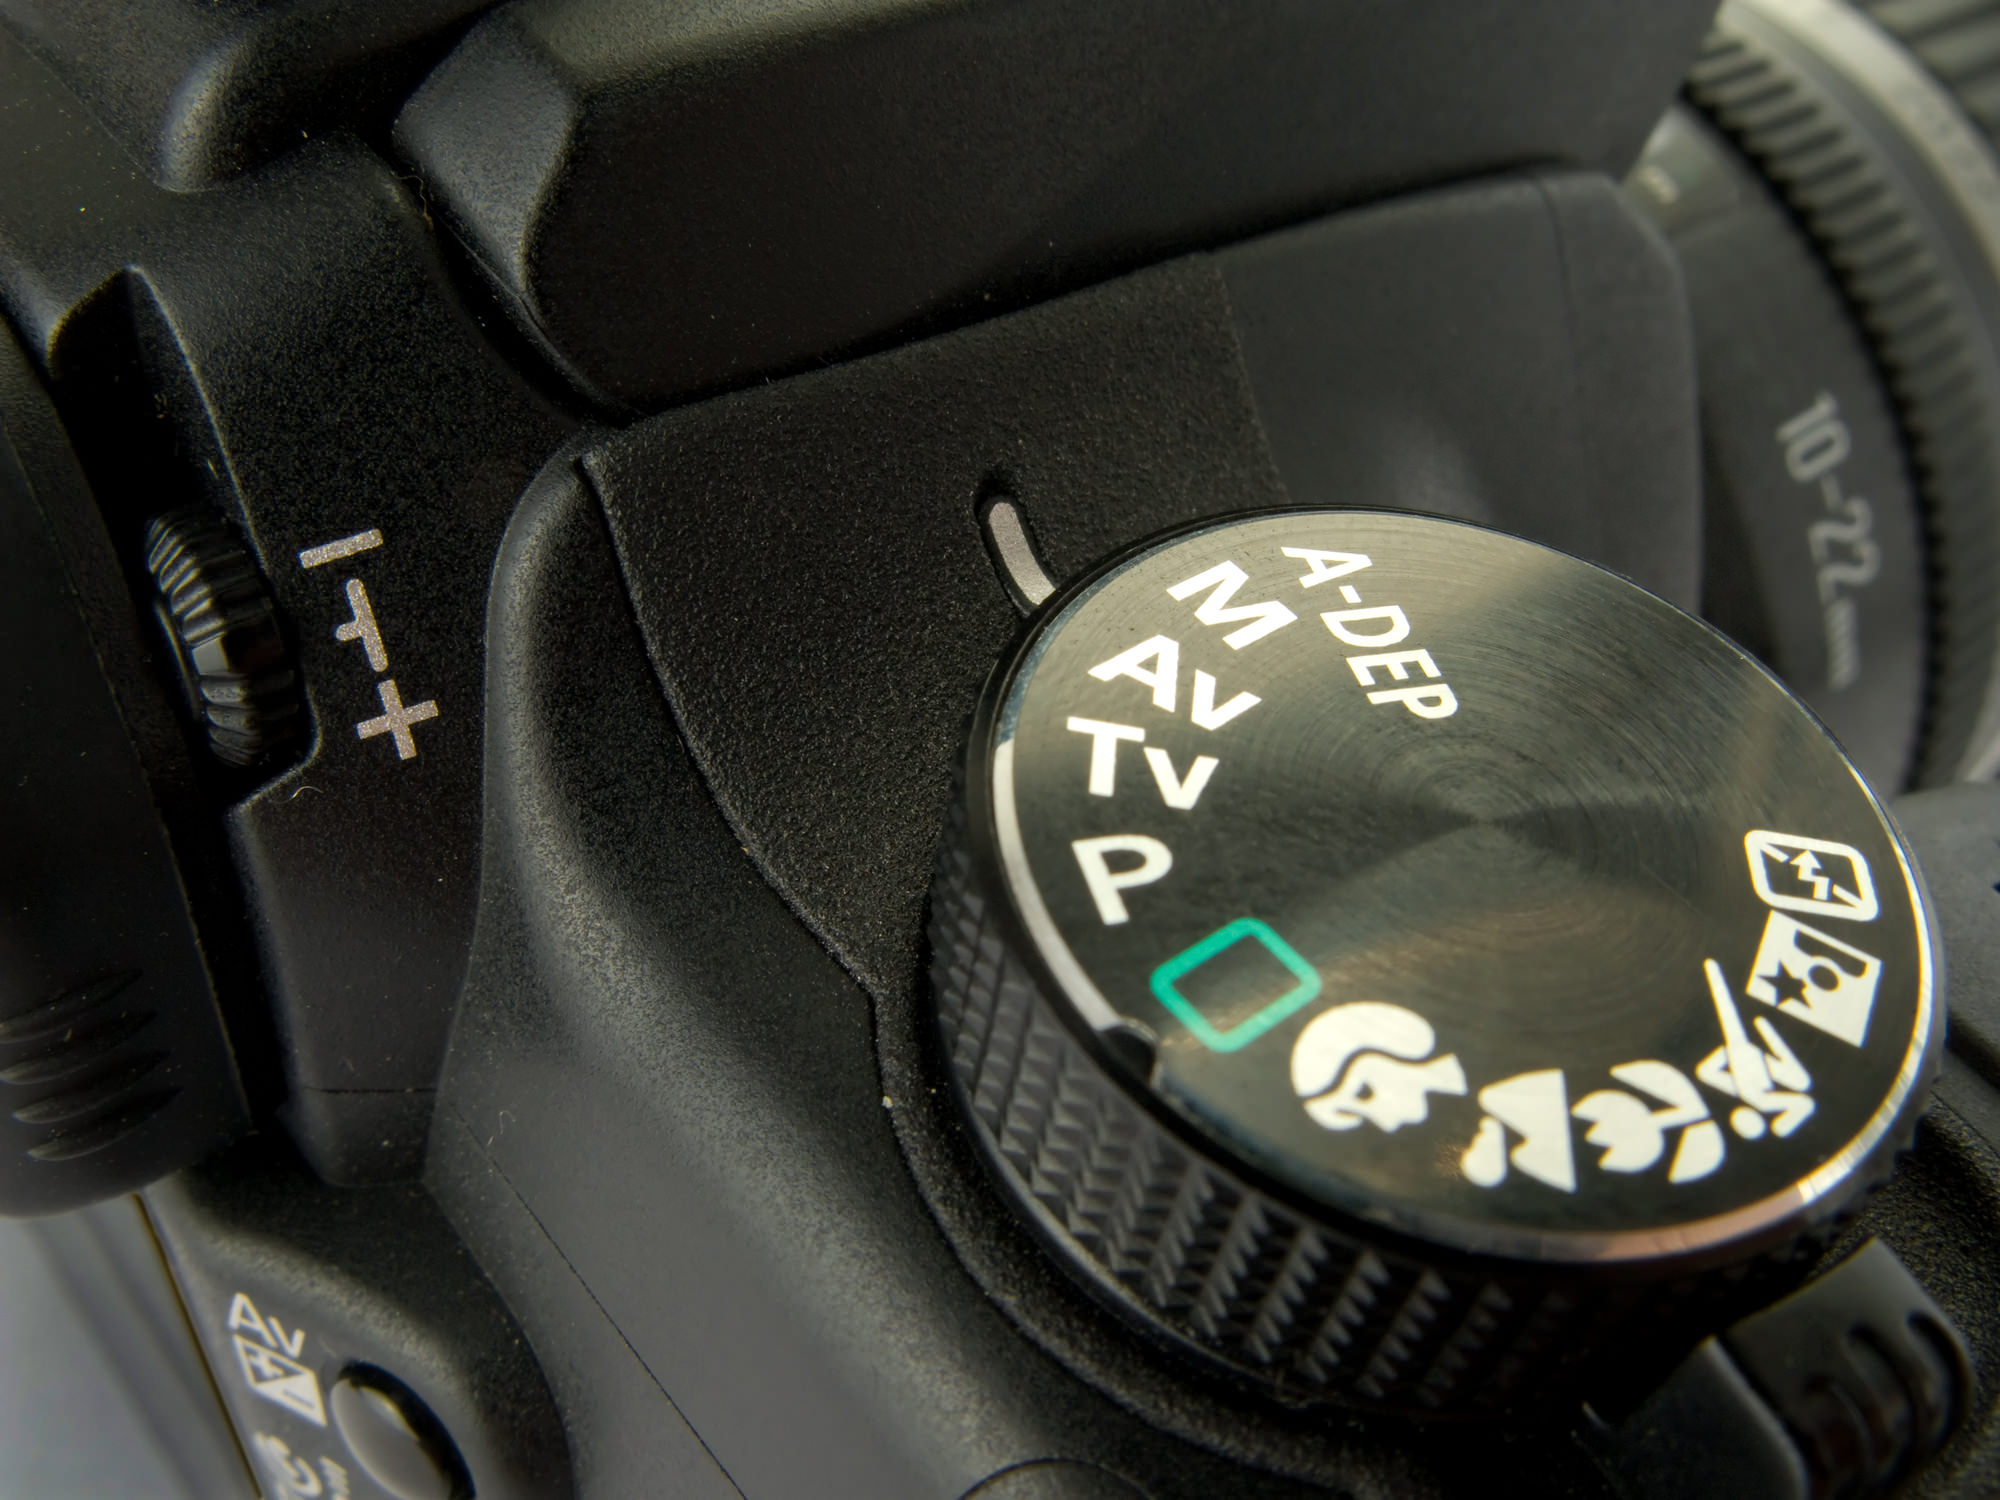
When shooting in full auto mode, the camera makes all the decisions regarding exposure settings on your behalf.
That's nice if you're just starting out because you don't have to worry about making constant adjustments to aperture, shutter speed, and ISO.
But, some cameras allow you to override the ISO selected by the camera.
That's beneficial for the reasons discussed above - if your images are too dark or your shutter speed is too slow, you can change the ISO.
In the case of shooting in full auto, you simply select the desired ISO to get the desired effect, just as above.
If the image is too dark when the camera selects ISO 100, bump it up to ISO 200.
If the shutter speed is too slow at ISO 400, bump it up to ISO 800.
Similarly, if you need a smaller aperture to get a larger depth of field, change the ISO value to a larger one.
The Artistic Side of ISO: Grain
Back in the film days, the ISO of the film you chose to shoot with had yet another impact on your images.
As the ISO value increased, the grainier the resulting images would be.
So, if you used ISO 400 film, you'd see more grain in the image than if you used ISO 100 film.
The same concept applies to today's digital photography - the higher the ISO value you select, the grainier the resulting image will be. You can see this in action in the series of images below:
Note the difference in grain from ISO 64, which has no visible grain, to ISO 12,800, which has grain that is plainly evident.
With film photography and digital photography alike, grain can be used as an artistic element.
In many cases, the artistic use of grain is used for black and white photography and for images that benefit from adding grittiness, like street photography.
That means that for a traditional portrait or a landscape shot, grain isn't viewed as positively.
That's because digital grain (usually referred to as noise) lessens the sharpness of the image.

In fact, noise can be downright distracting in some photos, as you can see in the series of images above.
Notice how the image on the left is clear, sharp, and crisp, but the image on the right with the highest ISO value has significant noise that detracts from the sharpness of the subject.
How to Decide on an ISO Setting
Your ISO setting really comes down to four fundamentals: light, movement, stability, and grain. Here's a quick refresher:
- In low light situations, dial in a higher ISO setting.
- To freeze movement, use a higher ISO setting so you can, in turn, use a faster shutter speed.
- If you're shooting handheld, use a higher ISO setting to help prevent blurry photos, again, because you can use a faster shutter speed.
- If you want a grainy look, use a higher ISO setting.
Conversely, if you have more than enough light - like shooting a portrait outdoors during the day - keep the ISO low so as to minimize digital noise. Likewise, if you're shooting with a tripod and need to brighten the image, you can use a slower shutter speed to get more light instead of using a higher ISO and dealing with noise.
See ISO in action and learn a little more about how ISO can impact your shots in the video above by Mike Browne.
Here's a final disclaimer: reading up on ISO is just the start! To really grasp how powerful of a tool it can be, you'll need to get out there and practice manipulating the ISO.
With practice, you'll develop a better sense of what ISO settings get you what results, and from there you can begin to manipulate ISO with more purpose and confidence.
Once you have the aperture, shutter speed, and ISO down pat, the next step is to learn how the three work together as part of the exposure triangle. Read more about that in this post on Exposure Triangle.
We Recommend
What to Look for in a Photography Lighting Kit
One of the more important photography lighting tips for anyone starting out with high-quality, adjustable, and upgradable lighting is what to look for in a photography lighting kit.
What do I need? What would be nice to have? Will it fit into my current camera system? All of these are good questions to ask about a photography lighting kit. Whether just starting out into studio-style lighting or looking to upgrade to a really nice system, I’ll give you some helpful hints.
To illustrate the points, I’ll be referring to the Avant lighting kits made by Hobolite. I’ve been testing their kits for a few months now, and they’ve impressed me with their high quality and ease of use, two of the aspects I’ll be highlighting in this discussion of what to look for in a photography lighting kit.
Table of Contents:
- Why You Want a Photography Lighting Kit
- What You Need in a Photography Lighting Kit - High-Quality
- What You Need in a Photography Lighting Kit - Ease of Use
- What You Need in a Photography Lighting Kit - Advanced Functions
- What You Need in a Photography Lighting Kit - Expandability
- My 4-Month Test of Avant Photography Lighting Kits
- Photography Lighting Kit Final Thoughts
- Other Recommended Photography Gear
Why You Want a Photography Lighting Kit
You have no doubt been using photography lighting already since most cameras have a small built-in flash, and you likely have a larger, more capable flashgun for your camera system. Additionally, I’m sure you’ve been using reflectors and mixing natural, ambient light with your artificial light sources.
In a studio setting, such as for portraits or small product photography, you likely find yourself with more control and a higher level of adjustability. The same holds true when on location, especially since you may not know exactly what lighting situation exists wherever you’re going.
If your repertoire includes creating videos, you will want your photography kit to be usable for that as well. When I learned portrait lighting, much of what was taught for great lighting would reference classic cinematography masters, so having a photography lighting kit that can be used for both still imaging and motion pictures, movies, and video is a huge plus.
LED continuous light is a preferred choice for high-quality, dual-usage video and photography lighting kits since you aren’t limited to only the short burst of light emitted from studio strobes or an on-camera flashgun. LED lights also operate with little heat and are color-corrected for photographic norms.
What You Need in a Photography Lighting Kit - High-Quality

Whatever style of light you choose for your photography lighting kit, you want it to be high quality.
For both photography and video use, high quality refers to more than the quality and ruggedness of the light units themselves but also to the quality of light emitted.
CRI, Color Rendering Index, is a measure of the attributes of a light source referencing an accepted standard of what is natural in appearance. The scale goes from 0 to 100, with zero meaning all colors would look the same and 100 showing the true colors of an object lit by that light source.
In a photography lighting kit, you want that CRI number to be as high as possible. A CRI over 90 is considered a high-quality light source; closer to 100 would be even better.

The Avant LED lights have a CRI of 96+, which is considered outstanding. Since these lights are LED continuous lights, you can gain benefits whether shooting still images or recording video footage.
High quality also refers to the durability of gear and how smoothly everything operates. Again, I’ll refer to the Avant lights as exemplifying this aspect. Not only are they built like tanks, but they are also designed well; everything works smoothly, and using them is pretty much intuitive for straightforward lighting setups.
What You Need in a Photography Lighting Kit - Ease of Use

That last point segues into this ease-of-use point. You don’t want to be fiddling with functions and controls that are hard to decipher or difficult to set when you’re in the middle of a photo shoot or a video session.
You also want to be able to see what’s happening as it is changed, another reason why I like using continuous lighting, even when I’m capturing still photography. The Avant lights have a user-friendly design for everything from the control knobs, buttons, and readouts to how they attach to a light stand.
What You Need in a Photography Lighting Kit - Advanced Functions
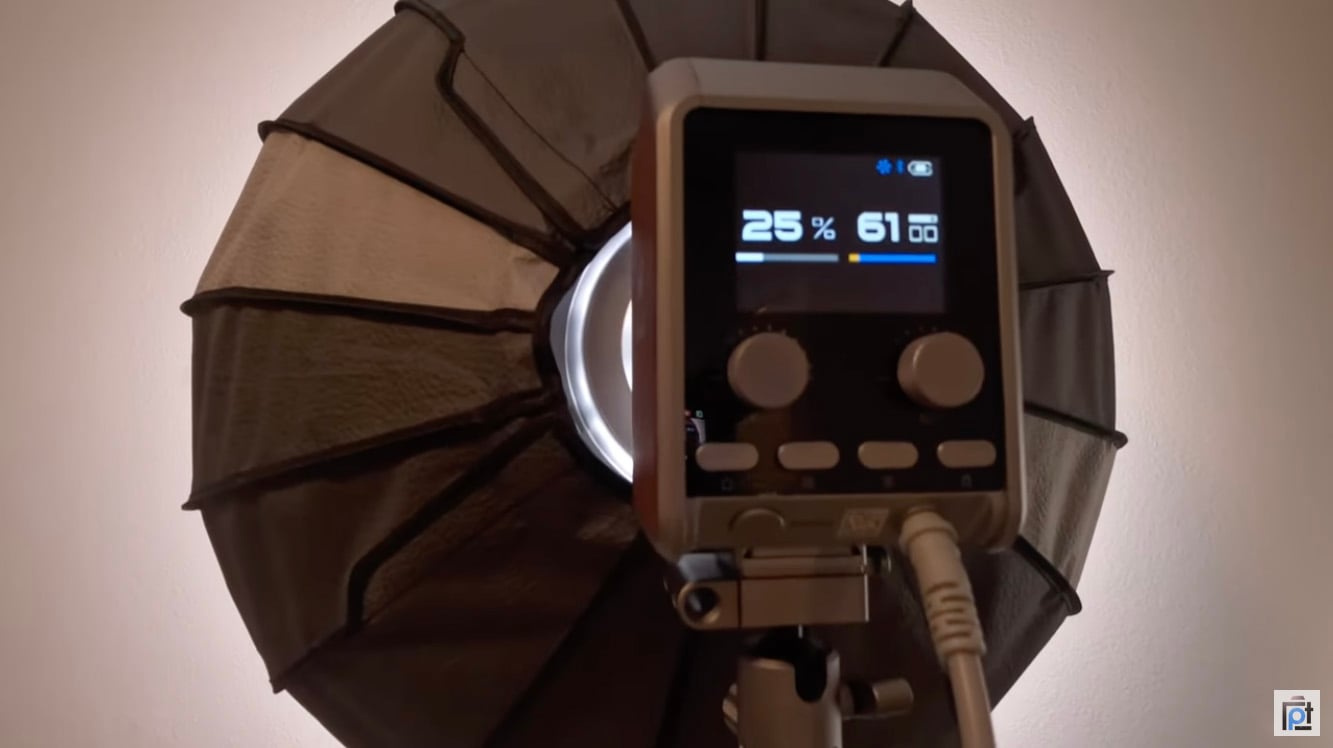
Advanced functions in a photography lighting kit include being able to adjust color balance and power levels, as well as being able to modify the light emitted from the unit.
I like to be able to see via a readout what power level and lighting color balance I’m using as I adjust it. The Avant lights have a digital readout on the back of the unit where the control knobs and buttons are. This allows for effortless adjustment of these advanced functions.
Some other advanced functions that are nice to have are remote control and heat dissipation. Avant has a built-in cooling fan to complement the cool running LED lights. They are also made of aircraft-grade aluminum with a venting grate that allows hours of continuous use.
There is a smartphone app that can be used with Avant lights, letting you adjust from the camera position without needing to adjust each light from behind the light, making complicated lighting configurations less of a hassle in actual use.
What You Need in a Photography Lighting Kit - Expandability
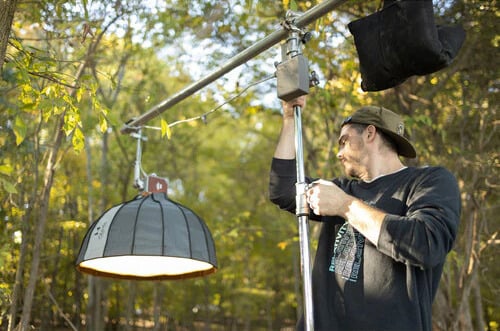
Once you find the photography lighting that fits your needs and wants, you don’t want to be limited to only those capabilities you have right now. So, being able to expand your setup with lighting accessories is a huge plus.
Avant has multiple very useful accessories available from Hobolite. As for power, you can use both AC or DC power. The batteries let you take these lights anywhere and last a long time on one charge. Or you can plug the lights into any wall socket with 110 AC power for using them without any time limit.

To modify the light emitted, Hobolite makes a wide range of accessories such as barn doors, color filters, a honeycomb, a diffuser dome, and an umbrella-shaped softbox. There is also a Bowen's Mount Adapter, making the Avant compatible with all industry-standard light modifiers.
There are several ways you can get these lights for yourself. You can buy the lights one by one and add any accessory you want, or you can opt for one of the two photography lighting kits offered by Hobolite.
The Standard Kit combines the Avant with a set of barn doors, color filters, a V-mount handle, a V-mount clamp, a D-tap cable, and a power supply, along with a carrying bag. The Creator Kit has all of that, adding a light stand and a softbox.
My 4 Month Test of Avant Photography Lighting Kits
The reason I’ve been highlighting the Avant photography lighting kits in this article’s illustrations is because I’ve been using them for a while and am very pleased with everything about them.
Here is a video I made covering a four-month test period where I put them through all sorts of tests and actually started using them as part of my own photography lighting kit:
You probably noticed from the links that Hobolite lighting products are not cheap, but they aren’t outrageously priced either. Just as with your cameras, lenses, tripods, and computers, it isn’t overpriced if that price provides you with exceptional quality and supreme usability.
Photography Lighting Kit Final Thoughts

Since you’re looking at photography lighting tips and ideas for what to use for your own photography lighting kit, that means you are serious about your photography and videography.
Check out the different lighting types and styles and read the real reviews and test results from users who are like you with similar wants, needs and styles. Then, you will make an informed decision about what to get as your photography lighting kit.
Other Recommended Photography Gear
Disclaimer: Our articles might have affiliate links and the occasional sponsored content, but don't sweat it – if you buy something, we get a little kickback at no extra cost to you, and we only hype products we truly believe in!
Learn More:
- What To Look For In Professional Photography Lighting
- 4 Photography Lighting Types You Need to Know
- 6 Things to Know About the Hobolite Mini
We Recommend
What to Look for in Professional Photography Lighting

As a photography hobbyist, you have likely tried your hand at various photography styles. Many types of photography can be done just fine with the equipment already owned by any serious photographer.
Some types or genres of photography may require developing more skills, learning new techniques, and using additional equipment. A couple that pop up in my mind are portrait photography and product photography.
Professional photography lighting is one factor that can make a huge difference in these photography endeavors. In this article, I’ll introduce you to some basic ideas of photography studio lighting and also show what professional photography lighting kits look like.
Let’s get started!
Table of Contents:
- What Is Professional Photography Lighting?
- Strobes or Continuous Lighting?
- Good Enough vs Great Lighting Gear
- Control and Reliability
- Importance of Portability
- Professional Photography Lighting Recommendation
- How To Use Your Professional Photography Lighting
- Other Recommended Photography Gear
What Is Professional Photography Lighting?
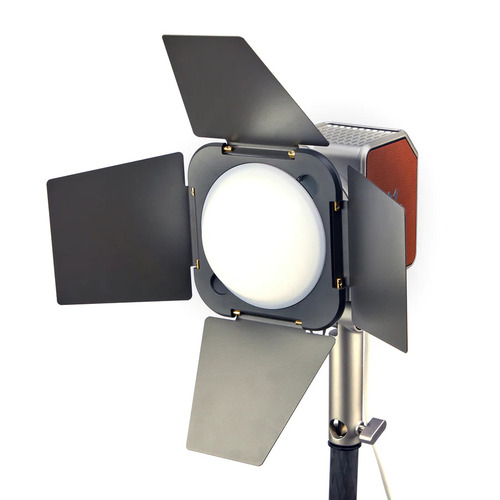
Type into your Amazon search the phrase “photography lighting,” and you’ll see hundreds of items ranging in price from a lunch at a nice chain restaurant to what your dream camera and lens costs.
There are many more considerations besides price. Size and weight come into play, as do what features the lights have. Some may wonder what features are needed; doesn’t it come down to merely flipping a switch for more light?
While it’s true that adding light can be as simple as turning on room lights, for serious photography, more is involved. The quality of light is often actually more important than the quantity of light. And at times, we really do need a hefty amount of light.
This is why we look at professional photography lighting. Just as an entry-level camera or lens pretty much does what professional gear does - take pictures - professional-level equipment is designed to be better, stronger, and faster.
It’s not gear snobbery to want higher-end gear. Going back to entry-level cameras, the sensors on new DSLRs and mirrorless cameras are superb, but there are other things a pro or serious photographer needs besides resolution. Special features, faster lens apertures, and a more rugged build all add up to more capability.
The same thing is true with regard to professional photography lighting. A light source is a light source, but professional photography lighting kits will be just as much higher-end as prosumer and full-fledged pro cameras compared to entry-level camera kits.
Strobes or Continuous Lighting?

Professional photographers are just like anyone else; we have our preferences and perhaps some preconceived notions, especially regarding professional photography lighting.
One big decision regarding a professional photography studio lighting setup is whether to have strobes or continuous lighting. A studio strobe operates like a flashgun, emitting a momentary burst of controlled light. Continuous lights are always on.
While both types of lighting gear are good, I tend to gravitate towards continuous lighting for a few important reasons. By the way, continuous light for my gear means LED lights instead of photofloods. LED lights are much cooler to operate than comparable photoflood bulbs.
One of the reasons for my preference for continuous lighting over studio strobes is that I can see exactly what the configuration is doing to my photo. Even with modeling lights on strobes, a high-quality continuous light shows me a better representation of lighting ratio and colors.
Another reason is that continuous lighting seems less intrusive to some subject matter than the popping off of a strobe. I find that strobes startle pets, young children, and even some adult subjects get distracted by the intense burst.
Additionally, I love dual-use gear. By dual use, I mean video. I have very specific needs and wants for my still photography equipment, such as resolution and low-light capability. Video capability is more than a nice added feature on current high-end cameras designed for still photography. It’s a built-in high-quality feature set.
The video capability and performance of my professional-level and prosumer or intermediate-level cameras are as good as their still imaging. So, I need continuous lighting for my video content creation.

Good Enough vs Great Lighting Gear
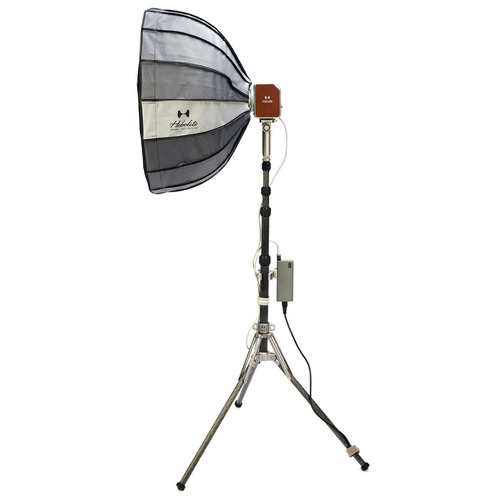
I’m not going to dwell too much on this because everyone has a budget, and we all must fit our expectations and desires into that budget reality. I don’t personally know anyone who has a truly unlimited budget for photographic equipment.
We all have to set a line that separates good enough vs great for our photography and videography wants and needs. A higher-end camera or lens has advantages over entry-level gear, as does professional photography lighting gear over entry-level setups.
Though higher-end gear, intermediate or pro level, costs more money, the investment is worthwhile. I’ve found that the longer I use the high-end gear I spent more to get, the happier I am with all of the results, from the final images and videos to the workflow used to get me those results.
Control and Reliability

Control and reliability are two factors I love in professional photography lighting.
Control is important for professional photography lighting in three main categories: intensity, color, and shape of the light emitted. The shape of the light being thrown is mostly controlled by light modifiers attached to or used in conjunction with the lights.
Intensity refers to the power level or how bright the light is. Adjustable power levels allow me to use the shutter speeds and lens apertures I want for the image I’m creating, plus adjustable power lets me set up lighting ratios with multiple lights for professional photography lighting configurations such as Short Lighting, Broad Lighting, or Rembrandt Lighting.
Color is an important component of photography lighting. This includes the color temperature as well as the quality rating of that color. Besides being truer to the color temps on the dial or the LCD display of the lights, professional photography lighting is consistent with less fluctuation.
Reliability means that the lights will hold up under use in less-than-ideal situations, plus it means that the settings will be consistent from session to session.
Importance of Portability
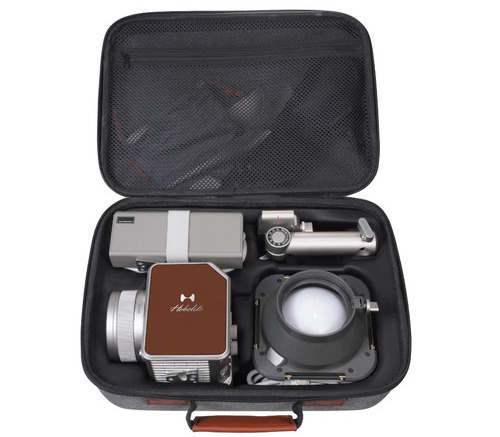
I like to take my professional photography lighting kits with me on location whenever possible, so portability is a huge plus for me.
I find that easily portable lights are also advantageous for photography studio lighting since they make it swift and easy to change from one lighting configuration to the next. A lighting kit that is lightweight and compact is better for this than large, heavy, and possibly cumbersome gear.
This includes more than the lights themselves. Light stands and light modifiers that are easy to handle and yet stay put reliably add to the value of a good professional photography lighting kit.
Professional Photography Lighting Recommendation
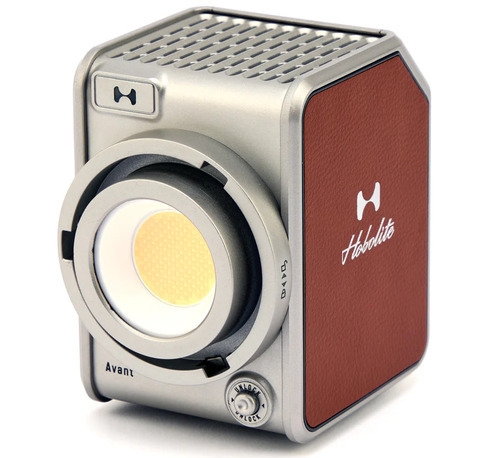
Add all of those points listed above together, and there are some very fine contenders for professional photography lighting that could compete for your choice.
One of the leading contenders for my professional photography lighting is Hobolite lighting gear.
Hobolite has been making fine photography lighting gear since 2000, and their newest lights are beautiful examples of professional-level studio and portable lighting equipment.
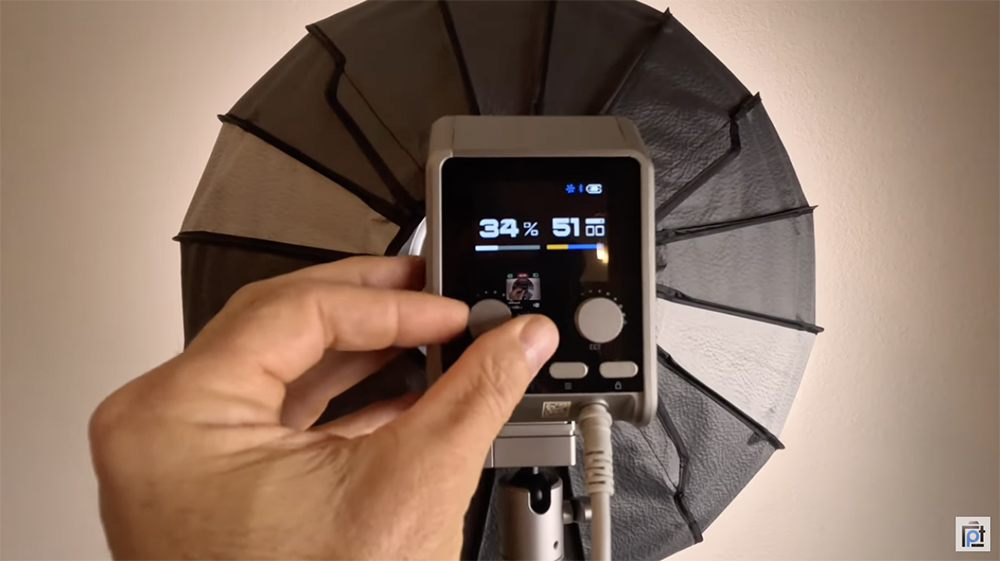
The Avant 100W Bi-Color Continuous LED Light is a top-tier professional photography lighting option that I have been testing for a while. It’s their flagship model, and you will be pleased with everything it offers.
Here is my PhotographyTalk YouTube channel video covering my four-month test of the Avant:
To hit on the points I listed earlier, Avant is an LED light with a high rating for light quality and can be set for various power levels and can be switched from Daylight color balance to Tungsten color balance for blending in with ambient light or for complete control of video and still image capture.
At 100W, it has plenty of power to light up what I need on set or in the field. The power and color settings are very consistent from use to use, plus the light feels like nothing could harm it, a solidly built light.

Despite the features and rugged build, this light is compact and lightweight enough to be easily moved around the studio or taken on location to a remote location. It can be powered by AC power (plug it into the wall) or by a DC power supply, which is as well built as the light.
Though compact, it can be used with industry-standard Bowens mount light modifiers by means of the available Bowens adapter. So that covers the control of the shape of the shape of the light I mentioned under the Control and Reliability subheading.
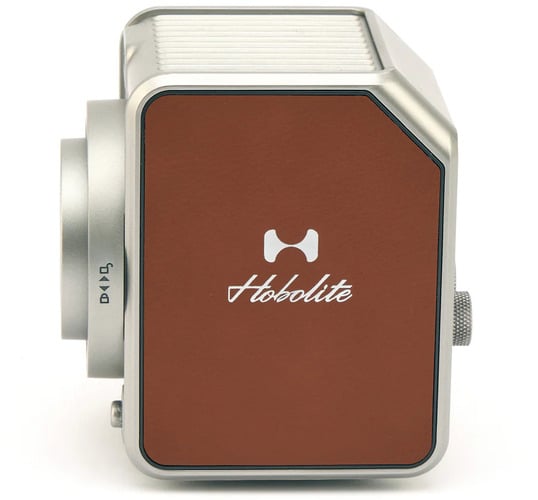
TheAvant is tough enough for all of the professional use I’ve thrown at it, yet it looks so cool! I have to admit, I do like my gear to portray the higher level of expertise people expect from professional photographers and videographers. EverythingHobolite does, from their carbon fiber light stands to light modifiers, batteries, chargers, and other accessories.

Regarding professional photography lighting, you can’t go wrong with these fine lights and lighting kits. At first glance, the prices may be somewhat daunting, especially if this is the first time looking at professional photography studio lighting, but quality and reliability are worth the investment. Think of it as you would when upgrading your cameras or lenses.
How To Use Your Professional Photography Lighting
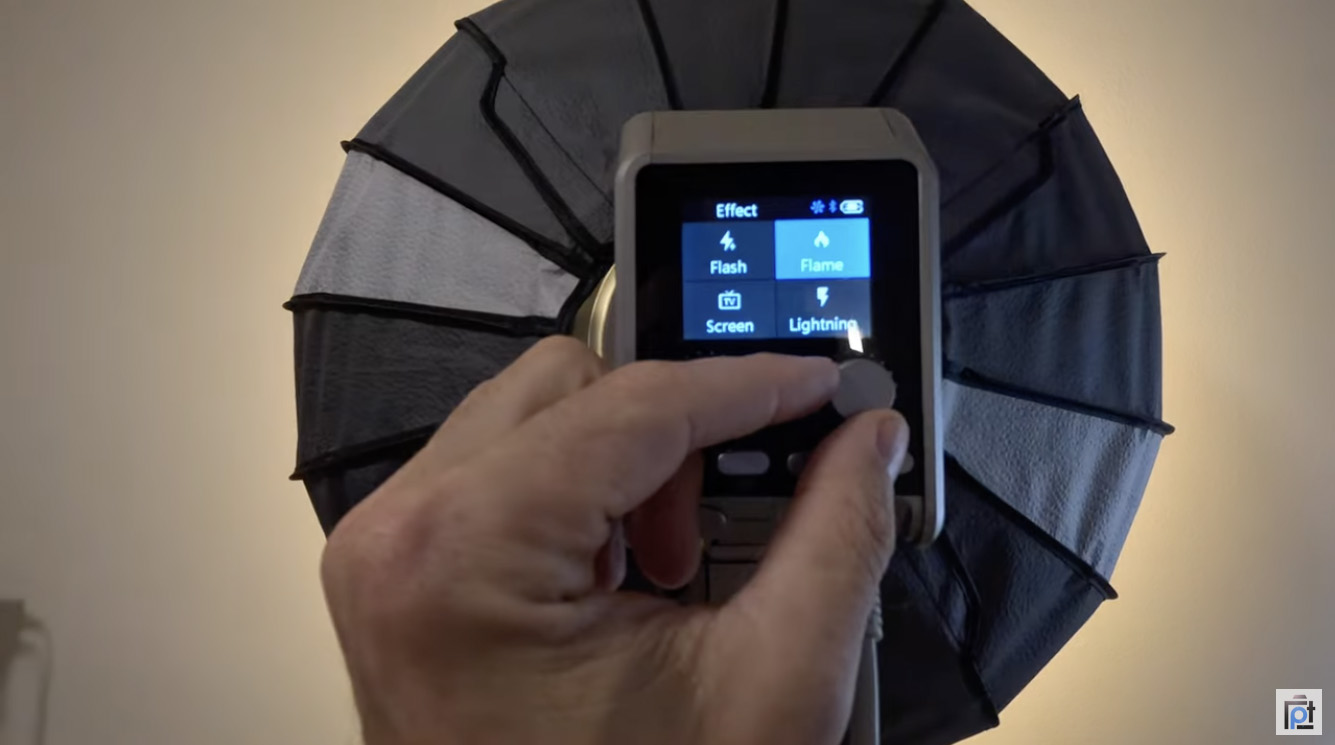
Once you have your professional photography lighting equipment, you want to get the most out of your investment. Check out the tutorials on our YouTube channel and all of the hints, tips, techniques, ideas, and in-depth tutorials printed on PhotographyTalk.
We can help you develop more skills, learn new techniques, and find the right equipment for your constantly improving photography and videography. The Hobolite Avant, with its clean, beautiful light, easy-to-use controls, and extreme portability is a great place to start!
Other Recommended Photography Gear
Learn More:
- 6 Things to Know About the Hobolite Mini
- The Hobolite Micro is the Portable Light You've Been Waiting For
We Recommend
Why It's Crucial to Understand Light Metering
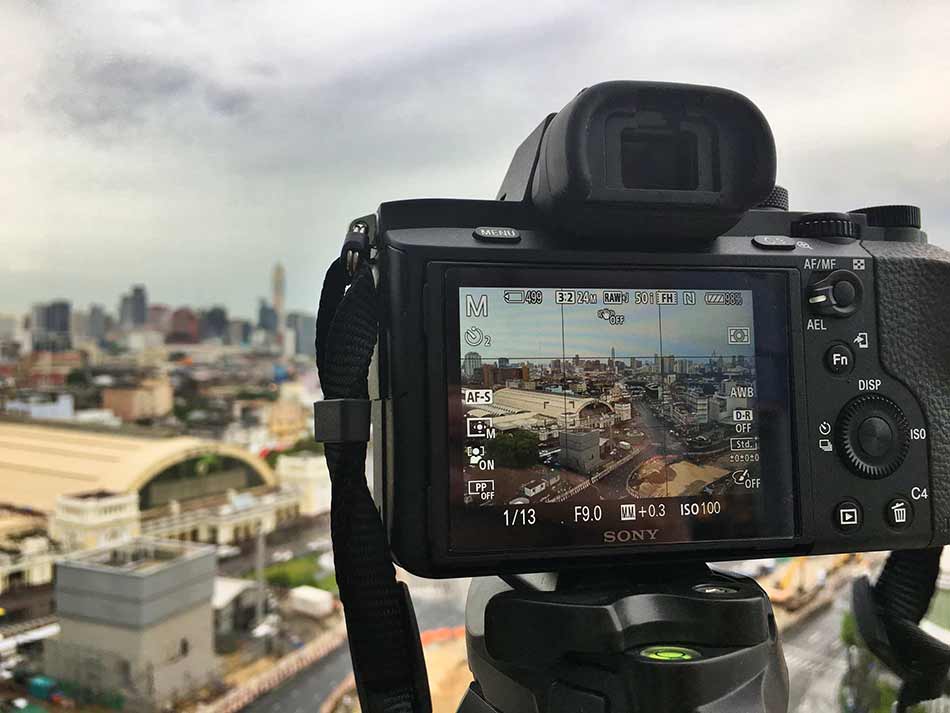
When you first venture away from auto mode, it might be a hard to wrap your head around the process of taking the correct exposure. Playing around with the “exposure triangle” (aperture, shutter speed, and ISO) seems to be mainly guesswork that leads you to no good places, and after a while, you just want to go back to your safe place - auto mode.
However, understanding how your camera measures light is necessary to take pictures in Manual Mode, or appropriately use Aperture Priority/Shutter Priority modes - and that is the only way to gain complete artistic freedom.
See, most DSLR cameras use a through-the-lens (TTL) system to measure the light in front of it. It does this by measuring the light that passes through the lens and gives you the reading either on your LCD or in your viewfinder. Once you learn to read this meter, you can manually change it to your advantage, and create more interesting shots as a result.
In more advanced cameras you might have the multi-point metering systems. These measure light on a number of different points scattered throughout the scene instead of just one. This allows you to have even more control of your main focus point, and become even more creative with your photographs.
This is why it’s important to take the time and learn light metering on your DSLR because sticking to auto mode will constrict you as an artist.
So let’s get to it! Don’t be worried, it sounds much more complicated than it looks.
The Light Metering Display
When you look through your viewfinder, you may have noticed a strange little scale at the bottom of it. It goes from -3 all the way up to +3, and is divided with small dots in between (sometimes instead of numbers it has little rectangles). When you point your camera at different things, there should be a little triangle dancing along that scale.
This is your light meter, and for correct exposure, you want that triangle to be at zero value.
In auto mode, your camera does all the work for you, and every picture you take is automatically near the center of this scale. But once you start using different camera modes, you will have to refer to this scale if you want to easily determine what settings you should be using.
However, in manual mode, it’s a little bit more complicated. When the camera measures the light, it determines the overall value of it and compares it to the settings that you have dialed in. If in respect to your desired settings there is not enough light, the little triangle will move towards the -3, indicating that the picture is underexposed. If you were to fully press your shutter release now, you would end up with a picture that is much too dark, or even completely black.
Learn More:
Using Light Metering in Manual Mode
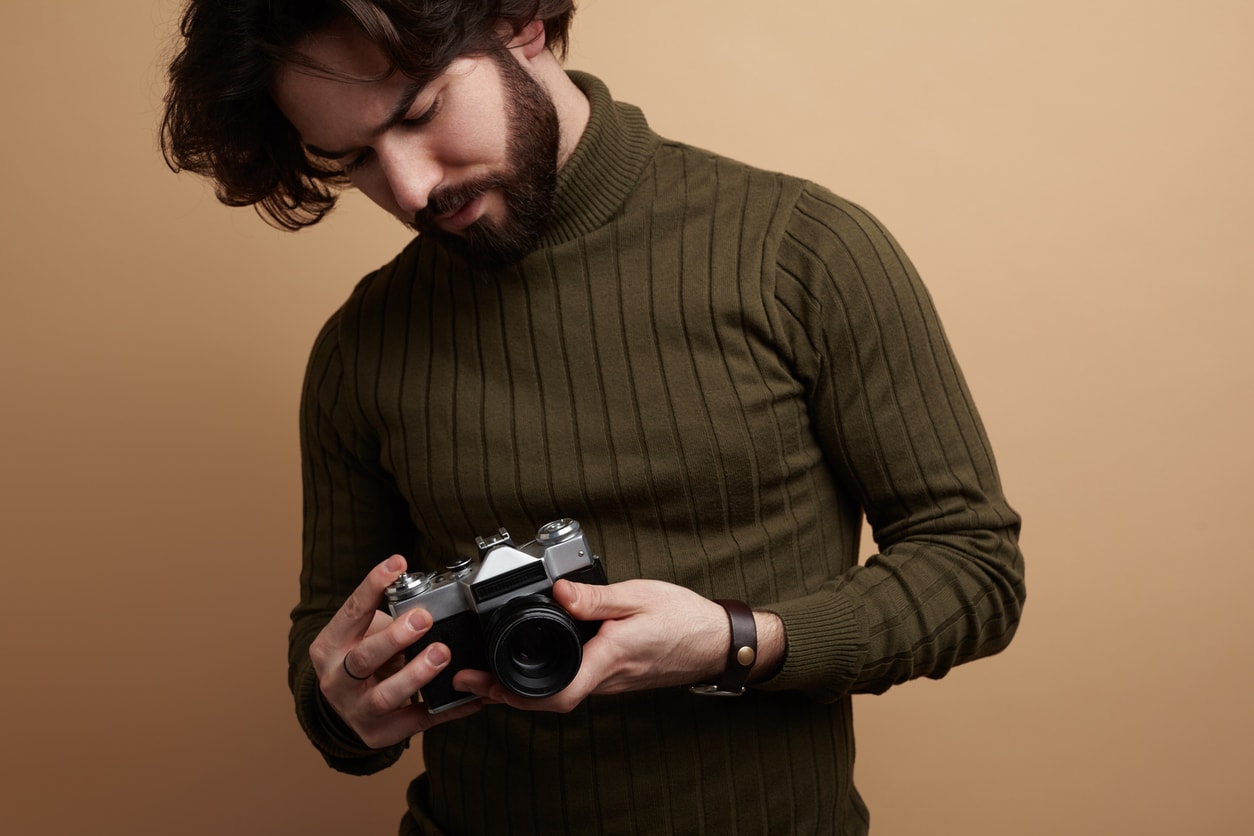
Shooting in aperture priority or shutter priority modes might give you an indication of how the light metering behaves, but you don’t start to fully utilize it until you set your camera to manual mode. Now, you are responsible for picking out the settings you want, which gives you full control of your creativity.
Here’s how you can fully utilize your camera’s built-in light meter:
- Determine what kind of shot you will be taking and which setting is going to be most appropriate. For example, for a fast moving object, you will want a higher shutter speed to capture the motion. But if you are taking portraits or detailed shots, you will want to focus more on aperture.
- Keeping your picture in mind, dial in your ISO. Start off with the low end of the spectrum (preferably somewhere around the ISO 200 mark to keep noise to the minimum). This can be increased later as needed.
- Now it is time to select your preferred aperture. If you want to keep only your object in focus and have the background blurred at the same time, you will want to have aperture wide open - e.g., f/2.8
- At this point, pay attention to your light meter. What does it say? If it is on the left side, you don't have enough light, and you need to compensate for this by slowing down your shutter speed. Slowly turn your dial until the triangle is at the center of your light meter.
- As soon as the triangle touches the middle, focus and then shoot.
Voila! Now you can fully enjoy your creative abilities.
Learn More:
Tips When Dealing With Tricky Lighting
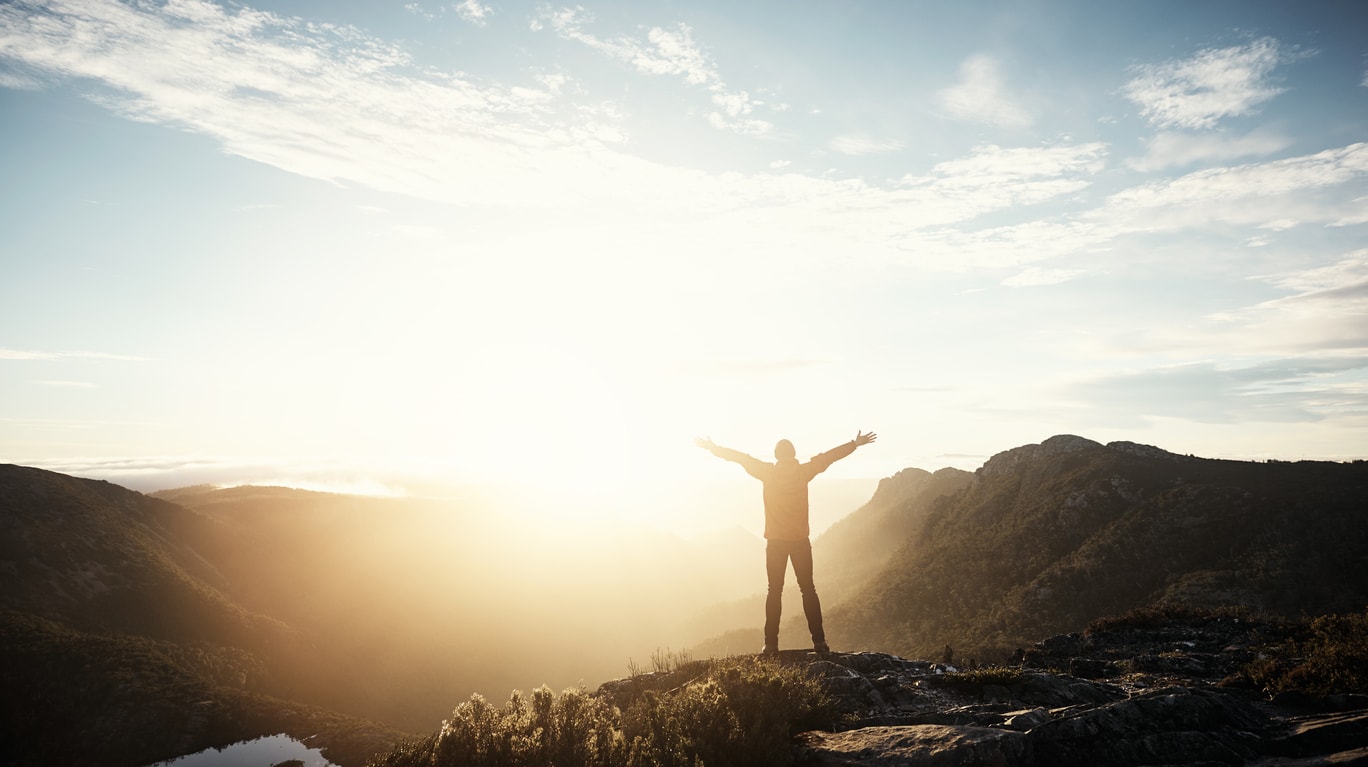
Of course, even with these advanced metering functions, the camera is still limited when it comes to judging the correct exposure. For times when you are shooting outdoors and your subject is much darker than the background, your camera will judge the overall light value, and you will most likely get an image in which your main subject overexposed.
Exposure Compensation Setting
The Exposure Compensation setting allows you to force your camera to compensate exposure by a number of stops.
For example, when your subject is darker than the background, try to use +1 stop on exposure. The camera will measure the light as it did before, but now, when you shoot, it will add an extra 1 stop of exposure.
Graduated Neutral Density Filters
Another issue with exposure that you are likely to face is shooting landscapes - most times the sky will come out much brighter than the rest of an image. If you tried the Exposure Compensation setting and it’s simply not doing it for you, you might want to invest in some graduated neutral density filters.
Graduated neutral density filters are darker at the top and neutral at the bottom (well, unless you are holding it the other way around). Placing one of these filters in front of your lens works in a similar fashion as the Exposure Compensation setting would. The dark side reduces the light coming in from the sky and balances out the whole image. Pretty nifty, huh?
These filters usually come in gradients of -1 stop, -2 stops, -3 stops, and so on. To determine which one you need under different circumstances, measure the light twice:
- First, tilt your camera down and exclude most of the sky. This will give you correct light reading for the foreground.
- Then tilt your camera up and exclude most of the foreground. Now you have the correct exposure for your sky.
- Calculate the difference between the two and select the filter that will balance out the scene.
Learn More:
- A Beginner's Guide to Aperture Priority Mode and Exposure Compensation
- The Best Filters to Have in Your Bag (and Why You Need Them)
Unleash Your Creativity
I hope that you can see why understanding light metering on your camera is important. After all, how else can you become truly free in your creative decisions unless you can fully control your tool of choice?
You don’t see painters using automated paintbrushes or sculptors using pre-made forms of clay. Same goes for professional photographers - the best art is always made from scratch!
Learn more about using your camera's light meter in the video above by Jared Polin.
We Recommend
Working With Good Landscape Photography Lighting and Its Effect on Your Photos
I'm a landscape photographer, and I'm not a morning person.
That's not a good combination to have seeing as how one of the best times to photograph landscapes is at sunrise.
But as much as I hate getting up early, when I'm out there at a perfect spot with a gorgeous landscape before me and the sun rises to cast its warm glow across the landscape, I have to say, losing a couple of hours of sleep is all worth it.
Good landscape photography lighting is the key to capturing drop-dead gorgeous photos. But it isn't always as easy as getting up early to find that awesome light.
Here's a few tips that will help you find the right light for your photography.
Defining Good Landscape Photography Lighting
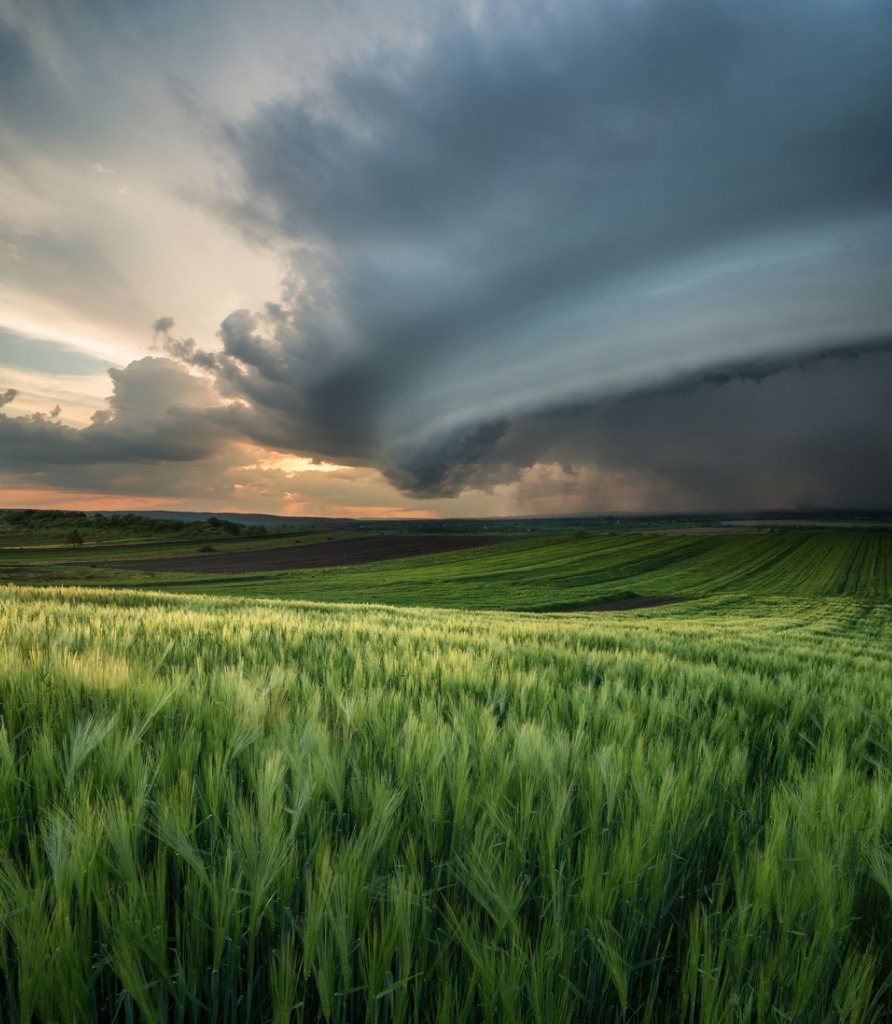
Defining "good light" is actually quite difficult because what constitutes good light depends on the landscape itself as well as the mood you want to set in your image.
For example, soft, diffused light on a cloudy day is very even, with little or no shadows and very little contrast, as seen in the image above.
But because there is so much drama in the cloud formations and so much detail in the foreground grasses, this shot doesn't need dramatic lighting to be visually appealing.
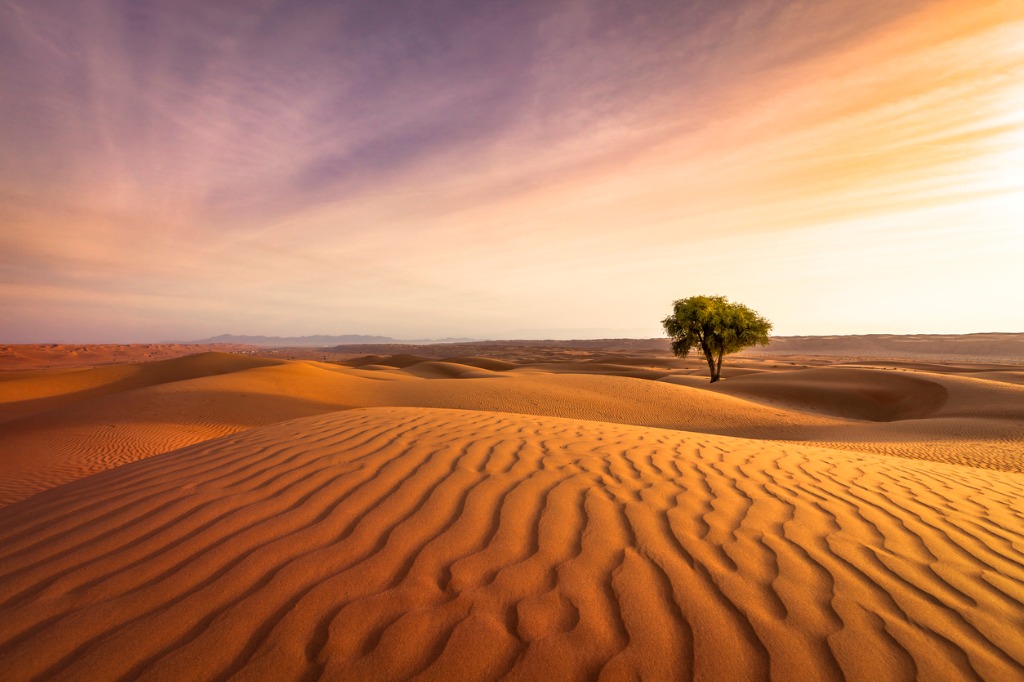
However, on other occasions, more direct light is a better choice.
In the image above, there are no clouds to diffuse the rays from the setting sun, which makes the light harsher and more contrasty than in the previous example.
But it works for this landscape because the low-slung light brings out shadows in the foreground that highlight the texture of the sand. Likewise, where the blue tones of the light in the previous image help set the tone for the dramatic clouds, in this shot, the warm tones are more conducive to the desert scene.
So, in the end, good light doesn't have a specific definition other than it's what makes the scene you're photographing look the way you want it to look. Explore warm vs. cool light to learn more about how color temperature impacts how your photos look.
Learn More:
- Easy Ways to Improve Your Landscape Photography
- Landscape Photography Composition Rules You Need to Start Using Today
Finding the Best Lighting
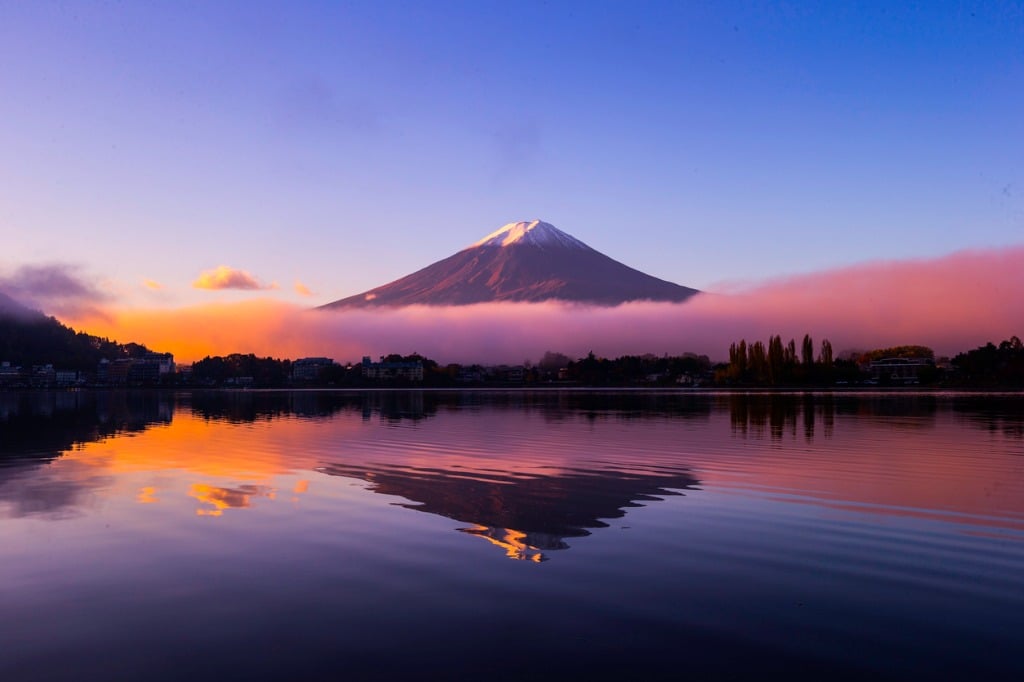
The first key to mastering natural light is simply taking the time and putting forth the effort to experiment with different types of lighting.
Now, that doesn't mean that you need to go out before sunrise and stay in the same spot until after sunset, taking a photo every five minutes.
But if you can revisit the same location at different times of day, or even if you can stay at the same location for an hour, you can get enough photos with different kinds of light such that you have some variety to see what works best for that location.

The second component of finding great light for landscape photography is to scout locations with light in mind.
That means that you aren't just looking for a strong subject or a pretty scene to feature in the photo. Instead, you're doing so through the lens of the best light to highlight those features.
For example, consider where the sun will rise and set in relation to the scene. Also think about how the sun will fall across the landscape. By that, I mean if the mountains you want to photograph face east, a sunrise shoot might be preferable because the sun will illuminate the mountains as it rises and help you get the best natural light photos.

Another thing to consider when hunting for good light is how the light interacts with each component of the shot, not just the subject.
That is, while sunrise light might give the mountains in your shot a nice, warm glow, the sun might be too low in the sky to cast light on the field of wildflowers in the foreground of the shot.
In other words, perfecting the lighting for landscape photography needs to be a process, one in which many different factors are considered and one in which light is used to bring cohesion to the shot.
Learn More:
- 4 Ways to Make Your Landscape Photos Look Like the Pros
- How to Get a Perfect Foreground in Landscape Photography
Change the Light to Suit Your Purposes

Have you ever heard the term "right light photography?"
It might not make sense at first, but it refers to doing what you can to get the right light for your shot.
In landscape photography, that process has to include changing the light as you see fit.
The question is, how do you do that?

The answer is simple: filters.
I headed to the beach the other day with my Nikon D850 and my NiSi filter kit, which includes the graduated neutral density filter you see in the shot above.
If you've never used an ND grad before, it's main purpose is to help you even out the exposure of your shot.
That is, when you photograph a landscape, the sky is often quite bright - much brighter than the landscape below it.
If you don't have a filter to block out some of the light in the sky, you will end up with a shot that's either well-exposed for the bright sky or well-exposed for the darker landscape, but likely not well-exposed for both, unless you shoot in HDR or stack multiple exposures together.
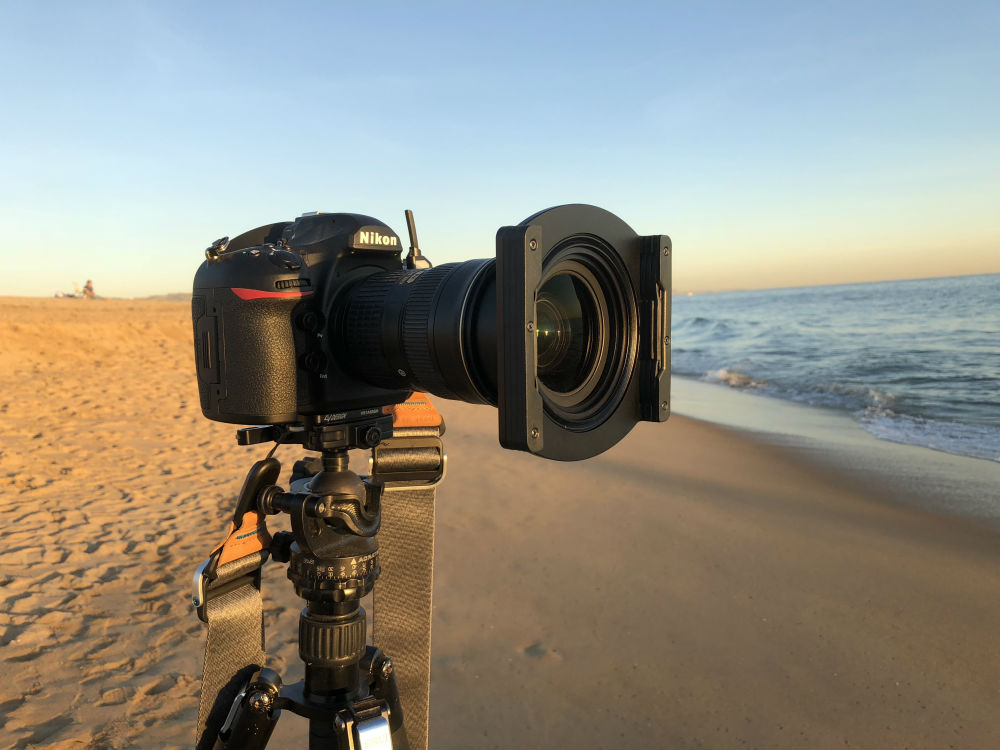
But using a graduated ND filter means you can control the light as you see fit in a quick and easy process.
Just attach the filter holder to your lens, as shown above, slide the graduated ND filter into the holder, compose the shot such that the filter is positioned precisely to block out the bright light in the sky, and take the shot.
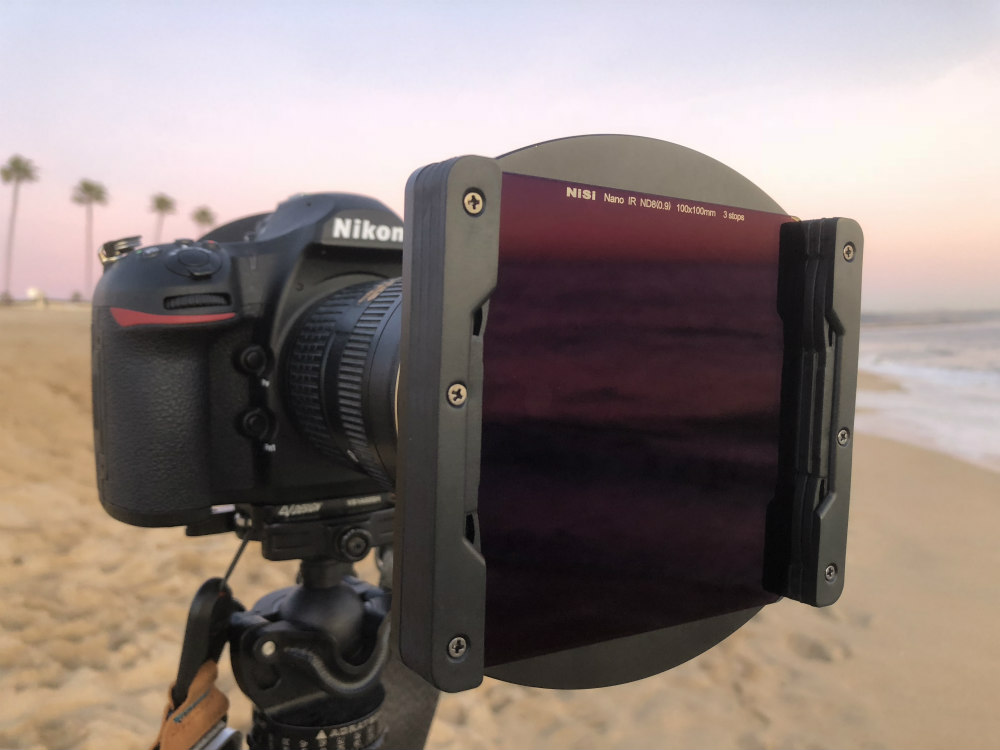
Of course, a graduated ND filter isn't the only option for manipulating light for landscapes.
You can also attach a solid ND filter (like the one shown above) that enables you to block out light from the entire shot. This is advantageous for times when you want to capture a long exposure during the daytime and blur the movement of waves crashing on the beach, a waterfall cascading off a cliff, clouds moving across the sky, and so forth.
Without the light-blocking power of an ND filter, none of this would be possible during the daytime, as the long exposure time needed to blur movement would otherwise result in a vastly overexposed image.
You can often find filter kits with various filters that help you change the light. In the case of my NiSi 100mm Filter System, I got a filter holder with adaptor rings for various sized lenses, a soft-edge graduated ND filter, a reverse graduated ND filter, and three different solid ND filters (3-stop, 6-stop, and 10-stop) that allows me to create all sorts of different light effects.
The kit even includes a carrying case and cleaning supplies to keep the filters nice and clean.
The moral of the story here is that while you need to put in the time and effort to find the right light, with the right tools at your disposal, you will be better equipped for lighting landscape photography in a way that better suits the goals you have for your photos.
Learn More:
- Change the Light in Your Landscape Photos
- A Step-by-Step Guide for Long Exposure Landscape Photography