10 Easy Ways to Help You Develop Your Creative Eye
No matter how great a photographer is, they had to start at some point. Ansel Adams, at some point in his life, was fumbling around with his first camera, learning the tricks of the trade, identifying how to control his camera settings, and learning how to compose creative and dynamic photos.
You have to start somewhere as well, and working on your creative eye is a great place to begin.
But often, it’s not the creativity aspect that’s difficult for new photographers, it’s simply figuring out how to use their creativity to develop their photographer’s eye. In this article, we offer a few quick and easy tips that will help refine your creative eye such that you make more interesting photos.
Let’s begin!
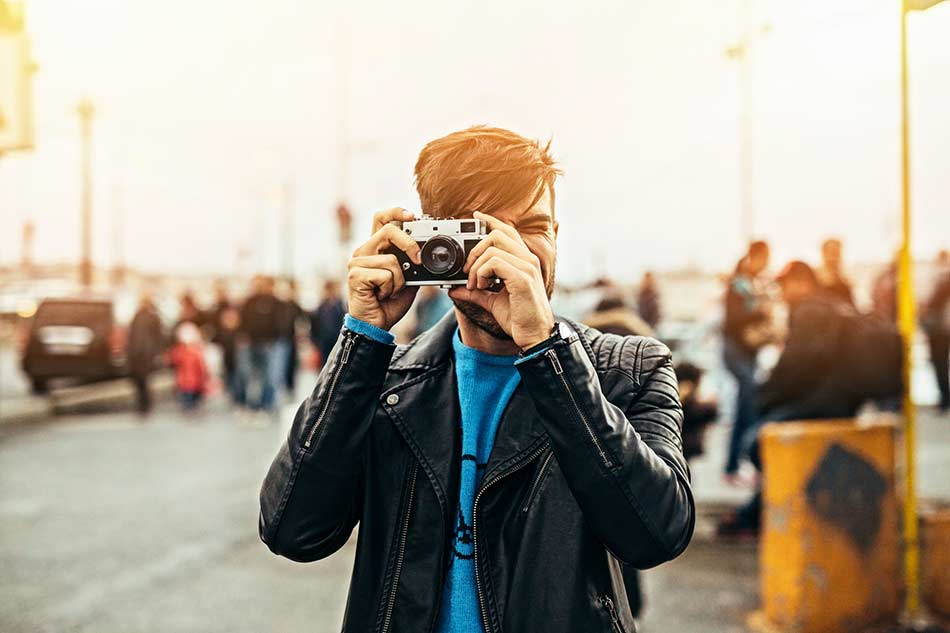
Practice - A Lot
It’s a cliche bit of advice, but it’s probably the most impactful advice you can get. Like any artistic pursuit, getting better at photography simply takes time. Snapping a few photos every Saturday won’t cut it. Instead, you need to commit a bit of time every single day to interact with your camera, learn the ins and outs of exposure, experiment with lighting, and exploring your surroundings. In other words, even if it’s for just 10-15 minutes a day, immerse yourself in the creative pursuits of photography. Only then will you begin to expand your creative possibilities.
Quick tip: Get into the habit of practicing your photography skills by taking part in a photography challenge. For example, you might strive to create a different type of photo every day for 30 days or come up with a different photography subject for each week of the year.
Tweet These 10 Easy Creative Eye Tips
Look at Other People’s Photos

Developing your creative eye can even be done while you’re at home sitting on the couch. Buy a few photography books, subscribe to a photography magazine, or go online and view images. Pore over them. Break them down and identify what you like and what you don’t like. Then, determine why you like what you like. Look at technique. Explore things that you might have done differently. Then, as you go through your daily routine, you’ll find that you start to look at scenes with this same critical eye. You’ll soon find that this results in improved photos because you can take what you’ve learned from others and apply it to your own artistic pursuits.
Quick tip: Don’t be afraid to share your images with others so you can get some feedback. No two people view a photograph in the exact same way, so getting an outside perspective on the images you create will only help you grow as a photographer.
Learn More:
- See What Happens When a Pulitzer Prize-Winning Photographer Takes Photos With a Toy Camera
- 5 Camera Tricks for Cheapskates
Develop a Personal Artistic Style

One of the benefits of getting a lot of practice and examining the work of others is that you’ll begin to identify your personal style. You’ll begin to see patterns in the types of images that are on your memory card. You’ll also note that many of the photos you enjoy viewing by other photographers share certain characteristics. Perhaps it’s the way light is used. Maybe it’s the manner in which the subject is framed in the shot. It could be something as broad as the subject matter - black & white or architectural photography, for example. The point is that once you identify your personal photography style, you’ll find that you’ll be more apt to find creative ways of expressing that style.
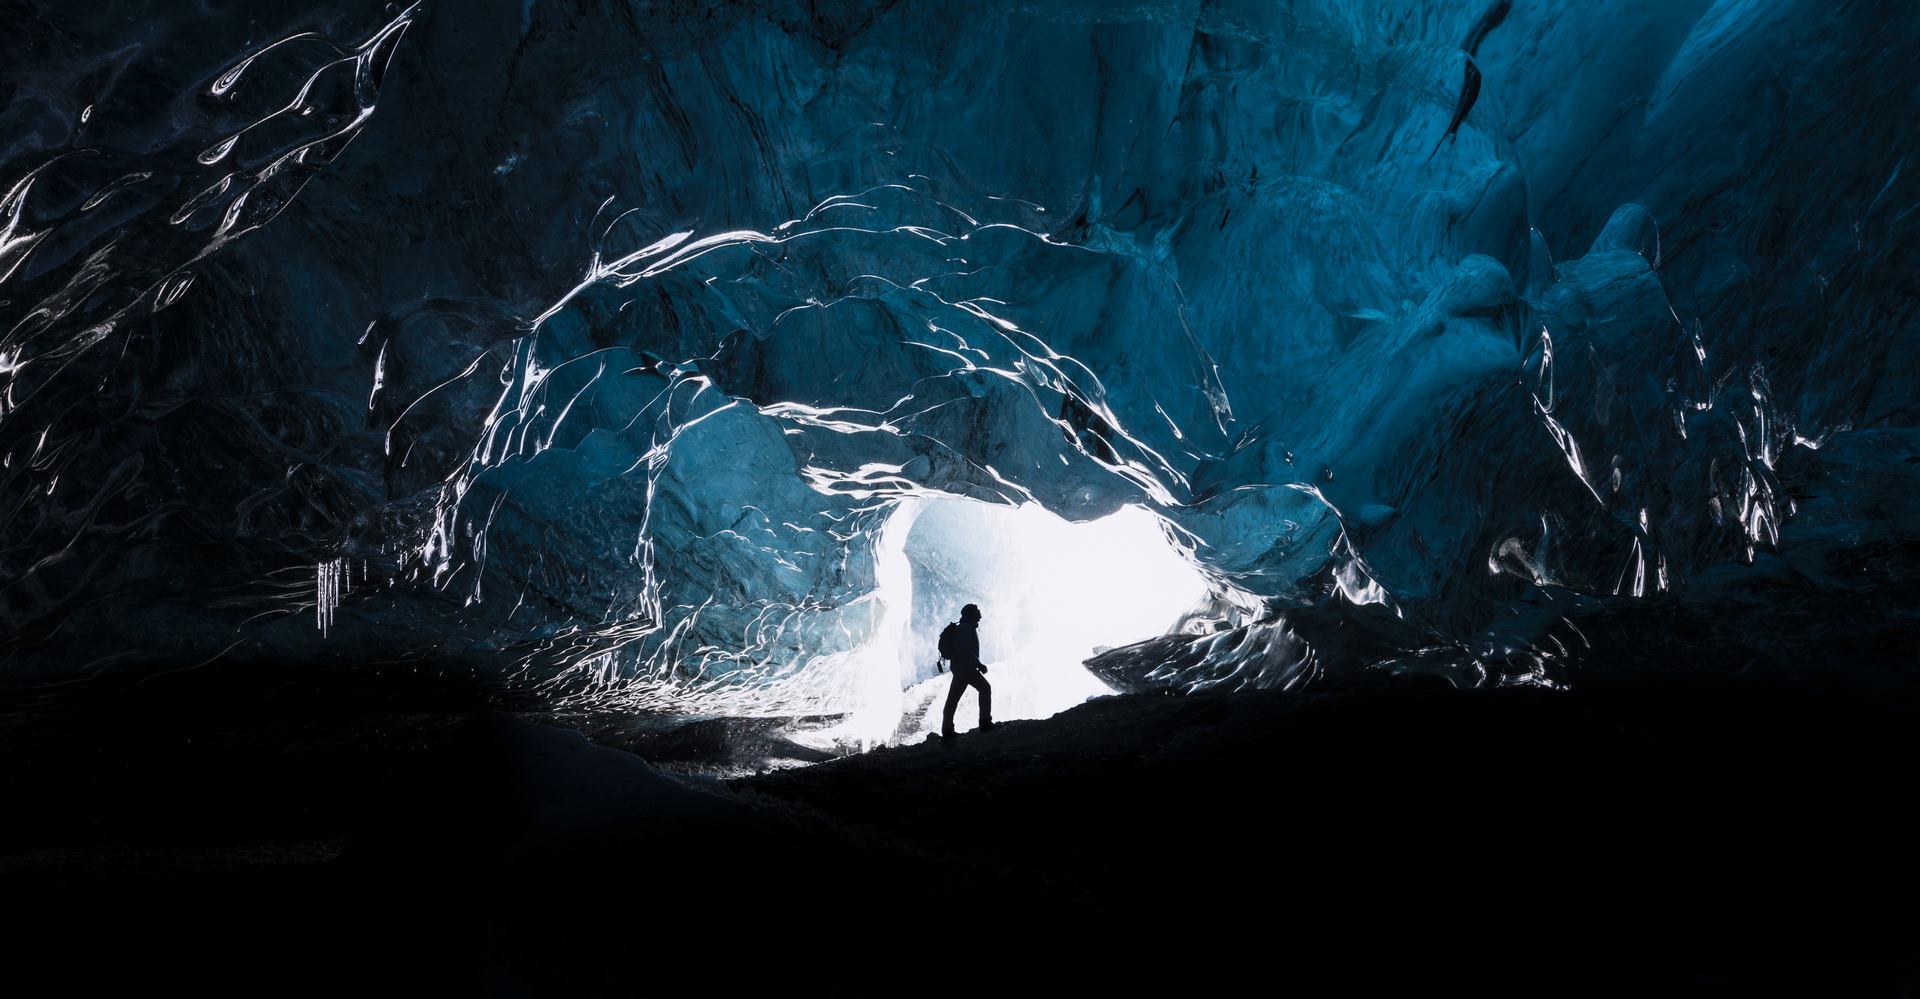
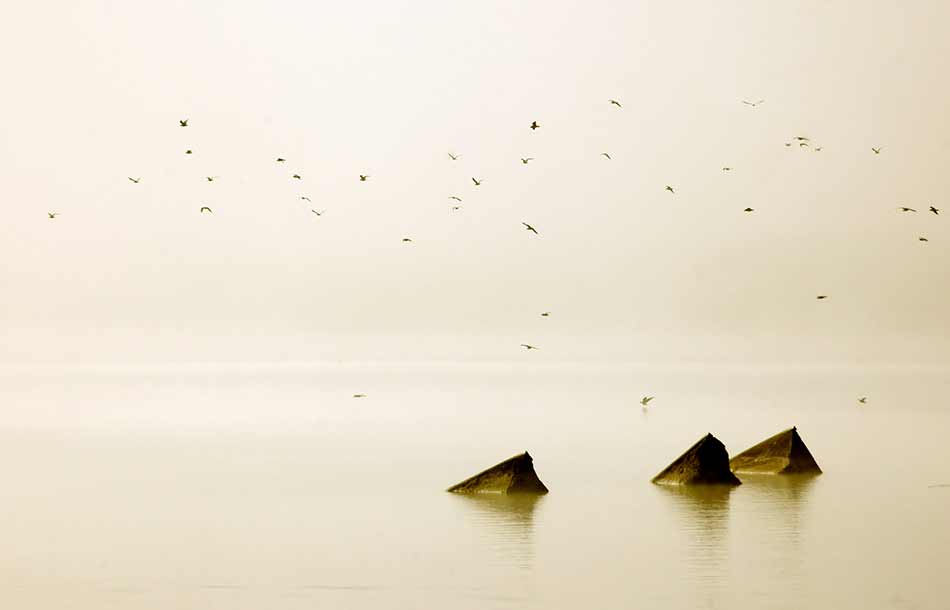
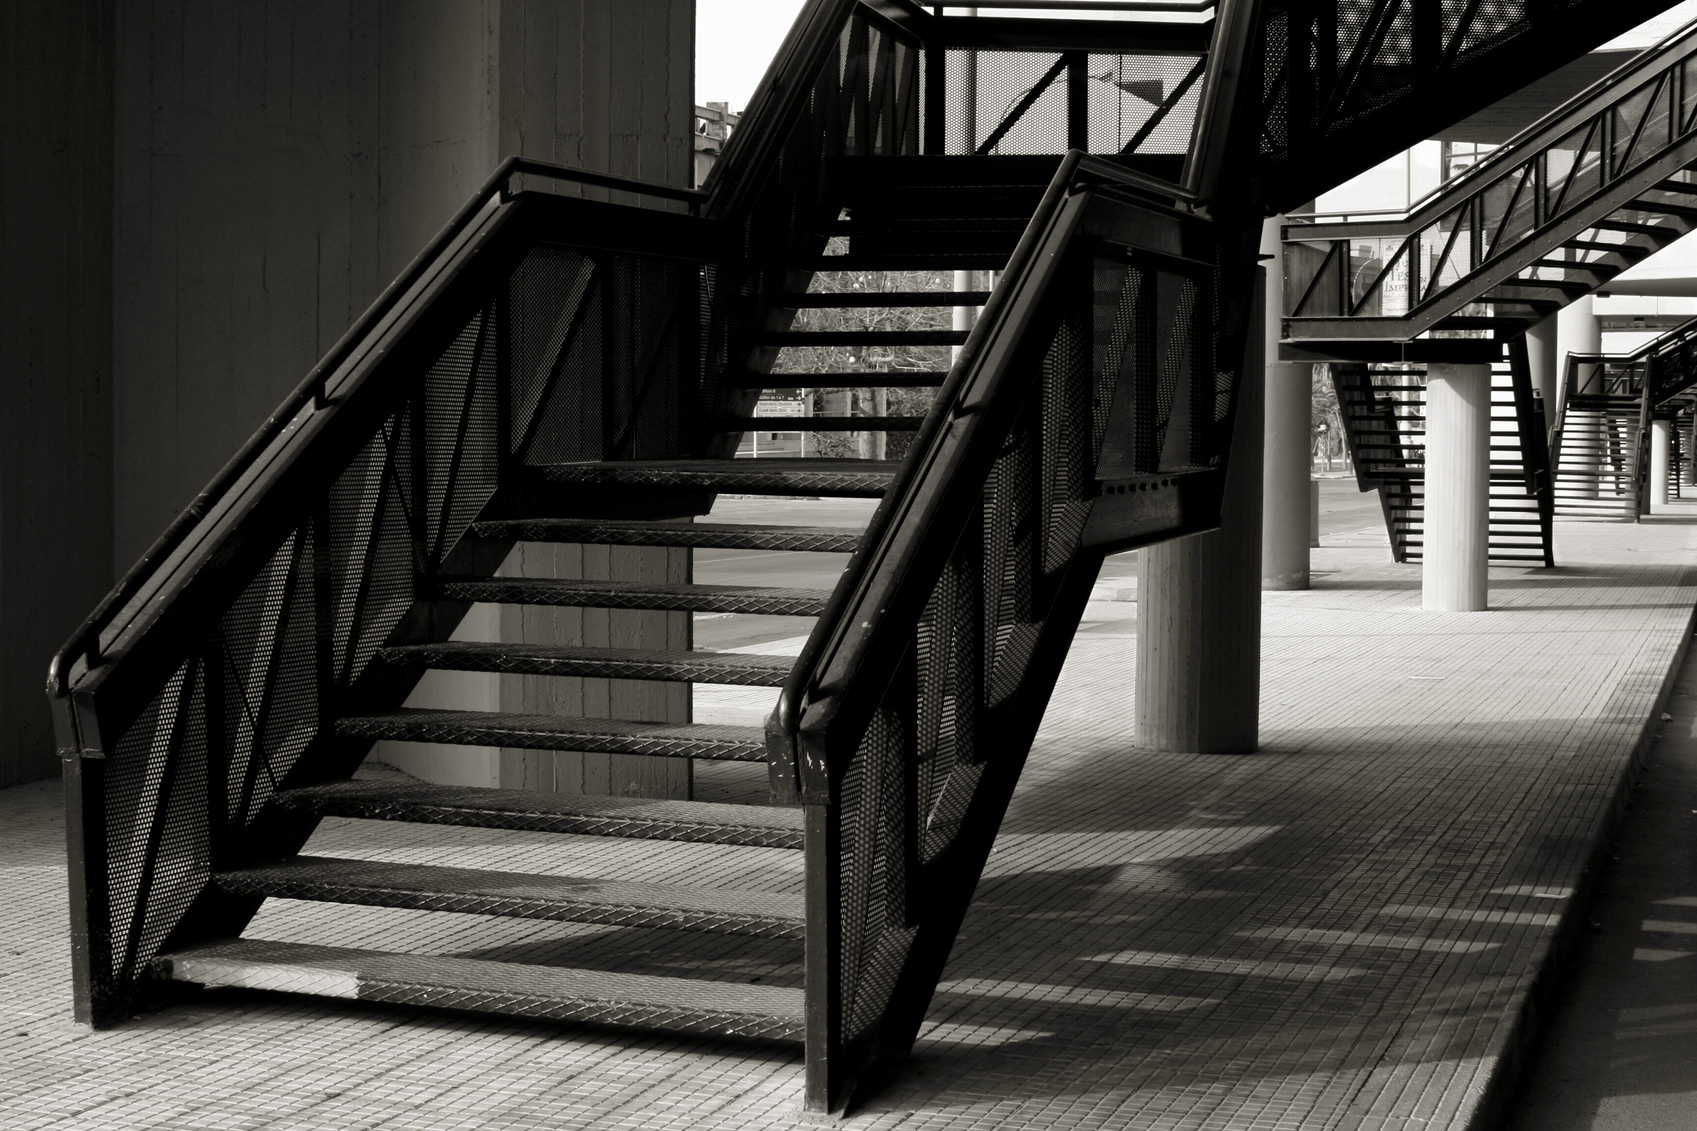
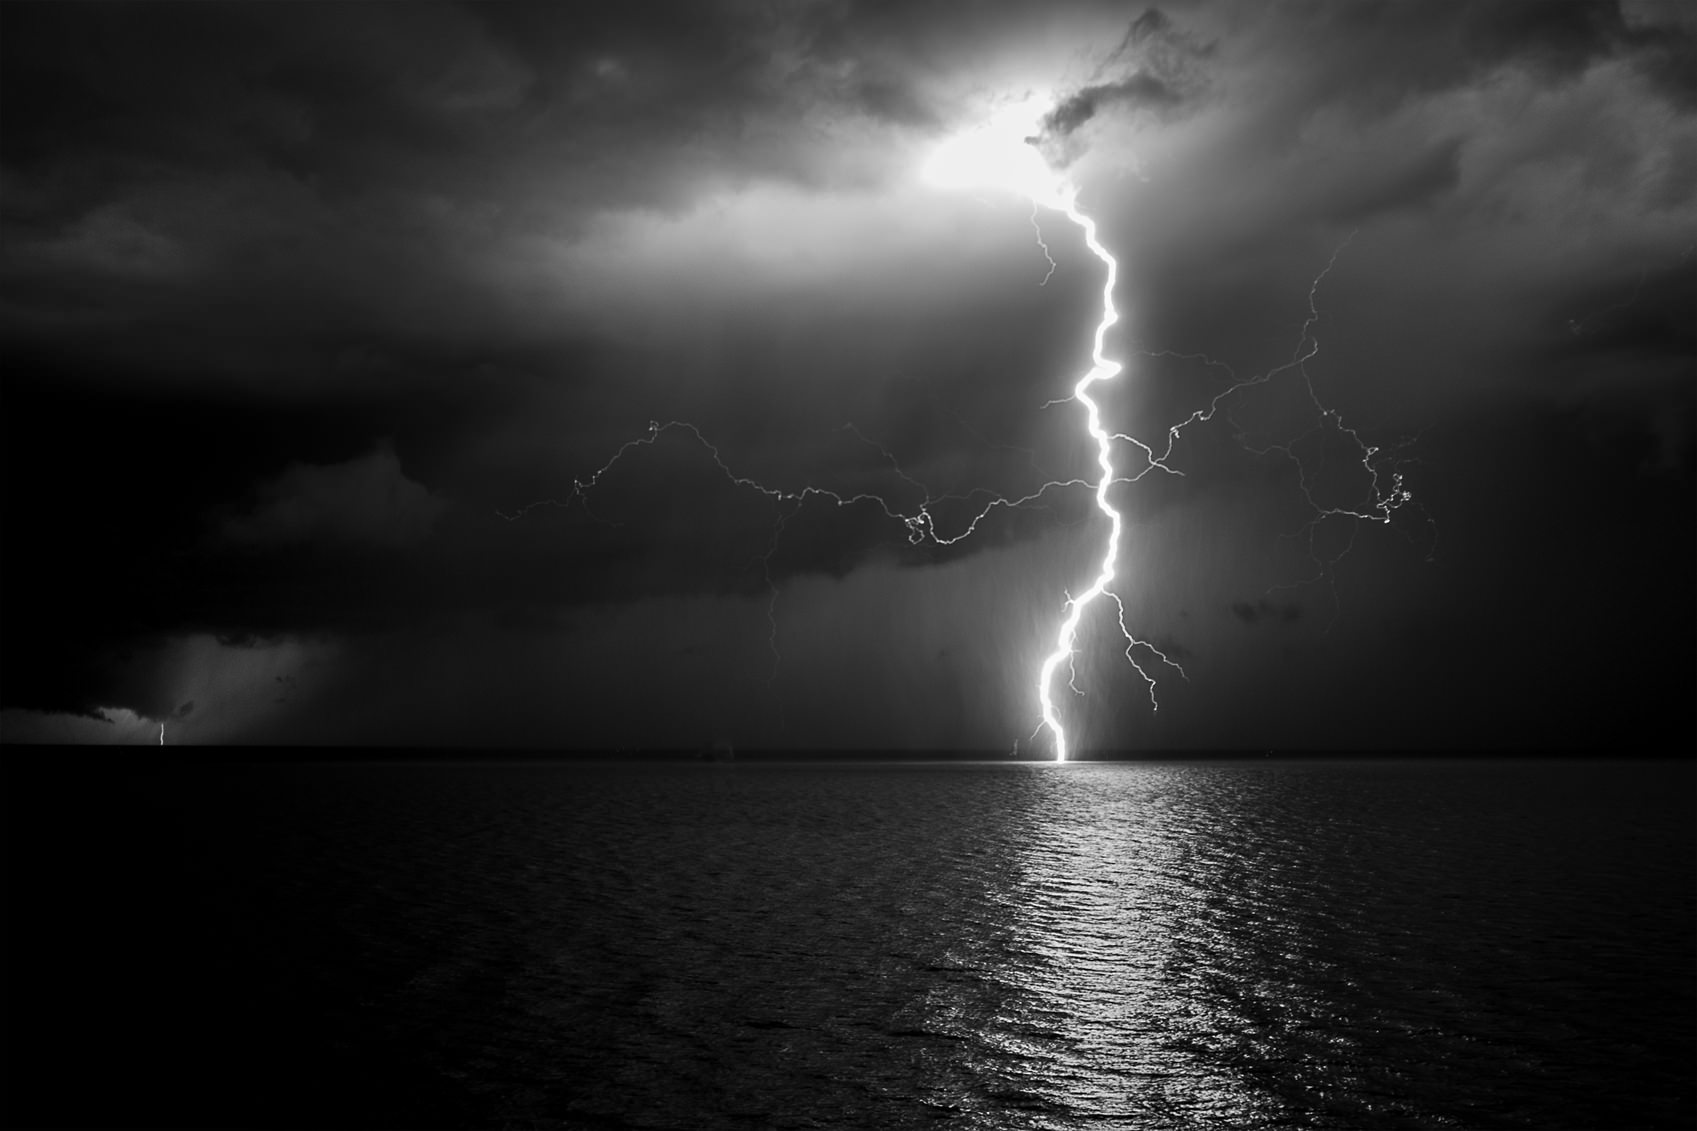
Learn - and Break - The Rules

Part of learning how to develop your creative eye is being willing to break convention and create images that don’t adhere to the standard photography rules of thumb. An ideal example of this is the Rule of Thirds. On many occasions - perhaps the vast majority of times - the Rule of Thirds helps you create images that are more organized, balanced, and compelling. But sometimes, as seen in the image above, going against the rule can result in a beautiful image nonetheless.
With that in mind, it’s important to learn the rules, but perhaps even more important to break them. Create a portrait with a background that’s in focus. Don’t include leading lines in a landscape shot. Use a telephoto lens for street photography. Doing so will force you to use your creativity to find new subjects and learn unique ways of framing shots that will help you create more interesting images.
Quick tip: Don’t just break the rules for the sake of breaking them. Instead, be purposeful in the way you compose your shots, that way, even if you break the rules, your image won’t look like it was simply a mistake.
Editor's Tip: Not sure what all those numbers mean on your lens? Learn how to read the markings on your lens.
Go Easy When Deleting

Every photographer takes a few moments to cull their photos, and in the process delete all the ones that didn’t live up to their expectations. But in the process of doing so, there often isn’t much time spent examining the photos, but instead, just a few split seconds to determine if they are keepers or not. The danger in doing that is that you might overlook something that might not be that fantastic at the moment, but with some post-processing might turn into a very nice image. In this regard, you’re developing your creative eye on the back-end; you’ve already taken the photo so there’s nothing more to do compositionally, but you can learn how to look at an image and see improvements you can make with some editing.
Quick tip: Sometimes, all that’s needed to transform an image is a bit of cropping. If you come across a photo you think isn’t that great, see how cropping the image might make it more eye-catching.
Learn Manual Controls

Nothing will hold back your creativity more than shooting in full auto mode. Though it can be comforting to know that the camera is making all the decisions for you, the results will never be as good as if you take the reins and make decisions about things like exposure all on your own. Manual mode is scary, to be sure, but as noted above, practice makes perfect, and if you never take control of your camera, you’ll never be able to fully develop your photographer’s eye.
To start, try shooting in aperture priority or shutter priority mode. Experiment with different settings so that you develop an understanding of how adjustments to aperture or another camera setting changes the look and feel of your image. As you shoot, note what changes you make, then inspect the image to see exactly how those changes translate into the visual you create. In doing so, you’ll not only develop a more robust creative eye, but you’ll also gain a good deal of technical knowledge as well.
Learn More:
- A Beginner's Guide to Aperture Priority Mode and Exposure Compensation
- Everything You Need to Know About Shutter Priority Mode
Play With Perspective

All too often, photographers take their photos from the same perspective that they see the world - from their own eye height. And though many successful photos are taken from this point of view, not venturing beyond that typical perspective won’t do anything for aiding in the development of your creative eye.
By dropping down low for a worm’s eye view or getting up high and composing a shot looking downward, you’re forced into seeing things in a completely new way. As a result, there might be shapes, colors, textures, and so on that catch your eye which you can then highlight in your photos. So, the next time you’re out taking a few shots, don’t just stand pat. Move to the left and the right. Walk around the subject to see if there’s a better angle of view. Get down low, then get up high. See how the movements you make change the scene for the better.
Quick tip: Practice finding different angles of view by taking a series of photos of the same subject, but from different perspectives. For example, you might find a beautiful flower to photograph in your backyard and take four photos, each from a different angle.
Look for Photo Opportunities, But Leave Your Camera at Home

Oddly enough, one of the biggest barriers to developing your creative eye is simply not taking the time to see opportunities for photos. If you’re lugging around your camera and constantly looking at the LCD to inspect your previous photo, you could very well miss an even more compelling shot. So, by leaving your camera at home, you can give your surroundings a thorough visual inspection. After all, you can’t create an incredible photo if you don’t first see the opportunity for a photo with your own eyes!
Tweet These 10 Easy Creative Eye Tips
Take Chances

Maybe you’re most interested in portraiture. Perhaps landscapes are your favorite. It’s certainly okay to enjoy one type of photography more than others. But there is a wonderful opportunity to develop your creative eye by taking chances on creating images that are out of your comfort zone. If you enjoy nature and wildlife photography, head into town and try your hand at street photography. If you love landscapes, try still life photography. The point is that every genre of photography requires a little bit of a different approach, and learning how to create gorgeous photos that are out of your comfort zone will only help you in creating beautiful photos once you get back to photographing subjects with which you are most comfortable.
Quick tip: Another way to take chances is to travel light. On your next photography outing, take just one camera body and one lens. Force yourself to learn how to use the few implements you have to create eye-catching photos, no matter the subject.
Editor's Tip: Finish off your photos by turning them into a great print. See what your images look like as fine art.
Don’t Be Afraid to Make Mistakes

Above all else, one of the easiest things you can do to develop your creative eye is to grab your camera and take photos without the worry of making mistakes. Mistakes will happen - it’s unavoidable. Even the best photographers in the world still make mistakes. However, by letting go of the fear of screwing up a photo, you’re more able to approach photography in a relaxed, calm manner. In the end, photography is an art, and art is incredibly personal. What you think is a mistake might be viewed as a jaw-dropping photo by someone else. Let go of your fears, bring the camera to your eye, and fire away!
We Recommend
11 Examples of Why Black and White Photos are More Elegant at Times
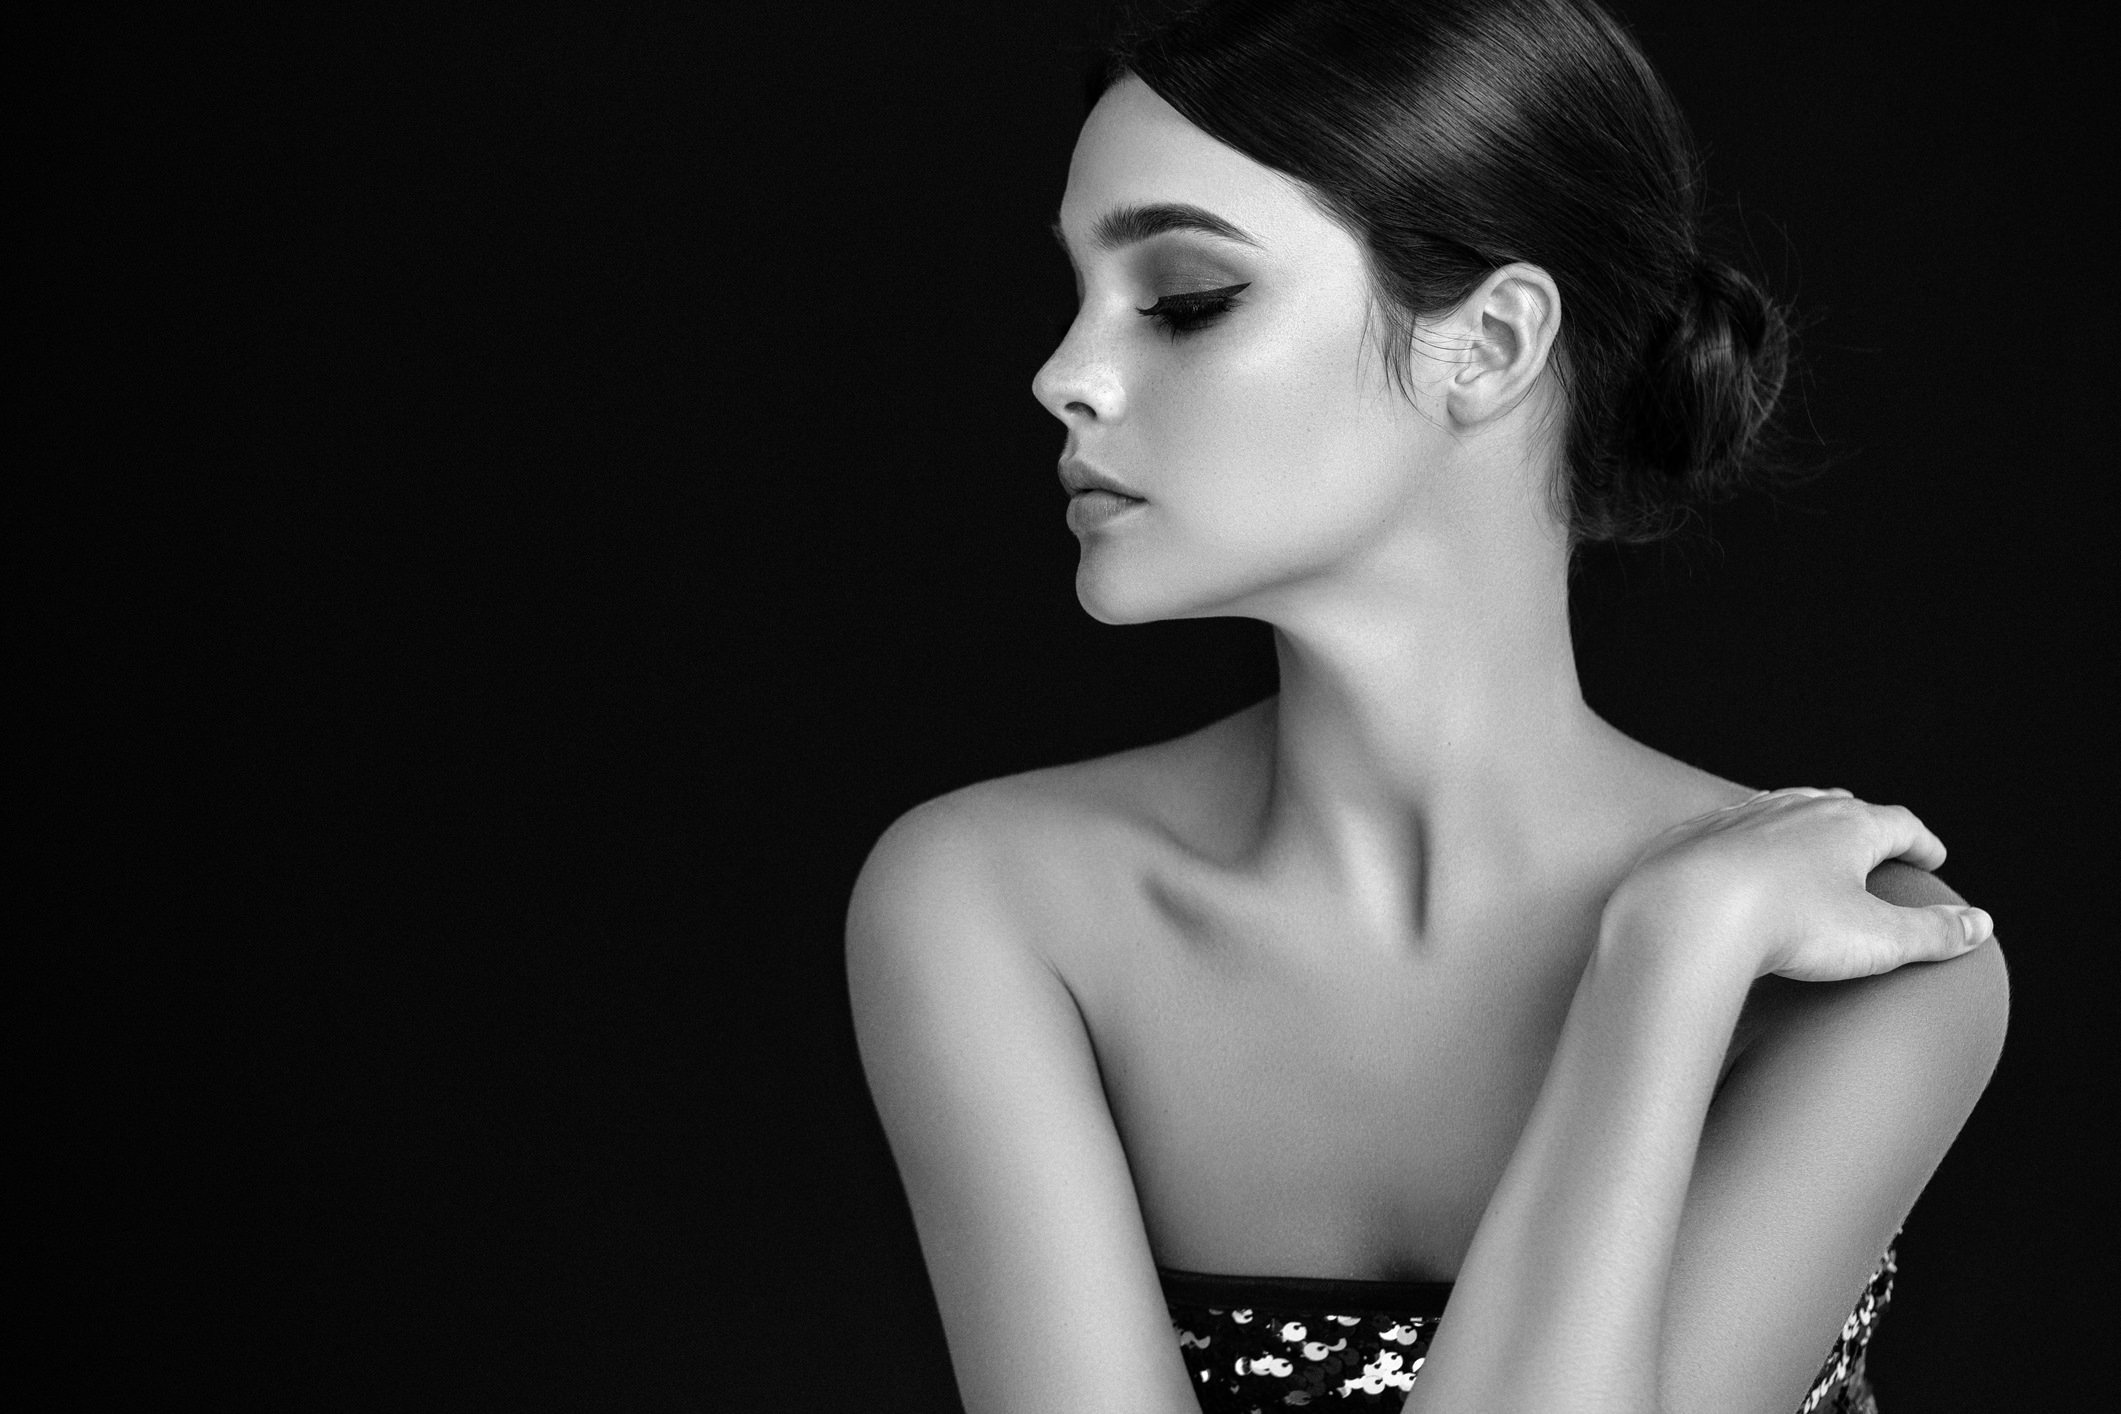
There's just something about black and white photos that exude class and sophistication.
That's on full display in the featured image above. The woman would be beautiful in a color shot too, but in black and white, the lines of her body, the contrast of her pale skin against the dark background, and the soft, even lighting turn this into a show-stopping photo.
Granted, not all black and white photos are winners, and unlike some photographers think, black and white shouldn't be the go-to treatment to try and rescue images that are poorly lit, not composed well, or suffer from some other malady like blurriness.
That means that though black and white photography can be more forgiving, it shouldn't be treated like a rescue project for bad photos.
Instead, with the right approach and preparation, black and white photos can turn into gorgeously elegant shots, no matter the subject.
Let's examine a few black and white photos to see this elegance in action.
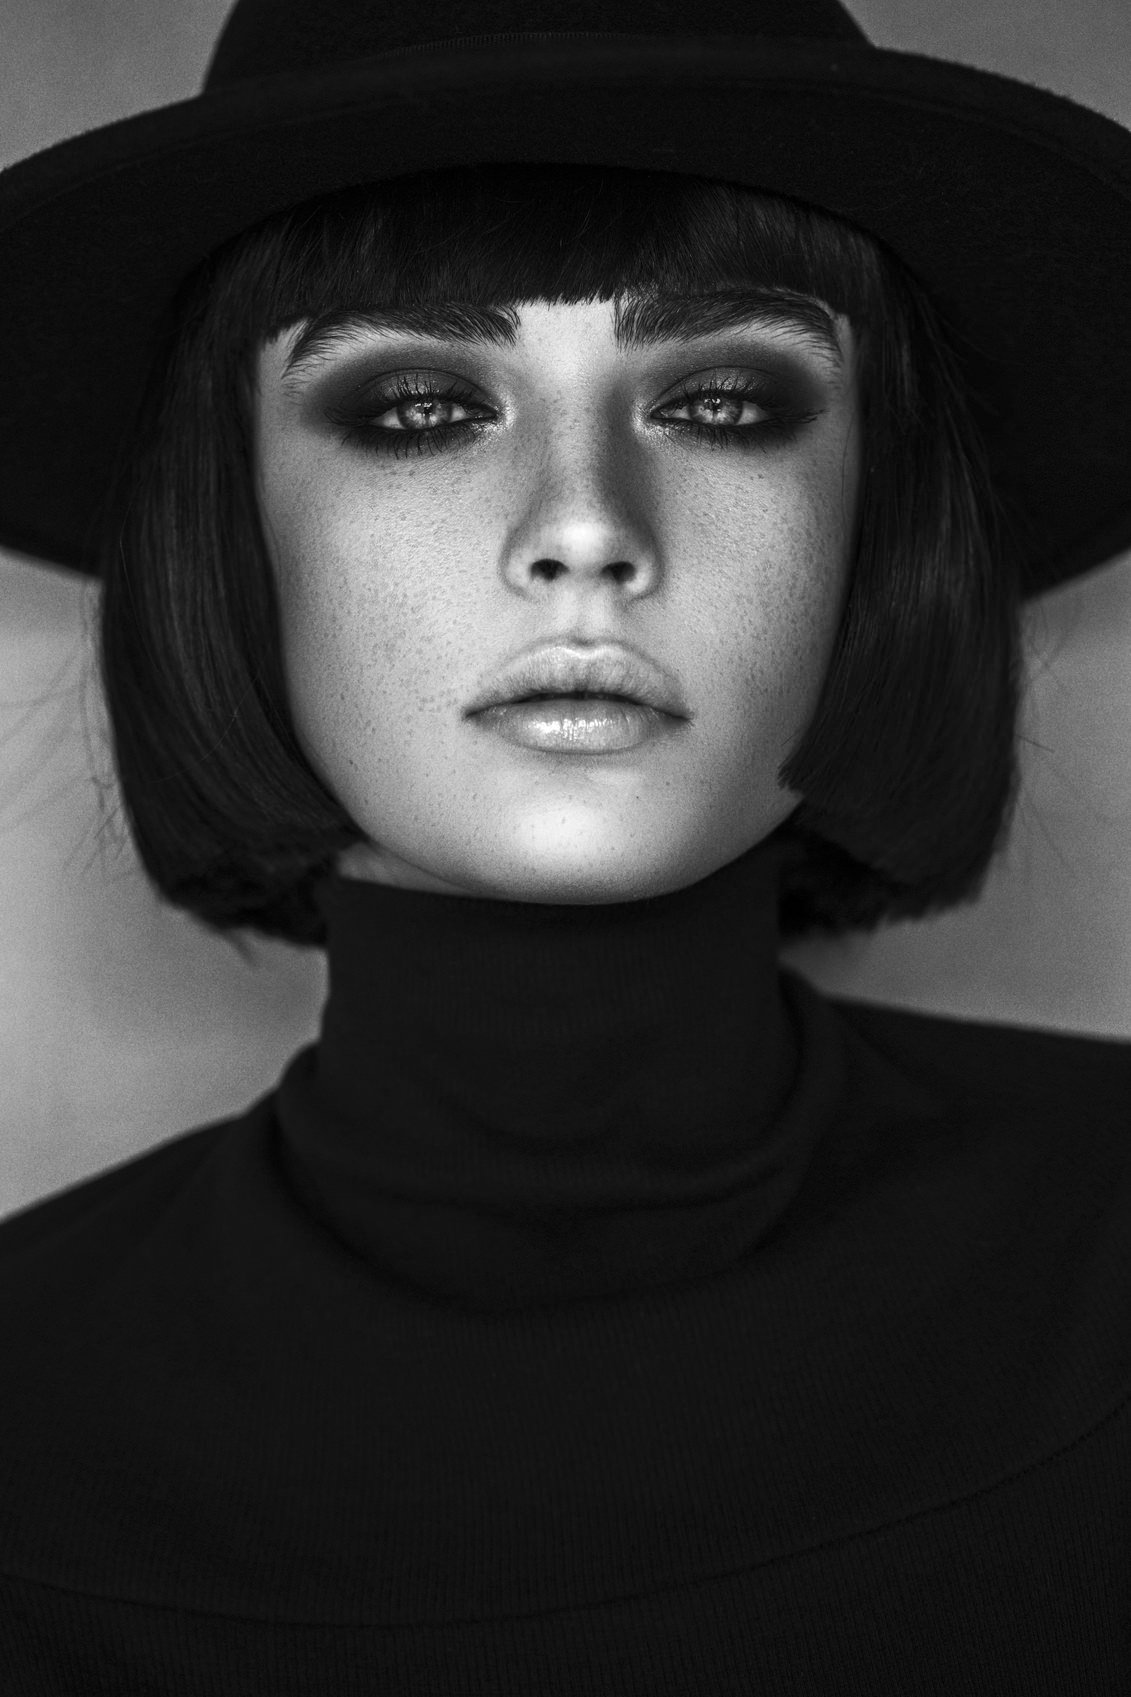
Portraits

There is elegance in simplicity, and this portrait of a little girl demonstrates that concept well.
Not only does the close-up view of her face put the fine details of things like the texture of her hair and her freckled skin on full view, but the black and white conversion serves to make those details stand out even more.
Even her eyelashes take on more prominence without the distraction of color to take the eye away from the abundance of textures and shapes in this portrait.
This image also shows how a lower contrast black and white image can be quite fetching. Note that there are still bright whites and dark blacks, but that they take a backseat to the abundance of middle grays. The result is a feeling of calm and serenity that jives well with the sweet innocence of the little girl.

Then again, there is something to be said about the visual impact of a portrait with greater contrast.
Like the featured image, the image above benefits from strong areas of light and dark, giving the portrait a sophisticated, high-fashion look.
In this instance, the lines created by the model's dress and hat help accentuate the richness of the shot.
Often, using lines in black and white photos is a primary tool for incorporating more interest. In this case, those lines also help elevate the image in terms of elegance.
Nature and Wildlife
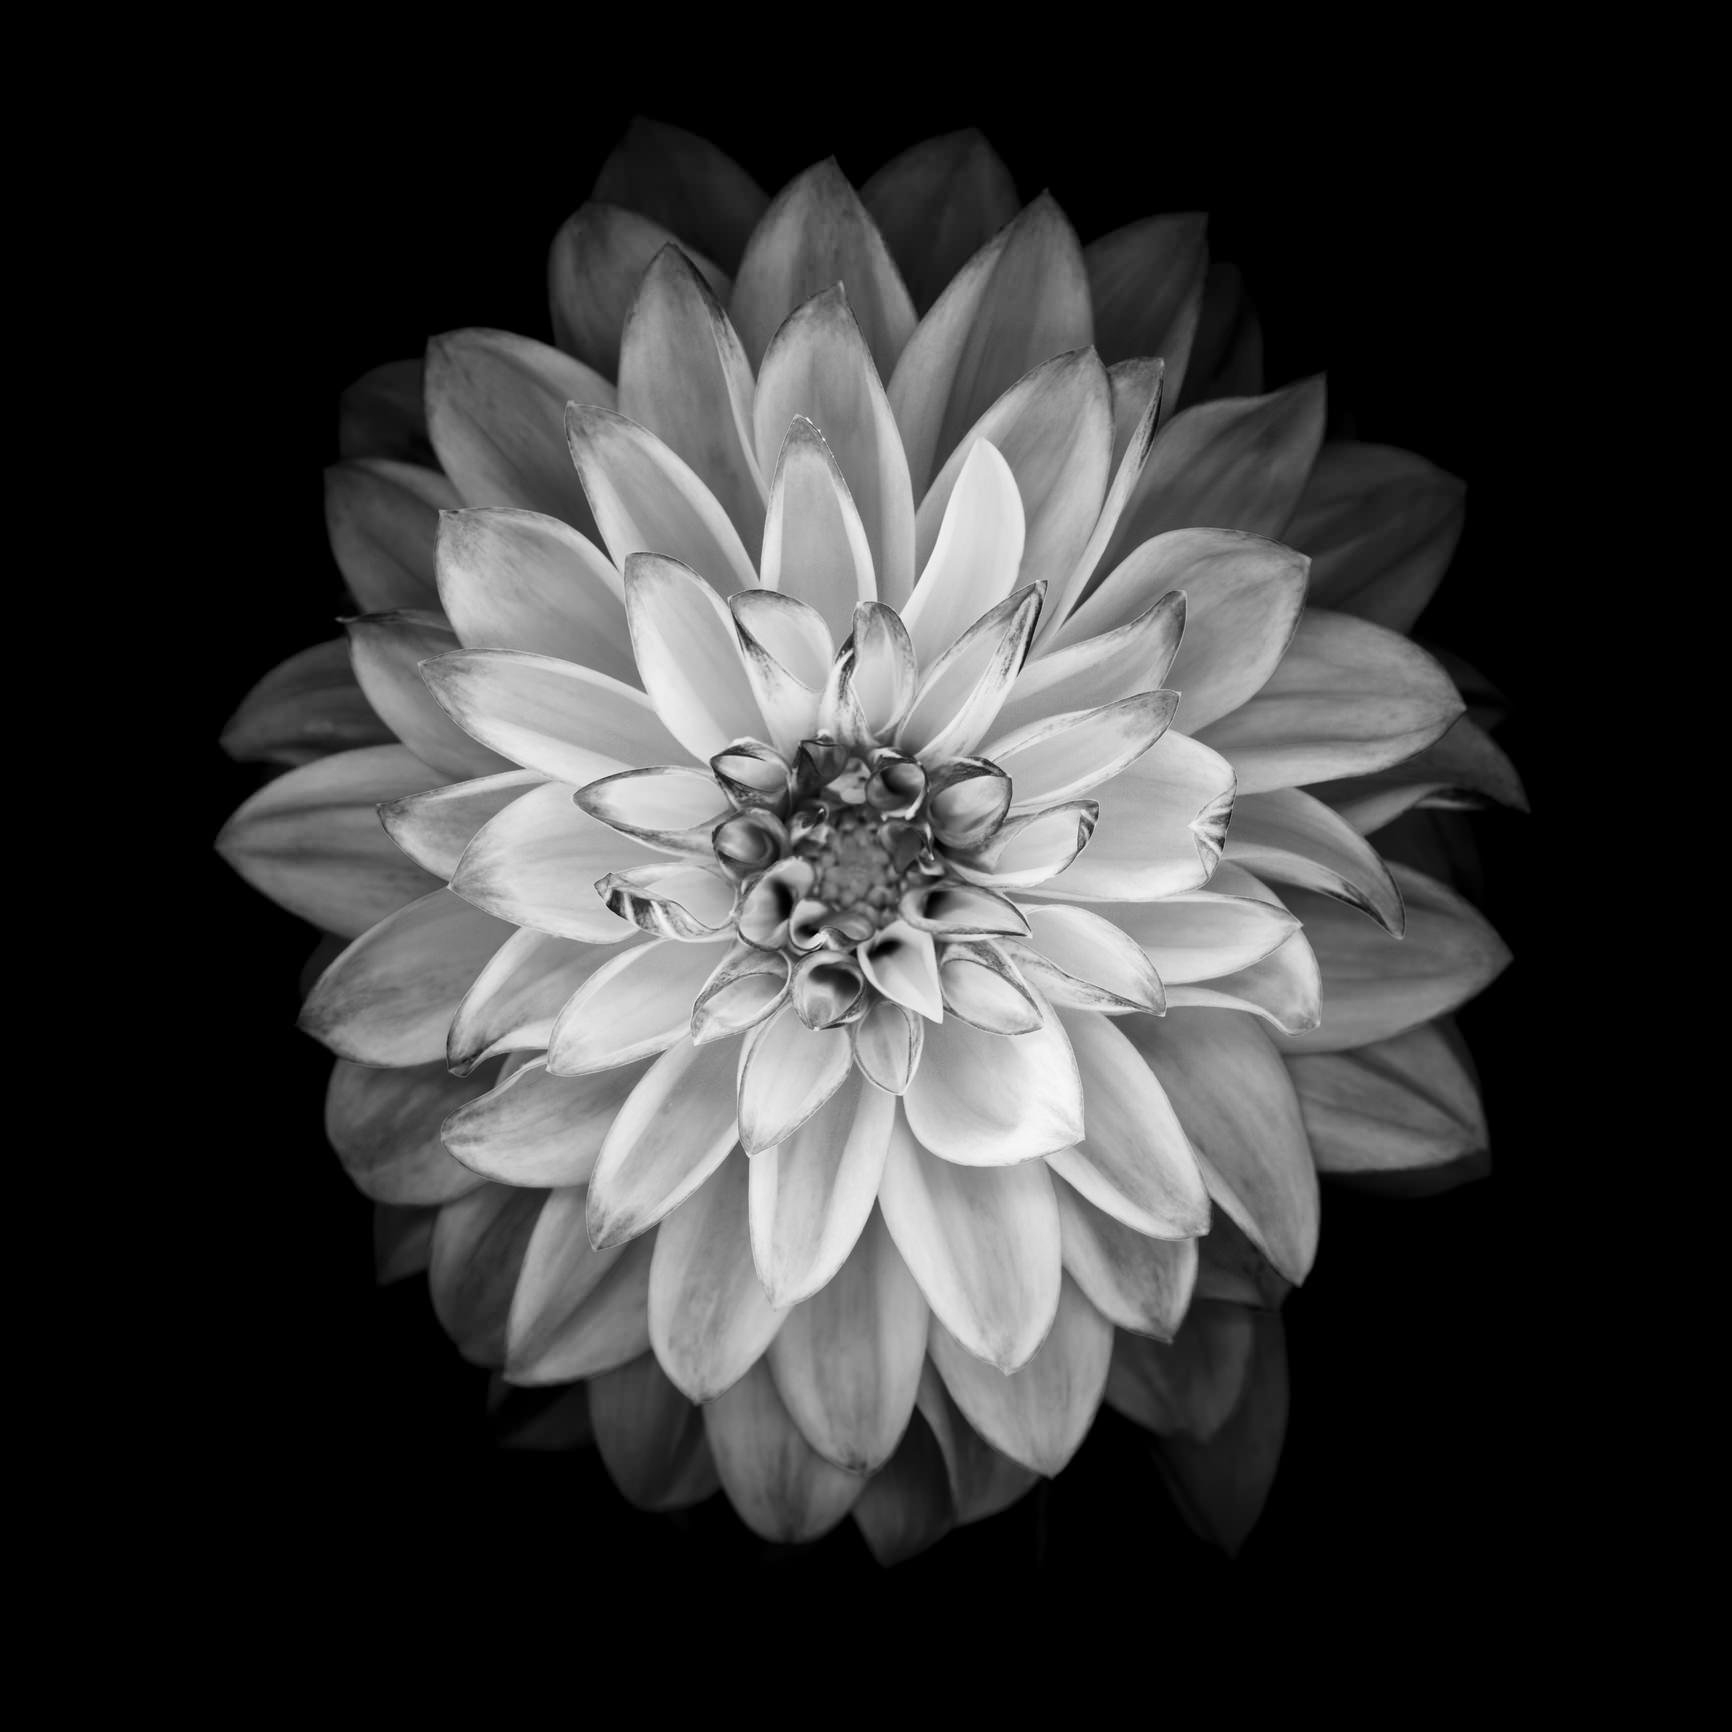
Even a simple photo of a flower takes on a different visual impact when the image is converted to black and white.
But simply converting the image in post-processing won't get you results like those seen above.
In this instance, great care was taken to create an environment in which the delicate petals of the flower take on the elegance of a jewel.
The lighting had to be just right to get this effect - bright enough to highlight the texture of the flower's petals, yet focused enough such that the light falls off quickly and doesn't illuminate the background.
In this case, we see again how crucial contrast is to a successful black and white photo: the pure black background helps the bright highlights of the flower seem as though the pop off the screen.

High-key black and white images might not be as common, but I think you'll agree that they have their place in terms of creating a high-impact shot.
This image is an ideal example of taking a subject with tons of visual appeal and ramping up that appeal with a level of contrast that's both in your face and beautiful at the same time.
The trick to creating an effective high-key photo is having the right background.
In this case, the bright white backdrop is an ideal complement to the delicate and intricate features of the dandelion. What's more, since the background is devoid of features, we get a full view of the dandelion's lines, form, and other details.
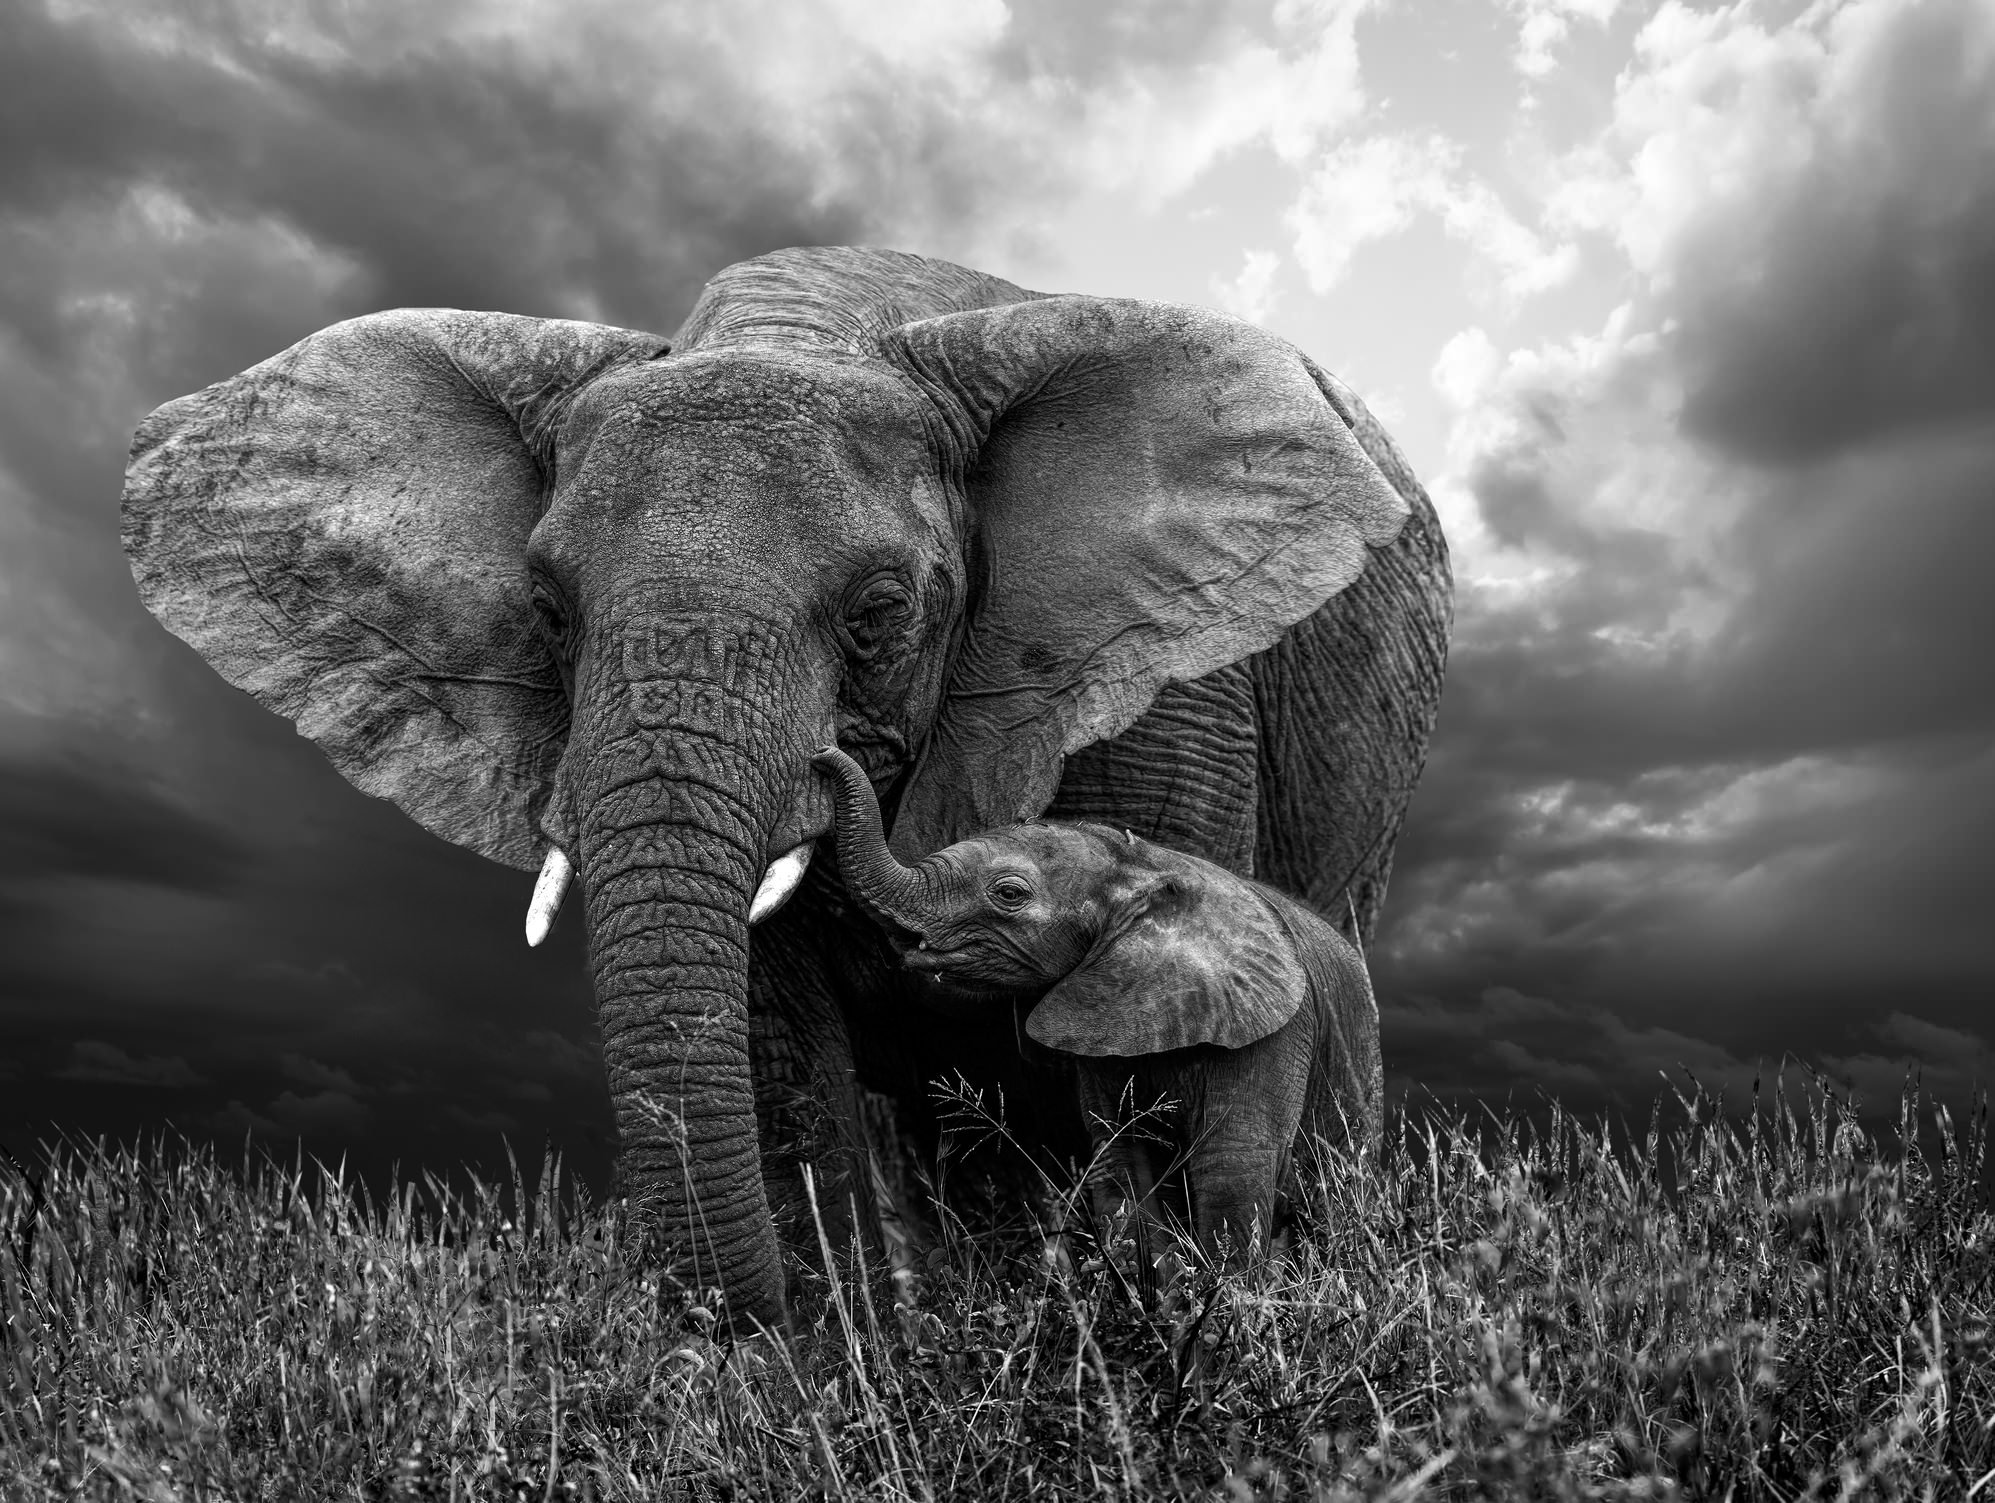
A photographic element that can take a black and white photo to another level is texture.
As seen here, the texture of the elephant's skin adds depth and dimension to the shot. The horizontal lines of the mother's skin contrasts nicely with the vertical grass in the foreground, creating a visual playground for the eye.
Note as well the position from which the photo was taken: by getting low to the ground, the photographer is able to create a scene in which the elephants are more imposing. Even with that powerful stance, the elephants have a graceful look about them that just couldn't be achieved had this image remained in color.
Landscapes
If you've ever seen an Ansel Adams landscape, you already know how a black and white treatment can result in a stunning, stylish take on the world around us.
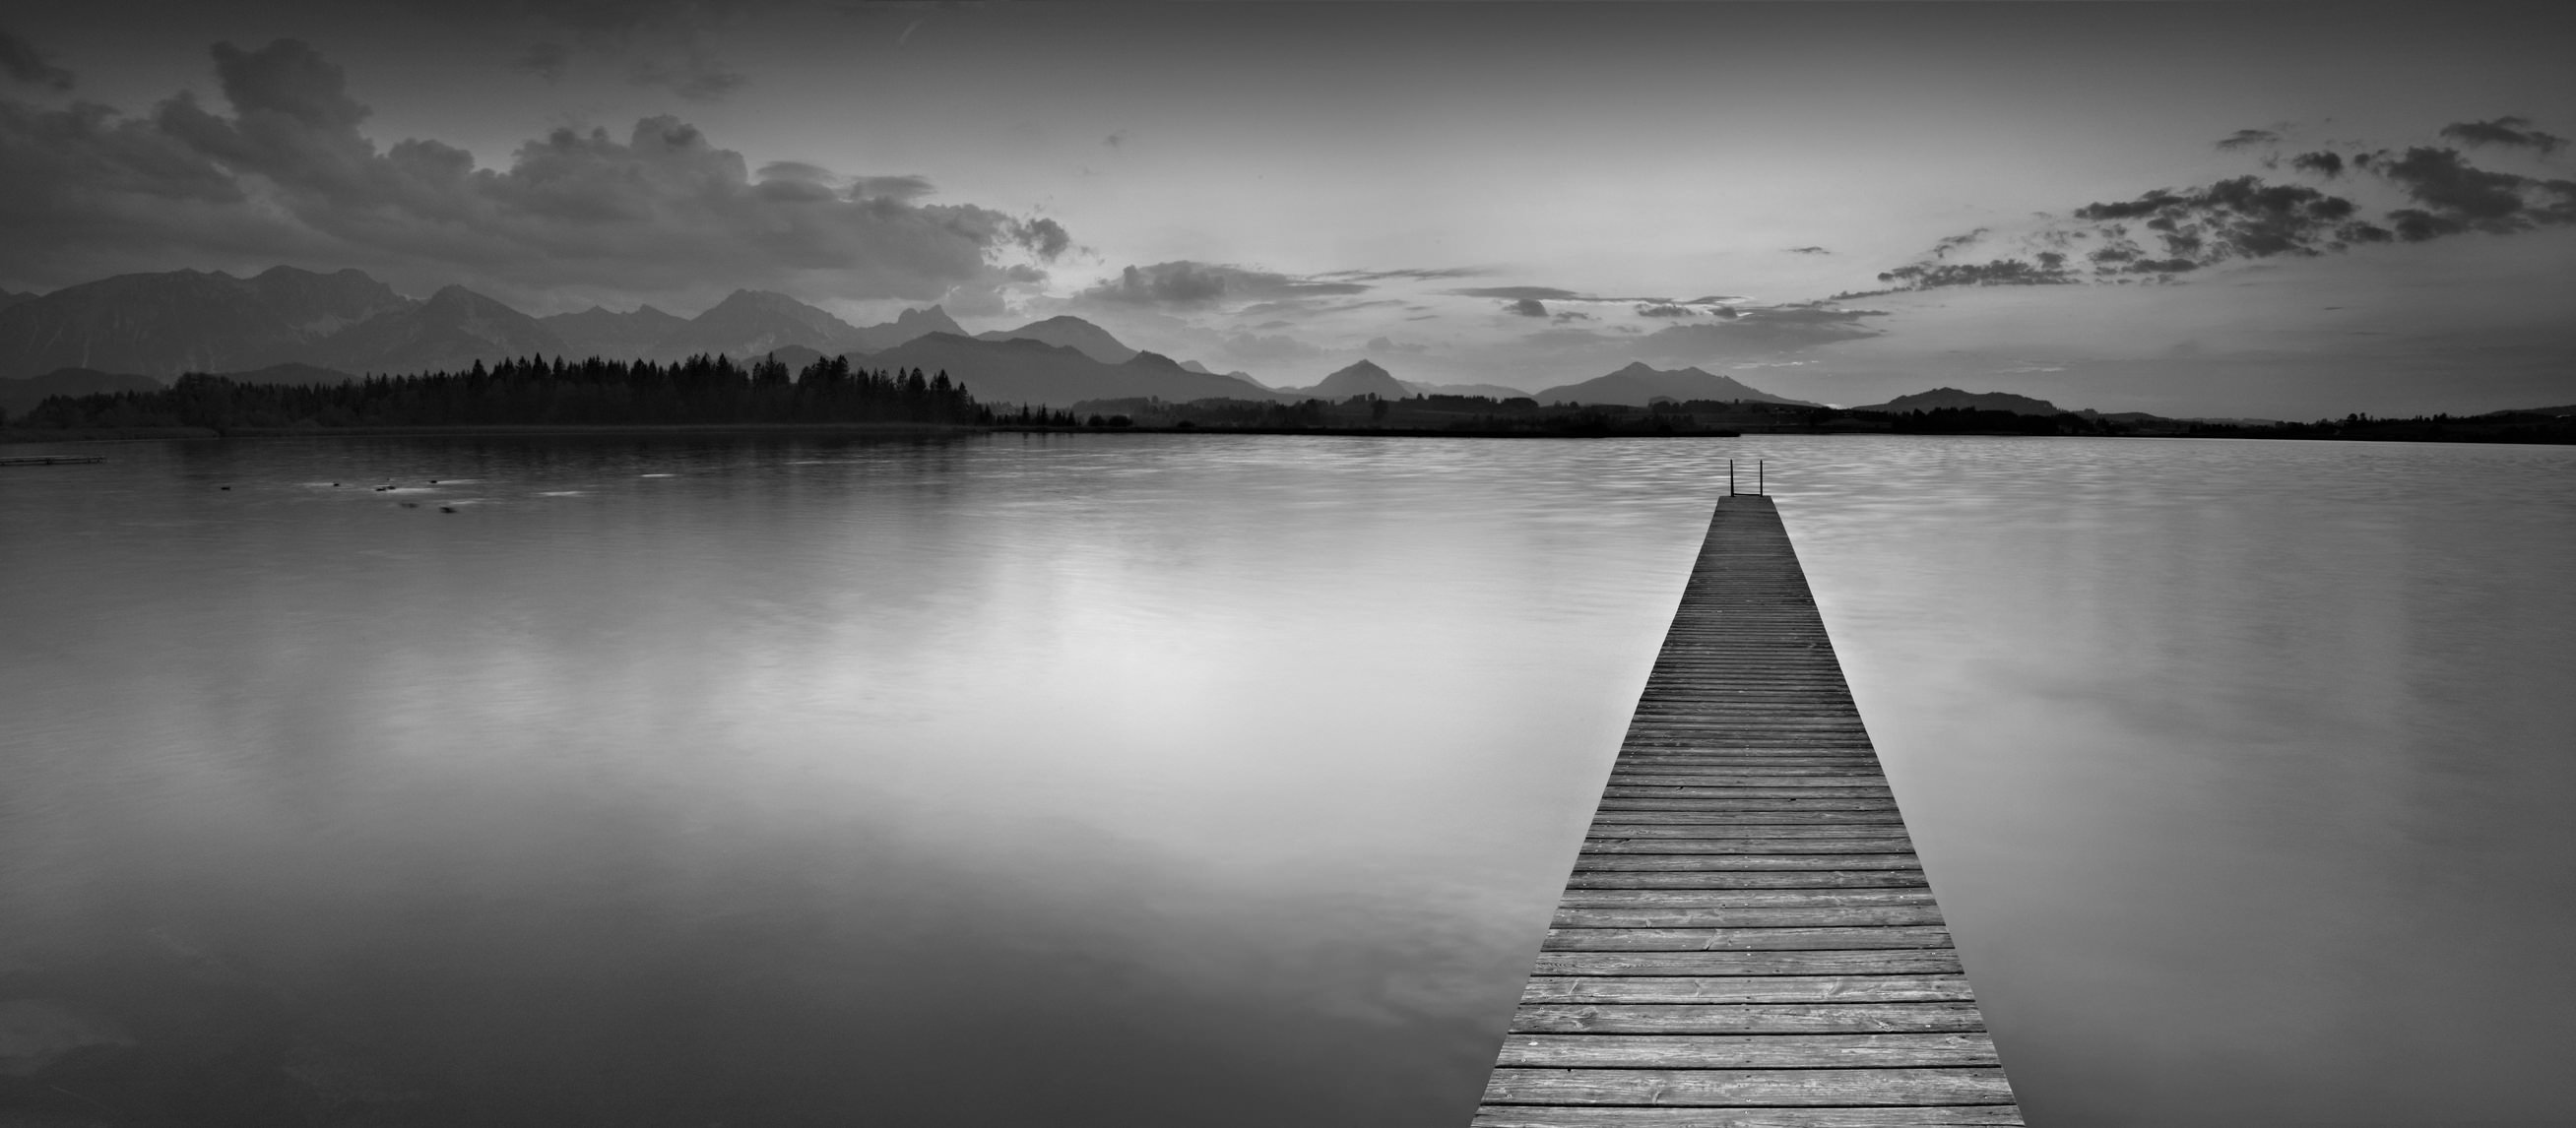
Much like is central to the success of a portrait or a photo of nature and wildlife, landscapes benefit from the inclusion of things like areas of highlight and shadow.
In this case, the lightness of the water combines with the darkness of the clouds and the trees in the background to create a classic black and white look with excellent dynamic range. Like the portrait of the little girl above, the abundance of middle grays helps give this shot an increased sense of tranquility and calm - effects that are mirrored in the still waters of the lake.
In that regard, converting this image to black and white doesn't just make it a more elegant shot, it helps accentuate the themes that are already present.
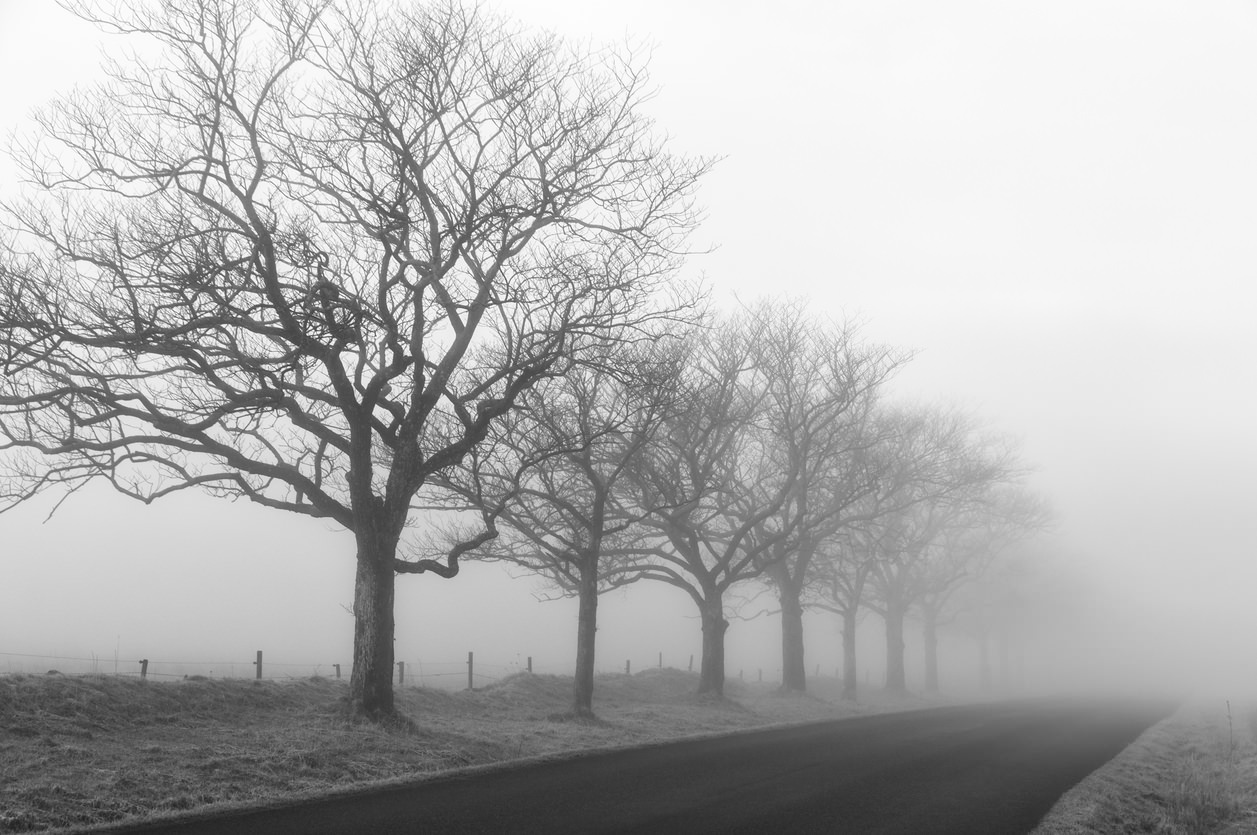
If you ask me, there's something mystical and mysterious about fog that gives landscapes an extra level of visual interest.
But when fog is combined with a black and white conversion, that feeling of mystery is only enhanced.
The key to an impactful black and white foggy shot is to include strong visual elements that grab the eye's attention.
In this case, the strong, linear lines created by the tree trunks offer a nice juxtaposition to the ether of the fog.
What's more, the repeating pattern of the trees gives the image some structure, which, again, is crucial for a black and white photo, no matter the subject. Without the benefit of color, things like lines, textures, and patterns help give the eye something on which to focus.
Abstracts

I noted earlier that there is beauty in simplicity. And though some might be hesitant to go the simple route when creating an abstract photo, I can see the value of doing so when that simplistic, abstract scene is presented in black and white.
In the example above, the high-key background helps put the gentle lines and curves of the dark fabric on full view.
The manner in which the fabric seems to be waving in a gentle breeze is chic, a quality that is only enhanced by the contrast of the dark and light tones in the shot.
This image is proof positive that you don't need tons of detail to create a compelling black and white photo. Contrast, lines, and texture will carry you a long way!

Because black and white photos can be, at times, much more elegant than color photos, you can get away with photographing objects that might seem odd or even mundane.
In the image above, a jet's engine becomes an interesting subject because of the black and white treatment.
The strong lines created by the engine's fan provide structure similar to the tree trunks I discussed in the landscape image above.
Working with that structure is lighting that offers just enough contrast that gives the photo needed depth, but without blowing out the highlights.
Notice on the left side of the frame how the light is gently reflected off the engine's blades. That bit of light contrasts beautifully with the darker recesses of the engine, the result of which is a classic image of a subject that usually goes without notice.
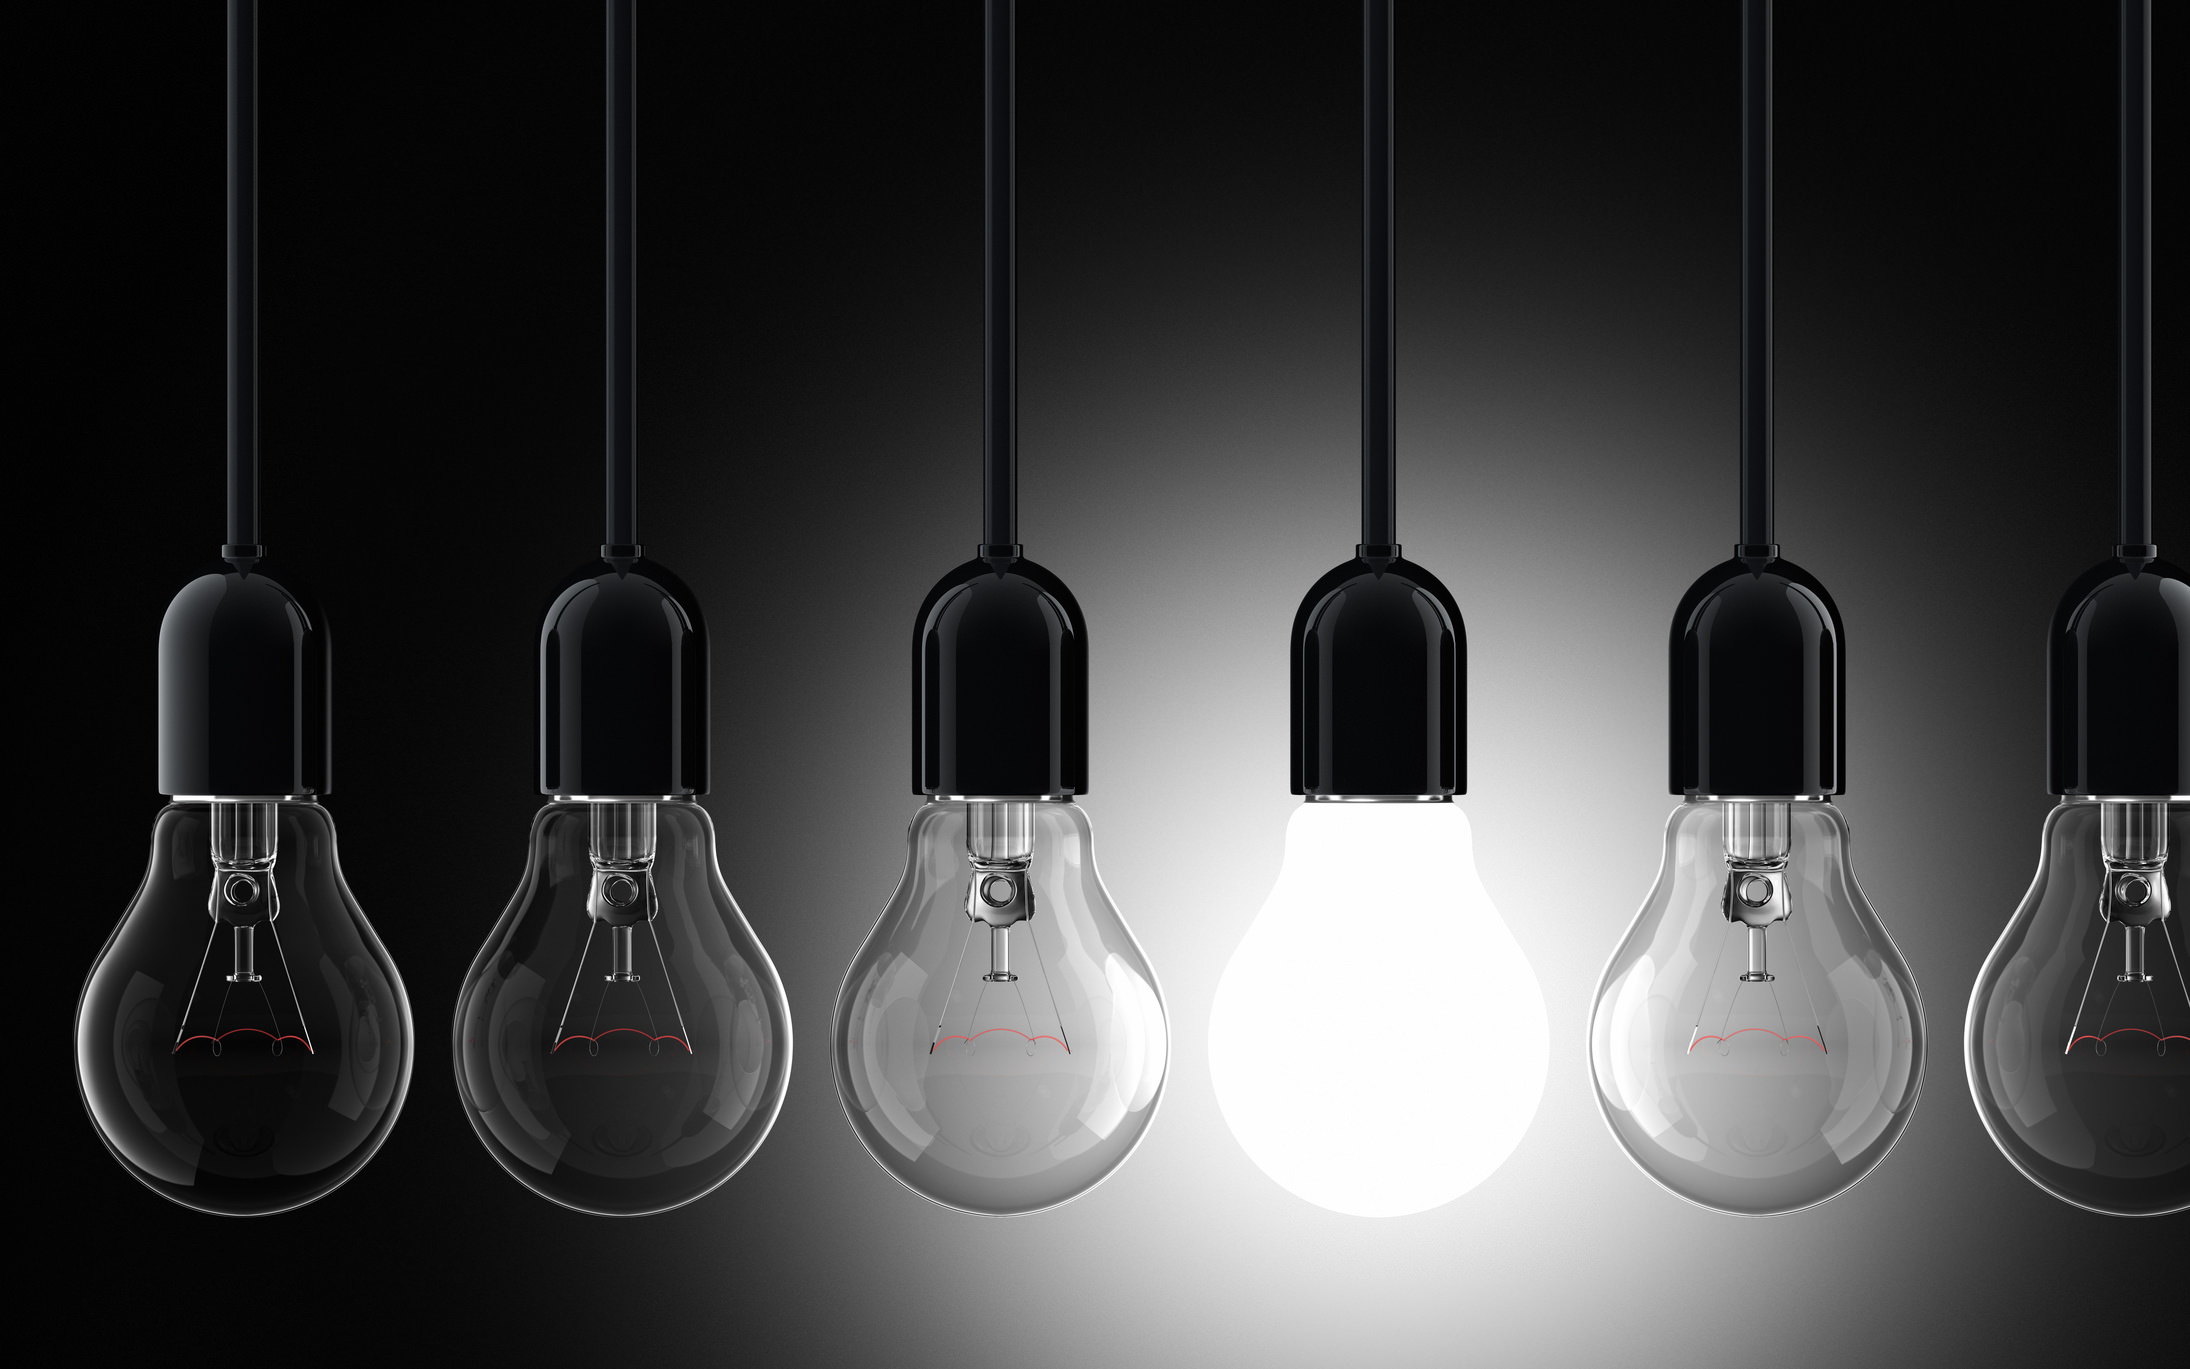
Speaking of everyday objects...
This photo of an array of light bulbs puts the notion of contrast in a black and white image on full display.
With a single bulb illuminated, we have a bright, featureless area of highlight that works nicely with the dark, shadow-filled corners of the shot.
What's more, that light helps illuminate the intricate and interesting details of the surrounding light bulbs - details that add visual impact to the shot.
Again, as noted earlier, repeating patterns give structure to black and white images. In this case, the array of lights helps elevate this photo with a polished and refined look that helps these everyday objects take on a greater sense of luxury and elegance.
With that, you've got 11 beautiful examples of how converting your images to black and white can garner gorgeous results.
Just remember that when looking for subject matter for a black and white shot, focus on things like light and shadow, texture, lines, and patterns, as each of these features will enhance the stately appearance of the subject.
We Recommend
3 (More) Things You Believe to Be True About Photography That are False

Last week, we took a look at three commonly held beliefs about photography that simply aren’t true. In that article, we explored the notions that aperture priority is the best shooting mode, that shooting with the lowest ISO is always necessary, and that tripods are a requirement for most shots.
After debunking those myths, we thought it would be fun to tackle three more photography falsehoods.

Photos Should Always Convey the Truth

Unless you’re a photojournalist, your photos do not have to convey the truth. Photography is an art, and as such, you have the creative freedom to do with your compositions what you want. What’s more, it’s often difficult to achieve a completely truthful photo anyway because the way you frame or crop the image, for example, means that you’re excluding something. Doing so bends the truth just a little, right? What’s more, how you create your photo may or may not jive with how people perceive it. You might create an image that you feel conveys a bright, cheerful mood, but a viewer might interpret it as being something else entirely.
Striving for the truth in your images is an admirable undertaking, but no matter how candid the shot, no matter how little post-processing you do, images can easily distort reality. Embrace this quality and focus on being artful and creative instead.
Shooting at f/2.8 Gets Better Photos

Sure, if you’re taking a portrait, f/2.8 will get you a better image than if you try to shoot the same image at f/16. The shallow depth of field you get with f/2.8 creates gorgeous bokeh-filled, blurry backgrounds that help the subject stand out.
But shooting at f/2.8 isn’t always the way to go. Not every photo you take needs a shallow depth of field. Not every background needs to be blurred. In fact, there are times when the subject matter calls for a large depth of field so that you can more effectively convey the context of the situation. Landscapes certainly come to mind as being subject matter that necessitates shooting with a smaller aperture, but so too does street photography, nature and wildlife photography, and travel photography, to name but a few.
Though it’s fun to shoot wide-open, it’s not a given that doing so will get you better photos. Match your aperture to the context to have greater success.
My Photos Suck if They Aren’t Perfect
Much like striving to create a truthful image, creating a technically perfect image is a tough task. Even the most veteran photographers can’t create an image that is perfect from corner to corner. More often than not, there is a compositional element missing or misused, an area that’s too dark or too bright, or a subject that isn’t quite aligned with the rule of thirds grid. And that’s okay!
The imperfection in the photos you create doesn’t mean that your images are terrible. Despite a less than ideal exposure, you can still have a wildly interesting and visually stimulating photo. Even though your subject looked away just as you clicked the shutter doesn’t mean the portrait you create of them should be deleted. The point is that if you find that one of your images isn’t quite exposed right or that it isn’t as sharp as you’d like, don’t automatically write it off. There’s much more to a compelling photo than technical perfection.
Just go out and shoot, stop worrying about being perfect, and leave your false beliefs about photography behind. You’ll have more fun, and probably get better results too!
We Recommend
3 Simple Tricks to Help You Learn Photography Faster

In today’s world in which we have high-tech cameras at our disposal with all sorts of features that promise to make photography faster, simpler, and easier, it’s hard not to get caught up in the notion that shortcuts will help you become a better photographer. What makes it even more difficult is the sheer volume of things out there to photograph - wildlife, landscapes, portraits of friends and family, street scenes, and so on.
But the fact of the matter is that becoming a better photographer is a process. After all, photography is an artform; a craft that takes years to perfect. What’s more, how one approaches portraits varies greatly from how one approaches landscapes or street scenes. It’s not necessarily a one-skill-set-fits-all situation.
Having said that, there are some strategies you can use to help you develop your skills while also simplifying photography. It’s really just a matter of focusing on a very straightforward workflow that includes three parts.
Pick One Lens and Roll With It

Photographers are notorious gear hoarders, with drawers and bags full of filters, tripod heads, camera bodies, and especially lenses.
While it’s nice to have a solid collection of gear once you get the hang of things, scattering your attention (and money) around on multiple lenses will only complicate matters for a beginner. Each lens does things a little differently, and lenses of different focal lengths have widely varying purposes. The best way to develop an understanding of how each lens in your kit behaves is to spend a lot of one-on-one time with each one.
The key here is not to pull out your wide-angle lens and spend an hour taking photos with it. Instead, spend a significant amount of time getting to know your lens. Explore its features, learn about its behaviors and idiosyncrasies. Photograph different subjects to determine what the lens’ strengths and weaknesses are as well. There’s no prescribed long-term time limit here - for some, a few days of shooting with one lens will be enough time to get to know it inside and out. For others, the process might be weeks or months.
What’s the benefit of the one lens strategy, you ask?
Not only will this help you get to know your gear, but it will also give you an opportunity to focus on the process of taking a photo rather than worrying about changing lenses. If you aren’t constantly waffling back and forth between lenses, you’ll have more time to concentrate on actually composing good photos. It also gives you a clearer picture of what your next lens purchase needs to be so you can fill in the holes that your current lens doesn’t quite fill. In that regard, this strategy helps you on all fronts - becoming familiar with your gear, improving the composition of your photos, and protecting your bottom line.
Simplify the Subject Matter

Given the broad capabilities of today’s camera systems, it’s hard not to get sucked into the idea that it’s easy to take great photos of any subject. If you think about it, how often do you grab your camera and head out to take photos of nature or landscapes, then along the way decide you’re going to take a few portraits and city shots as well?
The problem with hopping from one type of subject matter to another is much like the problem with trying to work with too many lenses - instead of becoming adept with one, you spread your attention across many different areas. More often than not, having this approach means you get more photos, but photos that are of a lesser quality.
Why is that?
The issue is that each subject necessitates different camera settings, if not different lenses as well. So, when you head out to photograph a sunset, you’ll need very different camera settings than if you were to take a portrait of a friend indoors.

Again, part of what will make you a better photographer is practice and experience. Bouncing from one subject to another won’t help you in that endeavor. Instead, strive to simplify things by focusing on one subject at a time. If you’ve set your camera up to take long exposure shots of a waterfall, take long exposure shots of a waterfall. If you’re good to go for natural light portraits, take natural light portraits.
This isn’t to say that you can’t change the subject matter you photograph from one day to the next; but in a single outing, limiting your attention to one type of subject will get you more time to practice your craft. In the long-run, the benefit will be a much deeper level of understanding of the camera settings, equipment, and creative aspects of taking higher-quality photos for that specific subject, the result of which are better photos.
Don’t Get Distracted by Gadgets

There are tons and tons of accessories and gadgets available for photographers. So many, in fact, that it’s easy to get into buying mode and end up with a camera bag full of accessories that you don’t necessarily need.
When you become distracted by gadgets, your attention is taken away from actually learning the processes involved in taking high-quality photos. Sure, it’s neat to be able to control your camera with your smartphone, but how does that help you learn the fundamentals of photography, like shutter speed, aperture, ISO, and the like?
The short answer is that it doesn’t. This isn’t a knock on the cool accessories and gadgets available today as they can certainly add to your ability to create the photos you wish to create. But before you begin investing in a bunch of accessories for your camera, focus first on learning the fundamentals of photography. Doing so will benefit you in the long run because with a deeper level of understanding of composition, lighting, exposure, and the like, you’ll be able to create more compelling photos, and you’ll be able to use the gadgets you buy in a more purposeful manner. Again, it’s a win-win situation!

If anything, limit the accessories you buy (at least initially) to a tripod, a set of filters, and a remote shutter release. These accessories will vastly expand your capabilities in terms of the types of photos you take without overwhelming you with possibilities.
The moral of the story is to simplify your approach and resist distractions. Spend time working with one lens and one type of subject so you can perfect your understanding of the fundamentals of photography. By engaging more deeply in the process of creating a photo, and resisting the urge to jump from subject to subject, lens to lens, and accessory to accessory, you will better your understanding of photography, and, in turn, improve the photos you create. It’s that simple!
We Recommend
3 Things You Believe to Be True About Photography That are False
No matter how much time you’ve spent as a photographer, the chances are that at some point, you’ve believed something to be true about this craft that is quite simply false. Some false beliefs have to do with the best semi-automatic mode in which to shoot, others involve always minimizing ISO, and still others revolve around the idea that you must use a tripod if you want to get a sharp, clear shot.

Let’s dive deeper into these false beliefs and see what the truth of the matter really is.
False Belief #1: The Best All-Around Shooting Mode is Aperture Priority
While it’s true that aperture priority is a great mode that makes many photographic situations easier, it isn’t the end-all, be-all mode for every situation you encounter. When your camera is mounted on a tripod, manual mode is an ideal way to shoot because you needn’t worry about a shutter speed that’s too slow to hold steady. Likewise, in situations in which the lighting is even and consistent, manual mode is a good choice because you can more easily pinpoint the correct exposure on your own and not rely on the camera to try and figure things out.
In other situations, shutter priority is a better choice, such as when you wish to freeze or blur movement. Whether it’s your kid’s soccer game, a waterfall, or cars passing you on the street, action shots benefit from the use of shutter priority because of the increased emphasis placed on shutter speed. Sometimes, when people rely too much on aperture priority they get well-exposed images, but don’t quite grasp the proper usage of shutter speed to freeze movement. Shooting in shutter priority will help alleviate that problem, as will shooting in manual.
False Belief #2: The Smallest Possible ISO is Always Required
A decade ago, this was definitely true. Early digital cameras were not nearly as refined as they are today, and in many cases, shooting at ISO 400 or above meant tons of digital noise and a terrible looking shot.
But camera technology has come a long, long way, and today’s cameras can perform very well, even at high ISOs. In fact, with many camera systems, you can push the ISO to 3200, 6400 and well beyond, and still get a high-quality image. Yet the myth that shooting at ISO 100 at all times still persists.
Granted, there are situations in which a low ISO is ideal. For example, if you’re shooting a landscape and you intend to blow the photo up to hang on the wall, a low ISO would benefit you greatly. The same goes if you’re in a studio with your camera mounted on a tripod taking portraits of people.
However, for just about any other application, pushing the ISO is perfectly fine. If you’re on the street photographing strangers, shooting a wedding, traveling the world photographing wildlife, shooting in black and white, and so on, don’t be afraid to use a higher ISO than you’ve traditionally been comfortable with. You will find that a willingness to bump up the ISO means you can use better shutter speed and aperture settings, which can result in more technically pleasing photograph.
False Belief #3: You Always Need a Tripod
How often have you been visiting a faraway city or stopped at a beautiful spot in a national park to find people setting up their cameras on a tripod? The belief that a tripod is always necessary just isn’t true. There are times when it’s beneficial to have a tripod - long exposures and shooting at dusk immediately come to mind. Your purposes for your image will be a deciding factor as well - if you intend to create a giant print, a tripod would be helpful.
But in broad daylight, shooting photos that will be printed small or shared online, there is no reason why anyone should be fiddling with a tripod. This is where the false belief about ISO comes in as well: if you push the ISO up, you can shoot handheld in many more situations. Without a tripod, you can also move more quickly without lugging around the extra weight, which means you can set up faster and, in theory, get better shots (and more of them!).
And that’s what it’s all about, right? Getting better shots sometimes means challenging convention, or at least putting false beliefs to rest. So free yourself from the notion that you always need a tripod, that you always need to minimize ISO, and that aperture priority is the best shooting mode at all times. Once you do that, you’ll likely find you enjoy photography more and have better results as well.
We Recommend
4 Tips for Improved Black and White Photos
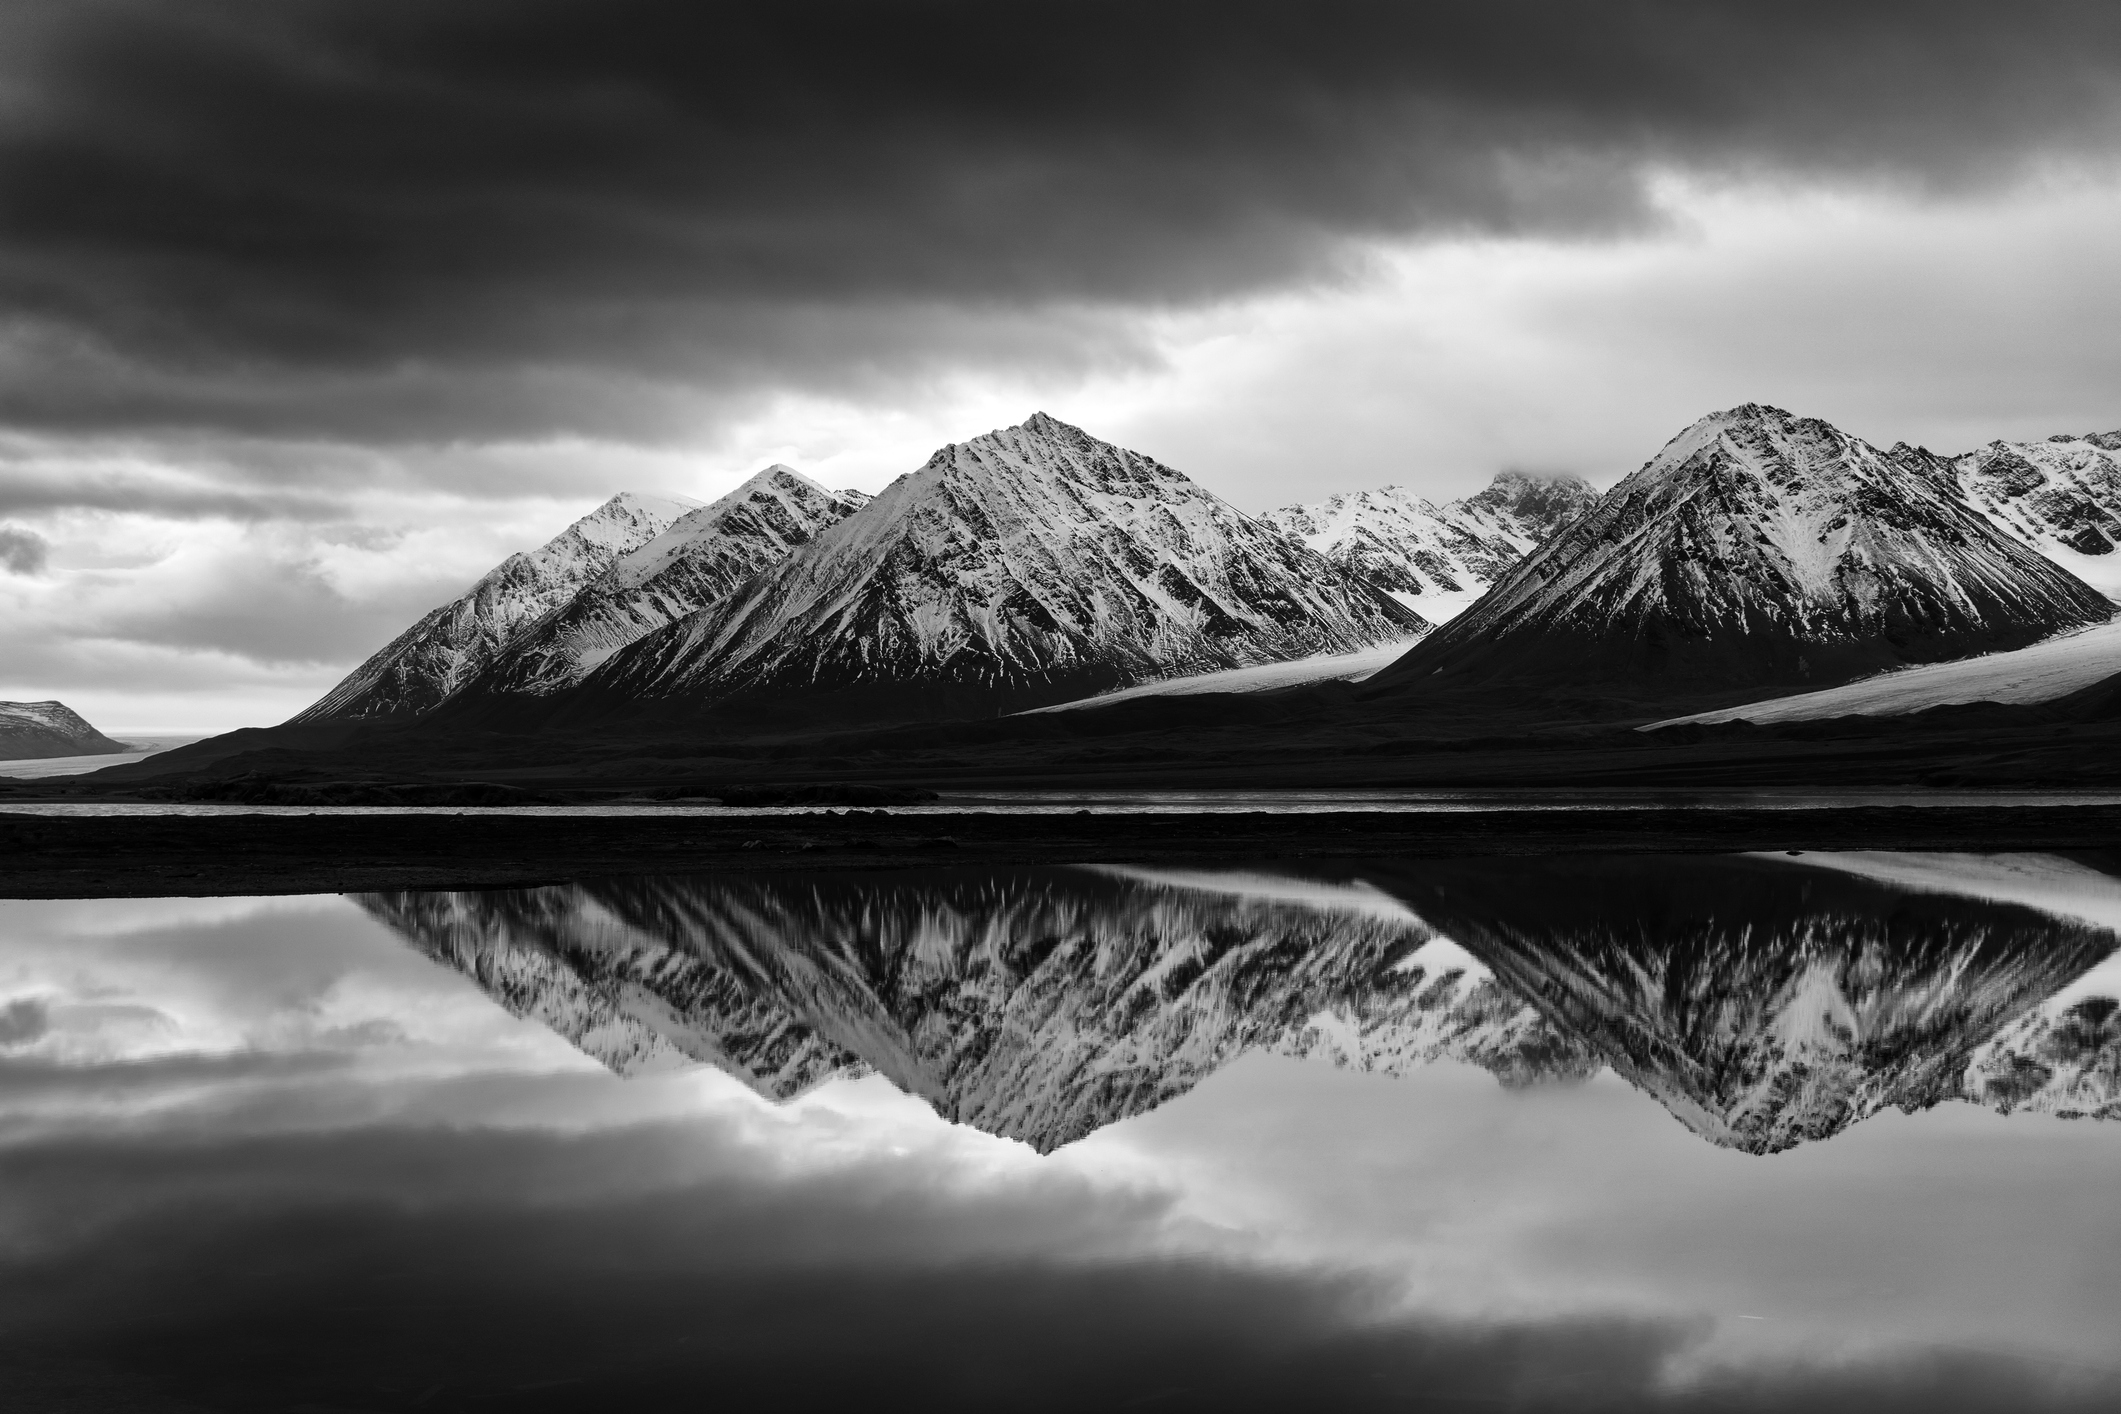
photo by justinreznick via iStock
Though black and white photographs look clean and simple, they can be difficult to pull off well.
It makes sense, too, because most of us see the world in vivid color, and changing our mindset to “see in black and white” is a process that can take months or even years to perfect.
But when everything clicks and you create a gorgeous black and white image, it’s tough to beat. In a world saturated with color, a black and white photo can stand out beautifully and pull viewers in like no other photograph can.
To help you get to that point, here’s four tips for improved black and white photos.
How to Get Better Black and White Photos: Find High Contrast Scenes

photo by ImagineGolf via iStock
Black and white photos really shine when there’s strong dynamic range in the scene. Without color to provide visual interest, lots of highlights and shadows take on that job.
Strong lighting - like that you find when shooting during midday - can look awful in a color photo, but as a black and white photo, all that harsh light and shadows comes to life.
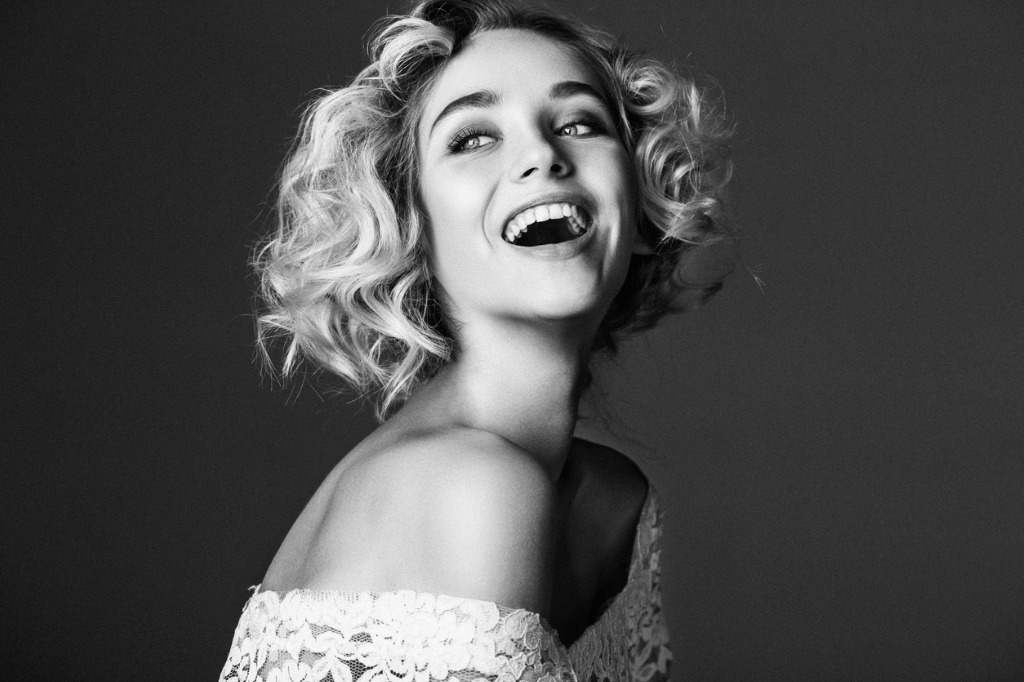
photo by CoffeeAndMilk via iStock
This isn’t to say that you can’t create a beautiful black and white photo when there isn’t a ton of contrast, but by and large, the more contrast, the better.
Low-contrast scenes can appear to be very dull and gray, so you have to be very careful when converting a low-contrast shot to black and white.
Learn More:
- Why Your Photos are Bad - and How to Fix Them
- Essential Tricks for Photos That Look ProfessionalEssential Tricks for Photos That Look Professional
Black and White Photography Tip: Simplify the Scene
photo by Johann Sebastian via iStock
One of the benefits of creating black and white photos is that they can simplify even the most chaotic scenes.
That is, what appears as an overly saturated, colorful distraction in the color version of the shot blends into the background of the black and white version.
But more than that, when you’re out shooting photos with the purpose of turning them into black and white shots, try simplifying the scene to begin with.
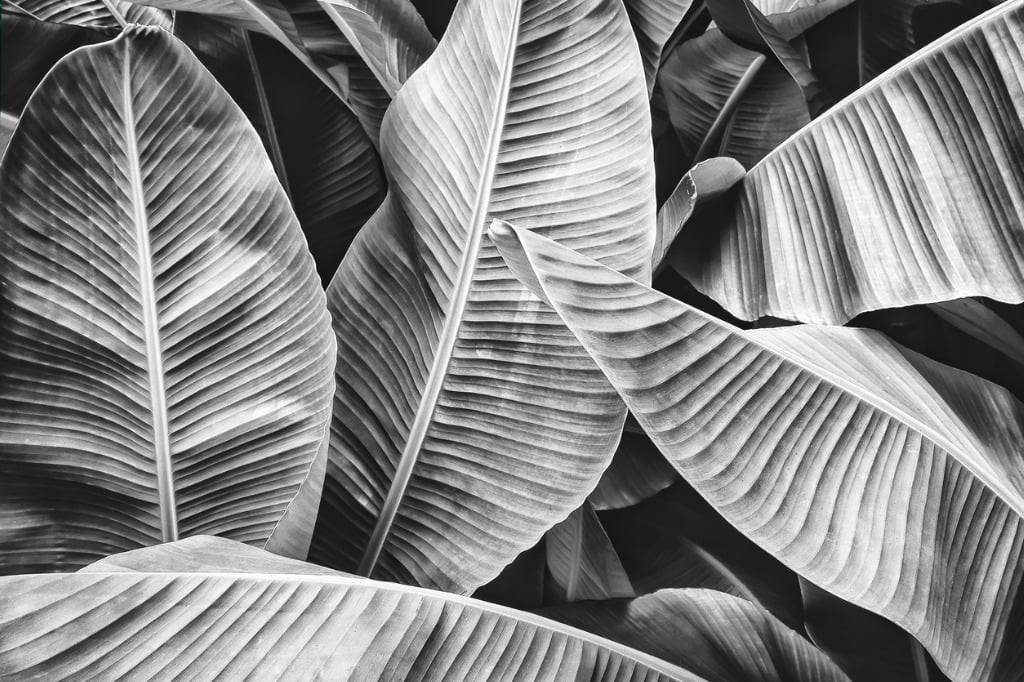
photo by pernsanitfoto via iStock
Get in close. Fill the frame. Have a single, strong subject that immediately grabs people’s attention.
You don’t need a lot in a black and white photo to create something dramatic, so focus on finding contrast and a strong subject, and in most cases, you’ll be just fine!
Learn More:
- Reignite Your Love of Photography With These Simple Tips
- Photography Gifts to Buy Yourself in 2019Photography Gifts to Buy Yourself in 2019
Improve Black and White Photography by Focusing on Shapes, Lines, Patterns, and Textures
As noted earlier, in the absence of color, contrast can add visual interest to a black and white photo.
Shapes, lines, patterns, and textures can do the same.
Though you probably don’t want to try to add all of these elements into one black and white shot, try incorporating one element into a shot to see how it helps improve the visual appeal of the image.
photo by skodonnell via iStock
You can do this in a variety of ways - fill the frame with a pattern, find a texture to highlight in the foreground, make a shape the focal point of the shot, or find strong lines that cast definite shadows in the image.
Though each of these elements has a profoundly different impact on the photo, what they have in common is that the details they create help make up for a lack of color.
Learn More:
- Beginner Photography Mistakes and Tricks for Avoiding Them
- Things You Should Do Before You Take a PhotographThings You Should Do Before You Take a Photograph
How to Print Black and White Photos: Give Canvas a Try
I’m a firm believer in having your photos printed. Call me old-school, but I just hate the idea that billions of photos are taken every year and most of them end up staying on our phones, memory cards, and hard drives, never to see the light of day.
I’m not saying that you should have every photo you take printed, but when you have one you’re quite impressed with, print that sucker out!

I especially like to have black and white photos printed on Canvas.
The fine texture of the canvas gives a nice depth to the print, and as discussed earlier, that texture can help the image become just a little more interesting in the absence of color.
I’ve tried probably half a dozen canvas printing companies over the years, and while most of them weren’t very impressive, CanvasHQ knocked my socks off.
Start designing your black and white canvas print now.
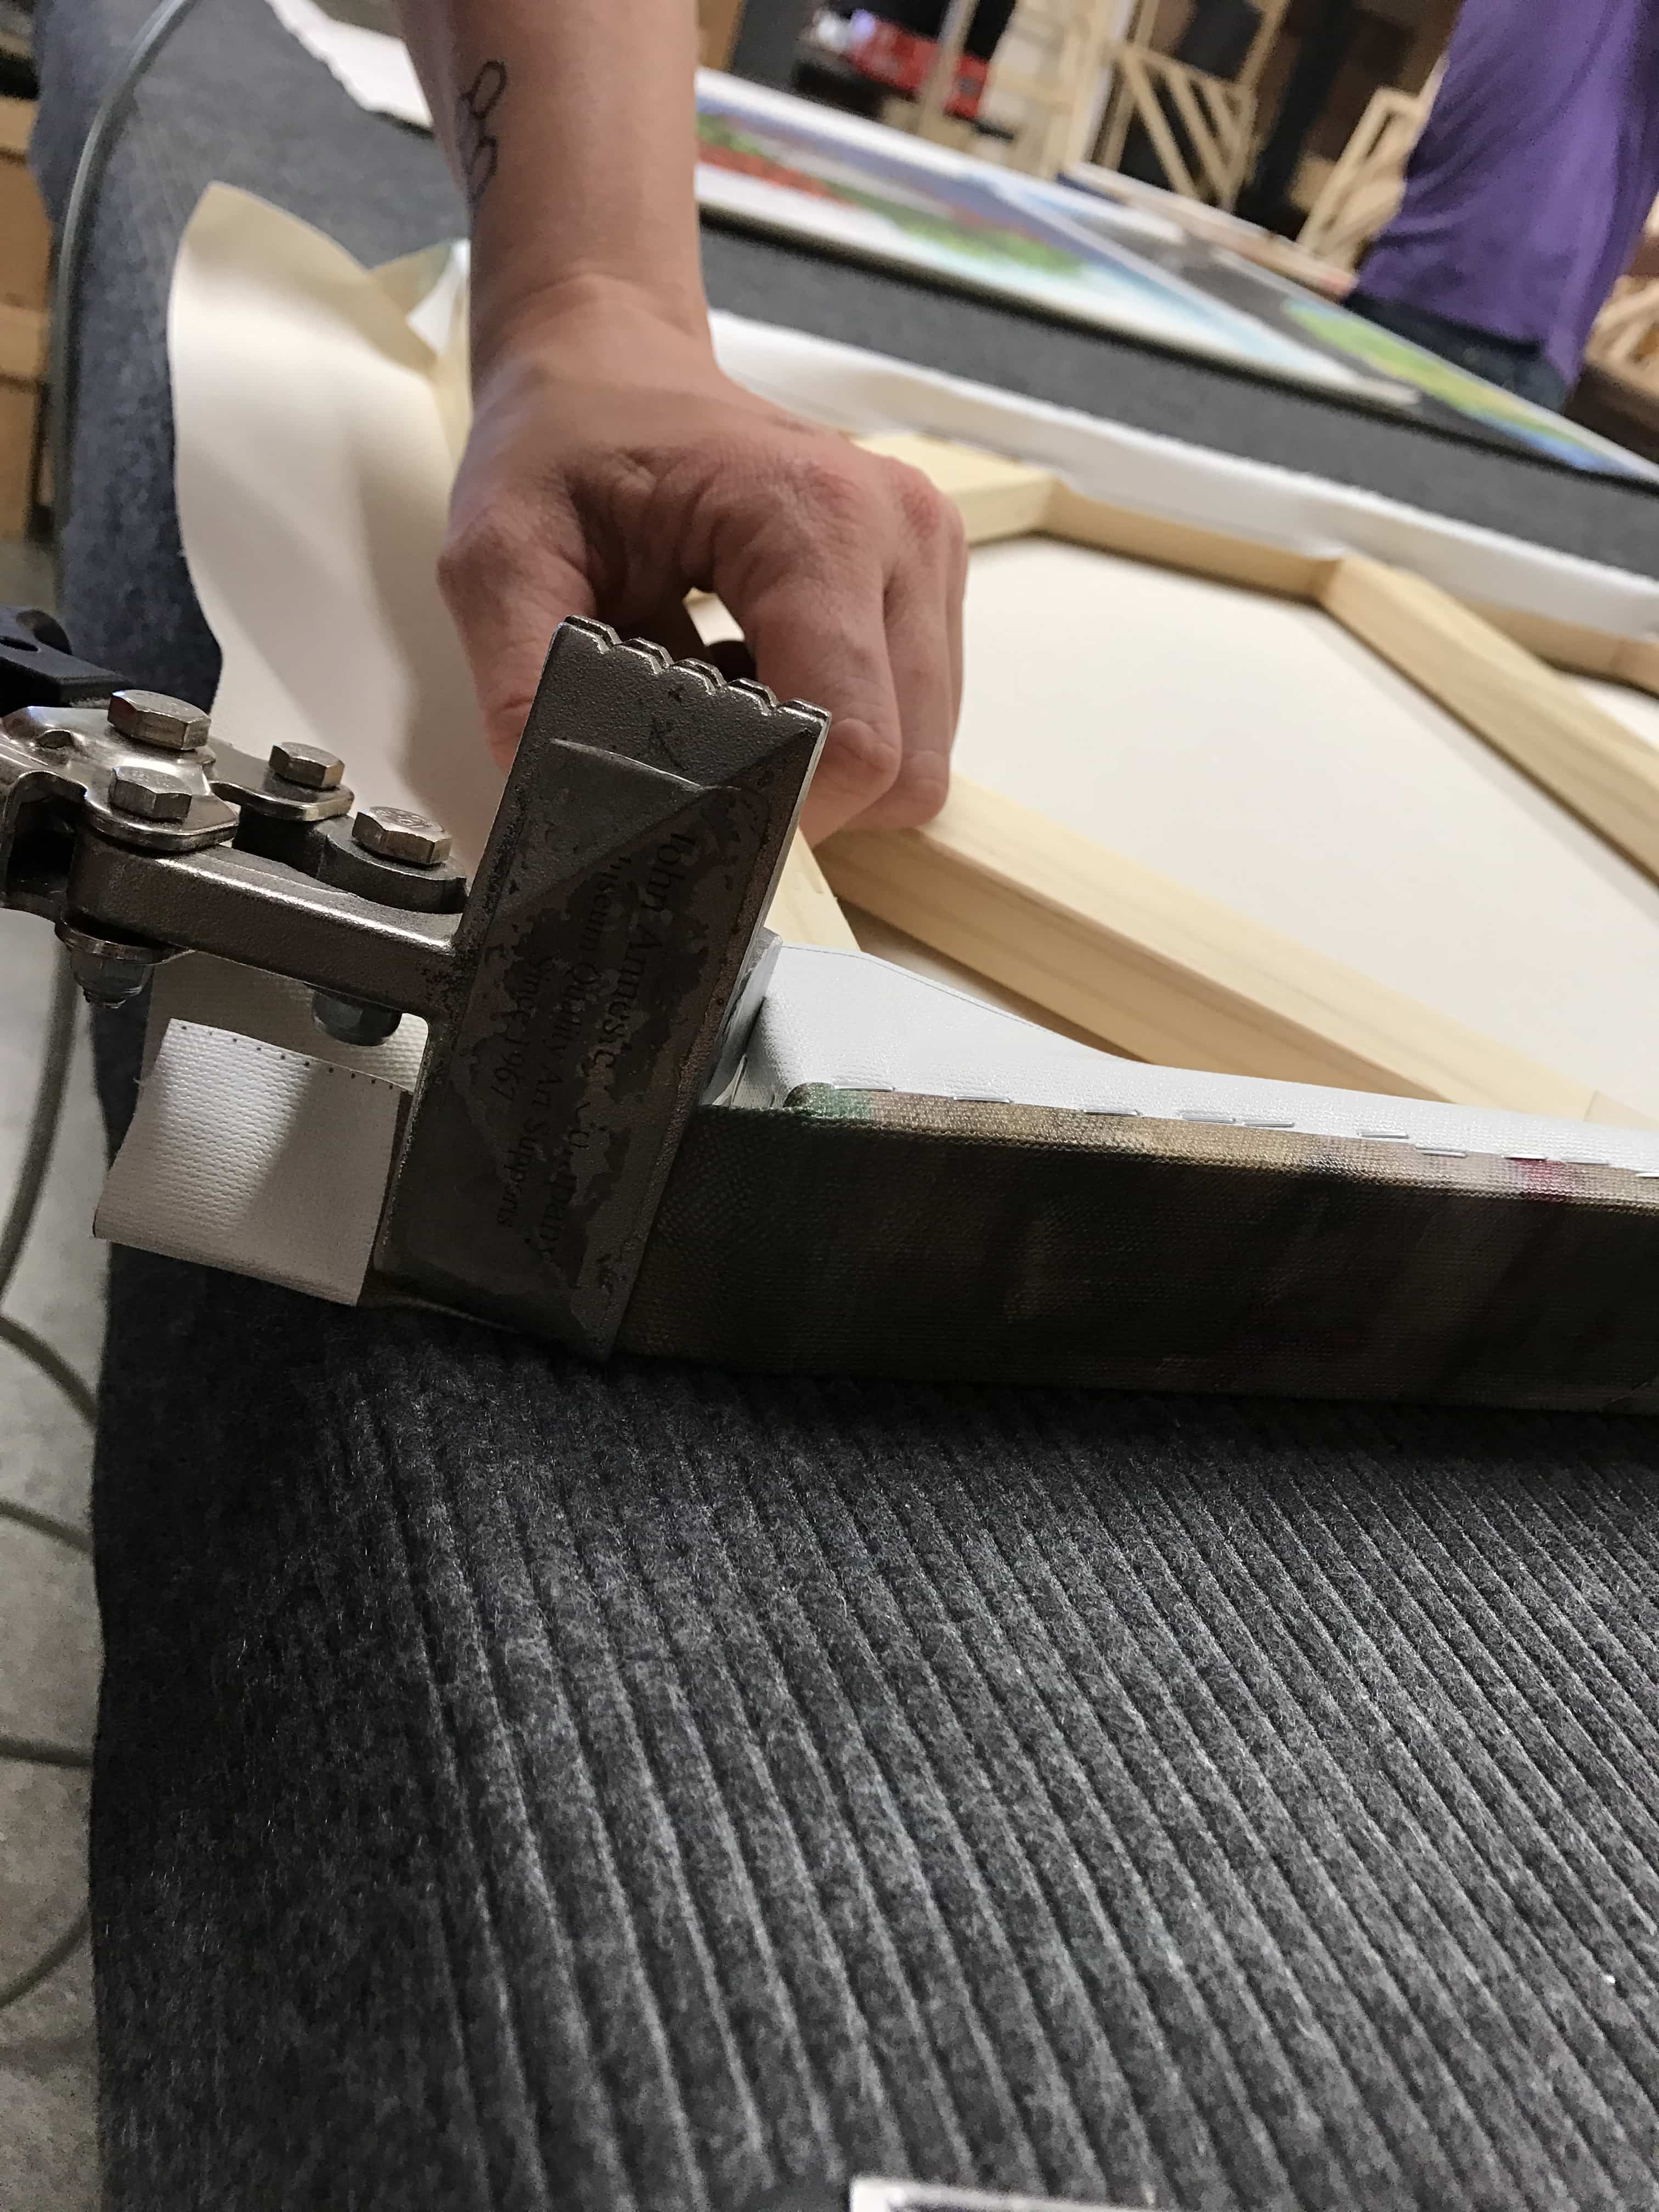
They’ve been my go-to printer for years now, and every time I get a canvas in the mail, I’m blown away by the quality of the craftsmanship.
The folks at CanvasHQ use only the finest materials - archival-grade canvas, commercial-grade inks that resist fading, and kiln-dried wood for the frames that are handmade to ensure the canvas stretches properly and stays that way for generations.
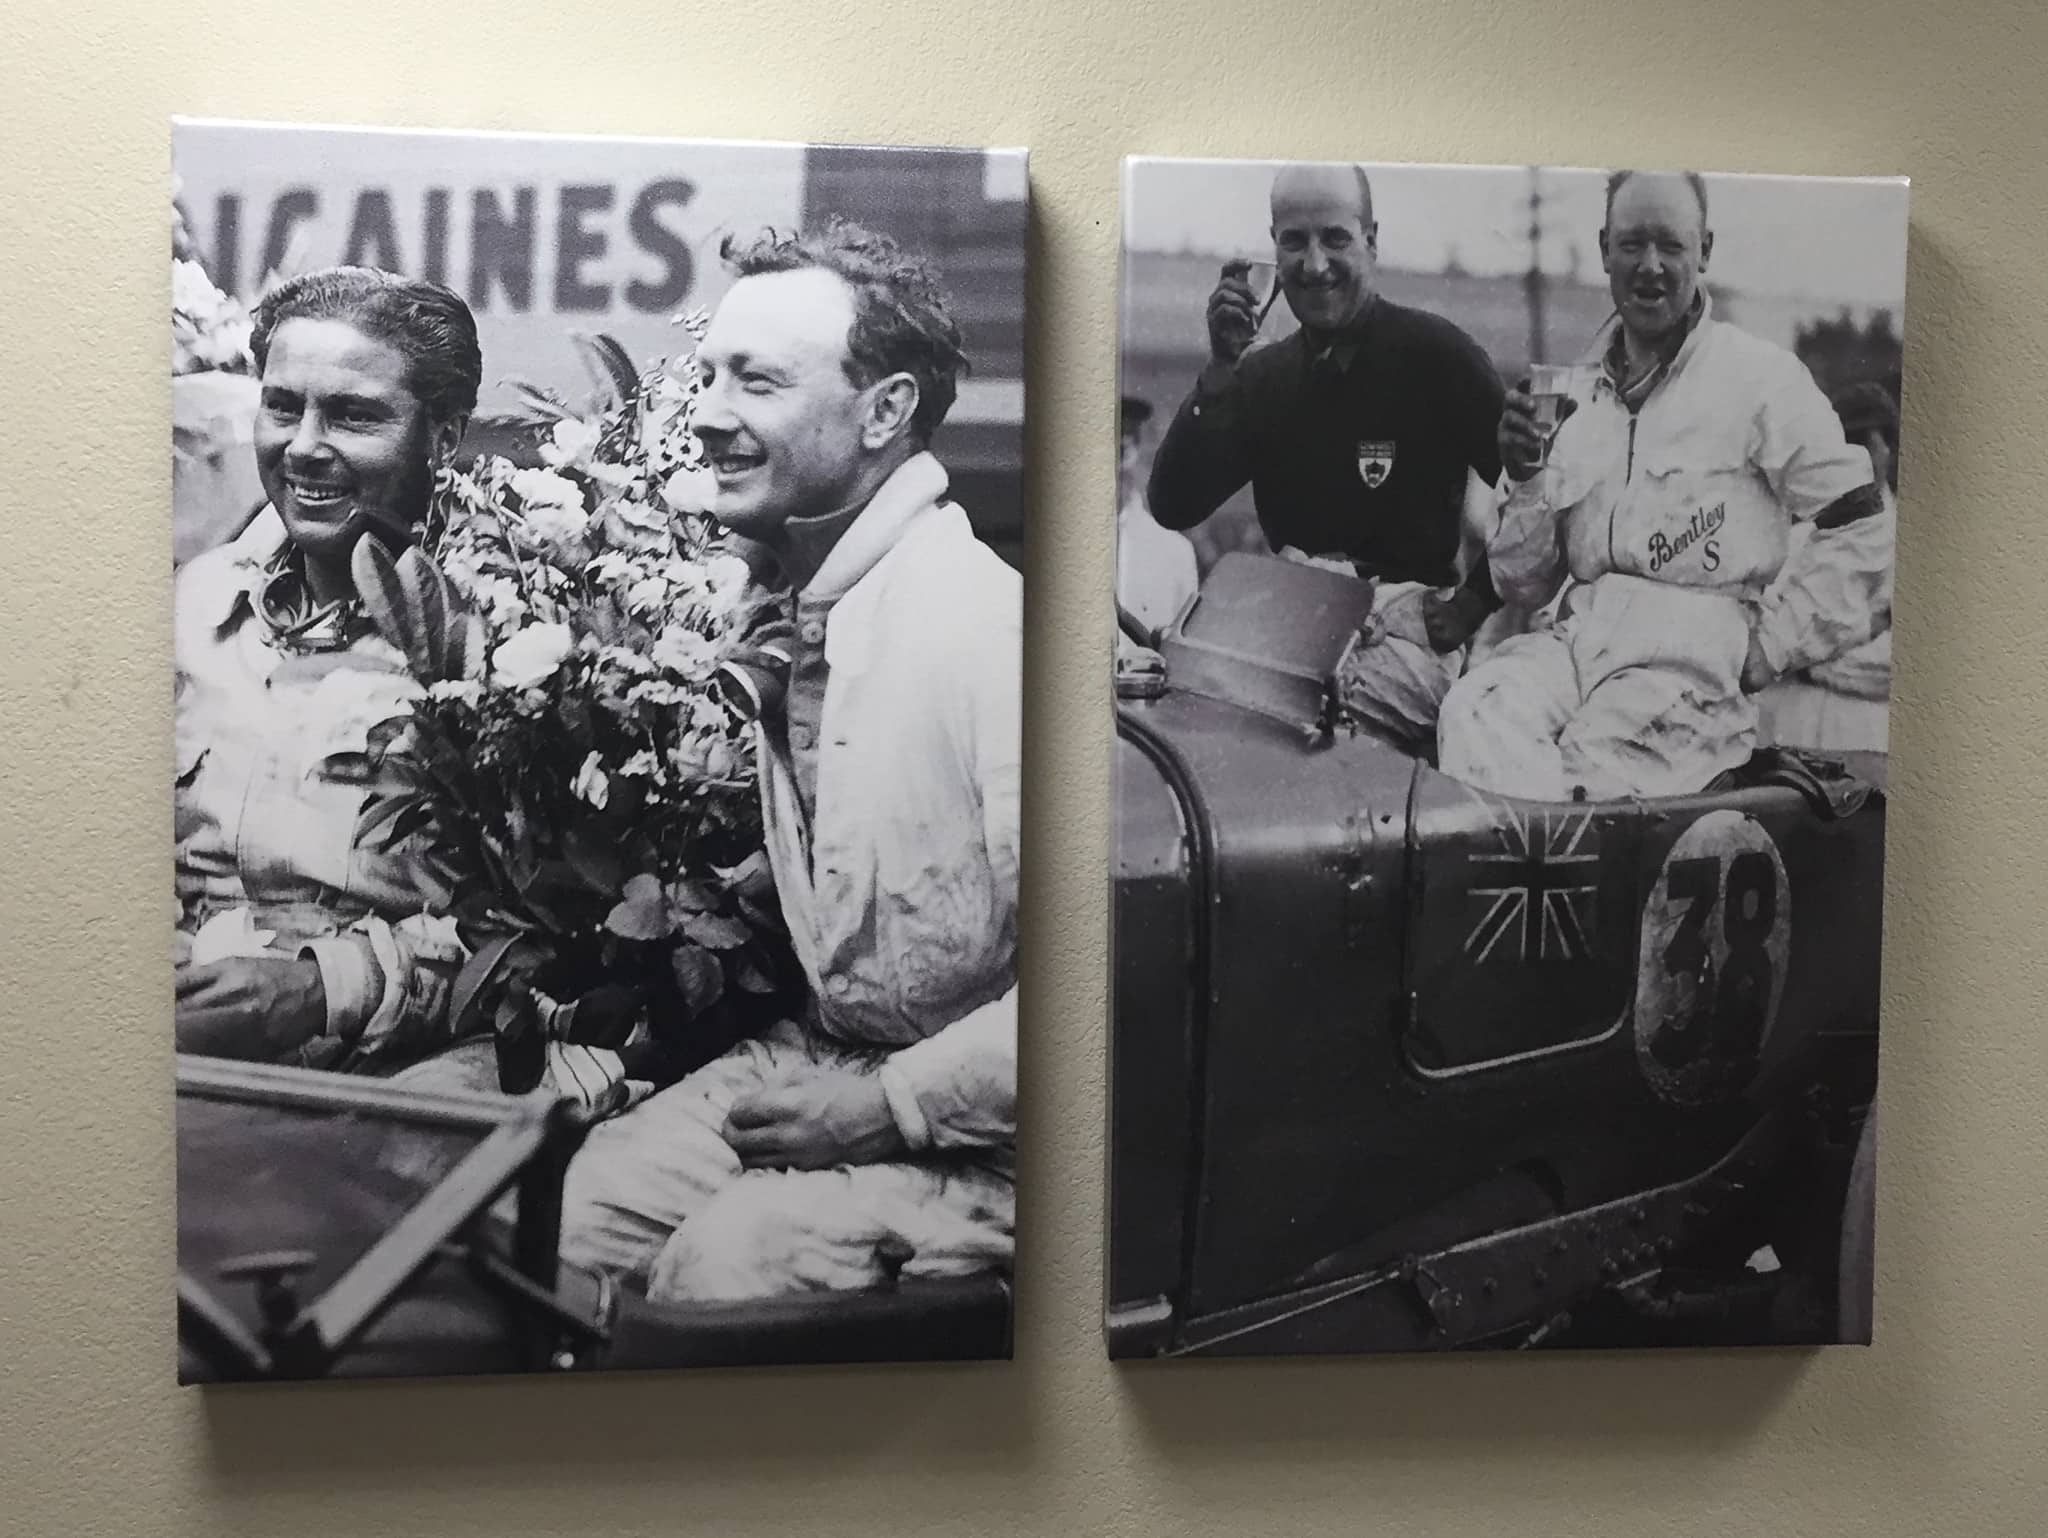
Like I said, not every single photo you take should be printed, let alone as a large format canvas.
But why not go big with the photos you most adore? The CanvasHQ team can help you determine the best size, the best finish, image effects, the frame depth, and more. That’s true whether you have a black and white or color image to print.
If you want to bring out the best in your black and white photos, give these tips a try, perfect the shot in post-processing, and have it printed so you can enjoy your hard work for years and years to come.
Learn More:
We Recommend
5 Essential Tips for Black and White Portrait Photography
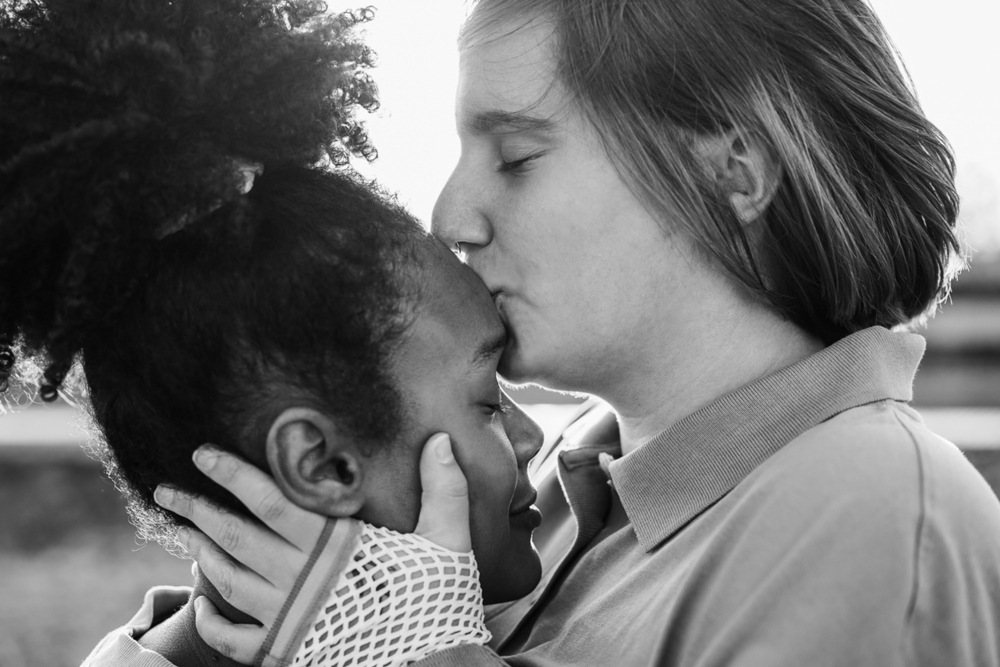
Photo by DisobeyArt via iStock
If you are a portrait photographer looking to spice up your portfolio, have you considered experimenting with black and white portrait photography? It’s a creative form of photography that has witnessed a rapid resurgence in popularity over the last few years thanks to its unique and beautiful look.
In this article, we’ll share five essential black and white photography tips that will help improve your results. They cover topics ranging from when it’s better to shoot photos without color and the importance of composition and lighting to partnering with a company that delivers high-quality black and white prints.
Keep reading to discover how you can enhance the quality of your black and white photography in five simple steps!
Check out the video above by John Gress to learn the six secrets to black and white portrait photography.
Jamie Windsor for more composition tips that will help you take better photos.
Table of Contents
- When is Black and White Portrait Photography Preferred Over Color?
- Black and White Portrait Photography Should Have a Simple Composition
- Prioritize High-Quality Lighting for Black and White Portrait Photography
- Let the Subject's Emotional Expression Be the Highlight of the Portrait
- A High-Quality Print Brings It All Together for Black and White Portrait Photography
- Recommended Photography Gear
When is Black and White Portrait Photography Preferred Over Color?

Photo by Sauce Reques via iStock
People usually choose black and white portrait photography over color portraits for one of three reasons. The first is that they want to create a specific old-school look. Black and white photography was the industry standard for over 100 years before the first color film was invented, and shooting in black and white is a great way to channel the spirit of the past.
Another time people prefer black and white portraits over those with color is when they want to highlight or accentuate certain features. Black and white images have greater contrast, making them more visually appealing to viewers in some circumstances.
Lastly, photographers use black and white portrait photography to “fix” photos that don’t look like they wanted. Anyone with photo editing software (like Adobe Lightroom) can easily transform their photos from color to black and white in a second with the push of a button. We recommend playing around with this if you’ve never done it before. The results can shock you!
Black and White Portrait Photography Should Have a Simple Composition

Photo by Georgeijevic via iStock
Black and white portrait photography is well-regarded because of its simplicity, so try not to overcomplicate the composition of your pictures. In short, the simpler your composition is, the better. There are three things to focus on regarding black and white photography composition: negative space, tonal contrast, and texture.
Negative space is excellent for drawing attention to and highlighting your subjects when used correctly. Moreover, you can manipulate tonal contrast by changing the background and clothes of your models. Textures of skin, backgrounds, and clothes can also greatly affect how you decide to compose your frames.
Learn More:
- A Step-by-Step Metal Print Guide: 5 Tips for a Beautiful Print
- Color Photography: How to Maximize the Impact of Colors in Your Photos
Prioritize High-Quality Lighting for Black and White Portrait Photography
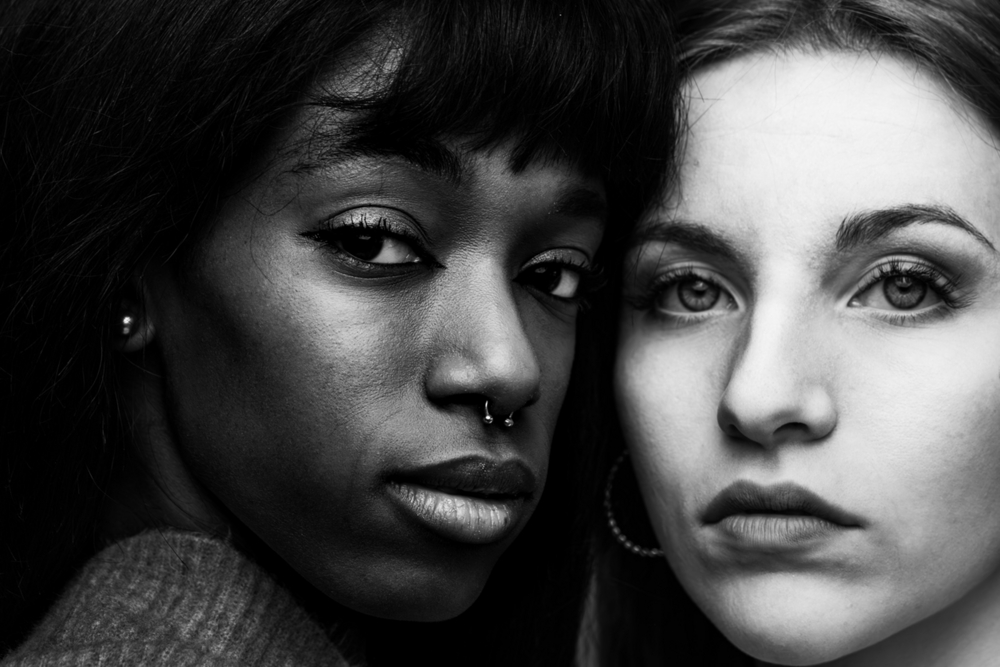
Photo by sruilk via iStock
Like all photography, nothing is more important than light in black and white portrait photography. That’s why prioritizing high-quality light is critical when shooting black and white pictures. That won’t change whether you are working with natural or artificial light sources.
One thing you really want to master is how to control shadows. Depending on how you use them, they can either be your best friend or your biggest enemy. Front lighting is ideal for eliminating shadows (especially on the face), while backlighting can create stunning silhouettes in your portraits.
Let the Subject's Emotional Expression Be the Highlight of the Portrait
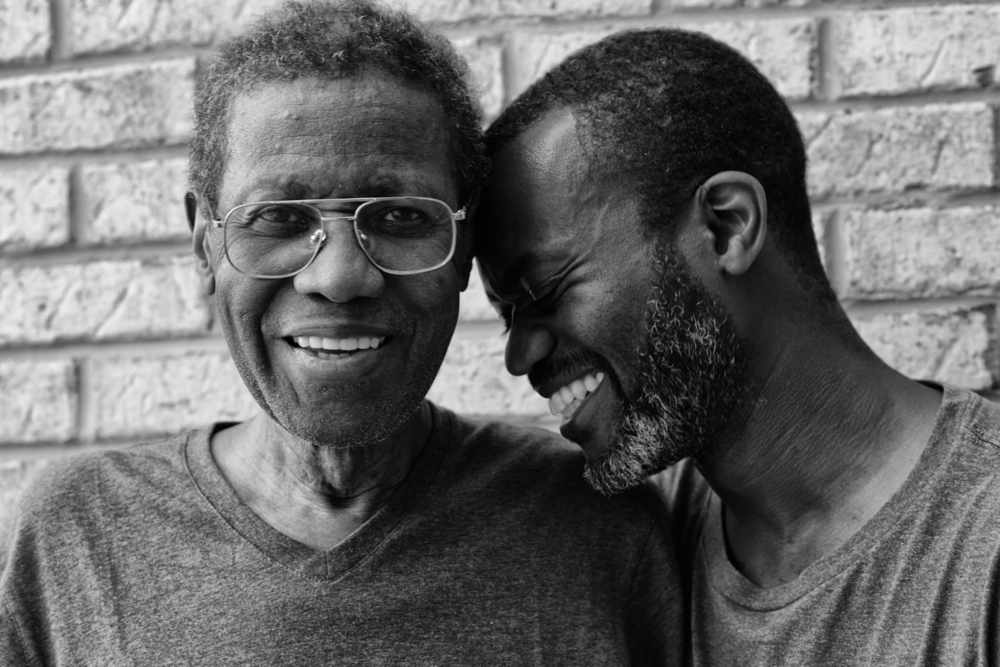
Photo by Gerville via iStock
Without the instant attraction of bold and vibrant colors in black and white portrait photography, you must rely on something else to grab people’s attention—enter emotional expressions! Facial expressions make all the difference in black and white photography and can help turn a bland photo into an award-winning masterpiece.
This rings true in both group and individual portraits. That said, it’s even more important in individual portraits since they are the sole focus of the picture. One crucial tip is to always try and capture natural, genuine emotions. The audience can usually tell if they are forced, which lessens a photo's visual impact.
A High-Quality Print Brings It All Together for Black and White Portrait Photography
Black and white portrait photography looks OK on screens, but we recommend printing your images to make them truly shine. Paper, canvas, and acrylic are all solid mediums for black and white photos, but in our experience, they look best when printed on metal. That’s because metal prints naturally add definition and contrast to images.
Where can you buy a high-quality metal print? We have ordered them from many different printers over the years, and our favorite place is unquestionably Shiny Prints. Not only is the quality of their products amazing, but their prices are super affordable, too!
What makes them stand out compared to other printing companies is that Shiny Prints only makes metal prints. This specialization allows them to invest 100% of their time and money into delivering the best metal prints on the market. Additionally, they offer outdoor metal prints and allow you to customize your print's surface, mount, and shape/size.
Recommended Photography Gear
Disclaimer: A quick heads-up: If you snag something through our affiliate links or check out our sponsored content, we might earn a commission at no extra cost to you. But fear not, we're all about recommending stuff we're truly stoked about!
Learn More:
- Golden Hour Photography: Capturing the Magic of Natural Light
- How to Become a Photographer Without a Degree
We Recommend
8 Incredible Black and White Portraits to Inspire Your Work
Despite all the millions of colors that today’s cameras can capture, there’s still something to be said about the appeal of a black and white portrait. Strip everything else away, and a black and white image is just pure emotion, with your viewer mesmerized by a subject that has no distractions.
Whether it’s composition, lighting, capturing emotion, or any number of other factors, black and white portraits have the power to mesmerize when done properly.
We’ve assembled a small collection of eight black and white portraits that are excellent examples of just what a black and white treatment can do for a portrait. Have a look, and be inspired!
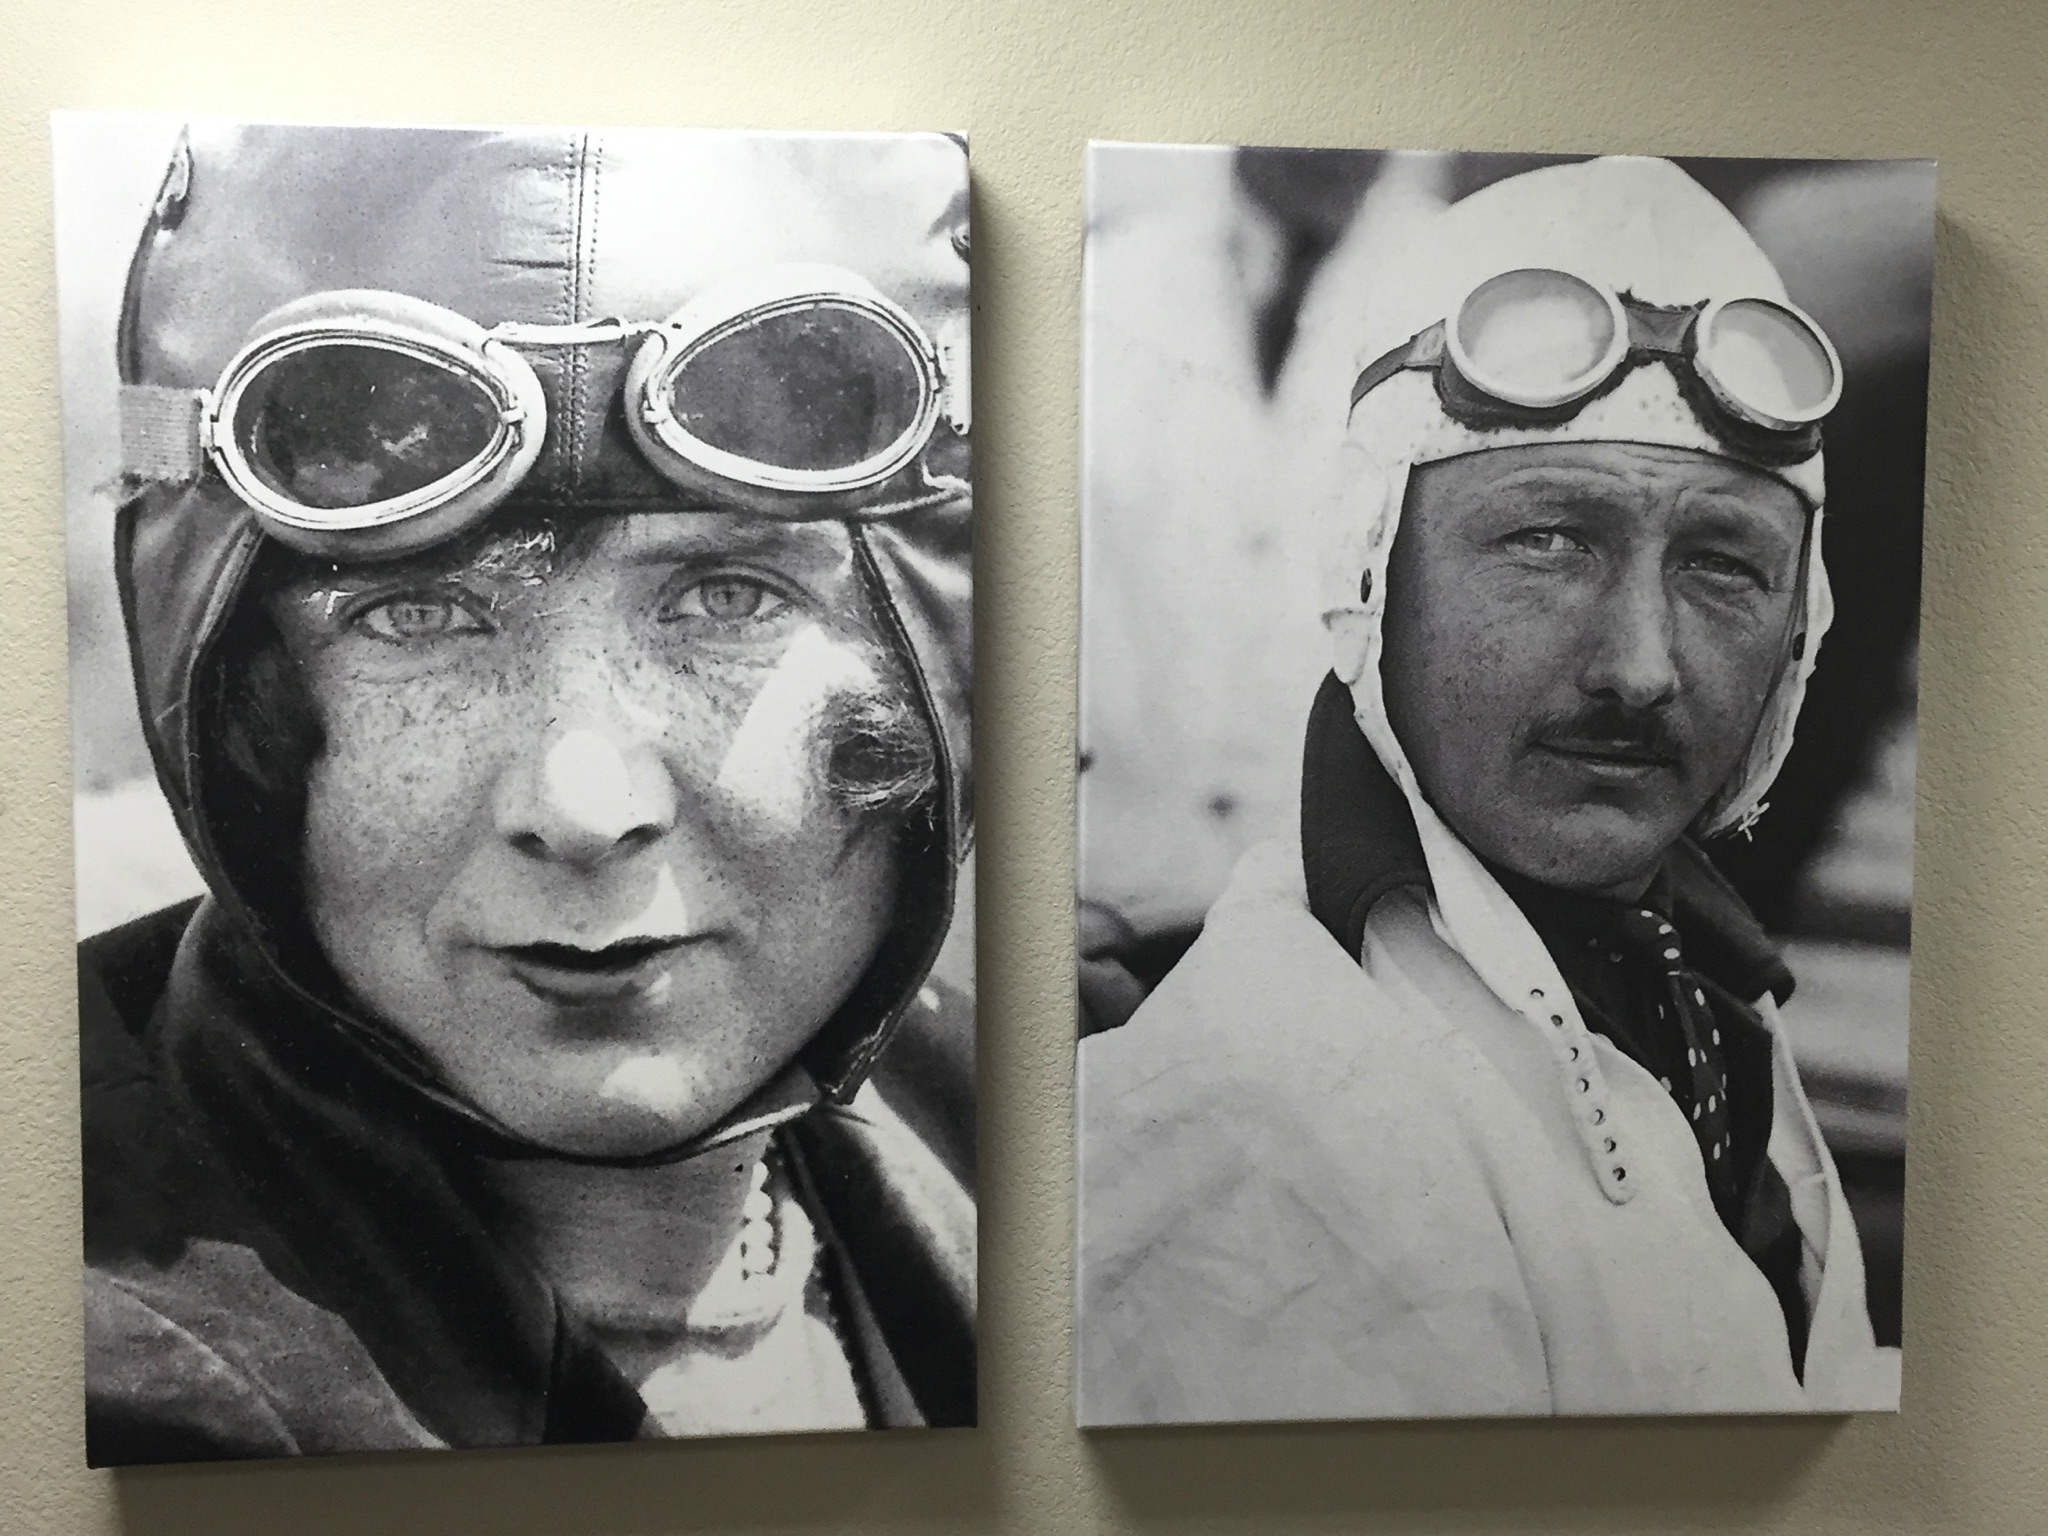
The Eyes Have It
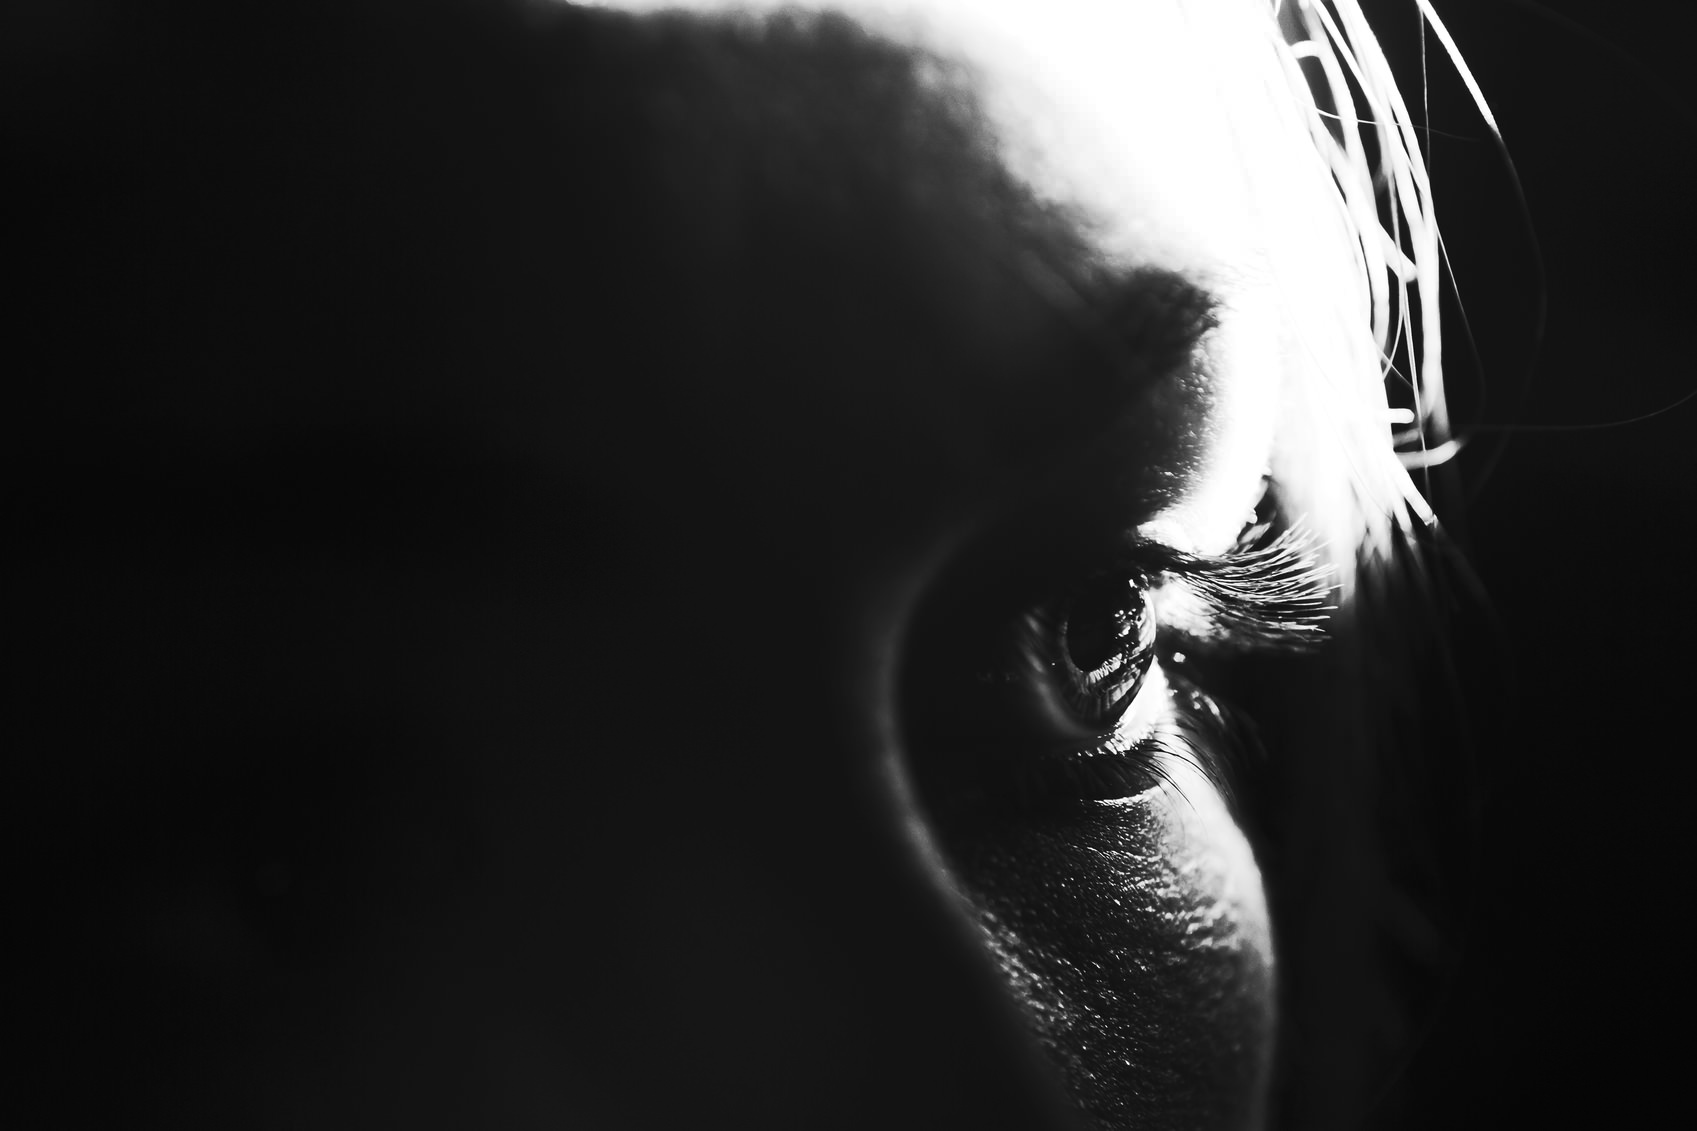
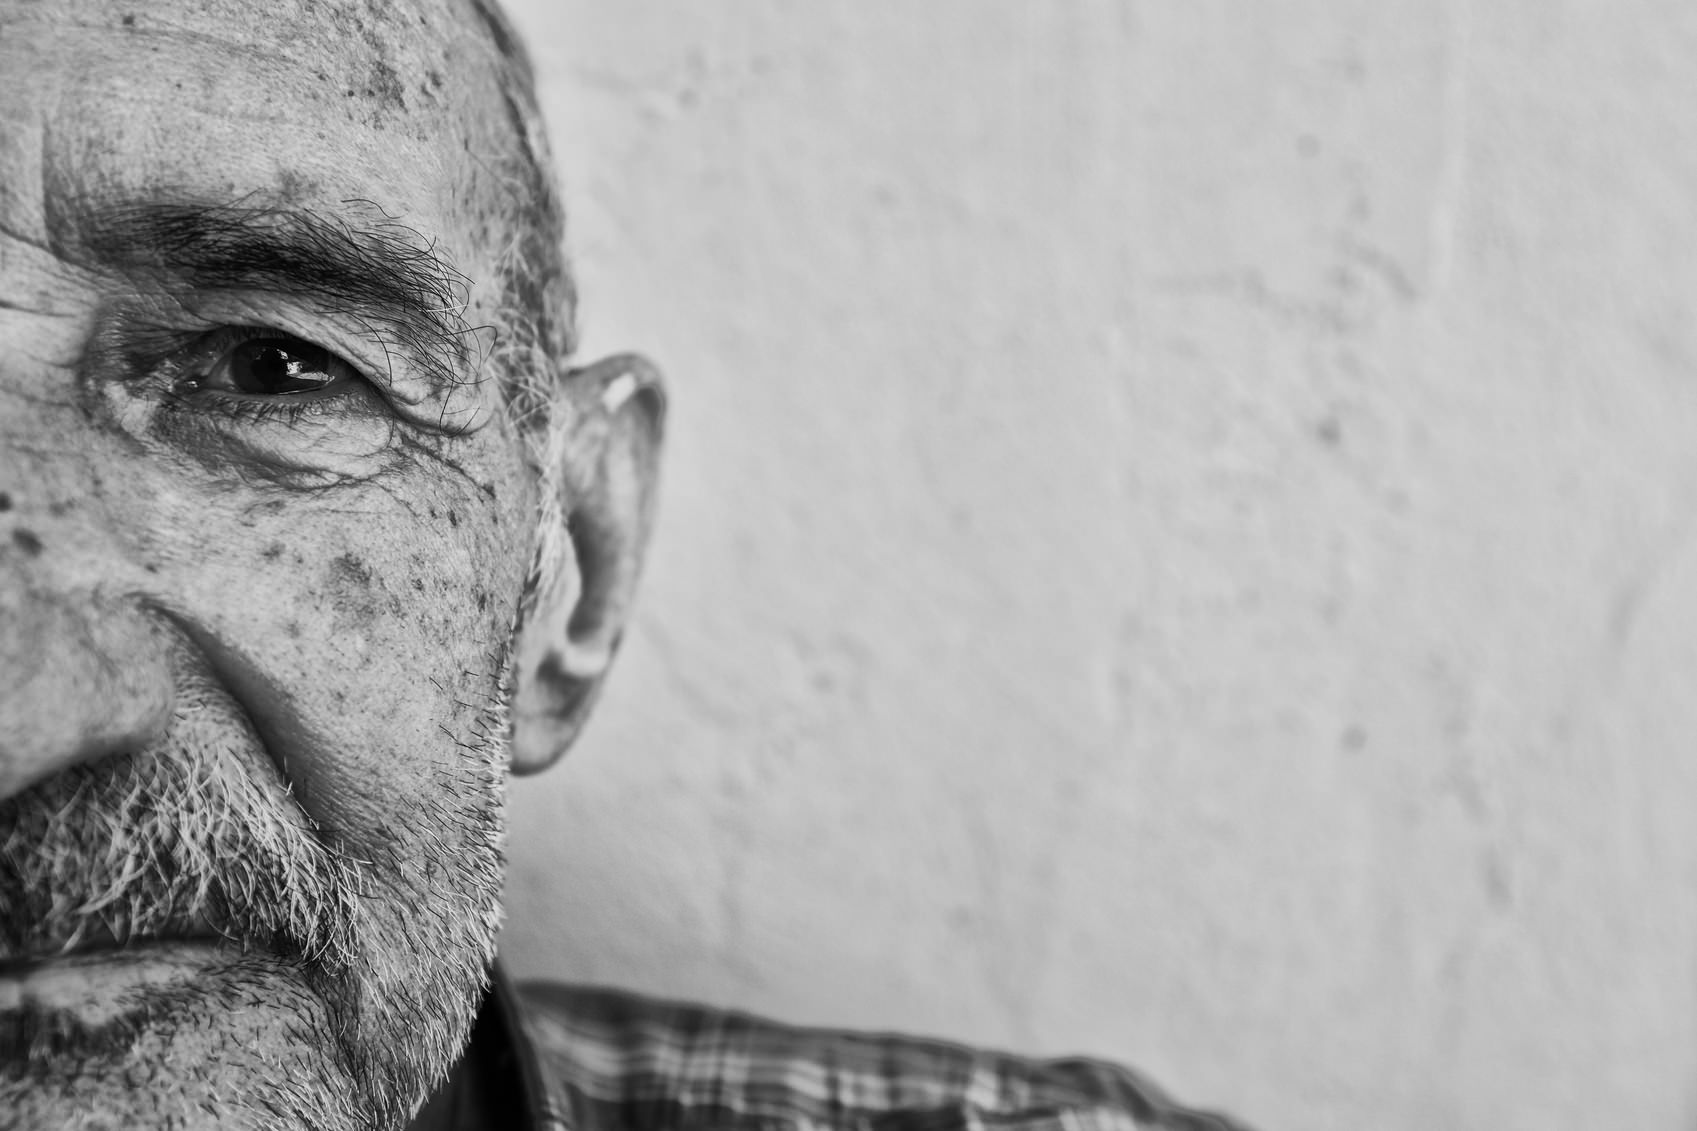
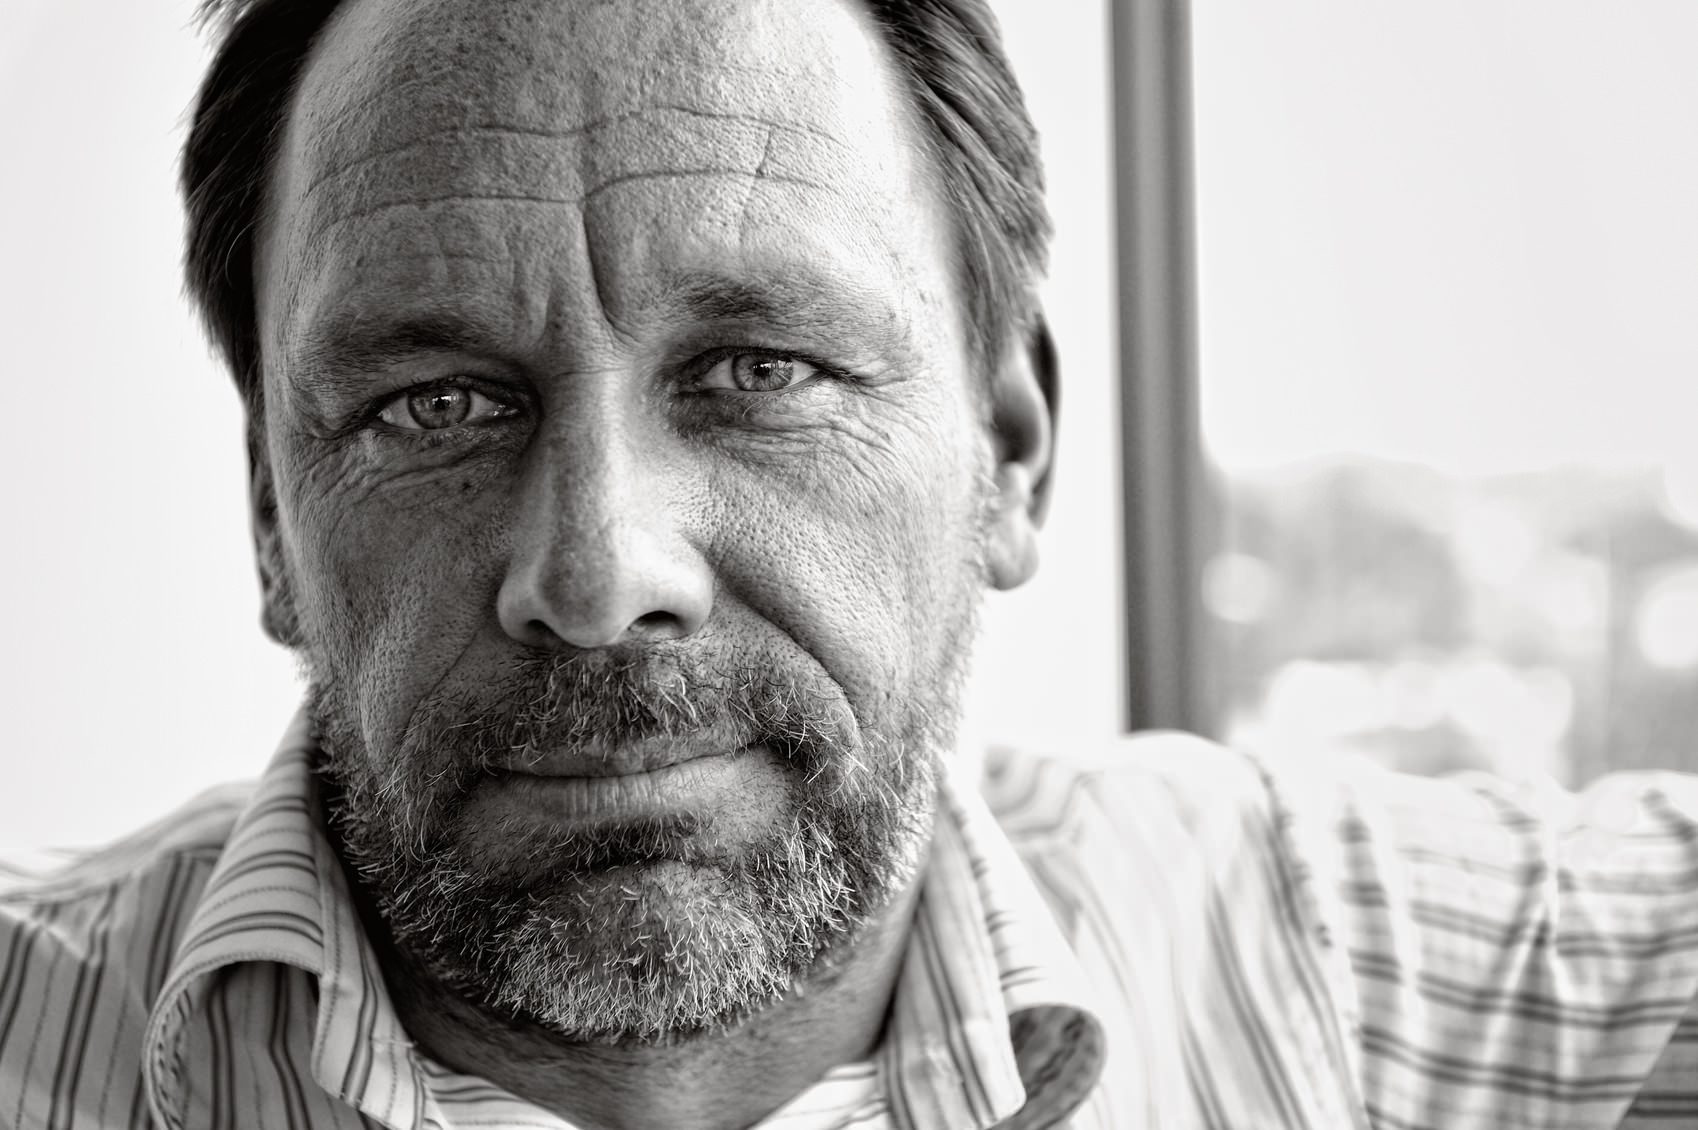
Most portraits benefit from having their focus on the subject’s eyes, but doing so is even more important when creating a black and white image. With a lack of color, black and white portraits often take on a very graphic vibe, with a collection of white, black, and gray shapes.

To help grab the viewer’s attention, highlight your subject’s eyes. The eyes are immediately recognizable and will give the viewer a leaping point from which to inspect the rest of the portrait. You can highlight the eyes in various ways: Use makeup to enhance the size of the eye, frame a close-up to give viewers an in-depth view, or use a nondescript background to simplify the scene, thus drawing more attention to your subject’s face. These are but a few strategies that will help you play up the importance of the eyes.
Play With Light
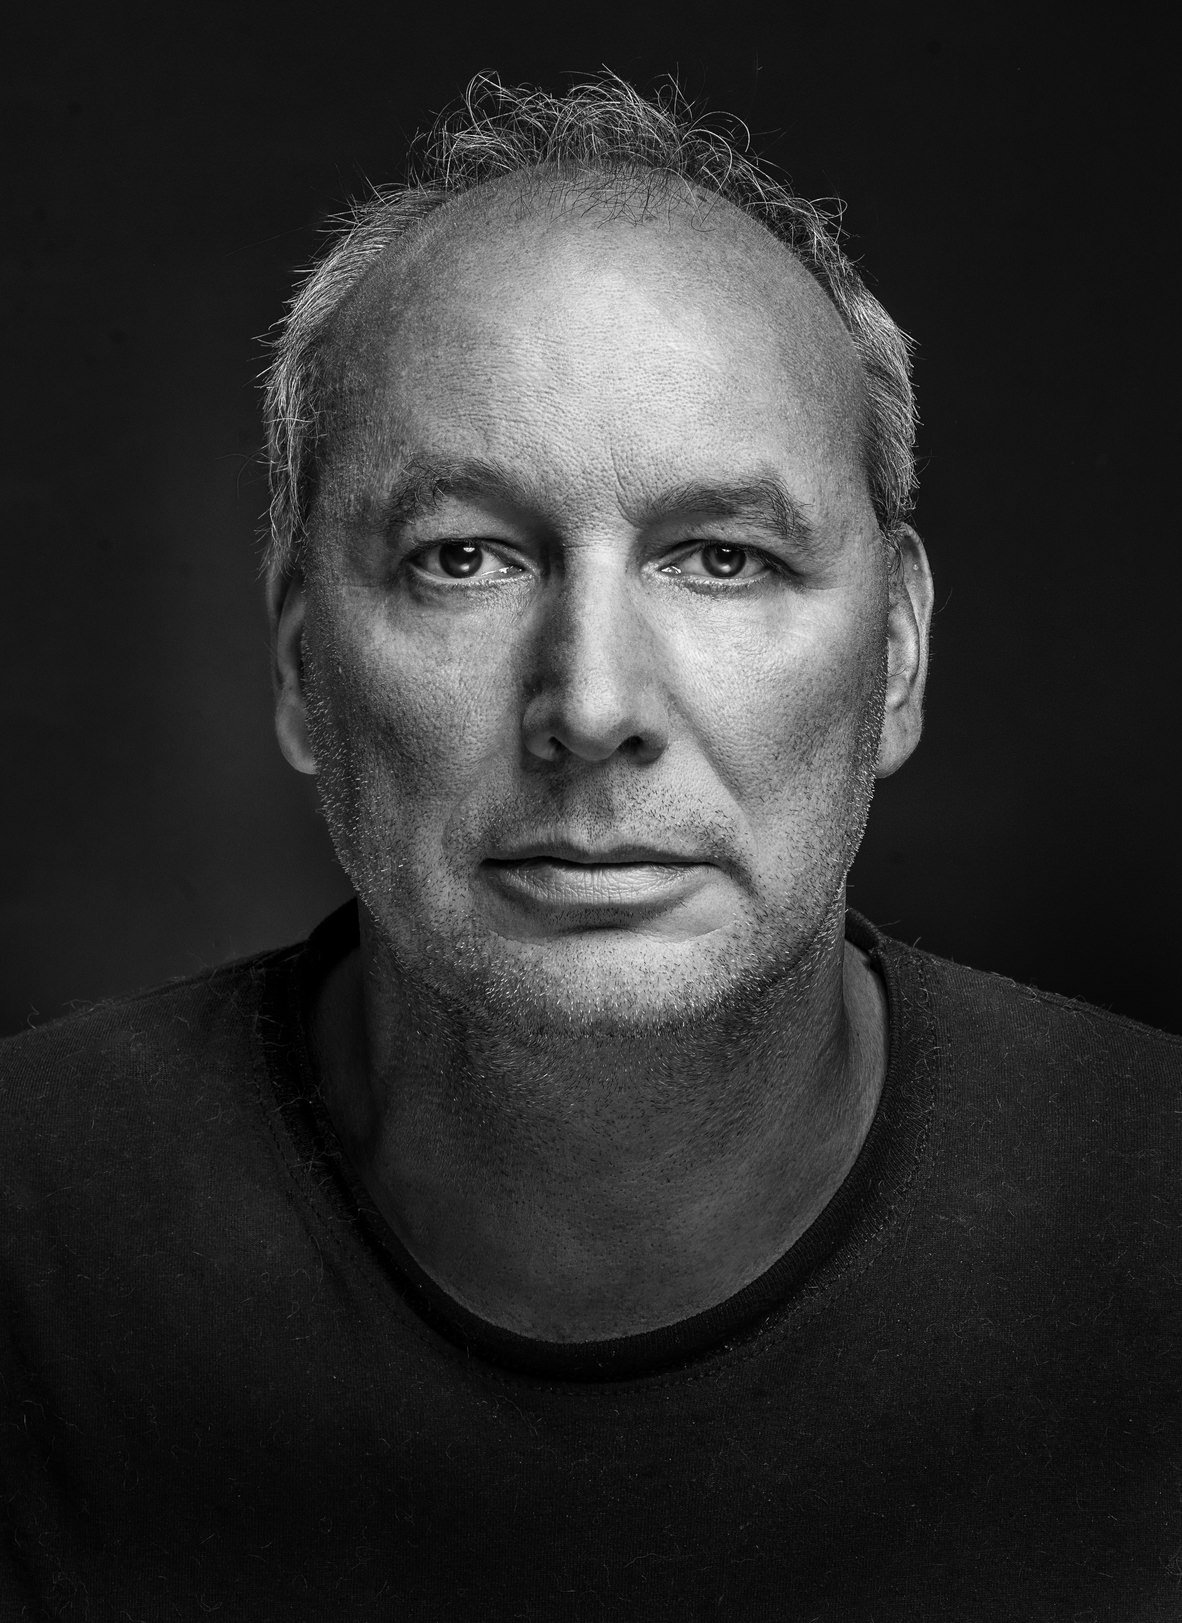
As with color portraiture, there is an abundance of options when it comes to lighting for your black and white portraits. You can take a soft lighting approach to create a low-key portrait that’s easy on the eyes, like the one above. Notice the absence of harsh shadowing and the prevalence of mid-range tones in the man’s face that create a soft look.
Alternatively, use harsh lighting to create a high-key look, one with significant contrast and strong edges that is reminiscent of graphic design. This look is much more jarring to viewers because of the deep areas of shadow interrupted by the bright highlights on the subject’s face.
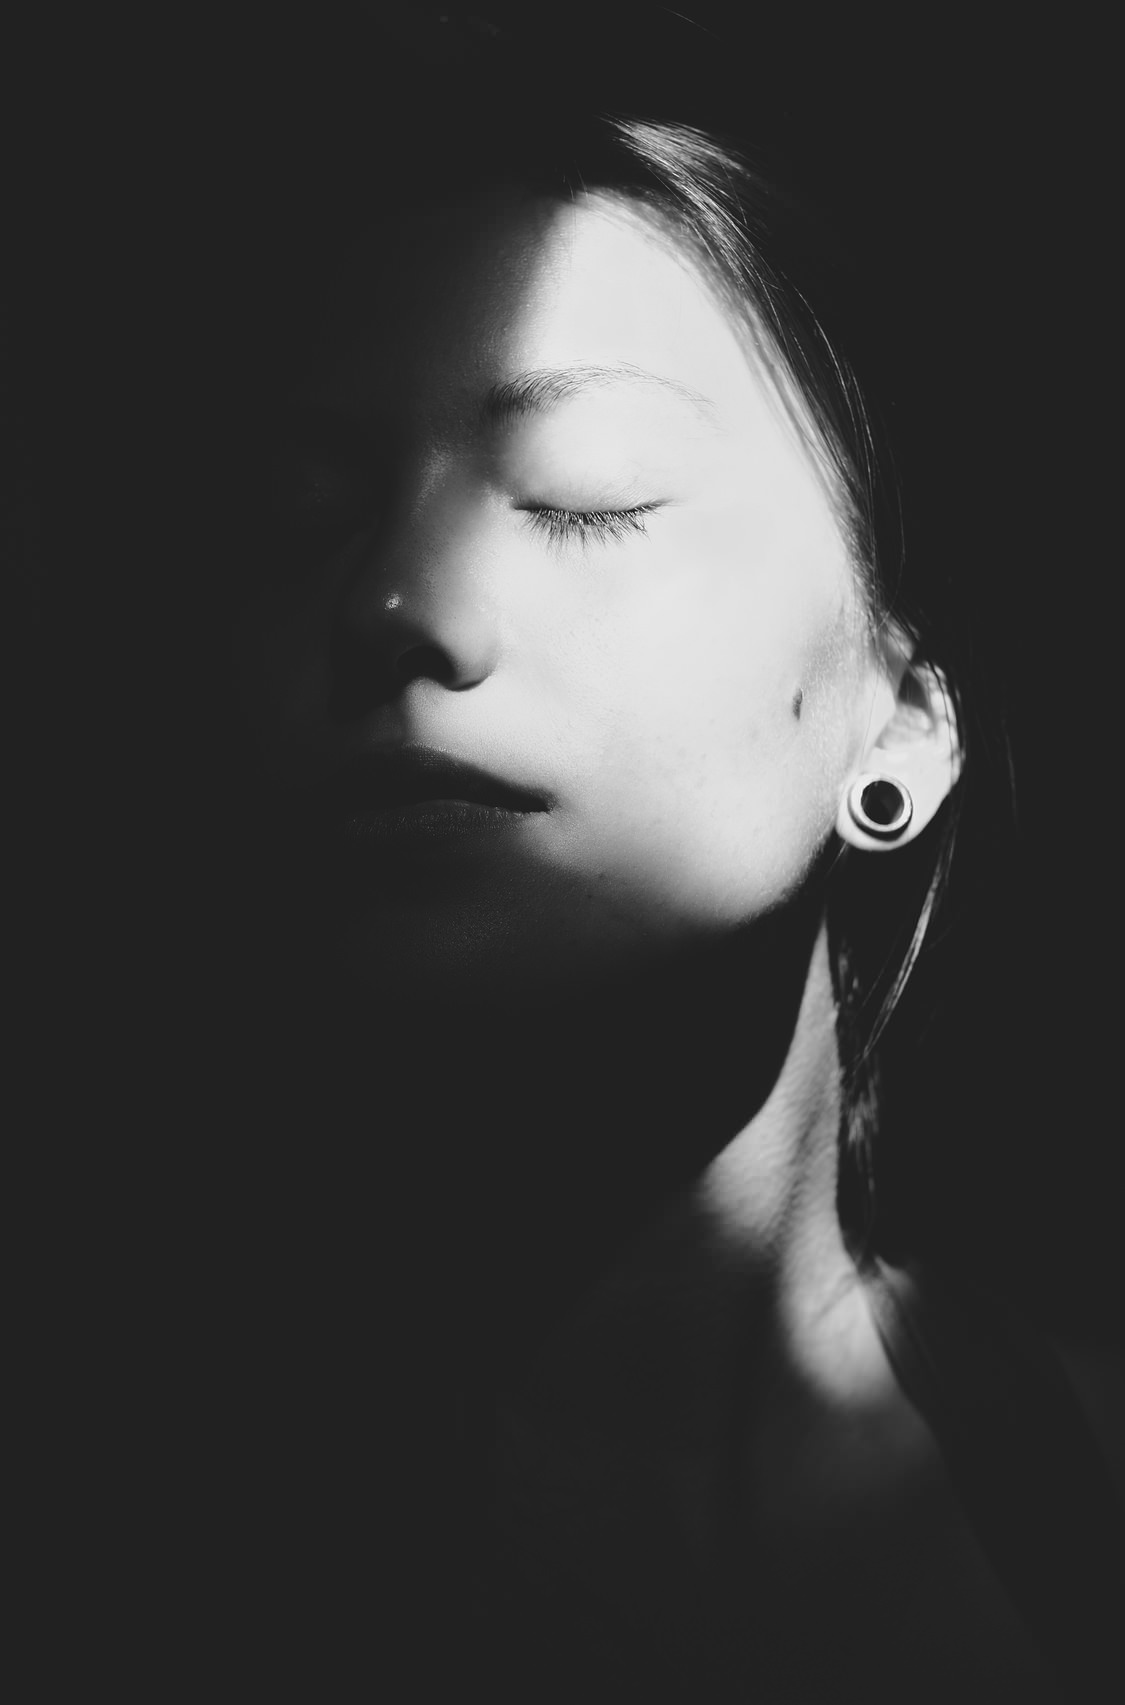
Go For Emotion

Having been stripped of color, black and white portraits bring far more attention to your subject’s face. As a result, there are times when it’s much easier to convey emotion in a black and white portrait versus a color portrait. In the example above, viewers can’t help but immediately connect with the little boy that’s not having a very good time. Had this image been created in color, the impact of his tantrum would be lost a little bit amongst everything else that is going on in the photo.
Even the smallest change in the subject’s facial expression will be noticeable without the distraction of color, making it easier for you to capture a highly emotive moment, one with which viewers will more easily connect. The woman in the image above appears somewhat pensive, but with a tiny change in her expression, a turn of her lips upward, for example, the image might take on a completely different look, one that is much happier in tone.
Frame for Impact
Taking color out of the equation makes for a simpler, cleaner portrait. You can emphasize that feeling by making smart decisions regarding your framing as well. In many cases, you’ll want to adhere to rules of composition, like the rule of thirds. But with black and white portraits, you can push the boundaries a little bit and experiment with placement that adds to the impact of the image, as was done above.
Play with negative space. Push your subject to the very edges of the frame. Even try positioning your subject in the dead middle of the frame. The key is to experiment and explore how framing can punch up the drama in your portrait.
Final Thoughts
When it comes down to it, black and white portraits, are, in a way, more raw than their color counterparts. That’s not to say that color portraits can’t be stunning because they most definitely can. But with more attention drawn to the eyes and the raw emotions of subjects, and the ability to use light and framing to play up those features, black and white portraits can be a goldmine for creating something that truly connects with viewers. Use the images above as inspiration and see what you can create!
We Recommend
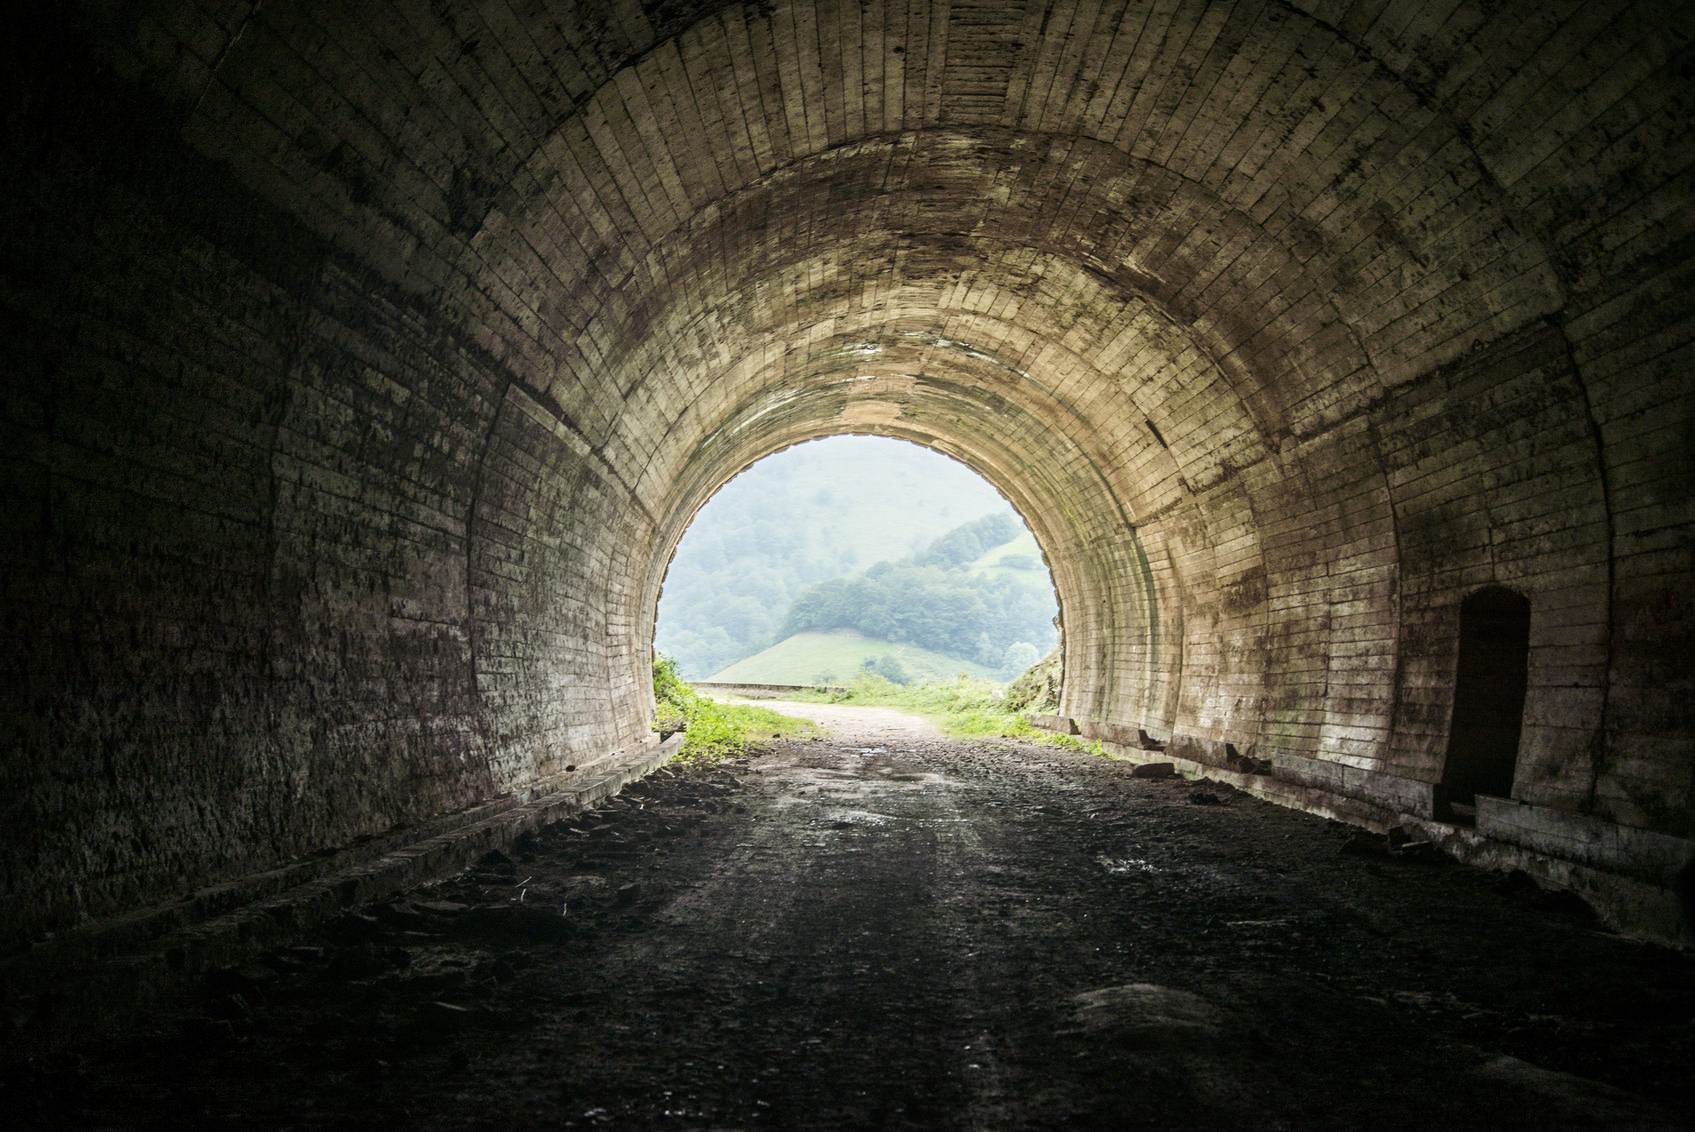
A Beginner’s Guide to Using Framing
Framing your shot in this context refers not to placing your final image in a literal frame, but instead refers to the compositional technique in which you use an object - natural or manmade - within the image to draw attention to your primary subject.
Framing is a technique used in all aspects of photography, from portraits to landscapes and everything in between. It is effective for a wide variety of reasons, and can be used to give your image added pop and depth, while signifying the importance of your focal point as well.
Using framing is quite simple too. For starters, just about anything can be used as a frame - a tree branch, the entrance to a tunnel, doorways, fabric, or even areas of shadow. Secondly, using framing doesn’t require you to be precise - the frame might only extend across one or two sides of your shot, but even so, will still serve to direct the viewer’s attention where you want it. Lastly, your frame might be in focus or it might not - that decision is left completely up to you.
As you can see, framing isn’t so much about being precise and technical as it is about using it to your advantage to create a more dynamic image. There are many benefits to framing your images as well.
Frames Create Depth
By utilizing the framing technique, you instantly create depth in the image. A foreground frame, like the one pictured above, sets the stage for the viewer’s eye to travel deeper into the shot. By including elements in the image at different distances from the lens, the eye has multiple points of interest to which it can travel. The result is an image that has a three-dimensional feel to it, even though it’s only two-dimensions.
Frames Direct the Eye
As noted above, the inclusion of a frame in your image more purposefully directs the viewer’s eye to the focal point or primary subject of the photo. Shape has something to do with this - the curvature of a tunnel or cave, for example, might be more effective in drawing the viewer’s eye toward the primary subject than a simple tree branch framing the top of the photo. Nonetheless, any frame that you use will allow you to create a barrier between the center of the photo and the edges of the image, which tends to help viewers engage with the image in a deeper, more meaningful way.
Frames Provide Context

The form your frame takes also gives you an opportunity to provide more context to the shot you create. For example, if your frame is the branches of a tree that has bright, autumn leaves on it, the viewer is clued into the time of year the photo was taken. Likewise, if you use people as the frame, the viewer better understands the primary subject’s place in the context of the gathering of people. In the image above, the frame draws attention to the child’s face, but also let’s us know that the child is playing on a playground. Having that extra bit of context gives your image greater impact because viewers have a better understanding of what is going on in the photo.
Frames Create Mystery

Certainly, frames help provide context to a situation that gives the image more meaning. But other times, frames can be used to mask what’s happening in the scene, creating a greater sense of mystery and intrigue. What goes on behind the frame can be just as interesting as what you’re able to see. In the image above, one can’t help but wonder where this woman is and what she’s looking at beyond the wall.
Creating some mystery gives viewers the opportunity to ponder and to question, both of which induces them to spend more time inspecting the photo and engaging with it. And in the end, isn’t that what we want to happen? Frames facilitate that, and as we’ve noted above, they can do much more as well.
We Recommend
A Step-by-Step Guide to Mastering Minimalist Photography
Ask ten people what minimalism means to them, and you’re likely to get ten different answers. It’s a difficult concept to define because minimalism means different things to different people. And when minimalism is combined with an artform like photography, you have an even broader spectrum of what the two mean.
Nevertheless, there are common features to minimalism that transcend most definitions. Simplicity. Use of negative space. Highlighting color or texture. Simple backgrounds. Using these elements will get you well on your way to creating a stunning minimalist photograph.
Let’s explore each element in more detail.
Embrace Simplicity

For many photographers, simplicity translates into boring. That assessment is not exactly fair, however. If you include a strong subject, even if that subject doesn’t occupy much of the frame, you instantly make the image more interesting while maintaining its simplicity.
The essential benefit of composing a simple shot is that you give the viewer more freedom to interpret your work. In this way, even though there isn’t much occupying the space in the frame, viewers still have an opportunity to deeply engage with the shot because so much of it is left to their interpretation. With more responsibility to discover the meaning of the image placed on the viewer, minimalism really does do more with less, and engages viewers on a deeper level.
Utilize Negative Space

A hallmark of minimalist photography is the appropriate use of negative space. Generally speaking, negative space is the area around and between subjects that is devoid of much detail. Without much detail to speak of, these areas then serve to enhance the importance of a subject. No matter the type of photography, be it a portrait, a landscape, a cityscape, or anything in between, the inclusion of negative space gives the viewer’s eye a chance to scan the image without becoming overwhelmed. Combined with the increased emphasis on the main subject, this creates a situation in which your image has a great deal of power and is very impactful, all without being overrun with visual details.
Emphasize Color and Texture

People who claim that minimalist photography is boring clearly don’t understand that part of minimalism is to embrace color and texture. Both features give great visual interest to a scene, yet by keeping things simple, such as using the same tones throughout, the image can remain minimalist while having a pop of color or texture that really grabs the attention of viewers.
This is especially powerful when there are multiple, small subjects in the frame. Using color to bring greater attention to each element is a handy trick. The same thing can be done with textures or even patterns. The key here is to use highly saturated colors or primary colors that are bright and vibrant. Better still, try using complimentary colors, like blue and orange, using one color as your negative space and the other color as your primary subject, as was done above.

Without all the distractions that other photos might have in the frame, you can get away with making bold choices related to colors and textures. In fact, you might even use multiple colors or textures to really pump up the interest in the shot. If you take this approach, be careful in terms of how much space is occupied by the colors and textures in the frame. Use each sparingly to stick with the spirit of the minimalist shot.
Stick With the Rule of Thirds (But Know When to Break the Rule)

Minimalist images can sometimes feel unbalanced because of the lack of subject matter. However, if you stick to the rule of thirds and place the areas of interest along its grid, the resulting image will have greater balance, and will therefore engage viewers in a more meaningful way.
Now, this doesn’t mean you have to place the primary subject exactly at one of the intersection point of the rule of thirds grid. Instead, use the rule of thirds as a guide for composing your shots while maintaining the freedom to throw the rule out the window when the situation is warranted.
Final Thoughts

Mastering minimalism is all about embracing its hallmark features and training your eye to find the vignettes that benefit from such simplicity. If you’ve never tried minimalism before, and even if you have and it didn’t go well, try focusing on the four steps outlined in this lesson to devise a more powerful, minimalist statement. You need not include each of these four elements in every image. In fact, that might be a bit overwhelming. Instead, get some practice incorporating each element into your photos, and with time, you will train your eye to see the many types of minimalist scenes you encounter in everyday life.
We Recommend
A Step-by-Step Guide to Regaining Your Inspiration
Creative ruts are the worst, but they always happen. If you’ve been carrying a camera for any length of time, you’ve undoubtedly found yourself completely uninspired by your surroundings. You might try to force the issue and go out and take photos in spite of your lack of creativity, but that might just push you deeper into the doldrums.
Instead, you need to find inspiration in new places, and doing so means that you need to expand your boundaries and remove some of the limits you’ve placed on yourself.
Let’s find out how to do that.
Step 1: Break Your Routine

We naturally like routine. It’s comfortable and familiar, and helps us stay on task and accomplish what needs to be accomplished in a given day.
The problem with routine, however, is that it can be an enemy to creativity. After awhile, the same commute to work each day, the same walk in the park at lunch, and visiting the same pond each evening as you walk the dog become less an opportunity to take interesting photos and more rote repetition of something that just needs to get done.
Breaking out of that routine might be all you need to jumpstart your creativity. Take a different route to work. Spend your lunch watching people on the street. Get up early and catch a sunrise. Take portraits of your friend’s kids. Just do something out of the ordinary and see how it might inspire you to do something different with your camera and lens.
Step 2: Get Uncomfortable

Closely related to the idea of breaking your routine is the concept of getting uncomfortable with your photography. It’s simple, really: if you traditionally take portraits, try landscapes for awhile; if you usually photograph landscapes, give wildlife photography a try; if you are most comfortable taking portraits of friends and family, head to the street and try photographing strangers.
You can also get uncomfortable by making alternative choices when it comes to gear and composition. Take portraits with a wide-angle lens or landscapes with a telephoto lens. Challenge yourself to hand hold your camera even when conditions might call for a tripod. Try using a slow shutter technique. Frame shots from unique perspectives, such as from up high or down low to the ground.
The point is that if you put yourself in uncomfortable situations, you’ll have to rely on your photography talents and know-how to make the most of those situations. By proxy, you’ll have to be creative in how you approach these situations, which might be just what you need to get your photography mojo back in order.
Step 3: Be Less Technical

Although photography is an artform, there are a lot of technical aspects to it as well. There are the mechanics of your camera and lens, the science behind exposure, and all the rules of composition that, when used together properly, can result in breathtaking images.
The problem is that if you focus too much on the technical side of things, and spend too much time worrying about whether or not you are doing things the “right” way, you can easily lose your creative touch. When faced with a dynamic scene, approaching it with the coldness of getting everything technically right might mean that you miss out on capturing the spontaneity or the emotion of the moment.
Being less technical doesn’t mean that you should purposefully head out and totally disregard all of the rules and suggestions of how to use your camera or compose a photo. Instead, give more credence to the power of being in the moment. Look for elements in the scene that grab your eye or elicit a response - for whatever reason - and snap away. Make minor adjustments as necessary, but focus more on the moment and less on things like, “Is my shutter speed right?”
Final Thoughts
The ebb and flow of creativity and inspiration is just a natural part of creating art. Some days you will be oozing inspiration and have trouble finding enough time to create all the photos you want to create. Other days, you won’t take a single photo that you like and find that you lack any inspiration at all. But simply breaking out of your routine, challenging yourself with new photographic pursuits, and focusing less on the technical aspects of photography and more on simply being in the moment are three easy ways to try to kickstart your creative juices. If you’re in a rut, give one (or all!) of these methods a try and see where they take you!
Recommended Reading

As noted in this lesson, creative ruts are just part of ebb and flow of photography. Though the recommendations we’ve outlined here are a good start for finding your inspiration again, a more in-depth reading to consider is The Creative Fight by Chris Orwig. In the book, Orwig discusses the difficulties of the creative process, and dives into easily implemented methods you can employ to be inspired, regain your creativity, and find meaning in the work you do once again.
The Creative Fight would be a solid addition to your library that you can reference over and over again to get back to the pinnacle of your creativity when inspiration seems to elude you. With chapter-based exercises designed to help you put concepts into action, The Creative Fight is the ideal tool for regaining your inspiration.
We Recommend
A Step-By-Step Guide to Using Lines

Lines are everywhere, from natural elements like the horizon line in a landscape shot to manmade elements like the stripes painted on the street to indicate a crosswalk. Lines take various forms too - vertical or horizontal, converging or diagonal - and each brings something a little bit different when included in a photograph.
Though they all have slightly different effects on an image’s composition, one thing is constant: lines improve the composition of just about any image. They help grab the viewer’s attention and direct their eye from one position in the image to another. In this tutorial, we will explore the different types of lines you can include in your photos and explain the ways in which each type of line can make your image better.
Vertical Lines
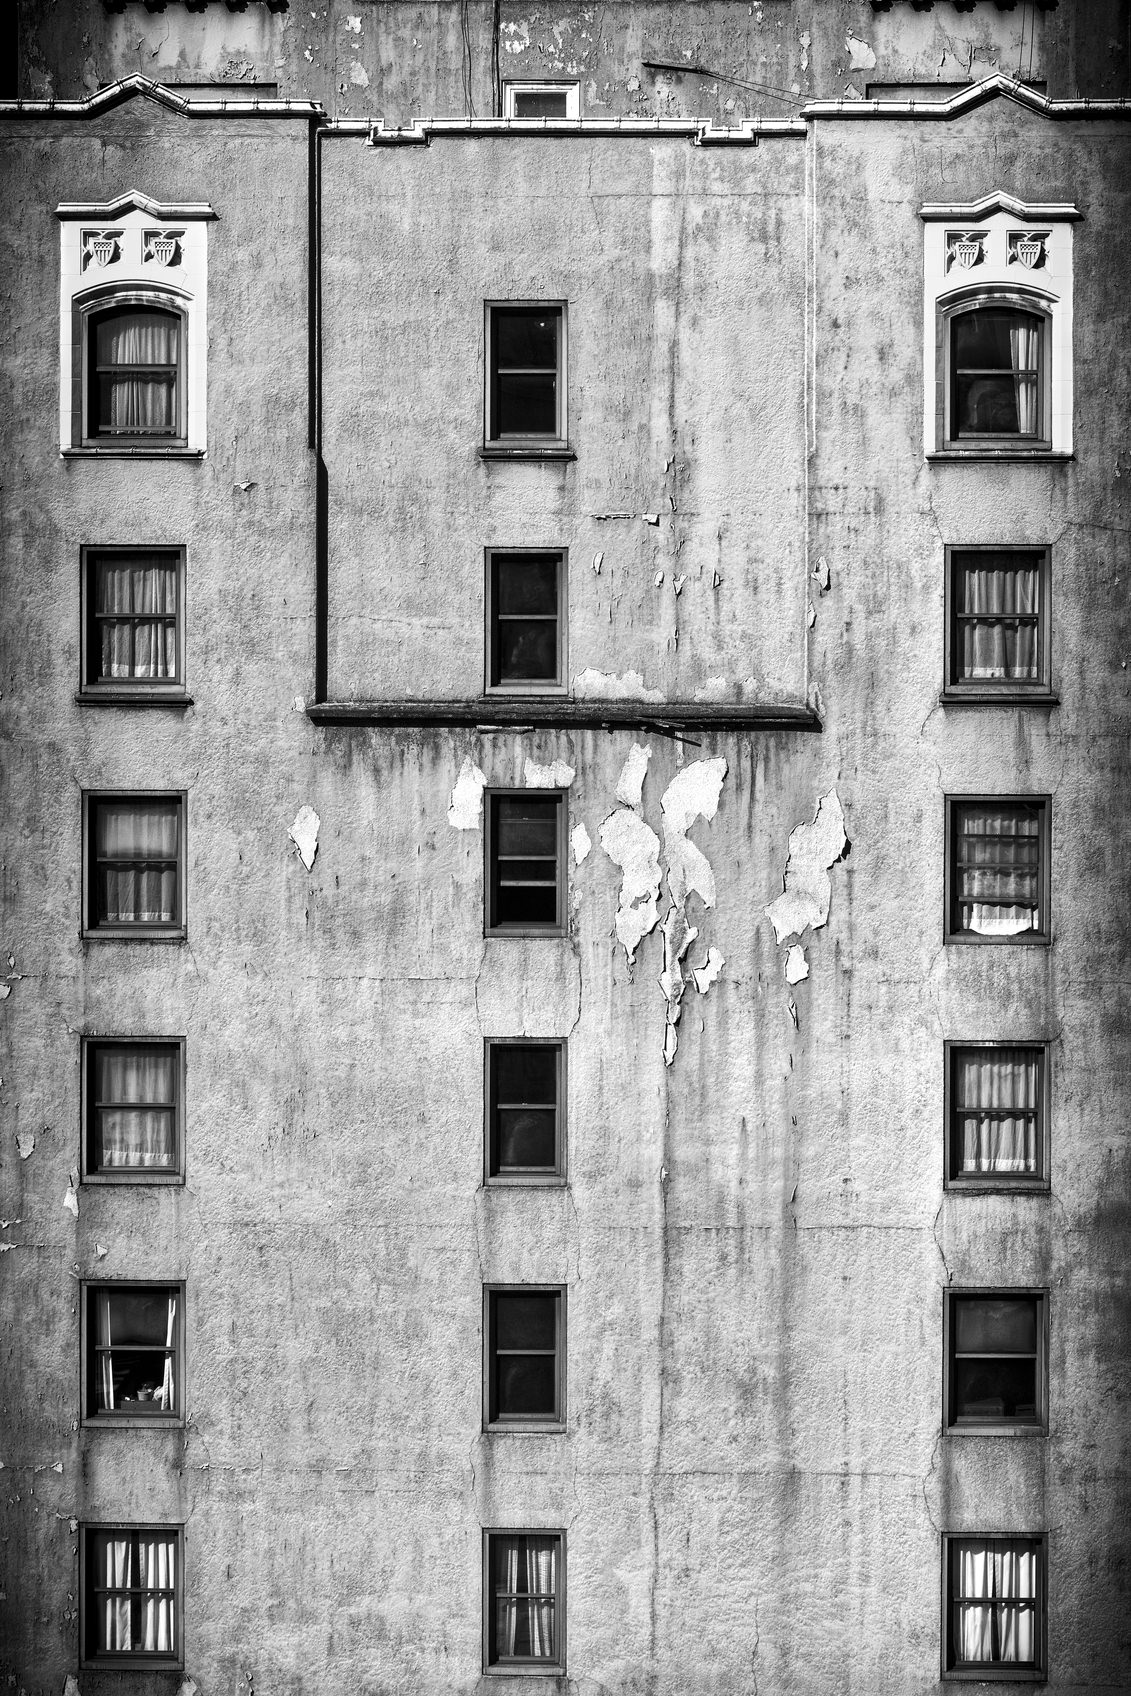
One of the primary benefits of vertical lines is that they help stretch the image and emphasize the height of your subject. This is ideal for cityscapes for obvious reasons. In the image above, the vertical lines created by the columns of windows accentuates the height of the building. It also helps create some visual tension: the orderliness of the lines of windows is in direct opposition to the crumbling, run-down look of the building’s facade.
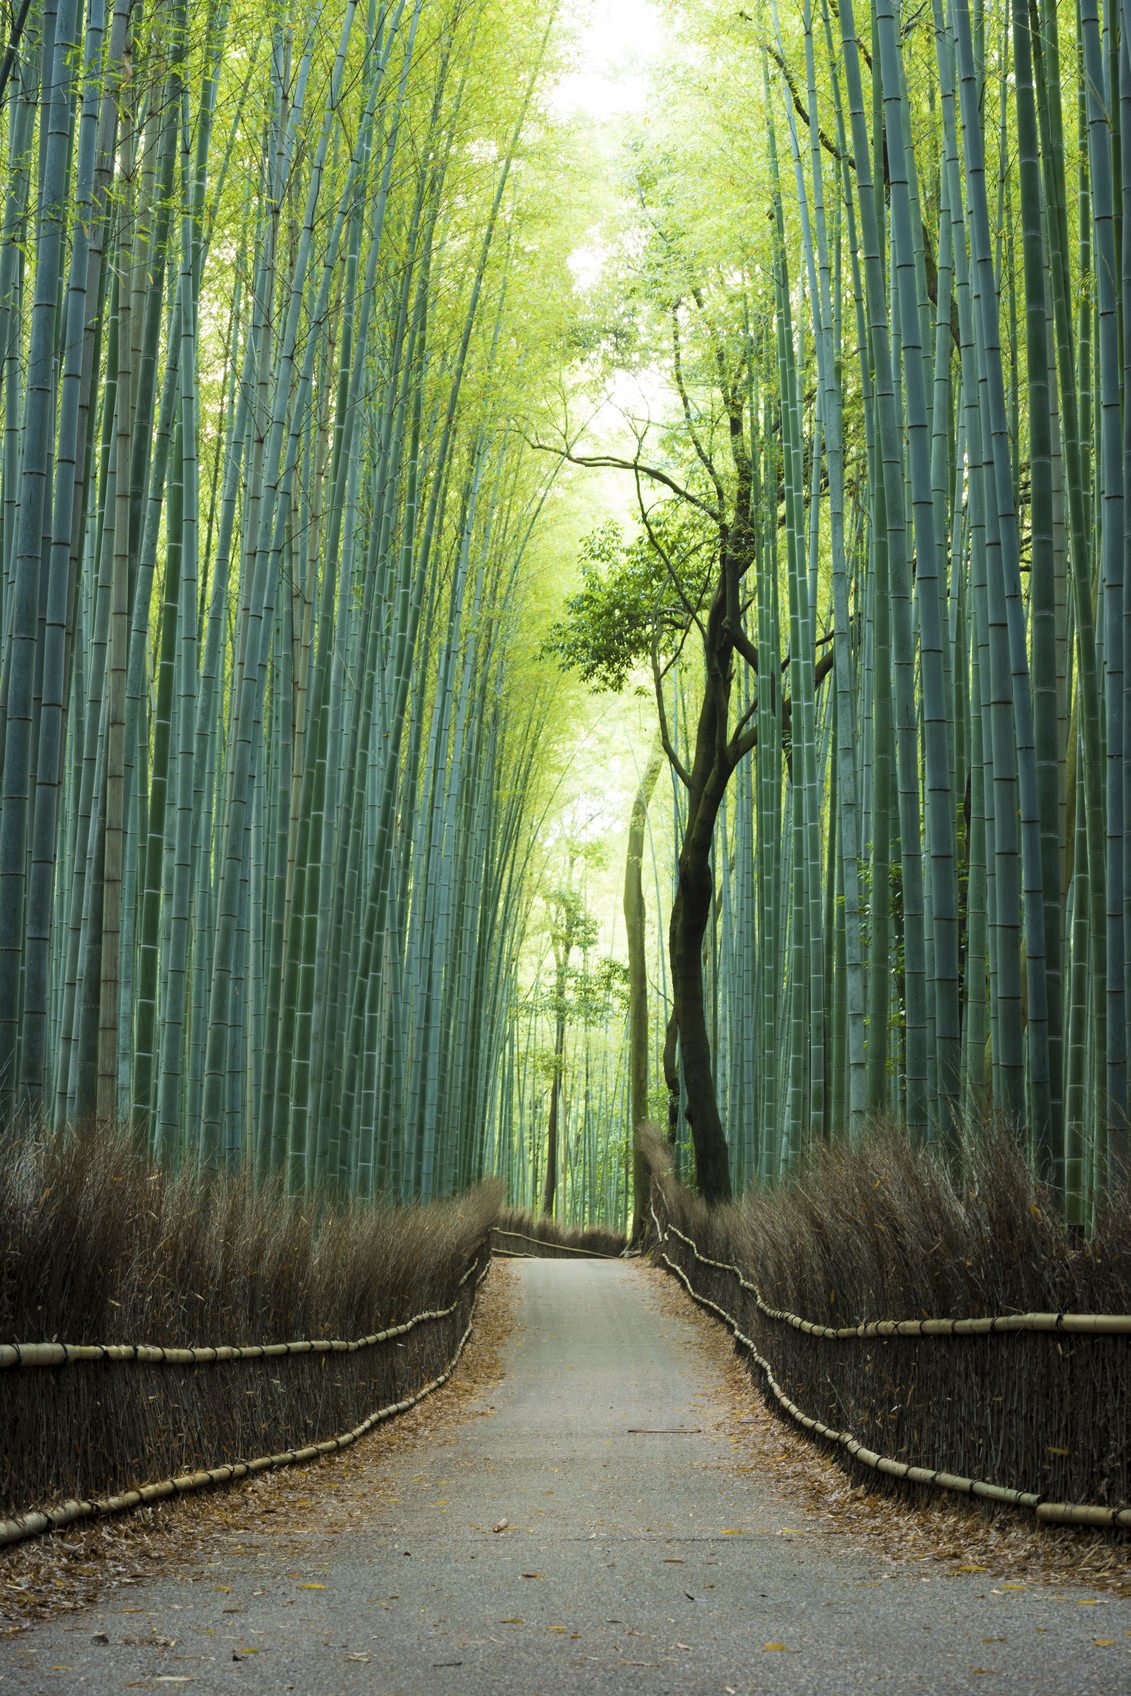
In a natural environment, vertical lines emphasize the height of the subject as well, in this case, the stands of bamboo. The vertical lines also help the viewer understand something else: an idea. When photographing natural elements like trees, strong vertical lines aren’t just advantageous for highlighting physical concepts but also for symbolic things like growth or adventure. In this image, the lines extending upward amongst the bamboo strongly represents growth and nature, while the juxtaposition of those lines with the leading lines of the path give the image a sense of adventure as well.
Quick tip: Regardless of your subject matter, when shooting vertical lines it is recommended that the lines align with the edges of the frame to the greatest extent possible. There are situations in which you won’t be able to accomplish this (i.e. shooting upward at a tall building), but if you can photograph the lines straight on, as was done in the sample images above, you will have a much stronger composition with greater emphasis on the lines themselves.
Horizontal Lines
Unlike vertical lines, horizontal lines tend to be less indicative of things like growth and adventure and instead instill feelings of calm and harmony. They also tend to serve as a dividing point in a photo. Take, for example, the horizon in the photo above. It serves as a line of demarcation between the ocean’s surface and the sky and helps the viewer’s eye break the image into those distinct areas.
Note as well the most important feature of a horizontal line - that it is absolutely horizontal in the frame. If a line is not perfectly parallel with the edges of the frame, the value of having the line will be totally lost. Just imagine how hard it would be to view the image above if the horizon rose or fell as your eye moved from one side of the image to the other.
When using horizontal lines, also bear in mind their continuity. An uninterrupted horizontal line can appear to be a bit too static and boring, so including something to break up the line is often helpful. In the image above, the lighthouse does just this and gives this image a strong focal point as well. Also note the placement of the horizontal line in the image above - in this case, it is shifted downward. Generally speaking, when you include a single horizontal line, it’s best to shift it above or below the center point of the image, otherwise the image will feel cut up and unbalanced.

Quick tip: Lines do not have to be obvious. In the image above, the shopping carts create a strong horizontal line in the frame, but the more subtle lines of the brick wall behind the carts is what gives the image extra dimension, texture, and visual interest.
Converging Lines
When it comes to leading the eye of the viewer from one point to another in a photograph, it’s hard to beat converging lines. These types of lines are most commonly associated with train tracks - the lines, though parallel, appear to get closer to one another in the distance, which is an ideal focal point for a photograph. The natural tendency for a viewer’s eye will be to follow the lines from the bottom of the image upward until they disappear into the background, as is the case in the image above.
Railroad tracks aren’t the only type of converging lines, however. Stairs, roadways, fence lines, and pathways are other possibilities. Regardless of the subject matter, when photographing converging lines, the placement of the convergence is of the utmost importance. Their termination point should align as closely to the rule of thirds grid as possible. Doing so means that the focal point will be one-third above or below the middle of the frame, which is a more interesting composition. But perhaps more importantly, this also means that the focal point of the image is well within the frame - you do not want to lead the viewer’s eye out of the shot.
It’s also important to add something of interest to the point at which the lines converge. In the image above, the lines of the walkway and handrails direct your eye straight to the setting sun. The same is true of the previous image, where the boardwalk directs your eye to the sunset. Landscape elements like these make excellent focal points. Another good focal point for these types of shots is people.
Quick tip: Try using a wide-angle lens when photographing converging lines. This will enhance the distance between the lines in the foreground, making the convergence seem more pronounced.
Diagonal Lines

Where converging lines help move the viewer’s eye from the foreground to background, lines on the diagonal help push the eye from one side of the frame to the other. Because of this, diagonal lines typically give an image the feeling of movement, even when the subject isn’t on the move, like the building shown in the image above. There is something about the manner in which the lines cross the field of view on the diagonal that gives the image a more dynamic presence.
Also worth noting is that diagonal lines help create the perception of depth in an image, especially when they intersect with other lines as they move from one side of the frame to the other. In the image above, the diagonal lines of the handrails on the stairs facilitate movement of the eye from left to right. But the addition of the horizontal lines of the stair treads helps create more depth; the repeating intersection of diagonal and horizontal lines, both in the stairway in the foreground and in the stairways in the background, give this image a lot of dimension.

Quick tip: Avoid having diagonal lines run from corner to corner as this tends to cut the image in half. Instead, strive to place your diagonal lines such that they enter and exit at different points, as was done in the image above.
Final Thoughts
Composing a beautiful and engaging photo takes a lot of work and practice, and requires much more than a few lines here and there. However, if you can master the use of lines, you will add another dimension of interest to your photographs. Whether vertical or horizontal, converging or diagonal, lines will help move the viewer’s eye around and within the frame, and make your point of interest more pronounced. As a result, your viewers will spend more time inspecting the photo and discover all the elements within it that make it engaging to view.
Recommended Reading
As discussed in this lesson, using lines in your composition will help viewers engage with your image in a more meaningful manner. But lines aren’t the only compositional element that helps you do this. In Bruce Barnbaum’s The Art of Photography, learn about everything related to composition, including light, color, contrast, balance, movement, and a whole host of other factors that impact how your photo is viewed and perceived. Also in the book is an extensive discussion of finding your personal voice as an artist. View dozens of incredible images for inspiration as well. This book is highly recommended for photographers of all skills levels that want to build their repertoire of compositional tools.
Recommended Vendors
You asked, and we listened! New on PhotographyTalk is a complete list of vendors that we highly recommend. Whether it’s a tripod or time lapse gear, camera bags or drones, whatever you need to make your photography better, we’ve got a top-notch recommendation to give you. Check out the complete list on our recommended vendors page.
We Recommend
Black and White Photography Mistakes Everyone Makes at Least Once
Black and white photography is a fun endeavor because it gives the images we create a classic, crisp look - assuming we go about it in the right way.
But as you might have guessed from the title of this article, there are plenty of things that can go wrong when creating black and white images, mistakes that we’ve all made at least once (and probably make far more often than we’d like to admit!).
To help keep you on the straight and narrow, we’ve assembled three of the biggest mistakes photographers make when working in black and white.
Mistake #1: Shooting in Poor Lighting
One of the benefits of working in black and white is that it is more forgiving than color photography when it comes to lighting. A prime example of this is shooting during mid-day. When working in color, the harshness of the light and the resulting bright highlights and shadows are difficult to work with in color imagery. However, because black and white images thrive on a high dynamic range, midday light is workable for some subjects.
Though challenging lighting is doable for black and white photography, that’s no excuse to shoot in conditions that are just plain bad. The mistake here is not matching the lighting to your subject. As noted above, mid-day lighting is workable for some black and white subjects, like a landscape. Portraits, on the other hand, will still suffer from harsh areas of light and shadow under the midday sun, even if the image is converted to black and white. Note in the image above how the lighting is soft and even, creating a top-notch portrait. In short, black and white isn’t the solution for all bad lighting - you still need to consider what lighting is best for the subject you’re photographing.
Mistake #2: Using In-Camera Conversion
Using the in-camera black and white shooting mode is a big no-no. The algorithms used by your camera to make the conversion are not good. In fact, compared to what you can do in a program like Lightroom or Photoshop, your camera’s black and white conversion tools are absolutely terrible. If you’re shooting in black and white, you’re doing your images a disservice.
Creating the best black and white images results from shooting in color and in RAW, then converting the image to black and white in post-processing. This means that the image file will contain a much larger range of details and tonal values and give you much more information to work with in post-processing. Had the image above been converted to black and white in-camera, the tonal range, which is critical to the impact of the shot, would be greatly diminished.
Mistake #3: Having Bad Composition

Oddly enough, some photographers think that a black and white treatment will mask compositional errors. However, this could not be further from the truth. Stripped of its color, a black and white image actually relies more heavily on having strong compositional elements. The best black and white images utilize features like lines and textures, patterns and shapes, negative space and dynamic range to build interest in the scene, as was done in the image above.
That means that when you create a black and white image, you really have nowhere to hide. Poor compositional choices will be on full display and have a greater negative impact on how your image is received by the people viewing it. Just like using poor lighting for the subject and using the incorrect means of converting your images to black and white, making bad compositional decisions will render your images ineffective.
So, the next time you’re out shooting and you want to create eye-catching black and white images, keep these tips in mind. Mind the lighting, incorporate strong compositional elements, and convert the image to black and white in post-processing, and your results will be for the better!
More on Black and White Photography
Interested in seeing the power of Lightroom for creating dynamic black and white images? Check out the video below! In it, YuriFineart gives an in-depth tutorial highlighting an easy, ten minute workflow for converting color images to black and white.
We Recommend
Black and White Photography Terms

photo byBenJacquot via iStock
Black and white photography is a wonderful form of our chosen art medium, whether done in film or digitally. Most of us will likely be working in digital format, but most of the same black and white photography terms will apply equally to film and digital.
When browsing for black and white photography tips, you have likely come across other terms such as grayscale and monochrome and may be wondering what the differences are. It will also be beneficial to have definitions or explanations of some other terms associated with black and photography.
What Is Grayscale?

photo bygoldhafen via iStock
What is grayscale? Grayscale is actually a more precise definition or label for black and white photography. The images we make are rarely 100% white and 100% black, but rather are comprised of several different shades of gray in addition to pure white or pure black. So “grayscale” is simply another way to say “black and white” (or B&W) photography.
There is a nice tool called the grayscale, that photographers used to buy from Kodak that can now be found from dozens of makers, that has a complete scale of steps of gray (or grey in UK spelling) usually marked off in 5% steps.
You can actually still get these from Tiffen on Amazon and other places.. It’s the same thing as the Kodak Q-13 Color Separation Guide and Gray Scale that has been an industry standard measuring tool for decades.
This Gray Scale is a good teaching and learning tool too, for learning about how light and shadow is seen photographically. In addition to the fun of learning, you can also use one as a control method for calibrating your editing monitor and checking how your exposure variations can change how the gray scale appears in grayscale photography.
What Is Monochrome?

photo byayagiz via iStock
What is monochrome? Is monochrome black and white or grayscale? In photography terms, monochrome refers to something that is all one color, though it can be different strengths of that single color.
So, a B&W image, a grayscale photo, can accurately be referred to as being monochrome since it is made of only one color, gray. Gray separates out to pure white and pure black at the extremes of intensity.
However, not all monochrome images are grayscale or black and white. An image made up solely of shades of red or green is also monochrome. Since lots of the technical side of photography deals with math, we’ll use a math logic method to explain it. All grayscale (black and white) images are monochrome. But not all monochrome images are grayscale.
So, grayscale = monochrome, but monochrome =/= grayscale.
Learn More:
Zone System

"Public Domain: Tetons by Ansel Adams, 1942 (National Parks Service/NARA)" by pingnews.com
Anyone searching for digital black and white photography tips and wanting to fully understand black and white photography terms really to look at the Zone System, at least for an overall view of it. How in-depth you want to go will be up to each person, but you won’t be disappointed if you spend some serious time on it.
The Zone System was developed by Ansel Adams and Fred Archer in the late 1930s and early 1940s. The results of working within the Zone System for film and paper black and white photography can be seen and are discussed in-depth in several books:
Collectively, these are referred to as the Ansel Adams Photography series. If you’ve read my articles for a while, you know how big a fan I am of Ansel Adams. I think many landscape photographers would point to him and his work as major early influences.
How to Make Black and White Digital Photos

photo byCoffeeAndMilk via iStock
There are two main methods that we can use to create our black and white or grayscale images digitally. One is in the camera and the other is in the post-processing program we use.
Capturing B&W in camera is fairly simple, you just switch to the black and white or grayscale mode in your camera menu. Funny thing is, in some cameras, this mode may be labeled monochrome. Don’t let that worry you, the monochrome will be grayscale.
This often creates a JPEG file of the image. Which is fine for casual shooting, but I like to capture in RAW and then use post processing to convert to grayscale. Lightroom has easy sliders that help you control how the image gets turned to B&W.

photo byY.Gurevich via iStock
What I like about this method is the control available for manipulating the contrast, the grayscale itself, and even the relationships in grayscale between different colors. This is also a fantastic learning tool for seeing how much difference attenuating the colors has on the final image.
For instance, by adjusting the sliders for blue down and red up, you can turn a blue sky virtually black, which makes puffy white clouds just seem to POP out of the image. Adjusting the green slider up and down has a great effect on foliage. You can even adjust so that it looks like an infrared image.
And since you captured in RAW, your original file still has all the color and exposure information available, allowing you to experiment again with different settings or to make a color final image. Which you can’t do if you capture a JPEG in the camera mode for grayscale with most brands.
You will see additional tools in the black and white convention menu of your post processing program. Some programs will adjust contrast separately, some have more fine tuning for the color sliders, some will allow adjusting exposure globally and others split it into shadow, midtones, and highlights, some have both styles of control.
The Art of Black and White

photo byanatchant via iStock
The earliest surviving photographic image is a monochrome image. Most of the history of photography is dominated by black and white, sometimes monochrome such as the sepia tone of daguerreotype metal plates and tintype.
A huge amount of pics in your family albums are likely black and white. Many of the images we love from the old masters are black and white. So much has been done with regard to the art of craft of black and white photography.
With such a rich history of the art of grayscale and monochrome photography, it makes a lot of sense to look into how B&W photography can be accomplished digitally. Besides that, it is incredibly fun and rewarding. Seriously, just try it out for yourself!
Learn More:
We Recommend
Color or Black and White Photos: How to Choose Which Format is Best
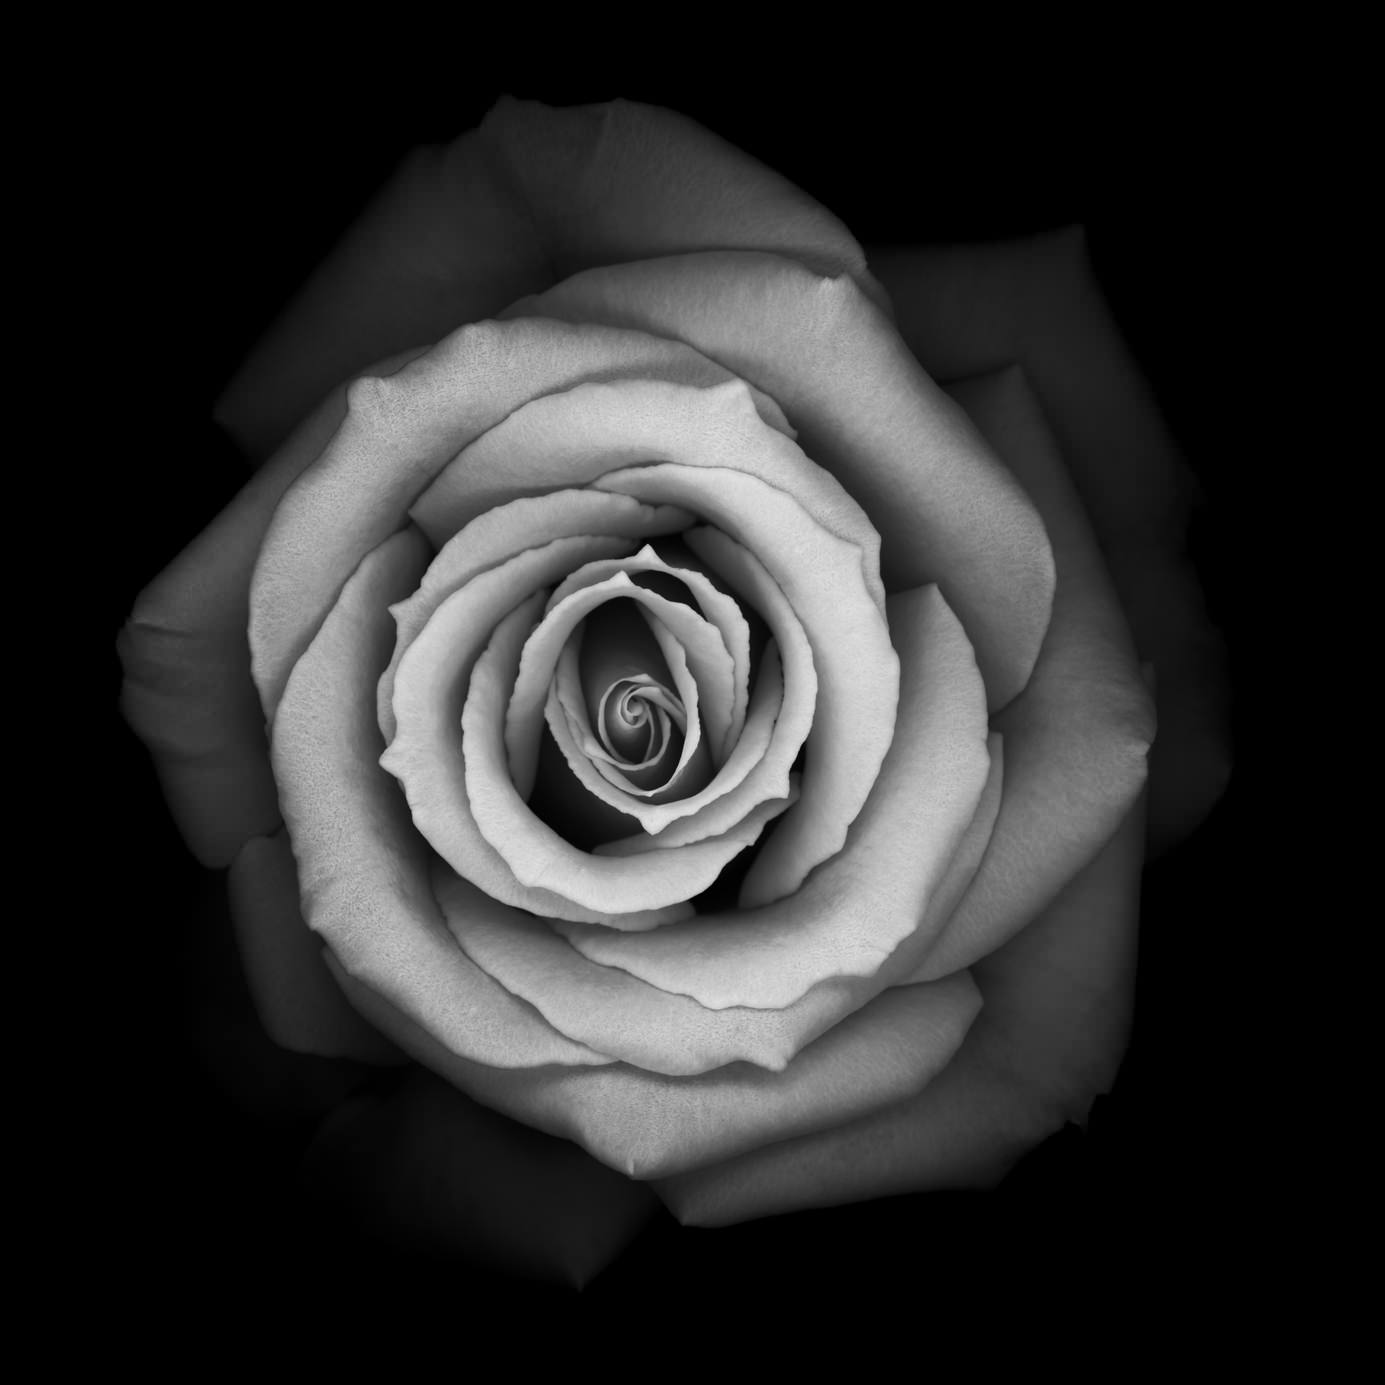
Color and black and white photography both have their place in this craft. Color photos grab our attention with their vibrancy and saturation; black and white images hold our interest with their emphasis on form, textures, and light. It is in these differences in details that you can find clues as to which format will help your photo be more successful. Granted, there’s no magic formula to be applied here - just a couple of guidelines that will assist you in the process of determining if color or black and white will be more appealing.
Consider these two essential questions to ask when making this all-important decision.
How Impactful is Color?

At first, this might seem like a silly question, but answering it isn’t always as easy as one might think. It’s intended not to get you to analyze the colors in your image, but to do quite the opposite: consider what elements in the image give it interest besides color.
Take the image above as a prime example of this concept. Its coloration is incredible, and quite eye-catching. But in asking oneself, “What elements give this image interest besides color?” it’s difficult to come up with anything. There’s no strong shadows, no textures, no patterns to catch the eye. As a result, this image wouldn’t be a good candidate for black and white - the colors are what makes this shot, and to remove them would detract from the image.
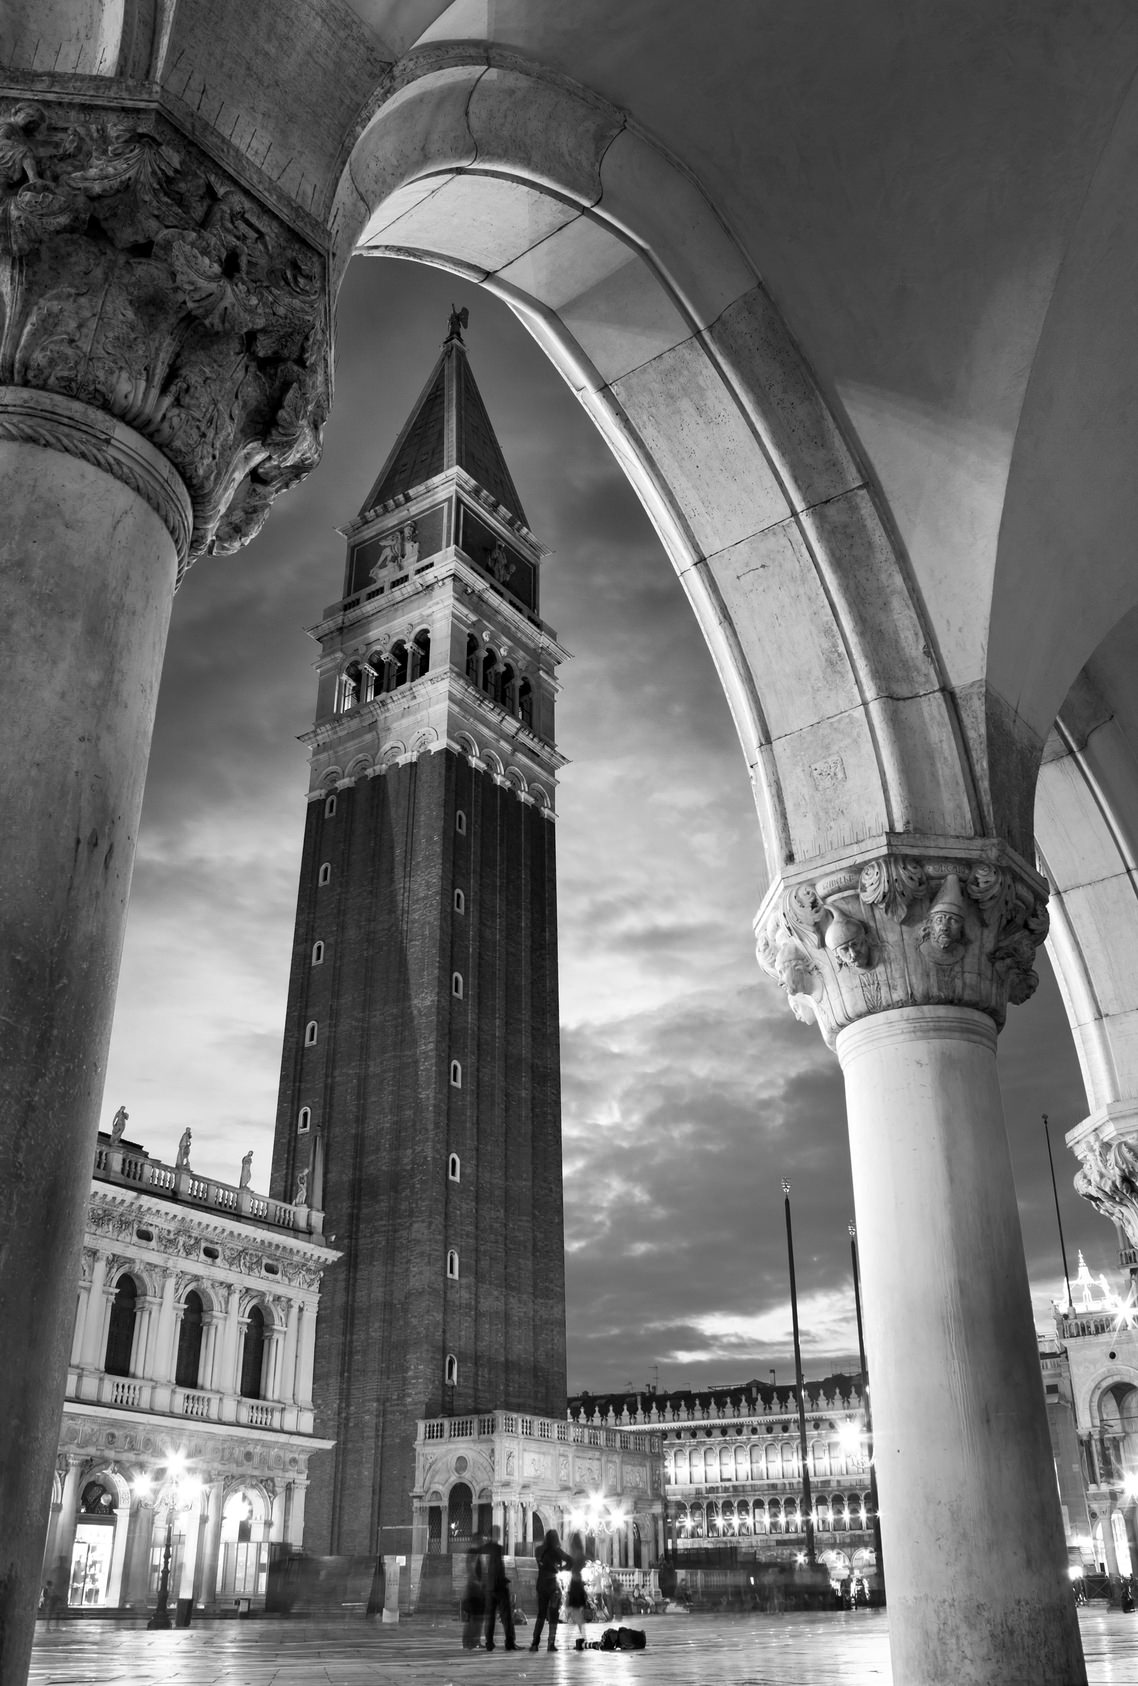
Conversely, this photo does quite well as a black and white for precisely the reasons the previous image would not. There is good dynamic range, with shadows and highlights to give the image contrast. There are interesting forms throughout, from the archway in the foreground to the strong vertical lines of the bell tower in the background. There are plenty of textural elements as well, from the facades of the various buildings to the areas of open and cloudy skies in the background.
In short, there are plenty of details from corner to corner that give this photo interest in the absence of color. When considering whether to convert an image to black and white, these kinds of details are paramount to the photo’s success.
What Mood Do You Want to Convey?

Part of what makes a photo successful is its ability to connect with viewers on an emotional level. In order to do that, your images must tell a story and convey a mood that will grab the attention of the viewer and help them imagine themselves in the scene.
So, how does one do that?
Because colors can trigger specific moods or feelings (i.e. red is associated with passion, blue with serenity), it’s perhaps an easier task to get viewers to feel what you want them to feel with a color photo. In looking at the image above, for example, it’s hard not to feel happy because of the vibrant array of colors. You can almost feel the warmth of the sun on your skin and smell the salt in the air just by looking at the photo. The ability to envision oneself in that particular place would be much more difficult to do without the presence of color.
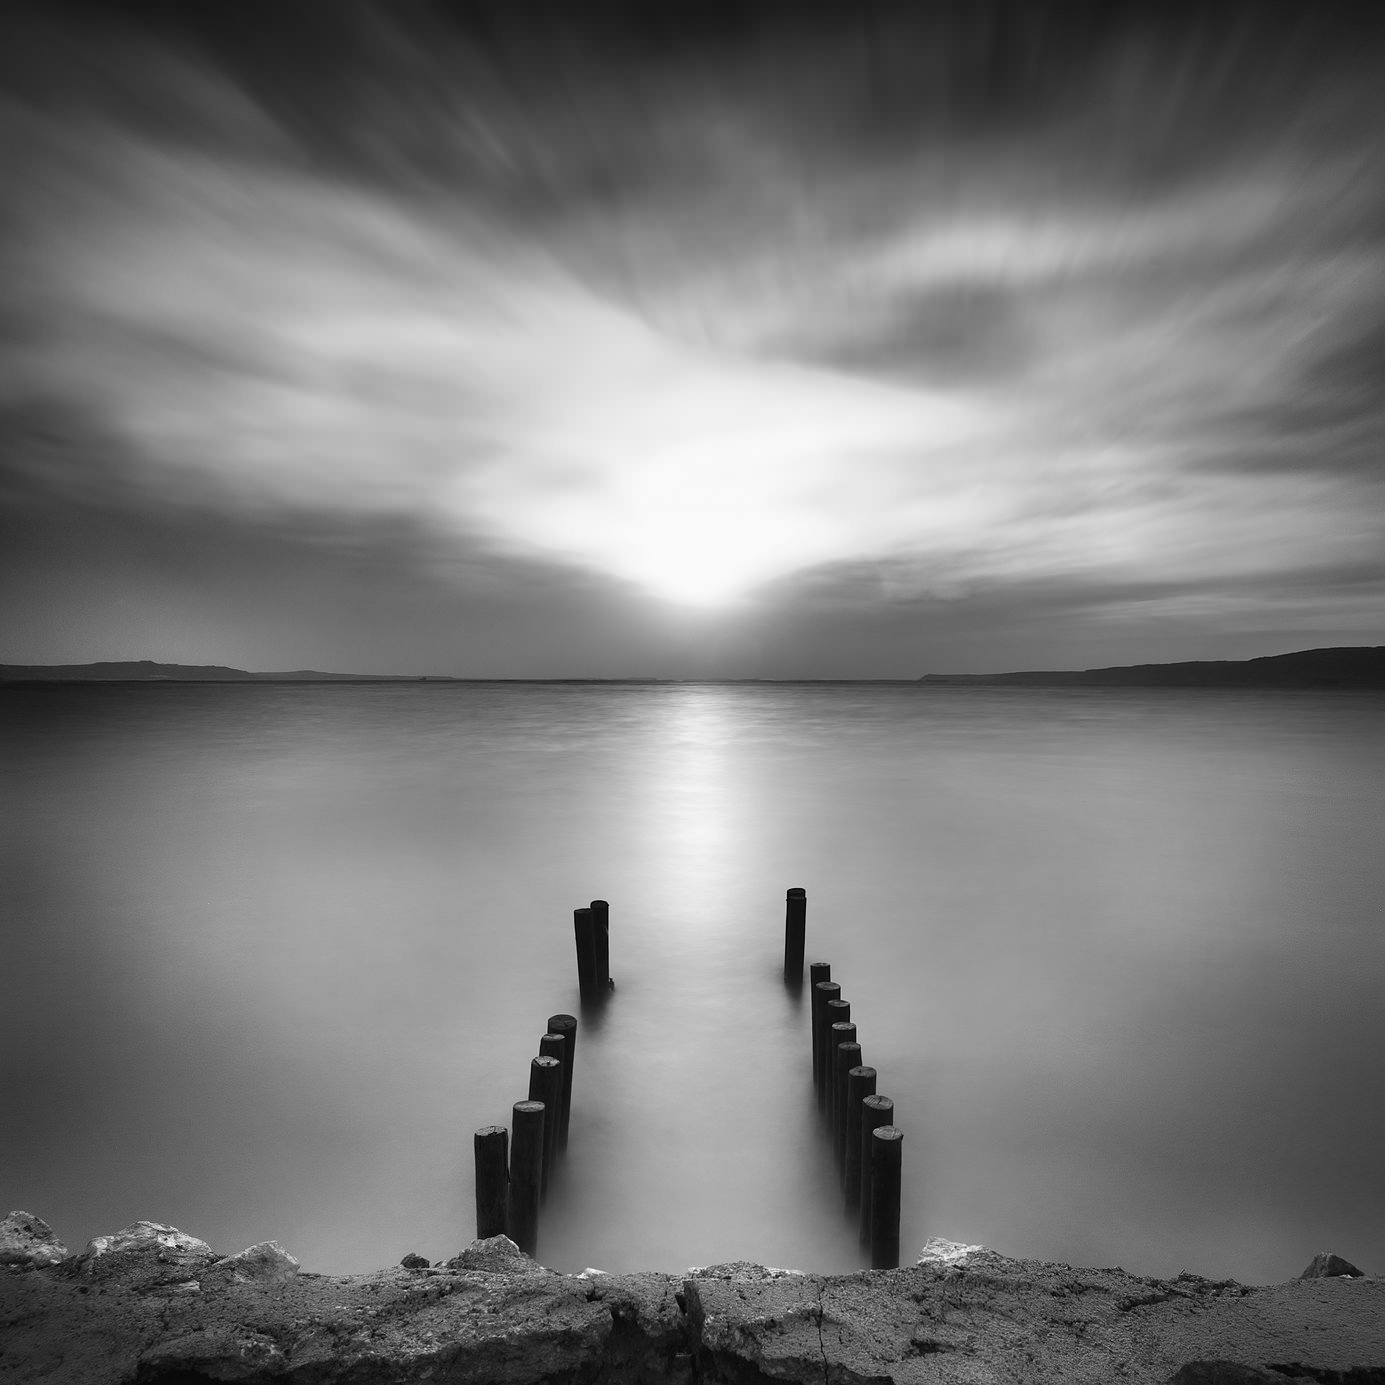
Though black and white images are often associated with more somber moods, there is something to be said about using black and white as a vehicle for viewers to experience a wide range of moods, depending on who they are and how they connect with the image. For example, the image above might evoke a feeling of serenity for some, and loneliness for others. Still others might engage with it more deeply because it’s so clean - with soft textures and strong lines that have a strong minimalist feel. Just imagine this same scene in color - would any of the same moods apply?
This is the crux of the color vs. black and white issue: which way is best? The answer to that question will vary from one situation to the next, and will depend on your answers to the two primary questions asked above - what mood do you want to convey and how impactful is color? So, the next time you’re out snapping photos, think about these questions as a means to help you identify what’s truly eye-catching about the scene. If color is the primary means by which the scene holds your interest, keep the image in color. But if there are interesting shapes, textures, or lighting, consider converting the image to black and white. Most importantly, remember that “rules” in photography are mere suggestions, and don’t be afraid to go outside the norm. It’s when you push yourself that you are most likely to create your very best images.
We Recommend
Emotion in Monochrome Photography: Capturing Mood and Feeling Without Color

Photo by Stephen Harker via iStock
Black and white photography, grayscale photography, and other labels of monochrome photography have been around since the advent of photography itself. Many photographers prefer monochrome photography for their art images because it allows for a lot of control over the mood and feeling of the image.
Capturing or creating emotion is part of the appeal of monochrome photography for many photographers working in it. I love it myself. Part of what drew me into landscape photography in the first place was admiring and trying to emulate the work of masters in black and white photography, such as Ansel Adams and Edward Weston.
Let me take you into the world of monochrome photography to show you how to explore all it offers for creating or capturing mood, feeling, and emotion in your photographic art. Plus, I’ll highlight how to finish the process with printing options.
Table of Contents:
- What is Monochrome Photography?
- Studying the Old Masters
- Is Monochrome Photography Always Black and White?
- Controlling Emotion in Monochrome Photography
- Monochrome Photography - The Entire Process Matters
- Going Beyond Color
- Recommended Photography Gear
What is Monochrome Photography?
Photo by Christopher Roth via iStock
What is monochrome photography? Mono = 1, chrome = color. Therefore, monochrome means something is one color. Photographically and in other art forms, monochrome can also refer to a dominant color of the image or different hues or intensities of one color.
Monochrome photography can be a descriptor for a huge gamut of image styles. Black and white photography is perhaps the most common style when talking about monochrome photography (more on this in a moment).
Studying the Old Masters
Photo by Elerium via iStock
The roots of monochrome photography go way back before there ever was photography. Chiaroscuro is a painting style or technique that may help us understand how to capture or create emotion in monochrome photography.
Chiaroscuro is another portmanteau combining two Italian words this time, “chiaro” for light and “scuro” for dark. It refers to the artistic use of gradients of light and dark. Traditionally, paintings made with the chiaroscuro technique have a dark, serious, somewhat somber mood.
One only has to look at Rembrandt's paintings of people as examples of this technique. In fact, there is a lighting configuration labeled Rembrandt lighting that takes the principles of chiaroscuro and applies them specifically to portrait lighting.
Obviously, this means you can learn a lot about monochrome photography ideas by studying the paintings of Rembrandt, Rubens, and Velázquez, among others. I won’t go too deep into all of this because it can take up several semesters of courses within a fine arts degree.
Some other old masters to study are closer to the modern era, photographers such as Ansel Adams, Edward Weston, Dorothea Lange, and André Kertész. In fact, I like to point out that the Zone System, perfected by Ansel Adams and Fred Archer, applies to digital photography.
Check out some of our Photography Talk articles about the Zone System, portrait lighting, and black-and-white photography for some great ideas that can be applied to capturing and creating mood and emotion in monochrome photography.
Is Monochrome Photography Always Black and White?

Photo by Zeynep Ozdelice via iStock
One of the things that gets a little confusing when talking about monochrome photography is that it doesn’t only mean black and white photography. Grayscale photography is another word for black and white. Grayscale photography uses the colors of black and white and all of the gray tones in between, so Black and White photography is monochrome photography.
Any color can be used for monochrome photography. You may already be familiar with sepia tone as an “old-timey” style of photography. It’s basically a black-and-white image but with the image printed on a warm, coffee or tea toned substrate instead of plain white photo paper.
Daguerreotypes, ambrotypes, tintypes, and copper prints are all methods that count as monochrome photography since they are basically B&W images printed on different types of metals, each one with its own overall color tone.
Other colors can be used, too. A night vision scope has a green hue, and an architectural blueprint is a print made with a process using, you guessed it, blue ink.
Controlling Emotion in Monochrome Photography
Photo by Wirestock via iStock
Using all of these ideas of monochrome photography will allow us to either capture or create emotion or mood.
You may have noticed that I’ve used both “create” and “capture” when talking about mood in monochrome photography. I separate the two because there are times when all we have to do is use our knowledge of adjusting exposure to capture a mood.
Exposing for high-key images captures a light, airy, almost whimsical mood, while low-key image captures can evoke a more serious feeling, even melancholy or depression.
We can create the mood or emotion by deliberately setting up the subject or the lighting configuration for high-key, low-key, low-contrast, or high-contrast images. A high-contrast image can invoke a mood of stress but also can cause a feeling of importance.
If we go into other colors of monochrome photography besides grayscale and related styles, we can add different moods, emotions, or feelings to our images.
For example, a green tint can create a feeling of mystery or intrigue because we are conditioned to see green-tinted photos as the results come from night vision optics. A photo with an overall red tint could make us feel danger, anger, or possibly even romance, depending on what hue of red and whether the image is high key or low key.
Some other color casts that can influence emotion or mood include blue or green for peacefulness or being back to nature. Purple or related shades, such as lilac, could create an air of fantasy or an alien feel. Yellow can portray joy or happiness.
Monochrome Photography - The Entire Process Matters
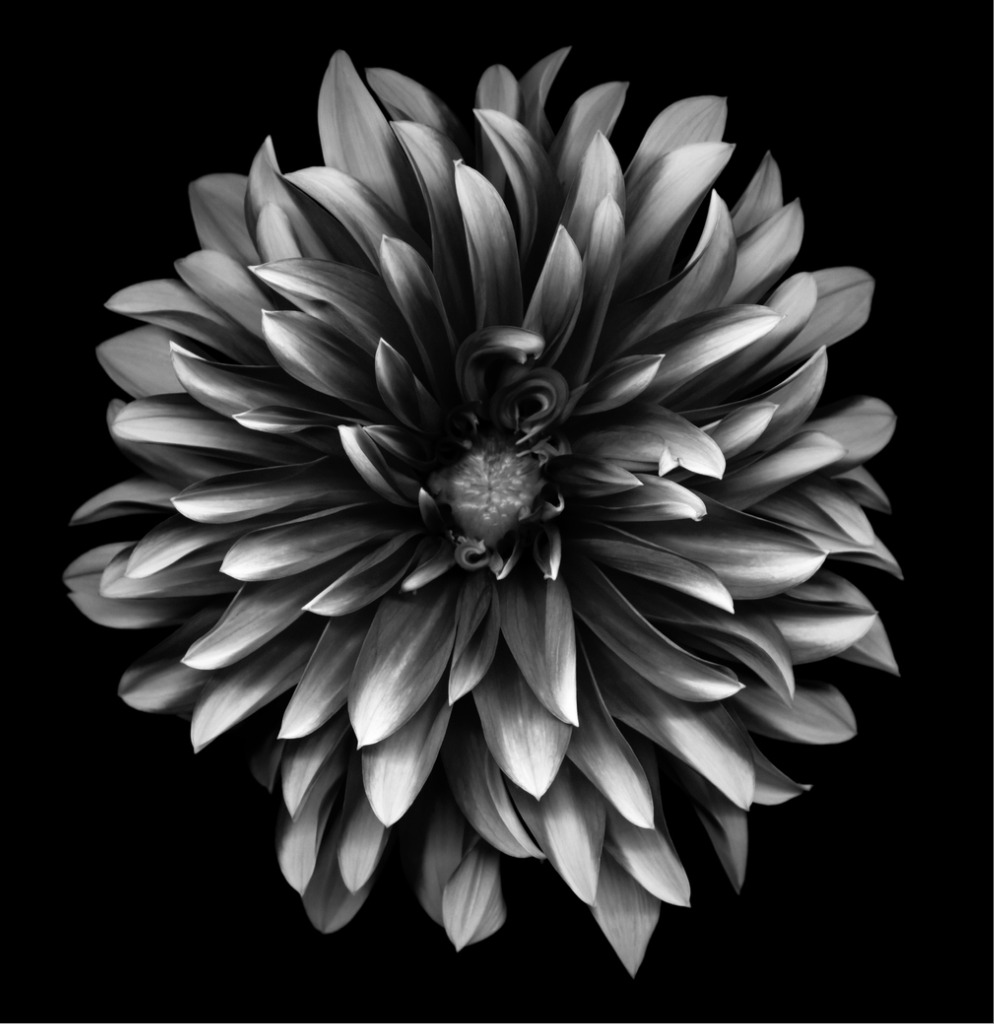
Photo by OGphoto via iStock
Just as the old masters of painting, Rembrandt and Rubens, or the old masters of Black and White photography, Adams and Weston, did with their respective arts, part of the process of monochrome imagery is the final display medium.
Rembrandt used treated canvas and hand-mixed inks to control the mood of his paintings; Ansel Adams used the Zone System from exposing the film to exposing and developing his photo paper, all with the intent of displaying to others exactly the feeling they wanted to portray.
With digital monochrome photography, the metal printing process is the perfect display medium. HD metal prints from Shiny Prints are the highest quality metal prints we can get for our images, whether regular styles of photography, black and white photography, or the interesting and moody monochrome photography images we’re discussing now.
I like the HD Metal Prints from Shiny Prints because they use the best aluminum panels in the industry, ChromaLuxe, make them with the dye sublimation process, with several different surface finishes, and the only thing they make is metal prints, so they put all of their effort and quality into that style of photographic printing.
Dye sublimation on a metal substrate is durable, virtually damage-proof (disclaimer: not entirely damage-proof), and gives amazingly detailed and RICH images. When made from regular color image files, an HD metal print is beautiful; an HD metal print of our monochrome photography can be absolutely mind-blowing.
Going Beyond Color

Photo by hallojulie via iStock
Black and White photography is an amazing artform, capable of delivering photographic images full of whatever feeling or emotion we want to put into them. B&W is not the only style of monochrome photography that we can use for creating or capturing moods within our photography.
Whatever color we use for our monochrome photography, we have all sorts of options for creating and capturing mood, emotion, and feeling in our fine art photography.
Recommended Photography Gear
Learn More:
- FAQs About Printing Photos On Metal
- 5 Key Components of Color in Photography
- Shiny Prints Metal Print Review
We Recommend
Essential Tips for Black and White Mobile Photography
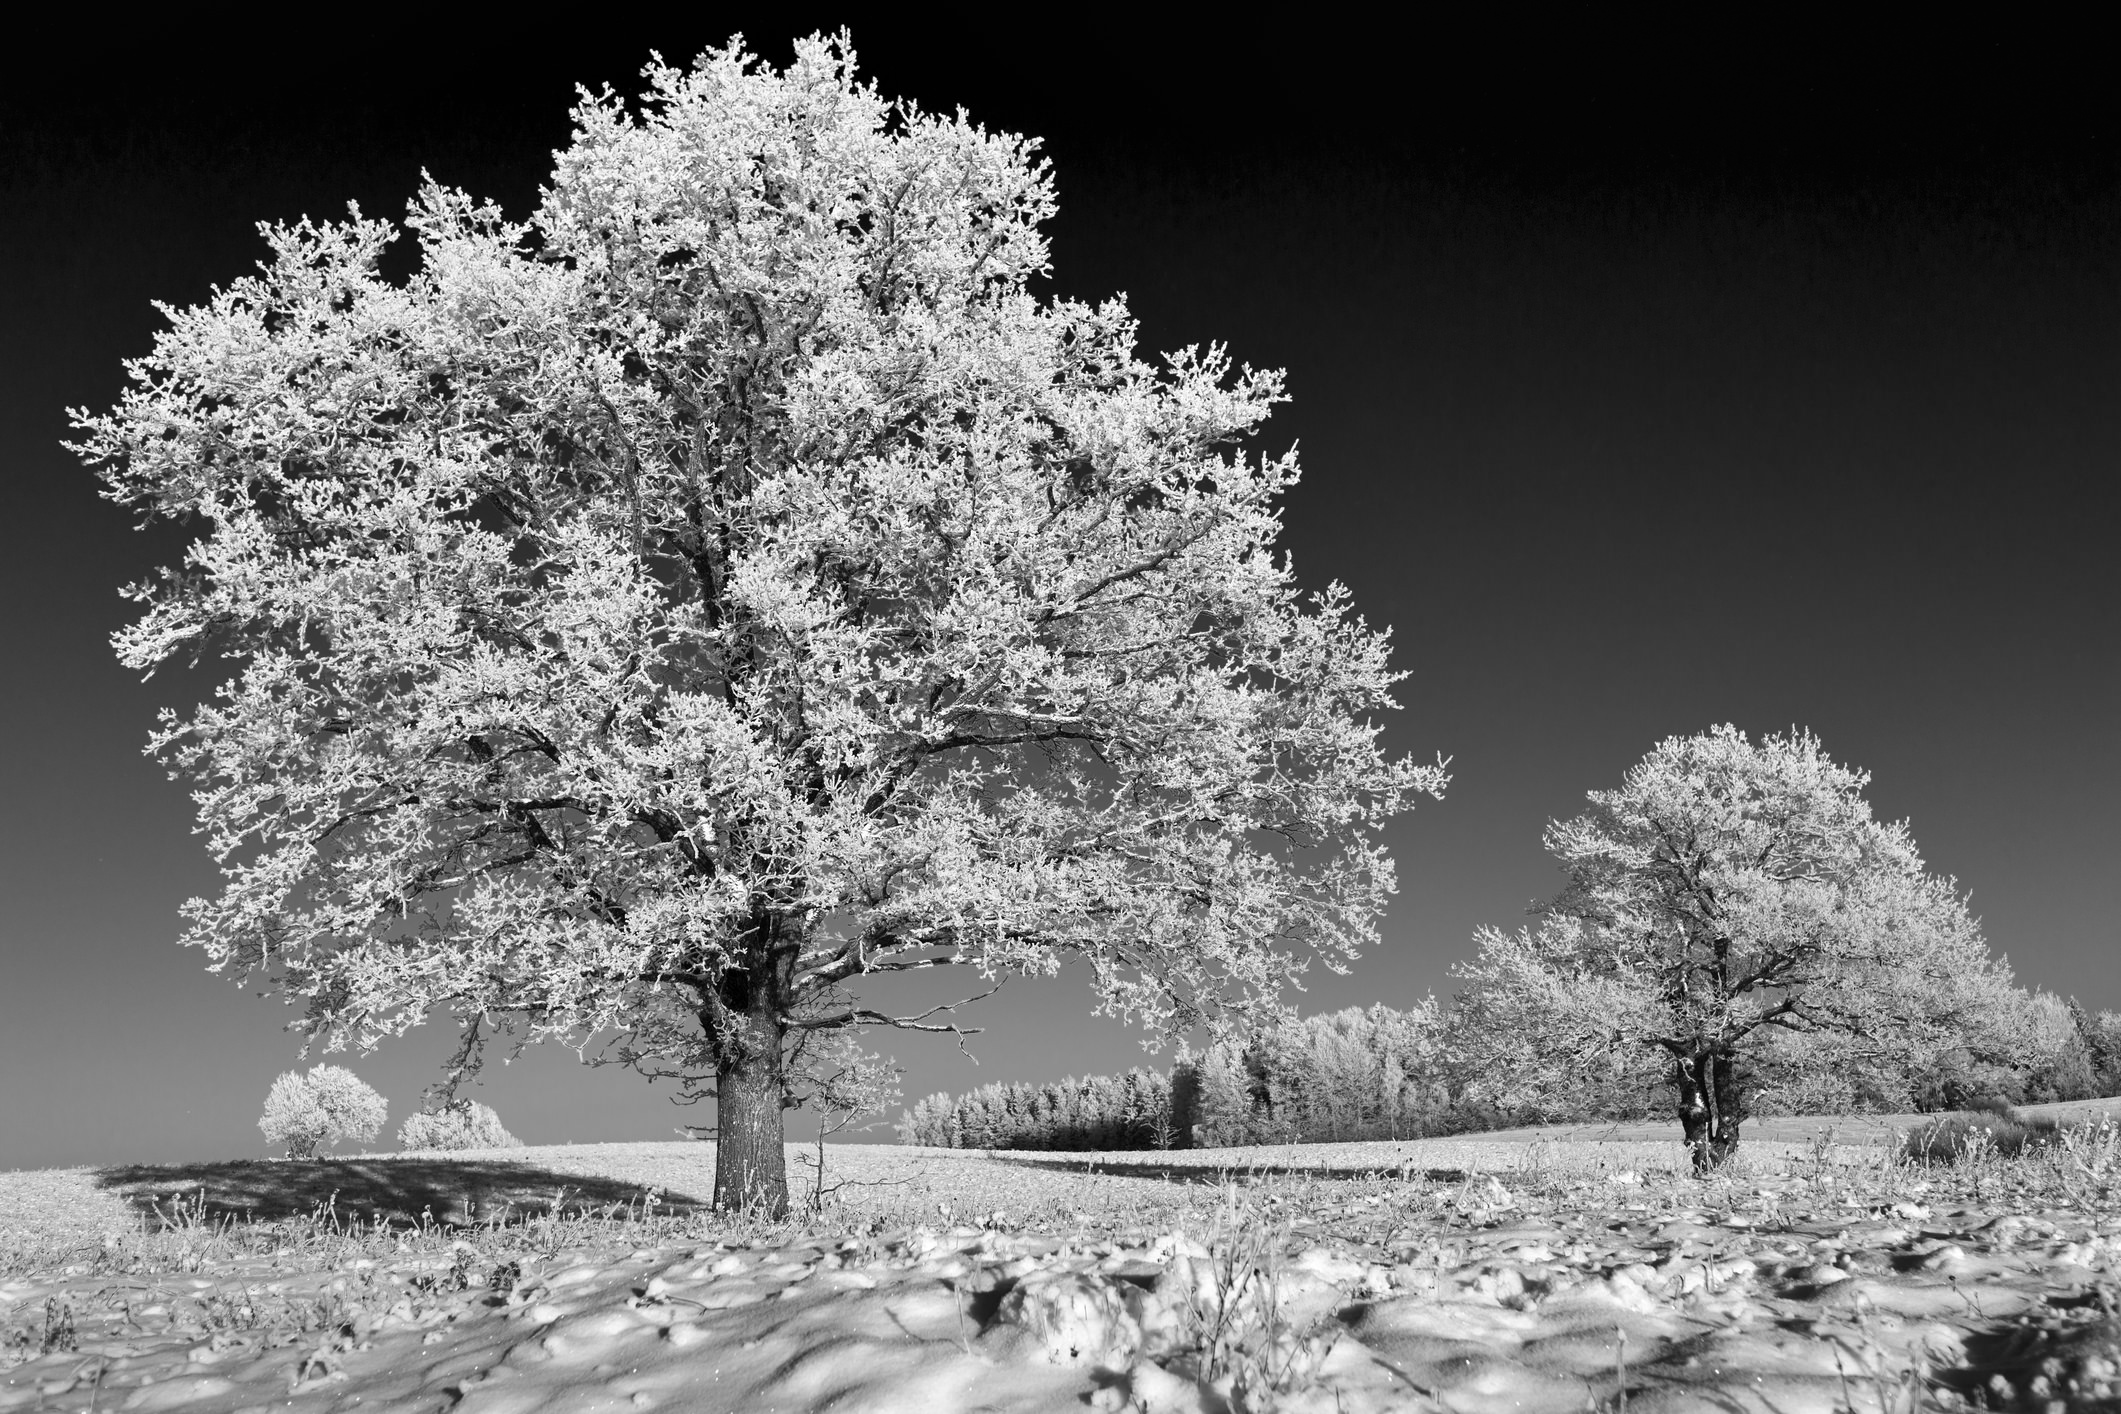
There is just something about black and white photography that captures our attention. Without color to give us clues about the makeup of the scene, we’re forced instead to inspect the image more closely - to look at the areas of light and dark and look for details like lines or patterns - that give the image visual interest. The simplicity of black and white photography is classic as well, regardless of whether it’s a landscape, a portrait, or something in between.
Creating black and white images with your smartphone might seem overly difficult at first, but when it comes down to it, it’s simply a matter of following a few crucial guidelines. Lighting, like for any type of image, is of the utmost importance. But beyond that, there are some creative choices and add-on gear for your smartphone that will enhance your ability to create compelling black and white images.
Look for Contrast
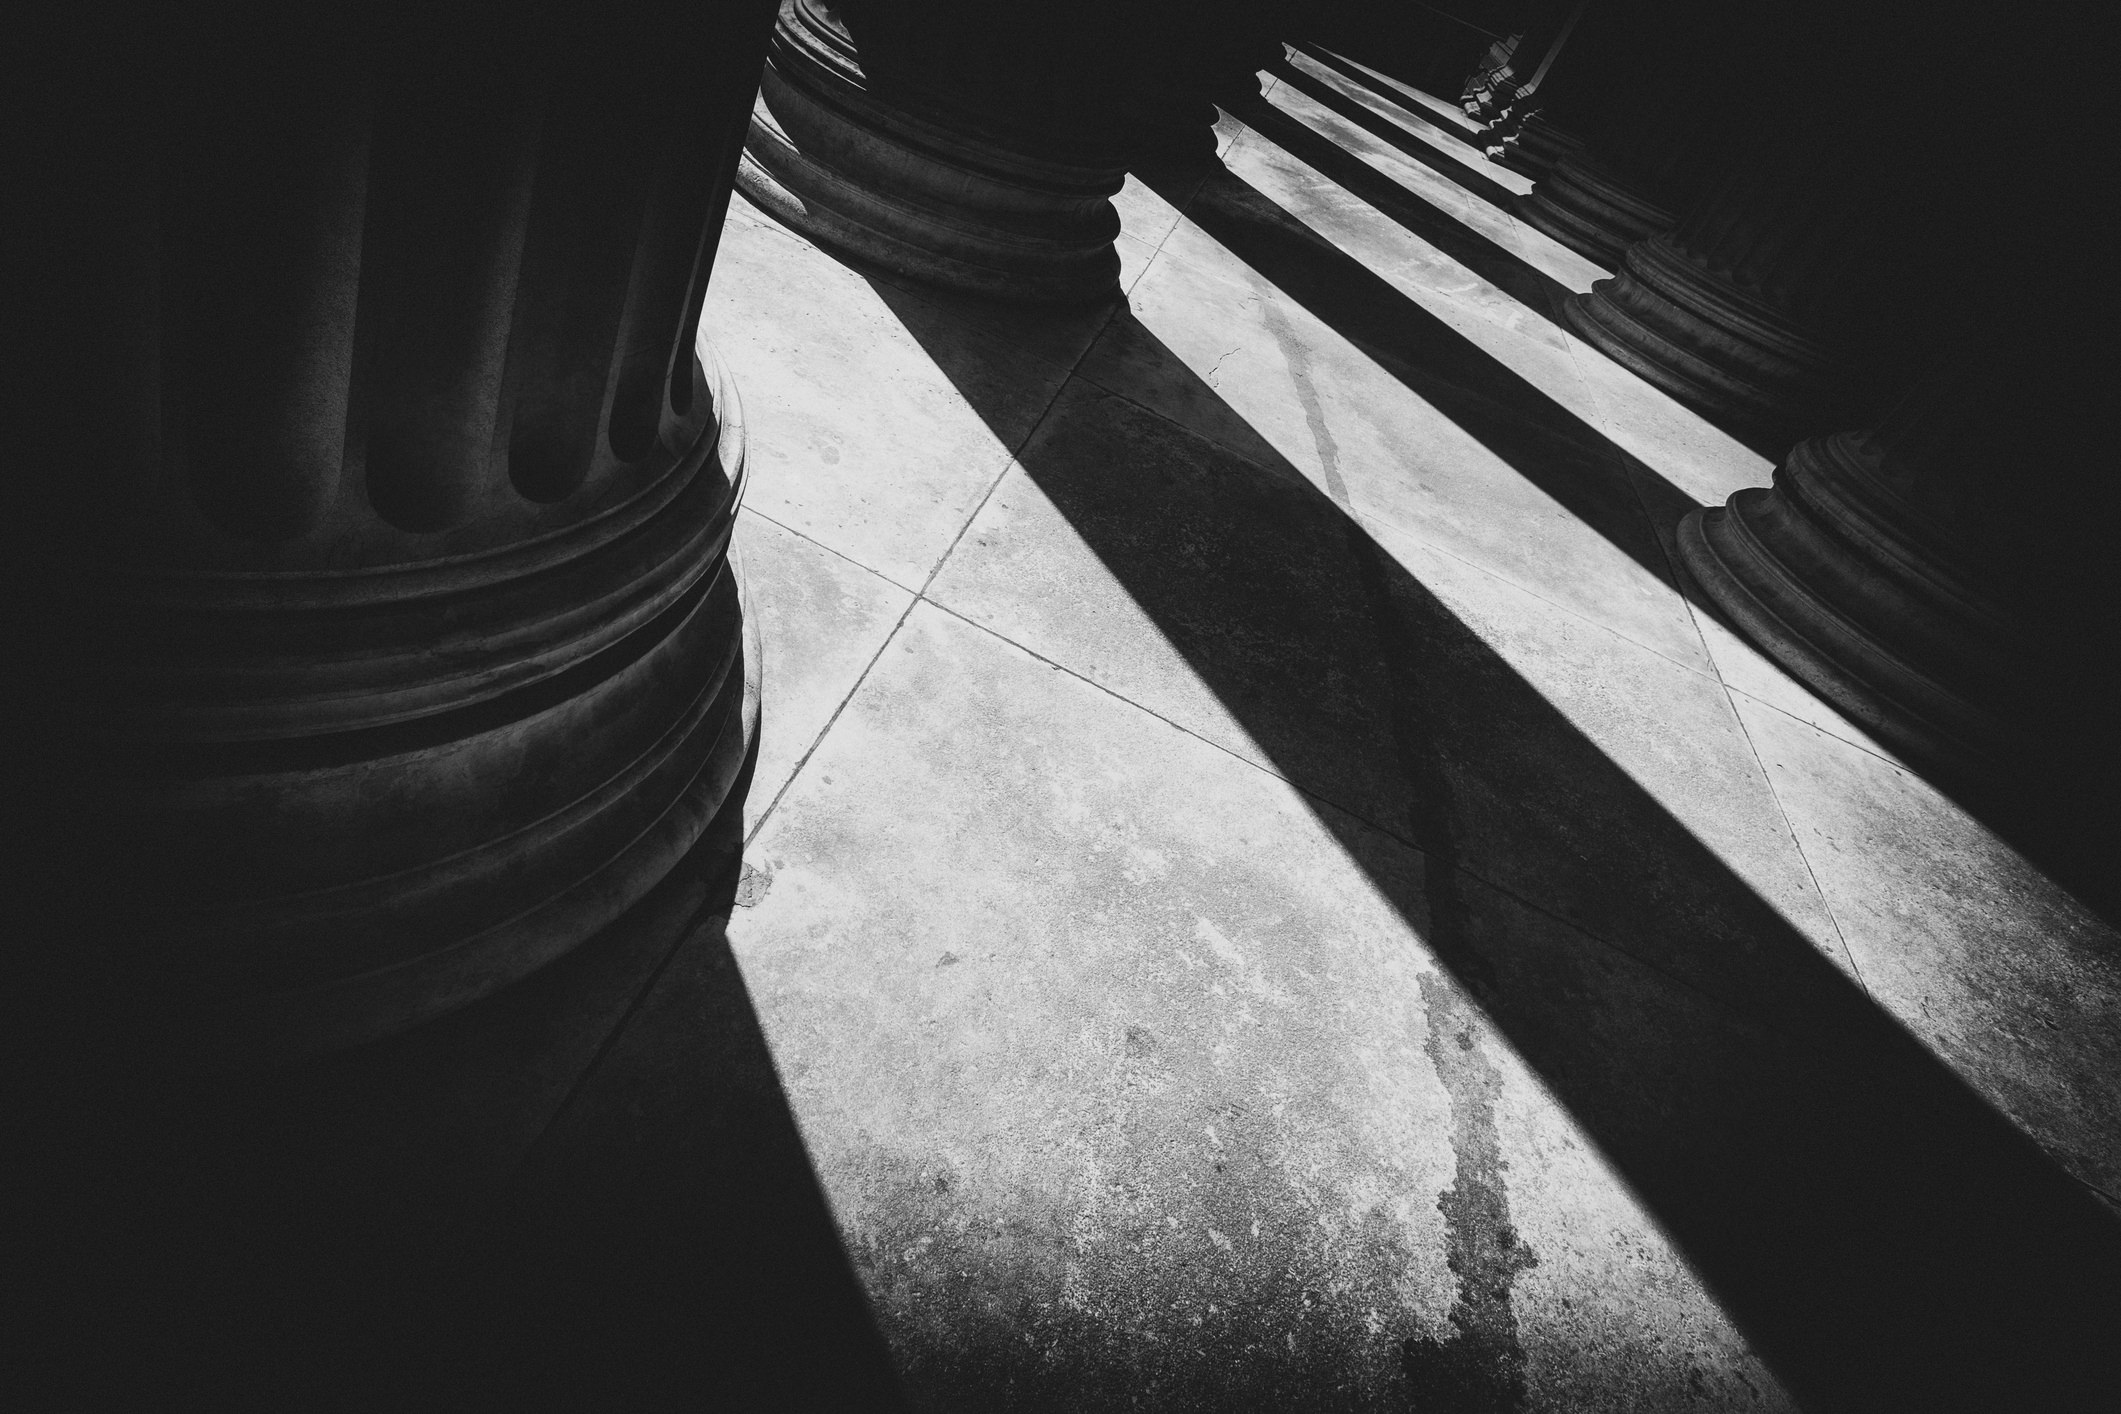
In the absence of color to provide visual impact in the image, black and white photos instead rely more heavily on contrast to capture the viewer’s attention. Fortunately, an increased level of dynamic range - the difference between dark blacks and bright whites - is easy to find, especially if you’re shooting during the middle of the day.
Typically, the rule of thumb is that you should avoid harsh, midday lighting regardless of the subject matter because the light creates such heavy shadows. However, this is a benefit for black and white photography with your smartphone. The deep shadows created by harsh lighting gives depth and dimension to the scene, making it appear three-dimensional. What’s more, deep shadowing makes the lighter tones in the scene appear even brighter, which gives the photo additional impact.
The direction of the lighting will impact the level of contrast as well. If, for example, you’re taking a portrait, having the subject face the sun will result in a high-key shot in which there is an abundance of bright whites and not a lot of contrast. This is especially the case when using your smartphone because of the limited capabilities of your phone’s lens (at least compared to traditional lenses for DSLR and mirrorless systems). Conversely, if you place the sun behind the subject, you’ll get a silhouetted image with few highlights and a lot of dark shadowing.
Perhaps the best lighting to get high-quality contrast is side-lighting. Whether it’s a portrait, a landscape, a street scene, or something in between, lighting from the side casts long shadows that give the image the depth discussed above, while also ensuring you’ve got a good range of light and dark tones. Remember, however, that when you take your images you’ll see them in color, so it will take a bit of training to get your eyes to see beyond color and look for contrast.
Taking a Portrait? Set the Exposure on the Subject’s Face
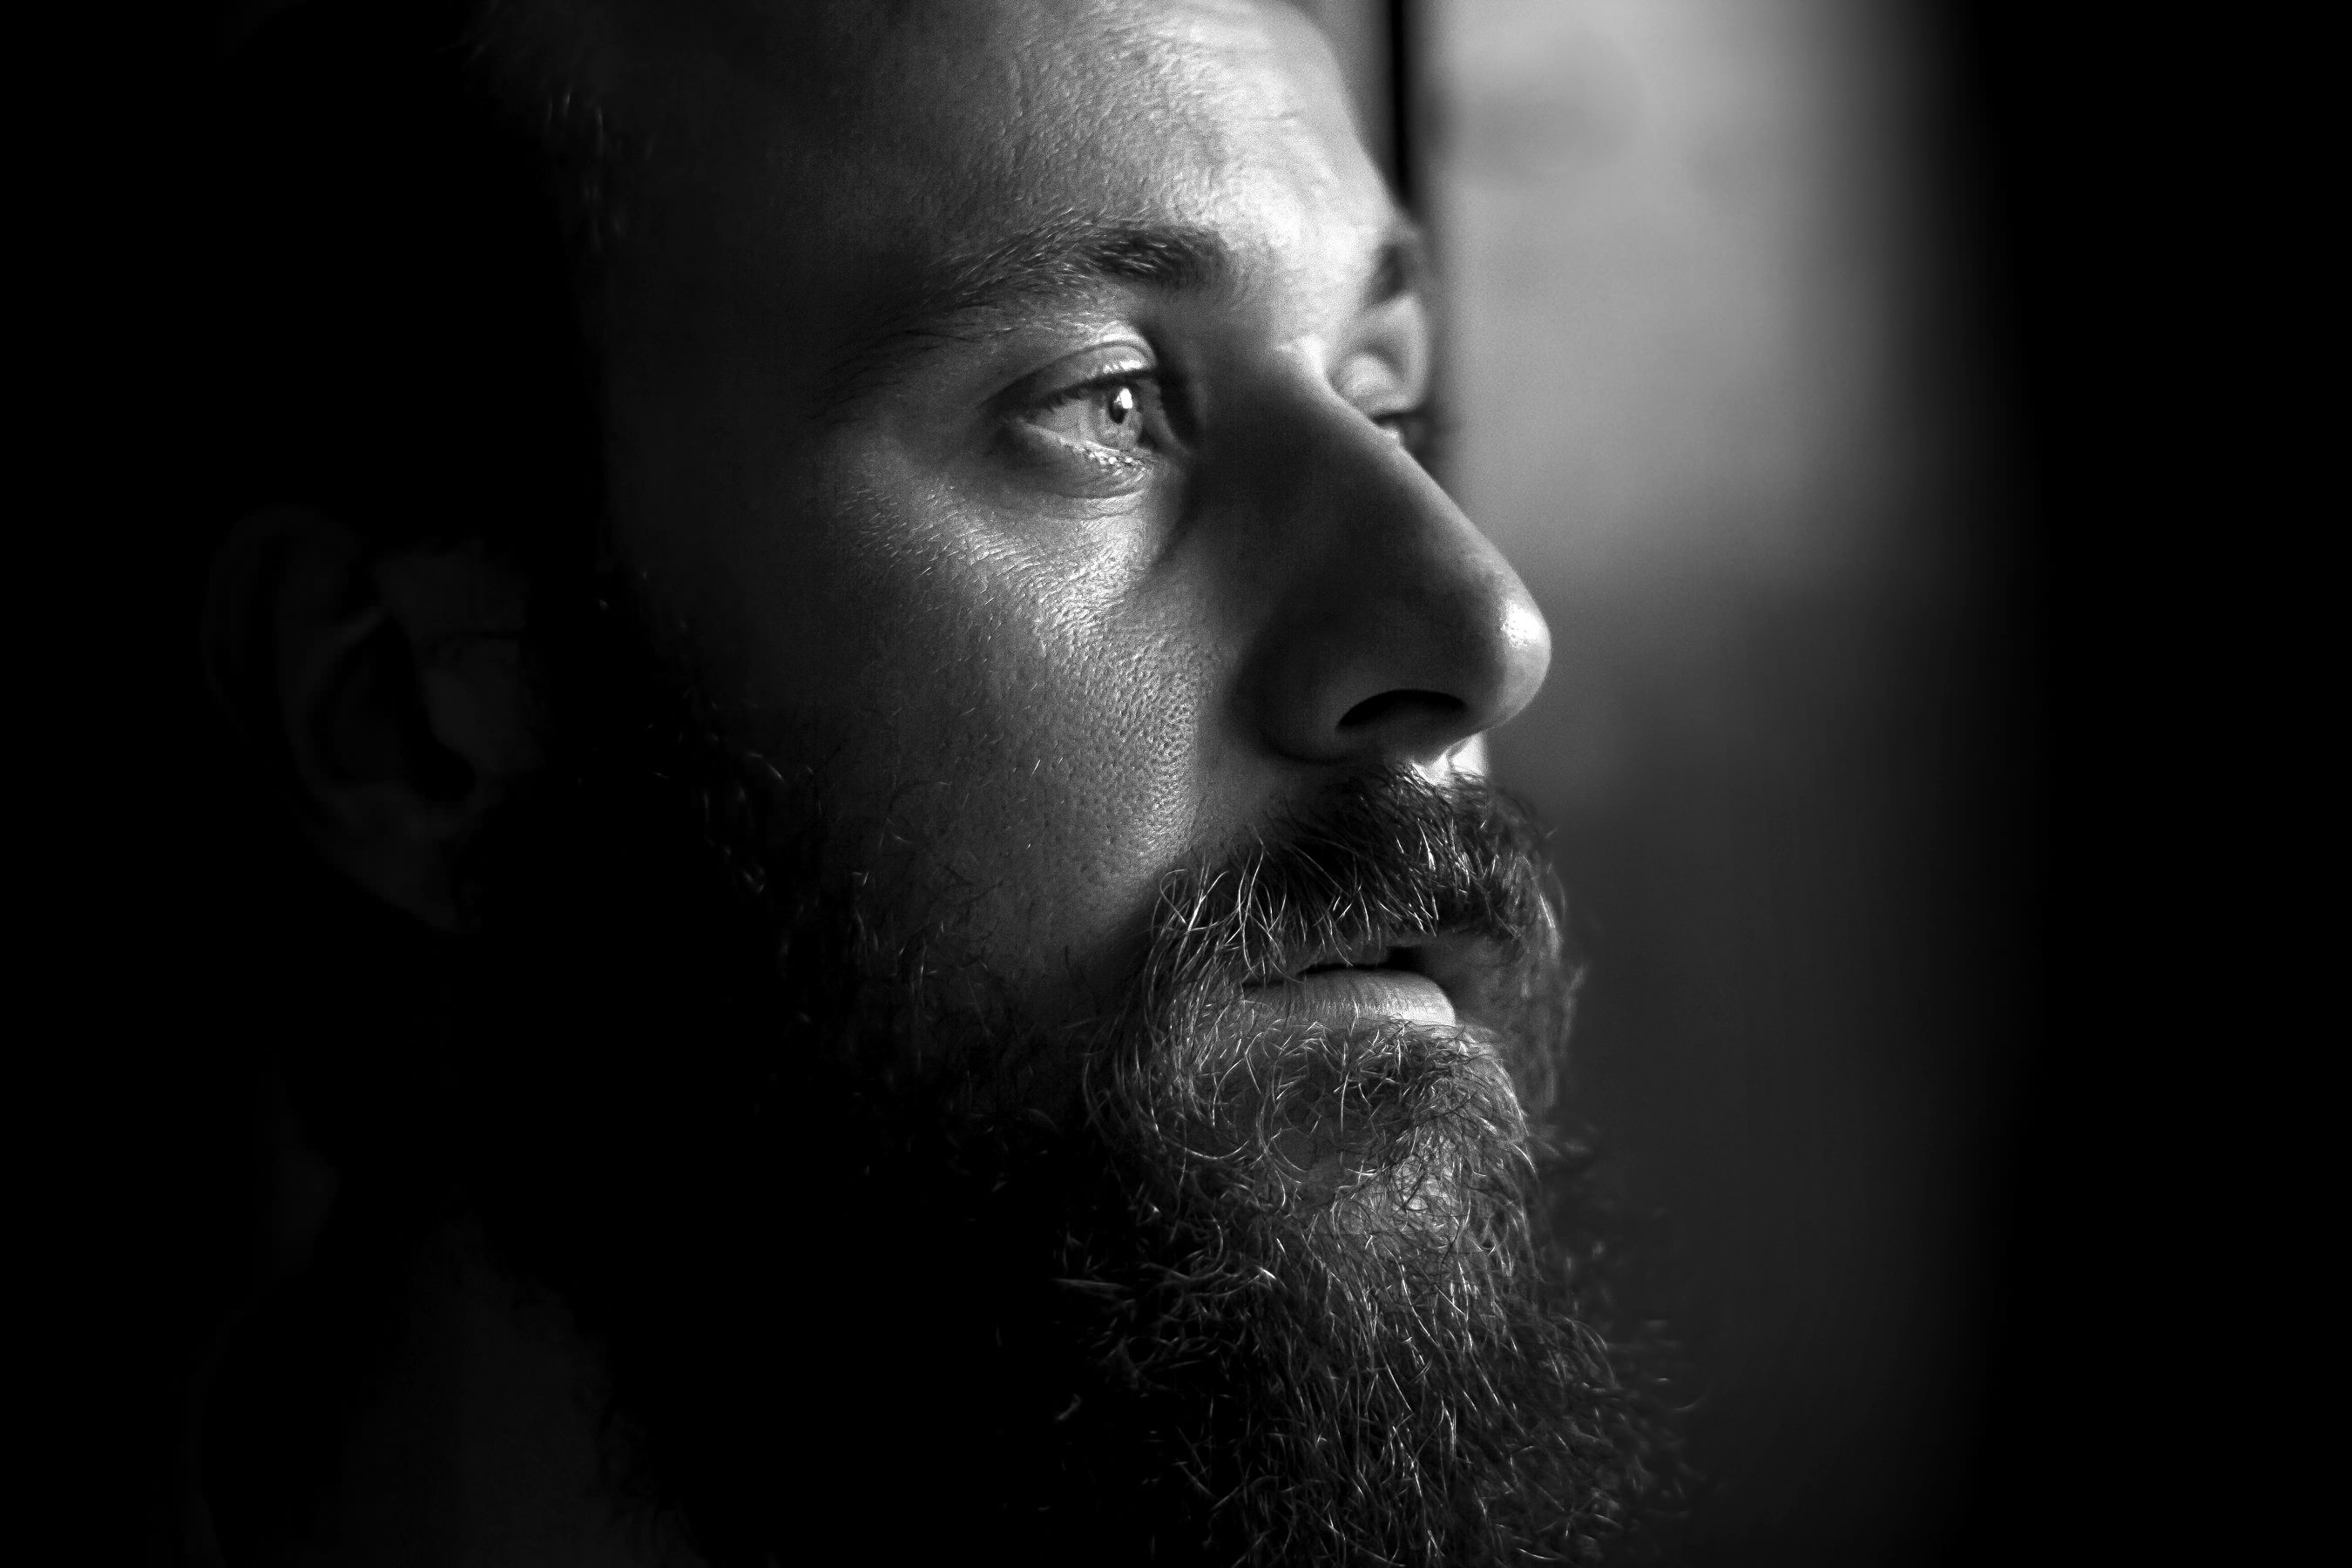
Portraiture with a smartphone camera is one of the most common subjects, yet many people that use their smartphones for photography don’t fully understand how to get the best exposure for the portraits they take. Fortunately, metering (getting a light reading from the scene) has become a standard feature on most smartphone cameras, which allows you to set the exposure for the scene wherever you’d like. Simply tap the phone’s screen and that’s where the camera will meter from.
In the case of portraiture, obviously you need to meter off of the subject’s face. This ensures that you get an image that is well exposed. Granted, metering in smartphones isn’t as powerful as something you’d find in a top-end Canon or Nikon camera, but it will still do a reasonable job. Even if it isn’t perfect reading, it will be a much more pleasing exposure for the subject’s skin tones than if you meter from elsewhere in the scene.
When metering, keep this in mind - underexposure is easier to work with than overexposure, especially when it comes to skin tones. If anything, slightly underexpose the image because you’ll have an easier time recovering details from dark areas than you will from light areas.
Try Silhouettes
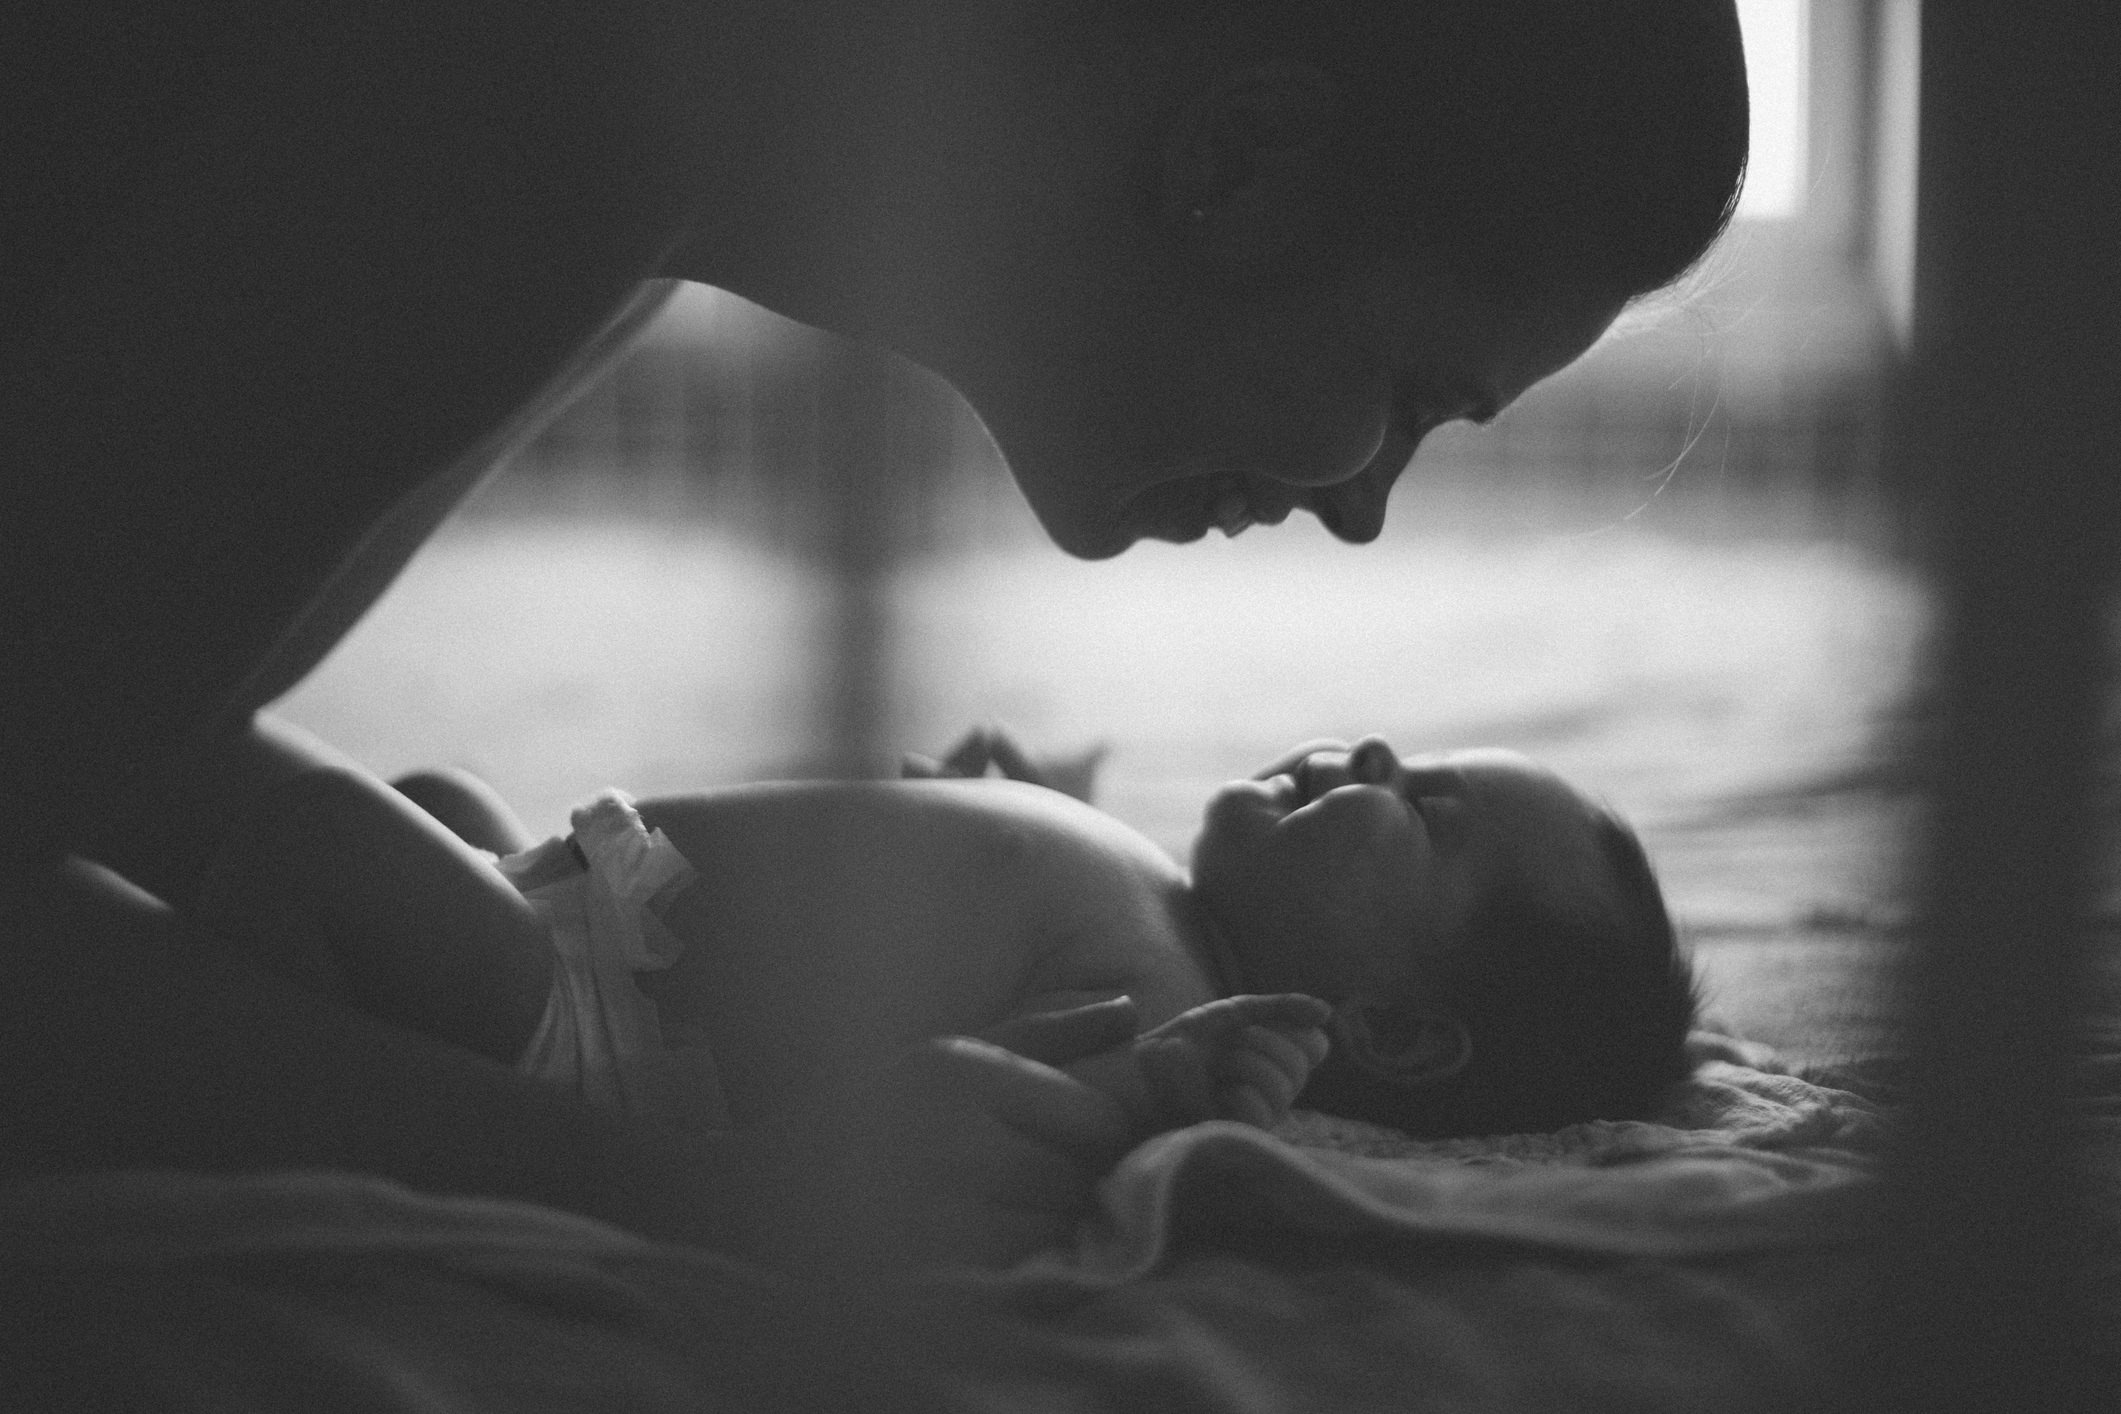
Silhouettes are an ideal choice for black and white photography because, as discussed above, black and white images benefit greatly from good contrast of lighting. Silhouettes are easy to create as well - just place a light source behind your subject, meter off of a bright area in the scene, and your subject will be rendered in shadow, creating a nice contrast with the bright background lighting.
Look at the image above as an ideal example of this. The mother and baby are both quite dark, yet you can still see the details of each of their faces. This contrasts with the light coming through the window, giving the image an incredible sense of depth. At the same time, the dynamic range in the image is extensive, from dark blacks on the left to bright whites in the background.
Use an Add-On Lens With Polarizer
As we’ve discussed throughout this article, contrast is your friend when it comes to creating dynamic black and white images. An ideal way to create better contrast is by using a polarizing filter. In color photography, a polarizer makes the sky a deeper blue and the clouds whiter. But when the color image is converted into black and white, this creates very dark skies and very bright clouds for a sky full of contrast, as is seen in the featured image at the beginning of this article.
Using a polarizer with your smartphone requires that you utilize an add-on lens as well, which is a smart choice if you want the highest optical quality. Sirui has a line of lenses for smartphones that that are constructed of high-quality glass that results in a high-definition picture quality that you’d typically associate with lenses for traditional cameras.
One of our favorite Sirui mobile phone lenses is the wide-angle version, which has a perspective similar to an 18mm lens on a full frame camera. This viewing angle is great for landscapes, street photography, and many other scenes that lend themselves to a black and white treatment. Better still, Sirui’s polarizing filter fits their wide-angle lens perfectly, giving you the opportunity to take stunning images with the dynamic range needed to make your black and white photos pop. If you want to maximize your ability to take impressive black and white photos with your mobile phone, a Sirui polarizing filter and wide-angle lens is something that should be at the top of your list!
Final Thoughts
Creating compelling black and white images with your mobile phone is probably simpler that you think. Contrast is key, regardless of the subject. Looking for opportunities to create silhouettes will also help you generate some eye-catching black and white images with your phone. If your subject is a person, be sure to use your phone’s metering function to meter off their face, bearing in mind that underexposure is preferred to overexposure. And, though there are limitations to your phone’s capabilities, adding a wide-angle lens and polarizing filter will allow you to get sharper photos with increased dynamic range. The drama-filled images you get as a result will be worth the time, money, and effort!
We Recommend
Get Better Black and White Landscapes With These Three Tips

There’s something classic about a landscape that’s rendered in black and white. Call it the Ansel Adams effect - black and whites just seems to have more drama, more depth, and more interest than a color photo of the same subject.
Granted, like everything else in photography, getting a stunning black and white image is much more than putting your camera in monochrome mode, pointing your camera at the subject, and taking a photo. But just because it isn’t that simple doesn’t mean it has to be hard, either.
Let’s have a look at three easy tips that will help you create more compelling black and white landscape photos.
Cast the Rule of Thirds Aside
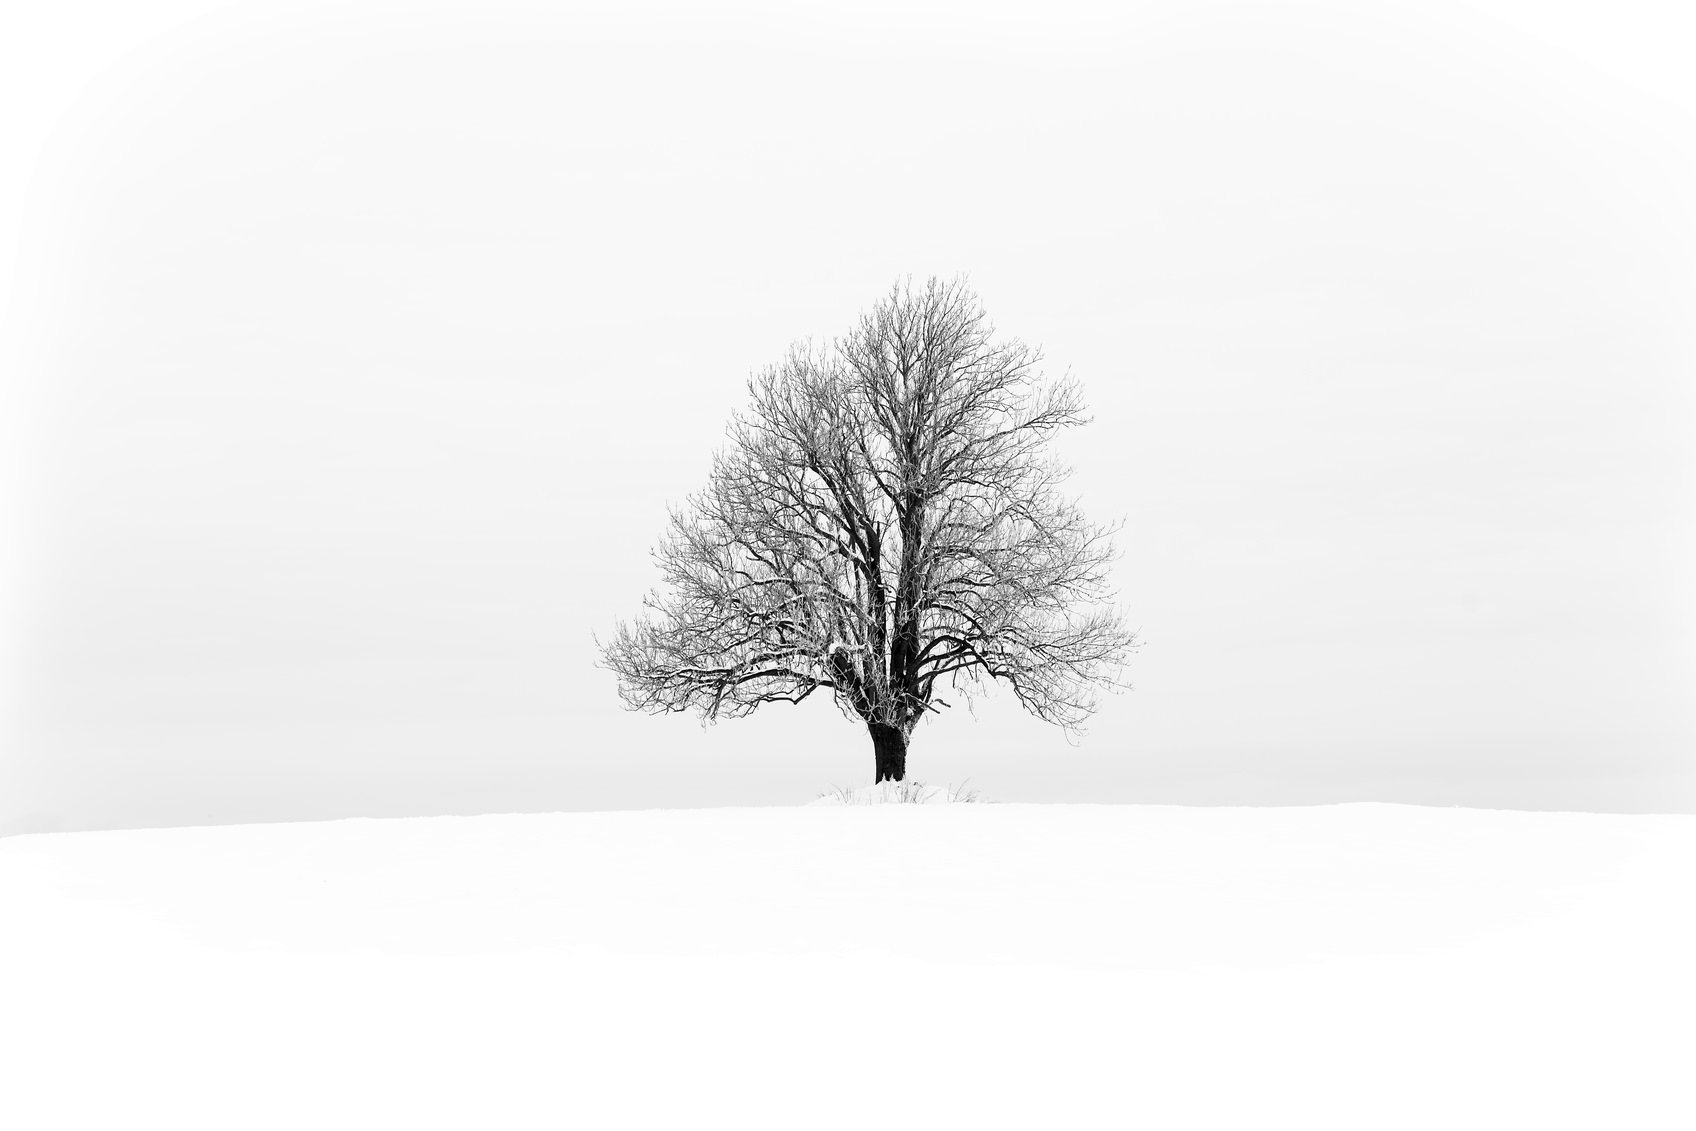
The rule of thirds is the most ubiquitous rule in photography. It certainly has its uses and should be part of your typical approach to photographing landscapes. However, it’s not an end-all, be-all, and you should be willing to cast it aside when the situation calls for it. Try placing your subject smack in the middle of the frame. Shift the horizon to the very bottom of the frame. Incorporate circles, arabesques, or incidences to help move the viewer’s eye around the frame. The point is that using the rule of thirds isn’t always the option that will get you the best result. Experiment with other composition techniques and watch your images improve greatly.
Try Luminosity Masks
Luminosity masks are a little like magic - they make images that appear to be dull and boring reveal details that were difficult or impossible to see. Essentially, a luminosity mask allows you to seamlessly blend exposures in Photoshop. The mask gives you the power to select different areas of the images based on their luminosity. That means that if you have two photos of a landscape, one in which the foreground is well exposed and another in which the sky is well exposed, you can use luminosity masks to select the overexposed area of the first image and blend it with the underexposed area of the second image, resulting in a good exposure.
Note that, although you can create luminosity masks yourself, there are some great resources out there with plugins for Photoshop that create sets for you. If you'd like to try them without need to create your own, download a set you like and import them to get a head start. You’ll need some practice using the masks, to be sure. Jimmy McIntyre offers a great tutorial on using the masks in the video below.
Make It Interesting
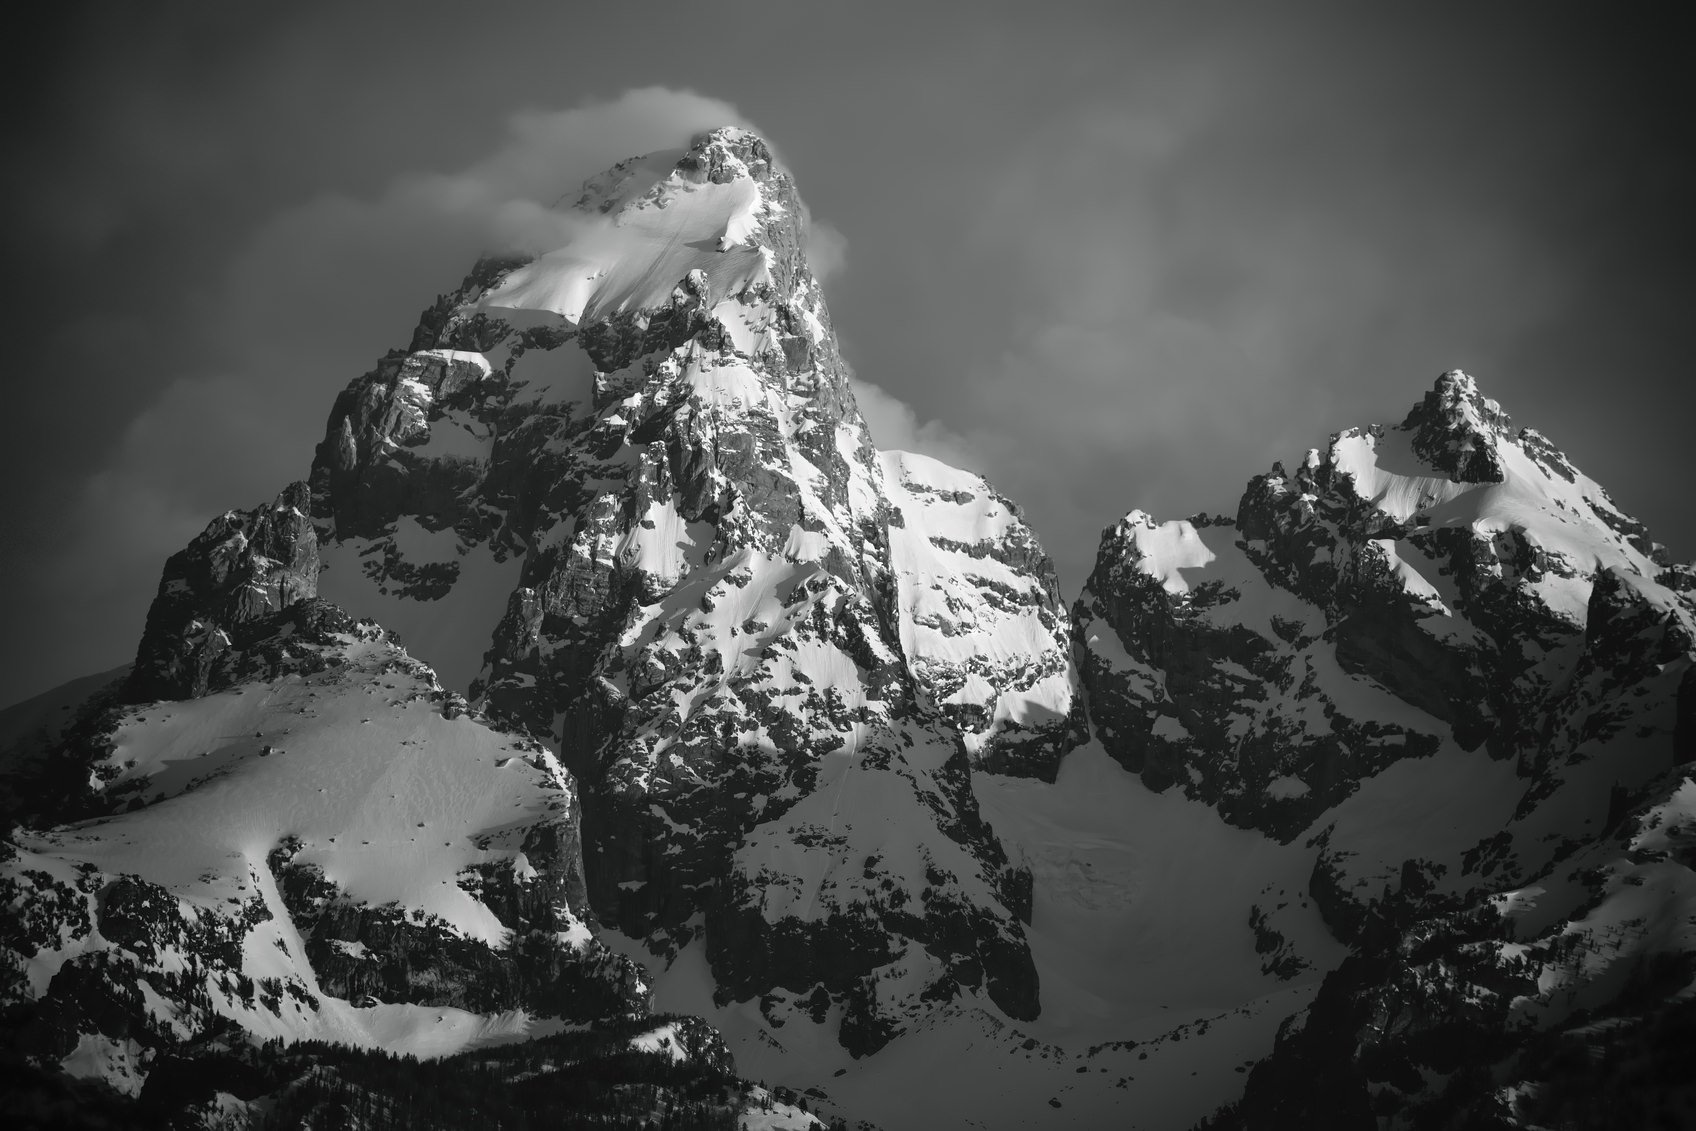
The postcard shots of iconic landscapes are a dime a dozen. Half Dome in Yosemite, the Snake River Overlook in Grand Teton National Park, and Grandview Point in the Grand Canyon have all been photographed millions of times from the same spot.
This isn’t to discourage you from taking the same photo from the same spot, but the point is that there are an incalculable number of other positions and perspectives from which you can photograph your landscapes. Make your landscapes a little more interesting by seeking out different vantage points to photograph these and other iconic landscapes. Simply moving to the left or right, kneeling down or finding a higher point of view can change the look and feel of the image.
What’s more, by finding a unique spot from which to take your photo, you can eliminate the inevitable comparisons between your shot and the images taken by the greats like Ansel Adams. Not that you can’t be a great photographer too, but when it comes to black and white landscapes, Ansel Adams is probably going to win more often than not.
Use these three quick tips the next time you’re out shooting landscapes, and see how effective they can be on the final black and white image you produce. You might just find that these changes to your workflow help you get the stunning images that have been elusive thus far.
We Recommend
How to Convert Images to Black and White in Photoshop
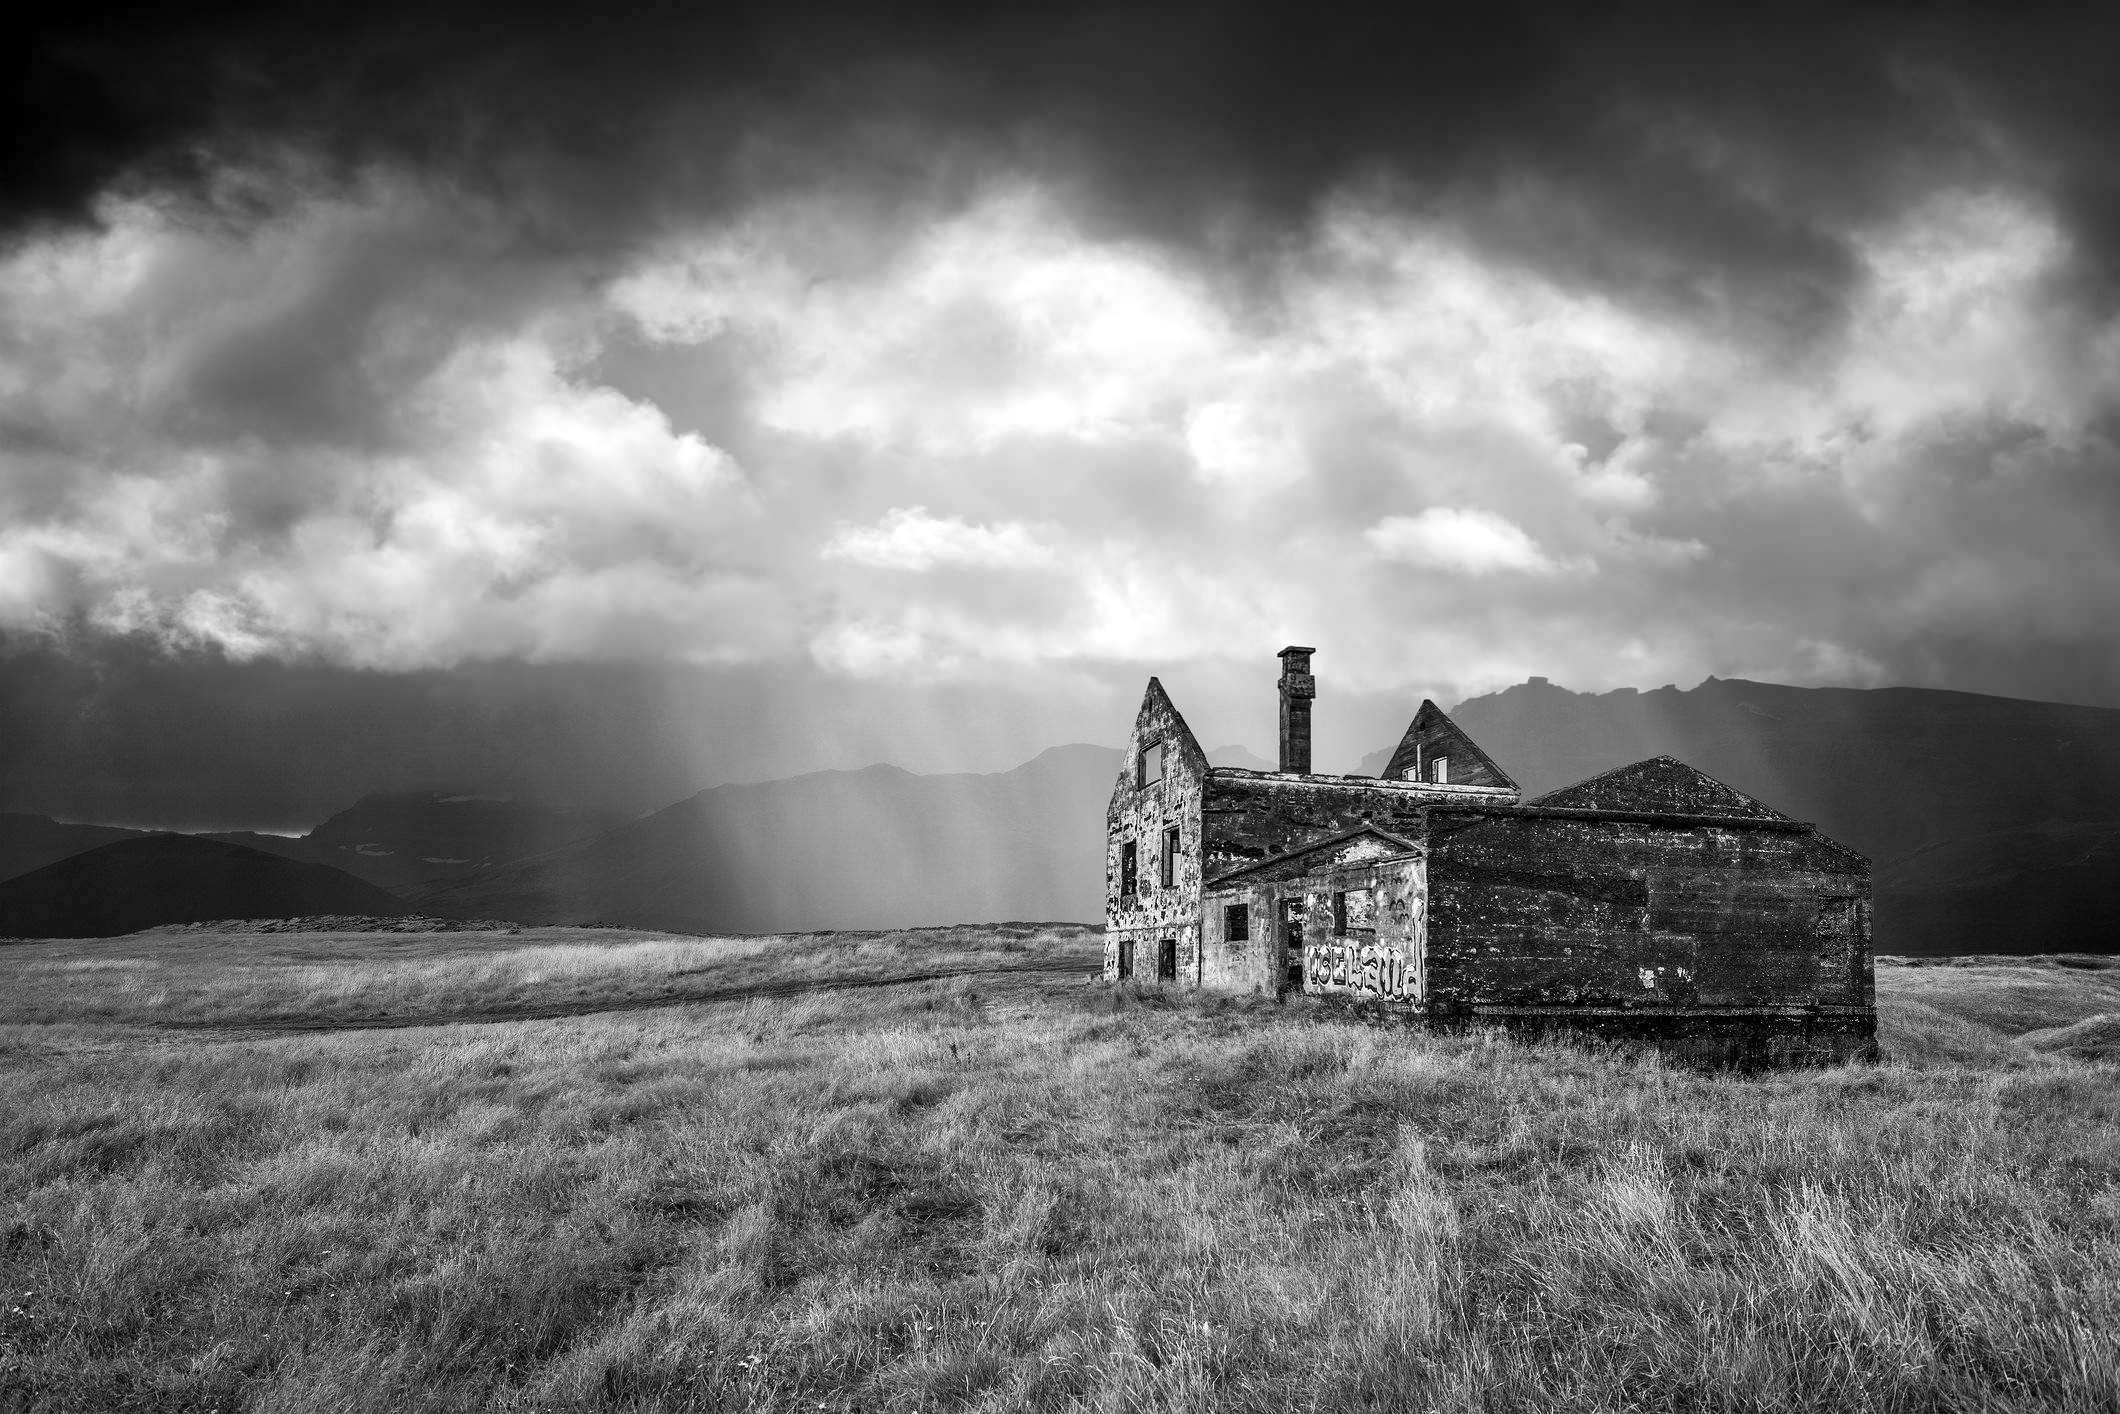
There are plenty of ways to convert your color images into black and white. Some are certainly more effective than others. Some are also more time intensive than others. The ideal setup would be something that is both effective and that doesn’t take up a ton of time either.
Joshua Cripps of Professional Photography tips has one such approach to black and white conversion. His method, which uses basic adjustment layers and blending modes in Photoshop, renders beautiful, impactful black and white photos. Have a look at the video below, and give his awesome process a try on one of your images!
Amazon Recommendations
- Black and White Photography: A Basic Manual Third Revised Edition
- Mastering Black & White Photography
- Adobe Creative Cloud Photography plan (Photoshop CC + Lightroom)
We Recommend
How to Improve Black and White Fine Art Photography
 photo by thomaslusth via iStock
Though the term "fine art photography" might scare you at first, the purpose of this guideline on how to improve black and white fine art photography is to give you the foundational tools you need to elevate the quality of your images to the level of fine art.
This isn't to say that this guide alone will automatically make your black and white photos fine art - there are many other factors at play.
But you have to start somewhere, and this guide is an ideal spot for beginning your journey towards creating fine art black and white images.
Black and White Fine Art Photography Starts With Your Creative Vision
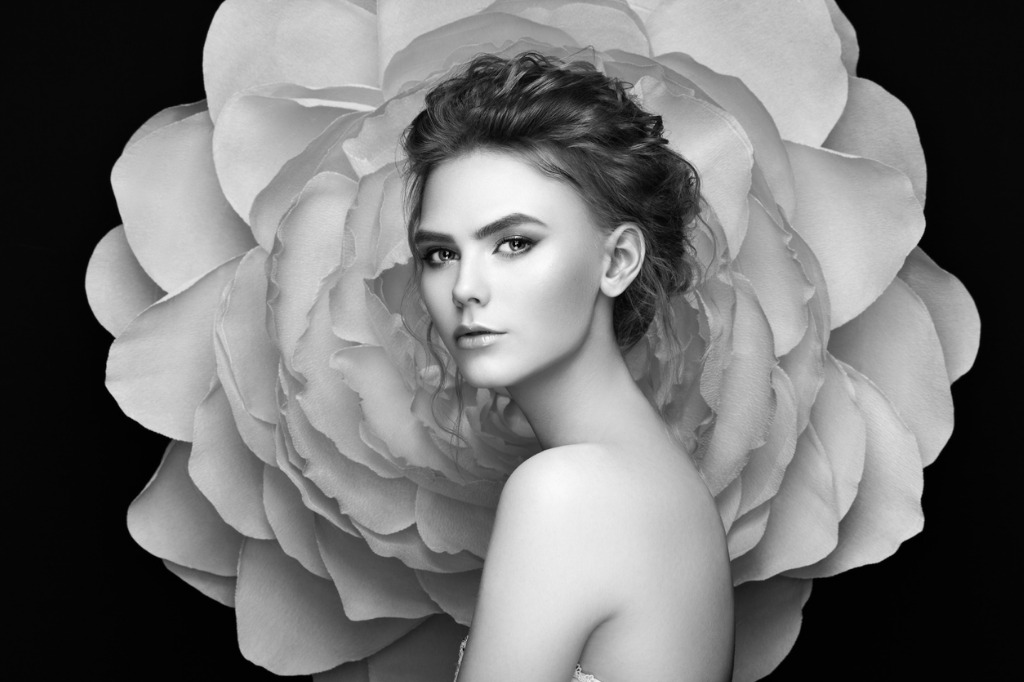 photo by heckmannoleg via iStock
A common trap that photographers fall into when trying to create fine art is thinking that the process begins with a pretty subject. This simply is not the case, though.
Instead, the process of creating black and white fine art photos starts in your head with your creative vision for the photos you want to create.
A cornerstone of this concept is developing an ability to drill down to what is important to you, what your point of view is, and how you can communicate that in a black and white photo.
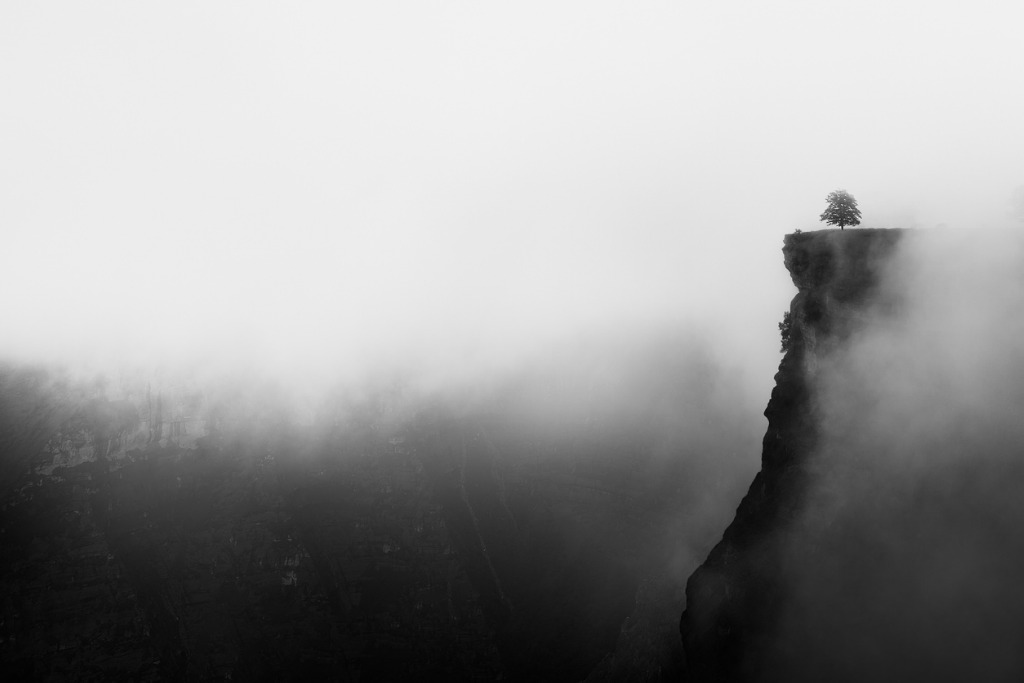 photo by Mimadeo via iStock
For example, let's say you want to create an image that evokes feelings of solitude or even loneliness. How will you convey that point of view in your photo?
One option might be to highlight a subject in space to show that it's all alone, as was done in the image above.
Note how the use of negative space around the lone tree both isolates it and brightens the image, providing gorgeous contrast with the dark tones of the tree and the cliff below.
In this regard, the timing of the shot, the location, the lighting, composition, and framing are all tools used to fulfill that vision of solitude, tools that had to be pre-planned in the photographer's mind.
Sure, sometimes you can step out of your car and snap a fantastic image without much planning or vision, but this is rare! Instead, planning and preparation are key to creating the best examples of black and white fine art photography.
Learn More:
- How to Create Wildflower Fine Art Photography
- Black and White Photography Mistakes Everyone Makes at Least Once
How to Create Black and White Fine Art Photography: Learn to See in Black and White
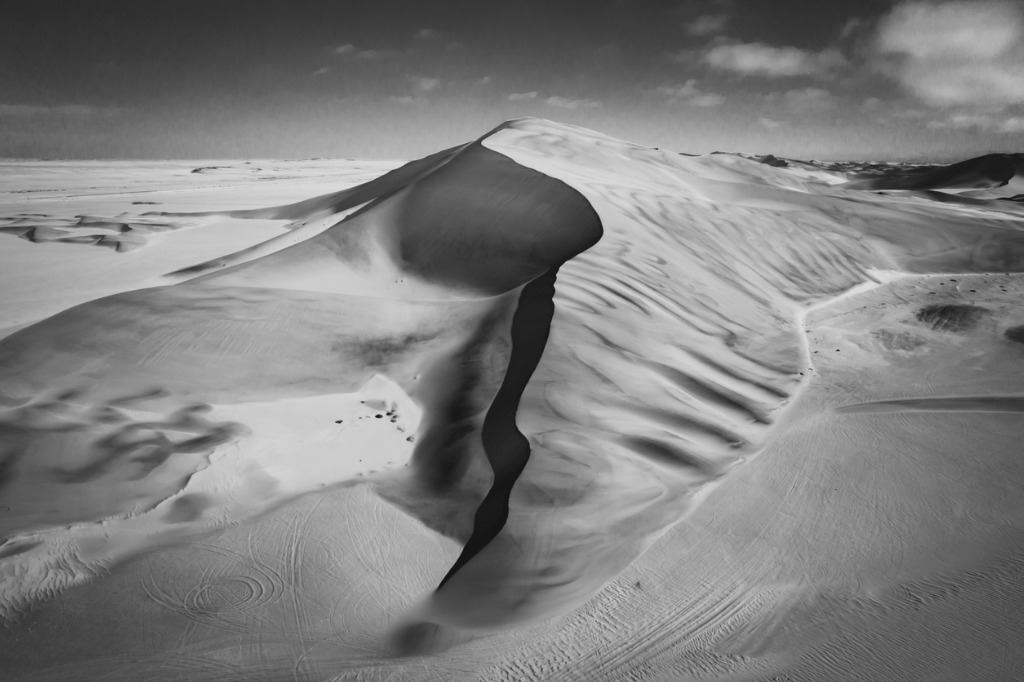 photo by Mlenny via iStock
For most of us, the world is in vibrant color, and when we bring our cameras to our eye to frame up shots, all that color has a great influence on how an image is created.
But in the absence of color, black and white photographs rely on other features - contrast, patterns, and textures, to name a few - to give the image the visual appeal it needs.
This requires you to learn how to see in black and white. This can be more difficult than it sounds, though.
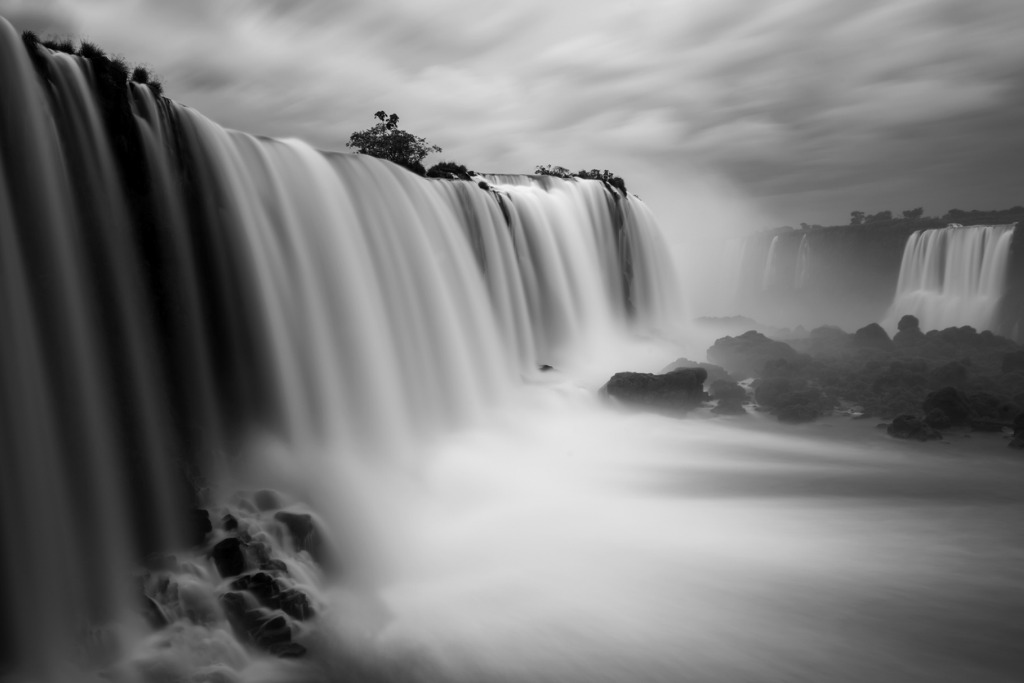 photo by SL_Photography via iStock
One of the most important components of learning to see in black and white is to train your eyes to look for tonal contrast.
In the example above, the low tonal contrast gives this shot a dream-like vibe. Note the abundance of middle gray tones in this shot and the relative lack of deep blacks or bright whites.
Compare this to the black and white fine art photography example below.
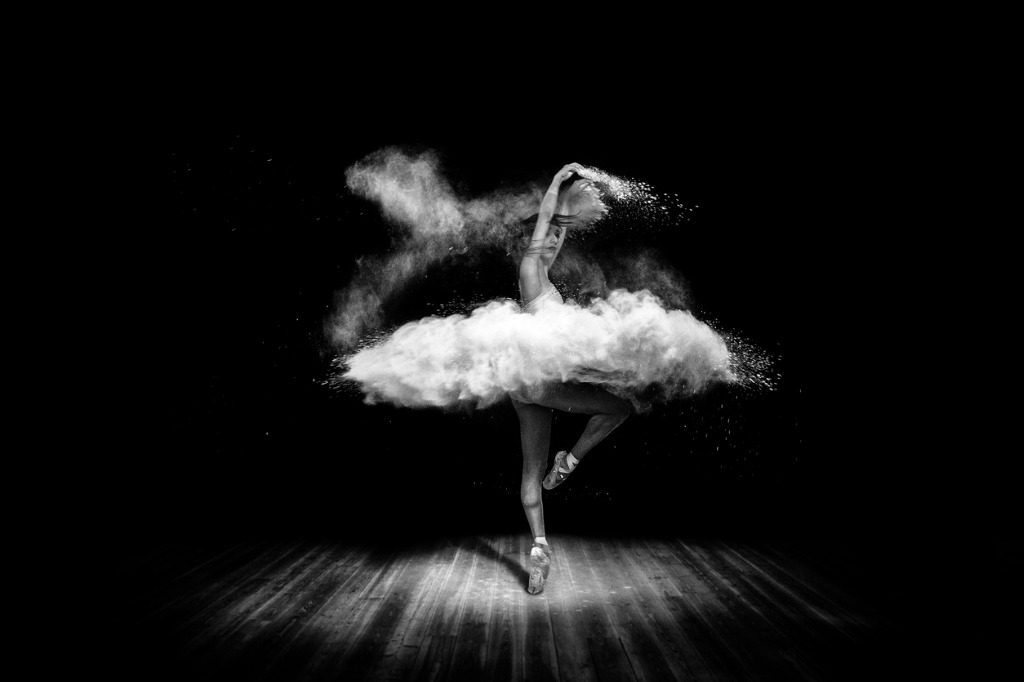 photo by 101cats via iStock
In this case, the tonal contrast is obviously much different.
Rather than having a dreamy, ethereal look to it, this image has much sharper tonal contrast with the majority of the image in deep shadow.
The contrast created by these pure black areas makes this photo highly dramatic - the ballerina's shape and form take on added importance as does her movement, thanks to the contrast of the white powder against the black background.
Again, this is all about developing your creative vision beforehand, then using tools and concepts like tonal contrast to make your vision a reality.
How to Improve Black and White Fine Art Photography: Emotion is Key
 Photo by Christopher Burns on Unsplash
As my good friend and fine art photographer Kevin Vandivier says, where color photography is often used to accurately portray the subject, black and white photography is often used to evoke a more emotional response to the subject.
In that regard, one of the ways to improve black and white fine art photography is to focus on an emotion or feeling.
As noted earlier, if your vision is one of solitude, composing your black and white image in a way that isolates the subject will help viewers feel that emotion.
But as Kevin notes, black and white photographs often romanticize the subject. That is, rather than documenting the subject with your camera, you should consider how your creative vision might help you make a black and white photo that represents something.
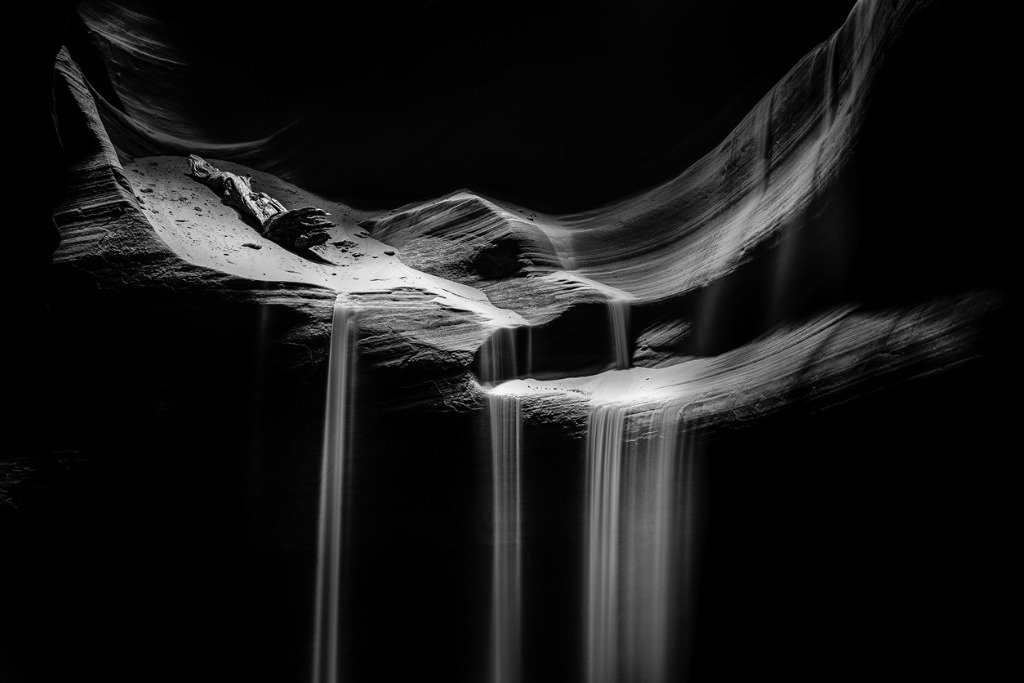 photo by Matt Dirksen via iStock
In the example above, the rich tonal contrast of the scene turns this shot of Upper Antelope Canyon into a dramatic representation that evokes thoughts of Ansel Adams' work.
Note how the lighting is used to accentuate the shape and texture of the canyon (as well as the log) to give the shot more depth.
Combined with the long exposure to create the dreamy, smooth shafts of water, this image reflects the idea of turning the scene into a representation of your vision, rather than simply snapping a photo that accurately documents the subject.
So, creating beautiful black and white fine art photography begins with your vision and your ability to train yourself to see in black and white. Then, you use those things as tools to create images that trigger emotions or portray the subject in a creative manner.
If you can do these things, you'll be well on your way to getting improved black and white fine art photos!
To see more examples of black and white fine art photography, visit Kevin Vandivier's black and white fine art gallery.
Learn More:
We Recommend
How to Take Interesting Photos in the Most Boring Places

Mundane Surroundings? No Problem!
All too often we get enamored with photographing the spectacular - the Yosemites of the world, for example - and shun the everyday locations with which we are familiar.
However, this is a mistake because gorgeous photos can be created in even the “ugliest” locations. It’s just a matter of getting creative.
Consider these quick and easy tips for making the mundane magnificent.
Focus on the Details
When striving to find beauty in the mundane, it’s important to focus on the little details. Doing so opens up new avenues for portraying the subject because you can focus on fundamental elements like shape, color, texture, patterns, light and shadows, to name but a few.
The image above benefits from this approach. The detail of the wall, with areas of peeling paint and cracks, along with the shadows cast by elements unseen in the frame, gives this image all sorts of visual appeal. What’s more, including typography in the frame - the signs on the door - adds another layer of punch, both in terms of the visual interest of the lettering and in terms of the pops of color that are added to the scene.
Look for details like these in your everyday scenes, and use them to create a more compelling image.
Go For Broke With Your Composition

Often, the manner in which you frame your shot, the way you utilize depth of field, or the perspective from which you shoot will have a tremendous impact on how your image is received. For example, shooting from eye level, from a standing position, with your subject centered perfectly in the frame might not be the most compelling composition. In fact, that sort of composition might make the most spectacular scene seem a bit boring.
Just like with any photo, an image of a “boring” subject needs to benefit from how you compose the shot. As a result, do what you can to shake things up. Try shooting downward to get a top-down perspective, as was done in the image above. Play with your aperture to see how a blurry background might change the impact of your photo. Shift your subject to the extreme edges of the frame, giving viewers something totally unexpected in terms of subject placement. You might very well find that doing so makes the shot.
Don’t Be Shy

A large part of your success in making great photos of less-than-stellar subjects is in your willingness to experiment and see what you can create. It’s a difficult process to learn how to take high-quality photos. But when you combine that with subjects that maybe aren’t as grand or gorgeous as you’d like, the process becomes a little tougher to master.
Nonetheless, don’t let an increased level of difficulty dissuade you. There will be many bad photos, no doubt, and many moments of great frustration as well. But being willing to try new things and stretching your comfort zone will not only result in an expanded set of technical skills, but it will also help you grow creatively. So, don’t be shy - grab your camera and a couple of friends, and see what “boring,” everyday subjects you can find in your house, your yard, or your neighborhood to highlight in a gorgeous photo.
We Recommend
Master the Art of Drone Photography: Part 1

If you have a drone - and these days, who doesn’t - you understand the trials and tribulations as well as the joys of using an aerial vehicle for photography.
But to think that taking photos from above is the same as it is from your handheld camera is a total misconception. There are the photographic considerations, including subject matter and camera settings. There are also the issues related to the responsible, safe, and legal use of drones.
In the first part of our two-part series on drone photography, we explore legal and privacy issues, as well as topics related to safely flying your drone.
Legal Issues

As drones have become ever more popular, more and more laws have been passed governing their use. Since consumer-based drones are still relatively new, governments worldwide are scrambling to devise rules that pertain to when, where, and how drones can be used, and by whom.
At the center of it all is the common sense use of your drone. Naturally, flying it near buildings, over your neighbor’s backyard, or near airports will do nothing but get you in a heap of trouble. Additionally, flying your drone over something that could be damaged or destroyed should the drone crash is a simple matter of using your head and your wits. In short, if you’re about to fly your drone somewhere and you have doubts about the appropriateness of it, don’t do it!

In the United States, the Federal Aviation Administration has issued a broad spectrum of rules of which you need to be intimately familiar before you take your first flight. The FAA’s Unmanned Aircraft Systems website is the go-to place for the latest in terms of news, regulations, instructions on how to register your drone, and procedures for flying. Other entities, like states, and cities, may have their own set of rules as well. These regulations also vary from country to country, so it’s best practice to check with local authorities before sending your drone up into the sky.
Another excellent resource is the Know Before You Fly Campaign. With guidelines for responsible flying, resources for drone enthusiasts, and much more, it is worth a visit if drone photography is in your future.
Practice Makes Perfect

Once you’ve explored the legalities of flying a drone, it’s time to practice.
It goes without saying that you will need to examine a practice area to ensure that it is safe and legal to fly there. A wide-open area would be an ideal spot, such as an empty field in a rural area. Granted, not everyone that has a drone has the luxury of an open field nearby, so this is another common sense moment. Choose a location that is as open as possible and affords you sweeping views so you can maintain eye contact with your drone at all times. Above all else, ensure that your practice location has nothing that can be damaged and no people that can be hurt. If it crashes, you want to deal with a broken drone at the worst, not a destroyed car windshield or a hurt bystander.
You’ll also want to check the weather to be sure you’re taking to the skies in the best possible conditions. The less wind, the better, for obvious reasons. You will have enough to worry about just trying to master the controls of the drone; you don’t need a breezy day to add more stress to the situation!
Beware of the Battery

Many drones are equipped with a feature that, in case of an emergency, it will return to its launch point automatically. This is great for both you and the drone if something goes awry.
However, if you don’t keep an eye on the battery levels of your drone, it will land wherever it pleases, which can be inconvenient at best and downright destructive at worst. It’s far too easy to get caught up in the process of flying, and once you add taking photos, there is an awful lot to command your attention.
As such, you will need to develop a system for checking your battery life. Set a reminder on your phone. Have a friend time your flight and call out how many minutes of battery life are left. Try to launch the drone as close to the area you want to photograph as possible. These are simple steps, but they could very well save you lots of trouble should your drone run out of juice.
Understanding the factors that reduce battery life is essential as well. The more camera weight it has to carry, the less time your drone will be able to fly. Windy conditions and cold weather have a deleterious impact on battery life as well. Be prepared to cut your flight time in these conditions by as much as half!
Final Thoughts

There is far more to know about flying a drone for photography purposes, so be sure to check the resources provided in this article before you attempt to tackle drone photography. As noted above, it’s mostly about using common sense and being informed about what you can and cannot do with your drone. Be responsible, check local regulations, and take the time to learn how to fly your drone safely before you attempt to add photography to the mix.
We Recommend
Staycation Photography: What to Photograph Close to Home

There seems to be the idea floating around that you have to “go somewhere” to take a fantastic photograph. Sure, it’s great to go to exotic or picturesque locales and take photos, but you don’t absolutely, positively have to pack your bags to find photo-worthy subject matter.
In fact, there are plenty of subjects right in your own backyard! It just takes a bit of imagination and an understanding of composition to get the breathtaking images you seek.
Here are a few photography project ideas for how you can maximize your staycation photography.
Look for the Right Stuff

All great photos have some things in common - good lighting, a strong subject, colors, shapes, or forms to give the image interest, or even motion. Certainly, you won’t find a vignette with all of these visually engaging qualities, but rest assured that with a little time spent looking at the scenes around you, you will find something that can be made into a high-quality photograph.
Part of looking for the right stuff is finding the best perspective from which to compose your photograph. The first angle you shoot from might get you a quality photo, but the second, third, and fourth angles might be even better. Get up high and down low and move to the left and the right. Move around the subject you’ve chosen to find the most appealing background. Look for ways to enhance the impact of the lighting that’s available. Don’t just settle for the first shot - keep looking and see what you can find that will get you an even better photo! Learn more about photography ideas at home on our website PhotographyTalk.com.
Get the Gear
Staying close to home means that you have easy access to your entire collection of gear. Try different camera bodies and lenses. Go macro, then go telephoto. Try some close-ups with a wide-angle lens too. Manipulate the shutter speed to freeze and blur movement. Mount your camera to a tripod, then hand hold it for additional shots. The point is that this is a great time to experiment and push the boundaries of what you typically do.
Focus on Depth of Field

A common complaint of people who try to photograph things near their home is all the ugly stuff they don’t want in the image - street signs, trash cans, freeway on-ramps, and so on.
Of course, these things can be easily eliminated by working with a very shallow depth of field. Remember that depth of field decreases as the aperture widens, so try shooting as wide open as possible. Also remember that the distance from your lens to the subject, and the subject to the background impact depth of field. As a result, get in close, and try to frame the shot with as much room behind the subject as possible. If you do these things, it won’t really matter what’s happening in the background because it will all be nicely blurred.
Subject Suggestions
There is a multitude of subjects just out your front door that are worthy of a photo, especially if you catch them at the right time. Here are a few of our favorites:
Birds

The birds that visit and live near your home are one of the best subjects to try your hand at wildlife photography. They are easily accessible, used to humans being present, and if you provide them with a birdfeeder, birdhouse, or bird bath, they will hang around for awhile, giving you time to snap their photo.
Insects

Your yard or garden is rife with life on the macro level. Grab your macro lens, ring light, tripod, and remote shutter release and head out to find ladybugs, spiders, dragonflies, and other insects that you can highlight in a macro shot.
Flowers

Flowers are abundant in many areas and make a wonderful subject for a lovely close-up photo. When photographing flowers, try to isolate a single bud in the frame, ensuring that it is in sharp focus in front of a nicely blurred background. Alternatively, you can step back for a wide-angle shot if there is a lot of variety in terms of color and shape. You can also check another post about photo projects.
Dew

In the spring and the fall, in particular, your grass and plants will be covered with dew in the morning. The dew drops are an excellent visual addition to any photo, particularly if you can position yourself such that there is backlighting to make the dew drops sparkle. Look for spider webs for a more graphic visual element.
Sunrise or Sunset

Golden Hour is an ideal time of day to photograph just about anything. Whether it’s a nearby field where you can isolate a single stalk of wheat in front of the rising sun or the silhouette of your kids playing in front of a sunset, Golden Hour will give you great lighting to highlight the everyday objects, people, and events like those outlined above.
We Recommend
Transform Daytime Photos Into Black & White Masterpieces in 5 Easy Steps
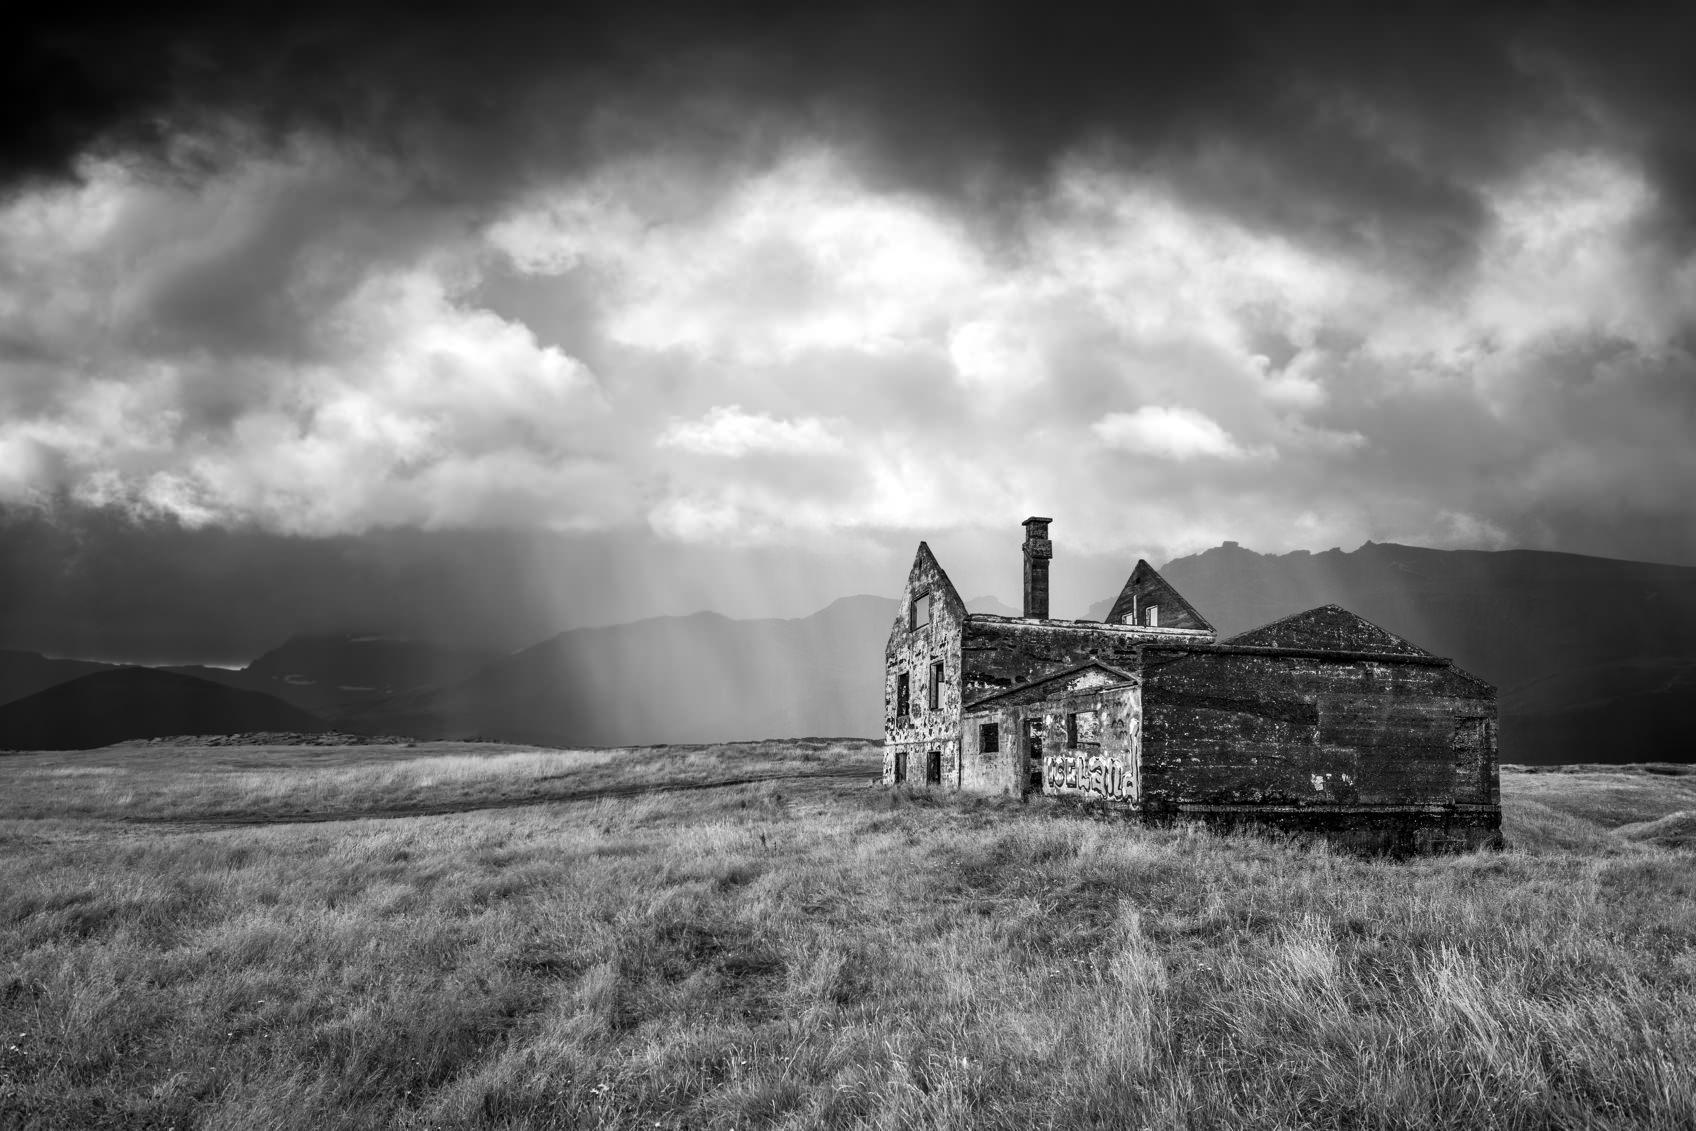
We all know that Golden Hour is the ideal time for outdoor photography, but sometimes shooting in the early morning or late evening hours just isn’t in the cards. That means from time to time we have to grit our teeth and deal with the harsh, mid-day sun that tends to make photos less than appealing.
However, Serge Ramelli has created a short 5-step process for taking drab daytime photos and transforming them into stunning black and white images. All you need is a bit of time and patience, Lightroom CC, and follow along in the tutorial he’s created below. In no time, you’ll have incredible black and white photos that will make friends and family say “WOW!”
Amazon Recommendations
- Art of Black & White with Photoshop: A Comprehensive Course on Professional Black and White Photography
- Mastering Black & White Photography
- Creative Black & White: Digital Photography Tips & Techniques
We Recommend
Use Texture to Make Your Black and White Photos Pop

There are a lot of factors that help a black and white photo become truly eye-catching. The use of shadows and light, for example, give the image depth in the absence of color. Lines and shapes have a similar effect, giving the eye interesting elements to help it move around the frame.
But texture is equally, if not more powerful, in terms of giving a black and white image a lot of dimension and interest. Not only do textures give the two-dimensional photograph a distinct feeling of being three-dimensional, but they also help make the image seem more real, as if you could reach out and touch the photo and actually feel the texture that’s highlighted within it.
In short, textures can elevate a so-so black and white photo into something that truly reaches out and grabs the viewer’s attention. That’s the whole point of photography, right?!
In the video below, learn how you can implement texture like the masters. Ray Scott of Visual Art Photography Tutorials explains the ins and outs of texture and gives us stunning examples of texture-filled black and white photos to inspire our creativity. Give it a look!
Amazon Recommendations
- Mastering Black & White Photography
- Digital Black & White Landscape Photography: Fine Art Techniques from Camera to Print
- Art of Black & White with Photoshop: A Comprehensive Course on Professional Black and White Photography!