10 Places to Photograph in Hawaii
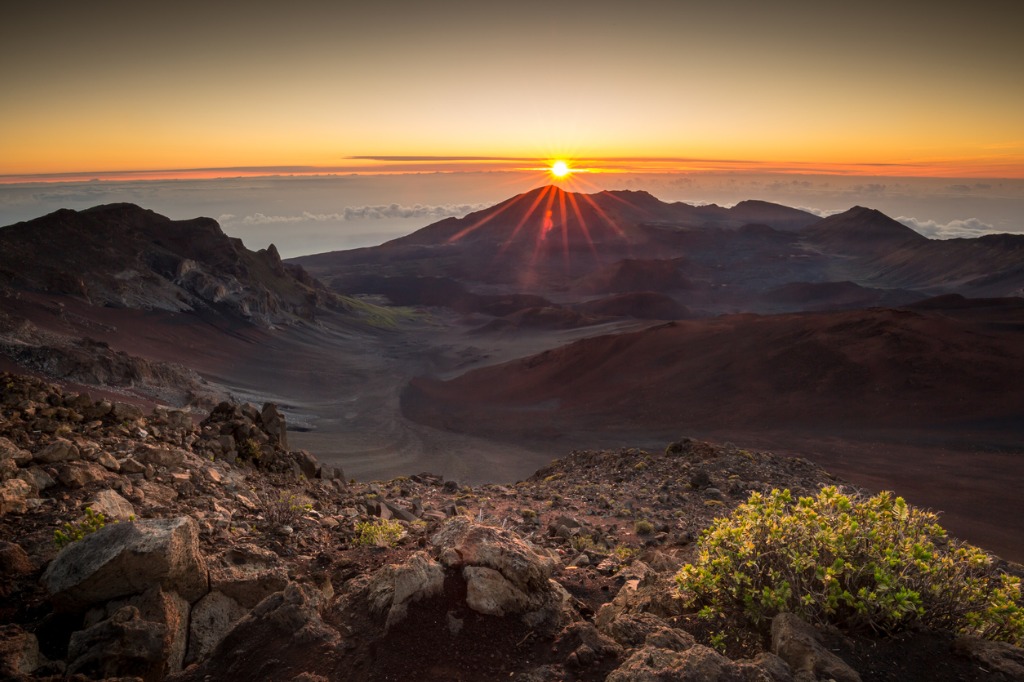
photo byEvan Austen via iStock
Hawaii is one of the most exciting places in the United States. It’s made up of 8 major islands, one of which is completely closed off to everyone who is not a native Hawaiian. So, it makes sense that this is an ecological paradise.
While you cannot go to Niihau (unless you marry an inhabitant), you can go to Oahu (the island with arguably the prettiest landscapes and unarguably the most incredible Asian food).
And, if you’re planning on making your vacation a working vacation, then you’re going to need some tips about places to photograph in Hawaii.
Here are our favorite popular Hawaii photography spots; we also may have snuck some local favorites in as well.
Yokohama Bay at Sunset
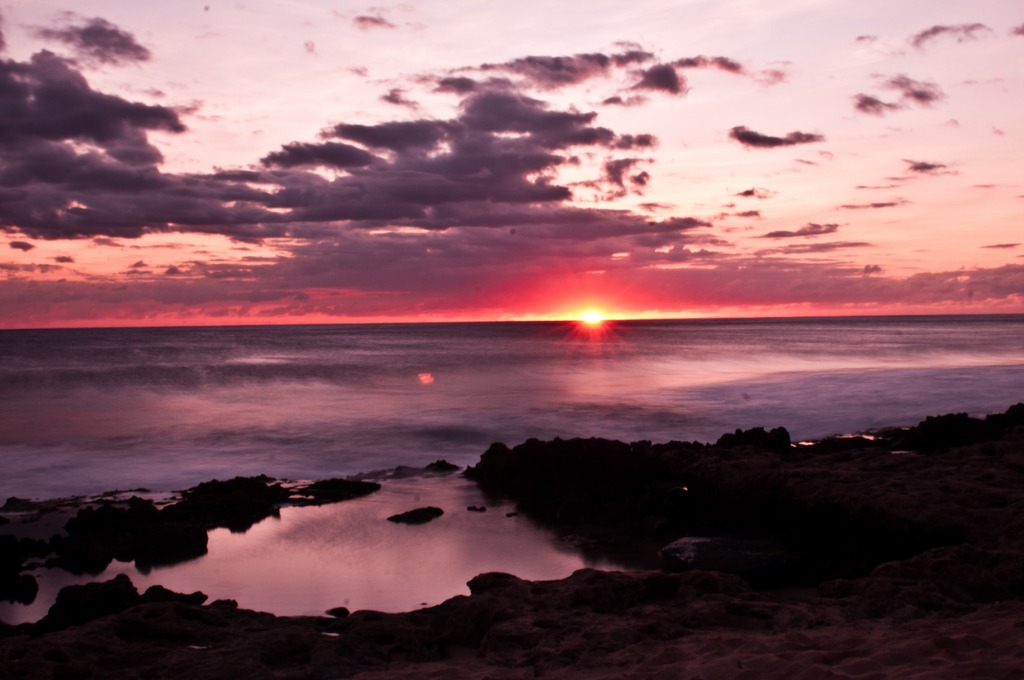
photo byNalunani_Photography via iStock
Sunset Beach is overrated and I’m the first person to say it. It’s gorgeous, but it’s constantly flooded with tourists, which makes photographing the natural landscape incredibly difficult.
Yokohama Bay is an incredibly well-kept local secret. It lies all the way on the far northwestern tip of Oahu, which means it will take you about an hour long drive through tropical forests to reach.
Yokohama Bay is quite a long beach, which means even on the most popular travel days, you should be able to find a huge spot to stakeout for yourself. Plus, Yokohama, or “yokes,” isn’t featured in any Hawaii photography guide yet, so you won’t be fighting crowds even on the weekends.
As is the case with most of Hawaii’s best kept secrets, there are very few photographs available online of this secret paradise. Thanks to Papahui Hawaii for the video about Yokohama Bay.
While you can photograph this gorgeous beach any time of the day, the sunset here is the best on the island.
Plus, you can make an entire day of Yokohama and photograph the wildlife in the area, like the endangered Hawaiian monk seal featured in this video by BlueWorldTV.
Pro Tip: There’s a hiking trail at the very end of Yokohama Bay which takes you to Ka’ena Point. During the winter months, you can find the world’s largest population of nesting albatross at Ka’ena Point, and during the summer months (if you’re lucky) you can photograph endangered Hawaiian monk seals resting along the shores.
Ko’olau Mountain Range
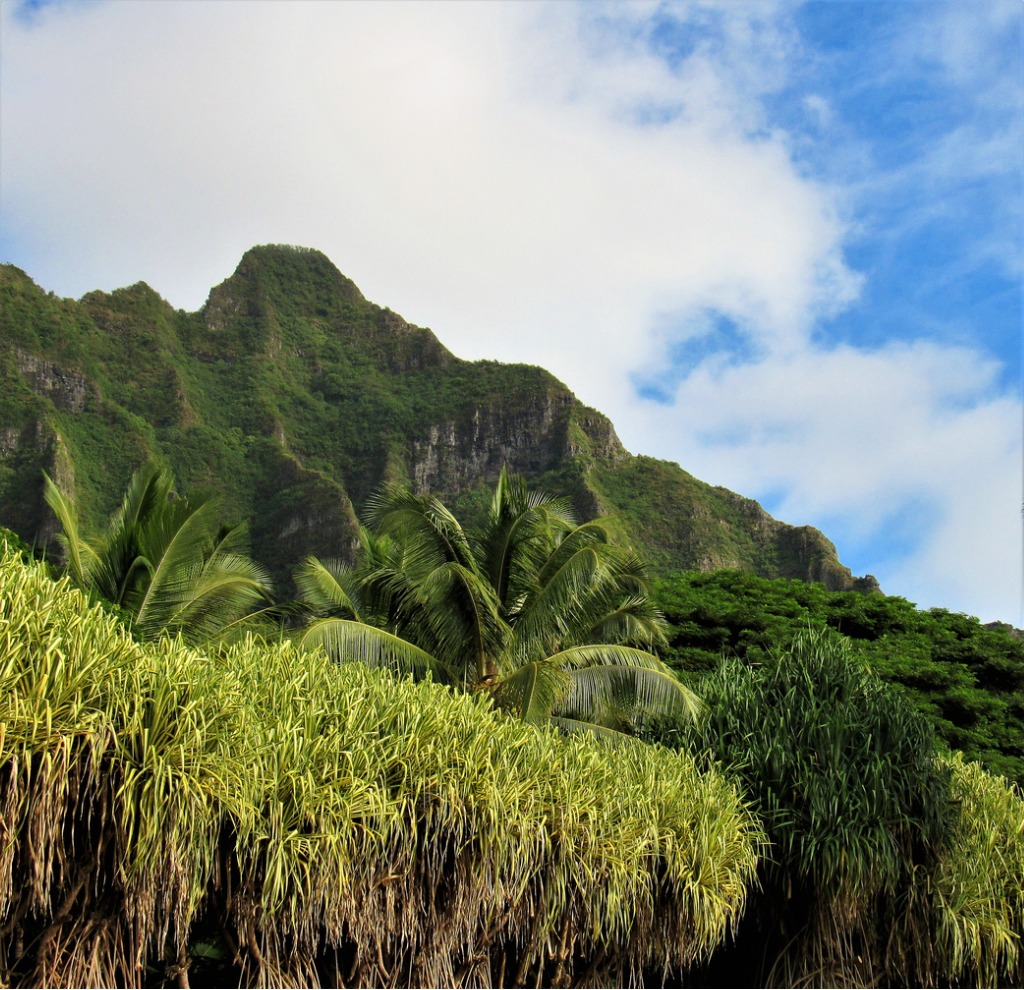
photo by Teri Wertman via iStock
The Ko’olau mountains are one of my favorite places to photograph in Hawaii because they are huge, which means there are hundreds of hikes you can take on them to snap a photo nobody else ever has before.
The Ko’olaus are located on the westward side of the island, opposite from Honolulu. They also wrap around a small Hawaiian town, “Waimanalo,” which the locals refer to as “God’s Country.”
While you’re out photographing the Ko’olaus, you can stop by any one of the farms located in Waimanalo.
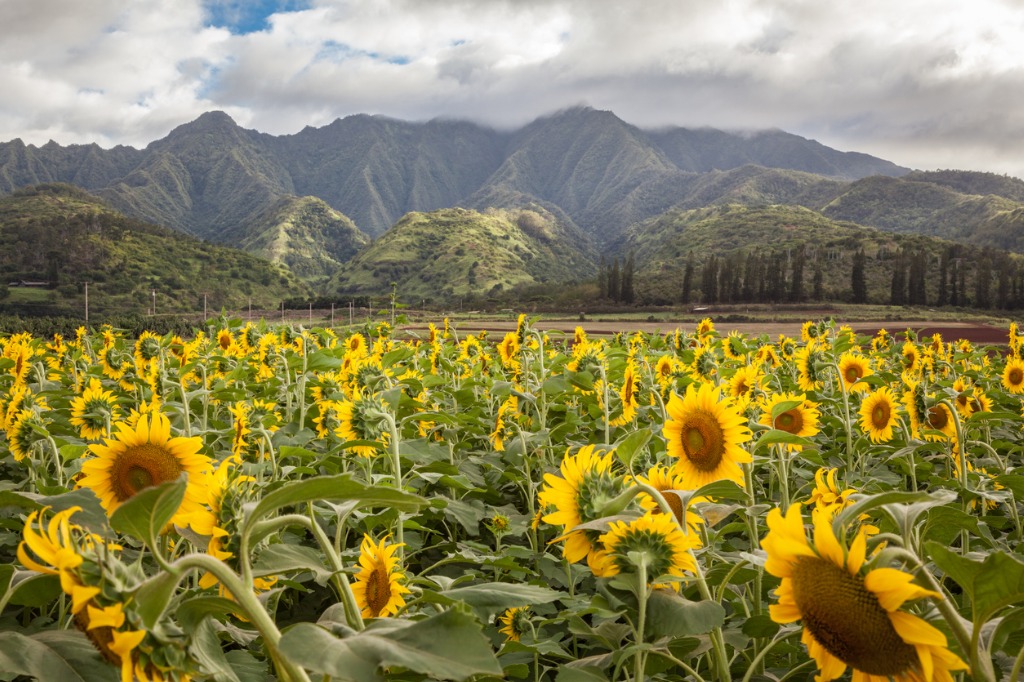
photo by Joshua McDonough via iStock
A favorite spot for the locals is Waimanalo Country Farms, which hosts pumpkin patches and sunflower fields year round.
As much as I love all of the flora and fauna that is local to Oahu, it’s always fun to read about travel tips for Hawaii that remind you of home, but with a twist.
It’s definitely an odd feeling to visit a pumpkin patch in the middle of the Pacific, but an experience that is not to be missed.
Editor's Tip: When I head out for a long photography journey, I want a camera bag that's bulletproof and can accommodate a lot of gear. For that, I've got the Nomatic Check-In. This bag has a lightweight polycarbonate shell that'll stand up well to the rigors of airline travel. It has TSA locking zippers, low-profile handles that won't get caught in luggage systems, and it holds up to 78 liters of gear!
Byodo-In Temple
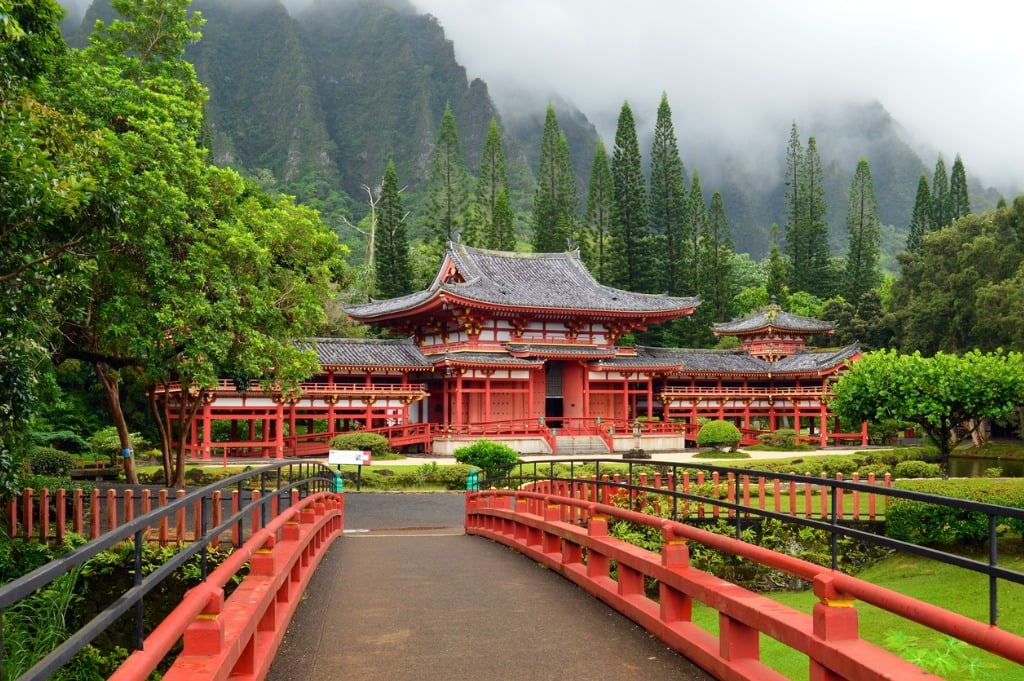
photo by Kirkikis via iStock
The Byodo-In Temple was created to commemorate the first time Japanese immigrants came to the island of Oahu. It is a smaller replica of a nearly 1,000 year old temple located in Uji, Japan.
After you’re done photographing all of the other places to photograph in Hawaii on this list, you may need a bit of relaxation, which is what the Byodo-In Temple is all about.
The temple itself houses a 9-foot-tall Buddha, which is thought to be the largest Buddha sculpture outside of Japan. Despite the fact that this is not a practicing temple, you must remove your footwear before entering to show respect for the religion.
The temple grounds are almost more beautiful, though. The temple is surrounded by a huge koi pond. You can purchase coconuts and trinkets from the tea house. Finally, the temple is located in a place called the “Valley of the Temples,” which also houses beautiful graveyards with intricately designed mausoleums and granite headstones for many wealthy Japanese families.
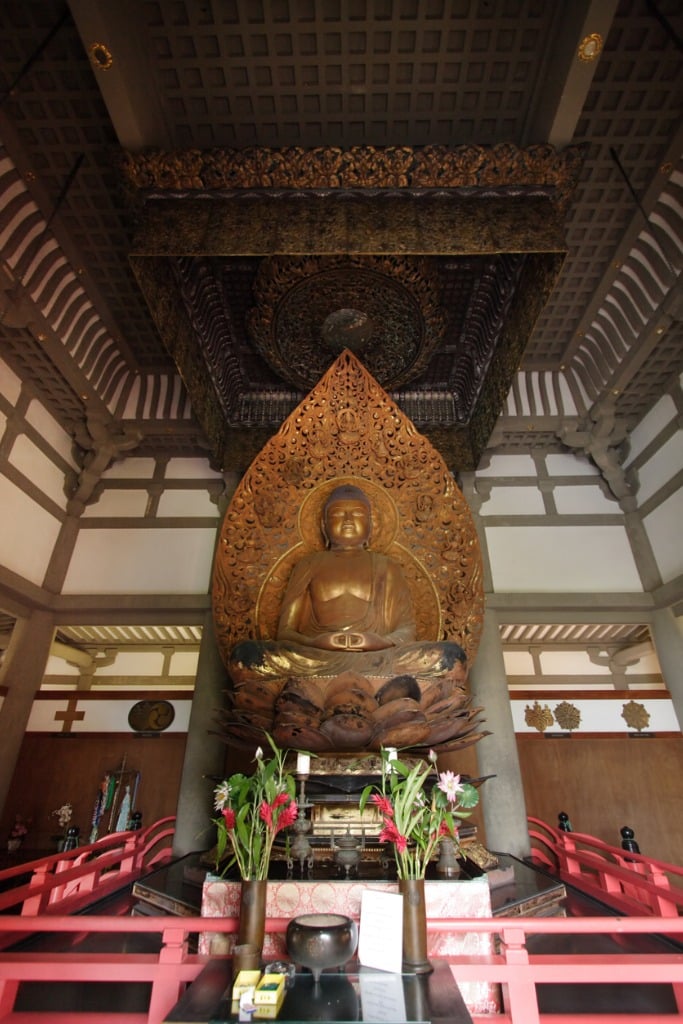
photo by kcastagnola via iStock
Pro tip: I’m not usually a fan of using a Hawaii travel guide, but they do have one good tip: don’t forget your bug spray. While the temple itself shouldn’t have many bugs, the less populated gardens surrounding the temple (which are an absolute must see) will. Don’t let a fear of mosquitos keep you from banging the three-ton gong (which is said to bring happiness and a long life) or meditate in the pavilion which is open to people of all faiths.
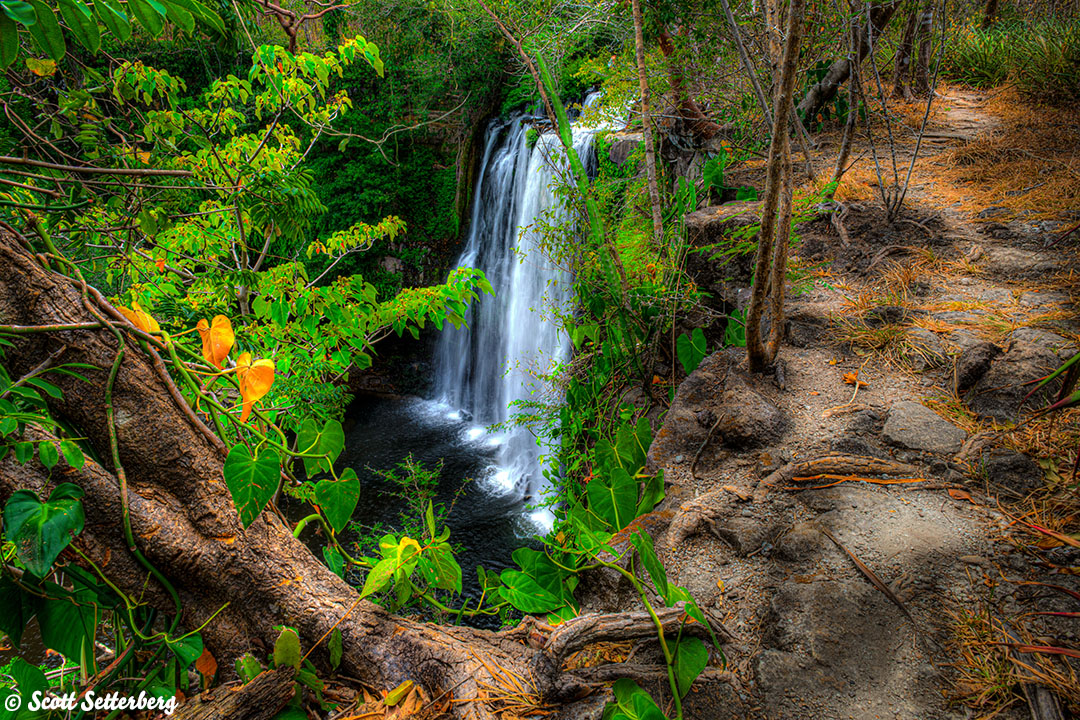
Any One of the Hundreds of Waterfalls
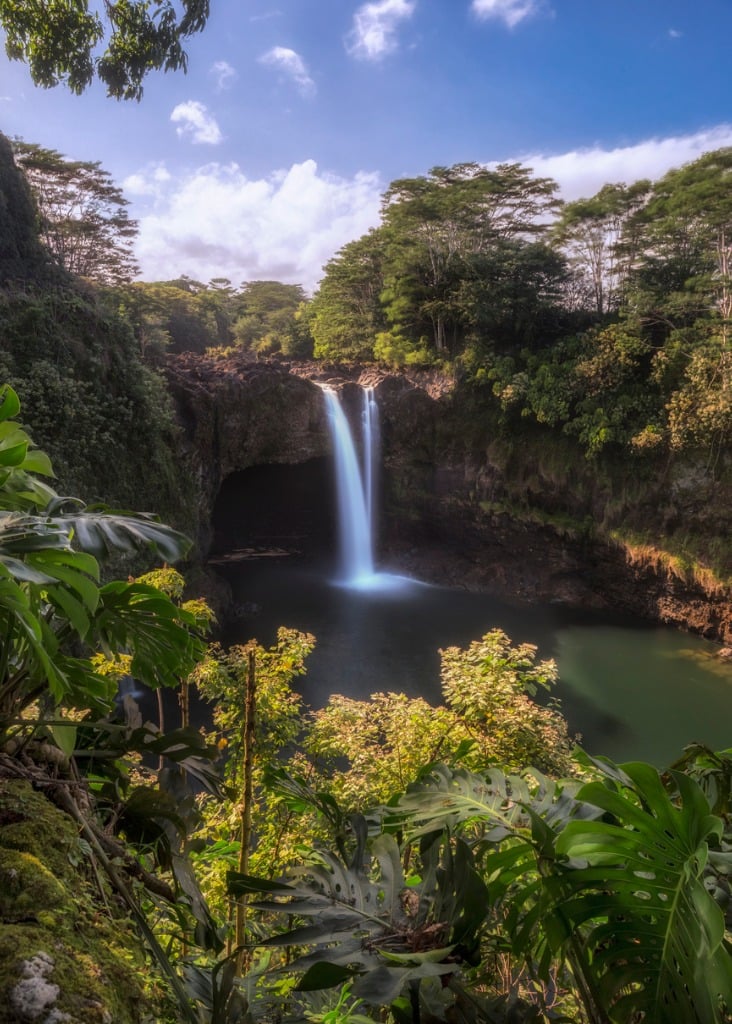
photo by Marcel Fuentes via iStock
I could create an entire list of places to photograph in Hawaii of just different waterfalls.
Some waterfalls are easy to reach, like Manoa Falls which requires a .8 mile hike along a well-maintained trail.
Some other waterfalls are a little more difficult, like Maunawili Falls which requires a 4-mile round trip hike through a well-marked, but less well-maintained trail. Maunawili is for the adventurers among you because once you scramble through the slippery tree root paved path, and wade through a river, you can actually cliff dive off of the waterfall into a pool at the bottom.
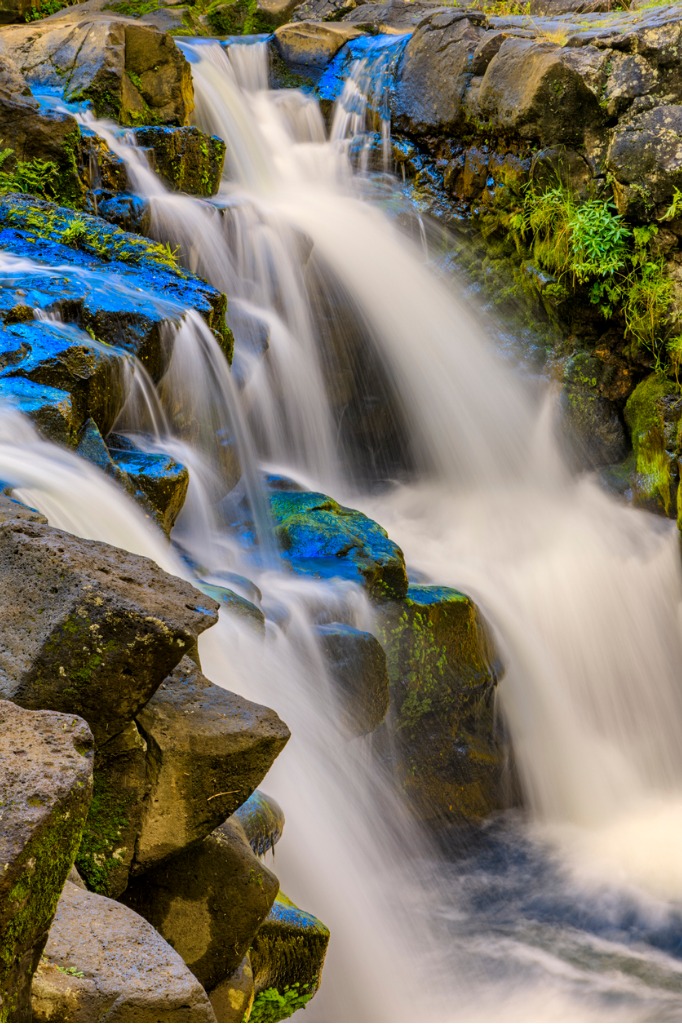
photo by Don White via iStock
Some waterfalls, on the other hand, are only for the serious adventurers. One of my favorite places to photograph in Hawaii is a series of 3 waterfalls along Ka’au Crater.
But, Ka’au Crater will take you at least 6 hours to hike, and climb, and fall. There are multiple points on this trail where it is only a single rope tied lovingly by another hiker between you and certain death.
Do you trust your hiking capabilities as much as your photography skills?
Learn More:
- 4 Reasons Why Oregon Should Be Your Next Photography Destination
- Top 10 Things to Photograph In Iceland
Diamond Head Crater
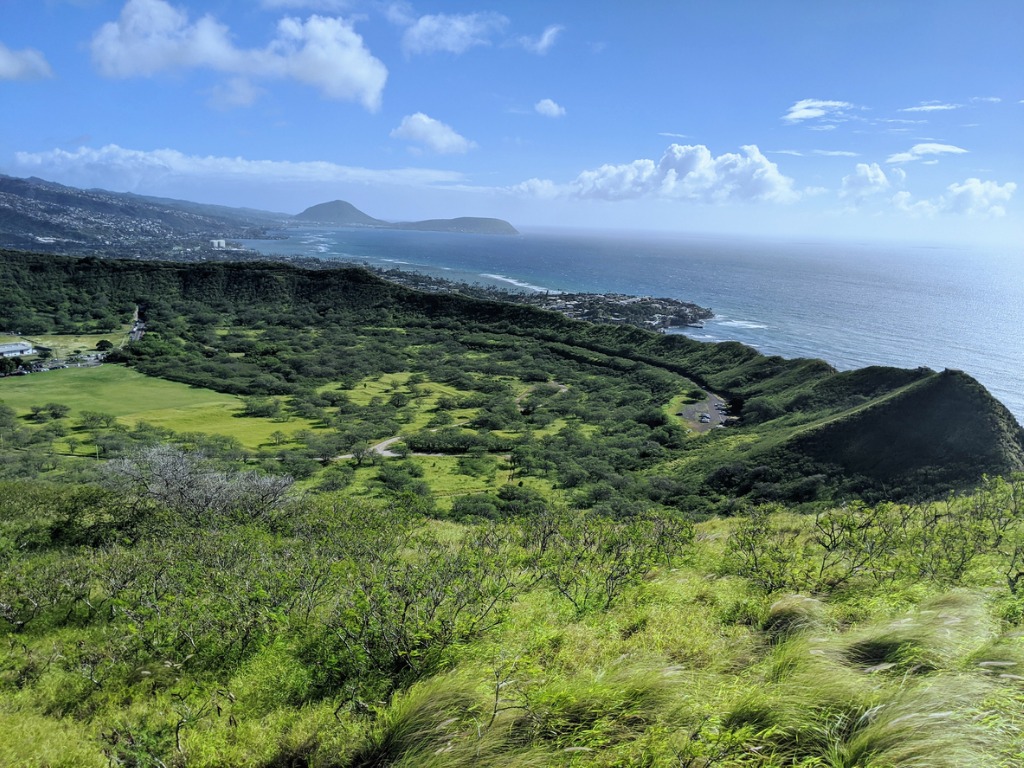
photo by Noah Sauve via iStock
Skip the crowds at Waikiki in favor of this spot overlooking it. Diamond Headis a .8 mile trail along the rim of an old volcano that helped to form Oahu.
Of all my Hawaii photography tips, my number one tip is to get as far out of Waikiki to photograph as possible. And there’s not much farther you can get than nearly one mile into the air over it.
And if Waikiki is still on your places to photograph in Hawaii bucket list, then you can catch beautiful aerial photos of it like the one above from the top of Diamond Head.
Shark’s Cove
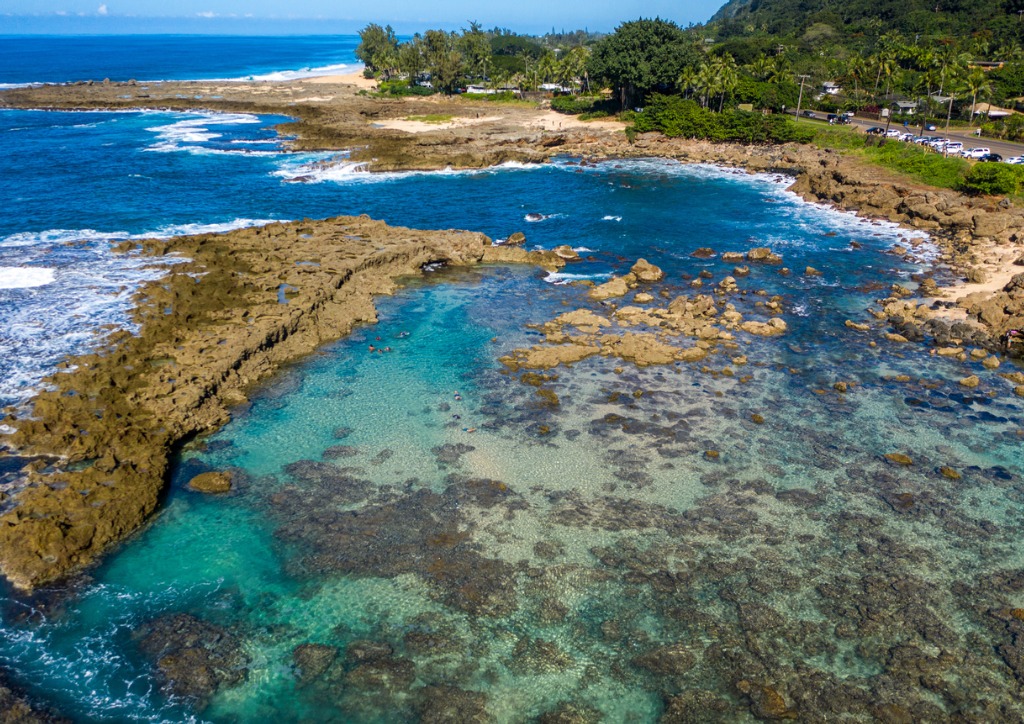
photo by BackyardProduction via iStock
Shark’s Cove is not known for its sharks (although you may find some reef sharks if you know where to look) but it is known for its beauty.
If you don’t know what to photograph in Hawaii, other than sea turtles, then this is definitely the place for you because it is one of the most likely places for a turtle sighting, but it has so much more to offer as well.
Shark’s Cove has the best snorkeling on the island, which means underwater photography enthusiasts will have the time of their lives.
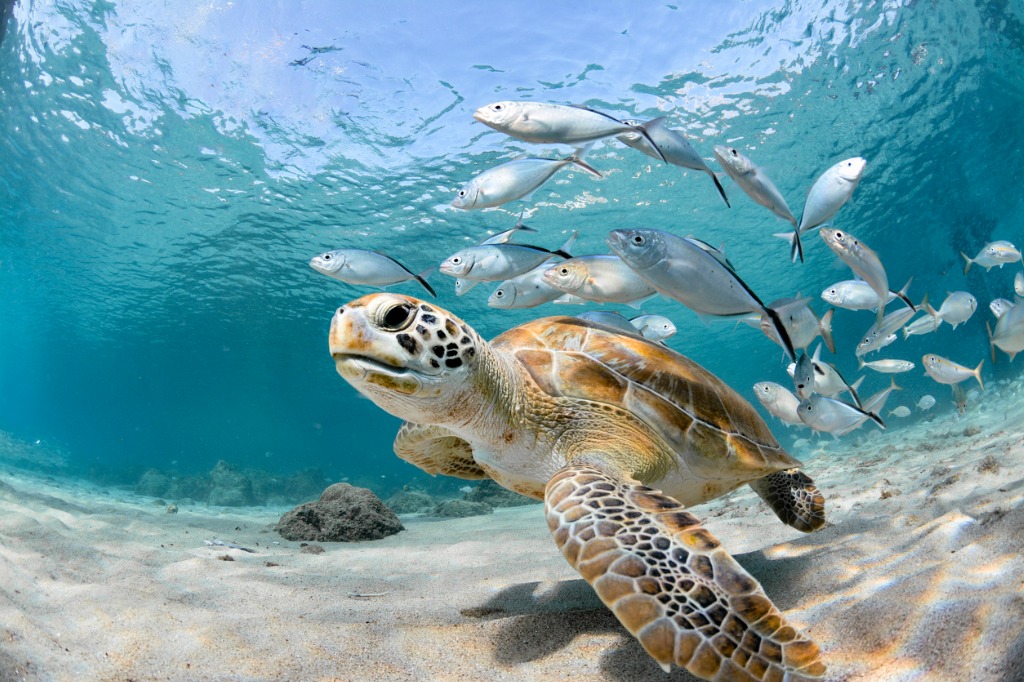
photo by LFPuntel via iStock
There are plenty of underwater caves, fluorescent schools of fish, and impeccably clear bodies of water here.
Editor's Tip: Traveling to Hawaii requires a multiple-day stay. After all, you can't appreciate it beauty on a quick trip! The Nomatic Check-In is the ideal bag for a multi-day adventure. It has a customizable folding compression panel to maximize interior space. It also has a full perimeter expansion zipper that gets you 12 liters of additional space. This bag is well-made, perfectly designed, and ultra functional. Just what you want in a travel bag!
Kualoa Ranch
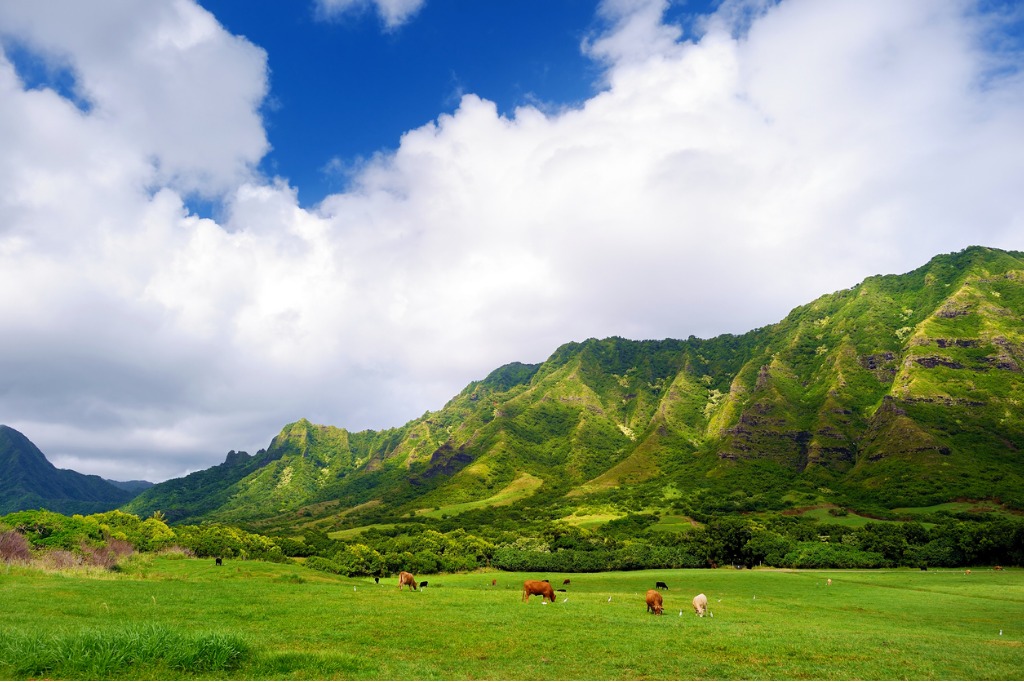
photo by maximkabb via iStock
If you’re lucky enough to get invited to Kualoa Ranch, take the opportunity. Technically, the entirety of Kualoa Ranch is private property (although they do host a variety of tours through the more well-traveled portion of the land).
Most of Jurassic Park was shot on Kualoa land, which speaks for the otherworldly beauty of it.
You can see some of this beauty in this video by Devinsupertramp.
Some places to photograph in Hawaii are a little more difficult to get into. This is one of them. Although, Kualoa Ranch hosts a half marathon every November where runners can trek through the backcountry of the ranch. So, if you’re really hoping to shoot here, you may want to start training.
Lanikai Beach (and “The Mokes”)
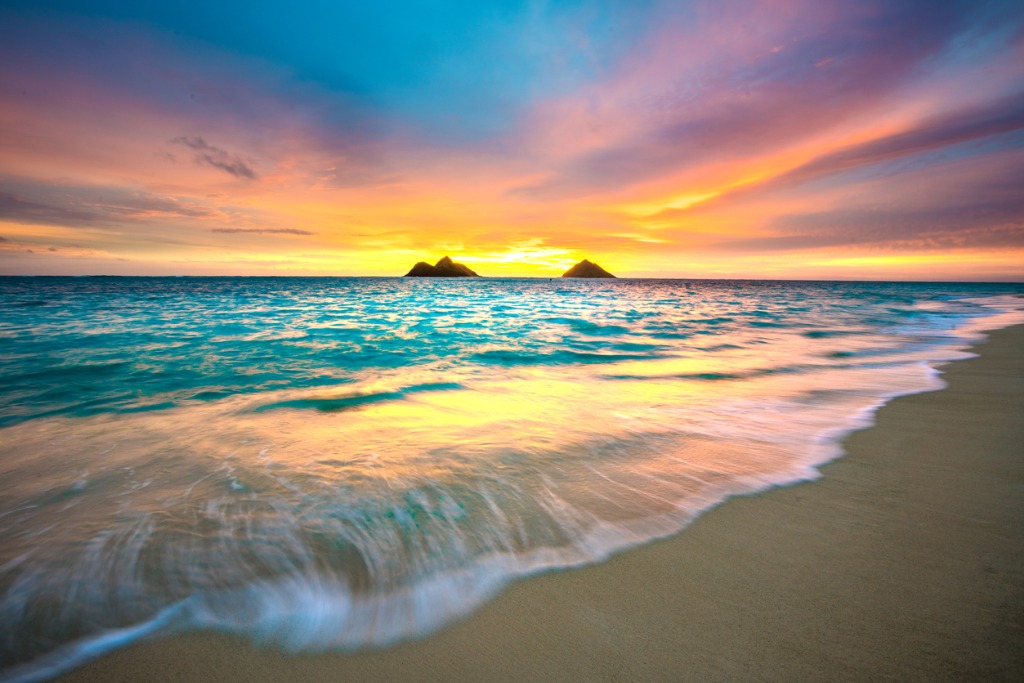
photo by ShaneMyersPhoto via iStock
Lanikai Beach is another well-hidden treasure on the westward side of the island. A little less than one mile from Lanikai Beach are a set of twin islands, called “the mokes” by the locals that you can kayak to.
There’s a natural turtle feeding ground between the beach and the islands, so don’t forget to look down during your journey out.
Plus, these islands provide an incredible spot for landscape photography shots that you would otherwise need to lease a boat to get.
Pro Tip: After a long day photographing Lanikai Beach, head over to Lanikai Brewing for an authentic, island inspired brew.
The Haiku Stairs
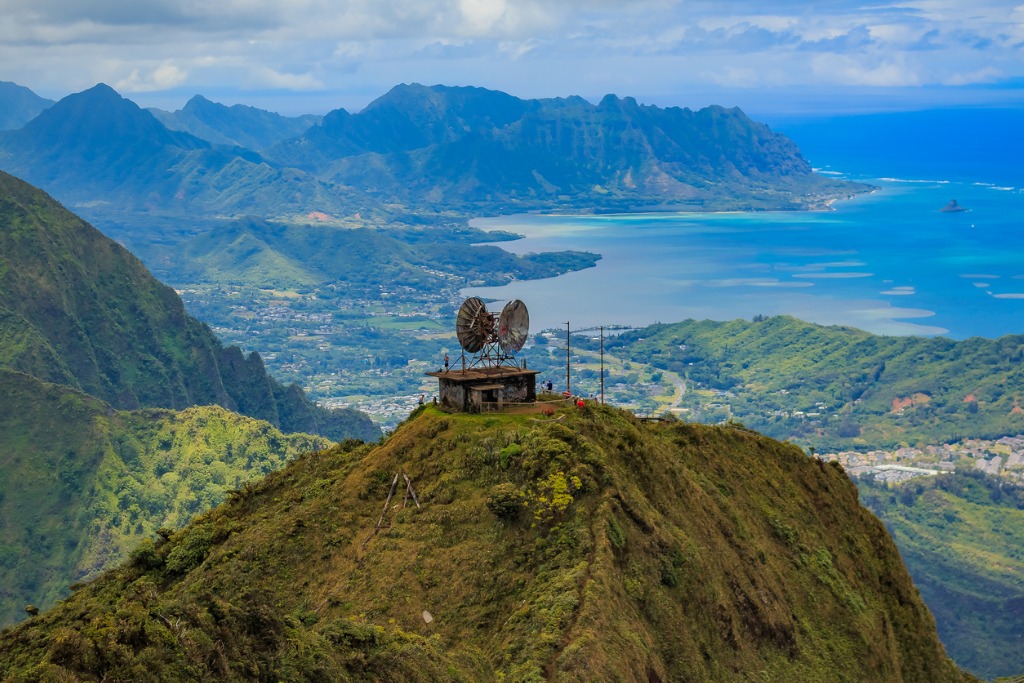
photo by SvetlanaSF via iStock
This hike is technically very illegal. But, nobody said popular Hawaii photography spots were easy to get to.
The Haiku Stairs, also known as the Stairway to Heaven, hike is illegal because it’s incredibly dangerous. The stairs were created during World War II to allow military members to build a naval radio station on the summit of Puu Keahiakahoe. And, its nearly 4,000 stairs haven’t had many repairs since that time.
Unless you’re planning on outrunning the 24-hour security guards at the bottom of this hike, or paying the $1,000 fine, you can do the legal hike on the other side of the mountain which brings you to the summit where you can then hike down some of the stairs to get those quintessential shots.
Learn More:
Mermaid Caves
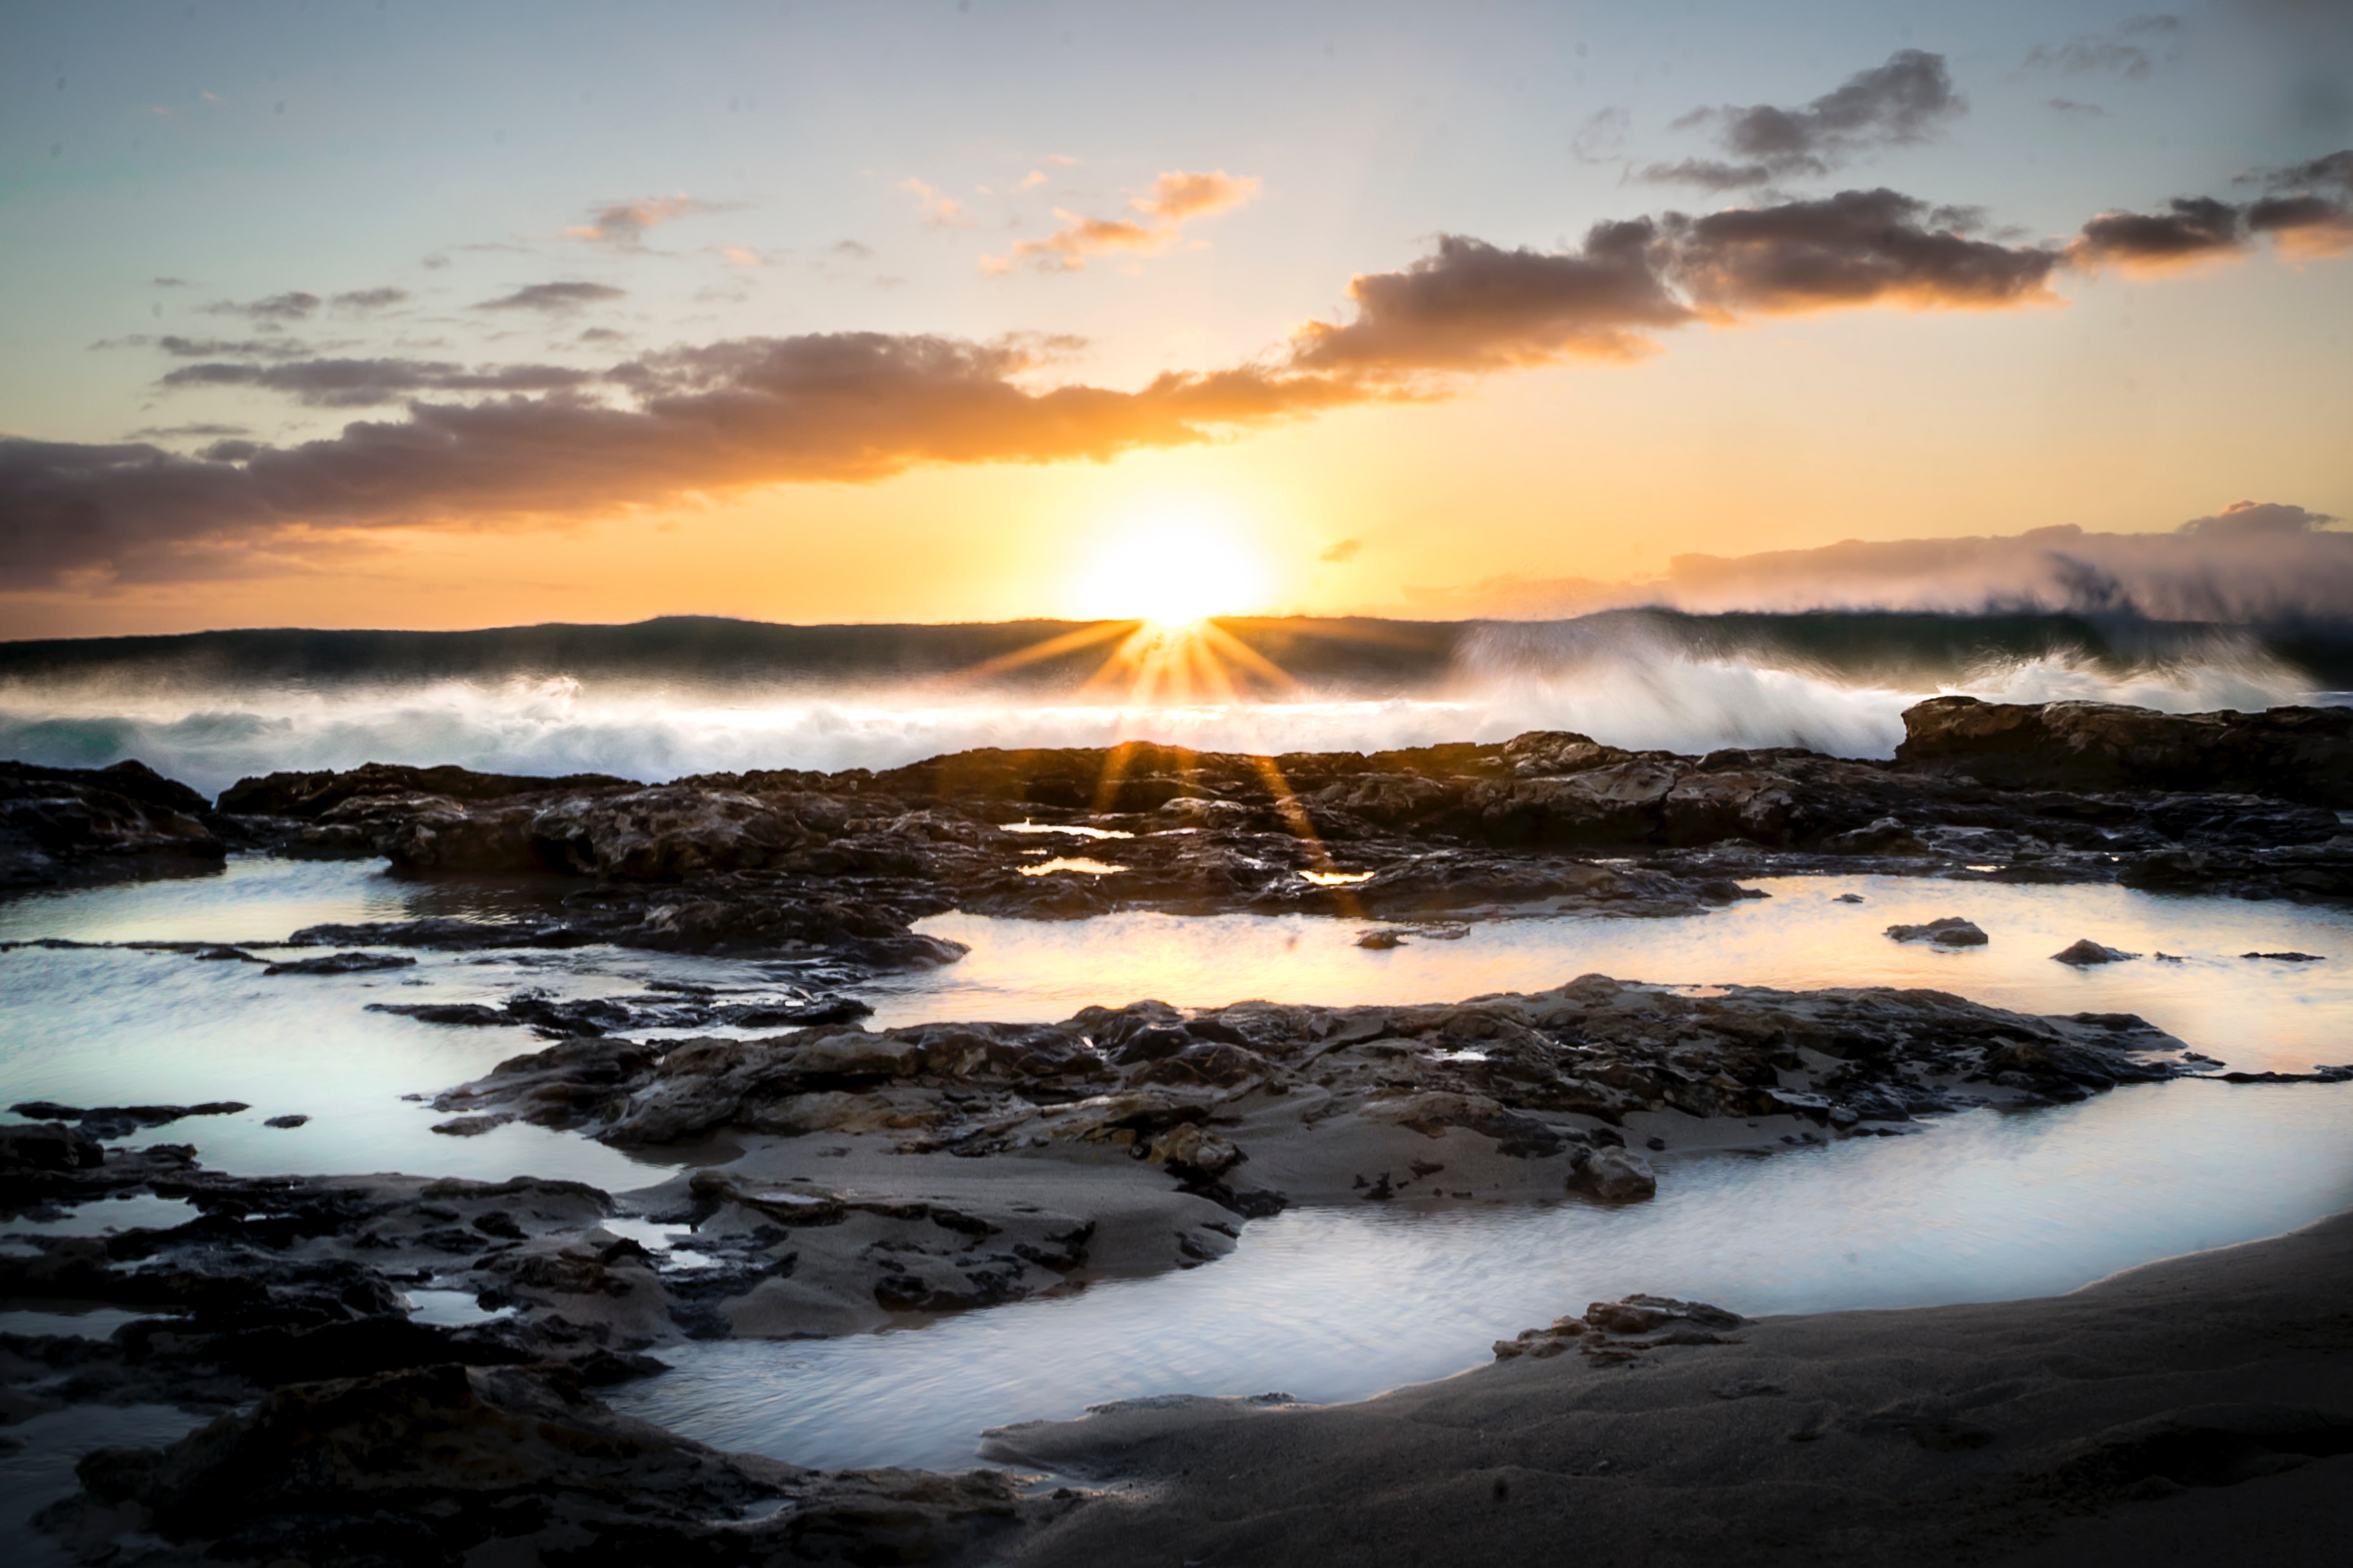
Photo by Pono Lopez on Unsplash
One of the more popular places to photograph in Hawaii are the mermaid caves off the Nanakuli Beach coast.
These caves, which were created by the steady erosion of lava tunnels, provide a photographer’s paradise.
However, don’t get in if you’re not comfortable swimming in strong tides and make sure to check the wave report before you go out. People have been stuck in the caves during high tide and drowned.
Planning Your Hawaii Photography Trip
- Where to stay: Hilton Hawaiian Village offers 4-star accommodations in Waikiki, and depending on the time of year, rooms can be found for around $250.
- Where to eat: For fish straight out of the ocean as soon as your plane lands, head to Nico’s Pier for a delicious poke bowl. Giovanni’s Shrimp Truck on the island's north shore is a must with nearly 30 years of happy customers more than willing to vouch for eating out of the back of a truck.
- Where to fly into: Daniel K. Inouye Airport is the largest airport in Hawaii.
- Where to rent a car: Enterprise, Hertz, and Budget all operate out of the airport.
- Best luggage: For a trip of this length, the Nomatic Check-In roller bag is the ideal choice. It offers polycarbonate construction that stands up to the rigors of travel, silent wheels, low-profile handles, and a three-stage aluminum handle to fit your height. With space for 78 liters of gear, this bag has plenty of room for a 5-day trip or longer.
- Best camera: The GoPro Hero 8 Black can go from the top of Kilauea to below the surface of the ocean and everywhere in between. Shoot beautiful still photos, crisp 4K video, and take advantage of tons of features like HyperSmooth to get stabilized footage.
- Check the weather in Hawaii right now.
We Recommend
10 Things to Photograph in Costa Rica

Costa Rica is one of those locations that is a landscape photographer’s dream.
In every corner of the country, from the beaches to the jungles, the waterfalls to the wildlife, and many points in between, there is beauty to behold and capture with your camera.
To say that Costa Rica is a stunning place is quite the understatement. In fact, a list of 10 places to photograph in Costa Rica is far too short!
With that in mind, here are 10 of my personal favorite things to photograph in Costa Rica
What to Photograph in Costa Rica: Llanos de Cortez

One of the most famous and beautiful waterfalls in Costa Rica is Llanos de Cortez.
This waterfall is a hard-to-find gem in the hot and arid Northwest region of Guanacaste, Costa Rica. Given the dry climate, it’s strange that this waterfall runs throughout the year. Yet, it does, and with a good volume of water, as you can see above.
There are many different vantage points from which to photograph this beautiful waterfall.
From the front, you can get the full breadth of the waterfall. From the top, you can compose a unique shot that most visitors don’t think to create.
You can also go down river a bit and compose an interesting shot of the base of the waterfall masked by the lush trees that grow along the river’s edge.
This is a great place to relax, swim, and have lunch too!
What to Photograph in Costa Rica: Lake Arenal
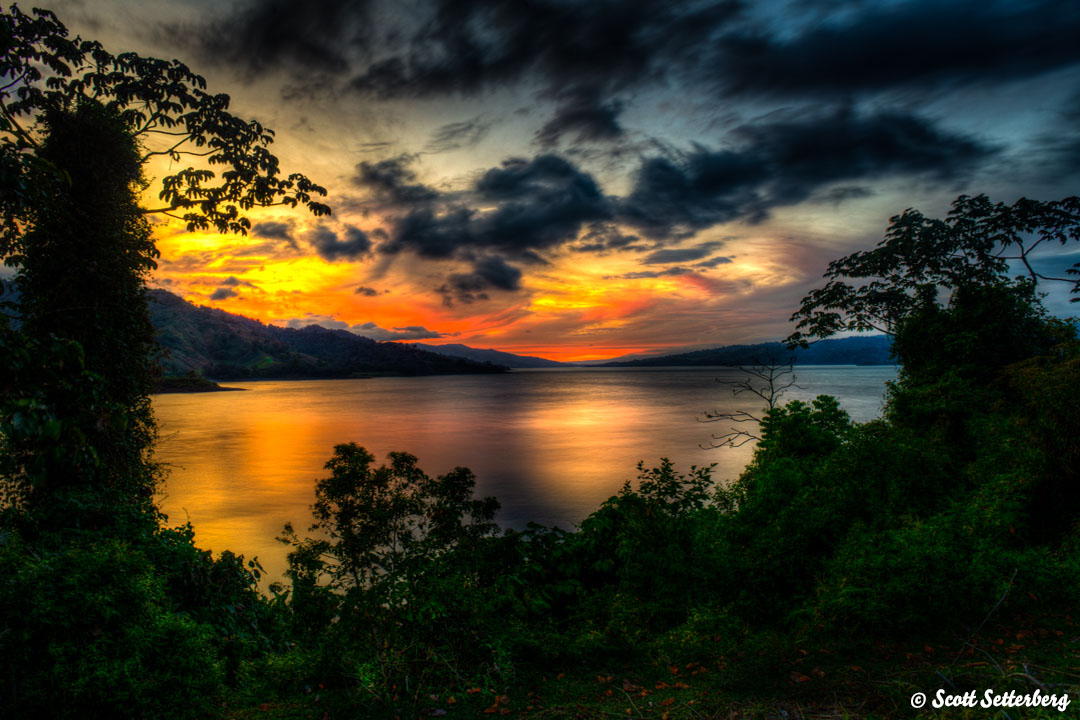
Lake Arenal is nestled next to the Arenal Volcano in the Northern Highlands. It is considered by many to be the most breathtaking lake in the entire country.
It’s hard to beat the scenery here - the volcano rises to the east of the lake while thickly wooded rolling hills ascend all around the lake’s shores.

Naturally, sunrise and sunset are particularly excellent times to visit the lake. But there are many other activities, too. Watersports like sailboarding and kayaking are top choices of many travelers.
There are also many species of birds that call this area home and provide you with opportunities to hone your bird photography skills.
Quick Tip: With so much to see and do in Costa Rica, we recommend visiting this gorgeous country as part of a photography tour. Your time in-country is limited, so you want to make the most of your time there, and a photography tour will do just that! Experts like our friends at ColorTexturePhotoTours know all the best spots to get the best photos, as well as off-the-beaten-path locations to get you away from the crowds. Learn more about photography tours in Costa Rica.
What to Photograph in Costa Rica: Rincon de la Vieja National Park
Located in the Guanacaste Province, Rincon de la Vieja National Park has an abundance of ecological diversity. There are no less than 32 waterways, two volcanoes, and a rich tapestry of plant and animal life.
While there, you can strive to photograph rare animals, like the elusive puma and jaguar, as well as tapirs, kinkajous, sloths, and many different types of monkeys. You’ll also find emerald toucanets and blue-crowned motmots.
Your visit should offer enough time to explore both sides of the park - the Pacific side and the Caribbean side.
The Pacific side is decidedly drier, with a landscape that contrasts with the more lush eastern side.
If you’re up for the adventure, head to the summit of the Rincon de la Vieja volcano. It requires a full day’s hike, but the journey to the top is well worth it. You’ll travel through multiple ecosystems on your way to the summit, and once there, you’ll have a beautiful view of Von Seebach, the volcano’s primary crater.
Recommended Travel Photography Books:
- The Enthusiast's Guide to Travel Photography: 55 Photographic Principles You Need to Know
- Destinations of a Lifetime: 225 of the World's Most Amazing Places
- Lonely Planet's Guide to Travel Photography
What to Photograph in Costa Rica: Bridges
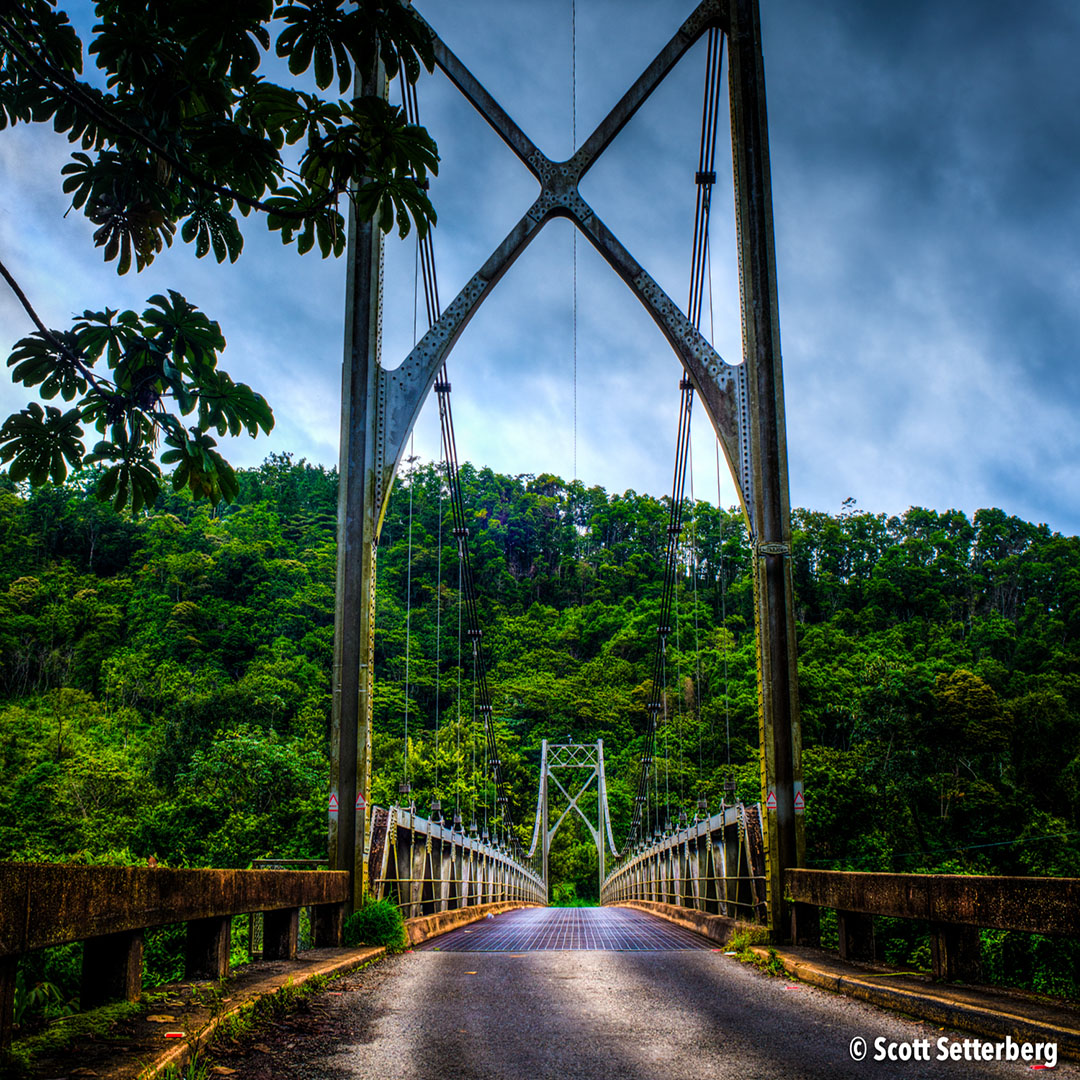
Mix up your landscape photography by seeking out some man-made elements to include in your photos. In Costa Rica, there are many beautiful bridges that pair well with their surroundings.
Bridges offer wonderful sightlines to help drive the eye deeper into the shot. In some cases, they also add pops of unexpected color, such as the billboards that line the approach to the bridge shown below.
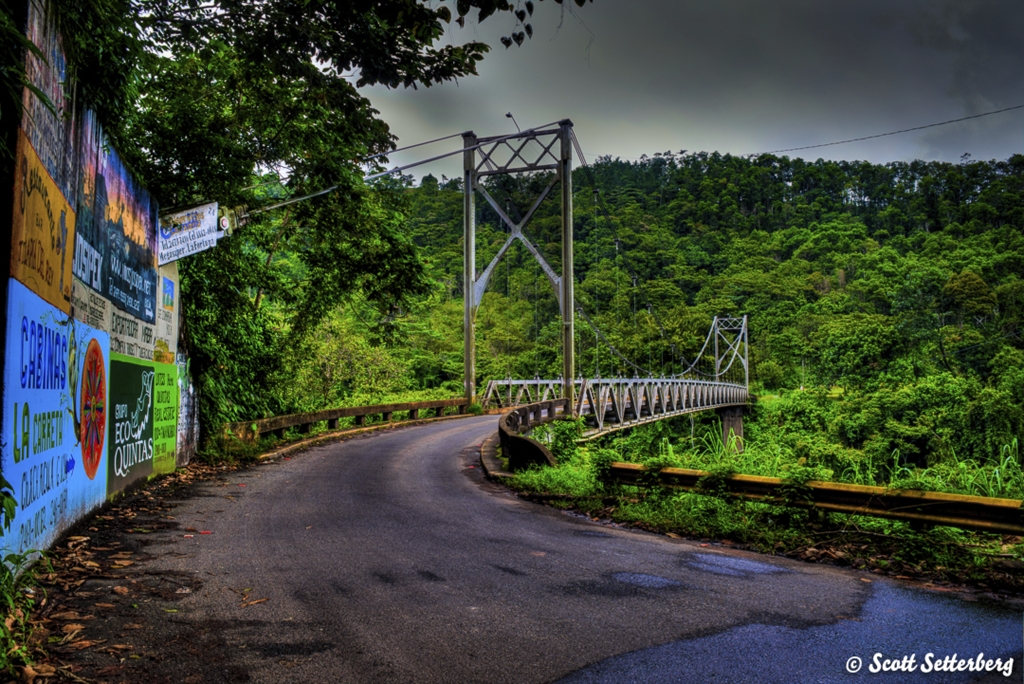
And, of course, bridges are prime subjects for creating a shot that’s all about symmetry.
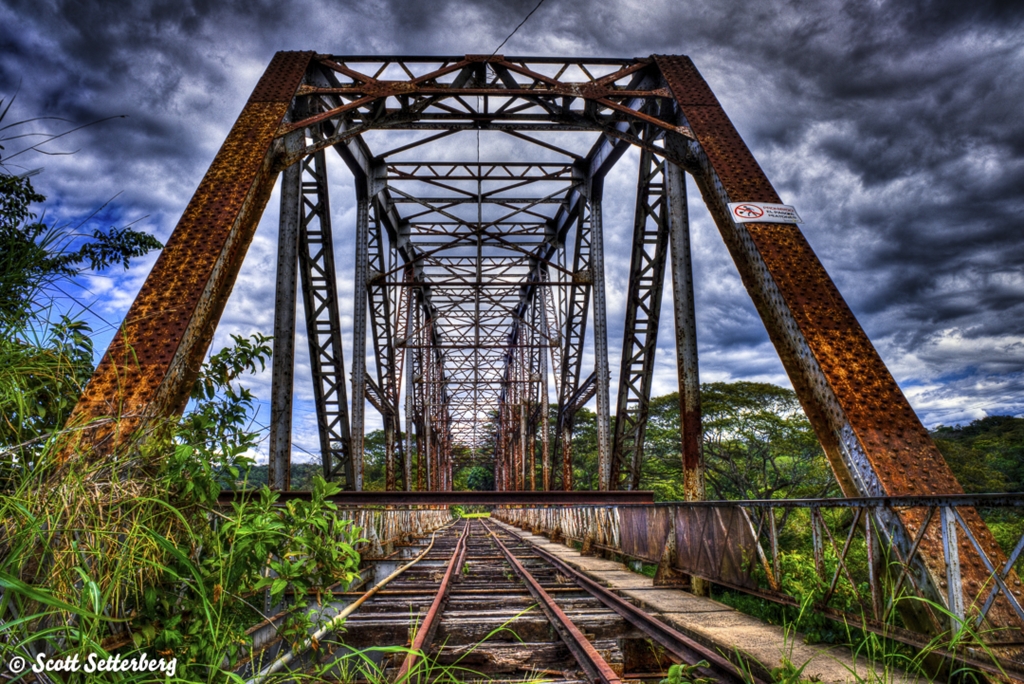
When composing a symmetrical shot of a bridge, patience is the key. Taking the time to frame the shot perfectly - as was done in the image above - will get you the payoff you’re looking for in the end.
Get more bridge photography tips in this detailed article.
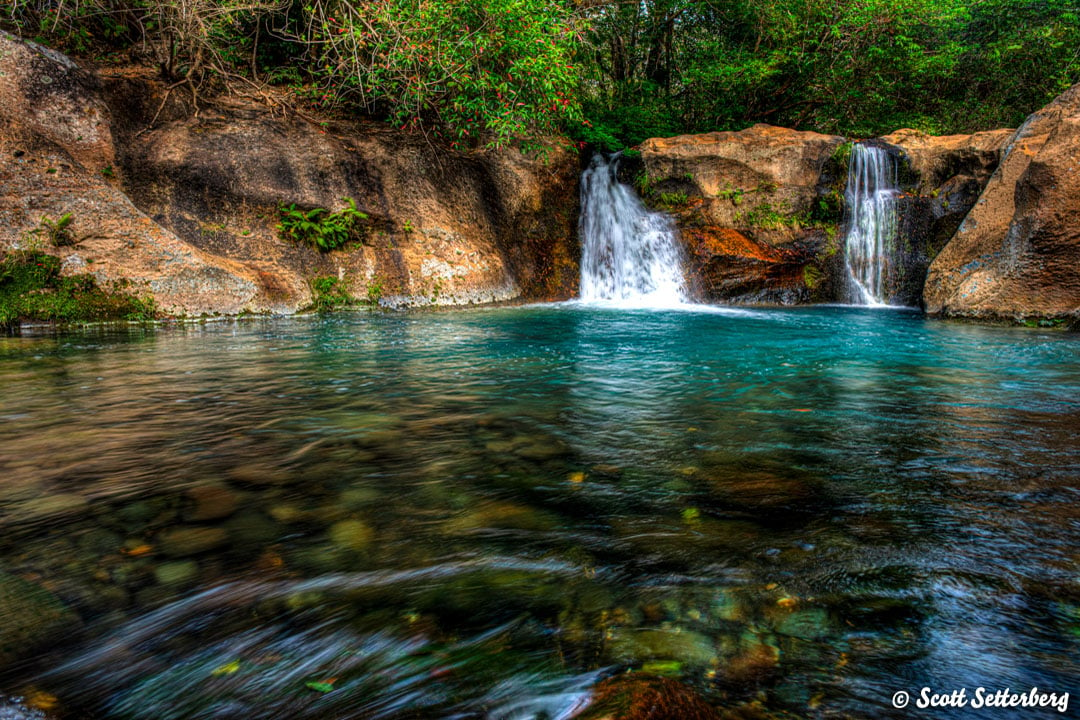
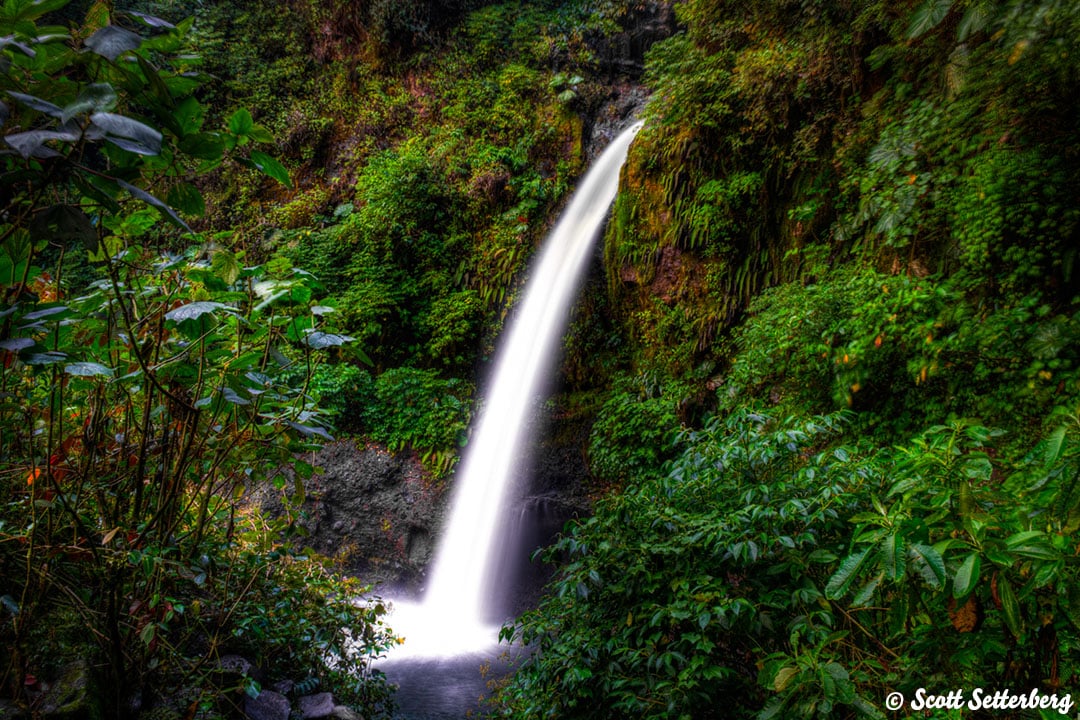
What to Photograph in Costa Rica: La Fortuna Waterfall
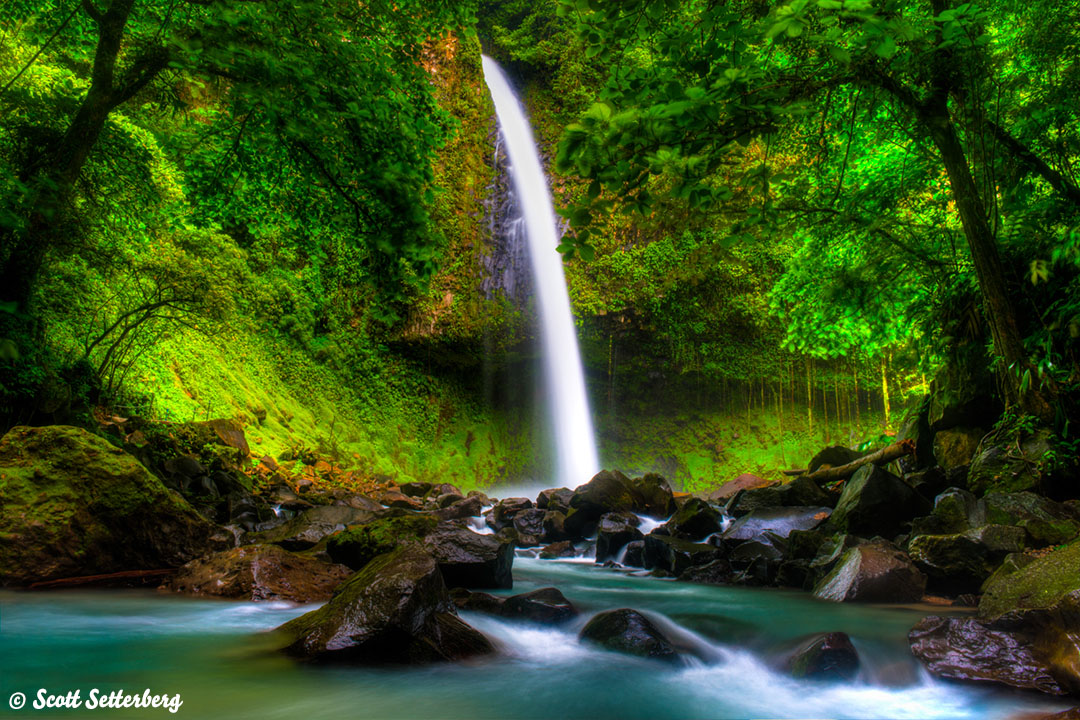
Known as one of the most breathtaking tropical waterfalls in Costa Rica, La Fortuna is 230 feet tall - quite the sight to see amidst the thick jungle surrounding it.
The waterfall’s thin stream of water sharply contrasts with other waterfalls in Costa Rica, like the much wider Llanos de Cortez discussed earlier. It terminates in a shallow pool of blue water where beautifully textured rocks protrude out of the water’s surface.
As you can see below, moving the waterfall to the side of the shot offers a different and unique perspective from the centered shot above. This is something you should strive to do when photographing any waterfall - seek out different vantage points to see how changing your shooting position changes the look and feel of the shot.
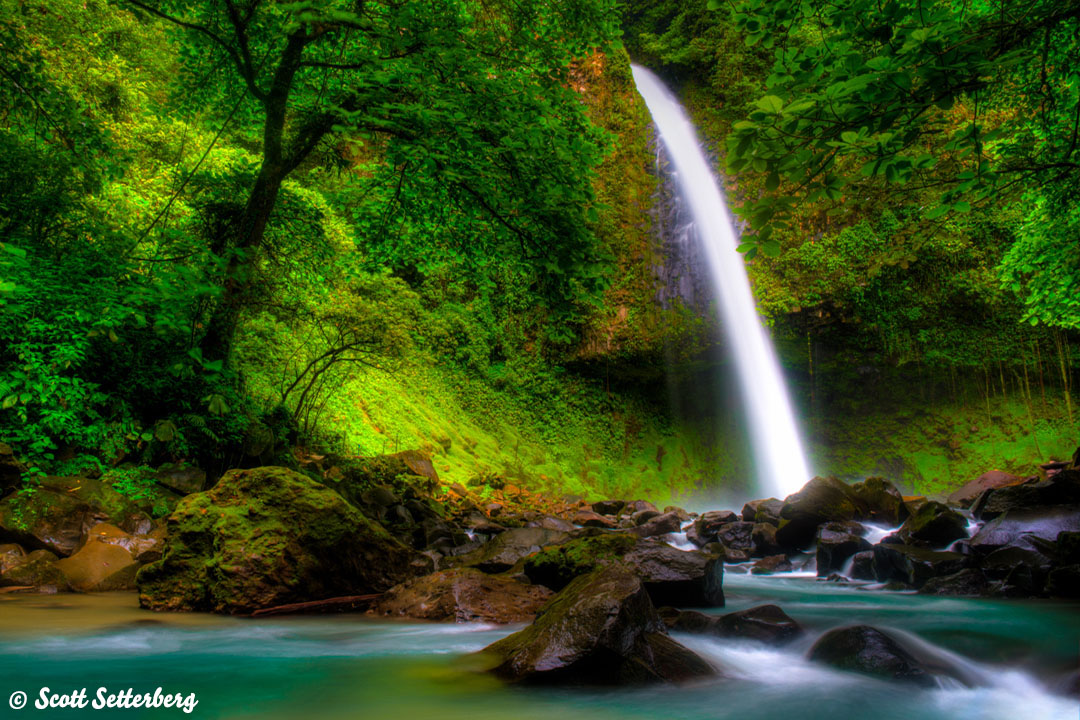
The combination of the water, rocks, and the intense green colors of the surrounding forest is a gorgeous combination for photos. There’s even a small beach where you can relax after getting your shots!
Here’s a quick read that tells you all about the La Fortuna area.
What to Photograph in Costa Rica: Birds
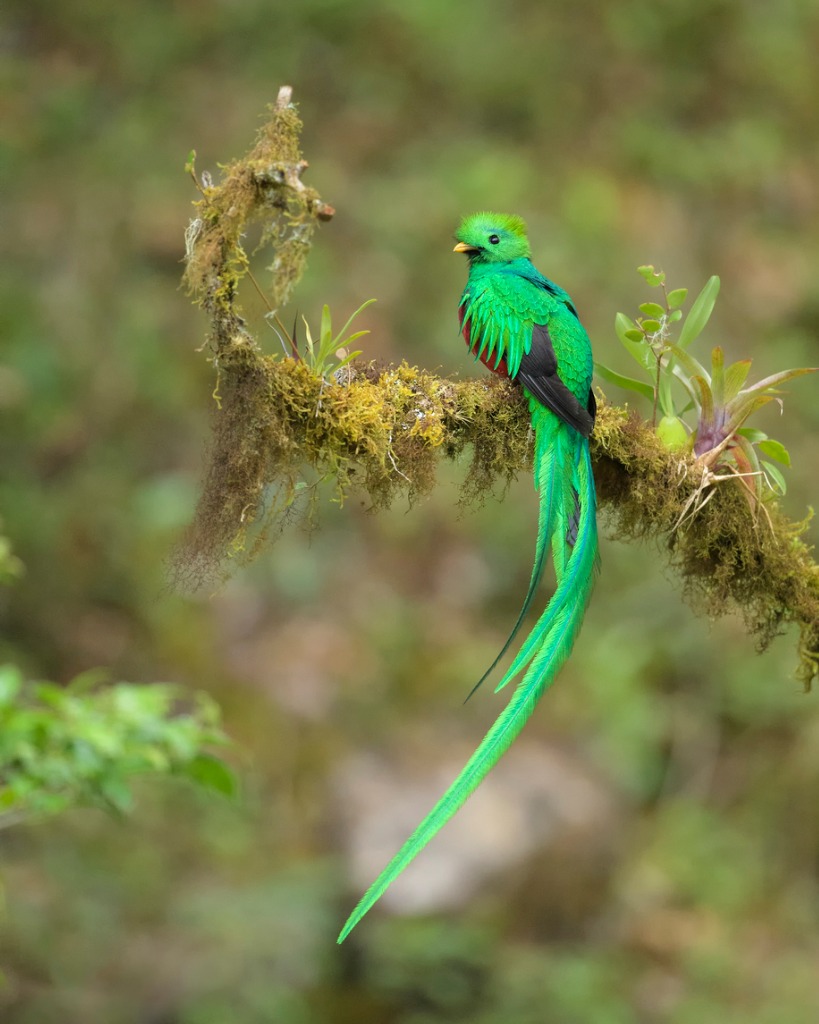
Photo by ALDO GRANGETTO via iStock
While Costa Rica might be more famous for its many different kinds of frogs, it is also home to a wide range of birds.
In fact, there are over 900 known species of birds in Costa Rica, with many more likely yet undiscovered. Since males and females have different plumage, there are far more combinations of colors and textures in these birds than the number of species.
The photo above is of the most spectacular bird in Costa Rica - the Resplendent Quetzal.
It’s iridescent green feathers are certainly eye-catching as is its extremely long tail feathers. These birds range through the tropical forests of Costa Rica, and throughout the forests of Central America.
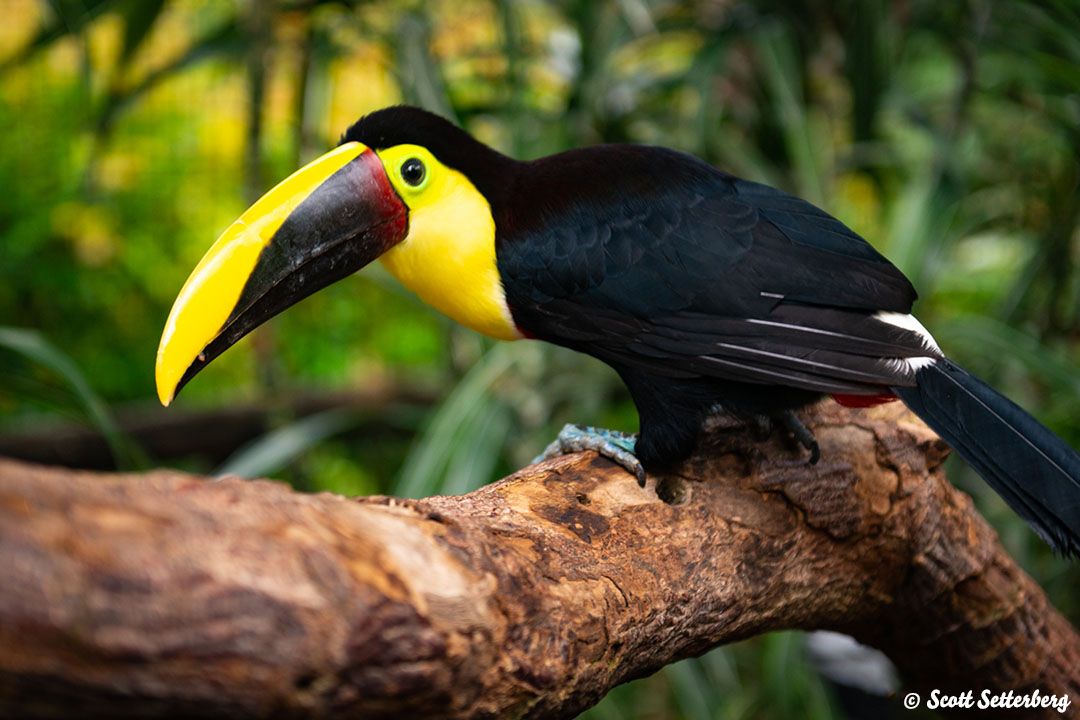
Toucans are one of the most common and popular birds in Costa Rica. There are six species, including the chesnut-mandibled (shown above), fiery billed aracari, emerald toucanet, collared aracari, yellow-eared toucanet, and keel-billed toucan.
Perhaps the most identifiable of the bunch is the keel-billed toucan, which has an enormous, rainbow-colored beak.
You can also photograph more than 50 types of hummingbirds, 17 species of parrots, over 50 kinds of tanagers, and four species of vultures, just to name a few.
What to Photograph in Costa Rica: La Paz Waterfall Gardens
Yet another must-see location in Costa Rica is La Paz Waterfall Gardens.
As you might’ve guessed, the gardens include multiple waterfalls you can photograph - five, to be exact.
There are viewing platforms above, below, and in front of each waterfall, so you can capture their beauty from multiple vantage points.
But the La Paz Waterfall Gardens offers much more than “just” waterfalls.
You can also enjoy an abundance of plant and animal life, including jungle cats, birds, monkeys, butterflies, and, of course, the famous Costa Rican frogs.
Quick Tip: The La Paz Waterfall Gardens is a private nature park and sanctuary that is home to more than 100 species of animals. You’ll find a jungle cat exhibit and monkey enclosure, a hummingbird garden, tropical aviary, and much more. Get a photographer’s perspective on the La Paz Waterfall Gardens to learn what the park has in store for you and your camera.
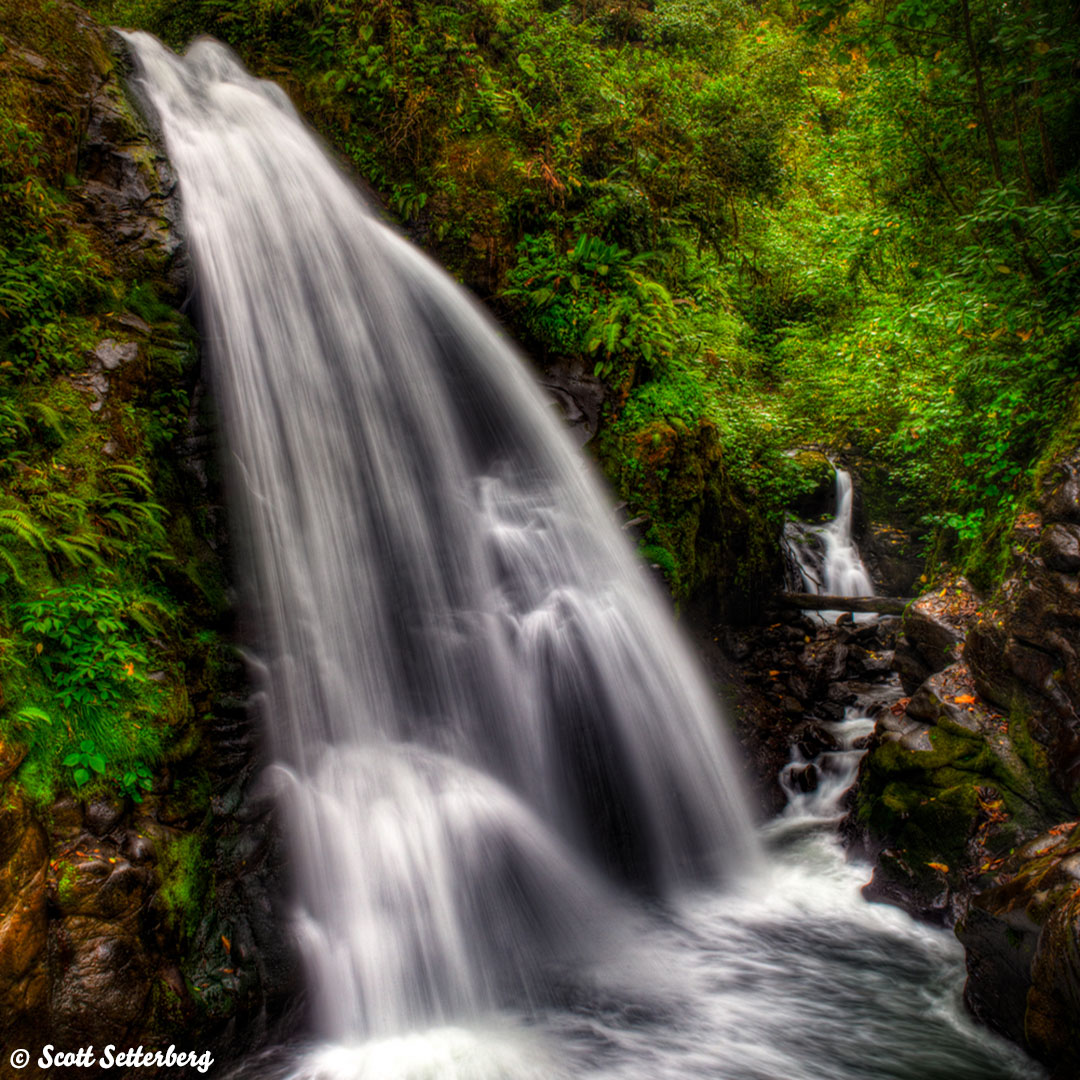
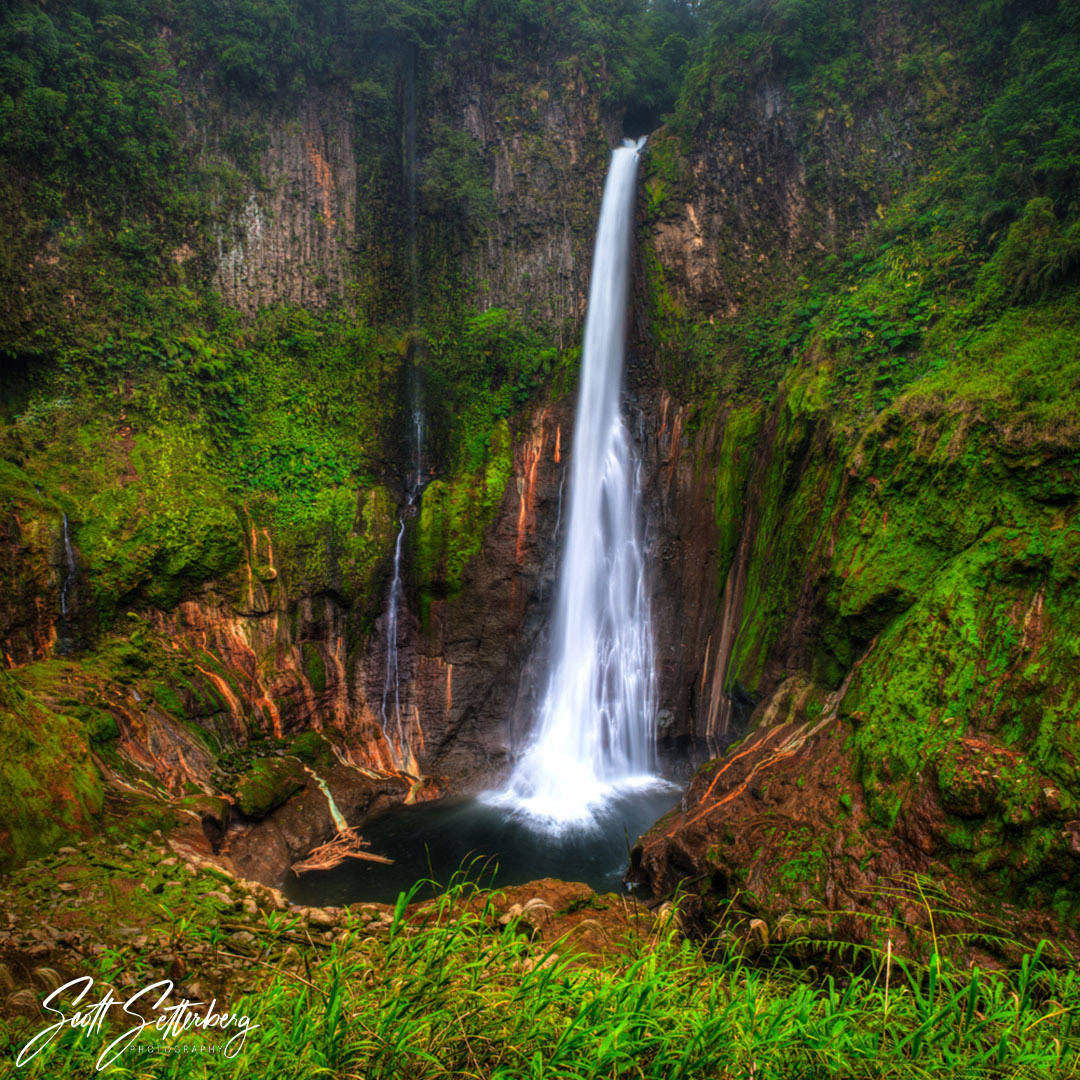
What to Photograph in Costa Rica: Juan Castro Blanco National Park
In the northern region of Costa Rica is Juan Castro Blanco National Park, a region teeming with wildlife, volcanos, rain forests, and more.
You can explore the park via an extensive trail system that allows you to see a wide variety of animals and plants, including well over 200 species of birds, orchids, sloths, ocelots, deer, and 22 species of bats.
The park is also home to Bajos del Toro, one of the tallest waterfalls in Costa Rica at more than 300 feet.
The waterfall descends into an ancient volcano crater, and as if that isn’t a sight that’s impressive enough, the walls of the crater are scarred with red and orange mineral deposits.
The combination of the red and orange minerals and the vibrant green moss surrounding the falls is truly breathtaking.
Get a feel for what Bajos del Toro looks like by examining these stunning images.
What to Photograph in Costa Rica: Frogs
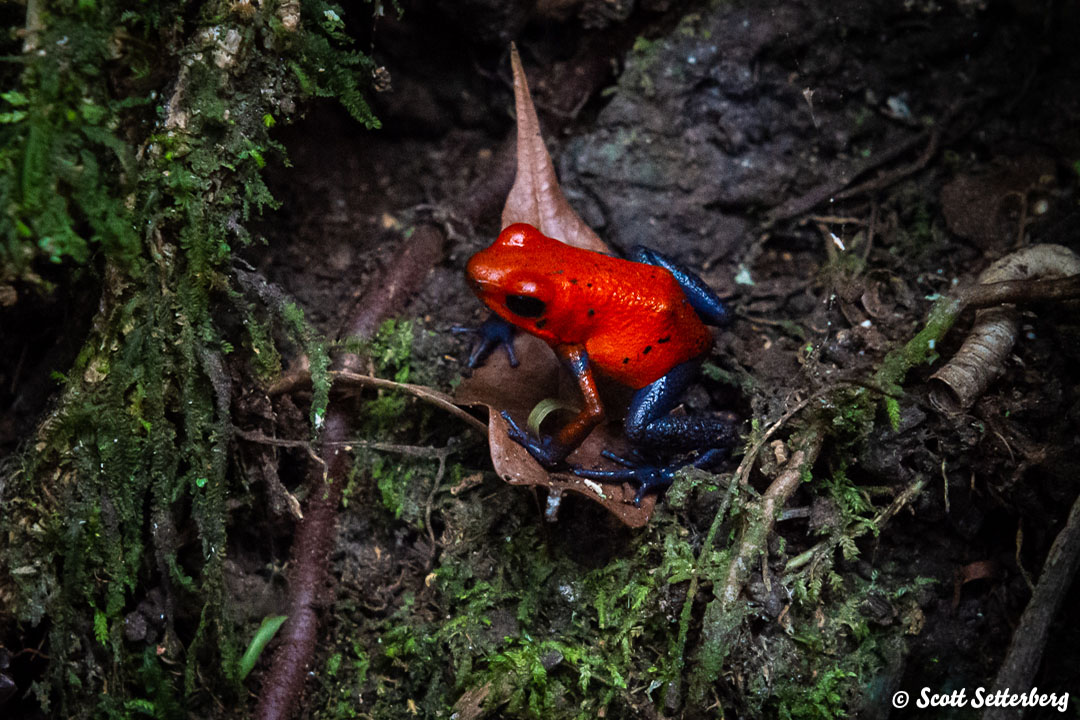
A trip to Costa Rica wouldn’t be complete without training your camera on the many types of frogs that call this area home.
There are more than 150 species of frogs in Costa Rica, but researchers believe the number to be far higher than that. It’s just a matter of discovering the rest!
One of the most impressive frogs you’ll find is the Red-Eyed Tree Frog.

These frogs get their name from their huge, bulging red eyes that are immediately identifiable. They have a neon green body with blue and yellow accents and a white underbelly that makes them a beautiful sight. Their orange hands and feet only add to the display!
But the Red-Eyed Tree Frog is just one of many you should seek to find while in Costa Rica. Learn more about some of the country’s most famous and beautiful frogs in this frog photography tutorial.
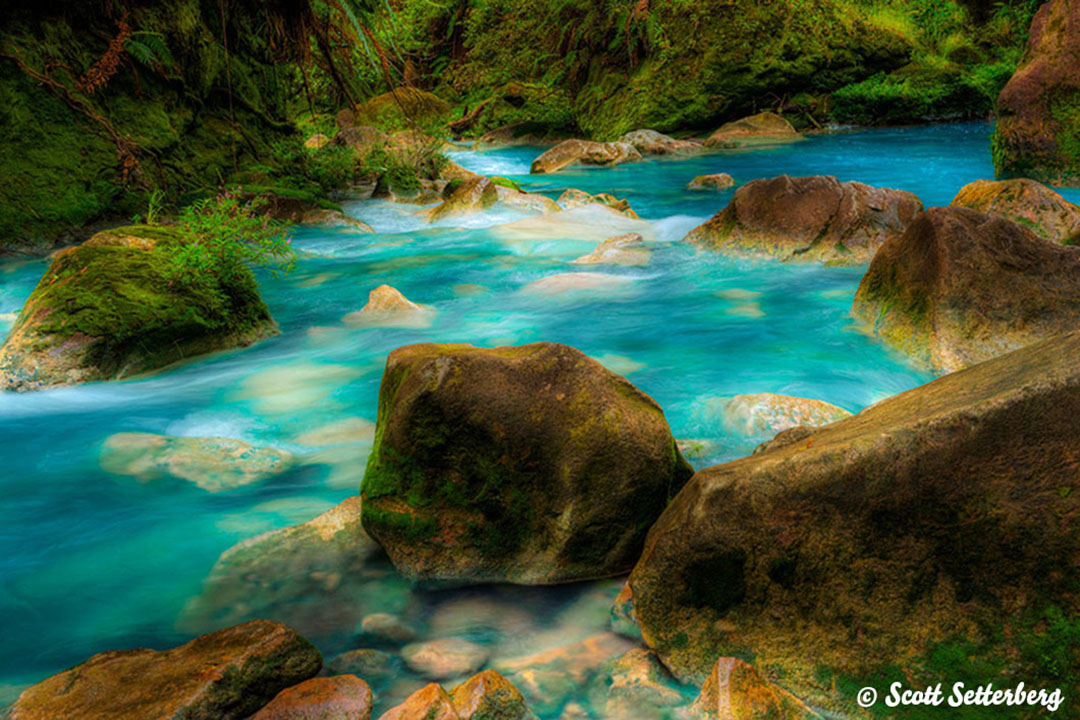
What to Photograph in Costa Rica: Tenorio Volcano National Park
Tenorio Volcano National Park sits in the northern reaches of Costa Rica and is home to four volcanic peaks and two craters.
The park’s namesake reaches nearly 6,300 feet high, though as impressive as it might be, the jewel of the park is Rio Celeste.
The river has a turquoise blue color to it that’s quite astonishing to see. The blue color comes from aluminosilicates - a combination of aluminum, siicon, and oxygen - on the river bottom that absorb all colors, except blue, present in sunlight. The reflected blue rays create the stunning visual sensation.
As with other areas of Costa Rica, the colors and textures of this place are astounding. The variety of flora, fauna, and ecosystems is equally impressive.
You’ll find thermal springs and geysers, lagoons and rivers, cloud forests and rainforests, and many varieties of animals, including the elusive Puma.
As far as things to photograph in Costa Rica go, Tenorio is a must!
Quick Tip: Ready to pack your bags and head to Costa Rica? Check out ColorTexturePhotoTours for upcoming dates this spring and summer so you can see these locations (and more!) firsthand.
Other Tips for Planning a Costa Rica Photography Trip
- Where to fly into: Juan Santamaría International Airport is the largest airport in San Jose.
- Best luggage: For a trip of this length, the Nomatic Check-In roller bag is the ideal choice. It offers polycarbonate construction that stands up to the rigors of travel, silent wheels, low-profile handles, and a three-stage aluminum handle to fit your height. With space for 78 liters of gear, this bag has plenty of room for a 5-day trip or longer.
- Attractions & Things to Do: When you aren't out photographing wildlife and waterfalls, consider checking out the National Theatre of Costa Rica in San Jose. The National Museum of Costa Rica in San Jose is also well worth your time.
- Best Time of Year to Visit: The dry season (December to April) is your best bet.
- Check the weather in the San Jose area right now.
We Recommend
@media (max-width:768px){ p,div,span{font-size:16px !important;} }
15 Incredible Oregon Waterfalls You Need to See
Oregon Waterfalls Photos
Oregon waterfalls provide some of the best waterfall photography opportunities on the West Coast. If you live in or near Oregon or plan to visit sometime soon, here is a short list of what could be considered the best Oregon waterfalls.
In this list of some of the best Oregon waterfall photography locations, we’ll show some of what we’ve found with the help of our good friend, Scott Setterberg, of ColorTexturePhotoTours. If you decide to tackle one or two on your own, you are sure to enjoy the trek.
This list is by no means the final say for beautiful Oregon waterfalls for creative imaging. Let us know your favorite spots, too! Our list will be in alphabetical order since it was actually rather difficult to rank them properly. They’re all so gorgeous!
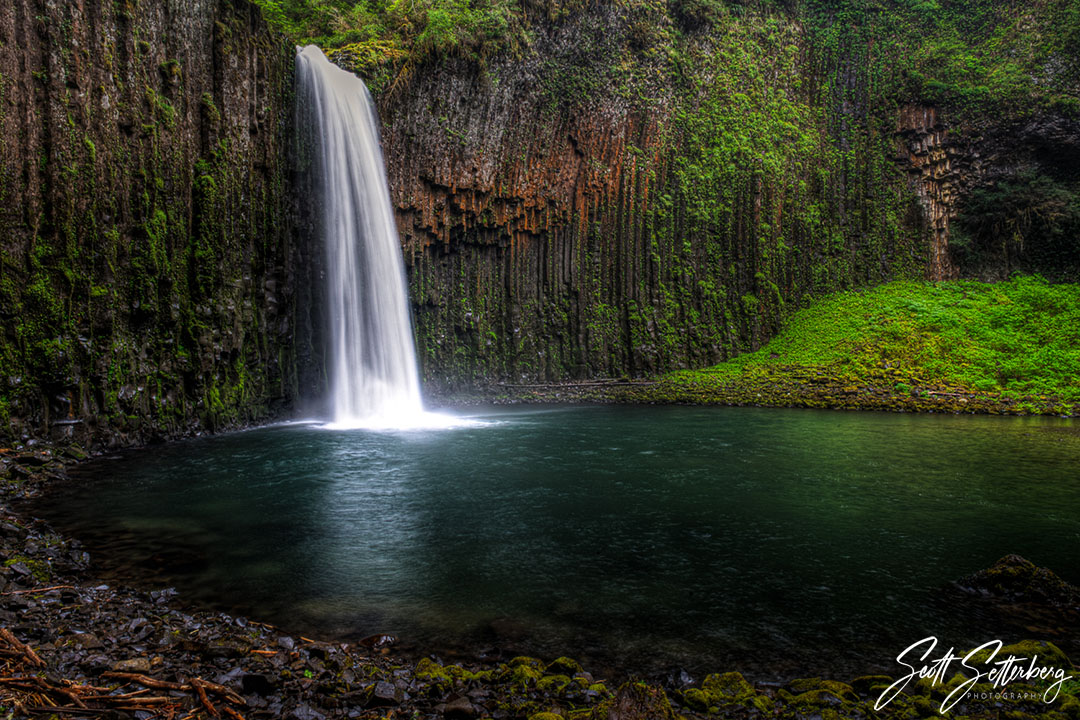
Abiqua Falls
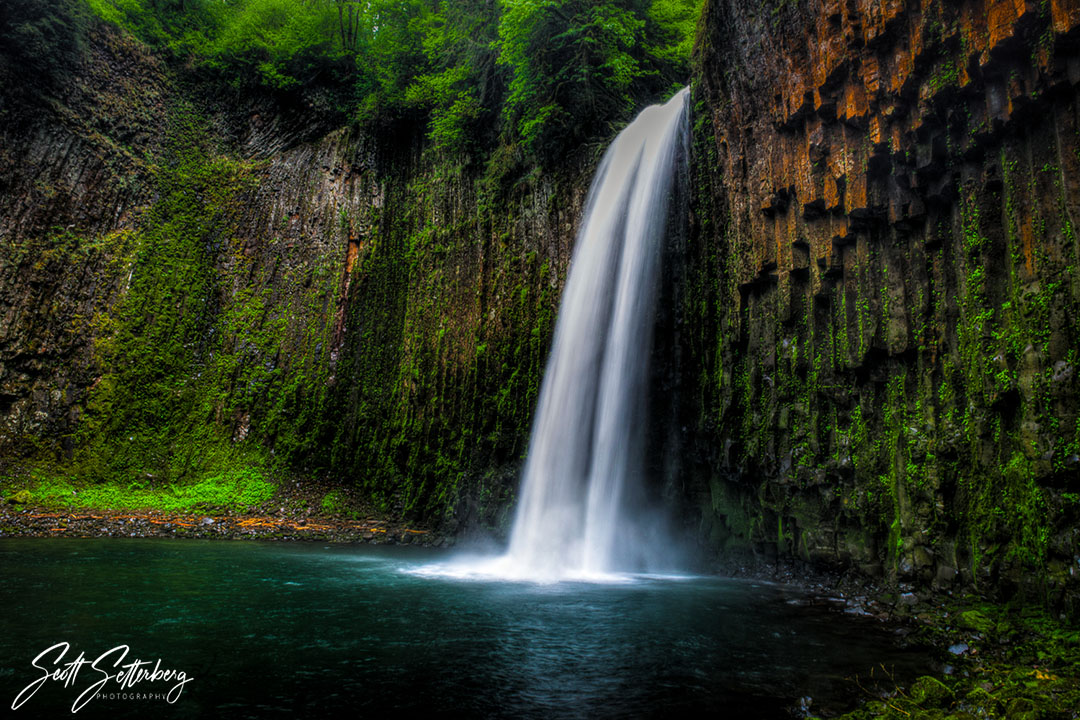
Abiqua Falls is accessed via the Abiqua Falls Trail, a 5-mile-long trail best traveled from Spring to early Autumn that is rated difficult. It’s located in the Santiam State Forest near Scott Mills, Oregon, a small mining town near Salem in Northwest Oregon. You get to Salem on I-5 and from there take Oregon Route 213, the Cascade Highway, and follow the signs.
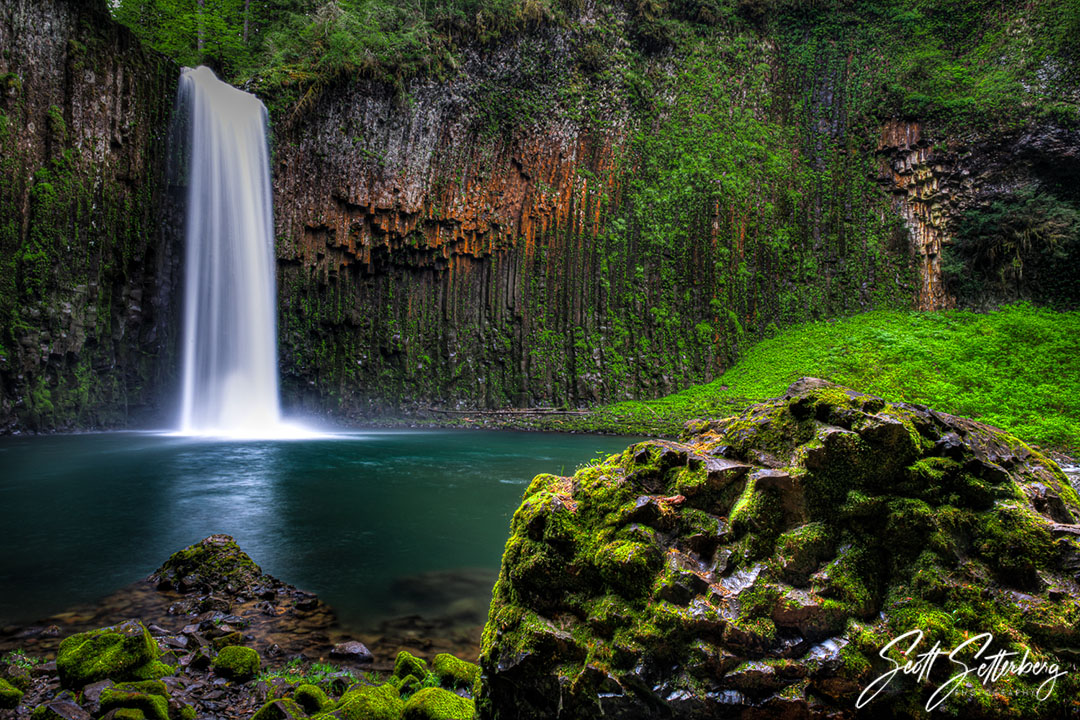
The waterfall itself is sandwiched between basalt rock formations and at certain times of day the light has an almost ethereal quality. You can get right down onto the stream to photograph it, but the water is very cold and some pools are deep.
The falls and the trail to it are full of luscious forest growth, making the entire trek a photo opportunity. There is wildlife to see, too, with the trail being a popular spot for birding.
Butte Creek Falls
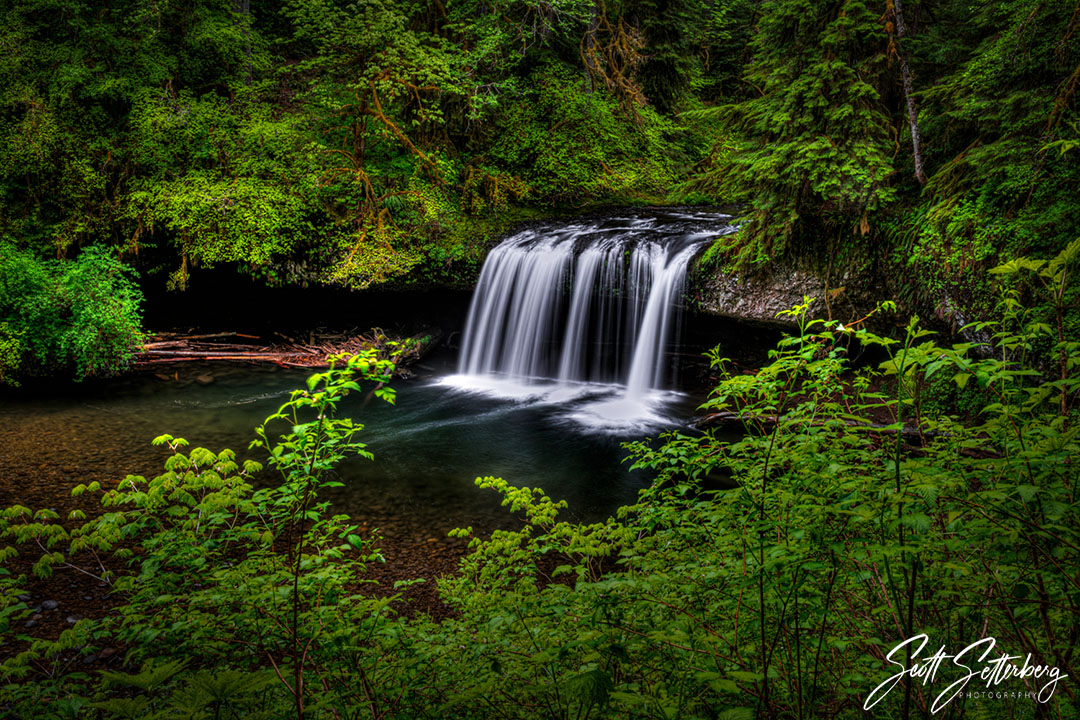
A short bit South and East of Abiqua Falls is Butte Creek Falls, accessed by means of an easy 1-mile trail that is part of the Butte Creek Falls Recreation Area, all of which is only about 90 minutes from Portland.
The easy hike rewards you with a very pretty set of two waterfalls that you can photograph. The main falls can be viewed from above or the front, and you can get behind the upper falls further down the trail. The upper falls is wider and shorter while the main falls is tall and somewhat narrow.
Lots of forest growth and many birds make the entire trek a picture taking journey. Though it is an easy hike, there are fall dangers, so be careful.
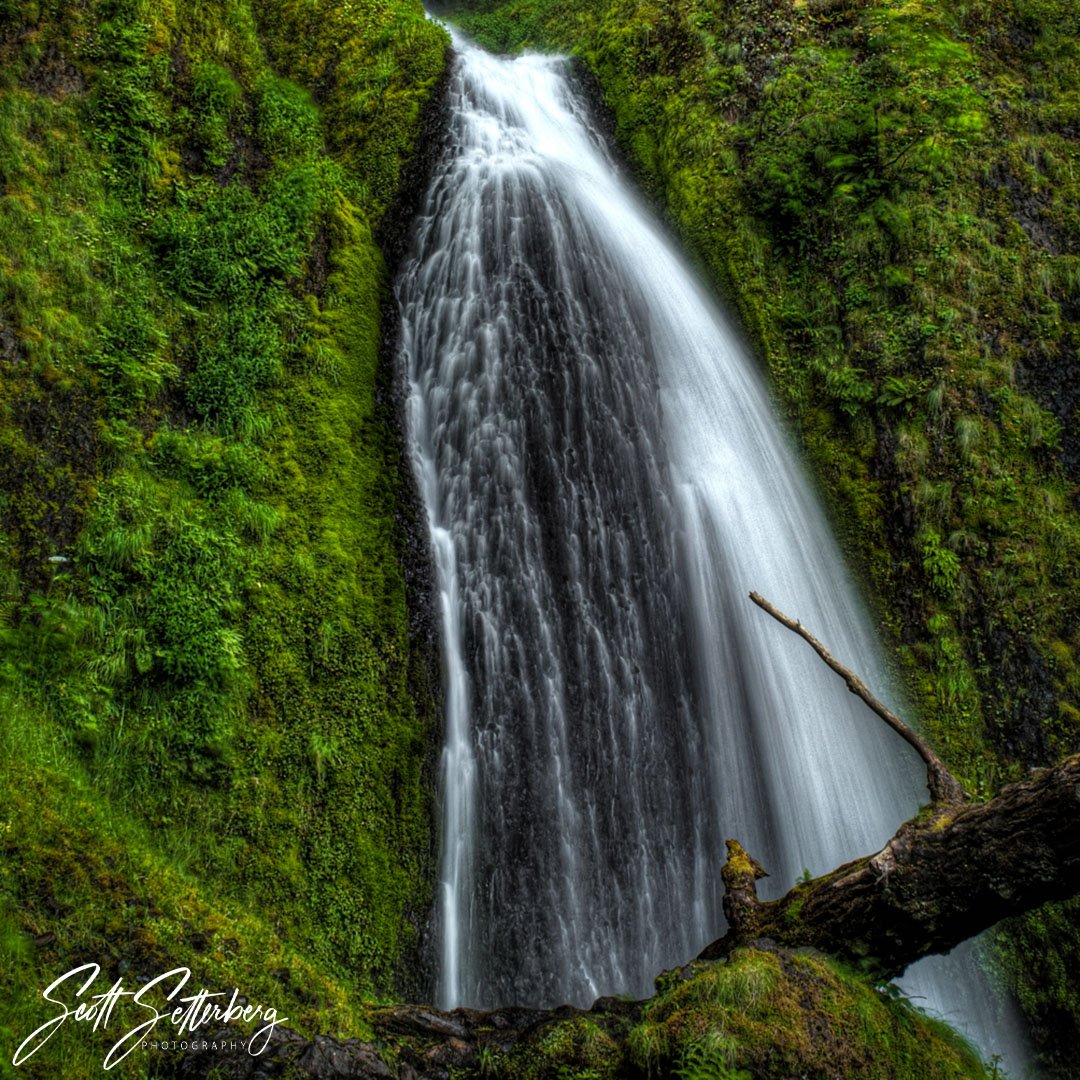
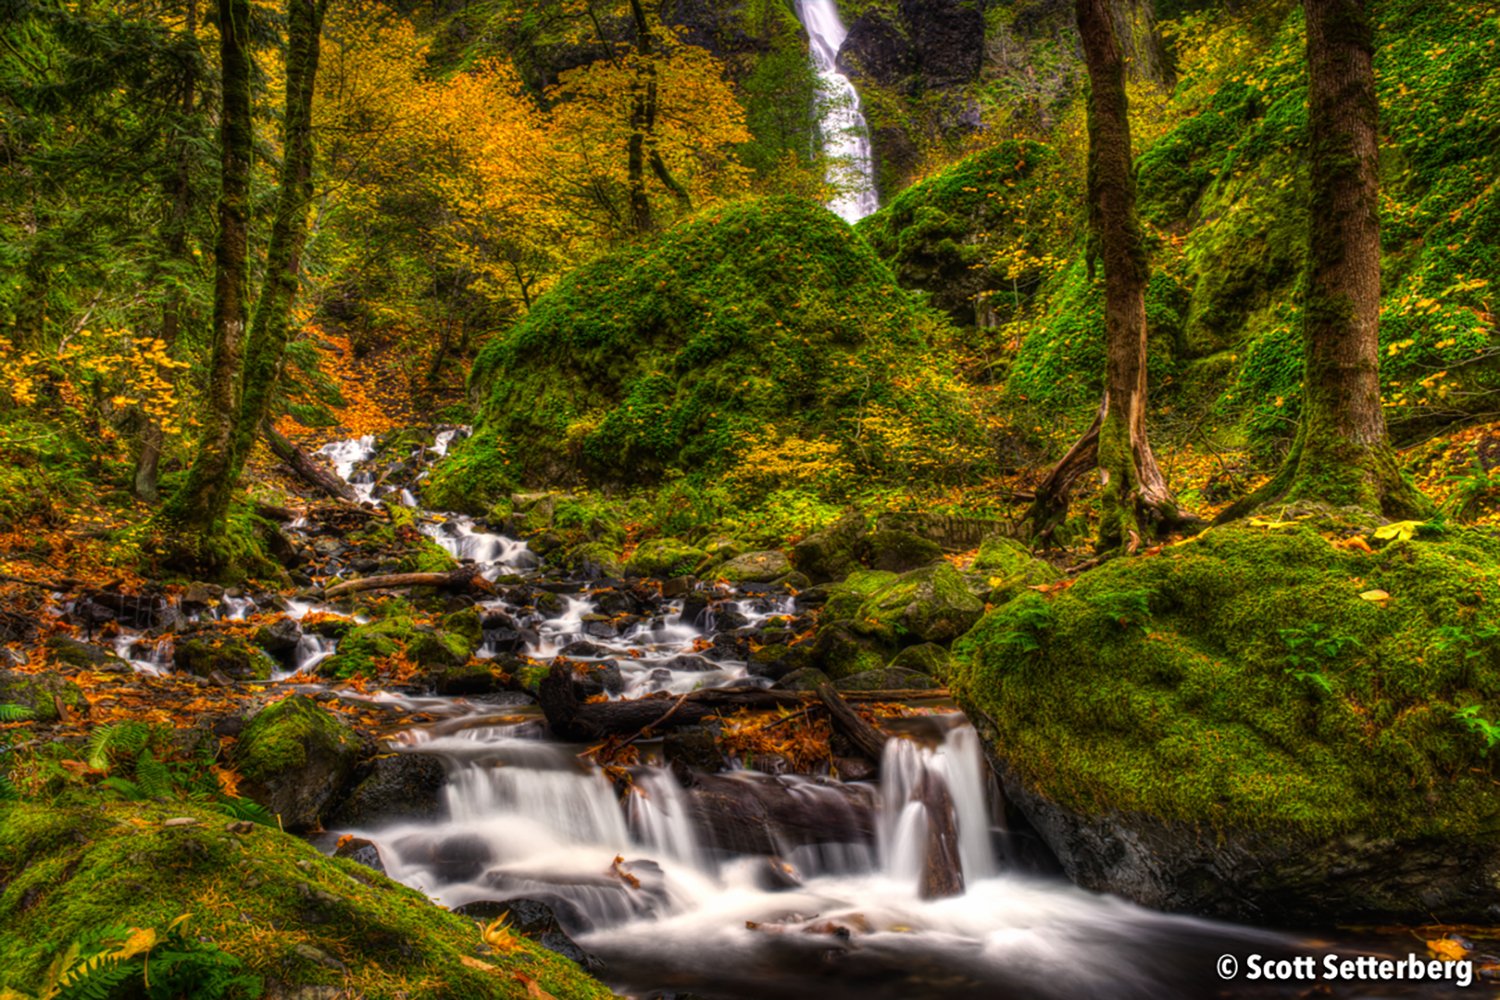
Fairy Falls
Part of the Columbia River Gorge National Scenic Area, Fairy Falls is a 20’ high veil type waterfall with great views of the falls head-on. It’s moderately difficult to reach, but the trail is also listed as dangerous. Again, exercise caution!
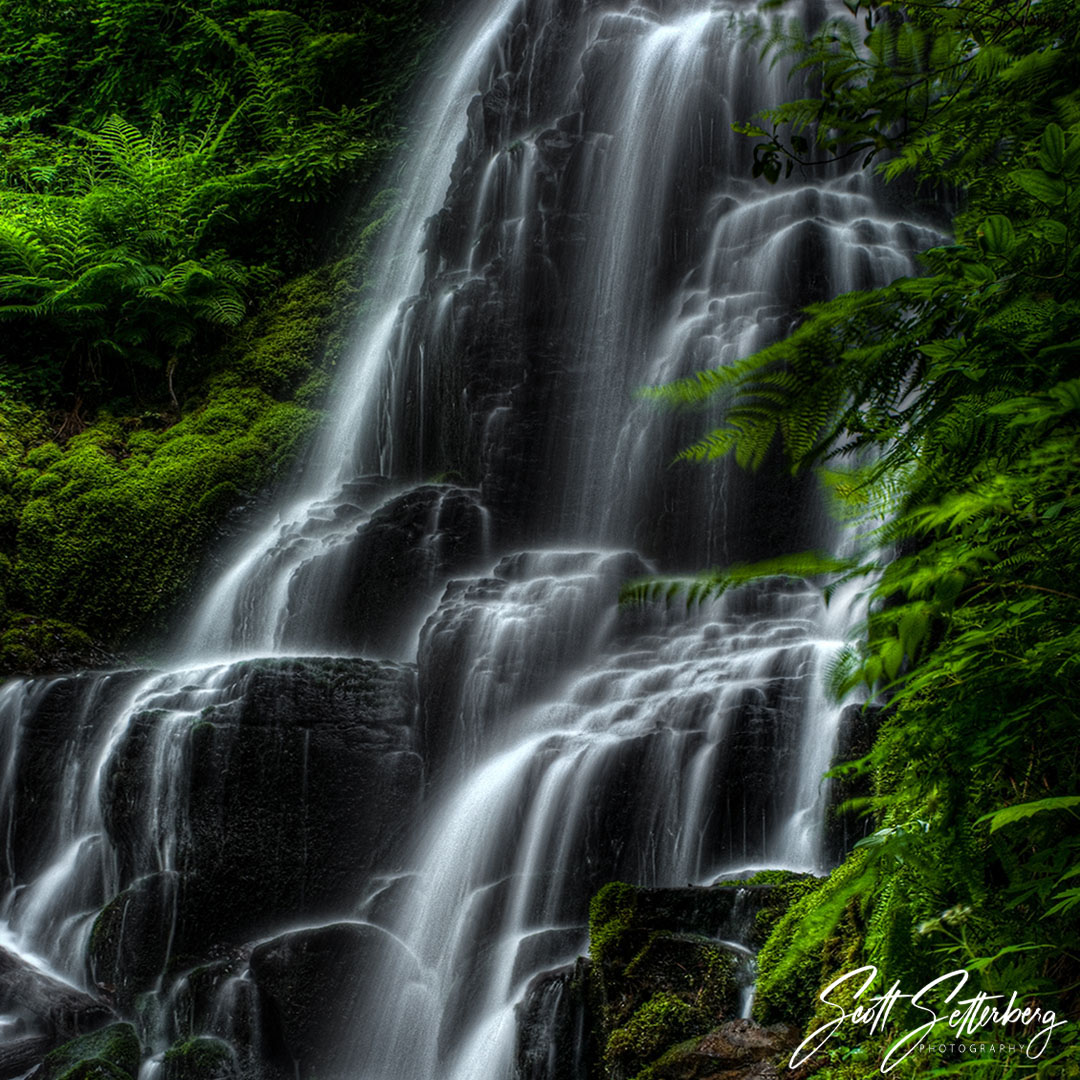
A short drive East of Portland, you can get to the trail system from the Historic Columbia River Highway or off of I-84, but the historic highway is more fun with many spots to stop and take pictures. The trail for Fairy Falls is near the area of the large Wahkeena Falls, so you could do both in the same trip.
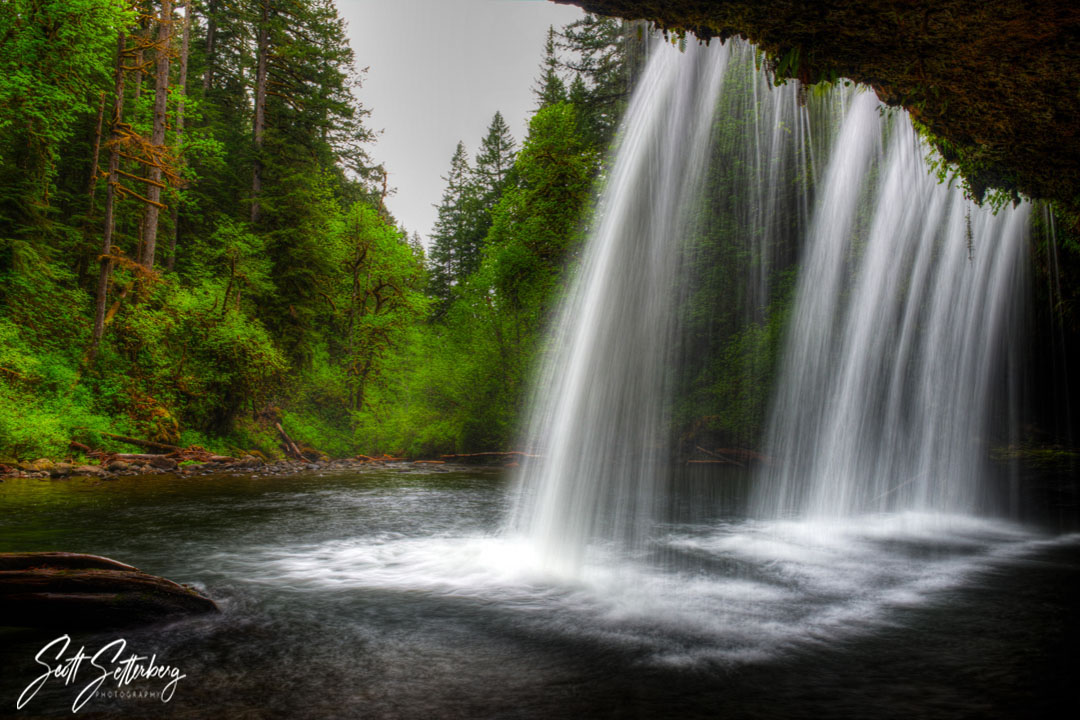
Horsetail Falls
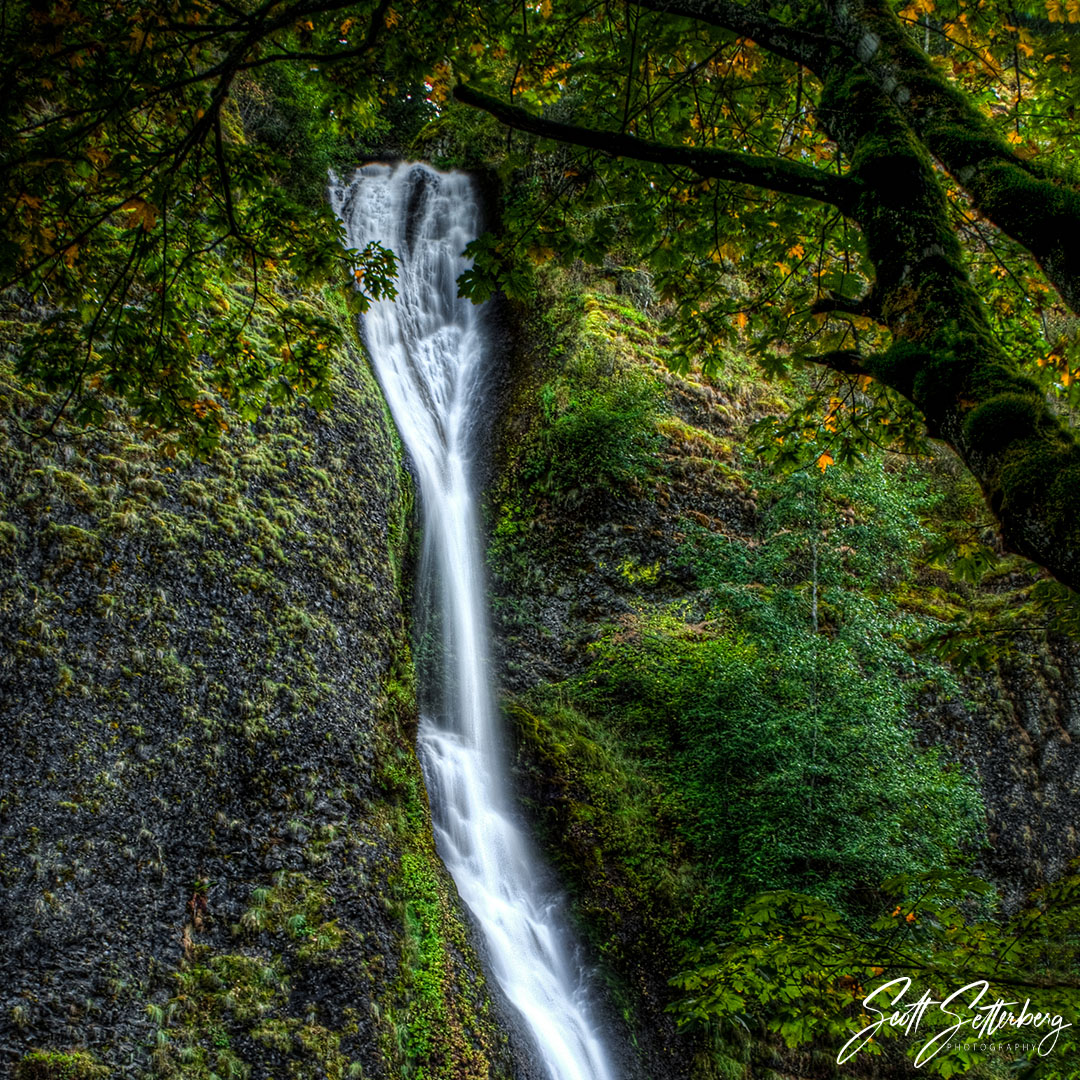
Named after its appearance, Horsetail Falls is one of the easiest of the Oregon waterfalls to access.
A couple of miles of the Wahkeena Falls trail and only about 100 feet or so off of the Historic Columbia River Highway, your best views for Oregon waterfall photography will be from this easy, short trail.
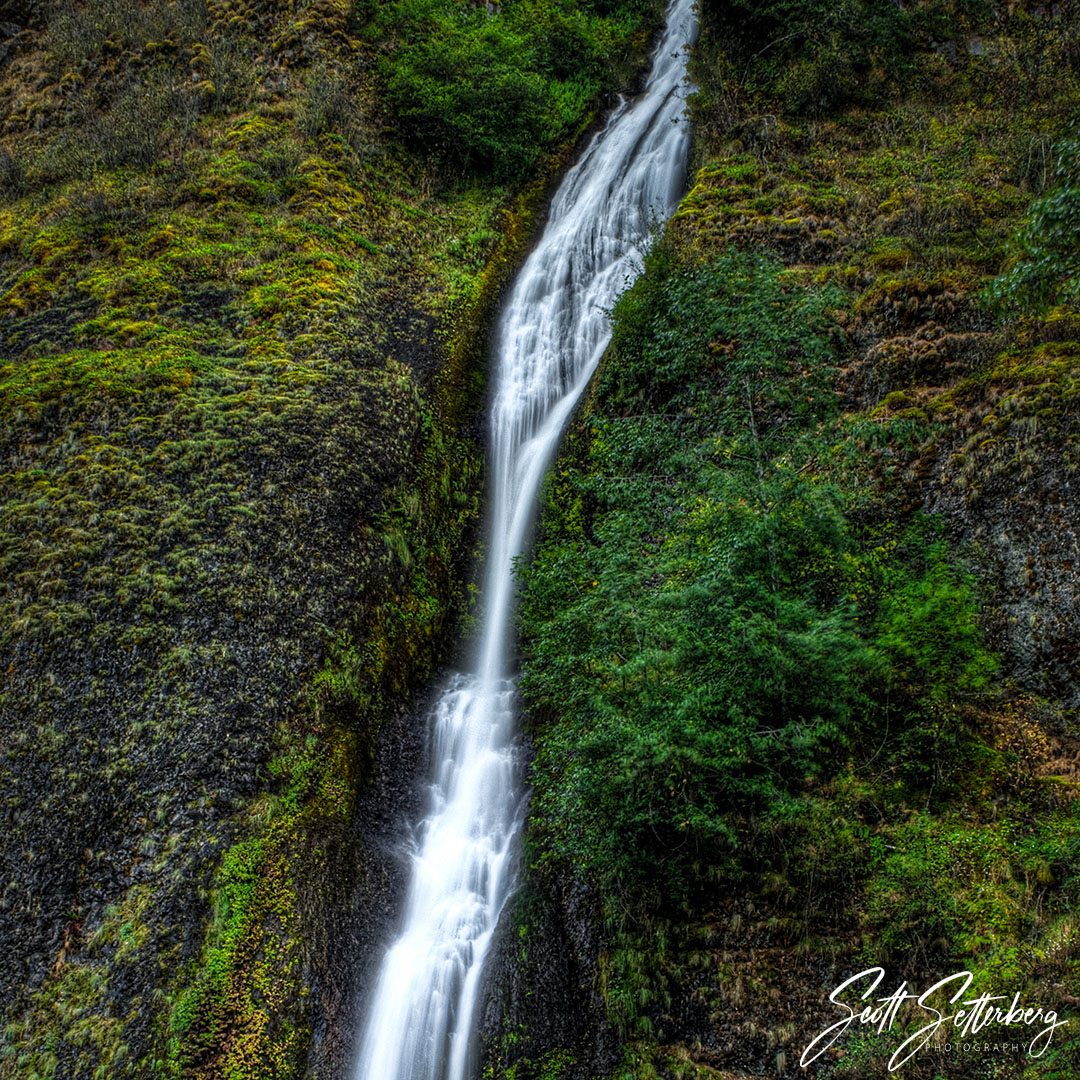
Photographically, this 176’ high falls is highly recognizable and is fun to image, as exposure techniques can make it appear very much like an actual horse's tail. The trail is full of other possible photo subjects, but it is also generally quite full of visitors due to its easy-to-access location.
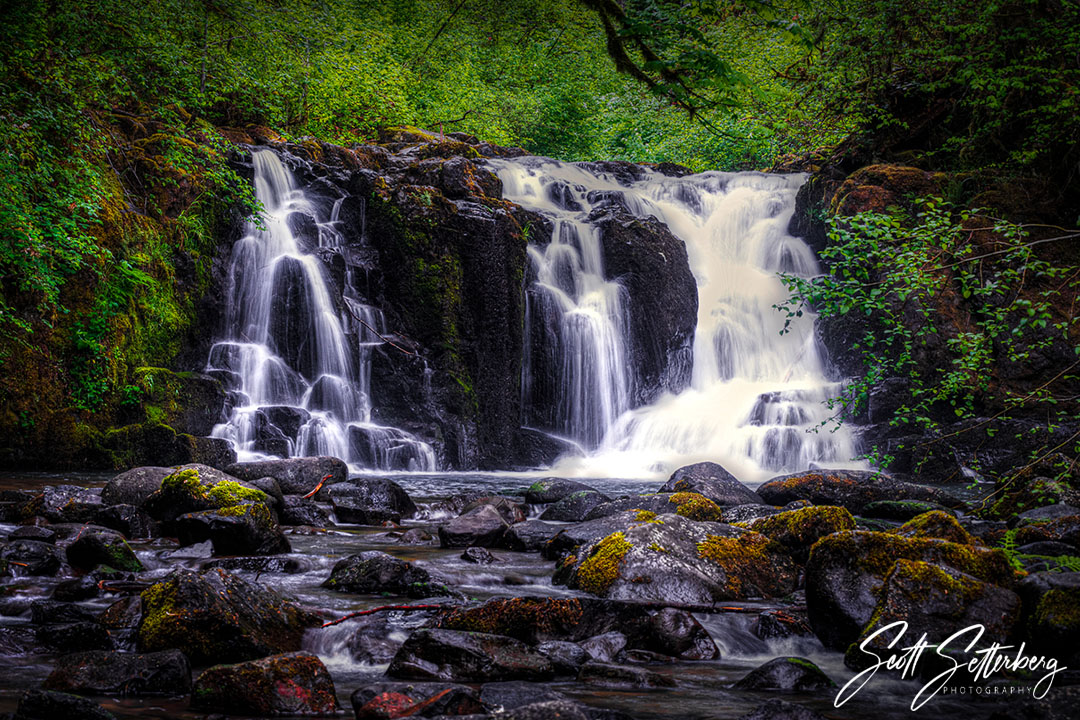
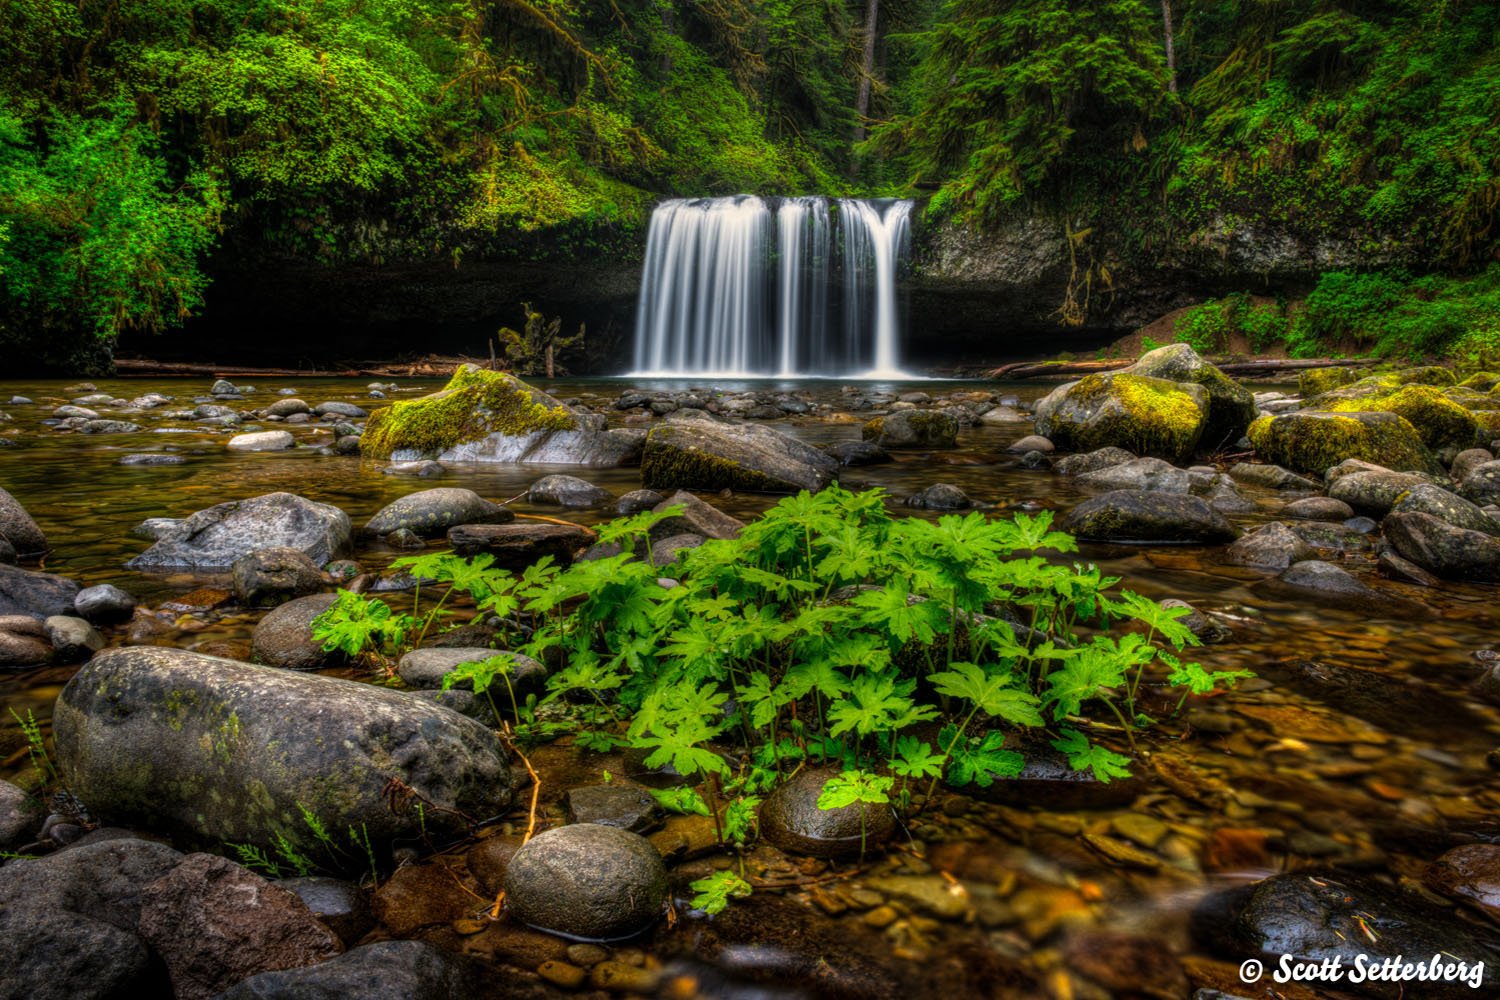
Lower North Falls
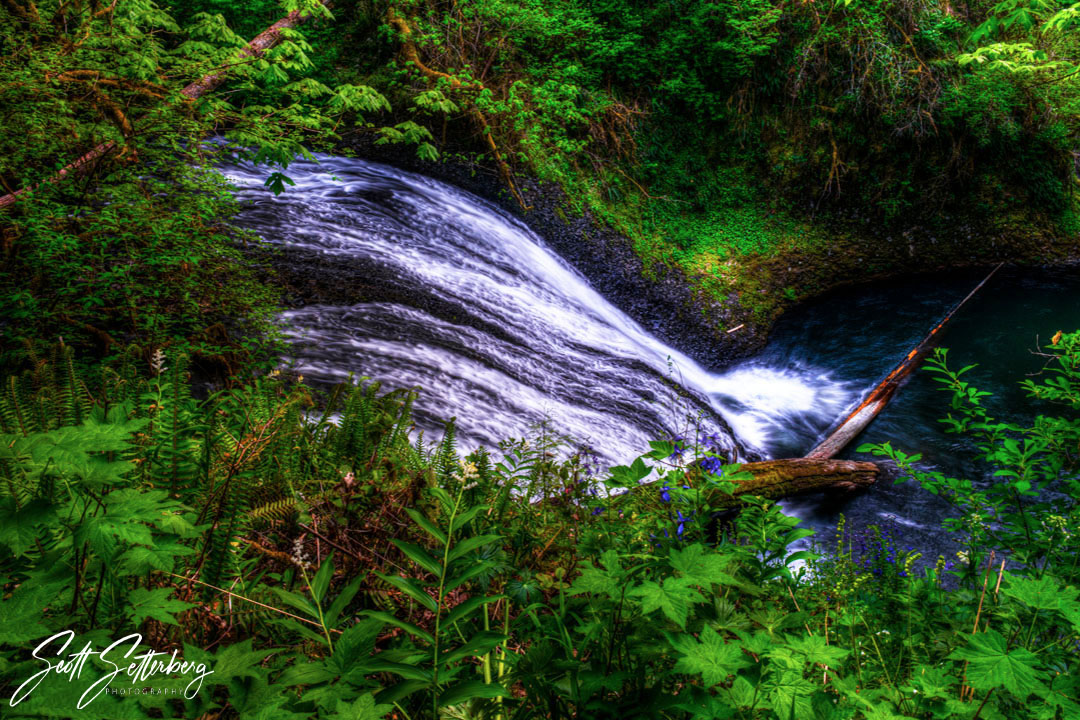
Popularly known as the Thunderdome due to its shape, Lower North Falls is located a few short miles East of Salem in the Silver Falls State Park, accessed from Hwy 214, which is also known as Silver Falls Drive.
It’s 30’ tall and 60’ wide and empties into a large pool at its base. A wide horsetail shape photographs as an interesting sheet of water, which varies as the volume of water changes seasonally. In addition to the trail, you can also get to it by recreational river travel.
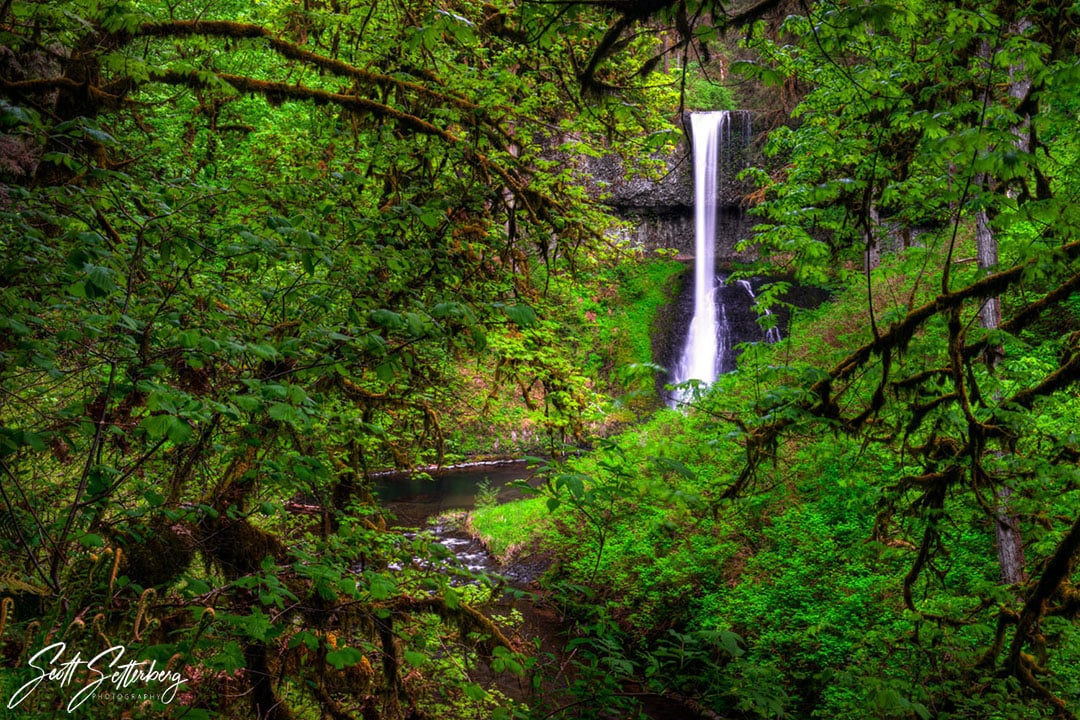
Lower South Falls

At 100’ tall and clearly viewed from the trail, Lower South Falls is a classically beautiful waterfall that lends itself to a variety of photographic imaging techniques to showcase that beauty.
Like Lower North Falls, this waterfall is also located in the Silver Falls State Park.
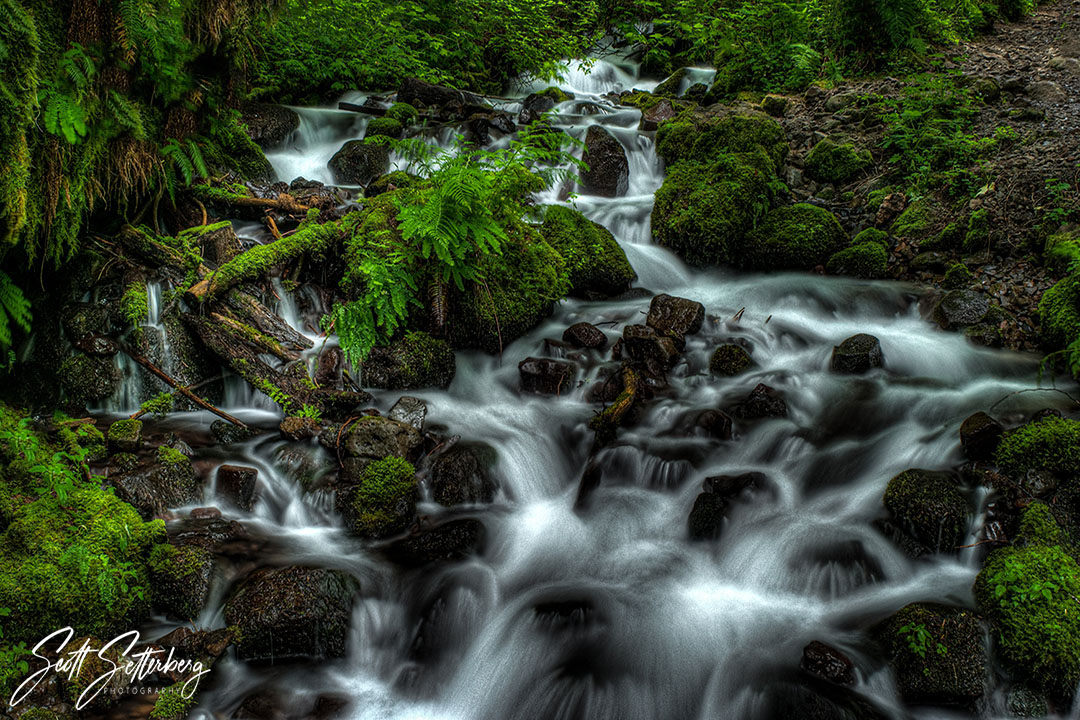
McDowell Creek Falls
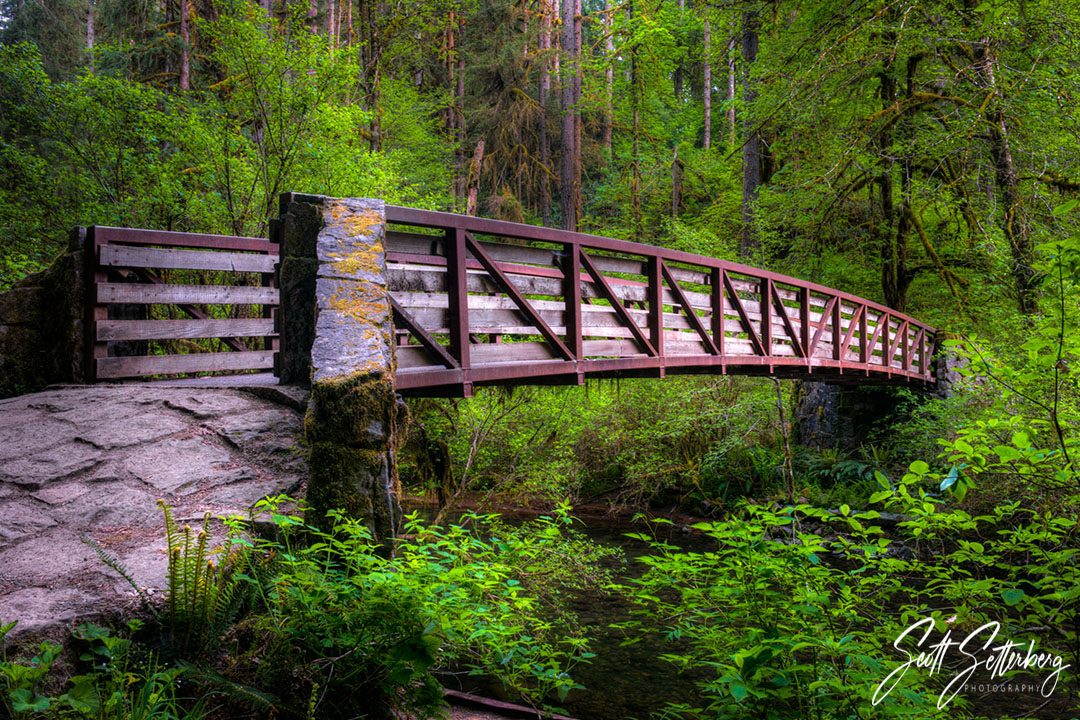
The views all along the trail leading to McDowell Creek Falls are excellent for photography as there are wooden footbridges, a wide, boulder-strewn stream bed at its base, and multiple intricate details of the rock face it tumbles down.
Generally open all year long, the falls are easily accessed from US 20 just a few miles from Lebanon, which is about halfway between Salem and Eugene.
Learn More:
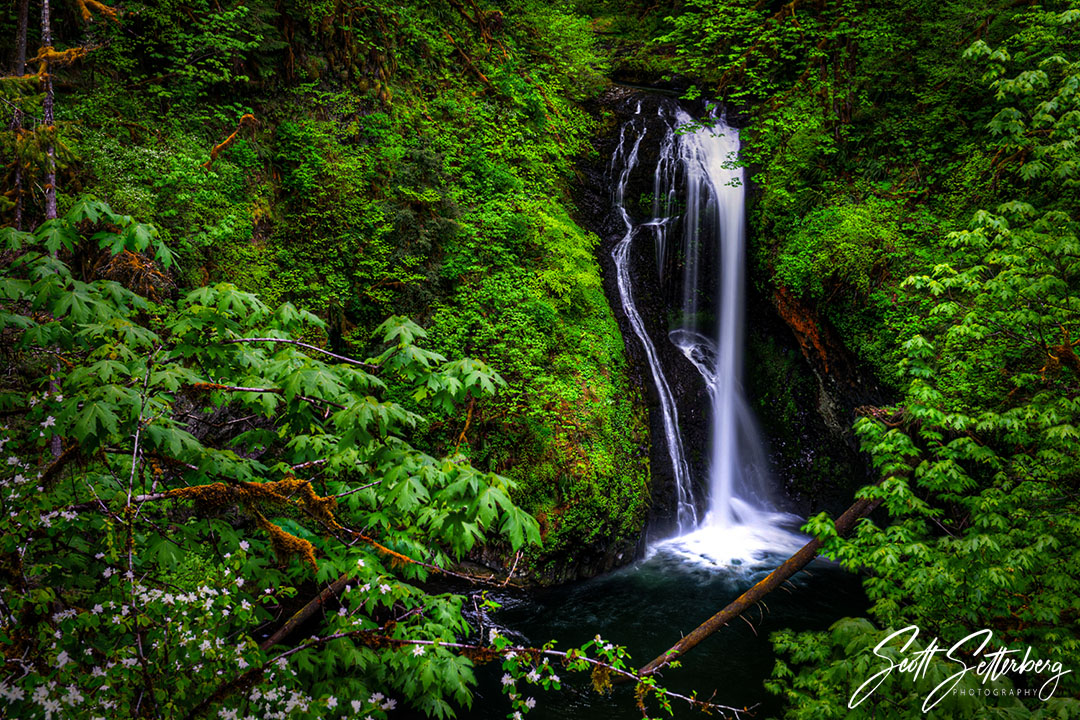
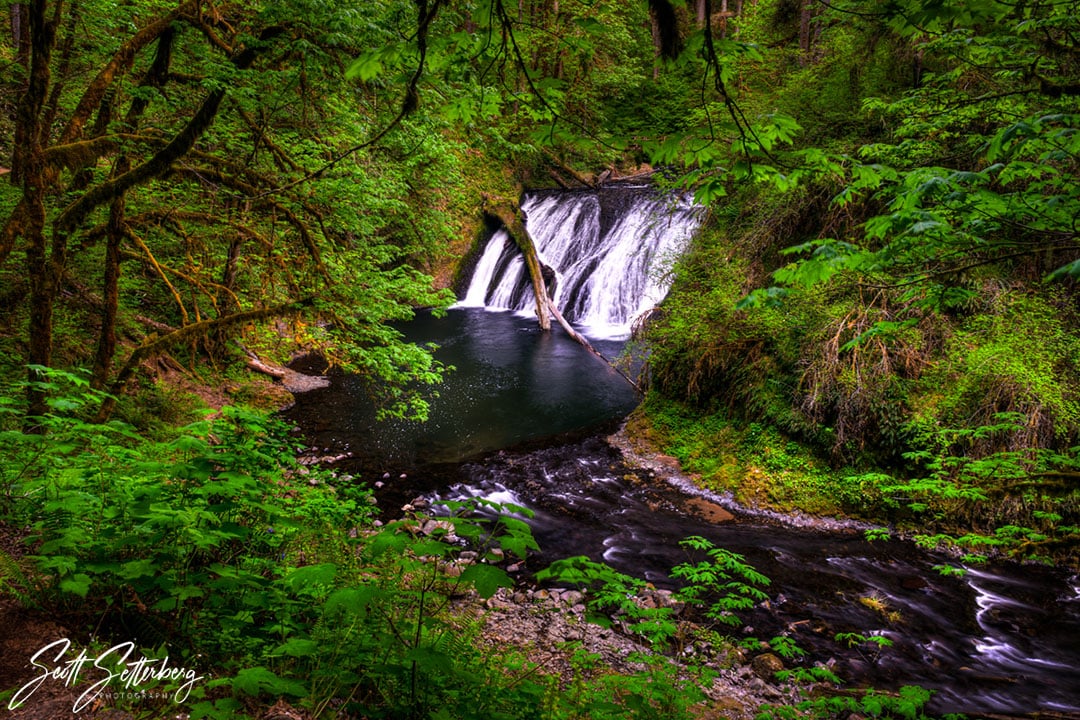
Middle North Falls
Part of the same trails as Lower North and Lower South Falls, Middle North Falls is a majestic wide sheet waterfall about 100’ tall that photographs beautifully by means of a variety of photographic methods.
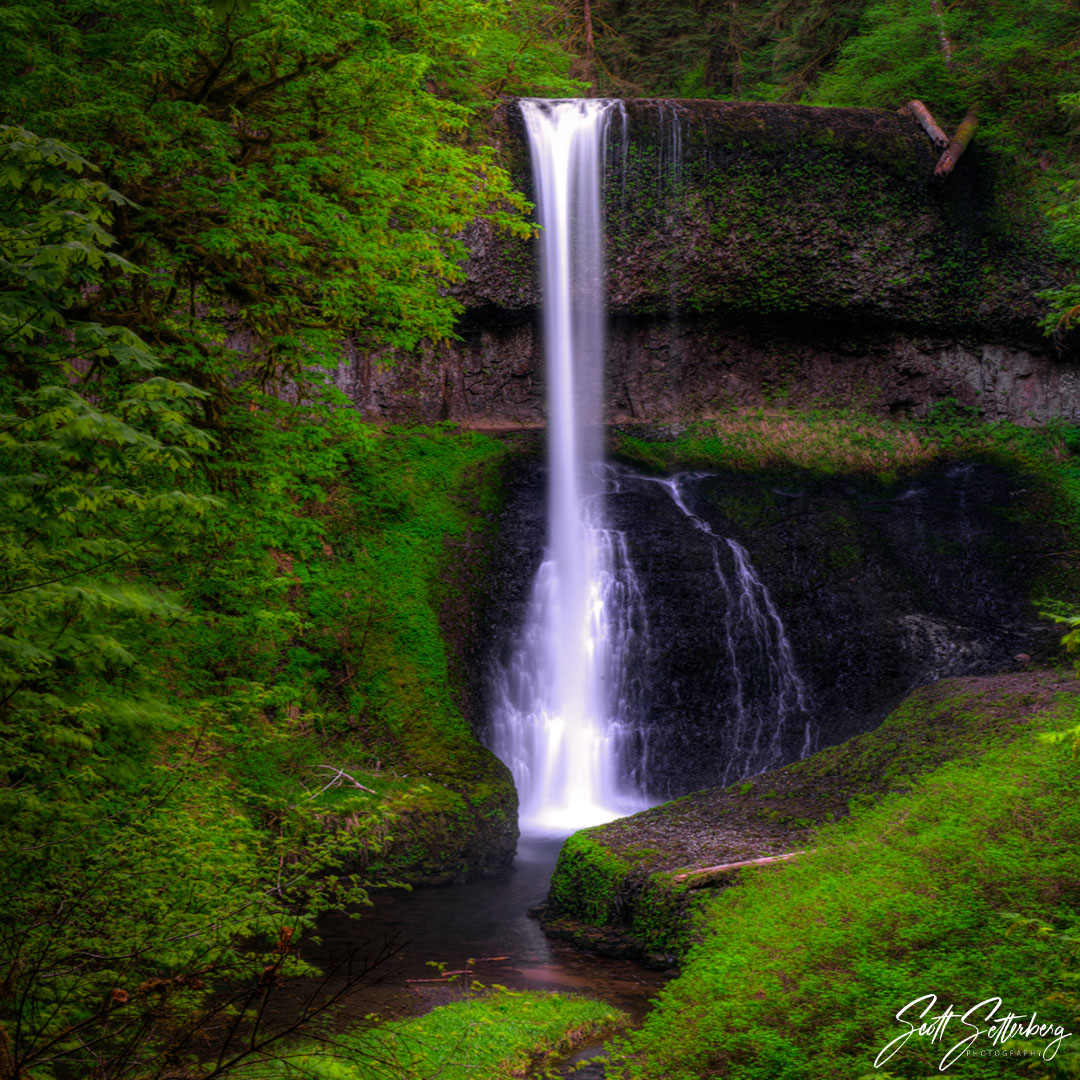
Surrounded by lush forest, there are several excellent views at various points along the trail so you can capture the beauty of this waterfall from multiple perspectives.
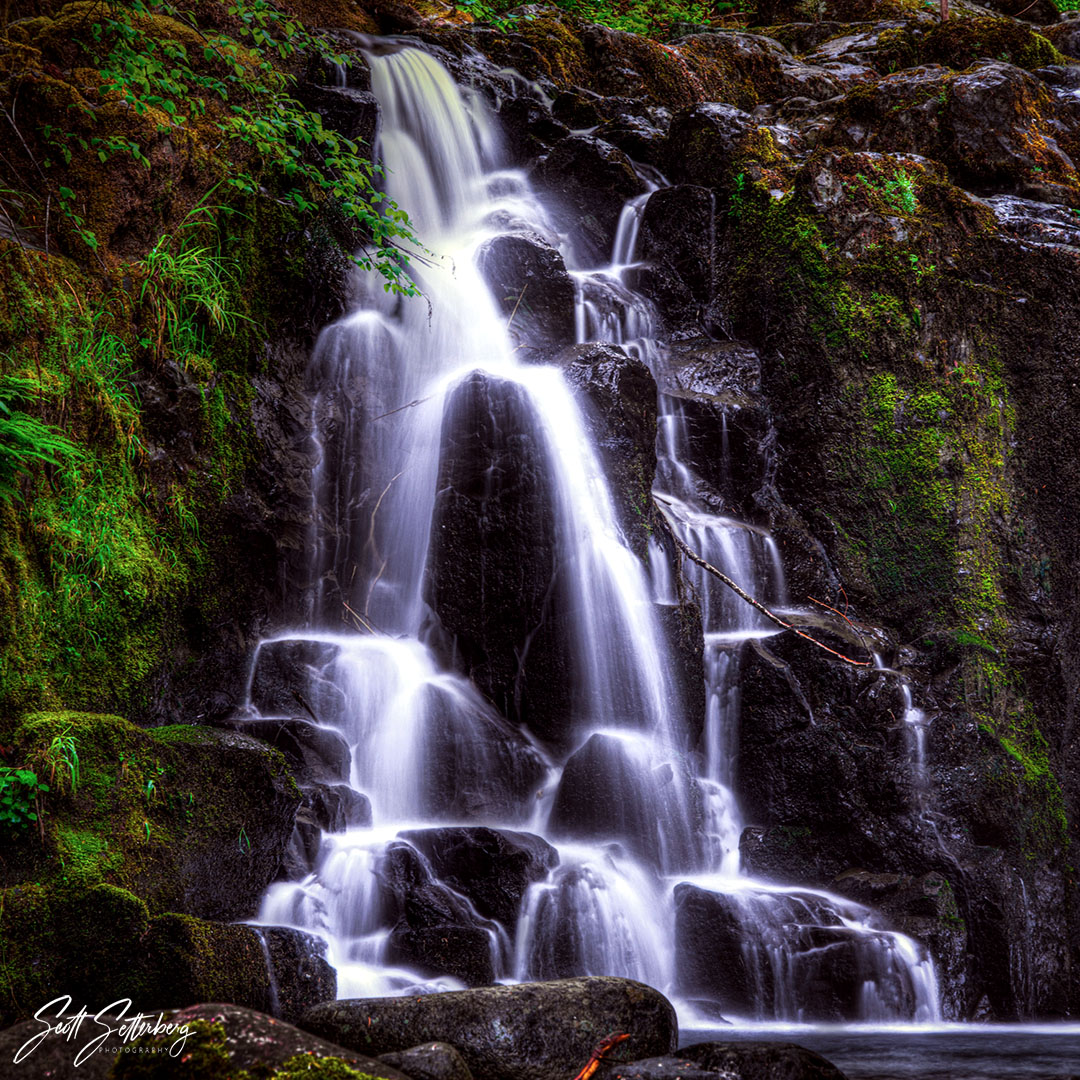
Royal Terrace Falls
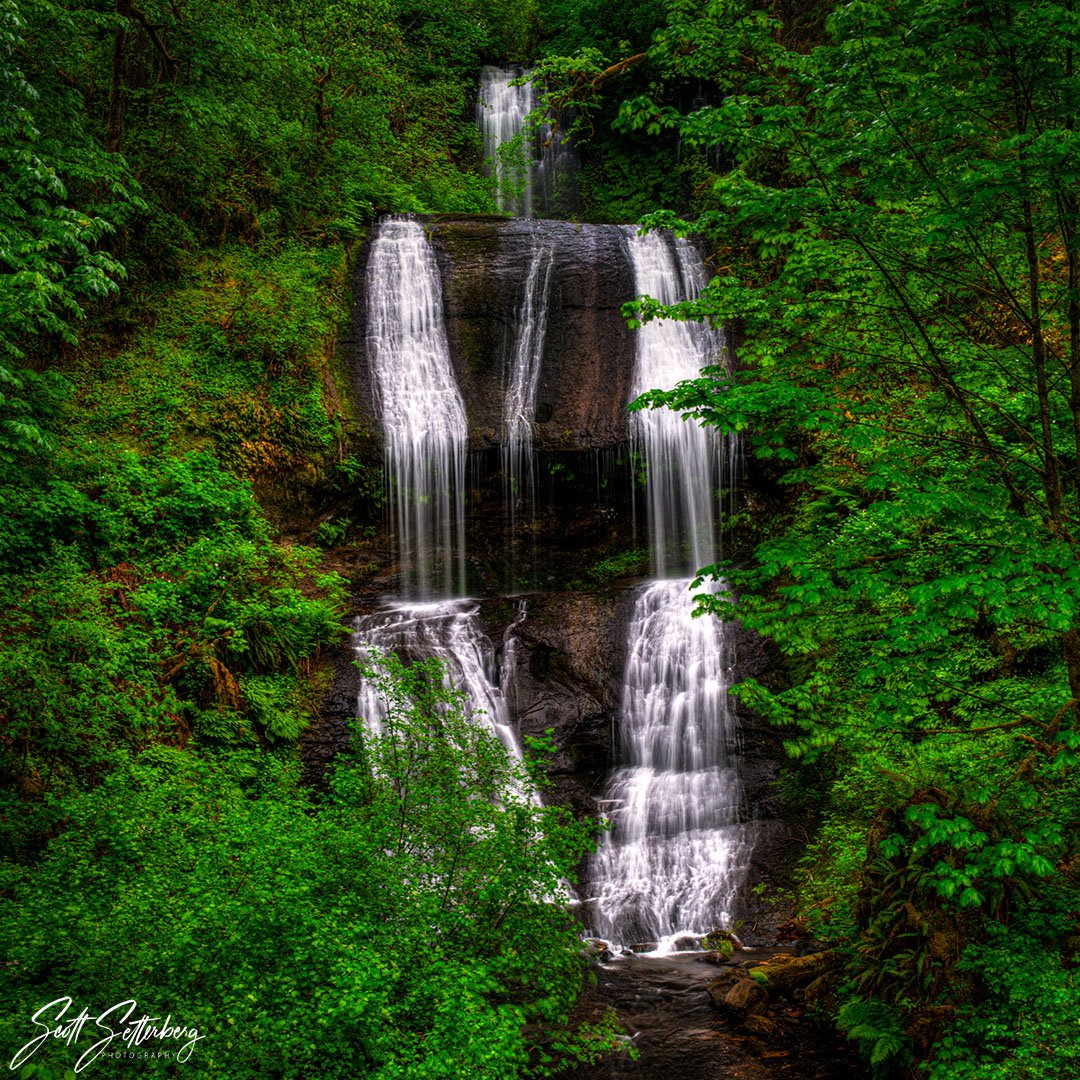
Royal Terrace Falls is part of the same area as the McDowell Creek Falls and is an awesome subject for waterfall photography. It’s a tiered, multi-level waterfall that is about 119’ tall and has been described as a stair-step waterfall.
The easy trail has multiple man-made paths and stairs constructed of wood which makes the trail accessible year-round for any level of hiker.
Silver Falls

Silver Falls is located in Silver Fall State Park about 20 miles Southeast of Salem and has a wonderful trail system that gives many photographic opportunities besides the waterfall itself.
A highlight of the trail is a beautiful wooden bridge. There are about 10 waterfalls along the entire trail which is rated easy.
The park is easy to access and is actually a very popular wedding venue.
Smith Rock
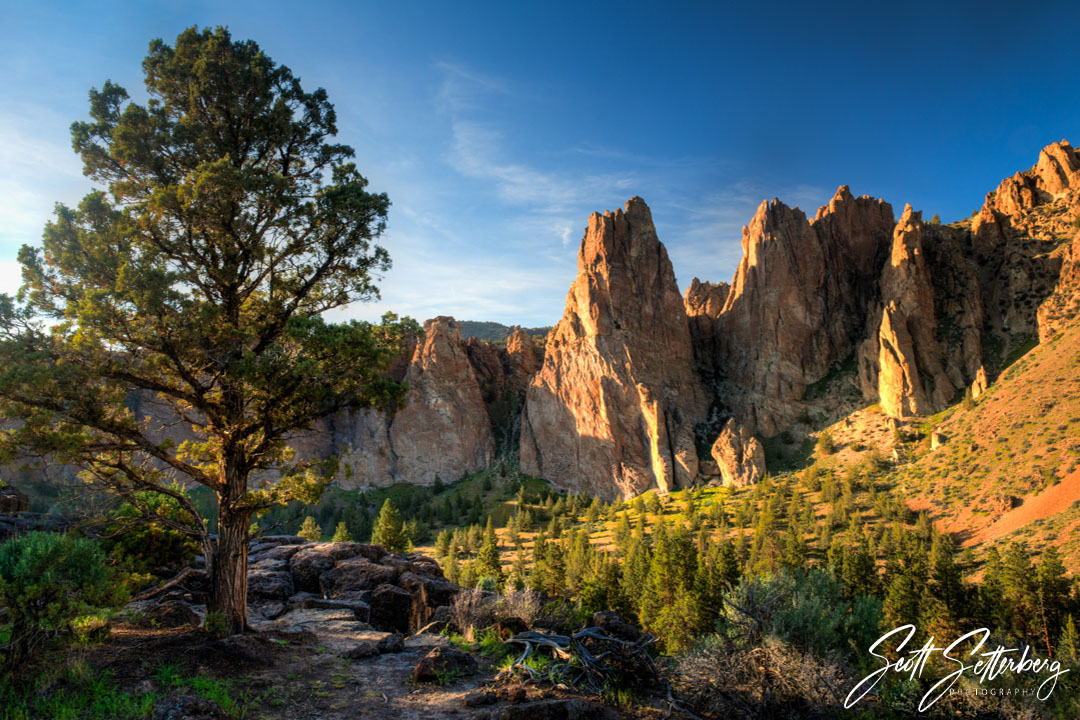
Smith Rock State Park is in the central part of the state near Redmond, along the Crooked River and is accessed from US 97. It is listed as part of the 7 Travel Wonders of Oregon due to the huge variety of recreational activities available plus the many different types of landscape views for photography.
Depending on the time of year, Crooked River is full of areas of white water and small falls, and the entire park has trails that range from easy to very difficult. It’s a great idea to book a guided photo tour by ColorTexturePhotoTours which may be the best way to see and photograph this area.
Starvation Creek Falls
A very easy drive on I-84 a mere 30 minutes from Portland, Starvation Creek Falls is a showcase waterfall of the Columbia River Gorge National Scenic Area. The parking lot for the trailhead is right off of the highway.

It is a two-tiered tall waterfall and is photographically magnificent, making it one of the most photographed of Oregon waterfalls and of the entire United States. The two drops total in height at 227’ and you can photograph it from various spots along the trail for a wide range of views.
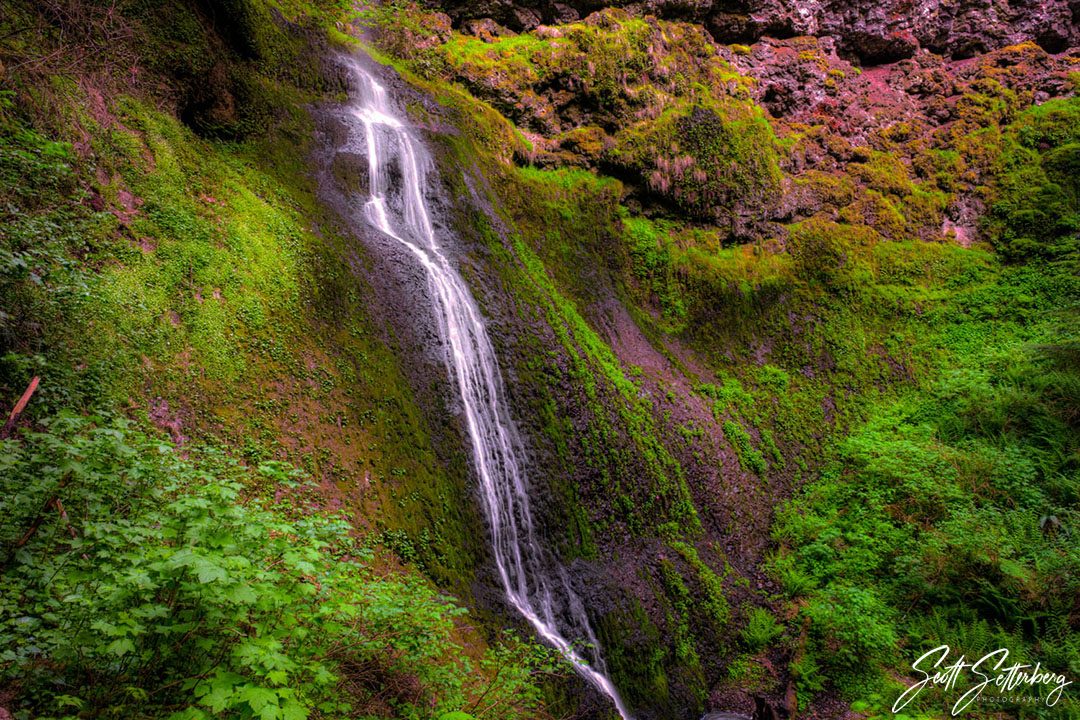
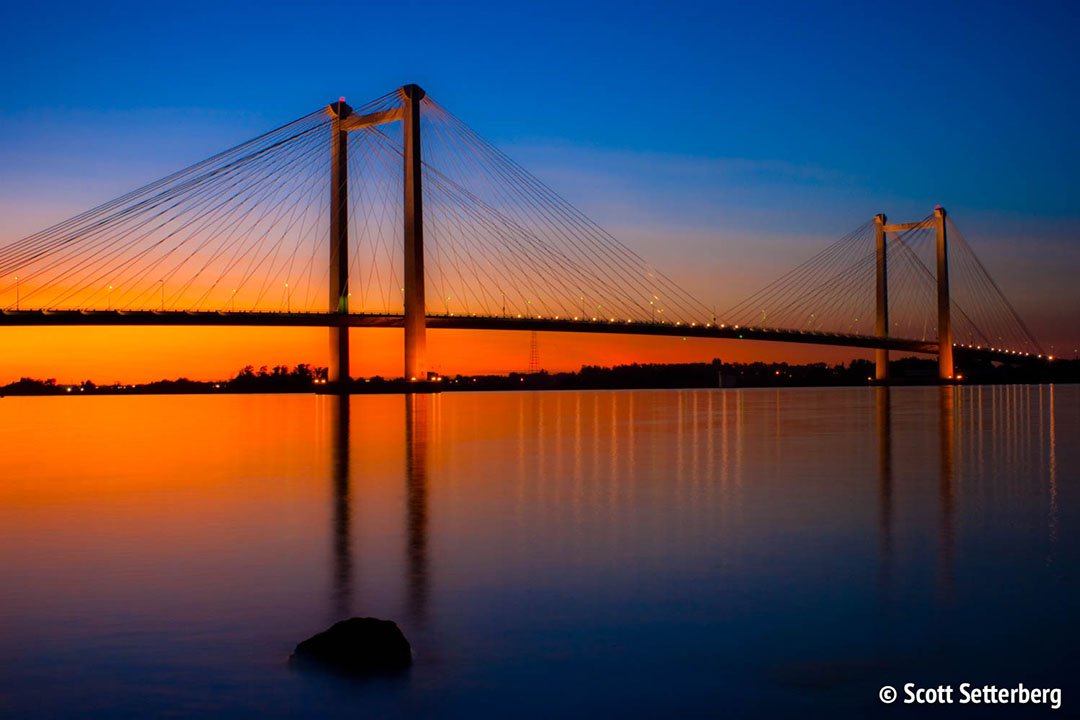
Sweeny Falls
About 5 miles East of the Bridge of the Gods over the Columbia River and just outside of Sweeny, Washington on Hwy 14 is Sweeny Falls. It’s a beautiful small falls and photographs wonderfully even in the dead of winter.
Bridge of the Gods is a 1920s era cantilever bridge about 40 minutes East of Portland that offers its own great photographic opportunities.
Wahkeena Falls
At a total height of 242’, Wahkeena Falls is a multi-tiered waterfall that is named for a word which means “most beautiful,” a label it lives up to in many ways. Photographically, it is easy to make stunning images of this Oregon waterfall.
It’s also easy to access from the Historic Columbia River Highway or off of I-84 about 30 minutes from Portland. The trail it’s on is part of a large trail that offers views of several photographically interesting waterfalls.
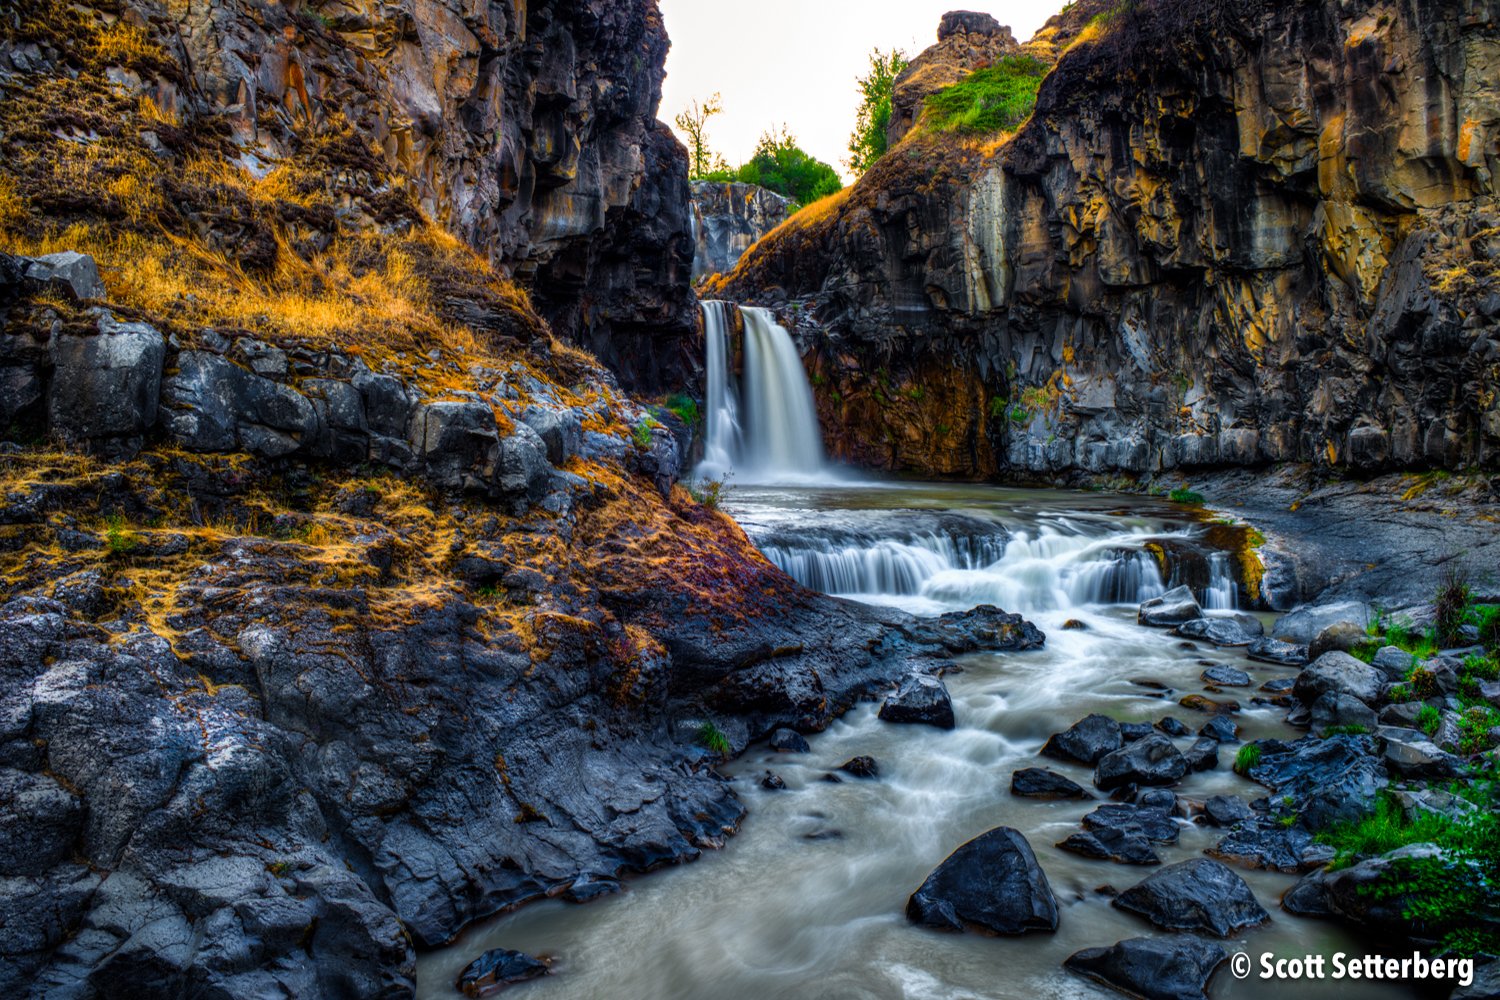
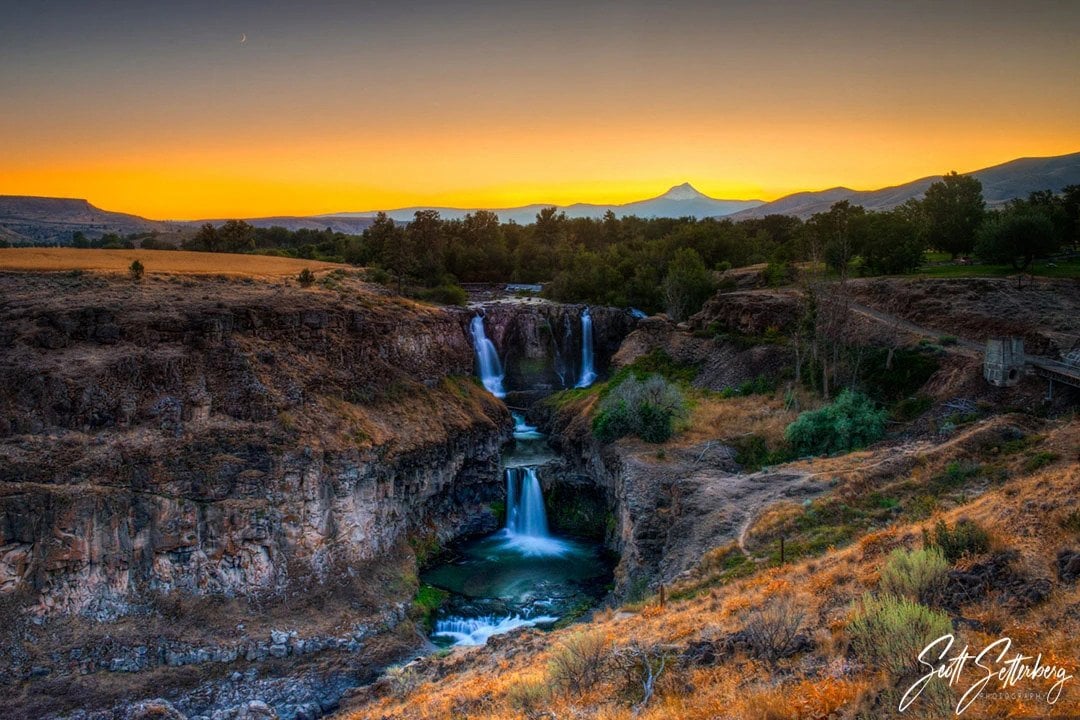
White River Falls

Located within the White River Falls State Park near Maupin in North Central Oregon, White River Falls is a great photo subject with its tall height and horseshoe shape. It’s about 75’ high and it can be as wide as 250’ during peak runoff season.
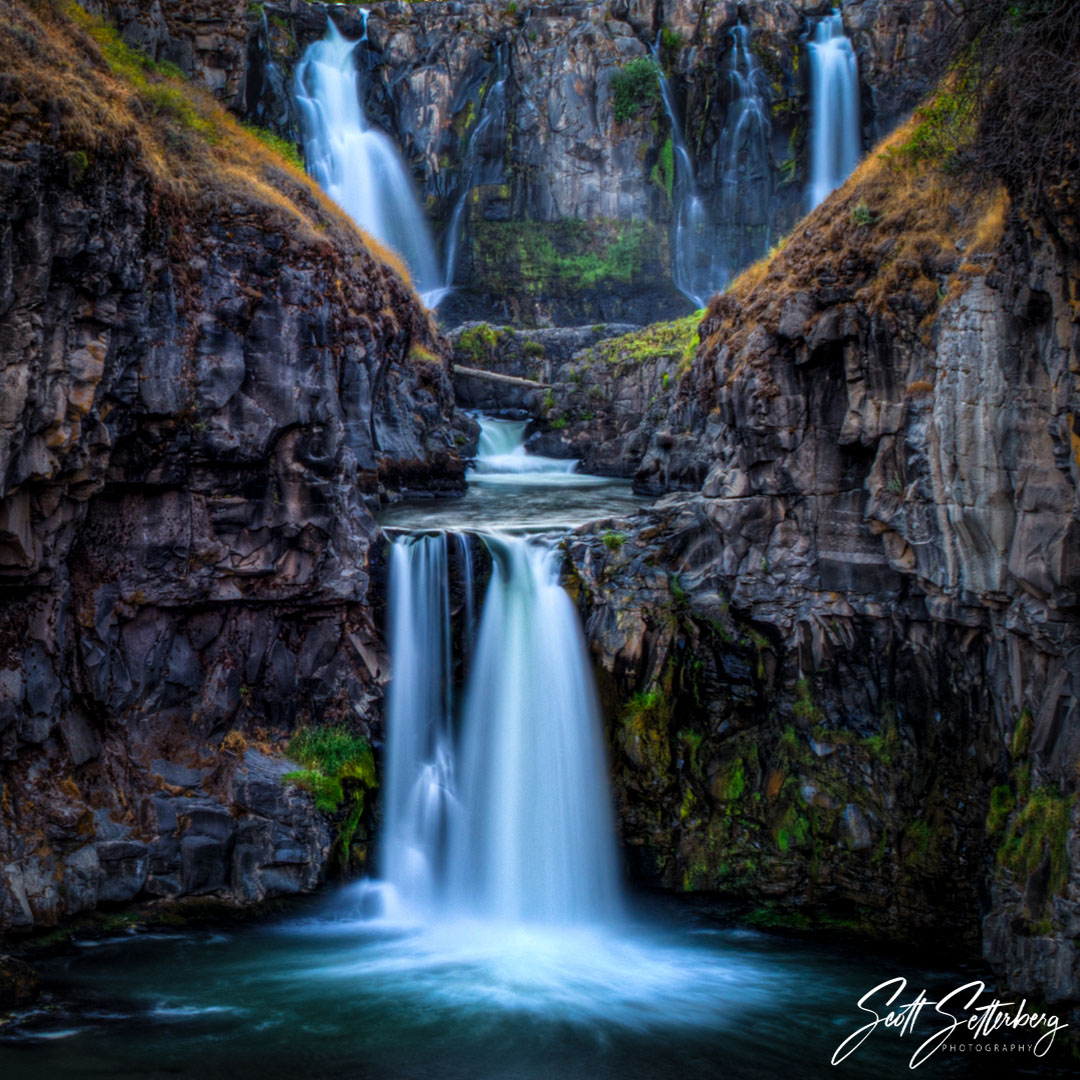
Various river canyon spots along the trail also make for great photography in addition to the waterfall photography offered by White River Falls, easily one of the most exciting of Oregon waterfalls.
Winter Falls
Tall and thin, the Winter Falls waterfall in the Silver Falls State Park near Salem photographs wonderfully from several different angles along the trail.
It’s on a moderate length trail, about 5 ½ miles, but the trail is rather easy for the most part and includes man-made stairs for several of the elevation changes.
Book a Tour or Take Your Own
Whichever method you choose to explore these beautiful Oregon waterfalls, we want to see your finished images. These waterfalls are generally somewhat simple to access, though some of them may have a challenging trail as the way in.
What really makes these waterfalls challenging is that they are naturally beautiful and can be imaged in many different ways.
If you’re unfamiliar with these areas, or if you’re in need of individual guidance on waterfall photography, I can’t recommend ColorTexturePhotoTours highly enough.
Scott hosts guided photo tours of Oregon waterfall photography locations. These highly rated photo tours provide photographers with valuable insights and are a treasure trove of beautiful sites and helpful photography tips.
Visit some of the waterfalls on this list in high style with one of Scott’s all-inclusive, small-group photo tours. Visit ColorTexturePhotoTours today to book your Oregon waterfall photography adventure!
Learn More:
- Top Waterfalls to Photograph Around the World
- 4 Reasons Why Oregon Should Be Your Next Photography Destination
We Recommend
3 Must-See Locations in Costa Rica
Costa Rica is a gorgeous country. Known for its wildlife, its volcanoes, and its beaches, Costa Rica is a haven for photographers, old and new alike. It’s one of the places I’ve been dreaming about ever since I figured out I probably wouldn’t be travelling for quite some time.
But, many photographers fall into a trap on their first visit to Costa Rica. Instead of getting off the beaten path, they strictly visit locations deemed “must-see locations in Costa Rica” by photographers who visited the country years ago.
There are so many new locations to visit now, since the country continues to be such a success story for development.
Here’s a list of the things you absolutely must capture in Costa Rica, just as soon as you are able to travel once more.
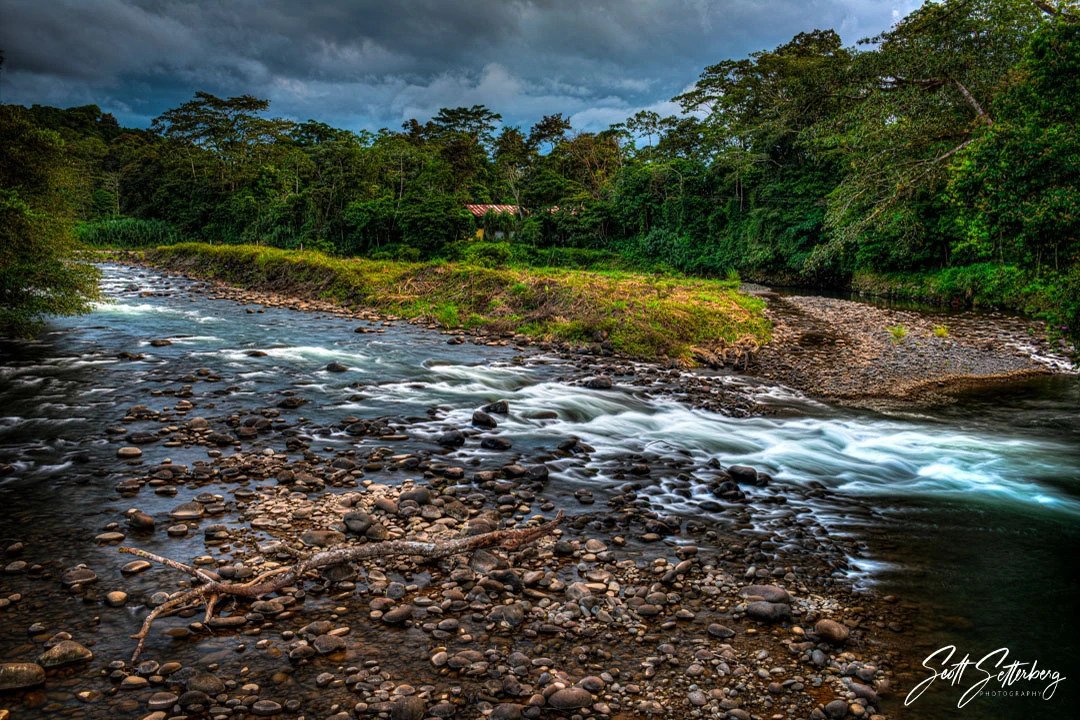
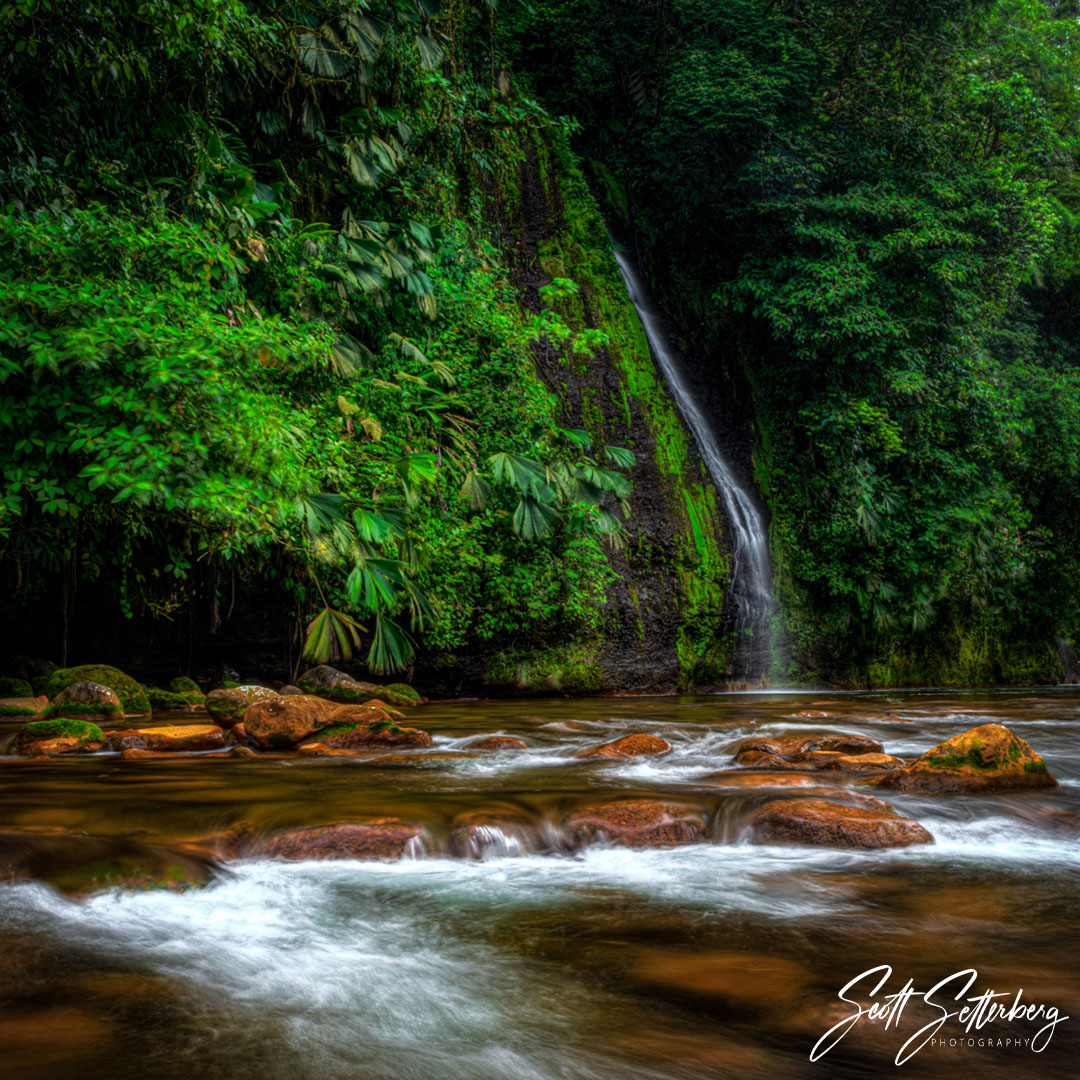
Sarapiqui
If you’re wondering what to photograph in Costa Rica, the first answer is: Sarapiqui. Sarapiqui is a lush, green area of Costa Rica known for its outdoor festivals and fairs.
You’ll find the most dense rainforests, the most colorful frogs, and miles of waterfalls, rivers, and wildlife.
It also hosts Pozo Azul, a gorgeous, secluded waterfall that can be difficult to find. That's why I suggest you join one of the many Costa Rica photography trips hosted by ColorTexturePhotoTours. Not only will you visit spots like Pozo Azul, which you never otherwise would find on your own, but you’ll be safe while doing so.
But, unlike other parts of the world, the raw landscape of Sarapiqui doesn’t mean you have to rough it in less-than-ideal hotels. Sarapiqui is close enough to La Fortuna to choose from an abundance of beautiful hotels and resorts. Of course, if you explore this area with a tour like ColorTexturePhotoTours, your accommodations are taken care of for you!
My favorite part about Costa Rica is that it really is whatever you want to make of it, and this is no more apparent than in Sarapiqui. You can chase waterfalls and frogs all day, or you can take a few hours to yourself and go on some of the most intense ziplines you’ll ever experience.
Sarapiqui is also known as one of the most authentic areas of Costa Rica, which brings with it a host of cultural activities (including incredible Costa Rican restaurants, like La Cueva del Marisco, which serves delectable seafood in a very humble environment).
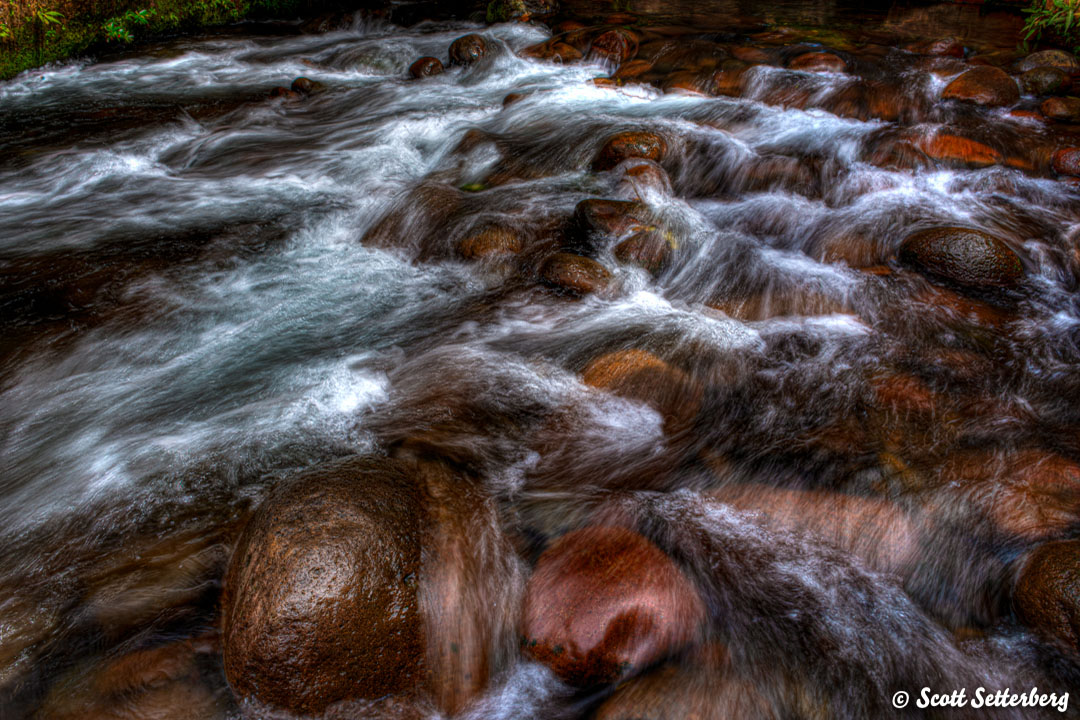
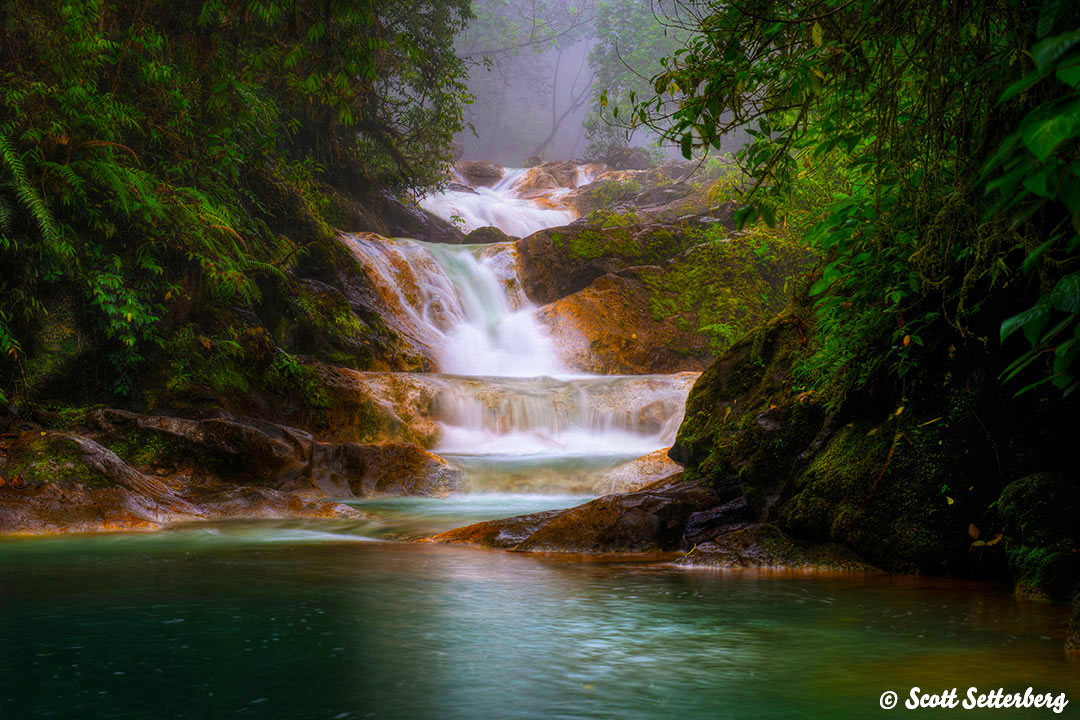
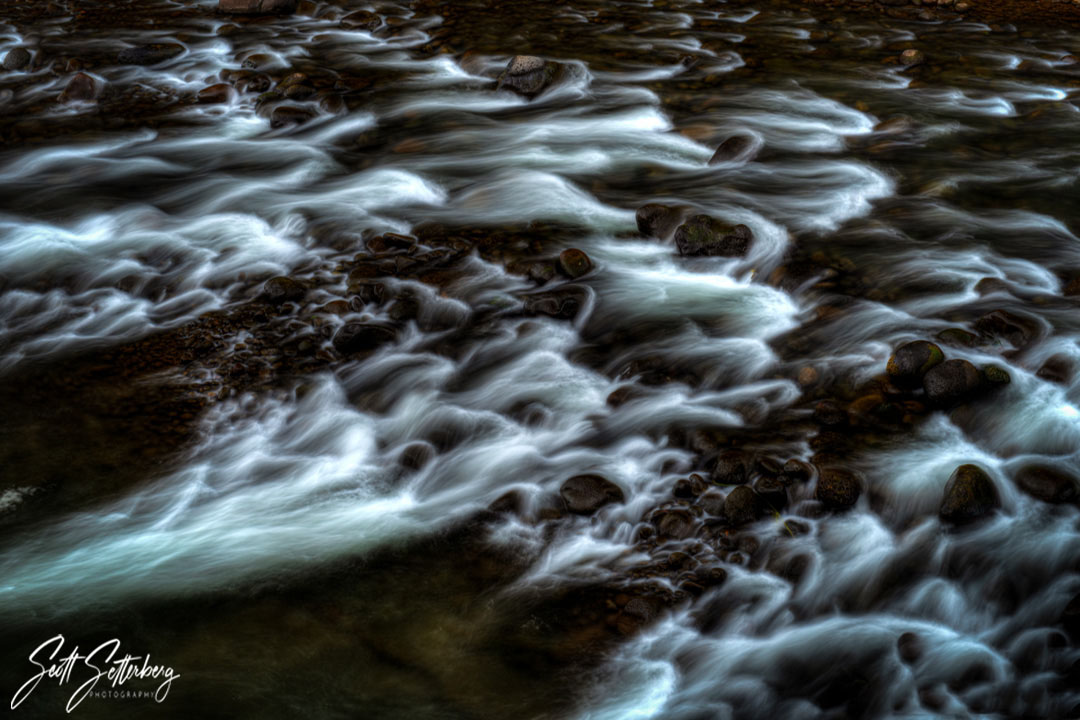
Toro Amarillo
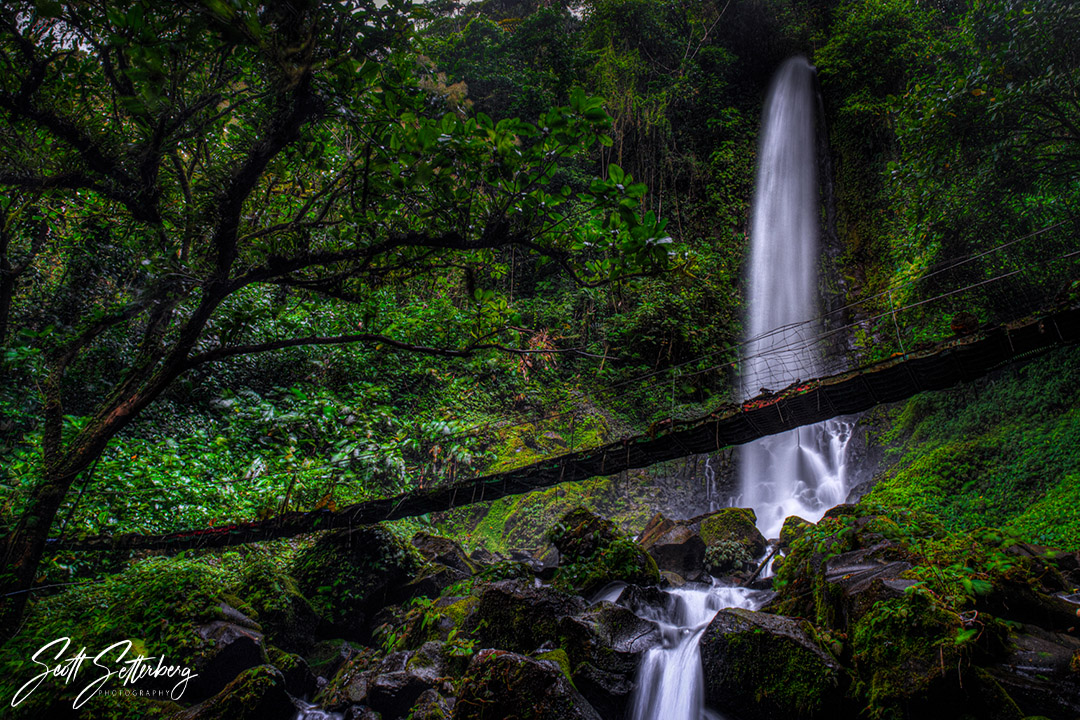
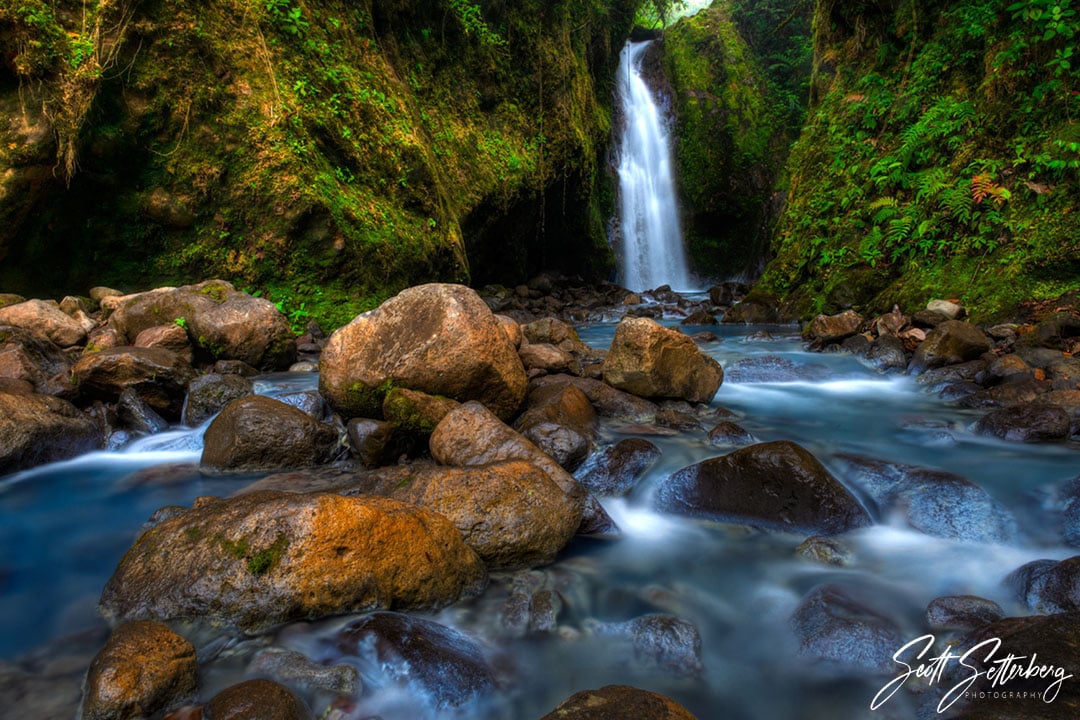
Another one of my favorite areas of Costa Rica is Toro Amarillo.
Toro Amarillo is a tiny pueblo that lies off of the Rio Toro, and like many towns in the area, receives visitors looking to photograph one of the many mighty waterfalls nearby.
One of ColorTexturePhotoTours Costa Rica trips visits Toro Amarillo and a single location with seven stunning waterfalls, several of which drop into the Rio Toro. Since the Rio Toro is lined with incredibly fluorescent, orange boulders, it’s sure to result in gorgeous photos.
Learn More:
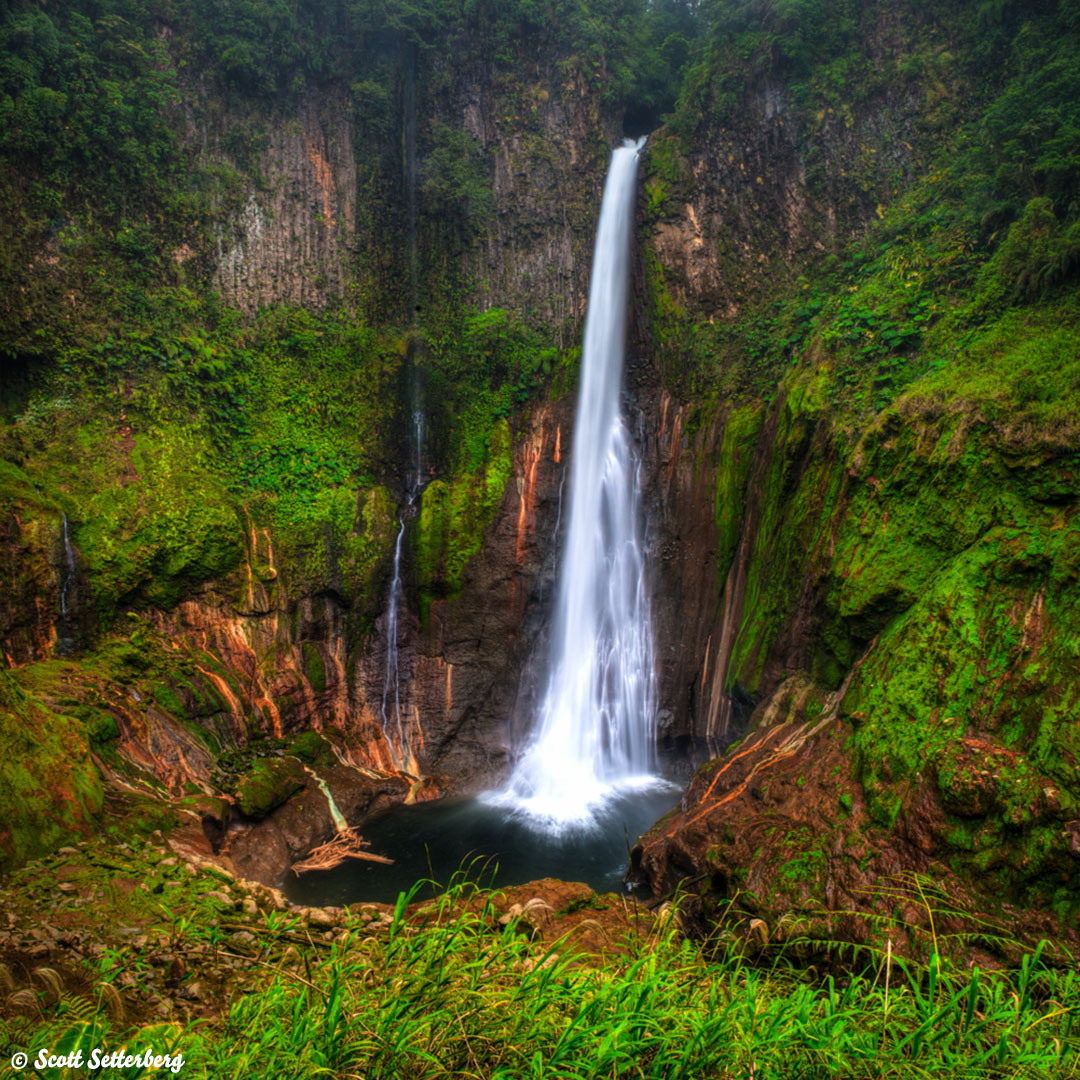
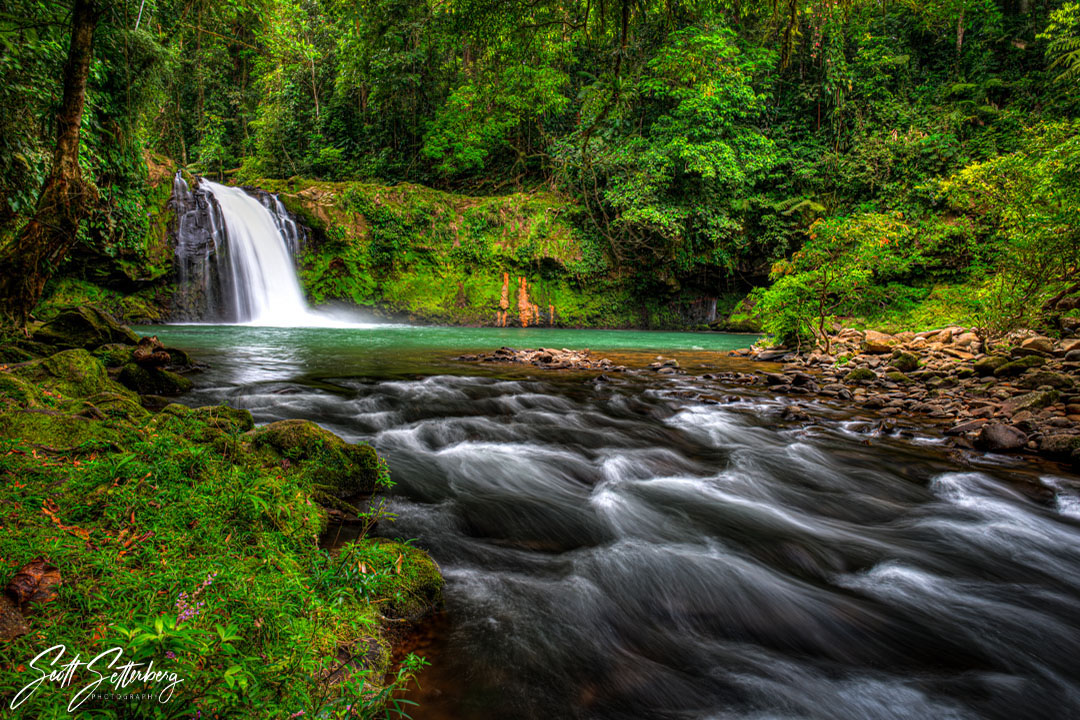
Bajos Del Toro
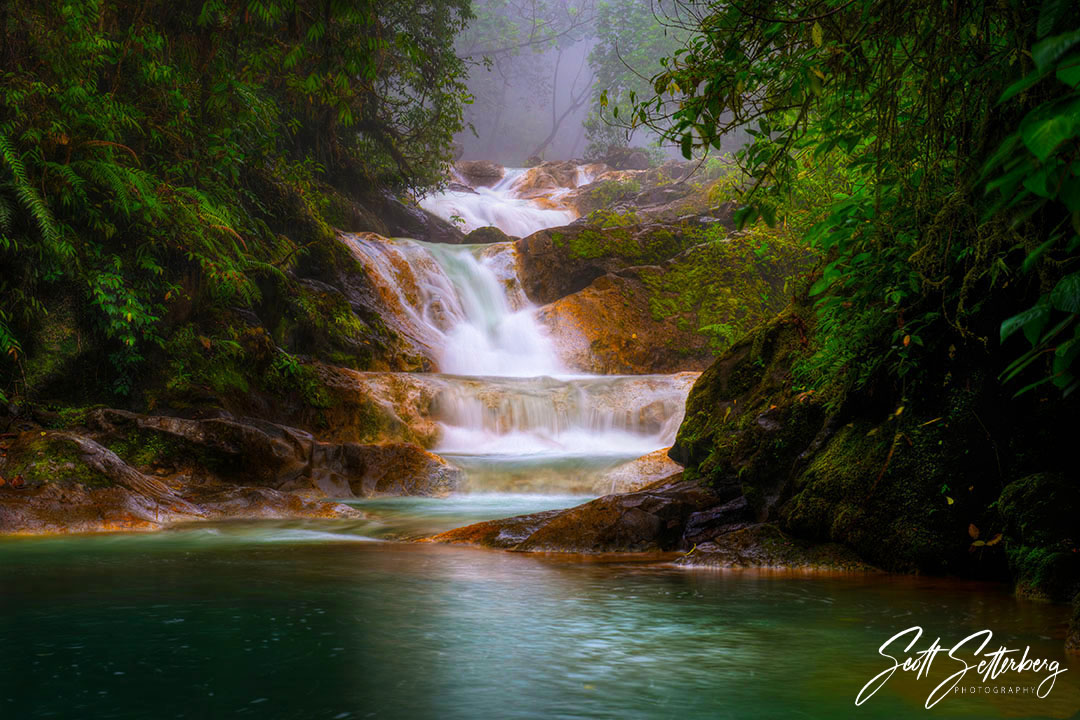
The last place I recommend you visit on your Costa Rica trip is Bajos Del Toro.
This area encapsulates everything I love about Costa Rica. For instance, one of the largest waterfalls in the whole country can be found in Bajos Del Toro and it drops directly into a mineral-scarred pool at the bottom of an ancient volcano.
Bajos Del Toro is also known as one of the best bird watching areas in the world. While hiking to that waterfall, you will pass through an area ripe with hummingbirds zipping around the flower gardens.
But, the most relieving part of Bajos Del Toro is that it may be the first location in Costa Rica where you aren’t scorched by heat all day.
Bajos Del Toro can be a challenge to shoot because of just how high its elevation is. One moment you can see absolutely everything and the next you’re completely surrounded in misty clouds.
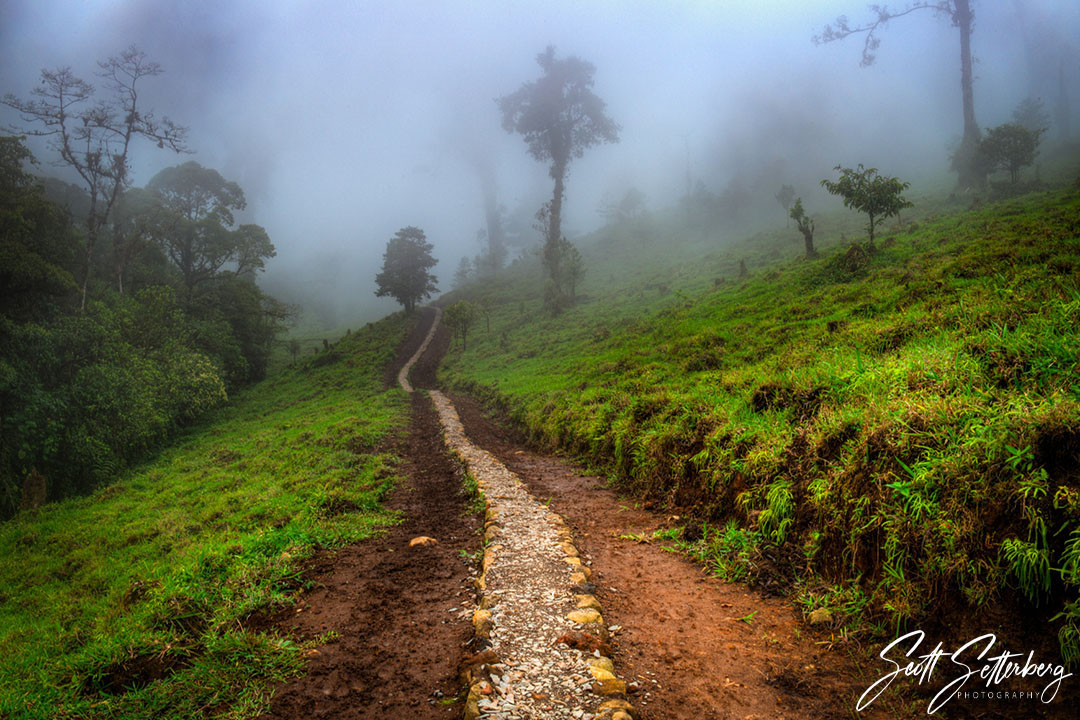
But, as is the case with many challenging areas, it also provides some of the best photography in the world. You can capture a bright, sunny photo, and a dark, moody one all in one day.
You just need to be quick and know what you’re doing, which is why it would be helpful to join a professional Costa Rica photography tour, like ColorTexturePhotoTours, which has 8 different Costa Rican trips coming up in 2021.
ColorTexturePhotoTours not only ensures that you have a professional at your side the entire trip to make sure you don’t accidentally miss the perfect photo opportunity, but all of the tours they do are high-end. You won’t find yourself camping out in a flooded cabin or eating street food that ruins your whole trip with them. Instead, you’ll get to experience an all-inclusive, small-group trip that helps you create memories that last a lifetime.
Start your Costa Rica adventure now by visiting ColorTexturePhotoTours.
Learn More:
We Recommend
3 Small Travel Cameras for 2024
Photo by Rawpixel via iStock
When traveling, the last thing you want is a giant camera taking up lots of space and adding extra weight to your luggage. That’s why investing in a small travel camera is crucial. But with so many choices nowadays, we know it can be difficult to find the perfect one. That’s where we come in!
In this article, we’ll examine three of the best lightweight and portable cameras for 2024: one mirrorless camera, one bridge camera, and one compact camera. So, regardless of what you’re looking for, there’s something here for you. Additionally, thanks to innovative online platforms like MPB, buying a used travel camerahas never been cheaper and easier than it is today.
Who is MPB? It is a trustworthy and reliable online platform selling pre-owned photography and videography gear at unbeatable prices. Better yet, all of its cameras and lenses are expertly hand-inspected by highly-trained product specialists with years of experience and backed by six-month warranties, allowing you to make your purchases confidently and worry-free.
We are huge fans of MPB because, over the years, we’ve saved thousands of dollars buying, selling, and trading in photography equipment on their one-of-a-kind online marketplace. If you want to upgrade your camera kit and save money, too, visit their website today. Now, without further ado, it’s time to dive in and discover which of these small travel cameras is right for you!
Check out the video above by Lizzie Peirce to learn ten tips and tricks that will improve your travel photography.
Table of Contents
- A Good Small Travel Camera
- A Better Small Travel Camera
- The Best Small Travel Camera
- Final Thoughts on Small Travel Cameras
A Good Small Travel Camera
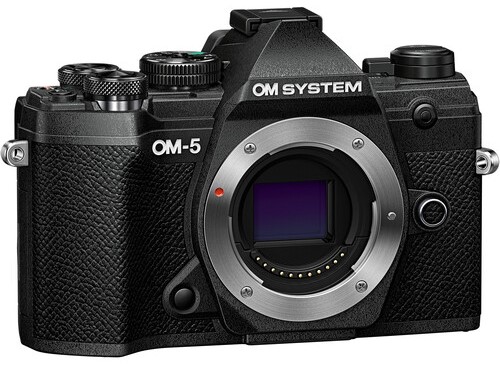
First up is the OM System OM-5. It’s an interchangeable-lens mirrorless camera that came out in 2022 and is the smaller sibling of the mighty OM-1. Internally, it houses a 20.4-megapixel sensor and TruePix IX image processing engine. It’s ideal for travelers who like shooting many different types of photography and want the freedom and flexibility to switch lenses on a whim.
Three of its signature features are its fast burst shooting, in-body image stabilization (IBIS), and affordable price. Using the electronic shutter, you can take photos at up to 30 fps, making it an amazing camera for action and adventure photography. At the same time, the IBIS reduces camera shake and enhances low-light performance, leading to better handheld video quality.
Now, here’s an in-depth look at the key features and specs of the OM System OM-5:
- Camera Type: Mirrorless
- Sensor: 20.4MP Live MOS Micro Four Thirds CMOS Sensor
- ISO: 200 - 25,600 (expandable to 64 - 25,600)
- Lens Mount: Micro Four Thirds
- Speed: 30.0 fps
- Autofocus: 121 focus points
- Video: 4K/24p & 1080p/120p
- Size/Weight: 125 x 85 x 50 mm / 414 grams
- Battery Life: 310 shots
- Stabilization: Yes
- Touchscreen: Yes
- Weather-Sealed: Yes
- Used OM System OM-5 Price: $899 - $944
A Better Small Travel Camera
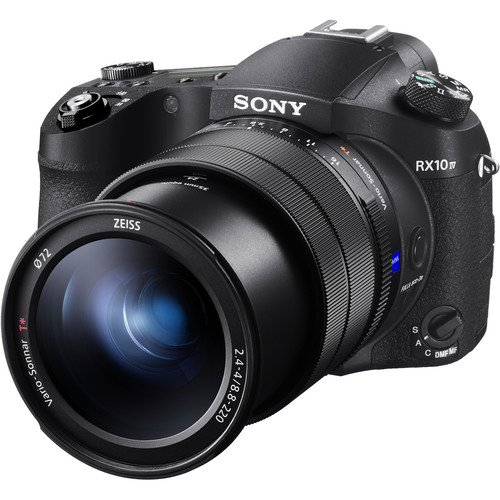
Next, there’s the Sony Cyber-shot RX10 Mark IV. It’s a unique 20.1-megapixel bridge camera that debuted in 2017, replacing its predecessor, the RX10 Mark III. Along with the sensor, it has an advanced Bionz X image processor. The pair work together seamlessly to consistently deliver sharp, high-quality photos and videos.
What makes this small travel camera special is its best-in-class Zeiss zoom lens. With a focal length of 24-600mm and 25x optical zoom, you can shoot everything from dramatic wide-angle landscape images to remarkably detailed architecture and wildlife photos. All without the hassle of ever needing to change lenses.
Now, here’s an in-depth look at the key features and specs of the Sony Cyber-shot RX10 Mark IV:
- Camera Type: Bridge
- Sensor: 20.1MP 1” Exmor RS BSI Stacked CMOS Sensor
- ISO: 100 - 12,800 (expandable to 64 - 25,600)
- Lens: 24-600mm zoom lens
- Speed: 24.0 fps
- Autofocus: 315 focus points
- Video: 4K/30p & 1080p/120p
- Size/Weight: 133 x 94 x 145 mm / 1095 grams
- Battery Life: 400 shots
- Stabilization: Yes (Optical)
- Touchscreen: Yes
- Weather-Sealed: Yes
- Used Sony Cyber-shot RX10 Mark IV Price: $1,149 - $1,409
Learn More:
The Best Small Travel Camera
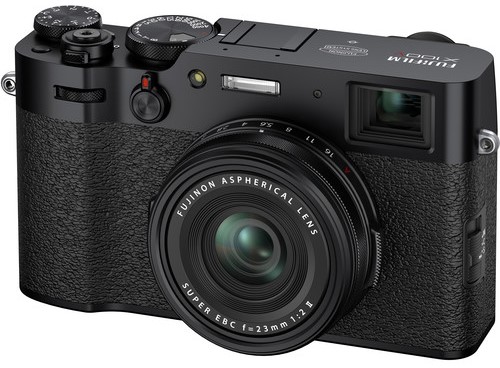
Last but not least, you have the powerful Fujifilm X100V. It was released in 2020, and with a 26.1-megapixel sensor, it’s one of the only large-sensor compact cameras on shelves today. Moreover, its X-Processor Pro 4 image processor helps record stunning 4K video and smooth Full HD slow-motion video, making the X100V a great camera for travel vlogging.
Other strengths include its redesigned lens, built-in ND filter, and excellent autofocus (AF) system. The 35mm f/2.0 pancake lens produces a creamy bokeh effect and is so small that you can fit the camera in your pocket. The 4-stop ND filter allows you to take better pictures during the sunniest times of the day. And the fast and responsive AF makes it easy for beginners and professionals to create sharp, in-focus content.
Now, here’s an in-depth look at the key features and specs of the Fujifilm X100V:
- Camera Type: Compact
- Sensor: 26.1MP APS-C X-Trans BSI CMOS 4 Sensor
- ISO: 160 - 12,800 (expandable to 80 - 51,200)
- Lens: 35mm prime lens
- Speed: 11.0 fps
- Autofocus: 425 focus points
- Video: 4K/30p & 1080p/120p
- Size/Weight: 128 x 75 x 53 mm / 478 grams
- Battery Life: 420 shots
- Stabilization: No
- Touchscreen: Yes
- Weather-Sealed: Yes
- Used Fujifilm X100V Price: $494
Final Thoughts on Small Travel Cameras

Photo by Solovyova via iStock
As you can see, there are many factors to consider when deciding on a new small travel camera, but three of the most important are size, weight, and camera style. With that said, here are our final recommendations.
The OM System OM-5 is a fantastic option for photographers who want a versatile, interchangeable-lens mirrorless camera. The Sony Cyber-shot RX10 Mark IV is the best bridge camera courtesy of its unmatched zoom capabilities. And the Fujifilm X100V, with its sleek body and premium prime lens, is the ultimate point-and-shoot camera for traveling.
While those are three of the most popular small travel cameras on sale in 2024, they aren’t the only ones out there. Check out the list below to see more compact and portable cameras currently in stock at MPB:
- Sony Cyber-shot RX100 VII
- Fujifilm X100F
- Panasonic Lumix DC-LX100 II
- Canon PowerShot G7 X III
- Sony ZV-E10
Disclaimer: Our articles might have affiliate links and the occasional sponsored content, but don't sweat it – if you buy something, we get a little kickback at no extra cost to you, and we only hype products we truly believe in!
Learn More:
- Get Ready for Summertime Travel Photography With This Crucial Gear
- How to Build a Beginner Photography Kit on the Cheap
We Recommend
3 Travel Photography Hacks to Simplify Your Life
Photo by Simon Migaj on Unsplash
Travel photography is life-changing. It opens your mind to new perspectives; it allows you to bring anyone who sees your photography on this journey with you.
You can try new foods, odd foods, awful foods. You get to photograph the whole thing.
Travel photography is also stressful, especially if you don’t know what you’re doing.
I’ve been gathering travel photography hacks almost all of my life, and here are a few of my favorites.
Practice Your Packing
Photo by STIL on Unsplash
Travel photography requires a lot of photography equipment, most of which can be heavy.
You need to learn how to do two things: pack smart and pack light. Ideally, you’ll leave a little room in your suitcase for things like, I don’t know, your toothbrush or shoes.
This video by Moment taught me most of the things I know about travel photography, and a few tips I still haven’t quite brought into my own packing routine yet.
Other travel photography tips include:
Pack your lenses in thick socks, so you’re prepared for any weather and prevent your glass from breaking.
Never check any of your camera gear, no matter how much travel insurance you bought.
Plan your next trip while thinking about your last trip. This will help you learn what you actually need.
Learn More:
Earn Money While You Travel to Pay for Your Travel

Photo by Chris Lawton on Unsplash
I have one of the best jobs in the world because I get to write about my passion for all of you and I can essentially do it from anywhere. But, few people are as lucky as me.
I have friends who complain about travel photography because they’re jealous they can’t do it.
I am always quick to point out, though, that they could if they really wanted to by learning how to become an affiliate marketer.
Affiliate marketers basically make passive income through marketing for other products on their websites so that they can do anything they want to.
TravelSchool is one of the websites that was created to teach photographers how to use their websites to affiliate market.
While you could learn all of it on your own, it’s bound to take five times as long. The creators of TravelSchool already put in all of the hard work so that you don’t have to.
Wouldn’t it be incredible to pay for your next travel photography vacation without even thinking about it?
With tons of resources available on their website, TravelSchool is an ideal partner for you to chase your dreams, travel more, and earn money while doing it!
Recommended Travel Photography Books:
- The Enthusiast's Guide to Travel Photography: 55 Photographic Principles You Need to Know
- Destinations of a Lifetime: 225 of the World's Most Amazing Places
- Lonely Planet's Guide to Travel Photography
Prep Your Camera for Travel
Photo by Reinhart Julian on Unsplash
There are two immediate things I worry about when it comes to my camera while I’m traveling.
The first is, if my camera gets lost, will someone who picks it up off the street, or more likely off the table at a coffee shop, be able to find me to give it back?
The second is, how can I make someone be more likely to return it (or, in the worst case scenario, less likely to steal it).

Photo by Nick Adams on Unsplash
In order to fix the first issue, I always take a photo of my business card before I start traveling. Anyone who finds a camera is bound to look through the photos and I want it to be easily recognizable.
For the second issue, I cover any logos with stickers or bandaids I can easily take off. I want my camera to look as old and beat up as possible. After all, people are less likely to target my old, beat-up looking camera than a brand-new, shiny one, right?
These are simple tips, but they can all be highly effective in making travel photography an easier and safer task. Give them a try, and see how much easier it is to hit the road with your camera!
Learn More:
We Recommend
4 Reasons Why Oregon Should Be Your Next Photography Destination
Traveling through Oregon is like traveling through two completely different states.
On the western side are the better-known vistas - the snow-capped volcanic peaks of the Cascade Range, the soaring trees in the thick rainforests, and the rugged Pacific coastline.
On the eastern side are much different, though equally breathtaking landscapes - the high desert plateaus, mountains covered with pine and juniper forests, and open basins that stretch as far as the eye can see.
Whether you head to Oregon to get a taste of it all or spend your time in one particular area, you’re in for a treat with landscapes that delight in every direction.
Let’s explore four reasons why Oregon should be at the top of your list of photography destinations.
Oregon is Home to Beautifully Varied Landscapes
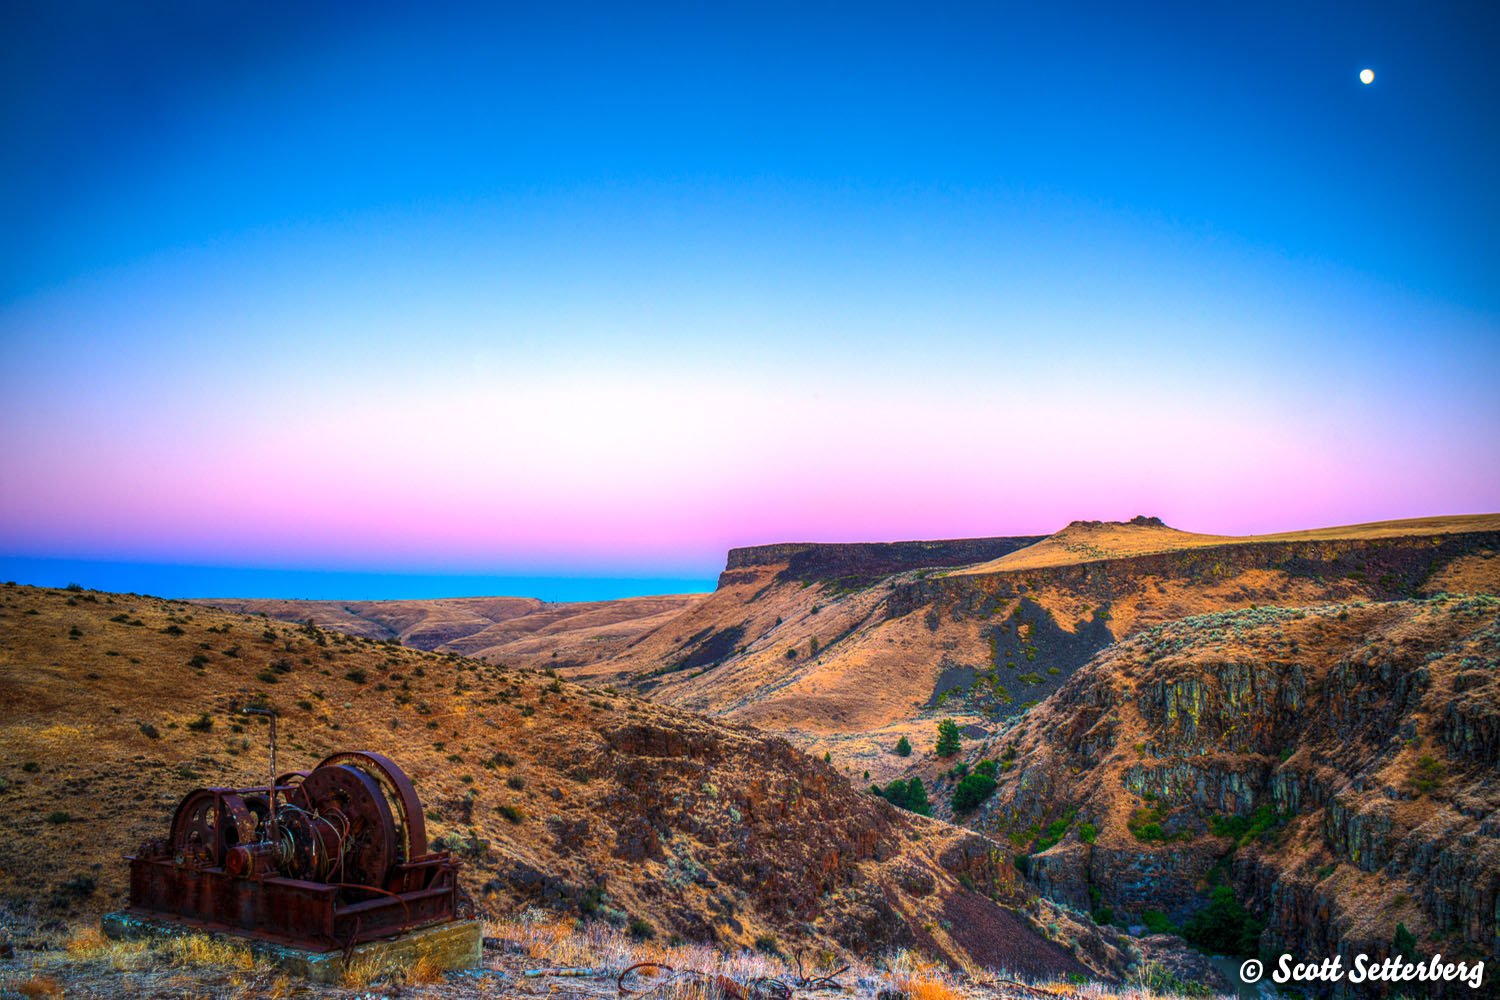
Photo by Scott Setterberg
I’ve already hit on this point, but it’s worth exploring it even further.
Though many states have widely varied terrain, the contrast between east and west in Oregon is among the most significant.
Rainfall on the Eastern Slope measures just a couple of inches a year thanks to the rain shadow caused by the Cascades.

Above, you can see this dry landscape surrounding White River Falls. The arid, sagebrush-covered earth is precisely what you think of when you think of the Oregon Trail, which cut through this area and brought settlers west in the mid-1800s.
On the western side of the Cascades, the story is much, much different.
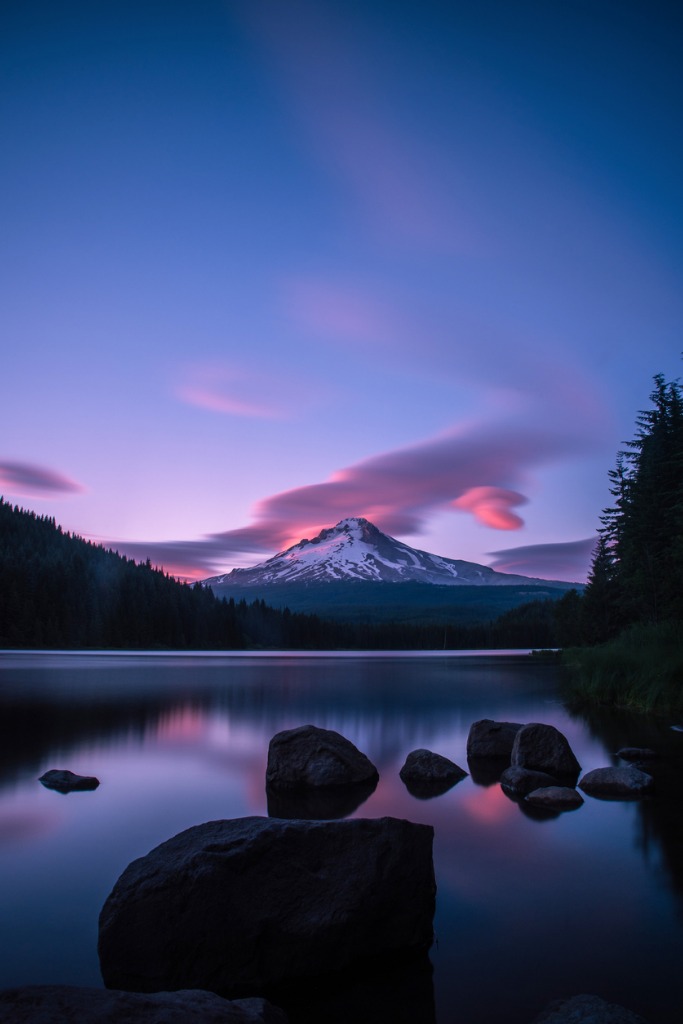
Photo by Nick Wiltgen via iStock
Places like Trillium Lake, shown above reflecting Mount Hood, are quintessential Western Oregon.
This particular spot is especially beautiful in the evening when the colors of the sunset provide an ideal backdrop to the scene of the perfectly-still lake and symmetrical shape of the mountain.
In Western Oregon, you’ll find more of the same - alpine lakes, rivers, glacier-covered mountains, fields of wildflowers, and dozens of waterfalls (more on that in a moment…).
What’s so interesting about these varied landscapes is that they are separated by just a few miles. White River Falls is barely more than 50 miles from Trillium Lake. Yet, these locations might as well be on different planets!
Oregon Waterfalls are a Must-See

If you love to photograph waterfalls, Oregon is your dream playland…
Waterfalls can be found throughout the state, but the largest concentration of them is in the Cascades. In some instances, you can find groupings of waterfalls in a relatively small area, like Silver Falls State Park.
The photo above shows just one of ten waterfalls in the park, each of which has its own unique personality. You could spend all day in this one park and never tire of the endless beauty of its waterfalls.

One of Oregon’s most spectacular waterfalls is Abiqua Falls, located northeast of Silver Falls State Park.
This 92-foot waterfall certainly isn’t Oregon’s tallest (that distinction goes to the 620-foot Multnomah Falls), but what it lacks in height it makes up for with its location.
The falls is surrounded by a basalt amphitheater that has spectacular texture. But when you add in the gorgeous greenery of mosses, lichens, and ferns that cover the basalt columns, the scene takes on an added layer of visual interest.
This waterfall can be a little difficult to find, but that makes it all the more rewarding because the crowds here are a fraction of what you’ll find at many other waterfalls in Oregon.
Many Photography Sites are Easily Accessible
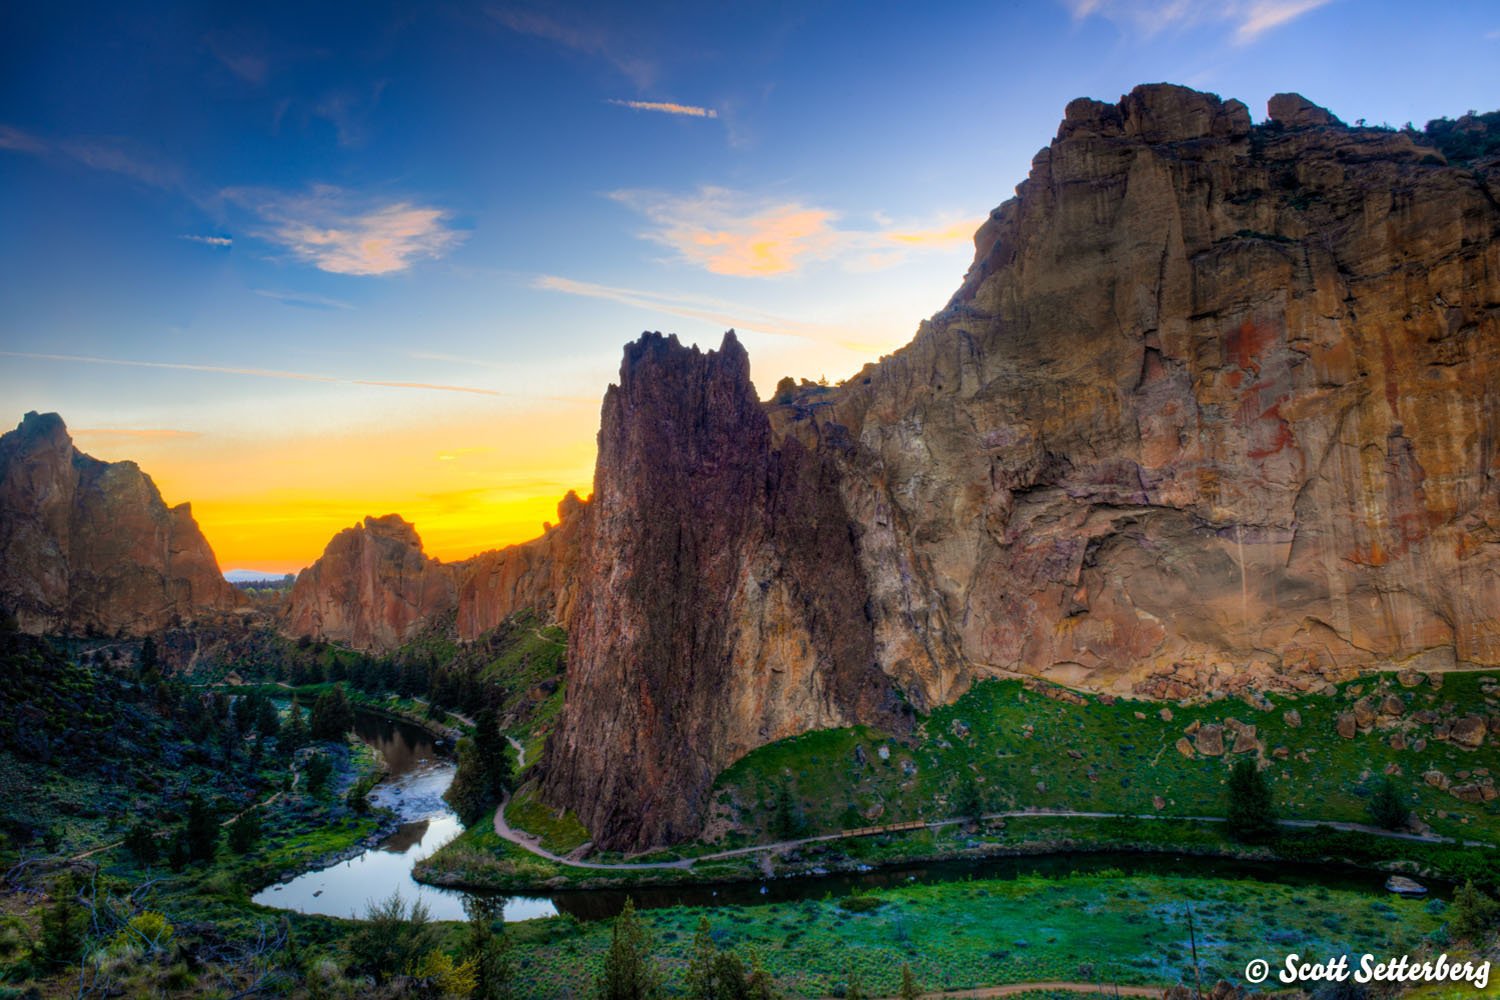
When you think of the most epic landscapes in Oregon, many of them are easy to get to.
Smith Rock State Park, shown above, has an expansive network of well-maintained trails you can use to explore the park. Many of the trails are classified as easy or moderate, so you can concentrate more on finding the perfect spot to take photos and less on your fitness level!
Starvation Creek, shown above, sits at the bottom of Columbia River Gorge, just a stone’s throw from Interstate-84.
Again, you’ll find well-maintained trails that you can take for short or long distances to explore the beauty that this tiny state park has to offer.
Whether you’re in Western Oregon, Eastern Oregon, or points in between, there is no shortage of epic landscapes that you can photograph just steps from where you park your car.
You Can Experience It All on a Photography Tour

For my money, the best way to experience all the beauty that Oregon has to offer is with a photography tour.
Think about it...why stress yourself out deciding where to go and when? Why spend your time behind the wheel paying attention to the road when you could enjoy the view out the window of your private transport? Why eat fast food along the interstate when you could stay in luxurious accommodations and eat gourmet meals?
Sounds nice, right?
My good buddy Scott Setterberg of ColorTexturePhotoTours provides all that and more with his Awe-Inspiring Oregon Photo Tours.
You’ll get to experience each location I discussed above (and many others, too!) while on the 6-day, 5-night, all-inclusive trip that bridges Western and Eastern Oregon.
You’ll spend your days exploring the beauty Oregon has to offer while also getting personalized instruction from Scott that will help you elevate your photography skills. Additionally, you’ll get to participate in workshops that focus on improving your digital workflow in Lightroom.
The private transportation that’s part of the package means you can sit back, relax, and spend your time on the road checking out the scenery, comparing shots with your tour-mates, and enjoying the company of other photography enthusiasts.
When it’s time to hit the sack, you’ll do so in luxurious, stylish, and award-winning hotels. You can even pamper yourself with a nice massage courtesy of ColorTexturePhotoTours!
You can bet that if I head to Oregon with my camera, I’m calling up Scott. There is simply too much to see and do, and I’d rather rely on someone that knows Oregon like the back of his hand to lead me from one spectacular location to the next.
If you’re ready to pack your gear and head to Oregon, check out the Awe-Inspiring Oregon Photo Tours Scott has planned for May 2020 and June 2020. There’s also Oregon Fall Colors Photo Tours this October if that’s more your style. Either way, a trip to Oregon will leave you blown away with its beauty and your memory card full of spectacular photos!
Other Tips for Planning an Oregon Photography Trip
- Where to fly into: The Tri-Cities Airport (PSC) in Pasco, Washington is well-located for starting your photography adventure in Oregon.
- Best luggage: For a trip of this length, the Nomatic Check-In roller bag is the ideal choice. It offers polycarbonate construction that stands up to the rigors of travel, silent wheels, low-profile handles, and a three-stage aluminum handle to fit your height. With space for 78 liters of gear, this bag has plenty of room for a 5-day trip or longer.
- Attractions & Things to Do: The Tri-Cities area is home to many wineries you can explore. The Wahluke Slope is a must-see for wildlife enthusiasts. For history buffs, consider a stop by the Hanford Nuclear Reservation.
- Best Time of Year to Visit: Late spring and early fall are ideal times to visit Western and Eastern Oregon. Late spring is after the rainy season ends and early fall is before it begins.
- Check the weather in the Tri-Cities area right now.
We Recommend
4 Spots for Breathtaking Photos of Mount Hood
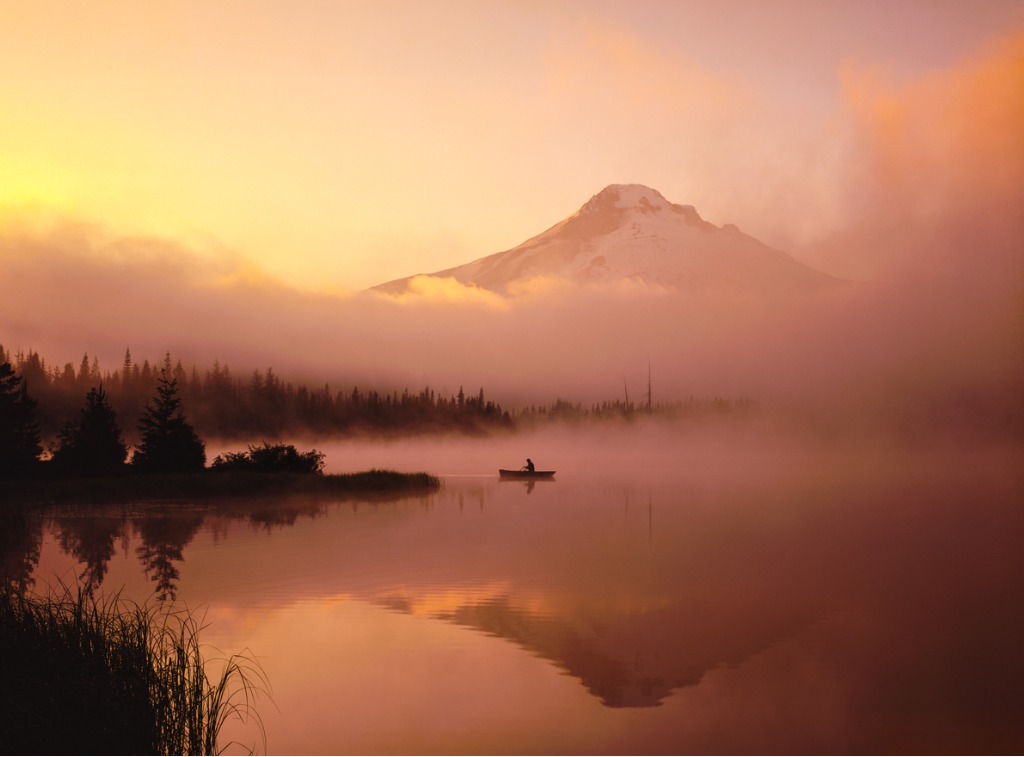
photo byRon and Patty Thomas via iStock
I vividly remember my first Mount Hood sighting. As someone from southern California, large, breathtaking mountains aren’t really a norm for us and Mount Hood is, simply put, one of the most gorgeous things I’ve ever seen.
If you’re looking to take photos of Mount Hood, you’ve come to the right place. You want to make sure to hit all of the iconic Mount Hood photography spots, but you’ll also want to see views of Mount Hood that only the locals know about.
Thankfully, I’ve spent a lot of time photographing Mount Hood and have picked up some Mount Hood photography tips along the way.
Here are some of my favorite spots for taking photos of Mount Hood.
Trillium Lake

photo byNick Wiltgen via iStock
If you’ve ever seen photos of Mount Hood over a large lake, chances are that was Trillium Lake. Trillium Lake is one of the best Mount Hood photography spots for a clear, windless day. This way, you’ll be able to get that mirror reflection of Mount Hood you’re looking for.
If you can, take your trip in spring when the namesake Trilliums bloom.

photo bylhongfoto via iStock
While you don’t need to do so to get great views of Mount Hood, if you can, rent a boat and take it out onto the lake. It’s the safest way to ensure you don’t get any tourists in your photos. It also gives you the freedom to take as many photos of Mount Hood as your heart desires, since you won’t be fighting any crowds.
- Where to stay: The Resort at the Mountain offers 4-star accommodations in Welches, and depending on the time of year, rooms can be found for around $170.
- Where to eat: Mt. Hood Brewing Co. is the number one rated restaurant on Tripadvisor and offers both beer and pub food. Ratskeller, which is just down the road from Mt. Hood Brewing Co., also features American fare (and lots of pizza) for a reasonable price.
- Directions from Portland: Trillium Lake is 60 miles from downtown Portland via US-26 E. Take this highway until you hit the turn off for NF-2656, where you’ll take a right. Follow the NF-2656 for 1.4 miles, then take a sharp right and two lefts, making sure to follow the signage for Trillium.
- Check the weather in Welches right now.
Buzzard Point

photo byjose1983 via iStock
Buzzard Point is located just off of the original Mount Hood Highway. It used to be used as a natural water source for travellers, but now acts as a less-travelled trail for photographers.
It’s a 4-mile round trip hike to get to Buzzard Point, but you’ll have breathtaking views of Mount Hood for the duration of the hike, so you can take it as slowly as you want to.
As you can see in this video by Adventures with Gumjuwak, this is not a trail you want to do in the winter time unless you come over-prepared.
- Where to stay: Timberline Lodge offers historic accommodations in Government Camp, and depending on the time of year, rooms can be found for around $150.
- Where to eat: Ram’s Head Bar is a ten mile drive from Buzzard Point (and conveniently located inside Timberline Lodge) and offers a gorgeous view of Mt. Hood and plenty of artisan Oregon cheese. If you’re looking for more of an adventure, you can eat at Mazot Eatery, which is located on Mt. Hood, and hosts the best sandwich/beer combo you’ll ever eat.
- Directions from Portland: Buzzard Point Trail is 62 miles from downtown Portland via US-26 E. Take this highway until you hit the OR-35 in Government Camp. Follow the OR-35 until you hit the State Route 35 N exit. Finally, continue on OR-35 N for 3.3 miles to Buzzard Point.
- Check the weather in Government Camp right now.
Learn More:
Timberline Trail
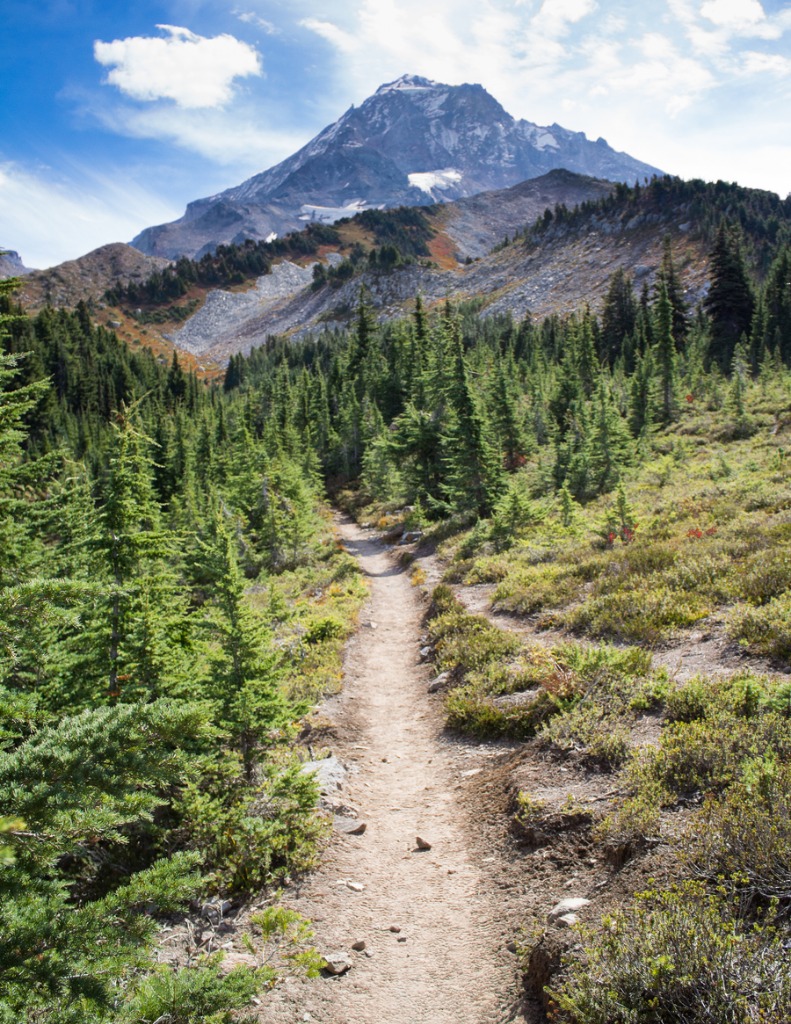
photo byKyle_Hittner via iStock
Timberline Trailwill allow you to get the best photos of Mount Hood of any of these Mount Hood photography spots with one catch, it’s a 40-mile trail.
While you obviously don’t need to do the entire trail to get the photos of Mount Hood you want to, I do recommend you go as far as you feel comfortable, since the trail wraps around the base of Mount Hood so the farther you go, the more views you’ll see.
You can see some of the views of Mount Hood in this video by AdventureArchives. Plus, if you get tired of taking photos of Mount Hood along this trail, you’ll also find stunning views of the Cascade volcanoes, Portland from a distance, and the Columbia River.
- Where to stay: For a more authentic Oregon experience, you can rent Wy’east Nest, a personal log cabin just off of Timberline Trail for under $100 a night.
- Where to eat: Glacier Public House offers pizza, wings and beer that will be much appreciated after an all-day hike.
- Directions from Portland: Timberline Trail is 65 miles outside of downtown Portland via the US-26 E. You’ll take the US-26 E until it ends and continue onto E Lolo Pass Rd. Drive to NF-1811 in Mount Hood where you’ll see signs for Timberline Trail #600.
- Check the weather in Timberline Trail right now.
Jonsrud Viewpoint
As you can see in the stunning video above by Oregon’s Mt. Hood Territory, Jonsrud Viewpoint provides views of Mount Hood from a distance that very few ever capture.
Jonsrud Viewpoint is located in Sandy, Oregon, which is less than 30 miles from downtown Portland making it the perfect day trip.
The problem with grabbing beautiful photos of Mount Hood from Jonsrud Viewpoint is that, as the locals say, you need to grab them while “the Mountain is out.” Oregon’s always stormy weather lends problems for photographers who only have a day or two for their Mount Hood photography.
However, as you can see in this video by Clifford Paguio, the Jonsrud Viewpoint is gorgeous in and of itself, even if you don’t manage to snap those photos of Mount Hood you came for.
- Where to stay: Sandy is pretty remote, so you can choose to stay in one of the local motels, like Best Western, or opt for a nicer option like Courtyard by Marriottin nearby Clackamas.
- Where to eat: AntFarm Cafe and Bakery is a nonprofit dedicated to youth in the Sandy community and just so happens to serve some of the best American food around. Definitely make sure to hit Joe’s Donut Shop on your way home which has been a local hotspot since the 70s and not much has changed.
- Directions from Portland: Jonsrud Viewpoint is 28 miles from downtown Portland via the I-84 E. From the I-84 E take exit 14 for Fairview Parkway and take a right. Then, turn left onto NE Glisan St. Next, turn right onto NE 223rd Ave., then left onto NW Fairview Dr., then left onto NE Burnside Rd. Continue straight onto US-26 E, turn left onto SE Kelso Rd, turn right onto SE Bluff Rd. and the Jonsrud Viewpoint will be on your right. Careful not to miss it.
- Check the weather in Sandy right now.
Bonus Tip: Take an Oregon Photography Tour
Many of these Mount Hood photography spots are dangerous if you get caught in inclement weather and don’t know your way around the area (especially the hikes). If it’s your first time to the area, you may feel more comfortable taking an all-inclusive photography tour, like the ones offered by ColorTexturePhotoTours.

Their next tour is coming up in October, from October 4th-9th, and will include some of the locations I discussed above, as well as other state parks and waterfalls in the area outside of Portland.
I work with Color Texture Photo Tours because they ensure every one of their trips is a unique and personal experience. For instance, their Oregon Fall Colors photo tour is only accepting 4 photographers to keep the experience as intimate as possible. Believe me when I say that fewer participants is better! You get much more one-on-one time with the tour leader and it’s a great environment for getting to know your tour mates and forming lifelong friendships.

Plus, the cost of the trip includes all of your hotels, all of your meals, personalized photography advice, and private transportation. All you need to worry about is getting gorgeous photos of Mount Hood!
There is simply no better way to explore this area than with a private photography tour. Head over to ColorTexturePhotoTours today to see what Scott and his team have in store for you!
Learn More:
We Recommend
4 Tips for Taking Better Travel Photos

Photo by Dino Reichmuth on Unsplash
I love traveling and I love hearing stories of my friends traveling, but as soon as someone pulls out their phone to show me their travel photos, I typically check out.
I know what the Eiffel Tower looks like and I know for certain you aren’t doing it any justice, which is a shame because travel photos can be such an incredible tool for telling the story of the vacation you just had.
I’m convinced that if we all took better travel photos, more people would get out into the world and expand their worldview.
I’m also sure that better travel photos would make me much more interested to hear about your Honeymoon. So, here’s a beginner’s list on how to take better travel photos.
Better Travel Photos: Keep Patterns in Mind

Photo by Junhan Foong on Unsplash
While my number one travel photography tip could just have easily focused on composition, I think I’ve effectively covered composition already.
So, I’m focusing on patterns. The human mind is hardwired to search for patterns in everything. Patterns are what keep us safe. Patterns are also aesthetically beautiful and can convey the sense of a place, like in the photograph above. From that one photo, it becomes clear that the building the photographer is in is incredibly ornate.
I’d argue even if the photographer had captured just one of the patterns, like the bottom of the pool or the long columns, this sense could still be conveyed.

Photo by David Siglin on Unsplash
Plus, it’s always easy to find patterns while traveling because they are everywhere in nature, from pine trees to prairies full of flowers, and people love to recreate these natural patterns in architecture, like in the church above.
Whenever you’re traveling, watch out for patterns, and you could very well have a much-improved set of photos on your hands.
Better Travel Photos: Leading Lines Are Your Friend

Photo by Clay Banks on Unsplash
Travel bloggers have recently rediscovered leading lines, which is why Instagram is filled with photos of people walking down streets, but this trend is a trend for a reason.
Leading lines help the photographer to redirect the viewer’s eyes, but they also convey a sense of adventure.

Photo by Joshua Earle on Unsplash
And leading lines are almost as easy to find as patterns. You can use roadways, bridges, buildings, windows and just about any object known to mankind to bring redirection to your travel photos.
Keep in mind: most travel photography tips are just beginner photography tips in disguise, so take a beginning photography class if you haven’t already.
Learn More:
Better Travel Photos: Add Depth

Photo by Clay Banks on Unsplash
When taking a photograph of someone, try to add depth by placing an object both in front of them and behind them. Every photograph, unless it is an extreme close-up or a hero shot, should have at least three layers to it.
Look to your foreground, midground and background in every photo to stop taking bland two-dimensional images.

Photo by Tobias Tullius on Unsplash
If you want your viewer to really feel like they travelled with you, then you need to bring them into the shot with depth.
In the photo above, the photographer’s legs and feet and the beautiful lichen-covered boulder in the foreground create lots of interest in the shot.
But these elements also create depth by adding a layer of interest in front of the rocky shoreline in the midground and the water in the background.
Better Travel Photos: Photos Are For Storytelling
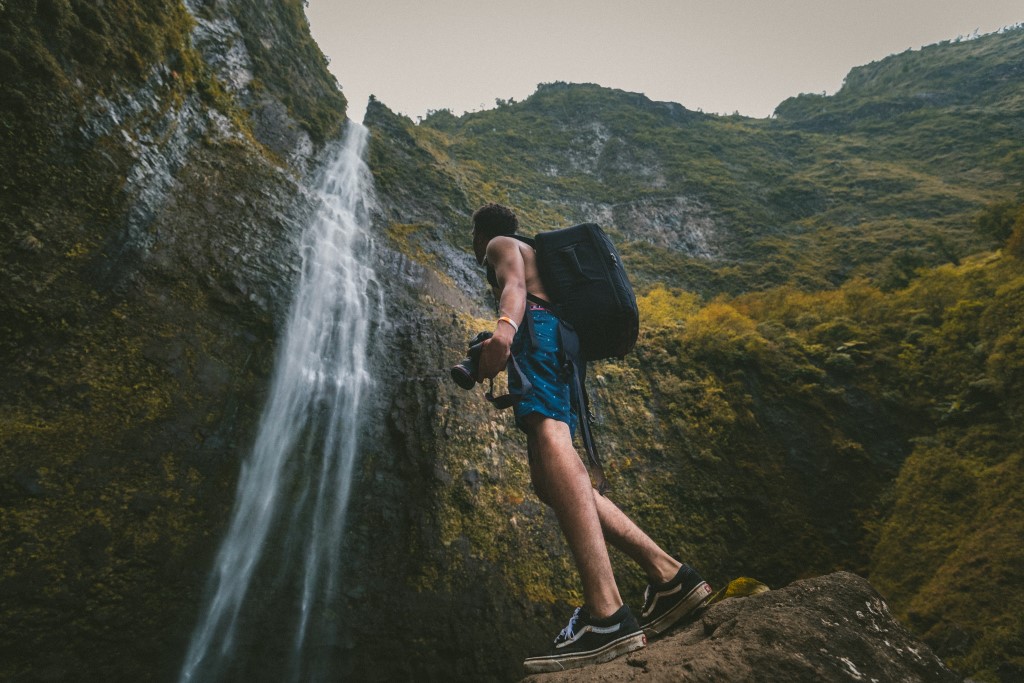
Photo by Jakob Owens on Unsplash
The number one reason why travel photographs are usually so boring is that they are just what I mentioned above: a photo of something you’ve seen before, with no added story.
I’ve seen hundreds of images of the Eiffel Tower, why would I want to see yours?
Try to get your viewer to feel what you felt while you were taking the photograph. In the shot above, that could easily have been just another photo of a waterfall, but by including the gentleman in the photo, staring up at the waterfall, you can tell how small the photographer might have felt while taking it.
Think about how the camera placement aided in this endeavor.

Photo by Tim Trad on Unsplash
I think storytelling is one of the main reasons why the photography trend of taking photos out of your tent or van started.
By taking a picture like the one above, the photographer is saying look at how big the world is and look at how small we are. It invites you to come along on a journey with the photographer to explore the world around them.
Bonus Tip: Get Paid to Take Better Travel Photos

Photo by Nicole Geri on Unsplash
If you’ve ever wondered how you can travel the world full time, or even part of the time, and get paid to do so then Travel School is exactly what you need.
It’s difficult to travel for long periods of time without earning any income, and unless you’re part of the global nomad community, then you may pick up part-time positions working in hostels or bars or basically anything else that can keep you traveling.
But, Travel School gives you the tools to start affiliate marketing, which is basically a way for you to make money through advertising.

It’s simple to get started, and once you become proficient, you can actually travel full time with the income you bring in.
TravelSchool.info gives you all the tools and resources you need to get started and build a successful affiliate marketing business with multiple income streams. There isn’t an easier and more productive way to earn money as you travel the globe!
Visit their website to get more details about how you can find your way to freedom!
Learn More:
We Recommend
5 Critical Travel Stock Photography Tips
photo byguvendemir via iStock
Stock photography can add a welcome income stream for photographers. Travel stock photography is one of the more popular categories among the stock photography niches.
Since so many of us are curious about beginning to work in this type of photography, we’ve put together a short list of five travel stock photography tips to help out.
Some travel stock photography tips may surprise you, while others will be helpful reminders that benefit our other for-profit photographic endeavors. Here’s what on the agenda:
Travel Stock Photography Trends
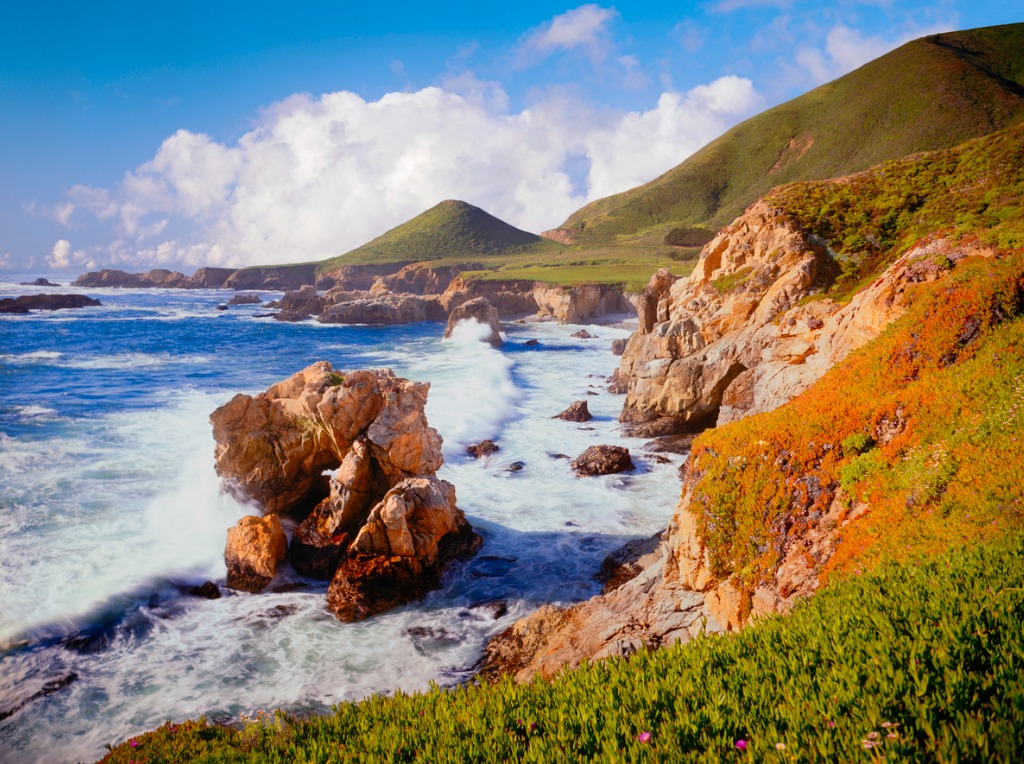
photo byRon and Patty Thomas via iStock
Just like everything else in our digital, online world, one of the things that stays the same in travel stock photography is that things change all the time. By changes in travel stock photography, I mean that there always seems to be some new trend that takes center stage for a while.
Please note, I don’t mean fads; trends is the important word. What’s the difference? It’s hard to cash in on an online fad. Once you actually see it saturating the online world, especially social media, it’s often already on its way out. It’s also difficult to predict fads, though if you do happen to catch a faddish wave before it breaks on shore, enjoy it!
Trends are more like a direction that image buyers are leaning towards. Some trends may last for years or months, so you may have some time to get up to speed. Inserting a person leading the viewer into a familiar view of a tourist attraction is a trend that I at first thought was a fad, but its popularity seems to have stood the test of time.
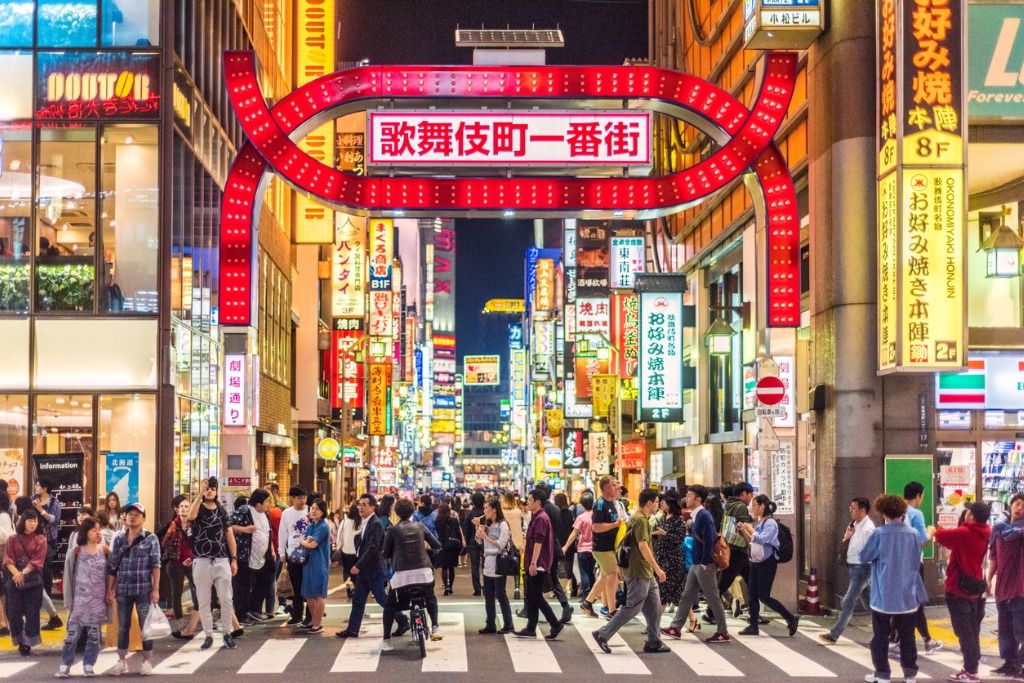
photo byke via iStock
An important aspect of following travel stock photography trends is to watch out for an oversaturated market. That trend I mentioned in the last paragraph is a good example of that. There are so many images like that available for every imaginable tourist destination, that the chances of our image-making a sale are very small.
So, how do we find trends that we can tap into? Believe it or not, the stock photography agencies actually help us out! It’s in their best interest to increase your sales potential, since they get a cut of everything that passes through their sites. We have to do a little work for ourselves, though.
For instance, if you’re signed up as a provider for iStock by Getty Images, you can read their blog pages, such as the regularly updated Creative Trends section. Other stock agencies have similar photographer assistance. These are excellent resources to help us keep up on trends within the travel stock photography market.
Look for Unique Views
photo bytawatchaiprakobkit via iStock
Travel stock photography is an interesting genre of professional imaging. Users are always looking for certain types of images or travel destinations to illustrate, but we don’t want our images to get stuck on page 30 of the same point of view of the same place.
Looking for a unique view for our travel stock photography can sometimes be as simple as changing our angle of view or zooming with our feet. A low angle of view of a familiar place can capture attention. Really, any change from the standard eye-level view right in front of a place can greatly impact whether or not our images get chosen.
Other unique views may include not being in the same place at the same time as everyone else with their smartphone cameras.
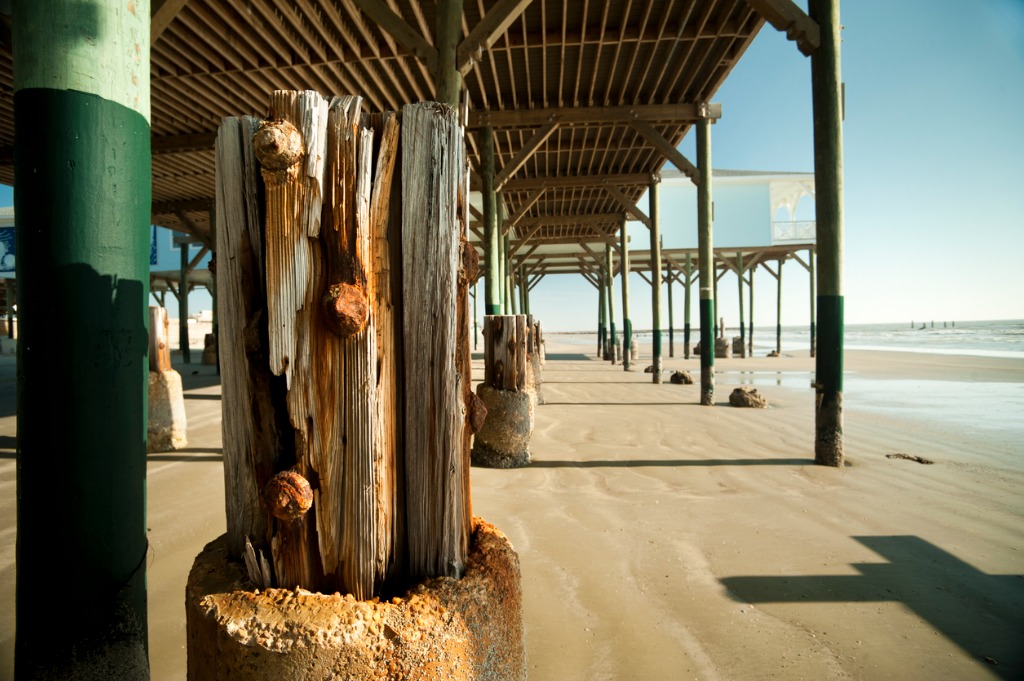
photo bymarkchentx via iStock
As an example, there are so many images of Bourbon Street in New Orleans, especially during Mardi Gras. But what is 2 blocks over? What does that area look like during the fall or in the dead of winter? Are there similar sights in Galveston, Texas or near Gulf Shores, Alabama? You get the idea.
Same thought applies to other travel stock photography destinations. Big Sur, California, Windsor Castle, Sydney Opera House, Eiffel Tower, downtown Tokyo, Moab, Utah, Denver and the Rockies, New York City, and the list goes on. What else is in that area? Maybe even include the well known thing in the background, but provide a different and fresh view.
Learn More:
- How to Pack Your Camera Gear
- Be Prepared for Every Shot with this Photography Gear
- Camera Safety Tips for Your Next Trip
Be Ready for Anything in Travel Stock Photography
An opportunity for capturing a very special travel stock photography image can come up right before our eyes in a moment’s notice. Or, inspiration may suddenly strike us as we’re out photographing the city, town, beach, or forest we’re in.
Being ready can refer to our state of mind, photographically, and it can also refer to having the right gear to assist our creative state of mind. Two items I find helpful in this are a great bag solution and a compact camera mount.
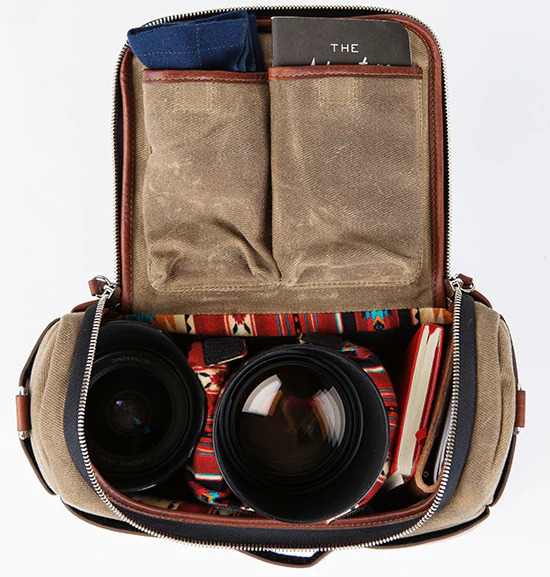
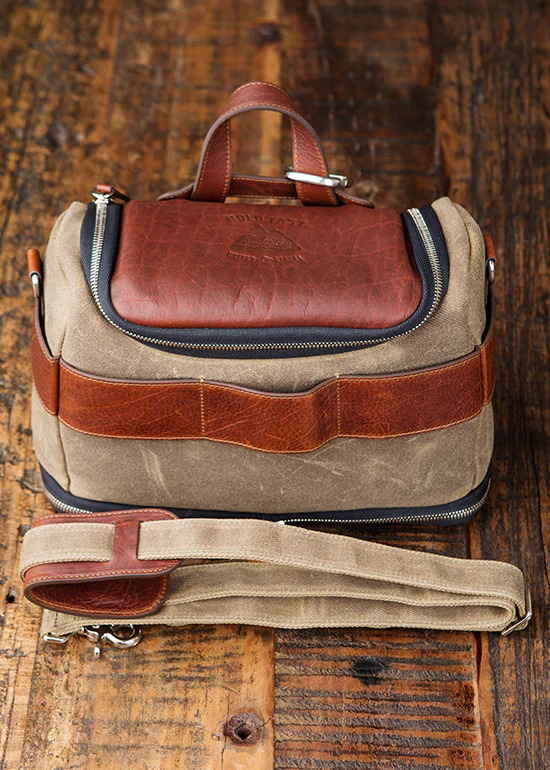
Hold Fast Gear makes the Sightseer Modular Lens System that can be used as a standalone bag by itself or attached to the MoneyMaker camera harness. The Sightseer bag is crafted from waxed canvas, American Bison leather, and Aztec flannel fleece, making it excellent protection for your extra lenses and an attractive camera accessory for travelers.
With the Sightseer, you can have your other lenses, such as an ultra-wide-angle lens or a fast telephoto zoom ready to go at a moment’s notice. Sometimes that unique point of view from the previous thought can be found in a different lens choice. A fast telephoto can give you a tighter view and selective focus. Or an ultra wide lens can be placed down low for another perspective.
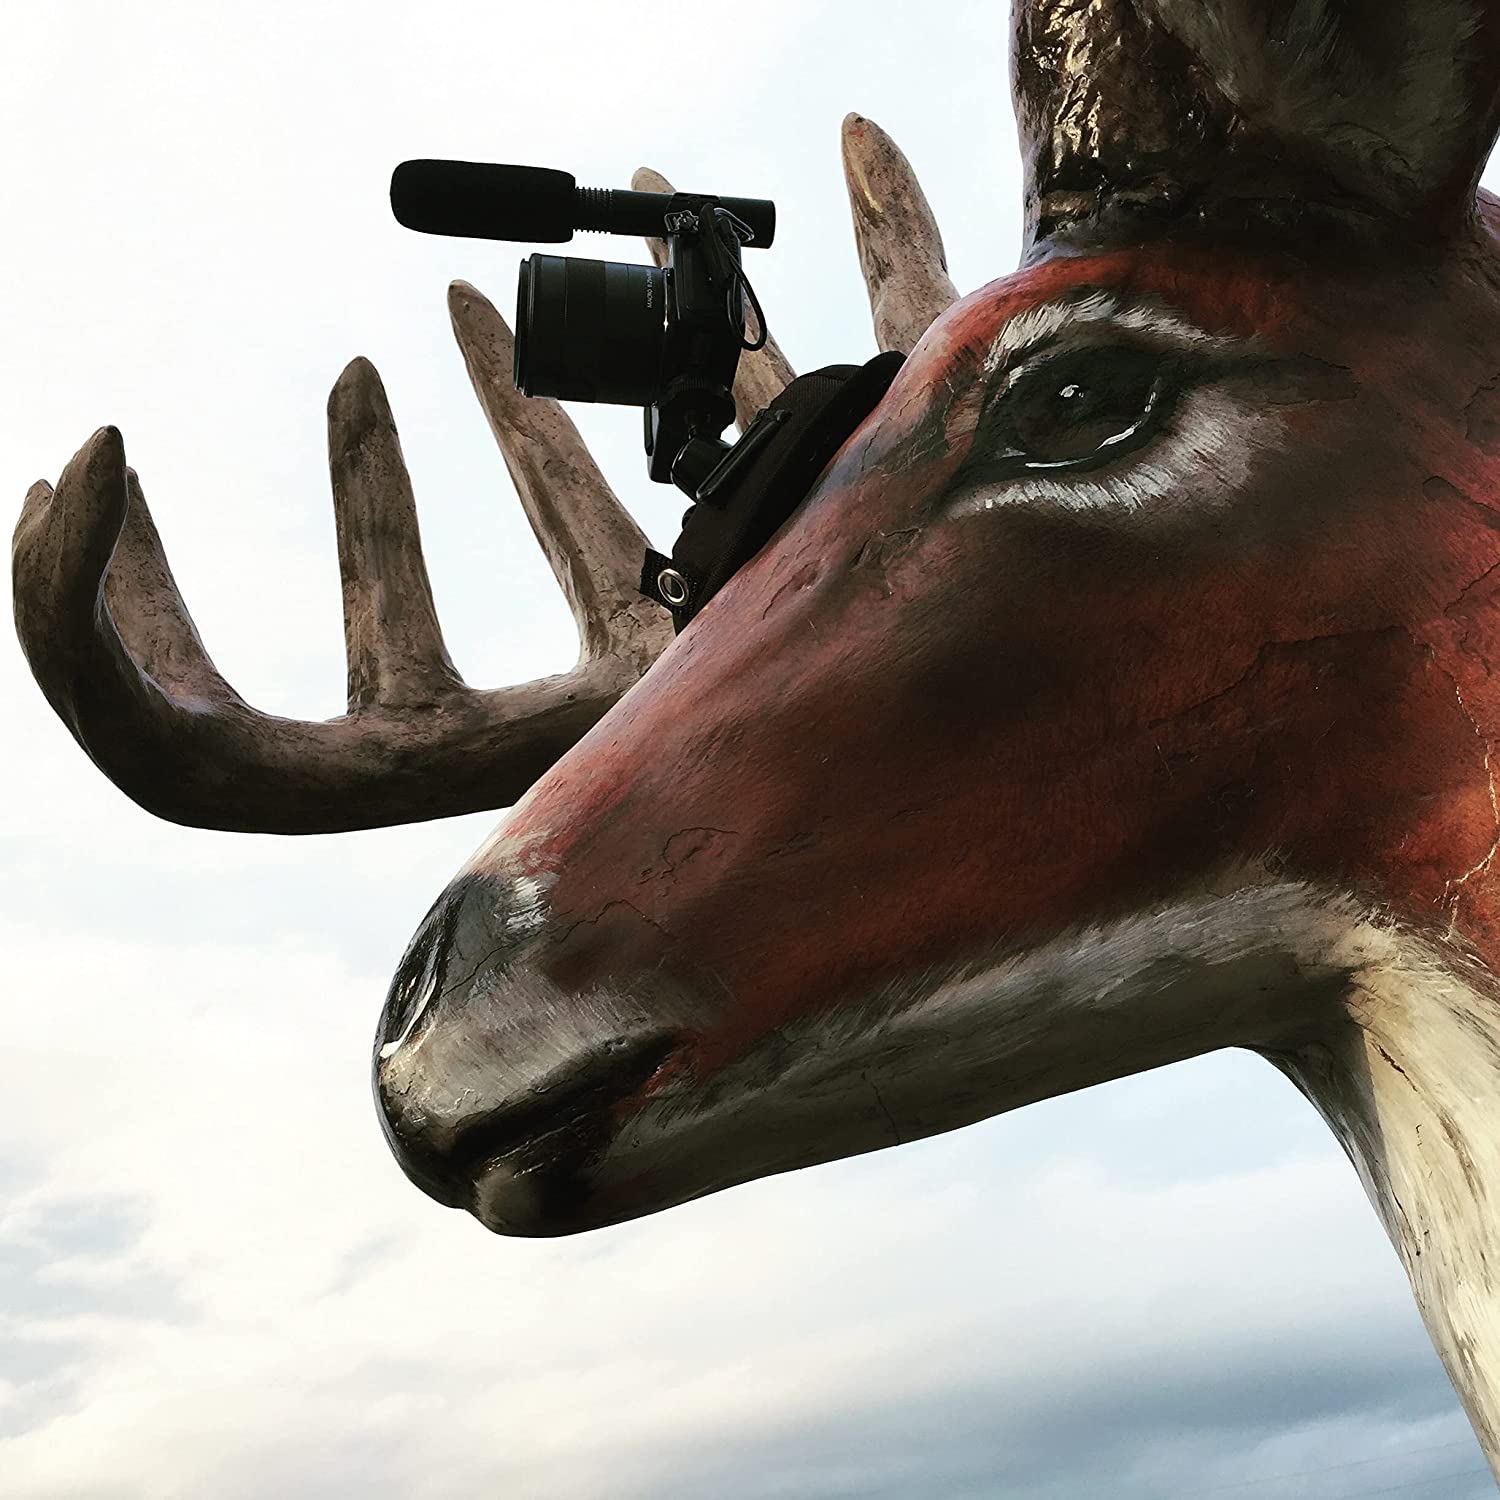
Using a low angle of view or finding a fresh perspective can be handled easily with a good camera mount. A very compact and highly versatile tripod alternative is the OctoPad Camera Mount. It’s a weighted disk with a ball head and it can be placed virtually anywhere. Its non-slip pad even allows it to sit securely on surfaces angled up to 45 degrees.
Another part of being ready is to look for the Defining Moment. This applies more to street photography than it might to regular travel stock photography, but it’s a good principle to use in a lot of our photography work. Several of our street photography articles discuss this idea in detail, check them out.
Try Special Techniques
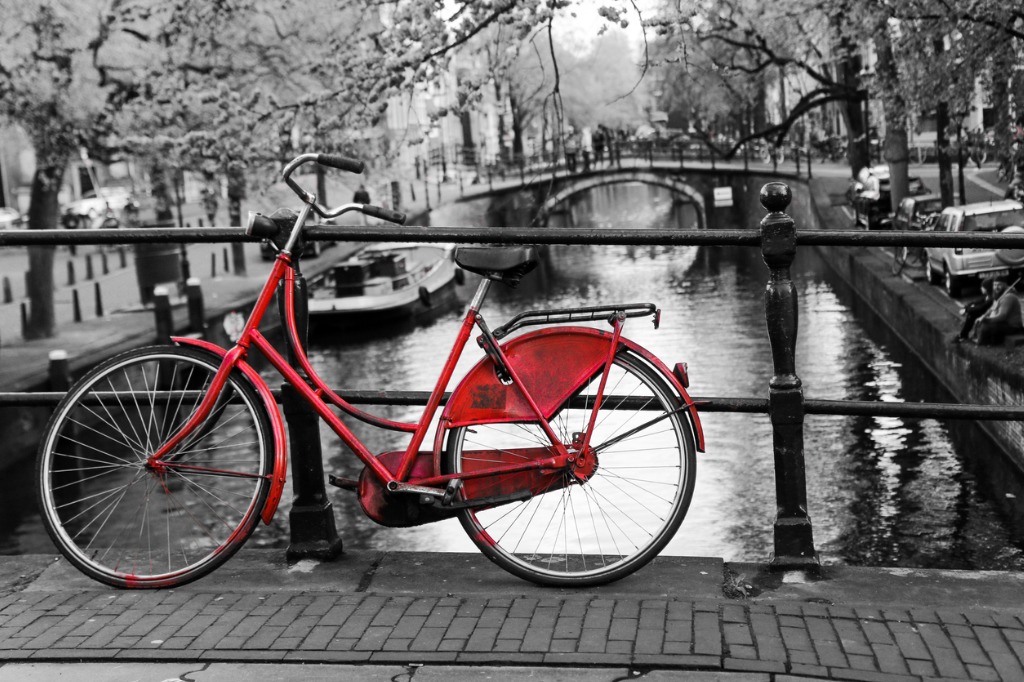
photo byundefined undefined via iStock
Special techniques that may benefit our travel stock photography could include camera and lens usage, post-processing, or a combination of both.
A technique involving our camera work and post-processing is bracketing and merging HDR photography.. HDR is for much more than special effects images, it also helps tame dynamic range issues in a scene and can even remove people from crowded places. (Look for “ghosting” instructions in your post-processing instructions or other online tutorials.)
Shooting with an eye for processing in Black & White is another creative technique that has a huge potential for creating travel stock photography images that stand out. Several of the popular post-processing programs such as Adobe Photoshop Lightroom have very intuitive controls for adjusting our image files into awesome B&W photographs.
Be a Critic of Your Own Travel Stock Photography
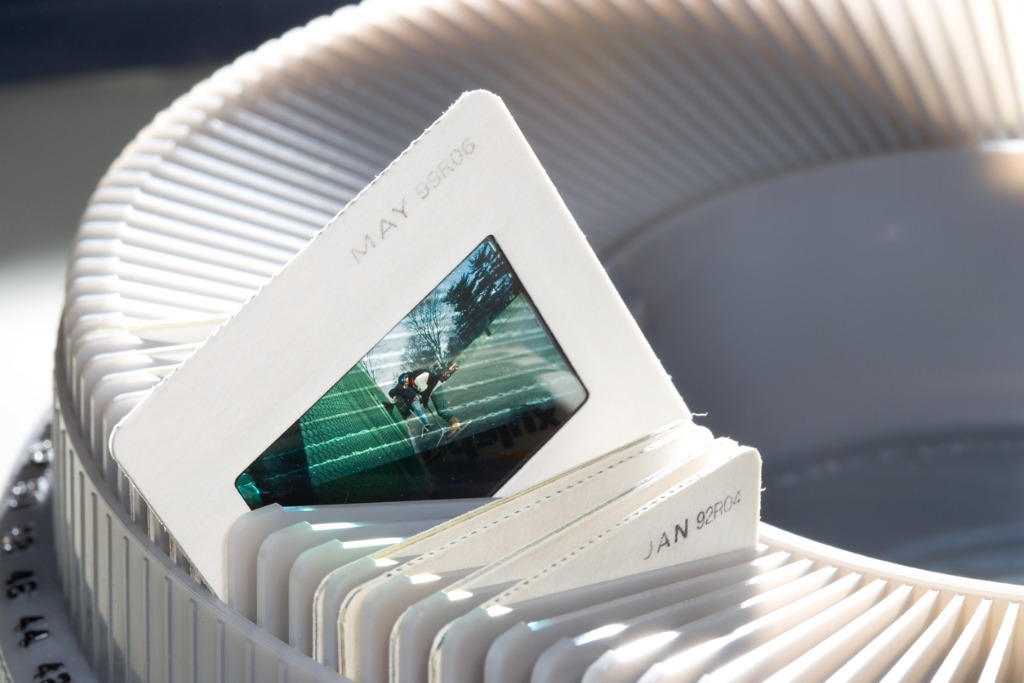
photo bymcouper via iStock
One of the hardest jobs for a professional photographer is to be our own critic. This holds true for shooting part-time as a provider of travel stock photography, too.
Many of the stock photography agencies have very specific and quite demanding standards. Our images need to be technically superb, but also artistically excellent. We may look at an image we made and remember all the good feelings about being there, but will the image stand on its own without our personal memories?
If we can look at our travel stock photography images with a truly critical eye, we will constantly be uploading excellent photographers that have a higher probability of being sold. Critical doesn’t mean being down on ourselves, but rather, viewing the images through the eyes of the realities of the travel stock photography marketplace.
The previous point about keeping up with trends in the world of travel stock photography will help us out a lot as we cull through our photos before we even try to submit them to any agency. Combine these ideas with being ready for anything and looking for fresh perspectives should greatly boost your travel stock photography success.
Learn More:
- Tips for Traveling with Photography Gear
- How To Find Your Personal Photography Style
- Essential Street Photography Tips
We Recommend
Arizona Photography and Travel Guide - Sedona
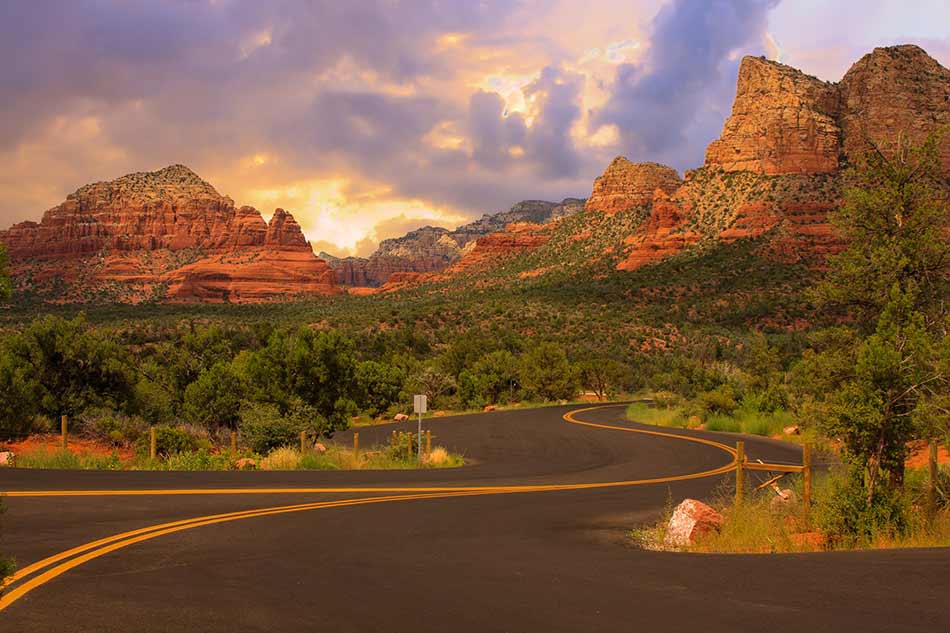 Photo by jose1983 via iStock
If you're planning a photography trip to Sedona, Arizona, the most difficult thing you'll have to do is decide how to spend your time.
After all, Sedona is one of the most beautiful places to visit in the United States, and if you're on a tight schedule, determining the must-see locations can be quite the chore.
Sedona is known for its gorgeous, towering red rock formations that evoke a sense of classic southwestern Americana, and fortunately, there are many different areas around Sedona where you can take advantage of the gorgeous landscape.
Below, I've outlined three of the top photography spots in Sedona and provide some insider tips on how to make the most of your time there, including recommended photography tours, places to stay, where to eat, and more.
Table of Contents
- What to Photograph in Sedona - Cathedral Rock
- What to Photograph in Sedona - Red Rock Sunsets
- What to Photograph in Sedona - Devil's Bridge
- How to Make the Most of Photographing Sedona
- Planning Your Sedona Photography Trip
What to Photograph in Sedona - Cathedral Rock
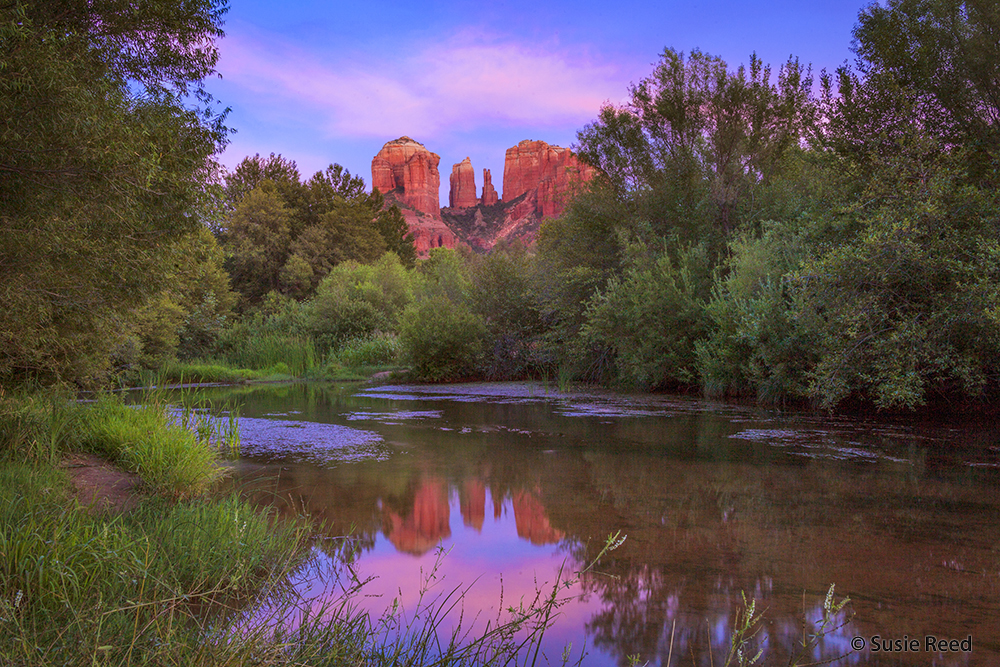 Photo by Susie Reed.
Perhaps the most well-known and most photographed landmark in Sedona, Cathedral rock rises above the valley like a beacon.
Though you can hike the saddles between its spires, most photographers prefer a view like the one above, of the formation itself standing watch over the surrounding landscape.
Just travel a few miles from Sedona to the Crescent Moon Picnic Area.
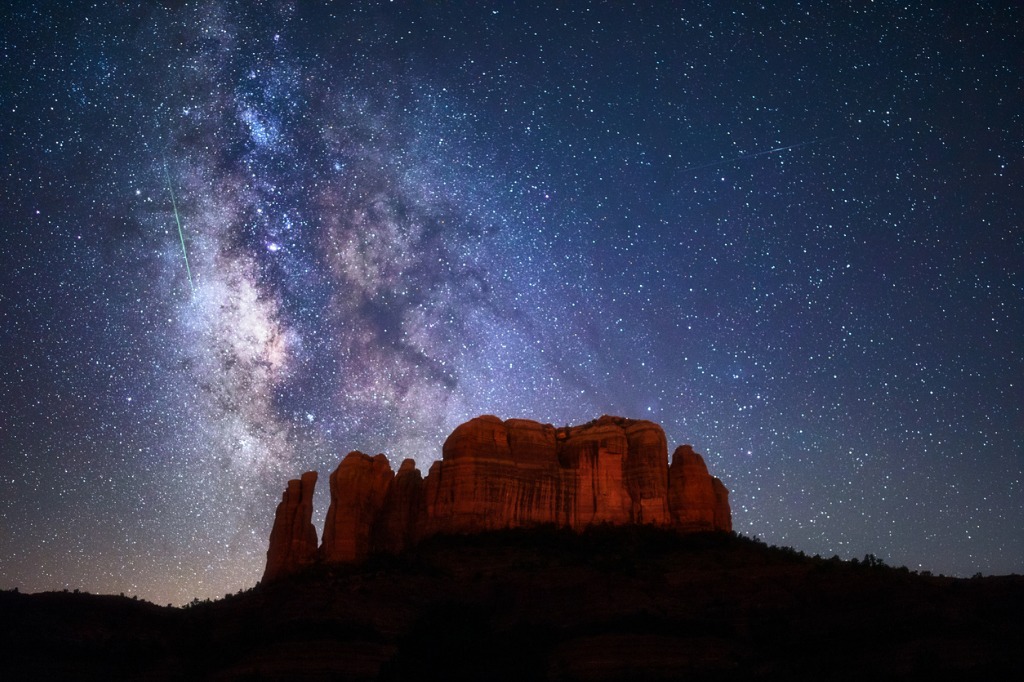 Photo by mdesigner125 via iStock
Take some time to explore this area. It is fairly large, and many different vantage points of Cathedral Rock can be found at locations away from the picnic area.
There are numerous hot-spots for photos of Cathedral Rock right along the river, but it's certainly worth time exploring trails in the area to find more unique views of this gorgeous landscape.
Just a word to the wise - you cannot enter the park after dusk, though, if you're already there, you typically won't be asked to leave. You cannot stay overnight in the park, though.
What to Photograph in Sedona - Red Rock Sunsets
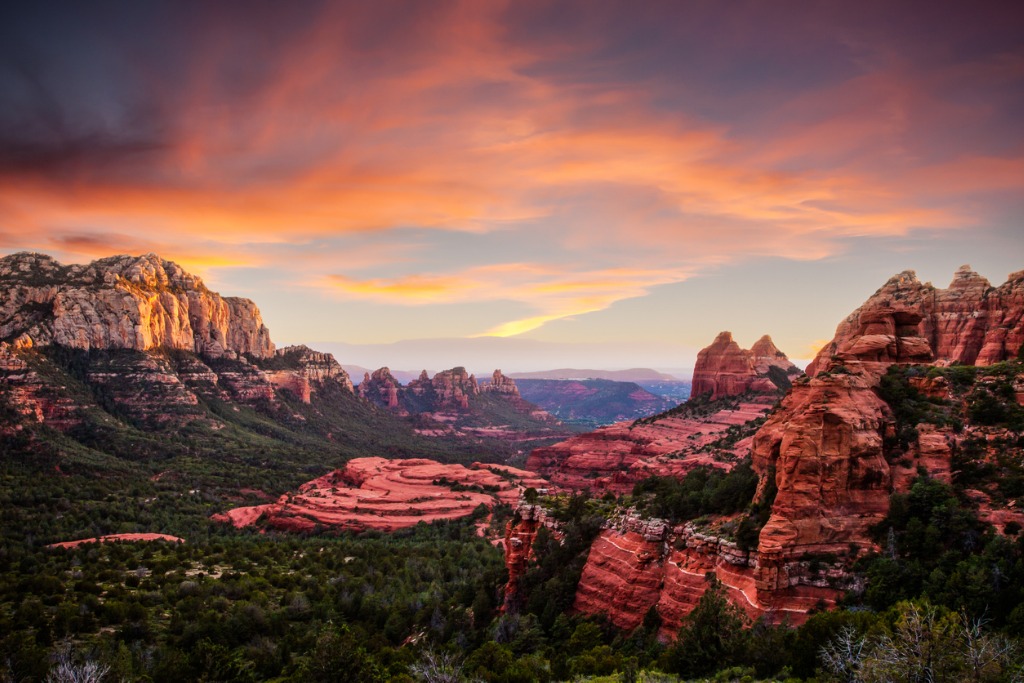 Photo by bboserup via iStock
The scenery in Sedona is spectacular any time of day, but when the sun sets and the orange, red, pink, and purple tones of the sunset illuminate the red rocks, it's truly something to behold.
Red Rock State Park offers many vantage points (like the one above) from which you can capture sunset images of the breathtaking landscape.
Unlike many areas in Sedona, the park is easy to get to, just 18 minutes southwest of town. Just be aware that there is a plethora of amazing vantage points in the area that are accessible only by four-wheel-drive vehicle or by hiking. The work is worth it, though!
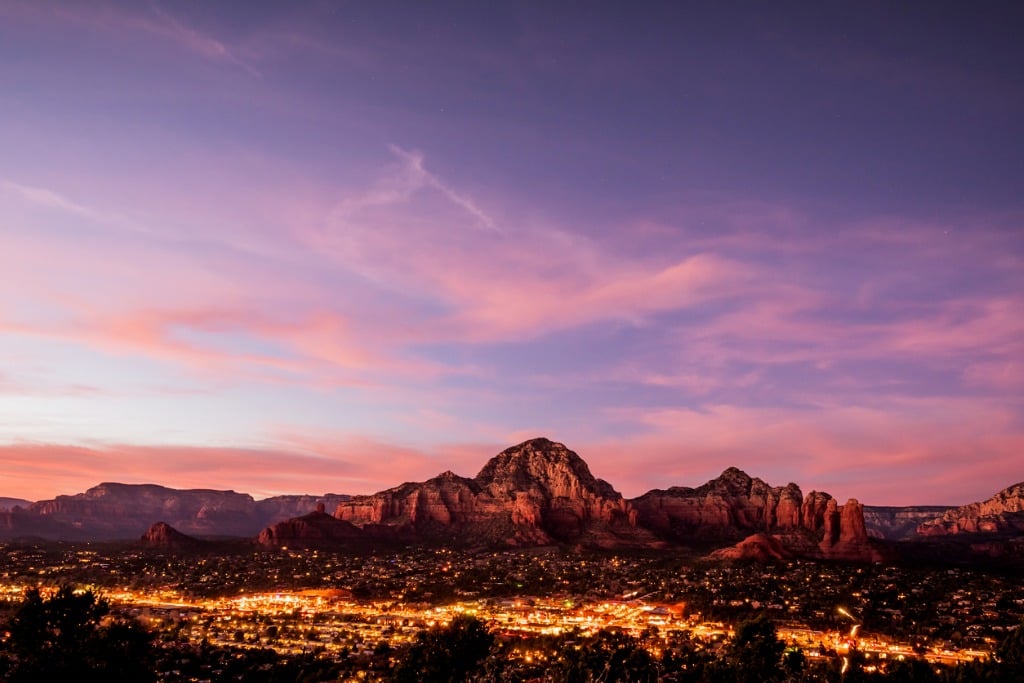 Photo by Wildroze via iStock
Of course, there are plenty of other areas where you can enjoy the sunset and capture beautiful images of the interesting Sedona landscapes.
Airport Mesa gets crowded at sunset because the views truly are incredible, but fighting the crowds is certainly worth it.
Just plan to get there early - at least an hour before sunset - so you have time to carve out a space for your camera and tripod.
Also take some time to explore the many trails that emanate from Airport Mesa. Even just a few yards from the main parking lot, you'll find gorgeous views that aren't quite as crowded.
What to Photograph in Sedona - Devil's Bridge
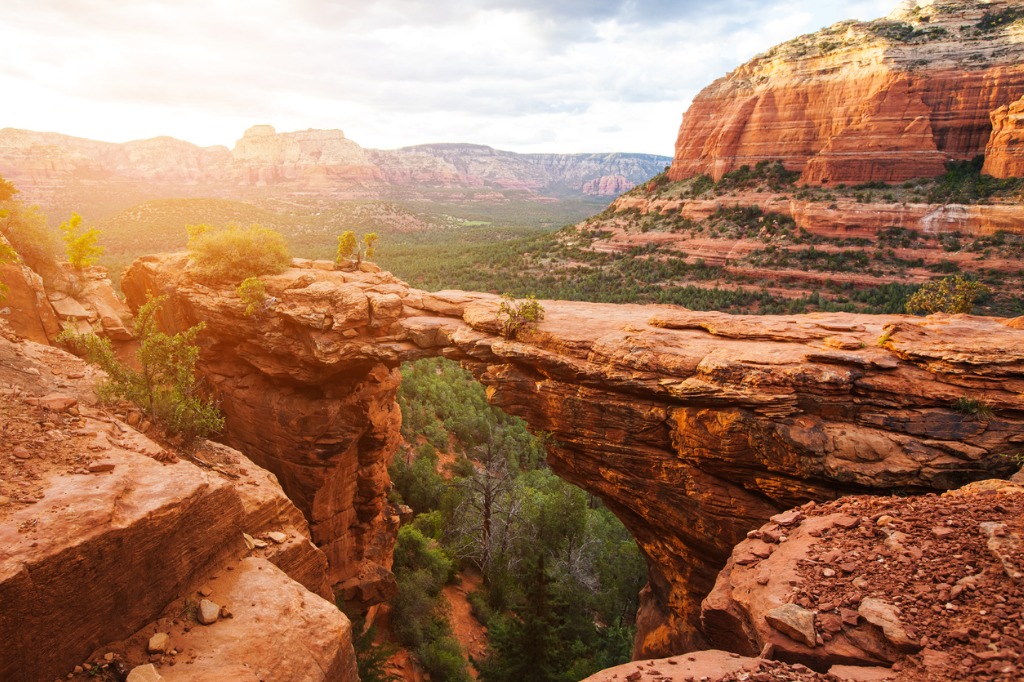 Photo by Nikolas_jkd via iStock
Devil's Bridge is by far the most difficult of the locations to get to that I've listed here.
Not only is there a 1.8-mile roundtrip hike to get to it, but to get to the trailhead, you need a four-wheel-drive vehicle.
However, the work to get there is certainly worth it!
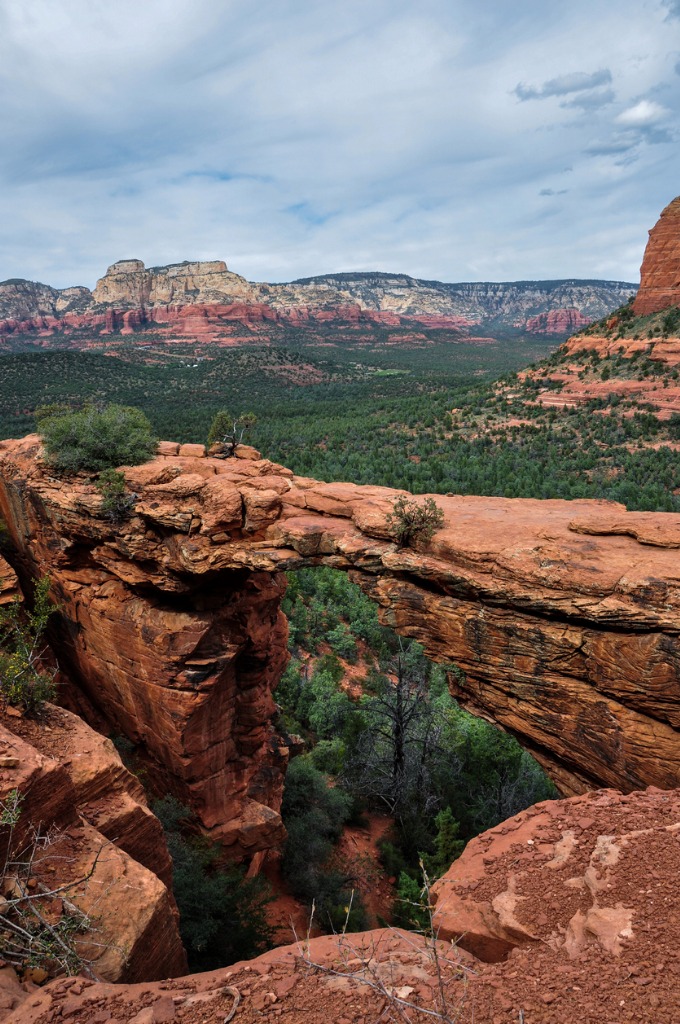 Photo by hbrizard via iStock
Devil's Bridge itself is a fantastic subject for your photographs. But you can also walk across it and take in stunning views of the surrounding landscape from the other side of the arch.
Furthermore, photos that include people on the arch make for an interesting shot, as it provides scale to the scene so viewers get a better sense of just how large this natural bridge really is.
Visiting this spot in the winter offers a totally different experience, and is highly recommended. If you time it right, you might even see the landscape covered with snow.
How to Make the Most of Photographing Sedona
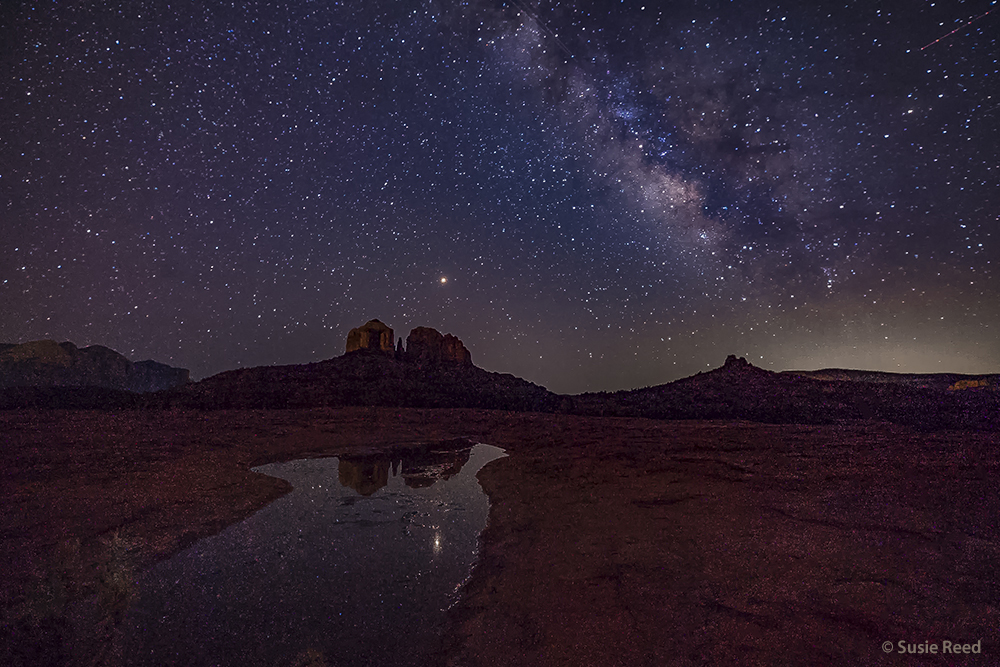
Photo by Susie Reed.
As I mentioned above, many photography hot-spots in and around Sedona are either extremely popular, and thus quite busy, or difficult to get to (or both).
That being the case, I recommend taking a Sedona photography tour.
Think about it...rather than spending all your time fighting the crowds or simply trying to figure out where to go, you can rely on a local expert to get you to those iconic spots to capture gorgeous photos.
What's more, taking a photography tour means you can rely on the guide's expertise of the area to take you to off-the-beaten-path locations that few tourists ever see.
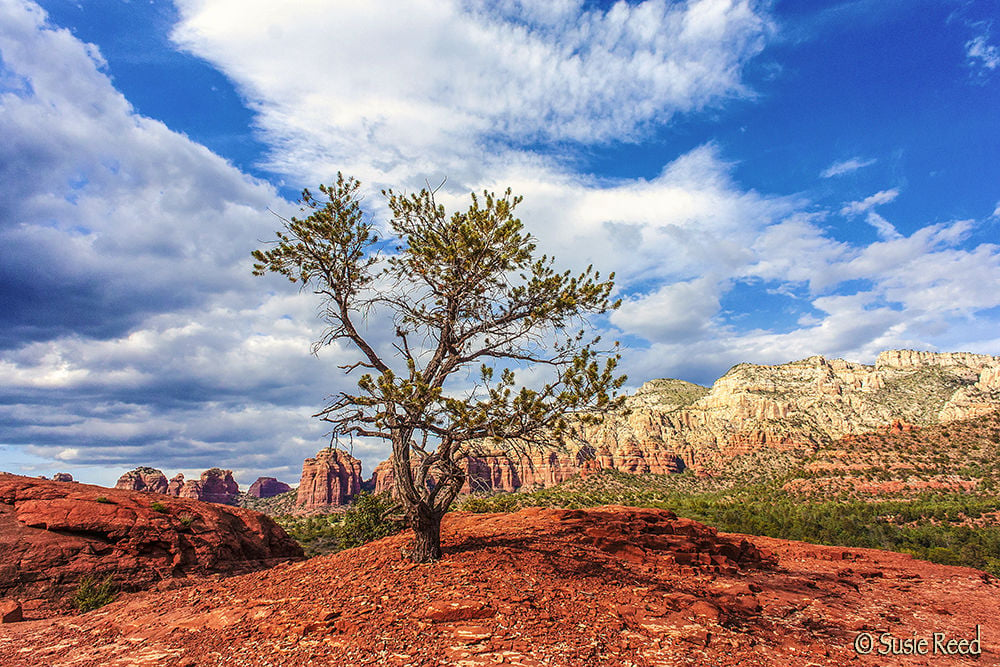 Photo by Susie Reed.
There are plenty of photography workshops in Sedona, but my recommendation is to book a tour with Susie Reed.
Though Susie isn't a native of Sedona, she's been roaming the area with her camera, leading workshops and tours, and finding the best locations for photos since the 1990s.
Her tours are private, so you can experience the beauty of Sedona in a small group setting - or even on your own with Susie!
Where other photography tours in this area cram as many people as they can into transport and hurry them along from one place to the next, Susie takes a much slower and purposeful approach.
As a result, you get to actually experience the places you're photographing and immerse yourself in the unparalleled beauty of Sedona.
As if all that isn't enough, Susie will take you to little-known spots all over Sedona so you can see picturesque locations you'd likely never find on your own.
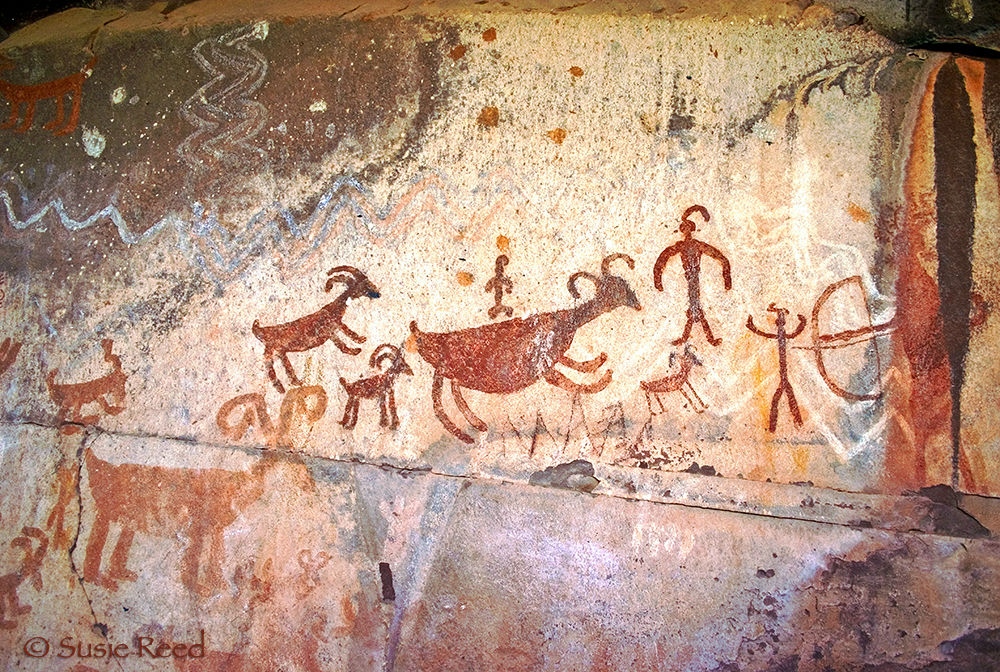
Photo by Susie Reed.
It's in these little enclaves away from the hustle and bustle of the crowds that Susie will guide and instruct you so you can develop a more skilled approach to landscape photography.
But don't take my word for it...Susie's tours have five-star ratings on Google and TripAdvisor, and for good reason if you ask me!
Learn more about Susie Reed Photography Workshops
Planning Your Sedona Photography Trip
- Where to Stay: Sedona Summit Resort by Diamond Resorts offers clean, centrally-located, pueblo-style accommodations for less than $100/night.
- Where to Eat: Red Rock Cafe is one of the top-rated restaurants in Sedona and offers American, Mexican, and Southwestern cuisine.
- Must-See Attractions: The Chapel of the Holy Cross is an architectural wonder built into the buttes of Sedona. Sedona Heritage Museum is located on a preserved family farm and offers a look at the area's rich history. There are also many hiking trails and other outdoor activities in and around Sedona.
- Best luggage: You'll need several days to explore Sedona, and for that, the Nomatic Check-In roller bag is the ideal choice. It offers polycarbonate construction that stands up to the rigors of travel, silent wheels, low-profile handles, and a three-stage aluminum handle to fit your height. With space for 78 liters of gear, this bag has plenty of room for a 5-day trip or longer.
- Check the weather in Sedona right now.
We Recommend
Awesome Camera Accessories for On-the-Go Photographers
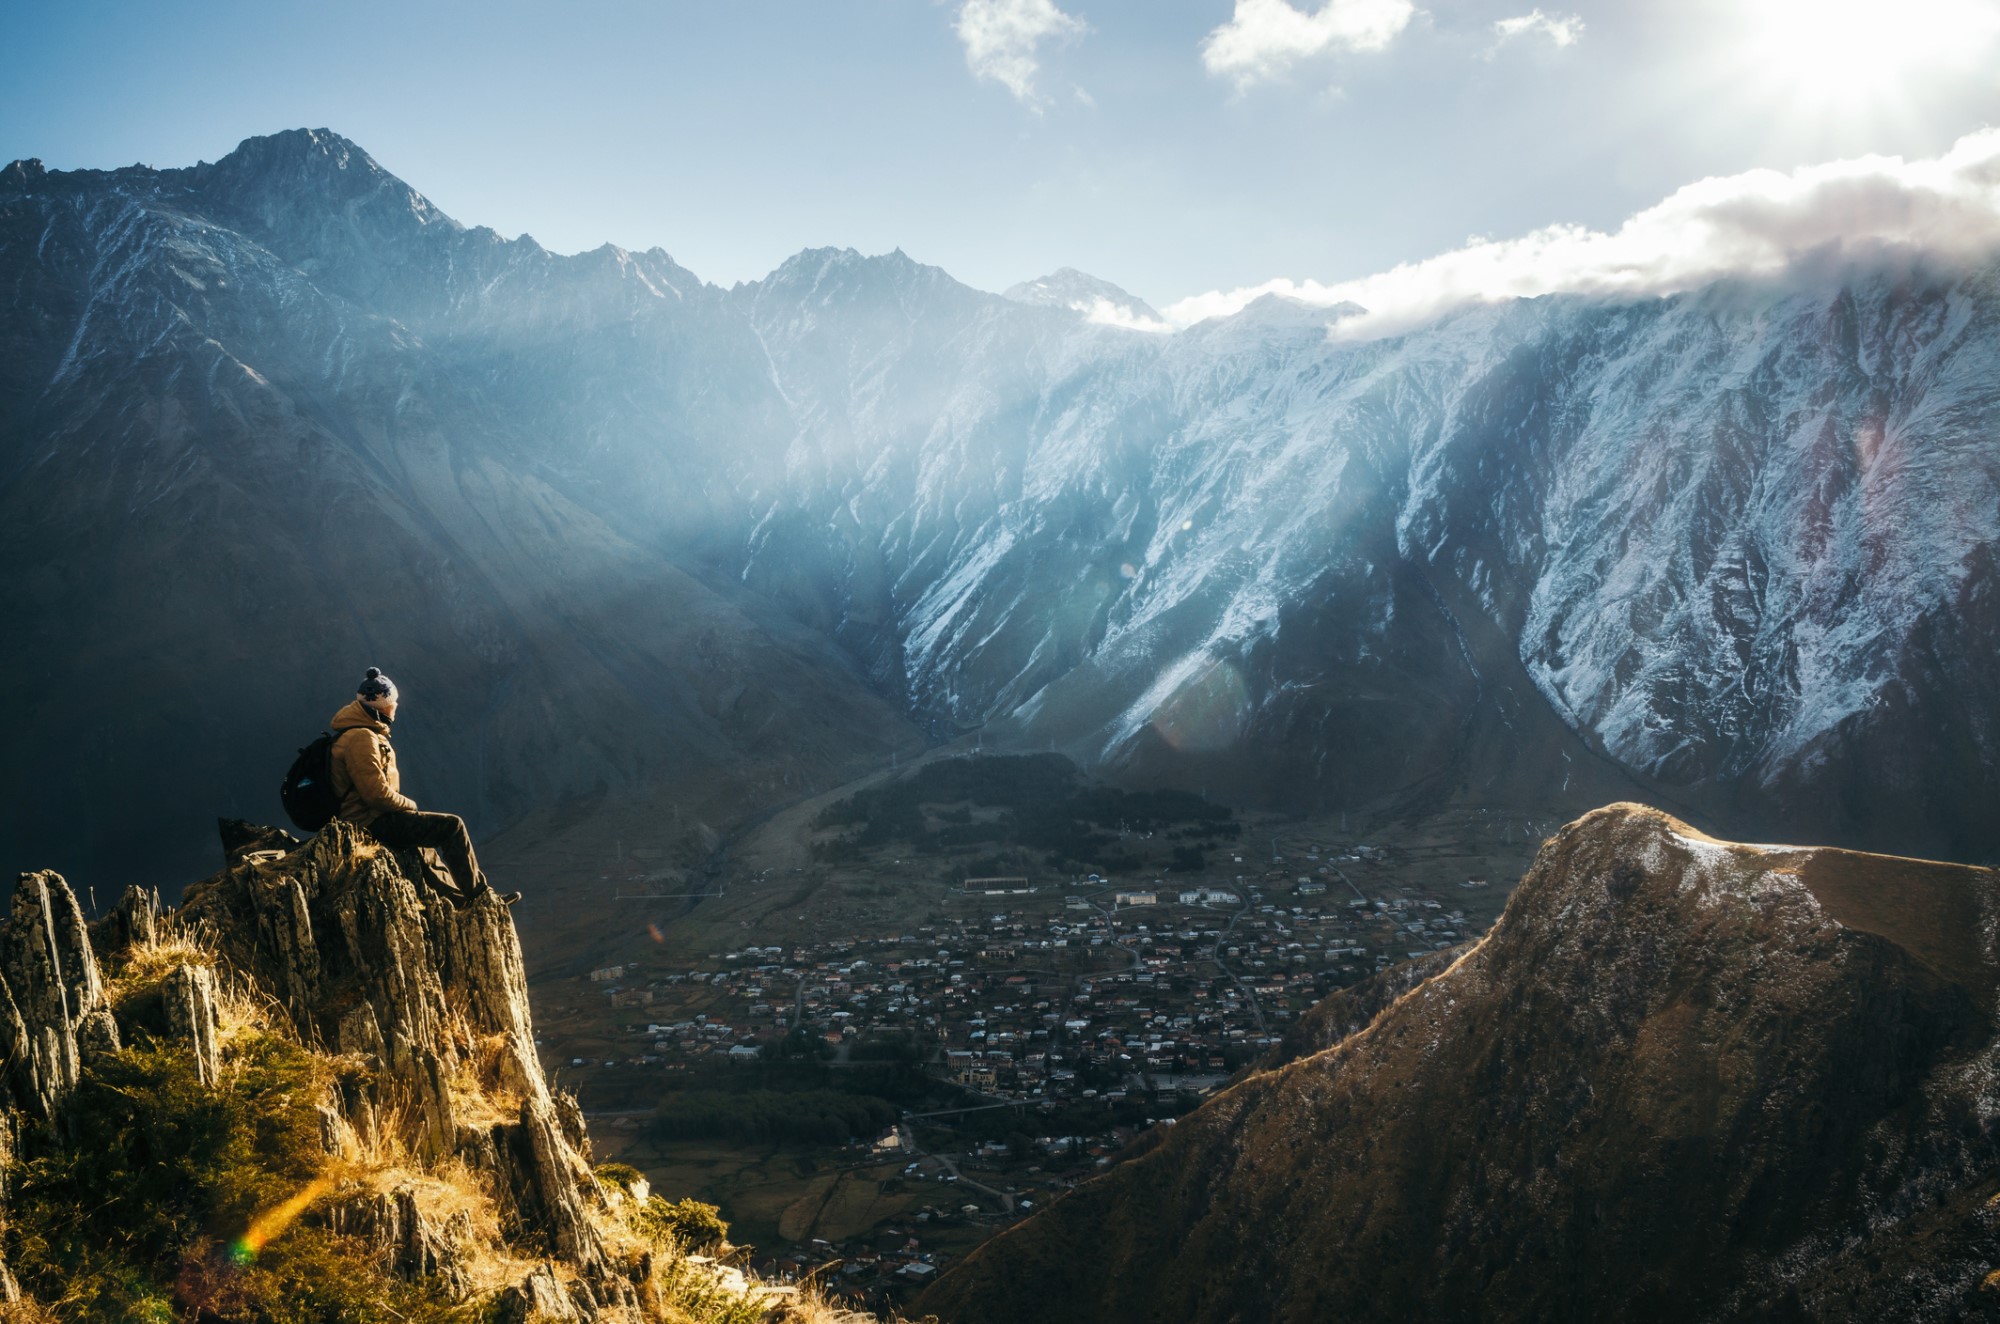
photo bybortnikau via iStock
Camera Accessories
Whether you’re on the road because you love to travel or you’re doing it out of necessity for work, you want to have camera accessories that can come along with you without being a burden.
Fortunately, recent years have seen awesome camera accessories made available that are small and portable, yet still pack a mighty punch.
Below, I’ve outlined a few of my favorite on-the-go camera accessories that will make your photography trips much easier.
Table of Contents
- LitraTorch 2.0
- E-Image EK610 Professional Compact Tripod
- Haida NanoPro Circular Polarizing Filter
- HEX Ranger Sling Bag
- Exposure X5
The LitraTorch 2.0 is a Must-Have for Travel Photographers

If you’ve spent any amount of time learning about photography, you know that good light is the key to getting a good photograph.
And while it’s perfectly fine to label oneself as a “natural light photographer,” there are times when natural light just won’t cut it.
But if you need to be highly mobile, the last thing you want to do is carry around light stands, softboxes, diffusers, and all sorts of lighting gear.
Instead, stay mobile and use the LitraTorch 2.0, an absolutely incredible light that will shock you with its power and quality of illumination.

I have this little guy (that’s it in the photo above, just above the lens) and it has been a Godsend as I get more and more into on-location work.
It has 16 LEDs that put out 800 lumens of light. Considering it’s just 1.5 inches square, that’s an incredible amount of light!
Since it weighs just three ounces, it’s not like you’ll be bogged down with heavy gear, either.
In fact, you can pick up a handful of these things, throw them in your camera bag, and not notice a difference in the weight you’re carrying.

Better still, the LitraTorch 2.0 is adjustable, so you can set it at 100 lumens, 450 lumens, or 800 lumens to suit the situation.
No matter the light output, this thing has beautiful, crisp, flicker-free light at a color temperature of 5700K.
With a CRI of 90+ and TLCI of 92, you begin to get a picture of just how superb this little light really is!
Add in durable construction, waterproofness to 60 feet, a magnet for mounting it to metallic surfaces, and two ¼-20 mounts, and you have the makings of the perfect little light.
Learn more about the LitraTorch 2.0
Learn More:
Save Space With the E-Image MA600 Monopod

A means of stabilizing the camera is a must for every photographer, but what you don’t want is a big, bulky, heavy tripod that you have to carry around from one shoot location to the next.
The E-Image MA600 Monopod is a great solution for on-the-go photographers that simply don’t have room for a traditional tripod.
At just 3.1 pounds, this monopod is lightweight, and with just a single leg, it’s form factor is much smaller than a tripod, thereby giving you more room in your camera bag for other gear.
This monopod can support an astonishing 44 pounds of gear, so whether you have a DSLR, mirrorless camera, or a large video camera, you’ll get all the support you need.
Made of aluminum, the MA600 monopod is strong and durable, yet more budget-friendly than carbon fiber options.
The flip-lock design of the leg locks makes setup a breeze and quick adjustments easy as well.
There’s a soft foam grip and a strap at the top of the monopod to give you multiple points of securing it while shooting.
It can extend to nearly 75-inches yet folds down to little more than 25-inches for easy transport. And with a base that spreads 16-inches, this monopod offers superb stability, even if you’re panning to track a subject.
Learn more about the E-Image MA600 Monopod
Learn More:
Step Up Your Photography Game With a Haida NanoPro Circular Polarizing Filter

When you’re on the move, it’s important to shed weight when you can.
One of the ways I’ve done that as of late is to ditch my giant filter kit and roll with just one filter - my Haida NanoPro Circular Polarizer.
Of all my filters, this one is the most invaluable simply because of the many benefits I gain from using it.
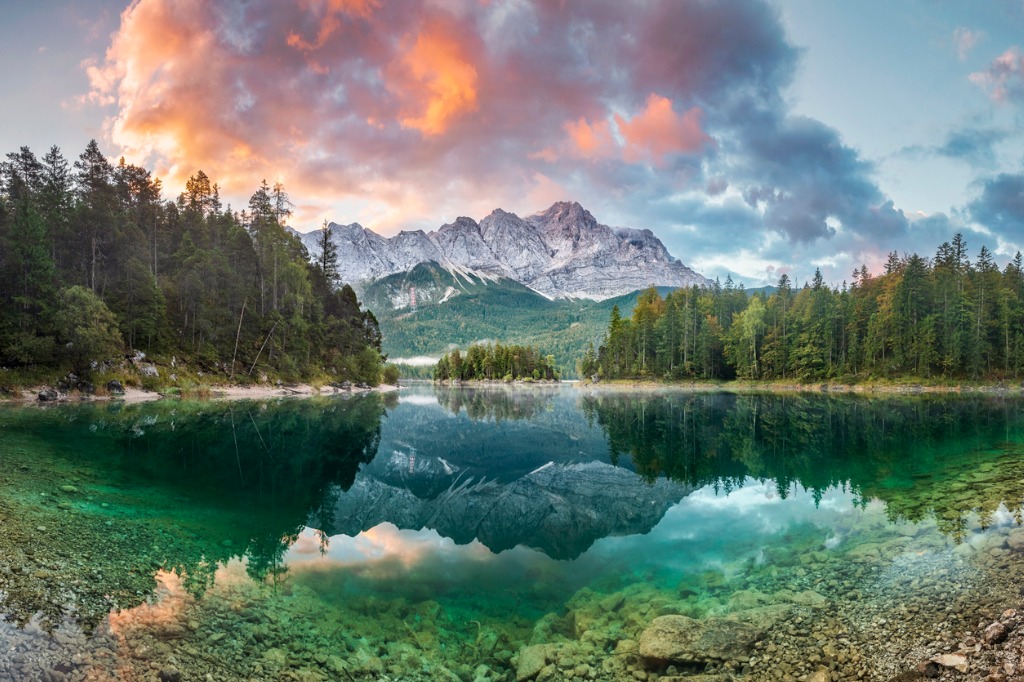
photo by DieterMeyrl via iStock
As all polarizers do, this thing boosts contrast in the sky, minimizes glare off of water and other non-metallic surfaces, and reduces atmospheric haze.
In all these cases, my landscape photos benefit from stronger colors, improved clarity, and gorgeous contrast.
But not all polarizers are made alike, so it’s important to invest in one that offers the highest-quality results. Haida does just that.
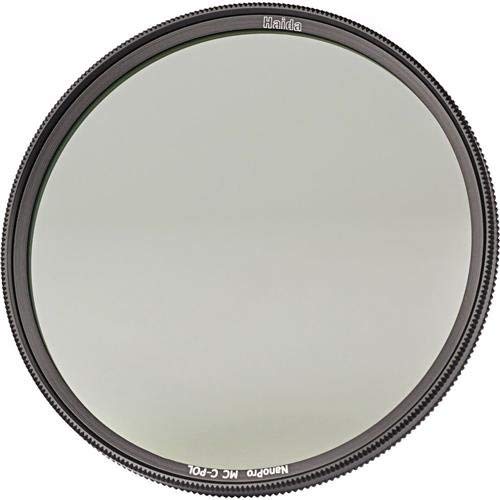
The NanoPro coating on this filter offers a number of benefits, including making cleaning an easier task. That’s because dust, dirt, smudges, and moisture are repelled thanks to ten (yes...ten!) layers of coatings.
What’s more, the NanoPro coating has anti-reflective properties to ensure your photos are as clean and crisp as possible.
With high-quality optical glass, a lightweight 5mm aluminum mount, and side knurling that allows for easier and more precise adjustments, this polarizer is definitely a camera accessory that takes up very little space in your bag, but is worth its weight in gold.
Learn more about the Haida NanoPro Circular Polarizing Filter
Learn More:
Carry Tons of Gear Without Feeling Weighed Down With the HEX Ranger Sling Bag
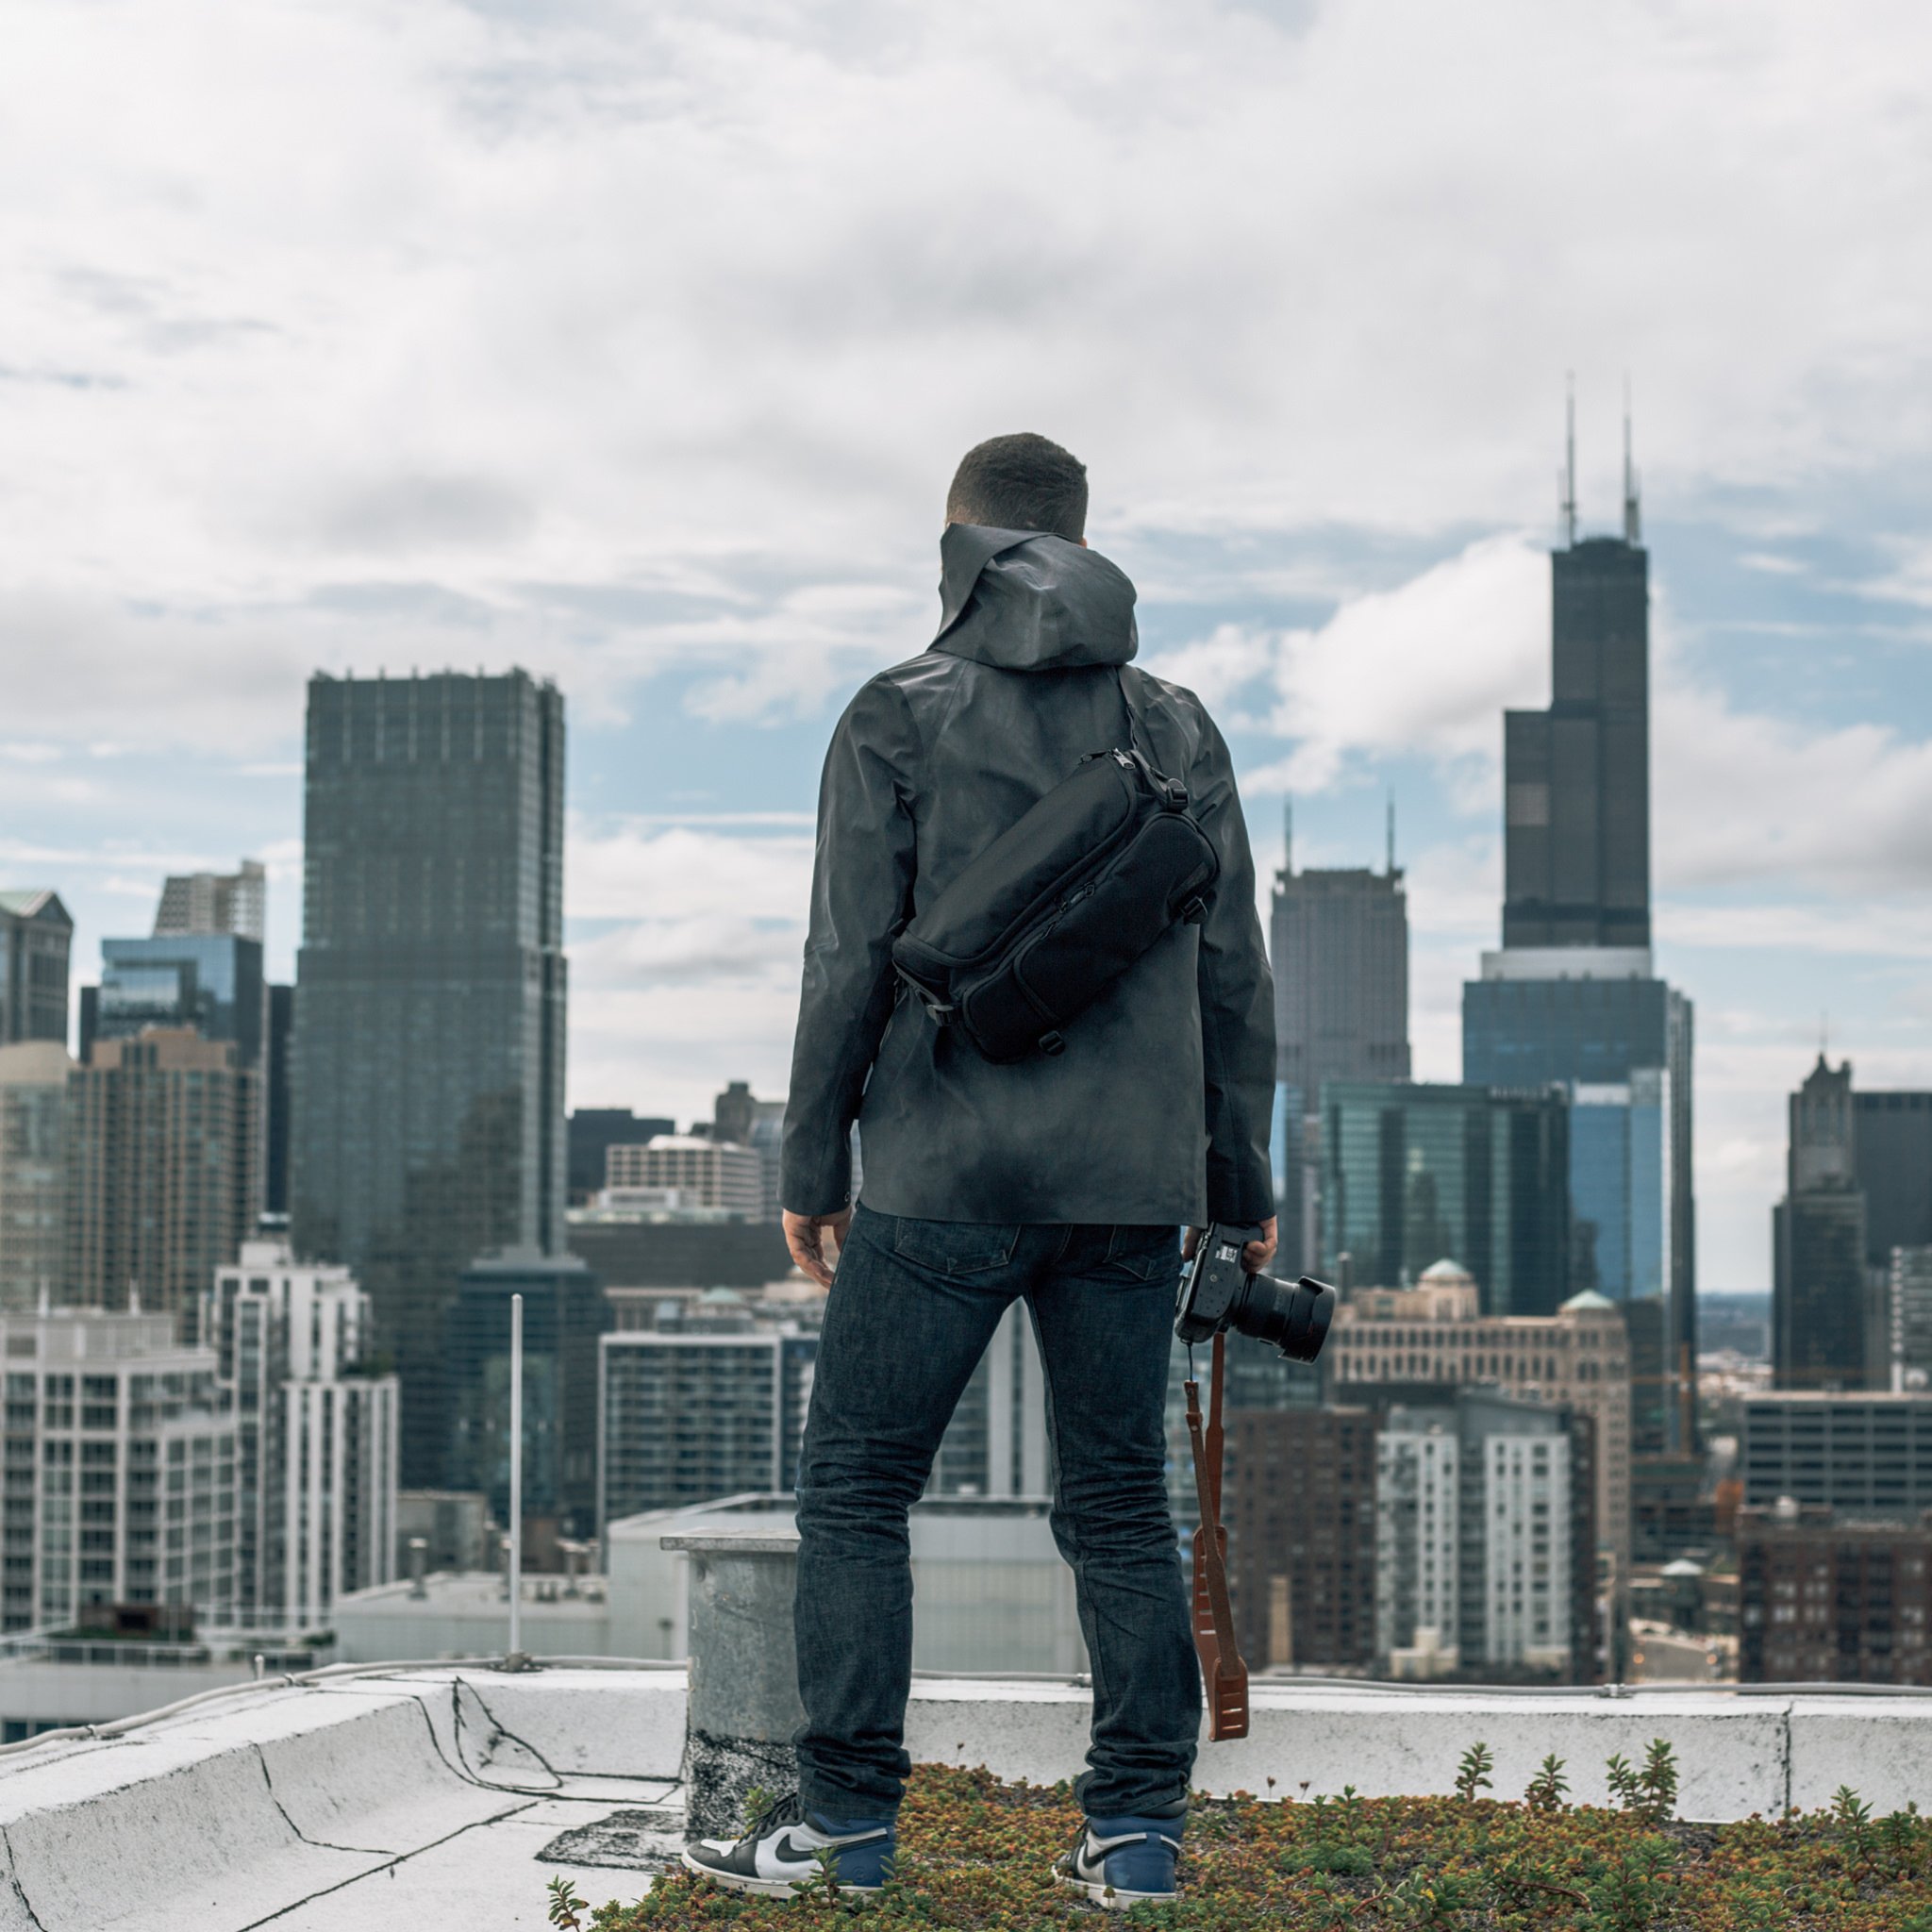
When you’re ready to head to points unknown, you need a camera bag that can fit loads of gear, but that isn’t big and bulky and difficult to carry.
Enter the HEX Ranger DSLR Sling Bag…
I have to say that I was completely blown away by this bag the first time I laid eyes on it when I met the folks behind HEX at their Los Angeles offices.
I’ve been a Peak Design guy for a long time, and if you know Peak Design, you know the quality that they put out.
But, man, HEX has taken it to another level!
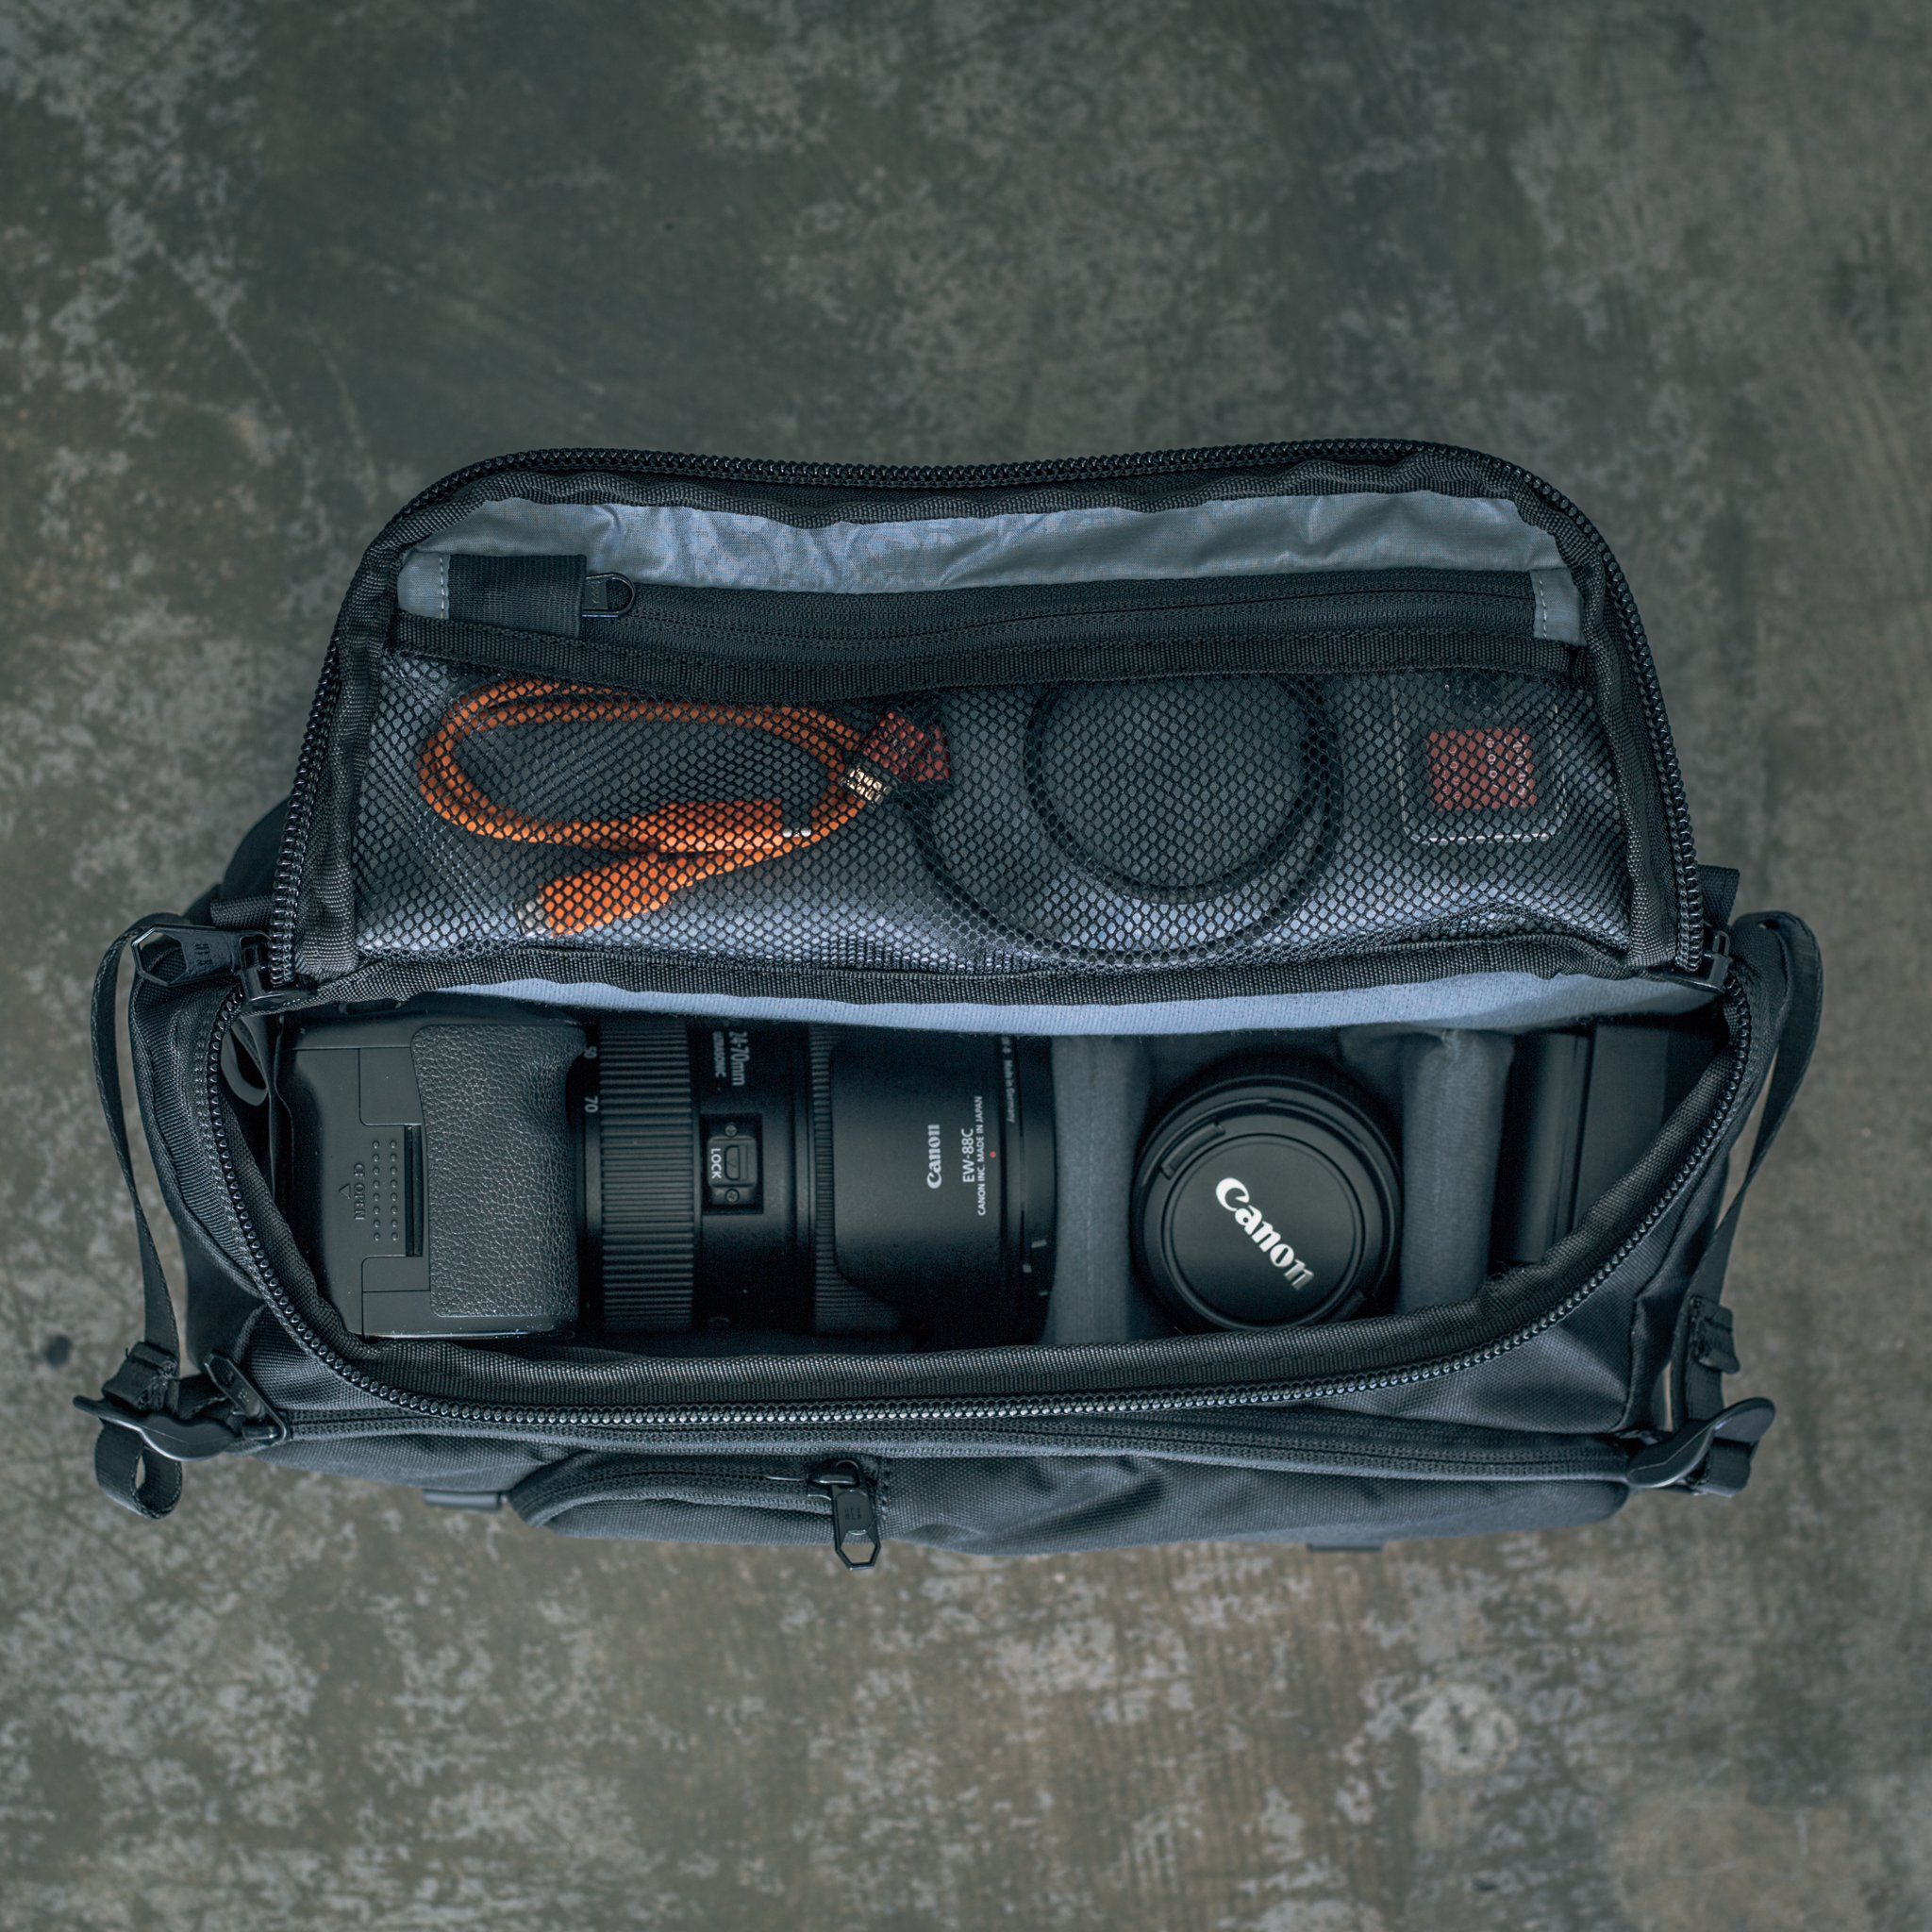
For starters, it’s a compact bag at just 1.3 pounds and 14.5"L x 7.25"W x 4.75"H, yet I can fit everything from my 10 liter Peak Design Sling Bag into this 8 liter Ranger bag.
Why?
It’s simple - HEX has eliminated all the unused space from this bag, which gives you tons of carrying capacity without the bulk.
But don’t think that because it’s slim and trim that it isn’t loaded with features.
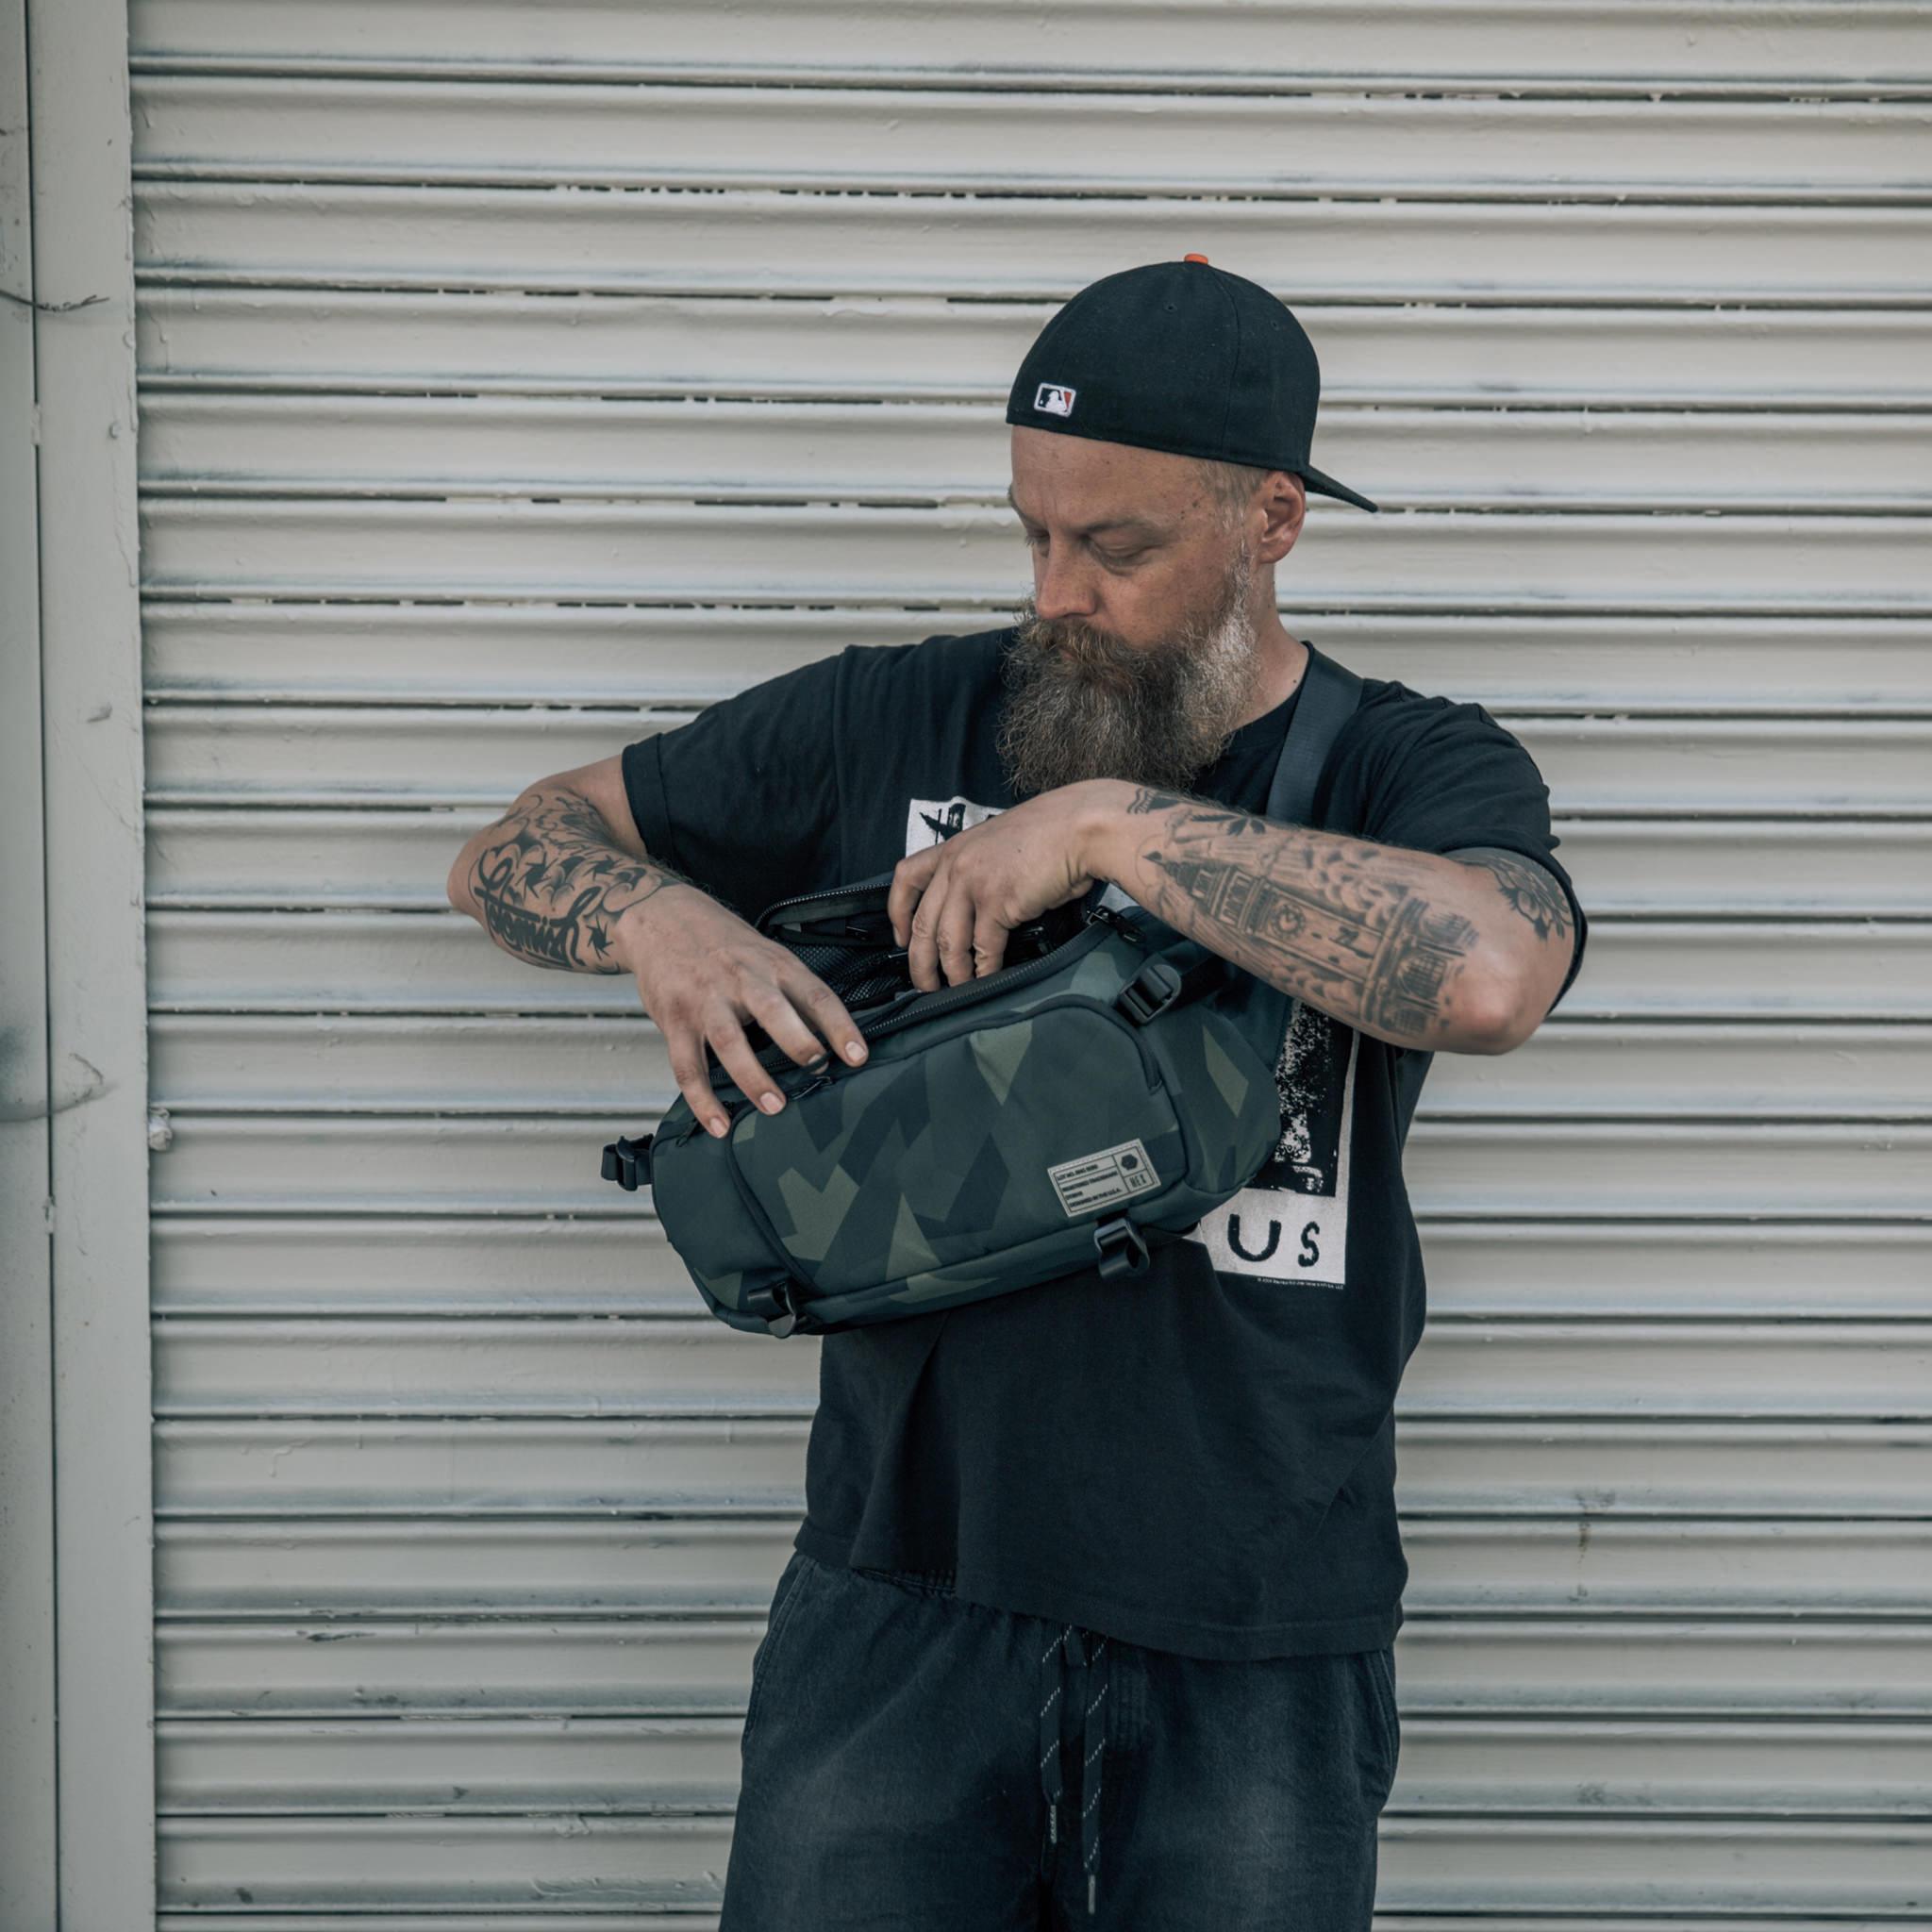
This bag has collapsible interior dividers that allows you to customize what gear you carry. The dividers can fold up or be removed completely, which allows the bag to lay completely flat. That’ll come in handy on your travels, for sure!
There are pockets galore, too, including a front-access organizer for the small things you need, a faux fur-lined sleeve for your tablet, and tons of velcro stash pockets. There’s even side adjustable load straps and an adjustable bottom carry strap to bring along more gear when you need it!
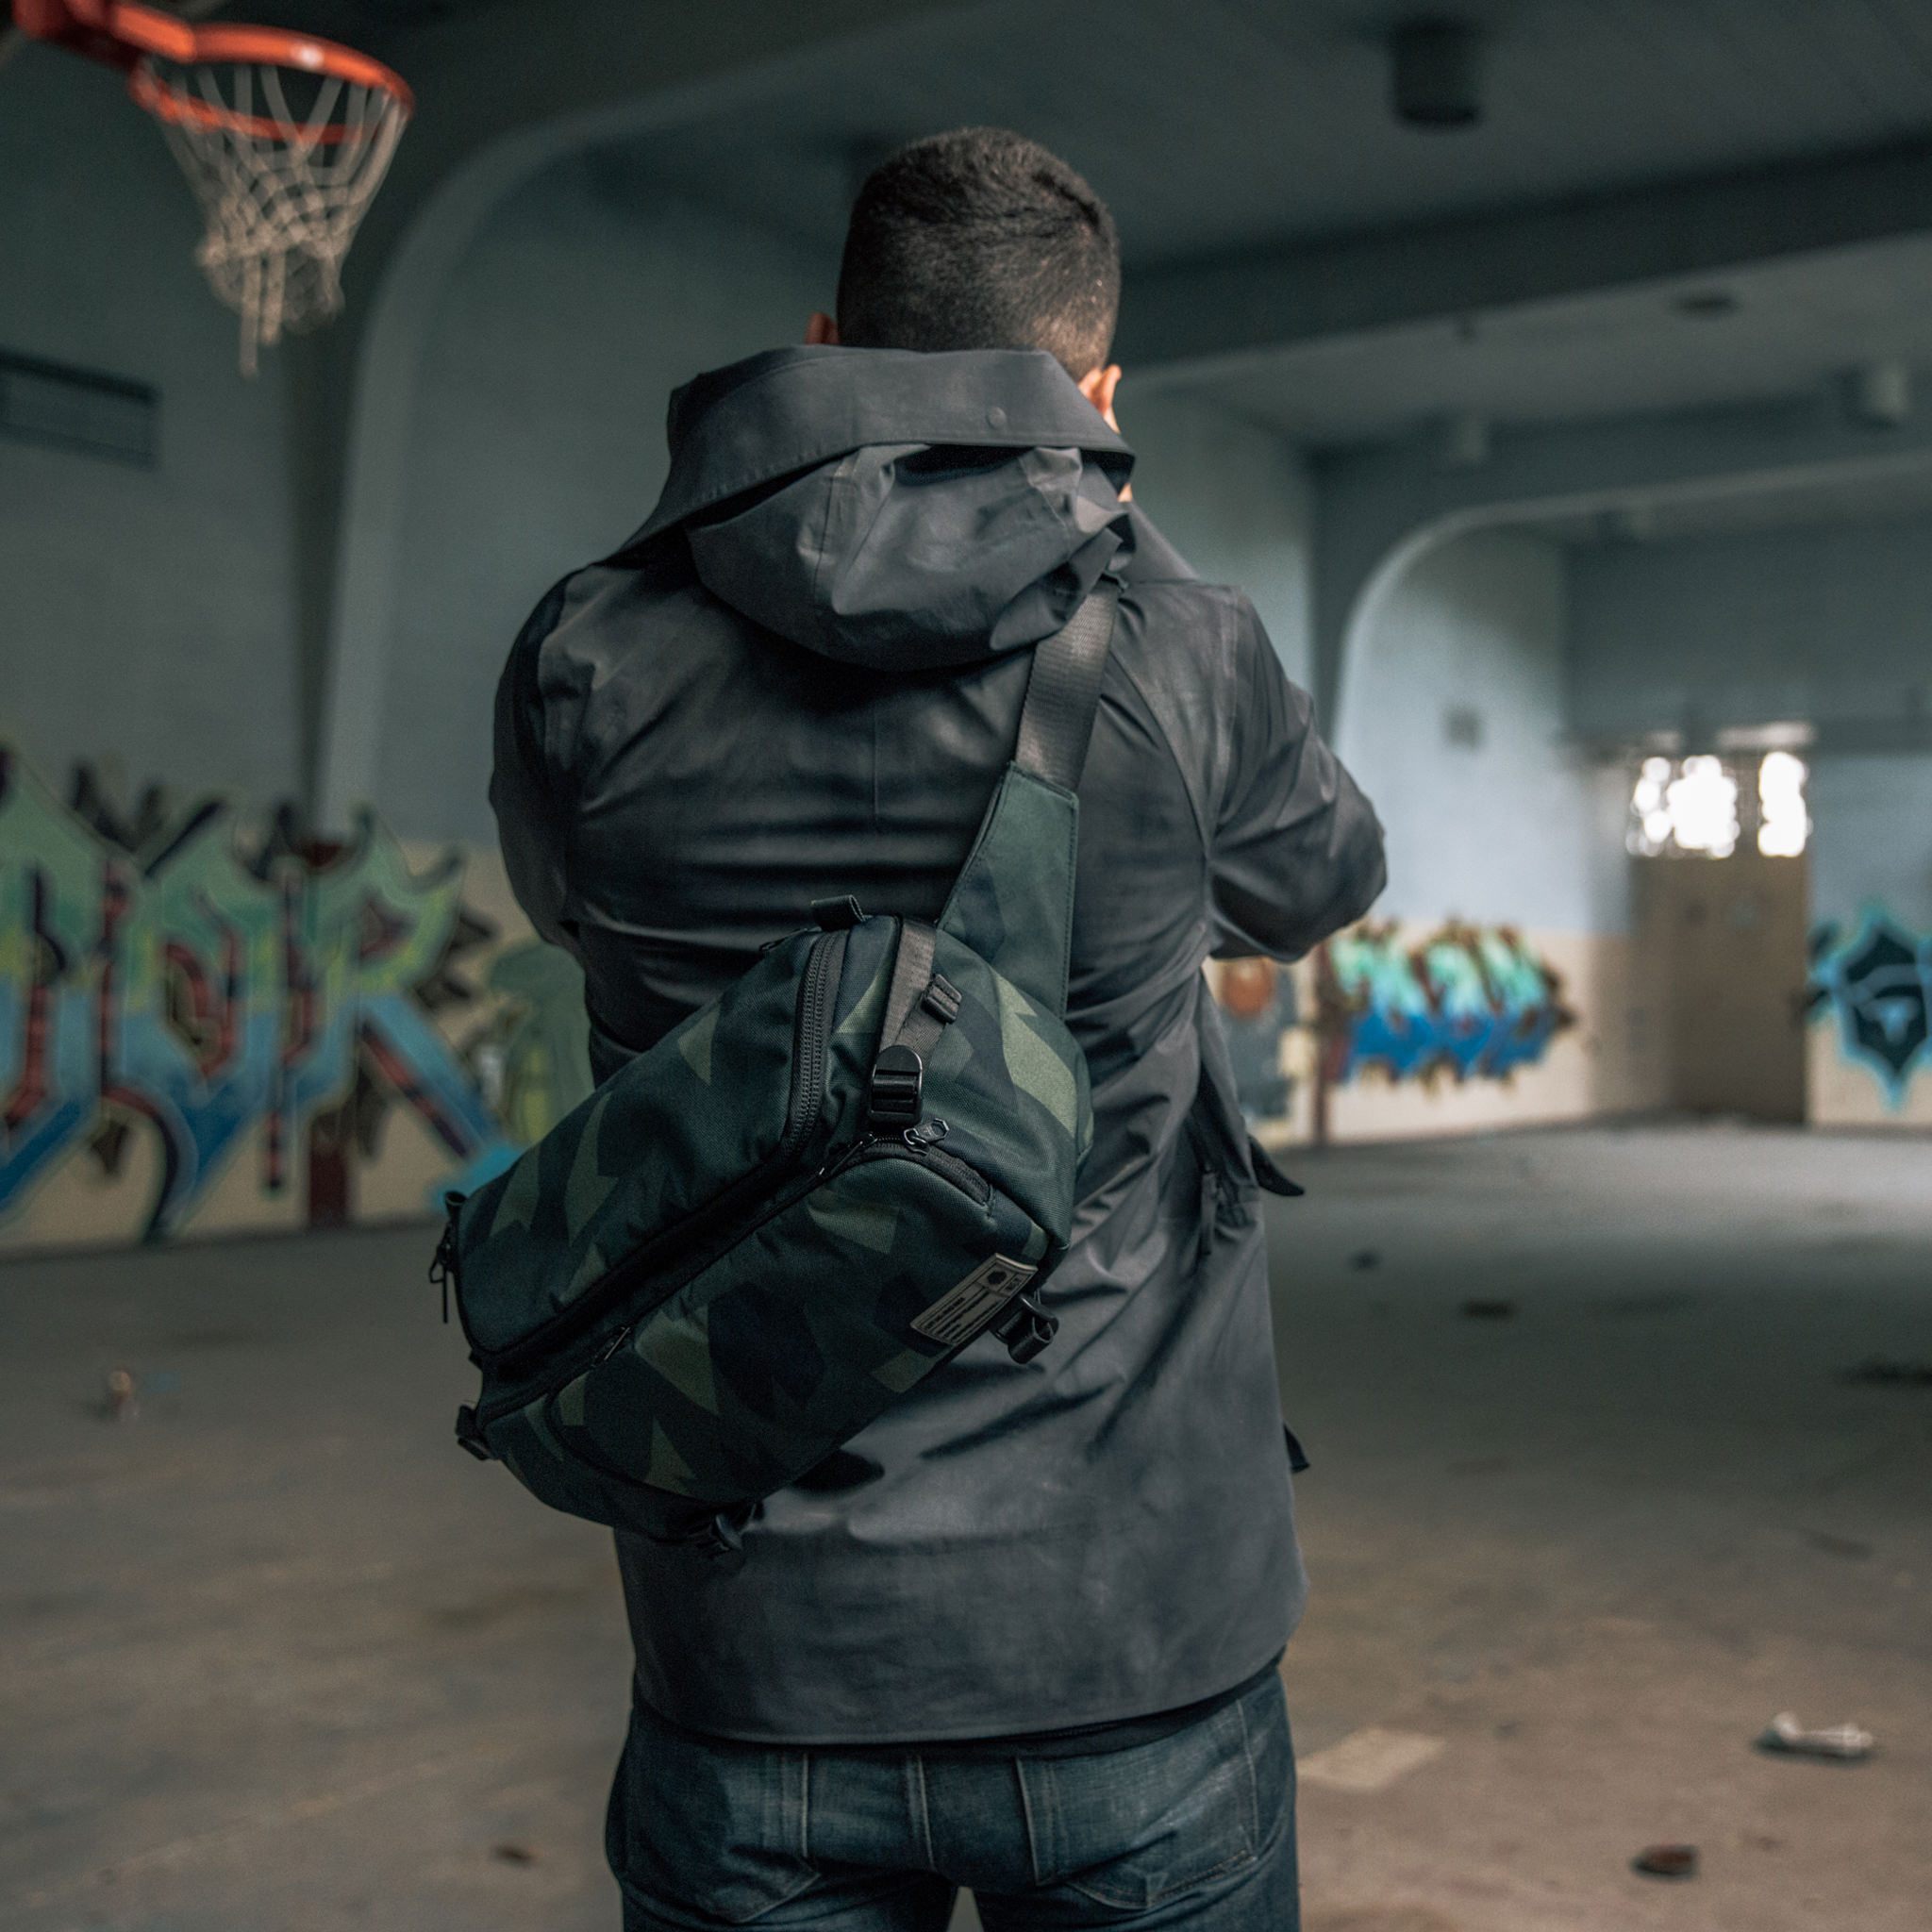
Perhaps the best thing about this bag is how it fits.
It’s snug to your body, so it doesn’t knock around as you walk, nor does it pose a threat to slide off and hit someone as you pass by.
It’s super easy to adjust and grab your gear thanks to the YKK zippers with metal pulls. The genuine Cordura material is great looking and durable too.
HEX simply impressed the heck out of me with this bag, which is why it’s my go-to travel bag now!
Learn more about the Hex Ranger DSLR Sling Bag
Learn More:
Save Time Editing With Exposure X5
 photo by lechatnoir via iStock
I enjoy editing my photos as much as the next guy, but when I'm on the go, I don't want to be in the hotel room slumped over my computer editing photos for hours on end. Instead, I want to be out exploring and shooting!
Exposure X5 lets me do that thanks to its ability to streamline my workflow when it comes to organizing and editing my photos.
In particular, there are three features (there are many, many more features, by the way) I especially like that make this some of my favorite photography software...
First, I appreciate the fact that Exposure includes hundreds of presets (like the one shown below). This enables me to add looks to my photos with just one click. In many situations, the presets are just what the doctor ordered, but if I need to tweak them, I can do so quickly and easily.
I can also save the presets that I customize and reuse them again in the future. How cool is that?!
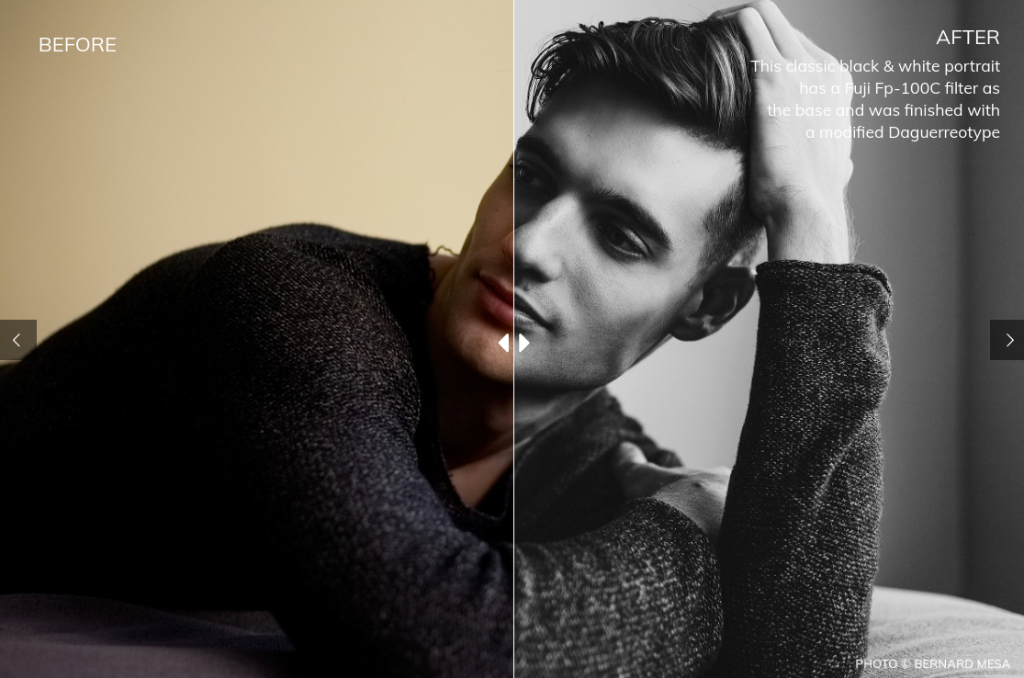
Second, Exposure is just dead-easy to use with an intuitive layout that makes editing images a breeze.
If need be, you can customize the workspace to better suit your needs, too. On top of that Photoshop and Lightroom plug-in support is included so you can more seamlessly migrate your images into Exposure.
The third feature I really love about Exposure X5 is that it allows you to quickly transition from editing images to organizing images without having to switch modules.
Speaking of organizing, you can create smart collections of images based on criteria you specify and use keywords for further organization. You can even choose to retain or remove keywords during image export and import keyword sets directly from Lightroom.
In other words, Exposure X5 is simply a well-designed, beautifully thought-out photo editor and management system all bundled into one easy-to-use workspace.
When you're on the go and time is of the essence, you can't ask for more from your imaging software!
Get a free 30-day trial of Exposure X5 to see just how awesome it is.
We Recommend
Best Camera for Travel
photo byhocus-focus via iStock
Do you have a bad case of the travel bug? Have you always wanted to do a better job of documenting your travels, but couldn’t fit a big, heavy camera in your backpack?
Well, I've got great news for you! Cameras have never been smaller, and today there are tons of amazing options!
Compact, Mirrorless, and DSLR cameras are all marvelous choices for those who wish to carry a traditional camera. Action cameras are super portable and fantastic for adventure enthusiasts. Even some phones take truly unbelievable photos and videos nowadays.
In this article I’ll give you my top choice for each, and what exactly makes it the best camera for travel!
Best Compact Camera for Travel
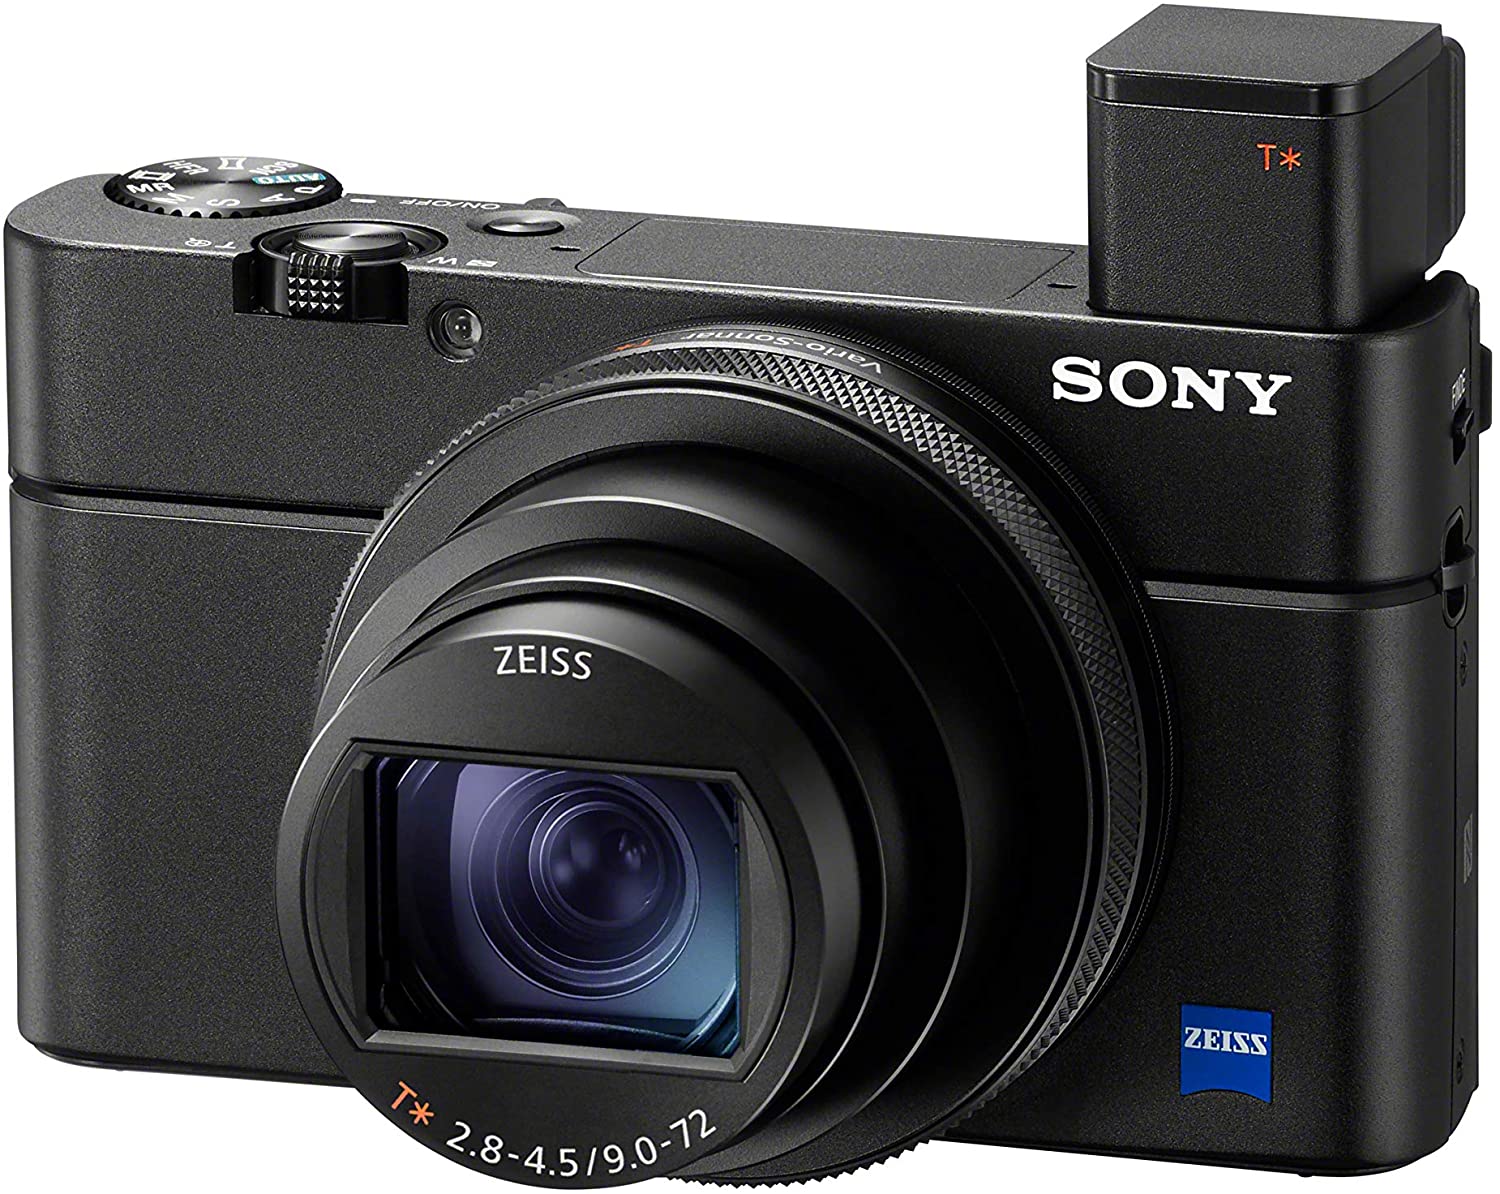
The Sony Cyber-shot RX100 VII is no doubt the best compact travel camera money can buy. Released in 2019, it’s the newest model in the ever so popular line of Sony Cyber-shot cameras, and boy does it pack a punch!
The RX100 VII boasts a top-of-the-line 1-inch, 20.1MP sensor which produces incredibly sharp images for a point-and-shoot camera. When you show off your photos to friends and family back home they will be shocked to discover you shoot with such a small camera!
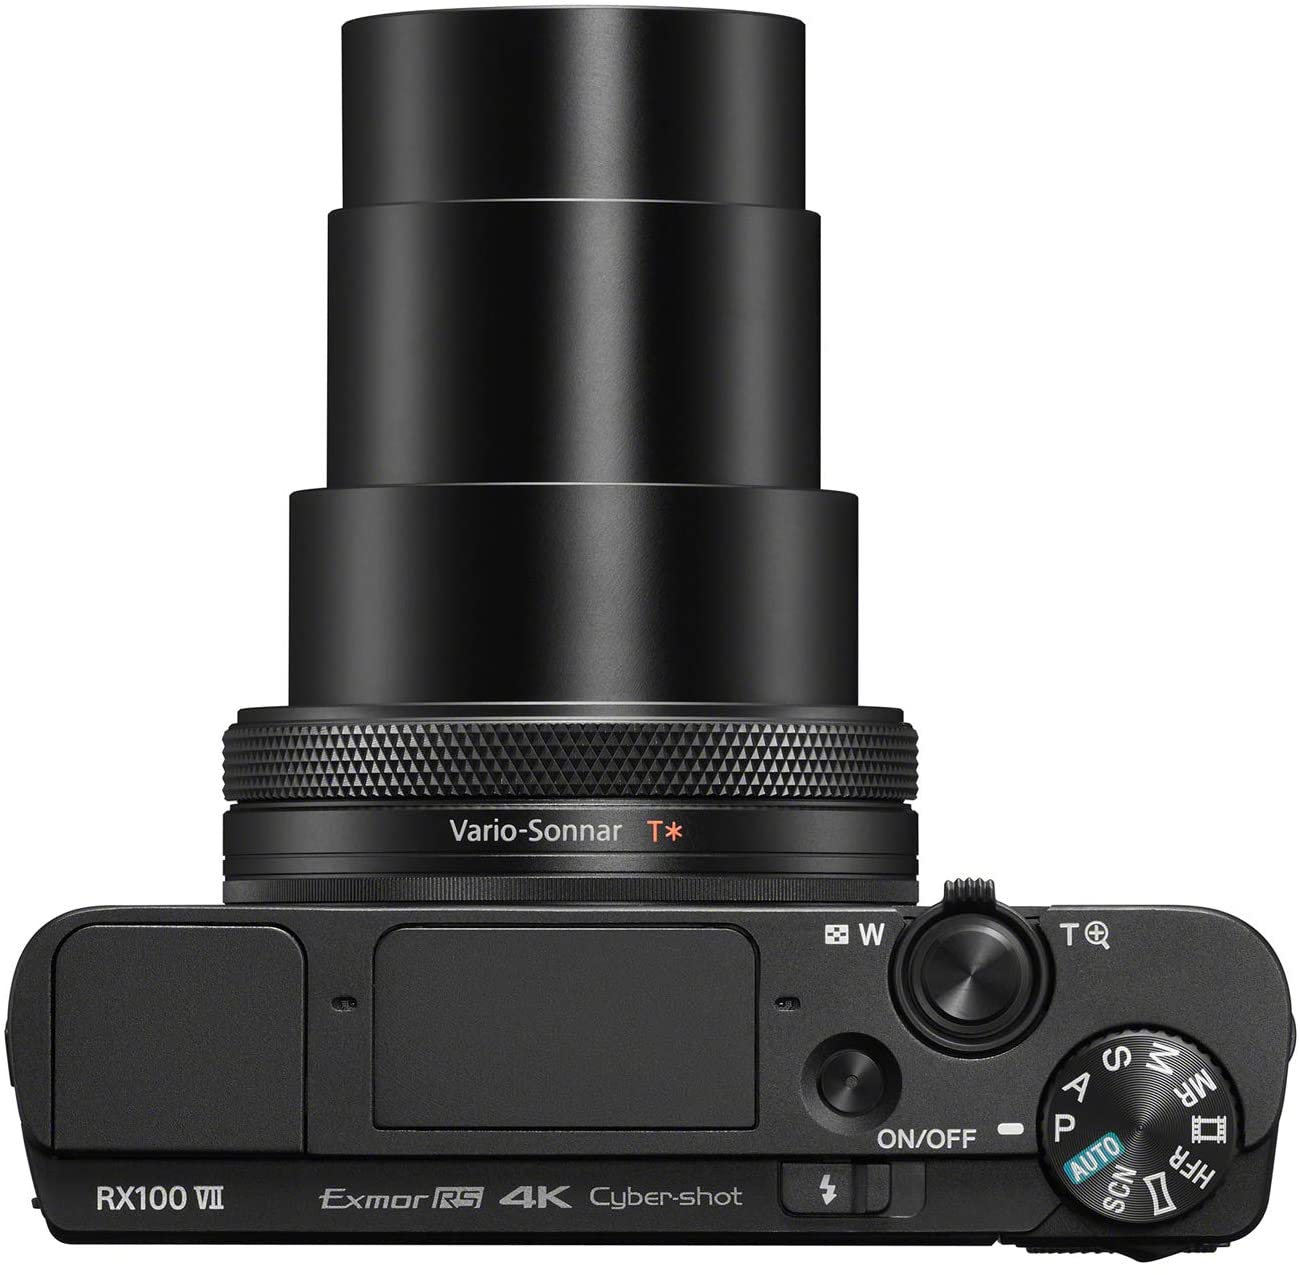
With a zoom lens that has a range of 24-200mm, it’s wide enough for dramatic landscape shots, but also can be zoomed in close enough to capture the most minute details of buildings and animals. Furthermore, if you like street and portrait photography you will love the buttery bokeh produced by the f2.8-4.5 aperture!
Additional superb features of this camera are that it can record 4K video, has lightning-fast autofocus, can shoot continually at a ridiculously fast 90fps, and that it has a 3-inch touchscreen monitor. Oh yeah, best of all it fits in your pocket!
Best Mirrorless Camera for Travel
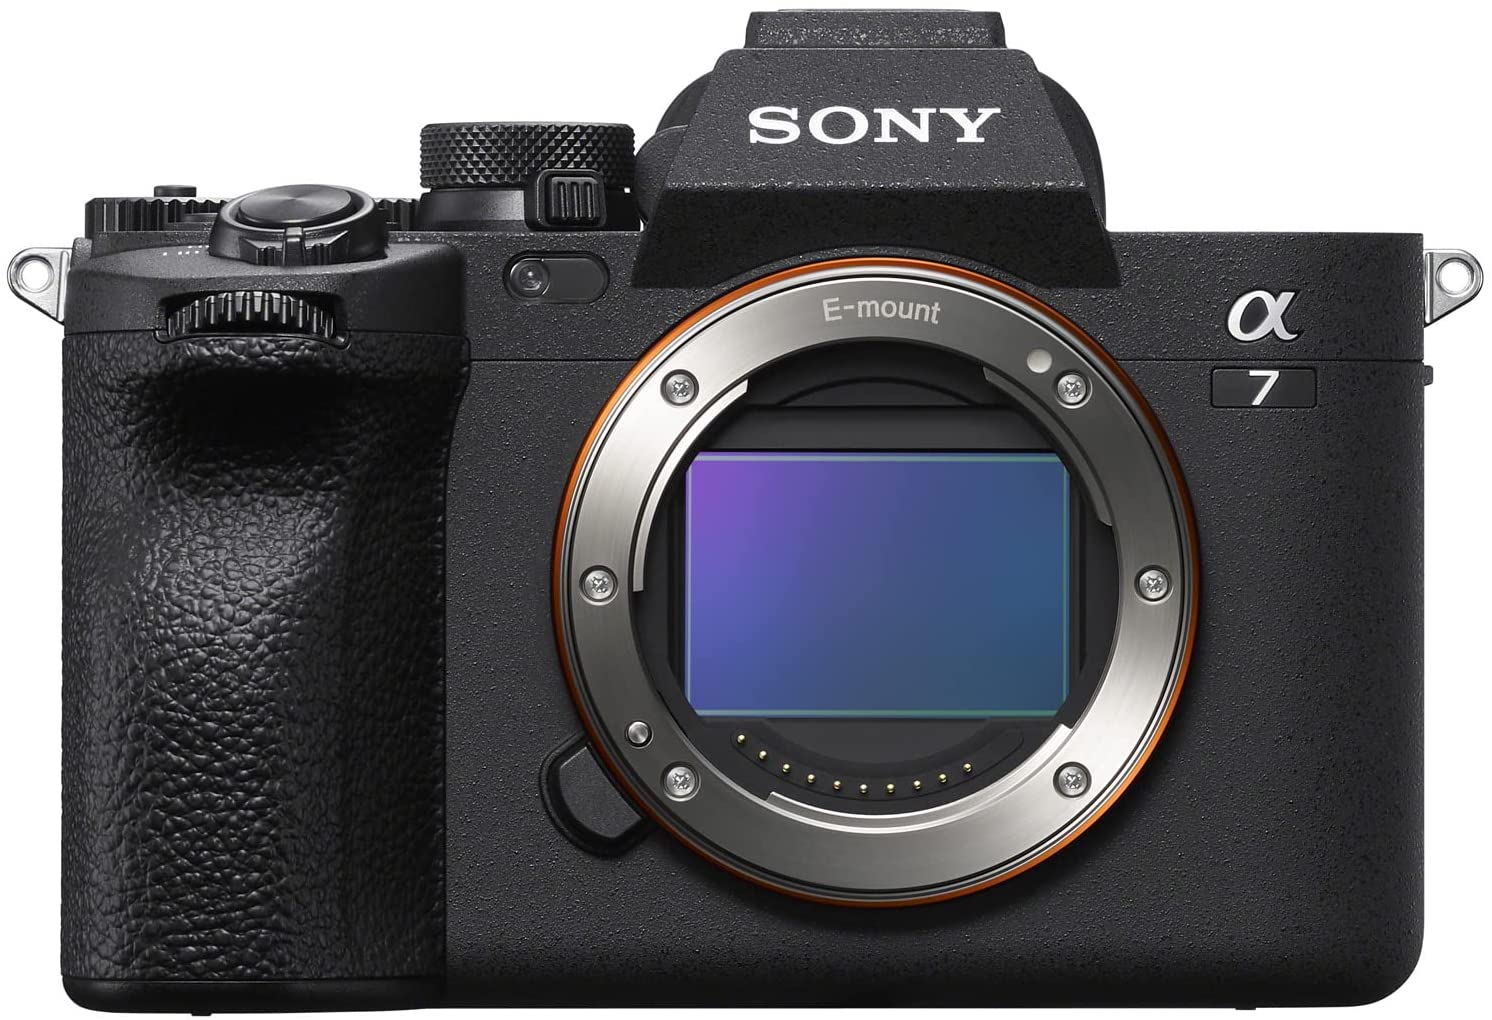
As a group, mirrorless cameras are one-hundred percent the best cameras for travel. They are smaller and lighter than DSLRs, but still give you the option of using interchangeable lenses! Sony were the pioneers of this new technology, and today they are still the unquestioned king of mirrorless cameras.
While you may be tempted to go for a full frame mirrorless like the Sony Alpha 7 IV, the best mirrorless camera for travel in my opinion is the Sony Alpha A6500. It’s noticeably more compact than the larger full frame alternatives, and the 24.1MP APS-C sensor is one of the sharpest and most advanced crop sensors on the market.
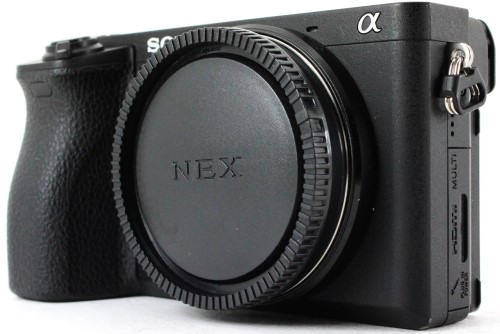
Other great travel features of the Sony A6500 are in-body stabilization, the option to record video in 4K or full HD, super fast autofocus, a weatherproof magnesium alloy body, and built-in wi-fi which lets you quickly and easily transfer your photos to your phone.
The A6500 has subsequently been replaced by the newer Sony Alpha A6600, but the differences are not substantial enough to warrant the huge difference in price. Better yet, shop second-hand and you are sure to find terrific bargains! MPB.com is an outstanding resource when looking for second-hand cameras and lenses, and always has endless choices in stock.
Learn More:
Best DSLR Camera for Travel
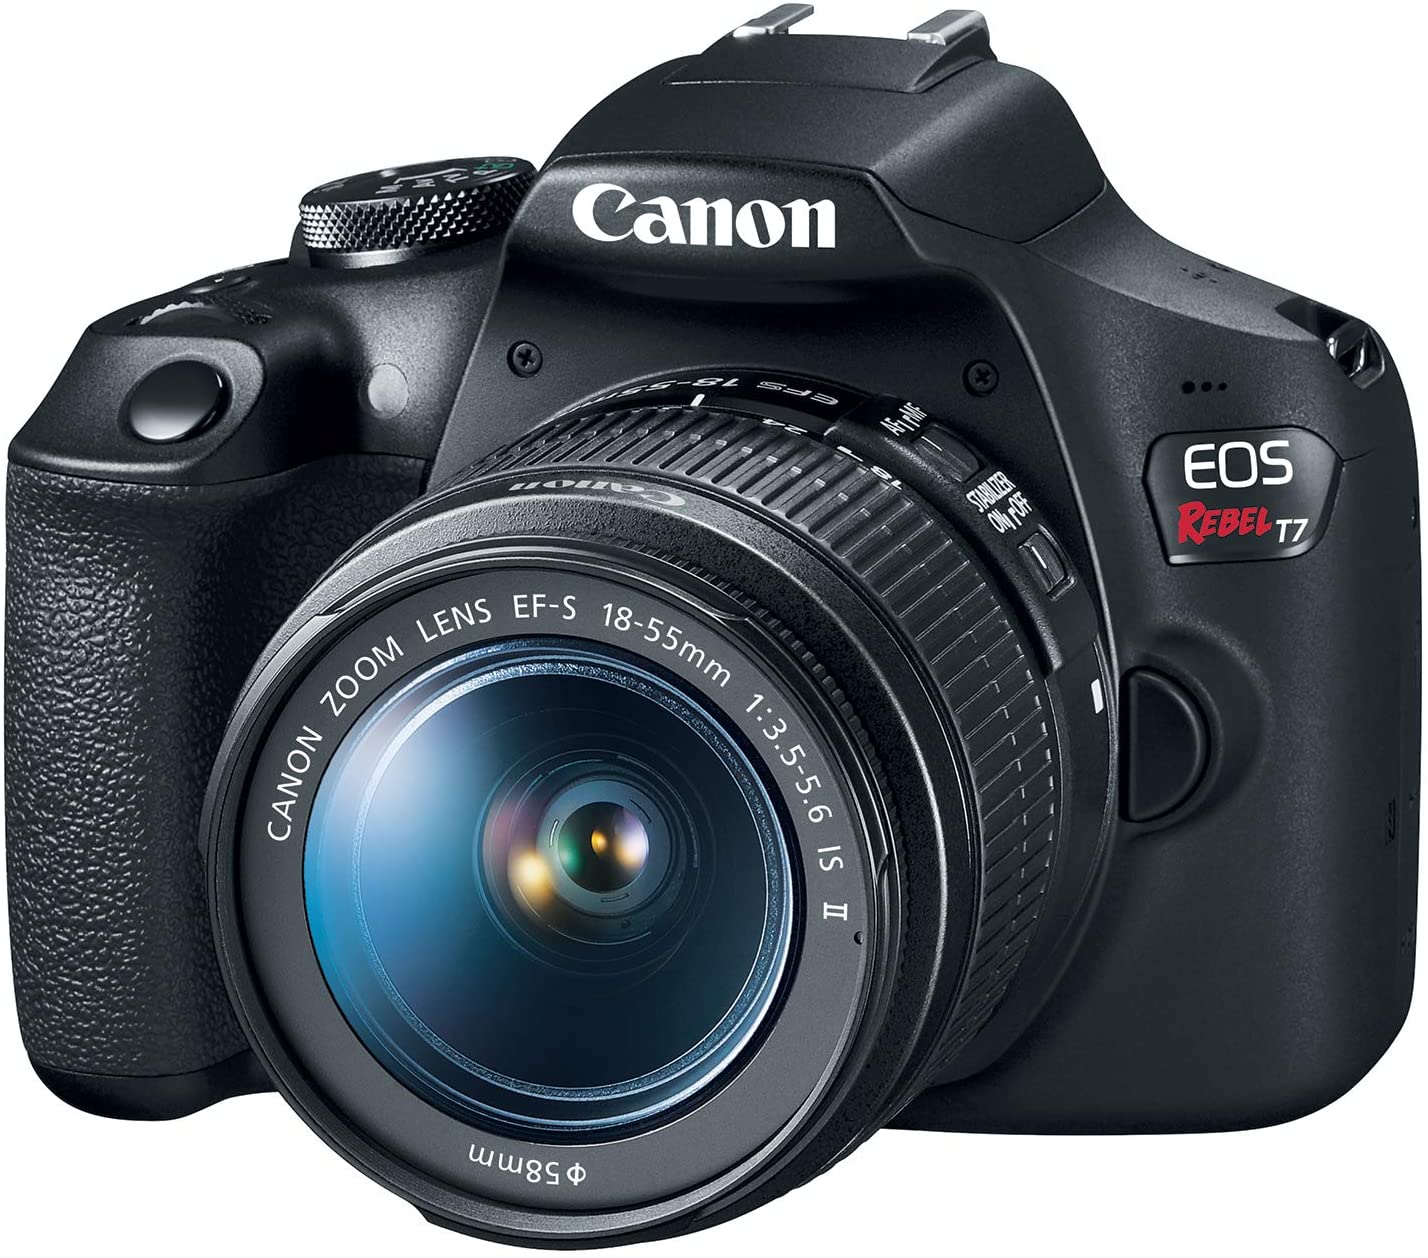
DSLRs tend to be heavier and bulkier than mirrorless systems, which is not the best for traveling, but if you have your sights set on a DSLR then the Canon EOS Rebel T7 is the best camera for travel.
The Canon Rebel T7 is considered an entry-level camera, but don’t let that fool you, it’s a fantastic machine! It features a new 24MP APS-C sensor, which is a noticeable upgrade from the 18MP sensor of the Rebel T6. Additionally, it has built-in wi-fi, multiple intuitive shooting modes, full HD video, and it’s extremely easy to use.
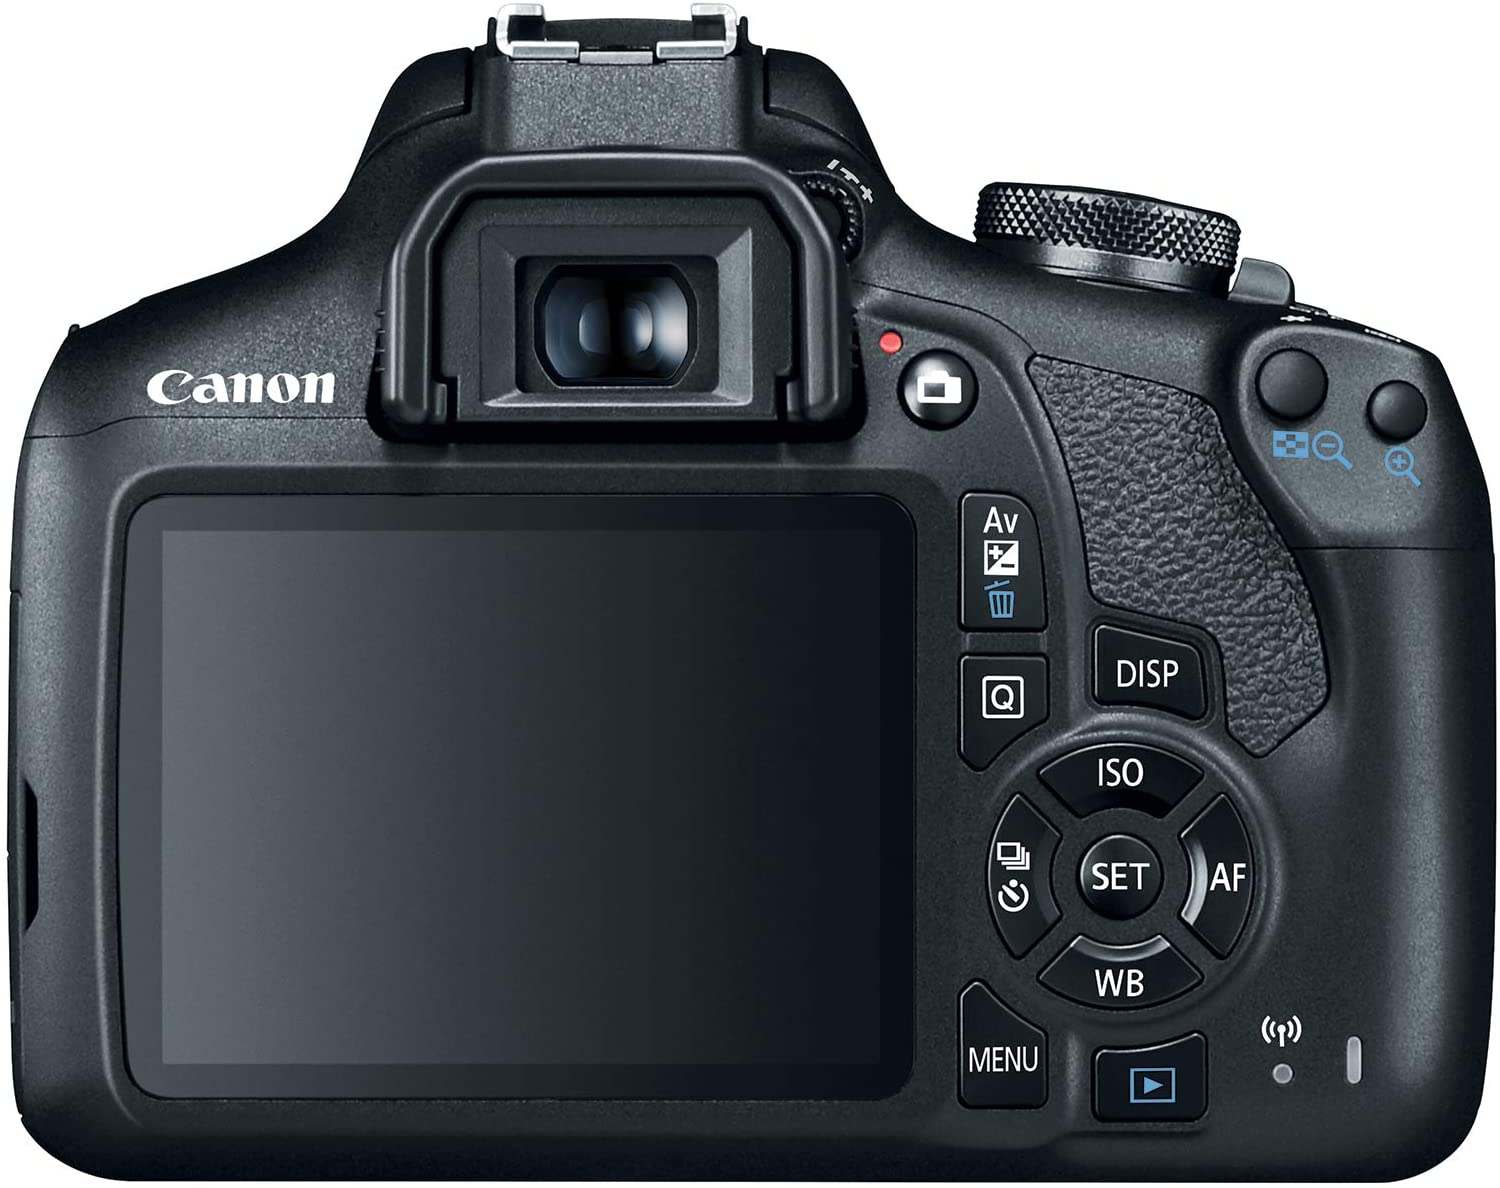
On top of those features, the real thing that makes this camera stand out is the price. You can get your paws on one of these brand new, with a kit lens, for only $449! That’s a fraction of the price you will pay for the majority of travel cameras.
Thanks to its easy-to-use features and low price tag, the Canon EOS Rebel T7 is without a doubt the best beginner camera for travel!
Best Action Camera for Travel
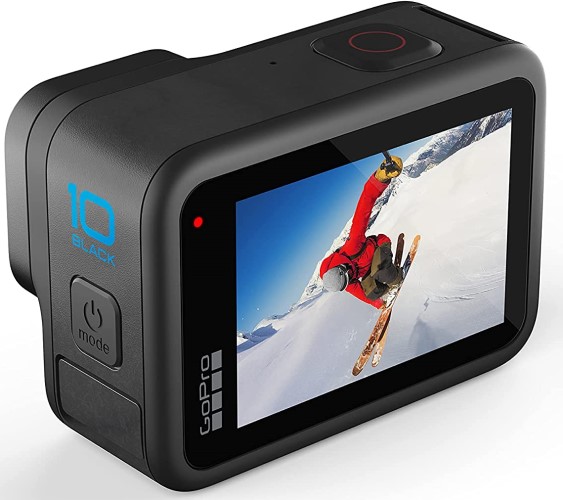
If you are an adrenaline junky, the GoPro Hero 10 Black is an absolute must-have item when traveling!
The recently released Hero 10 has a 23MP sensor and an all-new GP2 processor which it uses to be the first GoPro capable of recording 5K footage. It can shoot 5K at 60fps and 4K slow motion footage at up to 120fps. Let those numbers sink in for a moment, not even most high-end mirrorless and DSLR cameras can match them!

The addition of HyperSmooth 4.0 and horizon leveling software make video from even the most rigorous adventures look smooth. And saving the best for last, it’s fully waterproof up to 10m without the use of an additional case!
No matter your passion, scuba diving, biking, rock climbing, or kayaking, the GoPro Hero 10 Black is the best action camera for travel!
Best Phone Camera for Travel

If investing in a separate camera isn’t in the cards for you, but you still want to shoot amazing photos and videos, another great option is the Apple Iphone 13 Pro.
It possesses not one, not two, but three different cameras! A telephoto, a wide-angle, and an ultra-wide-angle. With all three built into the Iphone 13 Pro, you can be totally prepared at all times to capture absolutely anything.
Moreover, there are both optical and digital zooms which can magnify the image up to 15x. If all that wasn’t enough, there are new portrait and night modes which produce quite mind-blowing results.
I love all my cameras, and will always prefer shooting with a real camera over a phone, but the Iphone 13 Pro is the best phone camera for travel I’ve ever seen and the first phone to ever make even a small part of me think about leaving the camera at home.
Final Thoughts on the Best Camera for Travel
photo bymartin-dm via iStock
I hope you now have a better idea of which camera for travel is for you! The most important thing is finding one you like to use and won’t leave behind. Once you have the right one, you can finally document all those once-in-a-lifetime moments, and turn them into memories that will last forever!
Learn More:
We Recommend
Best Canon Camera for Travel
photo byMerlas via iStock
Canon is a kingpin in the world of cameras regardless of what type of photographer you are, and it's no different when it comes to travel photography.
Whether you are on the hunt for a pocket-sized compact travel camera, a traditional DSLR travel camera, or a newer best-of-both-worlds mirrorless travel camera, Canon makes them all!
So without further ado, let’s dive in and take a look at all the best canon camera for travel!
Best Compact Camera for Travel by Canon
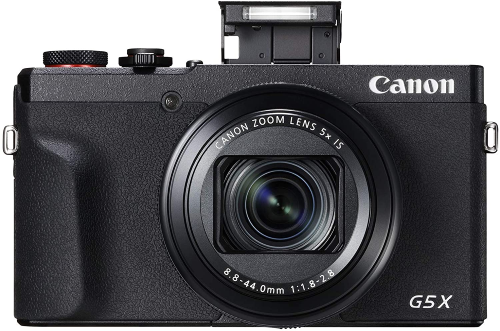
Compact cameras are popular choices for those looking to travel as minimally as possible, and the Canon G5 X Mark II is certainly my favorite Canon compact camera for travel.
The G5 X Mark II has a large 20.1MP sensor that delivers some of the sharpest images of any compact camera, and thanks to the new DIGIC 8 image processor it’s also one of the fastest. The autofocus is super quick, it can shoot continually at up to 20fps, and has a 30fps burst RAW burst mode.
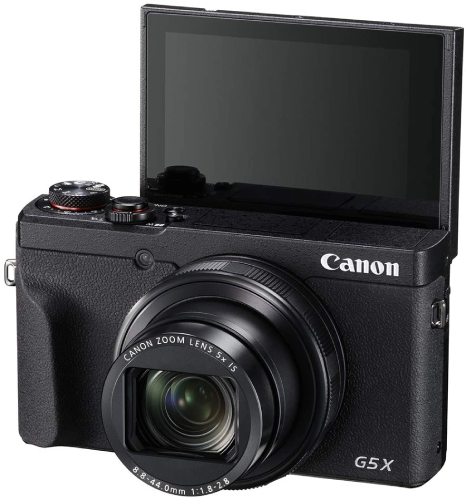
It has a 5x optical zoom lens which is the equivalent of 24-120mm. With those focal lengths you can shoot every type of travel photography! Furthermore, the f1.8-2.8 aperture lets you have a shallow depth of field and creates a beautiful bokeh effect when shooting travel street photography or travel portrait photography.
Switching over to video, it can record 4K footage at 30p and full HD at up to 120p. Those numbers are hard to come by in compact cameras and make the Canon G5 X Mark II one of the best compact cameras for travel if you plan to shoot both photos and video.
Other amazing travel features I love in this camera are the optical image stabilization, the 180° touchscreen LCD, built-in Wi-Fi and bluetooth, panoramic mode, macro mode, and the special star shooting mode!
Best Mirrorless Camera for Travel by Canon
Having used all different types of cameras, mirrorless cameras are my personal favorite for travel photography. They are more versatile than compact cameras since they have the ability to use interchangeable lenses, but they are smaller and lighter than DSLRs.
With that being said, the best Canon mirrorless camera for travel is the Canon EOS M50 Mark II. It has a 24MP APS-C sensor, the same upgraded DIGIC 8 image processor as the G5 X Mark II, and comes at a much cheaper price than comparable mirrorless cameras from other brands!
While the camera shoots great stills, where it has really made a name for itself is among travel vloggers. They just can’t seem to get enough of this camera! Video features they love are the ability to shoot both 4K and full HD, a 30-minute recording limit, face and eye-tracking autofocus, vertical video mode, a fully articulating screen, and live streaming to YouTube.
One of the best features of the M50 Mark II, along with all other Canon mirrorless cameras, is its ability to use EF Canon lenses with an adapter. That means if you are a long-time Canon DSLR user and want to make the switch over to a lighter mirrorless camera for travel, all your old lenses will still work!
The two biggest features I would like to see added to future models of the M50 are in-body stabilization and USB charging. These are two super-useful travel features and some of the only things holding it back from being the perfect mirrorless camera for travel!
Learn More:
Best DSLR Camera for Travel for Beginners
While DSLRs may not be the lightest cameras out there, they are still a popular camera thanks to their long history and relatively low prices. If you are on a budget, getting a beginner DSLR camera for travel is no doubt the best option!
My top pick is the Canon EOS Rebel SL3! Released in 2019, it's the smallest and lightest EOS DSLR ever made and a terrific entry-level travel camera. It has a 24.1MP APS-C sensor which produces crisp images, is extremely beginner-friendly, and can be bought new or used at an excellent price. A great place to look for used cameras is MPB.com.
Additionally, it can record 4K video and can create beautiful 4K timelapse videos without the need of any external software. The time-lapse movie mode is something long-time Canon users have been begging for for years!
The true stand-out feature of this camera however is the battery life! While most mirrorless cameras get somewhere in the range of 300-400 shots per battery, the Rebel SL3 can take a mind-boggling 1,070! When on the road you can never be certain when you’ll have access to power, so all that extra battery life is sure to come in handy.
Best DSLR Camera for Travel for Professionals
If you’re a more serious photographer, the best Canon camera for travel is the Canon EOS 5D Mark IV. Due to its large price tag and bulky frame, it’s not the optimal travel camera for the average person, but if you are a professional it’s an easy choice!
It has a giant 30.4MP full frame sensor that produces unmatched image quality when compared against the rest of Canon’s camera lineup.
On top of that, it produces stunning 4K video that rivals much more expensive cinema cameras. It’s no wonder this all-around beast of a camera is a top choice by both professional photographers and videographers alike.
Another crazy cool travel feature is the built-in Wi-Fi and GPS that allows you to instantly share photos to your phone and select social media sites! This is incredibly useful and saves a lot of time when you just want to make a quick post.
Other Canon Cameras for Travel to Consider
Not totally sold on one of the travel cameras above? Check out these other stellar Canon travel camera options!
- Canon PowerShot SX70
- Canon EOS Rebel T7
- Canon EOS M200
- Canon Powershot G7 X Mark III
- Canon EOS M6 Mark II
Learn More:
We Recommend
Best Canon Lens for Travel Photography

photo bymartin-dm via iStock
If you have a Canon camera and aren’t sure what Canon lens to bring on your next trip, you’ve come to the right place! I’m here to tell you which are the best canon lenses for travel photography and why.
The main thing to consider when deciding on a Canon travel lens is portability. Other things you will want to consider are focal length, aperture, image stabilization, mount compatibility, weather sealing, and, of course, price.
When traveling, you have limited space and, unfortunately, most of the time, it’s impossible to bring your whole kit. Carrying only one or two lenses is what I recommend for most people. That’s why choosing the right lenses is critical!
Zoom lenses are a popular choice for travel photographers due to their versatility, while new superzoom lenses are also gaining popularity. Prime lenses are less versatile, and telephoto’s are often quite heavy, but depending on the type of travel photography you like to shoot, they can also come in handy.
With all that said, let’s jump into this ultimate guide of the best Canon lenses for travel photography!
Best Canon Zoom Lens for Travel Photography

The Canon EF 24-105mm f/4L IS USM is my overall favorite canon travel lens! Speaking plainly, it’s hands down one of the best lenses for travel photography ever built, regardless of brand.
For starters, it weighs in at a very reasonable 1 pound, 8 ounces, and has an incredibly useful 24-105mm focal length. If you’re using it on an APS-C camera, the focal length grows by 1.6x to 38.4-168mm.
Additionally, the constant f/4 aperture helps in low light situations and creates a nice bokeh effect when shooting portraits and street photography.
If you shoot video, this lens works great too! It has image stabilizer technology built into the lens, which helps avoid shaky footage, and if paired with a gimbal, it works even better! It’s a top choice by travel vloggers, wedding videographers, and documentary filmmakers alike.
Other fantastic features of this Canon lens for travel photography include a dust and moisture resistant metal construction, silent and quick autofocus, and a large easy to use focus ring.
Best Canon Superzoom Lens for Travel Photography
Superzooms have been getting extremely popular in the world of travel photography in recent years due to more of them being made as well as the fact that they cover such a wide range of focal lengths.
Without a doubt, the best superzoom lens for travel photography is the Sigma 18-300mm f/3.5-6.3 DC Macro OS HSM! If you only want to carry one lens when you travel, this is certainly the best Canon lens for travel photography.
At almost half the price of the Canon 24-70mm that we just spoke about, this is a terrific budget lens for travel photography. It weighs in 1 pound, 5 ounces,, which is also less than the 24-70mm and has an unbelievable zoom range of 18-300 (28.8-480 with an APS-C camera).
More travel features I love are the fast autofocus, optical stabilization, a zoom lock switch which helps prevent accidental zoom adjustments, and its compact build.
The biggest faults of this lens are the plastic body and the lack of any sort of weather resistance. When shooting outdoors, you have to be a little more careful with it and try to avoid dust and water. Also, when compared with the Canon 24-70mm, the images aren’t quite as sharp.
Learn More:
Best Canon Prime Lens for Travel Photography
The Canon EF 50mm f/1.8 STM is the perfect prime lens for travel photography to pair with a traditional zoom lens. This nifty fifty is compact and lightweight (6 ounces) and will take up almost no additional space in your camera bag.
With this lens on, your camera will be much more low key and may even fit in your jacket pocket, depending on which body you pair it with.
The 50mm focal length is the closest to that of the natural eye and is a superb option for street photography. Additionally, the f/1.8 aperture makes this lens great for shooting portraits, sports, and astrophotography!
Further features this lens provides are an 80mm focal length when paired with an APS-C camera, smooth and silent autofocus when shooting video, a metal mount to increase its durability, and the fact that it’s the most compact Canon 50mm lens ever!
Best Canon Telephoto Lens for Travel Photography
The majority of people won’t want to travel with a telephoto lens since they are some of the biggest and heaviest lenses out there, but if you like photographing animals, sports, or super detailed shots (of architecture, for example), you may decide you need to pack one.
My go-to Canon telephoto lens for travel photography is the Canon EF 100-400mm f/4.5-5.6L IS II USM. That’s a whopping 160-640mm when paired with an APS-C crop sensor camera. It’s compact for a lens of its focal length, but at 3 pounds, 7 ounces, it’s definitely not light.
This lens was built for the outdoors and is extremely weather-resistant. You can comfortably take this beast even into the harshest of conditions without a second thought.
Moreover, it has three image stabilization modes that deliver astounding results no matter the situation. There are tons of customization options on this lens, too, so you can set it up and adjust it however it best works for you.
One thing to keep in mind is that this is certainly a professional lens. The performance and the price tag both reinforce that. While the quality of the images is hard to match, unless you are a pro photographer, I’d opt for a superzoom such as the Sigma 18-300mm f/3.5-6.3 DC Macro OS HSM.
Final thoughts on the Best Canon Telephoto Lens for Travel Photography
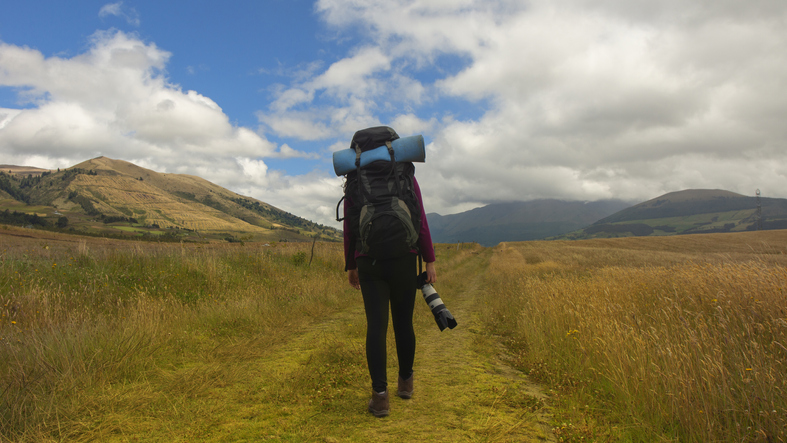
photo byalejomiranda via iStock
Personally, I like to travel with two lenses when I travel. If I’m going to be mostly staying in the city, I’ll go for a setup that includes a zoom lens and a prime lens.
On the other hand, if I’m going to be heading into nature, I like to pack a superzoom and a prime. The extra zoom range is useful for both wide dramatic landscapes shots as well as close-up animal shots.
Want to see more options? Check out these bonus Canon lenses for travel photography:
- Canon 24-70mm f/2.8L II
- Sigma 18-200mm f/3.5-6.3 DC Macro OS HSM
- Canon EF 16-35mm f/4L IS
- Tamron 28-300mm f/3.5-6.3 Di VC
- Tamron 18-400mm f/3.5-6.3 VC
And if you have a Canon mirrorless camera with the RF mount, these lenses are great choices:
- Canon RF 50mm f/1.8 STM
- Canon RF 24-70mm F2.8 L IS USM
- Canon RF 15-35mm F2.8 L IS USM
- Canon RF70-200mm F4 L is USM
Learn More:
We Recommend
Best National Parks for Photography in the Pacific Northwest
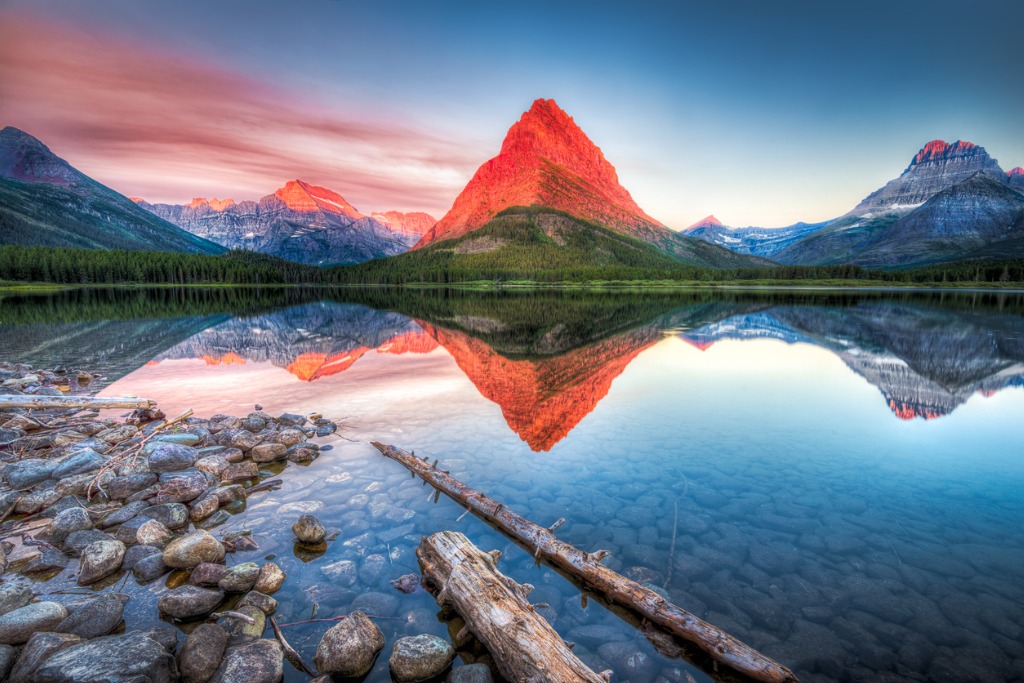
photo byDean_Fikar via iStock
The Pacific Northwest boasts some of the most spectacular nature in the country and is made up of Washington, Oregon, and parts of Idaho and Montana.
It’s home to five national parks featuring magical glaciers, towering mountains, hidden alpine lakes, dormant volcanoes, pacific coastline, and even wild grizzlies.
My top overall tip for national park photography that applies to every park is to arrive early and stay late. Sunrise and sunset are two of the best times for photographers to capture sensational images, and on top of that, you will avoid the crazy crowds.
Two other important things to keep in mind when visiting national parks are that some of the most iconic destinations require permits to visit, which must be booked months in advance, and that drones are strictly prohibited inside the borders of every park unless you have a special use permit.
Keep reading this ultimate Pacific Northwest national parks photography guide to discover which parks are the best to visit for photographers, where the top photo spots are in each park, and much much more!
Best National Parks for Photography in the Pacific Northwest: Glacier National Park
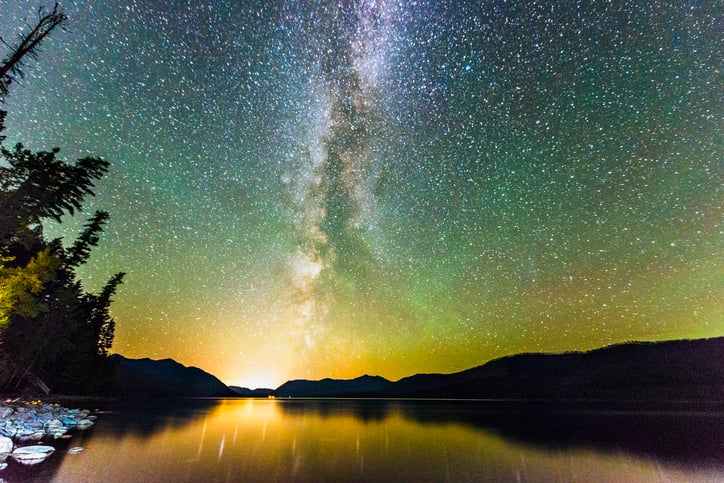
photo byBoogich via iStock
Located in northwestern Montana, Glacier National Park is a giant 1,583 square mile wilderness area that pushes up against the border with Canada. It’s not often mentioned side by side with the most famous national parks, but it absolutely should be! In my opinion, this is the best national park for photography not only in the Pacific Northwest but in the whole country!
Driving the Going-to-the-Sun Road and visiting Lake McDonald are the two most popular things to do in the park, but they are only the tip of the iceberg! If you have time to hike into the backcountry, you will be rewarded with some truly amazing views that most people don’t get to see.
Additionally, if you are a fan of wildlife, Glacier National Park is one of the best national parks for photographers. Moose, bighorn sheep, and grizzly bears all call this nature sanctuary home. For the best chance to see any of these majestic creatures, head out with your telephoto lens at dusk or dawn. Please make sure to always respect the animals and keep a safe distance away, though.
Photography Tip: Visit as soon as you can if you want to see a glacier! Unfortunately, due to global warming, the glaciers are shrinking in size every year and may one day disappear completely.
Here’s a list of some of the most popular spots for Glacier National Park photography:
- The Going-to-the-Sun Road
- Lake McDonald
- Grinnell Glacier
- Iceberg Lake
- Logan Pass
- Two Medicine Lake
- Hidden Lake Overlook
- Swiftcurrent Lake
Best National Parks for Photography in the Pacific Northwest: North Cascades National Park
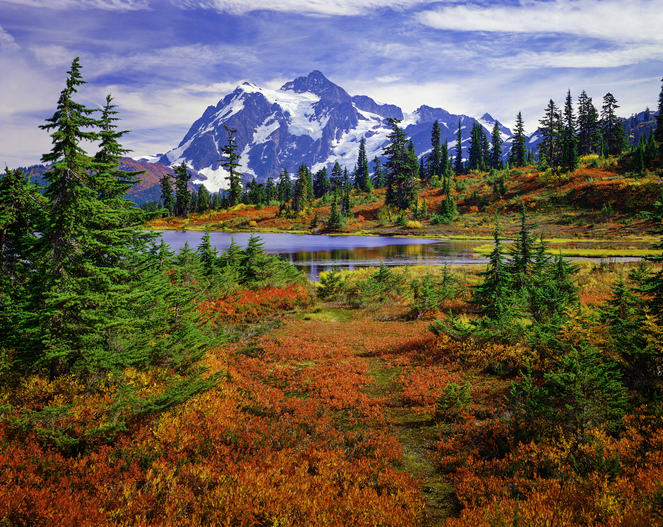
photo bydszc via iStock
North Cascades National Park is an off-the-beaten-path gem many people haven’t even heard of. It’s nestled away in the North Cascade mountain range a little more than two hours north of Seattle and is a remote alpine wonderland! It’s full of picturesque jagged peaks, cascading waterfalls, and over 300 glaciers.
Peak season is summer, and it’s the best time to visit unless you are experienced in alpine environments and ready to be fully self-sufficient. All park visitor and information centers close in late September or early October and don’t open back up until late May.
Photography Tip: Bring your backpacking gear! If you want to leave North Cascades National Park with the best photos possible, staying a few nights in the backcountry and exploring the trails by foot is the way to go.
Here’s a list of some of the most popular spots for North Cascades National Park photography:
- Sourdough Mountain Lookout
- Cascade Pass
- Heather Meadows
- Table Mountain
- Lookout Mountain
- Skyline Divide
- Washington Pass Overlook
- Park Butte
Learn More:
- Best National Parks for Photography in the Southwest
- Grand Teton National Park Photography and Travel Guide
Best National Parks for Photography in the Pacific Northwest: Crater Lake National Park
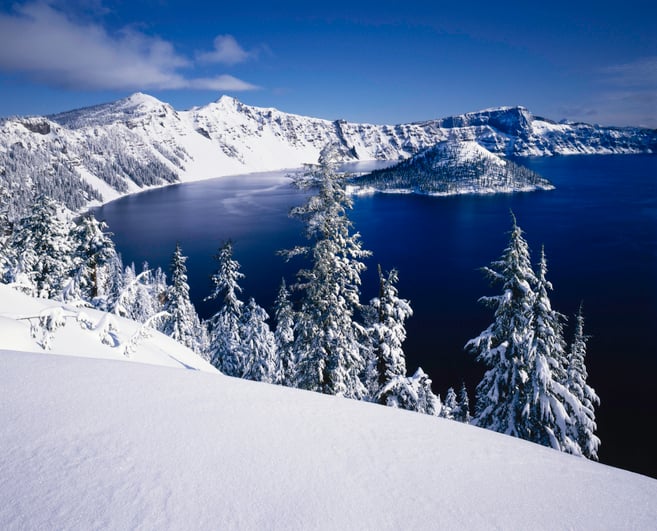
photo byRon and Patty Thomas via iStock
Crater Lake National Park is one of the most unique National Parks for photography in the United States. Formed inside an massive ancient volcano that last erupted some 7,700 years ago, the water of Crater Lake is exceptionally clean and has a beautiful blue hue that stands out in photos thanks to the fact that it all comes from rain and snowmelt.
The unquestioned star of Crater Lake National Park is Wizard Island! It’s actually another small cinder cone volcano that pops up in the middle of the lake and looks stunning in photos. Also, there's the tiny Phantom Ship Island which is rough and rugged and lots of fun to shoot.
The best way to see the whole lake and capture all the different angles is by completing the Rim Drive. It has 23 viewpoints to stop at, each offering special views.
Photography Tip: Pack a lens for astrophotography! The top of the crater has an elevation of 6,173 feet, and there’s almost no light pollution which makes it a terrific place to take photos of the stars on a clear night.
Here’s a list of some of the most popular spots for Crater Lake National Park photography:
- Drive the Rim Drive loop
- Watchman Peak Overlook
- Discovery Point
- Watchman Peak Trail
- Sun Notch Viewpoint
- Cleetwood Cove Trail
More National Parks for Photography in the Pacific Northwest
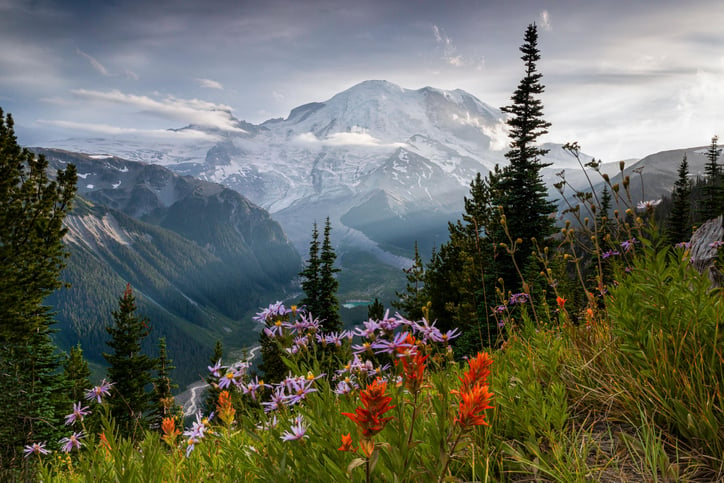
photo byarshad ullah via iStock
Those may be the most picturesque National Parks for Photography in the Pacific Northwest, but they are far from the only ones! Here are the rest of the beautiful National Parks, plus a couple bonus photo destinations in Washington, Oregon, and Montana!
- Mt. Rainier National Park
- Olympic National Park
- San Juan Islands National Historic Park
- Colchuck Lake and Alpine Lakes Wilderness
- Three Sisters Oregon
- Mt. Hood National Forest
- Bighorn Canyon National Recreation Area
- Giant Springs State Park
Create a Great Landscape Photography Kit With These Items:
- ND Filter Kit
- Travel Tripod
- Canon EOS R5
- Canon RF 15-35mm F2.8 L IS USM
- Acratech GP-SS Ball Head
- Haida M10 Pro Filter Kit with Drop-In Circular Polarizer
- Haida M10 ND Filter Kit
- Peak Design Everyday Backpack V2
Learn More:
We Recommend
Best National Parks for Photography in the Southwest
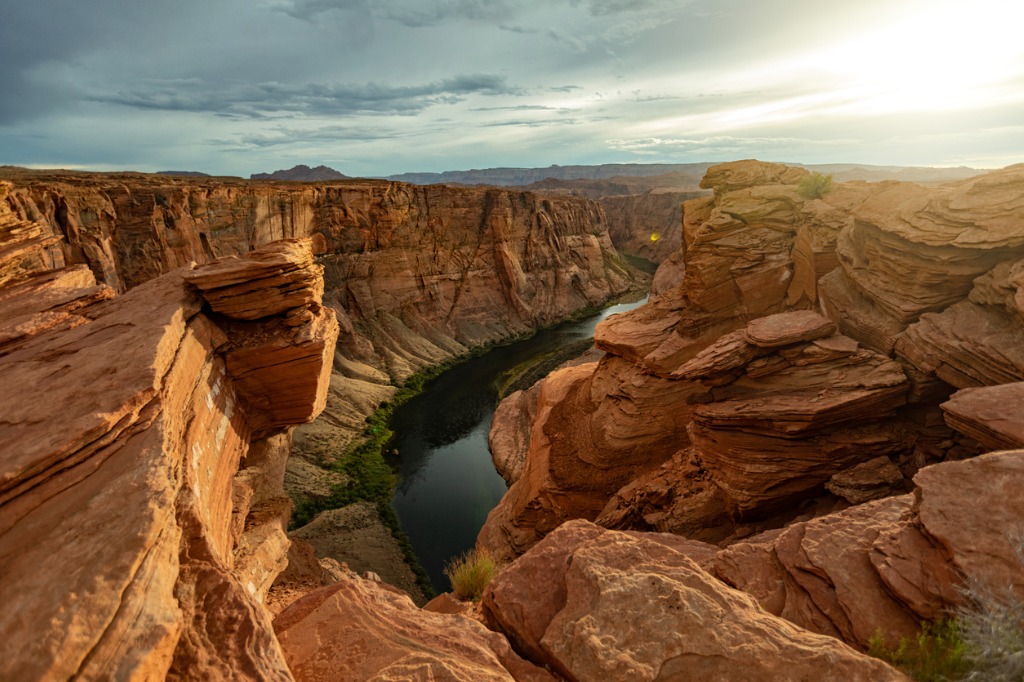
photo bypiola666 via iStock
For many photographers, the Southwest region made up of Arizona, Utah, New Mexico, and Nevada is their dream part of the country to shoot in!
The desert landscapes are home to eleven national parks featuring larger-than-life canyons, sweeping sand dunes, strange rock formations, an abundance of wildlife, and cacti as tall as trees!
My top overall tip for national park photography, which applies to every park, is to arrive early and stay late. Sunrise and sunset are two of the best times for photographers to capture sensational images, and on top of that you will avoid the crazy crowds!
Two other important things to keep in mind when visiting national parks are that some of the most iconic destinations require permits to visit which must be booked months in advance, and that drones are strictly prohibited inside the borders of every park unless you have a special use permit.
Keep reading this ultimate Southwest national parks photography guide to discover which parks are the best to visit for photographers, where the top photo spots are in each park, and much much more!
Best National Parks for Photography in the Southwest: Grand Canyon National Park

photo byMundusImages via iStock
Located in Northern Arizona, Grand Canyon National Park boasts one of the seven natural wonders of the world and is one of the most recognizable places on earth! Home to a 277-mile-long canyon that reaches depths of up to a mile, there's no shortage of spectacular views and photo opportunities.
The South Rim of the Grand Canyon is the most visited area of the park and has the majority of the famous viewpoints, but the North Rim is a great spot to visit if you are looking for an off the beaten path location with less tourists. Hiking down into the canyon or flying over it in a helicopter are both phenomenal ways to capture unique perspectives as well!
Photography Tip: Bring a range of ND filters when photographing southwest national parks! The sun is super bright during the day and they can help avoid overexposed images.
Here’s a list of some of the most popular spots for Grand Canyon National Park photography:
- Yaki Point
- Mather Point
- Mohave Point
- Hopi Point
- Desert View Point
- Point Imperial
- Bright Angel Point
- Cape Royal
- Cedar Ridge
- Horseshoe Mesa
- Plateau Point
Best National Parks for Photography in the Southwest: Zion National Park
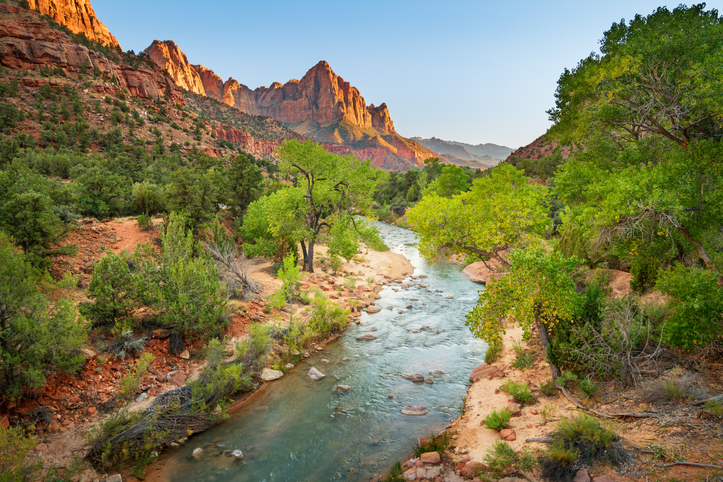
photo bybenedek via iStock
Zion National Park is tucked away in the Southwest corner of Utah and it's unquestionably one of the top national parks for photography in the Southwest! While it may not have the name recognition of the Grand Canyon, you may be surprised to learn that on average Zion actually receives more visitors per year.
The jagged red cliffs are the star of the park, but the narrow slot canyons, winding rivers, hanging gardens, and waterfalls are all fantastic landscapes to shoot too!
Photography Tip: Come prepared with waterproof gear. Some of the best photos of this southwest national park can only be taken if you aren’t afraid to get a little wet.
Here’s a list of some of the most popular spots for Zion National Park photography:
- Angel’s Landing
- The Narrows
- Canyon Junction Bridge
- Observation Point
- Towers of the Virgin
- Canyon Overlook
- Lower Pine Creek Falls
- Emerald Pools
Learn More:
Best National Parks for Photography in the Southwest: Saguaro National Park
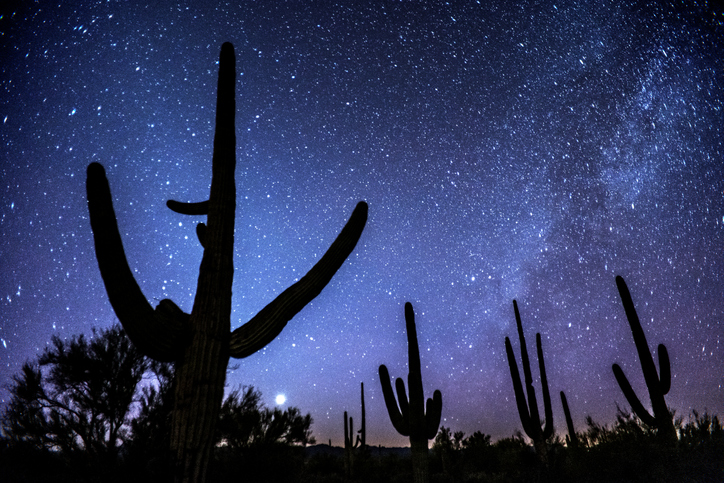
photo byCampPhoto via iStock
Saguaro National Park in Tucson, Arizona is a magical place like no other, and I’m not just saying that because I grew up in Tucson! The iconic saguaro cactus can only be found in the Sonoran Desert of Arizona and Mexico, and here you will find literal forests of these majestic cacti.
Furthermore, it’s one of the best national parks for photography in the Southwest due to the diverse amount of wildlife. From cute cats, to rare snakes and lizards, to hundreds of species of birds, Saguaro National Park is a haven for wildlife photographers!
Photography Tip: Pack a good lens for shooting in the dark and a sturdy tripod because you can take some astonishing astrophotography images if you are willing to stay out late!
Here’s a list of some of the most popular spots for Saguaro National Park photography:
- Gates Pass
- Red Hills Visitor Center
- Bajada Loop Drive
- Petroglyphs
- Wasson Peak
- Arizona-Sonora Desert Museum
- Saguaro East
Best National Parks for Photography in the Southwest: Arches National Park
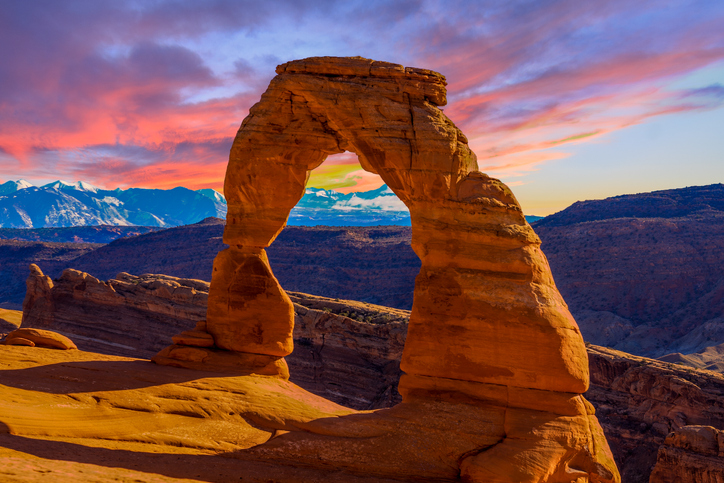
photo byjose1983 via iStock
Welcome to Mars, no wait, it’s actually Arches National Park in eastern Utah! Driving through Arches, located just outside of Moab, truly does feel like you’ve been transported to some strange alien planet.
And who wouldn’t want to capture otherworldly landscapes on camera?! Everything from the red color of the earth to the wacky rock formations presents gorgeous photo opportunities. All in all, the park features over 2,000 natural stone arches, let’s see how many you can track down!
Photography Tip: Bring sturdy hiking shoes and a water bottle. While not extremely strenuous hikes, all the top-tier photo points require some walking to get to.
Here’s a list of some of the most popular spots for Arches National Park photography:
- Delicate Arch
- Double Arch
- Balanced Rock
- The Windows
- Fiery Furnace
- Courthouse Towers
- Park Avenue
- Arches Scenic Drive
- Landscape Arch
Best National Parks for Photography in the Southwest: White Sands National Park
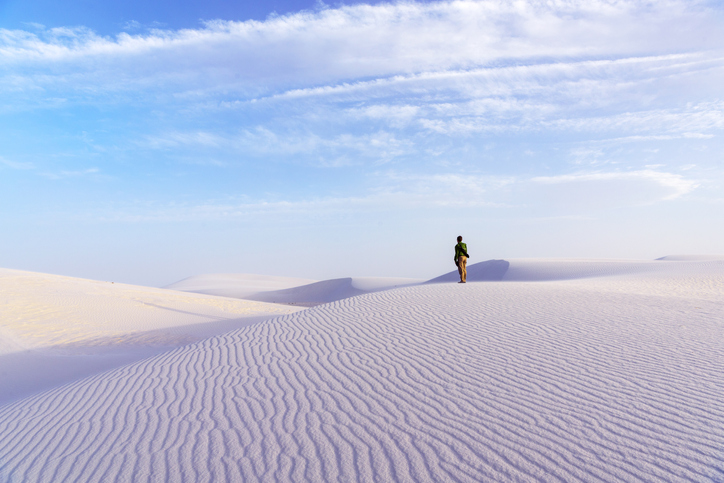
photo byYayaErnst via iStock
White Sands National Park is one of the newest in the country, making the switch from National Monument to National Park only in 2019. It also happens to be on the top national parks for photography in the Southwest!
Situated in southern New Mexico, it has 275 square miles of sand dunes, which makes it the largest gypsum dunefield in the world. The barren environment makes it easy to create stunning photos, and including a subject in your photos is a great way to show off just how vast the seemingly never ending desert is!
Photography Tip: Always carry a cleaning kit with you! Having one on hand will allow you to get the sharpest images even if sand gets in your camera.
Here’s a list of some of the most popular spots for White Sands National Park photography:
- Alkali Flats Trail
- Playa Trail
- Dune Life Nature Trail
- Backcountry Loop
- Interdune Boardwalk
More National Parks for Photography in the Southwest
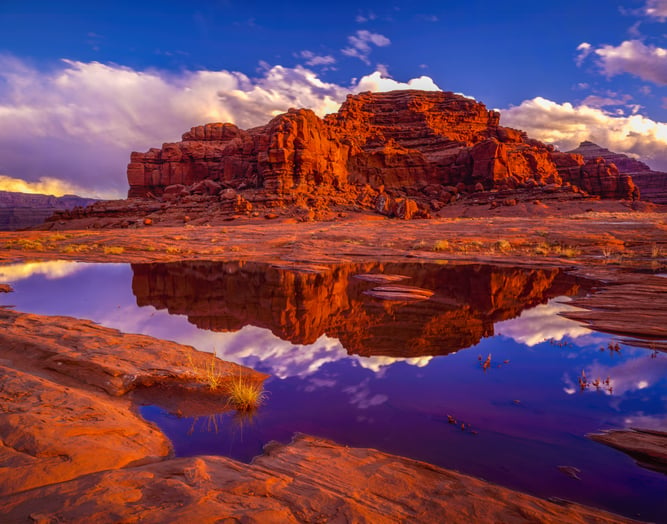
photo byRon and Patty Thomas via iStock
Those may be the most picturesque national parks for Photography in the Southwest, but they are far from the only ones! Here are the rest of the beautiful national parks, plus a couple bonus photo destinations in Arizona, Utah, Nevada, and New Mexico!
- Canyonlands National Park
- Petrified Forest National Park
- Bryce Canyon National Park
- Great Basin National Park
- Capitol Reef National Park
- Carlsbad Caverns National Park
- Horseshoe Bend
- Antelope Canyon
- Monument Valley
Recommended Landscape Photography Gear:
- Canon EOS R5
- Peak Design Travel Tripod
- Acratech GP-SS Ball Head
- Haida M10 Pro Filter Kit with Drop-In Circular Polarizer
- Haida M10 ND Filter Kit
- Peak Design Everyday Packpack V2
Learn More:
- How to Increase the Wow Factor of Wide-Angle Landscape Photography
- Advanced Landscape Photography Tips
We Recommend
Brazil Photography and Travel Guide
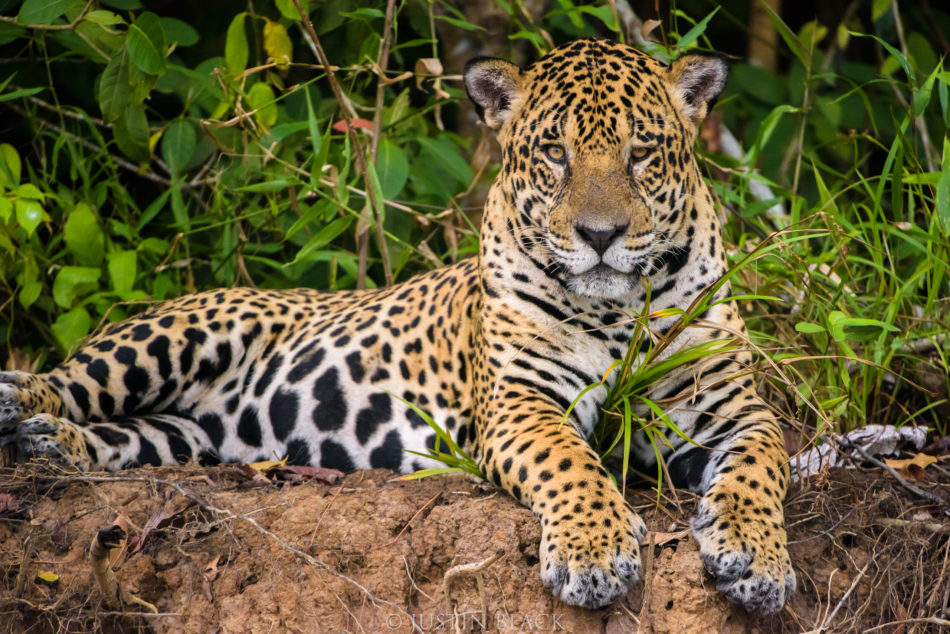
photo by Justin Black
National Geographic named the Pantanal, “Brazil’s Best Kept Secret,” because while most photographers have their eyes on the Amazon rainforest, the Pantanal truly has the most biodiversity.
The Pantanal is part national park, part UNESCO World Heritage site, and all a dream come true for landscape, nature, and wildlife photographers.
Plus, it’s huge at over 70,000 square miles. No wonder it’s Brazil’s best-kept secret! Even if you’ve visited the area before, you’ve probably barely begun.
While you’re planning your first trip to Brazil, don’t forget the Pantanal and don’t forget these tips and tricks to make the most of your time there.
What to Photograph in Brazil - Landscapes

Photo by Sébastien Goldberg on Unsplash
The Pantanal is the world’s largest freshwater wetlands, so it goes without saying that the landscapes here are breathtaking (and many are undiscovered). Because of the absence of roads, the Pantanal is both the landscape photographer’s best friend and worst enemy.
While there will be no people or manmade structures to obscure your views, there will also be a high chance of flooding and an even higher chance of not showering for a few days.

photo byVideowok_art via iStock
One of the prettiest landscapes in the Pantanal are the areas where giant lily pads lie in abundance.
Of course, while you’re out photographing these giant lily pads you will need to be hyper aware because anywhere there is water there are also caimans.
And it’s difficult to see them until you are almost on top of them. The hissing alone is enough to give you a heart attack!
What to Photograph in Brazil - Jaguars
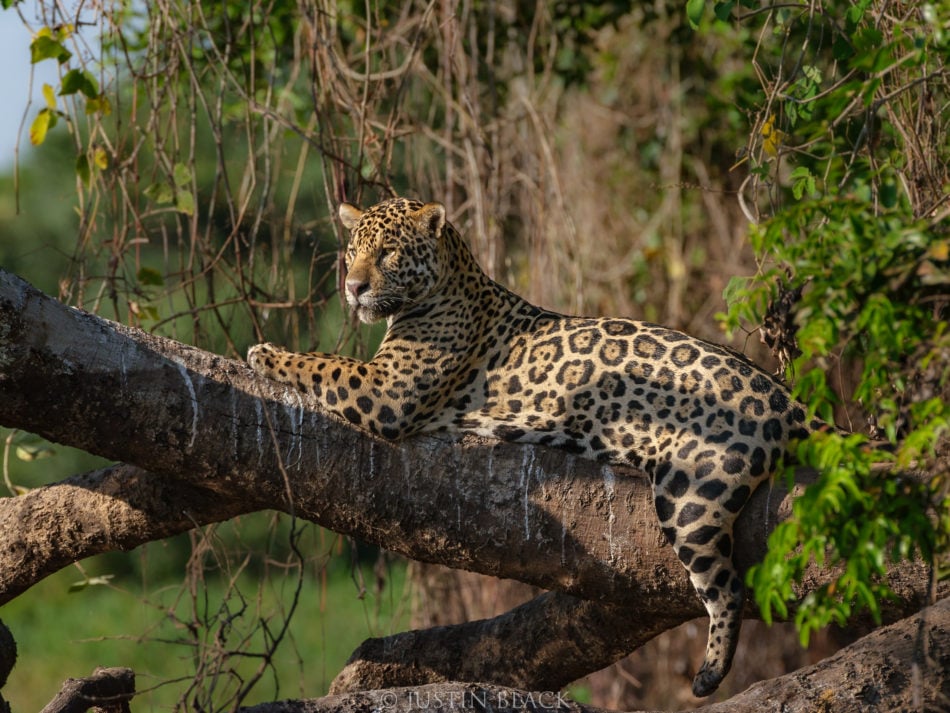
photo by Justin Black
The Pantanal’s biggest attraction is its abundance of jaguars. Jaguars are incredibly elusive in most parts of the world, considering there are only 64,000 of them in all of the Americas.
In the Pantanal there are 9 jaguars every 40 miles, the highest concentration anywhere in the world.
Plus, unlike the Amazon rainforest, the Pantanal is mostly open wetlands, so your chances of spying a jaguar are much higher. Imagine trying to photograph this through brown and black branches.
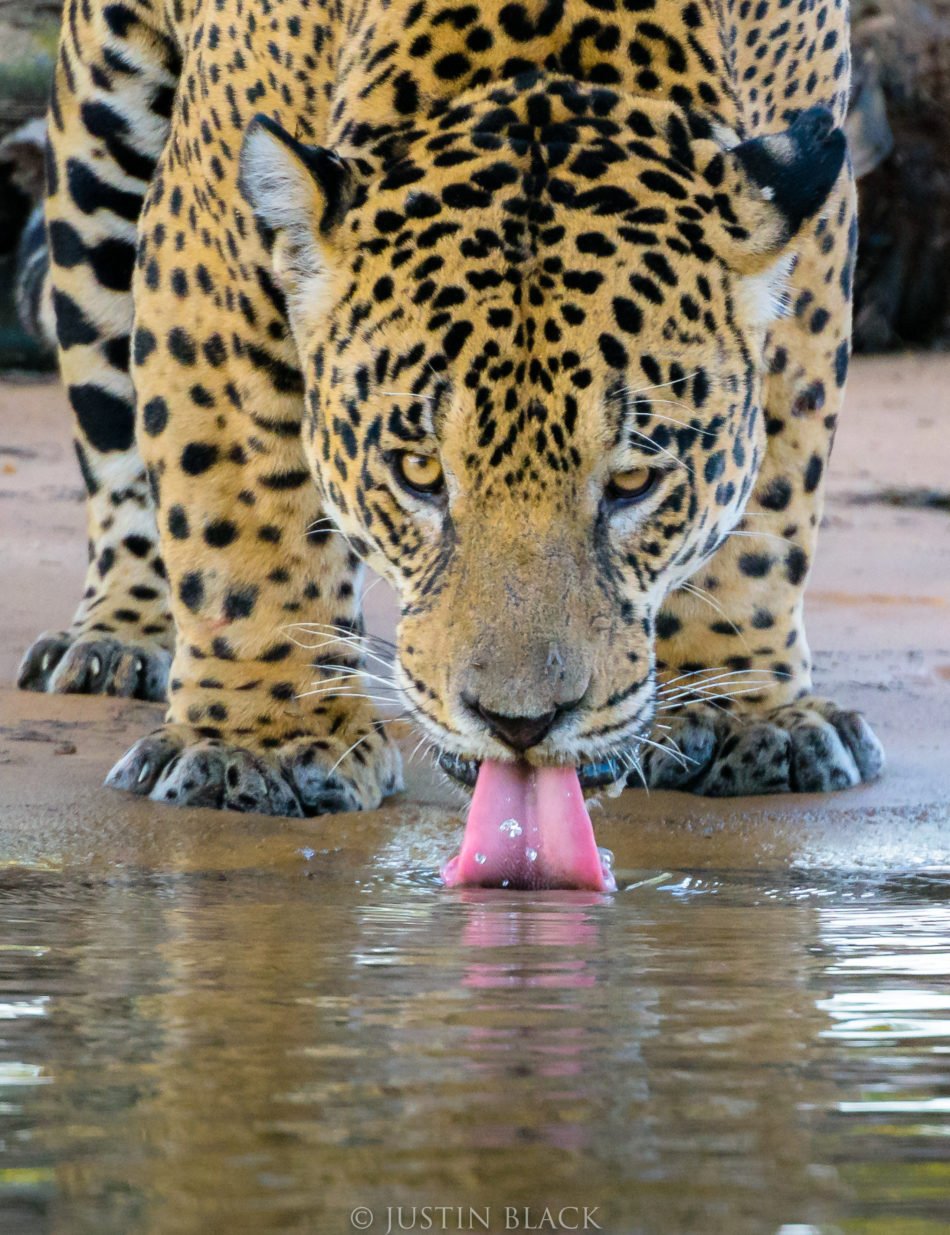
photo by Justin Black
While your chances of seeing a jaguar somewhere in the Pantanal are pretty high already, there are places where you are almost guaranteed to spot some jaguars.
The hotel Fazenda Santa Teresa, for example, has several wildlife observation towers. If you get up high, and if you get close to water, you will double your chances of the perfect shot.
If you are really serious about shooting jaguars on your trip, you will need to rent a boat or go on tour with a group that is planning on chartering one.

photo by Justin Black
The easiest place to photograph jaguars is along the water. This is where they come to drink and it is also where they hunt incredible beasts like caimans and capybaras.
It also helps your chances if you’re going to the Pantanal with an experienced host (more on that later).
What to Photograph in Brazil - Birds

photo by Justin Black
The Pantanal is also known for housing nearly 377 (known) species of birds. It’s estimated that those 377 species probably make up about 81% of the area’s total bird species.
Among the birds you are bound to spot are toucans, parrots and herons. If you’re lucky, you can spot feeding frenzies of storks, ibis and jacanas.
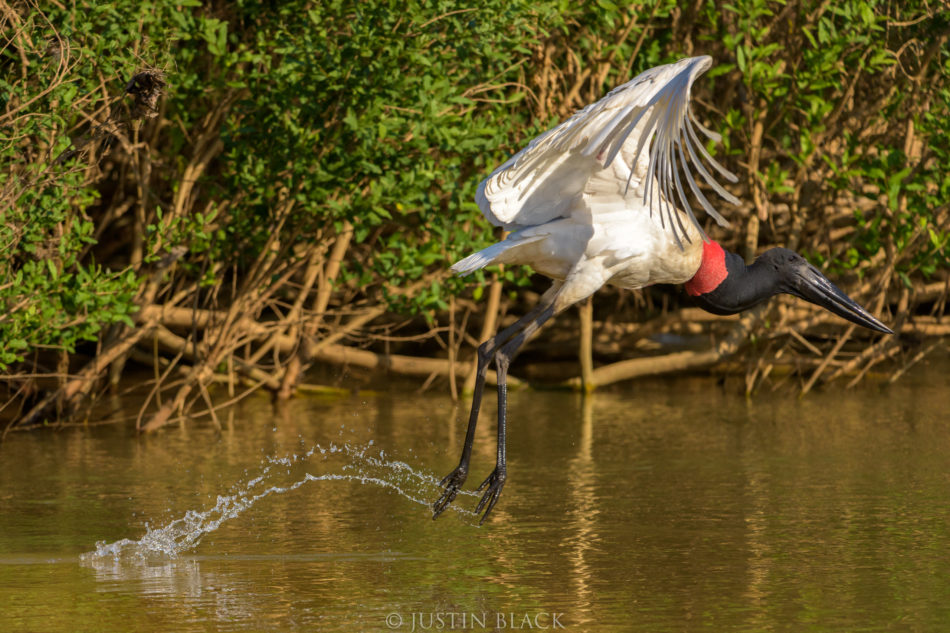
photo by Justin Black
If you venture deep enough into the Pantanal with your lodging choices, you can photograph birds right outside of your hotel room in the middle of the hot, sweaty days.
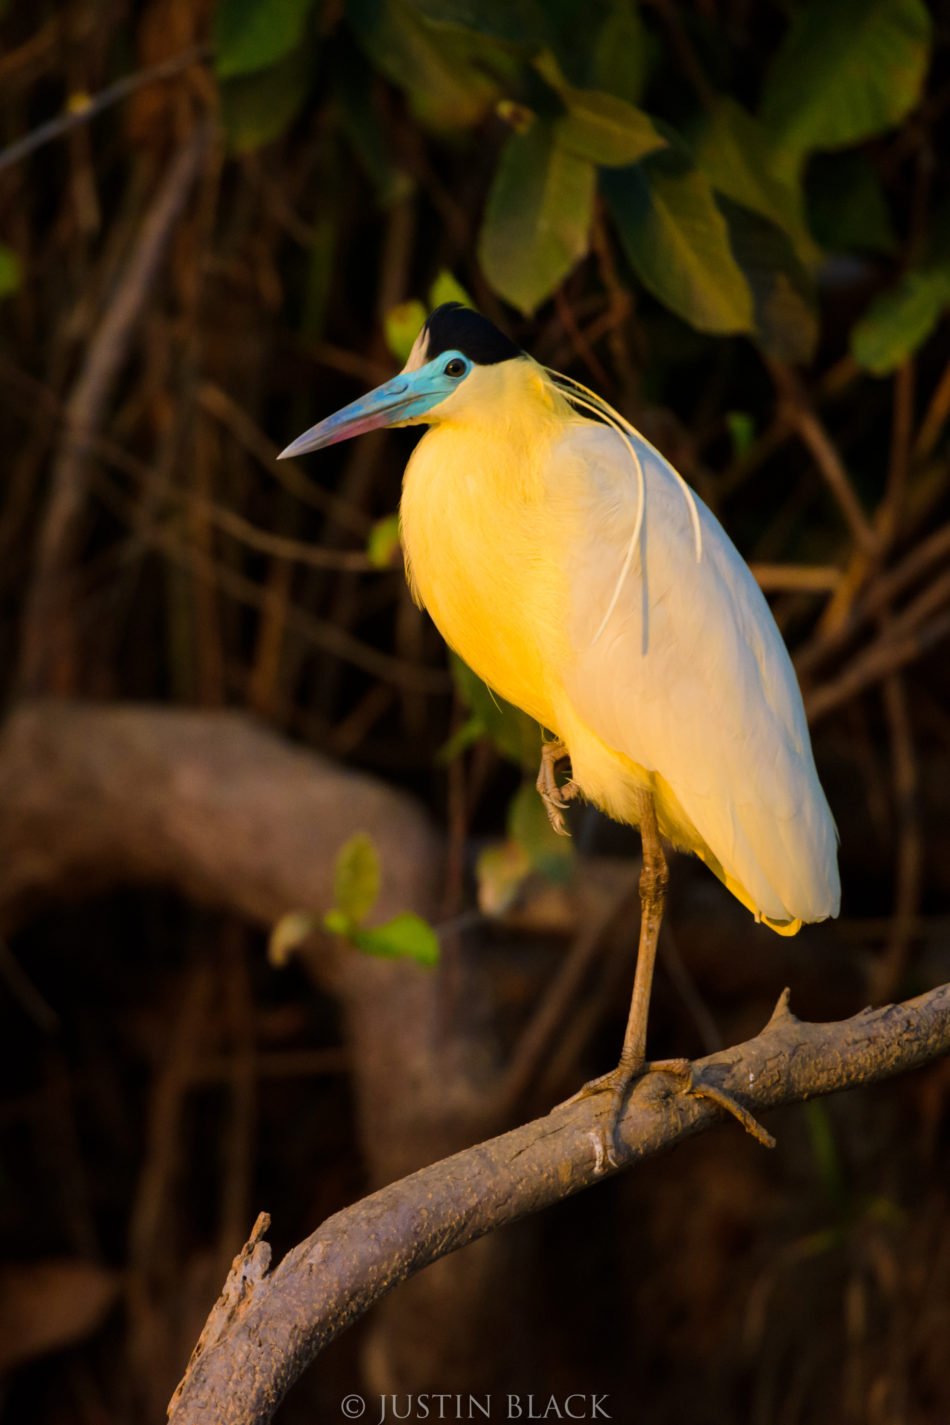
photo by Justin Black
It also helps to maximize your time in the Pantanal by staying in a variety of different lodges, so you are more likely to spot dozens of species instead of just the few that are nearest you.
How to Make the Most of Photographing Brazil
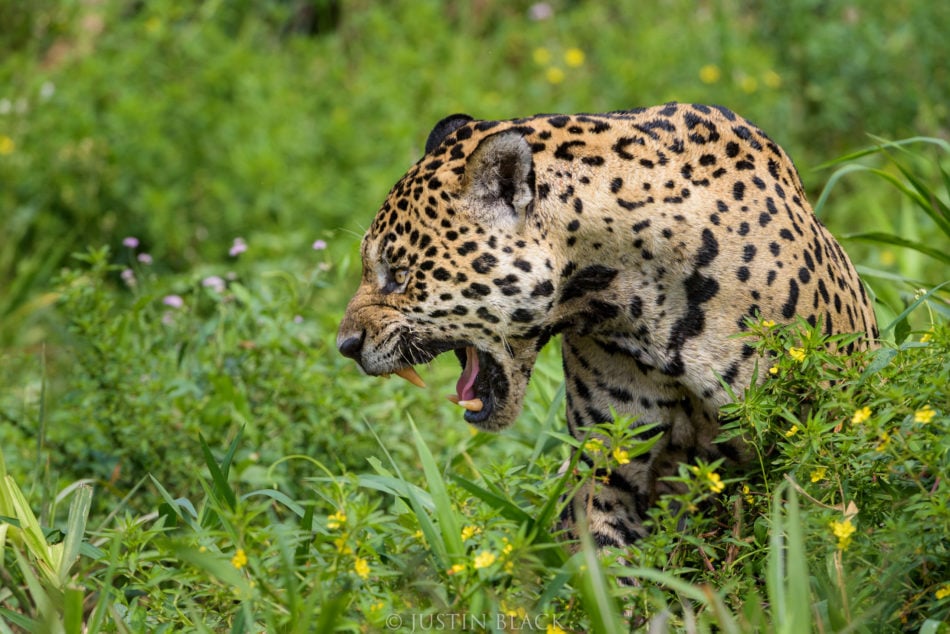
photo by Justin Black
I always say in order to make the best of a new travel destination you either need to do intense research or go with someone who has gone before.
Nobody knows the place best like a local, and nobody knows how to photograph the place best like a photography teacher.
Visionary Wild, a photography travel company, is hosting a Pantanal trip in 2020.
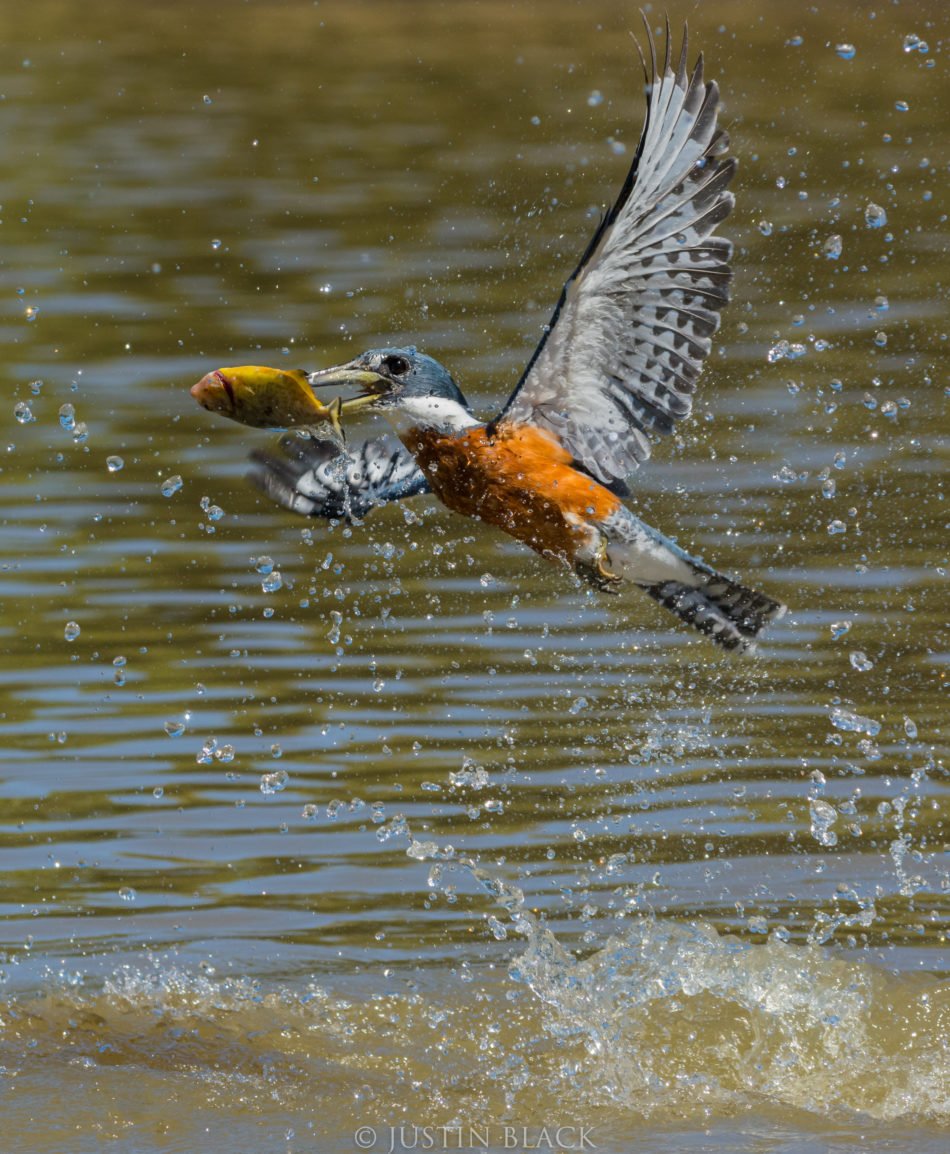
photo by Justin Black
This Pantanal trip will be the ninth trip with the company for the tour’s leader, Justin Black, so you can be sure all of your questions will be answered by someone who has had the same questions before.
The tour takes place from August 31 to September 10, 2020, and begins at around $10,000, which is a steal considering the number of locations you will be visiting.
Visionary Wild also isn’t like other photography travel companies because the tour guides are focused on active education throughout the trip.
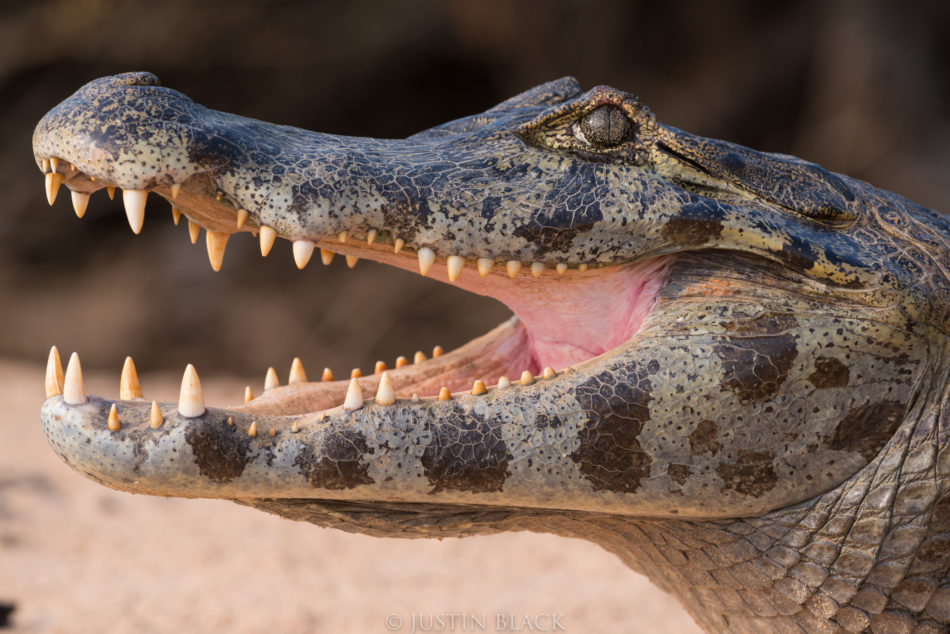
photo by Justin Black
While this education begins on the areas you will be staying and the flora and fauna you will be photographing, it also extends to the ways you are photographing these subjects.
You will be mentored one-on-one throughout the trip with your artistic expression as the focus. Sure, you will have your basic photography questions answered on any photography tour, but isn’t it better to be with a tour guide who can also help you convey the exact emotions you are trying to in your photos?
During Visionary Wild’s Pantanal trip you will stay in 3 different hotels and be able to focus on jaguars, landscapes, birds and a variety of other wildlife, all while networking with world-class photographers.
If that doesn’t sound like my ideal vacation, I don’t know what does!
We Recommend
California Photography and Travel Guide - Redwood Coast
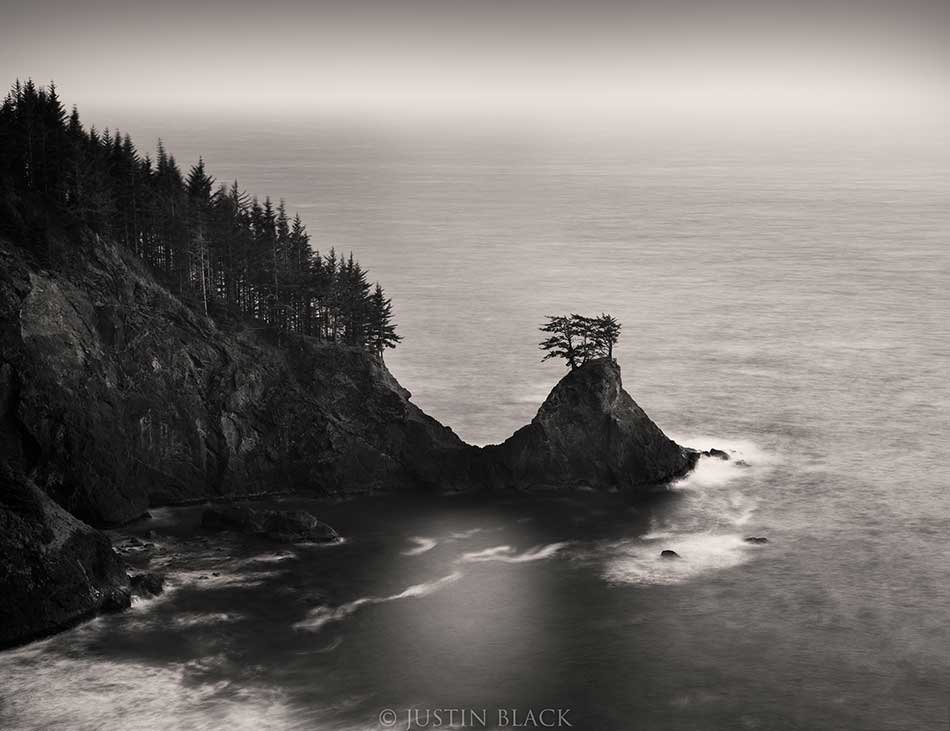
Photo by Justin Black
Few places in the world have the mystique and primordial beauty of California’s Redwood Coast.
This area is rich with photographic opportunities, from its signature trees to the carpet of rhododendrons that explode with blooms in early summer to the coast itself - a long and jagged playground of sea stacks, cliffs, and wild beaches.
One could spend weeks in this region and never see the same vista twice. But that begs the question, if you travel to the Redwood Coast, what are the must-photograph locations?
Below, I’ve outlined three Redwood Coast sights that you absolutely cannot miss on your visit.
What to Photograph on the Redwood Coast - The Redwoods!
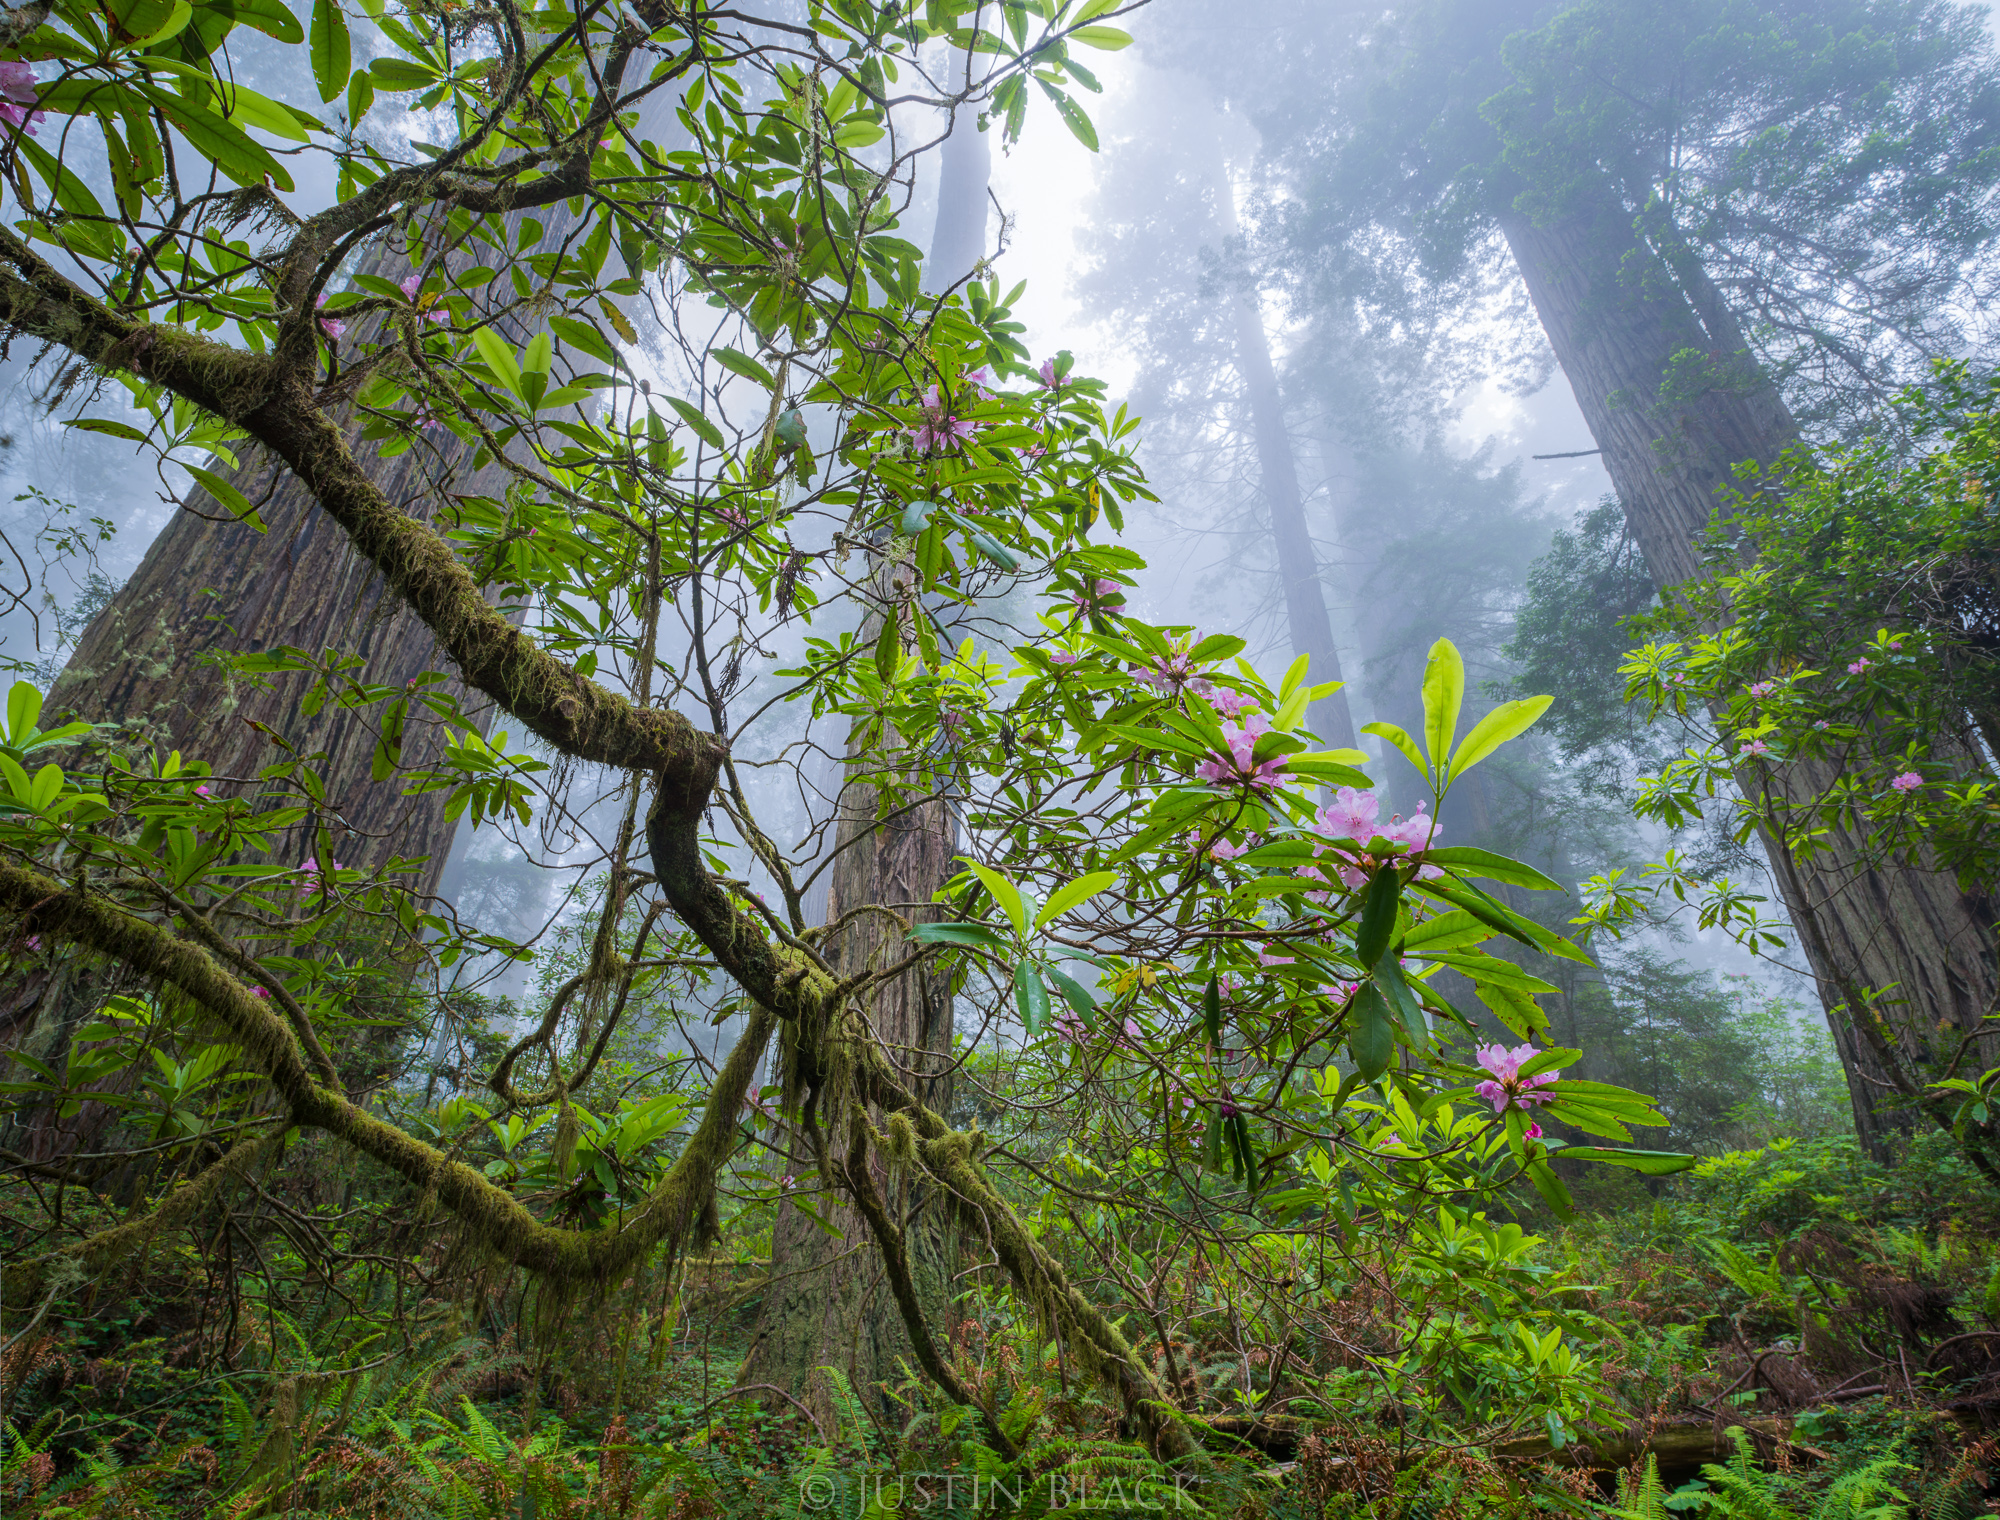 Photo by Justin Black
Clearly, the ancient redwood forests have to be on your list of things to photograph on your trip.
The redwoods along the coastal forest soar over 300 feet high, piercing the fog that rolls in each day. The quality of atmosphere and light photographs spectacularly well.
Opportunities are abundant to photograph these beautiful beasts from up close and afar. A can’t-miss location is the Avenue of the Giants, a 31-mile drive through the forest that puts the sheer size of the redwoods on full display.
On foot, you can explore the redwood forests from easy hiking paths in the Lady Bird Johnson Grove or in Prairie Creek Redwoods State Park, where the forest floor is covered in lush ferns.
The coastal view of the redwood forests (discussed below) is a can’t-miss sight as well!
What to Photograph on the Redwood Coast - Wild Rhododendrons
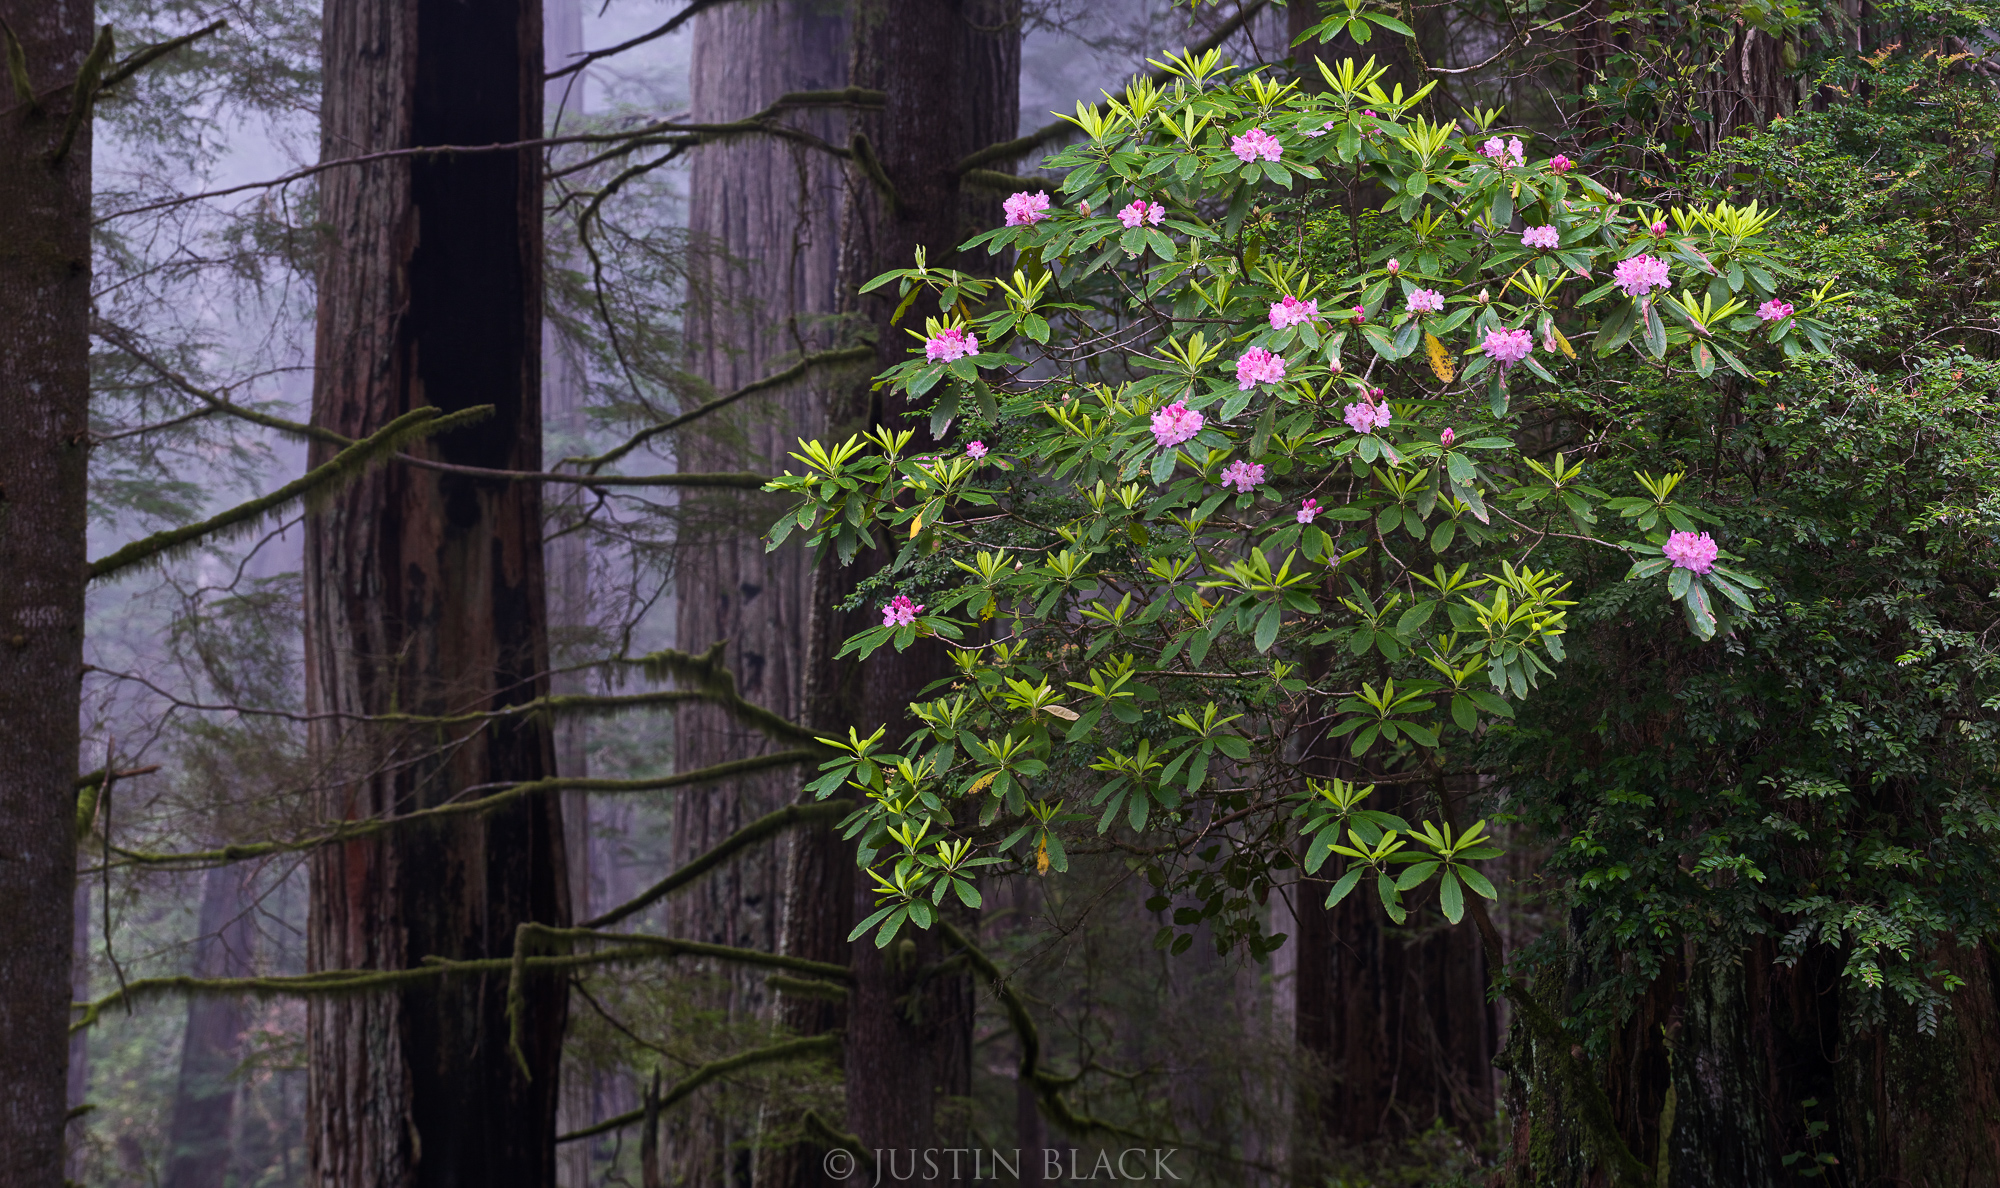 Photo by Justin Black
As impressive as the massive redwoods are, there’s something to be said for the chance to photograph a much more delicate subject on the Redwood Coast.
Nearly translucent, pink wild rhododendrons dot the redwood forest floor, a gorgeous juxtaposition to the hulking mass of the dark brown redwood trunks and their deep green needles.
If you time your trip just right in the early summer, you’ll be provided with the best opportunities to photograph wild rhododendrons as they reach their peak bloom. The Rhododendron Trail is a particularly excellent spot to view these blooms, and the light filtering through the forest canopy offers opportunities for truly dramatic images.
Quick Tip: Lupine can also found in abundance in early summer, their vertical plumes carpeting the hillsides. Take time to visit the Bald Hills, which has a history of some of the most spectacular lupine blooms in Northern California.
What to Photograph on the Redwood Coast - The Coast
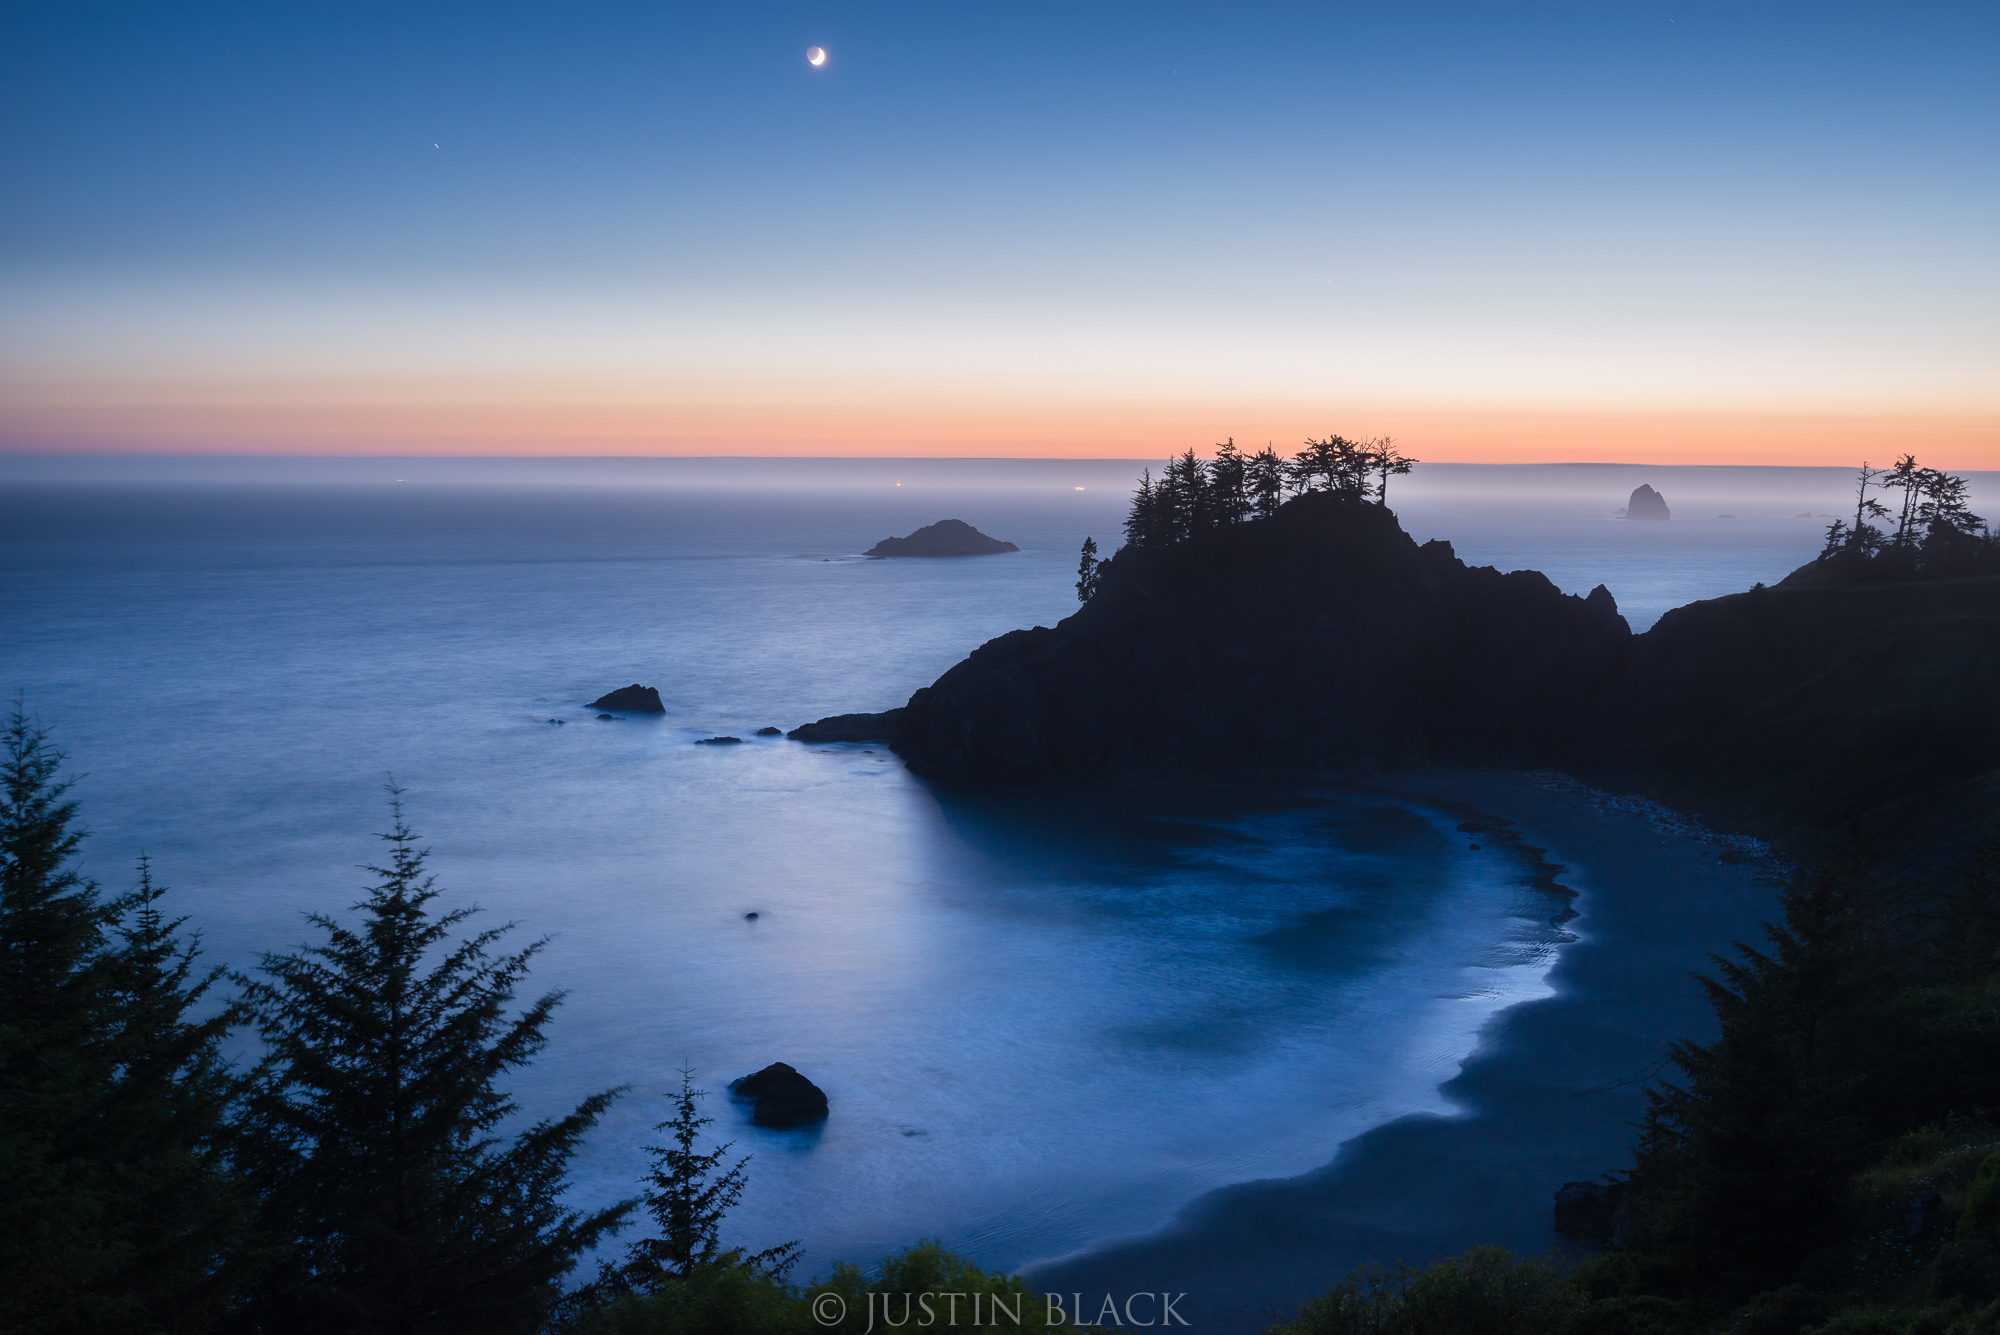 Photo by Justin Black
A visit to the Redwood Coast isn’t complete without taking some time to explore the spectacular coastline of Northern California and Southern Oregon.
Unlike the Southern California coast, which is known for its golden beaches, the Northern coast is far more rugged and wild.
Humboldt Lagoons State Park - a windswept area where the forest meets the sea - should be a prime target for your camera. If it’s a view of massive sea stacks dotting the coastline, Moonstone Beach County Park should be on your to-do list.
The combination of the jagged coast, soaring cliffs, quiet coves, and redwoods dotting the coastal mountains is simply breathtaking. Add in the opportunity to photograph these diverse landscapes amidst the fog and spectacular California sunsets, and you have a recipe for a photographic location that cannot be missed!
How to Make the Most of Photographing the Redwood Coast
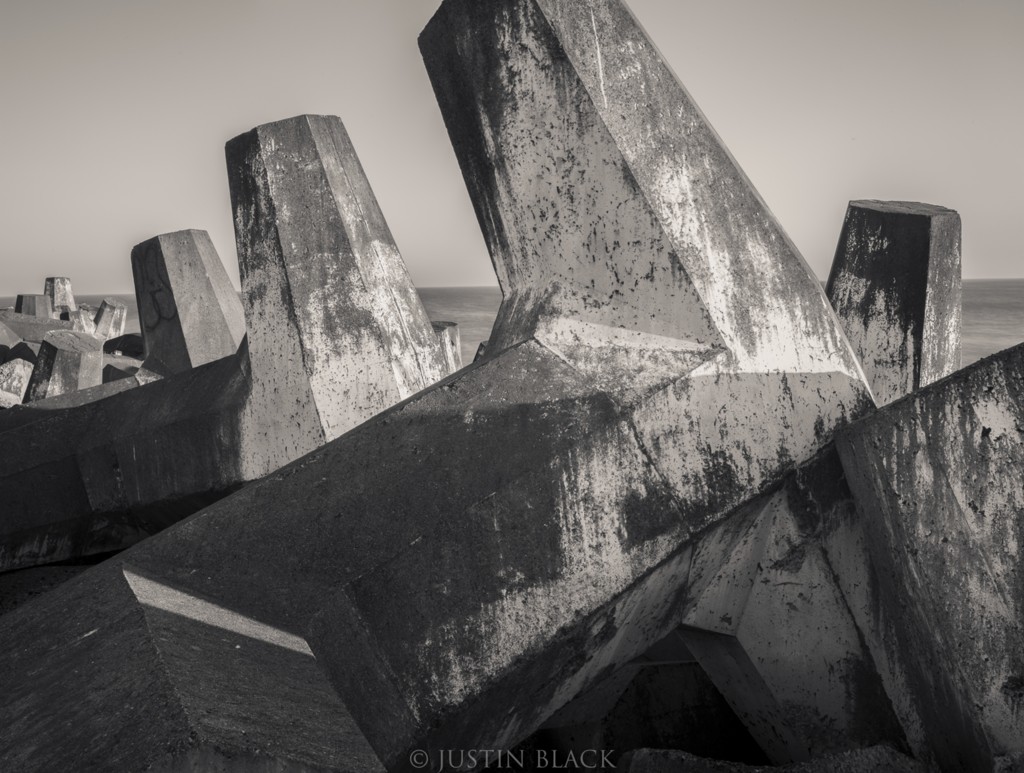 Photo by Justin Black
Like any gorgeous place ripe for photographers, the Redwood Coast offers so many possibilities that it can become a challenge to simply decide where to head with your camera.
That being the case, it’s best to explore this majestic area as part of a photography workshop.
Visionary Wild offers a Redwood Coast Workshop with master photographers Jack Dykinga, John Shaw, and Justin Black that will take you to some of the most stunning locations Northern California has to offer. But this isn’t just a photo tour with a few stops along the way to take photos...
Instead, Visionary Wild is dedicated to helping you achieve personal growth as a photographer. In a small-group setting (no more than 10 participants), you’ll get plenty of one-on-one time with the workshop leaders so you can get expert advice on how to improve composition, lighting, tonal control, your overall workflow, and much more.
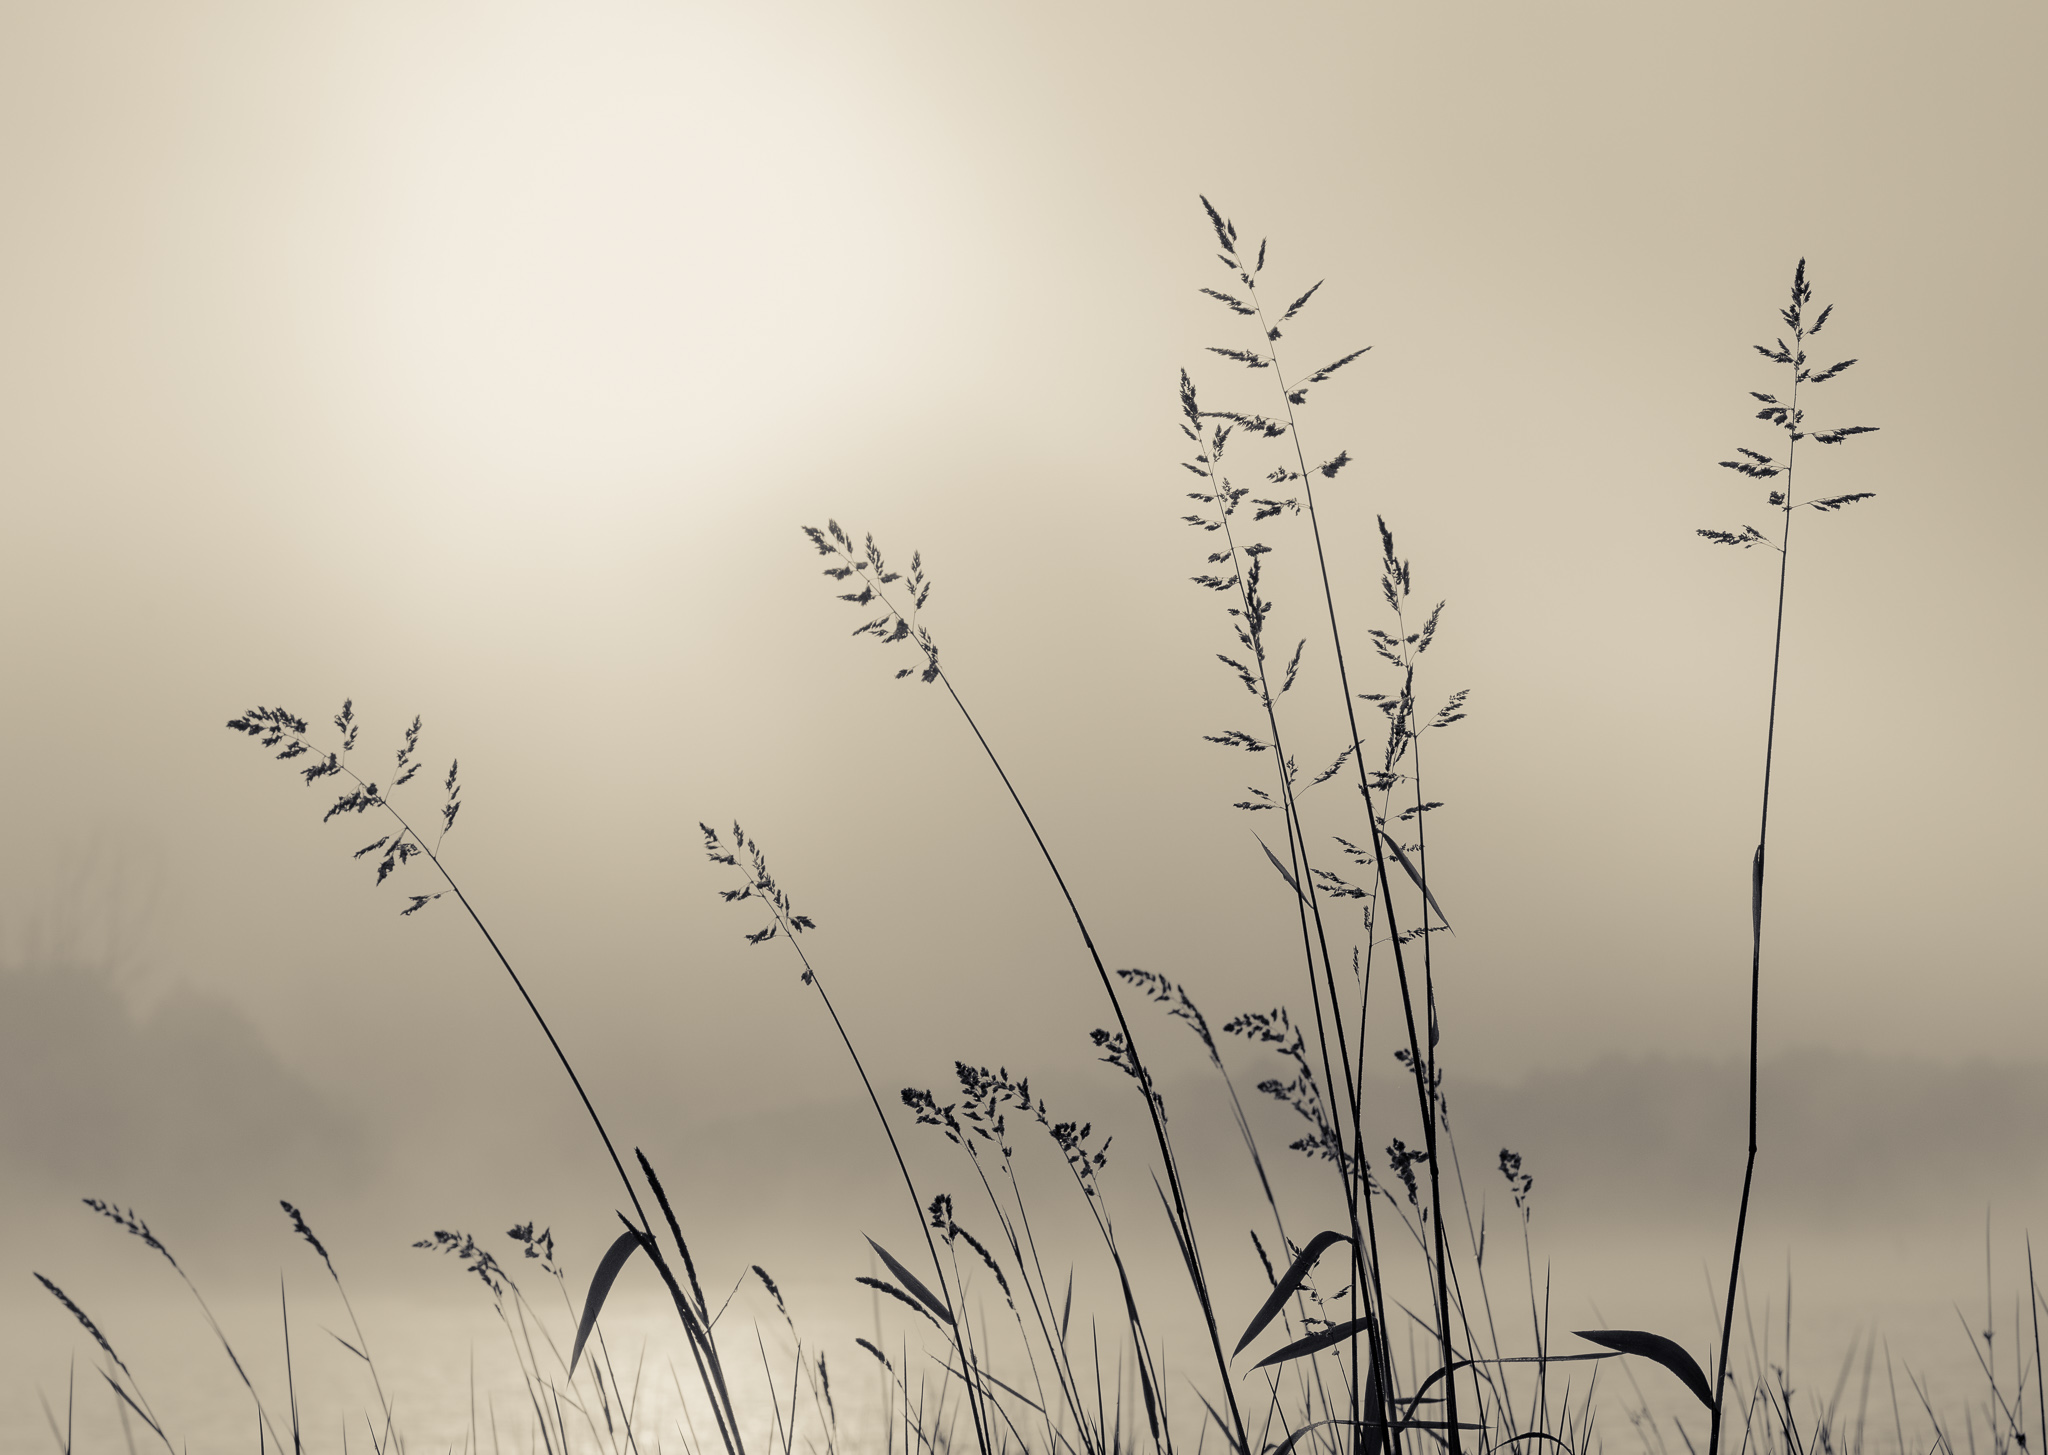 Photo by Justin Black
As part of the Redwood Coast Workshop, you’ll spend mornings and evenings exploring your outdoor classroom and capturing the beauty of the landscape under the warm glow of golden hour lighting.
During the day, you’ll join the workshop leaders for classroom sessions in which you dive deep into topics on advanced seeing, composition, creativity, and digital workflow. Critique sessions offer a chance to share your work with others and get constructive feedback on how you can maximize your potential behind the lens.
Dykinga, Shaw, and Black - each possess extensive experience exploring and photographing the Redwood Coast. Their insights, instruction, feedback, and support will help you build the strong foundation you need to reach your potential behind the lens.
Learn more about Visionary Wild
Planning Your Redwoods Photography Trip
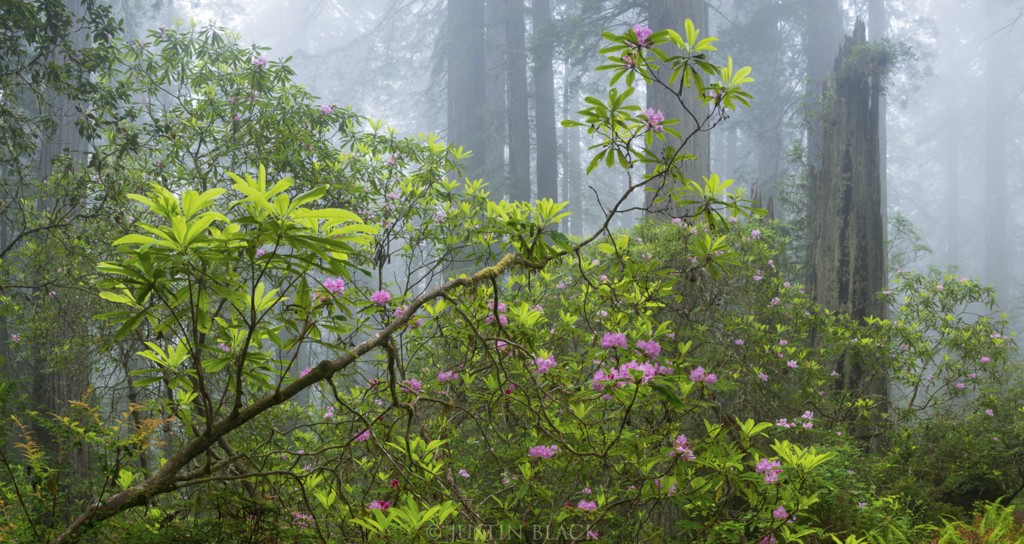 Photo by Justin Black
- Where to Stay: Ocean View Inn in Crescent City. The hotel is centrally located which makes day trips to various points along the Redwood Coast more manageable.
- Where to Eat: The Good Harvest Cafe is locally-owned and gets rave reviews for its American cuisine and seafood.
- Must-See Attractions: Battery Point Lighthouse, Oceanworld, and Beach Front Park are just a few attractions near Crescent City worth your time.
- Best luggage: For a trip of this length, the Nomatic Check-In roller bag is the ideal choice. It offers polycarbonate construction that stands up to the rigors of travel, silent wheels, low-profile handles, and a three-stage aluminum handle to fit your height. With space for 78 liters of gear, this bag has plenty of room for a 5-day trip or longer.
- Check the weather in the Redwoods area right now.
We Recommend
Camera Safety Tips for Your Next Trip
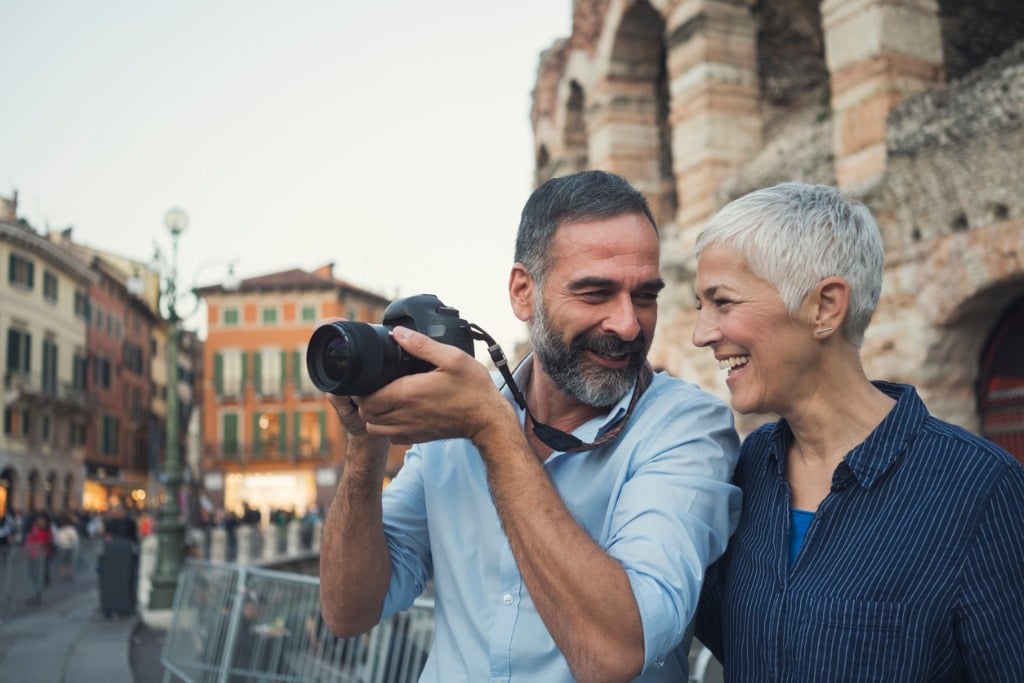
photo byVesnaandjic via iStock
I haven’t had the opportunity to go on a photography trip in more than one year, since my home state of California has been almost entirely shut down throughout the entire pandemic. However, I have a huge list of places I intend to visit before the end of the year once I’m vaccinated. I realize that international travel might still not be available this year, but I intend to do some travel photography even if I just get to go on a staycation somewhere in California.
However, I’m a little rusty traveling with all of my gear; I may need to relearn how best to travel. This includes relearning some camera safety tips.
This article will not only cover some important camera safety tips, but it will cover some info about how to carry your camera when you’re travelling which camera backpack is best to do it with.
Get a High-Quality Bag
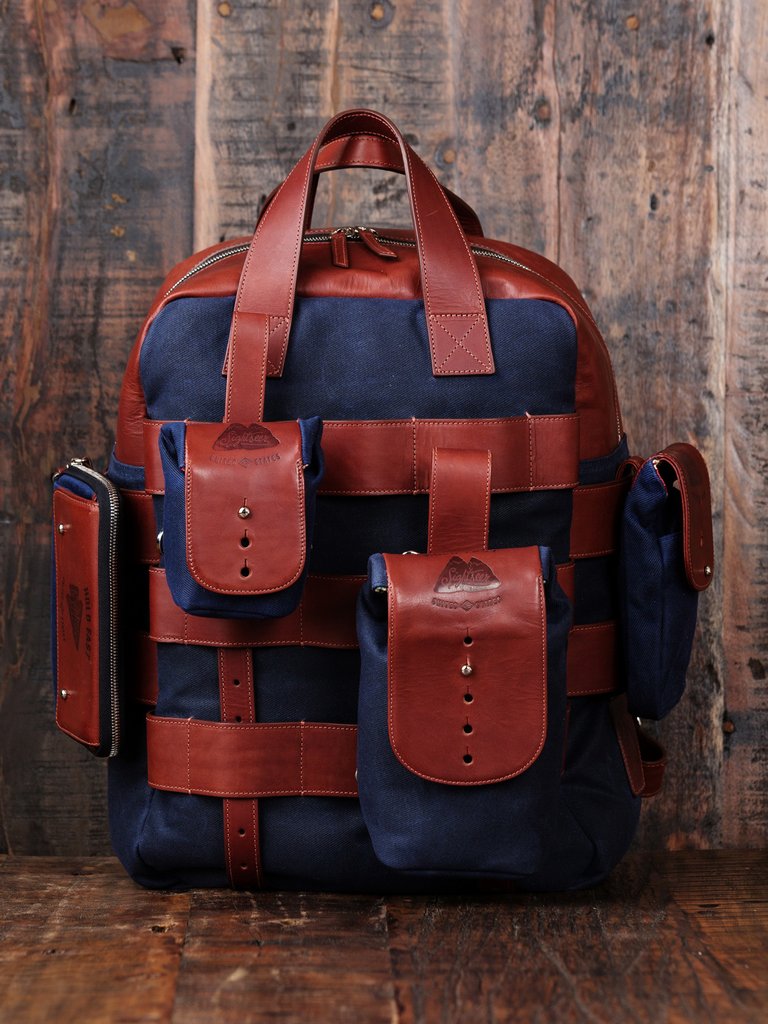
The most important of all of the camera safety tips is to buy a good bag. There are hundreds of camera bags for traveling on the market, but they are definitely not all made the same and some of them could wind up making you purchase a new camera when you get back home.
A high-quality camera bag is one with a ton of padding. You’re going to be moving around a ton and you don’t want your camera and lenses doing the same inside of your bag.
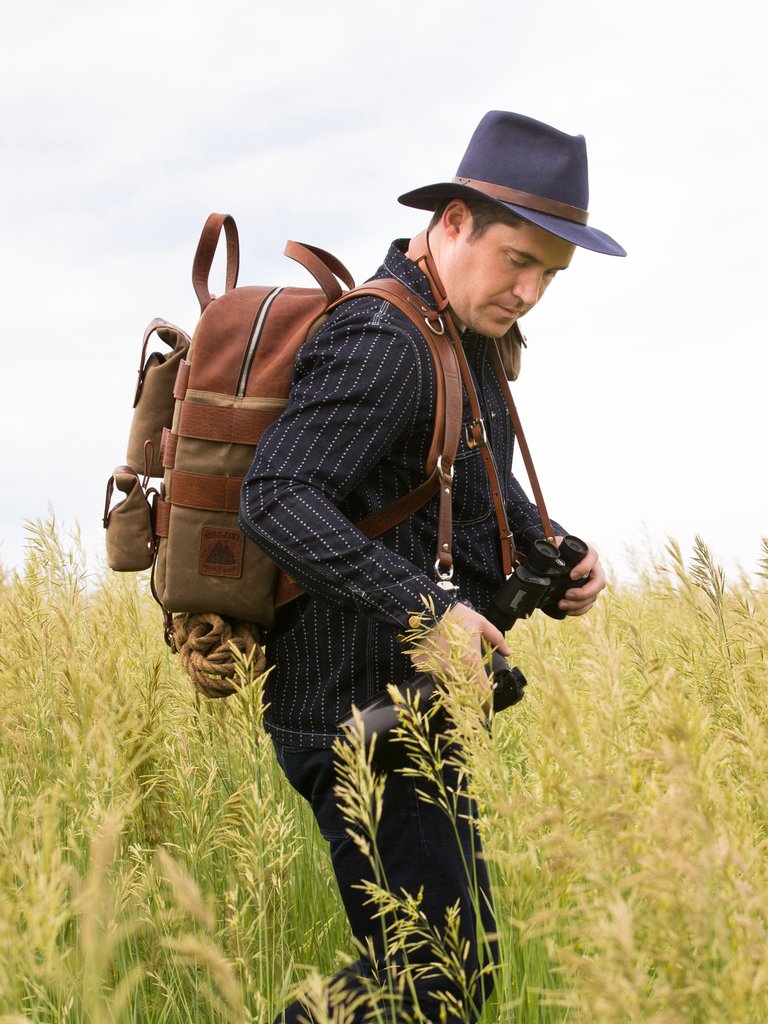
A high-quality camera bag is also one that is comfortable to wear. You don’t want your bag digging into your shoulders all day, especially if you’re dragging your luggage all over town with you at the same time. It’s already enough of a pain.
The camera bag that I recently purchased is the Holdfast Sightseer Backpack System.This backpack is made out of waxed canvas and American bison leather, so you know it will last for decades. The waxed canvas helps to keep all of your camera gear dry and the bison leather keeps your bag looking classic no matter how used it is.
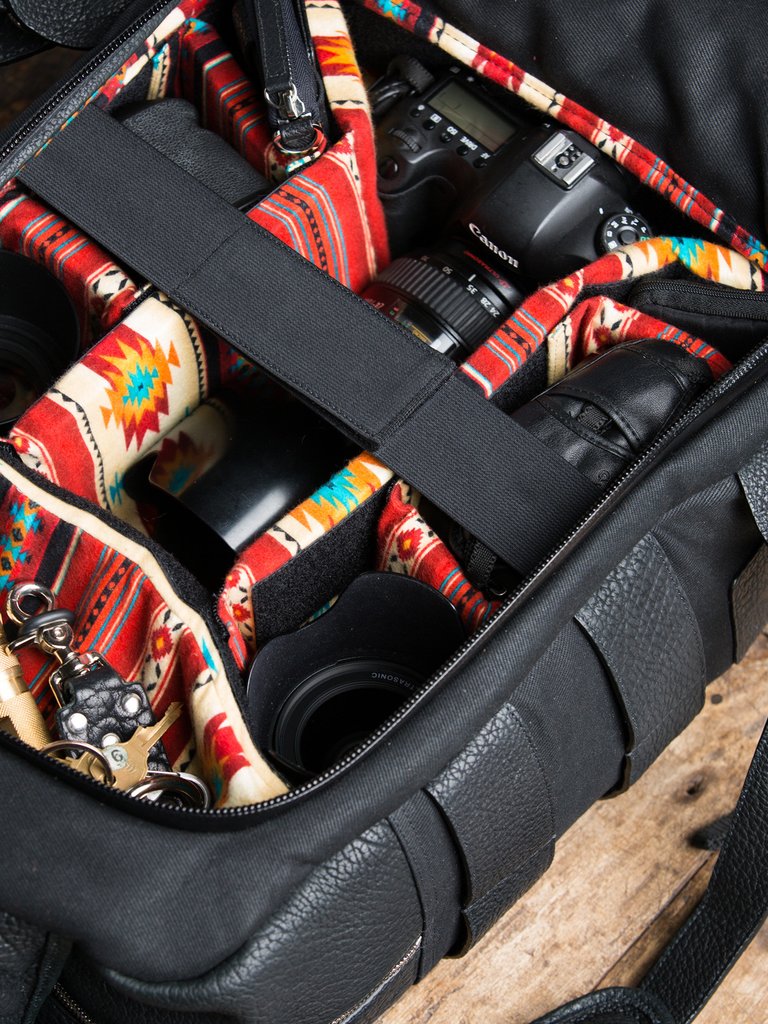
The Holdfast team has really thought of everything with this bag. The zipper is a waterproof zipper. Every Sightseer pouch can attack directly to the bag if you need more room. Plus, the bag looks genuinely nice. It comes in black, navy, or olive.
While the Holdfast Sightseer Backpack System is a little on the pricy end at $800, every Holdfast product comes with a lifetime guarantee so it is literally the last camera bag you will ever need to purchase.
Cover Camera Branding
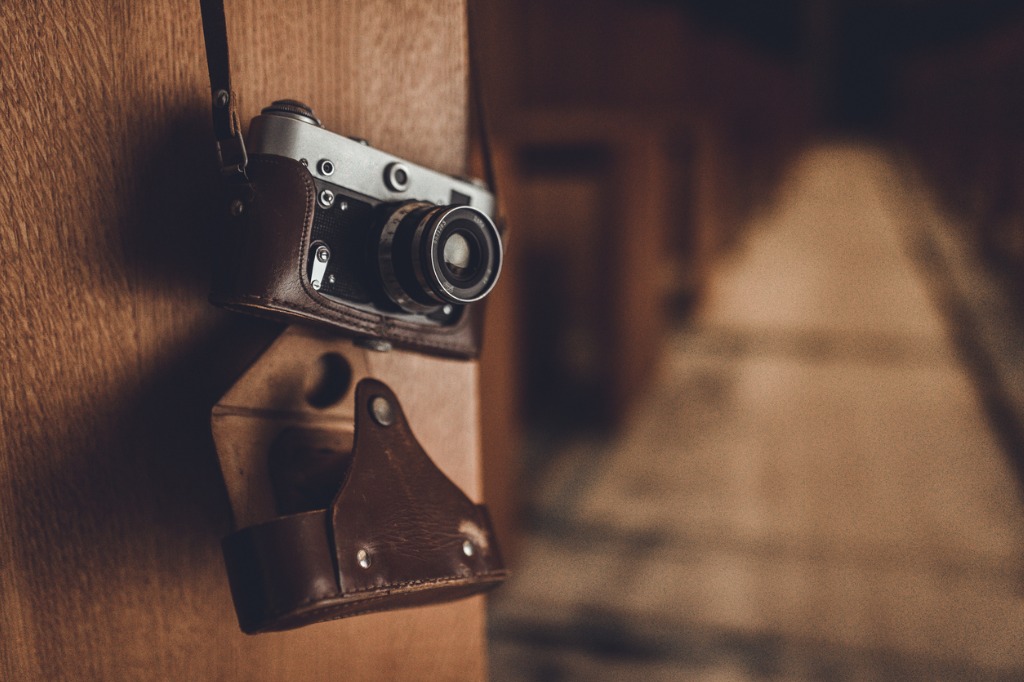
photo byanandaBGD via iStock
One of the most important camera safety tips is to make your camera look as inexpensive as possible. Your $5,000 camera may be one of your favorite things in the world, but it also looks really flashy to thieves.
You should cover all of your camera branding with small pieces of black tape. This tape won’t permanently damage your camera and it’s easy to get off, but it also will keep you protected while you’re shooting.
There are some other camera safety tips when it comes to making your camera look less expensive than it is, but I personally think that making your camera look artificially beat up is a little bit of overkill. Make sure your Canon or Nikon branding isn’t showing.
Learn More:
Keep Your Camera and Lenses Clean
photo bykazunoriokazaki via iStock
Keeping your camera and lenses clean doesn’t really seem like it would make a list of important camera safety tips, but I’m not just interested in keeping you as the photographer safe. I’m also interested in keeping your camera safe.
In order to get the most out of our camera safety tips, you need to be doing the same. You can follow all of the photography safety tips you should follow and still end up being really disappointed with your trip if you ruin your expensive equipment.
But, thankfully this is one of the easiest camera safety tips. Just make sure that you’re keeping your lens covered whenever you aren’t actively shooting and clean it on a regular basis.
Get Insured

photo byeternalcreative via iStock
If you’re learning how to travel with your camera gear, then you’re likely encountering a ton of travel photography tips. The tip topping most of those lists should be to get insurance.
No matter how many camera safety tips you’re following, the chances are still high that you’re going to get a camera stolen at least once in your life. This is especially true if you’re traveling to countries where you don’t speak the language or countries with high rates of crime.
If you’re planning on buying regular camera insurance, double check your policy because some will not cover travel outside of your home country. Then, write down all of the serial numbers of your cameras and lenses and make sure you have extra copies of their receipts.
You’ll be thankful you followed all of these camera safety tips the next time something doesn’t go as planned.
Learn More:
- Get Decked Out for Your Next Gig with the Holdfast Roamographer Collection
- These Handmade Camera Straps Will Last a Lifetime
We Recommend
Compact Photographic Items Useful for Traveling
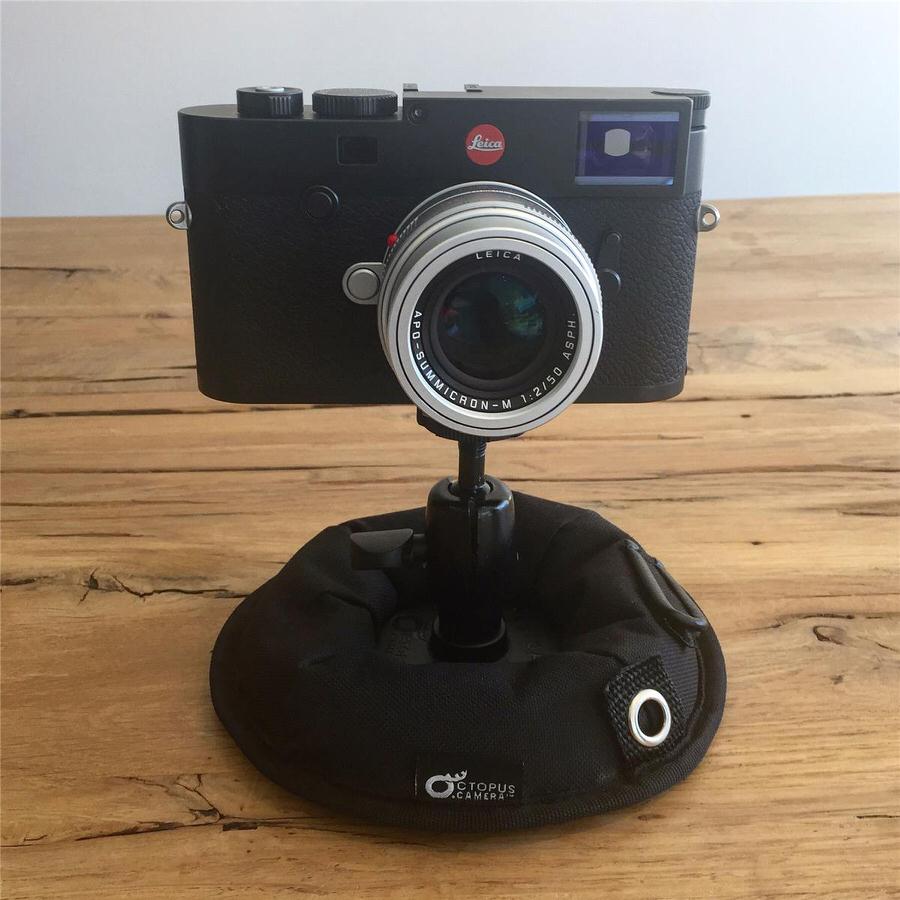
When I’m travelling for any purpose, I usually have a camera and other photo gear with me. You never know when you’ll come across a great opportunity for architectural photography, long exposure photography, nature photography, or landscape photography.
Even when travelling for a photo job, luggage space is often at a premium, so compactness or multi use capability is often something to value. So, for general photography gear, an MFT format mirrorless camera might be an option. For long exposure photography gear, a camera mount and a filter holder system. For landscape and architectural photography gear, an ultra-wide-angle zoom could be in order.
So, let’s look at some ideas for a compact camera, nature photography, and long exposure photography gear lists.
Compact Gear for Architectural Photography
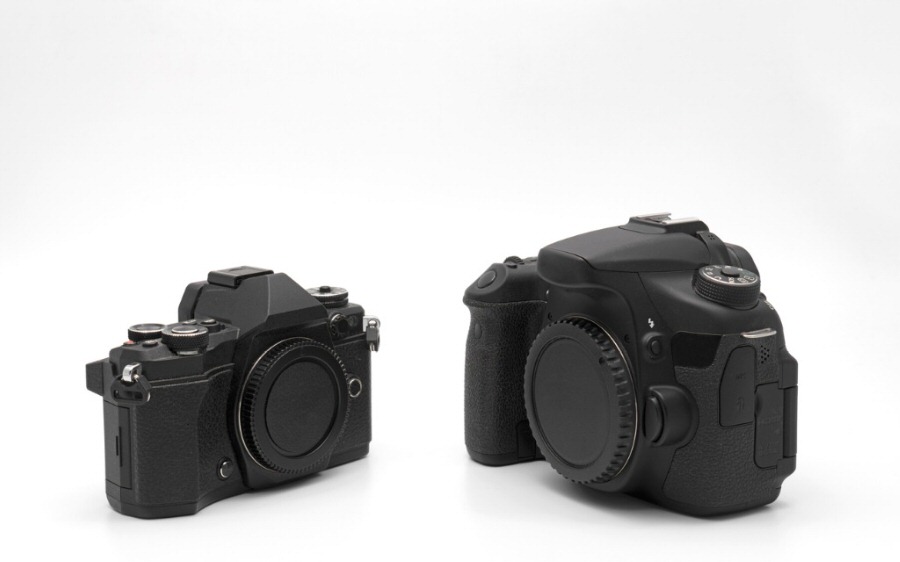
photo byBackiris via iStock
Even though I usually check online for possible subjects in any city or town I’m traveling to, I’m always surprised by what I find off the beaten path. I want to capture the beauty of the buildings I find, so I bring a high-quality camera.
High quality in the digital age can come in any size. The cropped format MFT (Micro Four Thirds) has excellent quality in a very compact size in the form of popular cameras like the Olympus OM-D E-M5 Mark III and the Panasonic GH5. Add a compact sized ultra-wide-angle zoom lens and you have a very capable tool for capturing outstanding architectural images.
These mirrorless cameras and their lenses are very compact and deliver outstanding image quality. They are also excellent videography cameras so you get double duty out of your MFT rig this saving space in your gear bag.
Compact Gear for Long Exposures
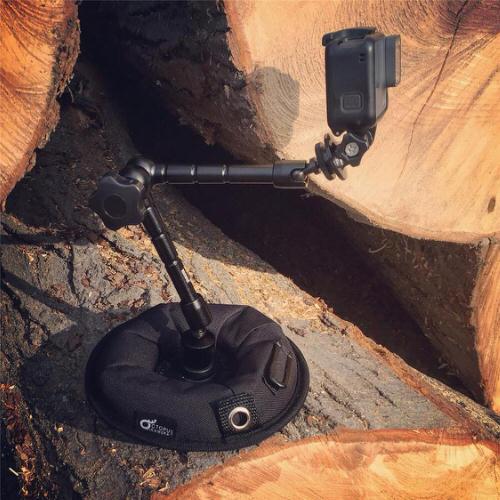
Using those same MFT cameras from the above paragraphs, we can capture ultra long exposures provided we have good enough support. As a long exposure gear guide for beginners, I like to extol the virtues and usefulness of a great tool I found, the OctoPad camera mount.
For long exposure photography, keeping the camera still is a prerequisite. Many times we would opt for a tripod, but when travelling light we can look for tripod alternatives. The OctoPad camera mount is an excellent way to keep our camera still for ultra long exposures.
It’s a compact, weighted, semi rigid disk with a non-slip pad on the bottom. The top has a ball head and can be extended up with an accessory mount arm. The pad can hold several pounds of camera gear on almost any type of surface, even when that surface slopes up to 45 degrees. The OctoPad is compact, making it very useful for travelling.
Learn More:
How To Pack Light for a Photography Trip
Long Exposure Photography Gear List
Compact Gear for Filters
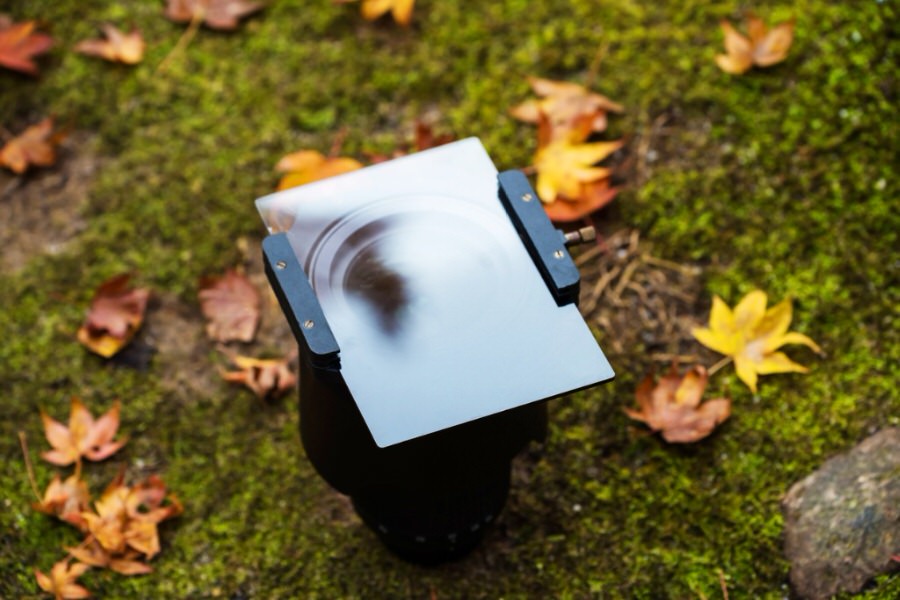
photo byblanscape via iStock
Other gear for long exposure photography is also useful for general photography and architectural photography. A good filter holder system is worth its weight in gold. A filter holder system allows for using specialty filters on several different lenses.
Some of these specialty filters also qualify for inclusion in our long exposure photography gear list. A good filter holder kit for landscape and other photography can hold multiple filters at once, such as a C-POL filter, a GND filter, or a 10-stop ND filter for perfect landscape, architectural, or long exposure photography.
The Perfect Bag to Hold Them All
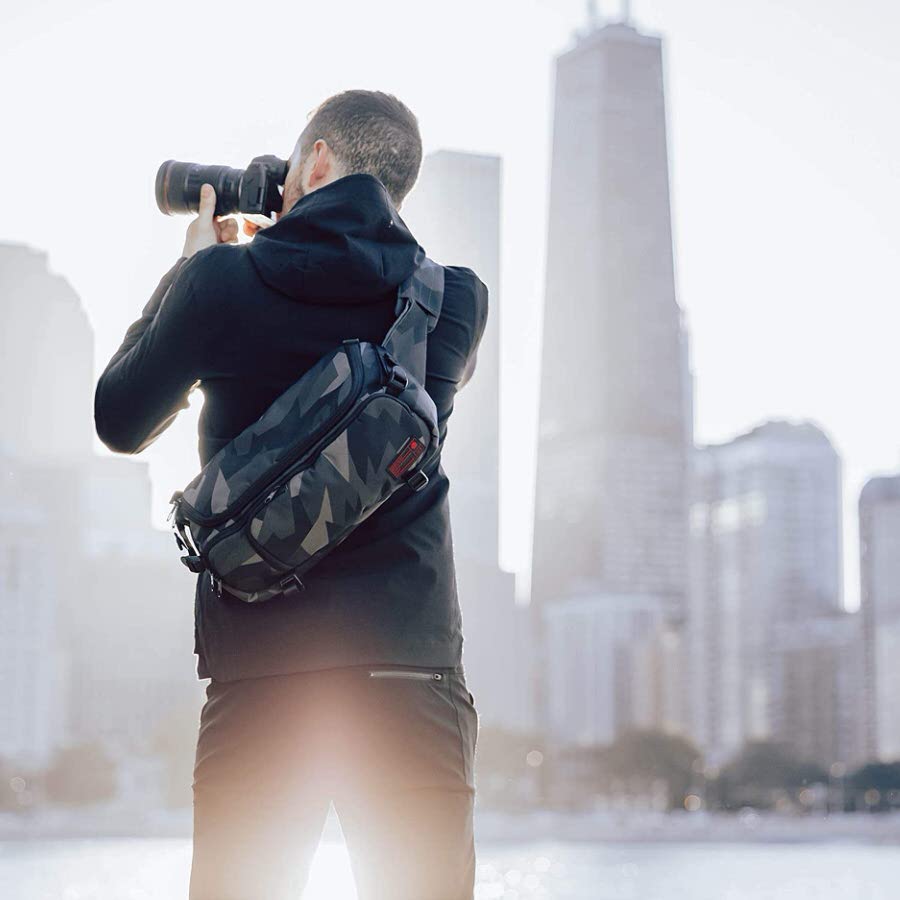
The perfect grab bag for holding all of our compact photography gear is a sling bag, like the HEX Ranger Sling shown above.
Not only is a sling bag compact, they are also quite convenient for rapid access to our photo gear while traveling. Many sling pack style bags have extra features such as webbing and grommets that we can attach more to.
In this case, the original Ranger Sling and the Ranger Sling V2 offer loads of features that make traveling with your gear a breeze.
For starters, the bag hugs your body so you don't have to worry about it bouncing all over the place as you explore for the next shot. It's slim form factor is ideal for things like street photography, but don't think that because it's a svelte bag that it can't hold all your gear. You get eight liters of space for all your stuff, so you can be well equipped and still travel light.
In the case of the Ranger Sling V2, you get the added benefit of a stowaway rain fly, increased padding on the shoulder strap and the top of the bag, and a double-buckle strap for more sizing options.
As far as I'm concerned, when you need to travel light, there is no better bag than the HEX Ranger Sling!
Don’t Forget a Compact LED Light

photo byJag_cz via iStock
Since we’re using an MFT camera system, we shouldn’t overlook the awesome video capabilities most of these fine cameras have. In order to take full advantage of their video modes, we should be sure to carry a portable light source like the LitraTorch 2.0.
Continuous lights made with LED bulbs are available in sizes small enough to mount directly to the camera. Since they’re LEDs, they can be battery powered for true portability. In fact, I own several that are about as small as a deck of playing cards. A couple of those attached to their OctoPad could make up a complete portable lighting studio for videography or on location photography.
What About Smartphones?

photo byDrazen_ via iStock
I really prefer the extra capabilities that mirrorless or DSLR cameras offer, but when it comes down to being somewhere or at some time that makes a full camera impractical, then the cameras built into our smartphones are very capable photography and video tools, especially the newest models. Add a couple of versatile apps to get the most out of these always available cameras.
A little planning and some compact photographic items in our bags will enable us to be ready to capture the awesome images and videos our creative minds see when traveling.
Learn More:
We Recommend
Essential Travel Photography Tips for Improving Your Photos
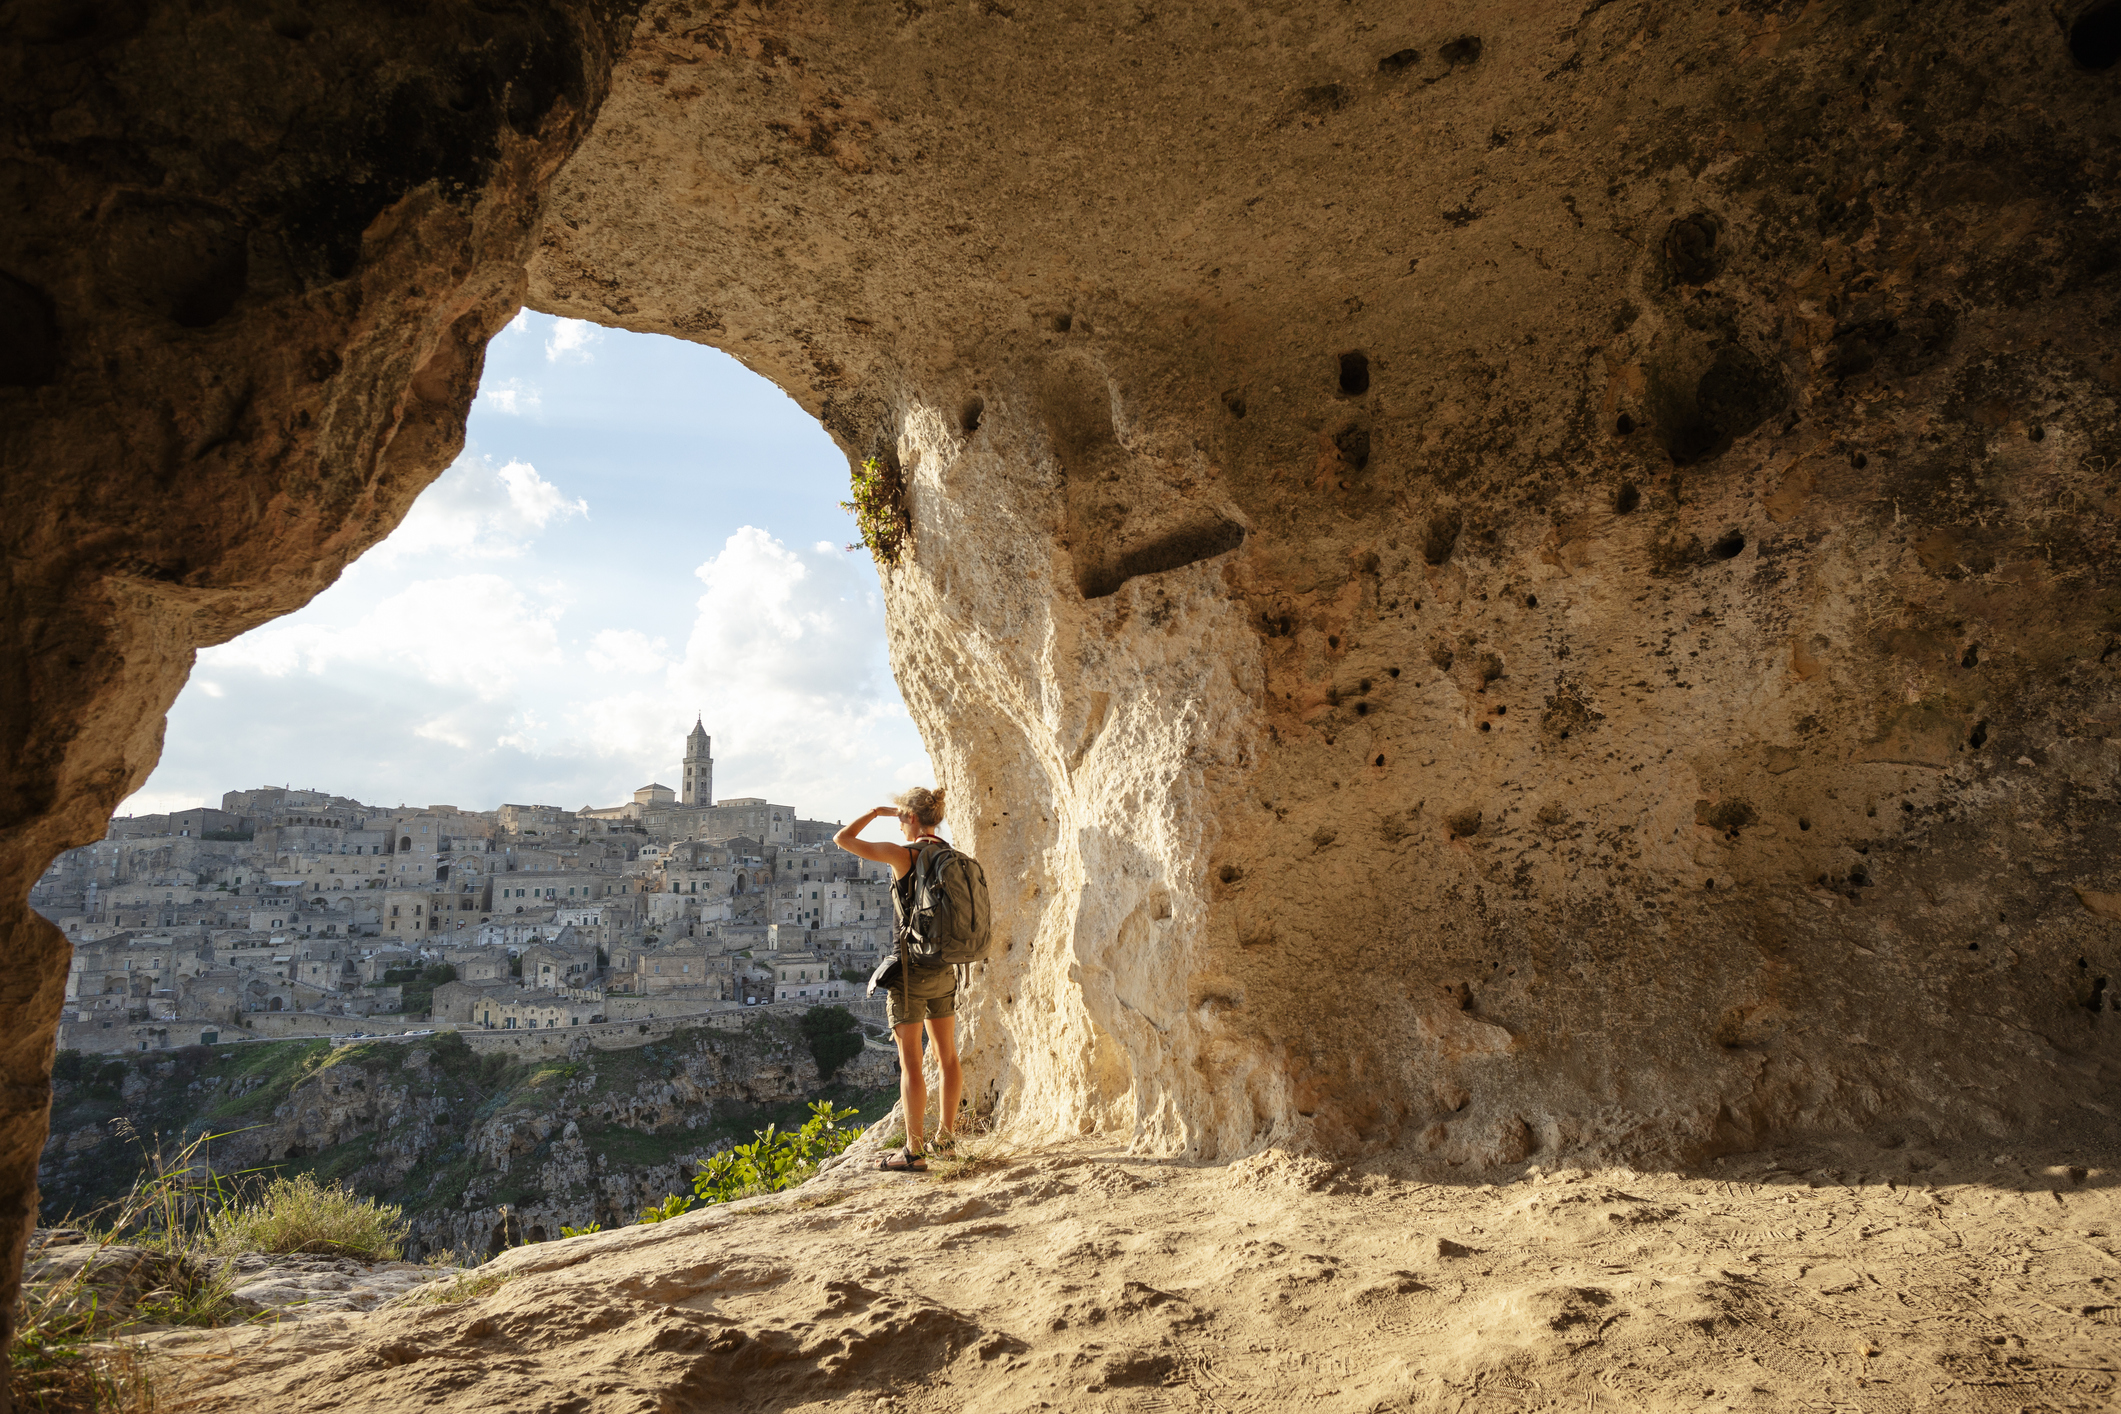
photo bydeimagine via iStock
Heading out on the road? You might want to give these travel photography tips a look.
From gear recommendations to tips for packing, composition techniques to planning your trip, we’ve got what you need to get your trip off on the right foot.
Travel Photography Tip #1: Pack Light
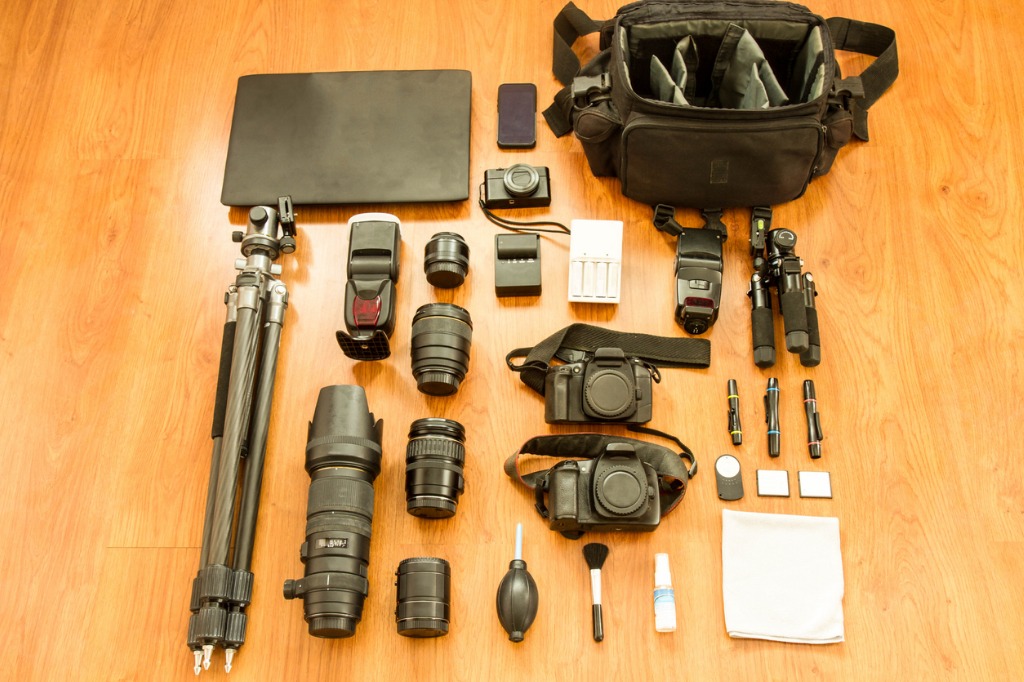
photo by Nirut Punshiri via iStock
And I don’t mean to just pack light when it comes to your clothes and other personal items. You need to thin the herd when it comes to your gear, too.
As you stuff your Nikon Z7 and your Nikon D850 and your Sony a6400 and three lenses for each camera into your bag, you should ask yourself, “Do I really need all this?”
The answer is no…
Having too much gear is not only uncomfortable to carry but it also causes you undue stress worrying about whether your gear is safe.
Here’s a travel photography idea: take one camera, a good walk-around zoom lens (i.e., a 24-70mm), and a small travel tripod (like this one!). With this small kit, you can photograph just about anything on your travels and not kill yourself trying to carry it all.
Learn More:
Travel Photography Tip #2: Carry Your Gear in Comfort
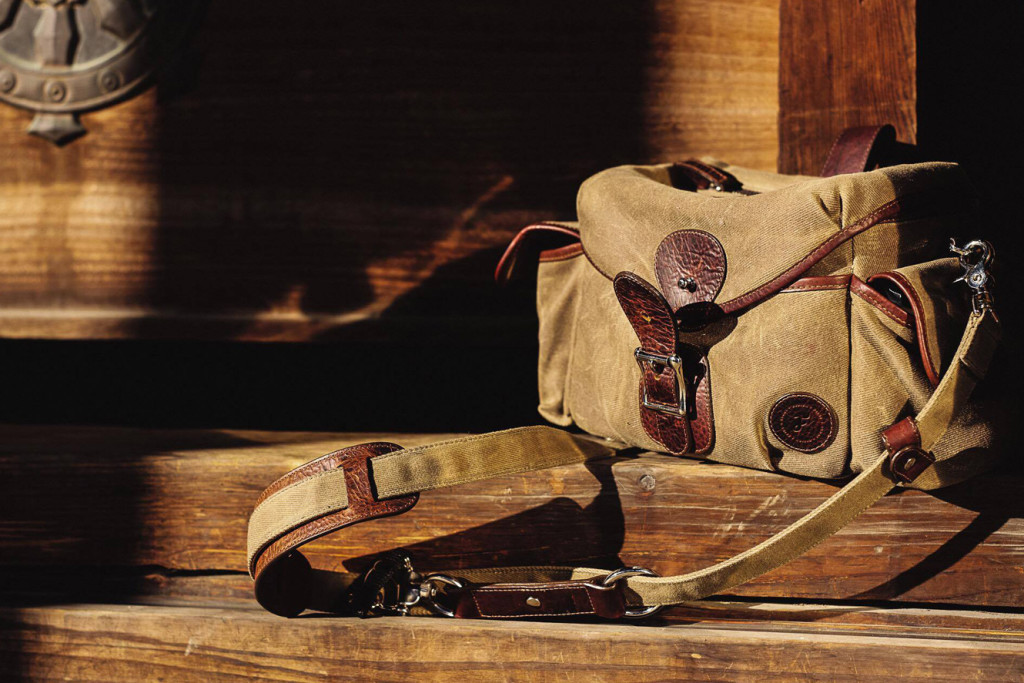
Speaking of carrying your gear, you want a camera bag that’s not only comfortable but also helps you keep your gear safe and organized.
When traveling, that means you need a small bag that’s big on features, and for my money, there’s nothing better than the Holdfast Fundy Streetwise Bag.
Designed for street photography, this little bag will hold a camera and several lenses along with all the necessary accessories like extra batteries, memory cards, your wallet, and so forth.
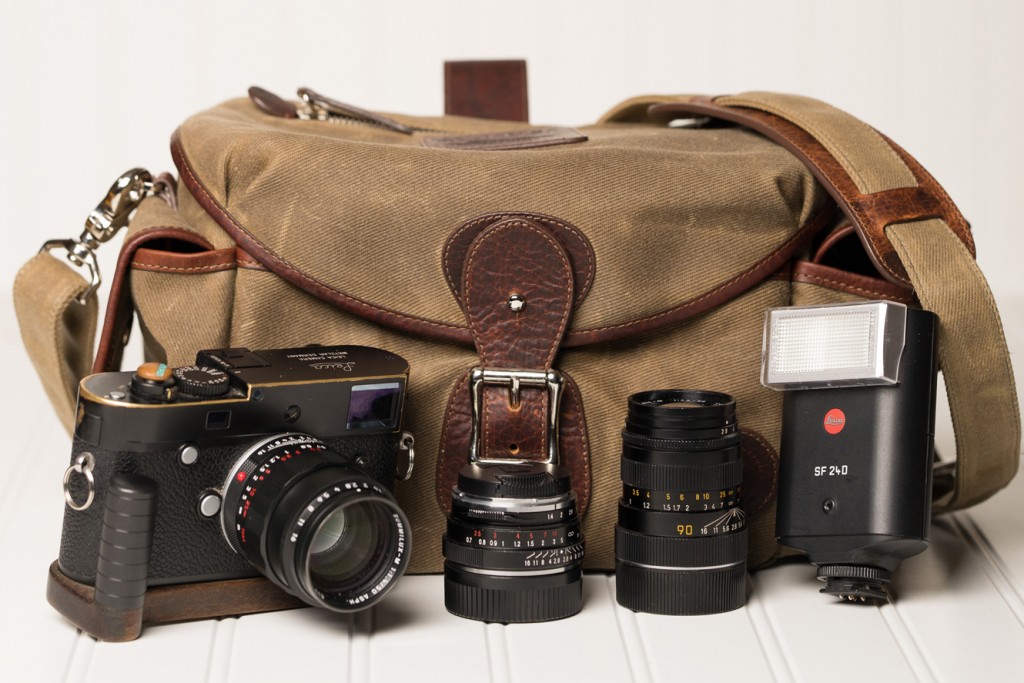
In addition to the comfort and organizational factors, this bag is unassuming. It’s small, lightweight, and doesn’t look like a camera bag. That’s a big deal because thieves will be less likely to target you because they won’t know you have expensive camera gear inside.
Speaking of the inside, this bag has multiple compartments lined with sheepskin that keep your gear cozy and safe as you travel. No bumps or bruises for your gear when it rides in this thing!
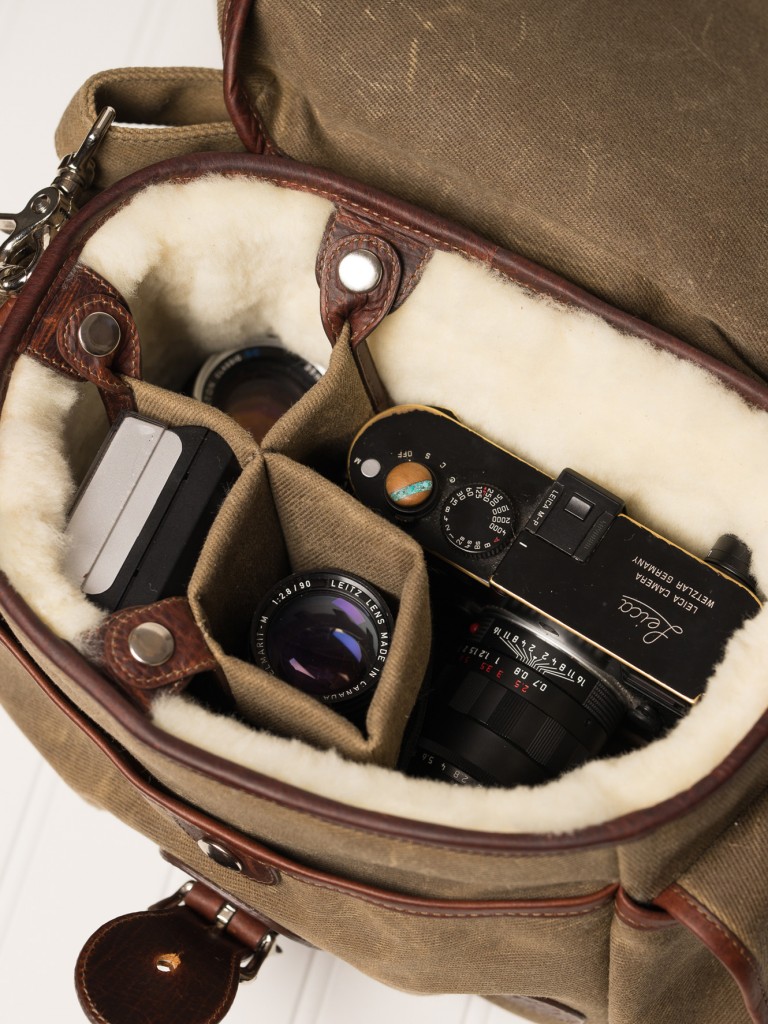
On top of all that, this bag can be worn as a traditional shoulder bag or it can be attached to the impeccable Holdfast MoneyMaker. That means you can customize how you carry the bag to suit your specific needs.
Either way, you have quick access to your gear so you won’t miss any shots on your travels. What’s not to like about that?
Get the specs on the Holdfast Fundy Streetwise Bag.
Travel Photography Tip #3: Bring a Polarizing Filter
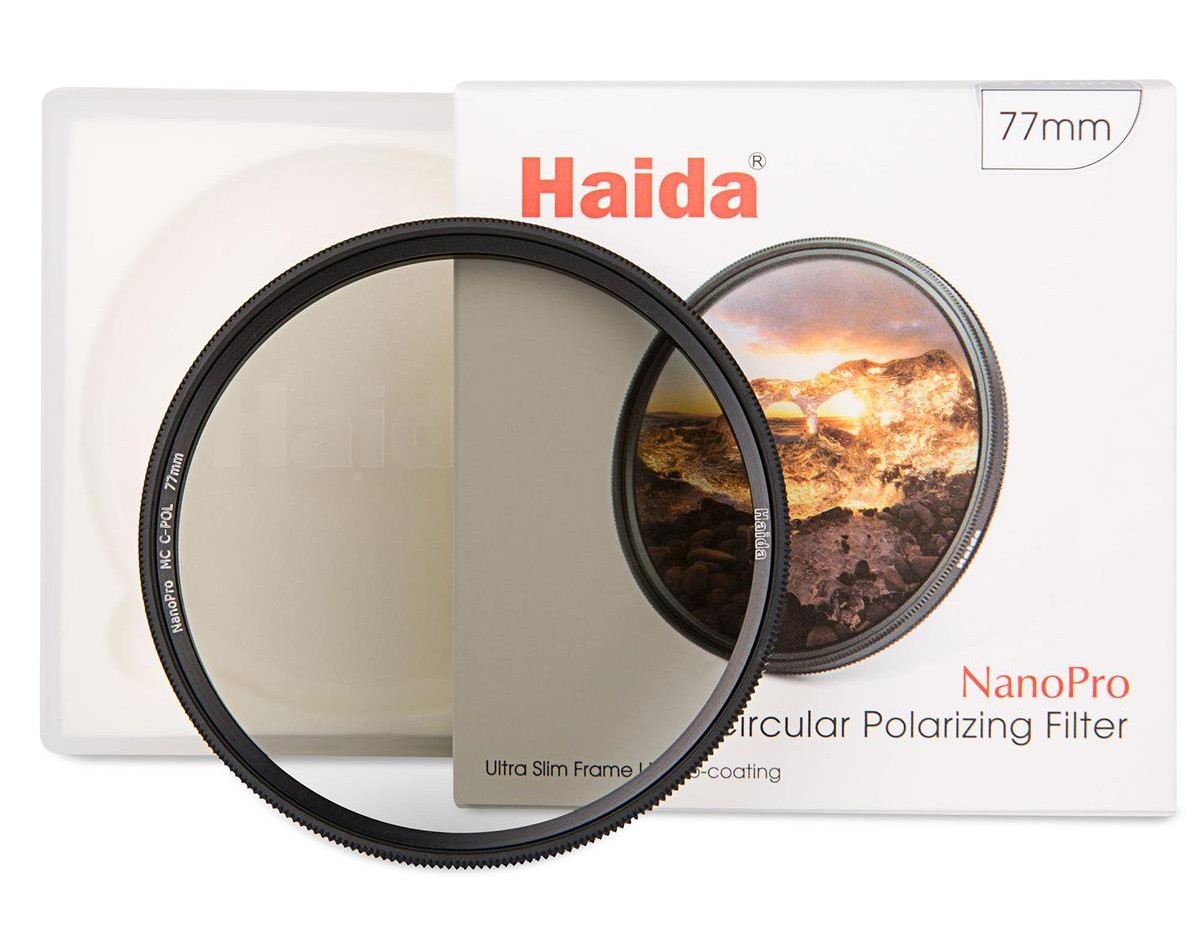
By far, one of the best accessories you can have for travel photography is a good polarizing filter.
Typically used for landscapes to reduce atmospheric haze, boost contrast in the sky, and minimize glare off of water and other non-metallic surfaces, circular polarizers have other uses too.
For example, you can use a polarized filter when taking portraits to reduce glare off of people's skin.
A polarizer can also be used as a neutral density filter in a pinch as it will slightly reduce the amount of light entering the lens, allowing you to slightly blur movement of things like clouds or moving water.
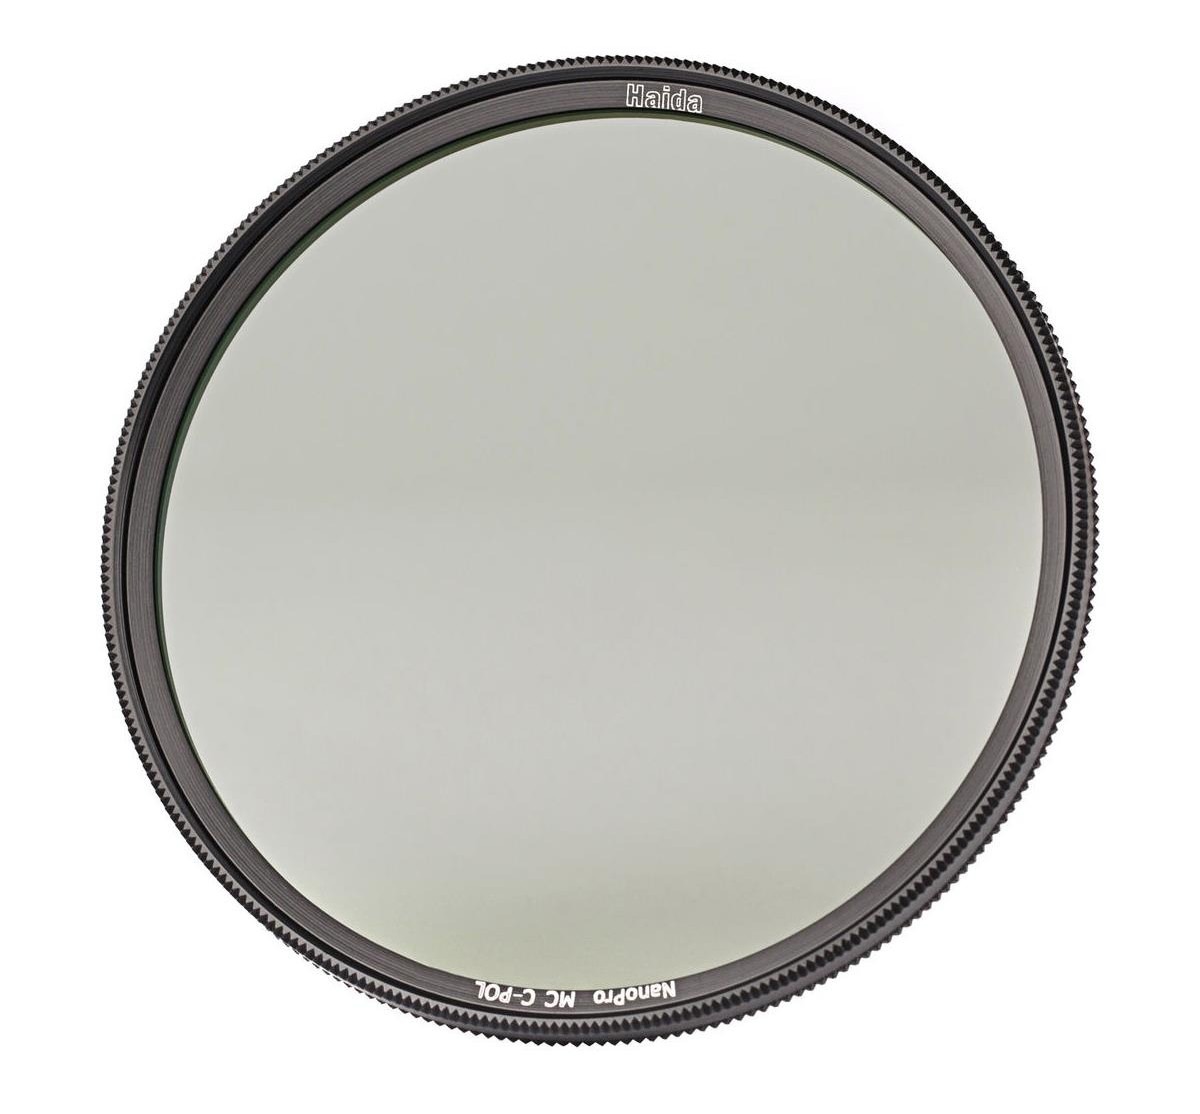
I've been using Haida Circular Polarizers as of late, and I've been impressed with the results I've been getting.
The filters are well made and durable, so they can stand up to the rigors of travel photography.
With 10 layers of multi-coatings, you get superb protection for the filter glass while also reaping the benefits of reduced glare.
Likewise, the multi-coating enables improved beading of water and oil, so they're easy to clean.
These filters are also easy to use...
With side knurling that provides a textured grip, you can more easily and precisely manipulate the filter to get just the right effect.
The filter housing is slim as well, which means less chance of vignetting when using a wide-angle lens.
There are just too many benefits of having a good circular polarizer with you on your travels. Do yourself a favor and add a polarizer to your kit today!
Travel Photography Tip #4: Plan It Out (But Still Be Spontaneous)
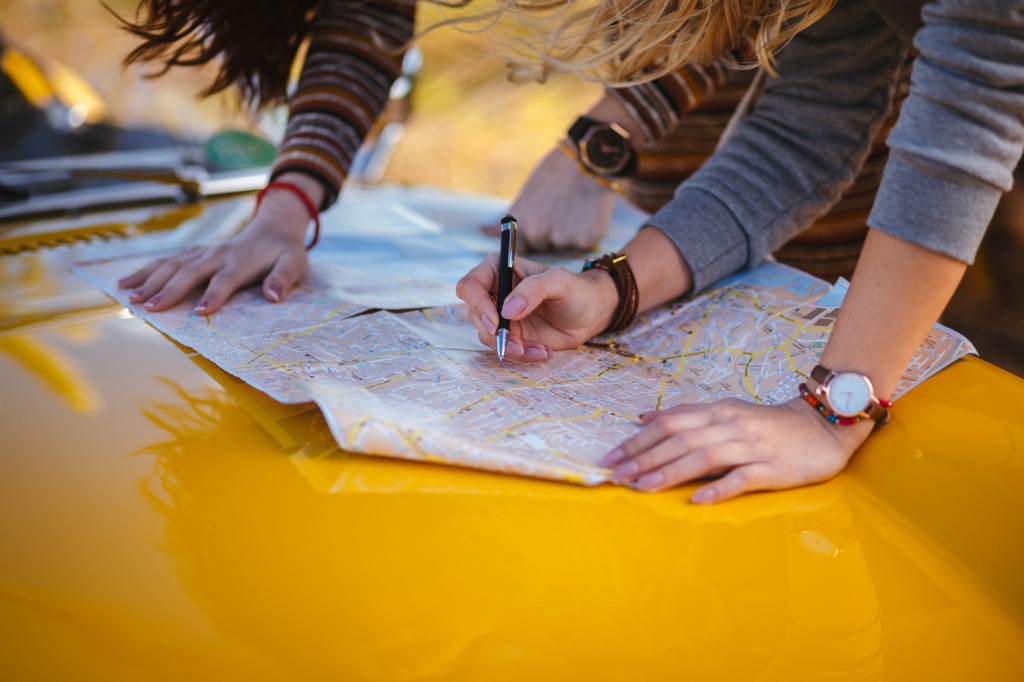
photo by wundervisuals via iStock
It’s important to plan your travels well ahead of time so you’re sure to be in each location at the ideal time of day. After all, getting to that quaint mountain village in the north of Italy at noon isn’t going to get you the best photos under that harsh, midday light.
So, while you’re figuring out where to go, think about when to go too. It’s one of the most important things you can to do improve travel photography
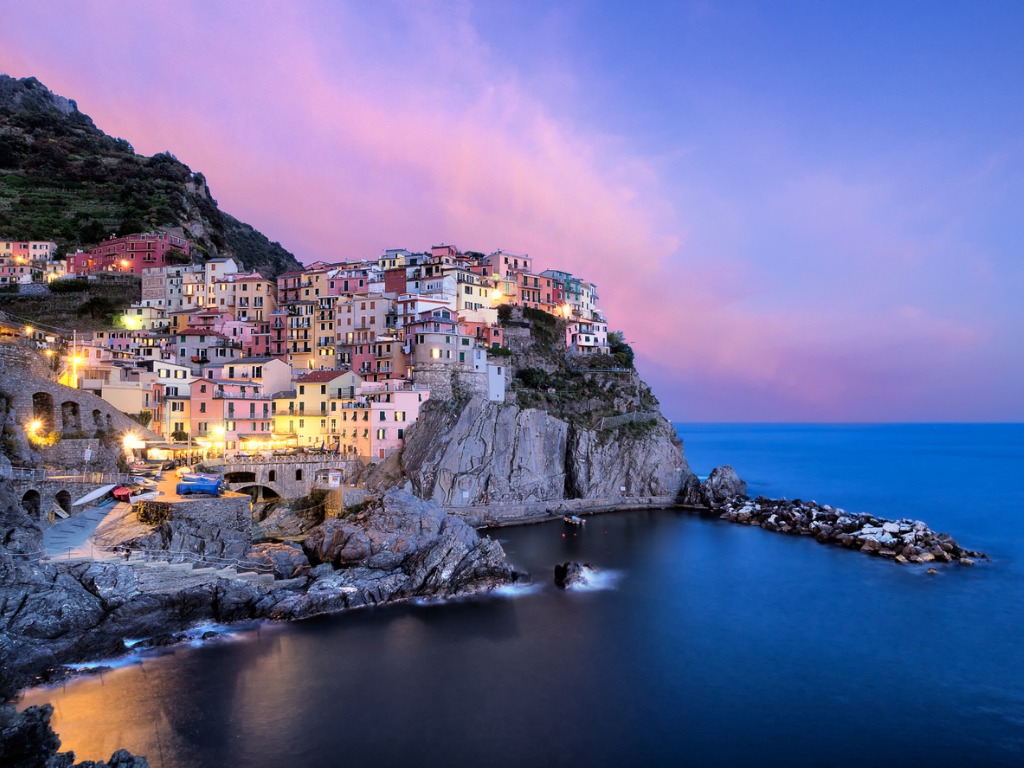
photo by FilippoBacci via iStock
The when part of the equation might be more complicated than simply deciding to be somewhere at dawn or dusk.
For deeper intel on the locations you’ll be traveling to, ask around. Get with your photographer friends and see if they’ve been to any of the locations you intend to visit. Once you’re in-country, ask the locals for inside knowledge about where you should go and when.
That brings up the “be spontaneous” part of this.
While you should leave home with a solid plan in place, don’t be tied down to it. Some of the best adventures (and best photos) result from ditching your initial plans in favor of something else at the last minute! Being willing to be spontaneous is a critical part of being a travel photographer.
Learn More:
Travel Photography Tip #5: Add a Human Element
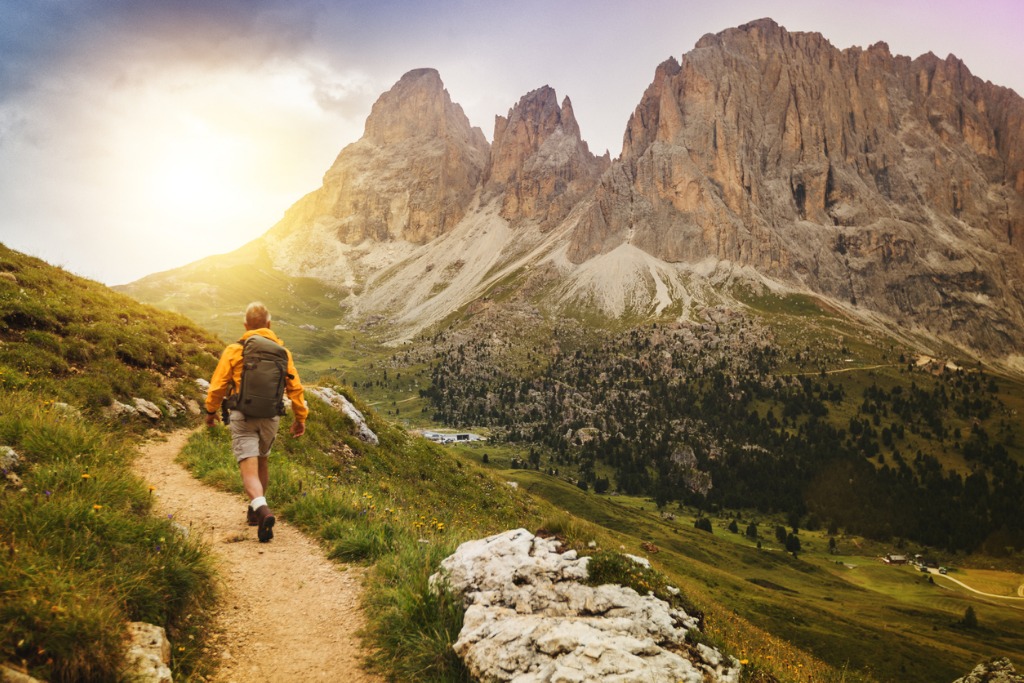
photo by piola666 via iStock
Sure, many travel photos will include people - portraits and street scenes and such.
But there’s a real opportunity to add more meaning and depth to your landscape photos by adding people or human elements to the shots.
Adding a person or a manmade object to a landscape is frowned upon by some landscape photography purists, but for me, doing so helps you tell a better story about that place.
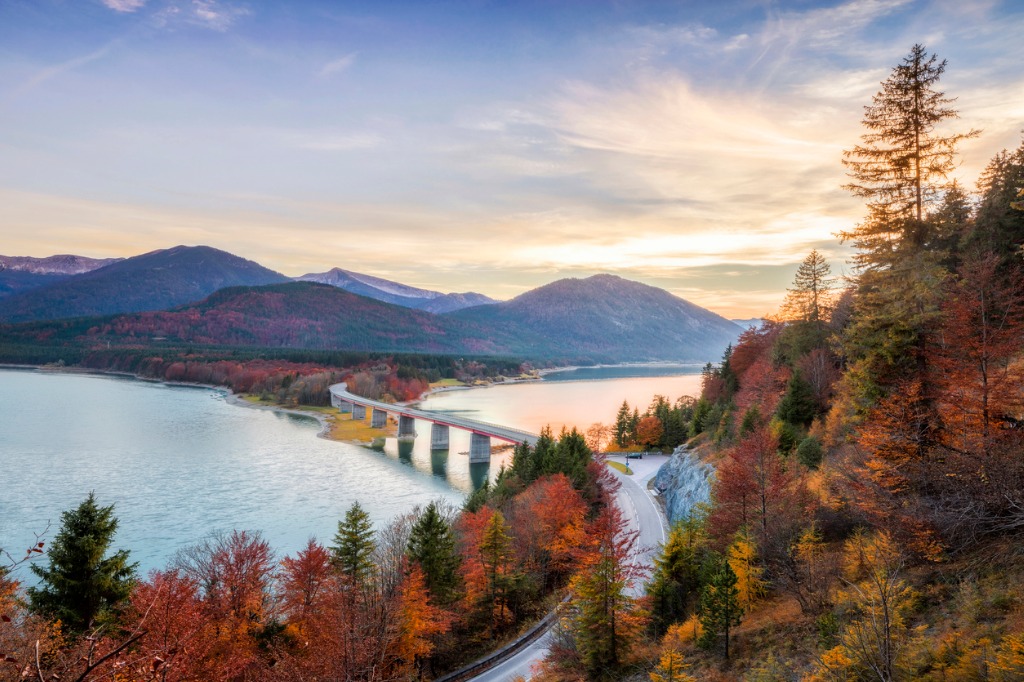
photo by DieterMeyrl via iStock
Additionally, adding a familiar-sized object like a person to a landscape shot creates context and helps viewers understand the scale of the scene.
Likewise, human elements like roads and paths are perfect leading lines that help direct the viewer's eyes from the foreground to the background of the shot.
So, while beautiful, untouched landscapes are certainly worthy subjects, try adding a human element and see how doing so can make the shot that much better.
With these simple tips, you’ll end up with better photos and a more pleasant traveling experience. It’s a win-win!
We Recommend
Explore Gorgeous Landscapes in this American Southwest Photography Workshop
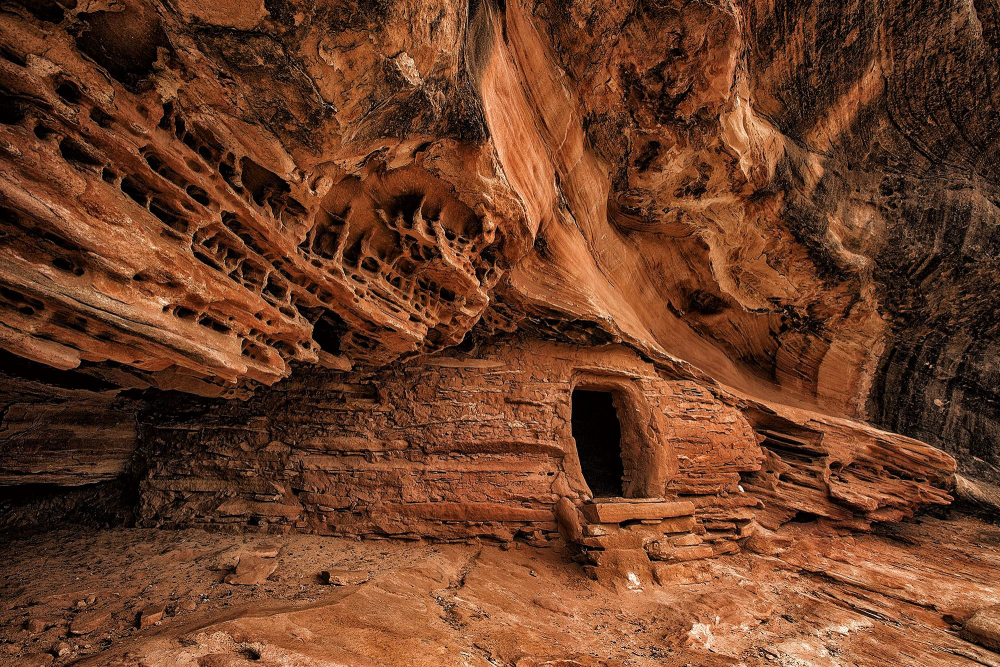
Are you ready for an extreme photography workshop in the beautiful American Southwest that includes guides, instruction, and a post-processing workshop?
Our friends at Aperture Academy are hosting a 4-day American Southwest Photography Workshop for anyone that wants to learn more about outdoor photography and capturing amazing images of gorgeous landscapes.
Table of Contents
The American Southwest
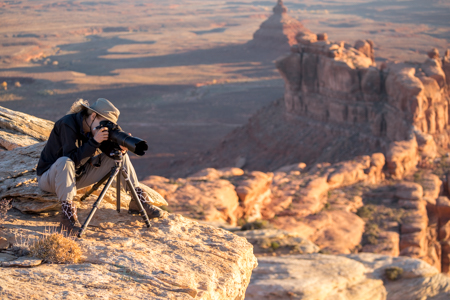
The American Southwest is a gorgeous destination for landscape photographers and also offers other incredible subjects to capture with your camera.
Photographers who enjoy closeups or macro photography will find lots of subject matter, from plants and insects to rock crystals. There are animals and birds unique to the area, and there is nothing quite like the astrophotography views under such dark skies.
Your visits to the area will include travels through mountainous terrain, desert vistas, interesting small towns, and even an abundance of unique architecture. Sunrises and sunsets are gorgeous. Plus, if a storm forms in the distance, the sky views are like nothing a city dweller has seen locally. If you play it safe, the storms themselves may provide a wonderful lightning show.
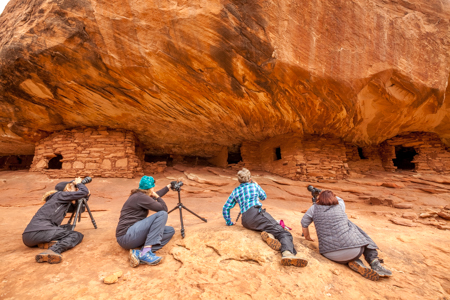
The season will have a lot of effect on some types of photography for you as well. During the fall months in the higher elevations of the American Southwest, you could find aspen trees turning gold and yellow.
Winter and early spring snows add their own beauty to what’s already there, and the summer evenings offer awesome Blue Hour and astrophotography opportunities, to say nothing of the ultra-long Golden Hour times.
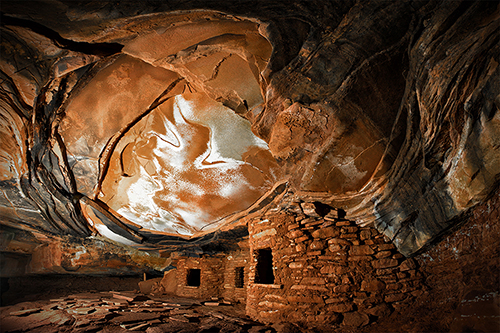
I really enjoy the variety of things available in the autumn months of the American Southwest. Just like summer evenings, the fall afternoons and early evenings are full of color, and you can see plant life in various stages of their own beautiful colors.
If you’re getting the idea that the American Southwest is a prime photography destination, you’re on the right track. You can try it out on your own, or you can opt to take part in a fantastic Southwest photography workshop to show you how to get the most out of any visit to this fantastic area of the country.
Aperture Academy
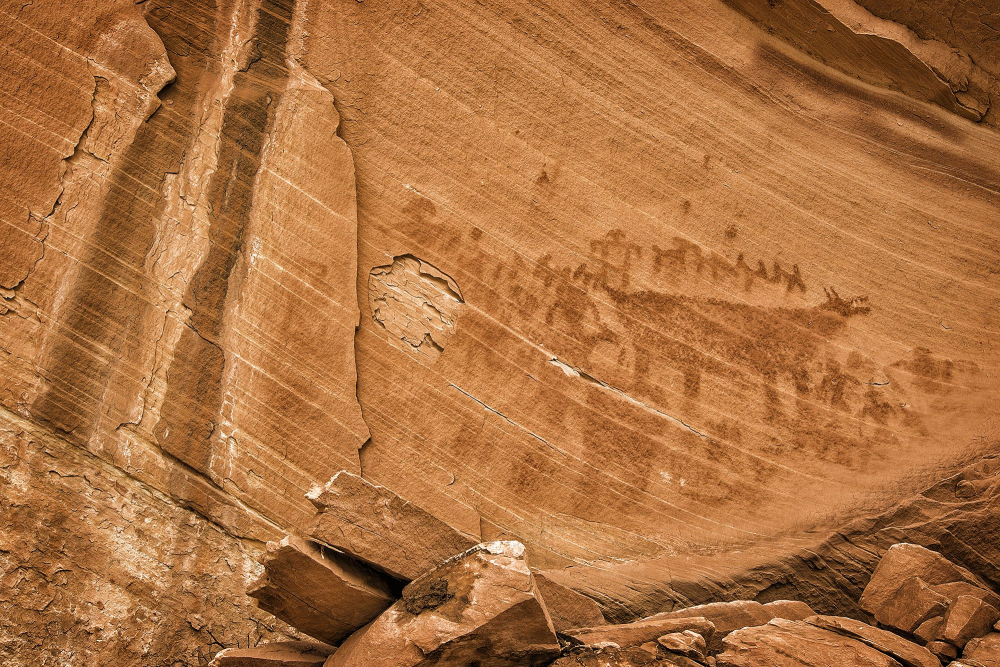
Aperture Academy has so many excellent workshops to choose from that it may be difficult to decide on just one!
In fact, if you sign up for their 4-day American Southwest photography workshop, you could also extend your trip with a 3-day workshop across the Million Dollar Highway in Colorado, since the trips can actually be booked back-to-back.
Whatever workshop you choose, you’re in for a treat. The American Southwest Photography Workshop is full of great photography subjects and can also be a fine source of continuing education in outdoor photography for all levels of photographers. This is true whether you’re an absolute beginner, a seasoned pro, or somewhere in between.
Learn More:
Adventure Photography Tours
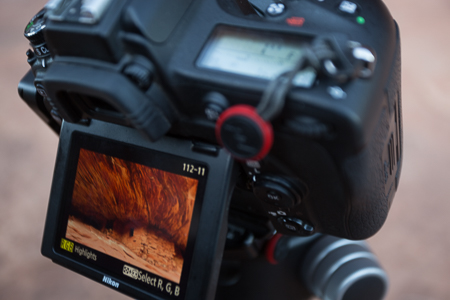
Some of the best aspects about attending the American Southwest Photography Workshop is that you will not only get excellent photography guidance and tips about your photography, but the tour providers are also able to get you into places you may not be able to reach on your own.
The guides take you off of the beaten path to show you photographic subjects and opportunities such as the red canyons where the Anasazi people roamed millennia ago. You will see ancient Anasazi ruins, petroglyphs, pictographs, and dwellings that still seem to be liveable, in pristine condition.
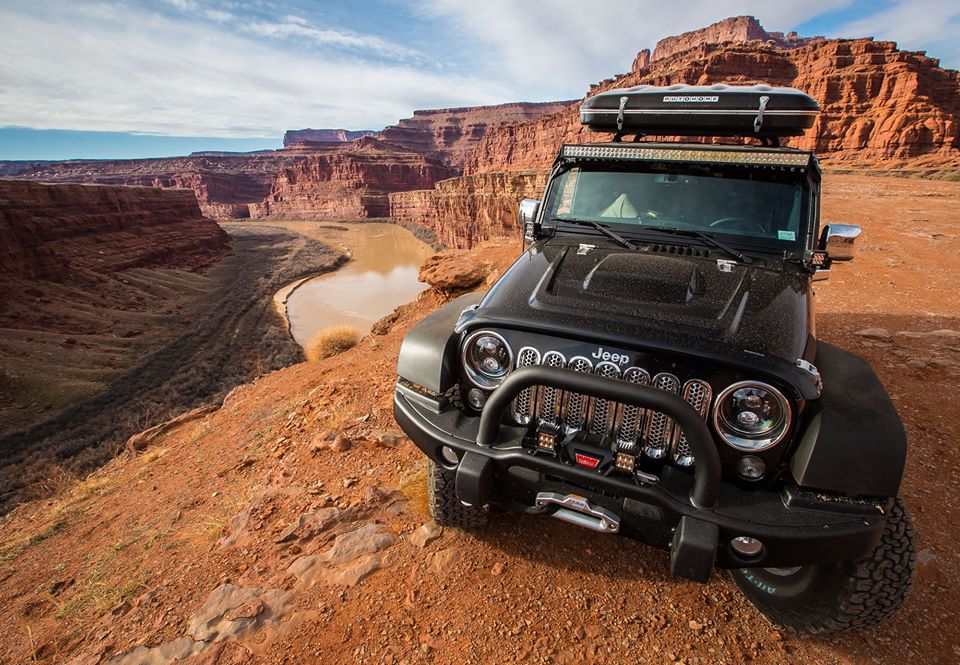
The way you get there is an experience in itself…
From the initial night with workshop orientation at the Bluff Dwellings Resort and Spa in Bluff, Utah, you will then head by 4-wheel drive vehicles to a base camp which serves as the campsite for the next two days of the American Southwest Photography Workshop.
From that base camp, you will hike into the wilderness to see some of the most beautiful and rugged scenery on the planet. There’s a reason why so many movies are filmed in the American Southwest - it looks absolutely amazing! You won’t need to carry all of your camping gear on the hikes, though - just your photography gear.
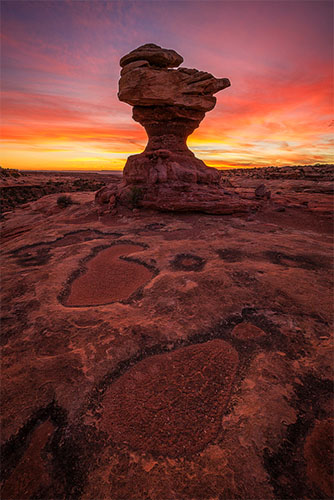
At night at base camp, you will have a chance to see stars and other celestial sights you’ve only seen in magazine photographs. Now, you see them for yourself under dark sky conditions, which is your opening to engage in astrophotography or maybe even some deep-sky imaging, if you have that type of equipment.
The final day of the workshop is back at the Bluff Dwelling Resort, where you will engage in a Southwest photography workshop post-processing session guided by the talented and knowledgeable Aperture Academy team.
Other Perks
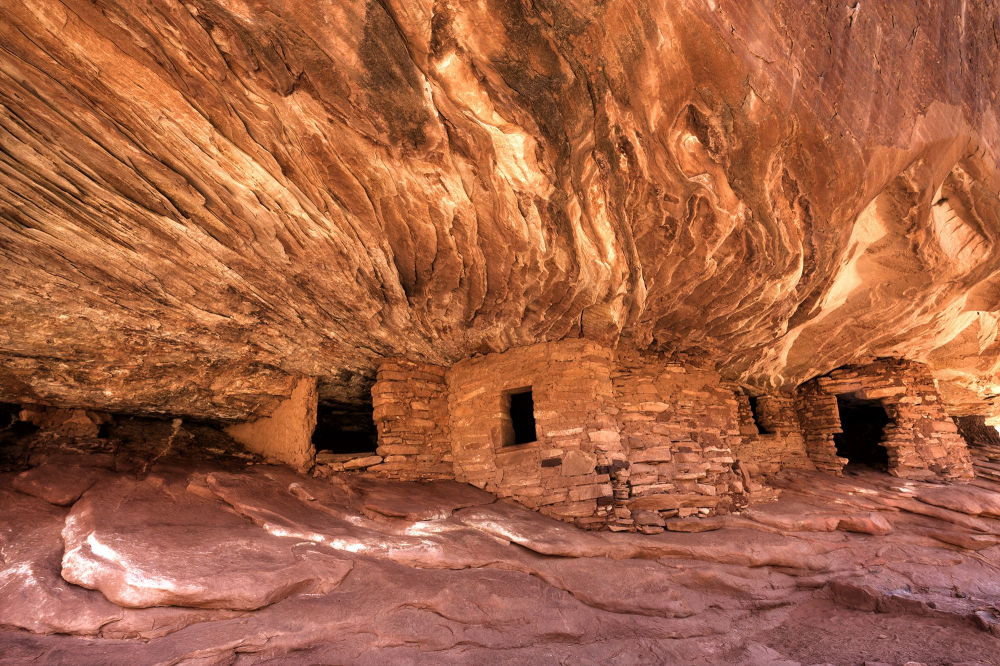
As I said, a great perk of this American Southwest Photography Workshop is that you’re already in the area of another prime outdoor photography location - the Million Dollar Highway area of Colorado. So, you may as well book back-to-back workshops to extend your trip!
You will be in Bluff, Utah, a wonderful town that was named as one of Budget Travel Magazine's coolest towns. Near the San Juan River and on the Trail of the Ancients Scenic Byway, Bluff has a Navajo reservation nearby, which gives you even more things, places, and maybe people to photograph. Ask the tour guides about the possibilities.
You will be close to other jaw-dropping scenic vistas such as the Gooseneck State Park, Valley of the Gods, Moki Dugway, and Mulley Point. You won’t want to leave, believe me.
Oh yeah - while camping out, you’ll enjoy a camp-cooked meal and tons of enjoyable conversation and association with fellow outdoor photography lovers and the staff. Once you attend, you will be looking for further opportunities to be a part of a photography workshop.
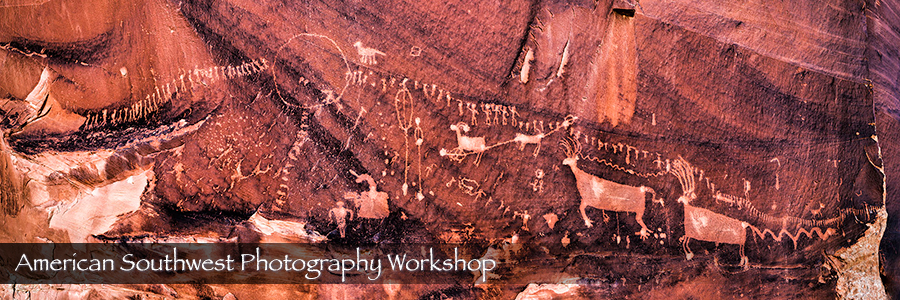
Aperture Academy has many workshops and guided trips. They offer one-day workshops, including online classes. There are several 2-4 day workshops in places such as Yosemite, Tahoe, South Carolina, and Death Valley. Aperture Academy even has extended four, seven, and ten-day excursions to Alaska (bears!), Canada, Iceland, and Africa.
Check out the American Southwest Photography Workshop from Aperture Academy, and get your photography education rolling in style!
Learn More:
We Recommend
Five Tips for Becoming a Better Travel Photographer
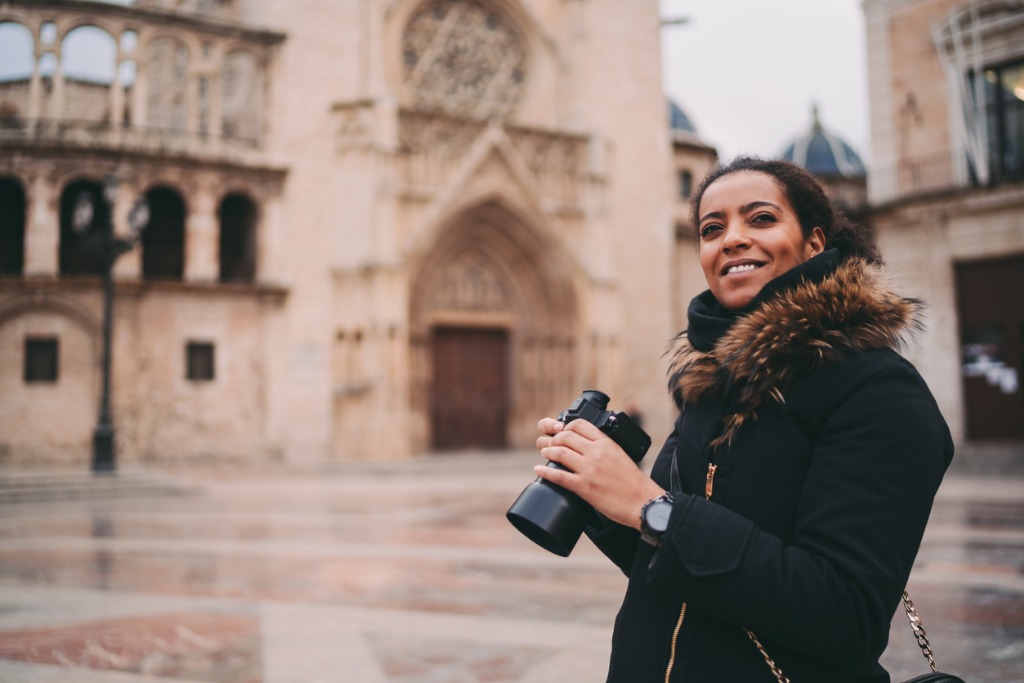
photo bymartin-dm via iStock
If you want nothing more than to be a travel photographer, you definitely aren’t alone. Travel photography is so rewarding because you’re constantly seeing new things, facing new challenges and figuring out why your photography is so important for people to see.
But, becoming a travel photographer is also difficult. Chances are that you won’t make very much money doing it. A good travel photographer salary is around $60,000 if you’re being sent on assignments by different clients, but if you’re working for yourself then this annual salary will probably drop to under $30,000.
However, $30,000 U.S. dollars is a really large sum of money if you’re spending most of your time in Thailand or Chile. It’s all about how and where you live.
If this sounds appealing to you, then I’ve compiled some travel photography tips for you. These tips will help you to make more money, find more clients, and understand your goals as a travel photographer.
Figure Out What You Want

photo bykatleho Seisa via iStock
The most successful travel photographers are people who are avid planners. This is not a profession you can just jump into. It takes effort.
Some questions you need to ask yourself about your travel photography career are:
- What do you want to do with travel photography?
- Is this your final career stop, or do you just want to use travel photography to travel for a short amount of time?
- How much are you comfortable earning every year?
- What sorts of personal and family goals will you be putting off by becoming a travel photographer?
- How much can you afford to start this business?
Just because you will be working for yourself doesn’t mean that you don’t need to create a career plan.
This is an especially important move because, chances are, you may be putting off some large personal goals, like owning a home or having a child, in order to pursue this dream right now.
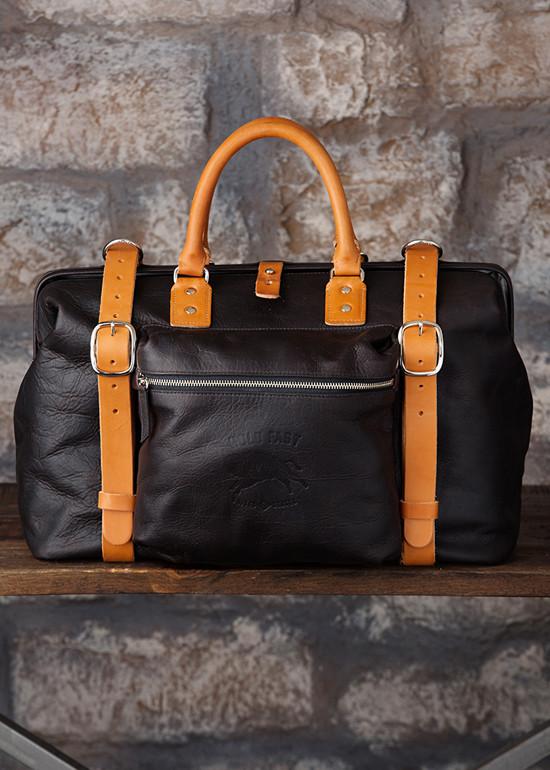
You’ll also need to closely examine how much money you can truly afford to spend to start this business. There are a ton of start up costs to travel photography. You’ll need plenty of new gear, like leather camera bags for traveling such as Holdfast’s Roamographer bag (shown above).
You’ll need plenty of other things too, like several lenses, a second camera body, and a good tripod. And investing in good gear that’s durable and can stand up to the rigors of travel isn’t exactly cheap!
Plus, you may need to hire freelancers to help you create your brand.
Once you understand what this career can and cannot do for you, all of the next steps will be much easier.
Create Your Brand

photo byAndreyPopov via iStock
There are three all important aspects of creating a brand in our modern world. First, you need to build a name for yourself.
You can use your own name, or you can create a brand name, but you need to decide now which of these things you want to do. Changing your brand name a year into your travel photography career means you will be losing valuable recognition.
You’ll also need to check to make sure that whatever name you choose for your company is available. Make sure there are no other LLCs with that name. Then, make sure a website title would be available for that name.
You should also check with friends and family to see what names they like best for your brand.

photo byFluxFactory via iStock
Next, you’ll need to create a logo. If you aren’t a marketing wizard, then there are plenty of websites, like Upwork or Fiverr, that will let you hire a freelancer to create a logo for you. It’s an added cost up front but will be worth it in the long run because logos help to catch someone’s eye much more than your name ever will.
Also, you’ll need to figure out what niche market you want to be a part of. Travel photography is incredibly broad and includes things like food photography, landscape photography, and adventure photography.
What do you love to photograph? Pursue it!

photo byRawpixel via iStock
Lastly, you’ll need to decide what style you want to portray. As a travel photographer, the way you look says a lot about the way people think your photos will look, whether you like this or not.
When I first started participating in travel photography, I used ratty old camera bags for traveling and paired them with mismatching travel gear I found at Goodwill. Suffice it to say, I didn’t look put together and potential clients could tell.

Now that I’m a little more established and understand how important my personal aesthetic is for my brand, I only buy Holdfast products, like my Holdfast Roamographer bag that I’ve had for going on 5 years.
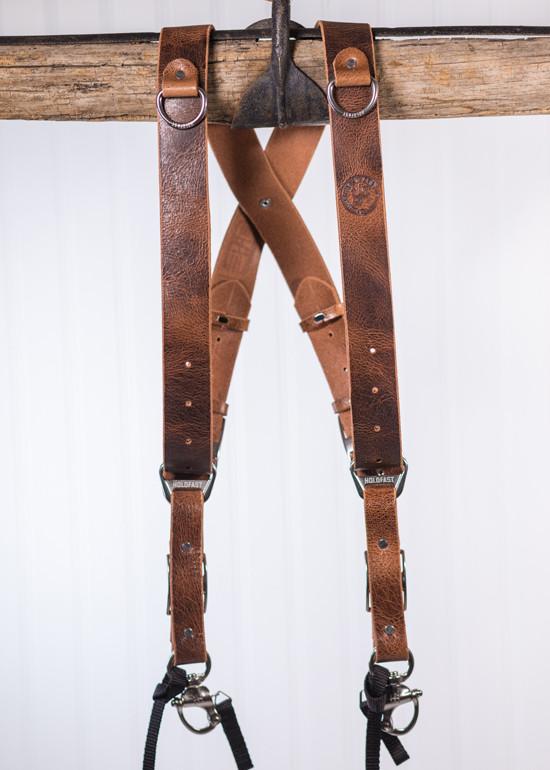
This bag is made of genuine bison leather, so it’s incredibly durable. But it also looks incredible! Besides, many of their products are available in leather, so they go very well together, like the Roamographer bag and the Holdfast MoneyMaker dual camera harness shown above. That means all of their products look good together, and thus, make me look good!
Invest in Good Face Masks
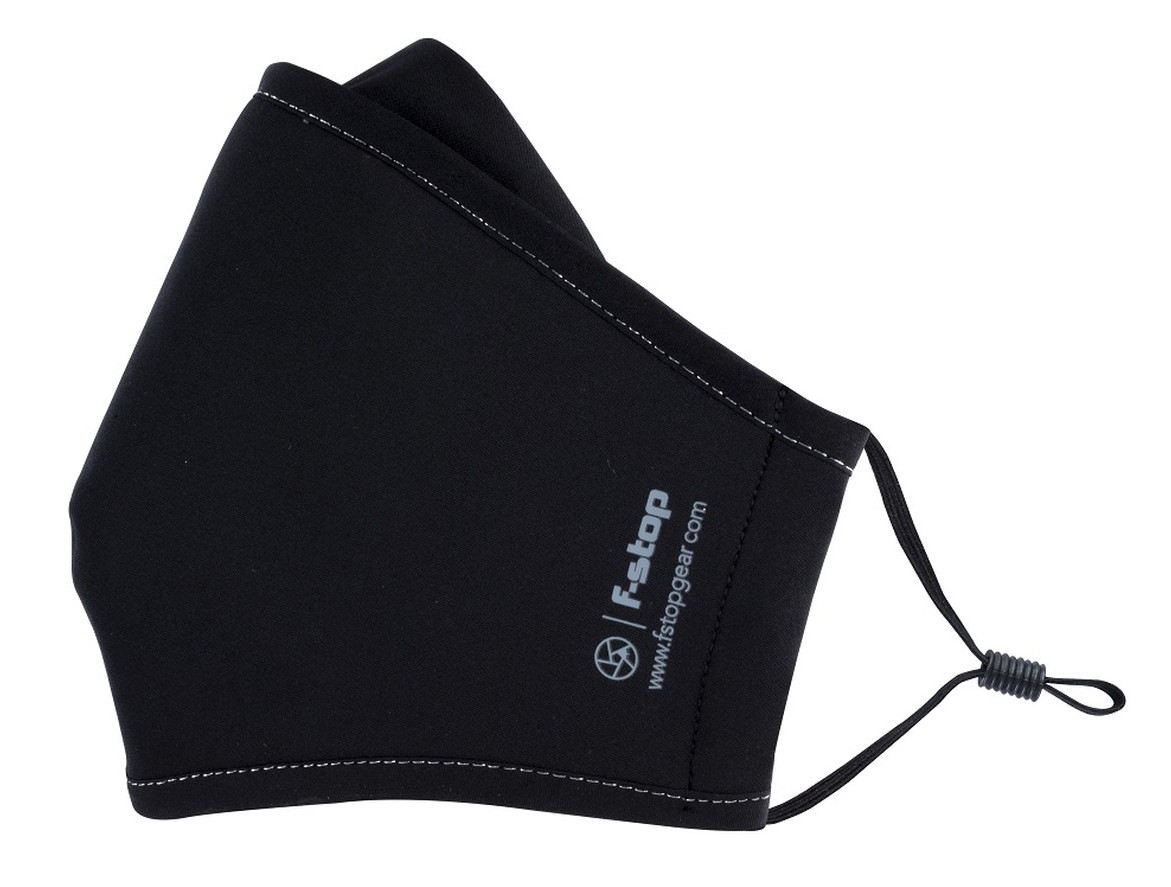
You want to ensure that you're being as safe as possible while traveling, and one of the best ways to do that is to have a good face mask to help mitigate the transmission of the COVID-19 virus.
f-stop makes a superb mask called the Dyota AG+ Ion that is washable, reusable, and has three breathable layers. There's a soft nose guard and adjustable ear loops to improve comfort, and the outer shell, which has a water-resistant treatment, wicks moisture away to help keep it dry.
The center layer is a non-woven poly that protects against particle and liquid penetration, and the innermost layer has a SILVADUR treatment to help prevent odors that result from frequent wear.
These masks are available in a variety of colors and are priced right at $19.99!
Build Your Online Presence

photo byAlexBrylov via iStock
There are two aspects of building an online presence as a travel photographer: your website and your social media accounts.
Let’s discuss your website first.
Your website should act as an extension of your brand that we talked about above. This isn’t to say that you can’t portray your personality on your website, because you should definitely do that. But, try and make sure everything you put on your website is directly relevant to whatever your potential clients may be looking for.
You’ll also want to follow SEO rules. Neil Patel goes through some of the basic SEO rules you should be following for your website above.
Next, you’ll need to build your social media presence. As a travel photographer, your Instagram and Facebook accounts are absolutely essential.
You should post as often as possible on each of them, but at least once every day.
Learn More:
Sell Your Work to Stock Libraries
Thanks to Julian Elliot Photographyfor the great video about learning how to keyword for stock photo libraries.
While stock image libraries are never going to be your only revenue source, they will be your most consistent if you use them correctly.
I have accounts with Shutterstock, Fotolia, Getty Images, and iStock, but there are dozens more where you can try your luck.
It’s important to note that all of these stock libraries have really high standards, so make sure you’re only submitting high-quality work to prevent being rejected.
It will be helpful for you to submit odd photos. For instance, there are thousands of photos of the Eiffel tower on iStock, but less than a dozen photos of patisserie shops.
Sell Your Work to Travel Magazines

photo bygrinvalds via iStock
This is one of my most lucrative avenues in travel photography, but also one of the most difficult to break into.
Firstly, you’ll probably need to write articles to accompany your travel photography if you’re planning to pitch magazines. If you’ve never written before, this can be a daunting task.
You’ll also need to become incredibly used to rejection. Like just about every other journalism industry right now, travel magazines aren’t making as much money as they used to so the very few full-time staff on these magazines are incredibly overworked. You may get a basic rejection letter or you may never hear back from many magazines that you pitch.
But, as soon as you get one yes, they start rolling in. Editors like working with photographers they’ve used before. Editors also talk to other editors. Once you have a good name in the travel magazine business, you’ll notice offers start to pour in.
Learn More:
We Recommend
Glacier National Park Photography and Travel Guide
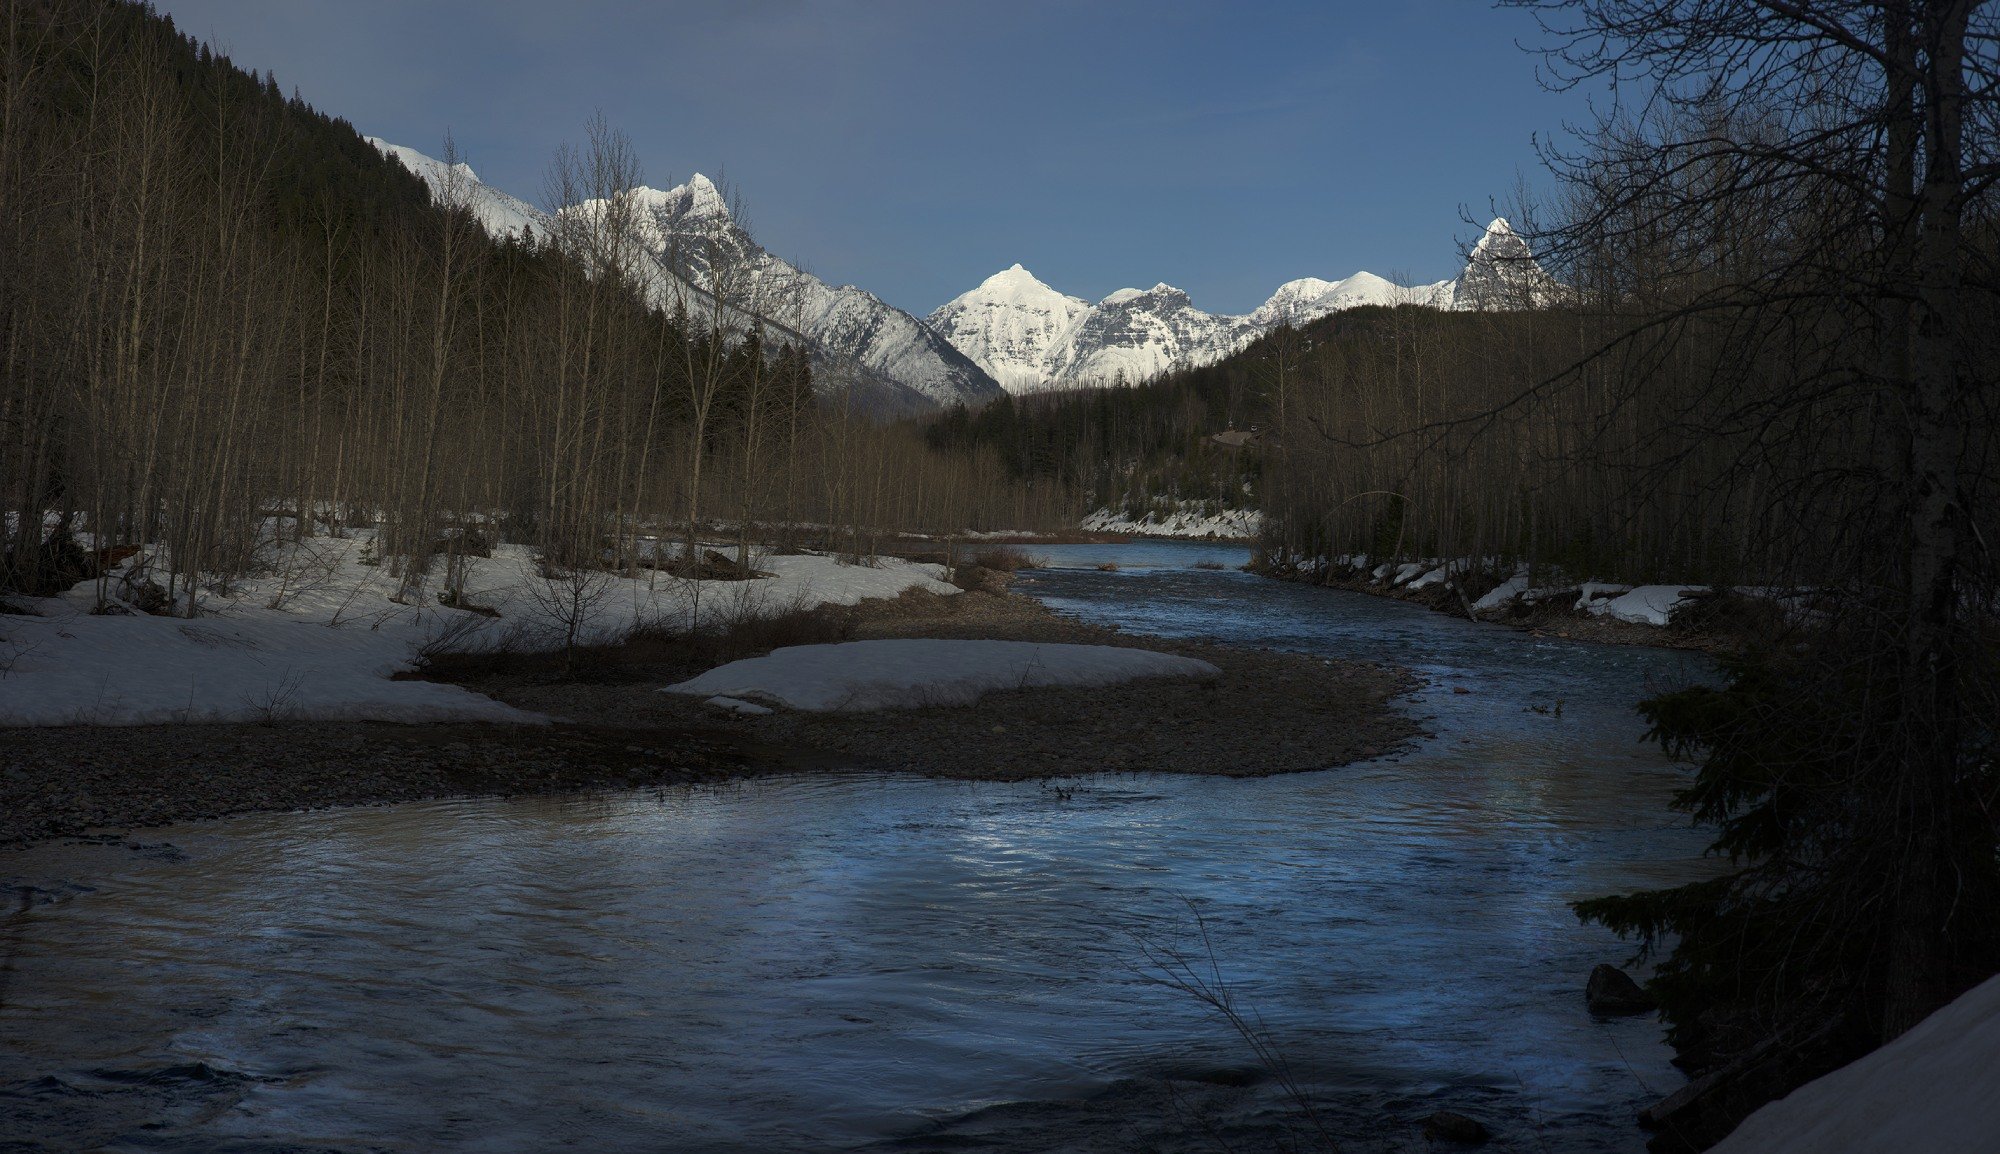 Photo by Kevin Vandivier
When I was a freshman in high school, my family made a trek to Glacier National Park in Montana that extended into a trip throughout Alberta, where we visited Waterton, Banff, Lake Louise, and a variety of other crazy beautiful locations.
But it was Glacier National Park that truly caught my attention.
I was no stranger to beautiful landscapes or soaring mountains, but it seemed as though Glacier National Park was on a completely other level. Everything was more beautiful, bigger, and more impressive than anything I'd seen before.
It was there that my love of photography began, and in the decades since, I look back on that trip with fond memories (and some pretty nice photos, if I don't say so myself!).
If you've never experienced the majesty of Glacier National Park, let this photography and travel guide serve as a leaping point for planning your trip.
Editor's Note: It has come to my attention that my buddy Kevin Vandivier has a spot open for his Glacier Photo Adventure coming up on August 15-19, 2019 and is willing to offer a pretty nice deal for the last-minute notice. Kevin is an expert photographer with decades of experience behind the lens, and started his career shooting wildlife for National Geographic Society, so a workshop with him is a fantastic opportunity to improve your photography skills. Contact Kevin today to join the ADVENTURE!
What to Photograph in Glacier National Park - Lake McDonald
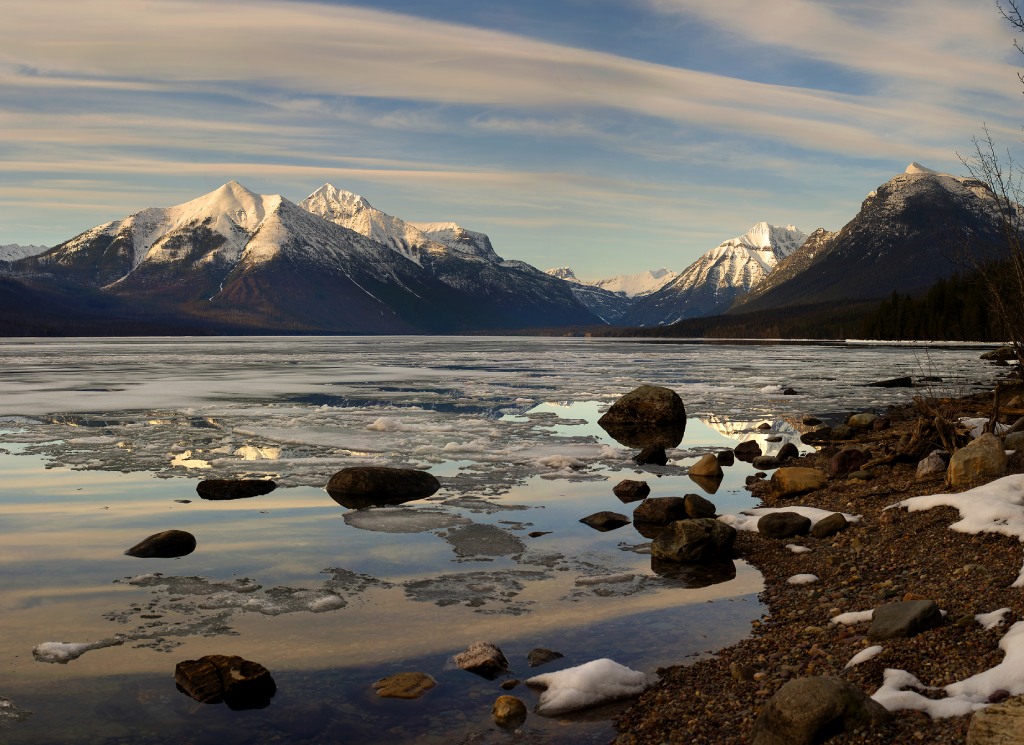 Photo by Kevin Vandivier
Lake McDonald presents a unique opportunity for photographers.
In many cases, one must walk or hike to find the premium views that escape the masses that rarely venture away from the roadways and parking areas that dot the park.
Yet, Lake McDonald affords breathtaking views just a few steps from the road.
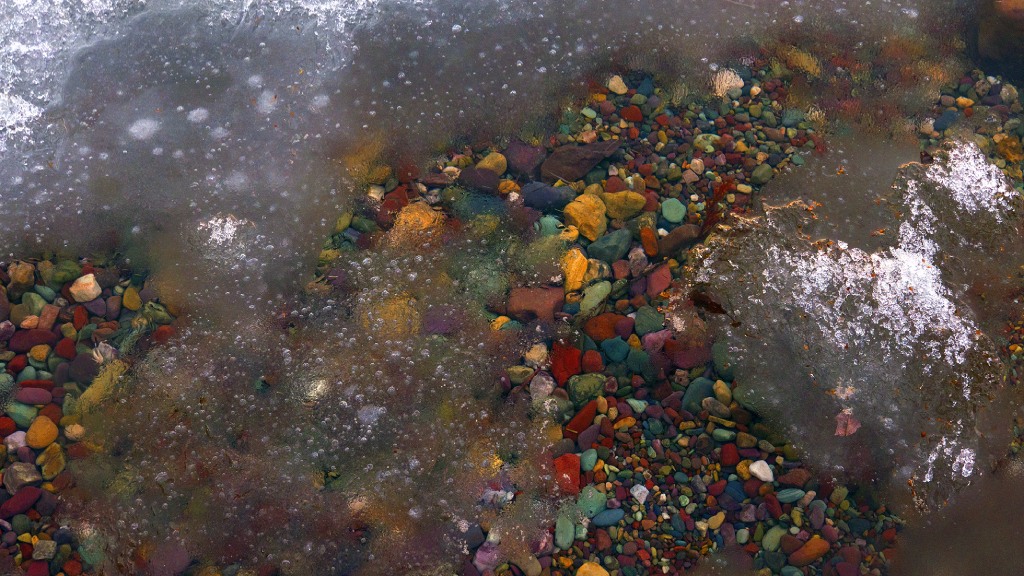 Photo by Kevin Vandivier
The perfectly still waters of the lake are the ideal foreground element for photographing the surrounding mountain peaks that extend toward the sky.
Sunrise and sunset are optimal times to visit the lake, when the soft glow of the morning or evening light sets the mountains on fire.
Don't miss out on an opportunity to highlight the rainbow-colored rocks beneath the surface of the lake's waters, either. There are secluded coves all over where you can set up your camera and capture a low-angle shot of the rocks, the lake, and the mountains without being disturbed by throngs of tourists.
As you can see in the previous two photos, visiting the park in the spring during the winter thaw presents you with unique opportunities to photograph the changing landscape of the park.
What to Photograph in Glacier National Park - Weather
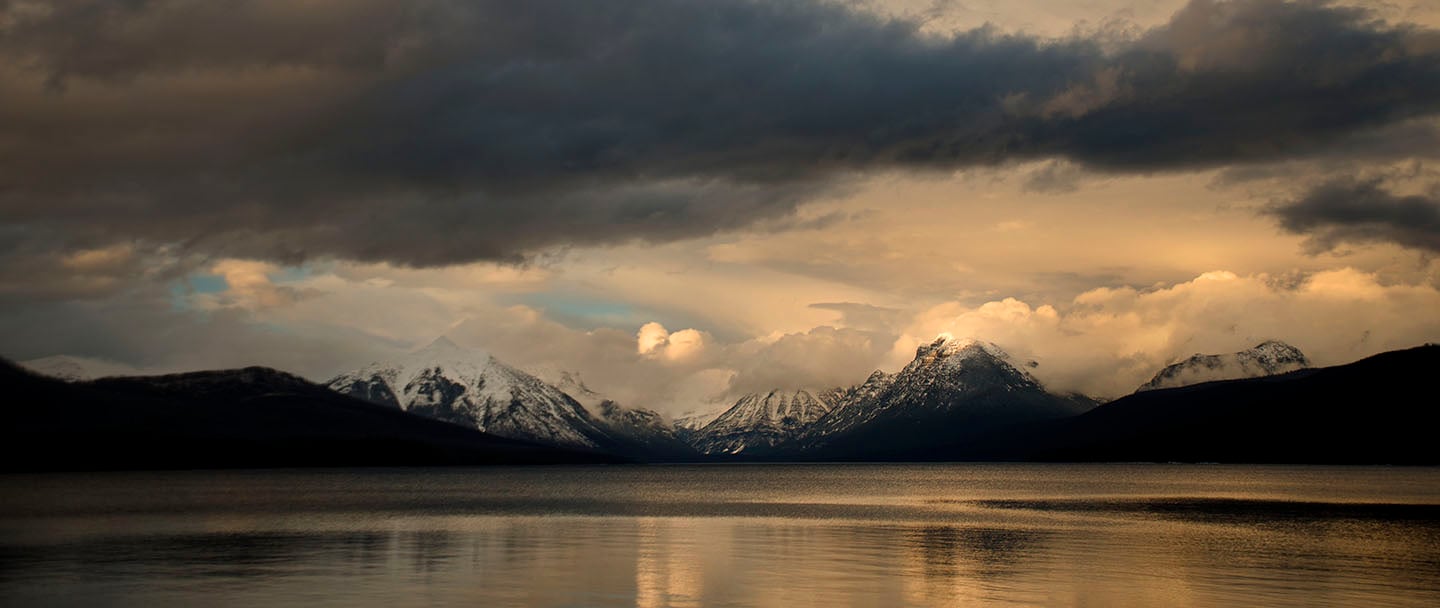 Photo by Kevin Vandivier
No matter if you visit in the spring, summer, or fall, Glacier National Park will eventually give you a chance to capture weather events that range from thunderstorms to gently falling snow.
With rainbows, lightning bolts, and spectacular sunsets a possibility as well, you can capture some truly dramatic shots!
It helps that the landscape of Glacier is one of the most awe-inspiring in the world.
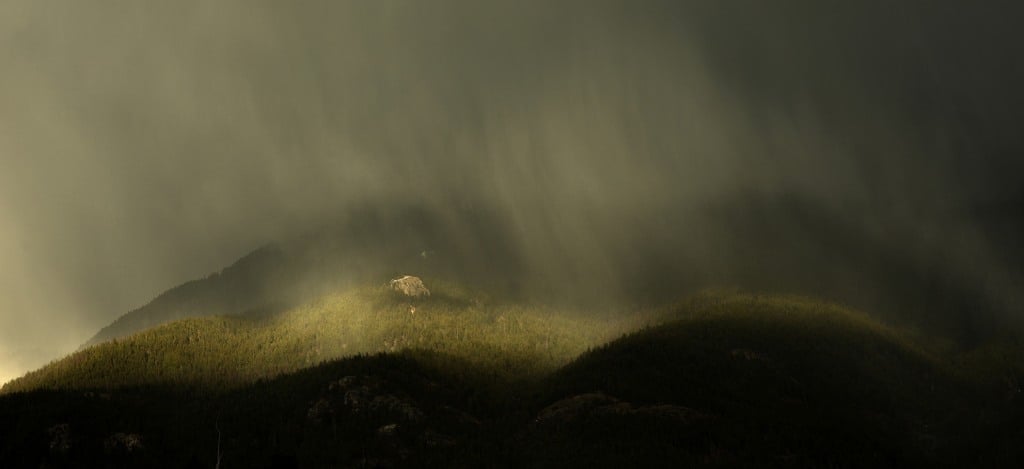 Photo by Kevin Vandivier
The combination of the jagged mountain peaks, crystal clear lakes, and soaring evergreens with roiling clouds, rain bands, and the saturated colors of the sunset is certainly one that can be utterly breathtaking.
And since there are so many vistas in the park from which you can compose a shot of a stunning scene, there's no lack of opportunity for showcasing how weather impacts the land. You just have to be patient - as they say, wait five minutes, and the weather will change!
Quick Tip:Use a long lens (as was done in the image above) to create a more intimate landscape photo. Doing so allows you to zero in on a small detail and delight the viewer's eye with aspects of the larger landscape that might otherwise get lost in a wide-angle shot.
What to Photograph in Glacier National Park - Wildlife
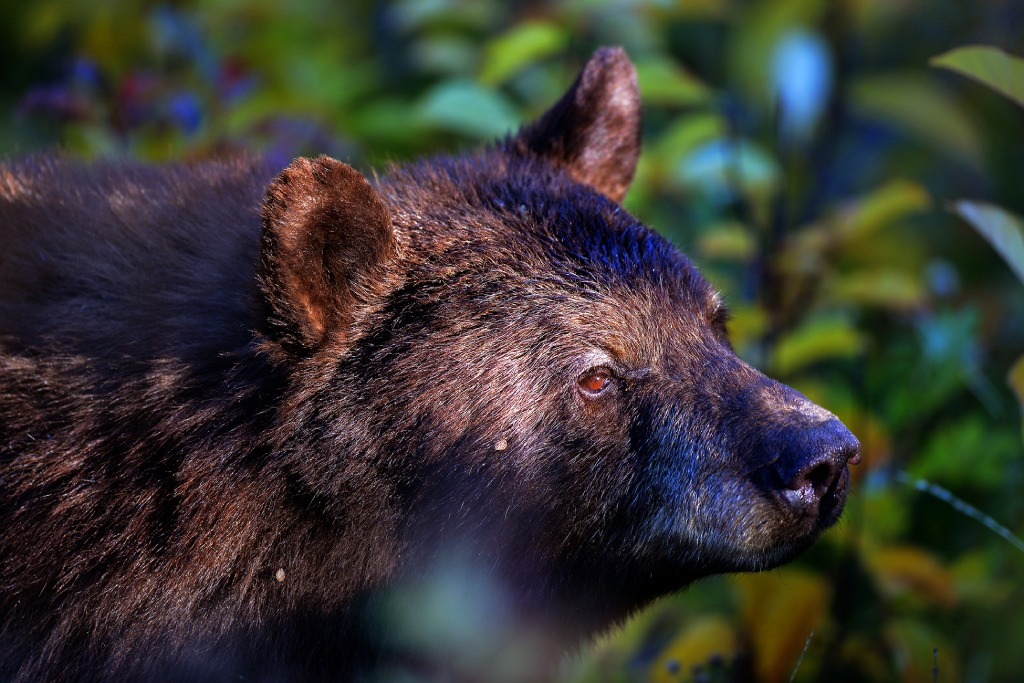 Photo by Kevin Vandivier
The wildlife in Glacier National Park is as abundant as the epic views it provides.
From the ever-popular grizzly and black bears to lumbering moose, elusive lynx and mountain lions, and commonly-seen elk, and mule deer, the park is full of large mammals you can photograph from afar.
In the spring, grizzly bears can be found in the high valleys and meadows where they dine on berries while black bears, like the one shown above, can be found fishing for trout in summer streams.
Moose can be found throughout the summer months in watery areas with willows and shrubs, and elk and deer are often spotted in mountain meadows in the spring, summer, and fall.
Planning Your Glacier National Park Photography Trip
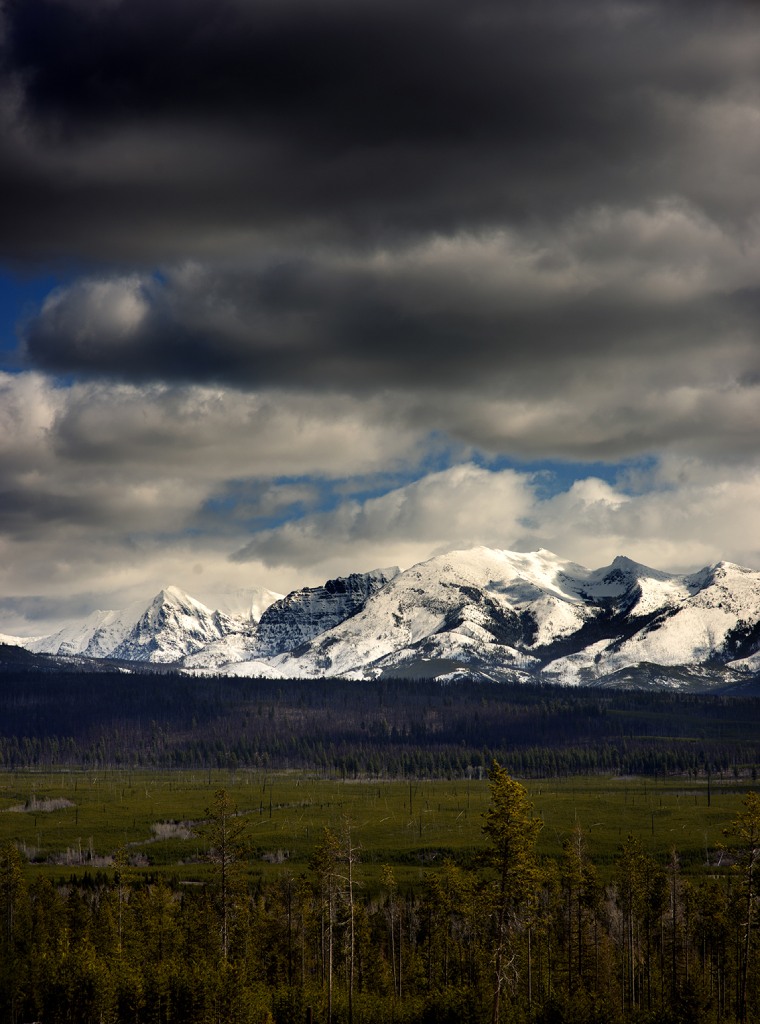 Photo by Kevin Vandivier
As I noted earlier, there is no doubting the sheer, unabashed beauty of Glacier National Park. There is a breathtaking view in every direction at virtually every spot you might visit along the parks miles and miles of roads and trails.
The difficulty with visiting the park as a photographer is simply deciding where to go and what to photograph - the opportunities are simply endless.
For my money, the best way to explore this incredible area is as part of a photography adventure.
I mentioned above that my buddy Kevin Vandivier leads photography adventures in Glacier, and has been doing so for many, many years. His next one is coming up fast, August 15-19, 2019.
If you think about it, it's the best way to see the park, find photography hot spots, and grow as a photographer.
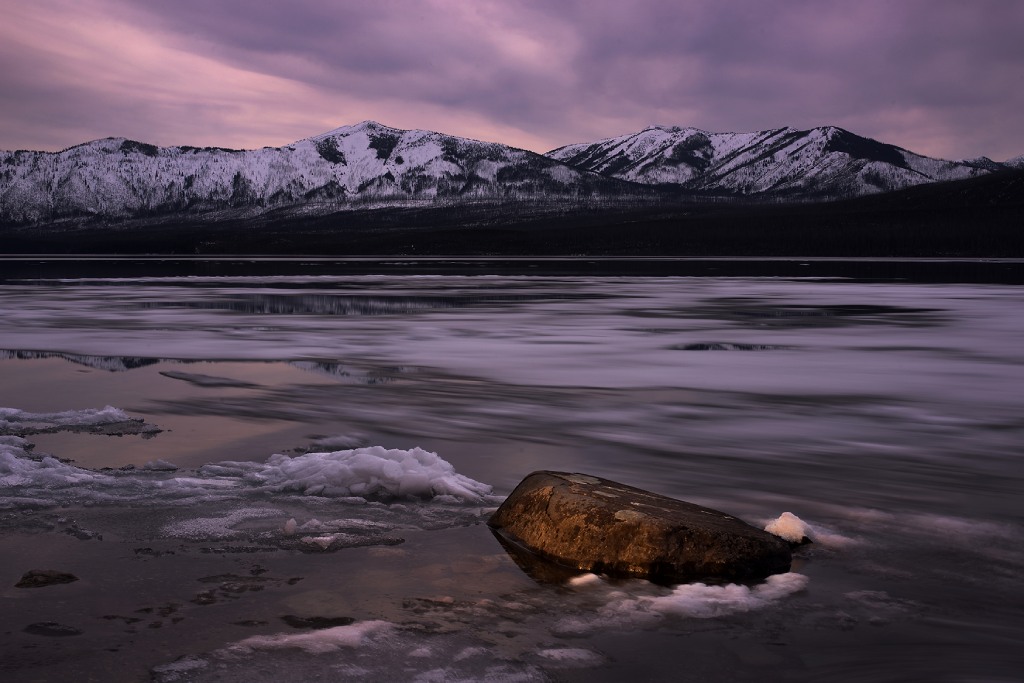 Photo by Kevin Vandivier
Besides, taking part in a photography adventure means you don't have to pay for in-park transportation, park entry fees, permits, meals, or lodging. You don't have to plan your days, either! Instead, you can rely on Kevin's expertise to get you to breathtaking locations where you can hone your skills in the most beautiful outdoor classroom you'll ever find.
All you have to do is pack your gear and get yourself to Glacier!
This is a once-in-a-lifetime opportunity you don't want to miss. Check out the workshop details and sign up here to reserve the last spot!
We Recommend
Grand Teton National Park Photography and Travel Guide
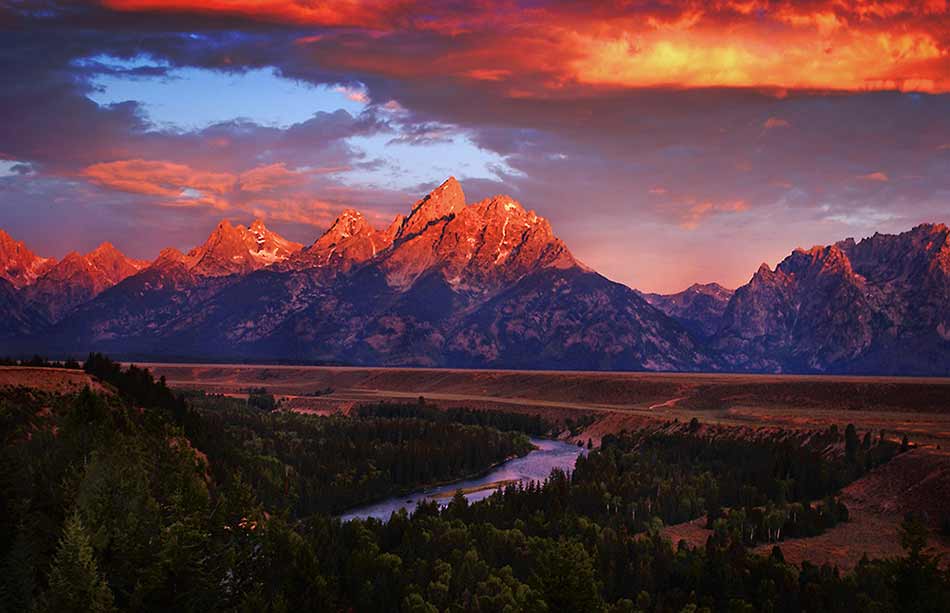
Photo by Kevin Vandivier
Though Wyoming is perhaps best known for the geothermal features of Yellowstone National Park, it’s neighbor to the south, Grand Teton National Park, offers unmatched beauty as well.
With soaring mountain peaks, pristine alpine lakes, and an abundance of wildlife, there is no lack of subject matter on which to train your lens.
After all, there’s a reason why Ansel Adams frequented the park!
In this photography and travel guide, we’ll reveal some of the best locations to photograph sunrises and sunsets, wildlife, and the landscapes of the park.
What to Photograph in Grand Teton National Park - Schwabacher’s Landing
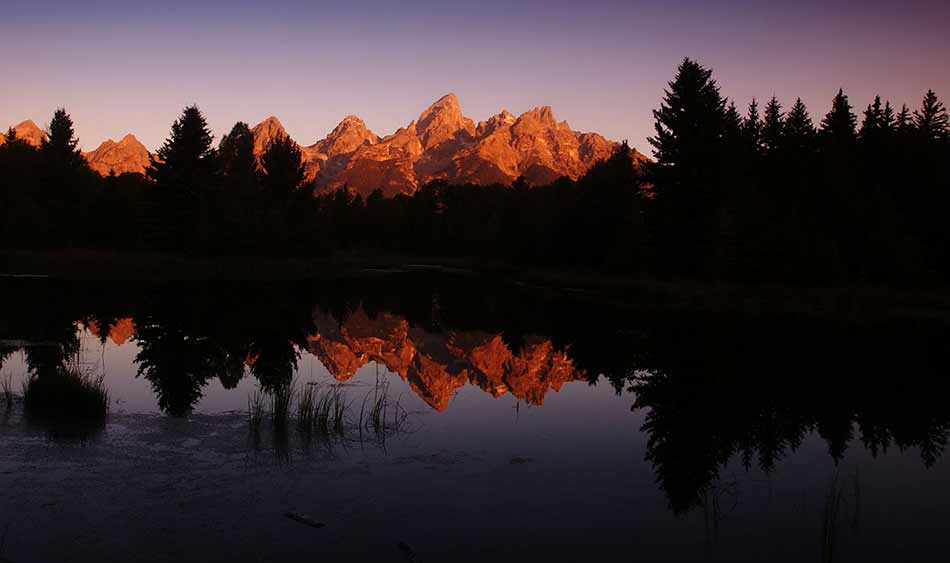
Photo by Kevin Vandivier
To be fair, it isn’t Schwabacher’s Landing itself that you should photograph, but the view of the Tetons from there.
Just a short jaunt down a gravel road from Highway 191 north of Jackson, this spot is one of the most popular photography locations in the park. As shown above, you can see why!
Beaver dams have created still pools of a tributary of the Snake River, which provides you with ideal conditions for capturing both the Tetons and their reflection in the still waters.
Sunrise is a particularly good time to take photos here, as the rising sun illuminates the peaks while leaving the valley in darkness. Just be sure to get there early to stake out a spot, and walk the pathways north along the pools to get away from the crowds in the parking area.
What to Photograph in Grand Teton National Park - Wildlife
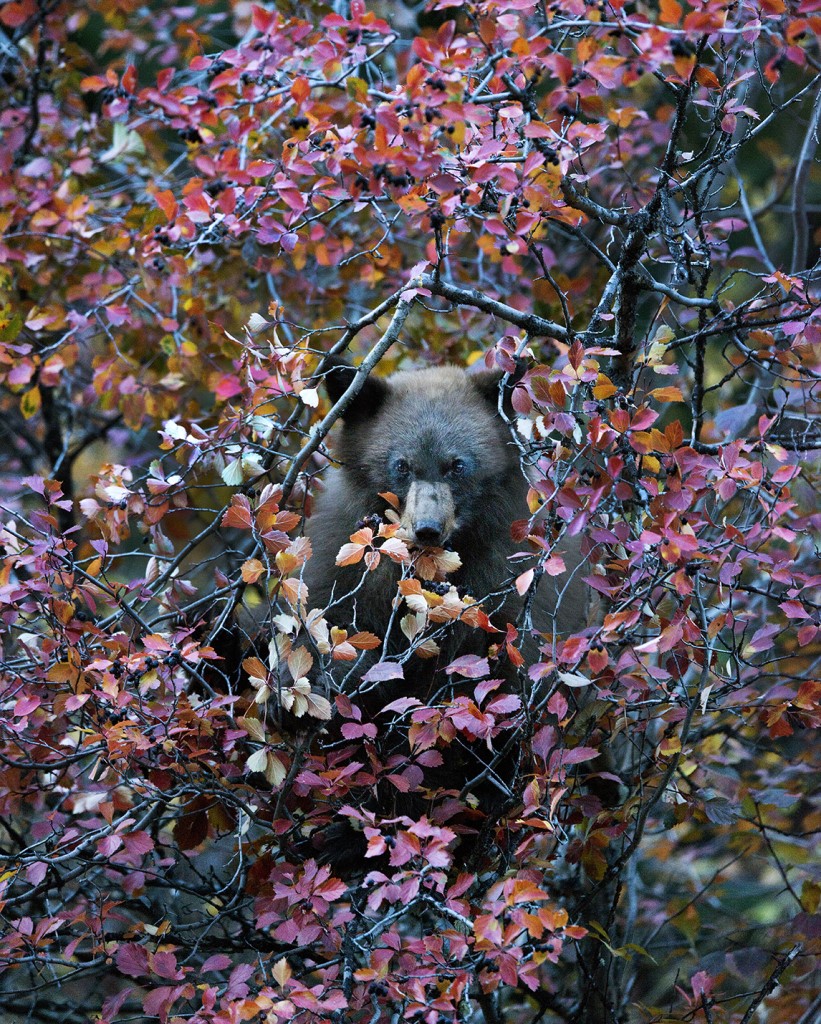
Photo by Kevin Vandivier
Though the Tetons are the crown jewel of the park, the wildlife in this area is vibrant and abundant.
From grizzly and black bears to elk and moose, there are plenty of large mammals to see and photograph.
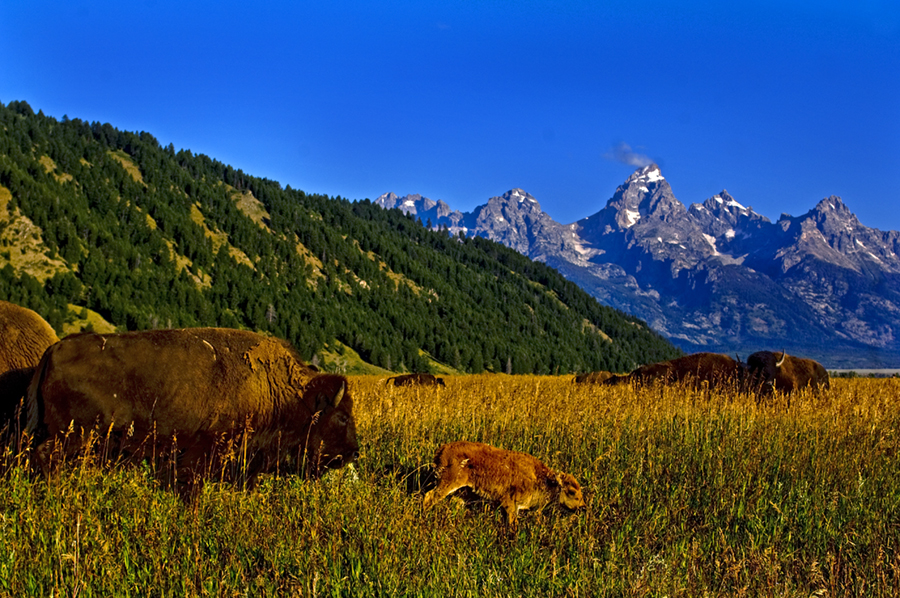
Herds of bison can be found roaming throughout the valley in the summer months, including Antelope Flats, which, as shown above, offers spectacular views of the Tetons. The drive through Antelope Flats is worth your time as well, especially along Mormon Row, where several 100-year-old barns and other buildings still stand from Mormon settlement in the early 20th Century.
In the winter, elk herds descend from the higher elevations of Yellowstone to graze in the National Elk Refuge on the northern edge of the town of Jackson. You can even take a sleigh ride through the refuge to get an up-close look at massive bucks, whose antlers can spread up to four feet wide.
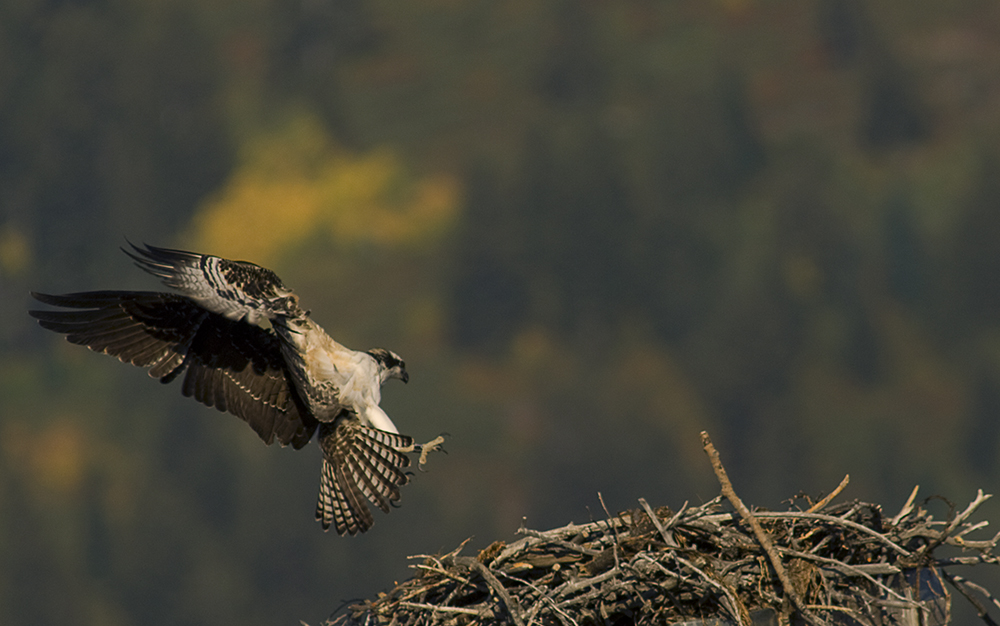
Photo by Kevin Vandivier
You’d be remiss if you didn’t seek out opportunities to photograph the many species of birds that inhabit this region as well.
Bald eagles, osprey, ducks, geese, and trumpeter swans can be found in and near bodies of water in the park, including Oxbow Bend, which offers a breathtaking view of Mount Moran with the Snake River in the foreground.
What to Photograph in Grand Teton National Park - The “Other” Side of the Tetons
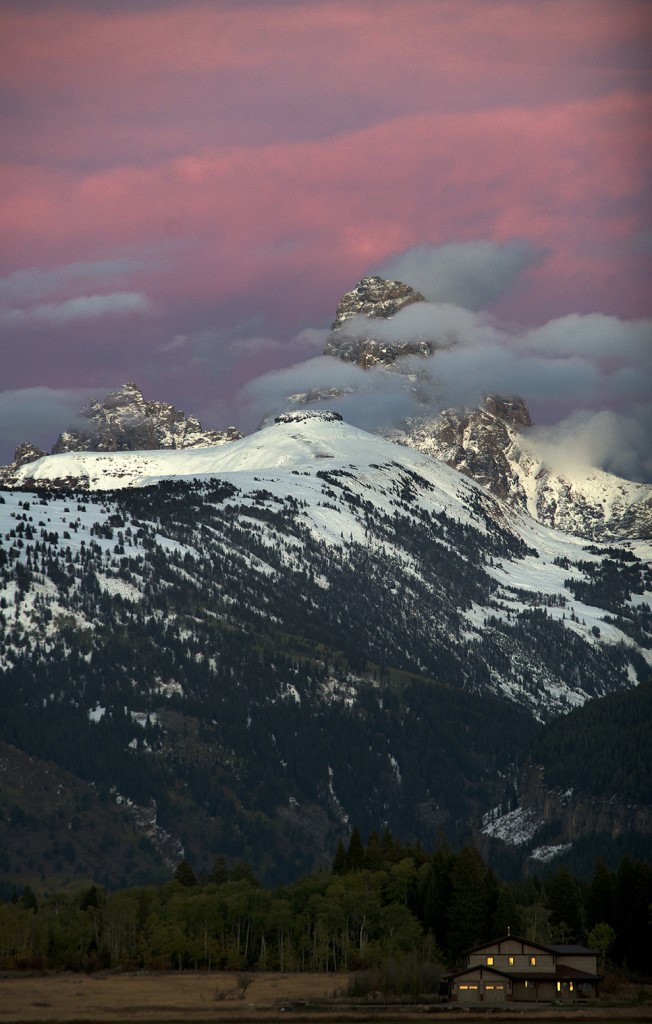
Photo by Kevin Vandivier
Though the Wyoming side of the Tetons gets most of the glory, the view from Idaho isn’t bad at all either. What’s more, there are far fewer crowds in Idaho’s Teton Valley than there are on the Wyoming side.
The signature peak of the Grand Teton takes on a completely different look from this side, as does the entire mountain range. Unlike the Wyoming side, which ascends rapidly from the valley floor, there are foothills on the Idaho side and large areas of farmland that offer unique opportunities for foreground interest.
If you want to get up-close to the Grand Teton, head up Ski Hill Road from Driggs, Idaho, through Alta, Wyoming, to Grand Targhee Ski Resort, where you can ride to the top of the Dreamcatcher chairlift to see the hulking mass of the Grand Teton and its surrounding peaks in full view.
Planning Your Grand Teton National Park Photography Trip
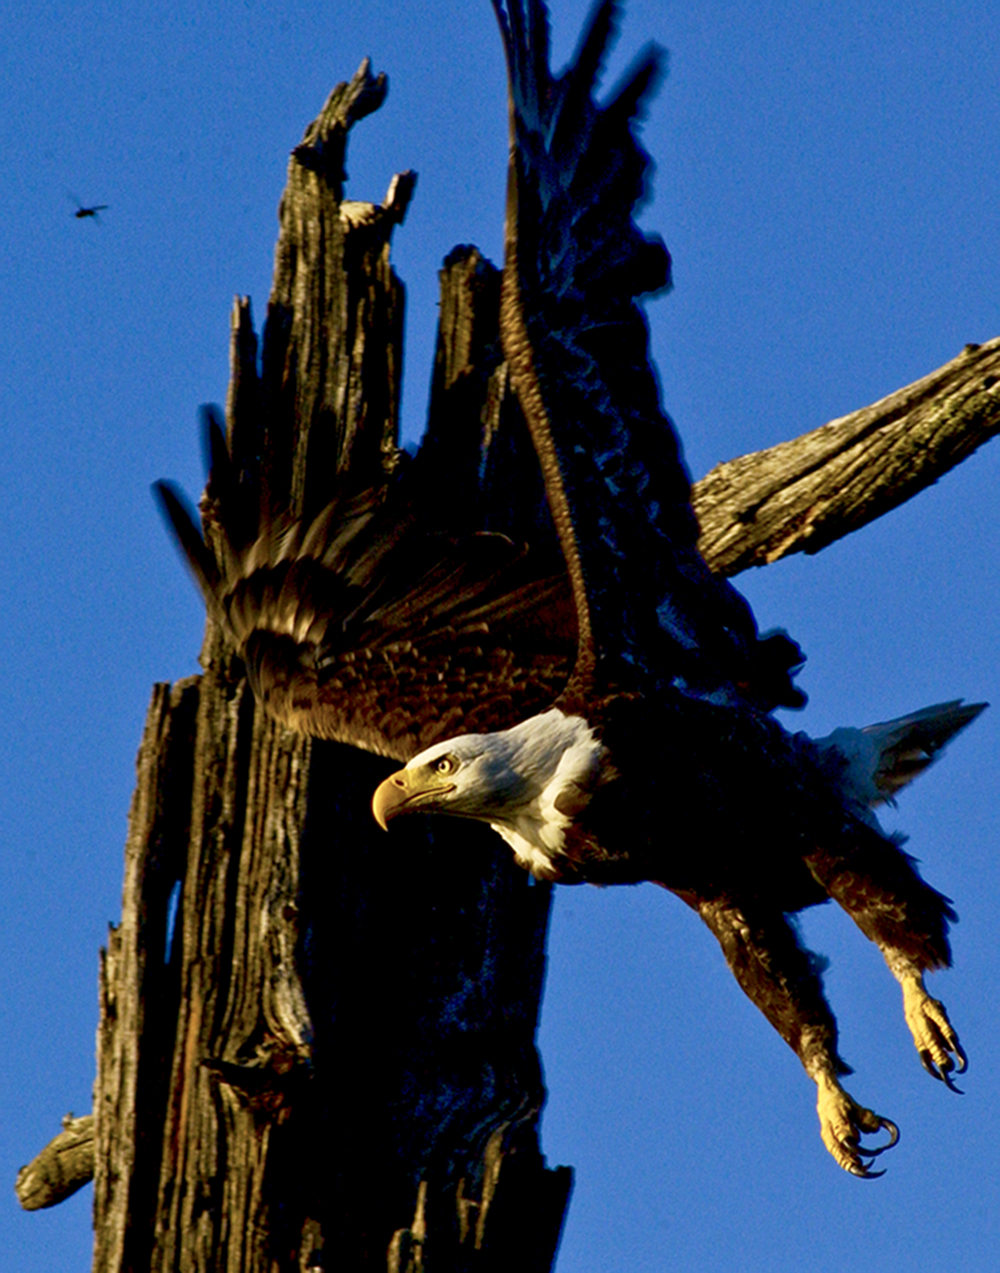
Photo by Kevin Vandivier
Though Grand Teton National Park offers spectacular photographic opportunities year-round, the ideal time to visit is in early fall.
Once September rolls around, the massive crowds that inundate the area for the summer have dispersed and you can often find yourself completely alone in many corners of the park.
What’s more, September is a prime time to visit for fall colors, active wildlife, and late-afternoon thunderstorms rolling over the peaks of the Teton Range.
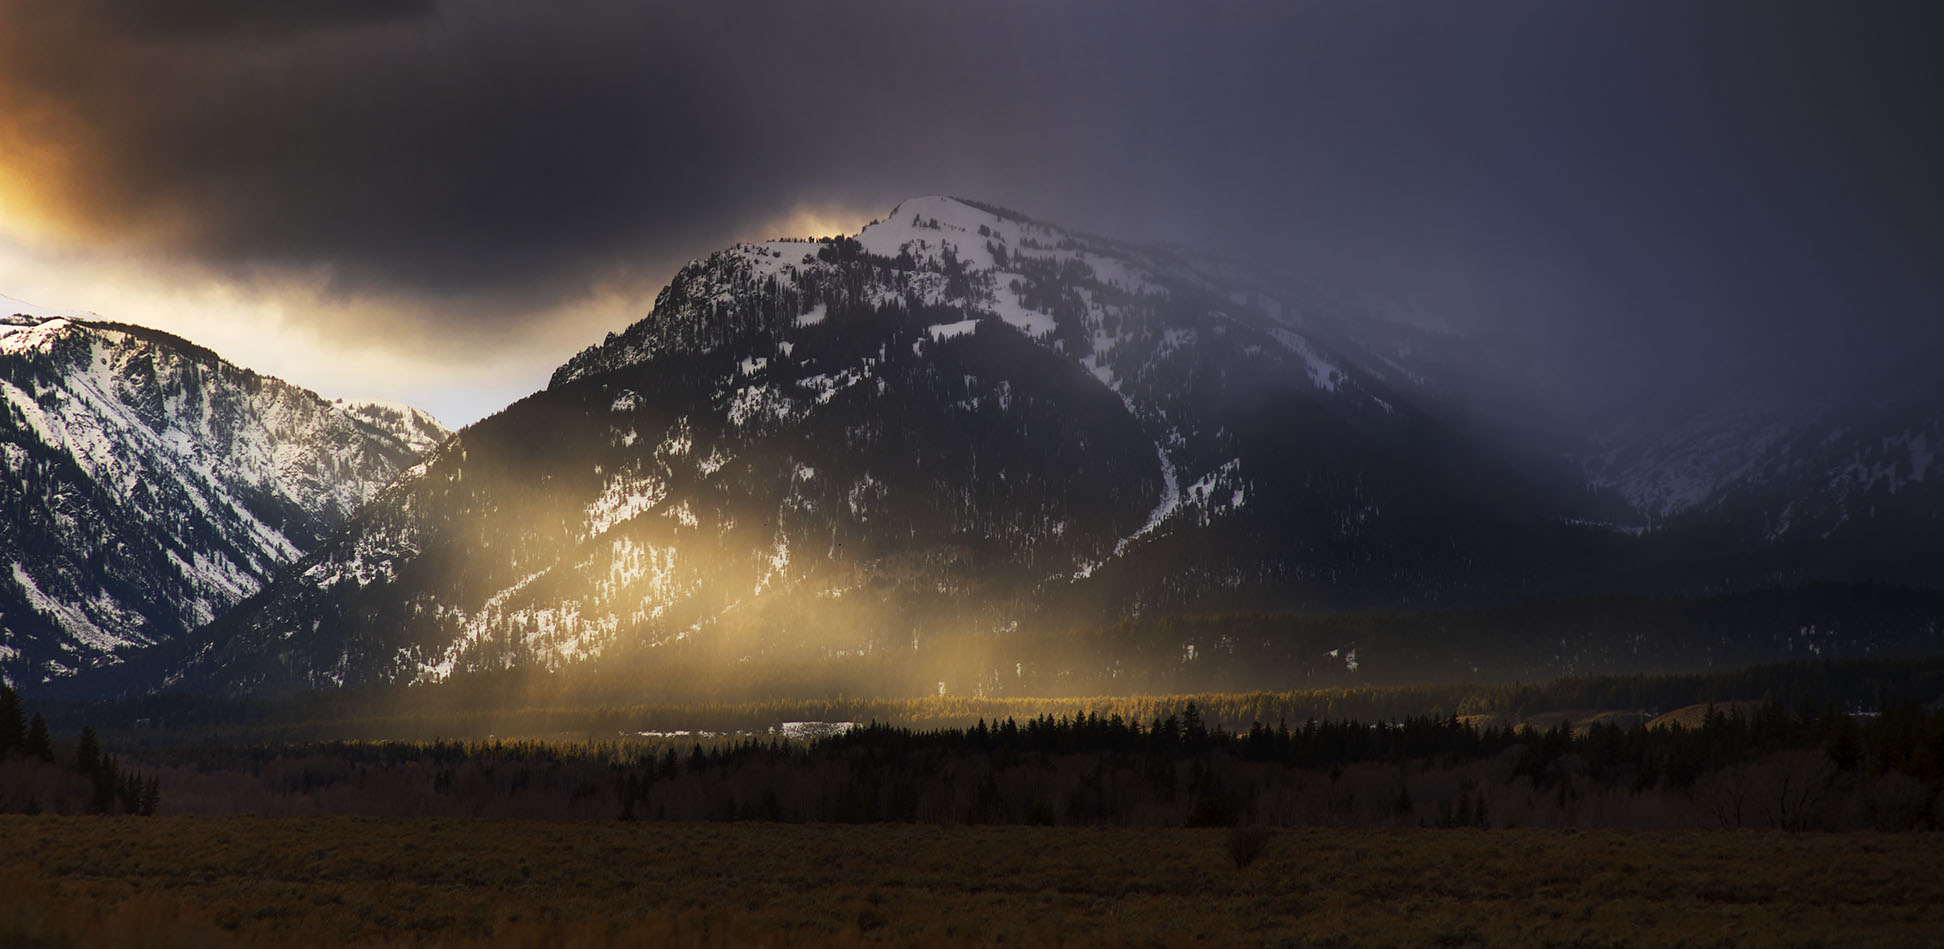
Photo by Kevin Vandivier
As noted earlier, while the park is much smaller than Yellowstone, there is no lack of locations to capture its incredible beauty. Often, you’ll find the most difficult part of photographing the Tetons is simply deciding where to go!
That’s precisely why visiting this breathtaking area as part of a photography workshop is the way to go.
What you don’t want to do is pick a photography workshop willy-nilly…
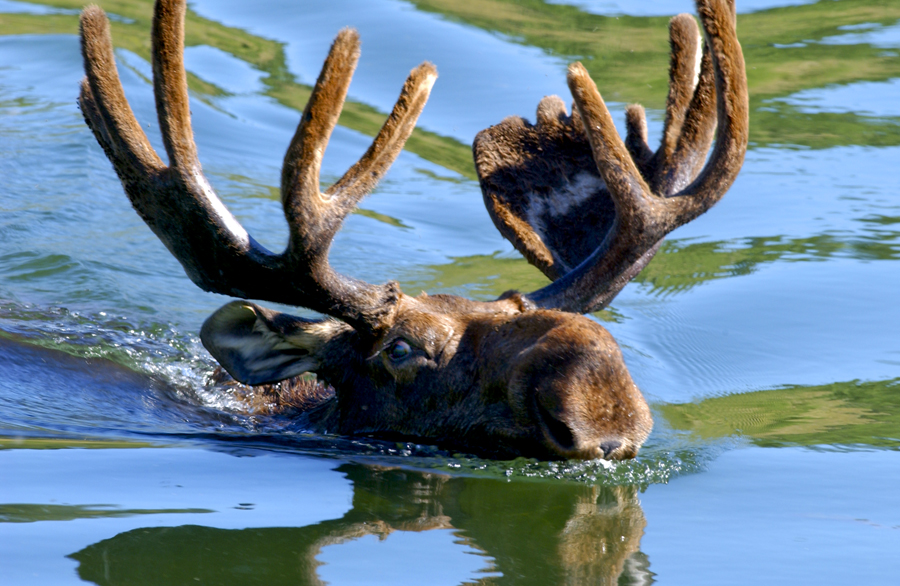
Photo by Kevin Vandivier
For my money, I want to participate in a small-group workshop that’s focused on self-growth, skill development, and adventure. That’s exactly what National Photographic Adventures provides in their Teton Fall Photo Adventure.
The man behind the curtain of National Photographic Adventures happens to be a good friend of mine, Kevin Vandivier.
I can tell you that Kevin’s knowledge and know-how of photography are unparalleled. With him as your guide, you have no choice but to learn and grow as a photographer!
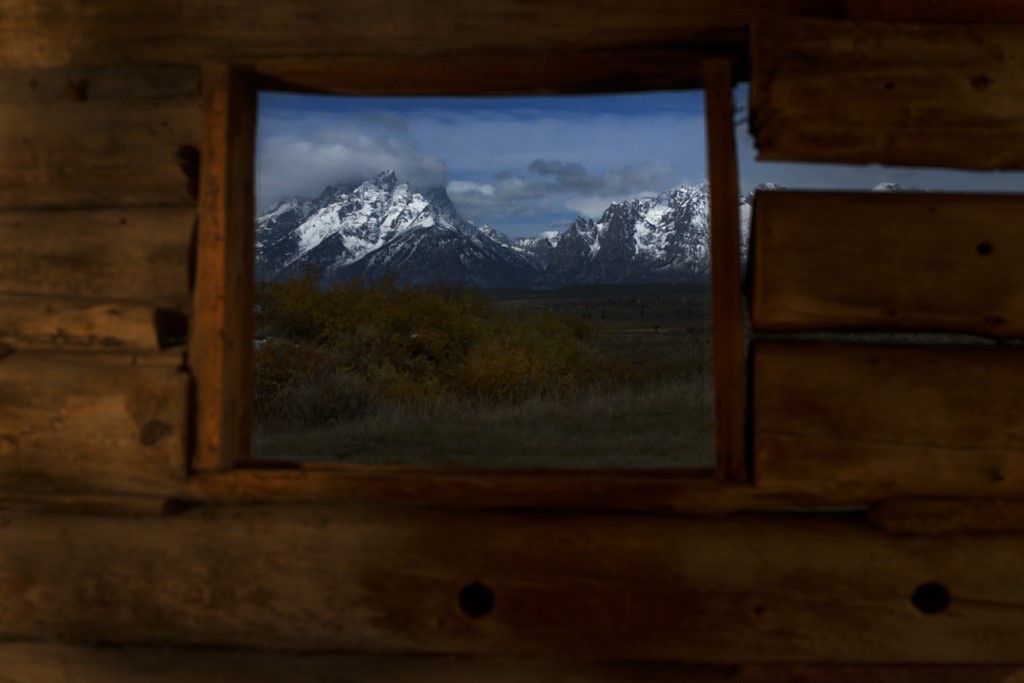
More than that, Kevin has a true passion for helping people achieve their goals behind the lens. His Tetons Adventure includes ample instruction time, one-on-one feedback, and a ton of fun that gets you excited about improving your skills.
Gorgeous views, beautiful wildlife, a small group of like-minded photographers, and a teacher that knows his stuff and truly cares about your development...what more could you want out of a photography adventure?!
This workshop is coming up fast - September 27-October 1, 2019 - so get all the details and reserve your spot today!
We Recommend
How to Create a Beautiful Travel Video
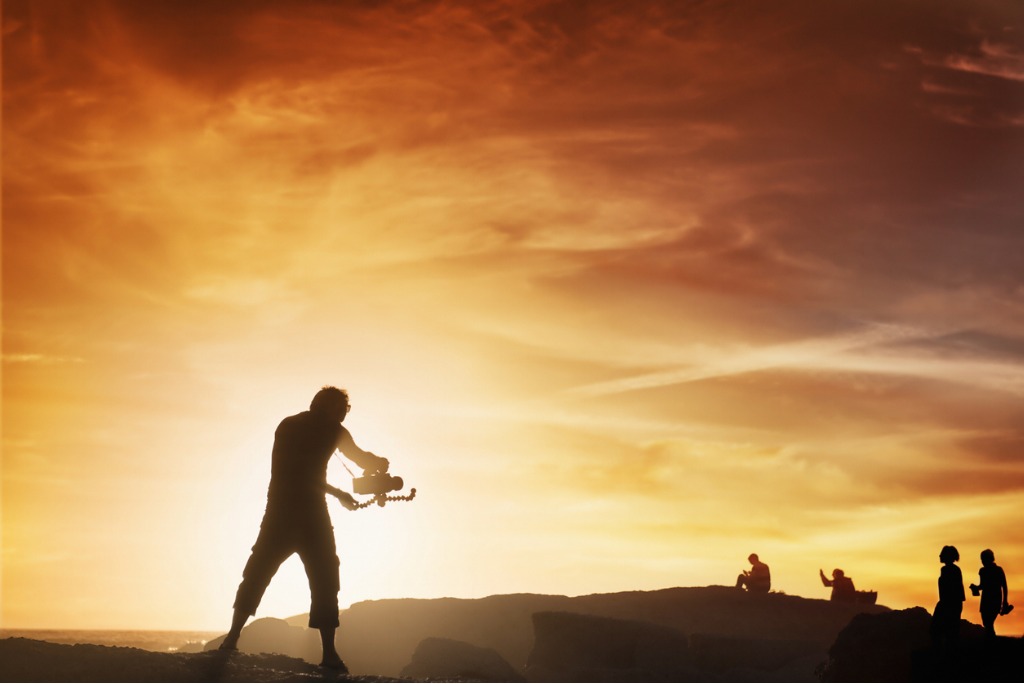
photo bylisegagne via iStock
While you may not be doing a lot of traveling right now, I know I’m personally planning for all of the traveling I’m going to be doing as soon as it is safe to do so.
This means that I’m also planning on doing a bunch of travel videos as soon as possible. In preparation, I’ve been looking up a ton of videography tips. Creating a travel video is an incredible experience for photographers who simply want to remember a phenomenal trip they took by themselves, but creating a travel video of your next trip can also lead to potential revenue in the future if you decide you want to pursue this route.
However, your travel video will only bring you clients if you create a truly beautiful one.
So, this article will walk you through how to make a travel video, from start to finish, in the hopes that you can get inspired for your next trip.
Get Inspired
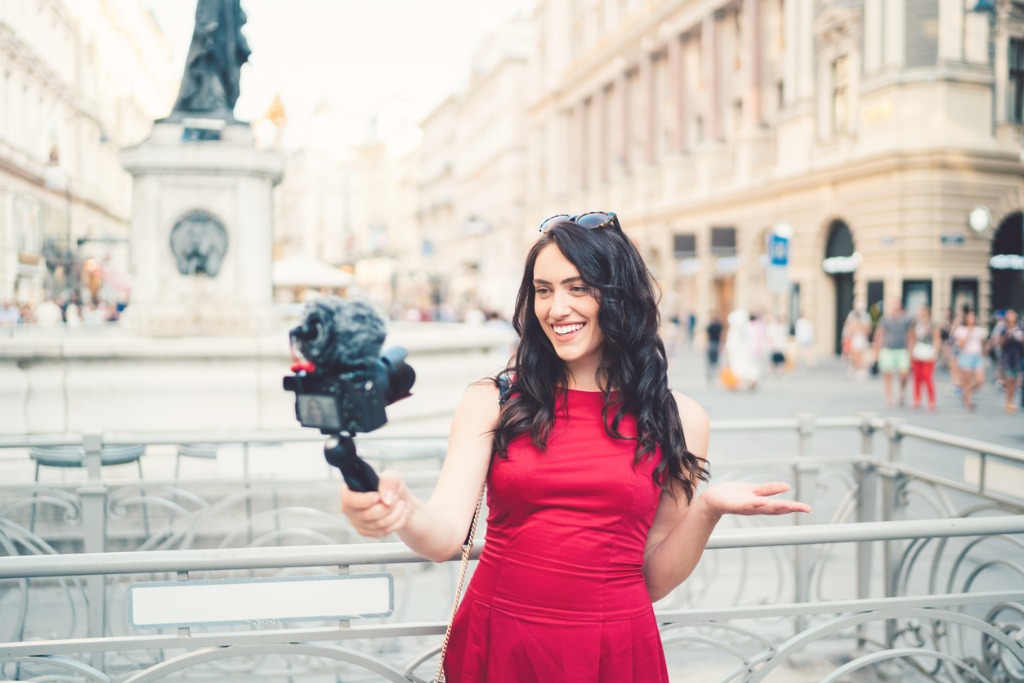
photo bymartin-dm via iStock
Before I ever created my first travel video, I must have watched hundreds of travel videos of people that inspired me. I also watched travel video tips for some of my favorite videographers.
Just like photography, getting started with videography is less about finding your own specific niche right away and more about finding other videographers who inspire you to develop your own style.
This is especially true the first time you try to make a travel video because most of them follow the same formatting, and you won’t be able to follow this formatting if you haven’t watched enough videos from others.
I personally love watching every travel video Touropia puts out so I’ve included one of them above for you to watch.
Once you think you’ve found the type of style you want to emulate in your travel video, you can get into more specifics.
Develop a Story

Photo by Jakob Owens on Unsplash
The first thing you need to do before even beginning filming for your travel video is to develop a story. What country are you going to be visiting? Why are you going there? What do you hope to do while you are there and who do you hope to meet?
While your storyline is obviously going to change a ton once you start shooting, developing a rough draft for your travel video at this early stage in planning allows you to better plan for your trip itself.
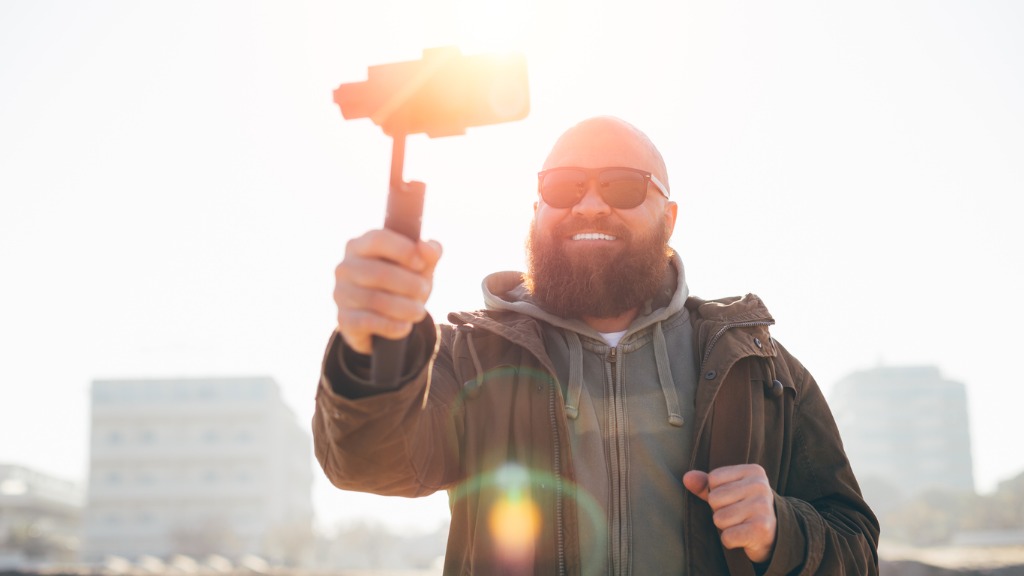
photo byAlina Rosanova via iStock
Then, while you are traveling you can capture as many clips as possible, all the while keeping the main point of your travel video in mind.
But, the real development of your storyline comes once you get home from traveling and can lay out all of your clips in front of you. I typically develop my storyline around the main characters I want to be in my final travel video, because characters are usually much more interesting than inanimate objects like cities.

Editor's Tip: Want an ideal travel camera? Consider the GoPro Hero 8 Black. This action camera can do it all when it comes to video, including shooting 4K at 60fps and 1080 at 240fps! Either way, with HyperSmooth 2.0 image stabilization, your videos will look beautifully smooth as though you were using a high-dollar gimbal. With features like digital lenses to vary the field of view, face detection, smile detection, and blink detection, and waterproofness up to 33 feet, this camera has everything you need to record epic videos of your travels. Learn more about the GoPro Hero 8 Black.
Get Your Camera Ready
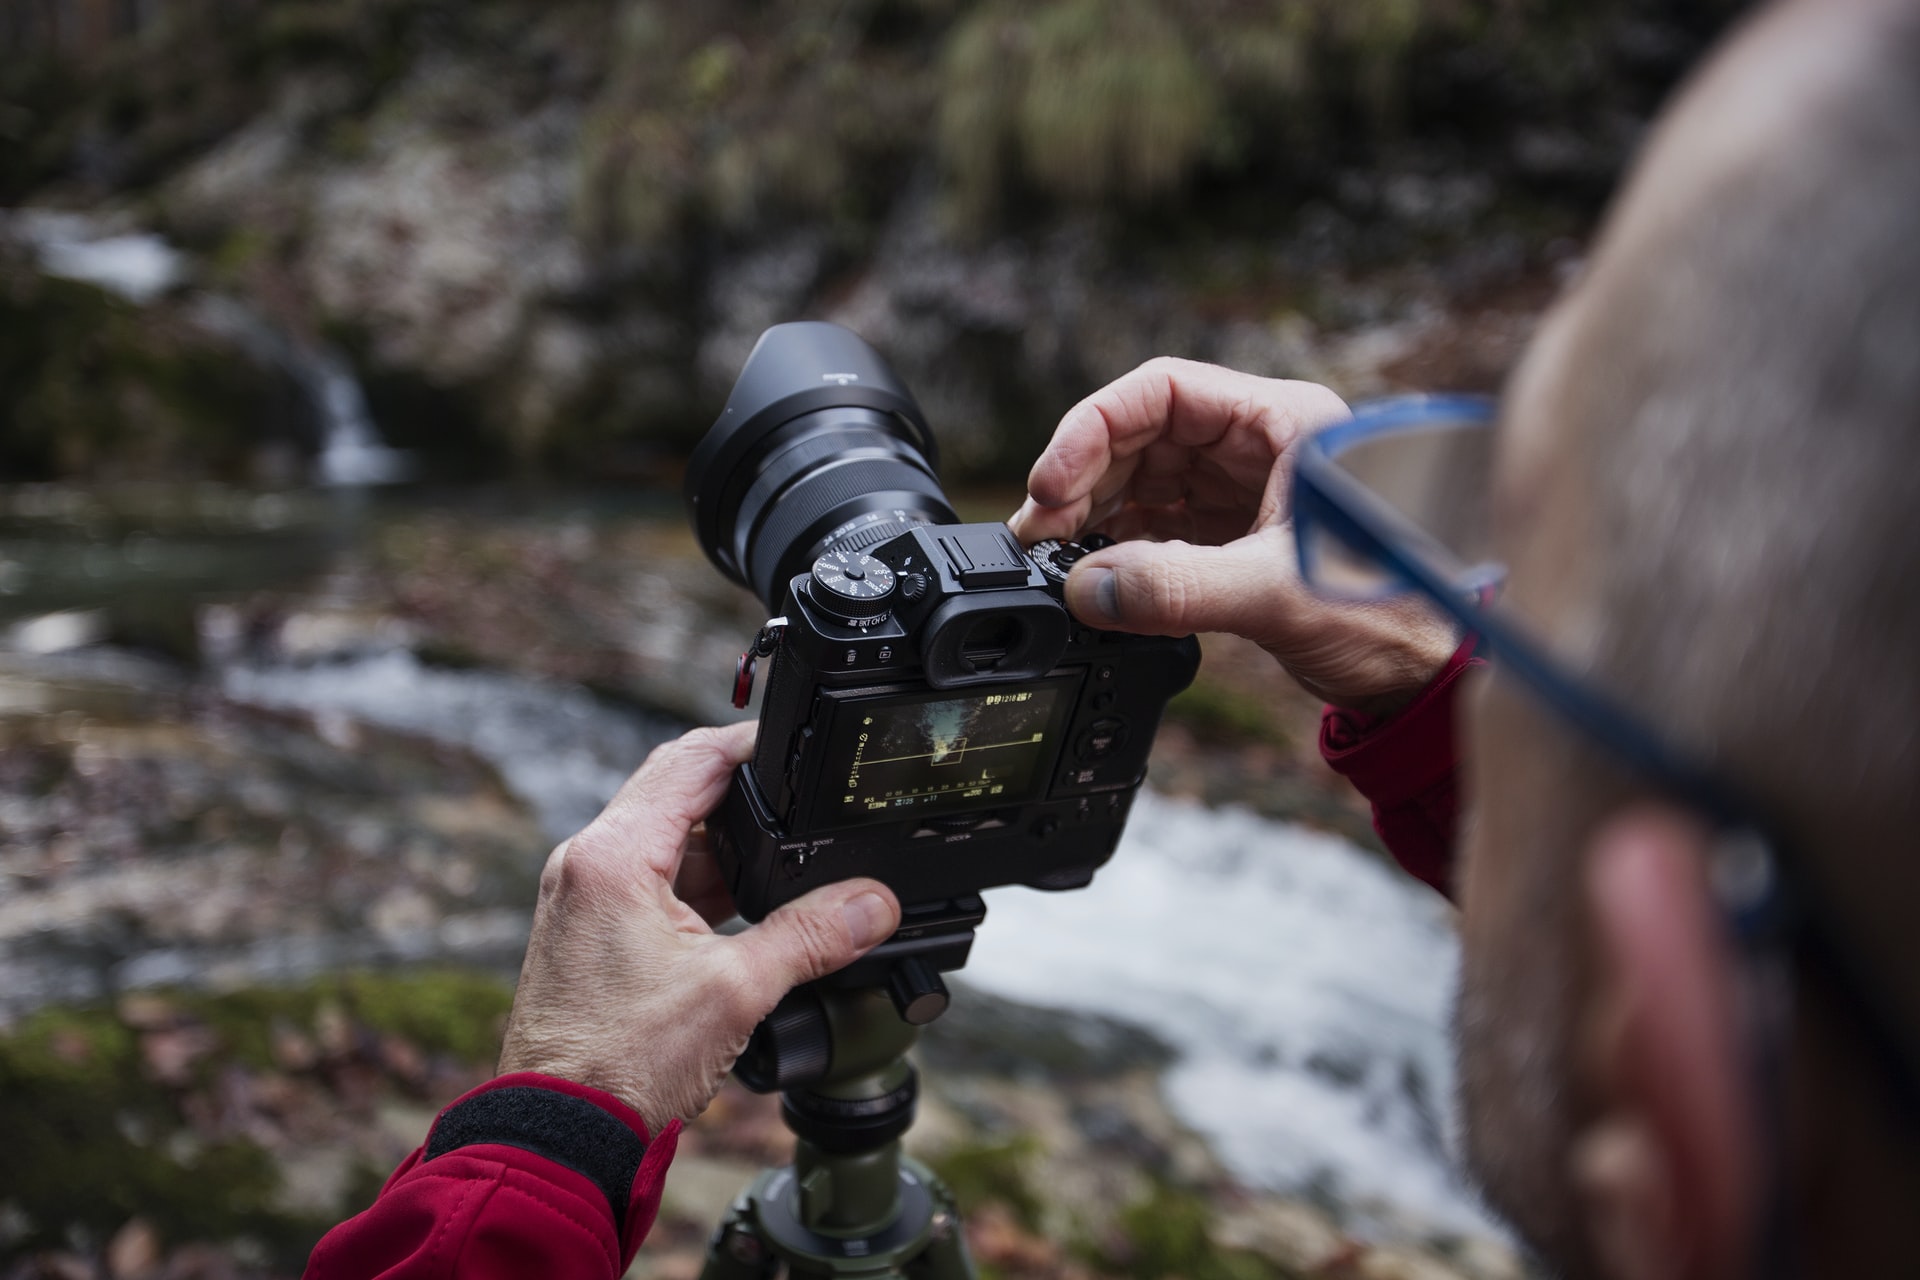
Photo by Federico Bottos on Unsplash
If you’ve ever watched even a single videography tutorial, then you know how important consistency is.
In order to be more consistent with your shots, play around with the settings on your camera before you head to your destination so that you can figure out what settings you like the most, set them and then keep them there.
This will prevent you from doing a ton of color-editing in post production.
But, you will also need to make sure that you have all of the proper camera travel gear before you take off because you want to ensure not only that your footage will be consistent, but that your camera is protected.
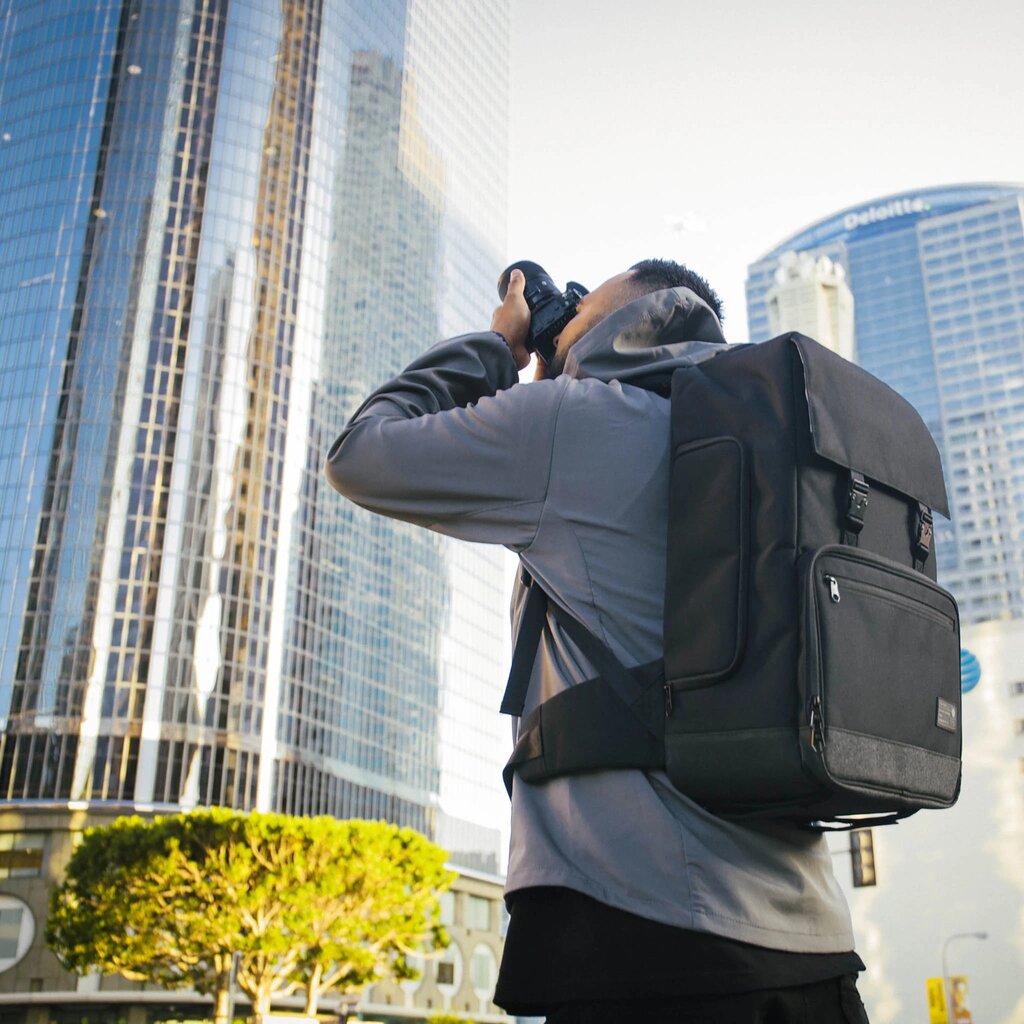
I use the Hex Black Cinema Backpackwhen I’m traveling because it helps me to keep my camera gear protected. For starters, it’s completely waterproof (even the zippers), which is something you don’t realize you need until it is way, way too late.
It’s also really large, which means you can fit your large laptop in it alongside all of your camera gear, which is helpful if you’re planning on doing editing while traveling.
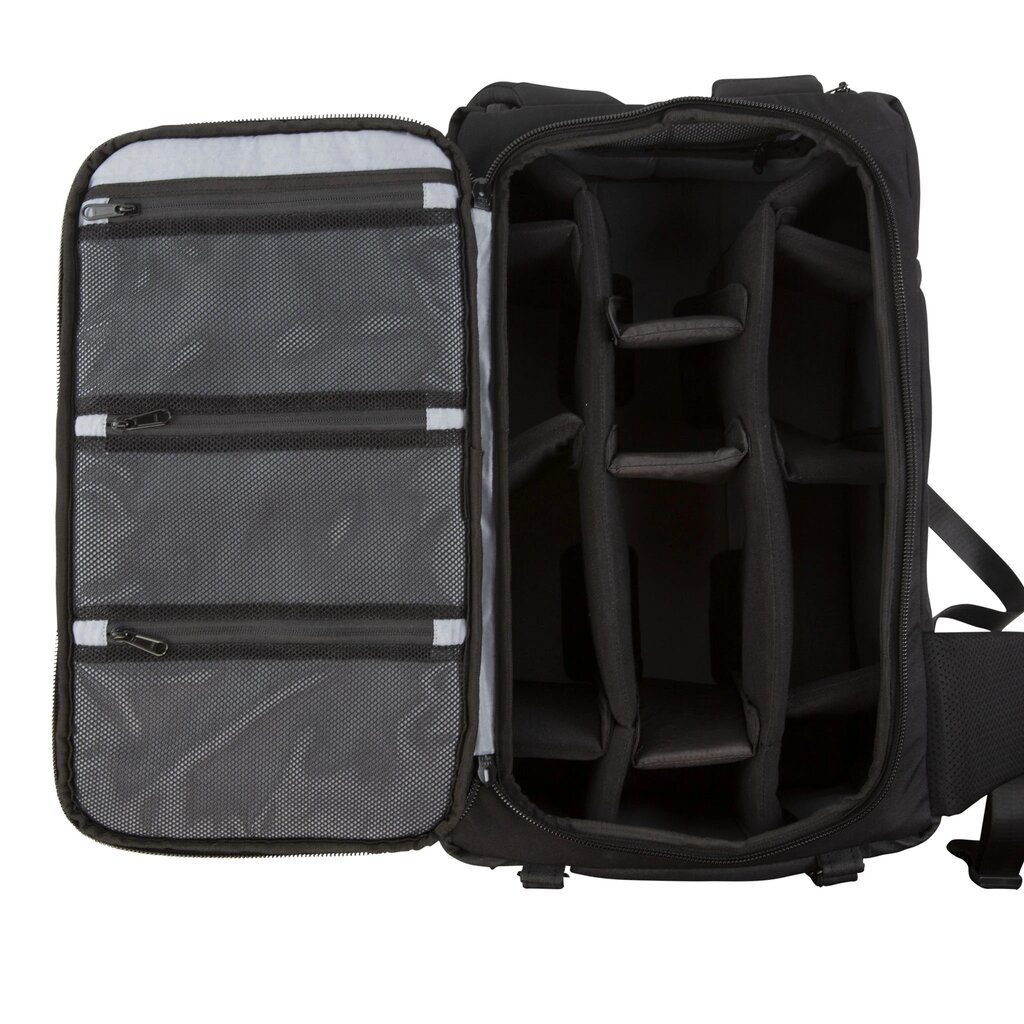
It comes with tripod straps and a quick access pocket for all of your memory cards and batteries. It also lets you access your gear from the top and side of the backpack, which is helpful for regular luggage and absolutely necessary for your camera gear.
You can pick up a Hex Black Cinema Backpack for $240.
Learn More:
Get Lots of Different Shots
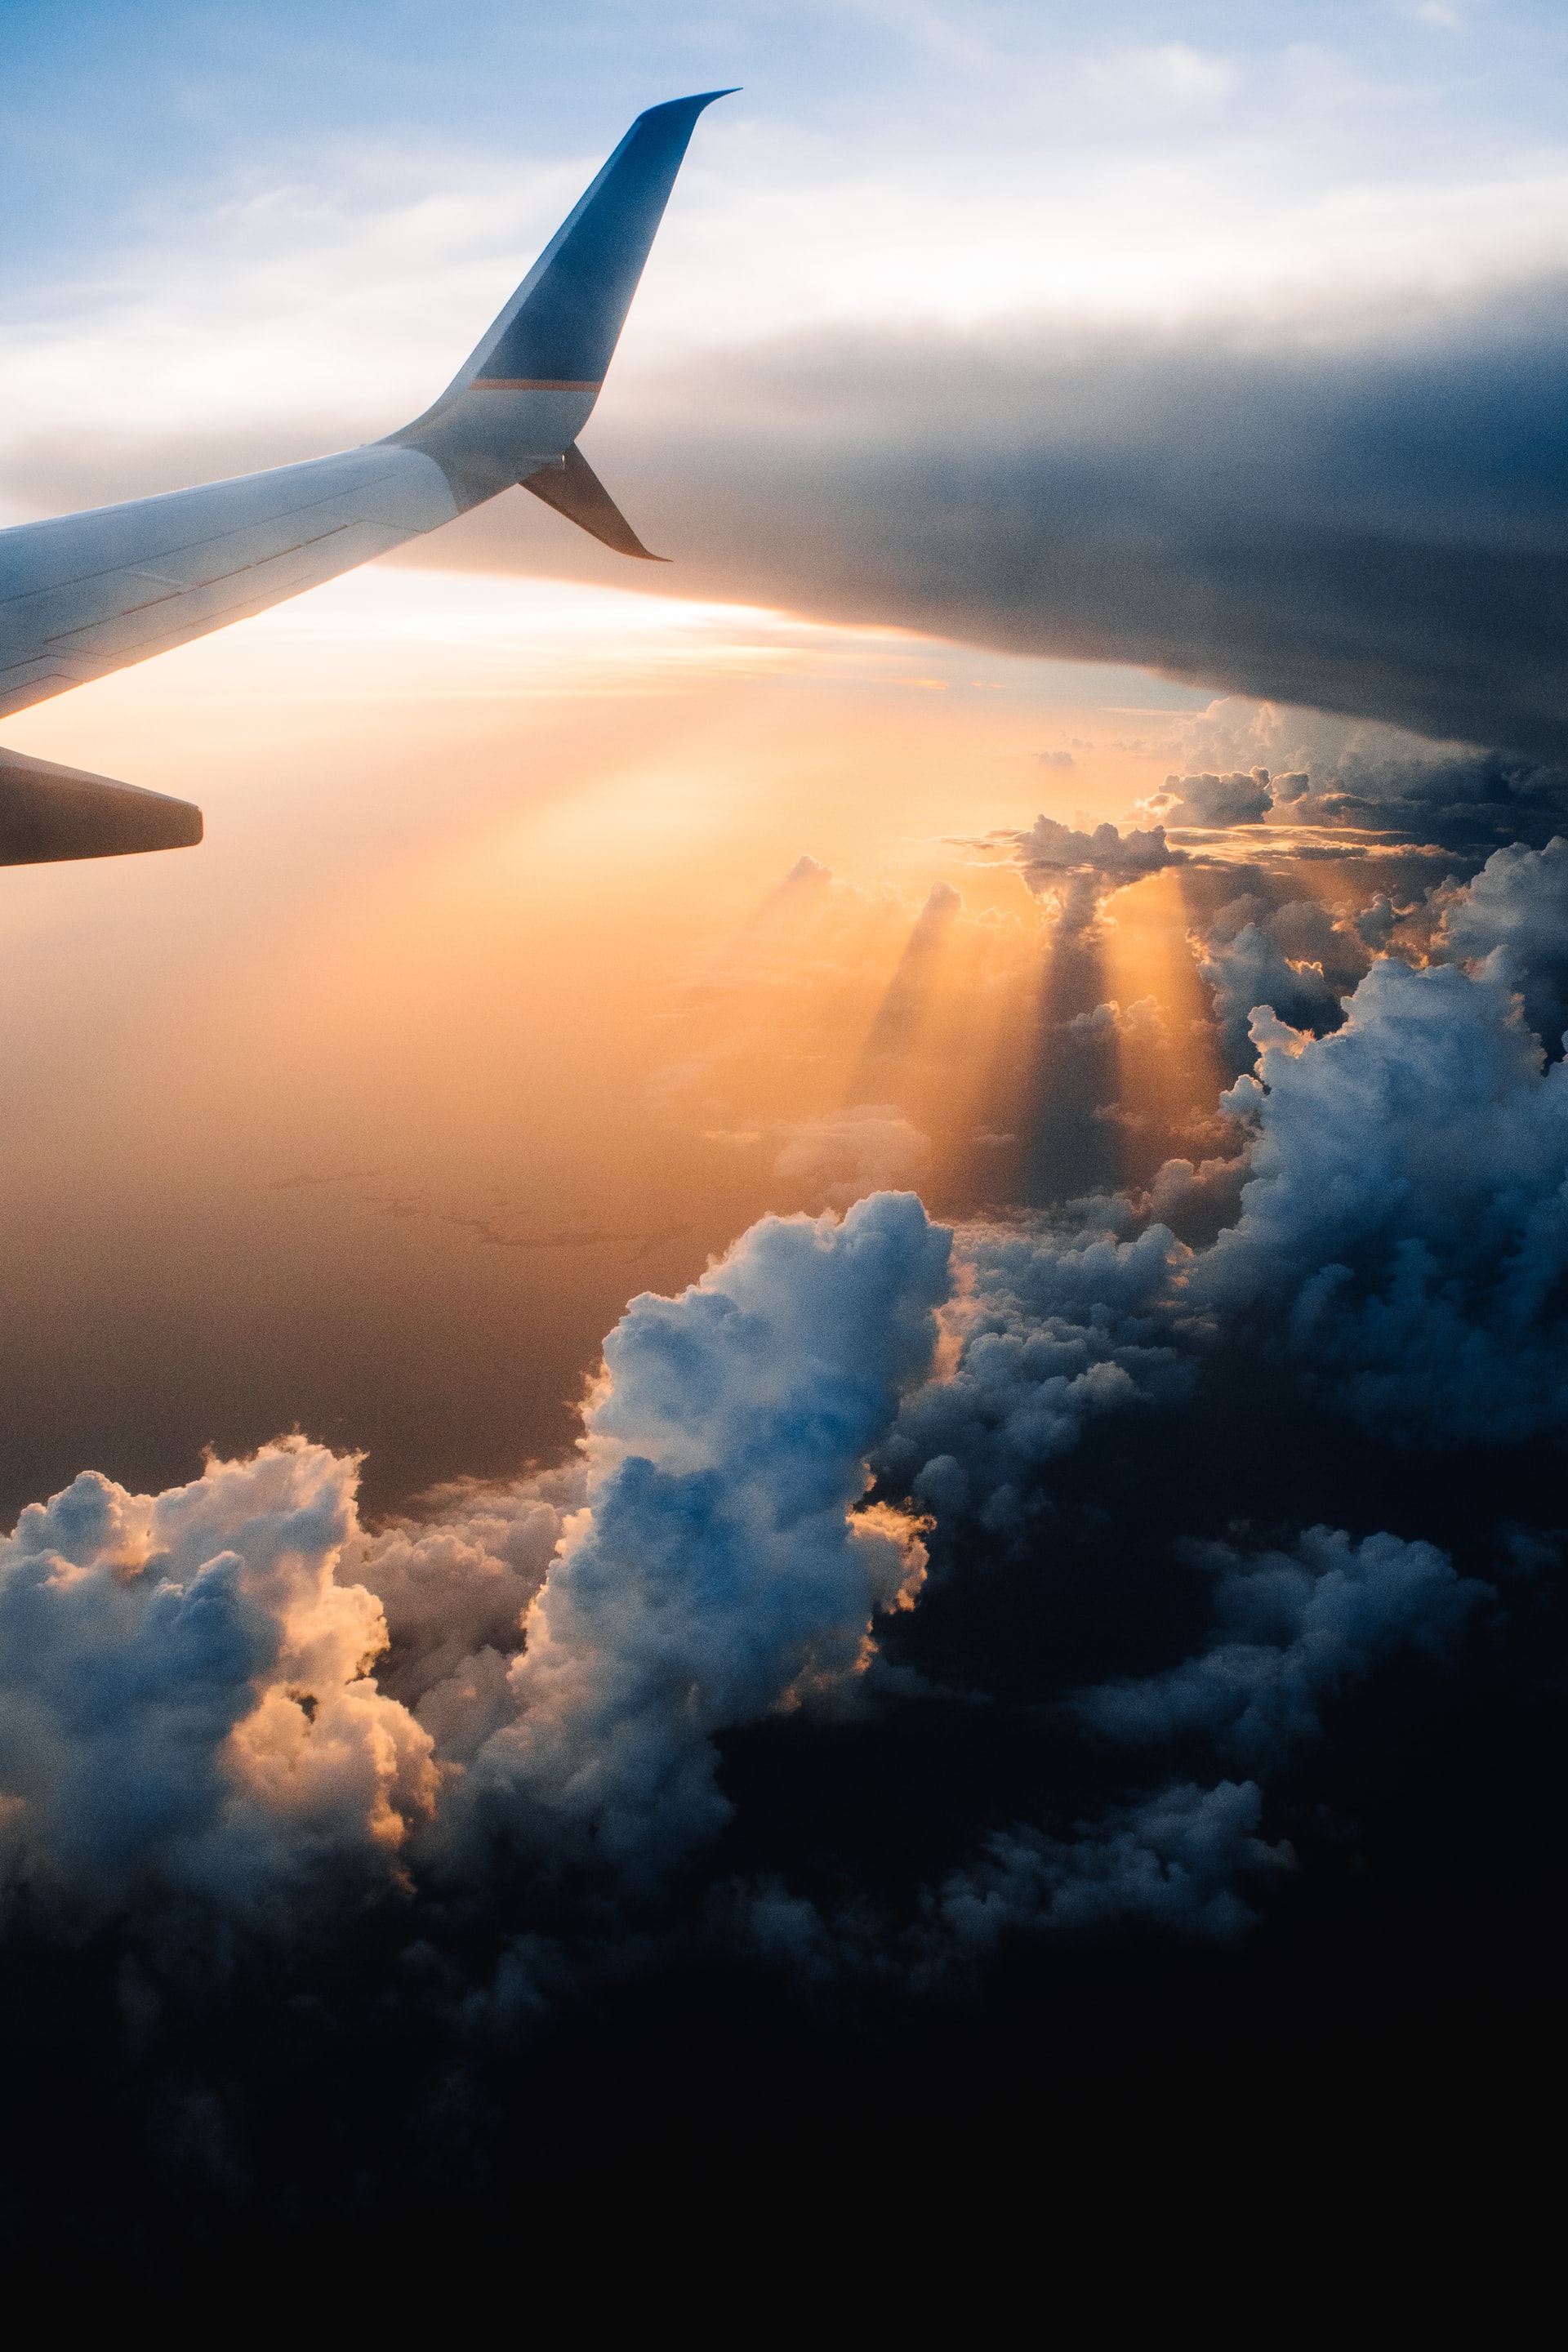
Photo by Tom Barrett on Unsplash
Since your storyline is simply not that strong with a travel video, you need to ensure that your audience remains invested in your video by including a ton of different shots.
This can mean that you are using new videography techniques, like pans and tilts, but it also can mean that you are diversifying your angles of your shots and are getting plenty of B-roll.
Thankfully, a lot of tourist destinations are a dream for B-roll. If you’re visiting a market, make sure you’re getting video of people trying interesting foods or chefs making those foods. You want to include the hustle and bustle of a crowd into your shots so that there’s a lot for your viewers to be looking at.
Create a Good Flow From Shot to Shot
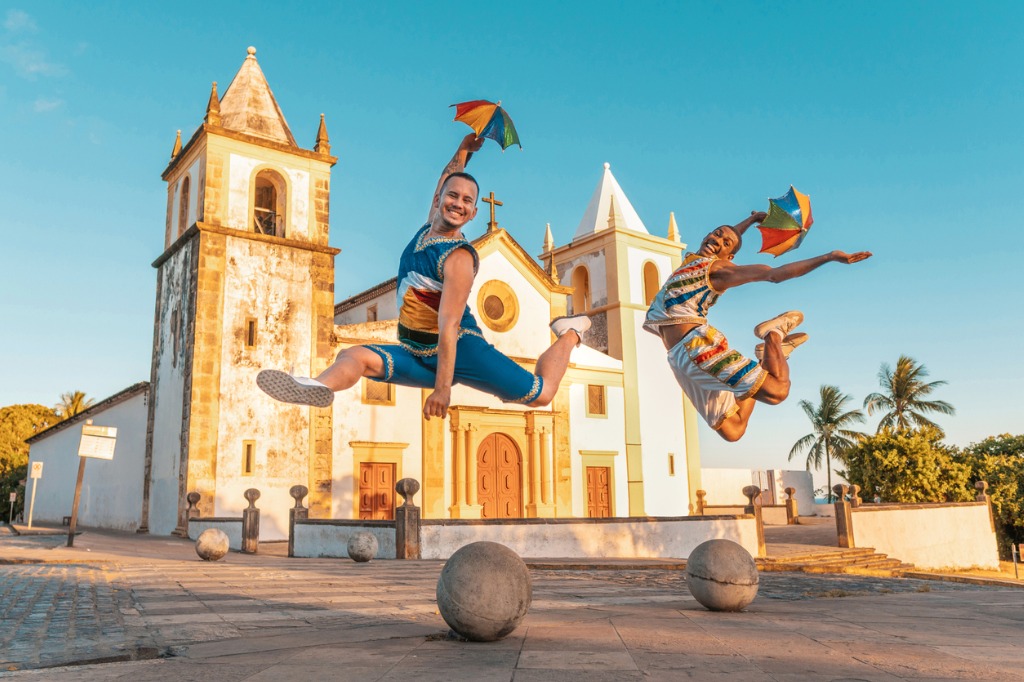
photo byMesquitaFMS via iStock
Some travel videos can be sort of jarring when a videographer doesn’t understand how to create a flow in their video.
One of the easiest ways to create this flow is to simply get a lot of shots of motion wherever you are. While you can fake this motion by panning your camera, it’s definitely easier to include people, animals and things moving. Or, conversely, you can shoot some time-lapse videos for your travel video.
Motion in your videos will allow you to also capture the excitement of the countries you are visiting.
If you’re looking to get especially creative with your travel video, then you can try to learn how to do a hyperlapse, which is when you are moving your camera and moving through time at once.
The video by Boone Loves Video above will walk you through how to create a hyperlapse. But remember, the best tip for creating a good flow from shot to shot is to use a good mixture of all of these tips.
Learn More:
We Recommend
How to Get Started With Travel Photography

Photo by Tim Trad on Unsplash
I don’t think I’ve ever met a photographer who isn’t obsessed with travel photography. Granted, travel photography is all the rage right now due to social media platforms like Instagram, but travel photography has been around since mass photography started.
People crave new experiences, and in an art form like photography where the goal is to bring new experiences to your audience, travel photography just makes sense.
But, there are dozens of types of travel photography, and thousands of places to pitch your travel photography, and it’s really easy to suffer from information overload while trying to research them all.
If you, too, want to start your travel photography career but don’t know where to start, then these travel photography tips may help.
Practice Traditional “Travel Photography” Shots in Your Own Backyard
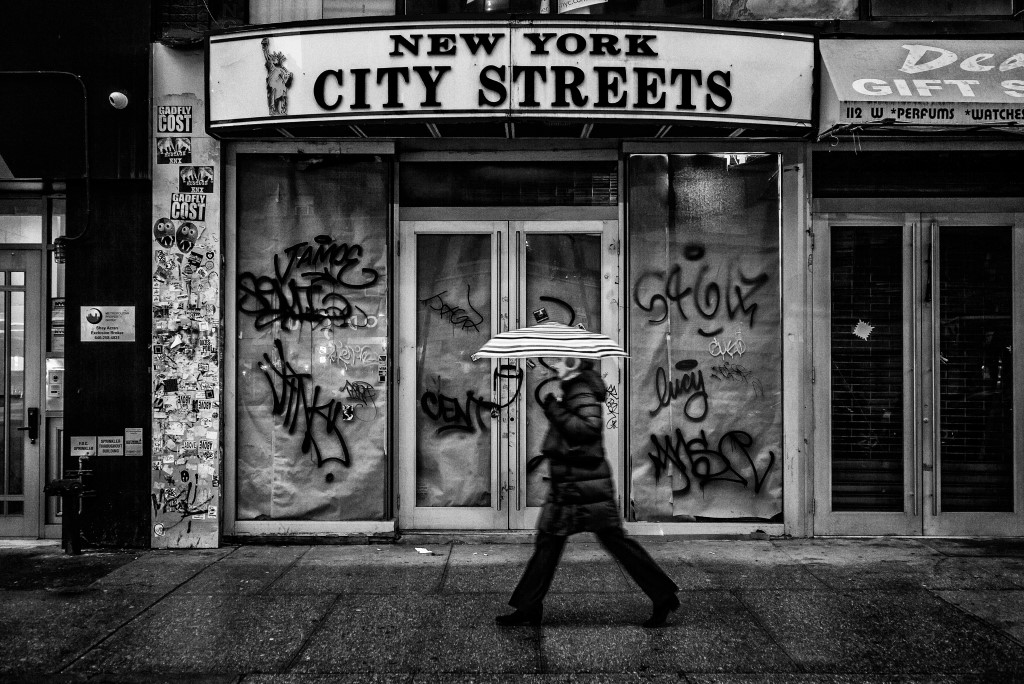
Photo by jesse williams on Unsplash
Before I get into how you can start practicing your travel photography in your own backyard, it’s important to highlight the main types of travel photography.
Street photography is both its own photography niche as well as an important part of travel photography. It’s been proven that pictures with people in them are much more likely to both catch and hold people’s attention, so you’re going to have a tough time selling any of your travel photography if you don’t throw some street photography in with it.
Food photography (along with most of the photography categories on this list) is rapidly expanding right now. The “foodie” trend continues to gain traction as people find traveling to new countries more and more accessible. Food is a major factor in where people decide to travel, especially for groups known as “food travellers” who solely pick their travel destinations on the cuisine in those countries.
Event photography has been around for decades, but people are obsessed with the weird, grotesque, or hilarious events and festivals that happen around the world. As proven in Netflix’s show, “Dark Tourist,” some travelers even pick their destinations based on natural disaster events like a nuclear explosion. While you don’t necessarily need to travel to Chernobyl to participate in event photography, you should look for odd festivals happening around the world that haven’t received much coverage. For example, there’s a cheese rolling competition that happens in Britain every year where the participants fling themselves down a hill in an attempt to catch the cheese first. Most participants come out with broken and bloody bodies, and the event didn’t receive much international coverage until 2018 despite the fact that it has been happening for hundreds of years.
Magazine photography is one of the only travel photography niches on this list that is losing popularity. However, print magazines are still a great resource for learning how to get started with travel photography for a few reasons. First, when you’re shooting travel photography for a magazine, you’ll need to take a huge variety of pictures for that magazine. Typically, magazine photography is in a listicle format, i.e. the New York Times very popular, “36 hours in…” articles. You’ll need to have photos of the food, people, places, and things to do in that town.
Landscape photography is also an important aspect of travel photography because it gives your viewer one distinct photo with one distinct feel about an entire country, or maybe an entire region of the world. When you’re using landscape photography as part of your travel photography, you’ll not want to focus on it very much, but rather focus on getting a handful of shots to showcase the natural beauty of that location.
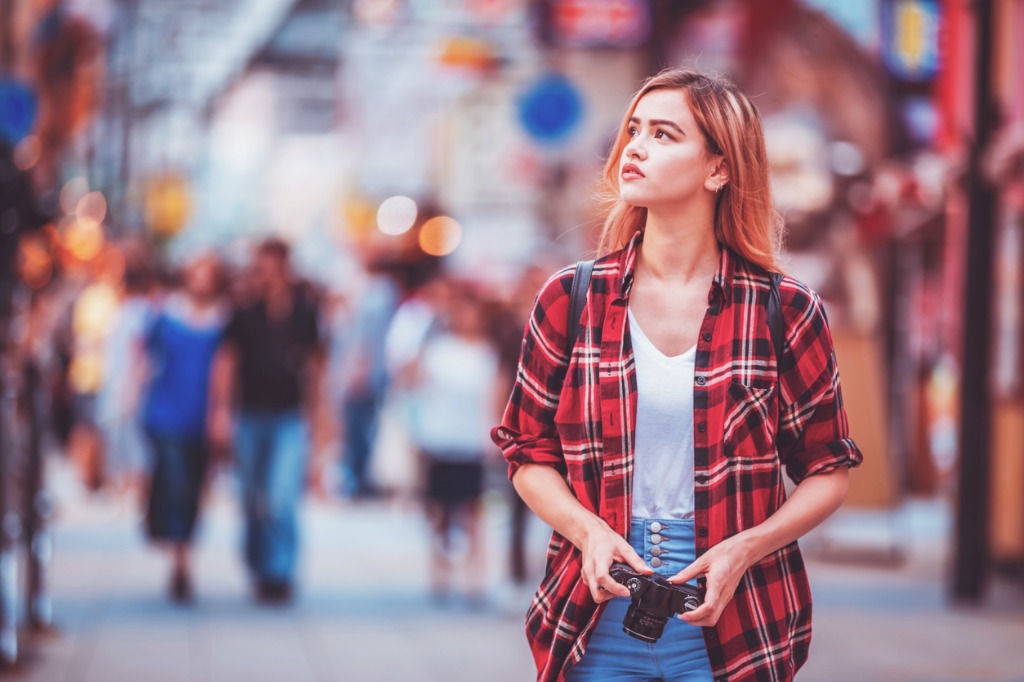
photo byGCShutter via iStock
Now that you understand the types of travel photography you should be practicing, get out into your hometown and practice them.
Not only will this help you to build a mini-portfolio, but it may just help you discover some incredible things about the town you call home.
Be Prepared to Travel Smart
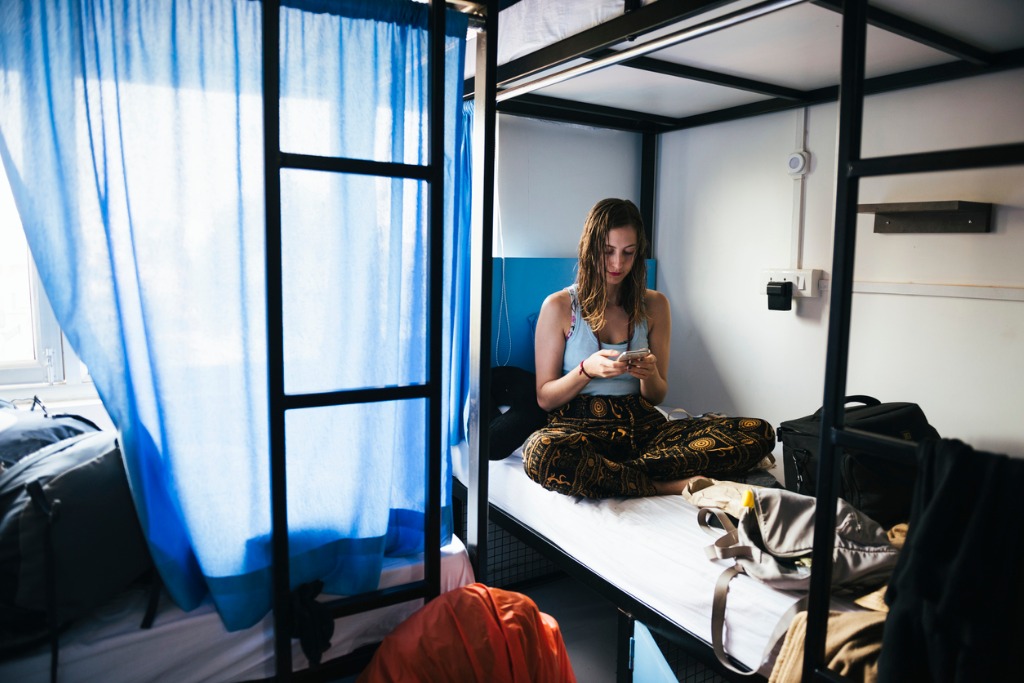
photo by Rawpixel via iStock
Traveling smart means a few things to me: it means traveling on a budget and traveling safely.
But, these two things are typically at odds. The safer neighborhoods usually cost more money, so you need to research your destinations thoroughly (I’ll touch more on this in a moment) and understand where you can make compromises.
For instance, using shared living spaces like hostels is a great way to save money while traveling, while also ensuring you are going to be space in that city.
All great beginner travel photography tips have one thing in common, though. In order to save money in the long run, you need to spend money in the short run.
photo byEshma via iStock
For example, if you’re going to be spending a lot of time in hostels (spending $20 per night as opposed to $100) you’ll need to have the proper equipment to ensure your camera gear isn’t stolen at that hostel.
Make sure you always have a traditional U-lock in your camera bag (most hostels have lockers you can rent for your more expensive items) and invest in a locking suitcase.
Learn More:
Plan Long Trips Efficiently
Portable Professional is used to long, international trips and this is exactly the type of person you’re going to want to meet when you start to plan your first long trip for the first time.
If you’re proficient at researching international destinations on your own, that’s a phenomenal skill that I’d love to pay you to do for me, but if you aren’t that’s okay. Chances are, you know someone in your life that has been to your destination before.
And if you don’t, then there are a ton of online resources created by people like the woman behind Portable Professional who have traveled to your destination before and can walk you through all of the boring bureaucratic things, like where and how to submit your visa requirements and what types of vaccines you need.
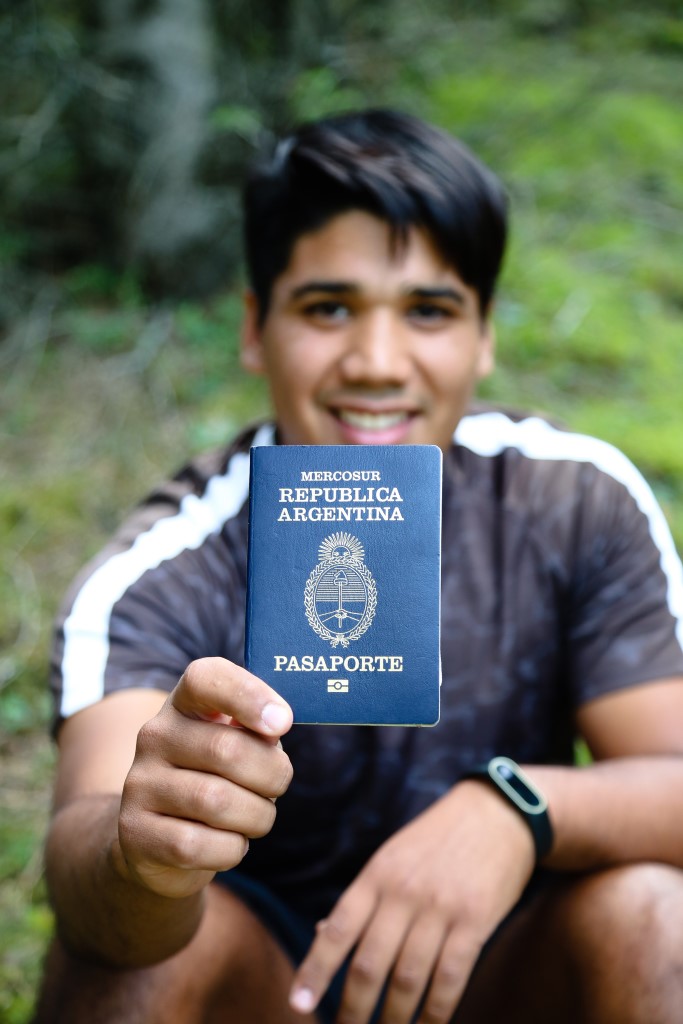
Photo by Irene Strong on Unsplash
Keep in mind there are all kinds of requirements immigration services in each country have and they can change at a moment’s notice.
On a trip to Peru I took a few years ago, I had hotels, flights and activities lined up in Bolivia (Peru’s neighboring country) that were completely canceled after a Canadian tourist brought Yellow Fever to La Paz a month before my arrival and immigration services there started requiring a Yellow Fever vaccine.
As a kicker, you needed to get your Yellow Fever vaccine a few weeks before entering Bolivia.
This brings us to another point: buy travel insurance. Part of planning travel photography trips is thinking about the incidentals.
Create a Portfolio for Every Single Trip
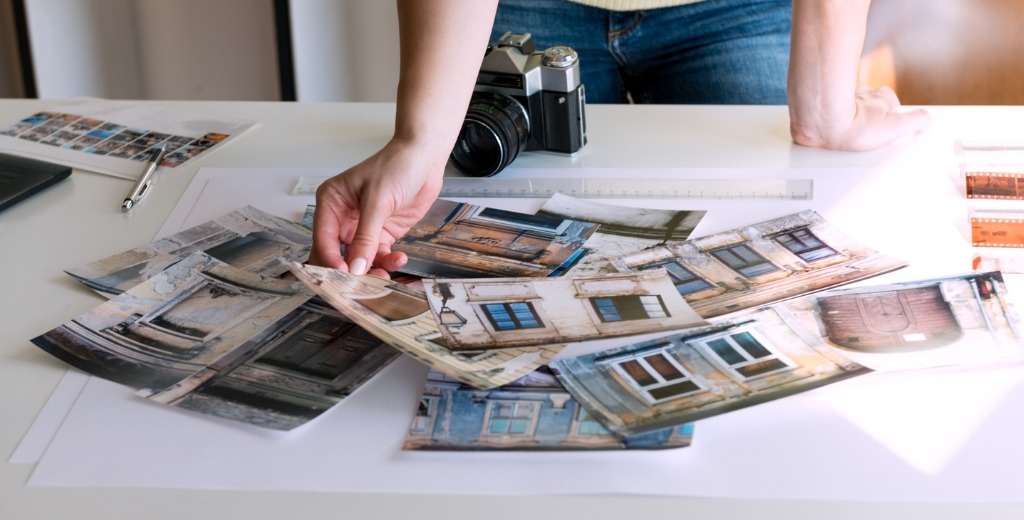
photo byStockRocket via iStock
You’re never going to sell your travel photography if you don’t have it all in one place, neatly displayed for potential buyers.
While you should have an overarching portfolio that showcases all of the photography niches you participate in, you should also create a portfolio for each individual trip you take as a travel photographer.
This means not only organizing and editing your photos as soon as possible after leaving one destination, but choosing the best ones and putting them up online (hopefully with themes).
This way, when you are pitching a story or set of photographs you don’t need to spend time individually choosing photos to send to editors with every pitch.
Make Money While You Travel

Photo by Christine Roy on Unsplash
It’s the unfortunate reality about long-term travel photography: it’s expensive. Photography is expensive enough as is, but with travel photography you’re paying for all of your camera equipment, plus all of your travel expenses (flights, hotels, transportation, visas), plus added things like travel insurance.
The expenses behind travel photography add up. Fortunately, we are moving towards a global economy with every passing day, which means it is becoming easier and easier to live as a nomad.
Travel nomads are people who have no “homes,” because they are constantly traveling from one country to the next. This means they work from wherever they are at. Usually nomads have work-from-home jobs in the marketing or finance spaces doing things like freelance copywriting or accounting.
But, if you aren’t especially skilled in any digital jobs, that doesn’t necessarily mean you can’t do travel photography full-time because there are a ton of resources popping up that help you learn how to make money while traveling off of just your portfolio (you know, the one we talked about above).

Travel Schoolis one of those resources, and they’re doing it better than anyone else because their formula teaches you how to make passive income you don’t even need to think about.
Their fully-online courses teach you about affiliate marketing, which is basically just inserting advertisements into your website, blog and YouTube. Depending upon the affiliate marketing agreement you establish with your clients, you either get a percentage of every sale you send their way, or you get a small fee for every click your client receives off of your link.
While you can learn the basics of affiliate marketing on your own, the creator of Travel School already has this knowledge because he’s been doing it for years and can streamline your process.
If you’re serious about travel photography and you don’t want to be tied to your laptop while you’re in Indonesia, or Thailand, or bumming across Europe, then check them out.
Learn More:
We Recommend
How to Get the Most Out of Photokina 2020

I couldn’t tell you how many trade shows I’ve been to over the years, but there is one thing in common about my trips - I spend half a day or maybe a full day at the show, and then I spend the rest of my time out exploring and taking photos.
So that got me thinking…
With Photokina coming up in May 2020 in Cologne, Germany, what other things can I see and do in the area.
Here’s a few things I think would turn a trip to Photokina into a photography adventure of a lifetime.
Photographing Cologne’s Architecture is a Must
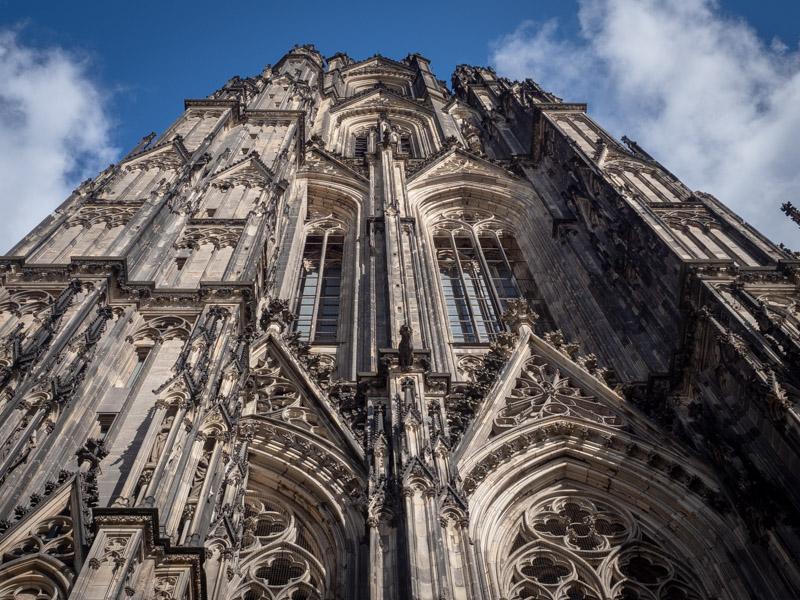
Princeton Photo Workshop: North Rhine-Westphalia-Photokina Photography Tour & Workshop
Cologne is a 2,000-year-old city, and its mix of ancient and modern buildings is beautifully unique.
The Cologne Cathedral likely sits at the top of the must-see building list in this city, with its twin spires rising above the surroundings like a beacon to parishioners.
Aside from the incredible details of the building’s Gothic architecture, there are many things inside to see, from 15th Century stained glass windows to the black marble high altar from the 1300s.
In fact, the cathedral houses so many precious antiquities that it’s a UNESCO World Heritage Site. It’s also the most visited landmark in all of Germany.
Quick Tip: Don’t miss the gilded shrine dedicated to the Three Kings. The sarcophagus is adorned with scenes from the life of Jesus, his apostles, and prophets. The reliefs were done in the 12th Century by Nicholas of Verdun and are one of the most celebrated works in the cathedral.
Take Time to Visit Cologne’s Old Town
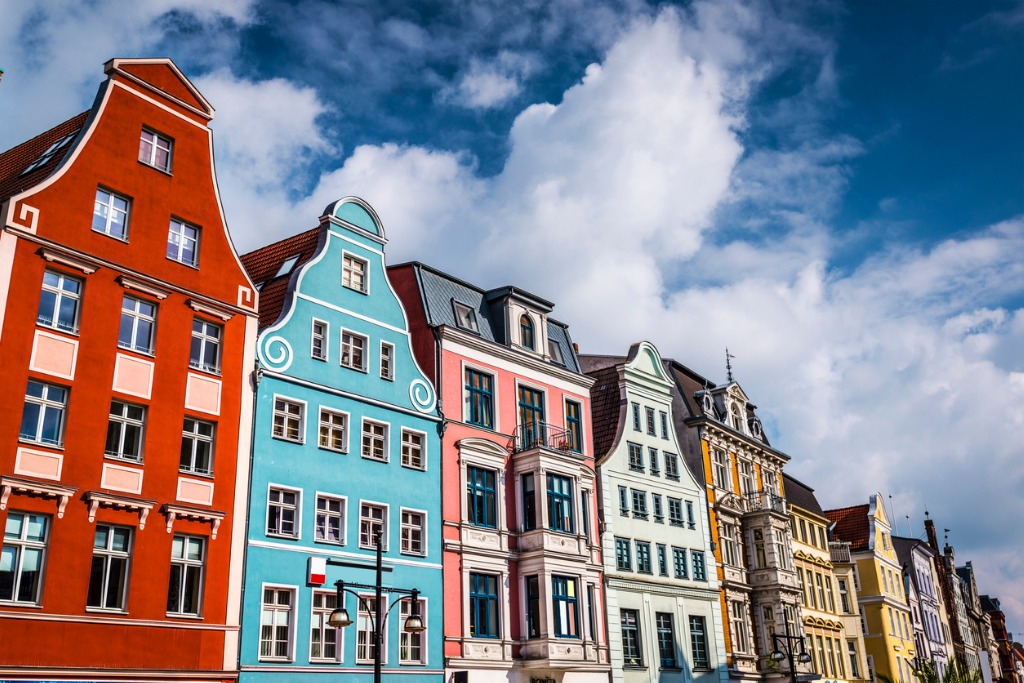 Photo by SeanPavonePhoto via iStock
The Old Town area of Cologne is an historic, hundreds-year-old residential and commercial area that offers many different opportunities for taking photos.
There’s street scenes that harken back to the old days with cobblestone streets and open plazas. Likewise, you’ll find 19th Century fountains, like the Heinzelmännchenbrunnen, that depicts Cologne’s gnomes, where were believed to have done all the work in the city at night so its residents could rest and relax.
Perhaps even more interesting is that the majority of Old Town (and the rest of Cologne, for that matter) were destroyed in World War II. Seeing the rebuilt city thriving today is a testament to humankind’s ability to overcome incredible obstacles.
Learn More:
- Off-the-Beaten-Path Photography Locations in Germany You Have to See
- Top Photography Workshops to Attend in 2019-2020
Be Sure to Experience German Cuisine (and Beer!)
 Photo by kabVisio via iStock
From Michelin-star restaurants to local mom and pop eateries to vendors on the streets of Old Town, there is no lack of superb food to be found in Cologne.
While you’re out exploring the city with your camera, why not pick up a bratwurst with sauerkraut as you stroll?
Or, you can sit down in a restaurant and enjoy a full meal, featuring German classics like schnitzel (a breaded cutlet), kartoffelkloesse (potato dumplings), and apfelkuchen (apple cake)
 Photo by MoreISO via iStock
And though I’m not much of a drinker, you can bet I’d be searching for a pub to grab a stein of German beer. After all, though the Germans didn’t invent beer, they’ve been making it for over 1,000 years, so it stands to reason that German beer has a long-standing tradition of being some of the best in the world!
In fact, since 1516, German brewers have worked under the Beer Purity Law, which mandates that beer must be made from barley, hops, and clean water - and nothing else. And while more liberal beer laws have since been passed, many brewers continue the strict tradition of using no more than the three allowed ingredients.
Maximize Your Time at Photokina
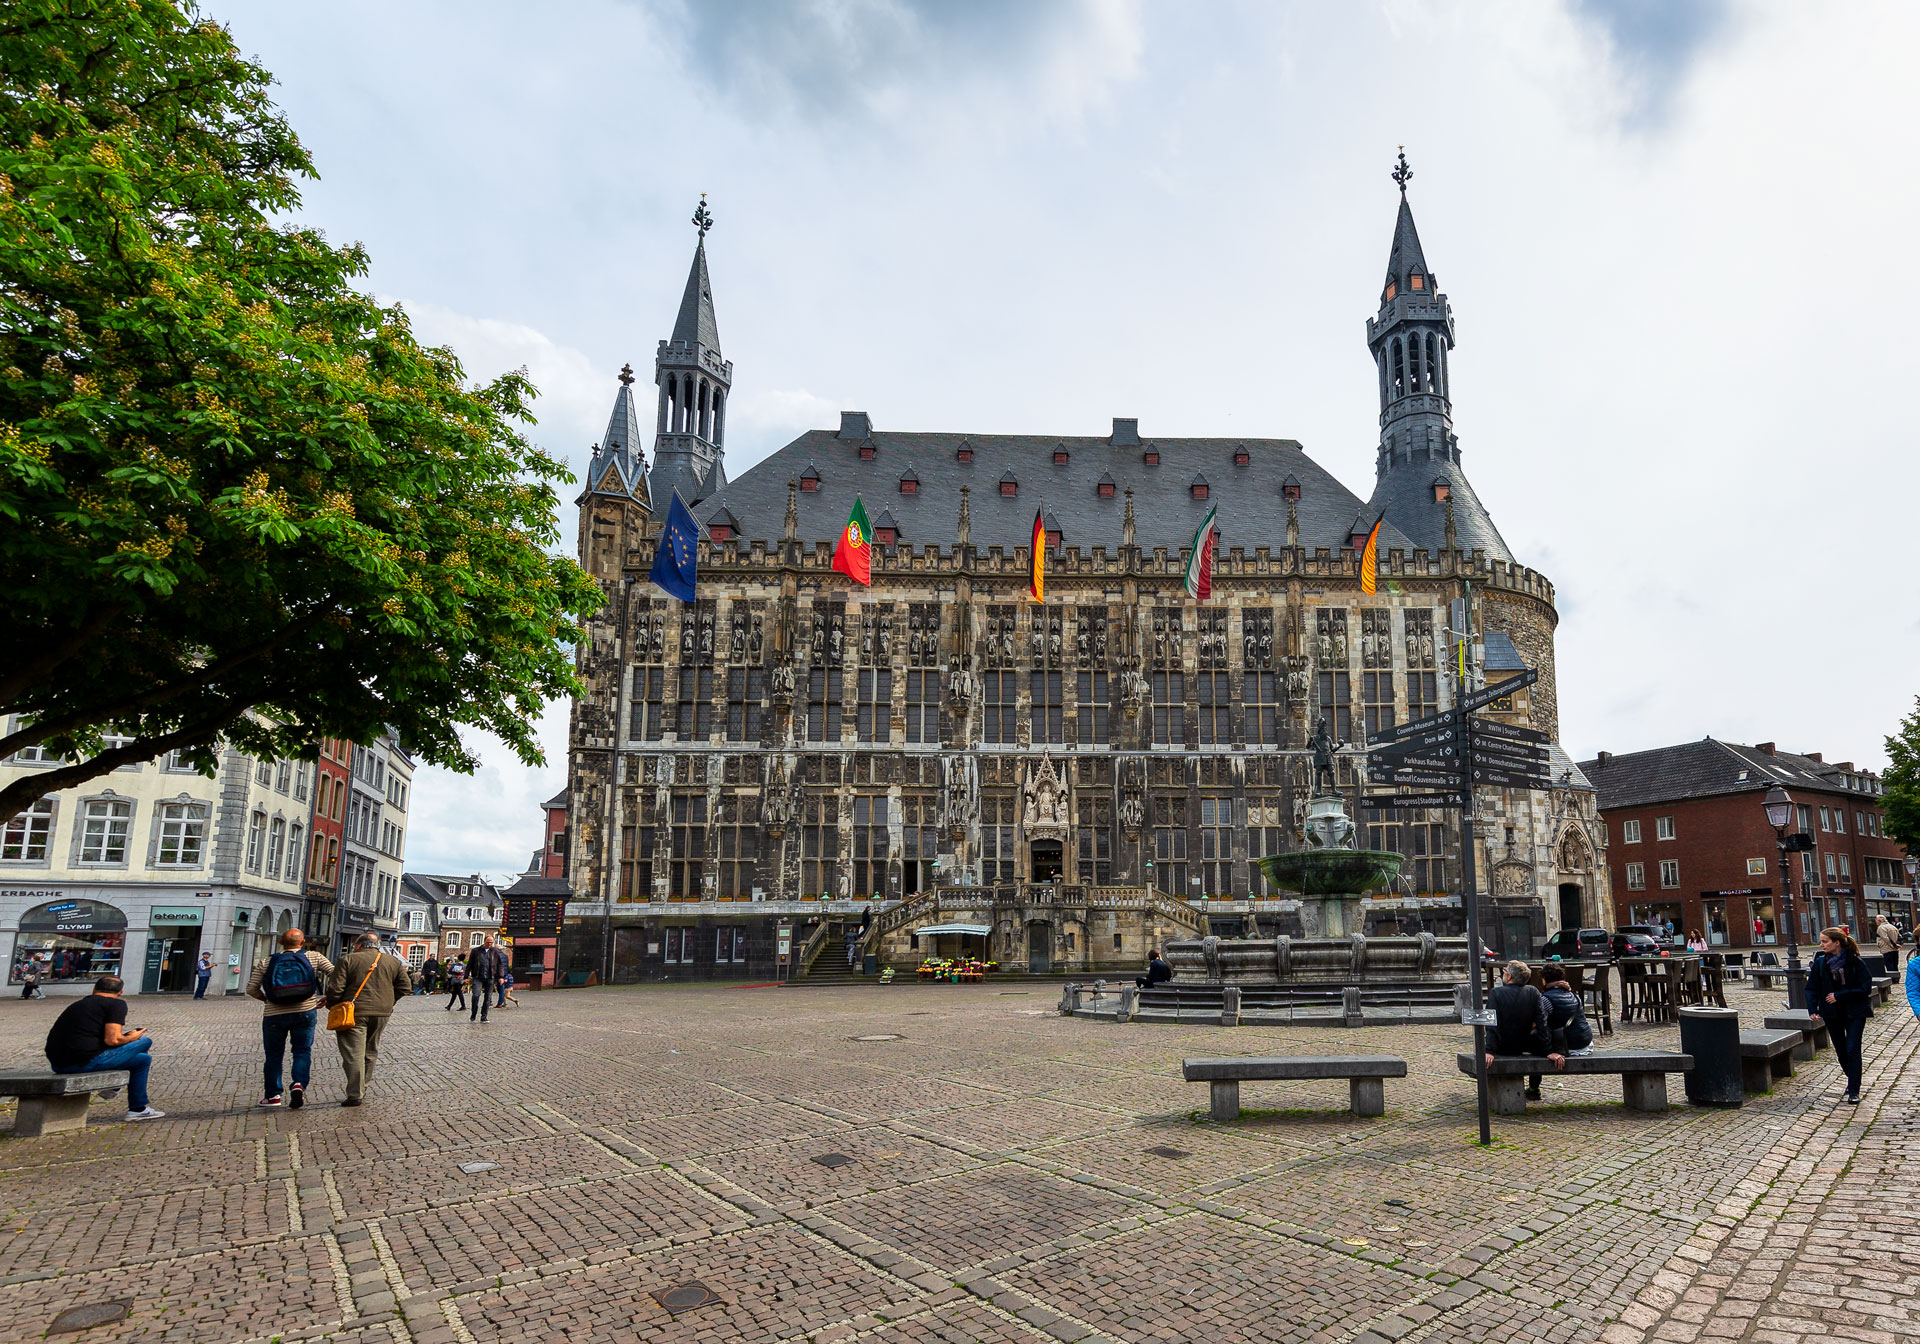 Princeton Photo Workshop: North Rhine-Westphalia-Photokina Photography Tour & Workshop
In addition to knowing what to photograph, where to go, and what to eat and drink, perhaps the best tip you can use to get the most out of your Photokina 2020 trip is to maximize your time while you’re there. And to do that, why not join a photography tour of the area?
I’ve had an opportunity to get to know the folks at Princeton Photo Workshop over the last month or so, and their passion for photography and dedication to providing top-notch experiences for their clients is truly inspiring.
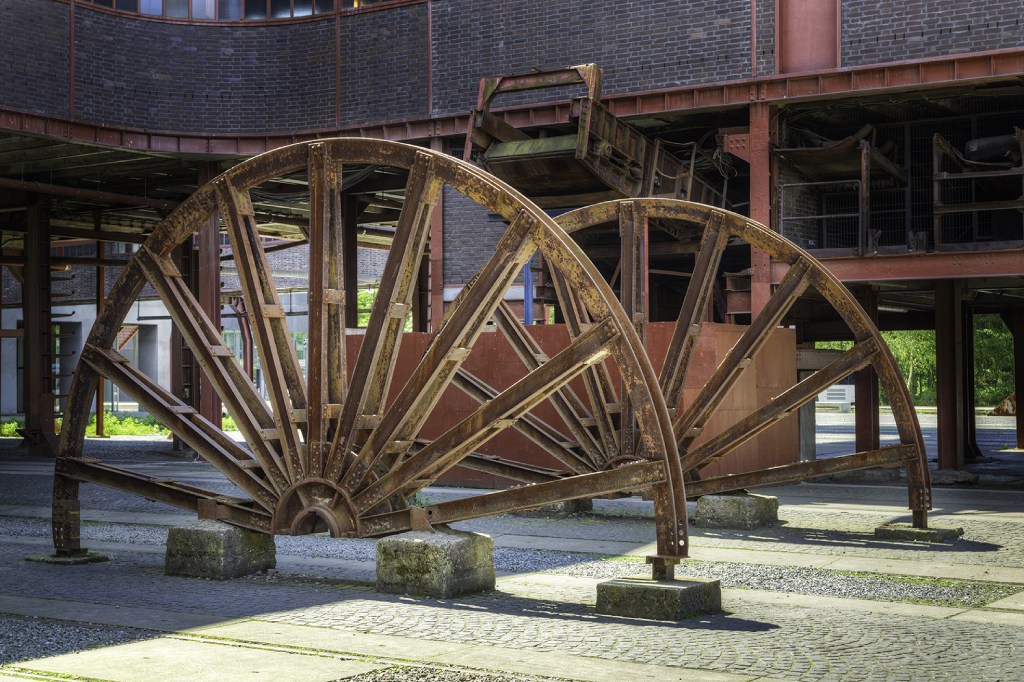 Princeton Photo Workshop: North Rhine-Westphalia-Photokina Photography Tour & Workshop
On their North Rhine-Westphalia-Photokina workshop (which runs May 24-30, 2020), you’ll get to experience out-of-the-way locations that many tourists don’t get to see.
From the breathtaking architectural wonders of abandoned industrial complexes in the Ruhr District to medieval villages like Aachen, where you can explore the gorgeous Aachen Cathedral, to the cobblestone streets of Monschau, a tiny village that has changed little in the last three centuries, you’ll have all kinds of opportunities to explore and photograph this unique region of Germany.
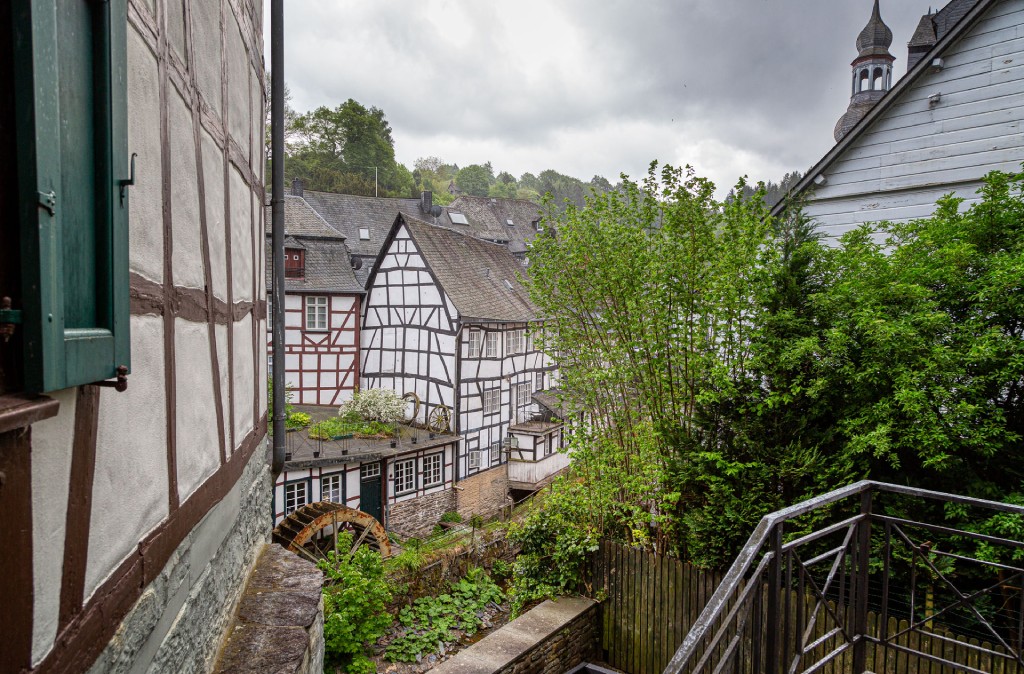 Princeton Photo Workshop: North Rhine-Westphalia-Photokina Photography Tour & Workshop
Princeton Photo Workshop, together with their local photography expert, has devoted a lot of time and effort to ensuring the best experiences for photographers to get the most out of your time.
Speaking of time, you’ll get to spend a day at Photokina, where you’ll witness the unveiling of the latest and greatest photography gear and gadgets. Likewise, you’ll have time to explore all the Cologne has to offer.
 Princeton Photo Workshop: North Rhine-Westphalia-Photokina Photography Tour & Workshop
Throughout the trip, you’ll gather with the other tour participants and the workshop leaders to review images, discuss techniques, and see post-processing demonstrations. This focus on education, growth, and sharing, along with the warmth and support of the tour leaders, is what makes a trip with Princeton Photo Workshop worth every penny.
If you’re excited to explore Photokina, make a true trip of it and add an exploration of the North Rhine-Westphalia area to your list for 2020!
Get more details about the North Rhine-Westphalia-Photokina Workshop.
We Recommend
How to Make a Living While Traveling
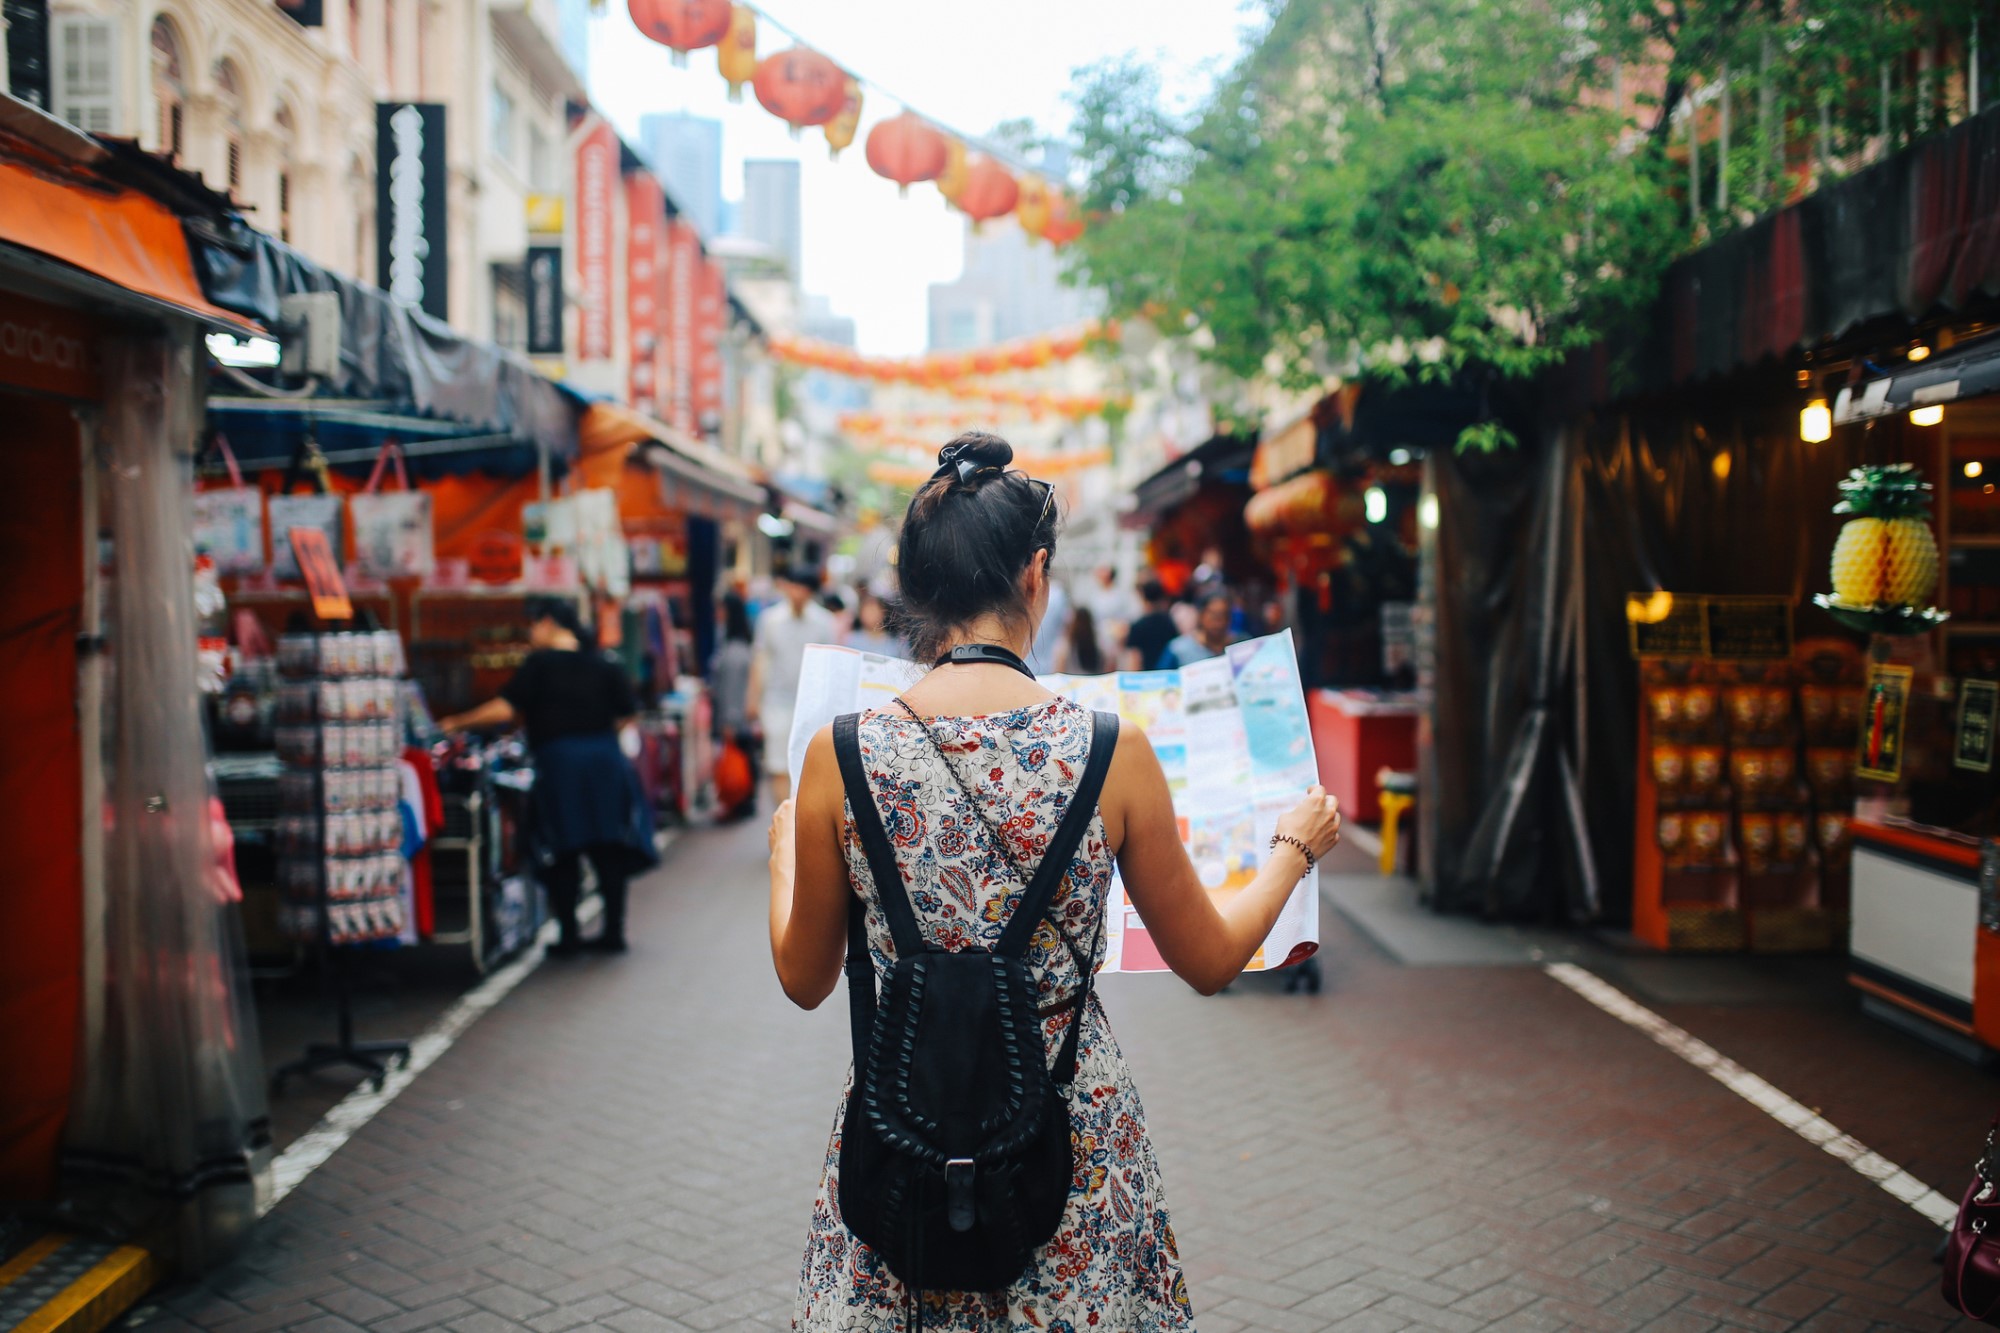
photo by lechatnoir via iStock
If you’re a photographer, there’s probably been more than one occasion in which you thought, “Man, I wish I could travel and photograph the world and make money doing it.”
And while that might seem like a pipe dream that most of us can never possibly attain, it’s actually something you can attain with some prep work.
Now, this isn’t to say that packing up your life and hitting the road for months or years on end is easy, because it isn’t. I’m just saying it’s not as difficult as you think!
Let’s take a look at a few ways to make a living while traveling that will allow you to do what you love and give you the freedom to explore the world at the same time.
Try Affiliate Marketing

photo by aydinynr via iStock
If you’re unfamiliar with affiliate marketing, it’s a method used by many photographers to generate income streams from product links that they promote.
In other words, companies pay you a commission for sales (or sometimes even just traffic to their site) generated by your affiliate links.
Affiliate marketing can be for virtually any kind of product or service, photography-related or otherwise. Cameras, hotels, food and beverages - you name it.
The question is, how do you get started?
Again, it’s easier than you might think!

photo by Geber86 via iStock
With no experience whatsoever, you can get going in affiliate marketing by joining Travel School’s comprehensive training program.
With a proven step-by-step process, you’ll learn how to build a successful business that generates you income in the short and long-term.
Travel School was built on the notion that anyone can master affiliate marketing. And their specific, actionable steps help you get there by helping you connect with various businesses and brands and develop core marketing skills that will lead to financial independence.
With private marketing lessons to get you jump started and recorded training sessions and webinars you can access anytime, Travel School gives you all the tools you need to realize your dream of living on the road!
Get Involved in Stock Photography

photo by zeljkosantrac via iStock
Stock photography might not offer the level of income it once did, but it still represents an excellent means of income for photographers that are traveling the world.
And it’s not like you won’t have plenty of subjects to photograph on your travels!
Like affiliate marketing, there’s a lot of passive income potential in stock photography.

photo by bogdankosanovic via iStock
Sure, there’s some legwork that’s required upfront in taking photos, editing them, uploading them to stock sites, tagging them, and so forth. But once they’re uploaded and tagged, you really don’t have to do anything.
Besides, there is an incredible need for stock photography in many different industries, so the possibilities are virtually endless for earning a little money from your stock photos.
Get started by exploring mistakes to avoid in stock photography and the following reviews of several popular stock photography sites:
- iStock Review
- 123rf Review
- Adobe Stock Review
Monetize Your YouTube Channel

Photo by Hello I'm Nik ?? on Unsplash
The great thing about YouTube is that you can monetize your channel as a means of making side income as you travel.
Essentially what happens is that after your channel is approved for monetization, YouTube will place ads in or near your videos. With a connected Google AdSense account, you’ll earn income that’s generated from the ads.
On top of that, videos are a great way to teach others about the process of photography. You can demonstrate your expertise, develop a reputation as a great photographer and teacher, and that in and of itself might lead into a nice following on YouTube (and get you more clients in the process).
Edit Other People’s Photos

photo by cdwheatley via iStock
Not every photographer has time to edit their own photos, so they outsource that job to other photographers. Why not make yourself that photographer?!
There will be days when the weather is bad or you can’t sleep or you just want to relax, and those are perfect times to make a few extra bucks by editing photos for other photographers.
If you look on sites like Upwork and Fiverr, you’ll find all sorts of job listings for photo editing.
So long as you have your laptop and a good post-processing workflow, you can hammer out editing photos in pretty short order and add that money to your income stream as you travel.
Better yet, combine all the different ideas presented here and you’ll have multiple revenue streams to support yourself as you explore the world.
We Recommend
Iceland Photography Workshops
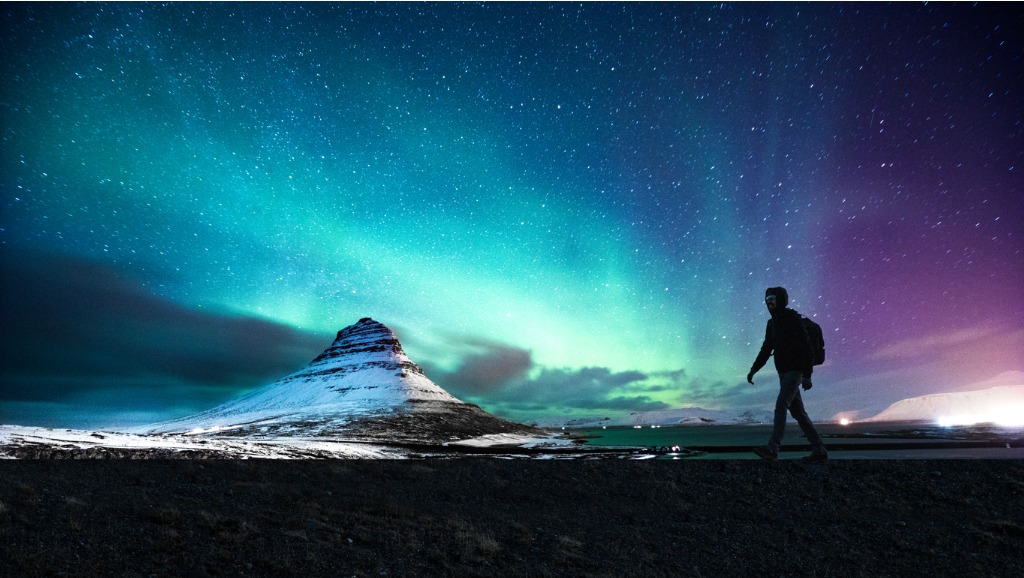
photo byLeoPatrizi via iStock
In the past twenty years, Iceland has gone from a small, unknown island, to one of the premier photography destinations on the planet!
It’s one of the wildest and most remote places on earth, and home to some of the most dramatic landscapes you will ever see. No wonder it’s a dream destination for literally every photographer I have ever met.
Whether you are a total beginner or a professional, Iceland photography workshops are an astounding thing to keep in mind if you are planning a trip to Iceland. Better yet, it’s home to countless award-winning photographers who are happy to take you around the island while also teaching you all the top tips and tricks of landscape photography.
With Iceland photography workshops ranging from a few hours to a couple of weeks, I guarantee there is a perfect option out there for you no matter how much experience you have or what your budget may be!
Spectacular One-Day Photography Workshops in Iceland
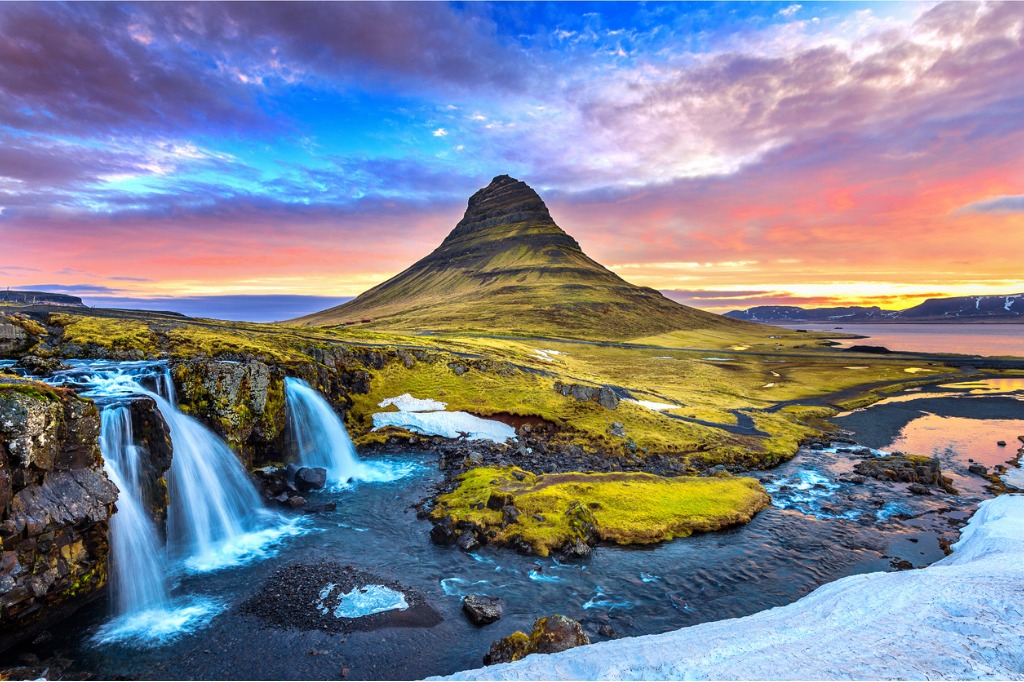
photo bytawatchaiprakobkit via iStock
If you only have a few days in Iceland, or are traveling on a cheaper budget, a one-day Iceland photography workshop will slide perfectly into your schedule!
These tours range from relaxing three-hour morning or afternoon sessions, to intensive twelve-hour workshops that cram as much as physically possible into one day. Additionally, all of them are led by professional photographers with extensive knowledge of the area.
In autumn and winter, my absolute favorite experience is this Northern Lights Photo Tour. It’s a trip like no other where you will not only get to view the aurora borealis, but learn precisely how best to capture it on camera. Your friends and family back home will be in awe when they see the photos you took on this excursion!
During Summer, this action-packed Private Photo Tour of the Snæfellsnes Peninsula is unbeatable. It’s a full-day tour where you will get to shoot stunning waterfalls, beautiful mountains, lava fields, volcanic craters, jagged coastlines, a glacier, and more!
Here are a few more spectacular one day Iceland Photography workshops:
- Golden Circle Photo Tour
- 3 Hour Sightseeing and Bird Watching Photography Hike
- Photo Workshop in the Icelandic Highlands
- 7 Hour Landscape and Nature Photography Tour in the Westfjords
- Landmannalaugar Photo Tour
- South Coast Photo Tour
Magnificent Multi-Day Iceland Photography Workshops
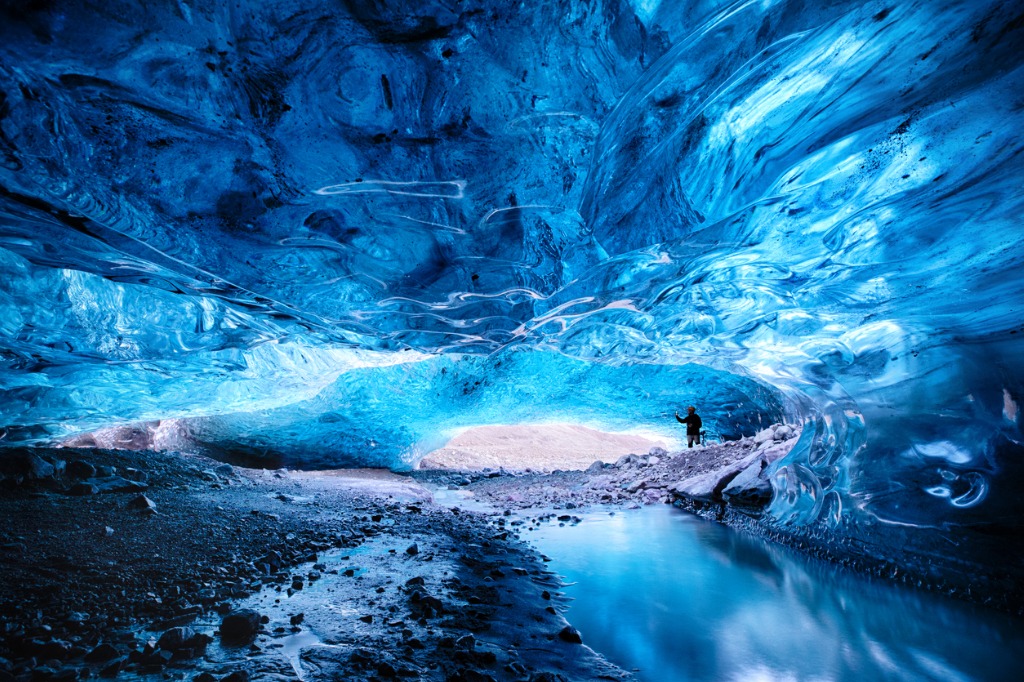
photo byRixipix via iStock
For those of you who want to see more of what Iceland has to offer, multi-day Iceland photography workshops are a fantastic option! With a huge selection of workshops ranging from two to five days, these multi-day trips are some of the most sought-after packages in Iceland.
On these tours you can choose between focusing and connecting more with one part of the island, or hopping around and exploring multiple locations.
This winter 4 Day Northern Lights & Ice Cave Photo Tour is the best-selling workshop in Iceland regardless of length. This Iceland photography workshop takes you along the southern coast to the Skaftafell Nature Reserve, the Diamond Beach and the Jökulsárlón glacier lagoon. If 4 days exploring ice caves by day and hunting the northern lights by night doesn’t sound amazing to you, I don’t know what will!
In warmer months, my top recommendation for Iceland photography workshops is this 3 Day Photo Workshop in the Icelandic Highlands. It focuses on the breathtaking Landmannalaugar region in the southern highlands, which is home to cascading waterfalls, boiling hot springs, and crystal clear lakes. Throughout the three days you will be taken to some of Iceland's most photographed locations, as well as a handful of secret hidden gems that only the local guides know about!
Check out these additional magnificent multi-day Iceland photography workshops:
- 5 Day Guided Photo Tour of Iceland’s South Coast in Winter
- 4 Day Summer Photo Workshop in Iceland
- 2 Day Private Photo Workshop of Iceland’s South Coast
- 5 Day Summer Photo Tour | Black Sand Beaches, Waterfalls, & Glacier Lagoons
- 5 Day Photo Tour of Snaefellsnes & The Westfjords
Mind-Blowing One and Two-Week Photo Workshops in Iceland
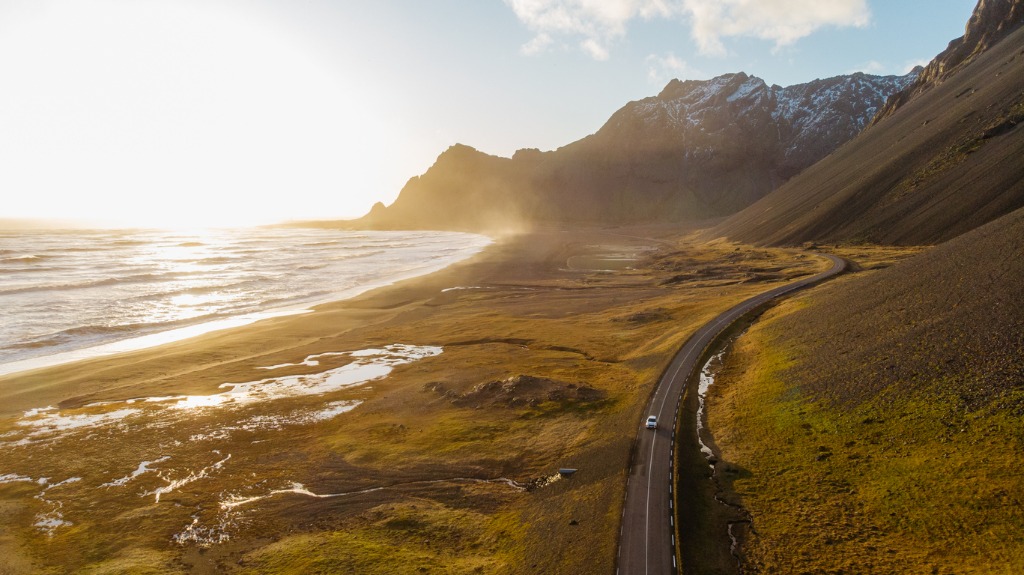
photo byhxyume via iStock
If you are a professional photographer looking to add to their portfolio, or an amateur looking to seriously up their skills, these epic one and two week Iceland photography workshops are for you!
If you enroll in one of these legendary workshops, you will get to explore and photograph the entire island. You can expect to visit all of the most recognized spots in Iceland while learning from professionals exactly how to capture out-of-this-world images.
This 10 Day Ring Road Photography Workshop is a once-in-a-lifetime opportunity! You will circumnavigate the whole island via the famous Ring Road, while stopping along the way at each and every one of Iceland's most picturesque locations. Over the ten days the guides will share with you more knowledge than most students receive in a four-year photography degree, and I guarantee you will walk away a much-improved photographer!
Take a look at these other mind-blowing one and two day Iceland photography workshops:
- Complete Two Week Winter Photography Workshop
- Scenic 12 Day Midnight Sun Photography Workshop
- 10 Day Northern Lights and Ice Caves Photo Workshop
- 7 Days Trekking Across Iceland
- Northern Lights and Fall Colors
No matter how long you’re in Iceland, and no matter how long your Iceland photography workshop, you are sure to see some of the most incredible landscapes in the world. Don’t spend your time wandering around trying to find the ideal locations for your Iceland photography. Instead, choose an Iceland photography workshop, let the experts lead you to the best photographic locations, and get snapping!
Learn More:
We Recommend
Improve Your Photography Skills with Expert Courses
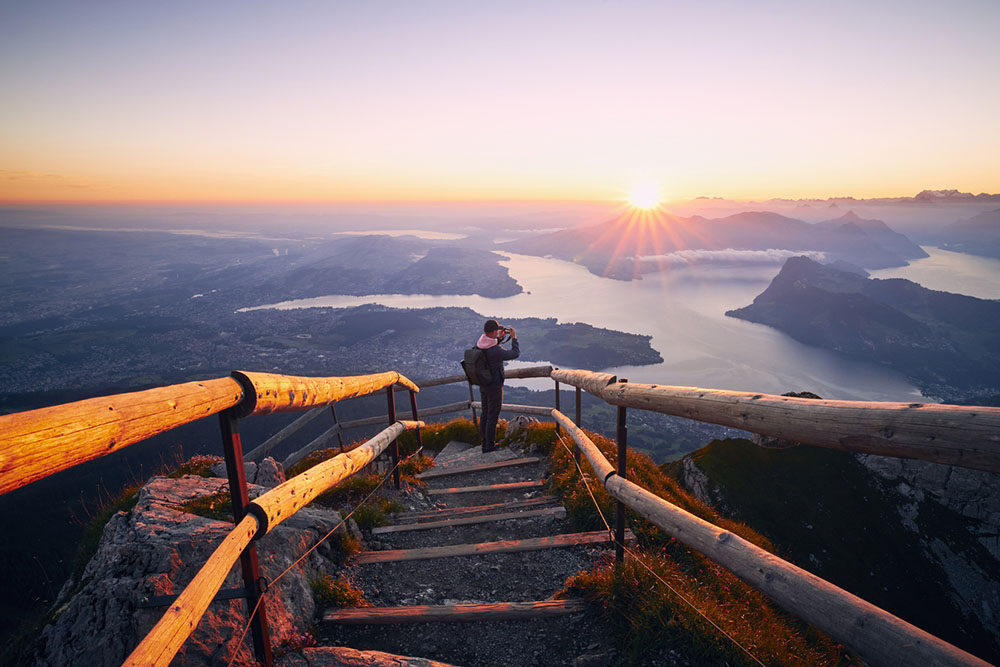
Photo by Chalabala via iStock
In an era where smartphones have made 'photographers' of us all, the true art and skill of photography can often be overlooked. But for those who wish to move beyond casual smartphone snaps and truly master the craft, photography courses can play an invaluable role. This article is dedicated to exploring how these courses can improve and enhance your skills.
At its core, photography is an art form that goes far beyond simply clicking a button. It's about understanding and manipulating light, composing a scene to tell a story, and truly getting to grips with the myriad functions of your camera. These elements can be effectively learned and improved upon through structured training offered by photography courses.
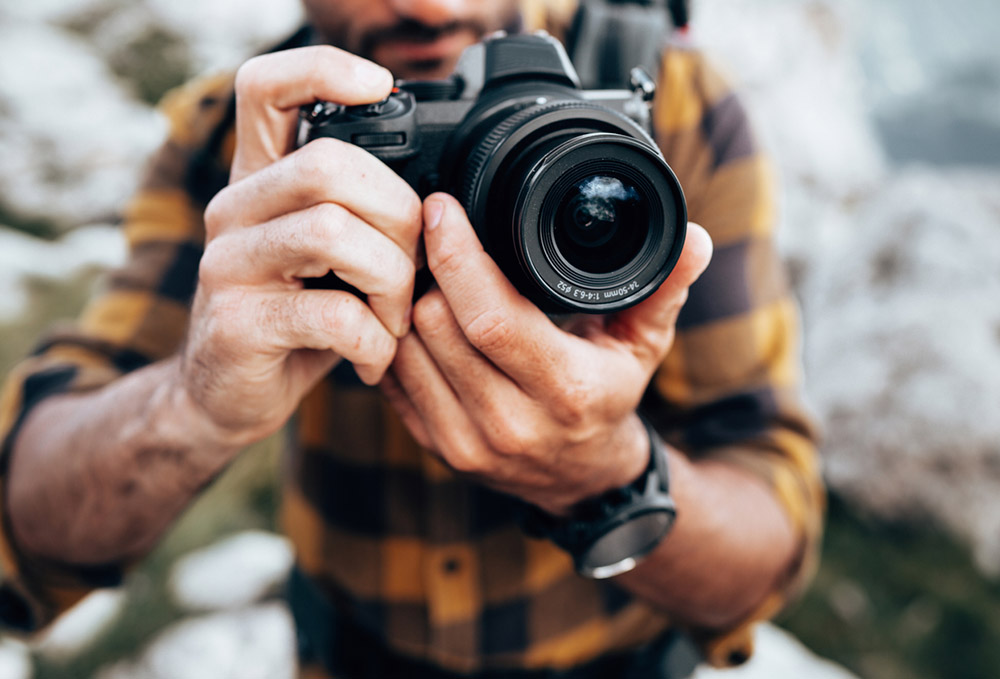
Photo by franckreporter via iStock
The importance of photography courses in skill development cannot be overstated. These courses offer comprehensive, systematic learning that is often hard to achieve through self-taught practices. They provide an all-around education, from the basics to the advanced techniques, thereby bridging gaps in your knowledge and skills.
This guide delves into the world of photography training, helps you understand the structure of photography lessons, and explores how online and local photography classes can significantly enhance your abilities. The aim is to highlight the value of investing in structured learning, regardless of your current skill level, and how this investment can set you apart in this highly competitive field.
Join us as we venture further into how photography courses can catalyze your skill development and guide you on the journey toward becoming a more proficient and accomplished photographer.
Table of Contents
- Understanding Photography Training
- The Power of Photography Courses
- Enriching Your Skills with Photography Courses
- Photography Classes Near Me: Local vs. Online
- How to Choose the Right Photography Courses for You
- Photography Courses Can Unlock Your Potential
- Start Your Journey Today With Our Photography Courses
Understanding Photography Training

Photo by mapodile via iStock
While self-learning through sources like photography books is a good start, there is immense value in structured learning that photography courses offer.
This form of training provides an organized pathway of learning, where each concept builds upon the previous one. It ensures comprehensive coverage of all key aspects of photography, reducing the chance of missing out on vital information or techniques.
This structured learning is particularly important for beginners who might be overwhelmed by the vast array of concepts and techniques in photography. That’s why we’ve developed our photography courses to be highly structured; you learn bit by bit and accumulate skills over the course.

Photo by Khosrork via iStock
Photography training is not just about learning to operate your camera, though. It also involves developing an artistic vision, understanding the importance of light, composition, and color, learning to tell a story through your images, and much more. It's about developing a well-rounded set of skills that make you technically proficient and artistically expressive.
You can get a head start on developing your photography skills by reading some of our free articles, like the Best Camera Settings for Landscape Photography, the Best Camera Settings for Portrait Photography, and the Exposure Triangle Explained in Plain English. By enrolling in one of our photography courses, though, you can expand on what you learn with detailed tutorials crafted specifically to help you build a wide range of skills.
The Power of Photography Courses
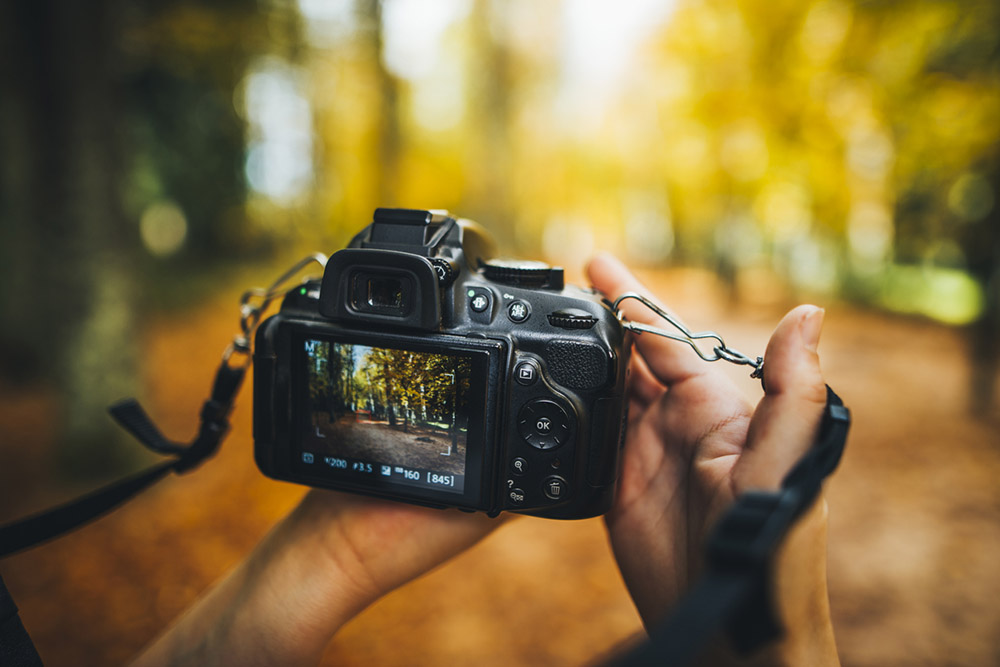
Photo by MarioGuti via iStock
Photography lessons are specifically designed to provide you with a comprehensive understanding of all aspects of photography. As noted earlier, photography courses follow a systematic structure, ensuring that you grasp fundamental concepts before moving on to more complex topics. This progressive approach avoids any potential gaps in knowledge, making it a much more efficient learning method than self-directed study.
Lessons often begin with the basics, such as understanding your camera settings, mastering lighting, and learning about composition. As you gain proficiency in these areas, the course will then move on to more advanced techniques, such as long-exposure photography, macro photography, or post-production editing. A good example of this is our 30-Day Landscape Photography Course.
Photo by demaerre via iStock
This photography course begins with the fundamentals of photography, including the kind of gear you need, and advances through topics like exposure settings, photographing landscapes during golden hour, and composition techniques.
Another advantage of photography courses like this is the opportunity they provide to learn from professionals. The experienced instructors who put these courses together offer insights and tips that aren't readily available in books or online tutorials.
Photography lessons can also help you explore different styles and genres of photography, something you might not do on your own. From portrait to landscape, bird to travel photography, these photography courses expose you to a range of possibilities, allowing you to discover what truly ignites your passion.
Enriching Your Skills with Photography Courses

Photo by GaudiLab via iStock
Photography courses can play a pivotal role in your journey to becoming a better photographer. They offer an excellent opportunity to deepen your understanding of the craft, learn new techniques, refine your skills, and gain inspiration from experienced professionals.
These courses also often cover modern photography tools and technologies, such as drones, underwater cameras, or cutting-edge editing software, ensuring you stay updated with the latest trends in the photography world.
Photography isn’t just a technical skill; it's a form of art. A great photograph is not just technically sound, but it also tells a story, stirs emotions, or offers a unique perspective.
Photography courses like our 30-Day Creative Eye Challenge can help you cultivate your artistic vision. You'll learn how to transform your ideas into compelling visual narratives through case studies, critiques, and assignments. You'll gain insights into the artistic aspects of photography, like composition, lighting, color theory, and storytelling. These skills can greatly enhance your photography, allowing you to create more impactful and expressive images.
Photography Courses are Just the Start...
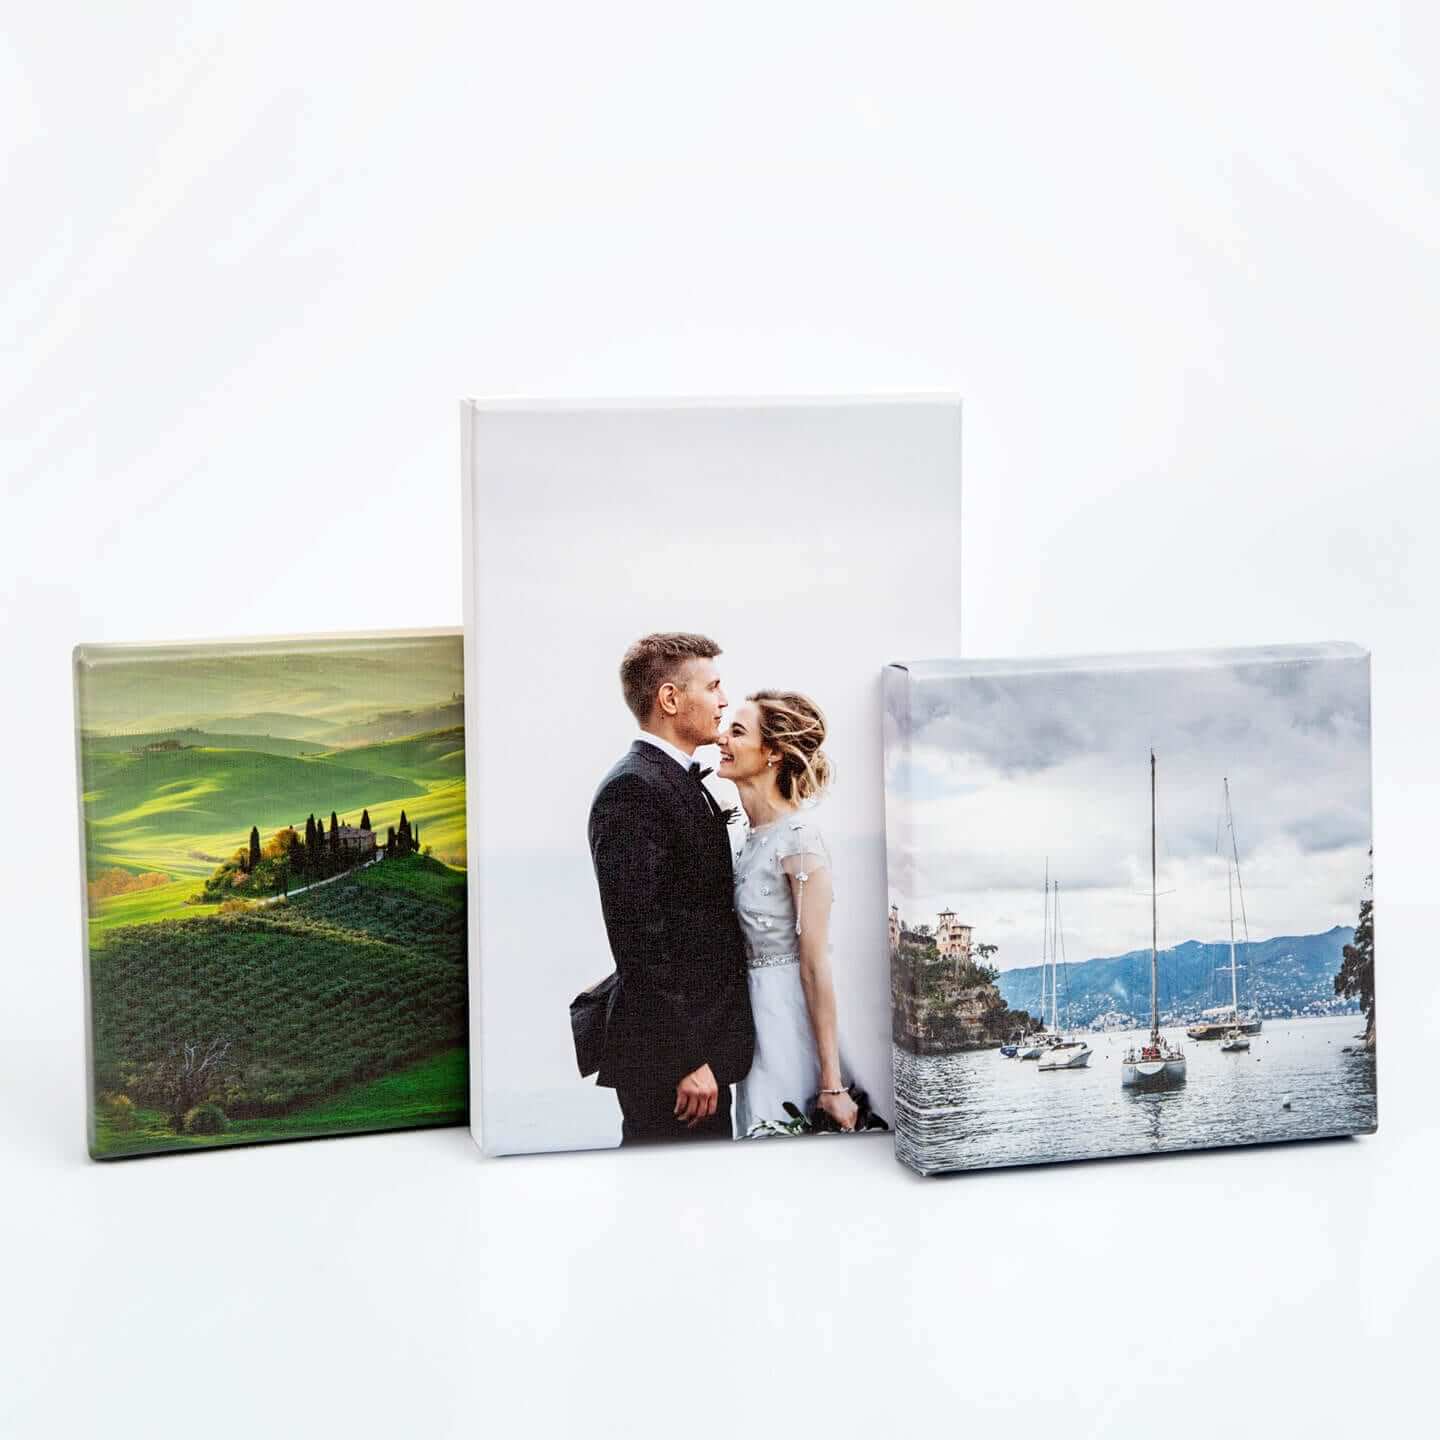
Learning additional skills in a photography course is one thing; acting on those skills and using what you've learned to generate better photographs is another.
And this doesn't mean just going out and taking photos all the time...
Instead, you should be purposeful in the images you create. Think of photographs that have impact and visual appeal. Consider what your images will make people think and feel as well. Also, consider how your image will look when printed as a large print.
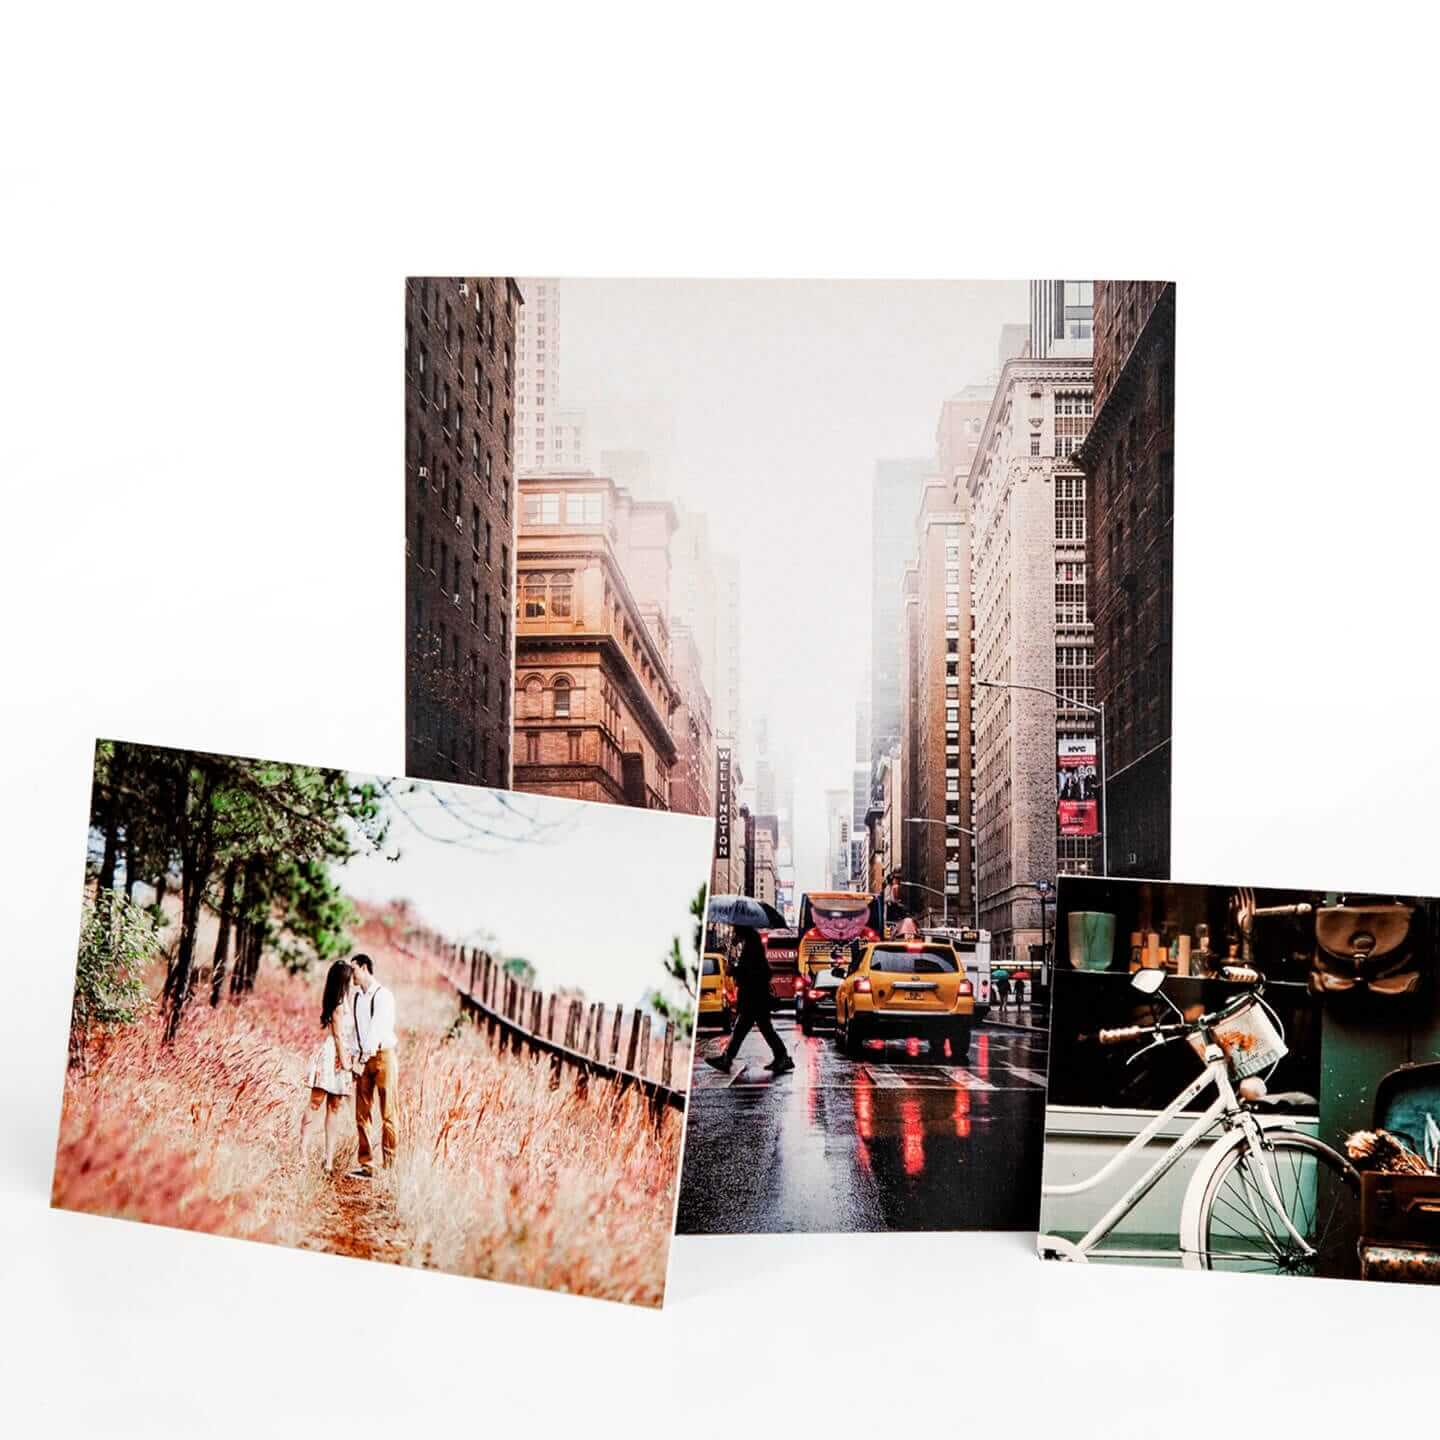
I've spoken many times over the years about the value of having your images printed out. You need not print every photo you take but certainly take the time to have your very best images printed. By partnering with a trusted printing company like Printique, you can get a high-quality print without spending a huge amount of money. It's a win-win!
Plus, companies like Printique have a huge selection of prints you can choose from, so you get a truly custom look for your favorite photos. Whether you prefer acrylic or canvas, metal or paper, or something in between, Printique can accommodate your needs and wants.
You can also choose from a wide range of sizes, finishes, and mounting options, so the end result is a gorgeous representation of your hard work and your progress behind the lens!
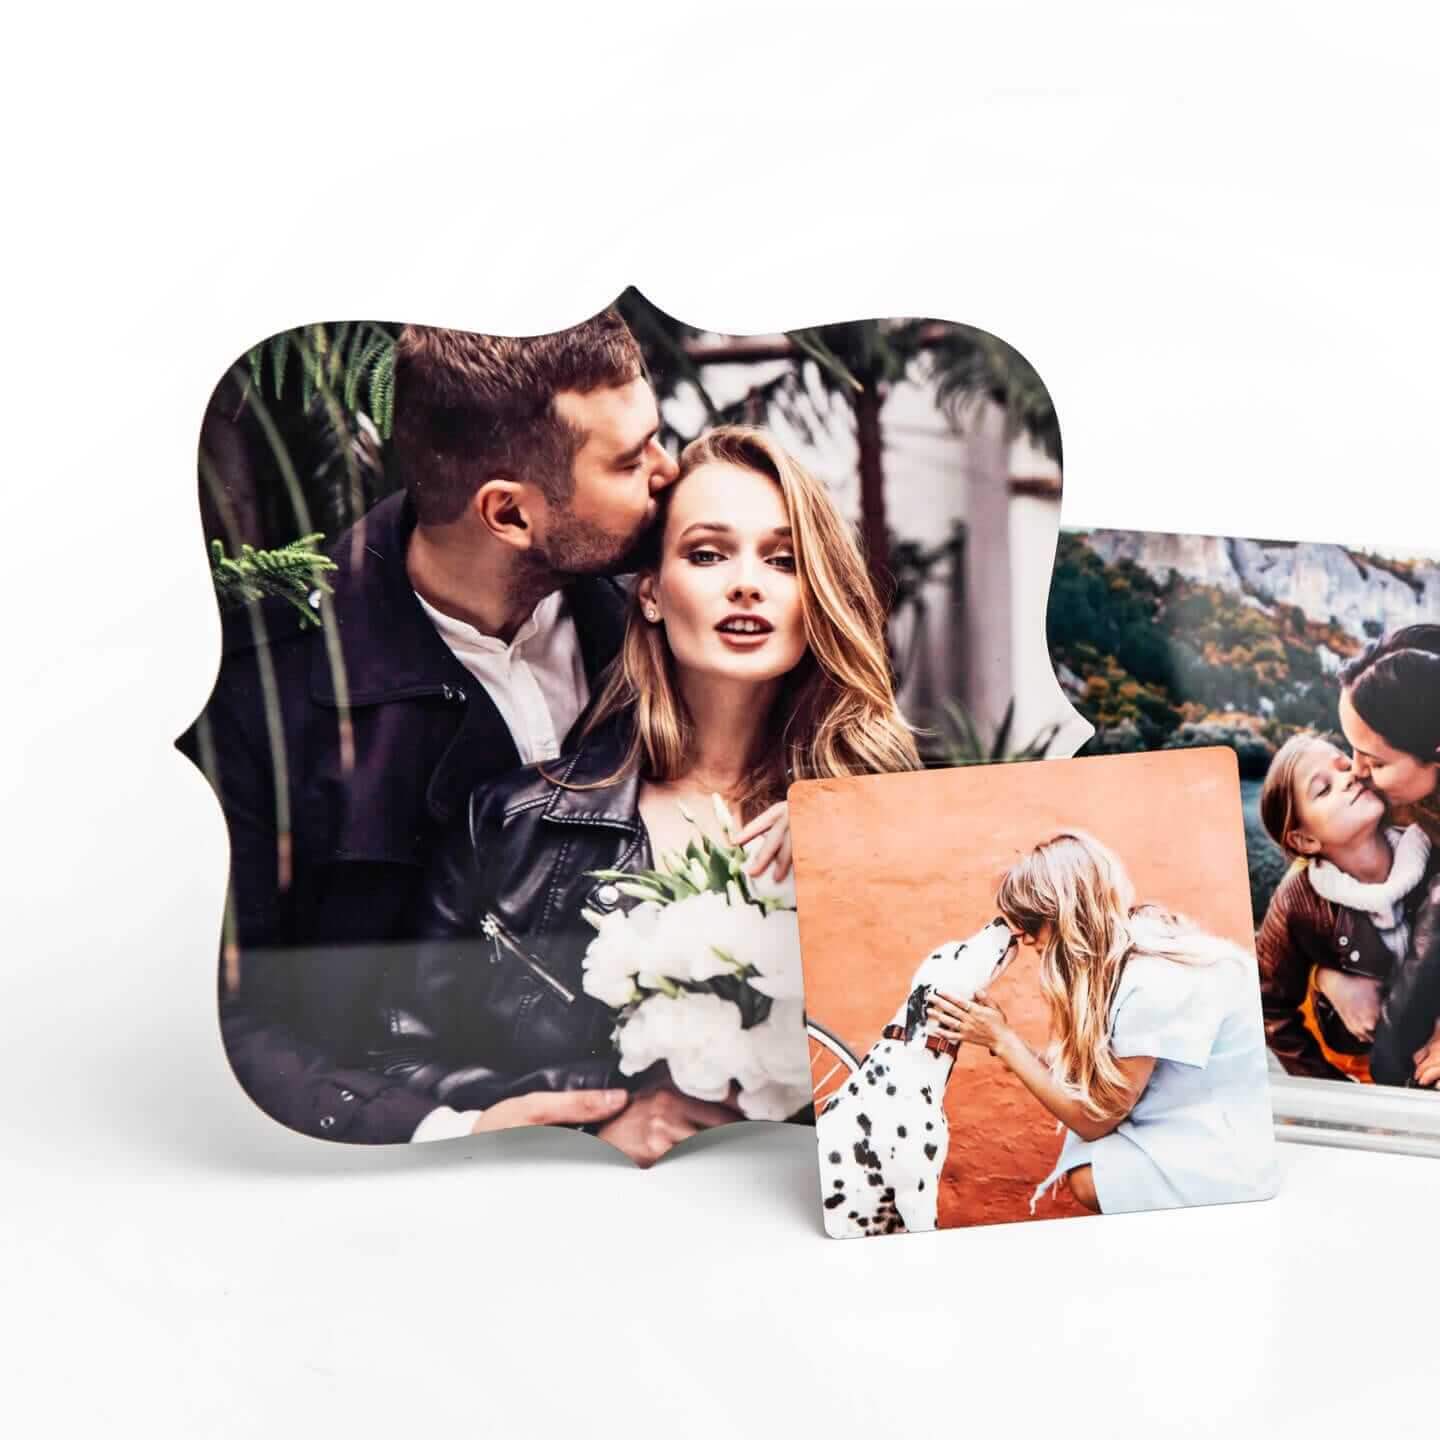
Looking at your photos on your phone or computer screen is one thing; looking at them as a large-format print on your wall is a totally different - and better - experience, if you ask me.
But not all prints are made alike, that's for sure. So, when you're ready to get a few prints made, trust the long-standing reputation of a company like Printique to provide you with a print that's representative of your hard work, skills, and talents!
Photography Classes Near Me: Local vs. Online

Photo by SeventyFour via iStock
With the boom in online education, aspiring photographers like you now have two primary options when it comes to pursuing a course: local, in-person photography courses and online courses. Both have their own unique benefits and considerations. Let's explore them in detail.
Local, In-Person Photography Courses
There's something to be said about the traditional classroom environment. Local, in-person photography classes often offer hands-on training with instant feedback from instructors. This kind of environment can be very conducive to learning, as you get to ask questions and clarify doubts on the spot.
Moreover, local classes often involve practical outings for fieldwork, providing unique opportunities to apply what you've learned in a real-world context. This hands-on experience can be invaluable.
Finally, local classes can help you build a network with other photographers in your area. These connections can lead to collaborations and sharing of ideas and can even open doors for professional opportunities.
Online Photography Courses

Photo by Pekic via iStock
On the other hand, online photography courses offer unparalleled flexibility. You can learn at your own pace, at any time, and from anywhere in the world. This can be a major advantage for those with full-time jobs or other commitments that make attending scheduled classes challenging.
Online courses often come with lifetime access to materials, so you can revisit the lessons as often as needed. Moreover, many online platforms have vibrant communities where you can share your work, provide feedback, and learn from each other.
Choosing What's Best for You
Whether you choose local classes or online courses depends largely on your personal preferences and circumstances. Consider factors like your schedule, learning style, and the specific skills you want to improve. In the end, the most important thing is that you're learning and growing as a photographer.
How to Choose the Right Photography Courses for You

Photo by Anchiy via iStock
With so many options available, choosing the right photography course can feel overwhelming. Here are some key factors to consider that can guide you in making an informed decision.
Identify Your Goals
Firstly, it's important to identify what you hope to achieve from the course. Are you a beginner looking to understand the basics or an experienced photographer aiming to refine certain skills? Are you interested in a specific genre of photography, like portrait, landscape, or wildlife photography? Having a clear understanding of your goals can help you choose a course that aligns with your needs.
Consider the Content of Photography Courses
Photo by GaudiLab via iStock
Take a close look at the course syllabus. Does it cover the topics you're interested in? A good photography course should offer a mix of theoretical knowledge and practical assignments. It should cover the technical aspects of photography while also helping you develop your creative vision.
Read Reviews
Reviews can provide insights into the experience of past students. They can help you understand more about the course structure, the quality of instruction, and the value of photography courses. However, remember to take each review with a grain of salt, as everyone’s learning experience and expectations can be different.
Consider the Price
Price is an important factor, but it shouldn't be the only one. An expensive course is not necessarily a better one. Consider what you're getting for the price – the depth and breadth of the course, the reputation of the instructor, the resources provided, and so on. Also, consider your own budget. There are courses available for every price range, and many online platforms often offer discounts.
Photography Courses Can Unlock Your Potential
Photo by Lyndon Stratford via iStock
Photography is a powerful art form, one that requires both technical knowledge and creative instinct. As we have explored throughout this article, enrolling in a structured photography course can significantly enhance your skills, taking your photography to new heights.
Through detailed lessons, expert guidance, and practical assignments, photography courses offer a comprehensive learning experience that is difficult to match with self-taught practices alone. They can sharpen your technical skills, hone your artistic vision, introduce you to the world of post-processing, and even equip you with the business skills needed to turn your passion into a profession.

Photo by jacoblund via iStock
Whether you opt for a local class or an online course, the structured learning environment ensures that no stone is left unturned in your photographic education. The investment of time, effort, and resources into such a course can result in a profound improvement in your photographic abilities.
So, the next time you search for "photography classes near me" or "online photography courses," remember the potential these courses hold. Embrace the opportunity to learn and grow, and let these courses guide you on your journey to becoming a more proficient, confident, and accomplished photographer.
Start Your Journey Today With Our Photography Courses
Photo by recep-bg via iStock
Are you ready to take your photography skills to the next level? There's no better time to start than now, especially when we're offering discounted prices on our popular photography courses for a limited time.
With our carefully curated photography courses, we provide a structured learning environment, professional guidance, and real-world applications. Whether you're a beginner or an experienced photographer, we have a course that can meet your specific needs and help you grow.
Photo by anyaberkut via iStock
Remember, the journey of becoming a skilled photographer is not just about clicking the shutter—it's about continual learning, honing your skills, and mastering your artistic vision. Our courses are designed to guide you every step of the way on this journey.
We believe that great photography should be within everyone's reach. That's why we're excited to offer these discounts to make our photography courses even more accessible.
So, what are you waiting for? Begin your exploration with us today, embrace the opportunity to learn, and let your creativity soar. It's time to dive into the world of photography and let your camera be the tool to express your unique perspective. Don't miss out on this chance—your photography journey starts here!
We Recommend
India Travel and Photography Guide
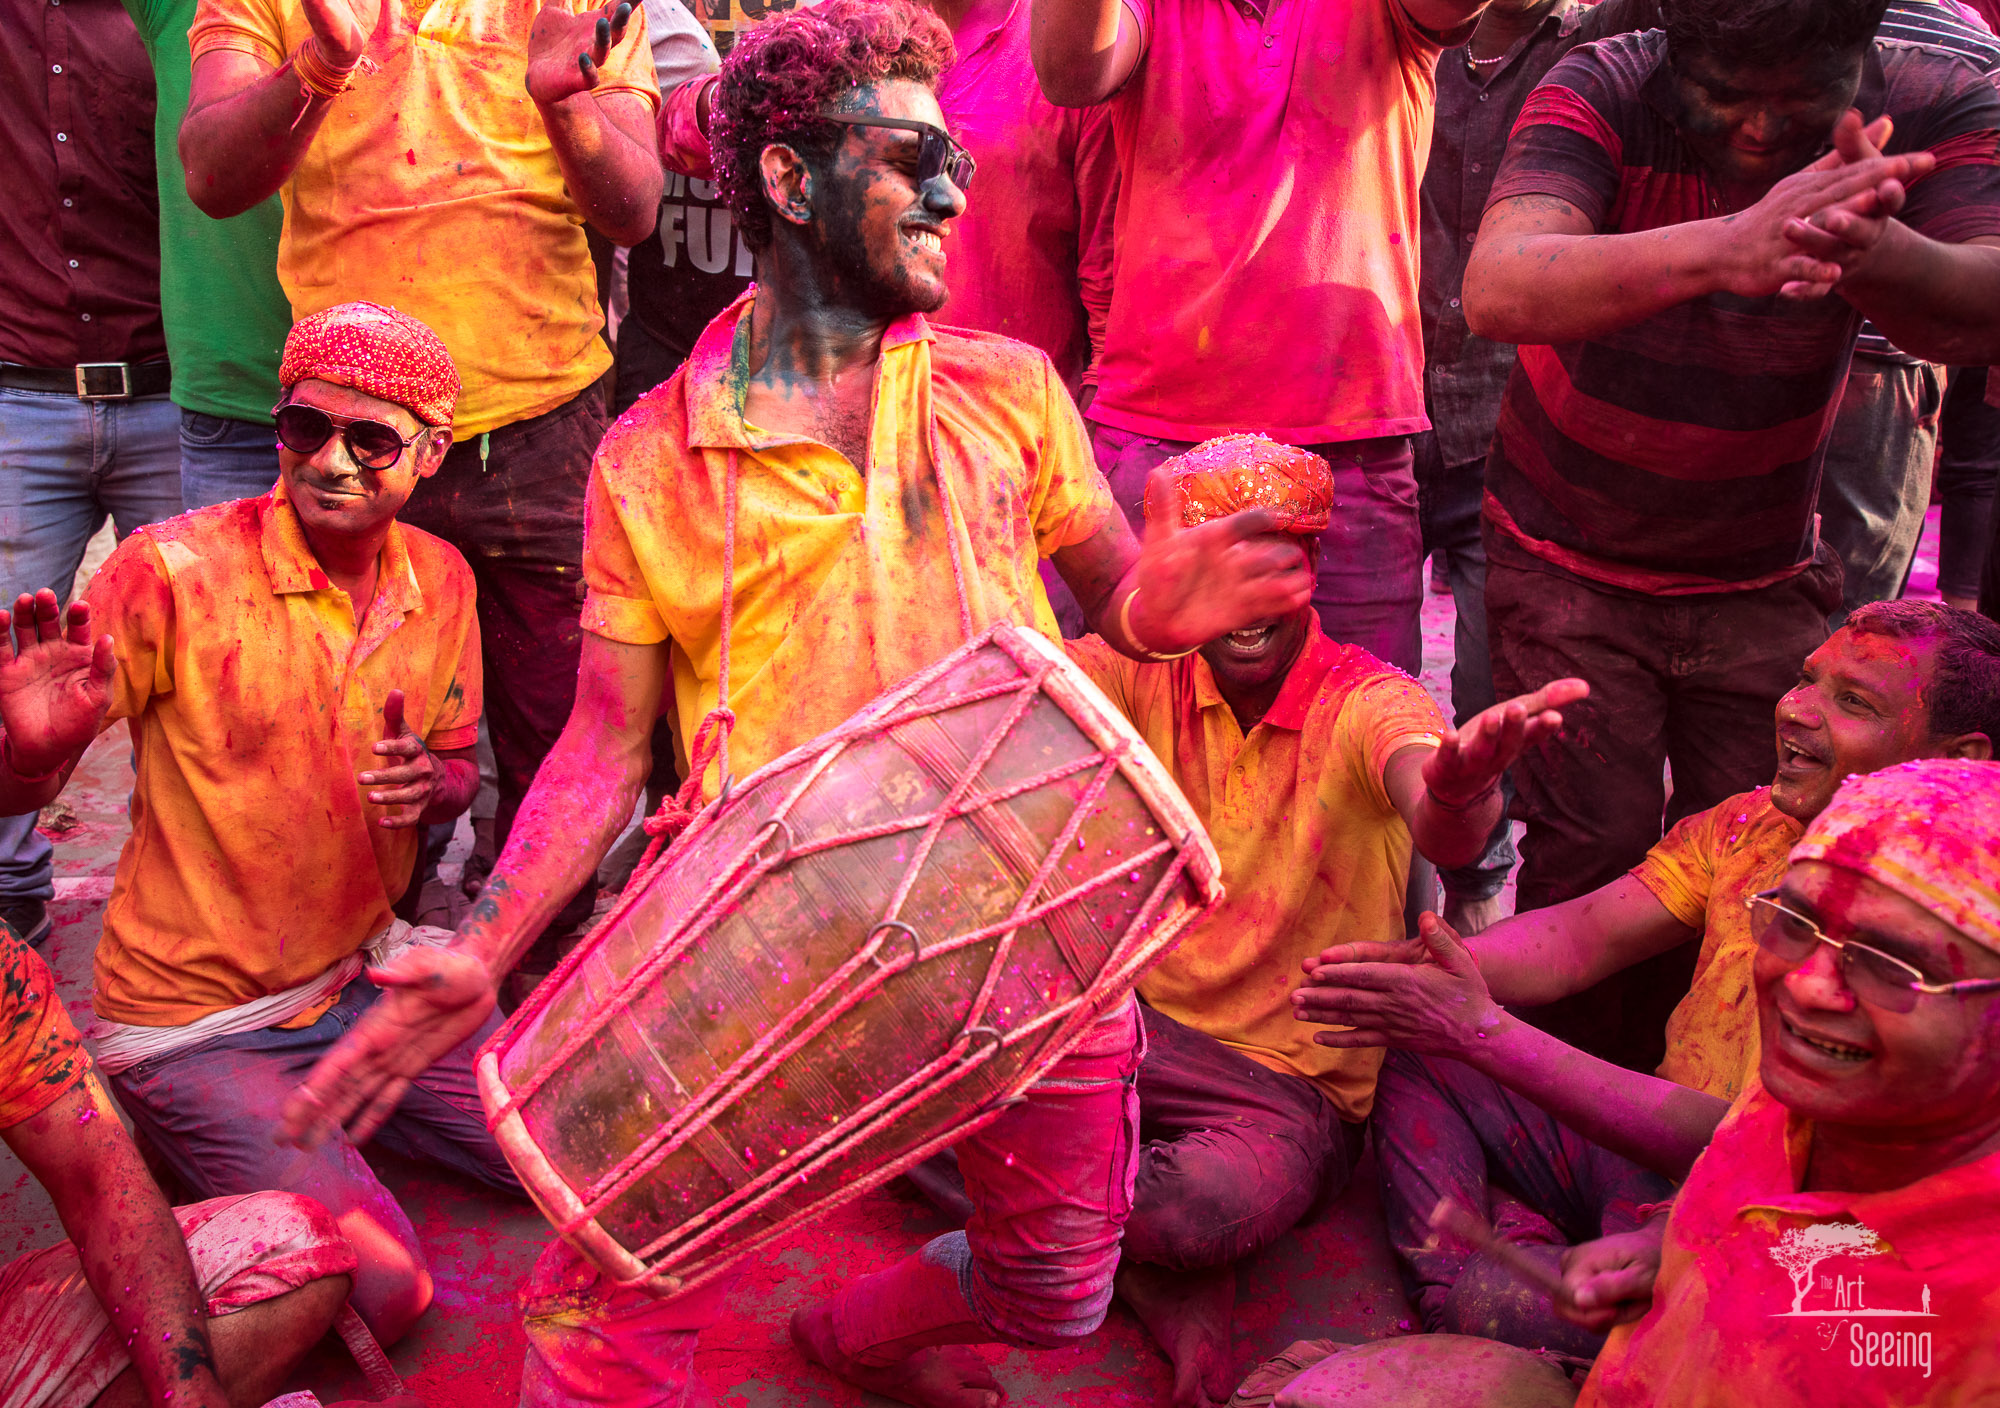
Photo by Ken Lee/Art of Seeing Photography Adventures
India is a country rich with photographic subjects.
Home to some of the most breathtaking landscapes in the world, it is a country of varied terrain from tropical rainforests to the heights of the Karakoram. There is an abundance of wildlife, too, that make India a top destination for wildlife photographers.
But to think that your camera should only be trained on landscapes and wildlife is a mistake…
In this India Travel and Photography Guide, we’ll explore three things to photograph in India that offer you every bit the opportunity to create a breathtaking shot that tells the unique story of India.
What to Photograph in India: The Architecture

Photo by Ken Lee/Art of Seeing Photography Adventures
Whenever the words “India” and “architecture” are uttered together, one’s mind can’t help but think of the Taj Mahal.
Perhaps the greatest monument to love the world has ever seen, this striking white marble mausoleum was constructed in the mid-1600s after it was commissioned by Shah Jahan, a Mughal emperor.
The purpose of the Taj Mahal was to serve as the final resting place of his favorite wife, Mumtaz Muhal.
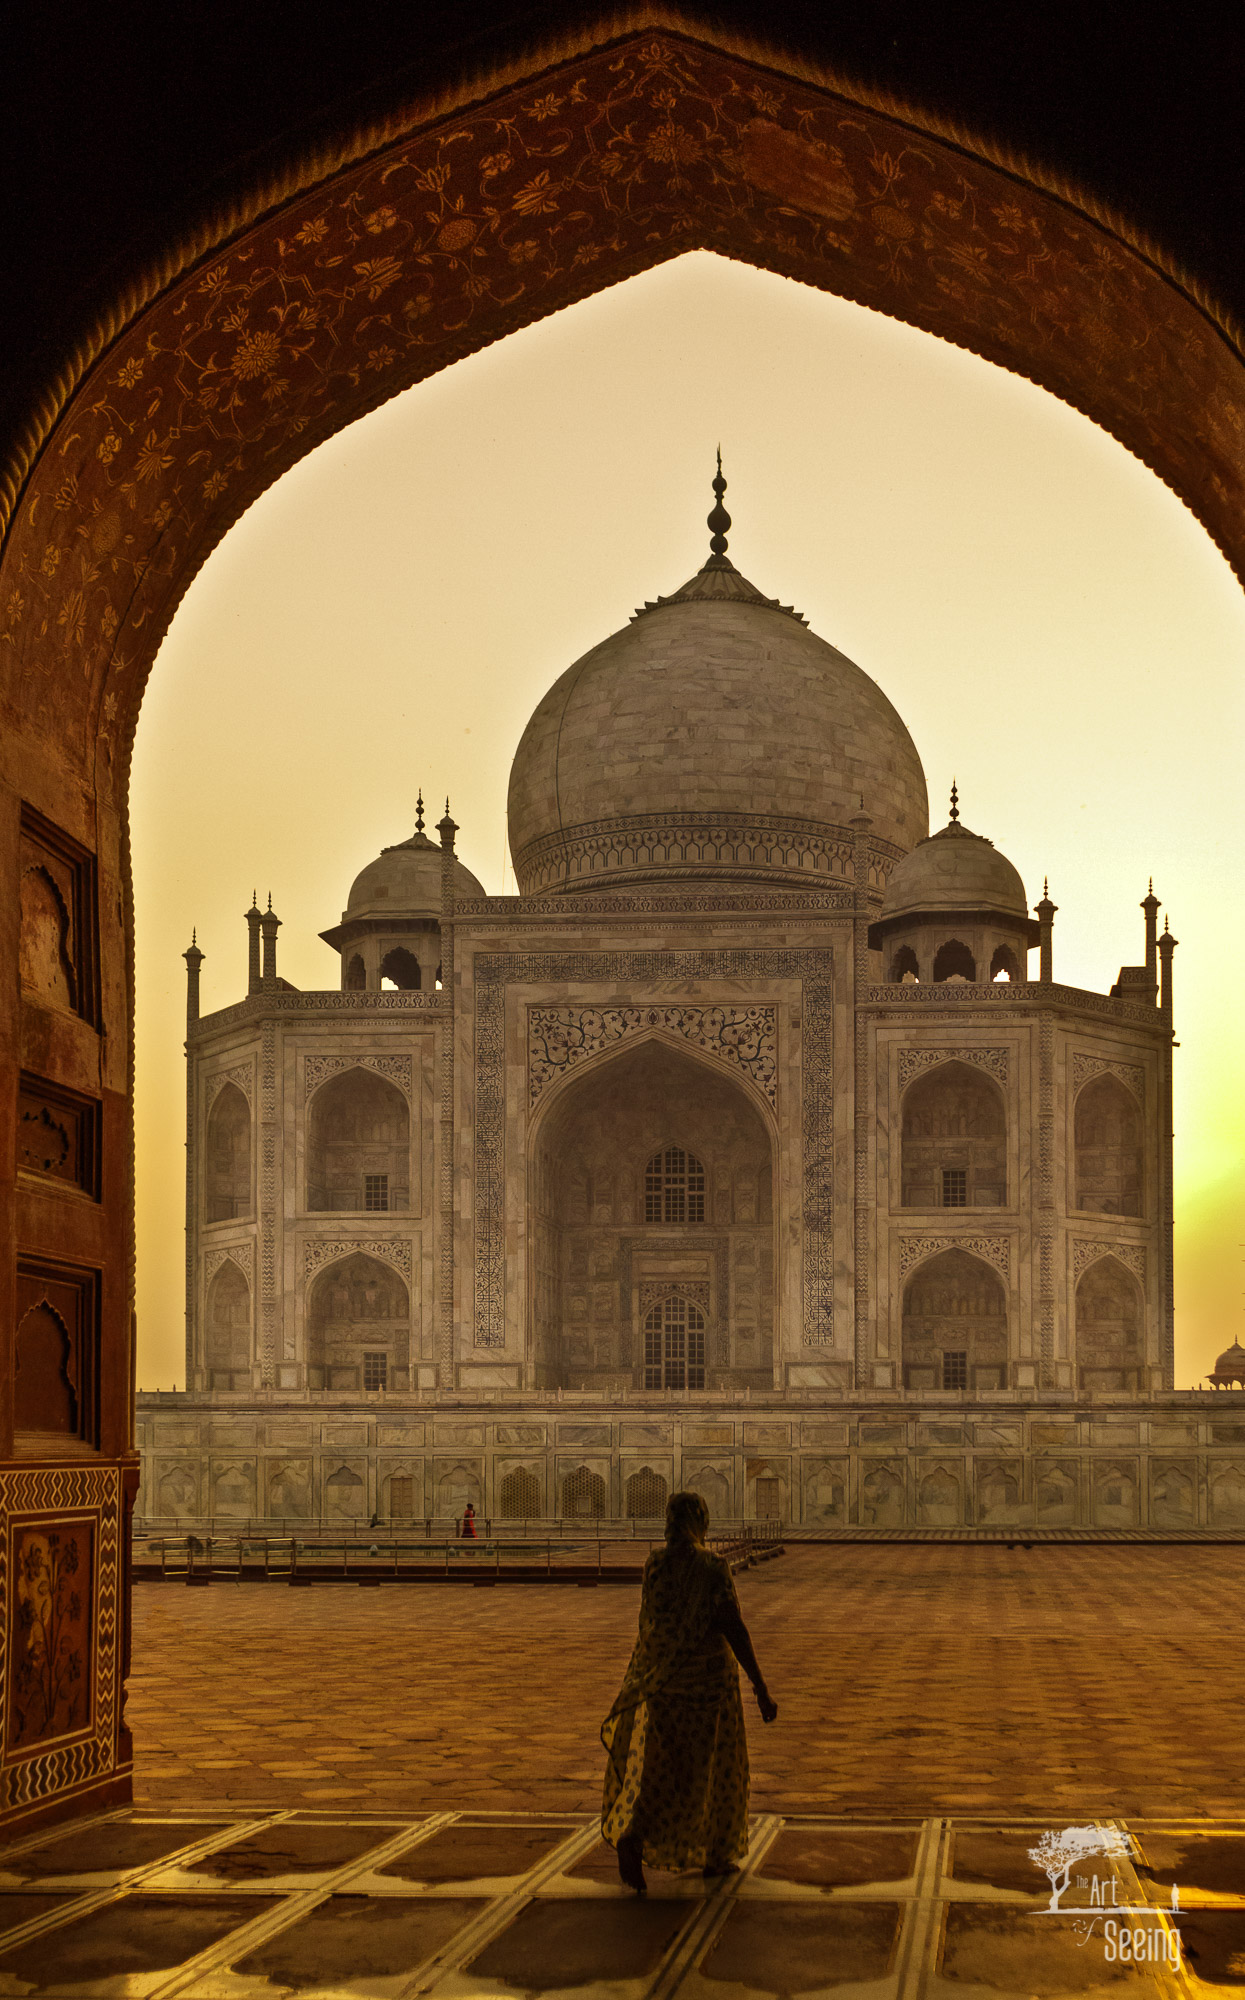
Photo by Ken Lee/Art of Seeing Photography Adventures
Rising from the banks of the Yamuna River in the city of Agra, the Taj Mahal is the centerpiece of a much larger complex - 42 acres in all - that also houses a mosque, formal gardens, and reflecting pools.
When visiting the Taj Mahal, the iconic shot of the building reflected in the pools is certainly worth making your way through the throngs of visitors.
But it’s also well worth your time to explore other vantage points and to visit the grounds at different times of day as the changing light can completely change the look and feel of your images of this iconic building.
What to Photograph in India: Festival of Holi
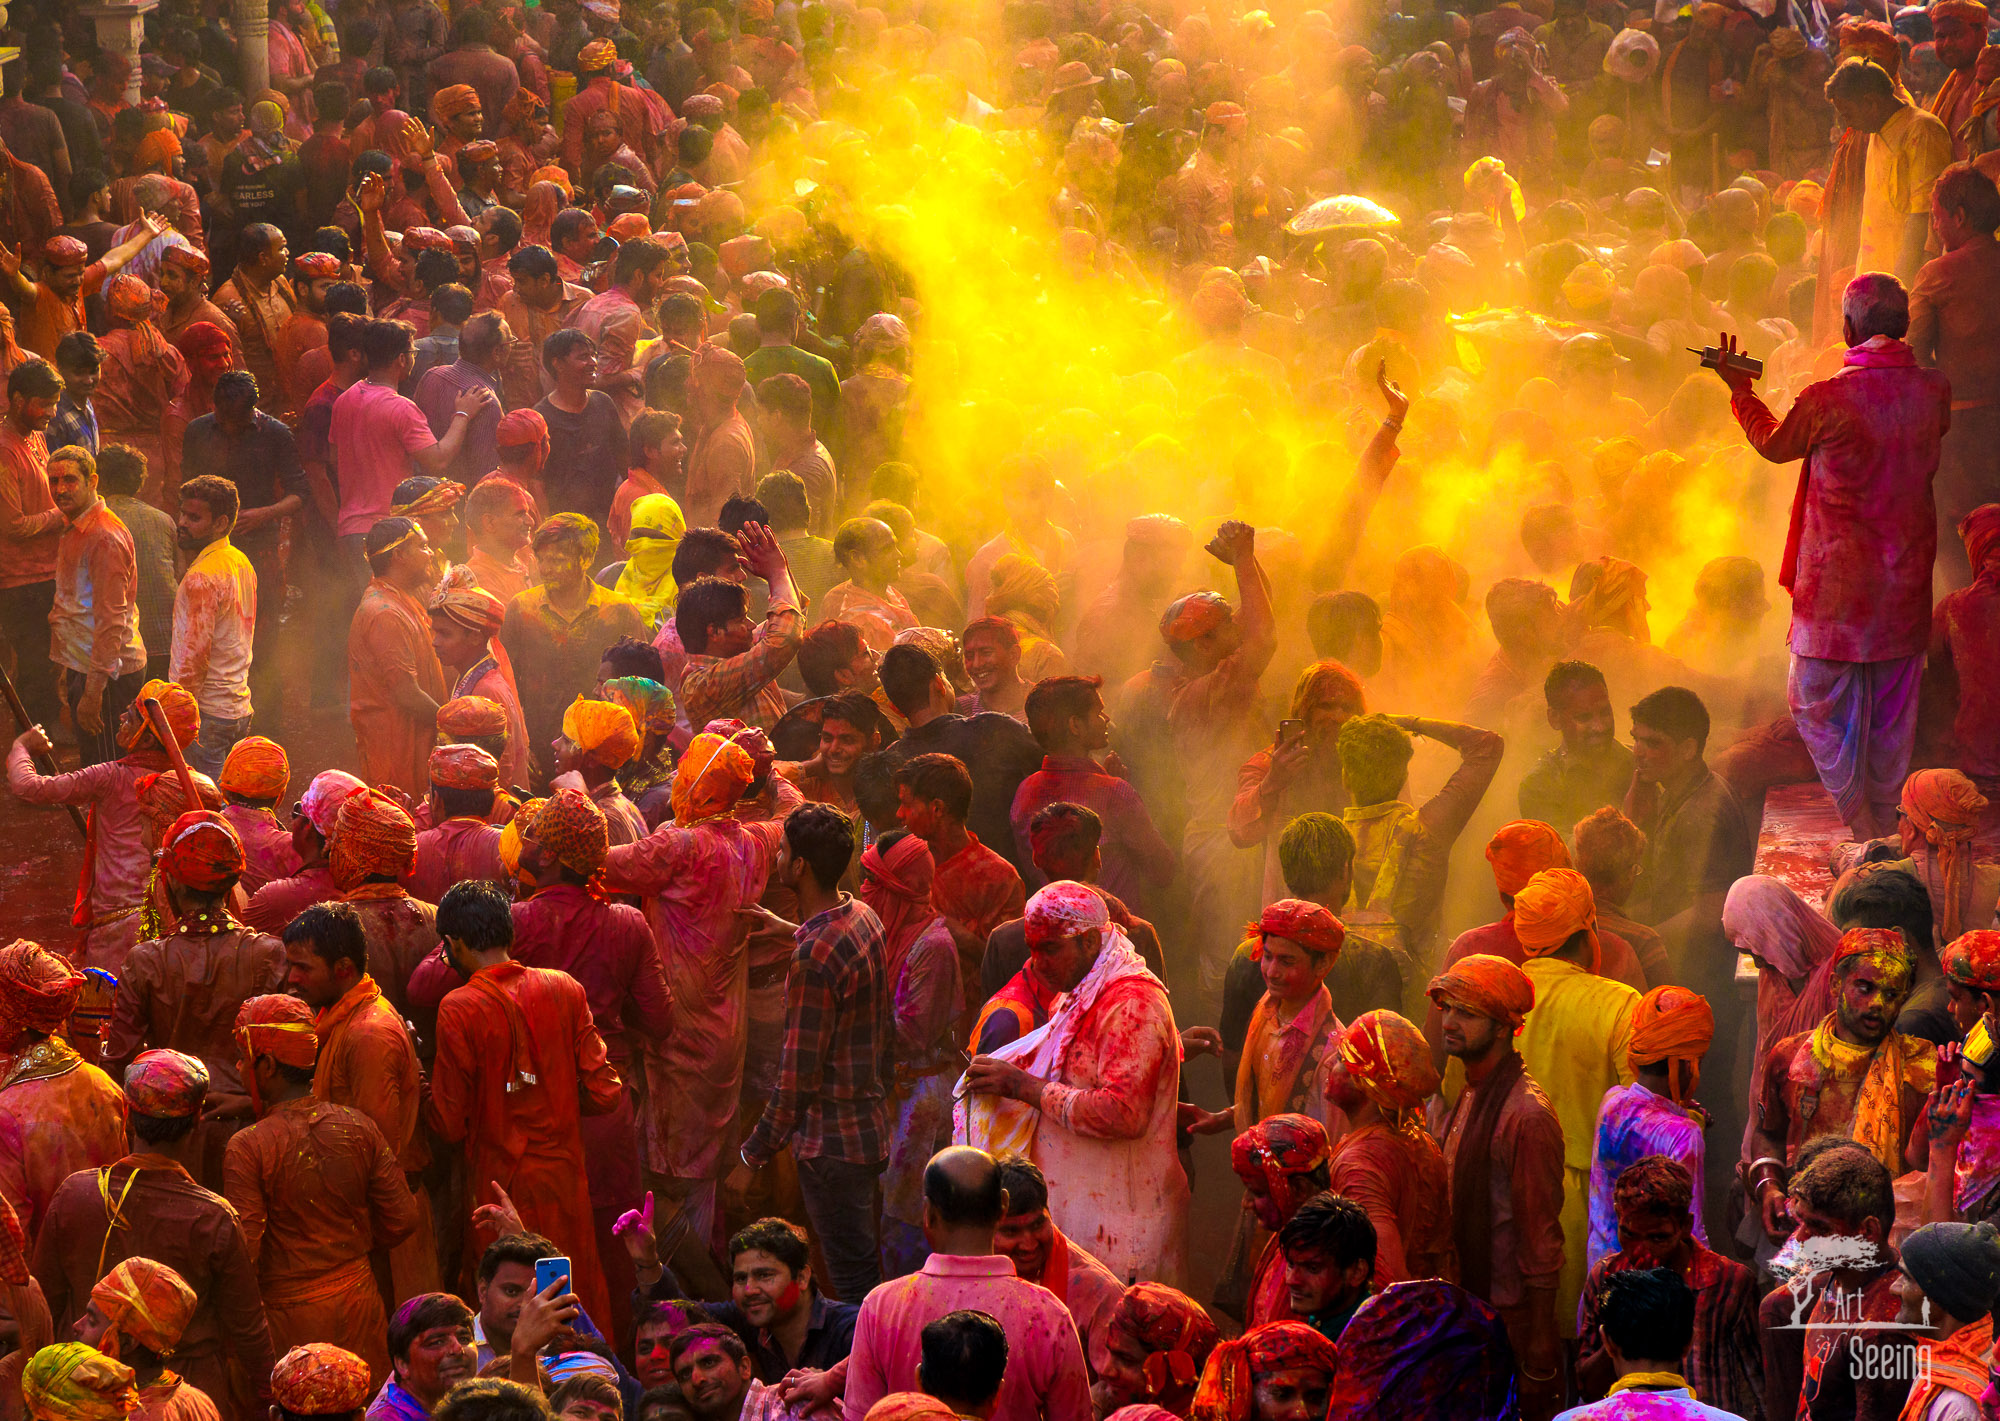
Photo by Ken Lee/Art of Seeing Photography Adventures
Holi, an ancient celebration of the arrival of spring in India, should be on your photography bucket list.
To say that it’s a time of excitement is an understatement - festival-goers from all walks of life join together to play Holi by throwing, rubbing, and smearing handfuls of colored powder all over everything and everyone.
And Holi is not an optional activity - for Indians or tourists. No matter one’s lot in life, you must participate in the Festival.
Naturally, the abundance of vibrant colors is an ideal addition to your photos, particularly of portraits of the Festival’s participants.
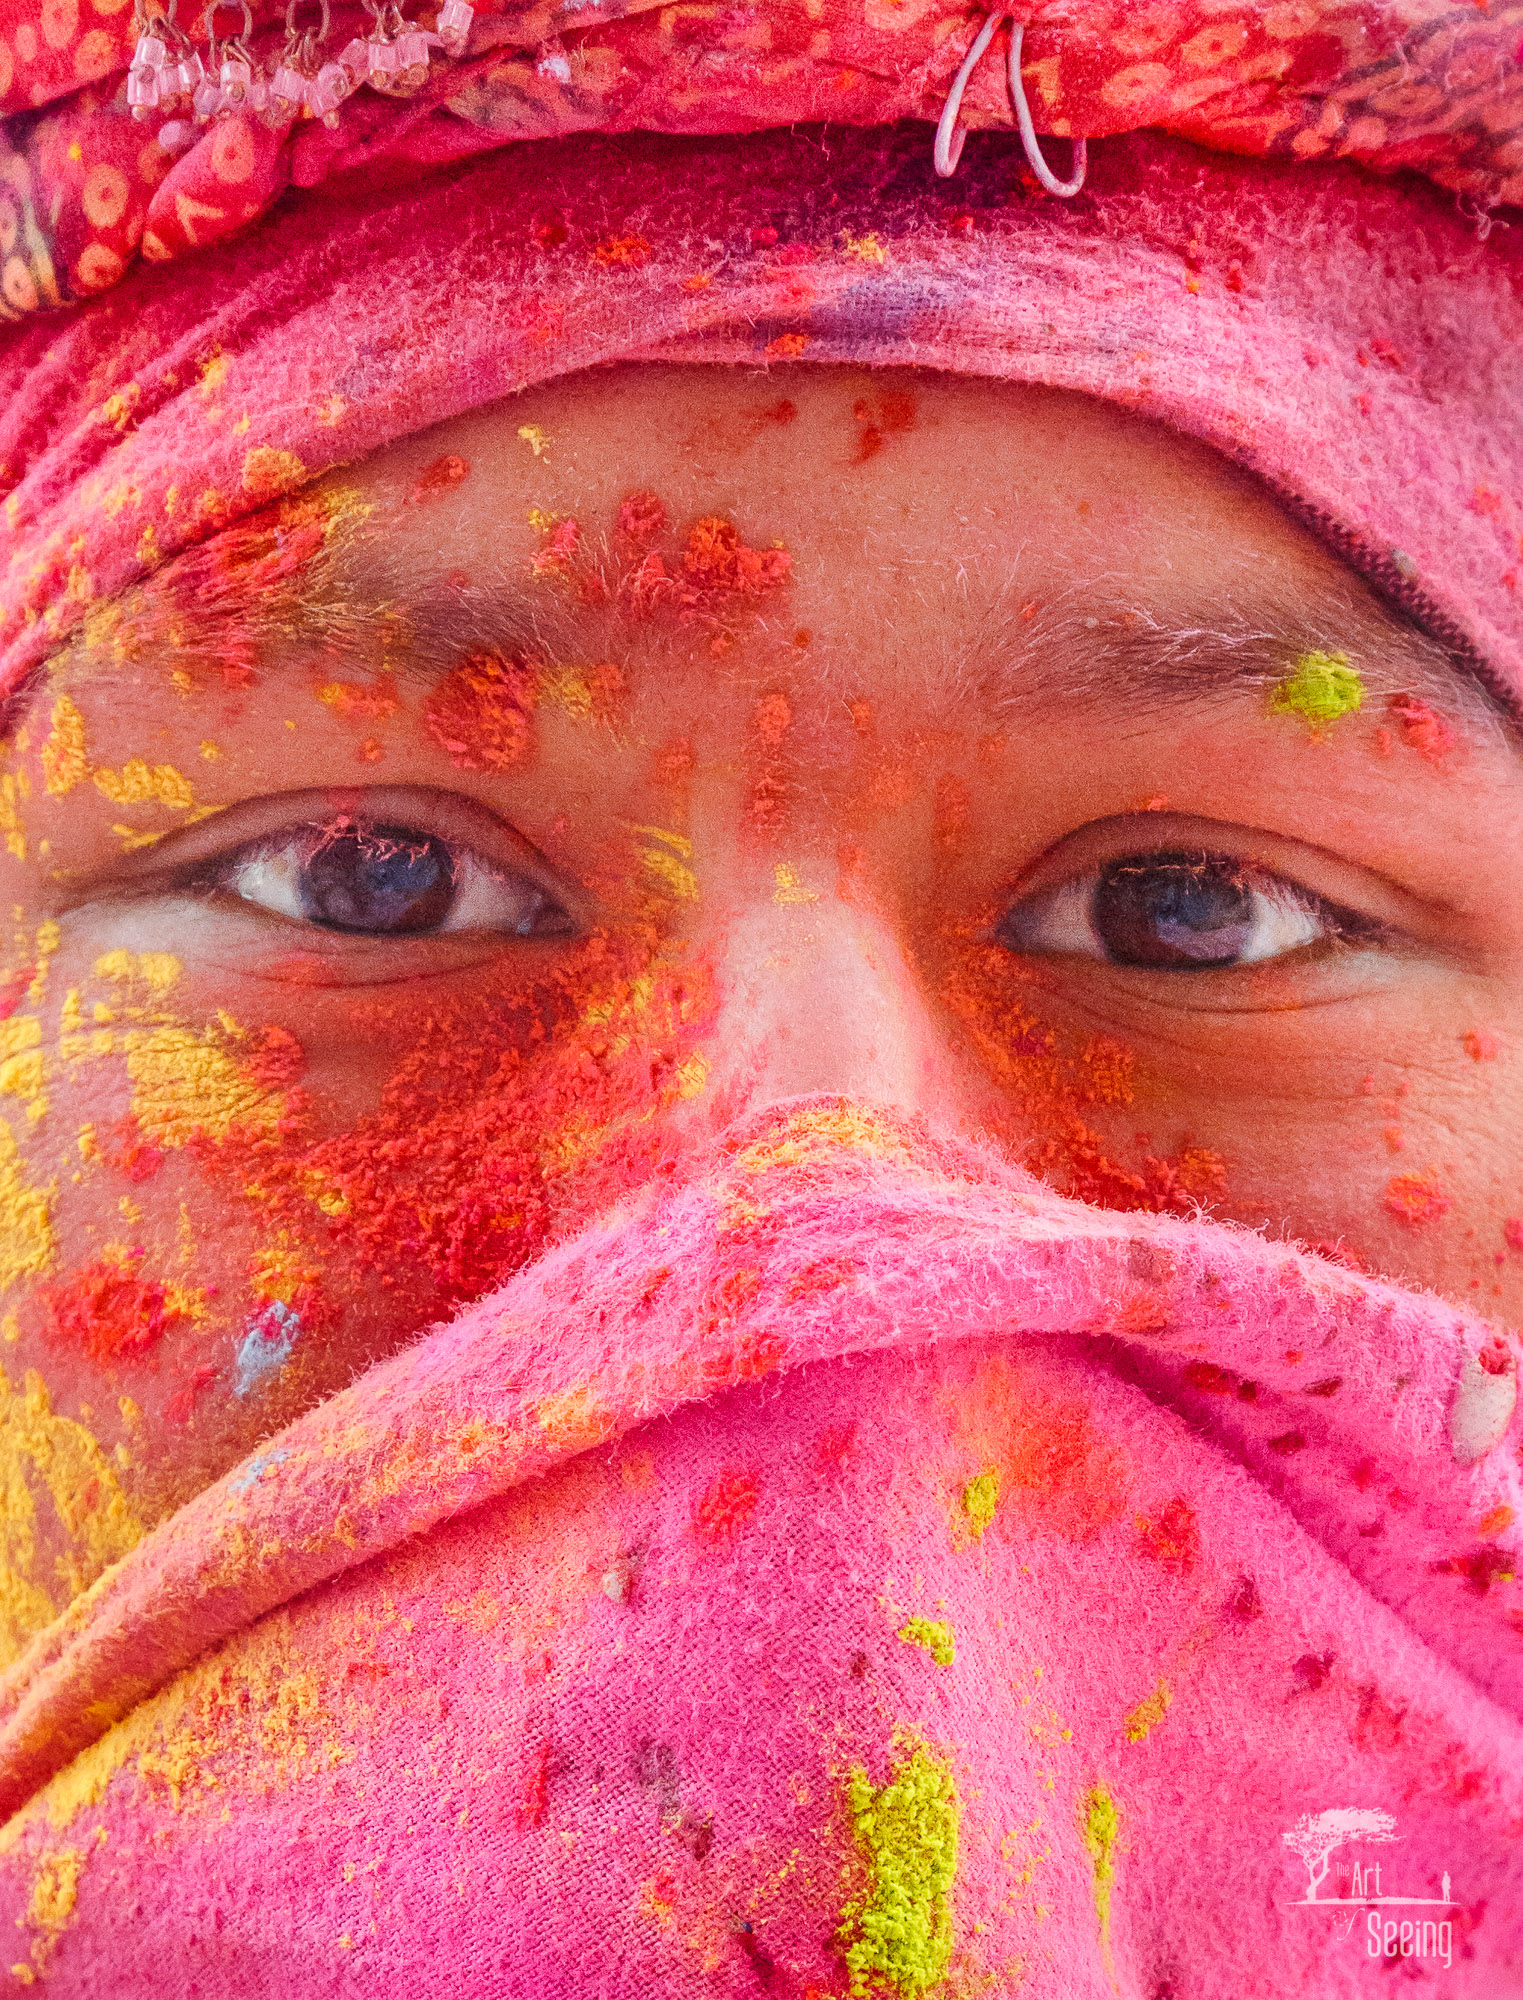
Photo by Ken Lee/Art of Seeing Photography Adventures
And while Holi is celebrated throughout India each spring, in some locations, it takes on further meaning.
For example, in the Lathmar Holi, men from the town of Nandgaon visit the town of Barsana, where the women of Barsana greet the men by beating them back with sticks, called lathis.
This spectacle is a celebration of an ancient Hindu tale, in which Lord Krishna of Nandgaon visited the subject of his affections, Radha, in Barsana. However, Krishna began to tease Radha and her friends, who took offense to his actions and drove him out of their town.
Regardless of where you participate in Holi, it is certainly a spectacle worth seeing and photographing! Just be sure you take precautions to cover your camera and lens, lest you’ll end up with lots of non-functioning gear.
What to Photograph in India: Daily Life

Photo by Ken Lee/Art of Seeing Photography Adventures
Whether in Delhi, Varanasi, Jodhpur, or a city or town in between, daily life in India affords you the opportunity to highlight the beautiful, vibrant, and friendly people of India.
In Delhi, the juxtaposition of new and old is plainly evident, with vestiges of ancient ruins and colonial rule still evident amongst modern-day luxury towers whose shadows linger above the streets where you can photograph the hubbub of commerce in one of the city’s many street markets.

Photo by Ken Lee/Art of Seeing Photography Adventures
In Varanasi, you can photograph young monks that begin their day on the banks of the Ganges by practicing yoga and meditating as the morning light burns off the mist hanging above the river.
In Jodhpur, the blue city, locals go about their day with the city’s once-vibrant, yet now fading blue walls to serve as the backdrop of your portraits.
And everywhere you go, you’ll likely have a following of children, some of whom may have never seen a foreigner.
It is a uniquely diverse and electric country, and one that is supremely open and friendly towards visitors as well.
Planning Your India Photography Trip

Photo by Ken Lee/Art of Seeing Photography Adventures
The difficulty with planning a photography trip to India is twofold. First, you have to know when the best time is to visit this magical place, and two, you have to figure out what should be on your list of must-see locations.
This might sound like an easy task, but with so many possibilities for subject matter in such a diverse and large nation, it can be almost overwhelming trying to decide what makes the cut and what doesn’t.
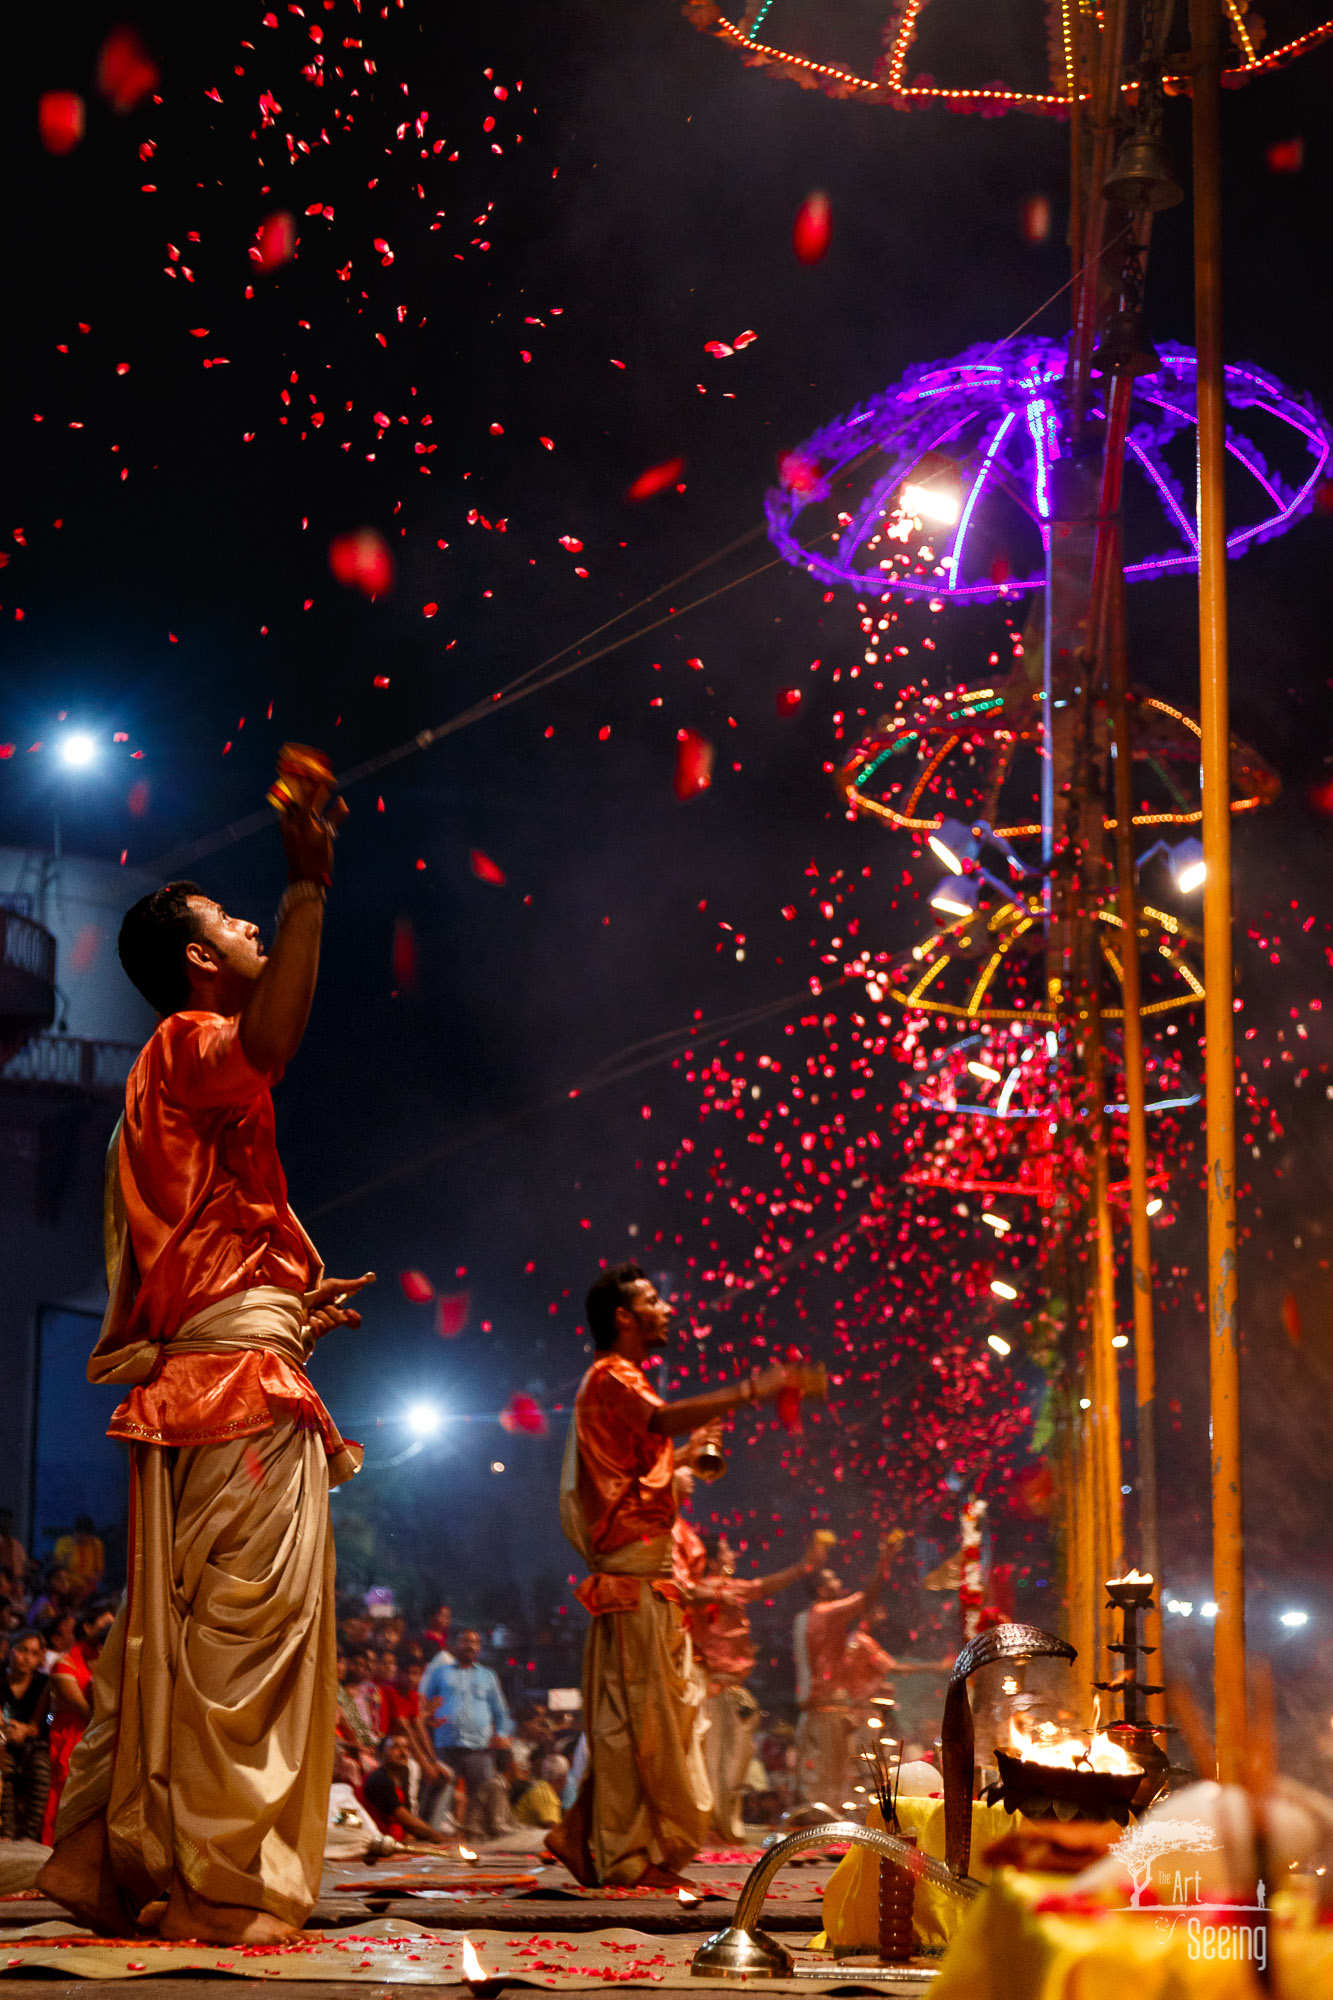
Photo by Ken Lee/Art of Seeing Photography Adventures
If you’ve never traveled to India, I highly suggest you do so as part of a photography tour.
And by “tour,” I don’t mean a run-of-the-mill photography experience in which you spend five days racing from one corner of the country to another in a motorcoach with a few dozen other foreigners...
Instead, India is best explored with your camera by using a slow, methodical approach - two weeks in-country is ideal - that is truly an immersive adventure.
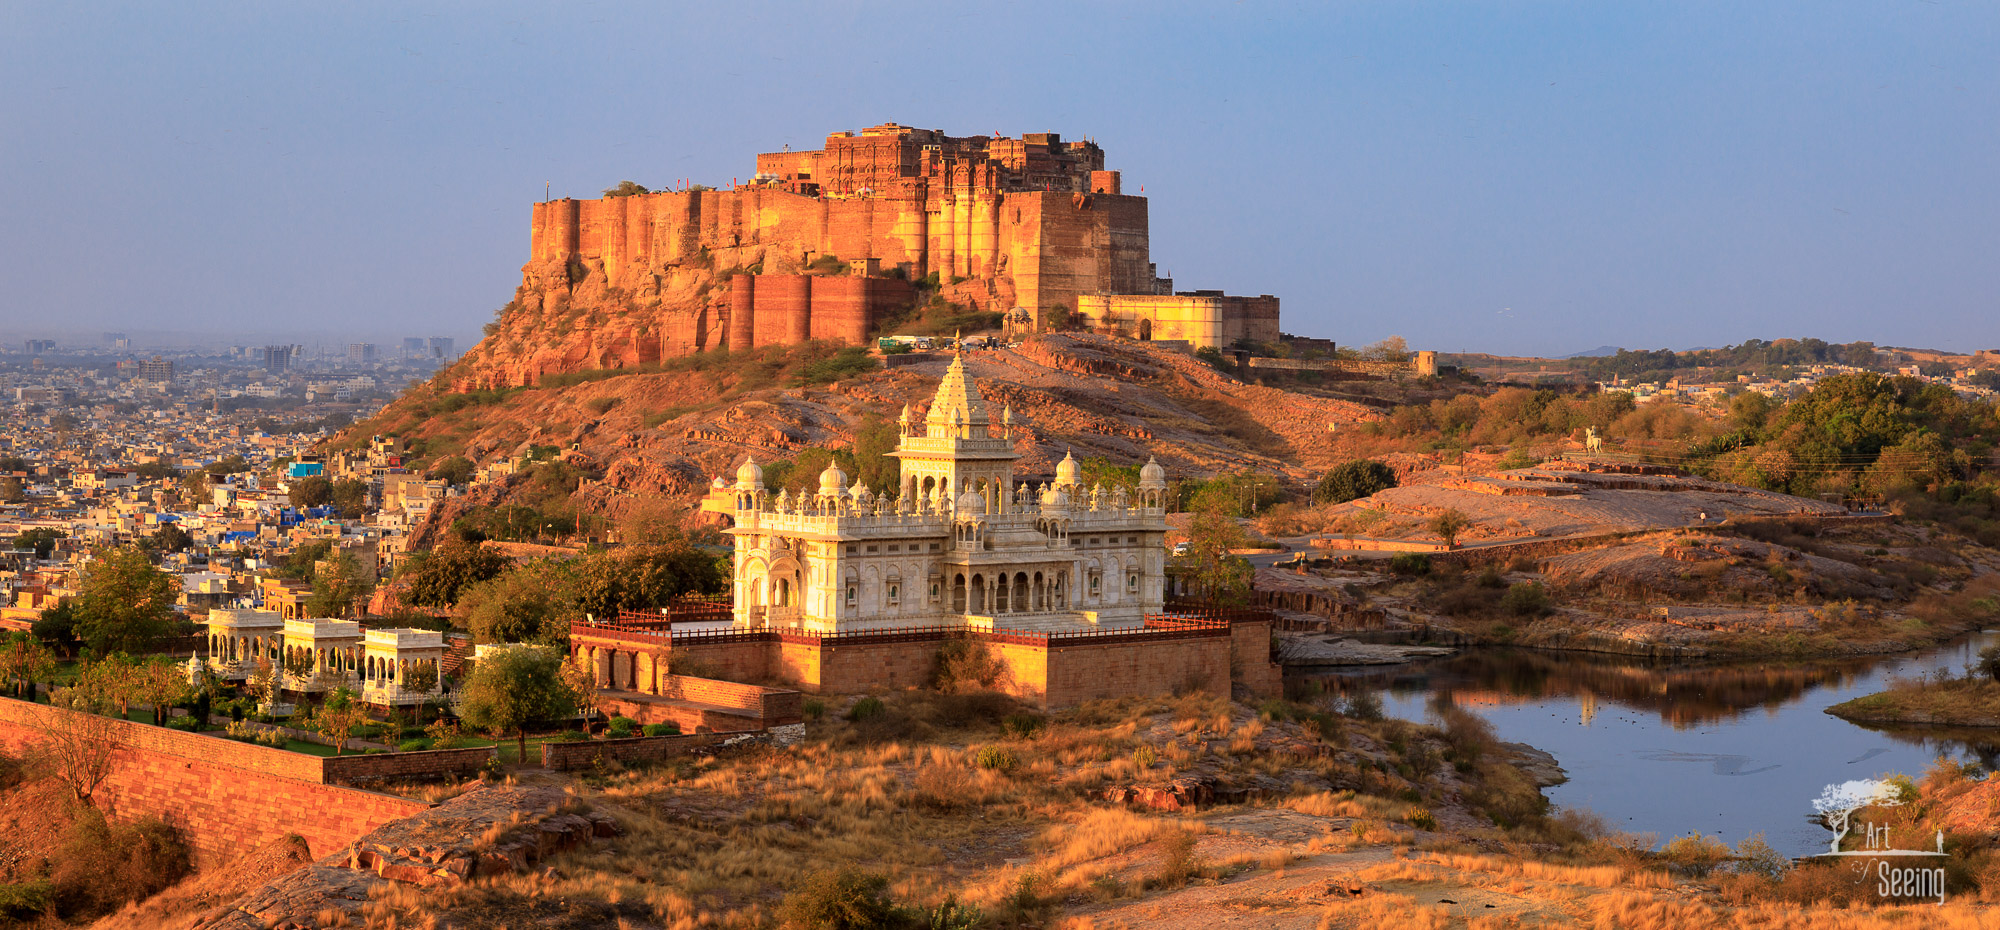
Photo by Ken Lee/Art of Seeing Photography Adventures
For that, I recommend exploring India with Ken Lee as part of his Colors of India Photography Workshop and Tour.
You’ll have a chance to photograph each of the locations discussed above and then some, all without having to plan the itinerary, book lodging, or concern yourself with getting from point A to point B.
For me, the best part of Ken’s workshops is that you aren’t just a number to be herded in and out of a massive bus for photo opportunities that everyone else gets.
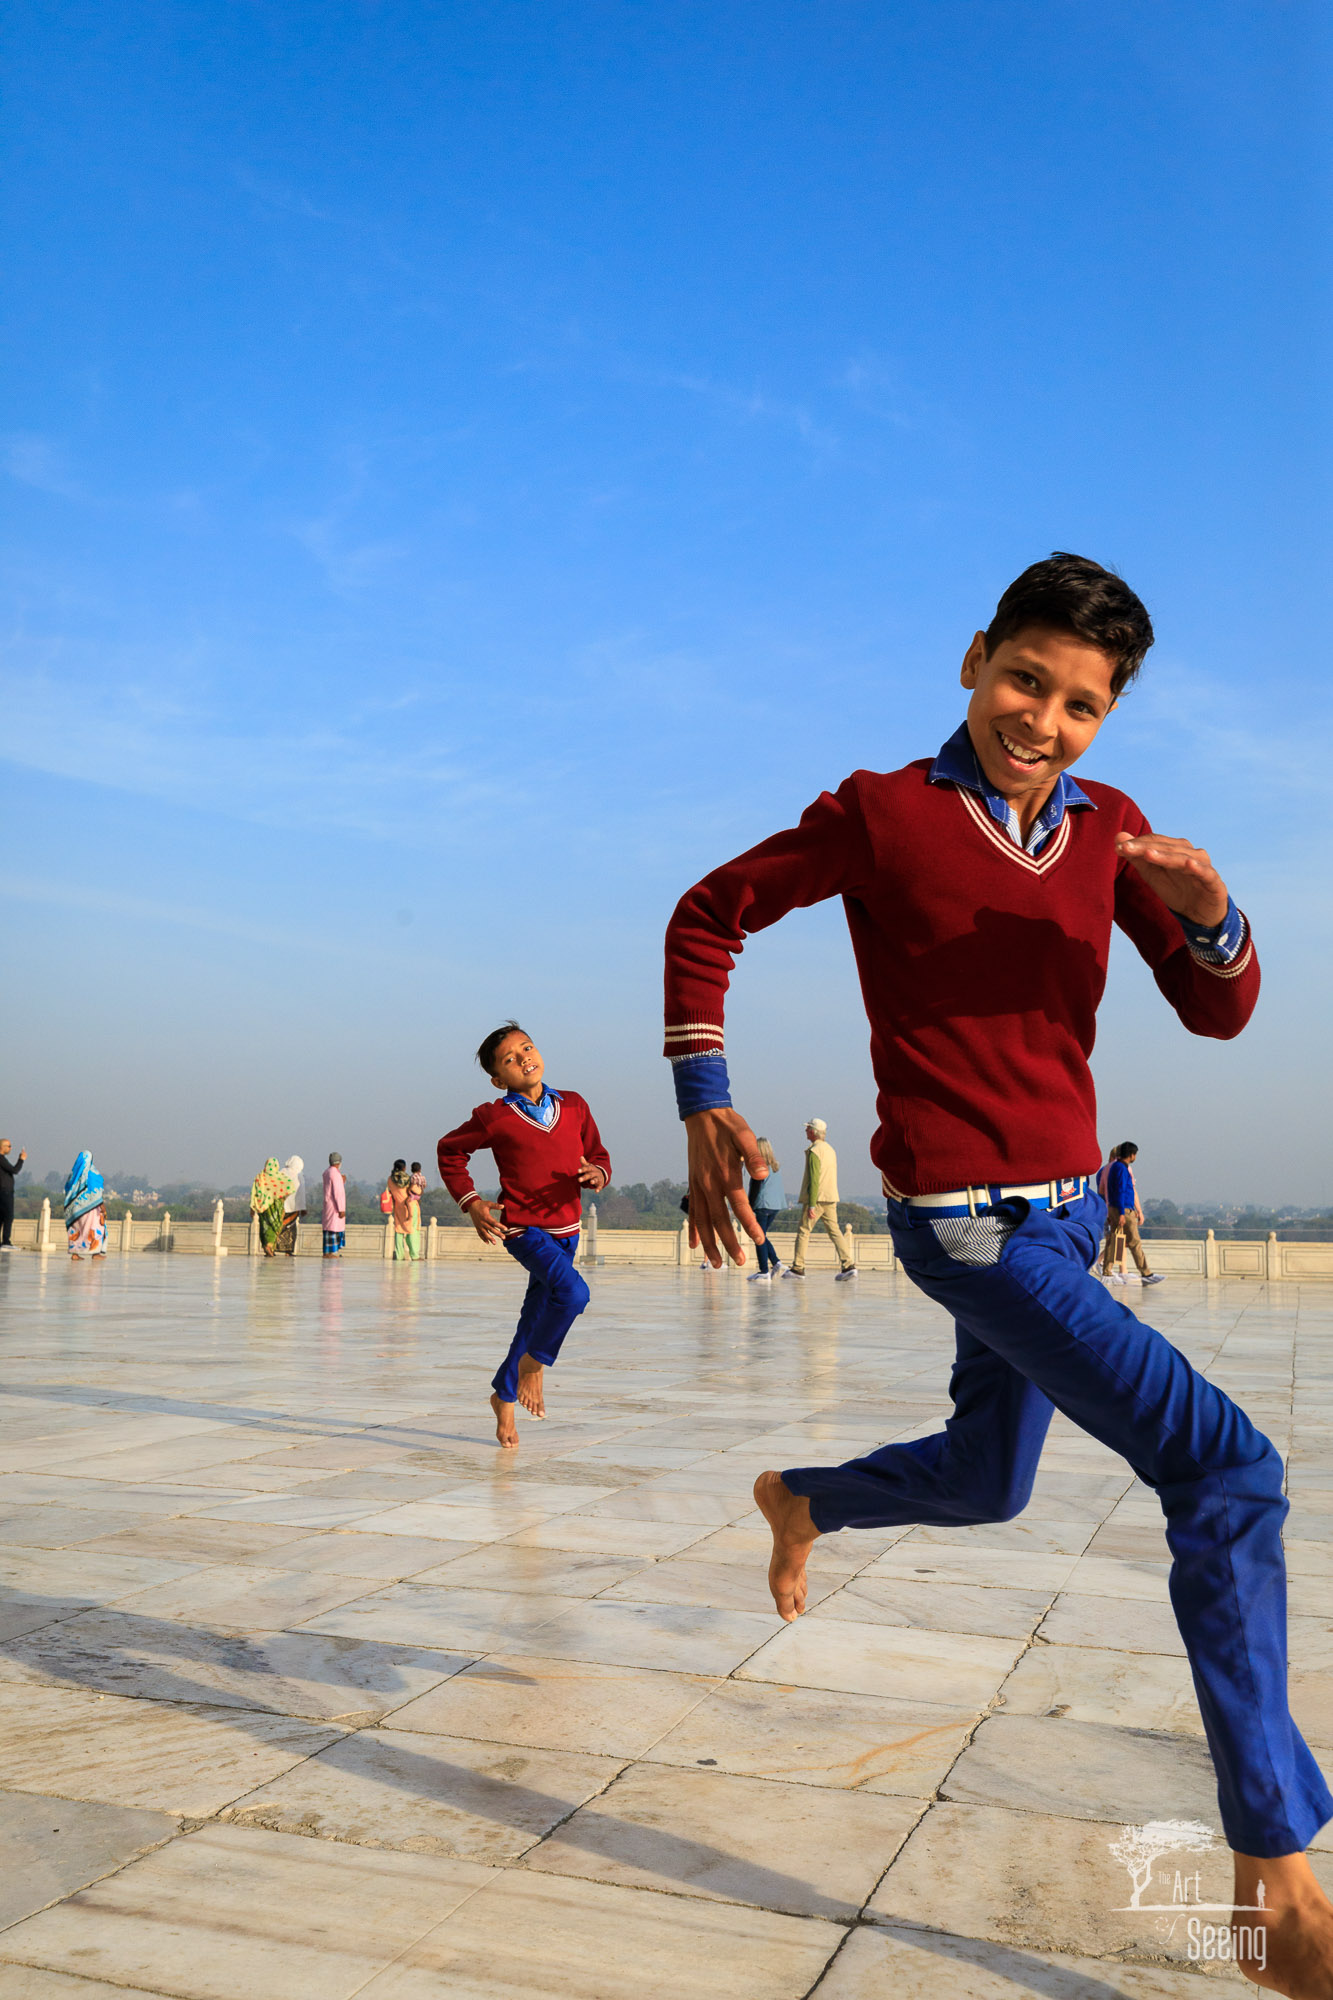
Photo by Ken Lee/Art of Seeing Photography Adventures
Instead, you’re shepherd from the iconic spots like the Taj Mahal to off-the-beaten-path locations that few tourists get to see or photograph.
In that regard, this workshop is as much about immersing yourself in the culture and traditions of India and learning about its history and people as it is about improving your photography skills. This is a hallmark trait of Ken’s Art of Seeing Photography Adventures - it’s a personal journey that puts you in touch with the real people and stories of the places you explore.
The tour takes place over two weeks - March 2-15, 2020 - so you can experience the chaos of Holi to the fullest extent as spring descends onto India.
This is an adventure you don’t want to miss! Get more details by clicking here.
Other Tips for Planning an India Photography Trip
- Where to fly into: Delhi Airport is the busiest airport in India and offers the most international flights.
- Best luggage: For a trip of this length, the Nomatic Check-In roller bag is the ideal choice. It offers polycarbonate construction that stands up to the rigors of travel, silent wheels, low-profile handles, and a three-stage aluminum handle to fit your height. With space for 78 liters of gear, this bag has plenty of room for a 5-day trip or longer.
- Attractions & Things to Do: Humayan's Tomb is an architectural wonder from the 16th Century that's definitely worth seeing. For fun and games, hit up Escape Reality Delhi.
- Best Time of Year to Visit: The dry season (October to March) is your best bet.
- Check the weather in the Delhi area right now.
We Recommend
It’s Time to Start Planning a Costa Rica Photography Trip
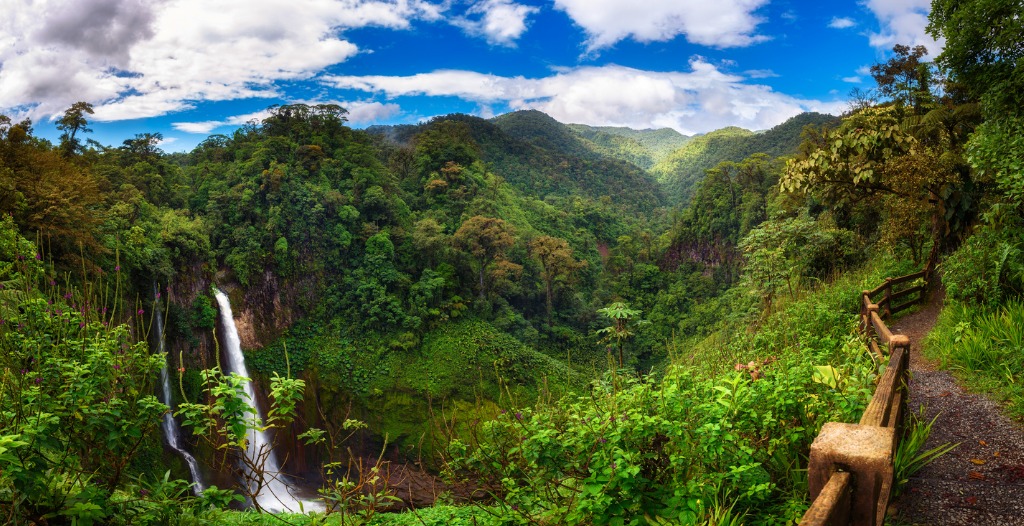
photo bymiroslav_1 via iStock
Costa Rica is one of the most peaceful countries in the world. If you know what you’re looking for, Costa Rica also happens to be a wildlife photographer’s mecca.
The moment you step off of your plane, you’ll know you’ve arrived in a place that feels almost like another world.
Costa Rica features gorgeous beaches, cheap and delicious street food, and some of the nicest locals you’ll ever meet.
If you’re thinking about planning a Costa Rica photography tour, there’s no better time than now. Once the pandemic has subsided, airlines and hotels alike are going to be desperate to get their tourists back, which means your Costa Rica photography trip will be cheaper than ever before.
Photographing Costa Rica
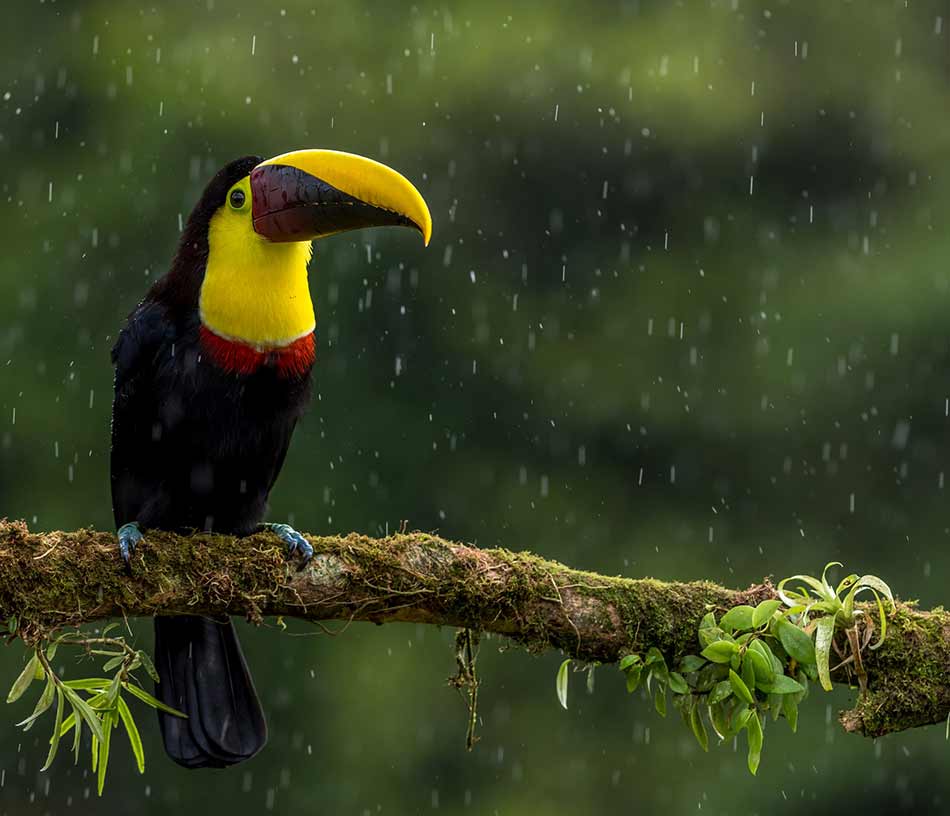
Photo by Zdeněk Macháček on Unsplash
If you’re planning a Costa Rica photography tour, then you need to know all of the different types of photography you can pursue there.
The first two obvious photography niches you can complete in Costa Rica are landscape and wildlife photos.
Costa Rica has some of the most beautiful waterfalls in the world, and is filled with less popular ones buried deep in the jungle. These waterfalls provide the perfect environment for both landscape and wildlife photography, since the wildlife need water to survive.
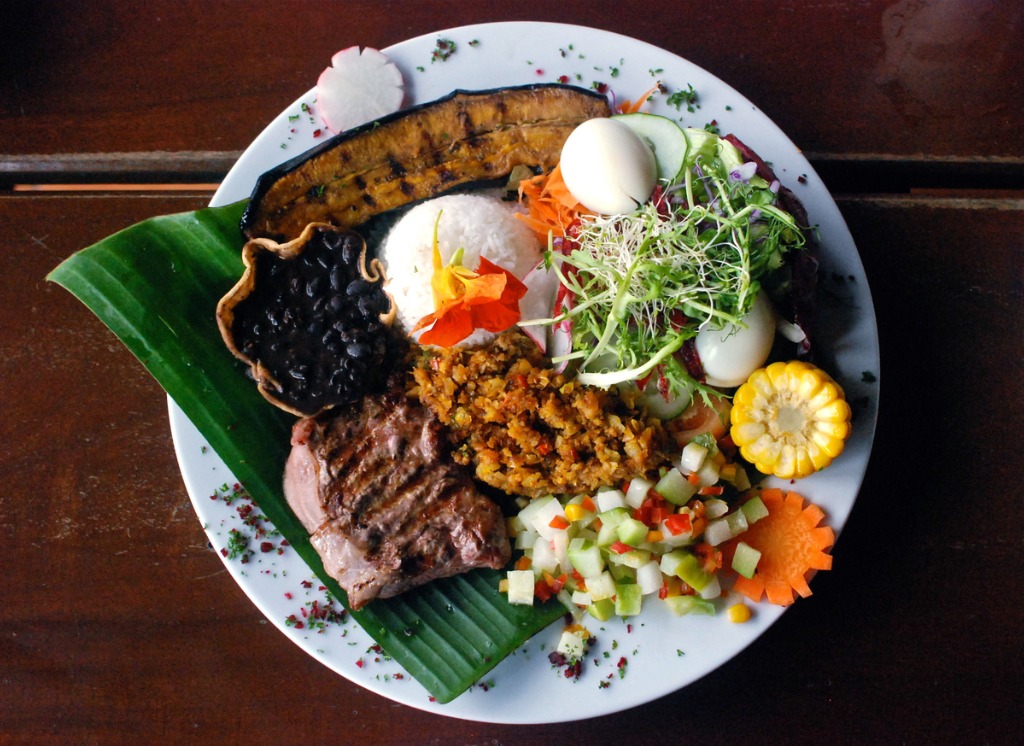
photo bygmirandah via iStock
But, there are also some different photography niches that people travel to Costa Rica for. As an example, Costa Rican fine dining is on the rise, and there’s a really intriguing push amongst Costa Rican chefs to include more local and indigenous ingredients into their cooking.
This means that food photography is also on the rise in Costa Rica because many of the dishes these chefs are creating are both colorful and intricate.
Additionally, many photographers join a Costa Rica photography tour because they are looking to photograph one of the indigenous tribes in Costa Rica.
There are 24 different government reserves for indigenous tribes in Costa Rica, and 8 different tribes. Many of these tribes continue to live as they have for thousands of years, practicing their ancient cultures and living off the land.
Tips for Your First Costa Rica Photography Tour
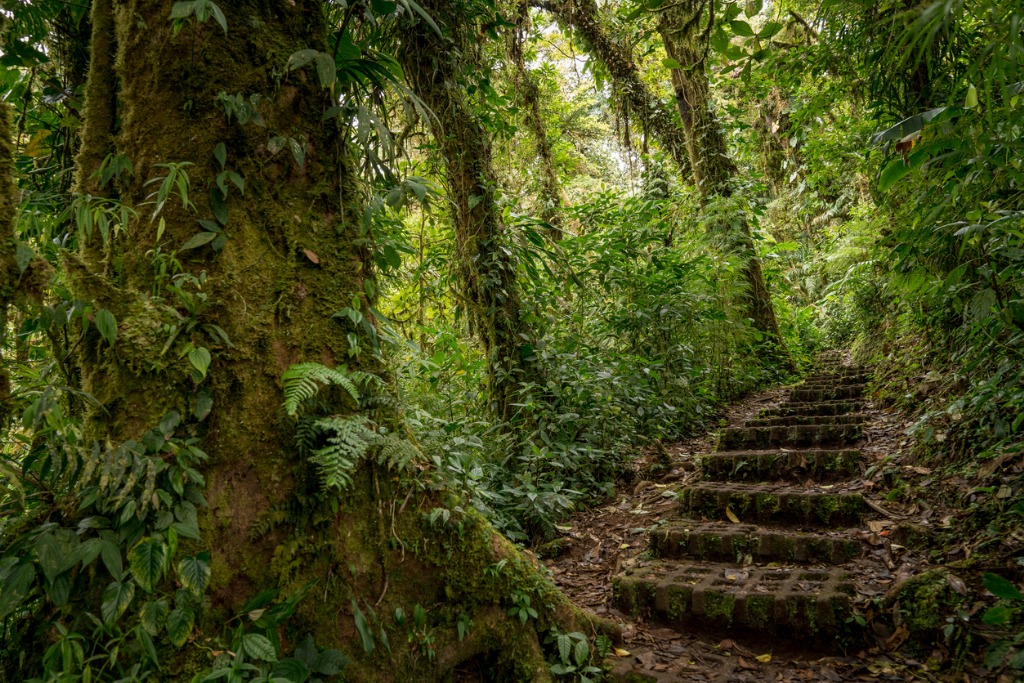
photo byMatsBehring via iStock
No matter your reason for embarking on a Costa Rica photography tour, you will need some basic tips to prepare yourself first.
The first is to prepare for dark photos. Jungles are beautiful, but they’re also dense, which means very little sunlight filters all the way down onto the jungle floor.
The second is to watch out for fogging on the inside of your camera lens. Depending upon your budget for your Costa Rica photography trip, you may end up staying in one of the tourist-centric hotels in the area and these hotels typically have air conditioning. When you go from an air conditioned hotel room to the steaming jungles, the condensation will be too much for your camera to handle.
You can prevent this by always storing your camera in its bag and by keeping your room just a little warmer.
A third tip for your Costa Rica photography tour is pretty obvious, but one you may still not be fully prepared for. You need to prepare for rain, and a ton of it.
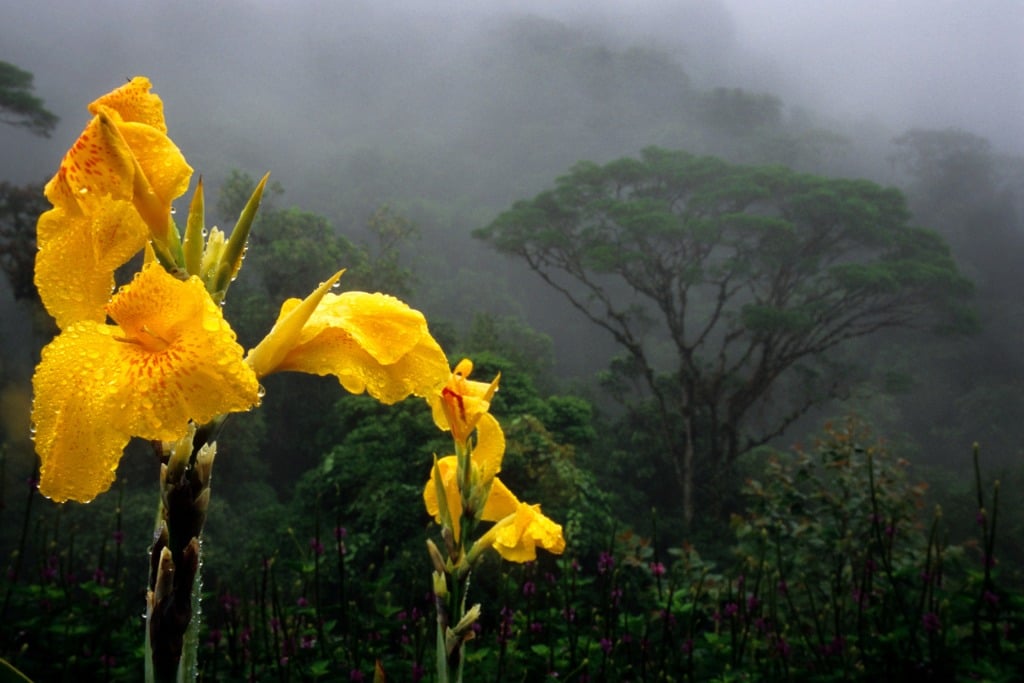
photo byMichaelSvoboda via iStock
Make sure you bring rain covers for your camera equipment, and backup garbage bags. You should also ensure you’re going to be comfortable by purchasing quick-drying clothing that is available at most sporting goods stores. You’ll want a light jacket, too. You’d hate to cut any days short on your Costa Rica photography tour because you’re wet and freezing.
One final tip is to pay close attention to your surroundings. A ton of photographers get swept up in photographing large birds and monkeys and forget to pay attention to things they may be stepping on.
Macro photography is huge in Costa Rica because of the amount of creepy crawlers. Bring a macro lens to capture them all.
Research the Best Professional Costa Rica Photography Tour
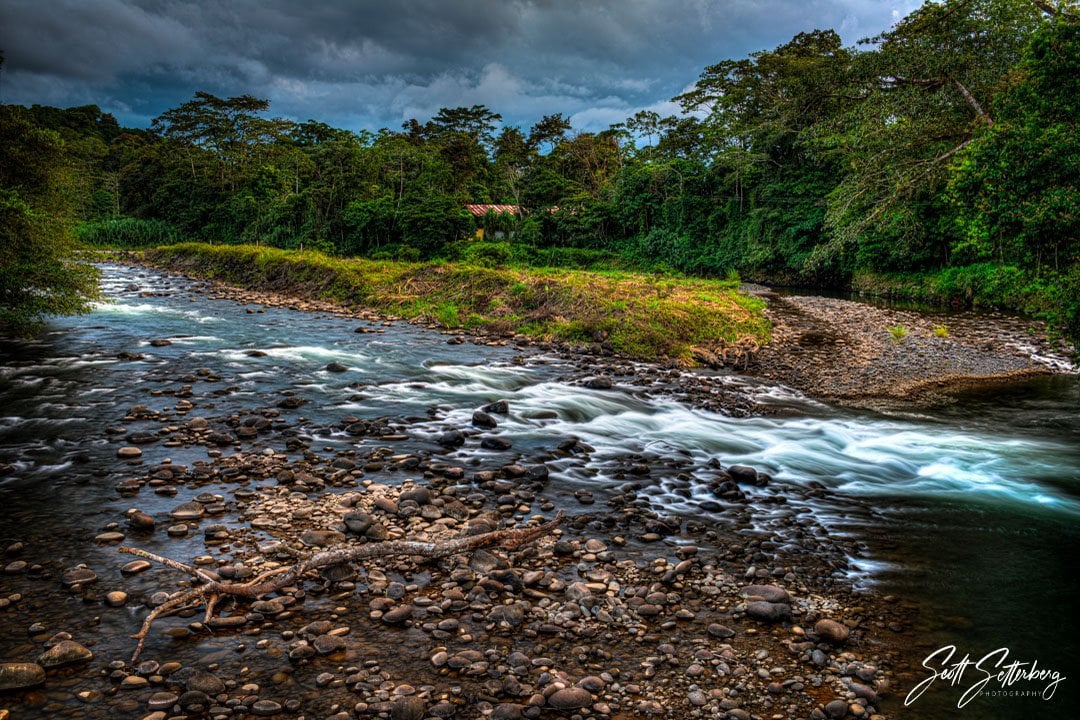
When travelling to another country for photography, it can oftentimes be easier to join a preexisting photography tour. The problem with joining a Costa Rica photography tour is that many of them aren’t high-quality.
You won’t want to be in another country in a terrible hotel with tour guides who don’t know much more than you. That’s why I recommend ColorTexturePhotoTours.
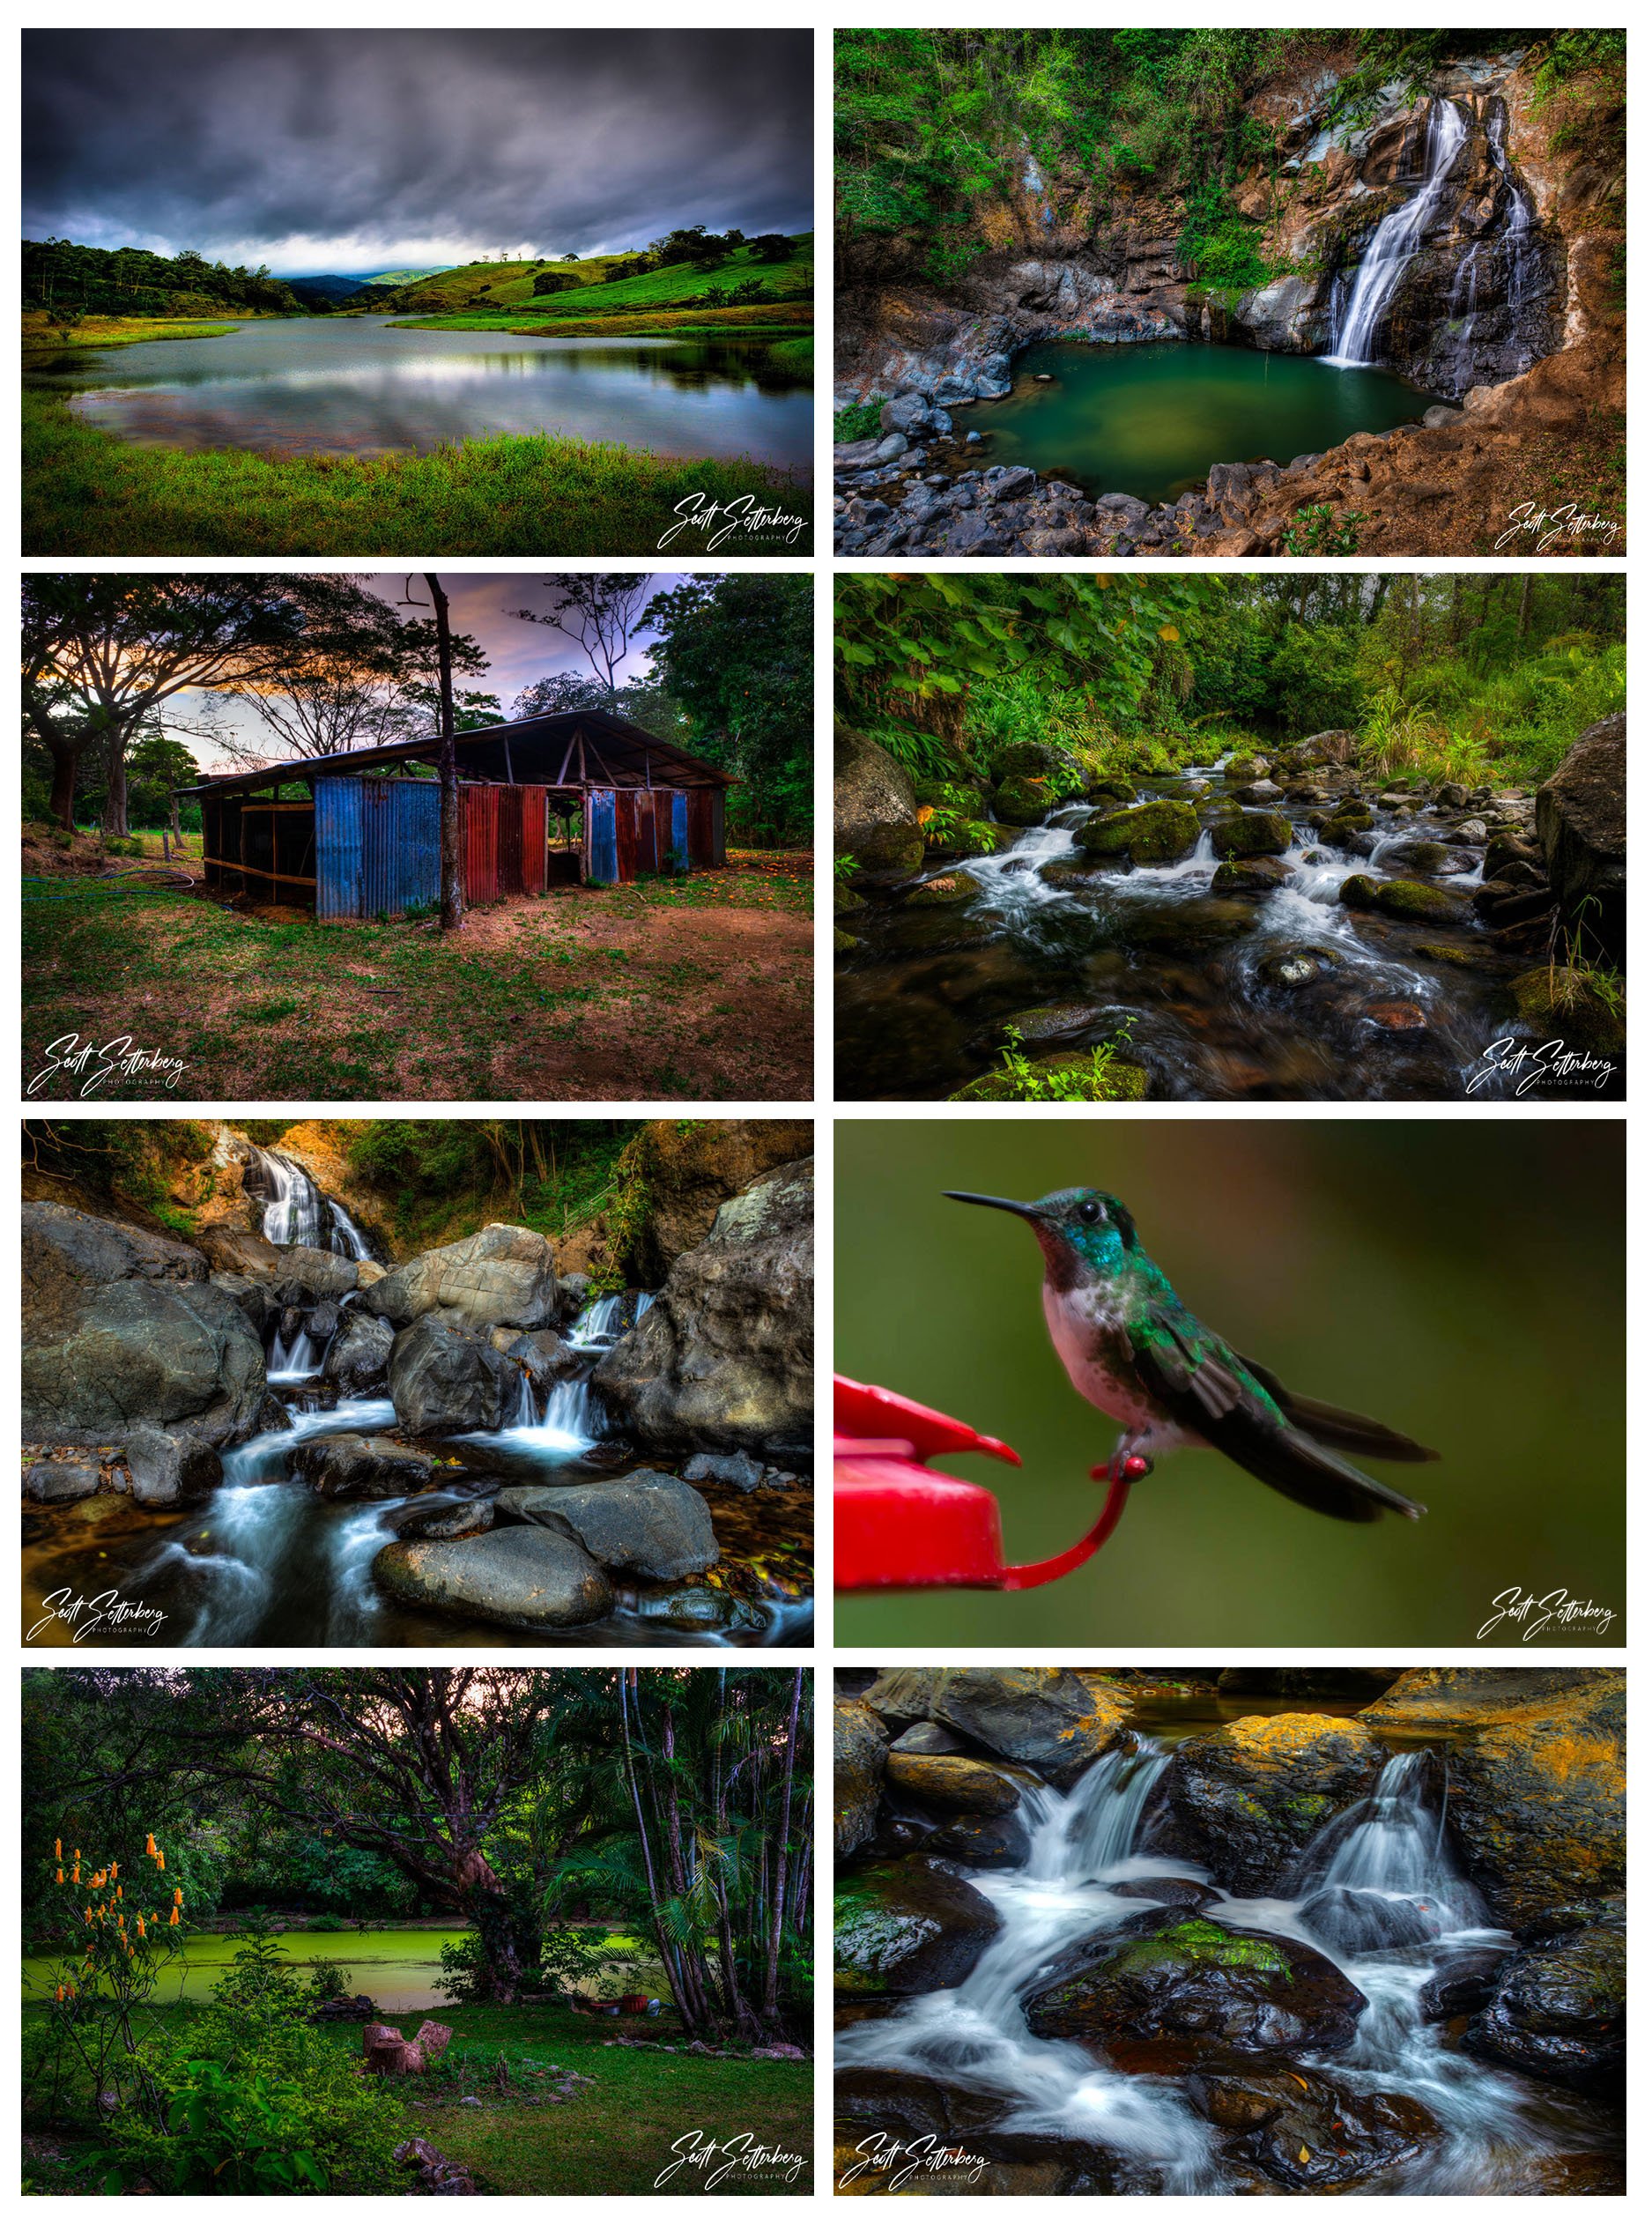
Scott Setterberg of ColorTexturePhotoTours loves Costa Rica so much that he holds more than one Costa Rica photography tour each year. In fact, they are doing 8 in early 2021.
Some of these tours specialize, like the Costa Rica Landscapes Photo Tourhappening in January. Others, like the Colors of Costa Rica Photo Tour happening in March, have something for everyone.
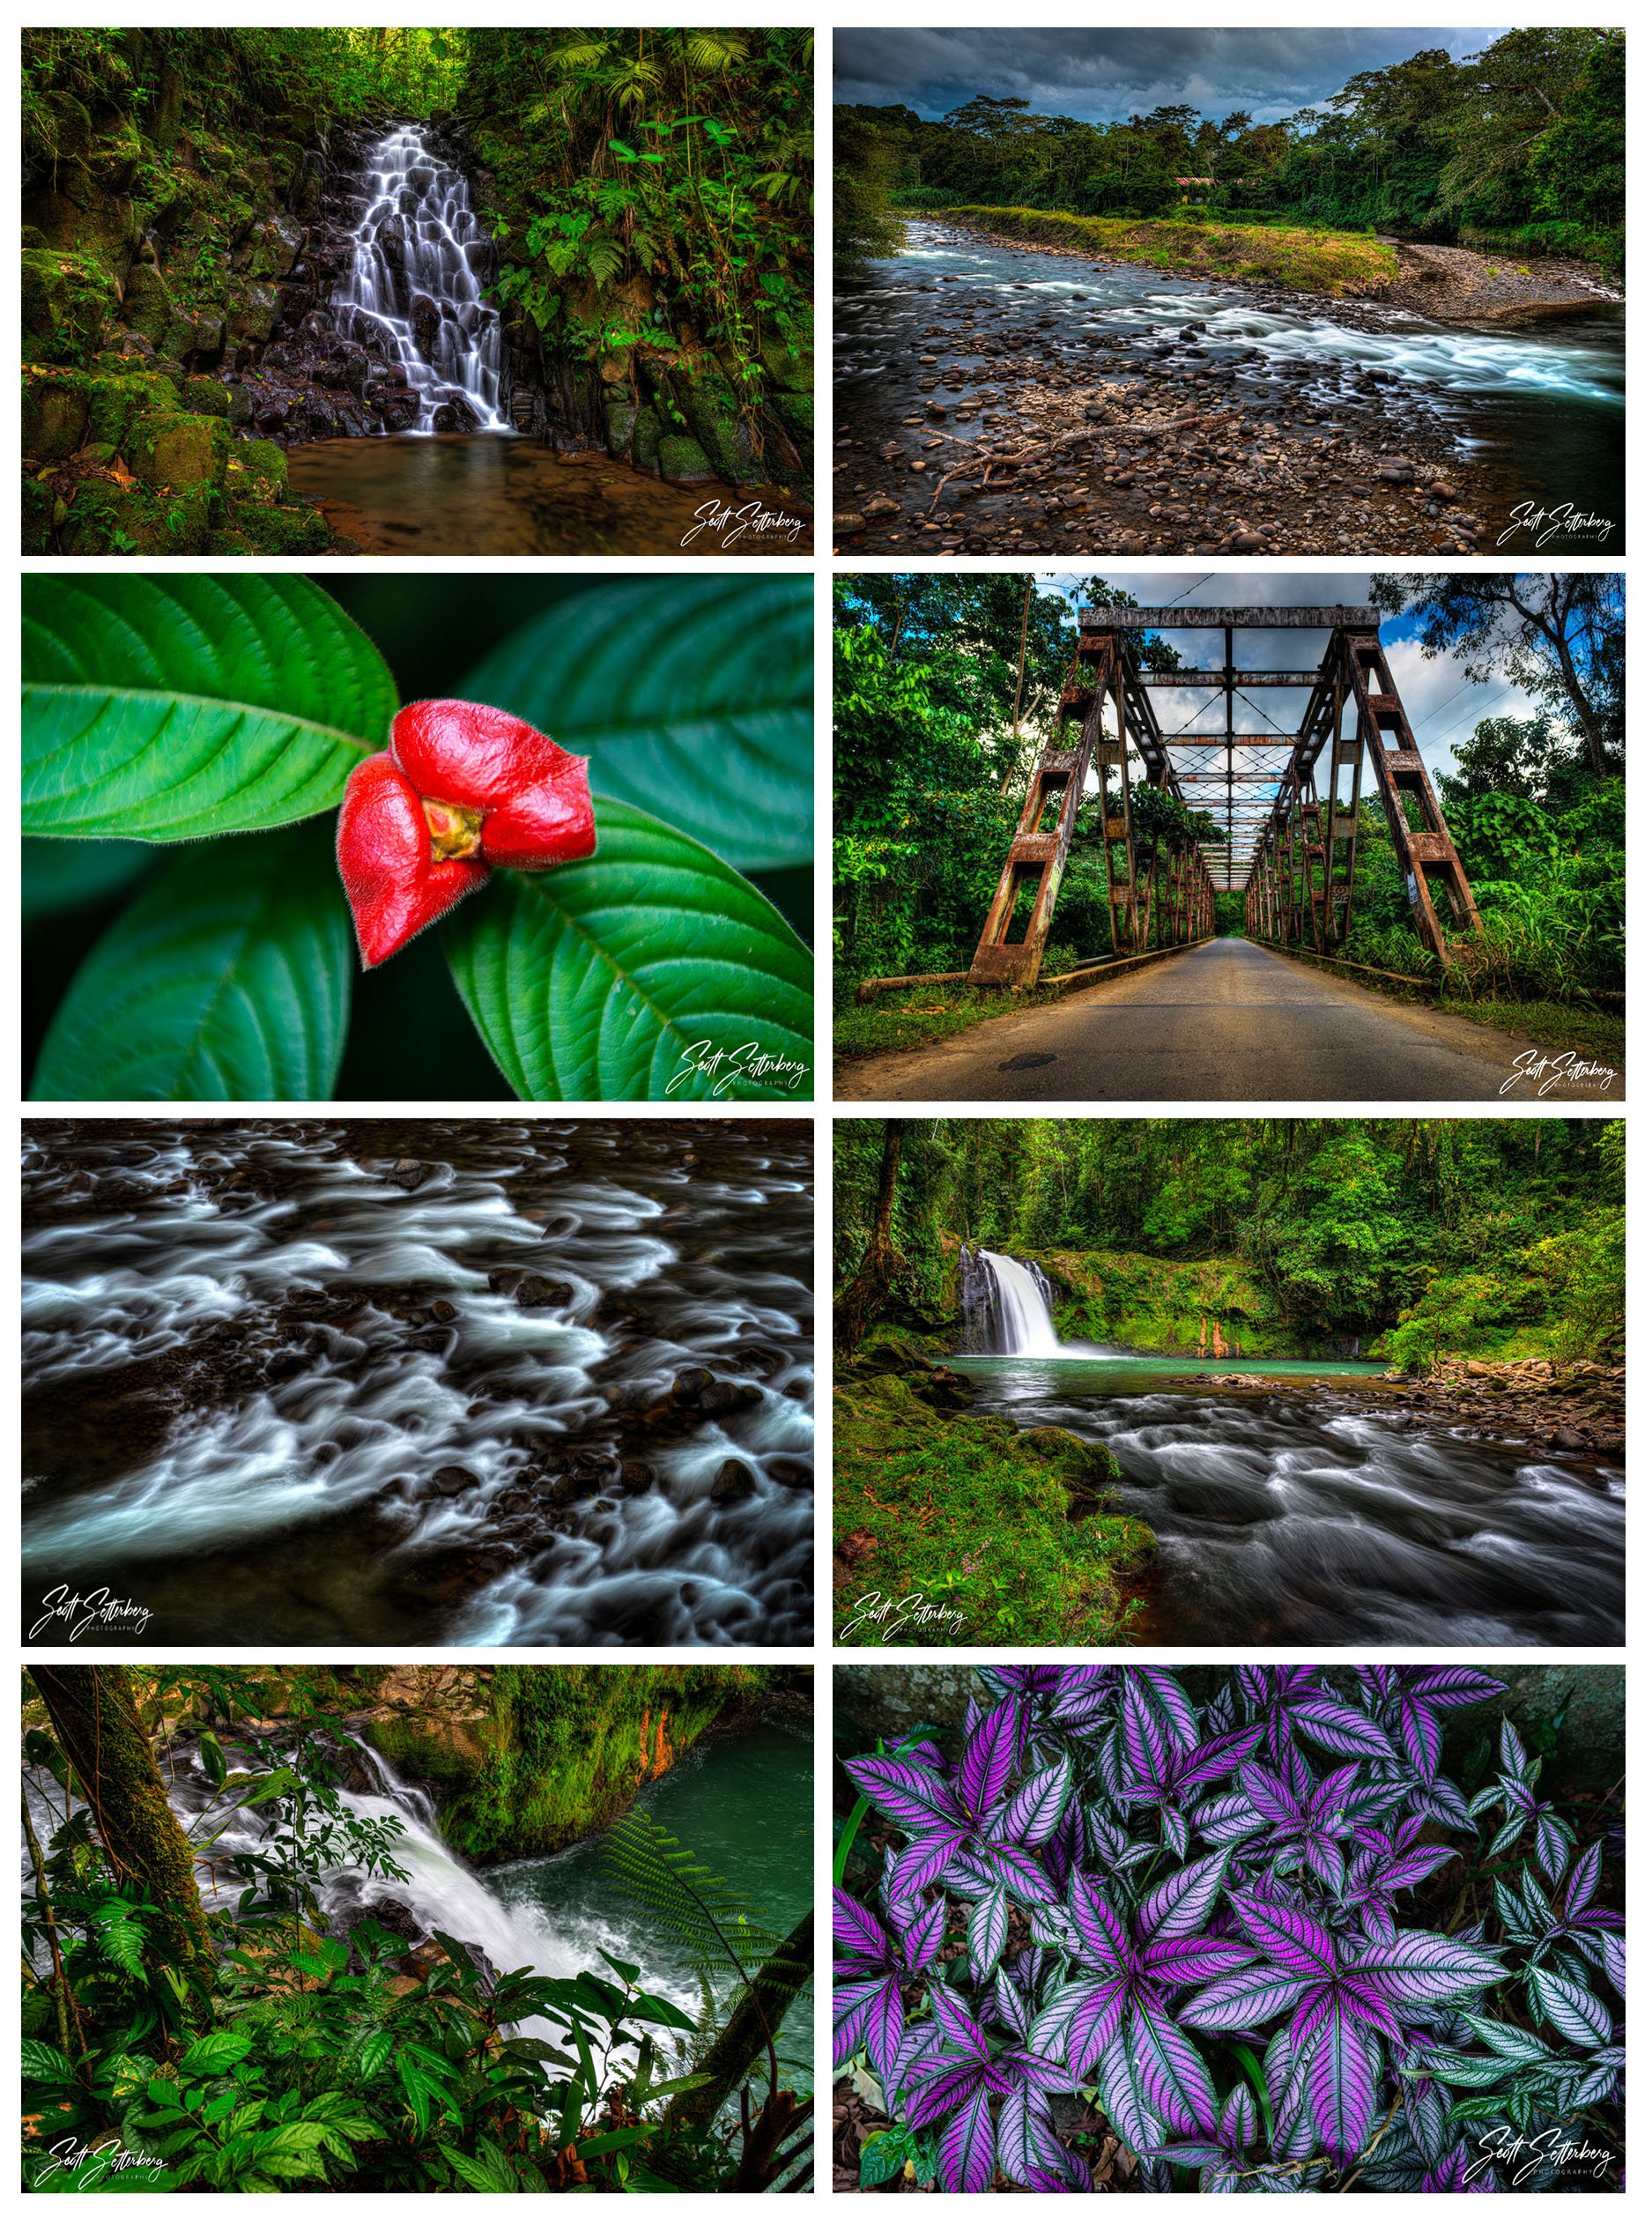
But, importantly, they all have incredibly small groups (just 4 people), diverse locations, and are led by a master tour leader who has been working in Costa Rica for decades.
Plus, every tour by ColorTexturePhotoTours is all-inclusive, which means you won’t need to worry about finding hotels, meals, transportation, or carrying change on you for park entrance fees.
An all-inclusive photography trip to one of the world’s most beautiful places? Count me in!
Learn More:
We Recommend
Lofoten Islands Norway: Photographic and Travel Guide
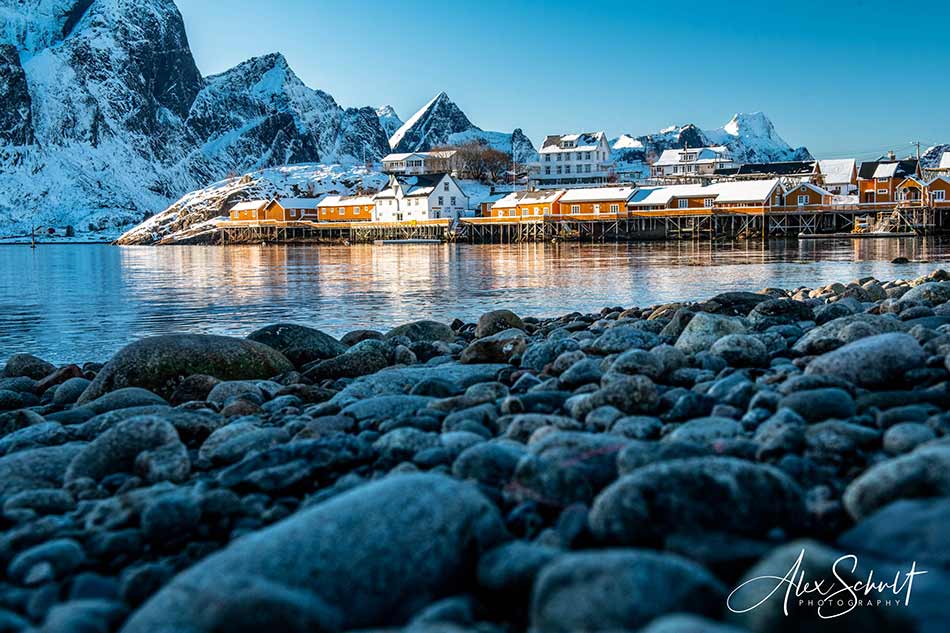
I recently had the opportunity of a lifetime to travel to Norway to photograph the northern lights (and many other Nordic wonders).
It's a place I've been dying to visit for years and years, and it certainly didn't disappoint.
More specifically, I explored the Lofoten Islands, a mecca for photographers that has beautiful sights everywhere you look.
Since it was my first trip to Norway, I wanted to create a short series of articles that act as a Lofoten Islands photography and travel guide.
In this installment, I want to give a broad overview of the trip, from the travel arrangements and accommodations to the areas I visited.
In future parts of this series, I'll take a deep dive into these topics so when it's time for you to head to Norway with your camera, you'll know where to go, what to do, where to stay, and so forth.
Let's get started!
Norway Travel Tips: My Travel Arrangements
 Photo by Miguel Ángel Sanz on Unsplash
My journey from Los Angeles to Norway began at LAX on SAS Airlines.
I flew non-stop from LAX to Stockholm, Sweden, and then from there to Oslo and on to Bodø.
Bodø has a very small airport, and was the final leg that SAS flies. At that point, I flew from Bodø to Svolvær on Wideroe Airlines, which, as you can see above, was on a much smaller plane. I didn't mind, though, being that I'm a trained pilot.
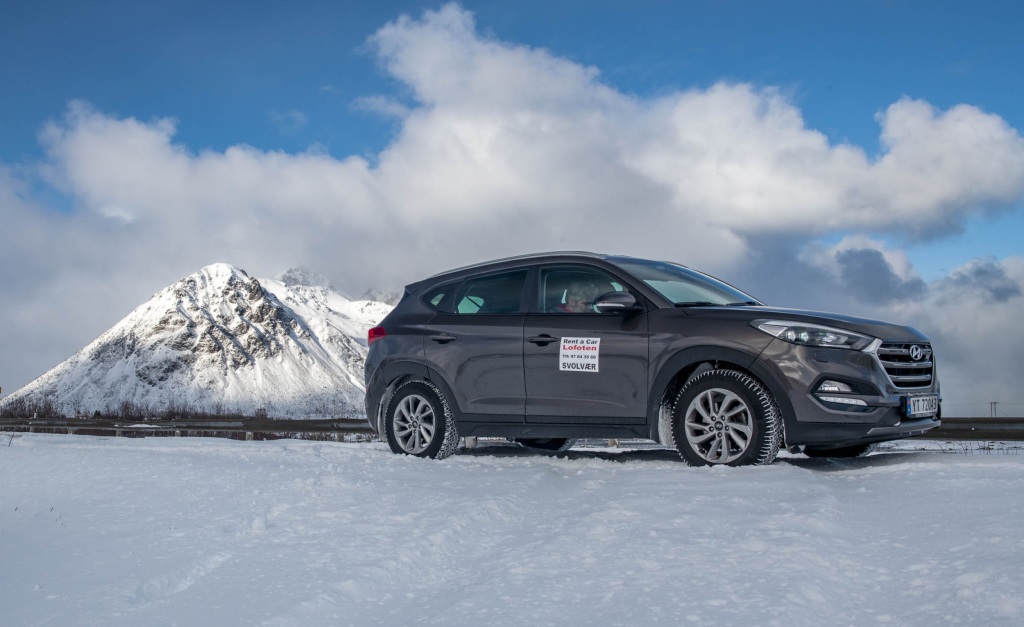
I made arrangements for a car before I left Los Angeles with a company called Rent a Car Lofoten.
Rather than renting from a big, multi-national company, I wanted to keep my money local, and I'm glad I did.
Upon arriving in Svolvær, I was met at the curb with my car, which was already on and warmed up for me.
That was just the start of the four-star service I got with Rent a Car Lofoten. Their representatives were knowledgeable, friendly, and ready to go the extra mile.
That was true on the tail end of the trip, too. I was able to drop off the car and be on my way in mere minutes - something that is not so easy to do over here in the U.S.
In fact, everywhere I went in Lofoten, the people were friendly, warm, welcoming, and most spoke English, which I greatly appreciated since I definitely cannot speak Norwegian.
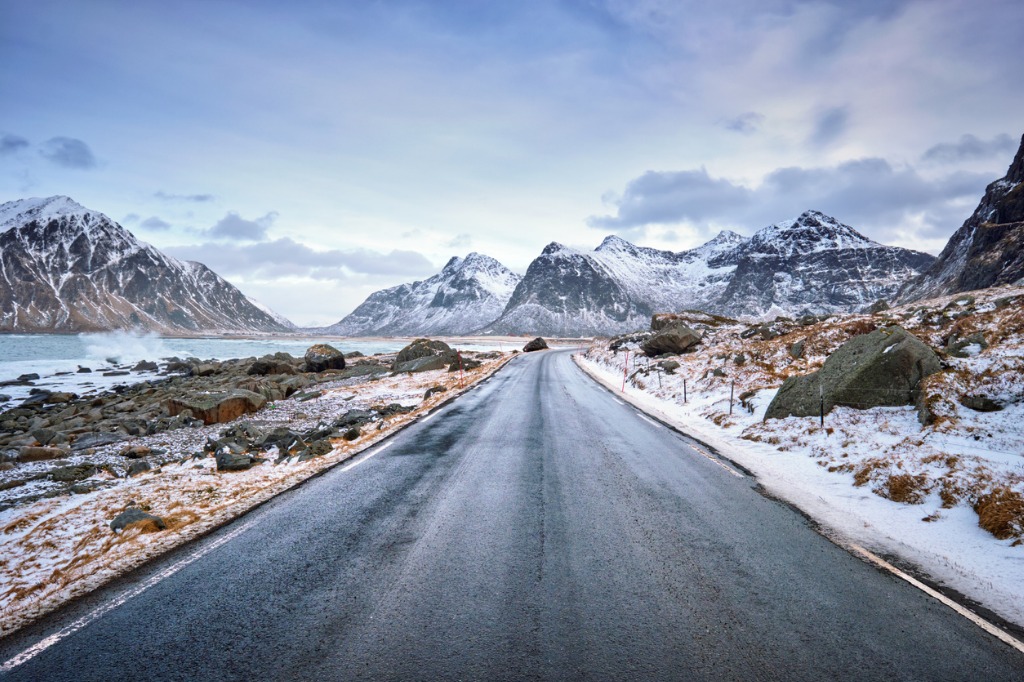 Photo by f9photos via iStock
As an American used to driving a big car on big roads, it took a little getting used to the very narrow roads in Lofoten. Not only that, but Norway in the winter means slippery roads with black ice. Living in Southern California as I do, that's something else I had to get used to, and fast.
The roads in Lofoten are also very curvy. Curves come up faster than you think, so it's important to slow things down and take it easy. I saw many cars getting towed out of ditches while I was there, and fortunately for me, being road aware prevented me from suffering the same fate.
I'd also recommend that you gas up your rental car at every chance you get. There are long stretches of road without filling stations, and about the last thing you want to do in Norway in the winter is sit on the side of the road with no gas!
Where to Stay in Norway: Svinøya in Svolvær
Svolvær was the ideal place to stay because it was smack in the middle of everything.
Aside from its central location, this quaint fishing village is absolutely drop-dead gorgeous.
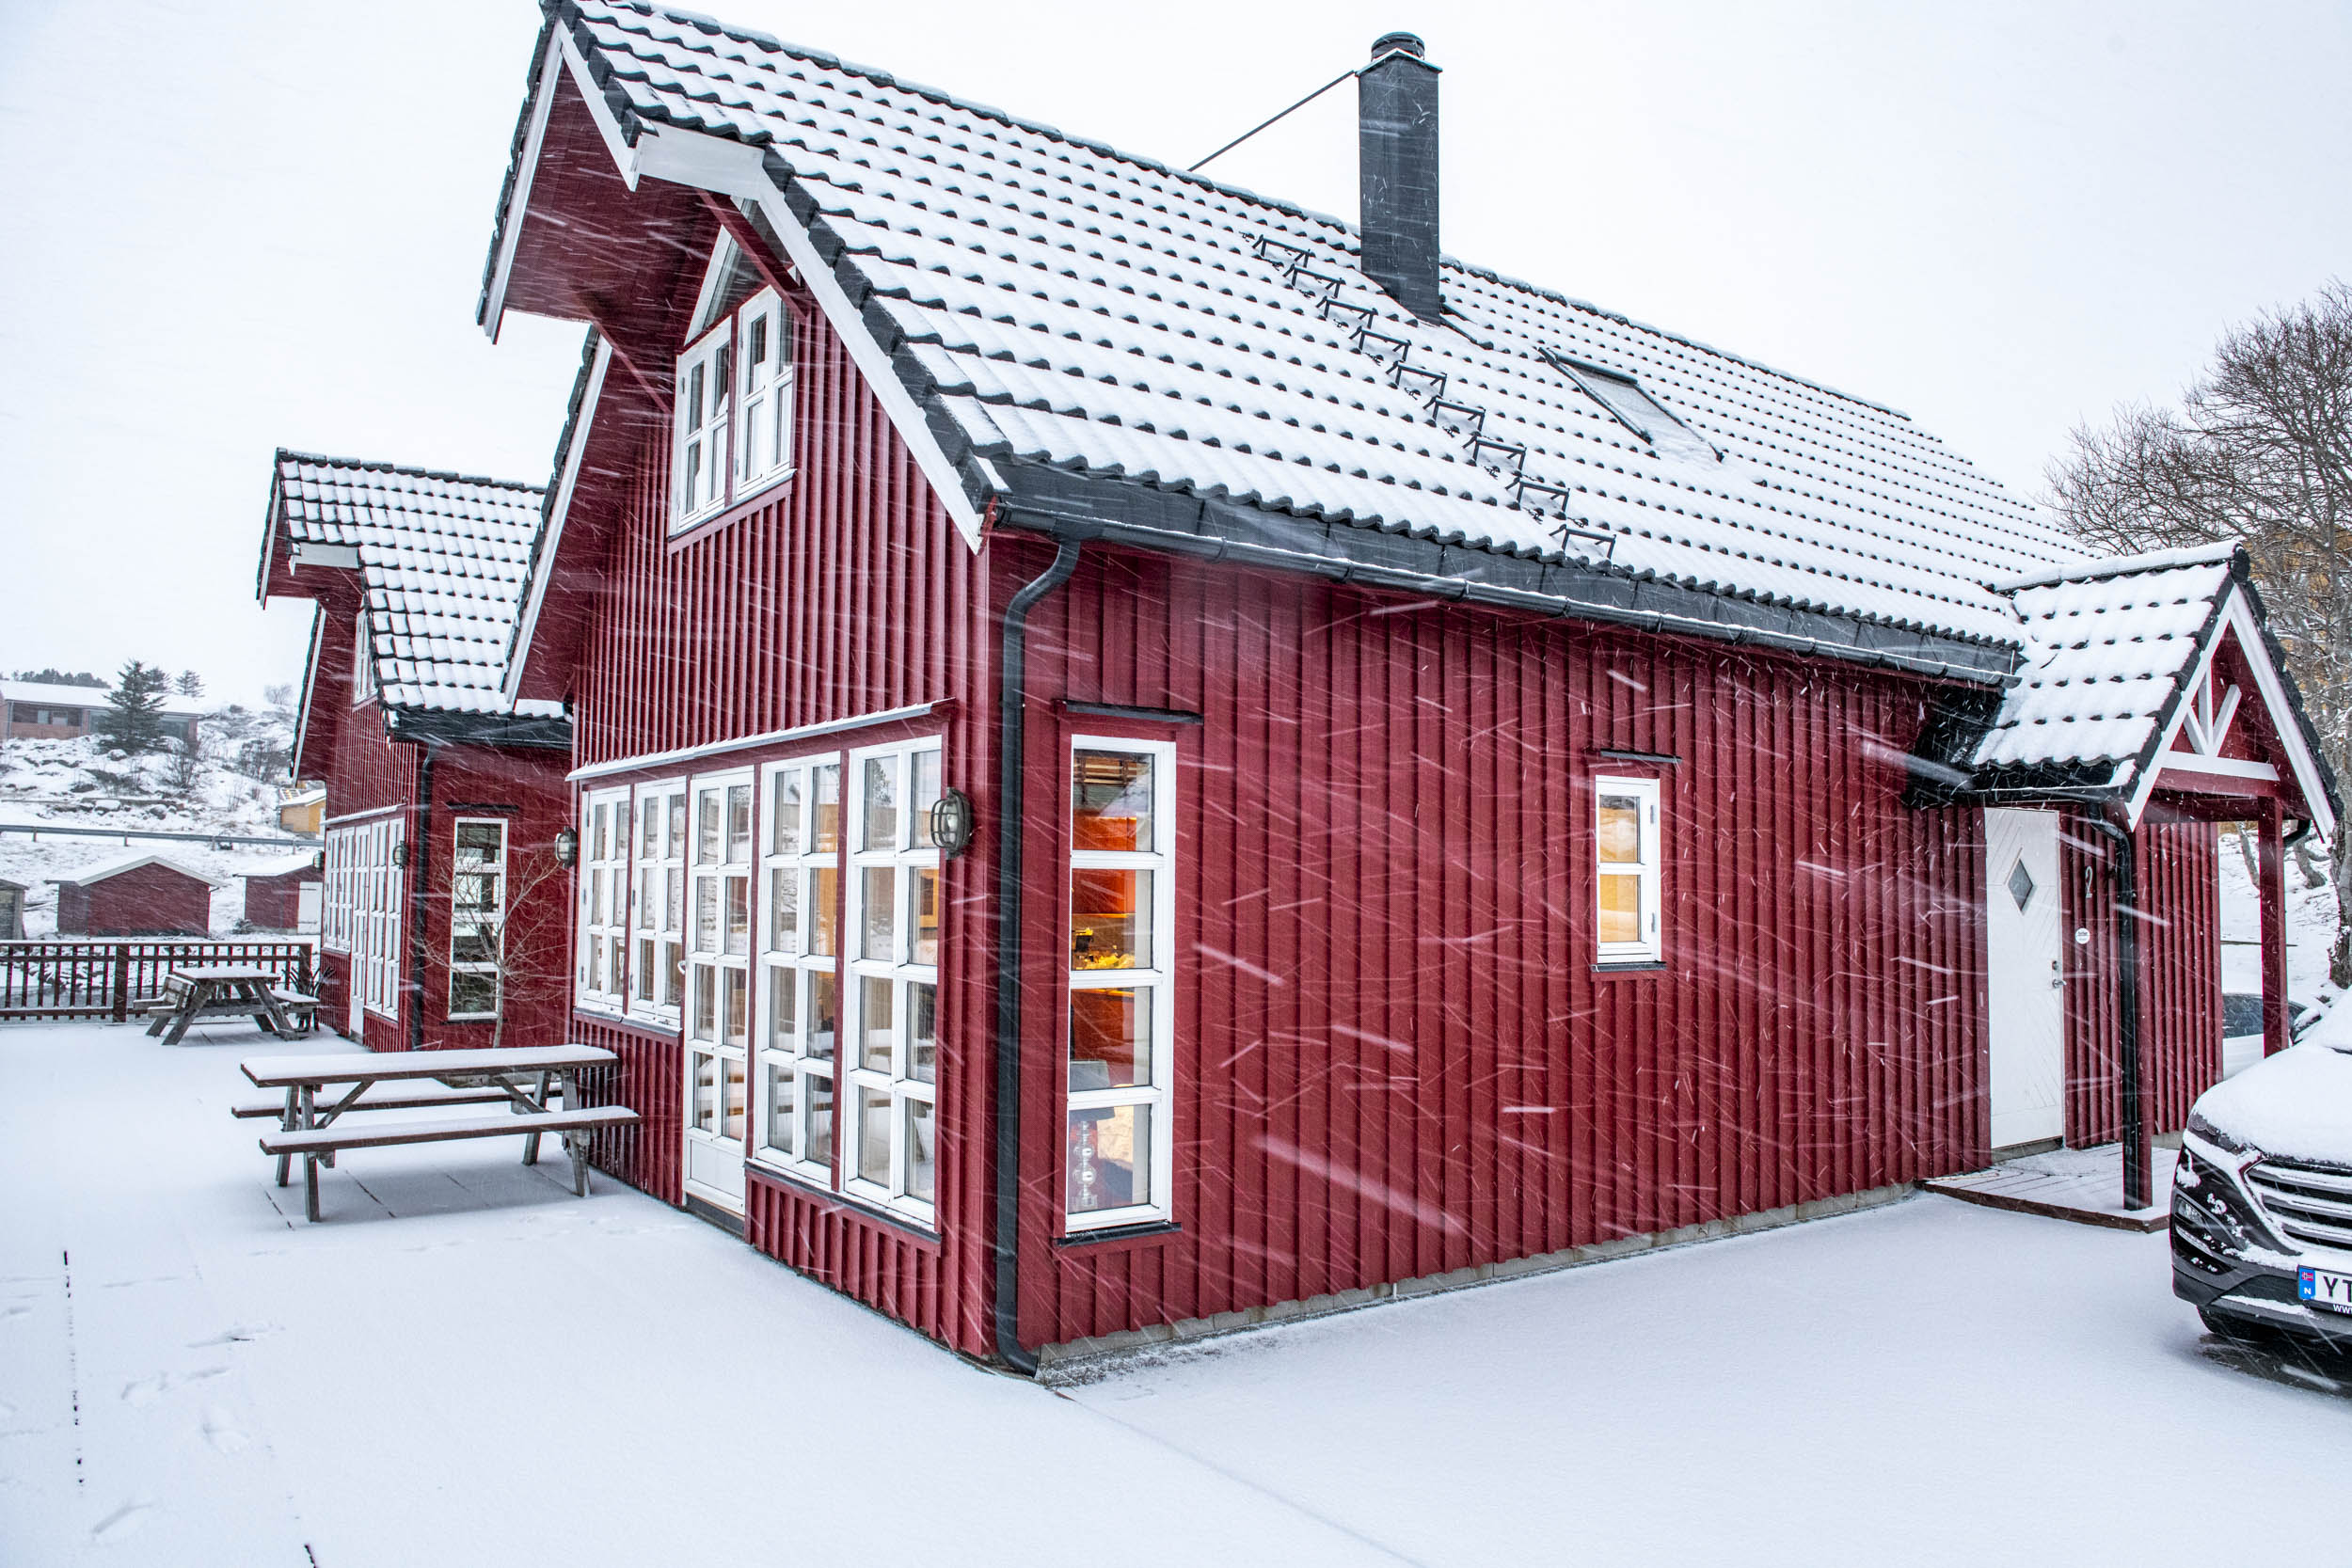
We stayed in a traditional Norwegian hut, which we rented through Svinøya.
Sure, there are hotels in the area, but why come all this way to stay in a cookie-cutter hotel when you can stay in a beautiful cabin right on the water's edge?!
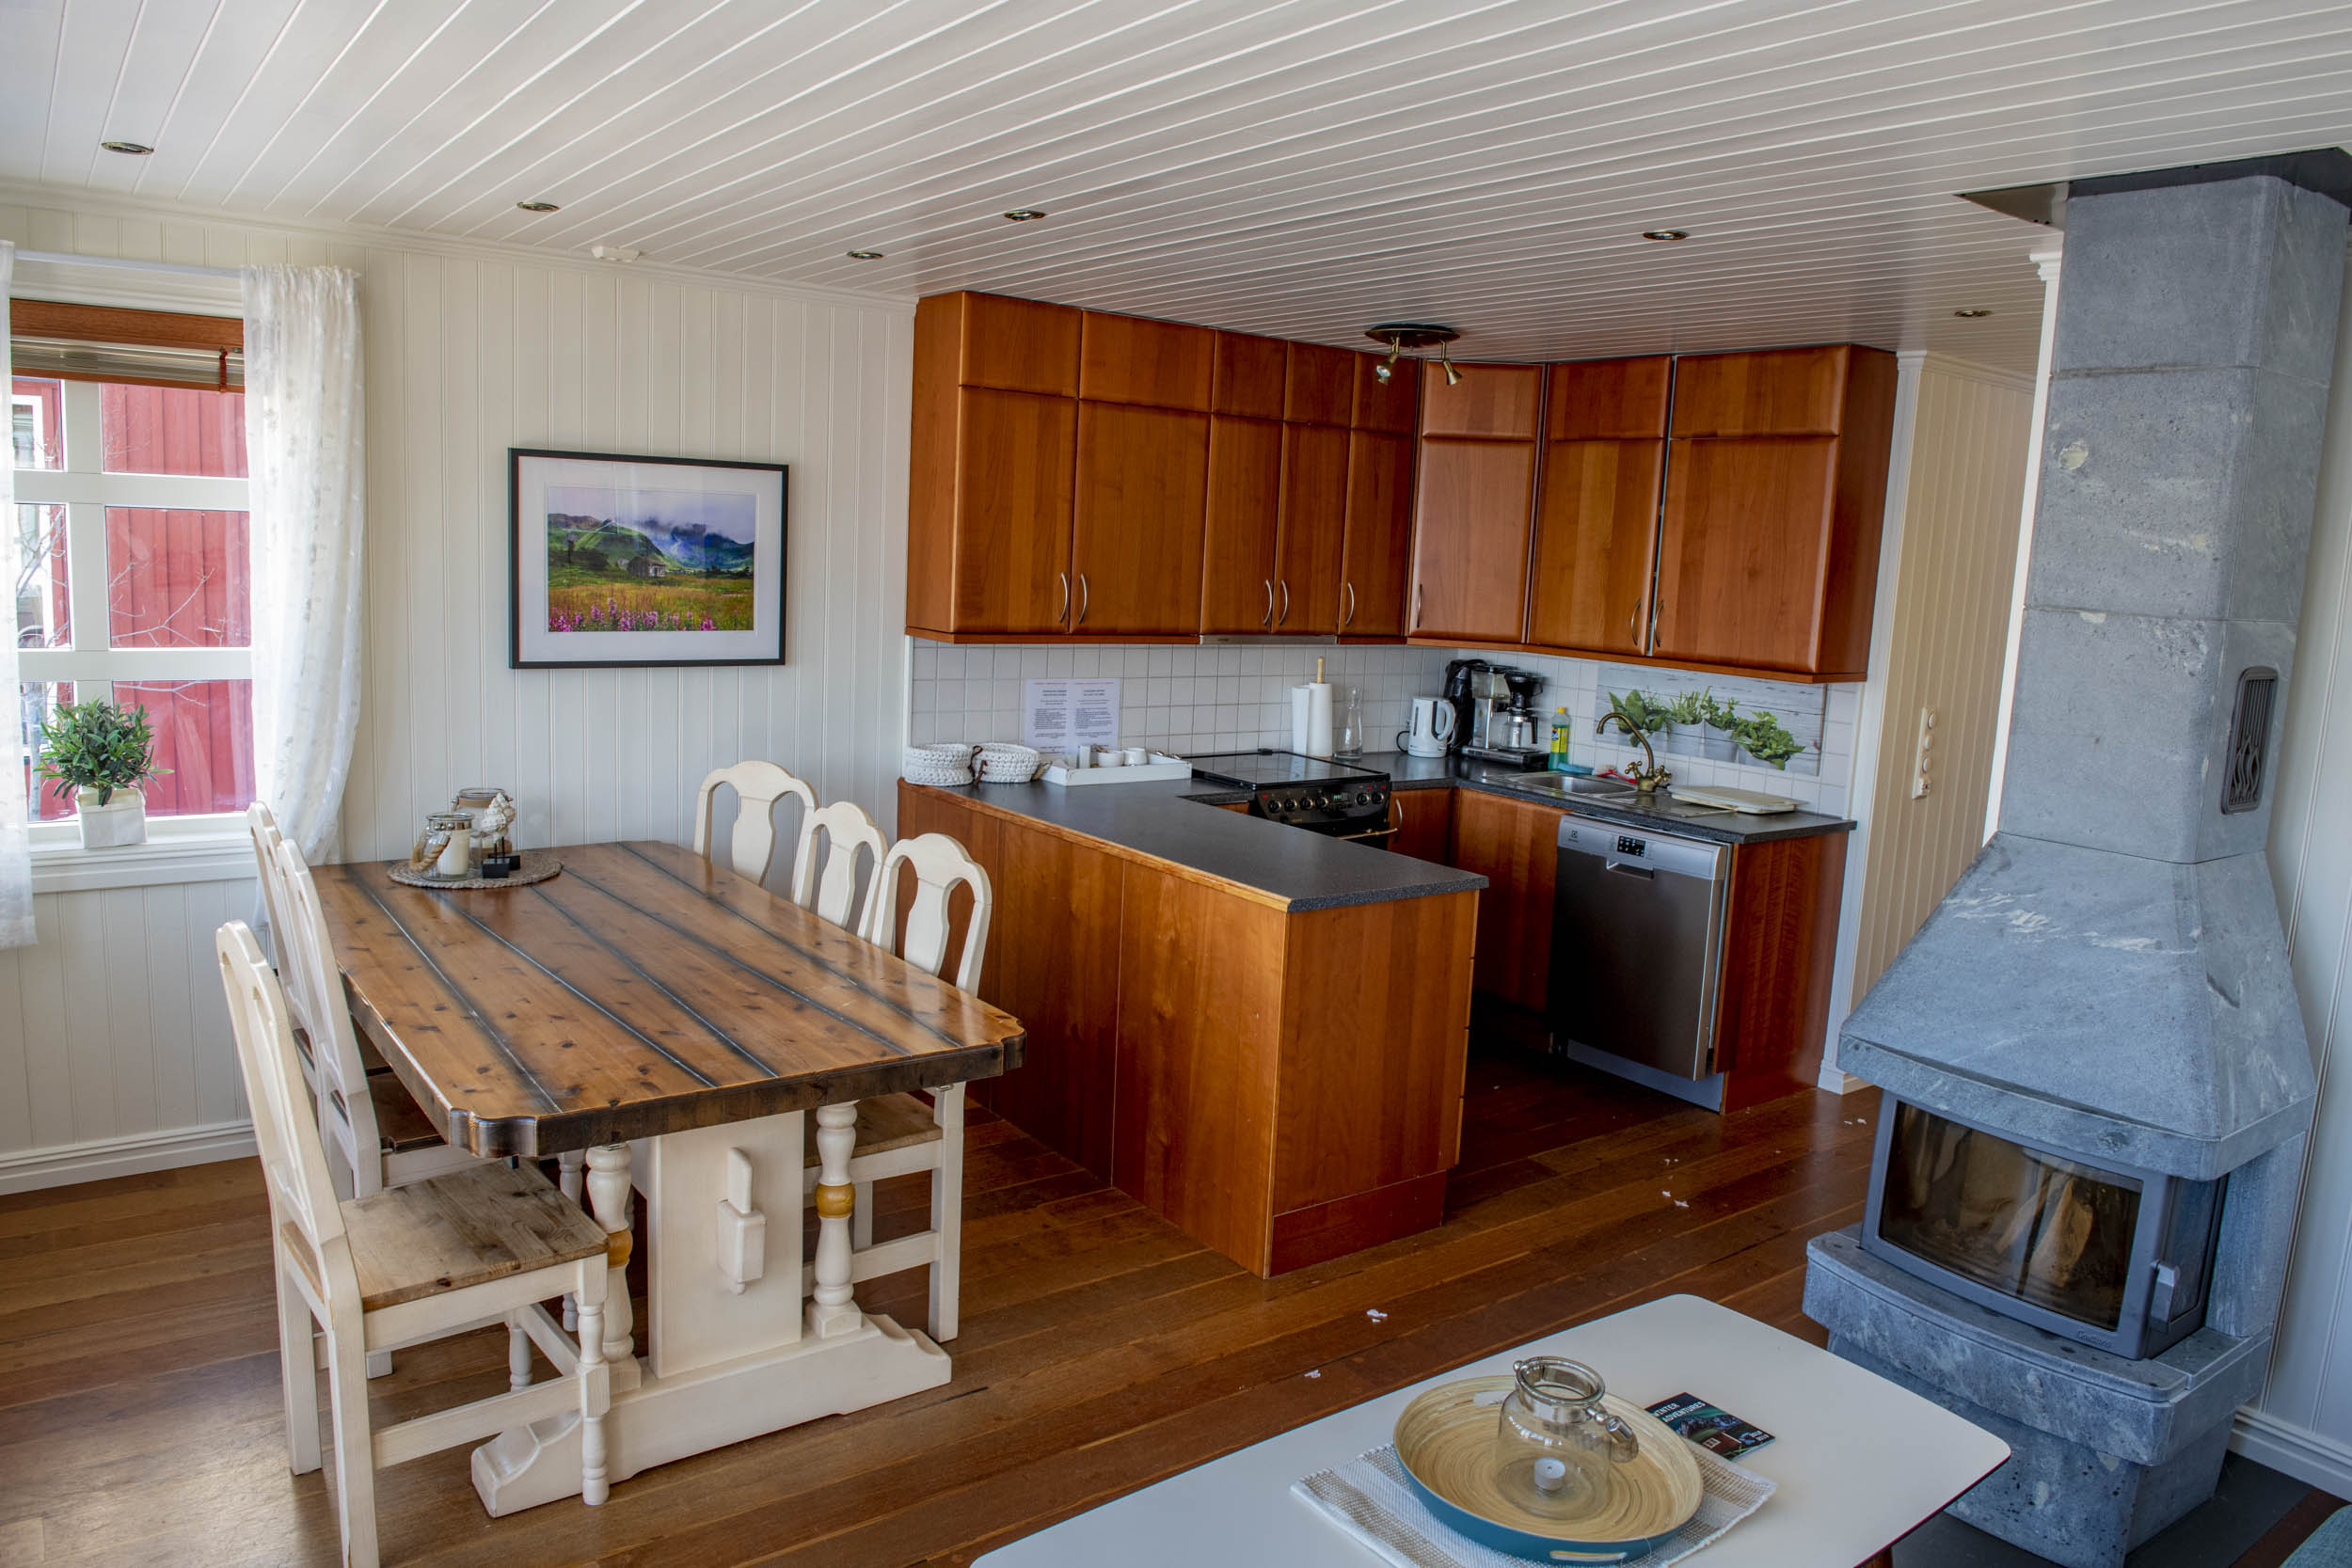
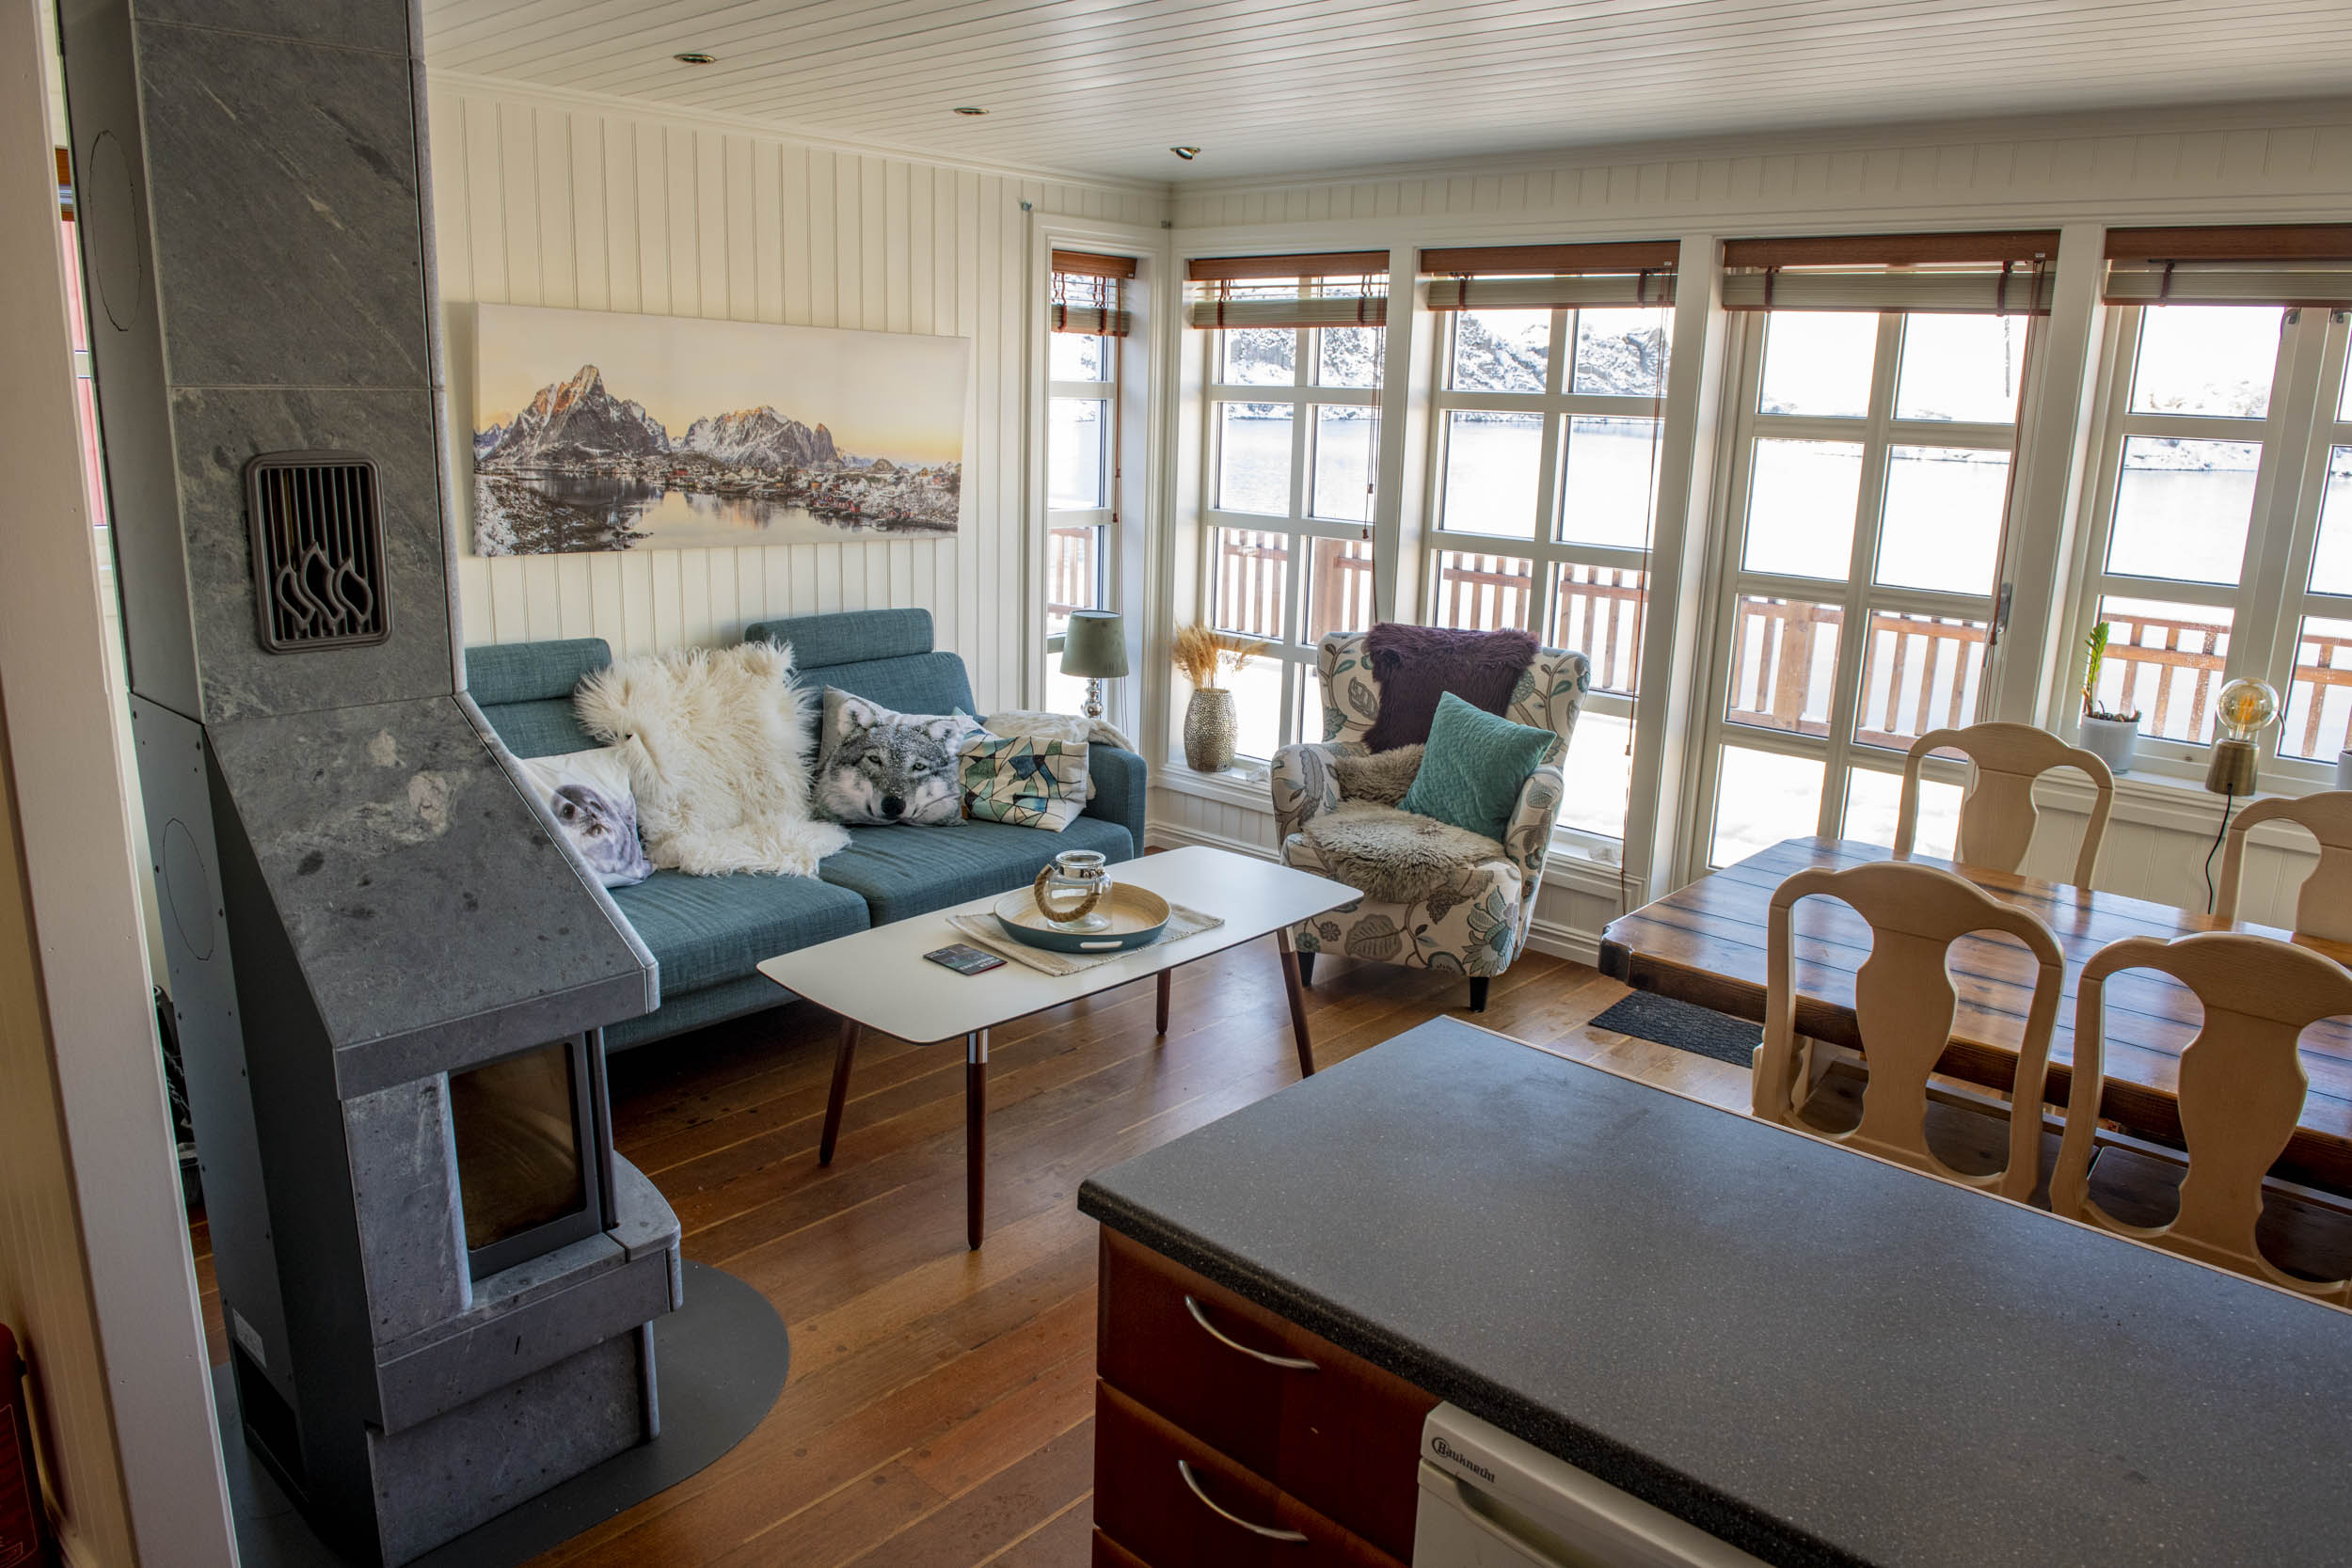
Our cabin was well-appointed with everything we might need during our stay.
Thankfully, there were large windows so we could take in the breathtaking views, even if we weren't out exploring.
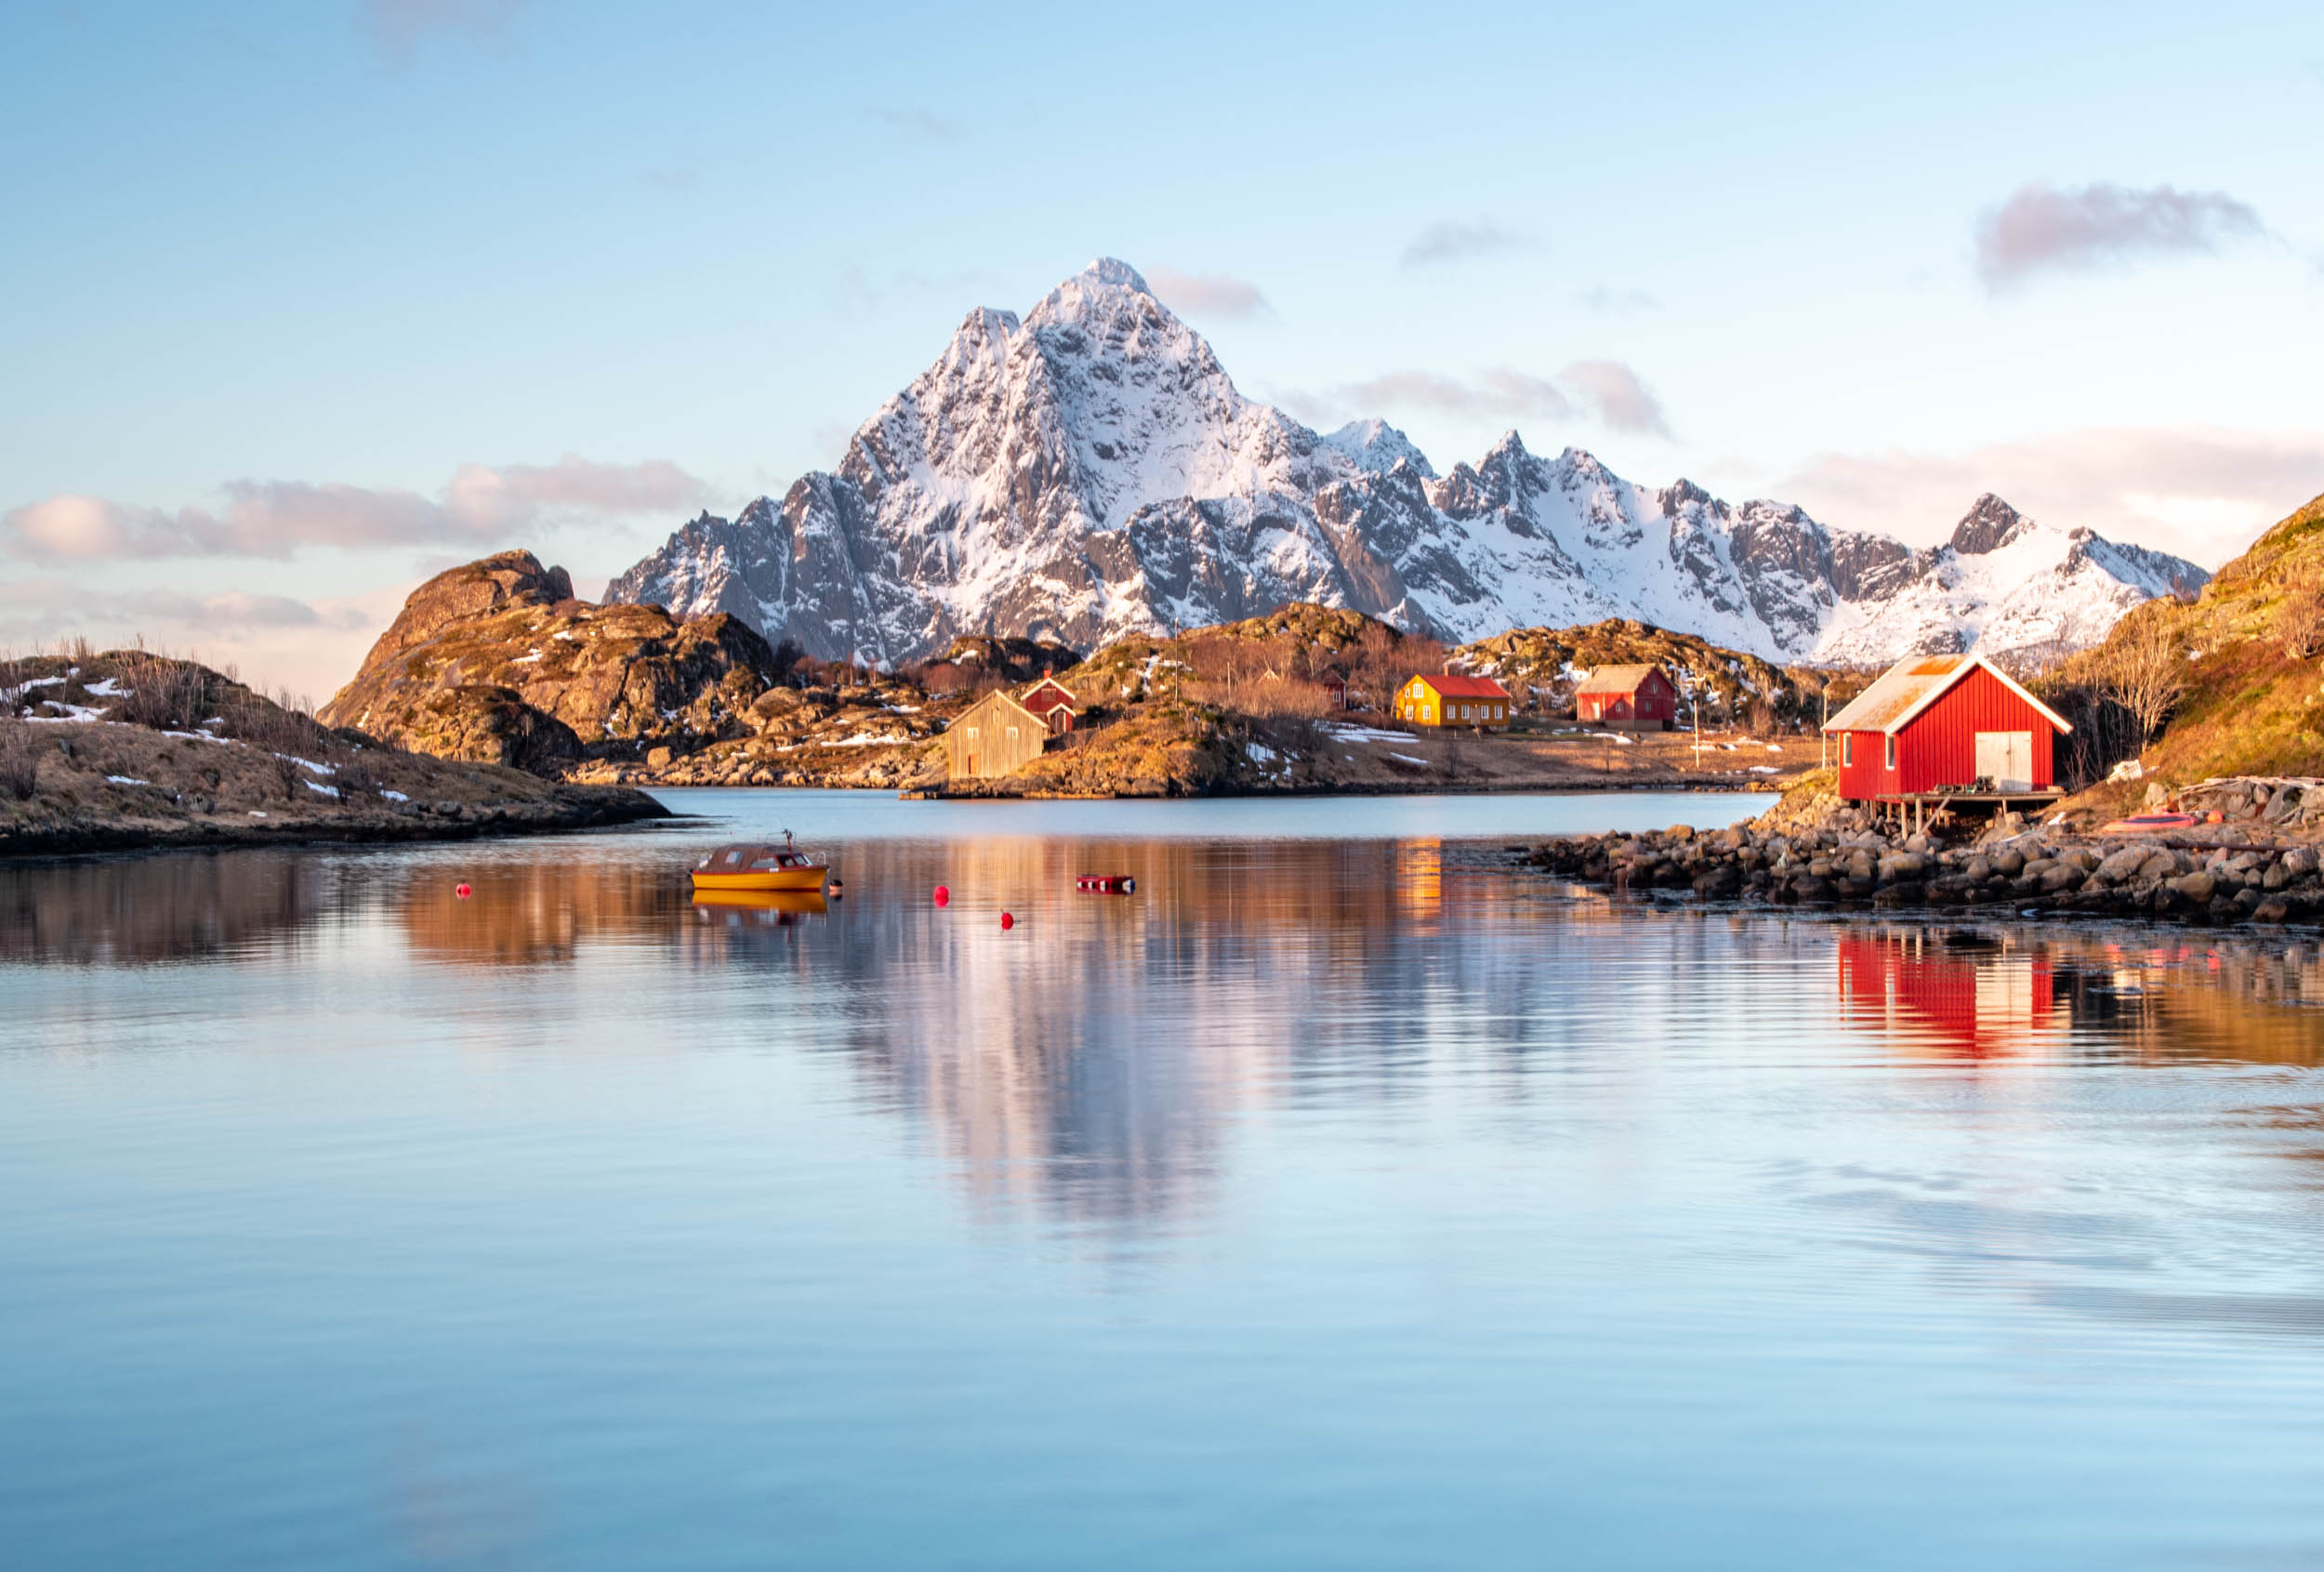
Speaking of views, as you can see above, the view from our deck wasn't bad at all.
It was a gorgeous sight to see each morning when we woke up, and one that inspired us to get ourselves together and into the car so we could get out there and see more of what Norway had to offer.
What to Wear in Norway in the Winter
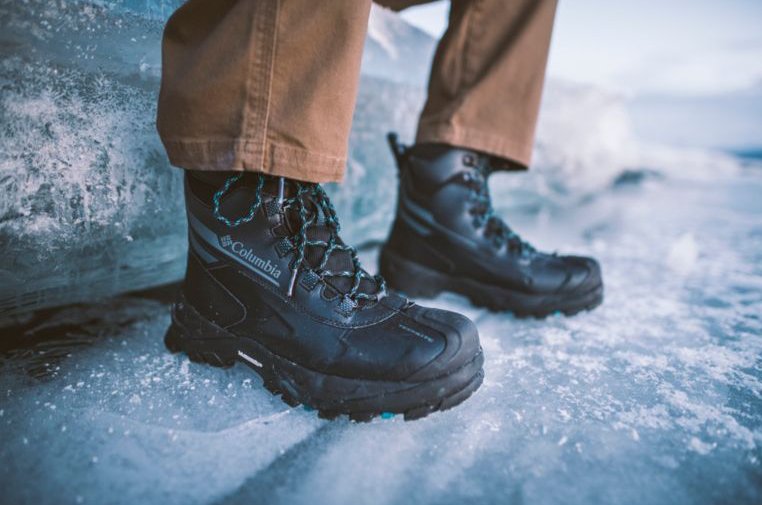
Naturally, visiting Norway in the winter meant I needed to be prepared to keep myself warm for the long days and nights out shooting.
I want to give a shout out to Columbia for making some truly killer winter clothes.
I picked up their Bugaboot Plus IV boots a couple of months before I left, and man, was that a good investment!
Those suckers are waterproof, seam-sealed, and insulated, in addition to having soles made by Michelin. Yes, that Michelin.
Needless to say, my feet were warm and dry and I didn't slip or fall one time with these babies on!
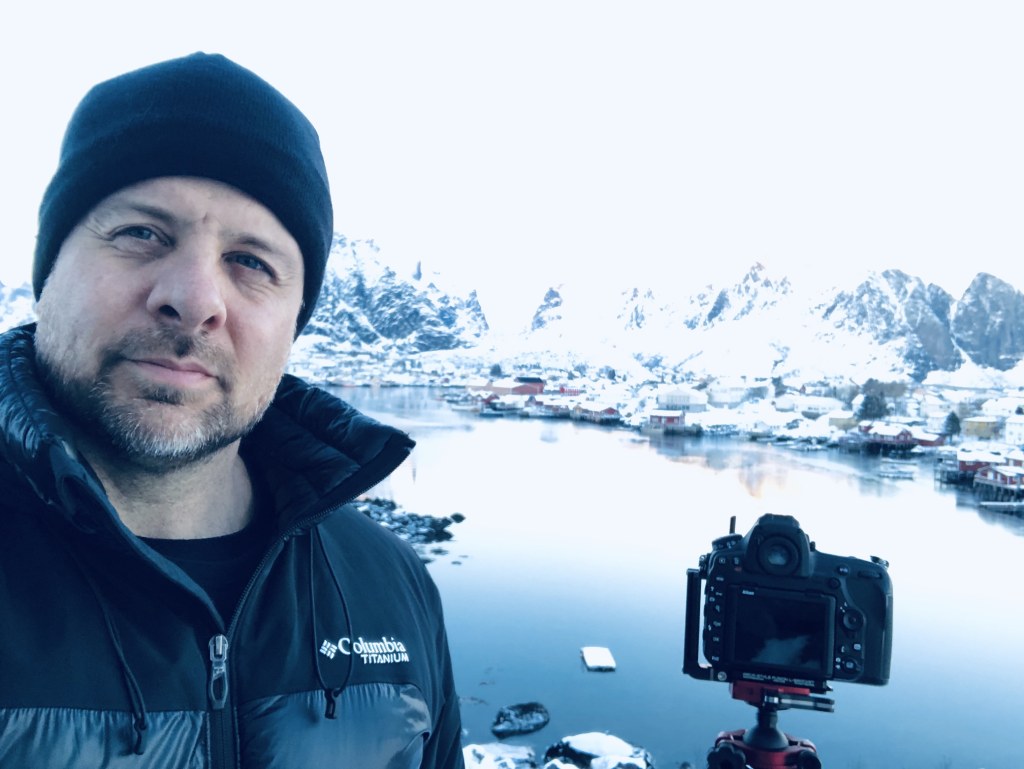
In the photo above, you can see my Columbia Heatzone TurboDown II jacket.
If you're a warm-weather kind of guy or gal and you head up north to a place like Norway, this jacket is exactly what you need.
The reflective heat technology on the inside of the jacket is no gimmick - it works extremely well. It's called 3D Thermal Reflective Omni-Heat, and it kept me toasty warm, even though it was obviously very cold while I was in Norway.
The shell is waterproof and breathable as well, so I was warm but not overly warm. It was perfect!
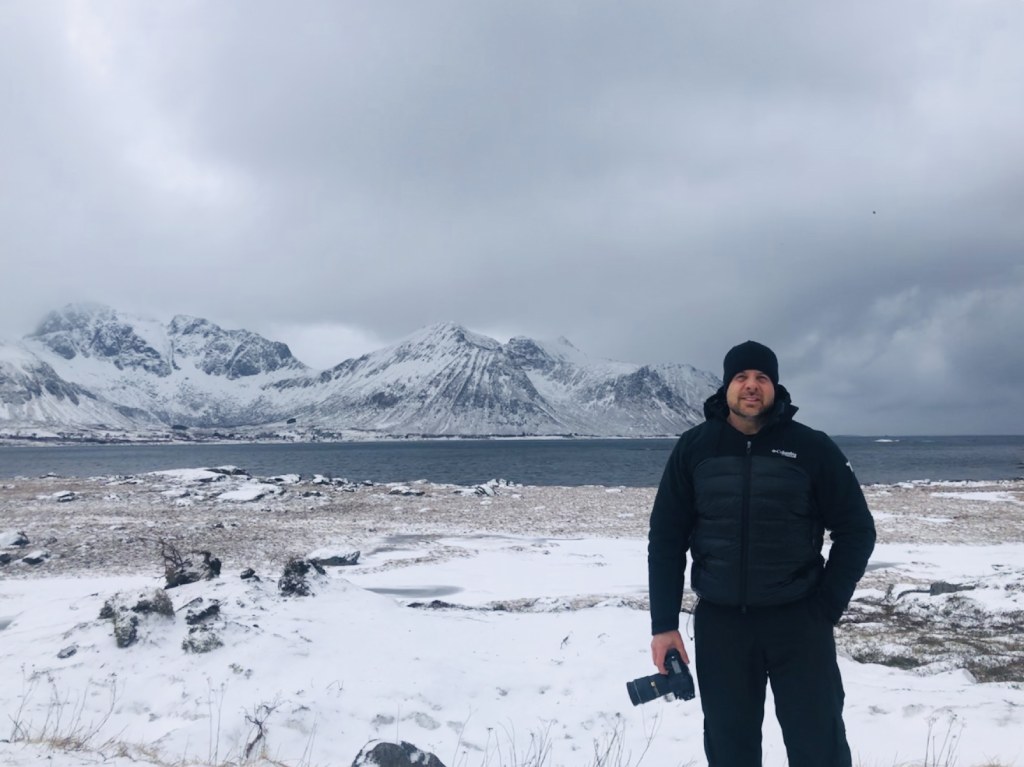
Underneath my jacket and pants was more Columbia gear - Titanium Omni-Heat 3D crew shirt and knit pants.
Again, Columbia's Omni-Heat 3D technology kept me perfectly warm, even as the temperatures dropped while I was out shooting late into the day.
But what I like even more about this top and these pants is that they are super soft. There's no itchiness to constantly bother you. Instead, they feel great against the skin while keeping you warm. It's a win-win!
My Ridge 2 Run III Pants - which themselves are waterproof and breathable and have the heat-reflective technology described above - also feature pockets all over the place for keeping cash, keys, lens caps and other items, internal gaiters to keep the snow out, and leg vents in case things get a little too toasty.
In other words, from head to toe, I had the ideal winter-weather outfit for exploring Norway!
Quick Tip: When you go to Norway in the winter, you need to bring a TON of clothes. That means having the right luggage to bring everything you need. To do so in comfort, I highly recommend the Nomatic Check-In roller bag. With space for 78 liters of gear (yes...78 liters!!) there is no shortage of space for your warm winter clothes. For items you don't want to check, the Nomatic Carry-On Pro is a rock star bag with TSA locking zippers, a removable tech compartment, and the same polycarbonate construction of the Check-In.
Filters to Bring to Norway

I often get asked what filters you should have with you when you visit a place like Norway. For me, there are two filters you need above all others.
First, as you can see from my photos above and below, the Lofoten Islands are surrounded by beautiful blue waters. All that surface area of water is a prime spot for glare from the sun, and to combat that, you need a polarizing filter.
I used my PolarPro Quartzline circular polarizer while traveling around Lofoten to help fight sun glare, to boost the contrast in the sky, and to help minimize atmospheric haze that made distant land formations look a little soft.

Additionally, I had ND64 and ND1000 filters on hand to tackle daytime long exposure photography.
This set of three filters is all I needed to capture the shots I wanted, and with PolarPro quality, getting my shots was a simpler task!
I have been a fan of PolarPro for some time because their filters are simply spectacular.

Not only are these filters made of 99.9 percent pure fused-quartz glass (which gives them impeccable clarity and durability), but they also have superb temperature stability. That's certainly a bonus when you're that far north in the winter!
The brass frames of these filters are super rugged, thread on smoothly, and are extremely durable. Even the harsh Norway winter was no match for these things!
I love how color neutral these filters are too. PolarPro has implemented a new coating process that results in zero color shift. Add to that a 16-layer coating that prevents scratches and repels water and oils, and I had the makings of a pretty remarkable set of filters for my trip.
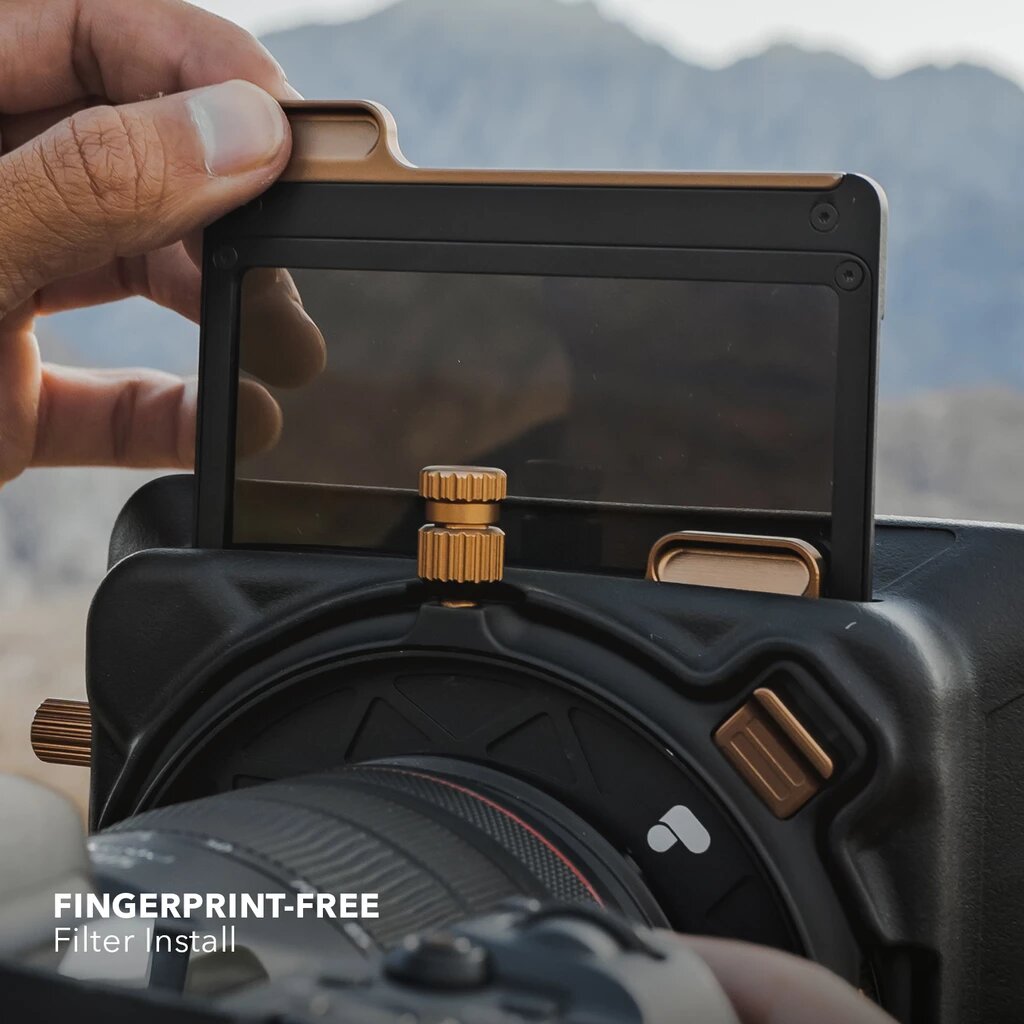
So, what filters should you take with you to Norway?
You can't go wrong with the Quartzline filters I used, but PolarPro has a newer line of filters - the Summit series - that's even more impressive than the Quartzline filters I took on my trip.
One of the best updates PolarPro implemented with these filters is the fingerprint-free install. Each filter has an aluminum frame that enables you to install the filters without the worry of smudging the filter glass.
What's more, the frames are crafted from super lightweight aluminum, so you get the durability you want without the added weight to carry around.
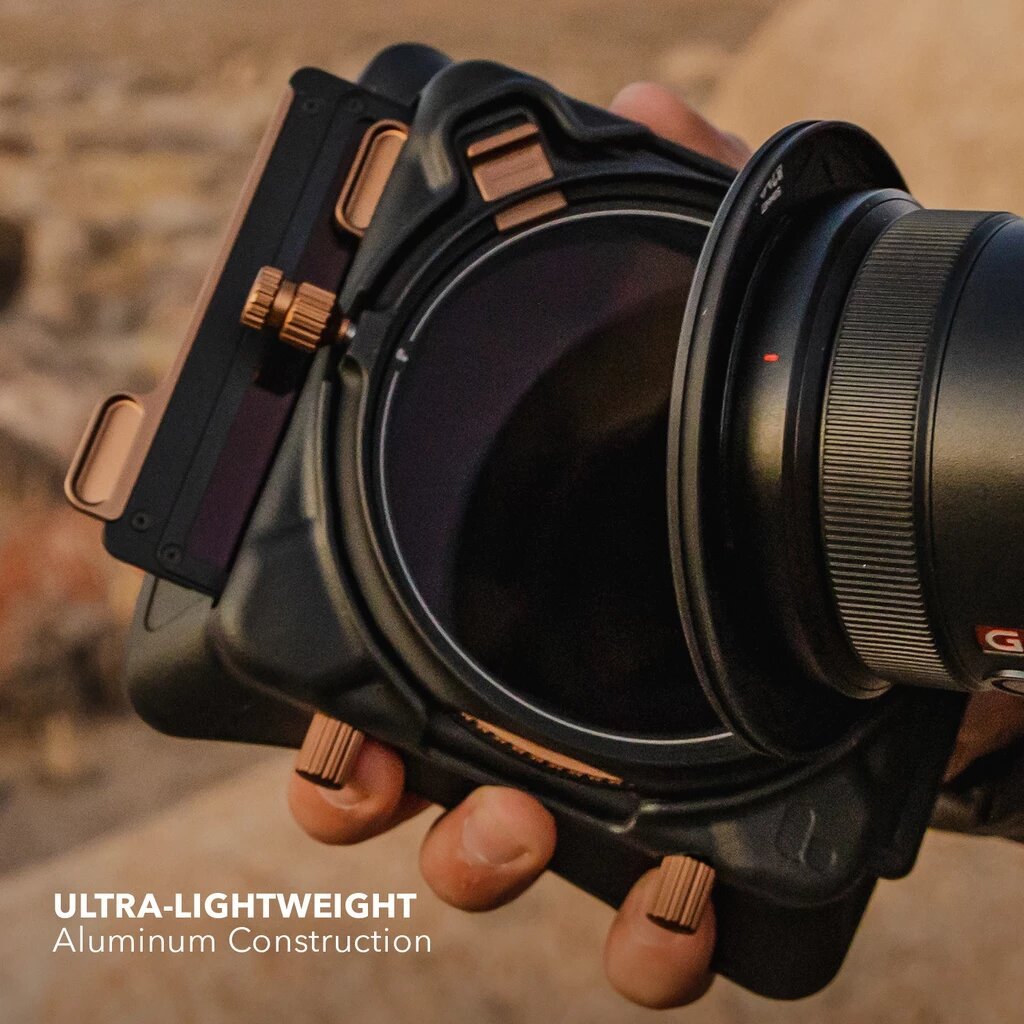
The Summit Core has an integrated slot for a circular polarizer, which offers you easy access for controlling the polarizer. It's also a fully light-sealed system, so you don't have to worry about light leaks messing up your shot.
The Summit Core also offers tool-free mounting, a snap-on hood attachment, and a filter lock for your convenience.
The Summit filters carry on the tradition of impeccable build and image quality with fused Quartz glass and multi-layer coatings. With a user experience that makes them a breeze to use, the PolarPro Summit series would be my choice for a return trip to Norway!
What to Photograph in the Lofoten Islands
Norway is a huge country full of breathtaking landscapes, but if you're like me, one location - the Lofoten Islands - stands out among the rest as a must-visit location for photography.
I'll just say that seeing these islands in photos on a computer screen does no justice to the unbridled beauty of this area.
Its location in far northern Norway means it's far enough off the beaten path that it remains a relatively unspoiled area.
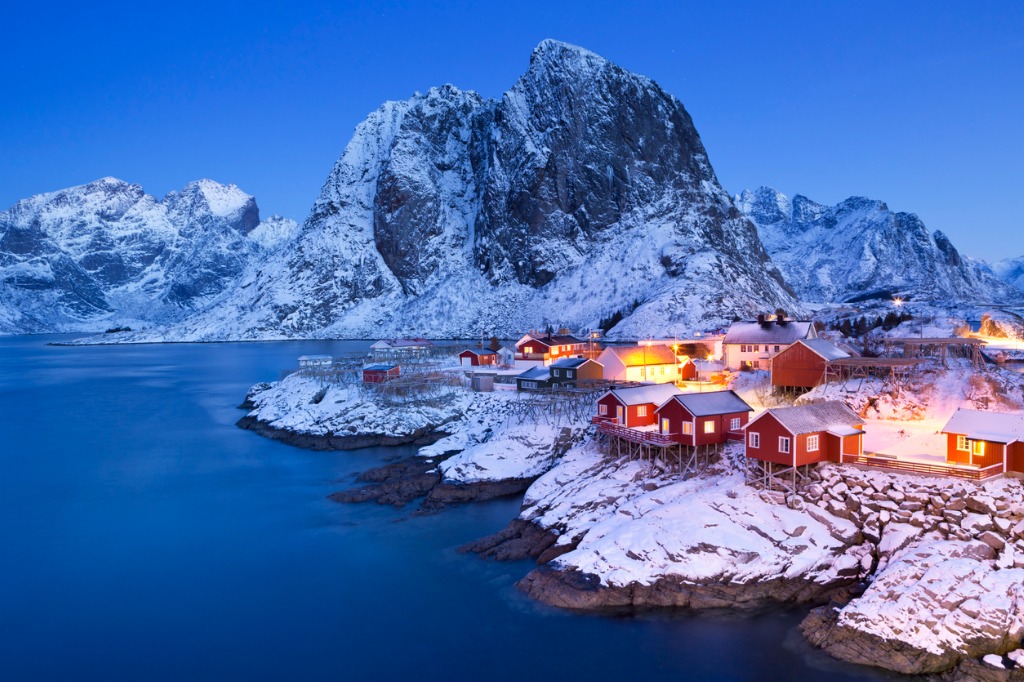 Photo by sara_winter via iStock
Surrounded by the churning waters of the Norwegian Sea, the islands are closely intertwined with the fishing industry.
The soaring mountains that dot the landscape are truly impressive, as are the majestic fjords with cool blue waters.
Naturally, many photographers like myself trek to Lofoten, so tourism has become a primary industry in this area.
Fortunately, Loften's residents are working to keep their lands accessible and unspoiled while also striving to preserve their culture and traditions.
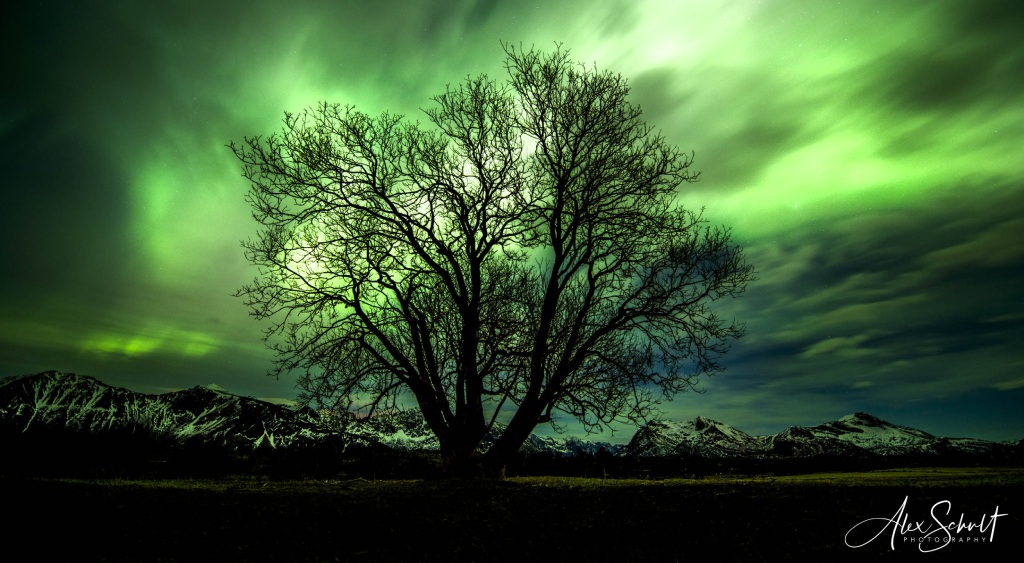
In fact, Lofoten is pursuing a Sustainable Destination designation. This certification signifies a dedication to providing visitors like me with the experience of a lifetime while focusing on reducing the negative impacts of the tourism industry.
It's a truly humbling experience to be amongst such incredible beauty, and the fact that the residents of Lofoten are working hard to preserve that beauty for future generations is quite inspiring.
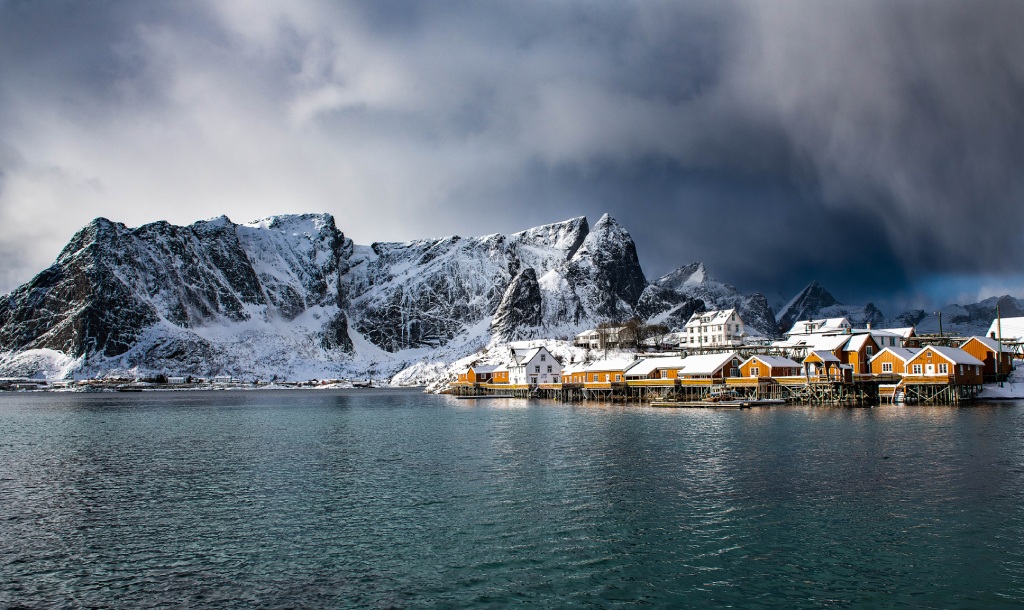
I'll get into the specifics of the locations we spent most of our time in future articles in this series, but to give a broad overview, Hamnøy, Reine, and Svolvær are must-see locations when you're in this neck of the woods.
Reine, shown above, was one of my favorite spots because of the gold-colored huts.
As you can see, there is the potential for some truly dramatic skies during the afternoons there!
Hamnøy is the "it" spot in the Lofoten Islands. It's a tiny island and fishing village with the iconic red fishing huts dotting the rugged coastline.
But now that I think about it, there are tons of "it" photography spots in Lofoten. It's just incredible how much beauty there is to see.
Like I said above, I'll be writing more detailed Norway photographic and travel guides in the coming weeks, so stayed tuned for those so you can get more specific details on this magical place.
We Recommend
Namibia Photography and Travel Guide
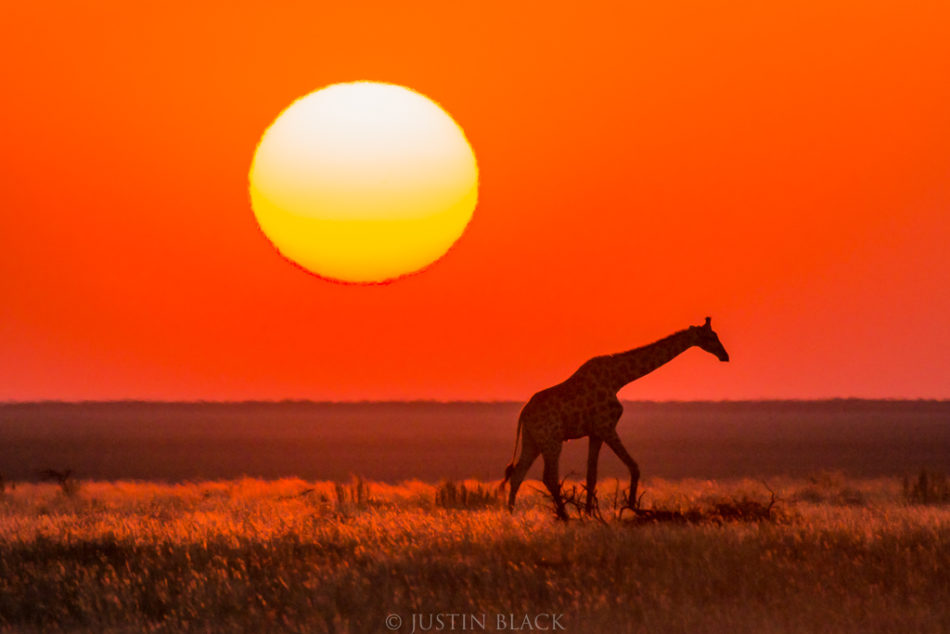
Image Credit: Justin Black
Namibia isn’t referred to as “Africa’s desert gem” for nothing.
It is a country of breathtaking beauty with awe-inspiring deserts with soaring dunes, plentiful wildlife, and abandoned ghost towns that serve as a reminder of how harsh desert life can be.
Namibia is home to some of the most incredible landscapes on earth as well, including the Skeleton Coast and Etosha National Park, both of which are must-sees for landscape photography enthusiasts.
Namibia is a place that can capture your heart, mind, and spirit, and when you travel there with your camera, you very well might not want to come back!
In this Namibia photography and travel guide learn about a few must-see locations and how to plan your Namibia trip to maximize your photographic opportunities.
Let’s get started!
What to Photograph in Namibia - Sossusvlei’s Thousand-Foot Dunes
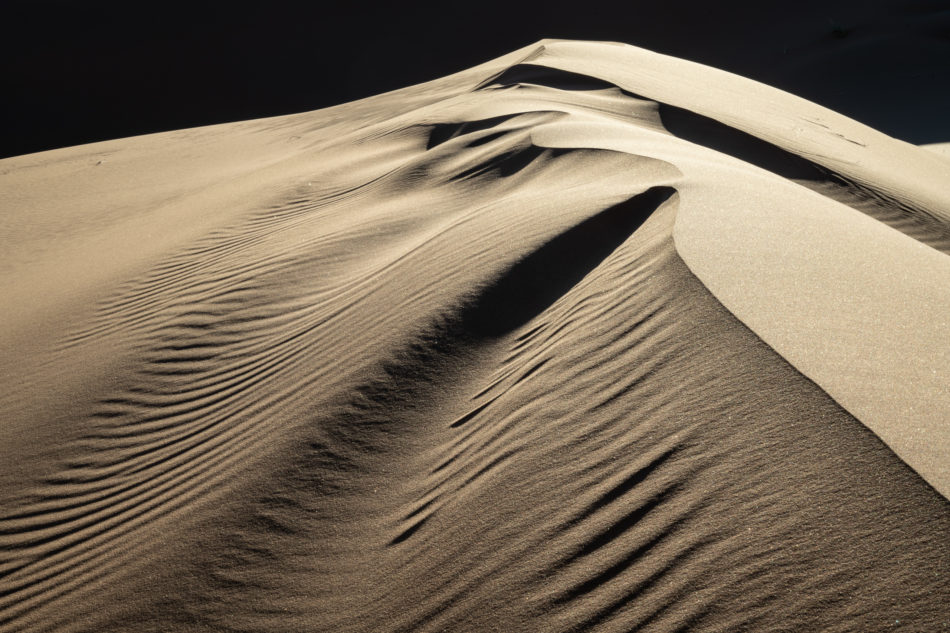
Image Credit: Eddie Soloway
The Sossusvlei region of Namibia is an interesting one, to say the least.
Located in Namibia’s Namib-Naukluft National Park, Sossusvlei is a salt and clay pan famous for its massive sand dunes.
The most interesting aspect of the dunes isn’t their height - some reach over 1,000 feet high - but instead it’s the colors of the sand that are the most fascinating.
You’ll find dunes that range from bright pink to dark orange, a variation that occurs because of oxidation (the sand has a very high iron content).
The longer the dunes have had to oxidize, the darker their coloring - old dunes are intensely red.
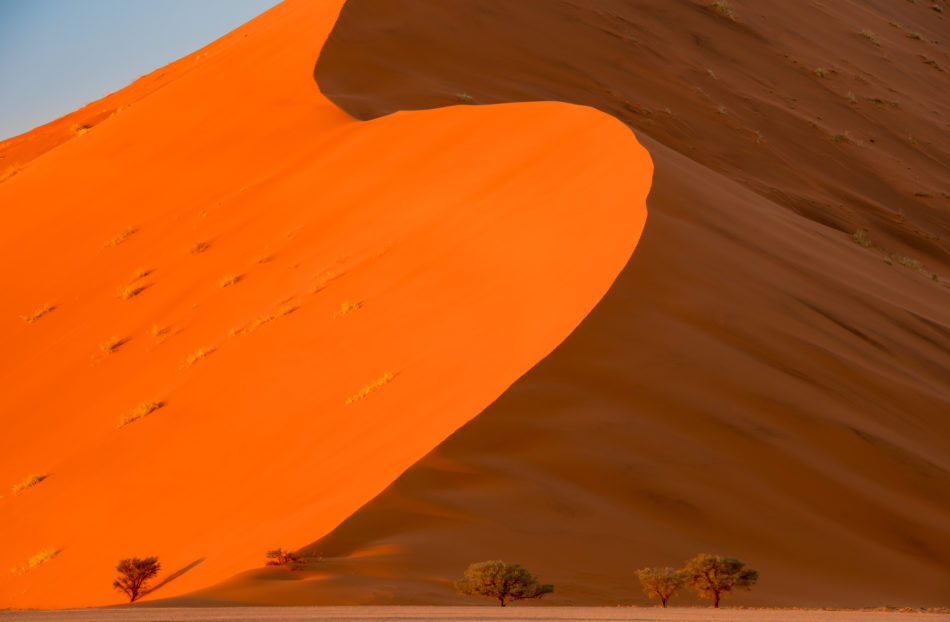
But the Sossusvlei region is much more than massive dunes...
Near the coast, the dunes give way to a completely different ecological zone, one with wetlands, lagoons, and mudflats.
Where the dunes harbor comparatively little life, their coastal neighbor is home to hundreds of thousands of birds and other animals that seek water, food, and shelter in the lagoons.
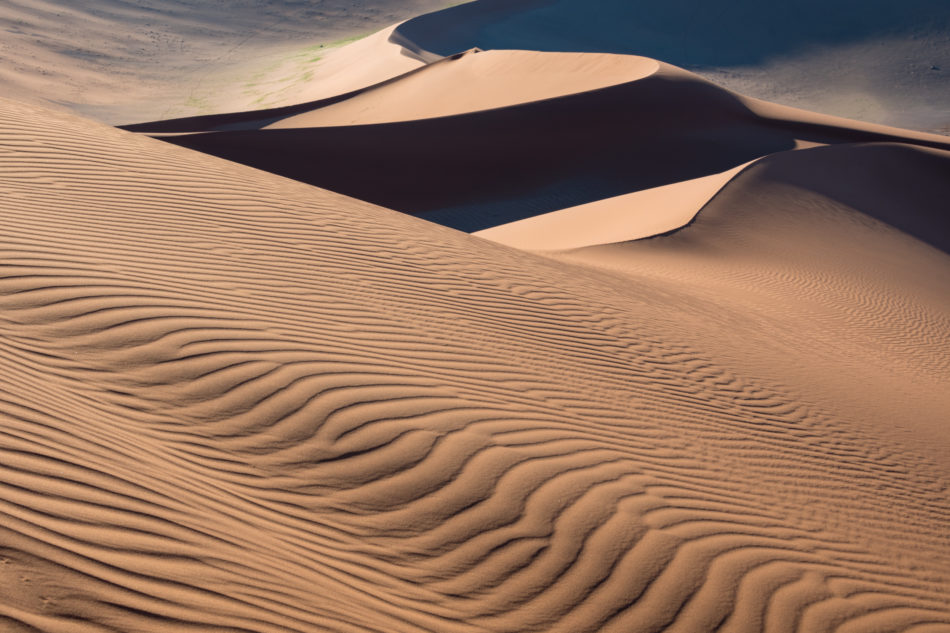
Quick Tip: Sidelighting is ideal for photographing dunes. As shown above, with the light entering the scene from the left, the right side of the dunes are cast in shadow to give the shot incredible contrast. What’s more, the sidelighting highlights the ripples in the sand created by the wind. The result is a photograph with incredible dimension!
What to Photograph in Namibia - The Wildlife of Etosha National Park
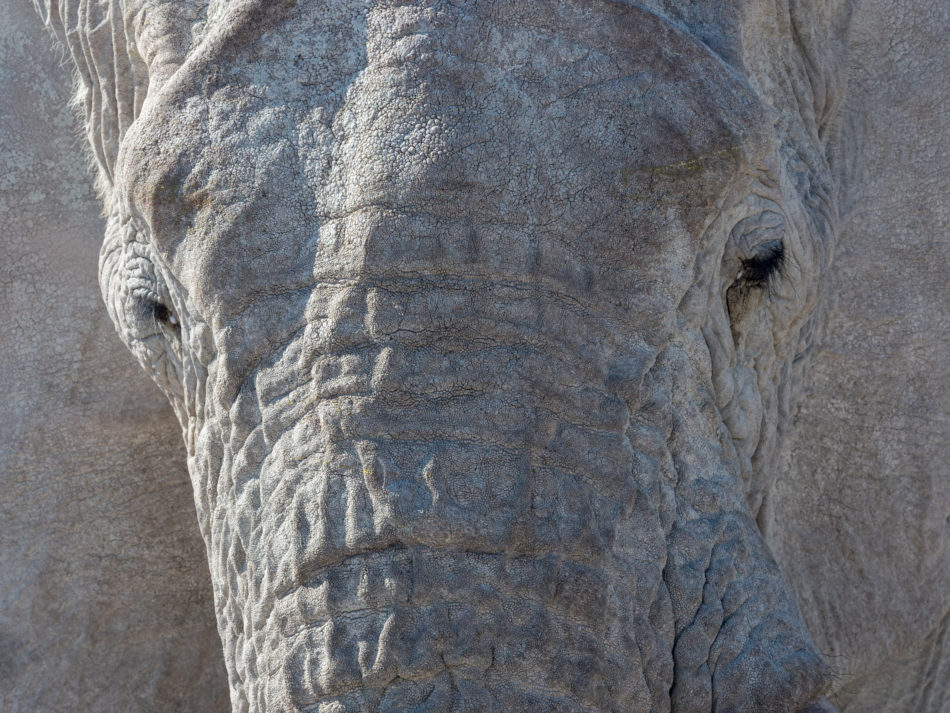
Considered the greatest wildlife sanctuary in Namibia, Etosha National Park is a must-see location if wildlife photography is on your agenda.
Though the majority of the park is a salt pan (which is so large it can be seen from space), wildlife from around Southern Africa migrates to the park’s many watering holes to satisfy their thirst.
To say that wildlife here is abundant is an understatement - you’re all but guaranteed to see game each time you venture out into the park, both because of the sheer number of animals and because the park is one of the most accessible reserves in all of Southern Africa.
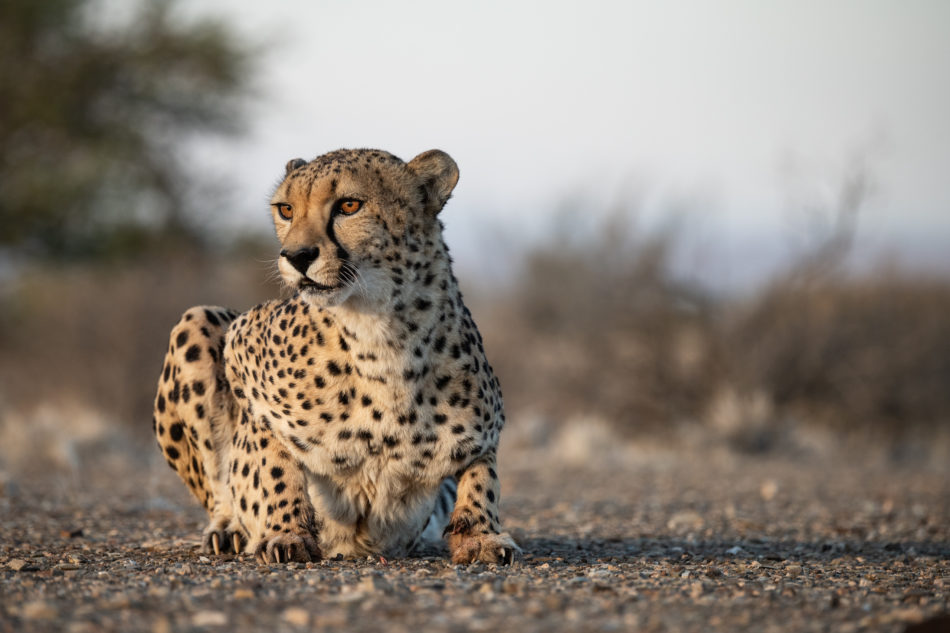
Image Credit: Eddie Soloway
The park offers a glimpse at both common and elusive wildlife species.
For example, elephants are found in large numbers, particularly in the areas of the park with thick vegetation. Lions, giraffes, and many common kinds of birds (all 340 species of them!) are easily spotted in many locations in the park.
At the same time, you can spot elusive leopards and the endangered black rhinos in the park, as well as the world’s largest bird, the ostrich, and the heaviest flying bird, the kori bustard.
Of course, the best time to visit this area is in the heat of the summer, when animals come from far and wide to find replenishment during the dry season.
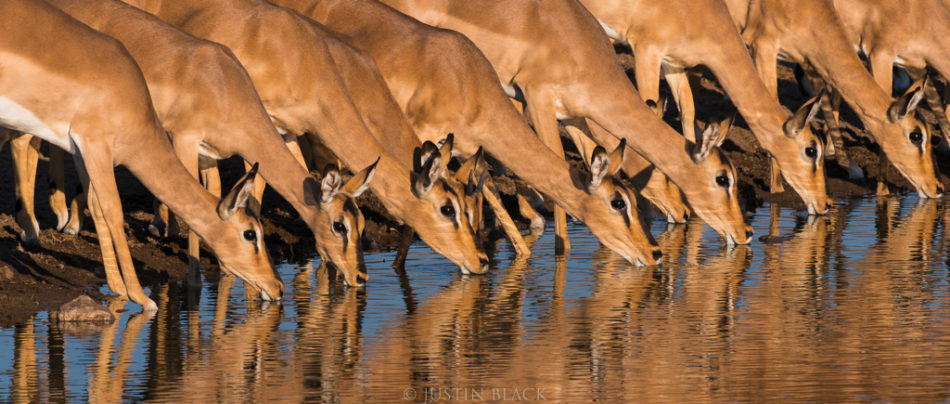
Image Credit: Justin Black
Quick Tip: At 8,598 square miles, Etosha National Park isn’t exactly small. As a result, plan for several days to explore its beauty. There are three main camps inside the park (Okaukuejo, Halali and Namutoni) that offer sleeping accommodations, restaurants, shops, and recreational opportunities. Deeper in the park are three more camps, Olifantsrus, which offers camping only, and Dolomite and Onkoshi, both of which offer safari-like experiences.
What to Photograph in Namibia Abandoned Ghost Towns
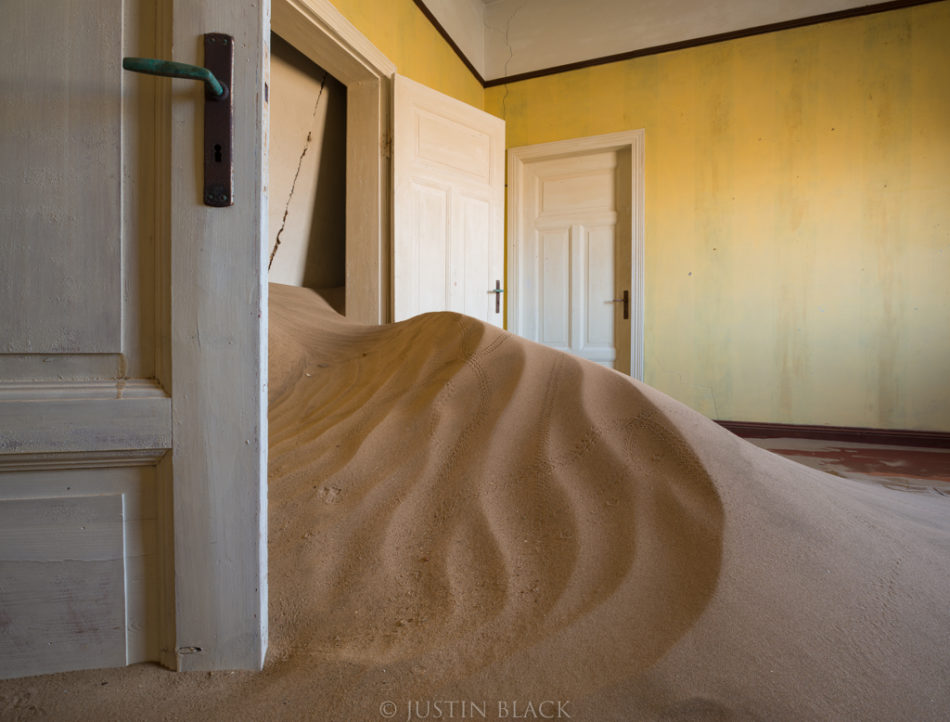
Image Credit: Justin Black
One of the most haunting scenes you’ll find in Namibia are its abandoned ghost towns that are slowly being reclaimed by the desert sands.
Kolmanskop, a once-bustling mining town, is a must-see. Its buildings still stand, but since the diamond mine there collapsed and its residents left, sand is overwhelming the buildings with dunes forming against their sides (and entering their doors and windows).
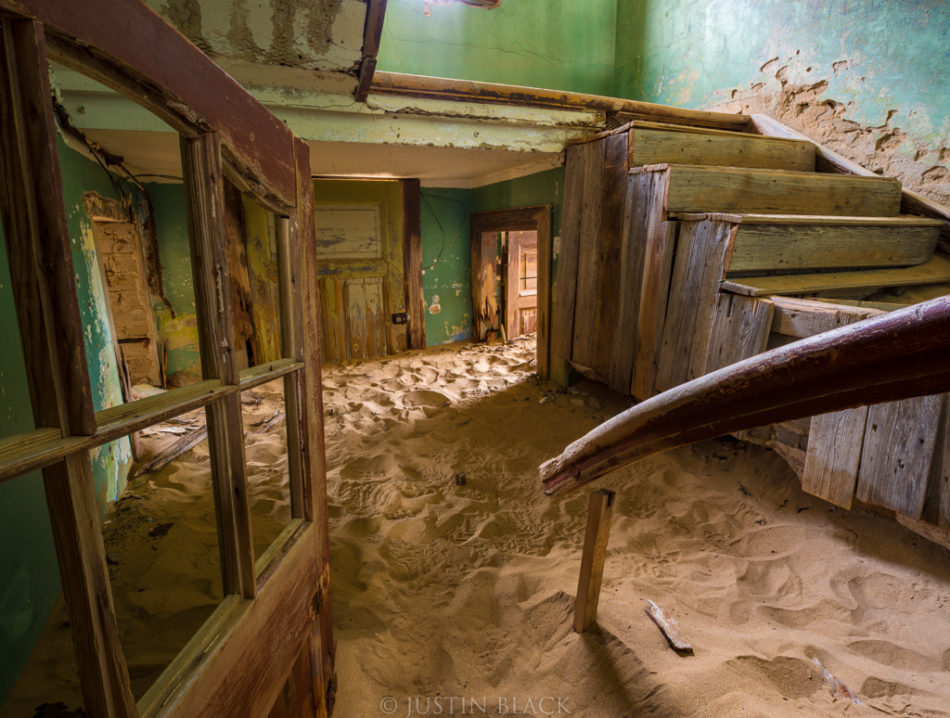
Image Credit: Justin Black
The town’s buildings bear the architectural style associated with German towns, thanks to the German control of the area in the early 20th Century after diamonds were discovered.
The dry climate has preserved the buildings, which are in shockingly good condition, apart from the knee-deep sand that now covers their floors.
Quick Tip: Elizabeth Bay is another abandoned mining town worth your time. Remains of the original town and mine still stand, though in the shadow of the new Elizabeth Bay Mine that opened in 1991 and is still in operation today.
How to Make the Most of Photographing Namibia
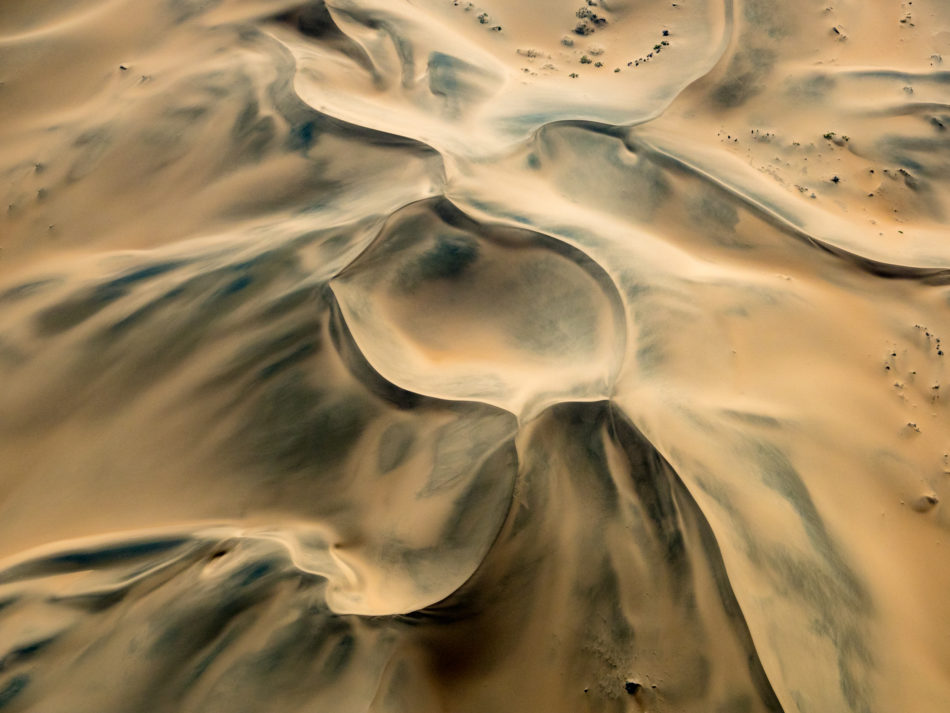
A photography trip to Namibia is on many people’s bucket list. So why don’t more people make the trek?
The primary difficulty with planning a photography trip to Namibia is simply determining where to go. With so many breathtaking sights and photo opportunities throughout the country, one could easily spend months there with a camera, yet most of us do not have that kind of time to do so!
It then becomes a difficult process of choosing the few locations you’ll get to see - a task that becomes doubly difficult after seeing photos of this impressive area. It’s simply so hard to decide.
That’s why traveling to Namibia as part of a photography tour makes so much sense…
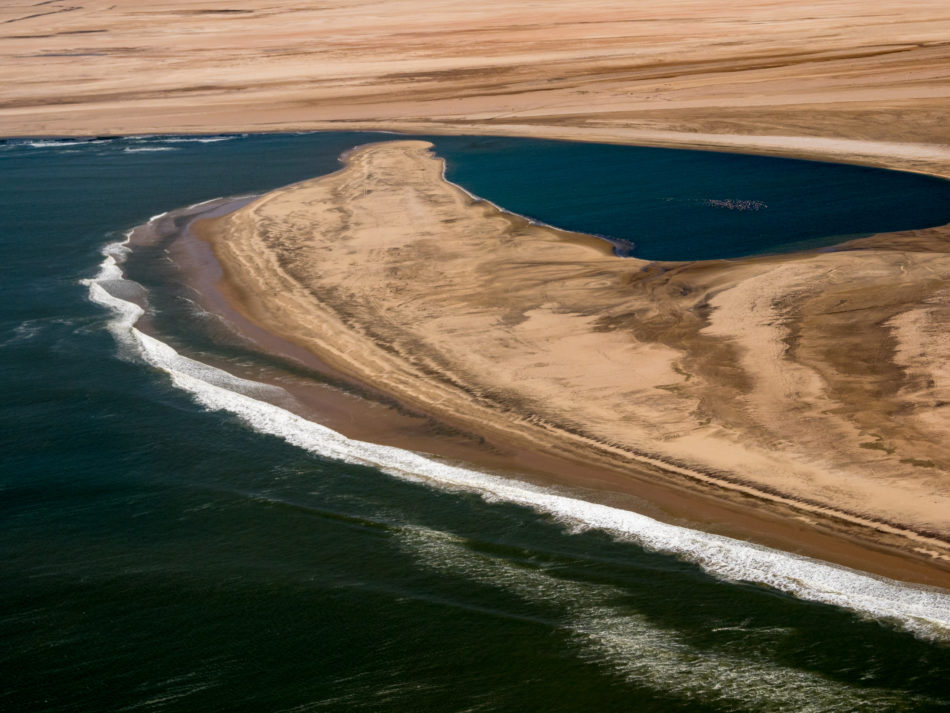
If you think about it, the hard parts are taken care of for you - creating an itinerary, determining when and where to go (and for how long), and arranging travel and accommodations in-country.
And, when you travel to Namibia with the likes of Visionary Wild, you’re led by world-renowned photographers Michael Melford and Eddie Soloway, both of whom have spent their fair share of time in Namibia.
That means that you get to learn from some of the best photographers in the world, but you also get to rely on their expertise to take you to iconic places and off-the-beaten-path areas that few tourists get to see.
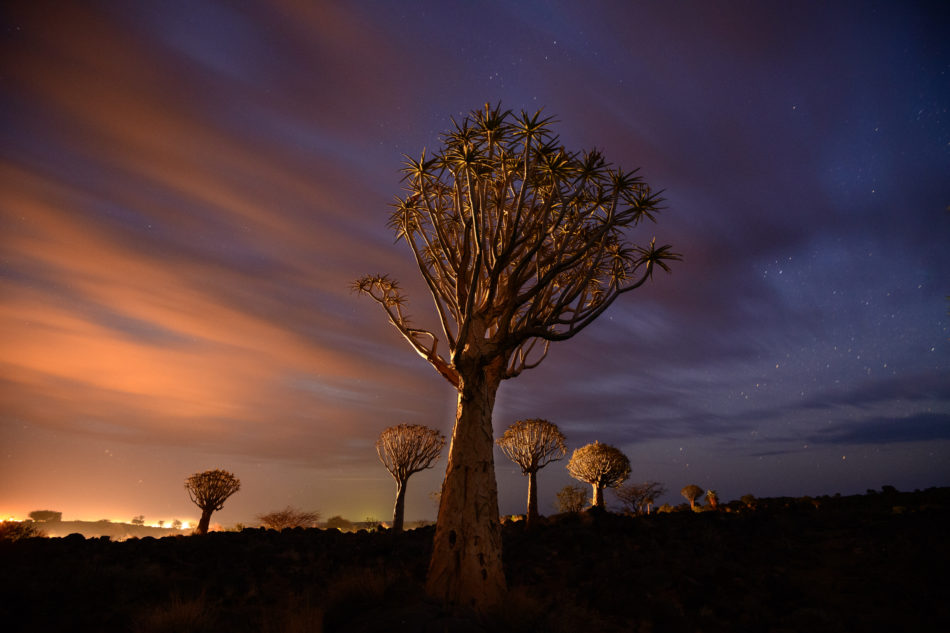
Visionary Wild’s Namibia expedition puts you in-country for two weeks (June 21-July 4, 2020). During that time, you’ll get to explore each of the locations described above, as well as many other photography hot spots in Namibia, including:
- The Quiver Tree Forest, where centuries-old trees and dolerite rock formations comprise the Giants Playground.
- Lüderitz, a mining ghost town that serves as an interesting relic of 19th and 20th Century German imperial aspirations.
- Swakopmund and Walvis Bay, two bustling cities on Namibia’s Skeleton Coast, which is named as such due to the large number of whales that have been stranded there, their skeletons still dotting the shore (which you can see from your private scenic airplane flight over the coast).
- Damaraland, a stunning landscape that’s home to the Brandberg, Namibia’s highest mountain, a millions-year-old petrified forest, and Twyfelfontein, a rocky outcropping that features thousands of engravings by Namibian bushmen.
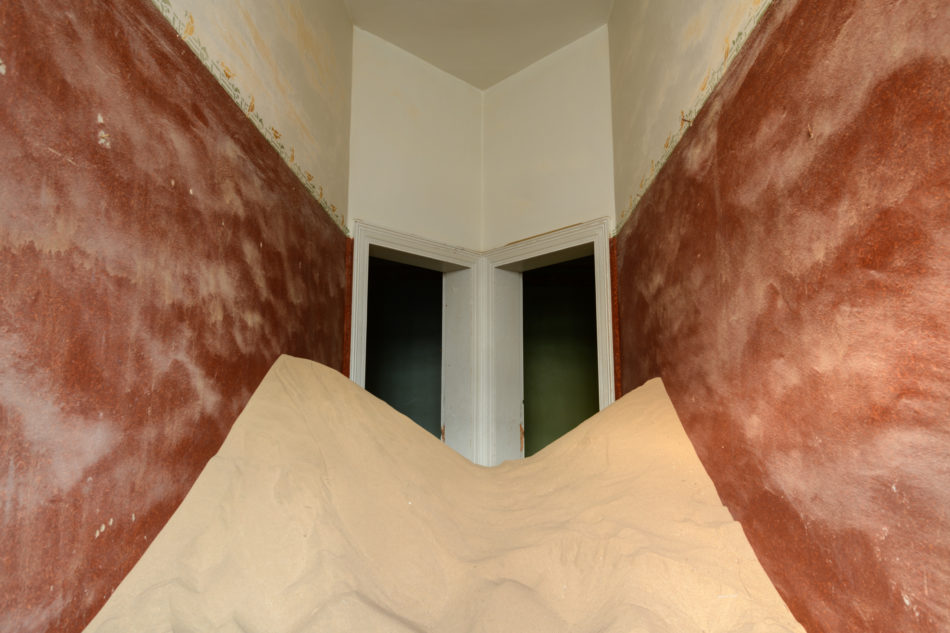
It’s an itinerary chock-full of adventure, but in amongst all that adventure, you get plenty of opportunities to learn more about photography and hone your skills behind the lens.
And since the expedition is limited to just six participants, the instructor-to-student ratio is just 3:1. That gives you ample time to get one-on-one instruction that will truly help you achieve your potential as a photographer.
There is truly no better way to experience Namibia and learn how to become a more skilled photographer than a small group photography expedition.
To learn more about Visionary Wild’s Namibia expedition, click here.
Other Tips for Planning a Namibia Photography Trip
- Where to fly into: Most international flights arrive at Hosea Kutako International Airport.
- Best luggage: For a trip of this length, the Nomatic Check-In roller bag is the ideal choice. It offers polycarbonate construction that stands up to the rigors of travel, silent wheels, low-profile handles, and a three-stage aluminum handle to fit your height. With space for 78 liters of gear, this bag has plenty of room for a 5-day trip or longer.
- Attractions & Things to Do: Take time out to explore the wildlife in Namibia's sand dunes. A stop in the coastal town of Swakopmund should be on your list of things to do as well. There, you can enjoy cool ocean breezes and visits with the friendly locals.
- Best Time of Year to Visit: Summer to early fall is the prime travel season to Namibia. Wildlife is extremely active during this time and the chances of rain are low.
- Check the weather in Namibia right now.
We Recommend
North Rhine-Westphalia, Germany Photography Travel Guide
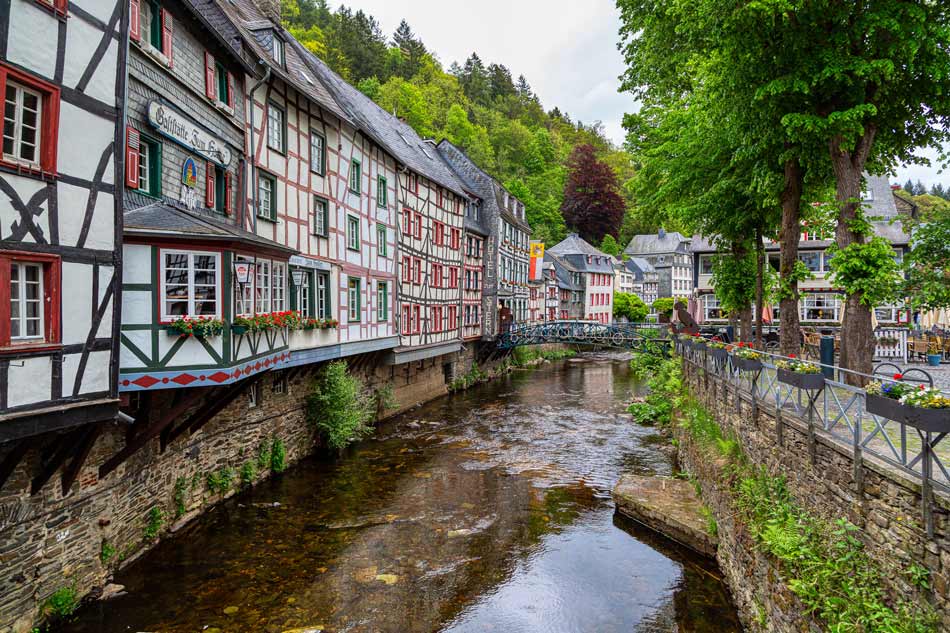
Monschau, Germany. Photo by Siegmund Bergemann.
The North Rhine-Westphalia area is one of Germany’s most diverse, fascinating and less-traveled regions.
The post-industrial Ruhr district, north of Cologne, is home to some of the world’s most unusual industrial heritage sites. The Zollverein complex in Essen, a UNESCO World Heritage Site, was once the largest coal processing facility in the world. Known as “the world’s most beautiful coal mine”, Zollverein is renowned for its architecture and historical significance and offers intriguing compositions and colors for photographers.
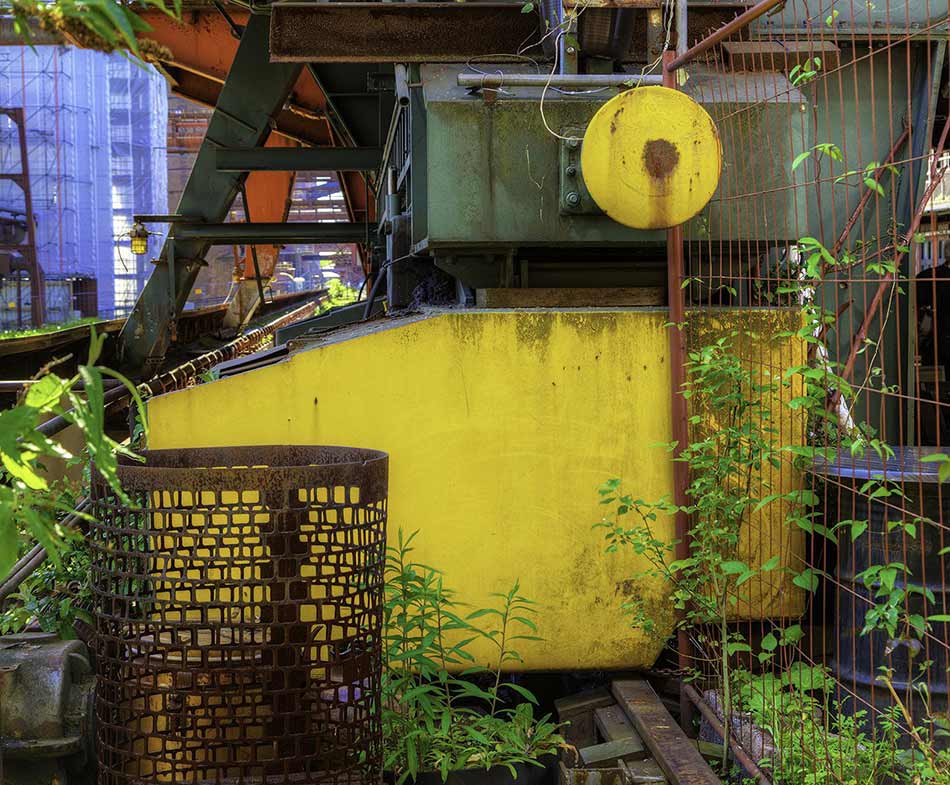
The Zollverein coal complex. Photo by Siegmund Bergemann.

The Zollverein coal complex. Photo by Siegmund Bergemann
In nearby Duisburg, tour Landschaftspark, the turn-of-the-century steel works decommissioned in the 1980s, with its photo-ready blast furnaces, inclined lifts and casthouses.
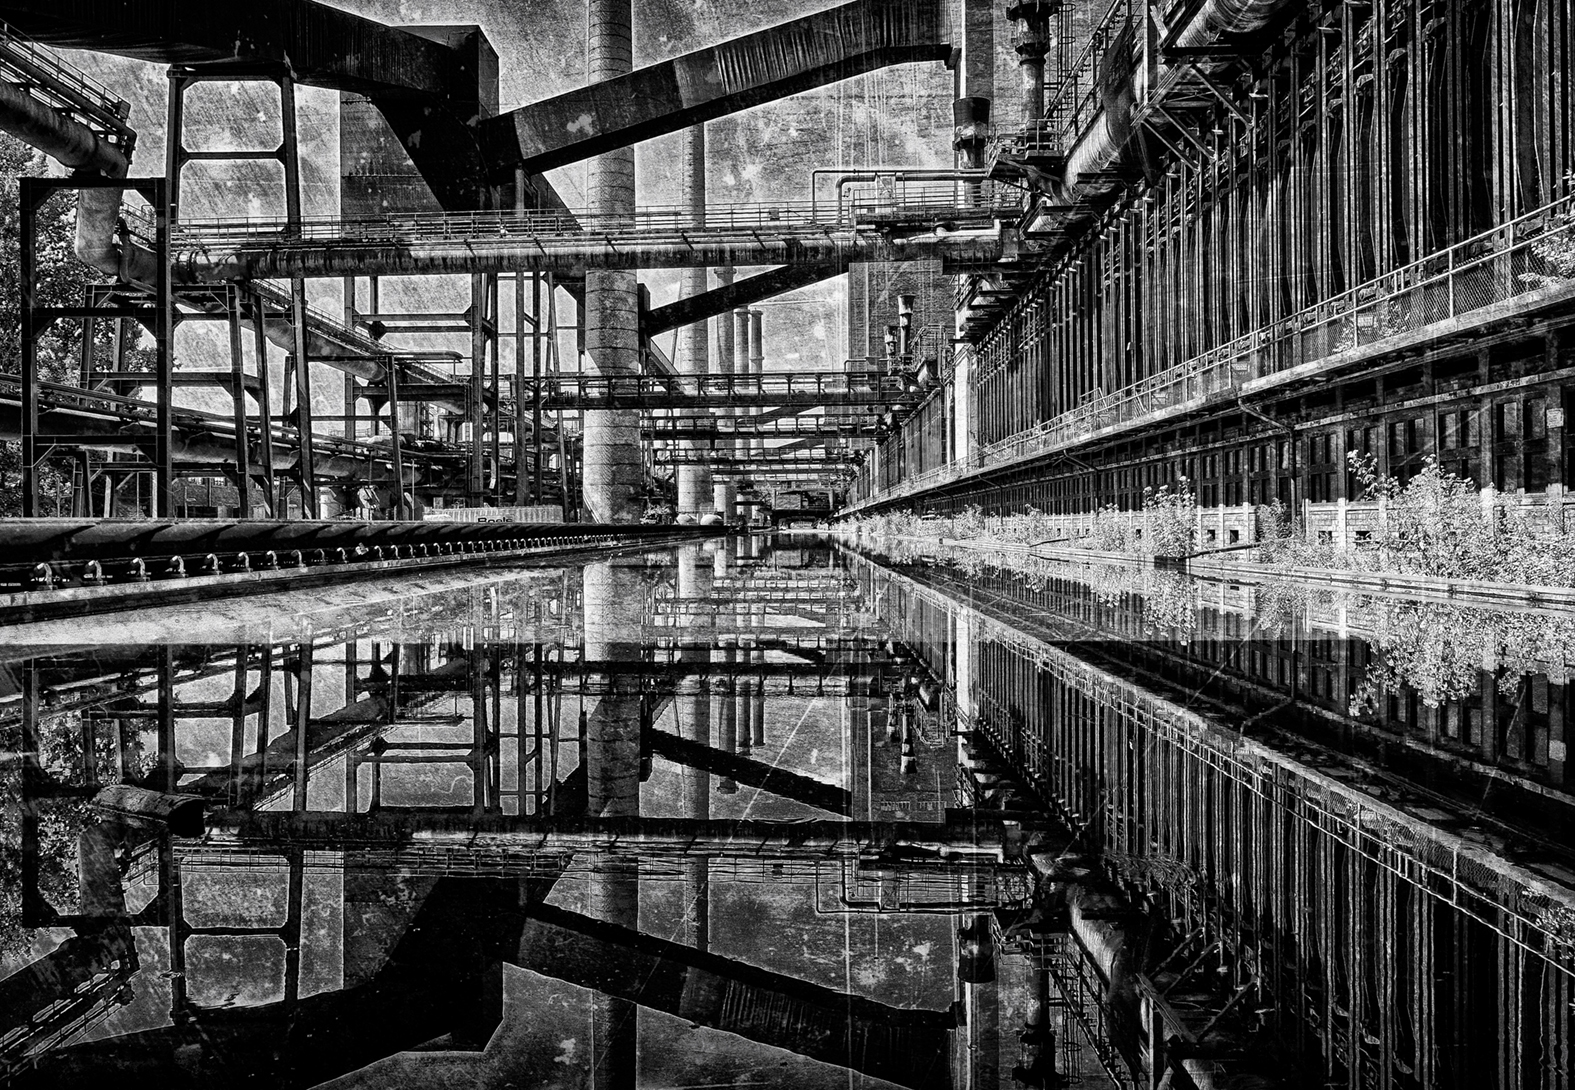
Landschaftspark, Duisburg, Germany. Photo by Siegmund Bergemann.
Aachen, west of Cologne, bordering on the Netherlands, is an iconic Westphalian town renowned as the capital of Charlemagne's Frankish empire and a destination for royalty over the centuries. Aachen offers photographers stunning medieval structures, including Aachen Cathedral, a UNESCO World Heritage site, combined with a lively street scene.
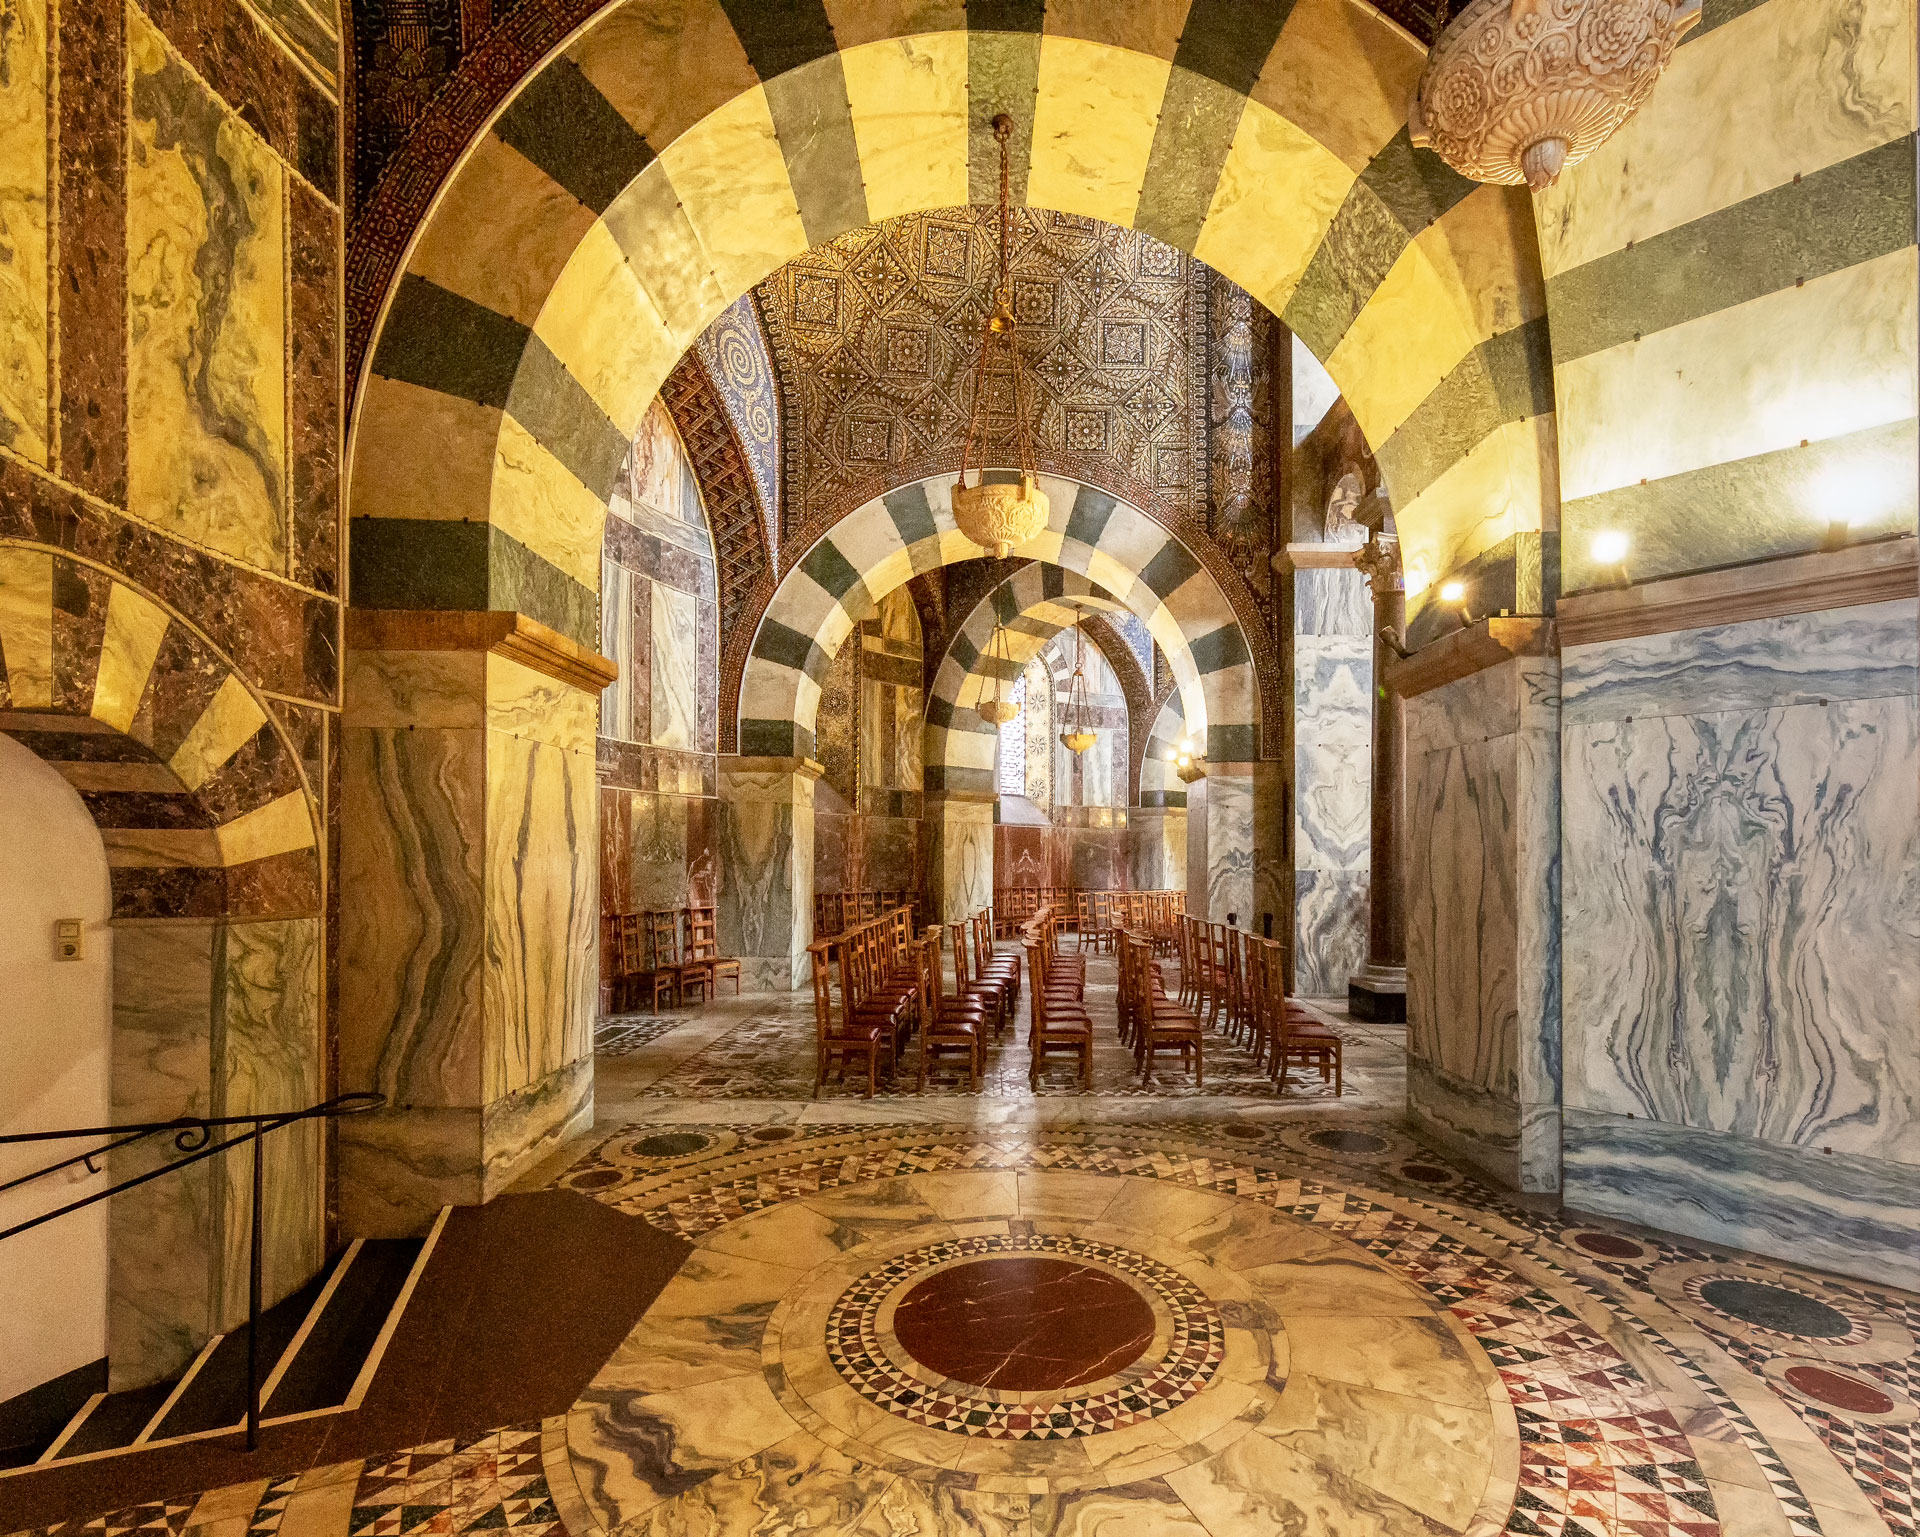
Aachen Cathedral. Photo by Siegmund Bergemann.

Aachen street scene. Photo by Siegmund Bergemann.
In May, 2020, the world-famous city of Cologne hosts Photokina, the world's leading fair for imaging, introducing the very latest in new products, trends and new model announcements.
The famed Cologne Cathedral, a UNESCO World Heritage site and an iconic example of High Gothic architecture set amid a reconstructed old town, is a short taxi ride from the fair location.

Photokina, Cologne. Canon Pro Stock Photo.
Cologne Cathedral. Photo by Alan Kesselhaut.
Approximately 45 minutes south of Aachen sits the quintessential German town of Monschau, with its picturesque narrow cobblestoned streets and traditional half-timbered houses, largely unchanged for over 300 years.

Monschau. Photo by Siegmund Bergemann.
The area surrounding Monschau offers photographers pretty views of the Westphalian and Belgian countryside.
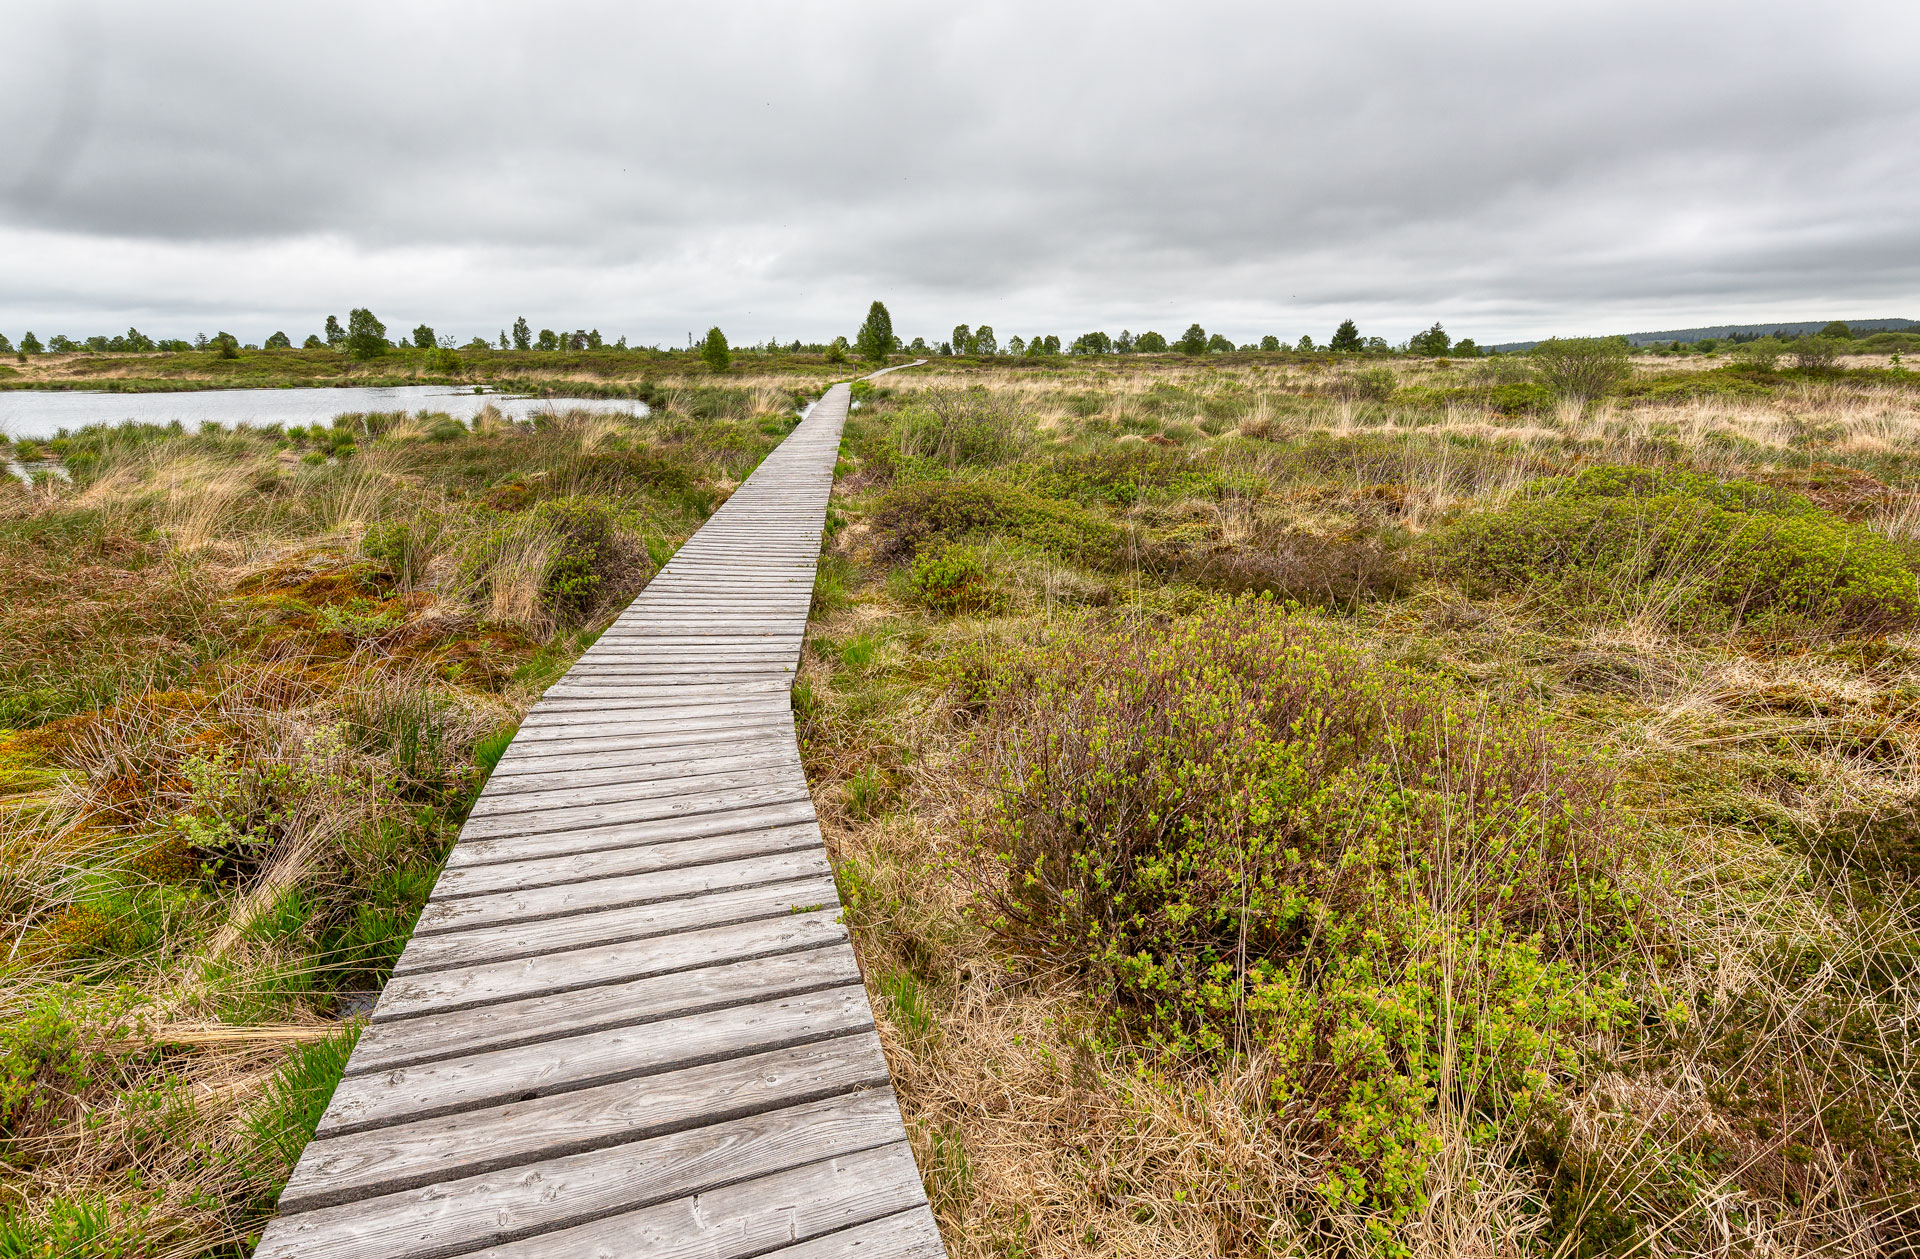
Monschau area. Photo by Siegmund Bergemann.
All of these destinations are included in Princeton Photo Workshop’s North Rhine-Westphalia-Photokina Photography Tour & Workshop, May 24 - May 30, 2020.
- Read MORE
- See the full ITINERARY
- Meet the workshop INSTRUCTORS
Other Tips for Planning a North Rhine-Westphalia Photography Trip
- Where to fly into: Düsseldorf International Airport offers easy access to the North Rhine-Westphalia area.
- Best luggage: For a trip of this length, the Nomatic Check-In roller bag is the ideal choice. It offers polycarbonate construction that stands up to the rigors of travel, silent wheels, low-profile handles, and a three-stage aluminum handle to fit your height. With space for 78 liters of gear, this bag has plenty of room for a 5-day trip or longer.
- Attractions & Things to Do: Take time to explore the many castles in the area, including Schloss Drachenburg and Schloss Nordkirchen.
- Best Time of Year to Visit: Late spring and early summer (April-July) usually offers warm temperatures and great weather.
- Check the weather in the Düsseldorf area right now.
We Recommend
Northern Lights: Best Places to See Them
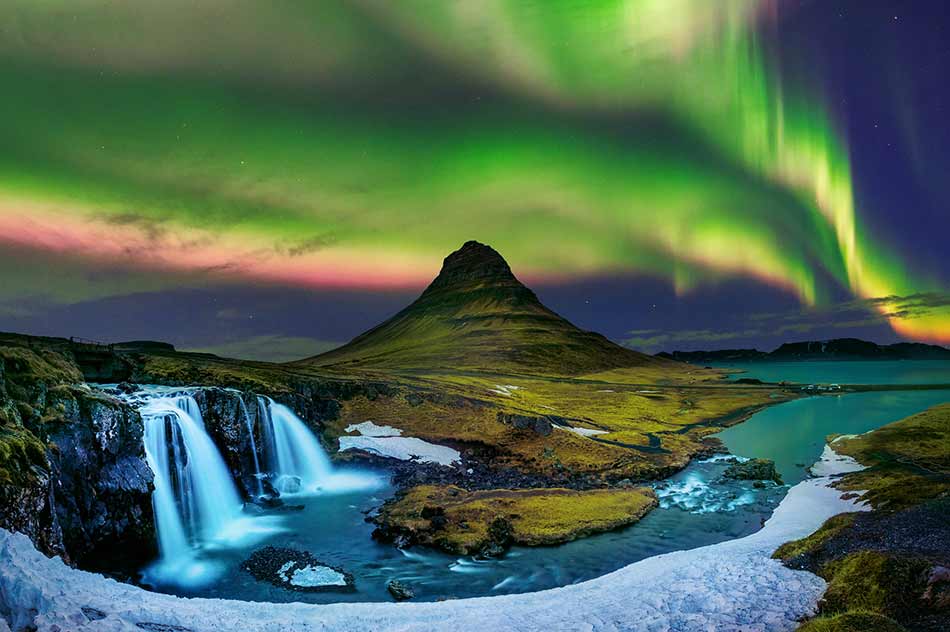
photo bytawatchaiprakobkit via iStock
One of the most beautiful phenomena you can witness in the northern hemisphere is the northern lights, or the Aurora borealis.
The dancing lights are certainly a wonder on their own, but when they’re paired with some truly beautiful landscapes, you have the makings of absolutely breathtaking photos.
That begs the question, where can you see the northern lights?
Let this guide direct you to some of the best vantage points for viewing and photographing the Aurora.
Table of Contents
- What are the Northern Lights?
- What Causes the Northern Lights?
- When Can You See the Northern Lights?
- Where to See the Northern Lights: Alaska
- Where to See the Northern Lights: Pennsylvania
- Where to See the Northern Lights: Canada
- Where to See the Northern Lights: Iceland
- Where to See the Northern Lights: Norway
- Where to See the Northern Lights: Finland
- Where to See the Northern Lights: Sweden
- Where to See the Northern Lights: Greenland
- Where to See the Northern Lights: Scotland
What are the Northern Lights?

photo byden-belitsky via iStock
Before we dive into where to see them, it’s worth it to explore what they are in the first place and what causes the northern lights.
The Aurora borealis (known as the Aurora australis in the southern hemisphere) is perhaps best known for pale green waves of color that appear to be dancing in the sky.
However, green is just one color that might be present - colors can actually range from yellow to violet and blue to red. Likewise, the dancing waves are just one form they might take. A simple glow in the sky is common, as are arcs of light, beams or rays of light, and streams of light in the night sky.
What Causes the Northern Lights?

photo bysolarseven via iStock
What causes the northern lights is the collision between particles from the sun that hit the Earth’s atmosphere.
More specifically, the electrically-charged particles released from the atmosphere of the sun collide with the gaseous particles in Earth’s atmosphere.
The type of particles involved influences the color of the northern lights.
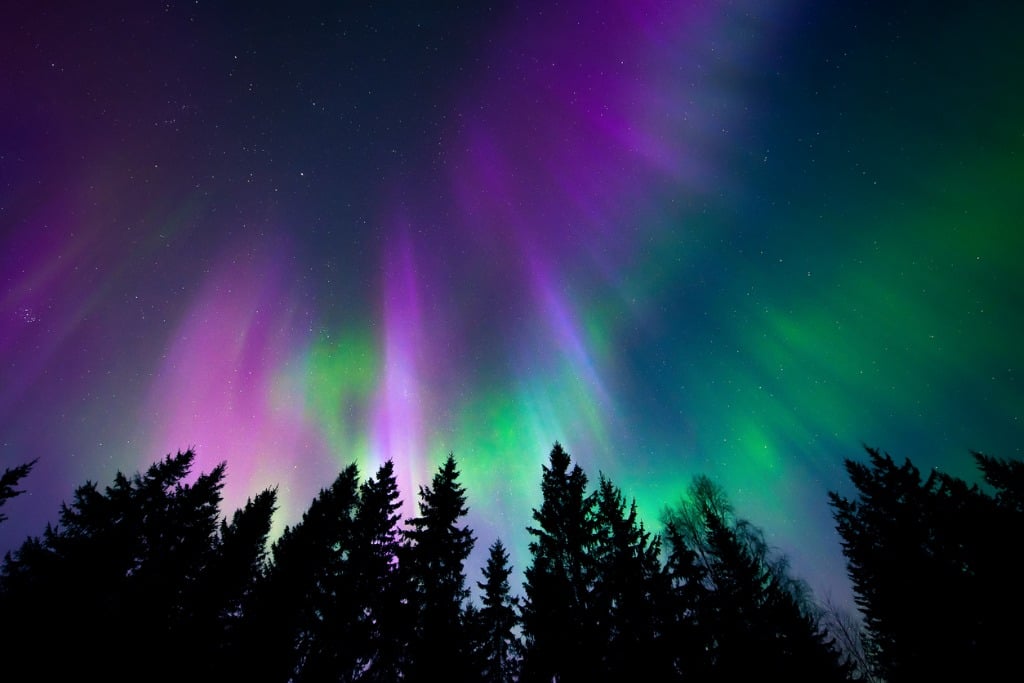
photo byFrozenmostvia iStock
For example, the most common color of the Aurora is a pale green with yellow undertones. This color is created by oxygen molecules in Earth’s atmosphere, typically at an altitude of 60 miles, but up to 150 miles as well.
Nitrogen molecules are associated with blue and purple Auroras, while red Auroras - the rarest kind - are the result of oxygen molecules at extremely high altitudes of around 200 miles above the surface of the Earth
Get a deeper explanation of what causes the northern lights, and what ancient peoples believed them to be, in the video above by BrainStuff - HowStuffWorks.
Learn More:
When Can You See the Northern Lights?

photo by mantaphoto via iStock
Apart from the obvious necessity of being nighttime, the best time to see the northern lights is in the winter.
Not only are the nights longer in the winter, but clear nights are also in greater abundance, giving you an unobstructed view of the night sky.
The prime time is around midnight local time, as that seems to be the peak of activity for the Aurora. Likewise, Aurora displays are cyclical in nature, and peak with heightened activity roughly every 11 years. This would mean the next “super Aurora” should occur in 2024.
Where to See the Northern Lights
Where are the northern lights? Fortunately, they’re all over the place in the Northern Hemisphere from Canada to Scandinavia, Russia to the continental United States.
But if you want the very best locations to see and photograph them, book a flight to one of the following locations.
Where to See the Northern Lights: Alaska

photo by Elizabeth M. Ruggiero via iStock
Fairbanks, Alaska’s second-largest city, is situated directly beneath an active band of northern lights activity that runs from August through April, which makes it a prime location for viewing the Aurora.
Typically most active between 11:30 pm and 3:30 am, there’s a significant window during which to take in the beauty of the lights, which range from green to yellow to purple.
Where to See the Northern Lights: Pennsylvania
Yes, that Pennsylvania…
More specifically, Cherry Springs State Park offers uber-dark skies far away from the hustle and bustle of cities like Philadelphia.
In fact, the park utilizes special lights that have zero effect on visibility and there are strict regulations about using headlamps, flashlights, and other light sources. For these reasons, the International Dark-Sky Association has designated the park as a Gold Level International Dark Sky Park, the highest possible ranking.
See the northern lights in action at Cherry Springs State Park in the video above by Gary Honis.
Where to See the Northern Lights: Canada

photo by NatashaWheatley via iStock
Head to the Yukon between August and the middle of April, and you’ll get to see spectacular shows of northern lights that swirl around the sky.
The lights are usually yellow or green (or a combination thereof), though other colors are present less frequently.
The Yukon is also home to the Northern Lights Centre, where you can learn about the scientific processes that cause the lights as well as the legends that peoples of the past developed to explain what the northern lights meant.

photo by Cheryl Ramalho via iStock
Another Canadian hot-spot for the northern lights is Churchill, a town in Manitoba that’s equally as well-known for its polar bear population.
With up to 300 nights of Aurora activity a year, it’s one of the best locations to get a glimpse of the lights.
Where to See the Northern Lights: Iceland

photo by ansonmiao via iStock
North, south, east, or west, Iceland offers epic locations for viewing and photographing the northern lights.
With shades of purple, pink, and green jetting across the sky, the combination of optimal nighttime viewing conditions and the rugged and beautiful landscape make this island country a top destination for northern lights photography.
If you’re wondering when you can see the northern lights in Iceland, the answer is about three-fourths of the year - from August to the first part of May.
Where to See the Northern Lights: Norway

photo by BublikPolina via iStock
Though you can view the northern lights from virtually anywhere in Norway, one of the prime viewing locations is Svalbard, a small group of islands roughly halfway between Norway’s northern coast and Greenland.
During the winter, Svalbard is in perpetual darkness because of its extreme northern location. That means you can view the northern lights day or night!

photo by mantaphoto via iStock
Another spot to check out in Norway is the city of Tromsø, which is right underneath an oval of lights in Northern Norway. Surrounded by fjords and mountains, it’s a breathtaking setting by itself, but under the glow of the northern lights, it’s even more spectacular.
Where to See the Northern Lights: Finland

photo by mantaphoto via iStock
Like Norway, Finland offers excellent viewing of the northern lights from virtually every corner of the country.
In fact, Finland experiences about 200 nights of the Aurora per year, so there’s no lack of time to grab your gear and snap some photos of the lights. The rural nature of much of Finland also means there’s an abundance of areas with little to no light pollution.
Where to See the Northern Lights: Sweden

photo by Oksana_Gracheva via iStock
Of course, Sweden, like the other Scandanavian countries on this list, offers excellent Aurora viewing.
Of particular interest should be the Aurora Sky Station, location in Abisko. With very little light pollution and clear, crisp skies, you can get epic views of the lights all night long from October through March.
Where to See the Northern Lights: Greenland

photo by RubyRascal via iStock
Greenland is an ideal location for photographing the northern lights because of its minimal light pollution. Likewise, visibility is often crystal clear for perfect views of the sky.
If you visit between September and April, you’re all but guaranteed to see the lights along with the Milky Way for a double-dip of celestial awesomeness!
Where to See the Northern Lights: Scotland

photo by Marc_Hilton via iStock
Though Scotland likely didn’t come to mind when you were searching for “where are the northern lights,” it’s a fantastic viewing spot, particularly in the far north, light the Shetland Islands.
Here, the northern lights are called Mirrie Dancers, and can be seen throughout the fall and winter months.
With that, you have some of the best places on earth to see the northern lights. Make plans to travel to one of these excellent locations this winter!
We Recommend
Off-the-Beaten Path Travel Destinations for Photographers
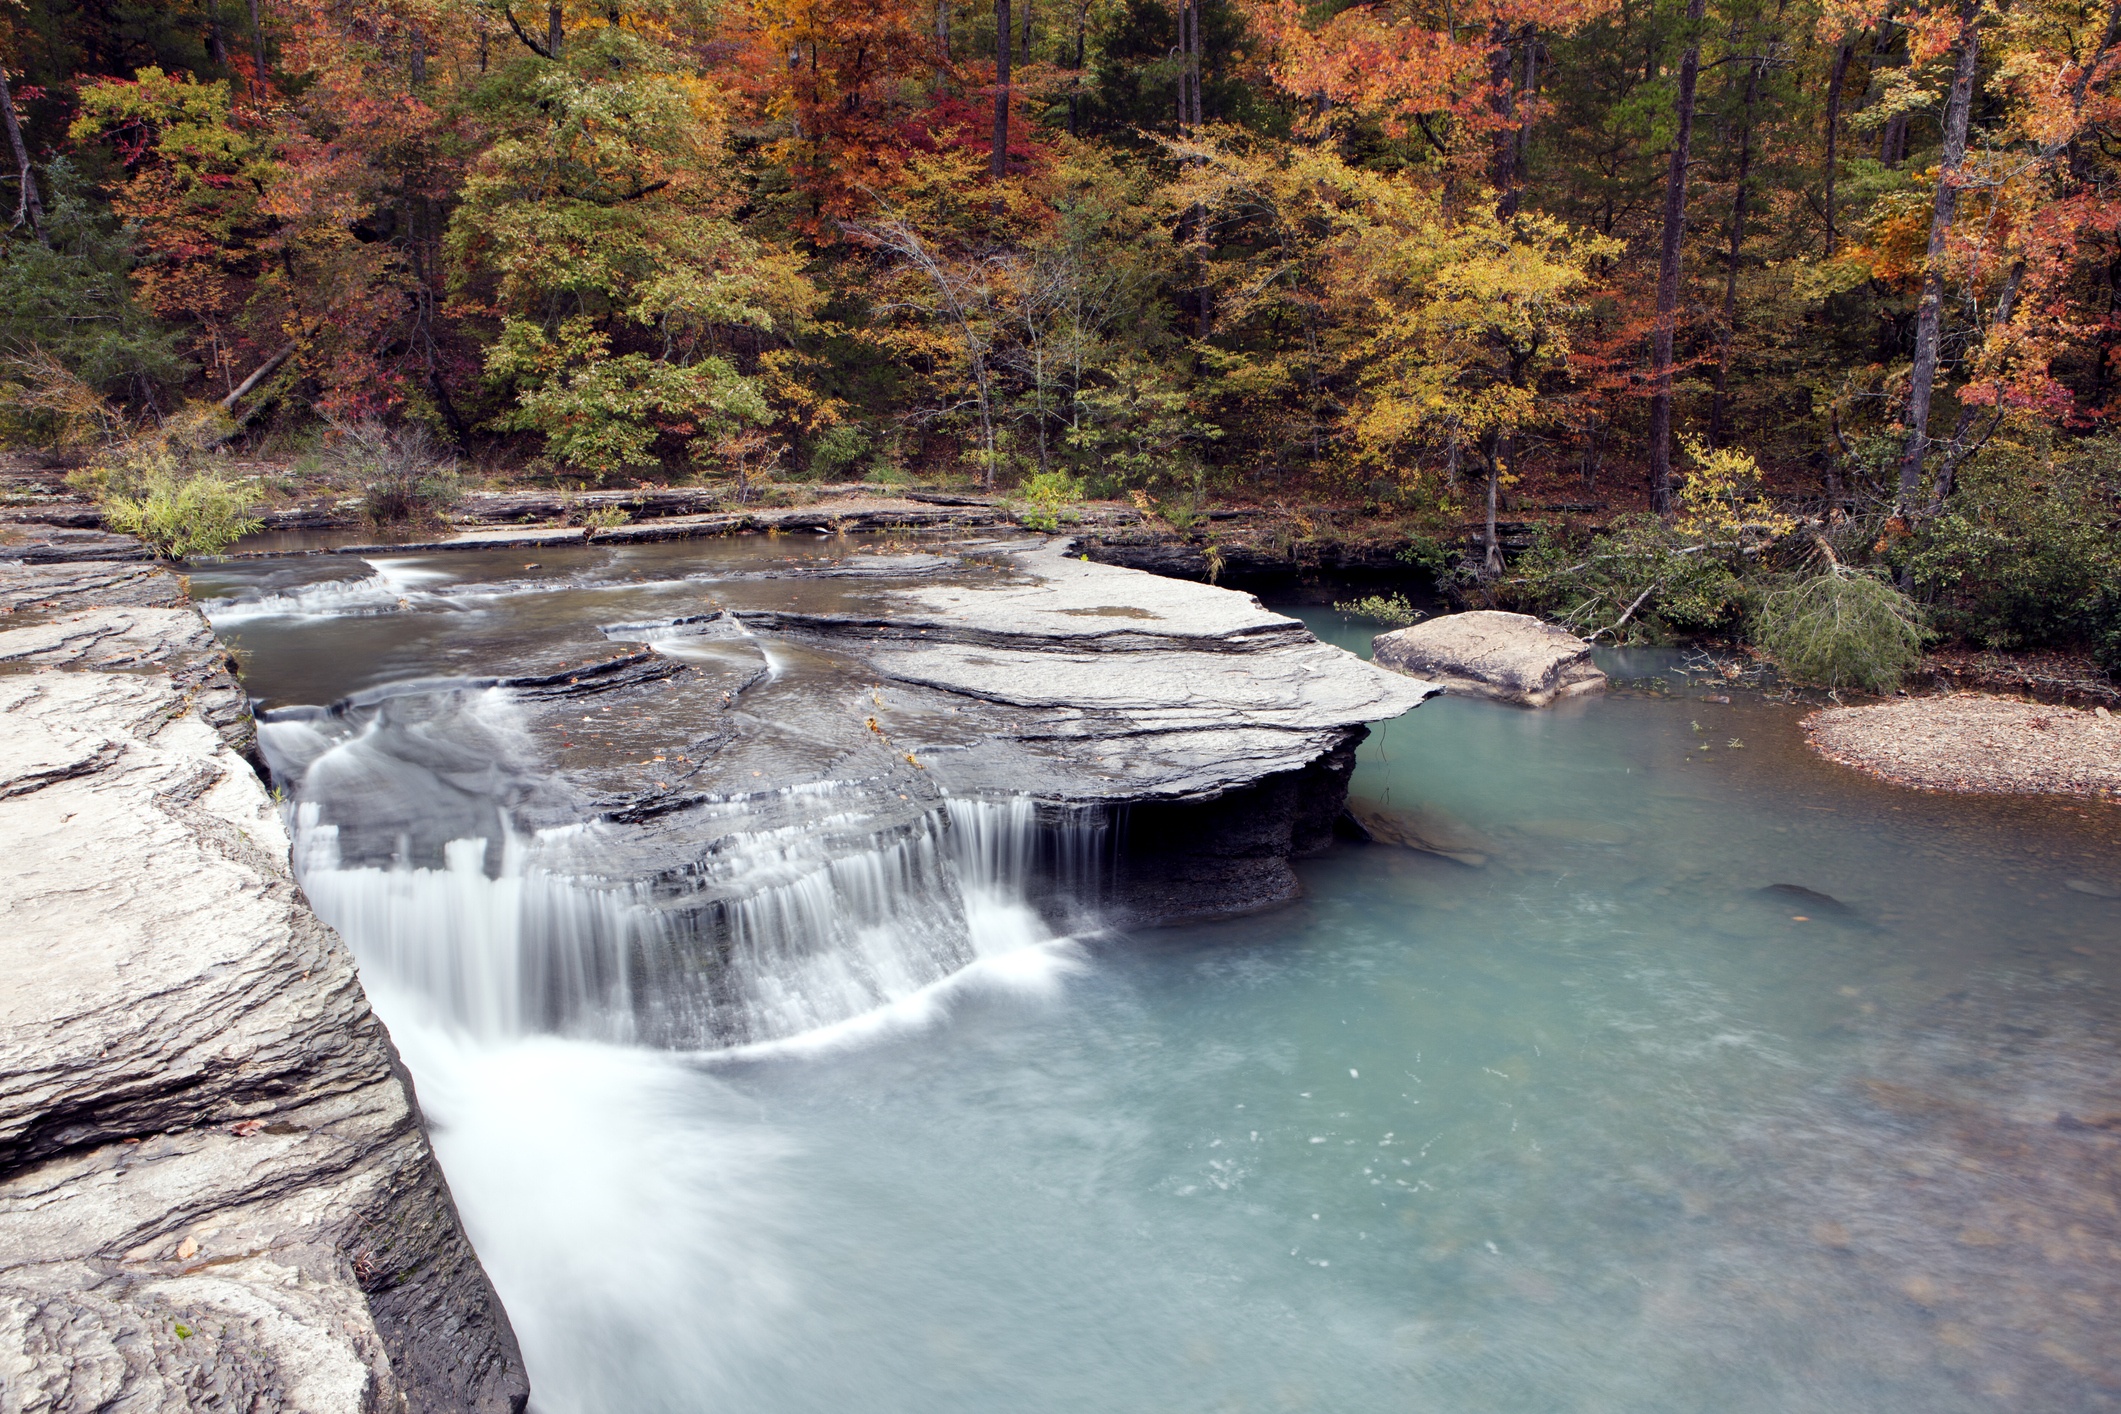 Photo by sestevens via iStock
When I think of the top travel photography destinations in the world, I think of the "big" places like the Swiss Alps, the African Plains, and Australia's Gold Coast.
And while these locations are certainly worth your while, there are many off-the-beaten-path locations where you can find all sorts of wonders to photograph - and without the huge crowds to fight, either.
Below, I've outlined a handful of must-see travel photography destinations that you likely have never heard of, but will definitely want to consider as your next go-to photography stop.
Table of Contents
- Mulberry River, Arkansas
- North Rhine-Westphalia, Germany
- Togwotee Pass, Wyoming
- Antarctica
- Costa Rica
Where to Travel With Your Camera: The Mulberry River, Arkansas
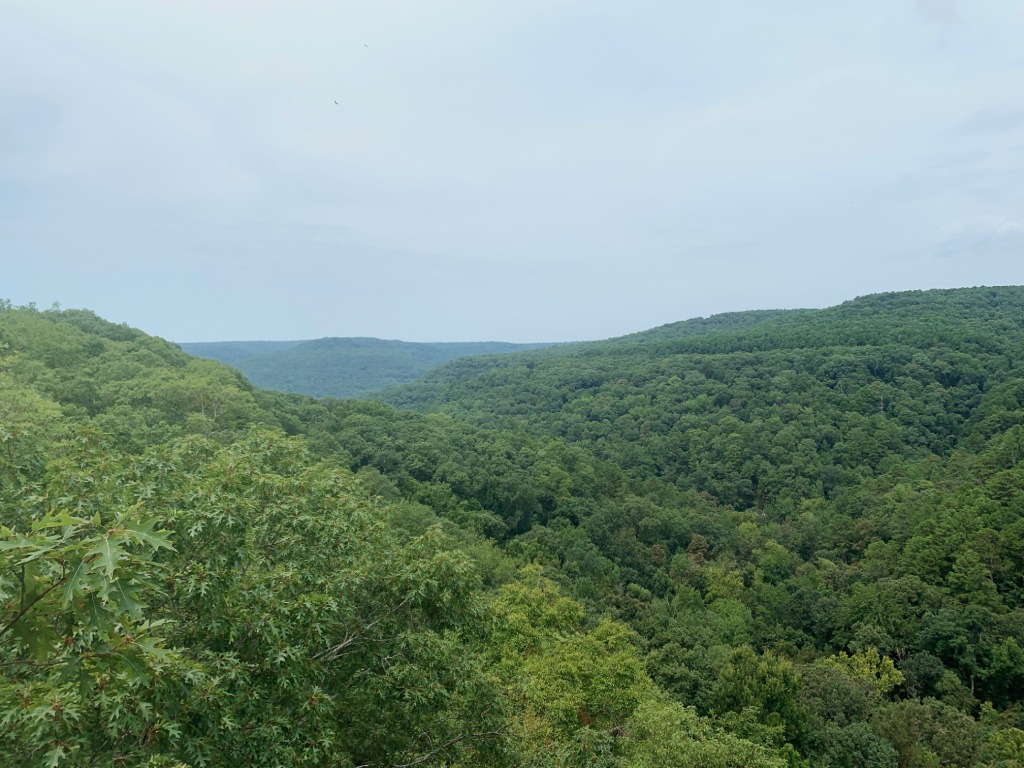
Though you might not immediately think of Arkansas as a landscape photography dream location, once you see the Mulberry River Area, you'll understand why it's a hidden gem.
The Mulberry River originates in the Boston Mountains, the most rugged area of the Ozarks. That means gorgeous mountain ridges, cliffs, and dense forests that you can explore with your camera.
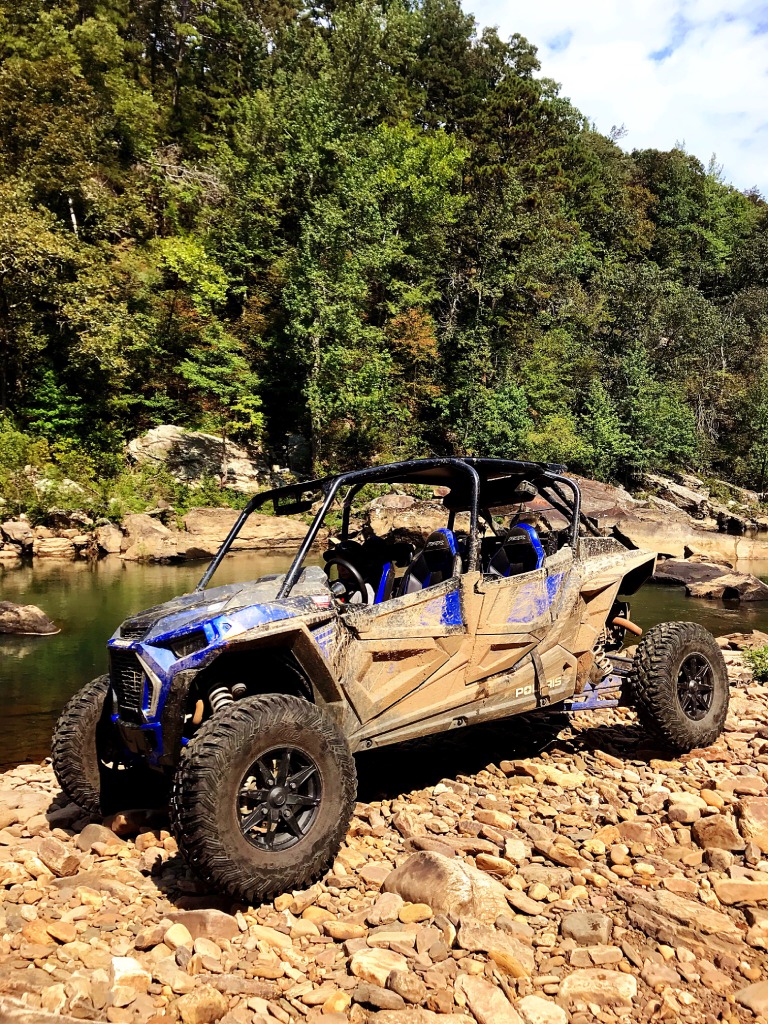
The river flows southwest toward the Arkansas River, completely unimpeded by dams. This means ample opportunities to photograph the beautiful landscapes reflected in calm pools. Likewise, there is an abundance of small waterfalls, babbling brooks, and moss-covered rocks along the way that provide further chances to capture the beauty of this area.
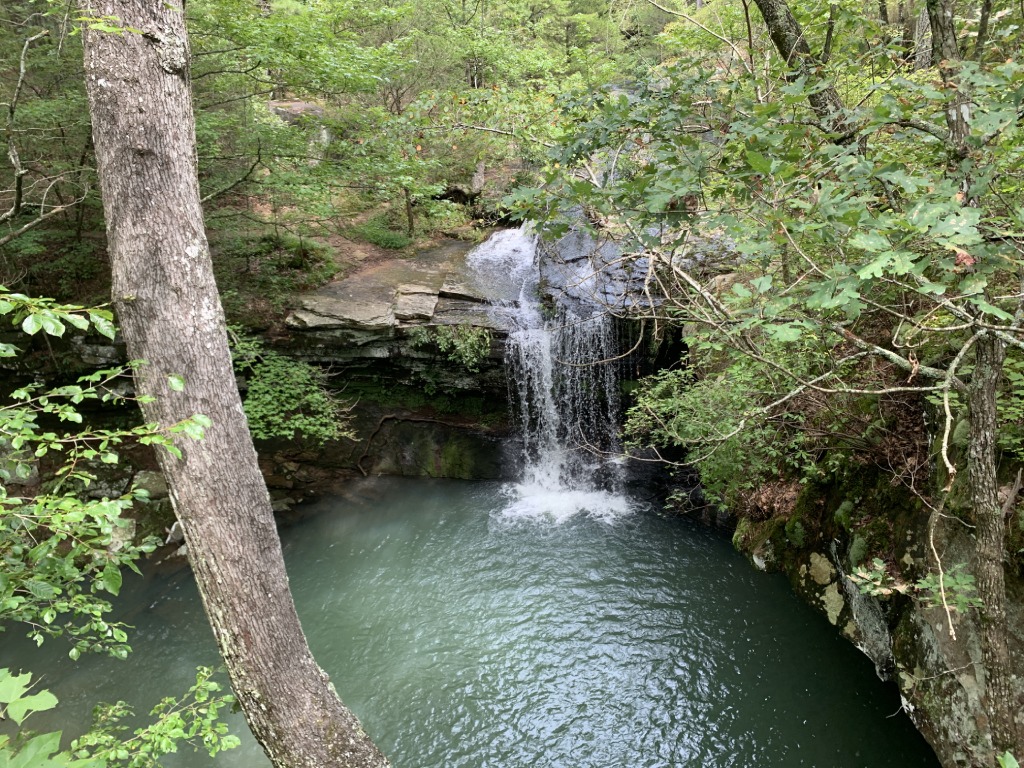
Depending on the time of year, you can enjoy whitewater rafting or a lazy float down the river.
There is an abundance of other recreational opportunities in this area too: kayaking, hiking, fishing, and riding ATVs, among them.
When visiting the Mulberry River Area, one of the best ways to take in nature's beauty is to stay right on the river.
For that, Mulberry River Outdoor Adventures is a great choice.
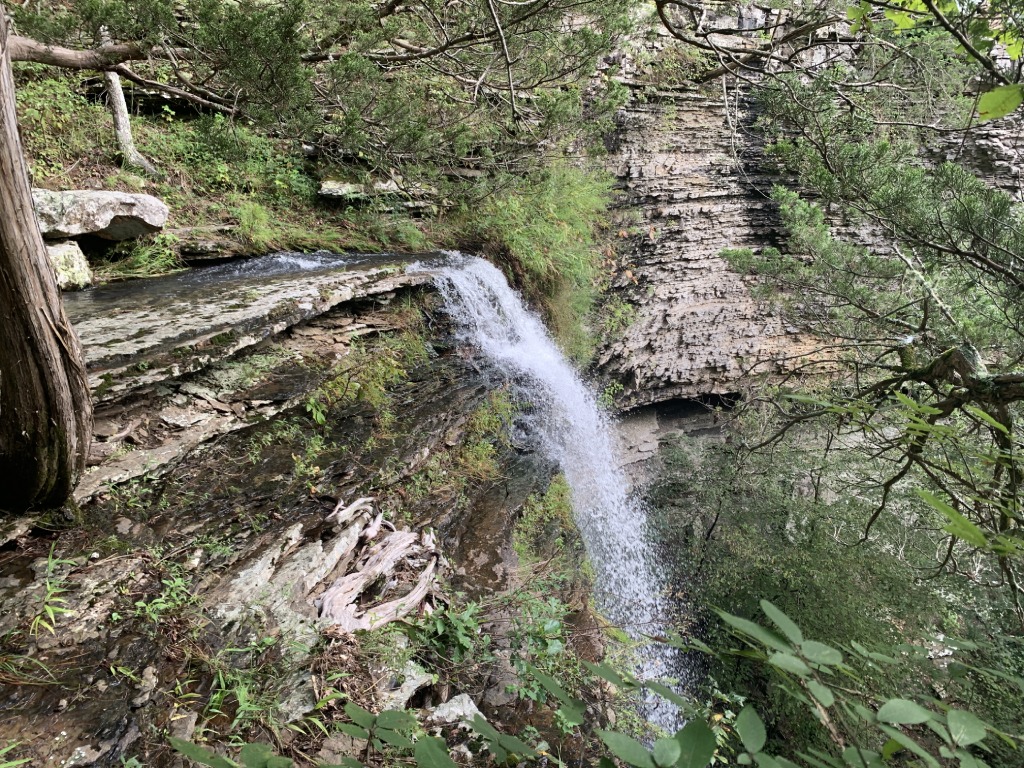
You can tent camp for just $15.00, or if you prefer RV camping, a full-service site with water, sewer, and electricity is just $35.00 per night.
If a day trip is more your vibe, you can grab your camera and backpack and spend the day exploring for just $5.00.
As far as beauty goes, the Mulberry River is certainly a hidden gem, but it's also a highly economical area in which to travel. It's the best of both worlds!
Learn more about Mulberry River Outdoor Adventures
Where to Travel With Your Camera: North Rhine-Westphalia Germany

Though Bavaria might be a better-known area for photographers, there is no lack of beauty - both natural and manmade - in the North Rhine-Westphalia area of Germany.
Away from the crowds, you can be free to explore beautiful landscapes, quaint villages, Medieval architecture, and abandoned industrial zones. It is truly a patchwork of variety for your camera!
In the tiny town on Monschau (shown above), you can explore winding cobblestone streets and photograph half-timbered houses that date to several hundred years ago.
In Aachen, you can visit Charlemagne's Cathedral and photograph its opulent beauty of this incredible house of worship.
But for photographers with a passion for architecture, it's not just hundreds-year-old homes and cathedrals that this area offers...

The post-industrial Ruhr District is full of abandoned buildings that have unique architecture. What's more, there's a coal processing facility that's a UNESCO World Heritage Site.
The lines, colors, shapes, and textures of these buildings are absolutely incredible, as you can see above.
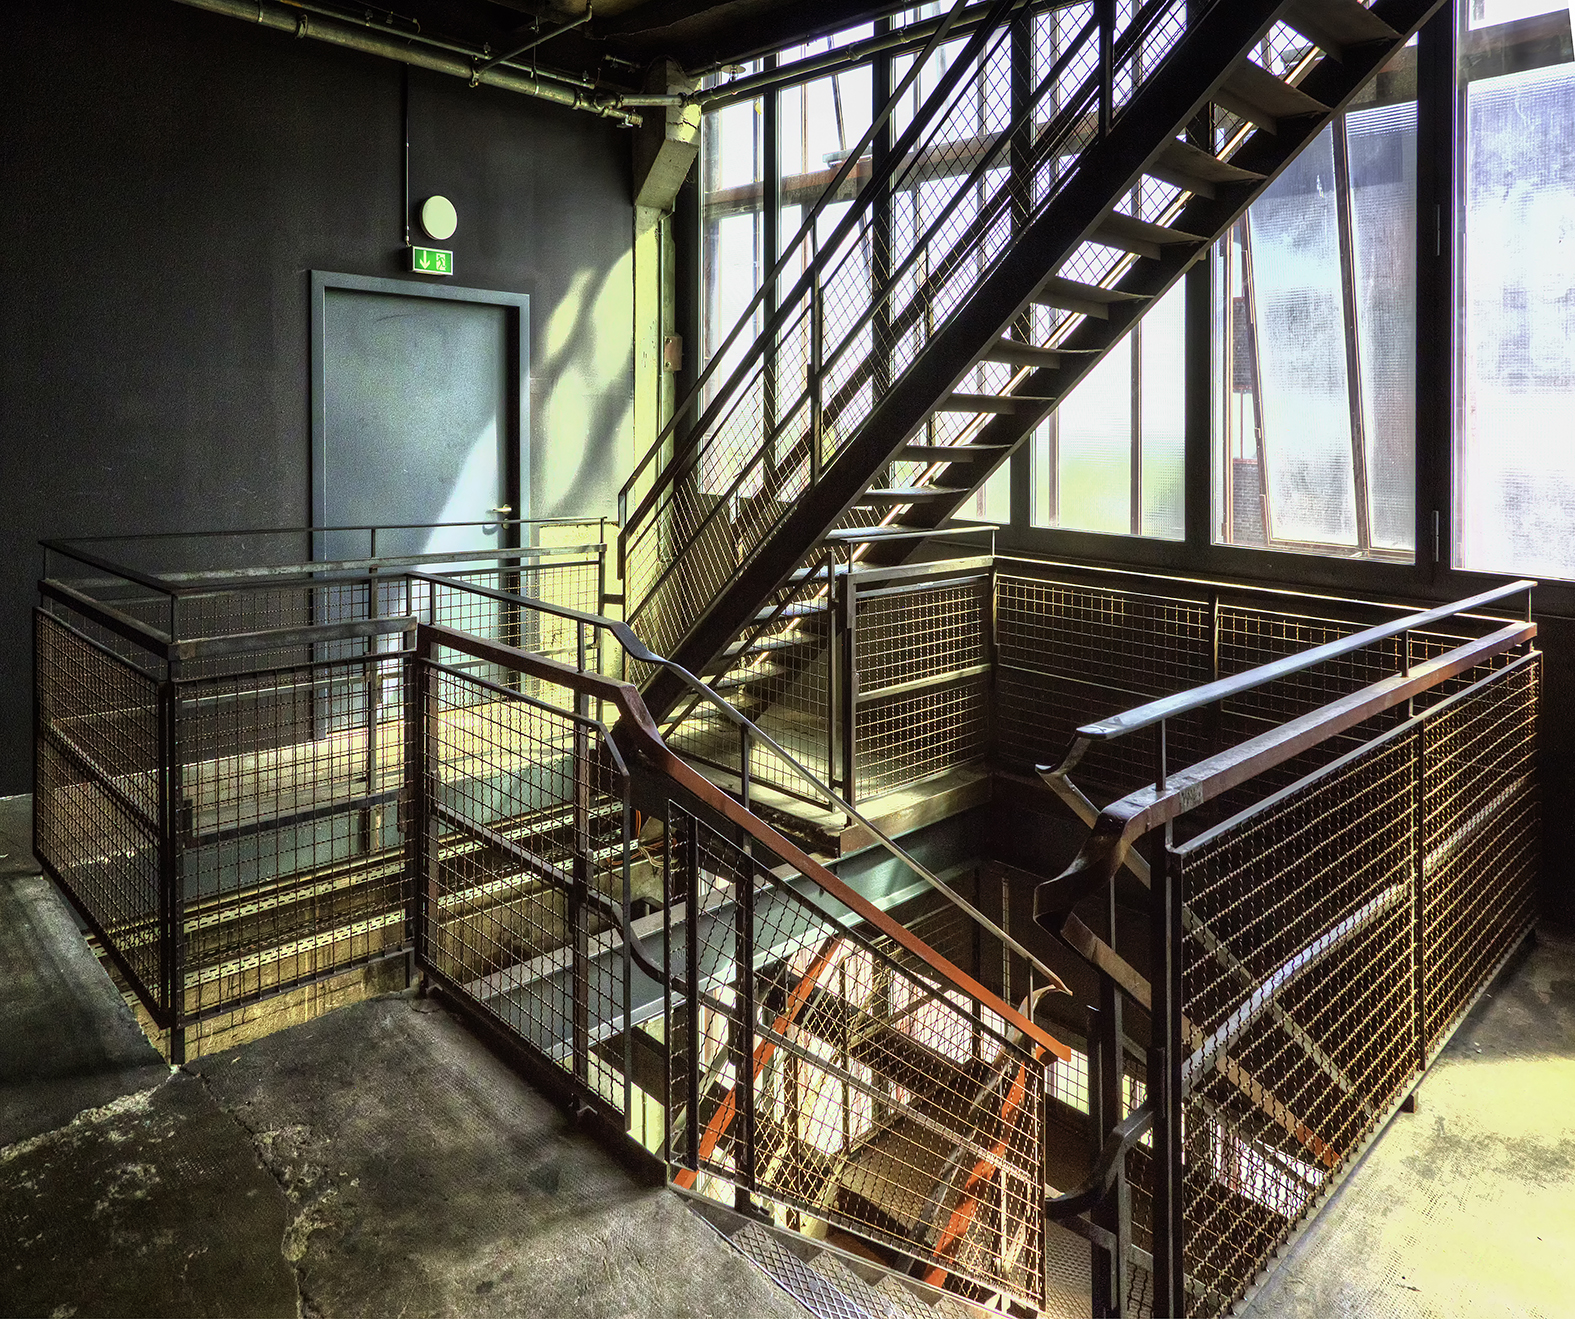
Traveling to this area is best done as part of a photography tour - after all, that way all you have to do is sit back, relax, and enjoy the ride!
Without having to decide where to go and when, where to stay, and what to do, you can focus instead on photographing the unique beauty of this area.
Princeton Photo Workshop has been offering photography tours of this area for years, and its leaders know the North Rhine-Westphalia region like the back of their hands.
With expert guidance around the region, a small group setting, and plentiful opportunities to reviewing images and taking part in photography demonstrations, there is simply no better way to experience this off-the-beaten-path area!
Learn more about Princeton Photo Workshop Westphalia-Photokina Germany Workshop
Where to Travel With Your Camera: Togwotee Pass, Wyoming
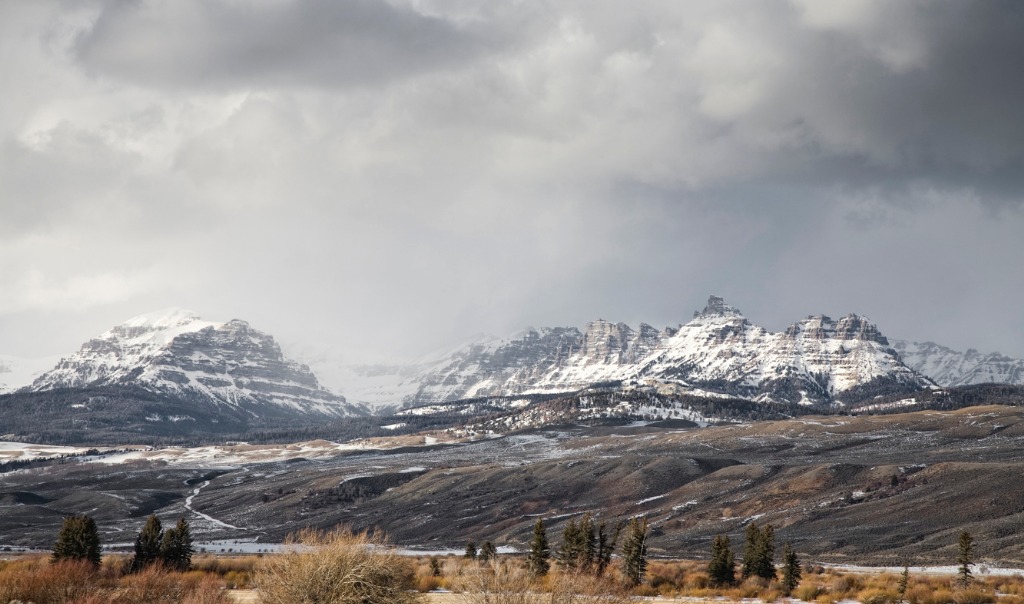 Photo by jaypetersen via iStock
Nestled in the middle of Wyoming's Wind River Mountains, Togwotee Pass is as beautiful as its name is to pronounce.
Situated at nearly 10,000 feet above sea level, the pass offers a wide range of photographic opportunities.
From soaring granite peaks to open meadows, dense forests to alpine lakes, there is no lack of fodder for your camera.
In the summer, meadows explode with wildflowers while the later summer and early fall offer gorgeous panoramas filled with the changing colors of the leaves.
And year-round, the drive over the pass offers spectacular views, from the Grand Tetons on the western end to wide-open vistas of the Shoshone National Forest on the other.
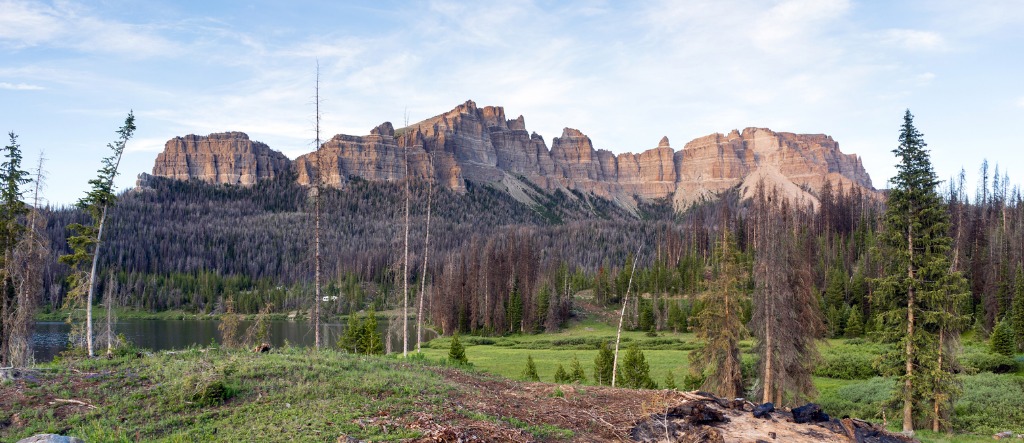 Photo by ChrisBoswell via iStock
You can explore hundreds of miles of forest roads in a four-wheel-drive vehicle, and many more miles of roads and trails on an ATV.
In the summer, hiking, mountain biking, horseback riding, fishing, and camping are just a few of the many recreational opportunities you can find in this area.
In the winter, the landscape gets buried in feet of snow, which gives you a chance to create vastly different images of a winter wonderland.
Some of the best snowmobiling, backcountry skiing, and cross-country skiing in the Rocky Mountains is found here as well.
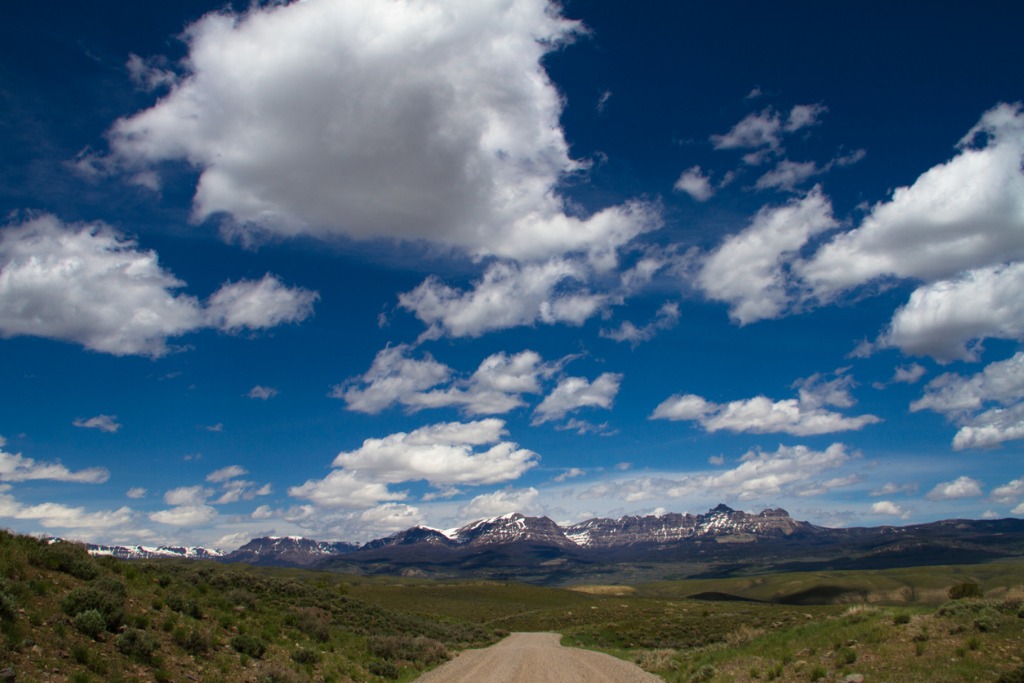 Photo by TenleyThompson via iStock
When you travel to the Togwotee Pass area, you can stay at the iconic Togwotee Mountain Lodge, the majestic Brooks Lake Lodge & Spa, or if you prefer staying in town, there are ample lodging opportunities in the tiny town of Dubois.
Likewise, campgrounds dot the area and primitive camping is allowed on many Forest Service lands.
Wherever you stay, spectacular mountains, gorgeous sunsets, and abundant opportunities for photographing wildlife are just steps away!
Where to Travel With Your Camera: Antarctica
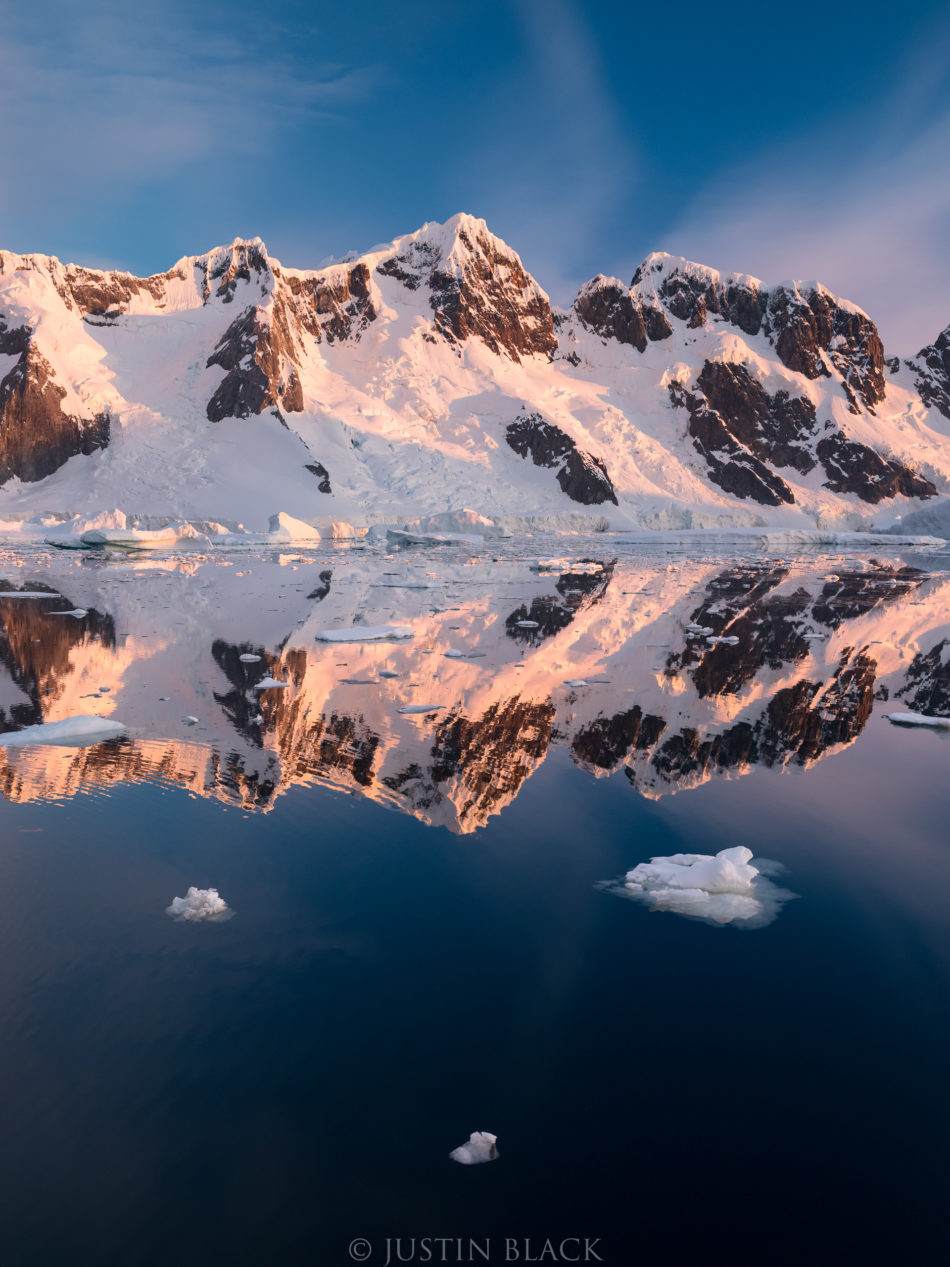 Photo by Justin Black/Visionary Wild
You'd be hard-pressed to find a more off-the-beaten-path location than the world's least-populated continent.
The frozen landscape has its own inherent beauty, but the wildlife in the Antarctic is especially captivating.
You can see penguins on land and in the sea, many different varieties of seabirds, earless seals, and albatross as well.
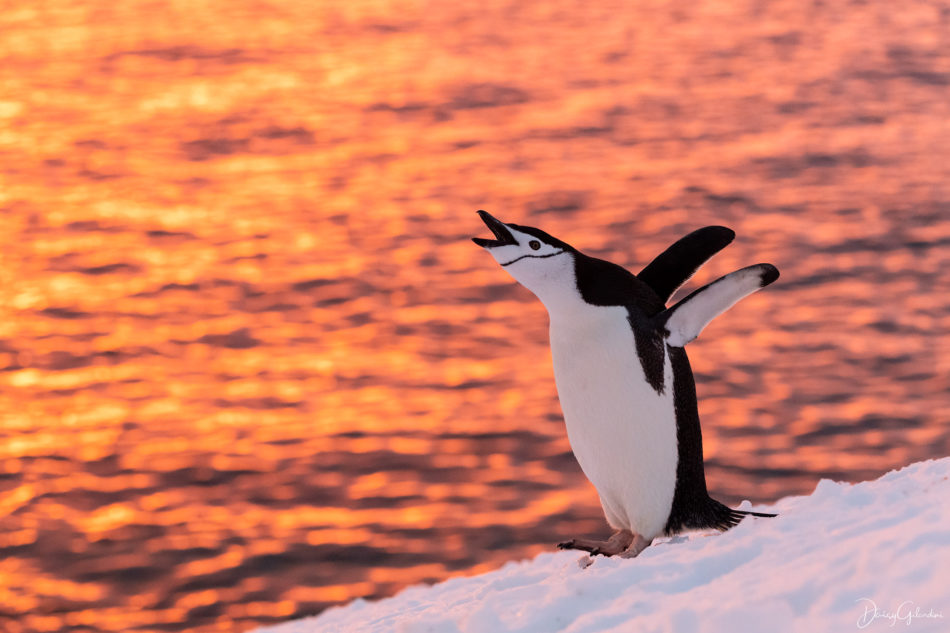 Photo by Daisy Gilardini/Visionary Wild
Glacial activity is something to keep your camera out for as well.
The giant masses of ice meeting the ocean are something to behold, as are the massive icebergs that dot the seas around Antarctica.
Traveling around the Antarctic is best done by small boat, that way you can get up-close views of the shore where ice activity and wildlife are abundant.
But don't make the mistake of booking a tour on a large vessel - they can't navigate as close to shore as smaller ones.
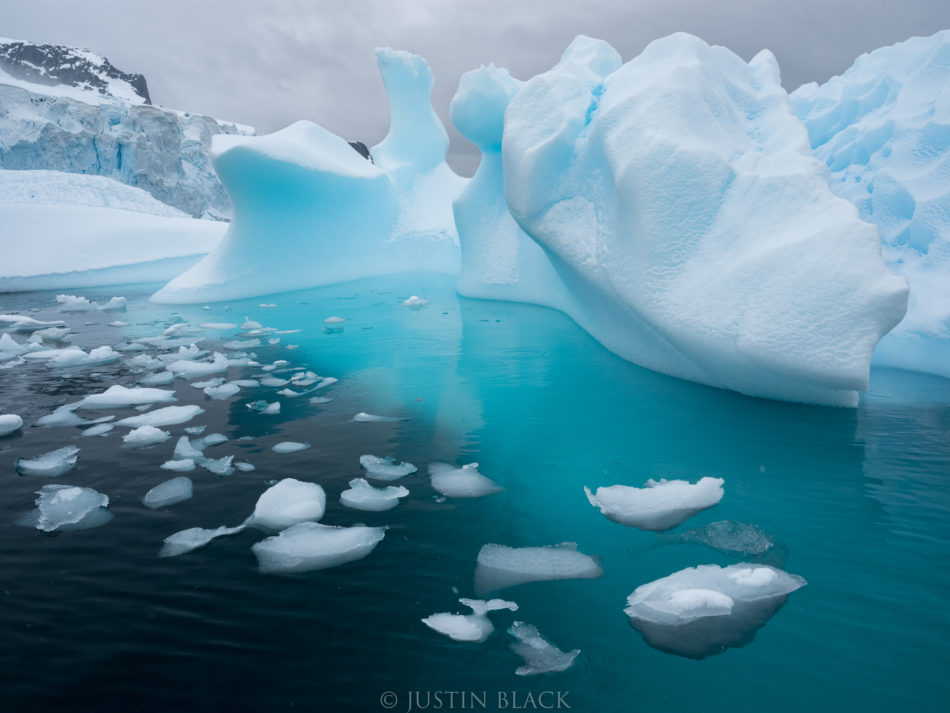 Photo by Justin Black/Visionary Wild
Instead, try something like Visionary Wild's Antarctic Expedition.
With just a handful of other guests, you'll make your way to King George Island in the South Shetland Islands, where you'll board the M/V Hans Hansson.
Aboard the vessel, you'll travel to the Lemaire Channel and Vernadsky Research Base, maneuvering into small inlets to get a closer look along the way.
Antarctica is a place like no other on earth, and when you travel in style like this, you're sure to make lasting memories (and take some awesome photos too!).
Learn more about Visionary Wild's Antarctic Expedition
Where to Travel With Your Camera: Costa Rica

The ruggedness of Costa Rica makes it one of the most beautiful places on earth.
And its diversity of landscapes and wildlife make it an ideal playground for photographers...
With incredible waterfalls, dozens of species of frogs, beautiful sunsets, and gorgeous wildflowers, you could easily spend weeks in Costa Rica and never photograph the same thing twice.
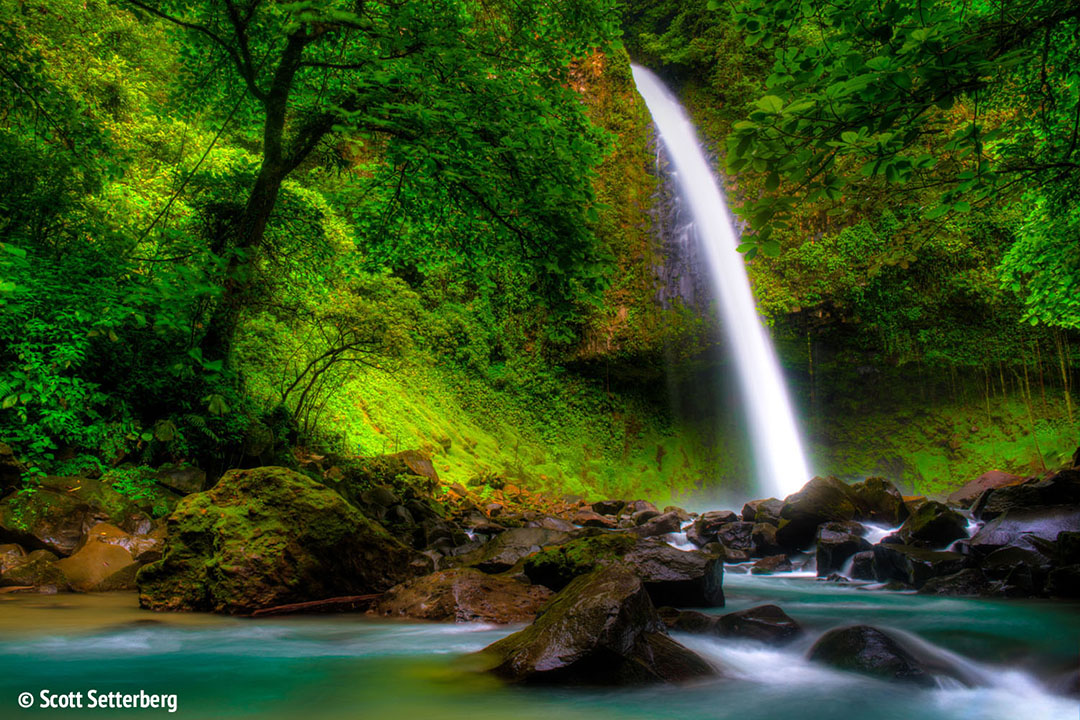
Costa Rica has several must-see national parks where you can get up-close and personal with jungle landscapes, mountains, and of course, waterfalls.
The La Paz Waterfall Gardens is certainly a must-see, as is Juan Castro Blanco National Park and Tenorio Volcano National Park, just to name a couple of excellent photography locations.
If you're ready to explore Costa Rica with your camera, why not do it in the lap of luxury?

ColorTexturePhotoTours offers an all-inclusive six-day, five-night trip that takes you to the locations listed above, and more.
Enjoy local cuisine, top-of-the-line accommodations, spa services, massages, and more.
Furthermore, as part of the Colors of Costa Rica Tour, you'll get lots of one-on-one instruction time with workshop leader Scott Setterberg because the tour is limited to just four participants.
What could be better than traveling off-the-beaten-path locations in Costa Rica, learning more about photography, and living it up in luxury accommodations?!
Learn more about the Colors of Costa Rica Photography Tour by ColorTexturePhotoTours
We Recommend
Off-the-Beaten-Path Photography Locations in Germany You Have to See
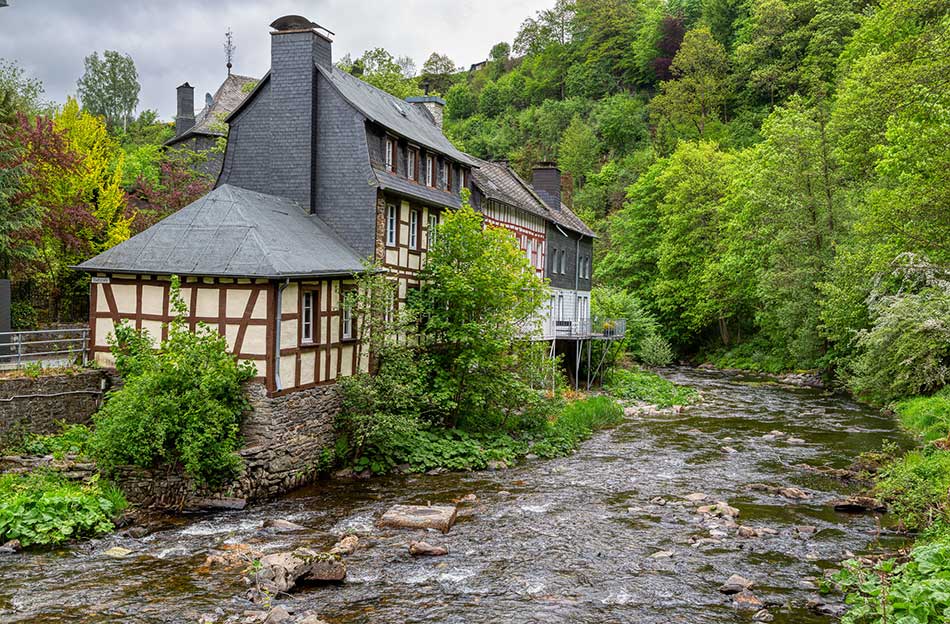
When one thinks of hot spots to photograph in Germany, your mind might immediately wander to the mountaintop castles of Bavaria or the busy streets of Berlin.
And while these locations are certainly worthy of a visit with your camera, there are some off-the-beaten-path locations that should be on your Germany to-do list as well.
In this guide, we’ll explore some lesser-known areas of Germany that present you with excellent photographic opportunities without the huge crowds found elsewhere in this magnificent country.
Photographing Germany: The Ruhr District
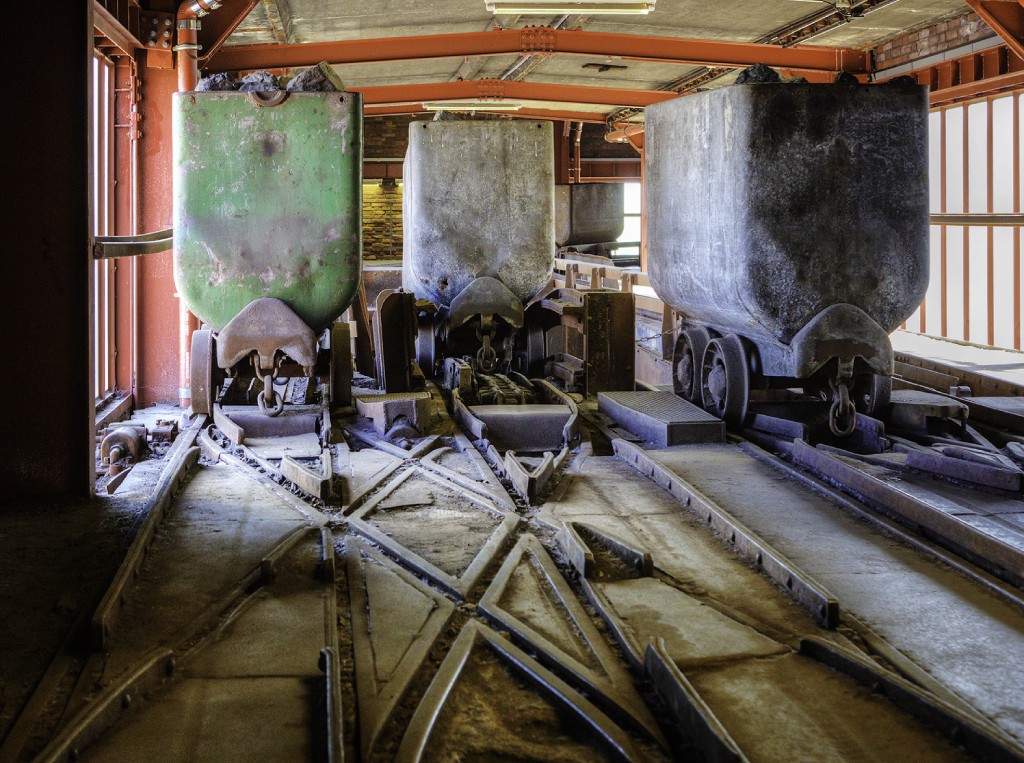
The Ruhr District is teeming with relics of the industrial era - abandoned factories, coal mines, and ironworks whose decaying vestiges are ideal subjects for your lens.
Specifically, the Zollverein Coal Mine Industrial Complex in the North Rhine-Westphalia city of Essen is an interesting location to shoot.
Not only is it a UNESCO World Heritage site, but the complex has acres upon acres of subject matter that you can explore and photograph. This includes all the installations of a coal mine: coal pits, coking plants, pit heaps, and railway lines.

The various buildings of the complex are also worthy of being photographed.
According to UNESCO, the complex’s buildings “are outstanding examples of the application of the design concepts of the Modern Movement in architecture in a wholly industrial context.”
As you can see in the images above, the small details of these buildings are nothing short of spectacular as well.
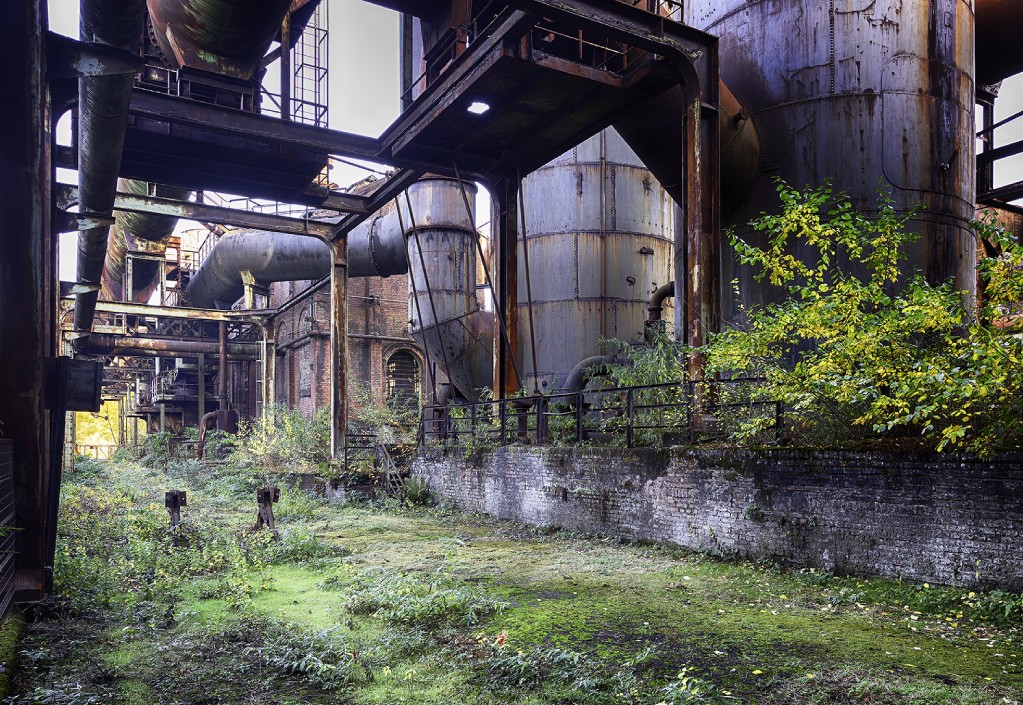
Quick Tip: Once you’re done exploring Zollverein, head to Landschaftspark in Duisburg. There, you’ll find a turn-of-the-century ironworks complete with cast houses, lifts, and blast furnaces that still stand testament to the might and power of the German industrial complex of the early 20th Century.
Photographing Germany: Medieval Treasures in Aachen and Monschau

Exploring the German town of Aachen takes you back even further in time than the hulking industrial complexes in Essen.
Once the capital of Charlemagne's enormous Frankish empire, Aachen is home to a breathtaking array of medieval architecture, the best example of which is the Aachen Cathedral.
Charlemagne ordered the cathedral built in the late 700s and it served as his burial location when he died in 805. His throne, a relatively plain seat, was installed in the cathedral in 796 and was used throughout the 10th-16th centuries for coronation proceedings of many Holy Roman Kings.
Because of its rich history and incredible architecture, UNESCO has deemed it a world heritage site as well.
Quick Tip: Just steps away from Charlemagne’s throne is the golden reliquary known as Karlschrein. Built in 1215, it stores Charlemagne's exhumed skeleton. It’s just one of many gold features in the cathedral, along with the Barbarossa chandelier, the Pala d’Oro (an altarpiece from the 11th Century), the Ambon of Henry II, and the Marienschrein, a shrine to Mary that was consecrated in 1239.
Another medieval site to explore is Monschau, a tiny village that looks as though it’s right out of the 1600s.
Little has changed in Monschau over the centuries - cobblestone streets and half-timbered houses dot the area, and the turreted Monschau Castle stands guard over the town.
If architectural photography is your passion, you must visit The Red House, an enormous home built in 1752 for a wealthy cloth manufacturer. The home’s period furnishings are ornate and beautiful, as is the carved oak staircase that winds its way from the first to the second floor.
Quick Tip: For landscape photography enthusiasts, the nearby Eifel National Park is a must-see. There, you’ll find deep blue lakes, unmolested forests, mountains, wildlife, and more.
Photographing Germany: Cologne
Though Cologne isn’t off-the-beaten-path, if you’re in the North Rhine-Westphalia region, you’d be remiss if you didn’t visit this bustling 2,000-year-old city.
Full of incredible street scenes, landmark architecture, arts, culture, and history, Cologne is a photographer’s paradise.
The highlight of the city skyline it Cologne Cathedral, a stunning example of High Gothic architecture with two spires that pierce the sky.
Like the Aachen Cathedral, the Cologne Cathedral has many examples of gilded medieval reliquaries that are as massive as they are beautiful.
Situated on the riverfront, there are spectacular views of the Rhine as well.
Quick Tip: Be sure to visit the Museum Ludwig next door to the cathedral. Inside, you can explore a massive collection of art that spans hundreds of years, including many examples of work by Pablo Picasso. The museum also has a permanent photography exhibit, including FOTO LAB, an area where you can experiment with various devices, including a camera obscura, the first type of camera.
If you plan to visit Cologne, do so in May, when Photokina, the world’s leading imaging fair, takes place.
Photokina represents a unique opportunity to explore as-yet-unreleased photography gear and witness some of the latest innovations in the world of photography. What’s more, the fair draws thousands of photography enthusiasts so there is a chance to meet photographers from around the globe and share your common passion for photography together.
The Best Way to See Germany’s North Rhine-Westphalia Region
With so many locations to explore in this region of Germany, it can be a little overwhelming deciding where to go, when, and for how long.
What’s more, making travel arrangements, figuring out where to stay, and booking local tours can be a time-consuming task that makes the prospect of travel seem more like a job than an adventure!
That’s why a photo workshop is the best way to see this area.
All of the locations discussed above are included in Princeton Photo Workshop’s North Rhine-Westphalia-Photokina tour.
This seven-day, six-night tour takes place May 24-30, 2020, and coincides with Photokina.
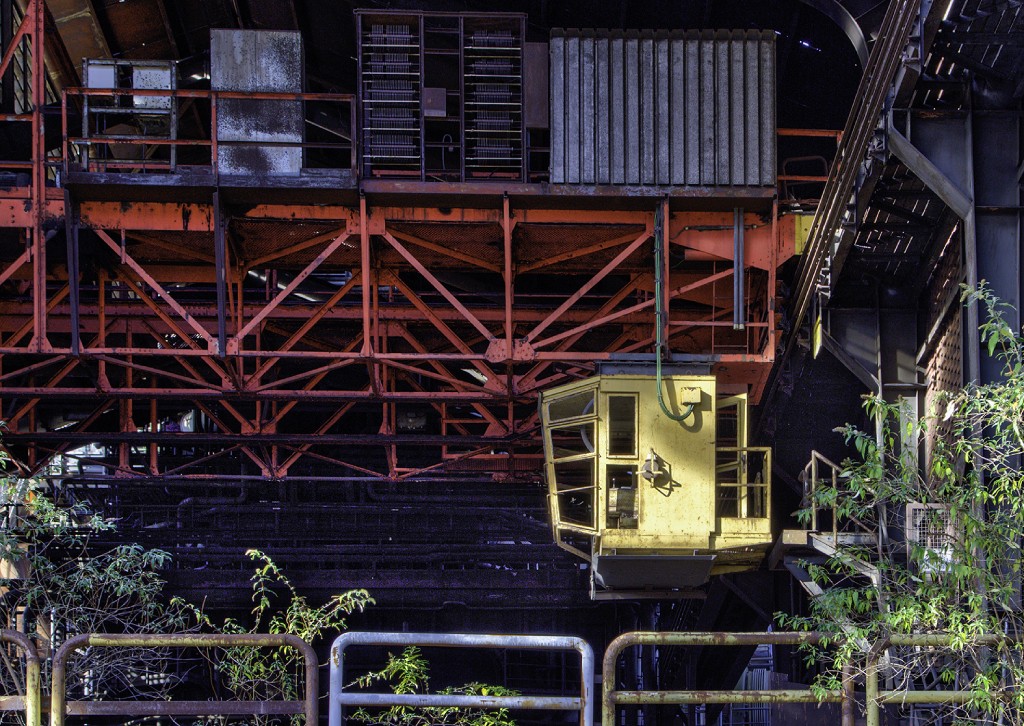
Beginning in the Ruhr District, moving to Aachen and Monschau, and culminating in a visit to Cologne, this tour provides ample learning opportunities for photographers of all skill levels.
With art, architecture, street scenes, and landscapes to explore, you’ll be able to expand your horizons as a photographer and put new skills to practice in a variety of settings.
Throughout the tour, workshop leaders will provide feedback on your images and the group will meet for discussions of critical photography topics, including lighting, composition, color, and post-processing.
Aside from the gorgeous settings and a small-group experience, what’s of note about this tour is the expertise of the tour leaders.
This is not a hands-off tour, by any means. Leaders are involved from moment one, guiding you, helping you put your learning into action, and providing constructive feedback so you can become a better photographer. In that supportive, welcoming, and warm environment, you’ll find your creative voice!
Visit Princeton Photo Workshop today to learn more about this photography adventure in Germany!
Take an Adventure Stateside Too!
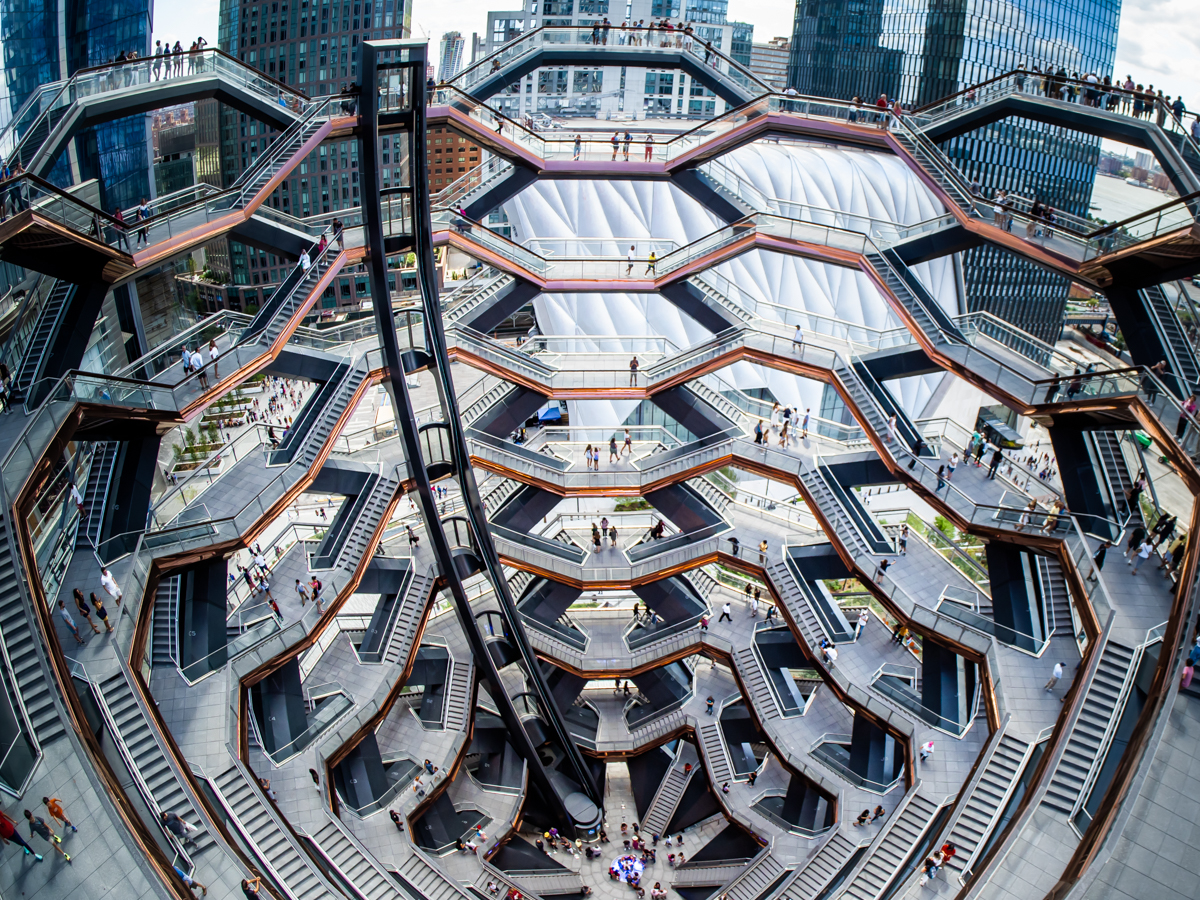
If the timing doesn’t work for you to head to Germany with Princeton Photo Workshop next May, why not take a photography class in the U.S.?
With classes in New York City, Philadelphia, and New Jersey, there is no lack of fodder for your camera.

In New York, explore the Highline and Hudson Yards, Grand Central Terminal, or the New York Public Library and Bryant Park.
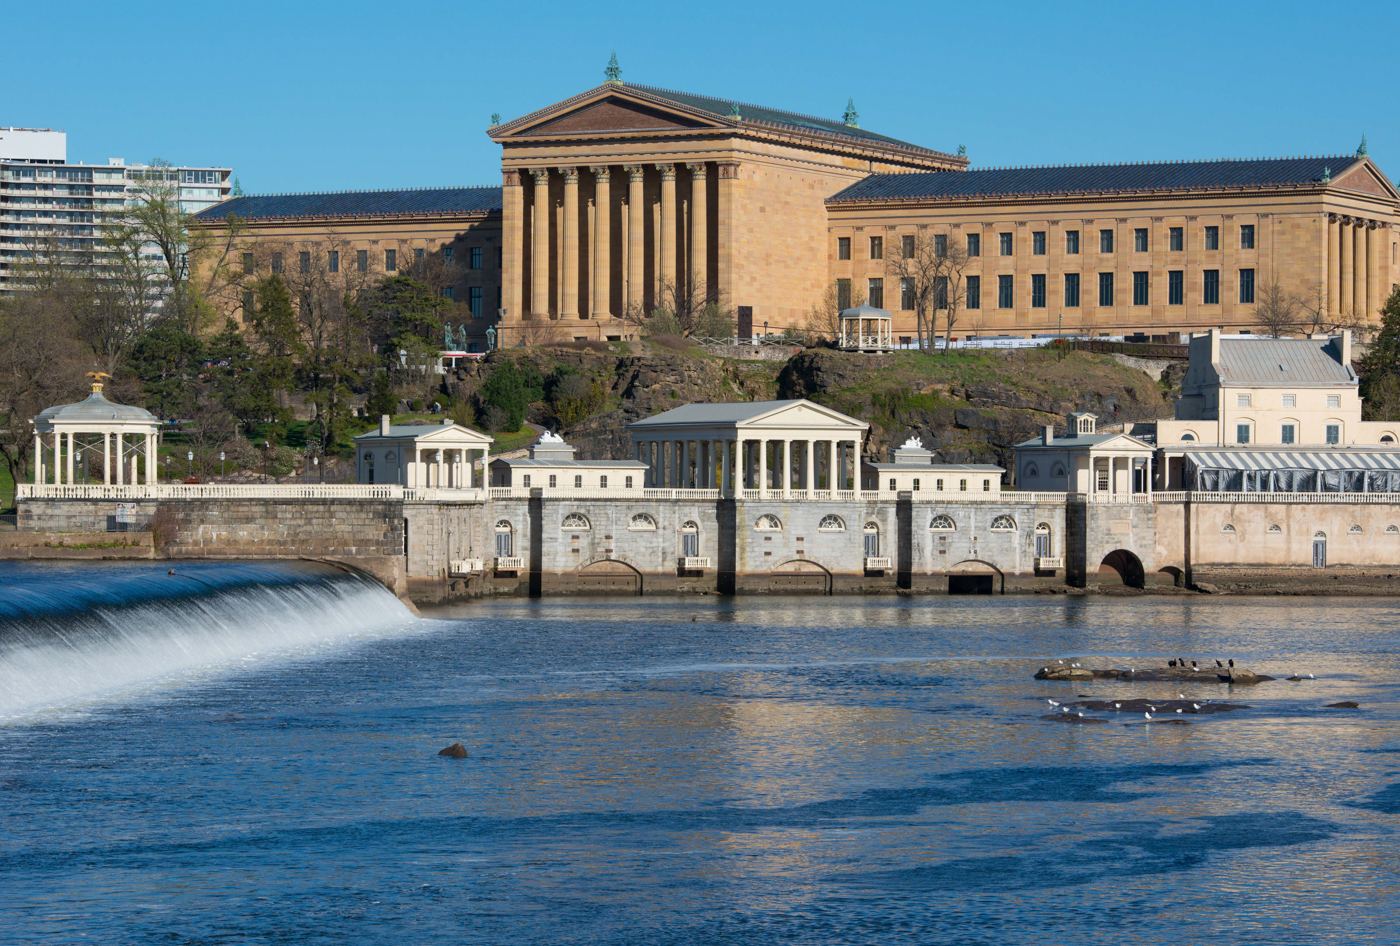
Touring Philadelphia, you can photograph the Boathouse Row and Art Museum area at sunset, the Cherry Street and Race Street Piers, or Eastern State Penitentiary, a haunting monolith that was at one time the largest and most expensive prison in the world.
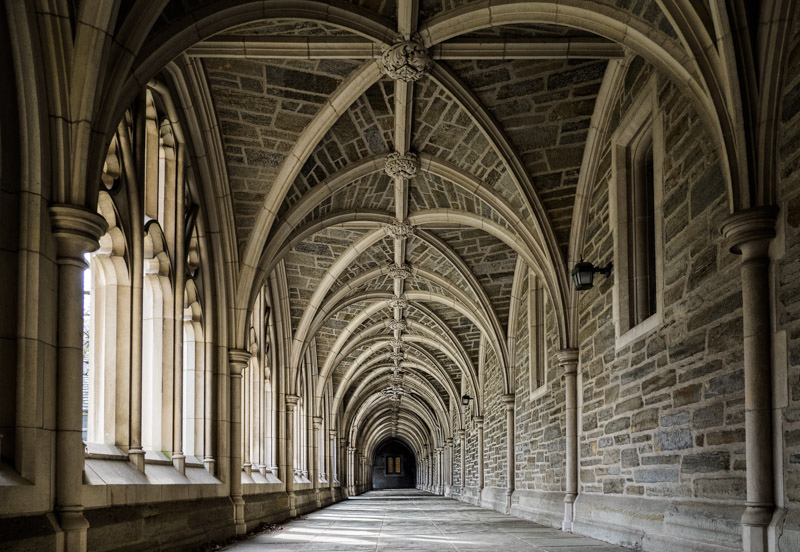
In New Jersey, you’ll find that Princeton University is the ideal location for learning about composition. Get exclusive access to the inner workings of a boatyard at David Beaton & Sons in Brick or head to Bluestone Racehorse Farms in Hopewell for a lesson on lighting in the picturesque New Jersey countryside.
Whatever your pleasure, Princeton Photo Workshop offers the professional guidance and support you need to elevate the quality of your photos. That’s just one of the reasons why we’ve named Princeton Photo Workshop as one of the top photography workshops to attend in 2019-2020.
We Recommend
Oregon Photography and Travel Guide - Oregon Coast

Just the other day, we explored the photographic opportunities on California’s Redwood Coast.
While some would say the Northern California Coast and the Southern Oregon Coast are cut from the same cloth, the two offer distinct reasons why they should be on your photography bucket list.
Where the Redwood Coast’s appeal is in its forests and rugged shoreline, Oregon offers more wide-open spaces and miles and miles of open beach where you can photograph tide pools, sea stacks, lighthouses, and more.
Let’s examine a few of the Oregon Coast’s photography hotspots that are worthy of your time.
What to Photograph on the Oregon Coast - Sunsets
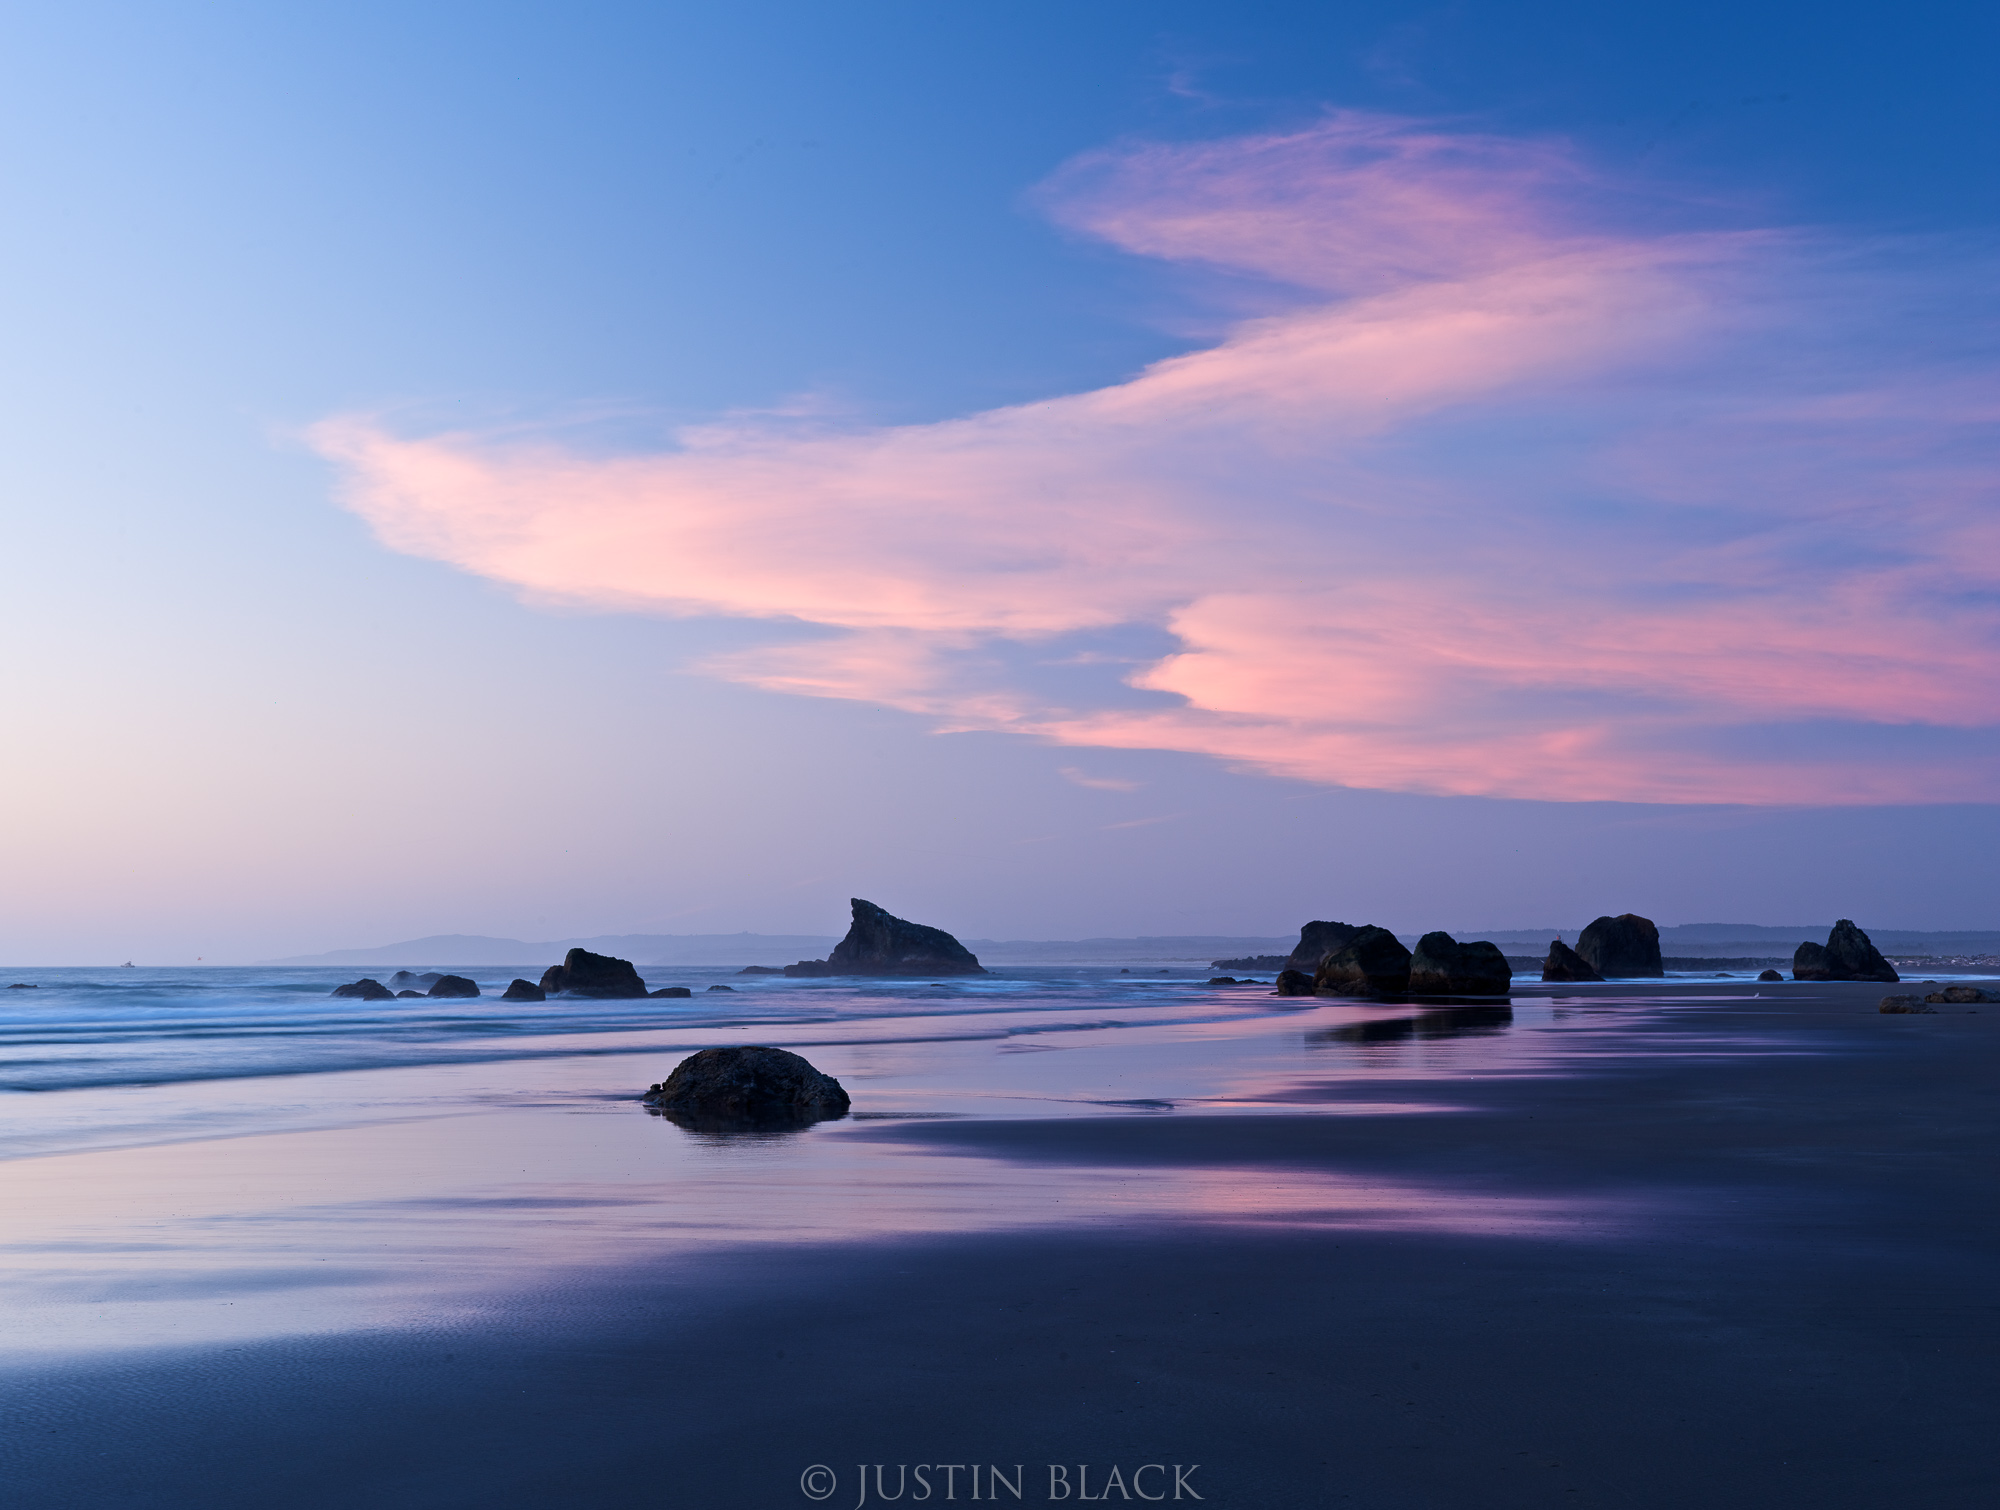
Given that there are miles and miles of open beaches along the Oregon Coast, it represents an ideal opportunity to photograph spectacular sunsets.
The beaches in the Bandon area, in particular, are a photographer’s playground given their size, accessibility, and the presence of sea stacks and other rock formations jutting out of the ocean’s waters.
The pastel colors of the sunset cast alongside the deep blues of the atmosphere is a gorgeous combination of colors, particularly when they’re reflected in shallow waters and wet sand of the beach.
When shooting at sunset, get there early and stay late. The light changes so rapidly that you can capture images of the same location that have many different moods and personalities.
What to Photograph on the Oregon Coast - Sea Stacks
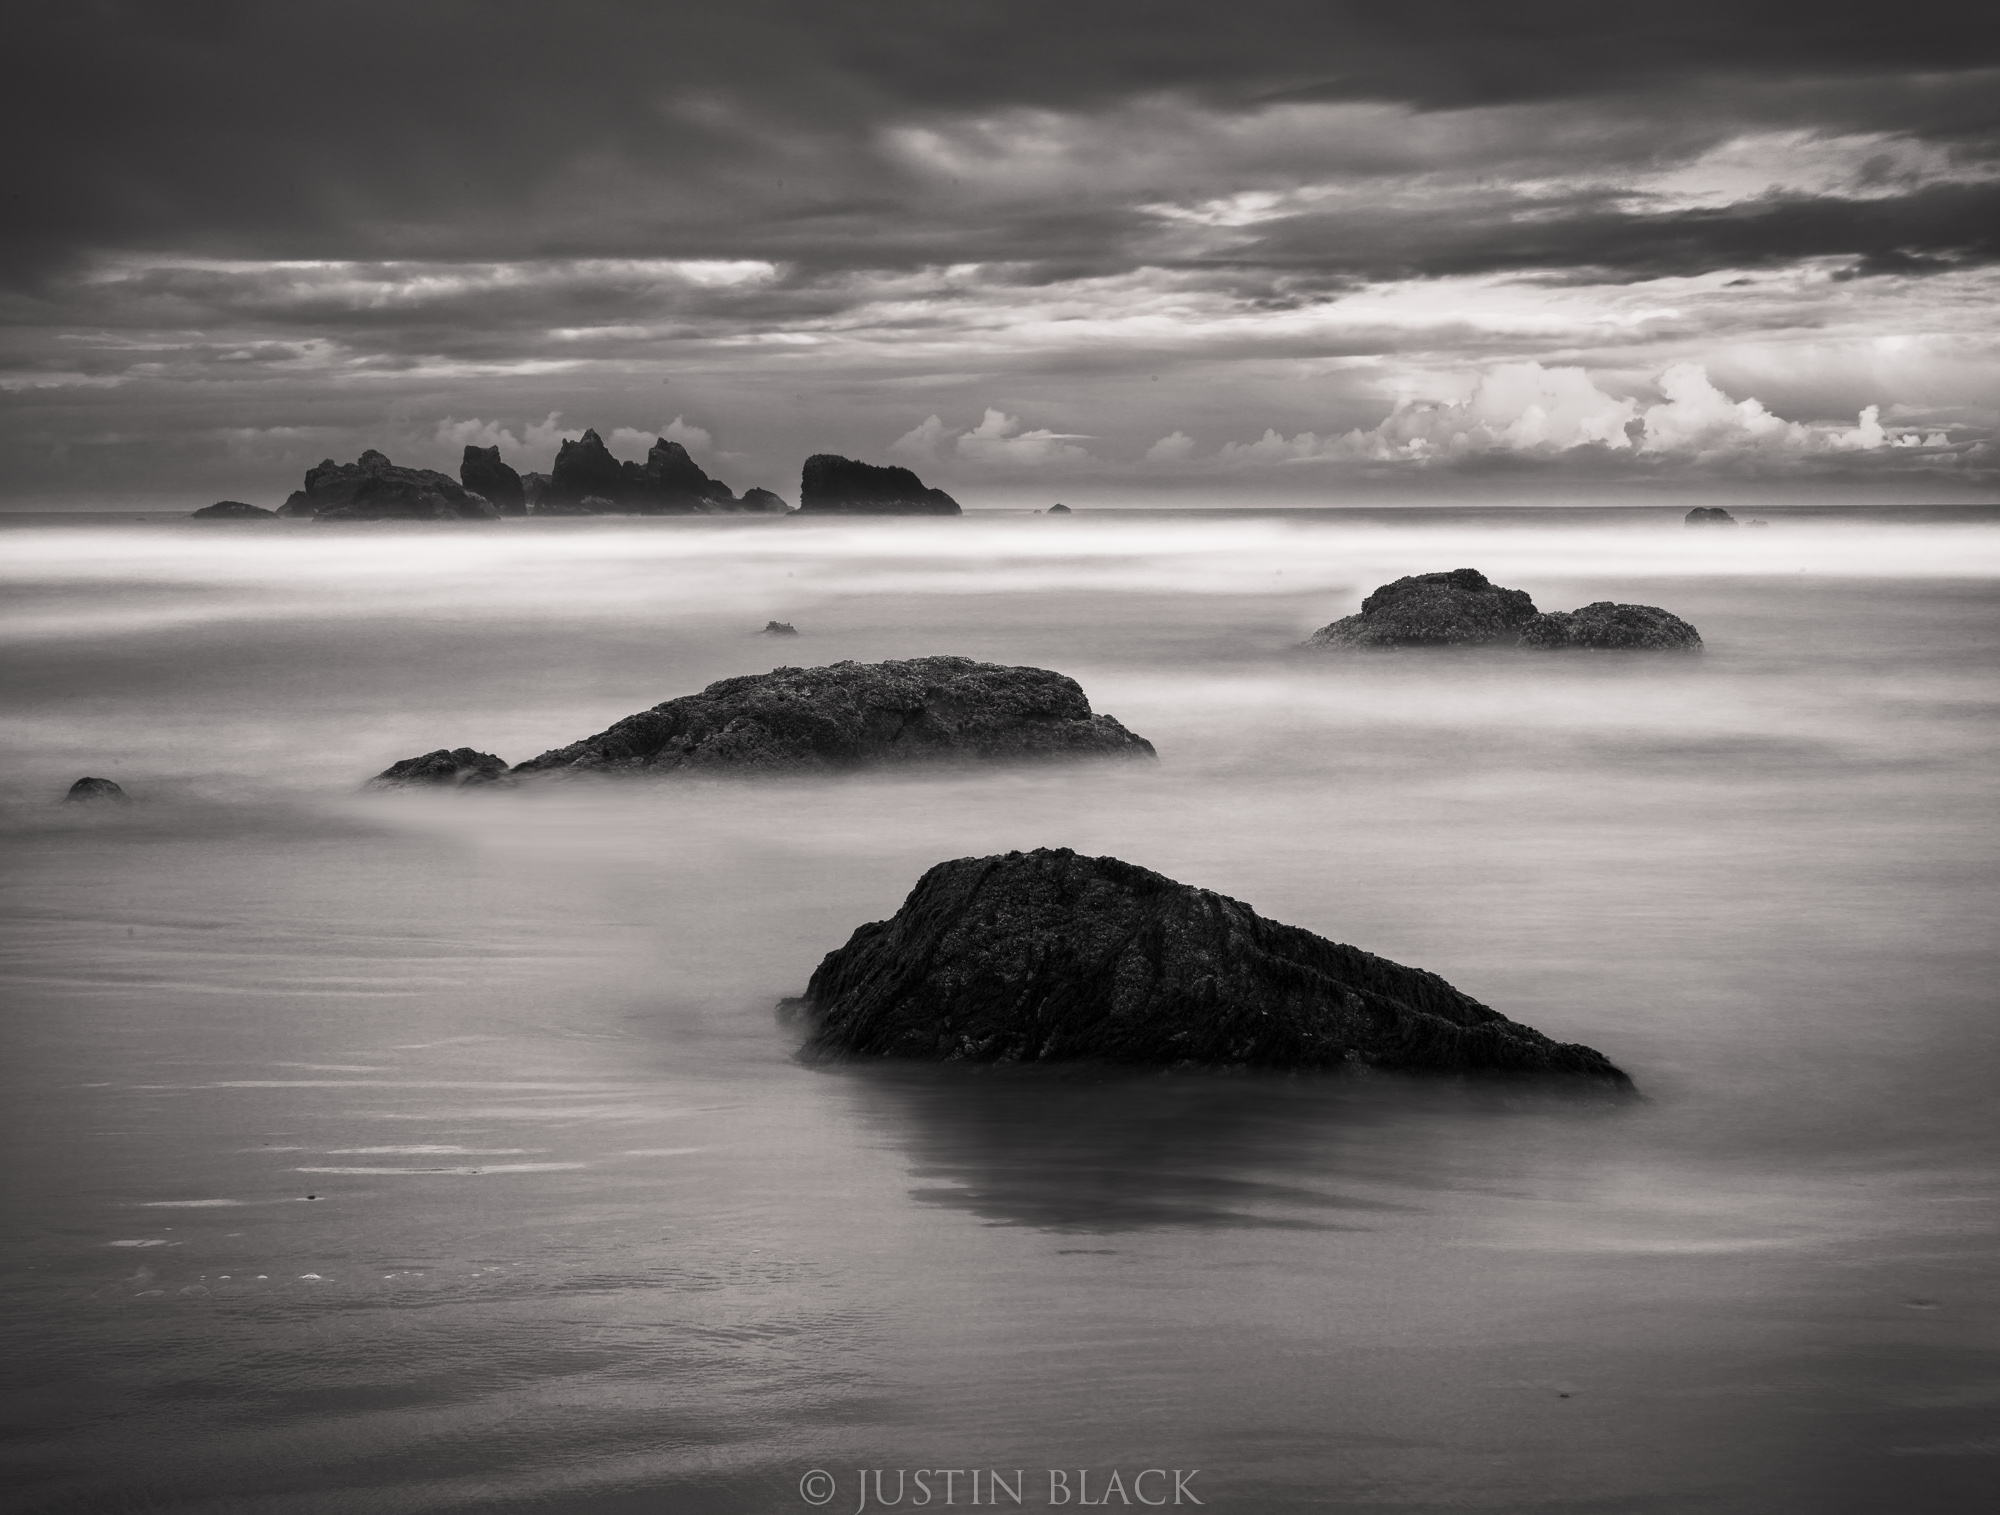
If you want to feature sea stacks in your photos, Face Rock State Scenic Viewpoint won’t disappoint. The area also has easily accessible beaches and intertidal areas you can explore at low tide.
The rugged shapes of sea stacks offer an interesting visual contrast to the softer elements you’ll find along the Oregon Coast, like smooth beaches, rolling waves, and windswept clouds.
This juxtaposition of hard and soft is an excellent subject for black and white photos, in which shapes, textures, lines, and contrast take on added visual importance in the absence of color.
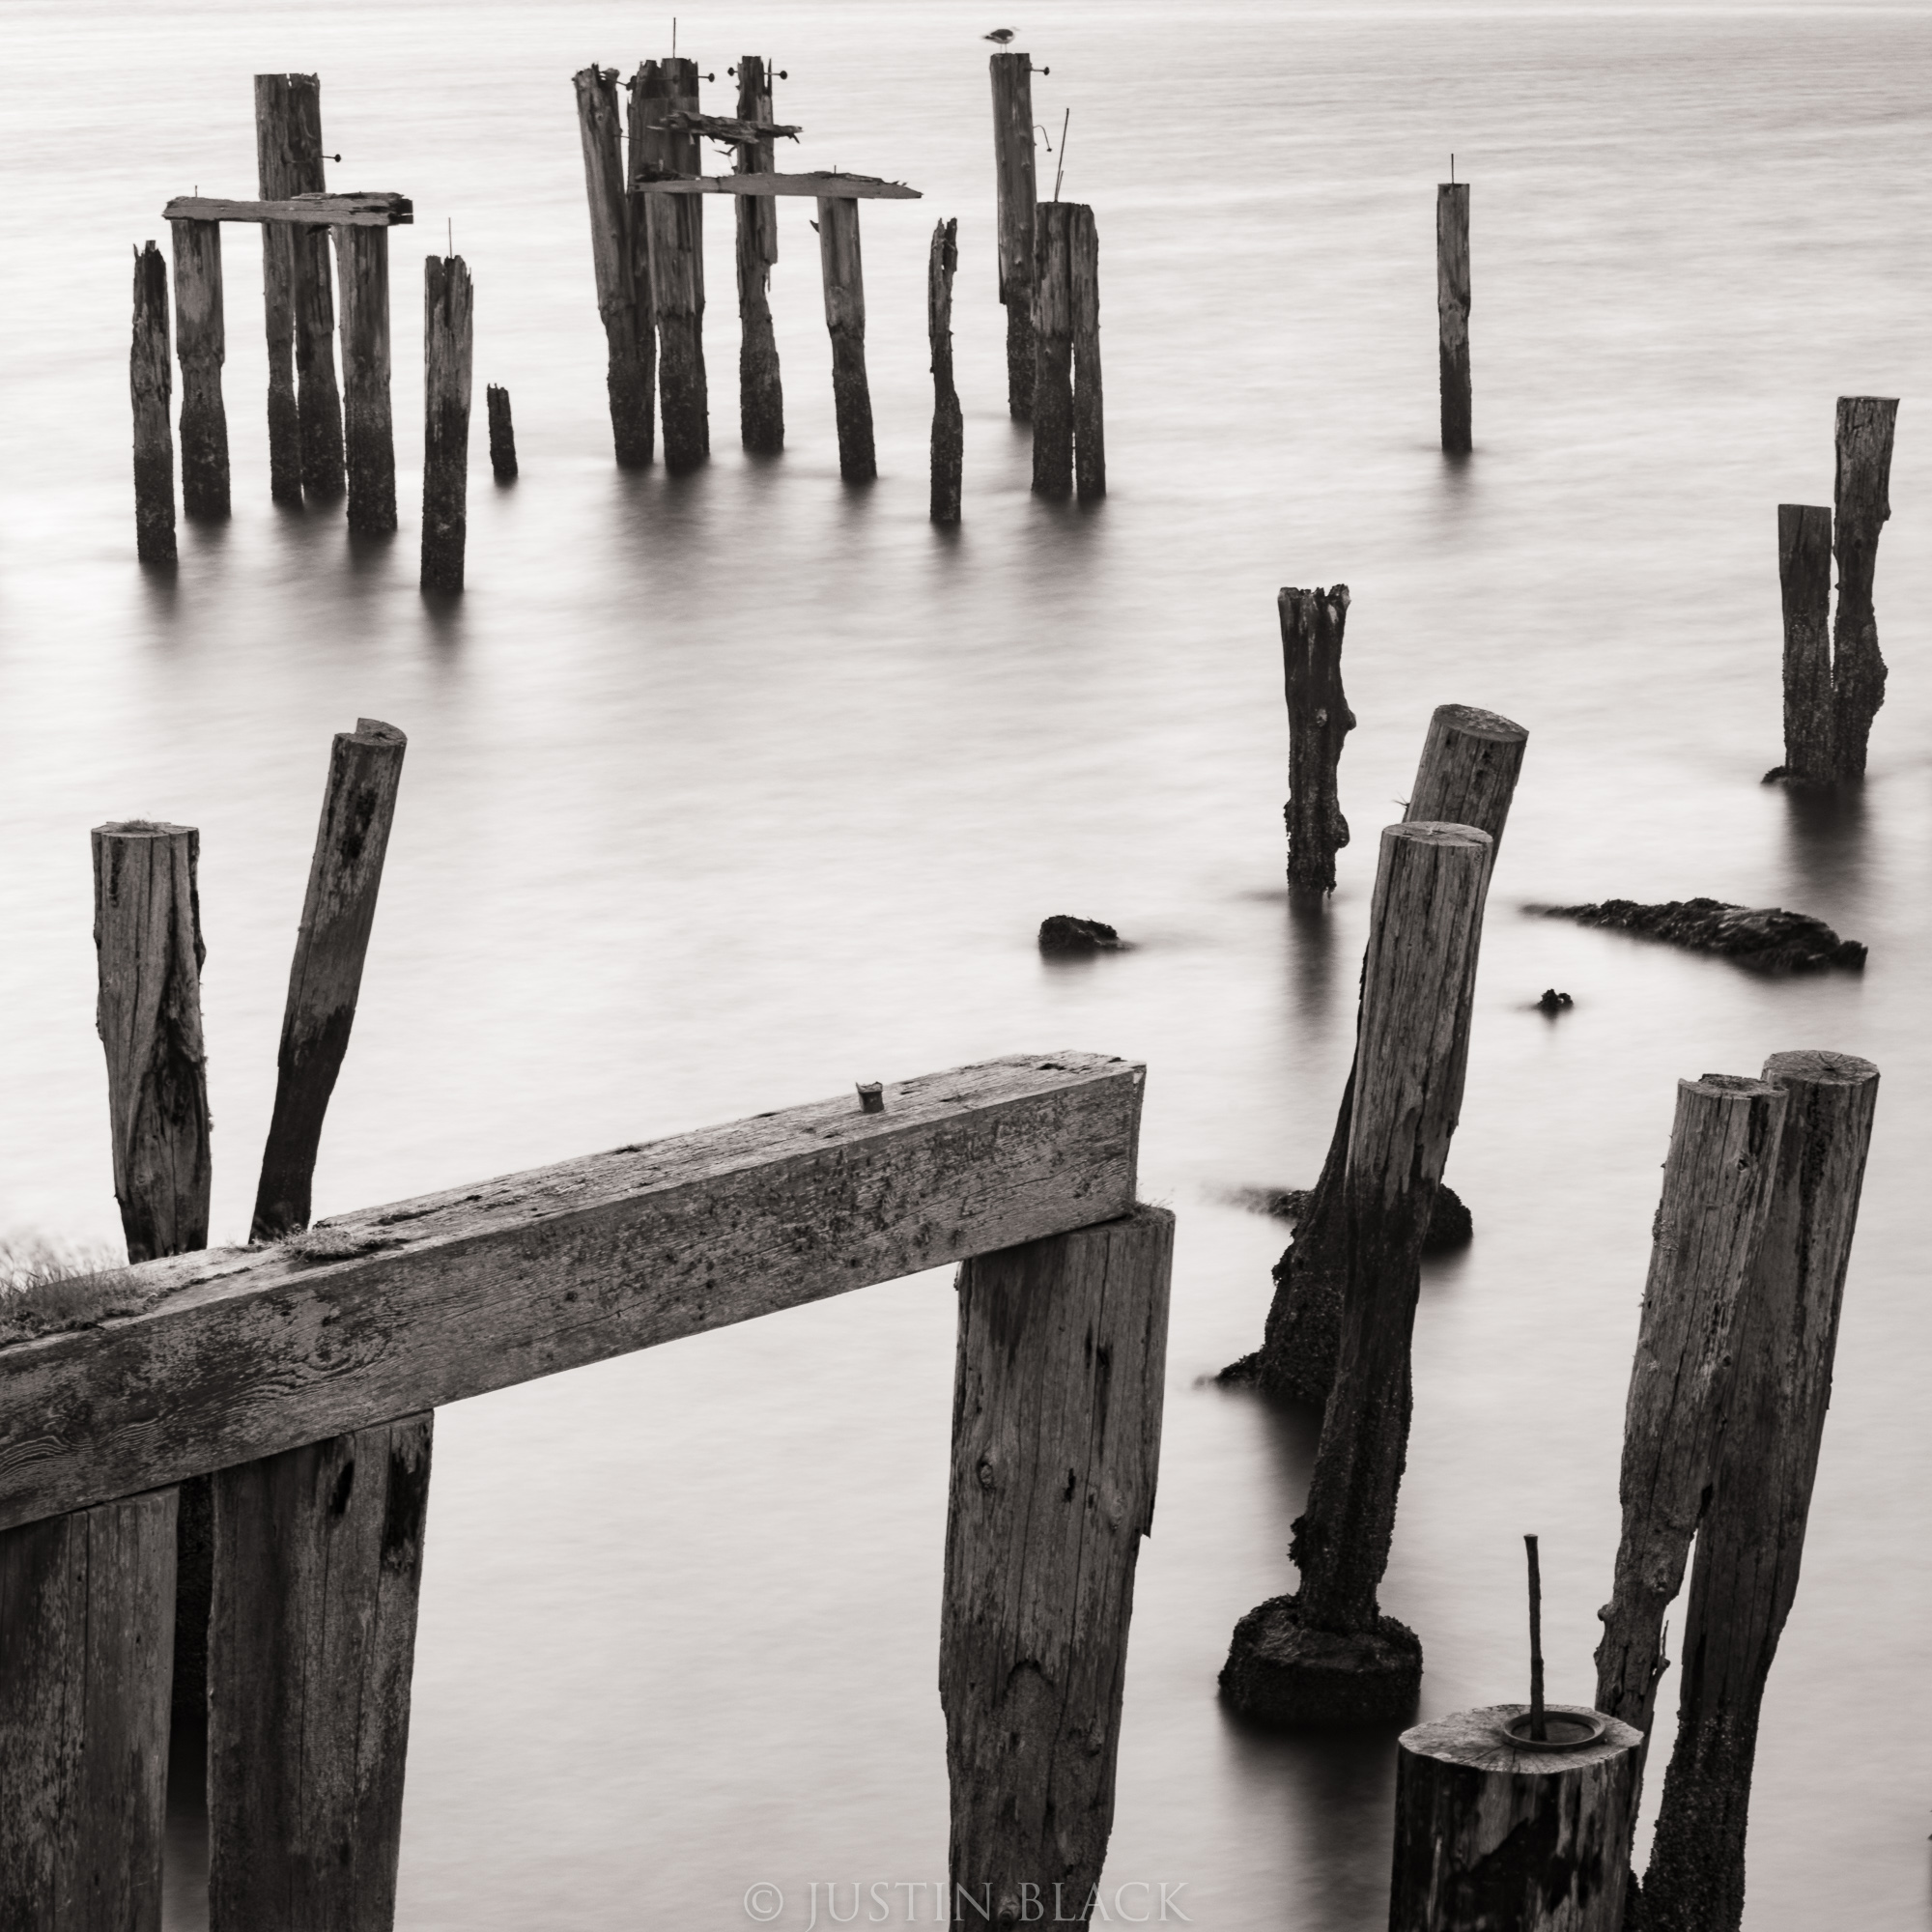
Quick Tip: Manmade elements like decaying ships or the remnants of an old pier are also excellent subjects for making black and white photos. Above, the linear lines of the old pier contrast beautifully with the smooth water.
What to Photograph on the Oregon Coast - Movement
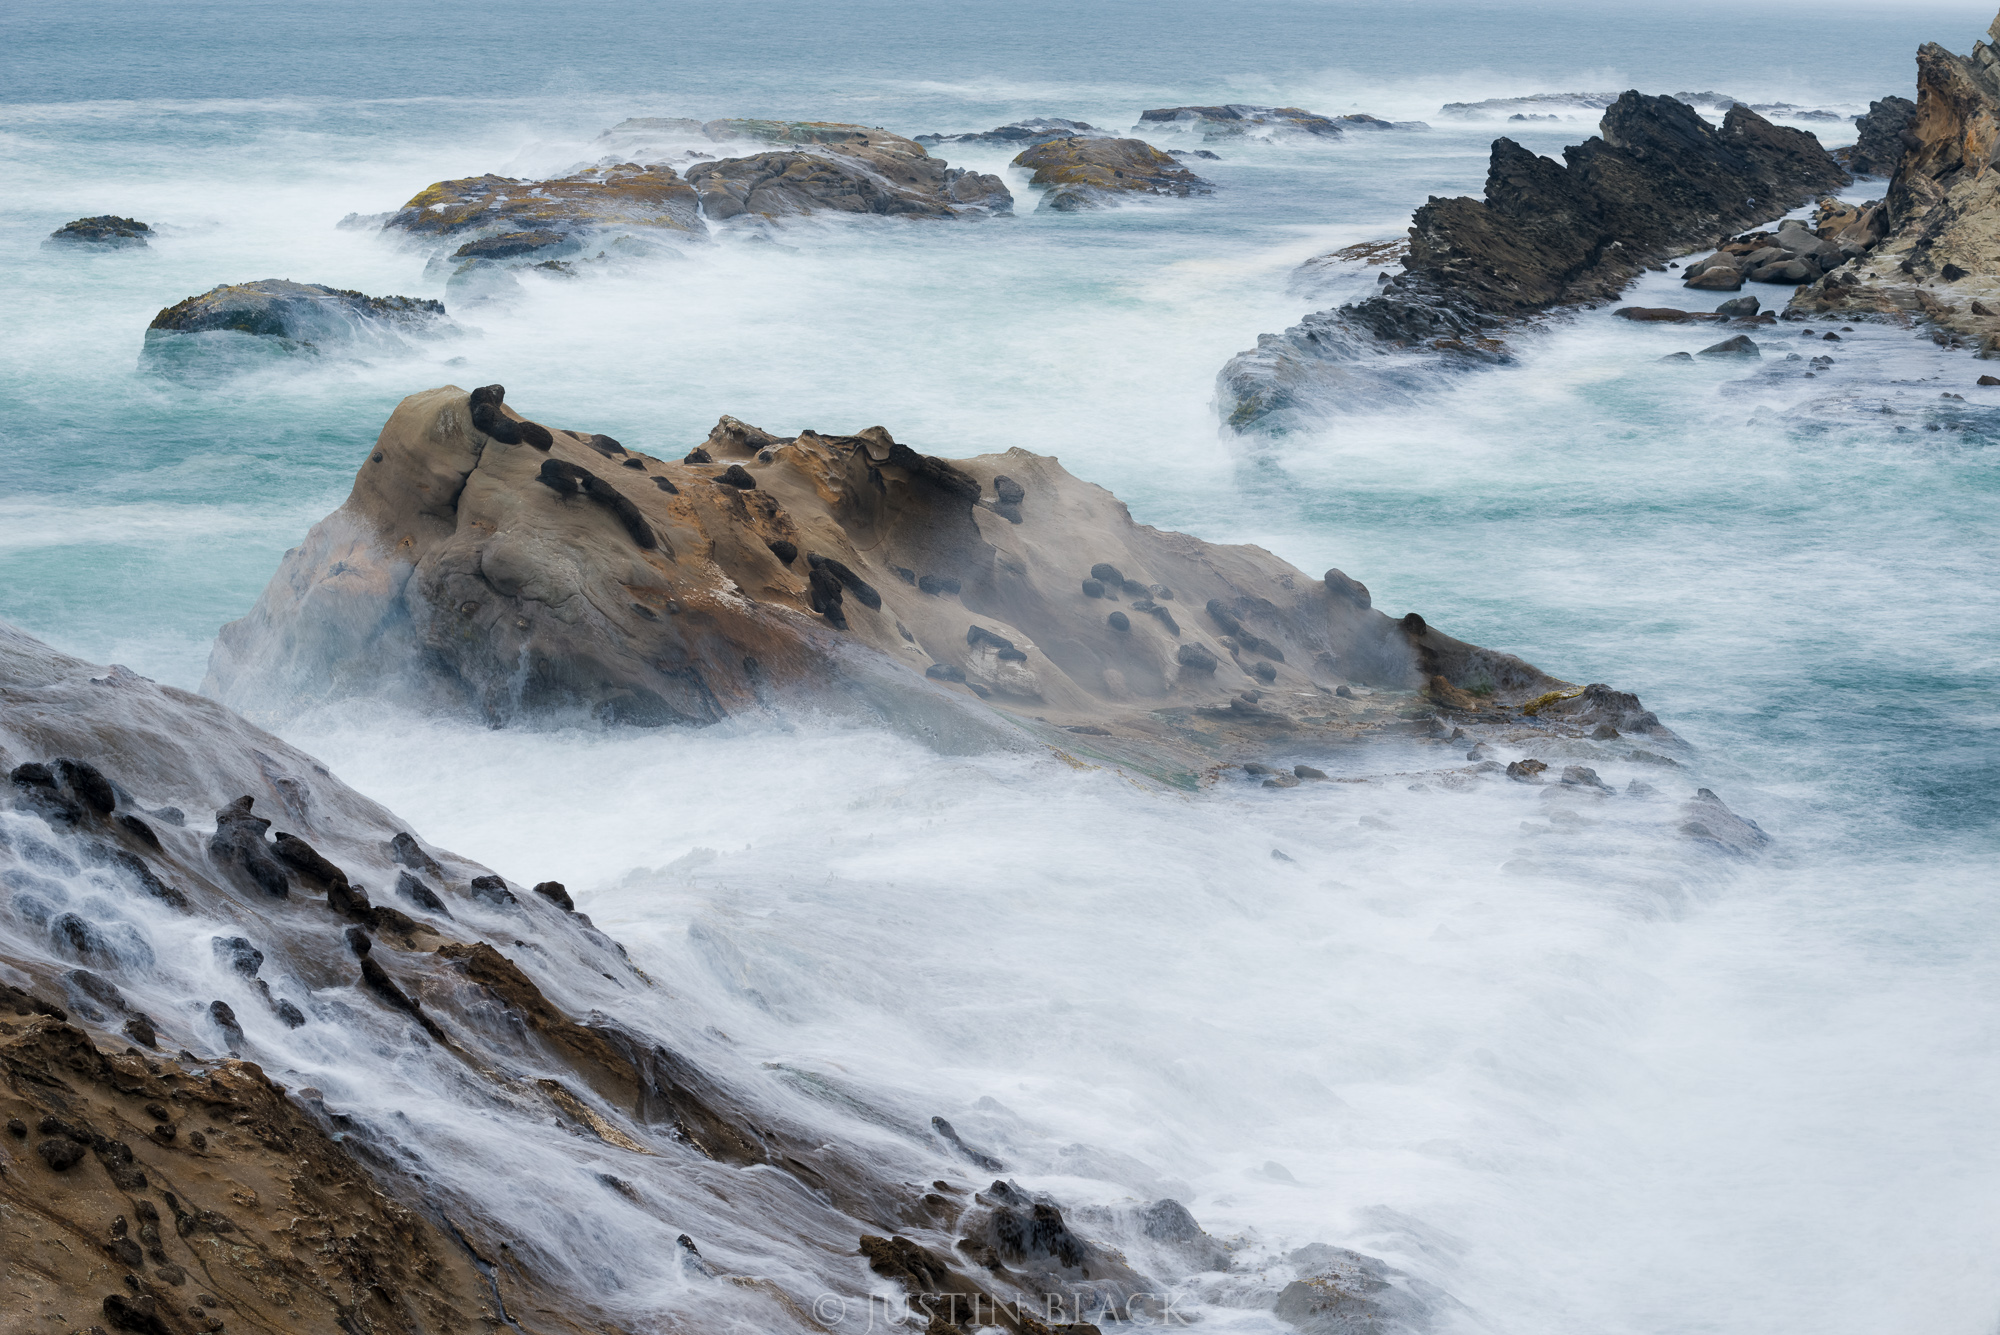
The Oregon Coast is a prime area for honing your long exposure skills.
Whether it’s blurring the movement of clouds as they roll towards the coast or creating ethereal shots of waves crashing on a rocky shoreline, there are ample opportunities to include indicated movement in your photos.
When creating long exposure images, it’s important to have static elements - like the rocks in the image above - that contrast with the movement in the shot.
Additionally, don’t be afraid to get in close for a tightly-framed shot. Doing so allows you to create a more intimate photo that puts movement on full display.
How to Make the Most of Photographing the Oregon Coast
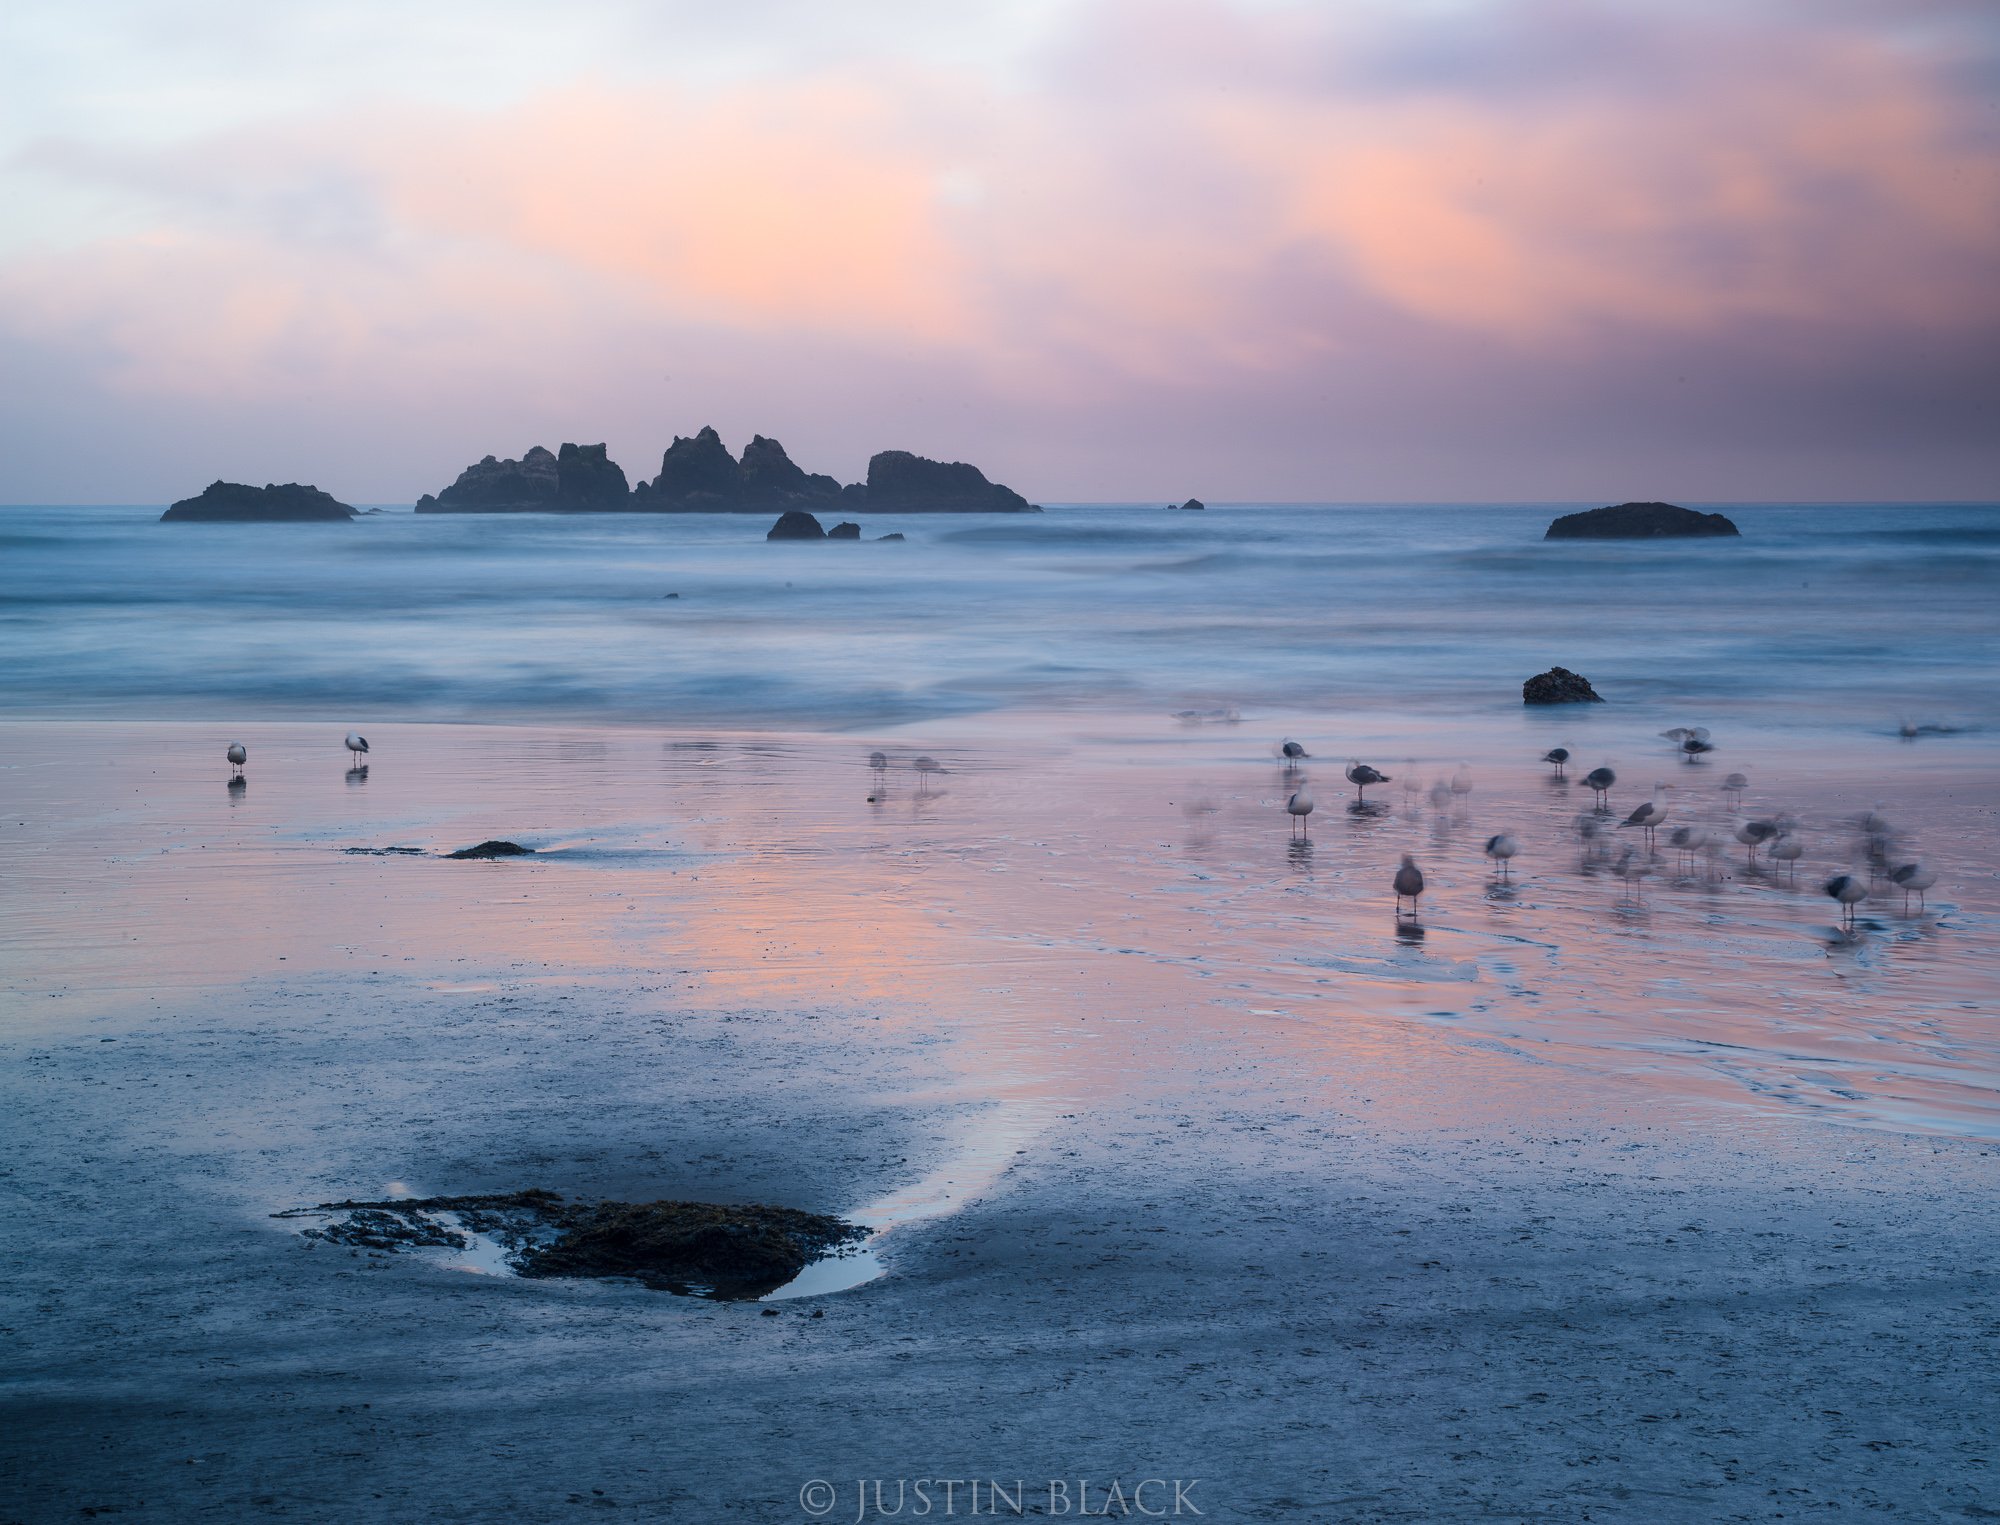
There are many resources you can utilize to plan a photography trip to the Oregon Coast, like those linked at the bottom of this article.
But why spend all your time trying to figure out where to go and what to see when you can leave the planning to the experts and explore this area as part of a photography workshop?
Visionary Wild’s Oregon Coast Workshop comes immediately to mind as being a prime candidate.
With master photographers Jack Dykinga, John Shaw, and Justin Black at the helm, you’ll be guided to locations up and down the Oregon Coast where you can develop your skills behind the lens.
From the “base camp” in Bandon, you’ll head out each morning and evening for photo sessions on the coast. In the context of the small group, you’ll take part in advanced instruction on key photography topics.
Of course, it helps that all this learning takes place in one of the most beautiful areas in the world!
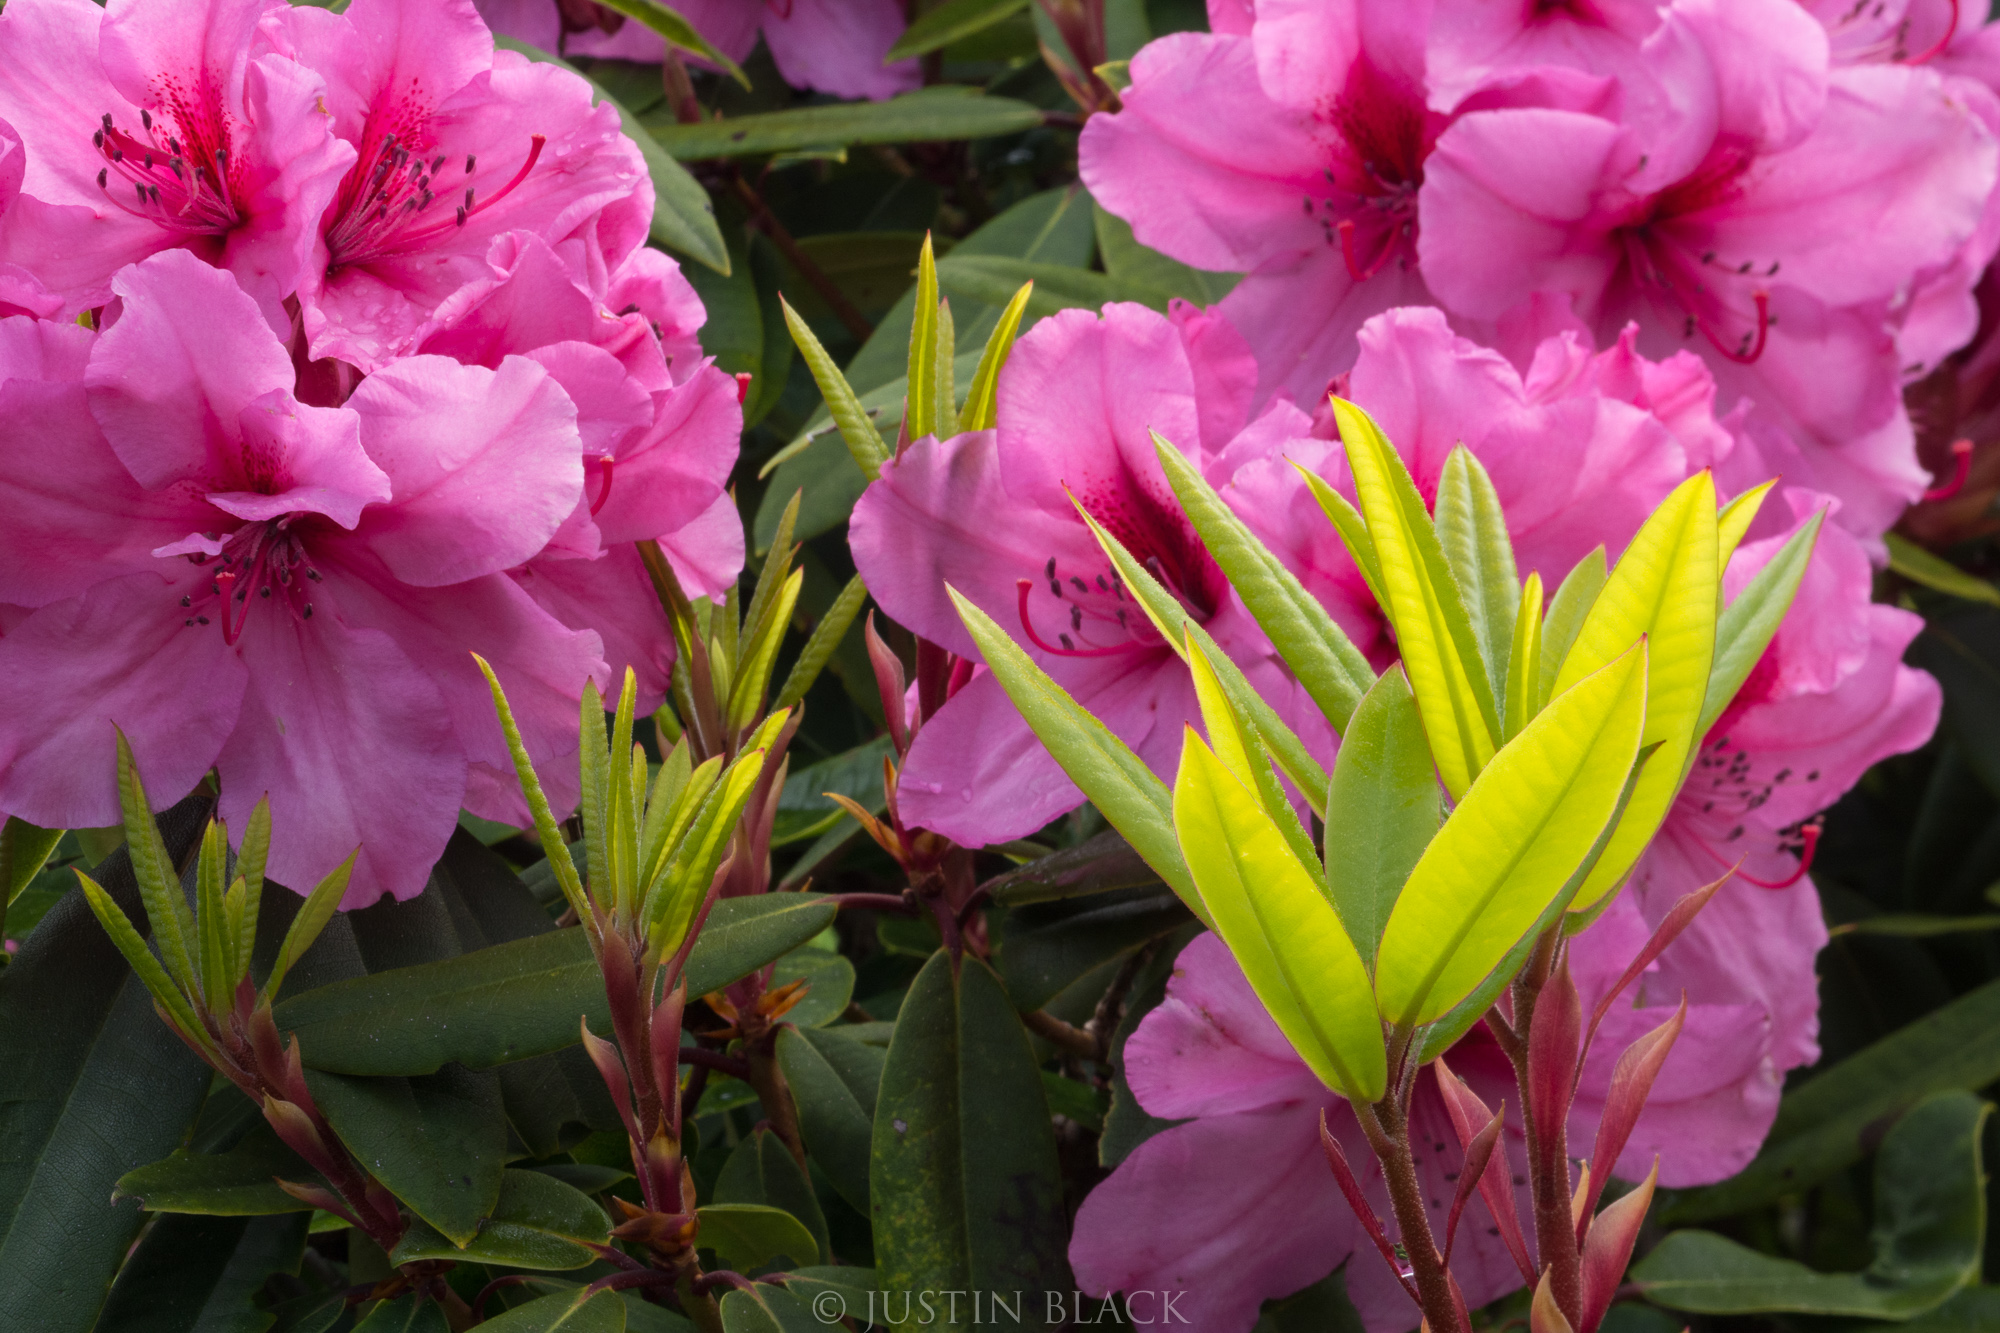
When you’re not out exploring with the group and getting one-on-one time with the workshop instructors in the field, you’ll come together at the hotel to take part in presentations on composition, light, creativity, and digital workflow.
Likewise, time is set aside for image critiques so you can get feedback and support from the group and workshop leaders.
In that regard, Visionary Wild’s photography workshops are much more than showing you the sights. Instead, this workshop is all about seeing, learning, developing new skills, and becoming a better photographer.
All you have to do is get yourself there and get yourself home after the workshop is completed. While you’re there, lodging, food, and transportation are taken care of.
What could be better than enhancing your photography skills under the close tutelage of expert photographers in a breathtaking location?!
Learn more about Visionary Wild
Planning Your Oregon Coast Photography Trip
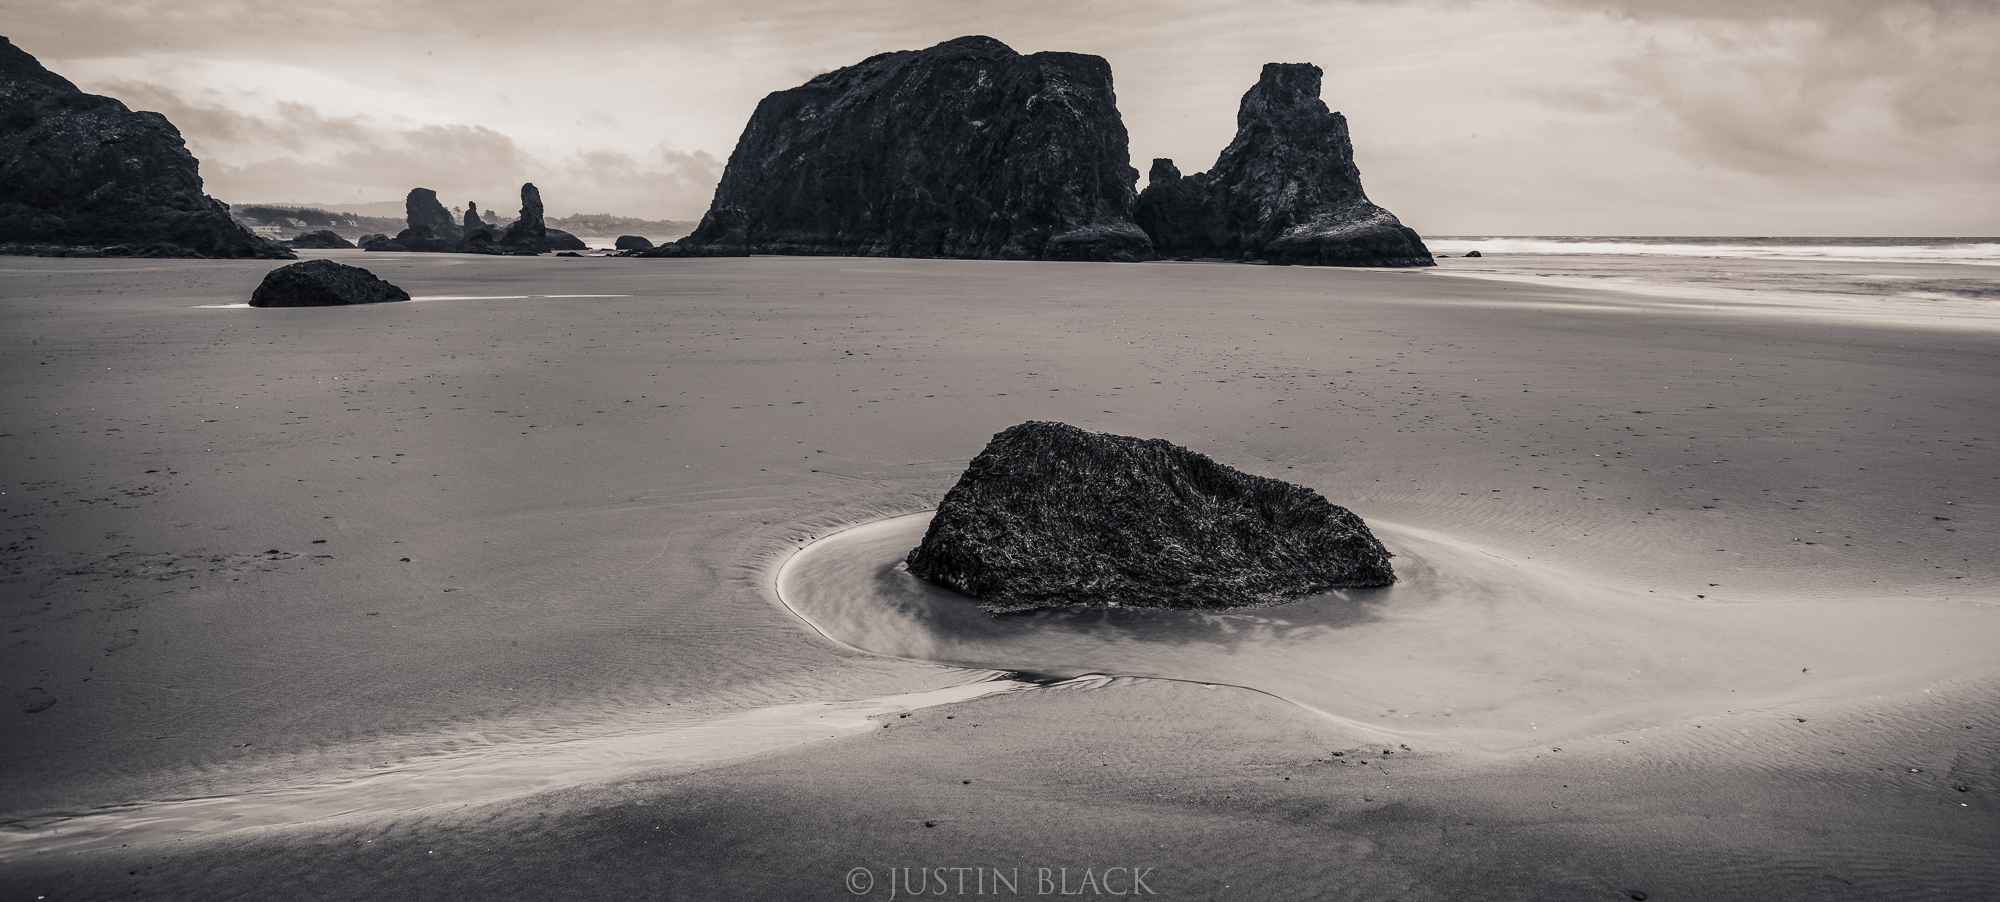
- Where to Stay: Best Western Inn at Face Rock in Bandon is an affordable hotel on the southern end of the Oregon Coast. The hotel is set on a gorgeous seven-acre lot right on the ocean and is just minutes away from dozens of activities and attractions.
- Where to Eat: Edgewaters gets rave reviews for its fresh seafood and local cuisine. The view of the water isn’t bad either!
- Must-See Attractions: Charleston Harbor, numerous lighthouses that dot the coast, and Bandon Beach should top your list of things to see while you’re traveling the Oregon Coast.
- Best luggage: For a trip of this length, the Nomatic Check-In roller bag is the ideal choice. It offers polycarbonate construction that stands up to the rigors of travel, silent wheels, low-profile handles, and a three-stage aluminum handle to fit your height. With space for 78 liters of gear, this bag has plenty of room for a 5-day trip or longer.
- Check the weather on the Oregon Coast right now.
We Recommend
Oregon Photography Hot Spots
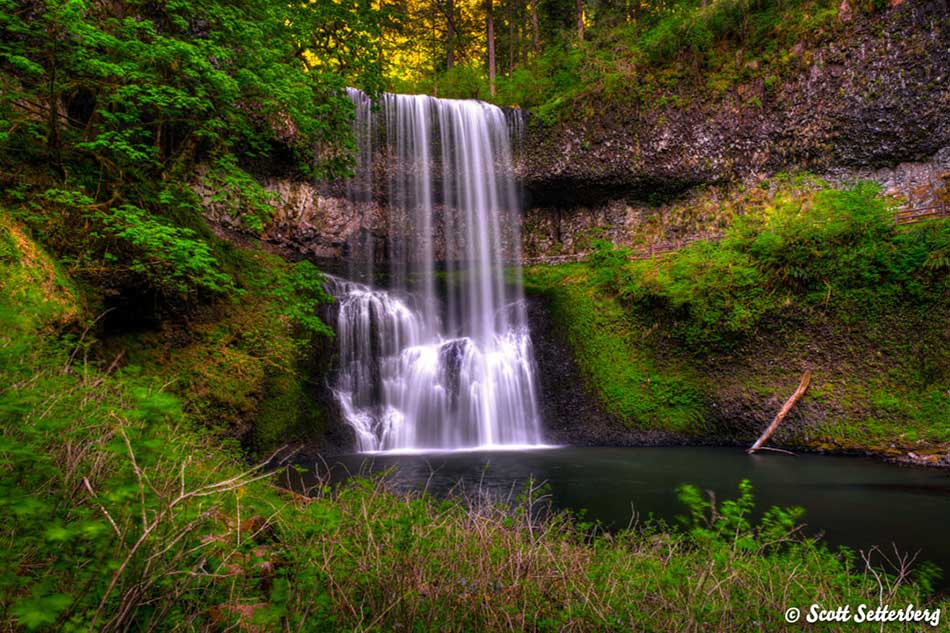
In times like these, I can’t help but to find myself daydreaming about my favorite photography trips, most of which include the Pacific Northwest.
Oregon photography is incredible because of the wide array of natural landscapes. Every time I visit, I come across new Oregon photography hot spots. Plus, thanks to the constantly changing weather, you can photograph the same Oregon photography locations over and over because the lighting is always different.
So, since we can’t participate in any Oregon photography for a while, we can at least read about the best Oregon photography locations. This way, we’ll be prepared when we can!
Crater Lake
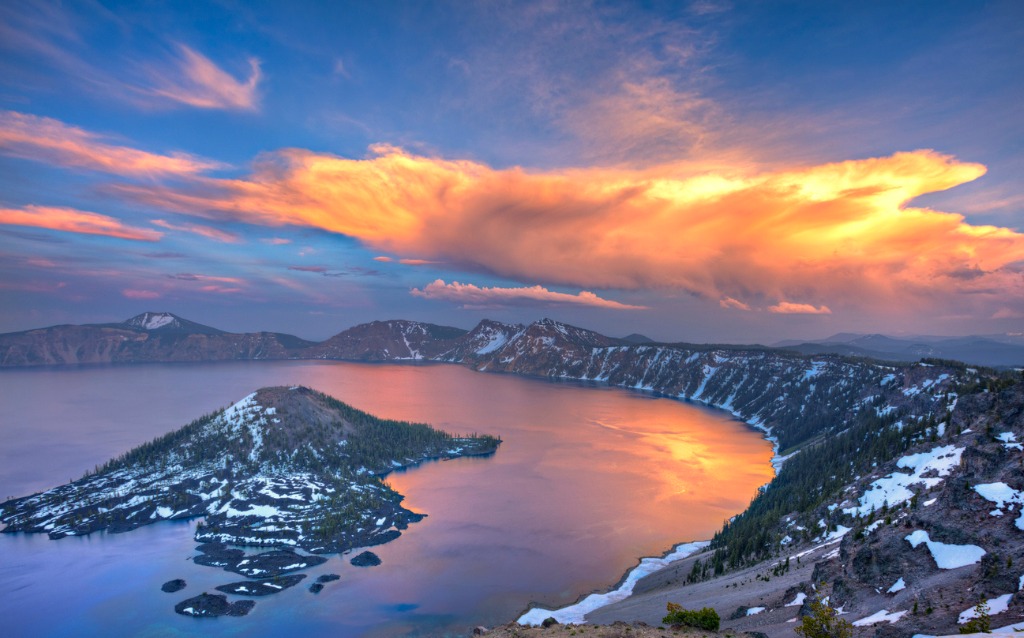
photo bytonda via iStock
Crater lake is one of the most popular Oregon photography hot spots. It’s an old volcano that has since filled up to be the deepest lake in the United States.
And, since it is so far from civilization (it’s a designated national park) it’s pretty much pristine year round.
During the winter, you can rent snowshoes to traverse the park the old fashioned way and explore areas outside of the tourist zones or do a little cross country skiing all the way around the rim.
Just make sure to check the visibility before you go since, like many of the places to see in Oregon, Crater Lake is typically covered in clouds and will take some patience to capture all its beauty.
For more information on Crater Lake, visit its National Park Service page.
Mount Hood
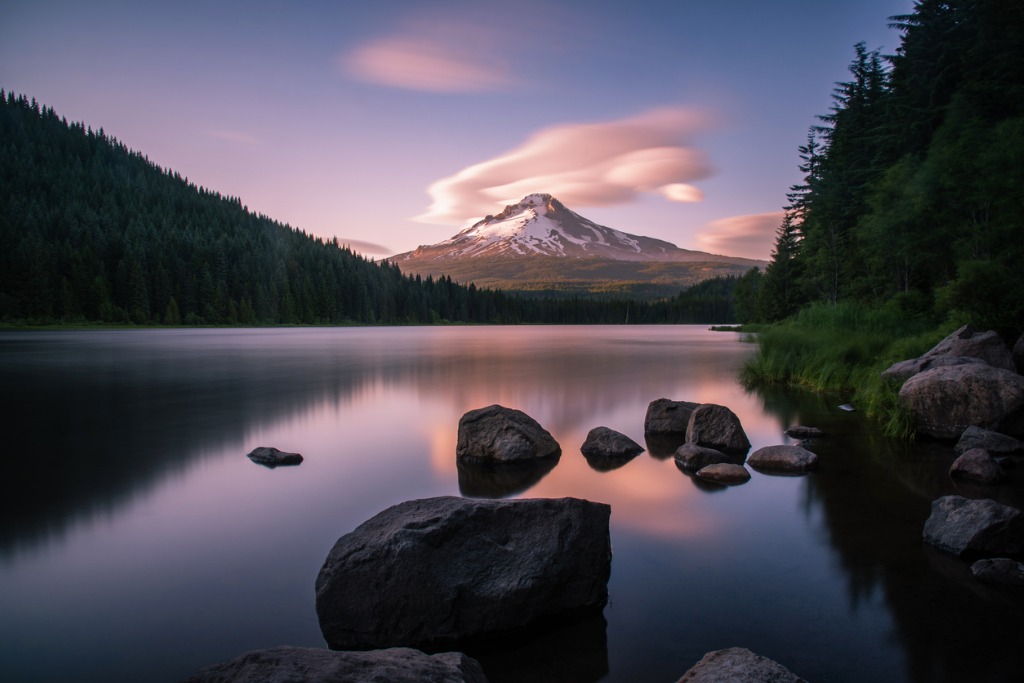
photo byNick Wiltgen via iStock
Mount Hood is the most famous mountain in Oregon and has something for every photographer. It features 11 glaciers, hundreds of waterfalls, rivers and lakes, and the most gorgeous flora available in the Pacific Northwest.
The mountain is especially beautiful in the autumn for those chasing Oregon fall colors photography because the changing colors of the trees are echoed in still waters of the many lakes that surround it.
But, don’t let the season dissuade you from heading to Mount Hood during your Oregon photography session because it is beautiful year-round.
The Mount Hood website has some invaluable information for those looking for the best Oregon photography locations.
Hood River Valley
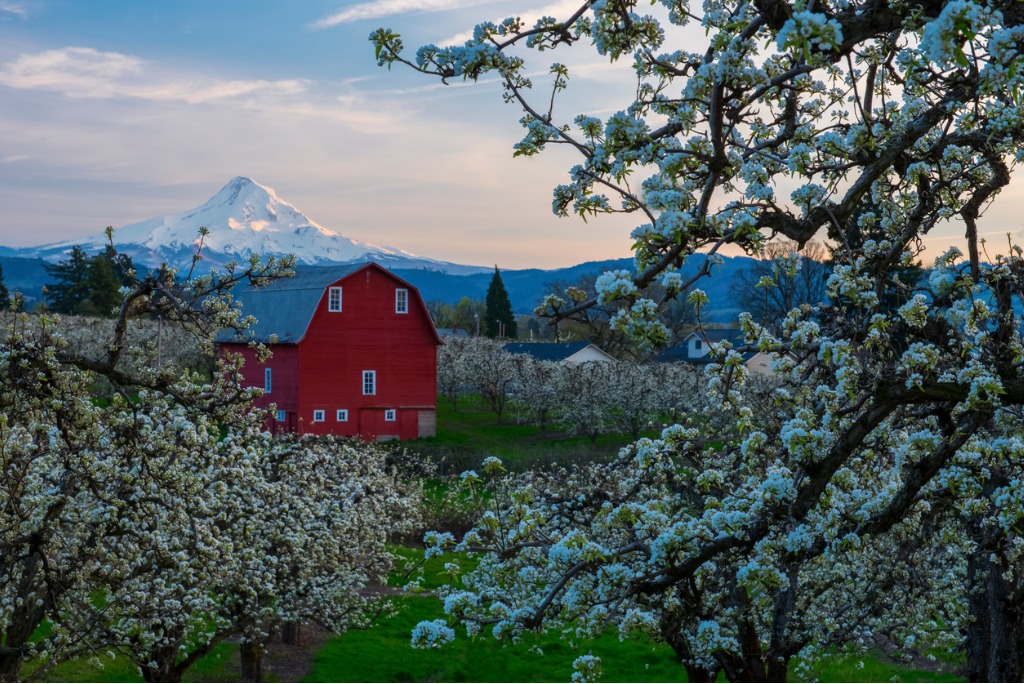
photo bysvetlana57 via iStock
Funnily enough, Mount Hood is everyone’s third favorite reason to visit the Hood River Valley (at least according to TripAdvisor).
The Hood River Valley features thousands of acres of pristine wilderness between Mount Hood, the Columbia River, and the Cascade Mountain Range.
It should be no surprise to anyone, then, that most of Oregon’s fine photographic prints are of this wilderness.
While many of the areas can only be reached by foot and are thus more difficult for a short Oregon photography trip, the Hood River Valley is worth the trip if just to visit the many vineyards surrounded by snow capped mountains in the area.
The Hood River Valley Parks & Rec website has all the up to date information on park trails.
Cape Perpetua
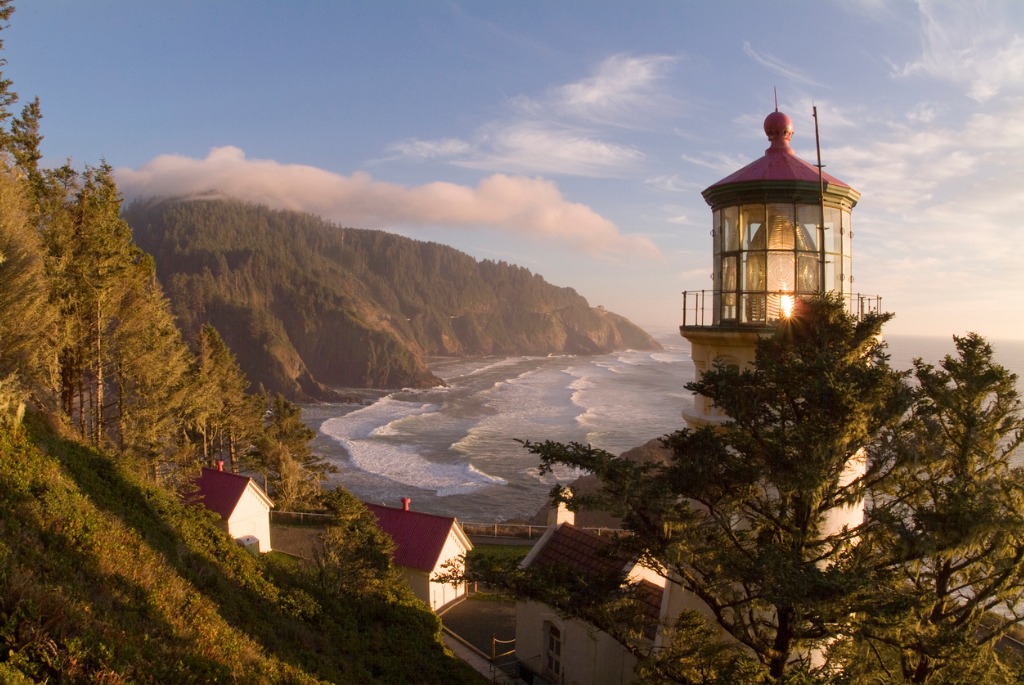
photo byLong_Strange_Trip_01 via iStock
You can’t miss Cape Perpetua on your next Oregon photography trip, even if it’s a bit far from all of the other tourist destinations.
Cape Perpetua is a wooded landscape bordering the Pacific Ocean in Lincoln County. It’s technically part of the Siuslaw National Forest, which is why the land is so immaculate.
Cape Perpetua is a great addition to your Oregon photography trip if towering trees, coastal fog and choppy waters is the mood you’re looking for.
Feel free to call the folks at the Cape Perpetua Visitor’s Center for further details as you plan your Oregon photography trip.
Samuel H. Boardman State Scenic Corridor
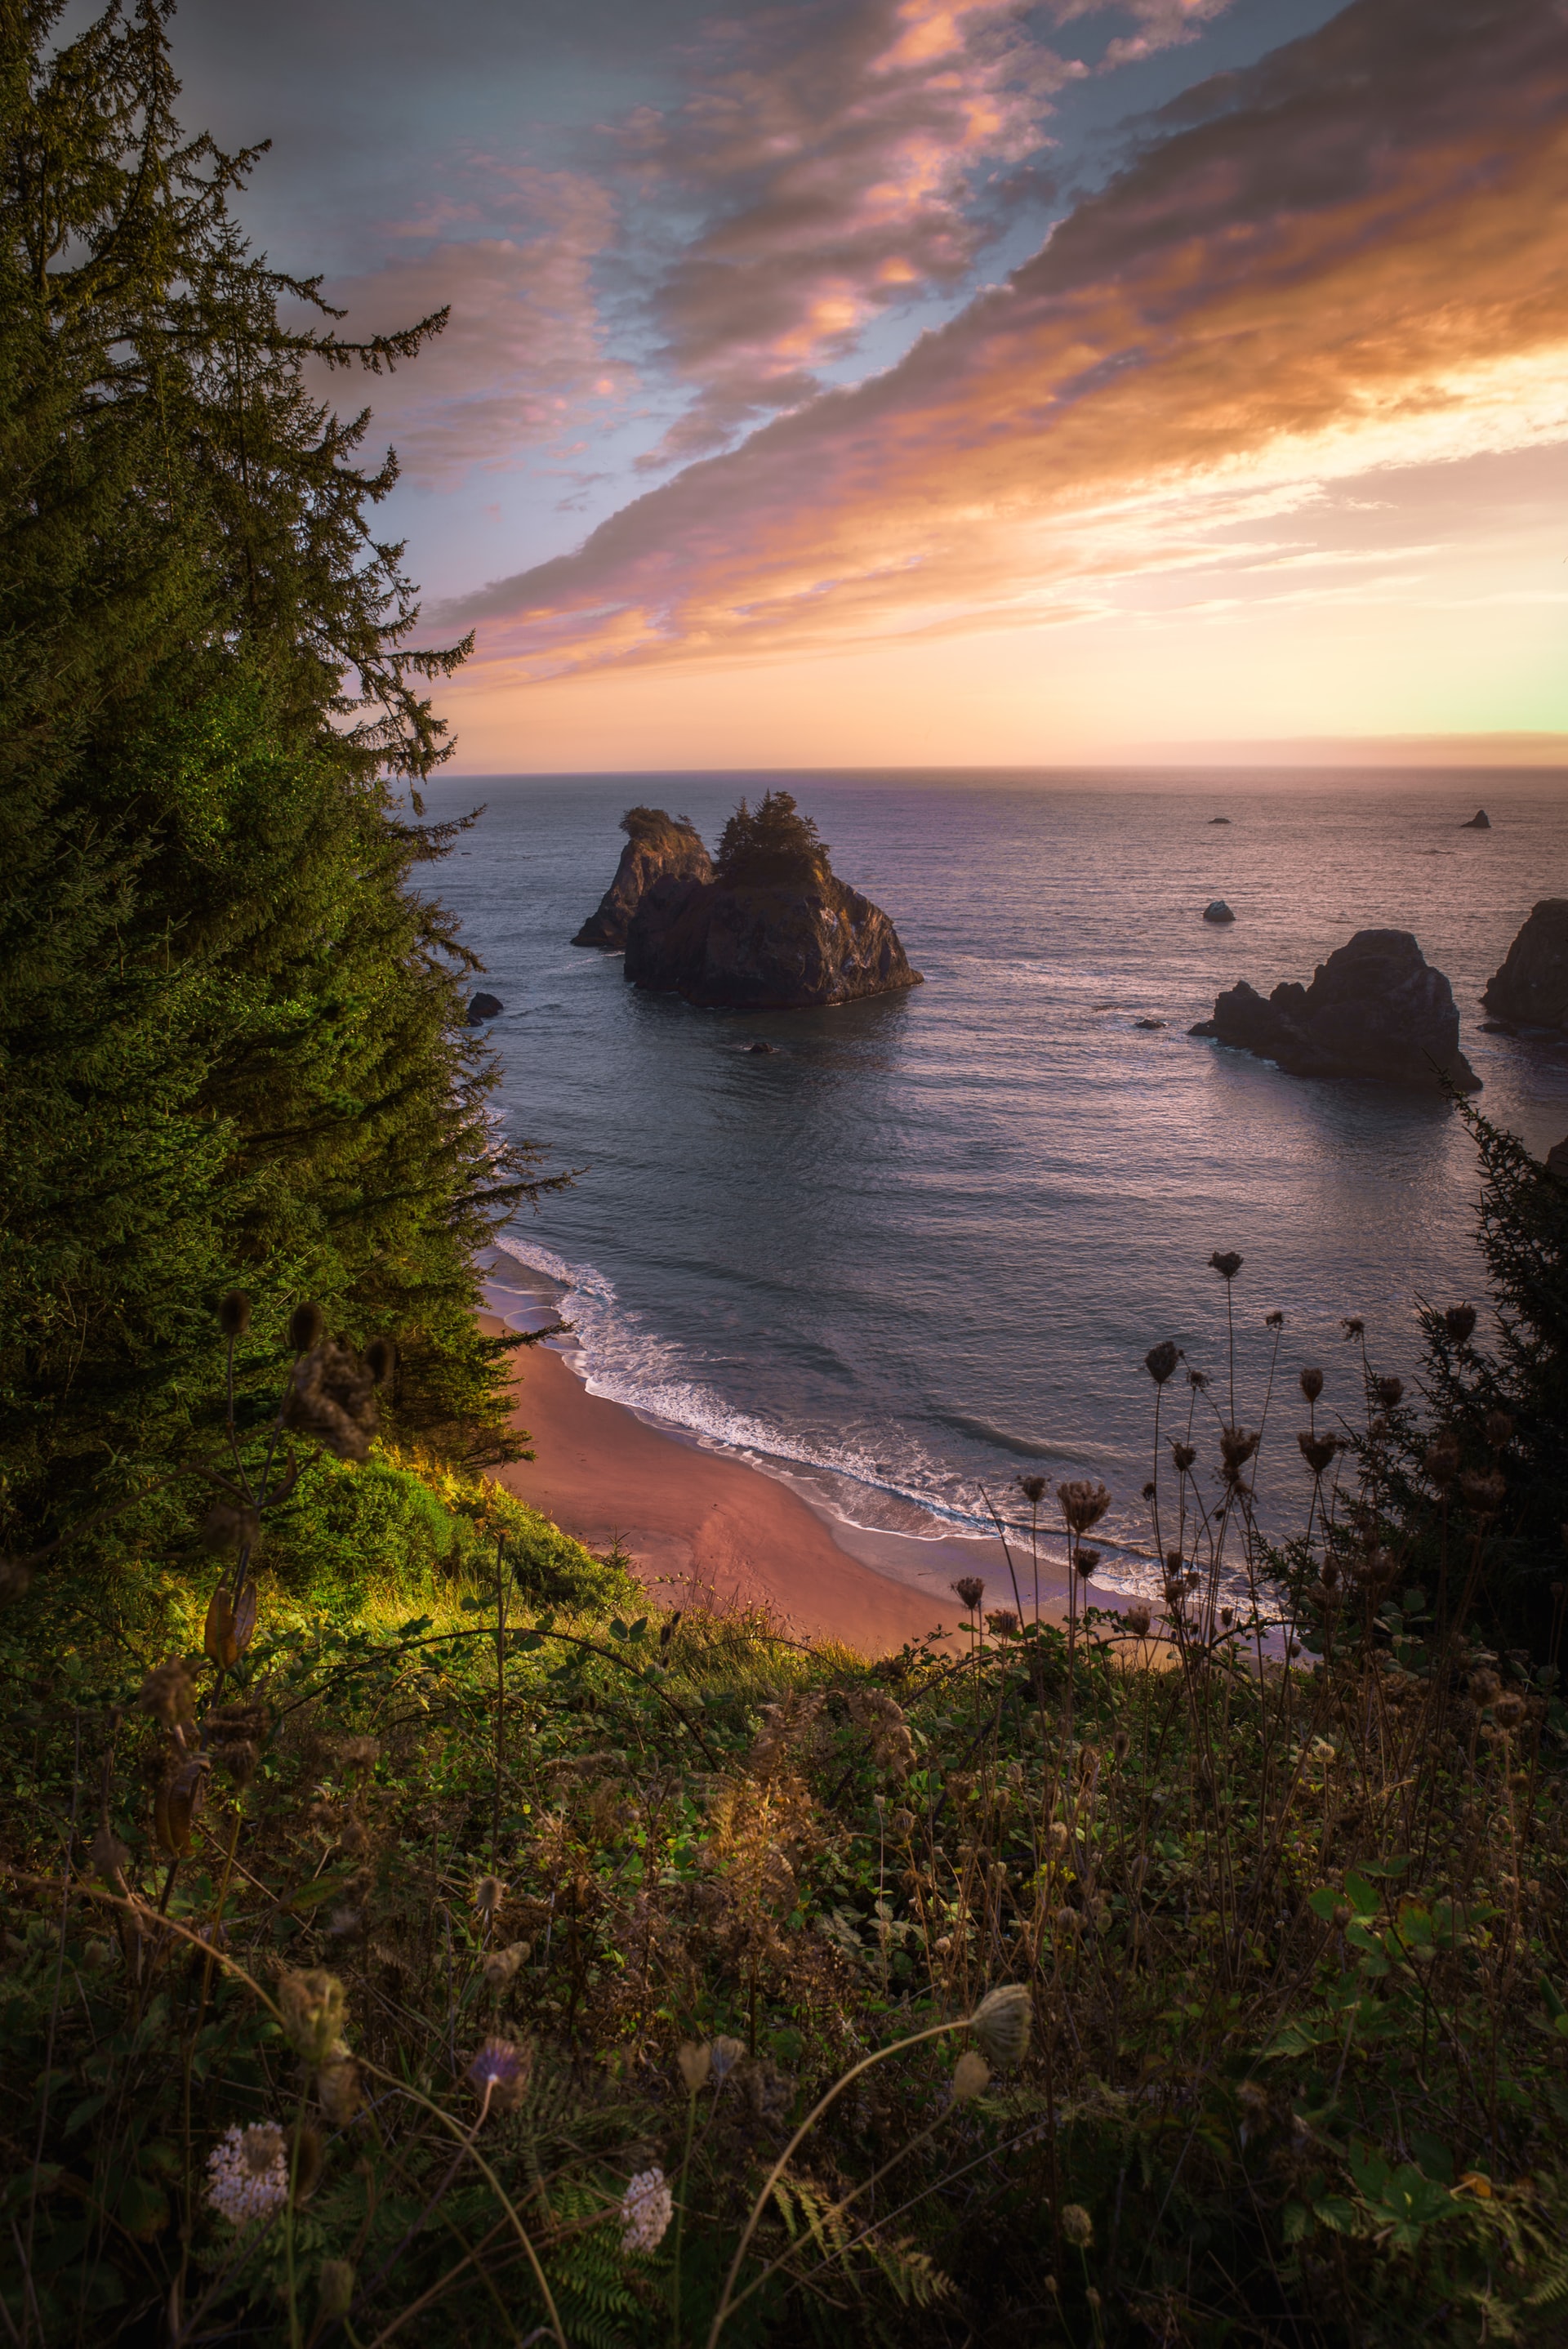
Photo by Justin W on Unsplash
The Samuel H. Boardman State Scenic Corridor is the easiest way to photograph Oregon without ever leaving your vehicle. It’s a quick 12-mile drive on Highway 101, but with a different turn-off every half mile you could get lost for days along this corridor.
One of my personal favorite spots along this corridor is the Cape Ferrelo Viewpoint which features a stunning angle for Oregon sunset shots and the best whale watching in the state throughout the autumn and spring months.
Read more about the Samuel H. Boardman State Scenic Corridor here.
Haystack Rock
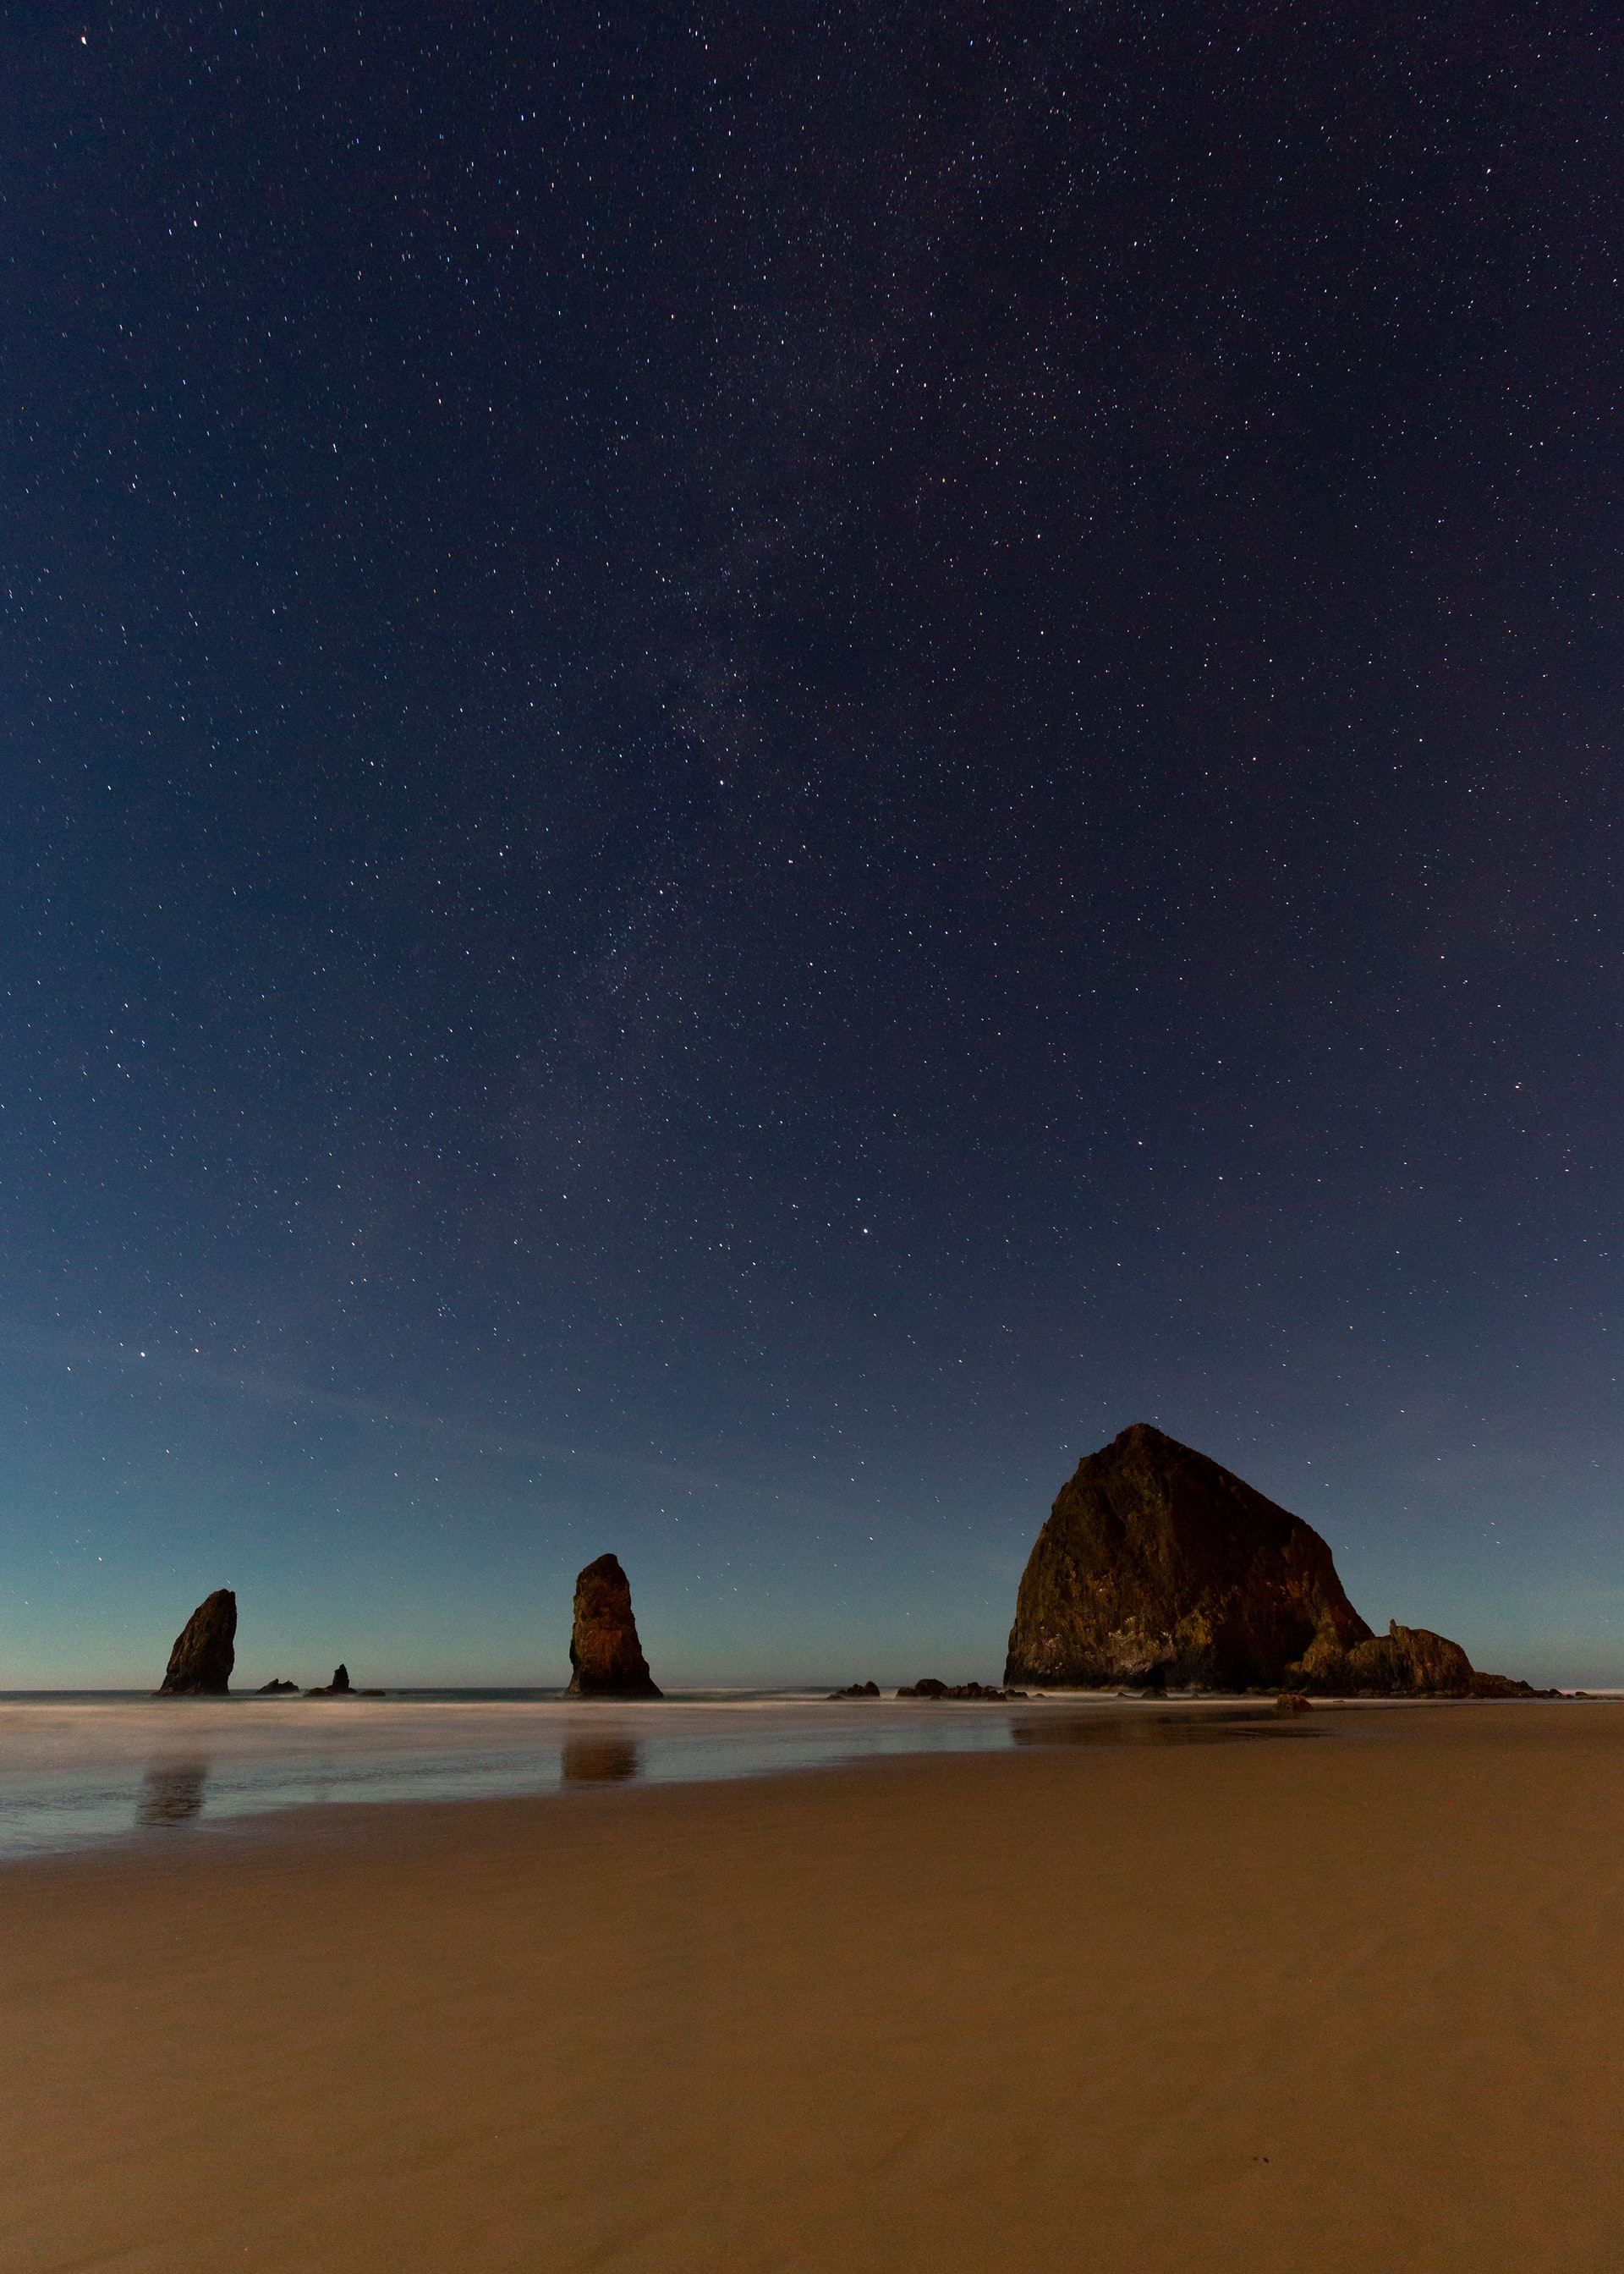
Photo by Dave on Unsplash
Besides Mount Hood, Haystack Rock may be the most recognizable scene from Oregon. Haystack Rock is a 235-foot rock that juts out of the ocean near Cannon Beach (which coincidentally means you can fit two Oregon photography hot spots into one).
If you can afford it, try spending an entire day at Haystack Rock. At low tide, you can walk up to it and search for sea stars along the newfound beach, while at high tide you can take incredible photos of the sea stack standing tall amidst the incoming waves.
The Cannon Beach website has more information about Haystack Rock.
Multnomah Falls
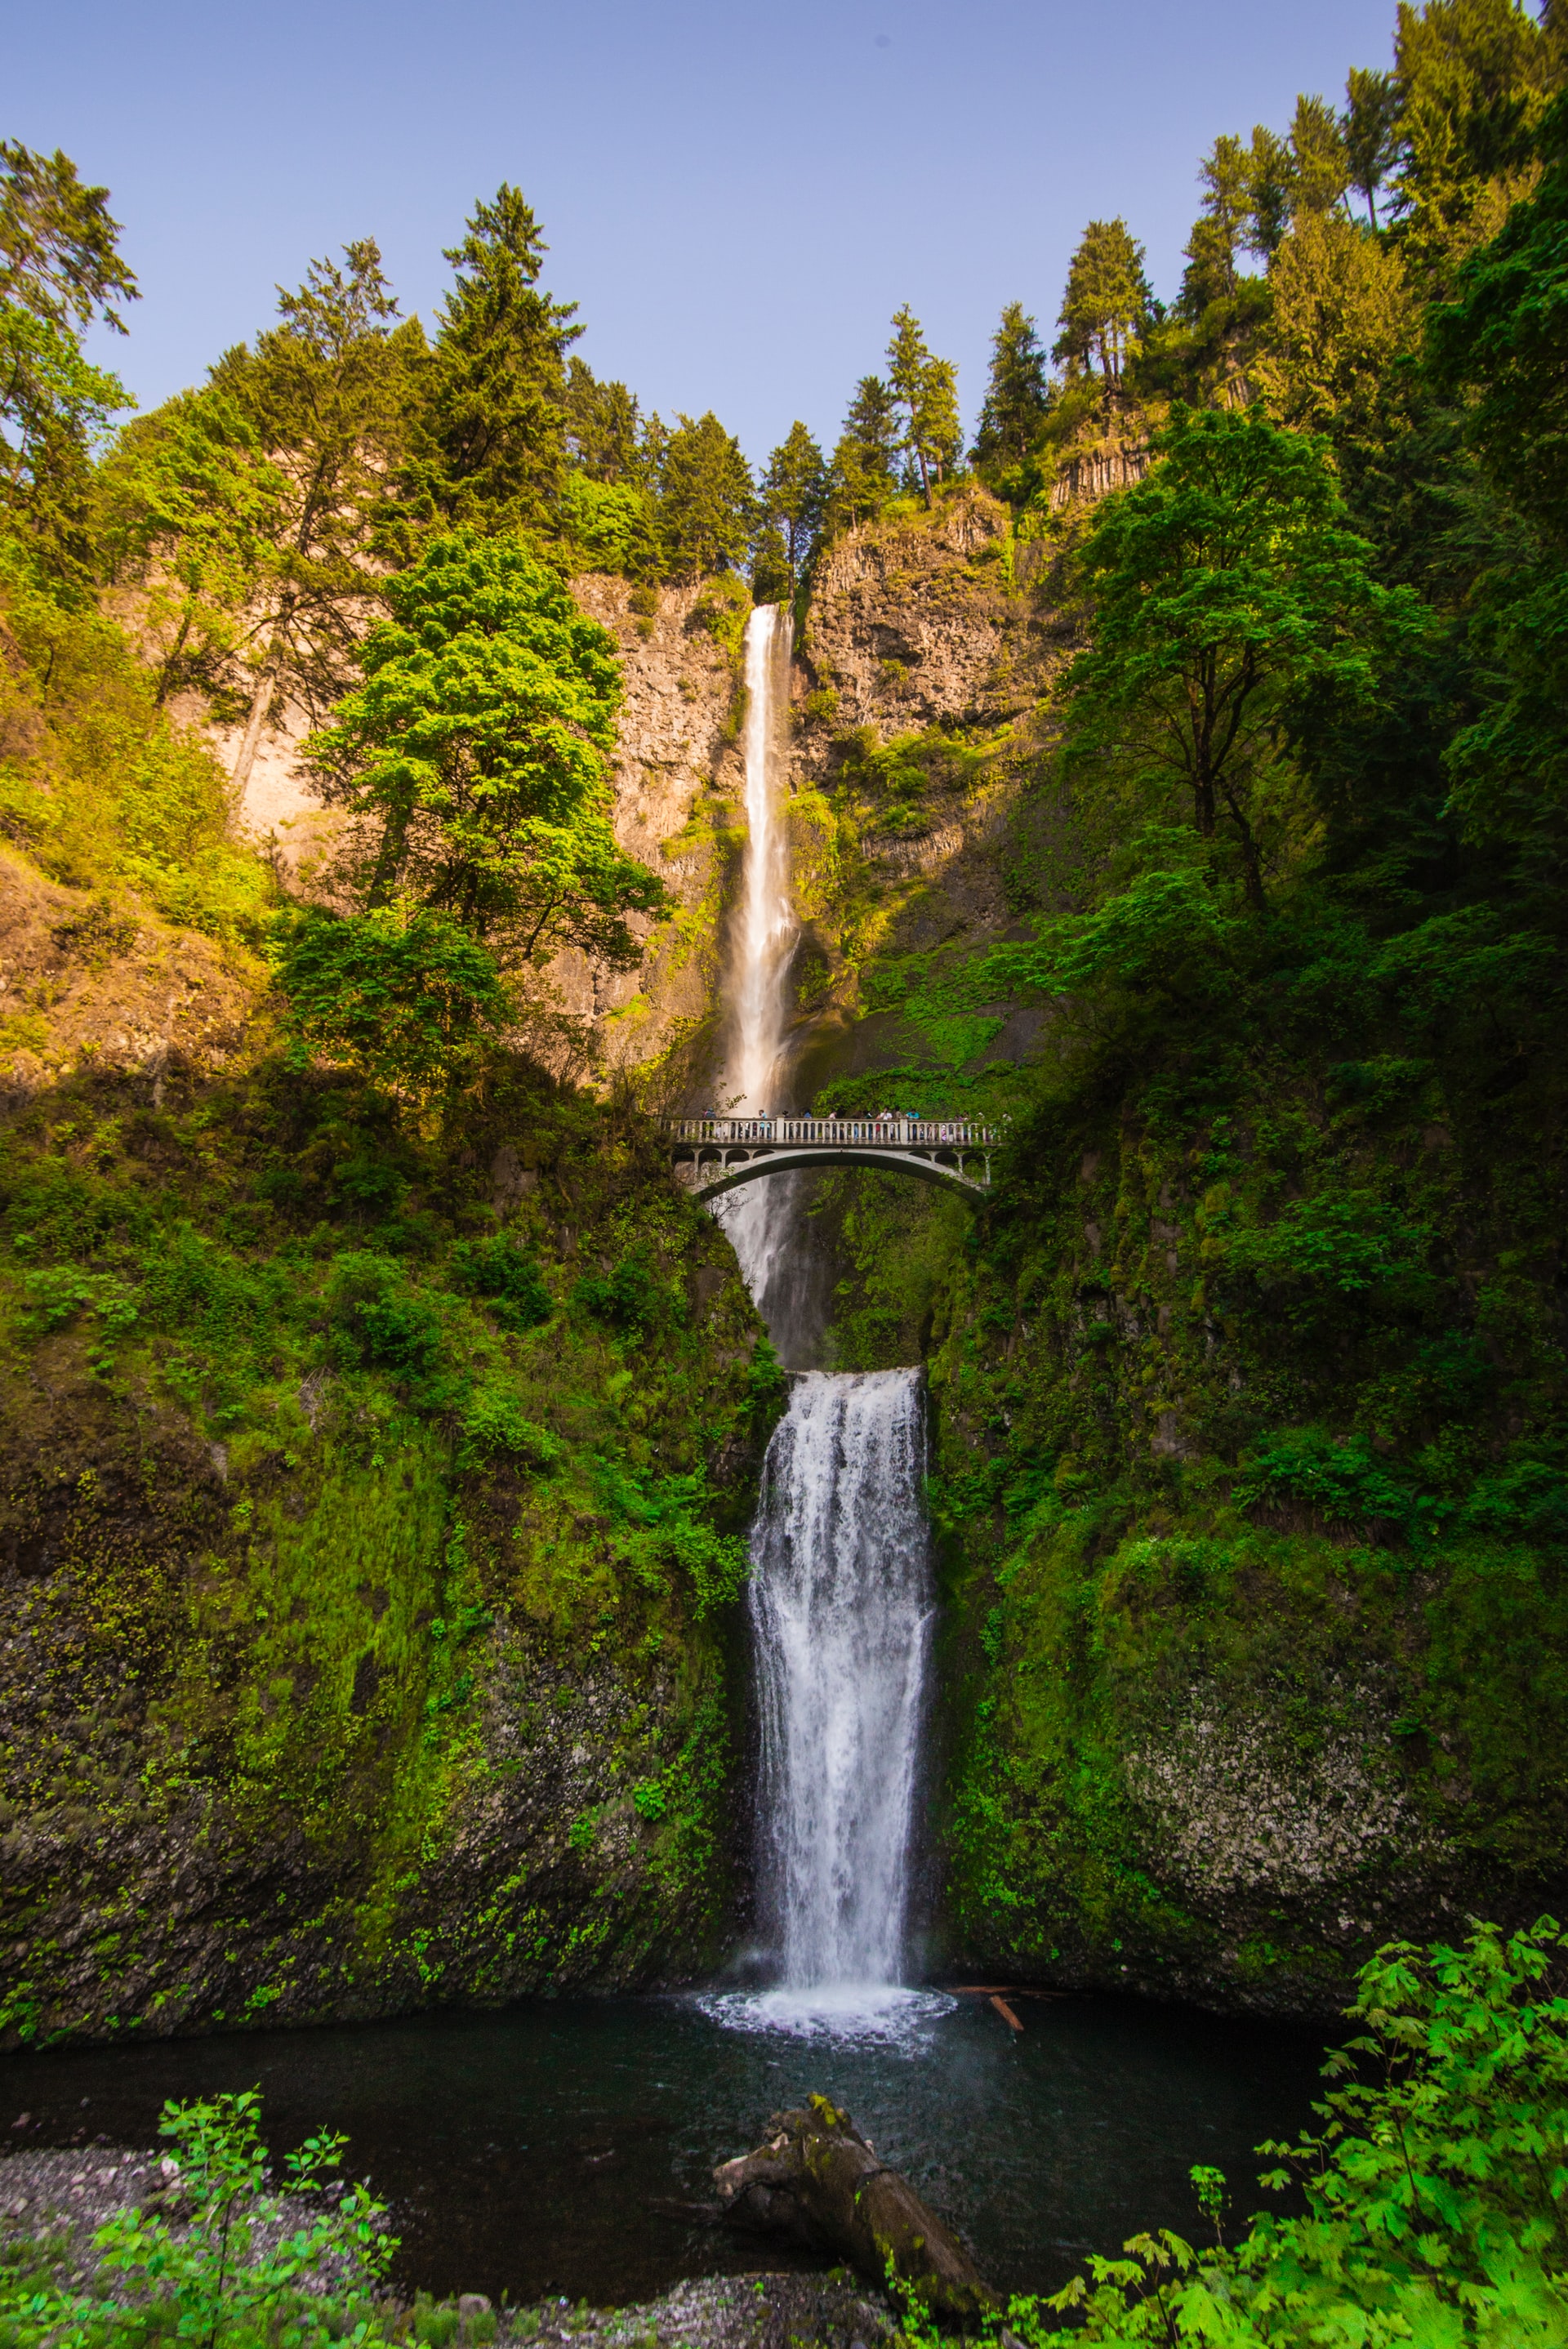
Photo by Ethan Dow on Unsplash
Multnomah Falls is a 620-foot waterfall nestled in the Columbia Gorge scenic area. It’s a quick drive from Portland, but it’s a very popular day trip so you should be prepared before you include it in your Oregon photography trip.
For instance, if you can try and go during an off season, like in the middle of winter, you’ll have many more opportunities to snap your photos without tourists in them.
Multnomah Falls is named after the Multnomah Native American tribe that is indeginous to this area. Another place in Oregon that borrows its name from the tribe is the Multnomah Whiskey Library in Portland, which is the perfect end to a long Oregon photography trip.
And, if you're looking for more information on visiting Multnomah Falls, you can find it on the Multnomah Falls visitor guide.
Silver Falls

Silver Falls is yet another gorgeous waterfall hidden in the forests of Oregon. Since it isn’t quite as popular as Multnomah Falls, you can visit year round without much worry about fighting crowds.
Silver Falls is one of the best Oregon photography locations because it is located inside Oregon’s largest state park and is located outside of Salem, so less international travellers hit this waterfall than any others.
Check out the Oregon State Parks page on Silver Falls for more info.
Smith Rock State Park

Smith Rock State Park is one of my favorite places to see in Oregon because, unlike many of the other Oregon photography hot spots on this list, it is located in the high desert.
Don’t let this fool you, though. Smith Rock State Park is still incredibly windy and cold. It features 650 acres of smashed volcanic ash that creates gorgeous valleys that rival the forests of the Portland area.
You can visit the Smith Rock State Park page on the Oregon State Parks website for information about camping, hiking, and Oregon photography.
Three Sisters Wilderness

photo byhockeymom4 via iStock
The Three Sisters Wilderness is yet another fantastic Oregon photography destination. This wilderness area actually lies within the Cascade mountain range and features some of the best backcountry hiking in the world.
Since the Three Sisters Wilderness begins at just under 2,000 feet elevation and soars to over 10,000 feet elevation, you can expect intense changes in scenery, wildlife, and climate.

Photo by Dan Meyers on Unsplash
For more information on the Three Sisters Wilderness, visit the U.S. Forest Service’s page on it.
All-Inclusive Oregon Photography Tour
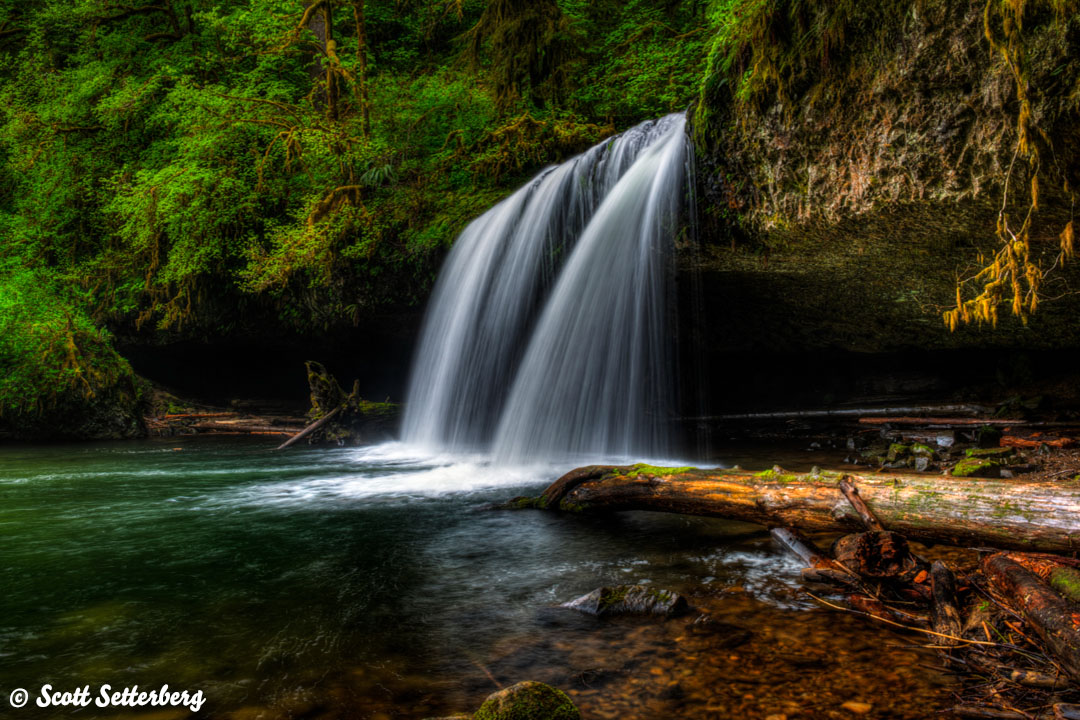
I’ve spent a lot of time in Oregon over the years, and have seen much of its beauty first-hand.
But the next time I’m in Oregon for a photography outing, you can bet I’ll be joining a photography tour in order to maximize my time seeing and photographing the state’s beauty.
A good buddy of mine, Scott Setterberg of ColorTexturePhotoTours has been leading photography outings in Oregon for decades. He knows where to go and when so you get to see the most beautiful landscapes Oregon has to offer.

In fact, Scott has two Oregon Fall Colors Photo Tours slated for fall 2020 that you don’t want to miss.
This tour takes you from locations like White River Falls to Smith Rock, Silver Falls State Park to Abiqua Falls, Trillium Lake to the Tri-Cities, and many points in between.
The tour is limited to just four people, that way your time learning and sharing with Scott and the rest of the group is maximized.
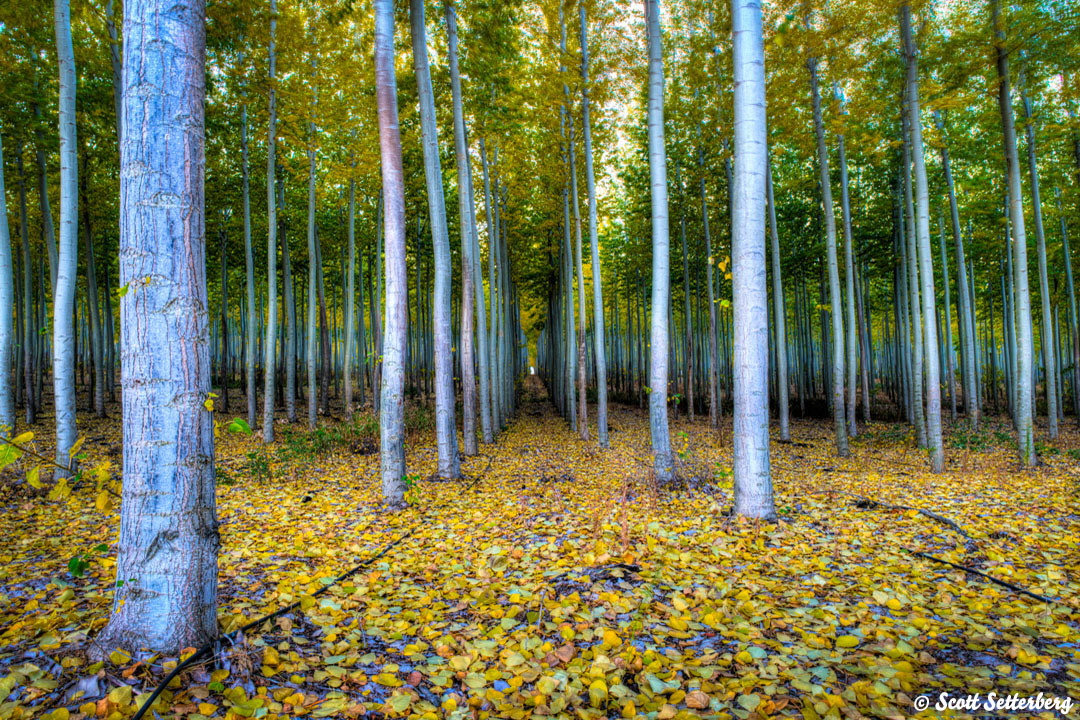
This is an all-inclusive trip, too, so you don’t have to worry about lodging, meals, or transportation while you’re there. Just get yourself to Oregon and ColorTexturePhotoTours will take care of the rest!
I think we’ll all need a nice, relaxing trip once the pandemic is under control. Why not make your trip an unforgettable experience to Oregon?!
Get more details about the Oregon Fall Colors Photo Tour.
Other Tips for Planning an Oregon Photography Trip
- Where to fly into: The Tri-Cities Airport (PSC) in Pasco, Washington is well-located for starting your photography adventure in Oregon.
- Best luggage: For a trip of this length, the Nomatic Check-In roller bag is the ideal choice. It offers polycarbonate construction that stands up to the rigors of travel, silent wheels, low-profile handles, and a three-stage aluminum handle to fit your height. With space for 78 liters of gear, this bag has plenty of room for a 5-day trip or longer.
- Attractions & Things to Do: The Tri-Cities area is home to many wineries you can explore. The Wahluke Slope is a must-see for wildlife enthusiasts. For history buffs, consider a stop by the Hanford Nuclear Reservation.
- Best Time of Year to Visit: Late spring and early fall are ideal times to visit Western and Eastern Oregon. Late spring is after the rainy season ends and early fall is before it begins.
- Check the weather in the Tri-Cities area right now.
We Recommend
Patagonia Photography and Travel Guide
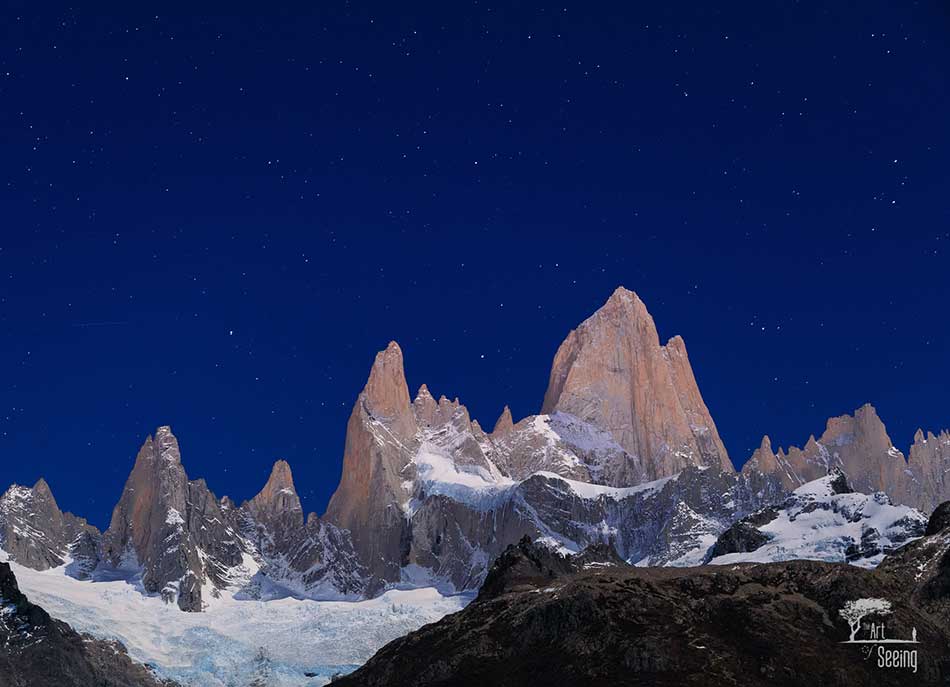
Photo by Ken Lee/Art of Seeing Photography Adventures
Patagonia is a breathtakingly beautiful area that occupies the southern end of South America.
It’s soaring mountains, windswept plains, pampas, and deserts extend into parts of Chile and Argentina.
The sheer variety of landscapes in this region makes it worthy of a photography-centric trip. But there is so much more to Patagonia than impressive granite spires, alpine lakes, and desert plateaus.
In this Patagonia photography and travel guide, we’ll dive into some of Patagonia’s well-known, must-see features that you need to photograph and give some insights into some off-the-beaten-path opportunities for exploring Patagonia with your camera as well.
What to Photograph in Patagonia - Mirador Los Torres and Los Cuernos
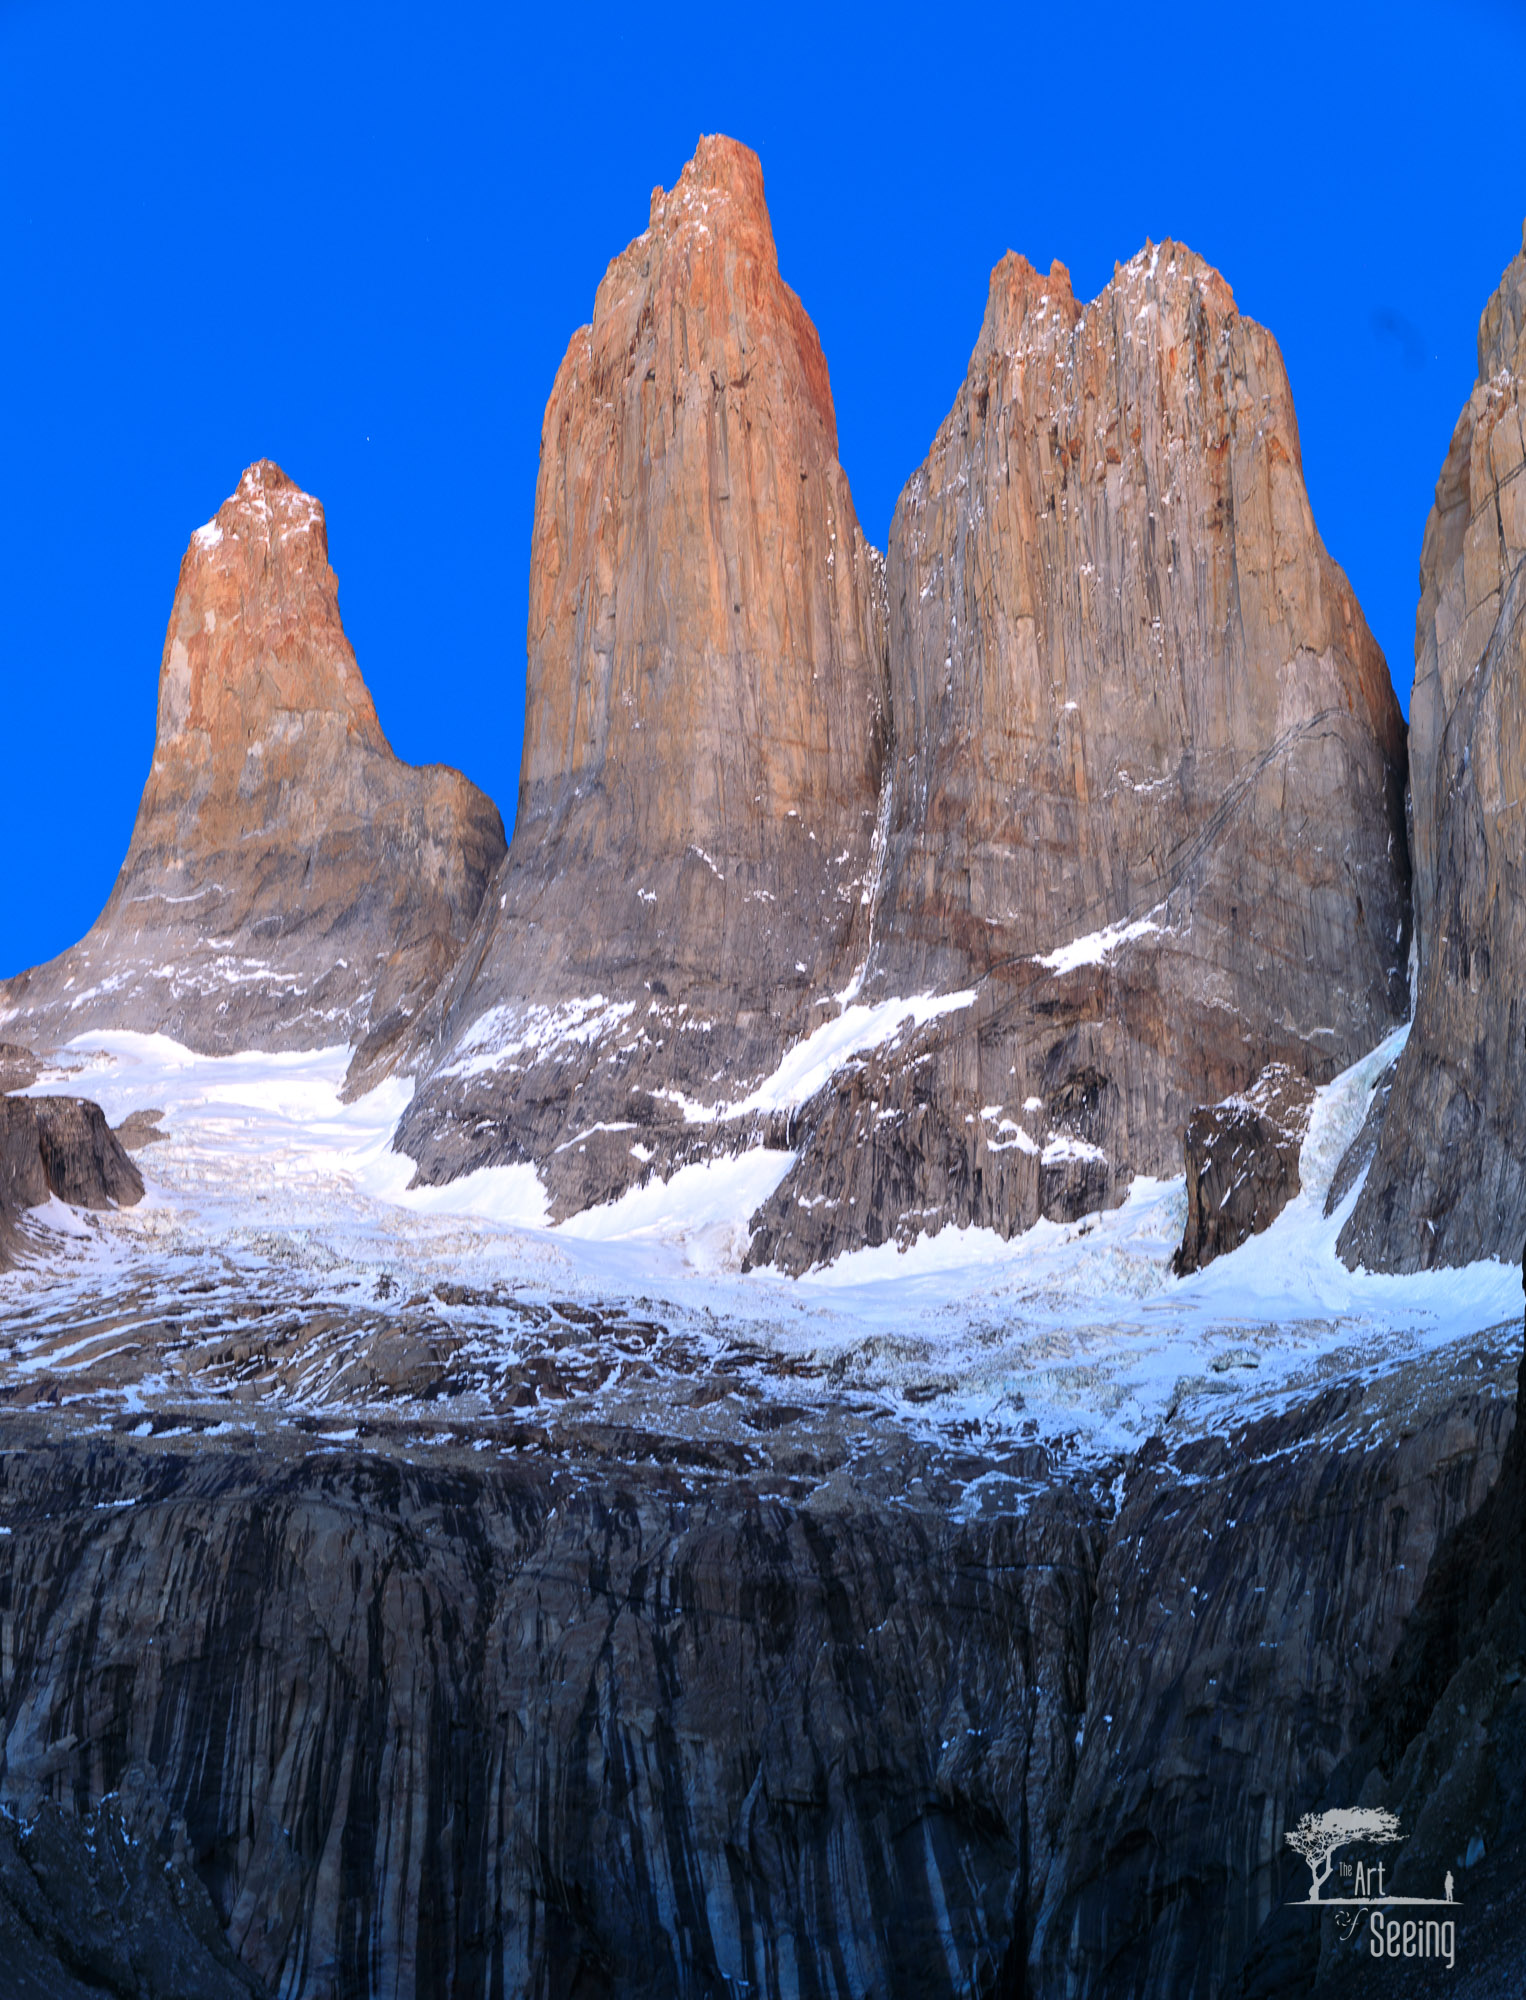
Photo by Ken Lee/Art of Seeing Photography Adventures
A trip to Patagonia would not be complete without capturing images of its jagged mountain peaks.
Areas like Mirador Los Torres and Los Cuernos are extremely popular, and for good reason - the views from these locations are postcard-worthy, to be sure.
Mirador Los Torres, or “The Towers” is worth the trip to Patagonia by itself.
The triad of granite towers extend virtually straight up toward the heavens, their pointed peaks piercing the sky.
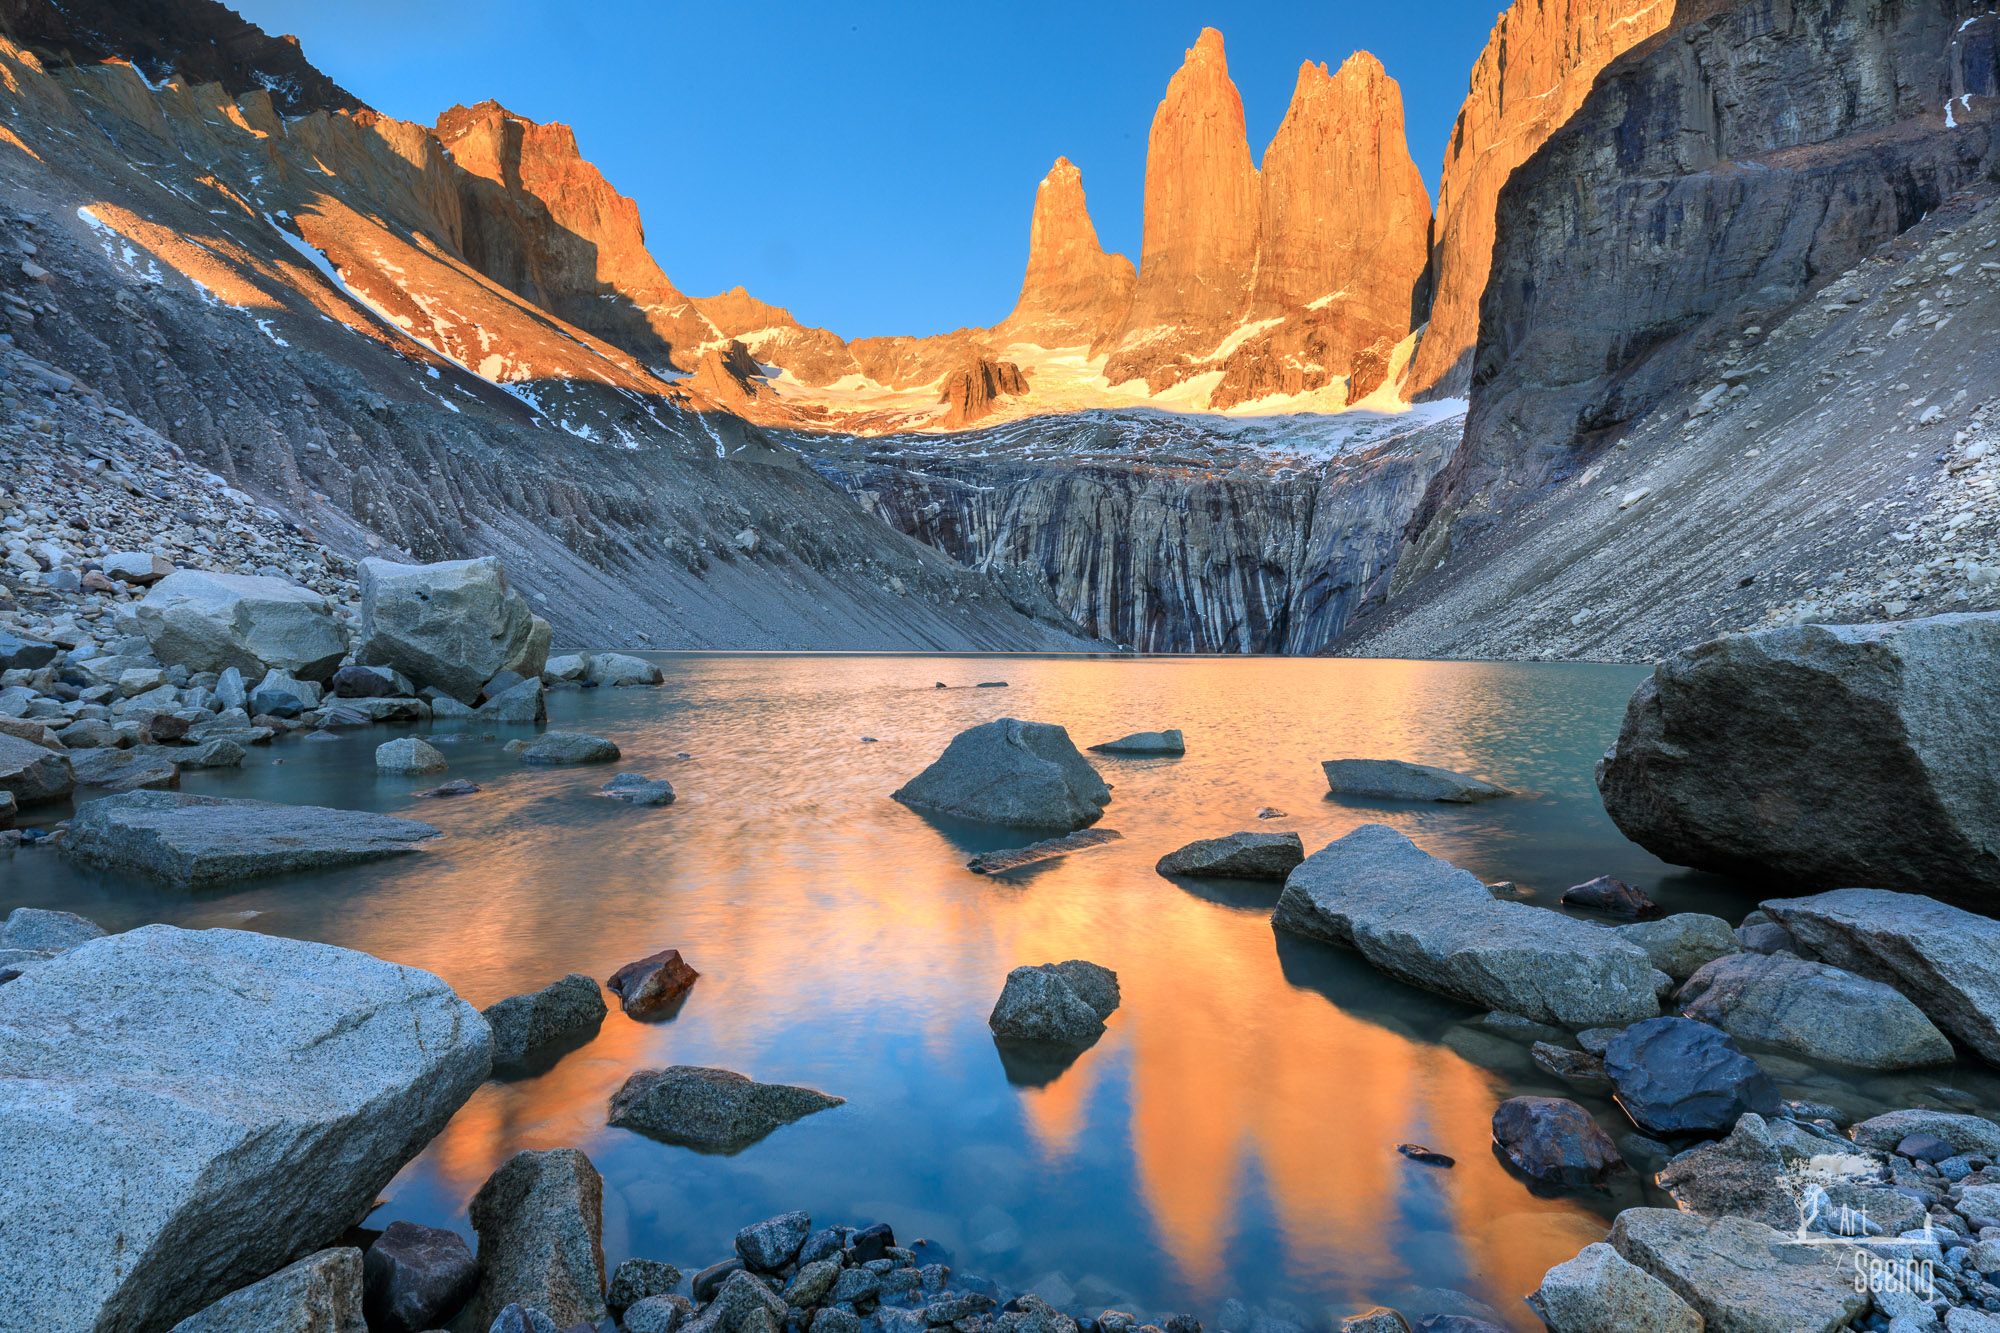
Photo by Ken Lee/Art of Seeing Photography Adventures
As you can see above, sunrise and sunset are the ideal time to photograph these mountains, with the warm, golden tones of the light softly falling on their rugged profile.
It’s a busy location, despite the grueling hike to get there. But it’s clearly a location you don’t want to miss on your trip to Patagonia!
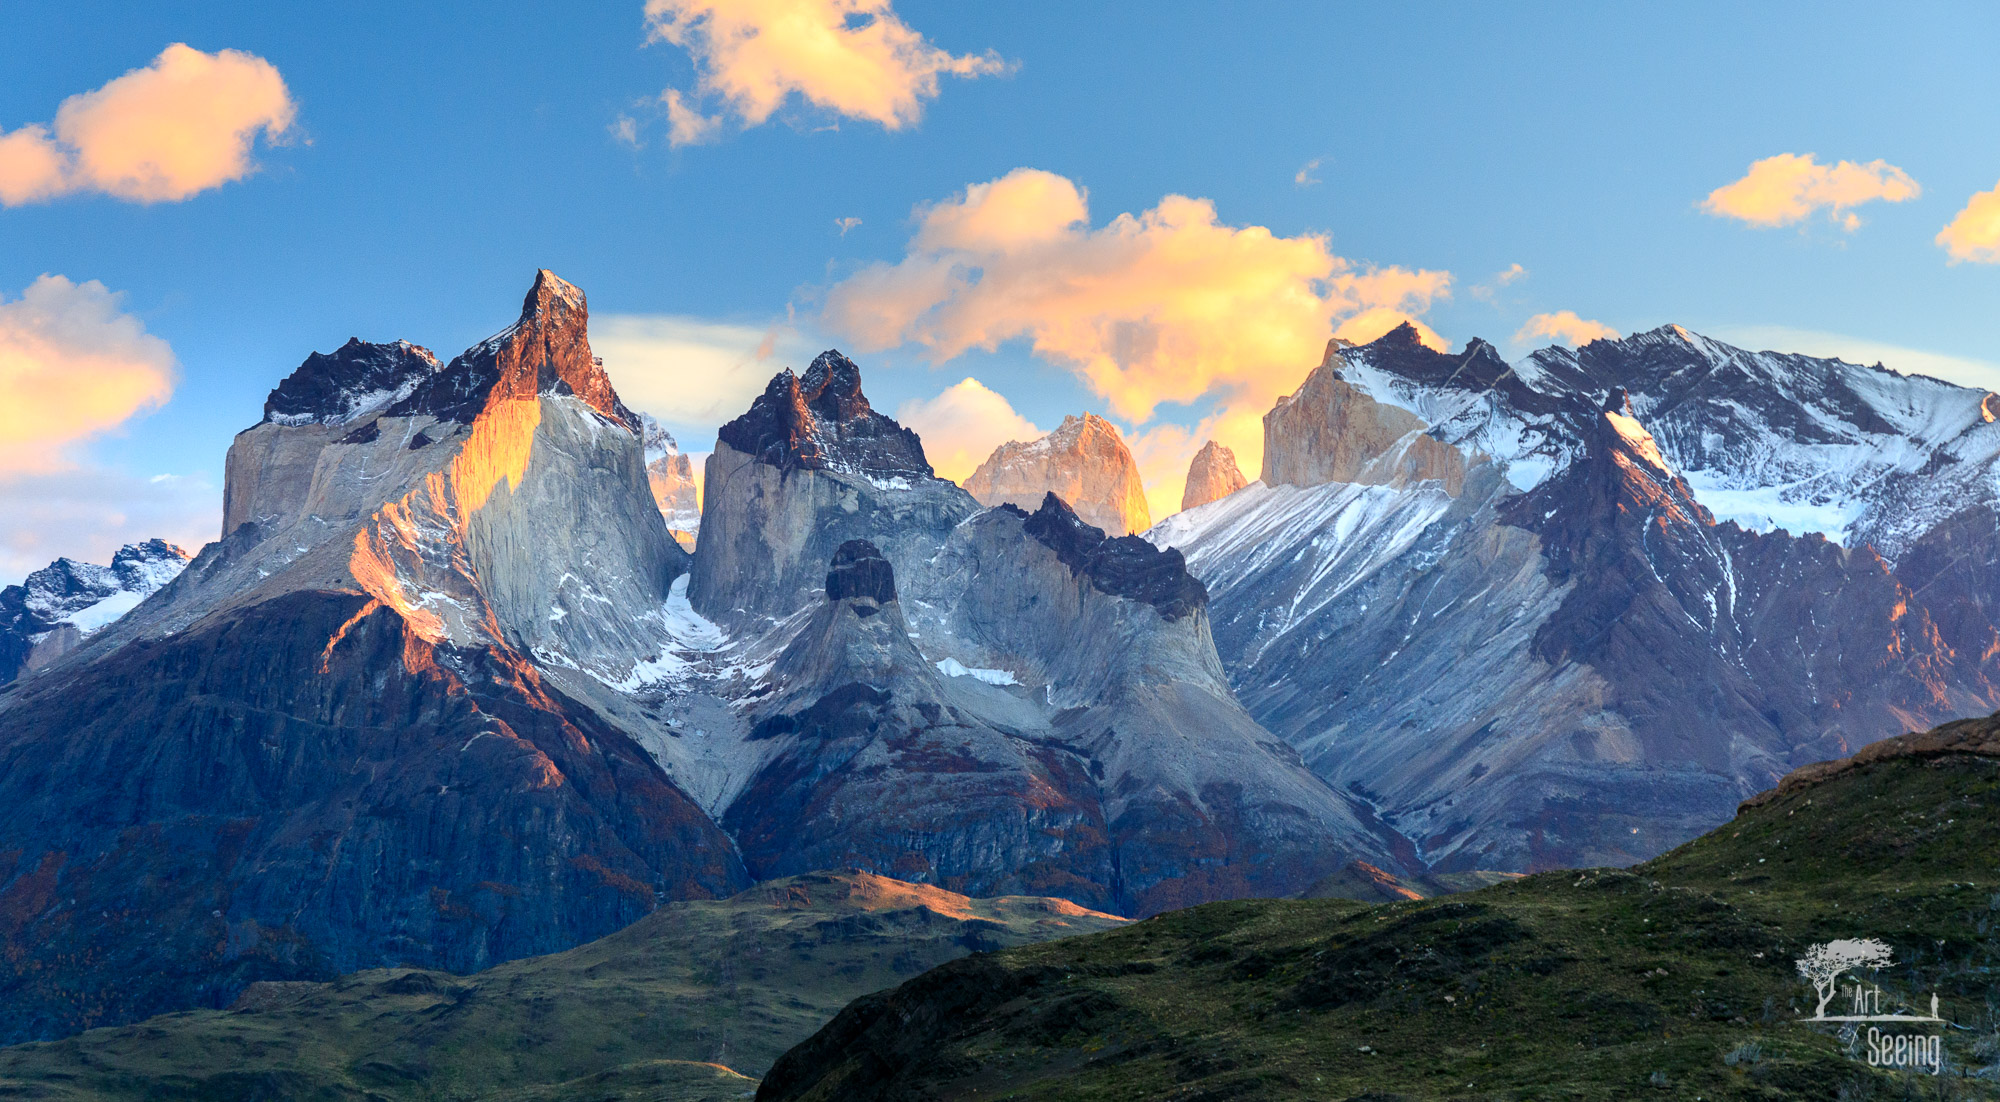
Photo by Ken Lee/Art of Seeing Photography Adventures
For a completely different view - a much wider one that encompasses a vast swath of the Patagonian landscape - travel to Los Cuernos.
Los Cuernos, which means “The Horns,” is in Torres Del Paine National Park, Chile, a particularly spectacular area of Patagonia that’s also home to Mirador Los Torres.
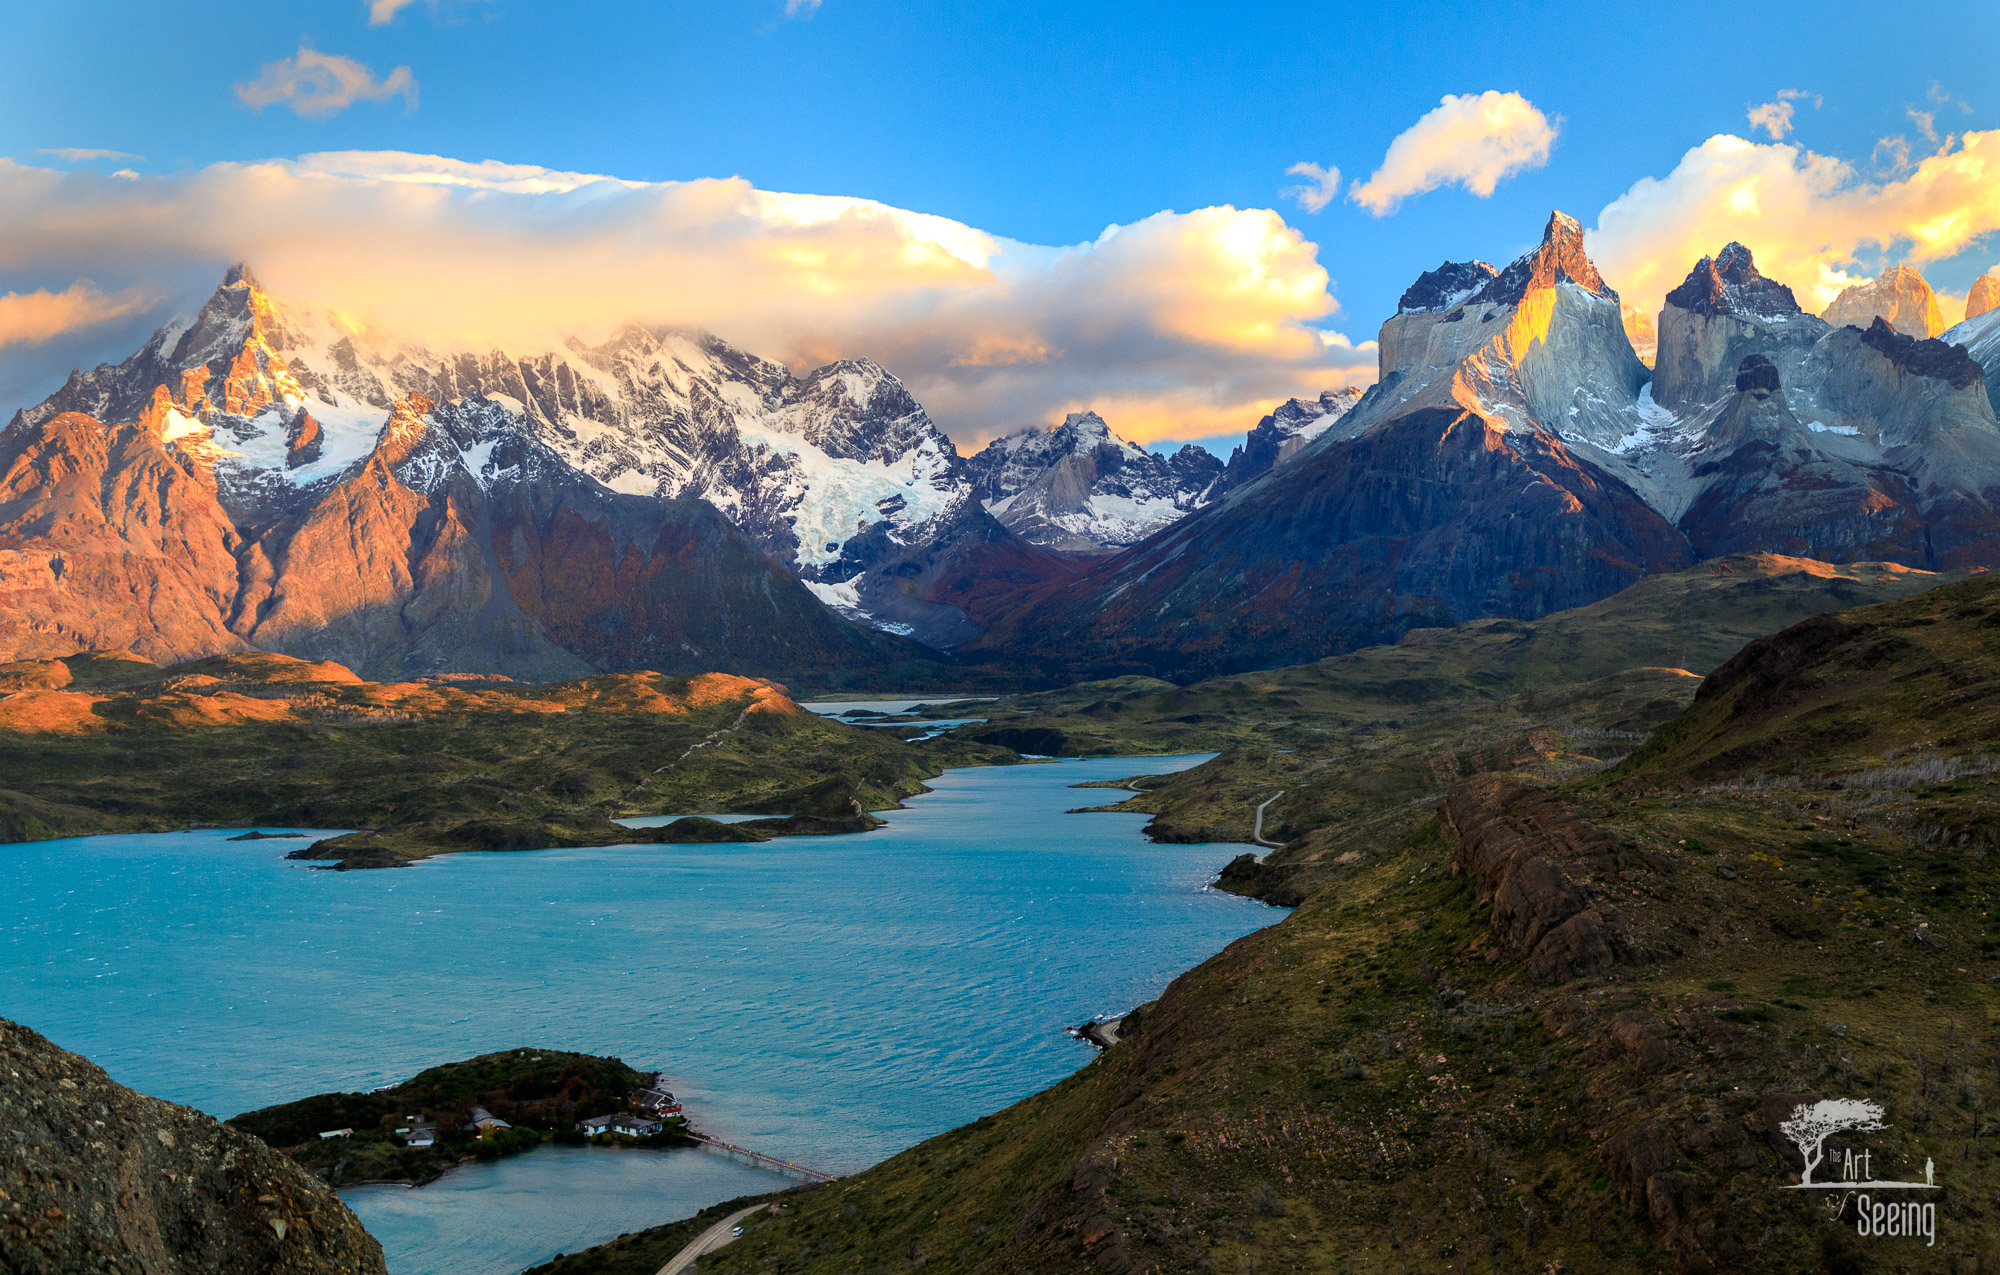
Photo by Ken Lee/Art of Seeing Photography Adventures
The mountains by themselves are impressive enough, but from the vantage point seen above, with the eye-poppingly blue waters of Lake Pehoe in the foreground, the scene becomes that much more impressive.
Better still, this and other popular vantage points in the Lake Pehoe area can be accessed easily on foot. In fact, you can simply walk the primary road along the lake and find many different perspectives for photographing the lake and the mountains beyond.
What to Photograph in Patagonia - Wildlife
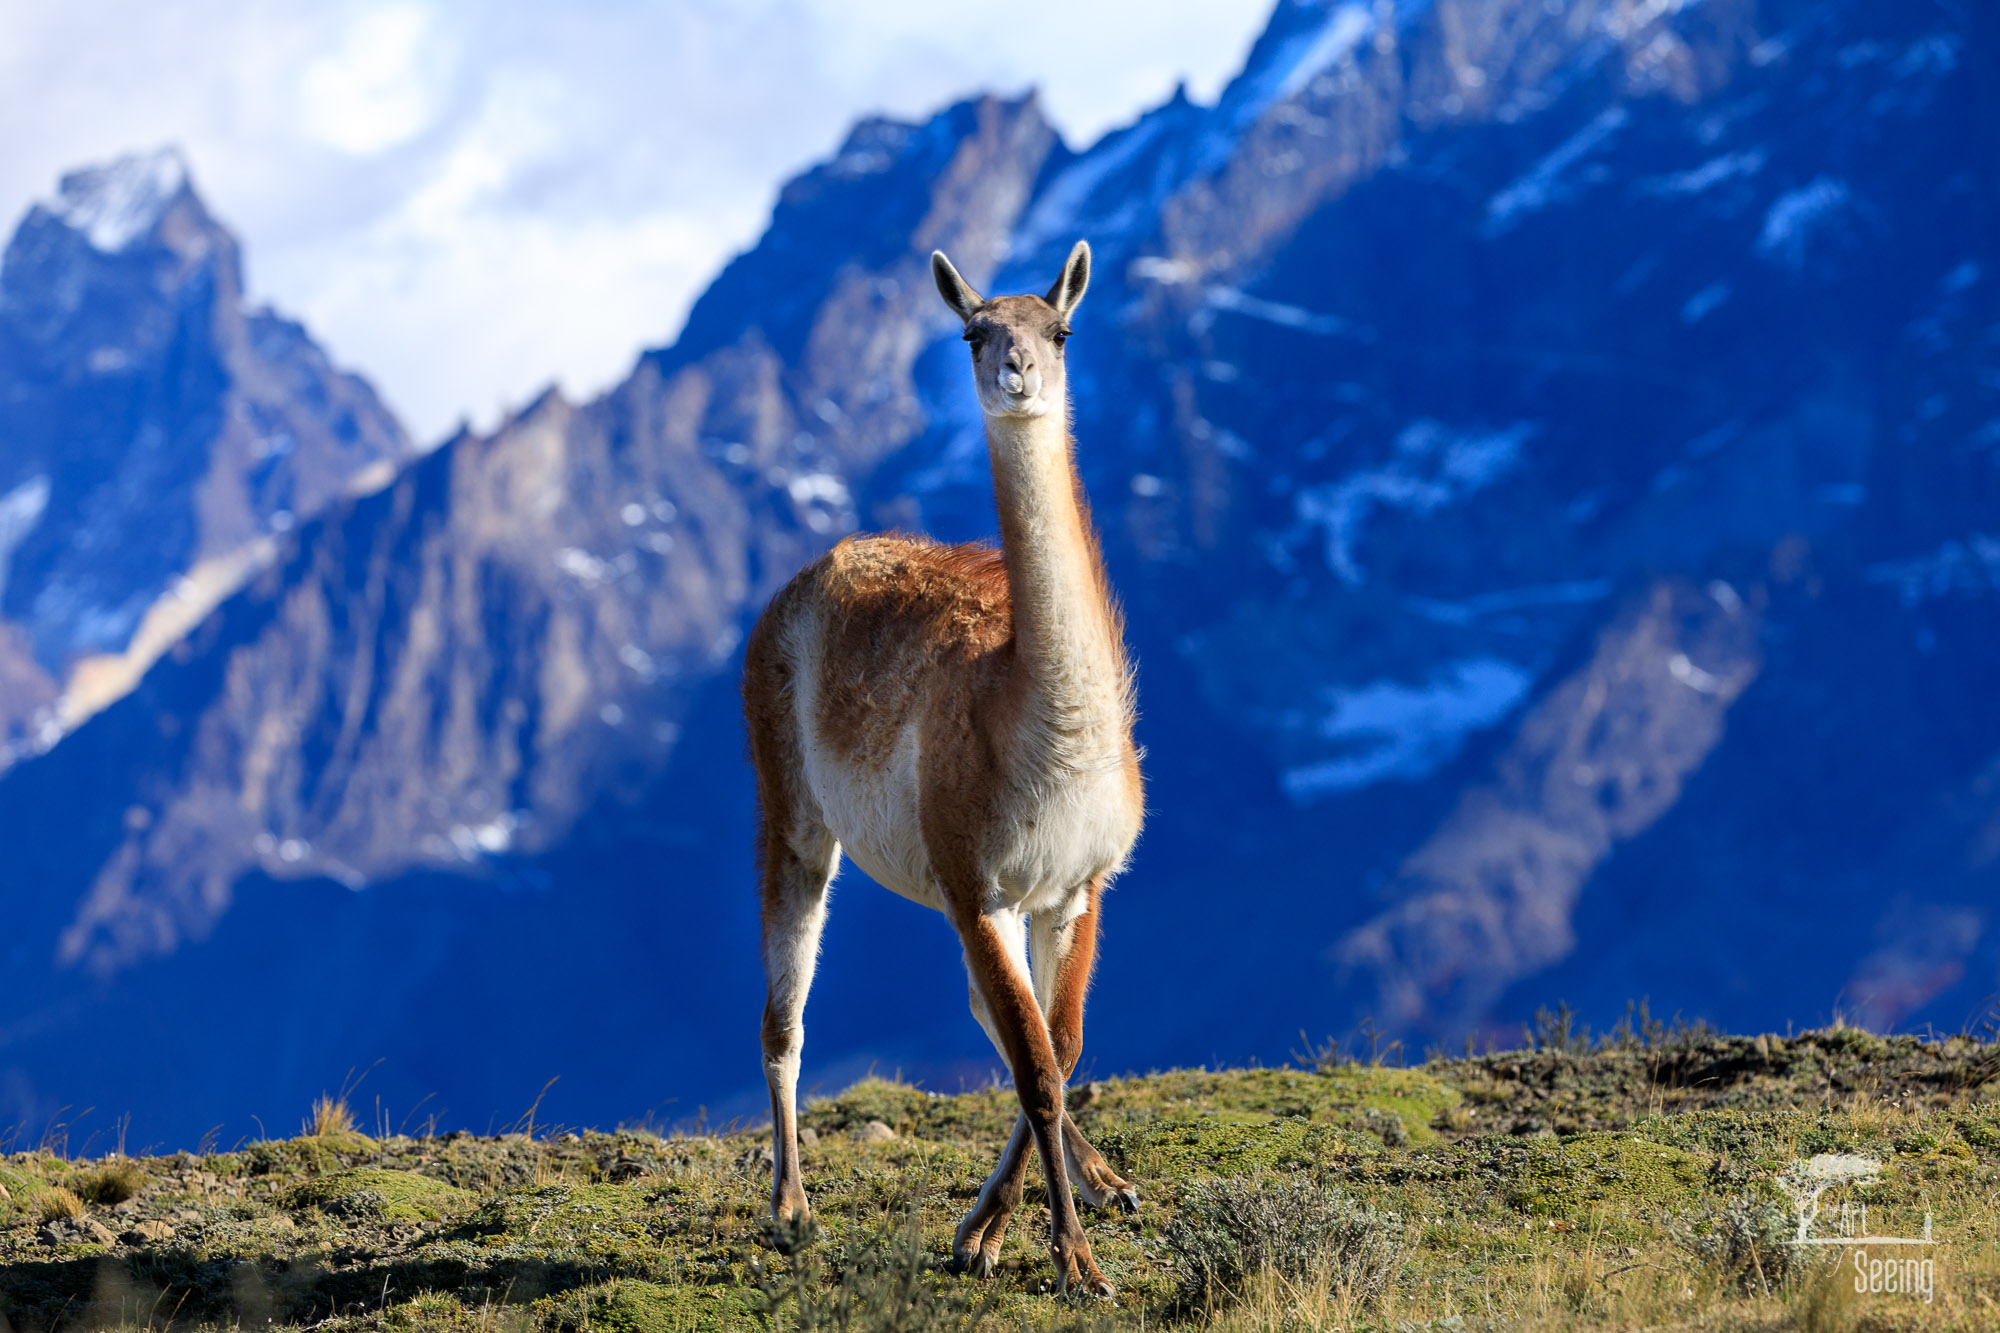
Photo by Ken Lee/Art of Seeing Photography Adventures
If you can peel yourself away from the stunning vistas that Patagonia presents, you’ll find that it’s also an area abundant with wildlife.
Land animals like the Patagonian Mara, Hairy Armadillo, Patagonian Fox, and Guanaco can be found in many locations throughout the region.
There are large populations of birds and sea life as well, including the Andean Condor, Southern Crested Caracara, Dolphins, Sea Lions, and Southern Elephant Seals.
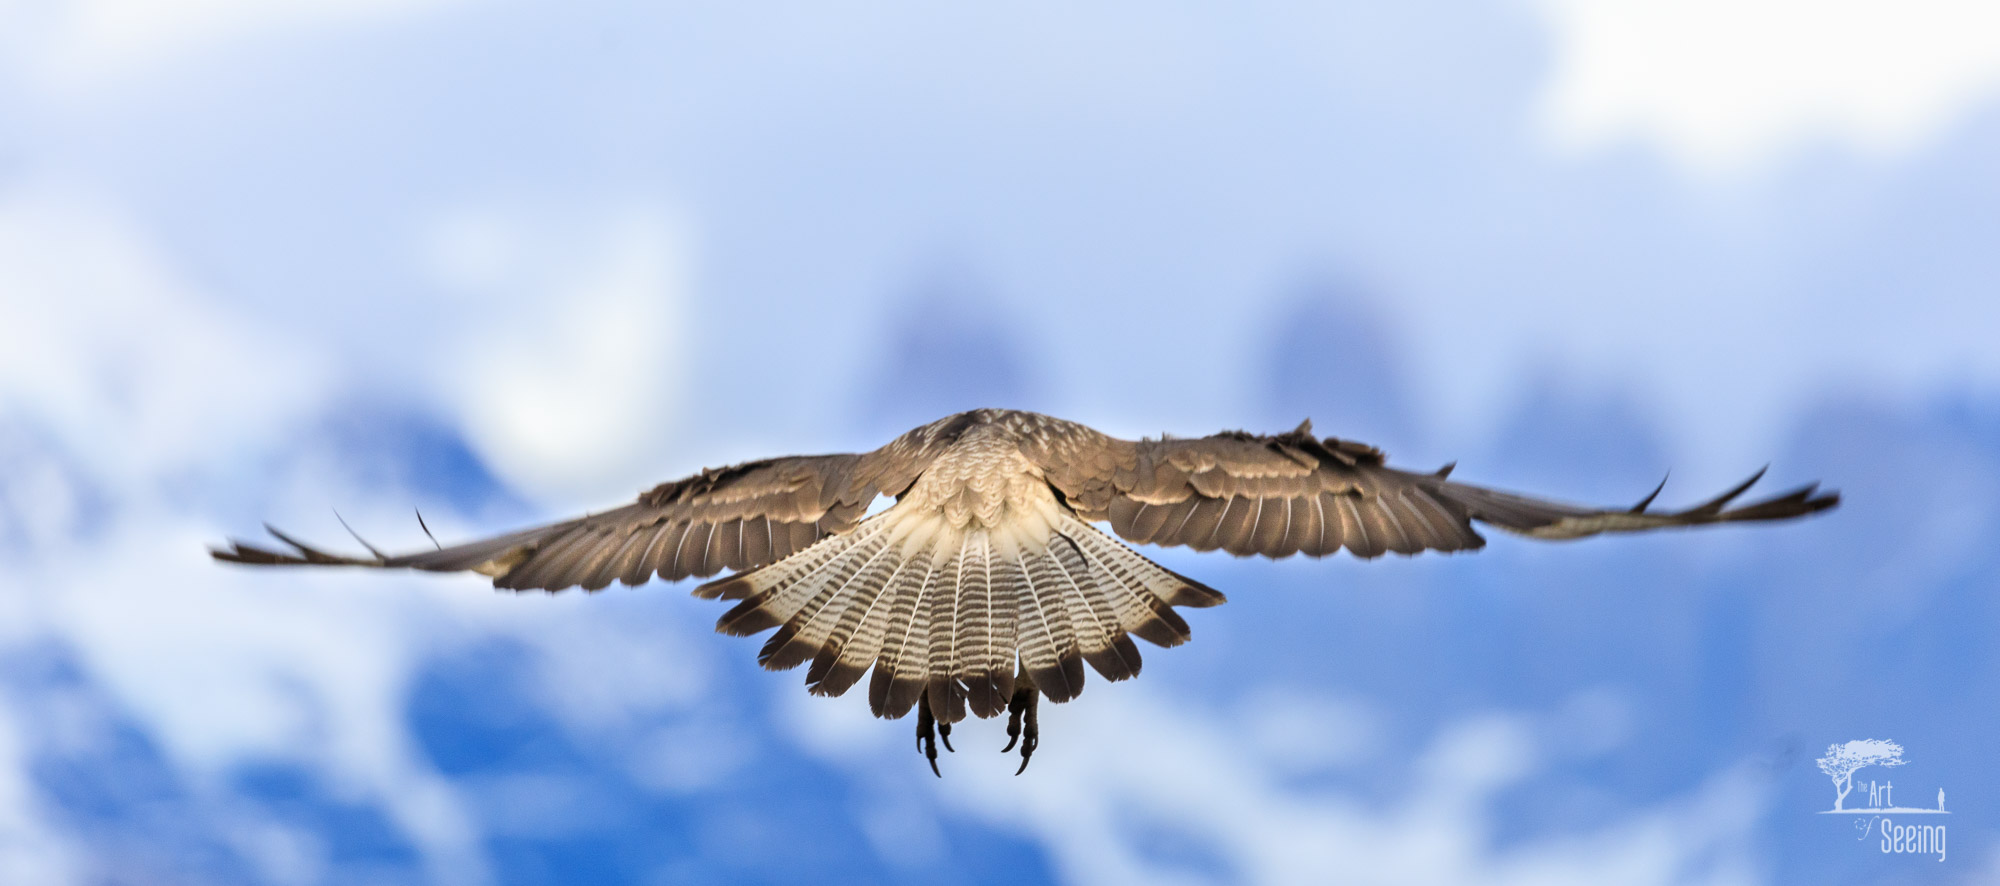
Photo by Ken Lee/Art of Seeing Photography Adventures
Photographing wildlife in Patagonia requires a bit of a different approach than photographing landscapes, but the two certainly make an ideal pairing.
When photographing land animals like the Guanaco, taking a wider shot that allows the viewer to see the animal’s surroundings gives a little context to the photo. Paired with some close-up views from a telephoto lens, these images allow you to tell a more detailed story about the animal and where it lives.
Of course, as seen above, there’s opportunities to use the majesty of Patagonia as a beautifully blurred backdrop for wildlife photos.
Though the mountain peaks are blurred, the impression of them is nonetheless strong.
Don’t be afraid to experiment with your compositions, either. One typically doesn’t see photos of birds in flight that feature their backsides, but in this case, it works beautifully. Just look at the sharpness of detail of the bird’s hind feathers!
It’s a different take on bird photography, but one that certainly results in a unique and compelling shot.
What to Photograph in Patagonia - Gaucho Culture
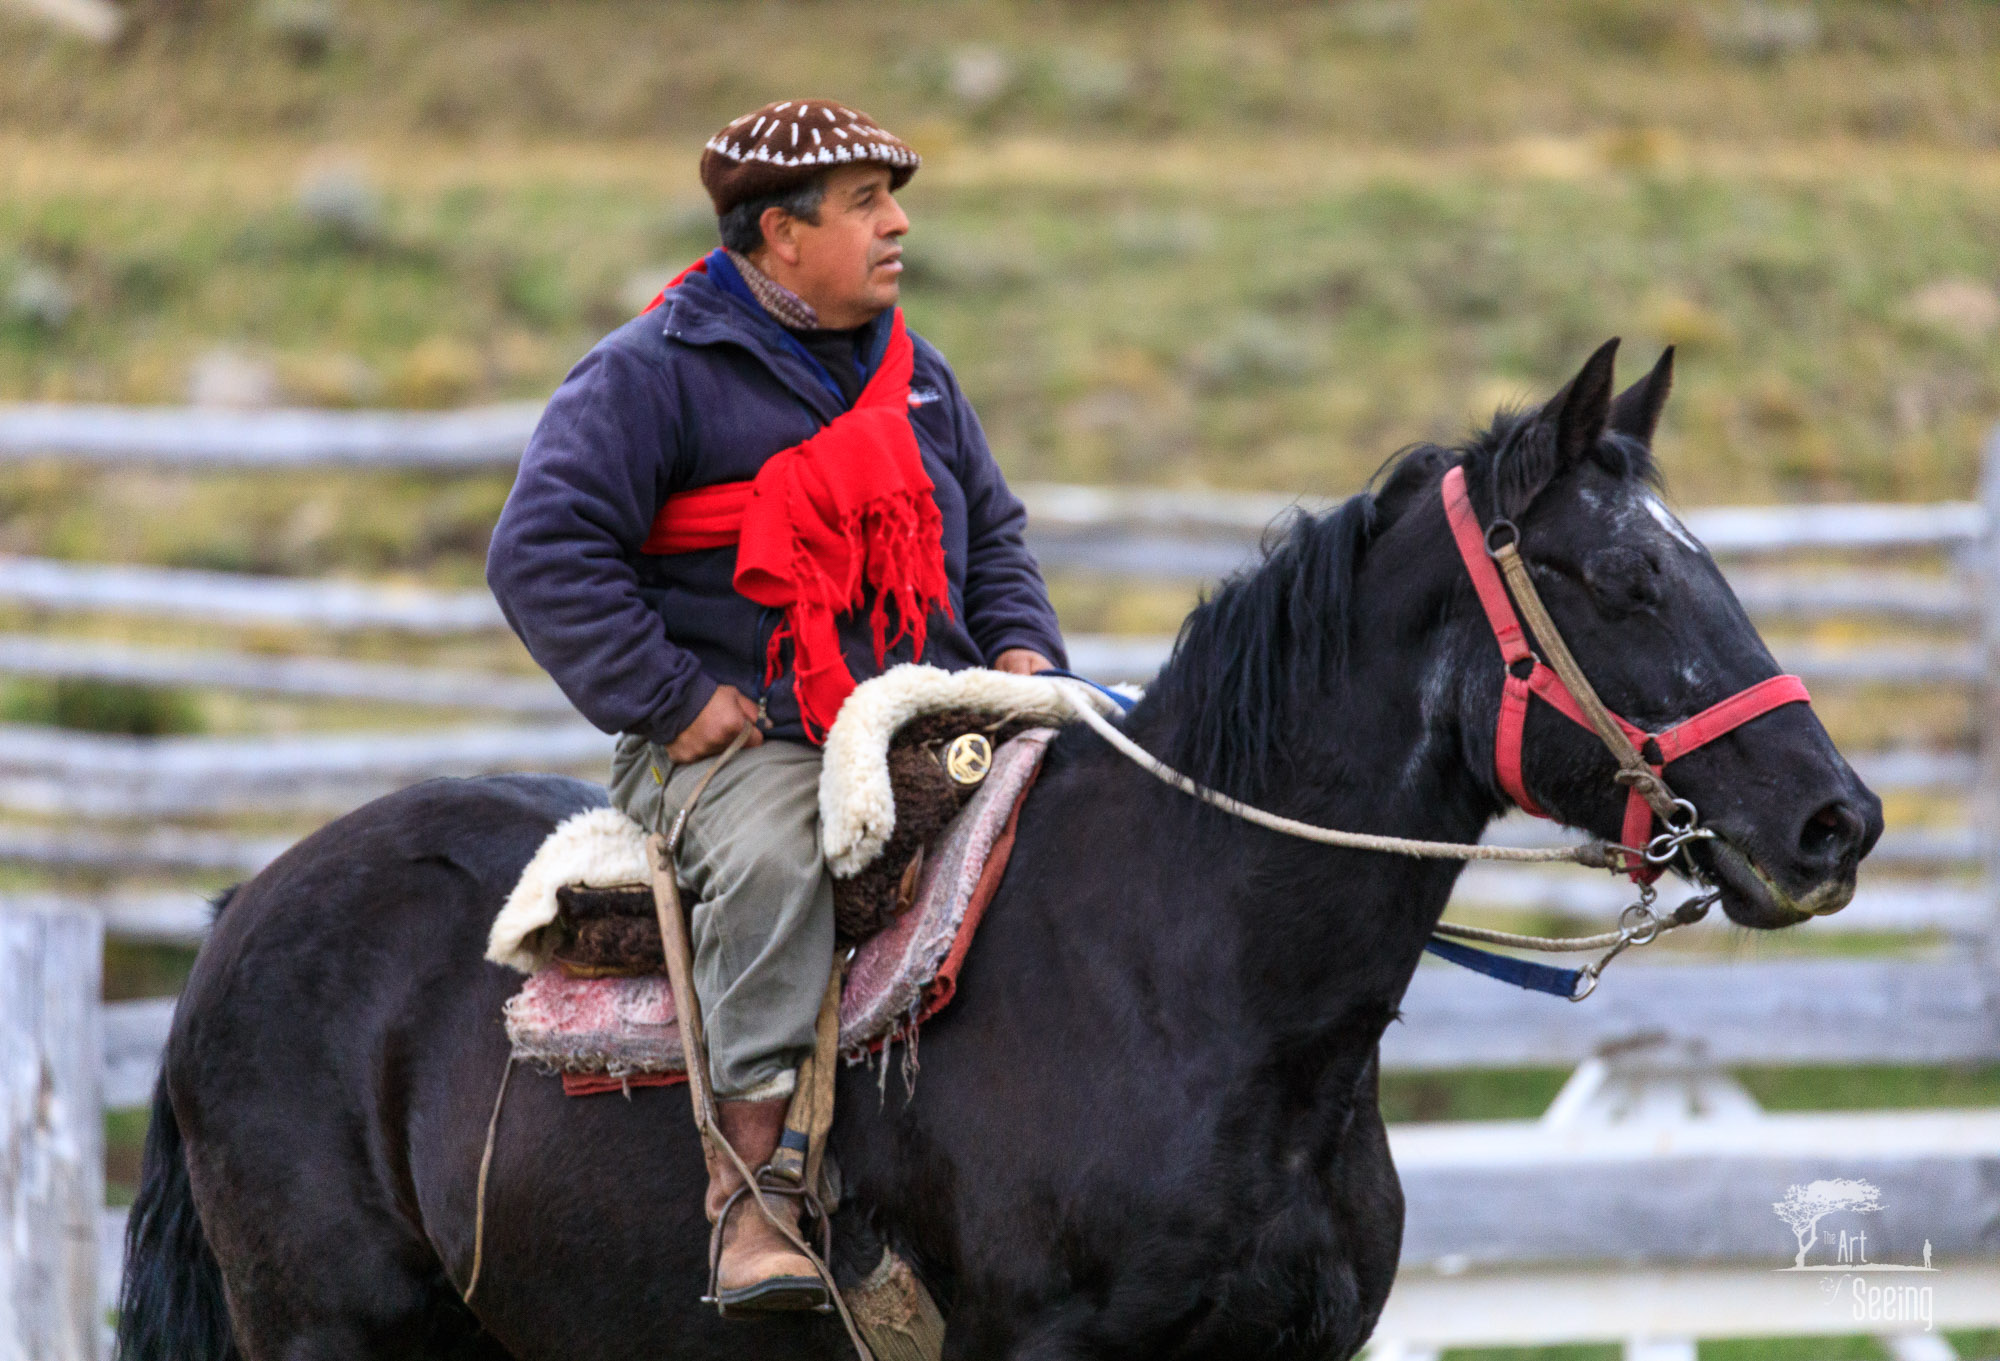
Photo by Ken Lee/Art of Seeing Photography Adventures
In addition to breathtaking landscapes and abundant wildlife, the culture of the people that inhabit Patagonia is well worth your time to explore.
Patagonian gauchos live a much different life than gauchos in other parts of South America, primarily due to the harsher climate of the area in which they live. Thus, one of their most recognizable features - the thick ponchos they wear to keep warm.
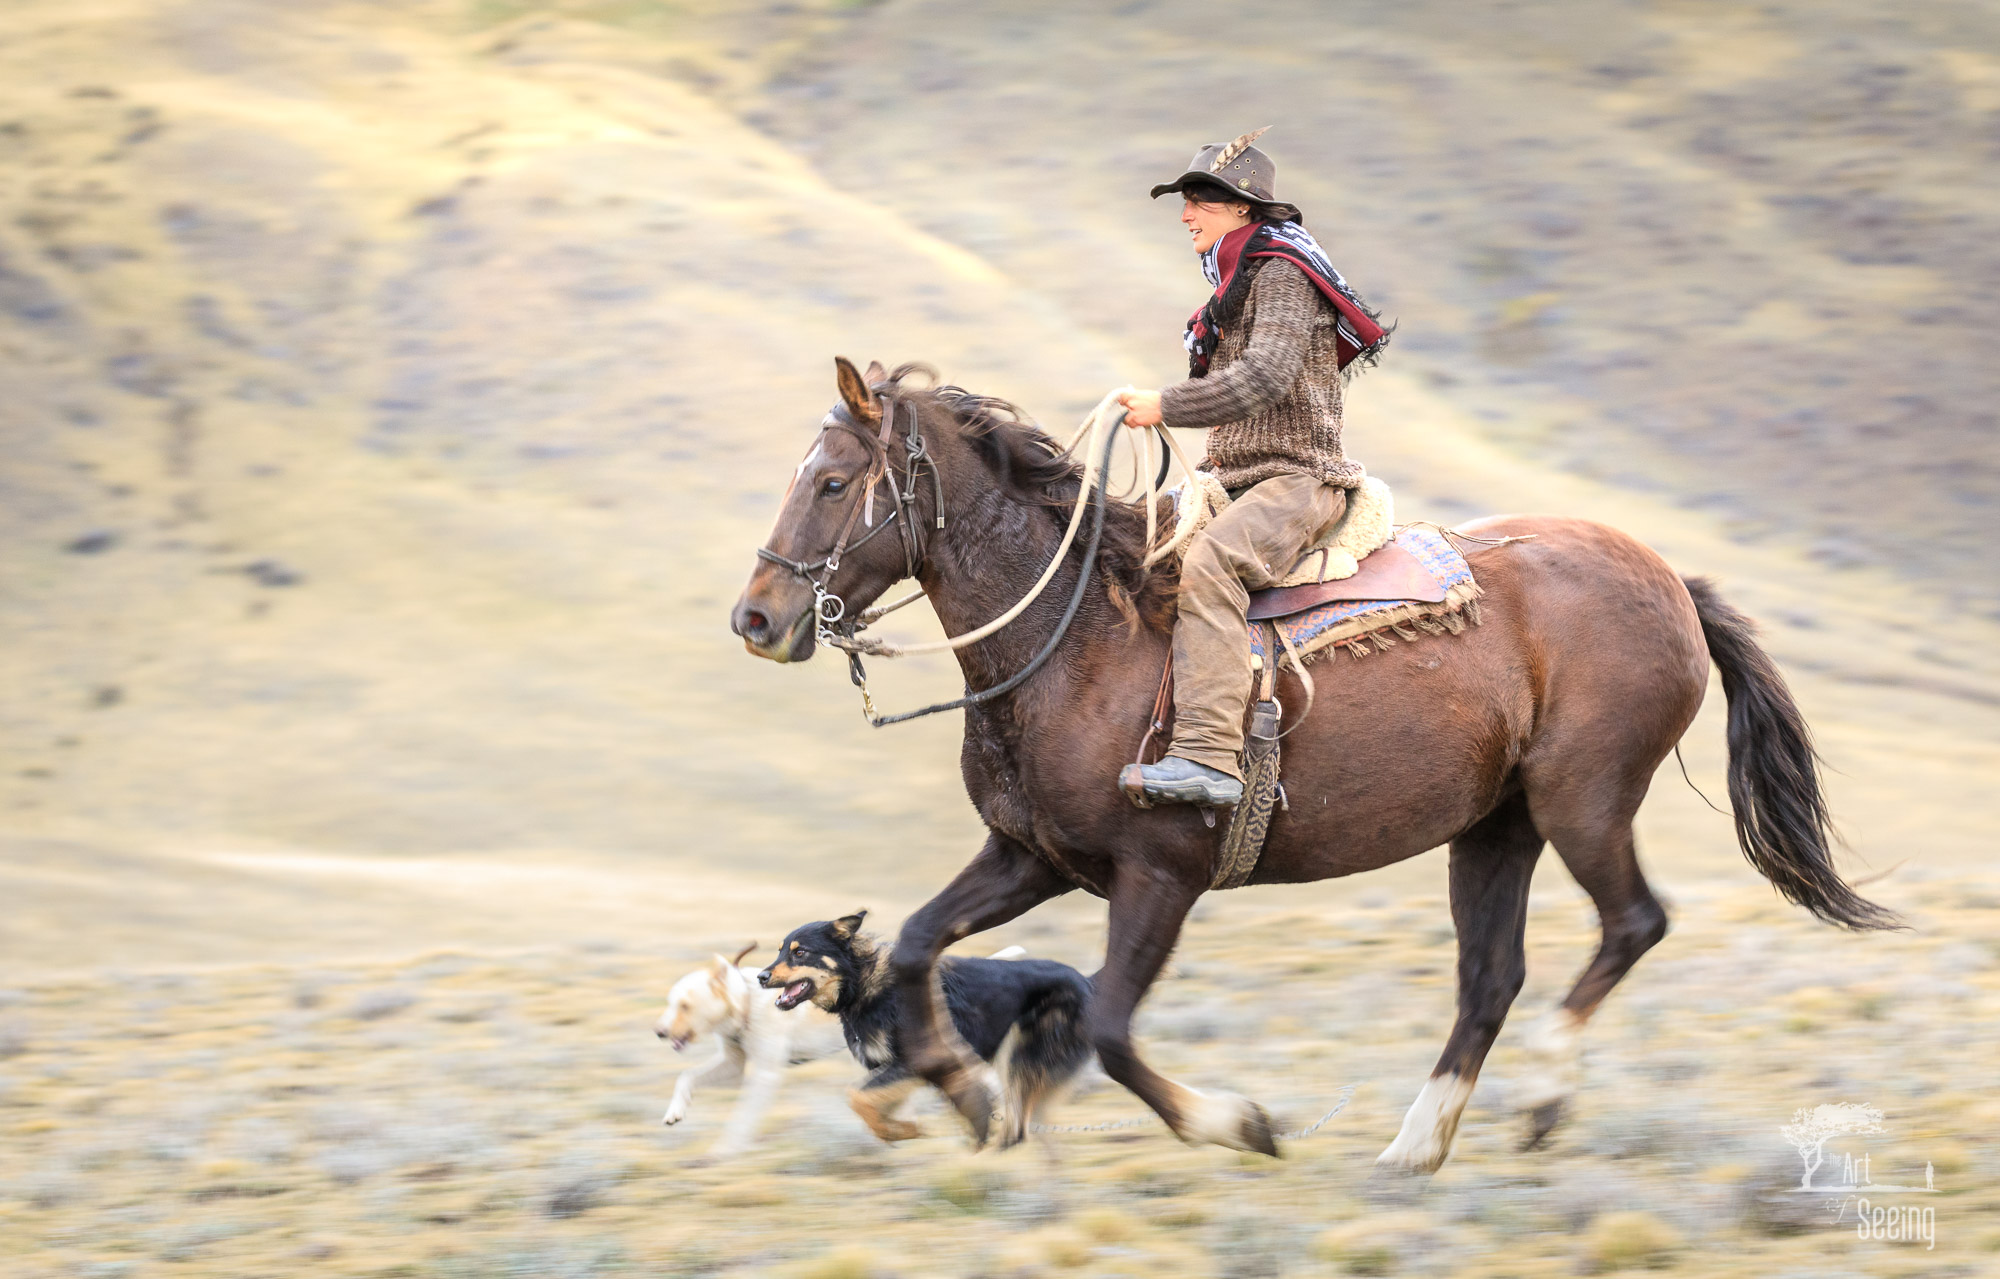
Photo by Ken Lee/Art of Seeing Photography Adventures
Gauchos are renowned for their skilled horseback riding skills as well as their intimate knowledge of the earth - a must in order to survive in such a desolate and challenging environment.
In Patagonia, you’ll find gauchos working herds of sheep, accompanied by their faithful dogs to help them keep track of their herds.
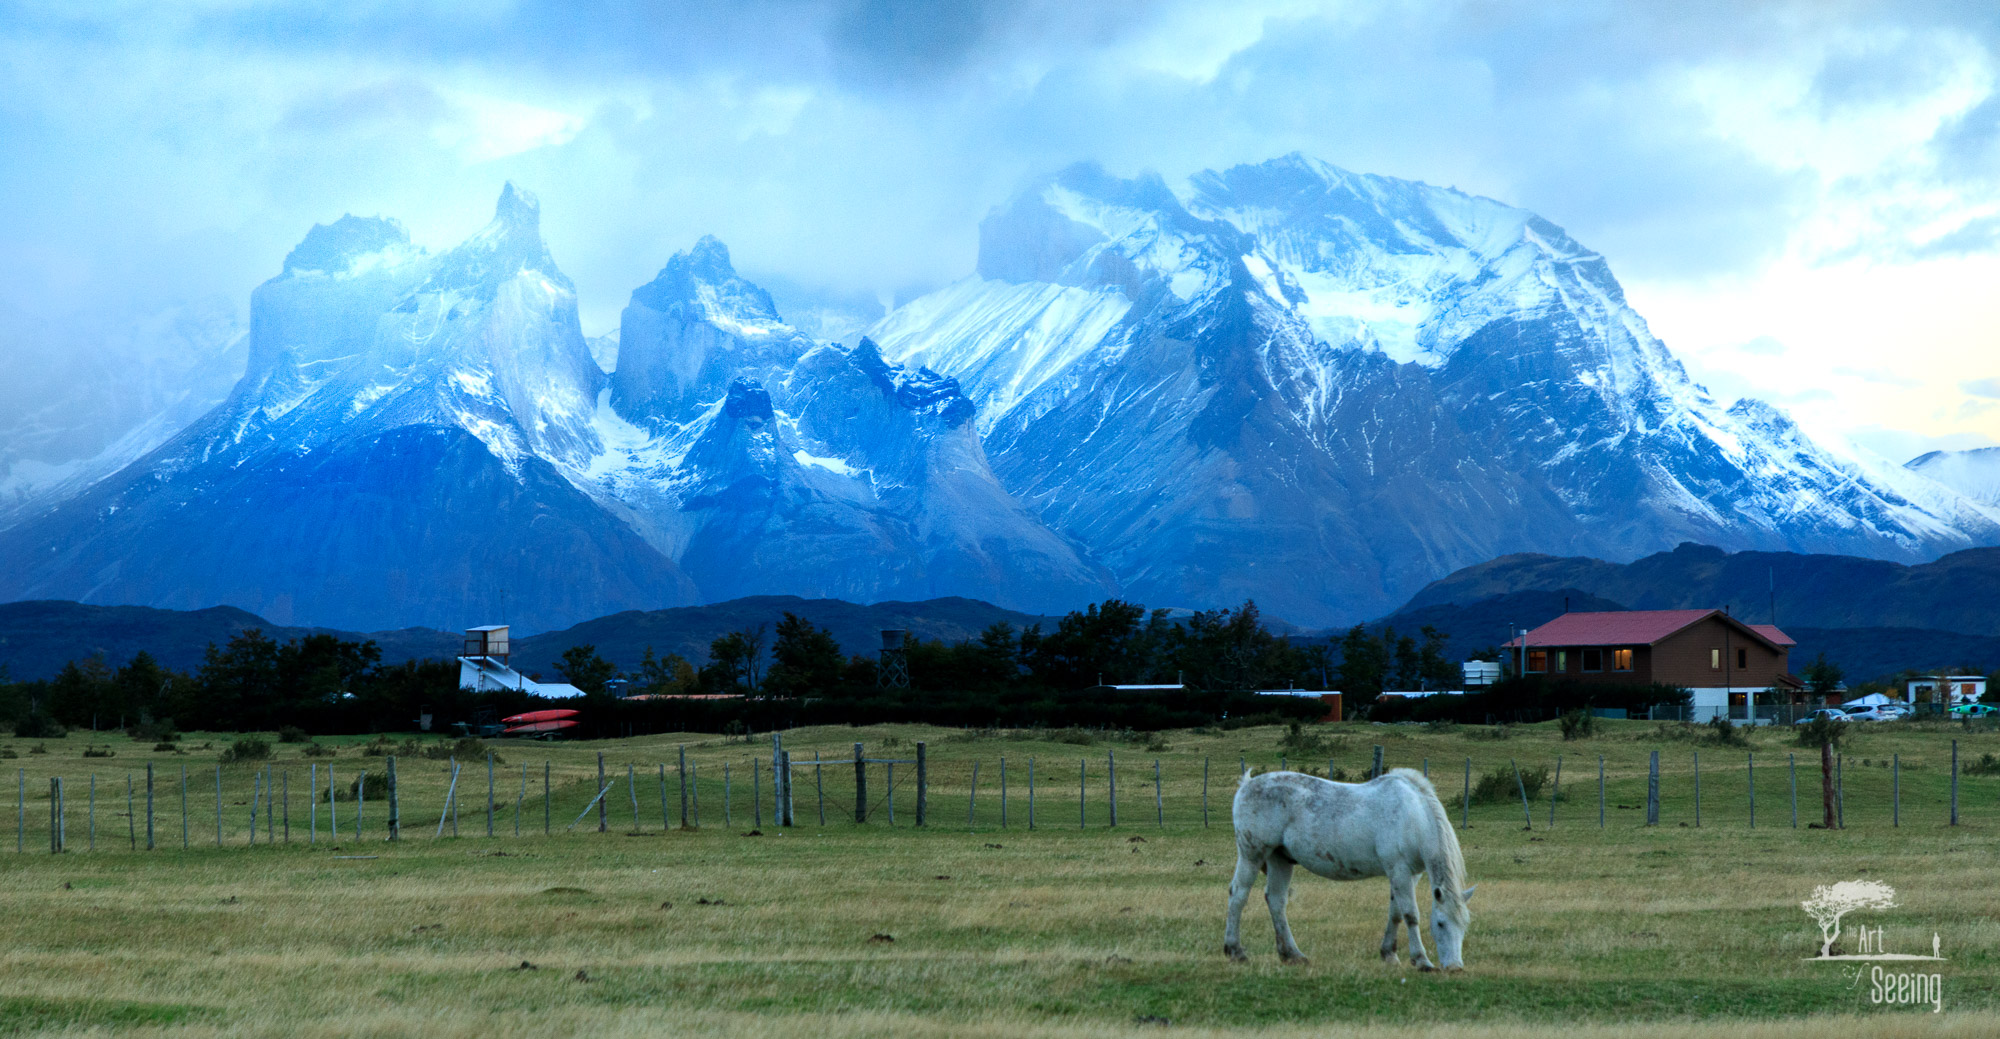
Photo by Ken Lee/Art of Seeing Photography Adventures
Many gauchos also work on ranches, or Estancias, where tourists can visit, stay, and learn more about this unique and vibrant culture.
In fact, you’re likely to find that time spent learning about gauchos is the most precious time you have in Patagonia!
Planning Your Patagonia Photography Trip
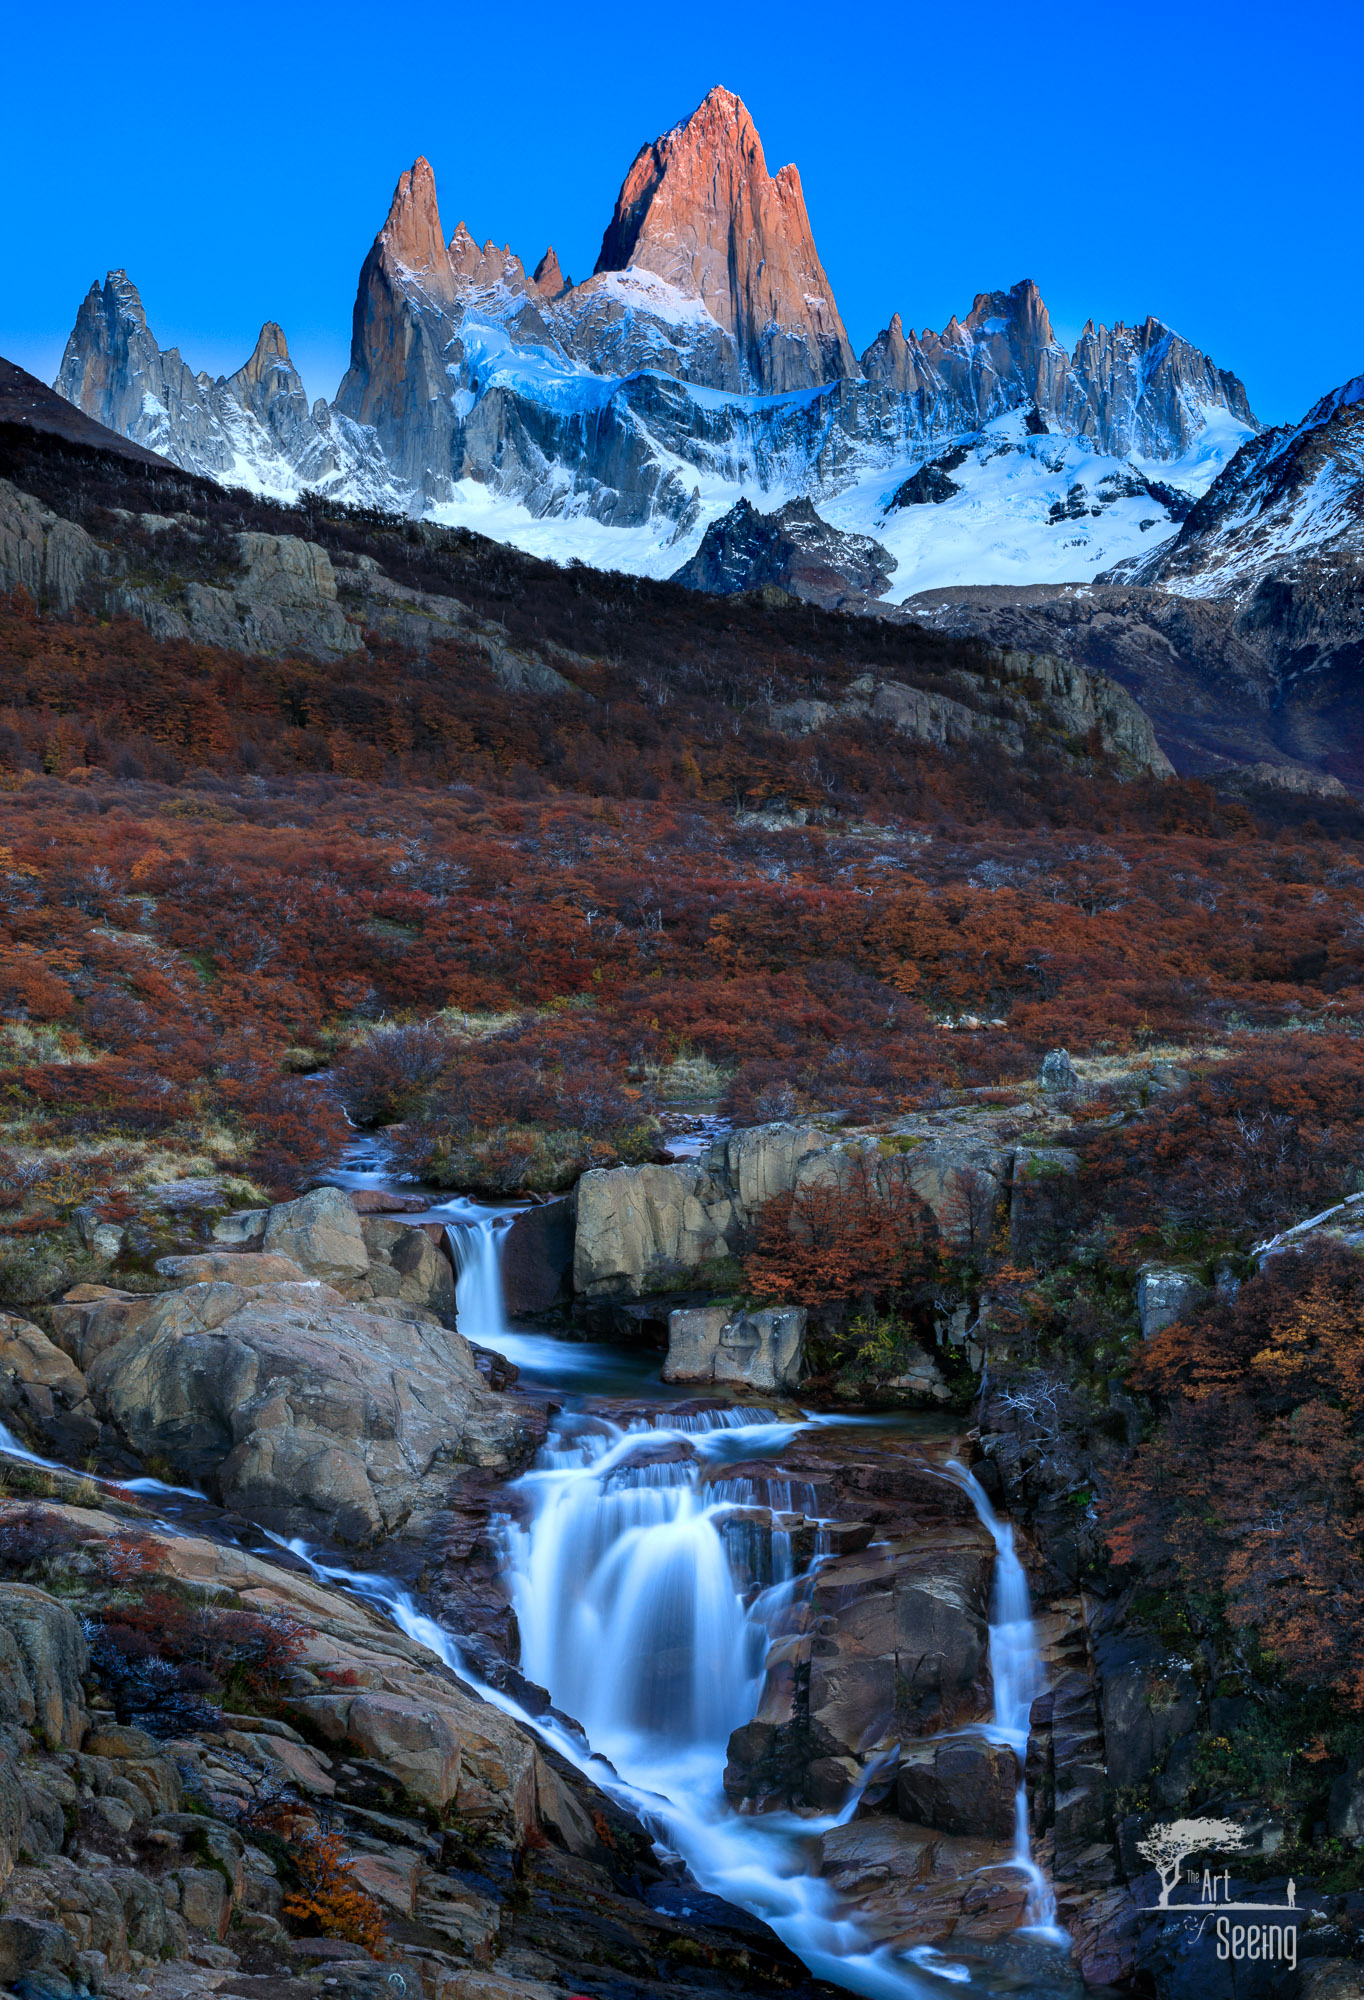
Photo by Ken Lee/Art of Seeing Photography Adventures
When visiting Patagonia with your camera, you certainly want to see the sights you often see in images online.
But you also want to experience Patagonia, too, don’t you? Often it’s when you get away from the tourist spots and into the off-the-beaten-path locations that you truly find opportunities to learn and grow with your camera.
For my money, exploring Patagonia as part of a photography adventure is absolutely the way to go.
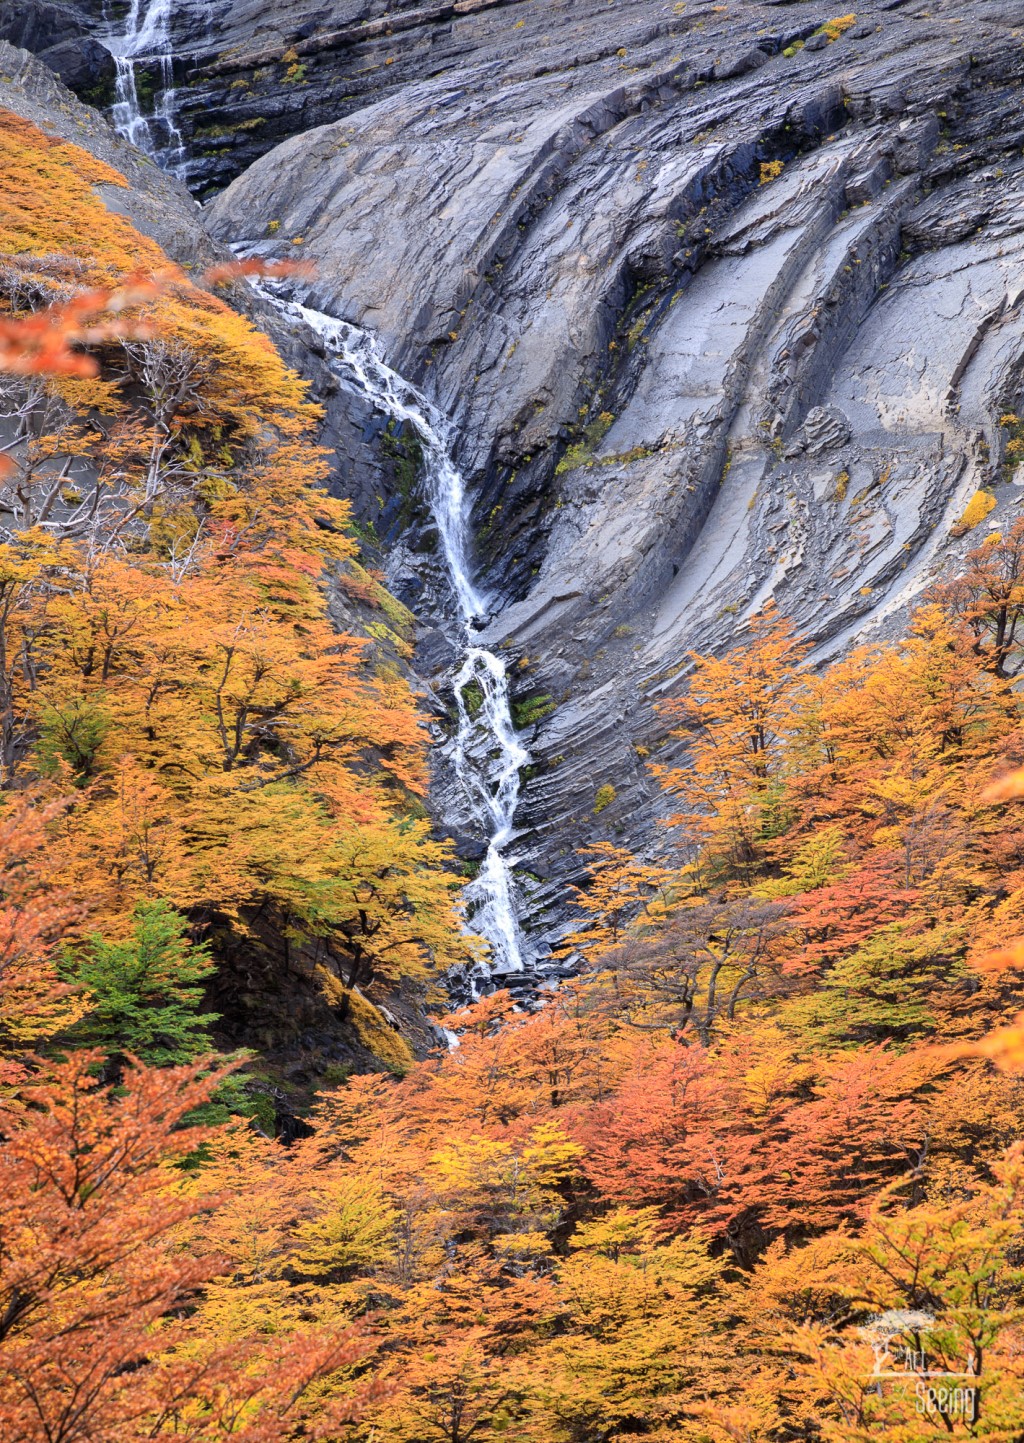
Photo by Ken Lee/Art of Seeing Photography Adventures
Think about it - with a photography adventure, everything is planned out for you once you get to the location. That means you just have to book your flight and pack your bags, and the rest of the journey is taken care of for you.
Without having to worry about where to eat, where to stay, finding guides, and so forth, you can instead focus on the sights and sounds that surround you as you travel through Patagonia.
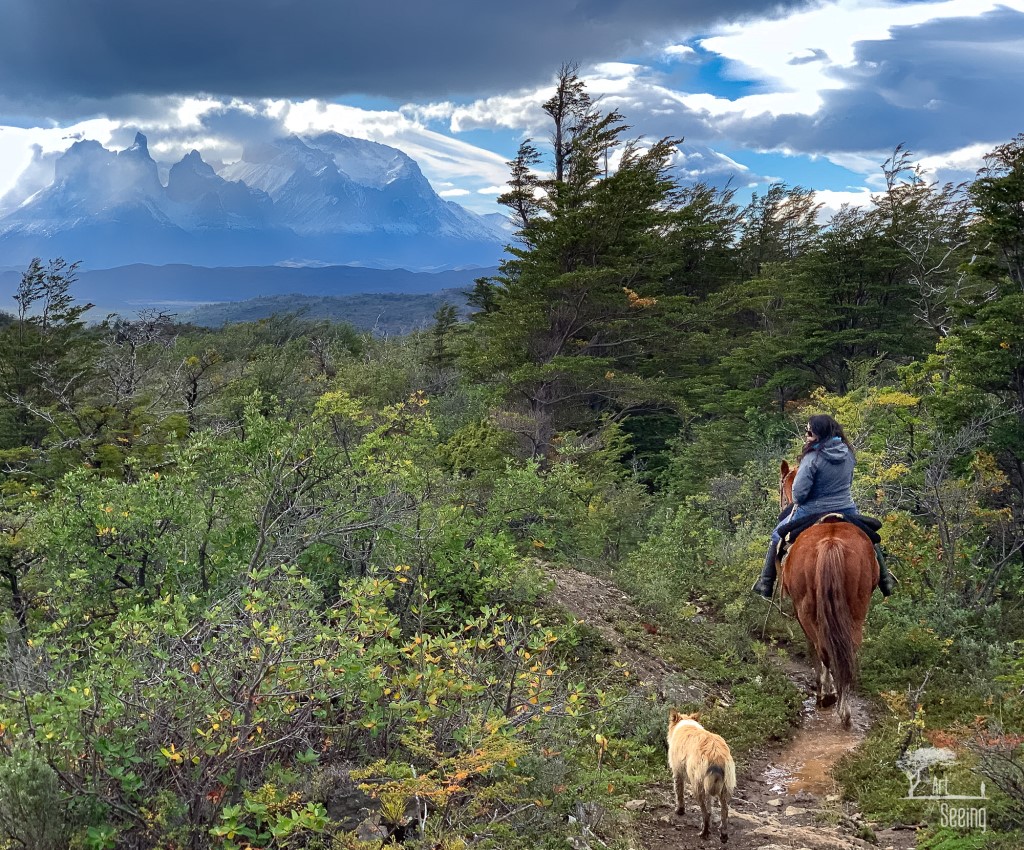
Photo by Ken Lee/Art of Seeing Photography Adventures
Sure, there’s the typical benefits of being on a photography tour in that it’s all planned out for you, but what Ken strives to provide to each adventure participant is a unique experience that allows you to really immerse yourself in the location.
You aren’t just carted around in a vehicle on one of Ken’s adventures - you hike, drive, and on his Patagonia Fall Colors Photography Adventure, you even spend three days on horseback!
What’s more, Ken is all about the creative process - you aren’t just led to gorgeous spots - you’re encouraged to explore the creative process in addition to the technical aspects of taking great photos.
This “whole brain approach” makes elevating your photography game that much more likely.
Sounds exciting, doesn’t it?
Other Tips for Planning a Patagonia Photography Trip
- Where to fly into: Santiago Airport offers the widest array of international flights.
- Best luggage: For a trip of this length, the Nomatic Check-In roller bag is the ideal choice. It offers polycarbonate construction that stands up to the rigors of travel, silent wheels, low-profile handles, and a three-stage aluminum handle to fit your height. With space for 78 liters of gear, this bag has plenty of room for a 5-day trip or longer.
- Attractions & Things to Do: San Cristóbal Hill offers panoramic city views from the second-highest point in Santiago. Plaza de Armas is another must-see spot that is surrounded by beautiful architecture and filled with statues.
- Best Time of Year to Visit: Santiago and the surrounding area is a truly year-round destination. If visiting Patagonia, October through March offers the warmest temperatures.
- Check the weather in the Santiago area right now.
We Recommend
Peru Photography Tips
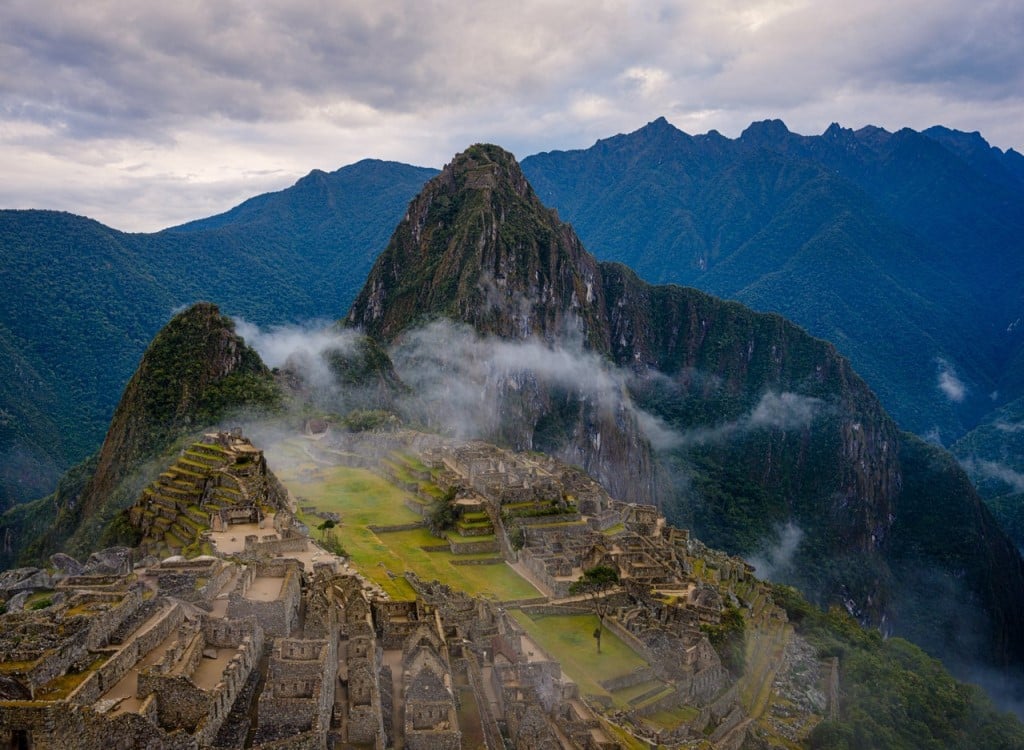
Photo Tours and Expeditions/Daniel Korzeniewski
If you’ve never been to Peru, it’s a place that many call “mystical.” It’s a true photographer’s paradise with a wide range of landscapes, an intensely beautiful culture, and a rich history that dates back thousands of years.
From the bustling streets of the modern city of Lima to the quiet mountaintop location of Machu Picchu, there is a seemingly endless variety of scenery to capture with your camera.
In this Peru photography guide, I’ll go over a few essential tips for making the most of your time in this enchanting country.
Take a Variety of Lenses
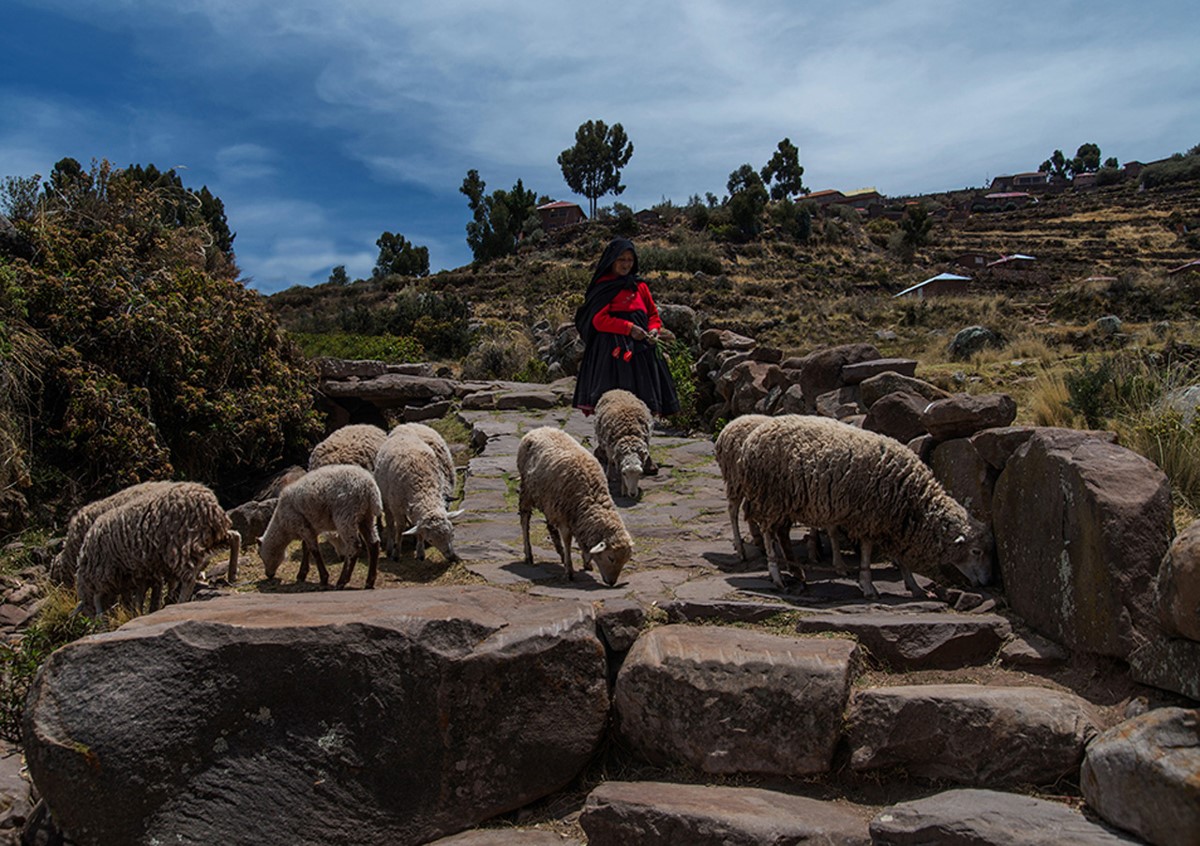
Photo Tours and Expeditions/George Plucienkowski
While I’m all for traveling lean and mean, when you head to Peru for a photography adventure, you need to pack more than one lens.
At a bare minimum, I’d suggest taking a wide-angle and a telephoto lens.
The wide-angle lens is ideal for capturing wide vistas and taking in massive scenes like Machu Picchu. The drama you can create with a nicely layered shot - foreground interest, the subject in the middle, and an interesting background to complete the shot - is something a wide-angle lens is purpose-built to help you do.
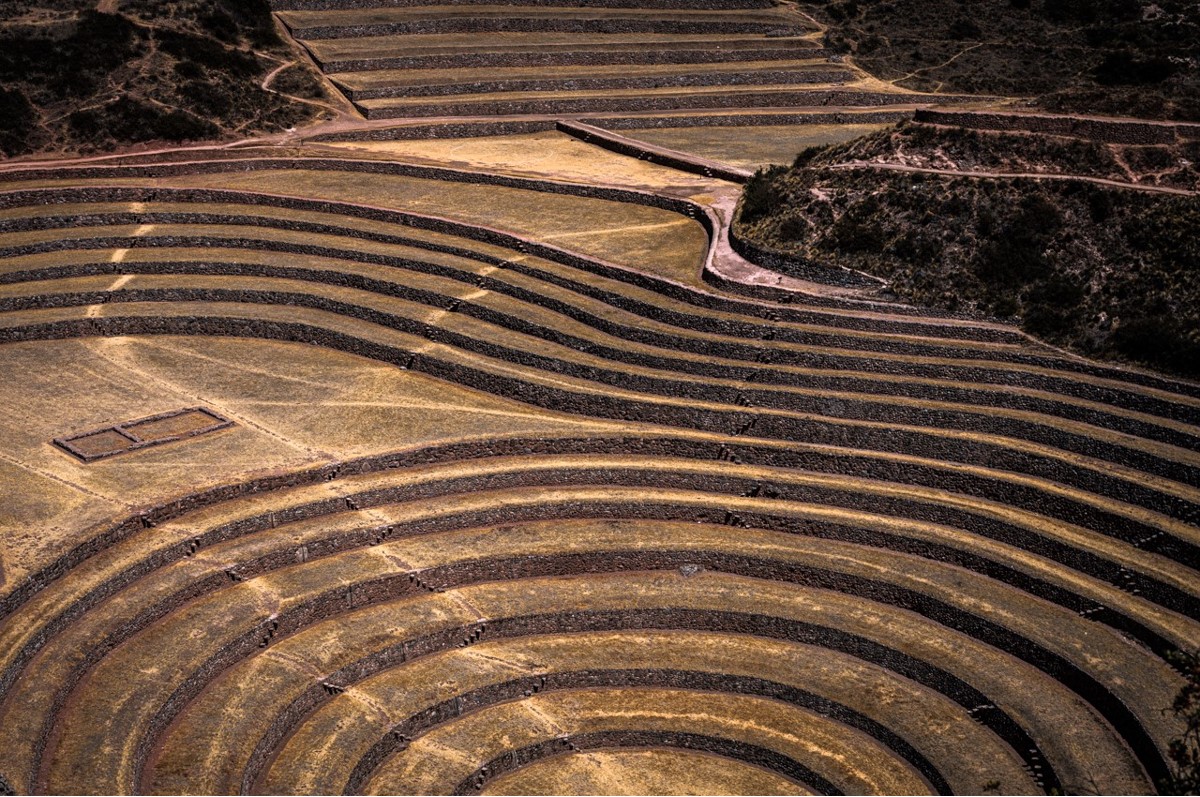
Photo Tours and Expeditions/Daniel Korzeniewski
Having a telephoto lens is a must for creating much more intimate images.
Use your telephoto as you roam the streets of Lima, taking candid photos of people on the street. You can also use it to compress landscape scenes and exaggerate the enormity of the peaks of the Peruvian Andes.
If you have room in your bag, throw in your Nifty Fifty, too. If you ask me, there’s no better all-purpose, walkaround lens!
Basic Camera Settings
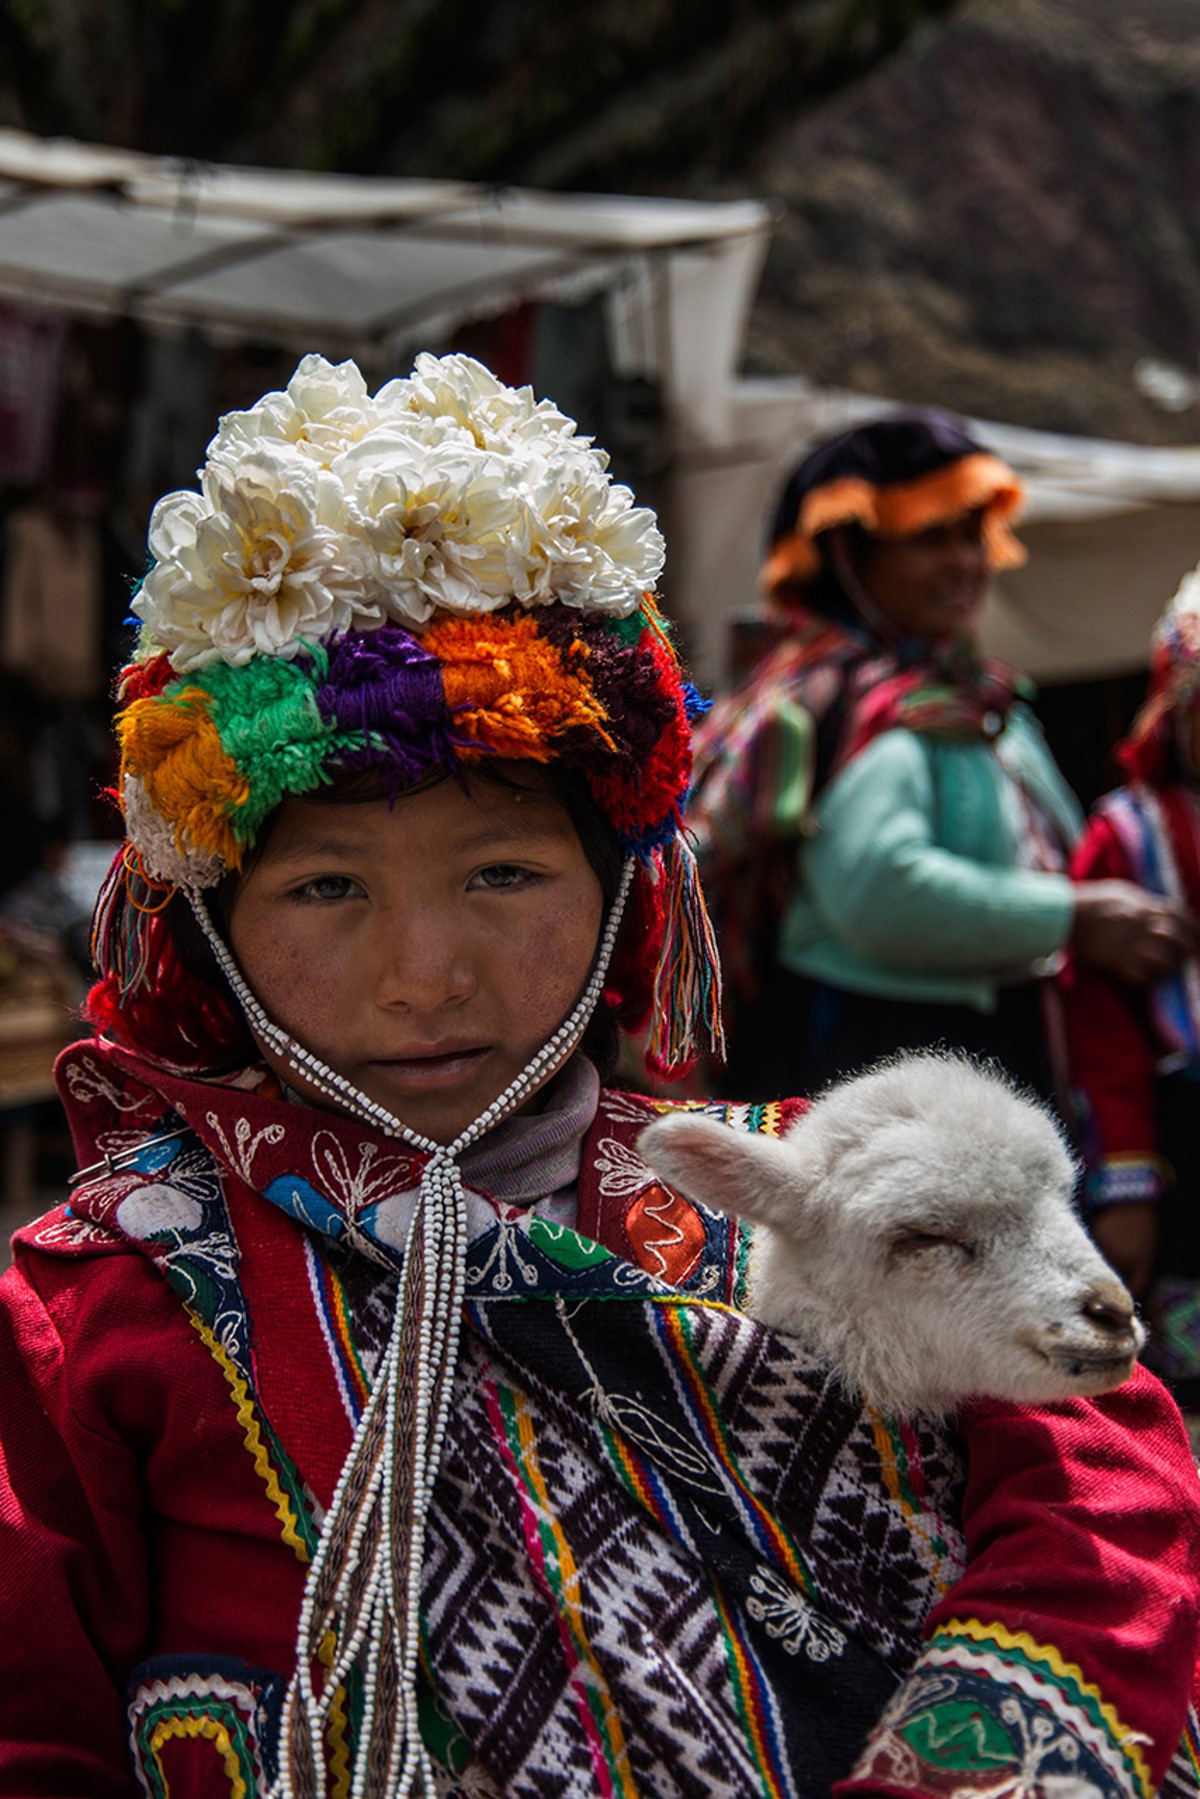
Photo Tours and Expeditions/George Plucienkowski
When you’re exploring the city streets, open the aperture to f/1.8-f/2.8. This allows you to blur the background so you can separate your subject in the frame. Likewise, with all that light entering the lens, you can bump up the shutter speed to freeze movement (and help keep camera shake at bay as well).
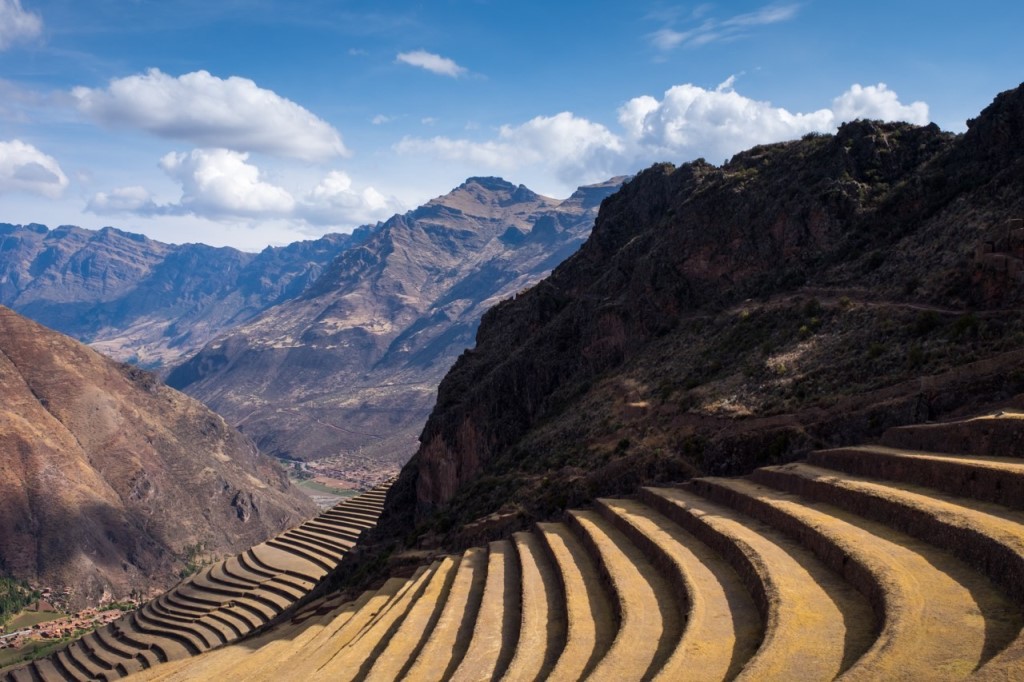
Photo Tours and Expeditions/Daniel Korzeniewski
But when you’re in the mountains, close down the aperture to maximize the depth of field. You don’t need to shoot at f/22, either - far from it. If you aim for f/8, you’ll find that you get the depth of field you need to keep everything from the foreground to the background nice and sharp.
Regardless of where and what you’re shooting, keep the ISO as low as possible. A setting of 100 or 200 will do the trick to minimize digital noise.
Machu Picchu is a Must
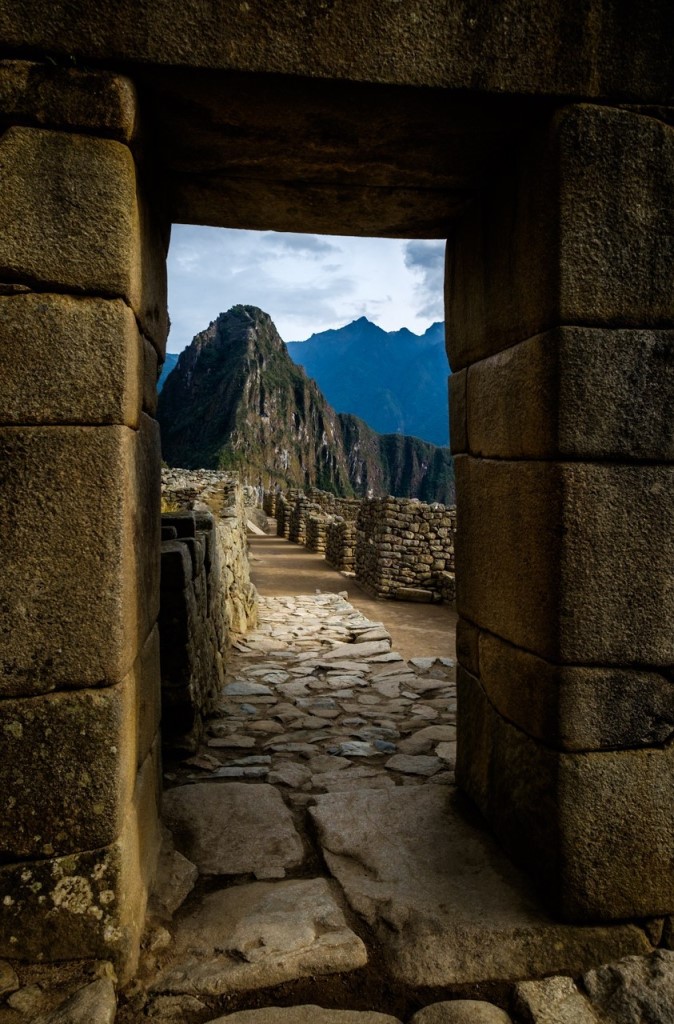
Photo Tours and Expeditions/Daniel Korzeniewski
Obviously, if you’re going on a Peru photography trip, you have to make time to explore Machu Picchu.
This place is one of the Seven Wonders of the World for a reason - it is absolutely spectacular. And when you consider the story behind it - it was unknown to the outside world until 1911 - you begin to realize the true magnificence of this five-mile-long mountaintop citadel.
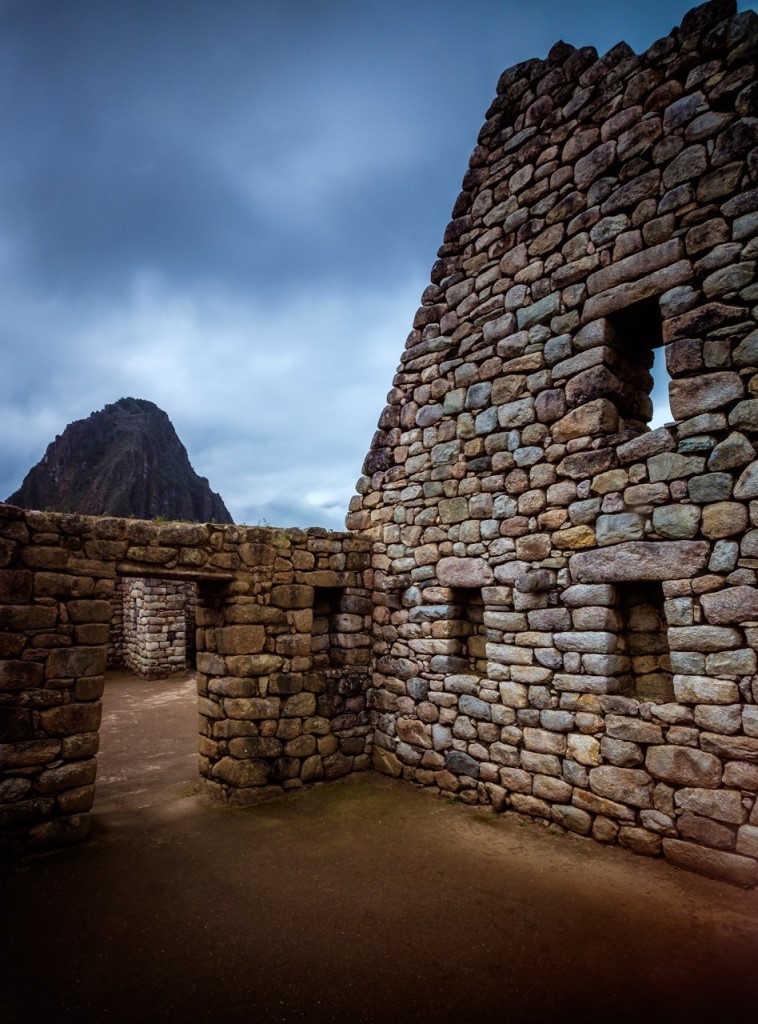
Photo Tours and Expeditions/Daniel Korzeniewski
Machu Picchu is impressive not just because of its size but also because of its location. High in the rocky countryside northwest of Cuzco, it is unimaginable how the fortress was built by hand.
While you’re there, get wide shots of the citadel, but also go in for detailed images, say, of the many stone steps that link the different levels of the ancient city. The ruins of the stone buildings are a worthy subject as well.
You’ll want to be there for sunset, too. The fading light illuminating the city and the surrounding mountains is definitely something to behold.
It’s Not Just About the Landscapes
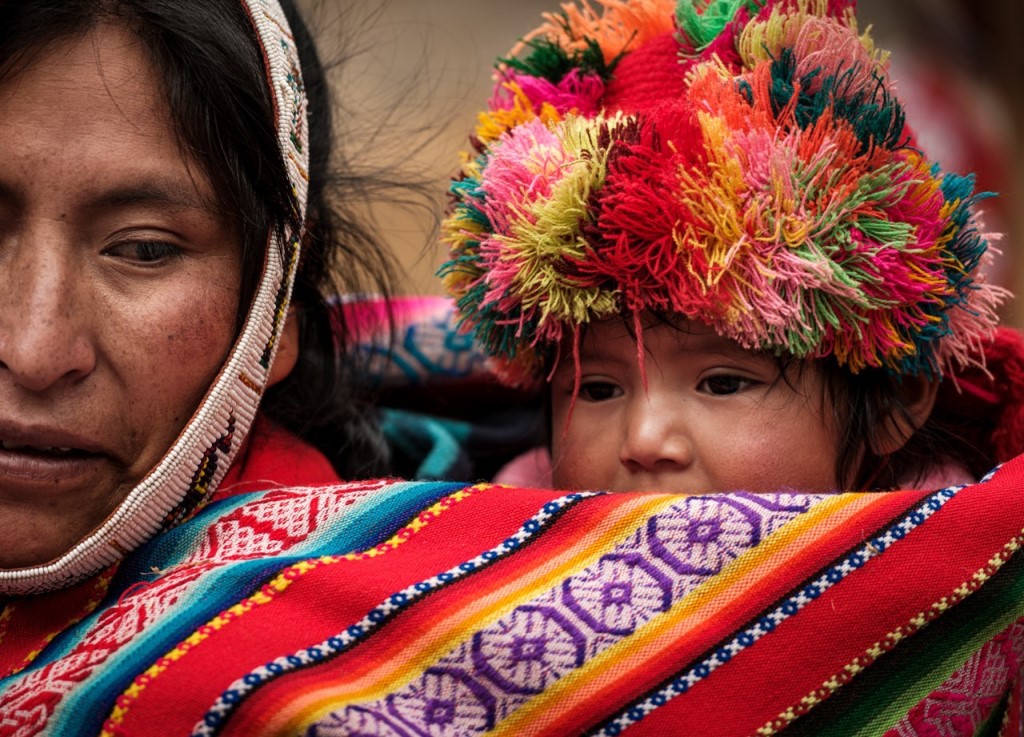
Photo Tours and Expeditions/Daniel Korzeniewski
Peru’s landscapes are stunning, no doubt. But there is much more to photograph in Peru than its mighty mountains.
Take some time to explore the city of Cusco, the ancient capital of the Inca Empire and a UNESCO World Heritage Site.
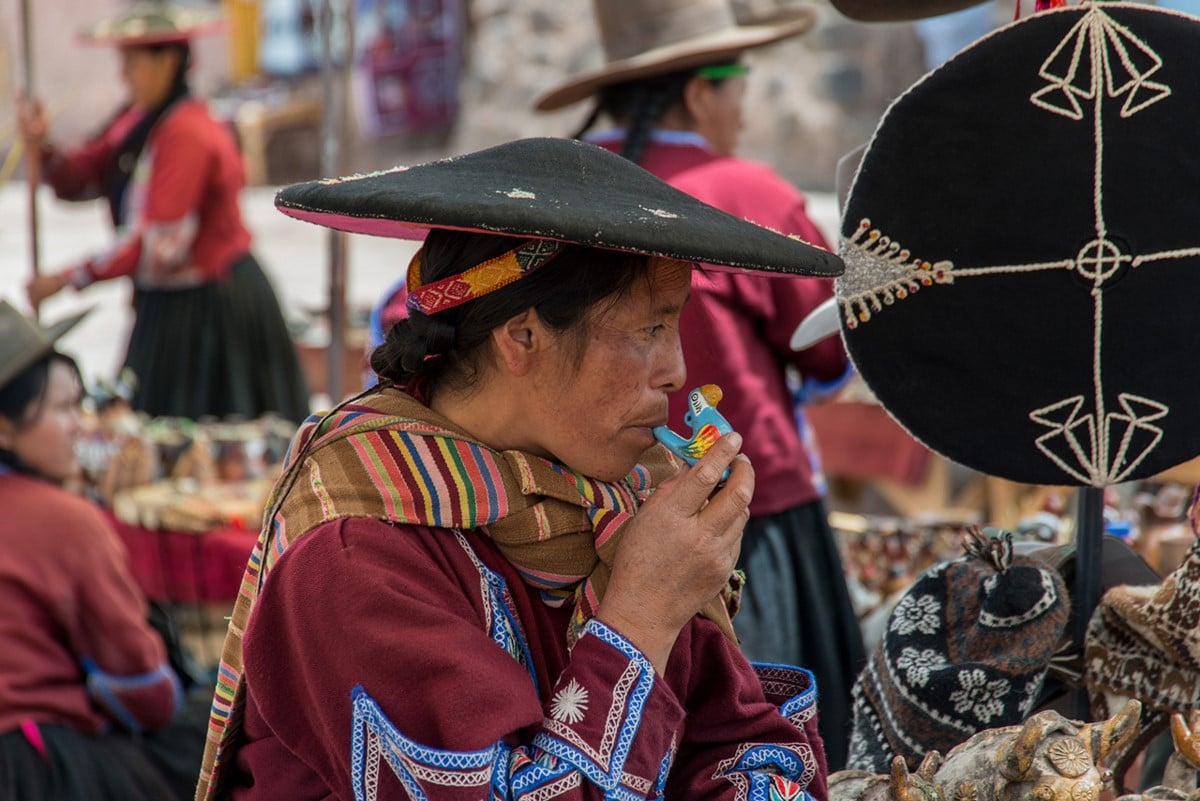
Photo Tours and Expeditions/George Plucienkowski
This vibrant city is an excellent location to hone your street photography and architecture photography skills. There are busy plazas full of people, gorgeous archaeological remains, and Spanish colonial architecture that oozes with bright colors.
Be sure to drop by the Plaza de Armas - Cusco’s central square - where you will find the locals wandering through Incan ruins, old arcades, and breathtaking wood-carved balconies.
Planning Your Peru Photography Trip
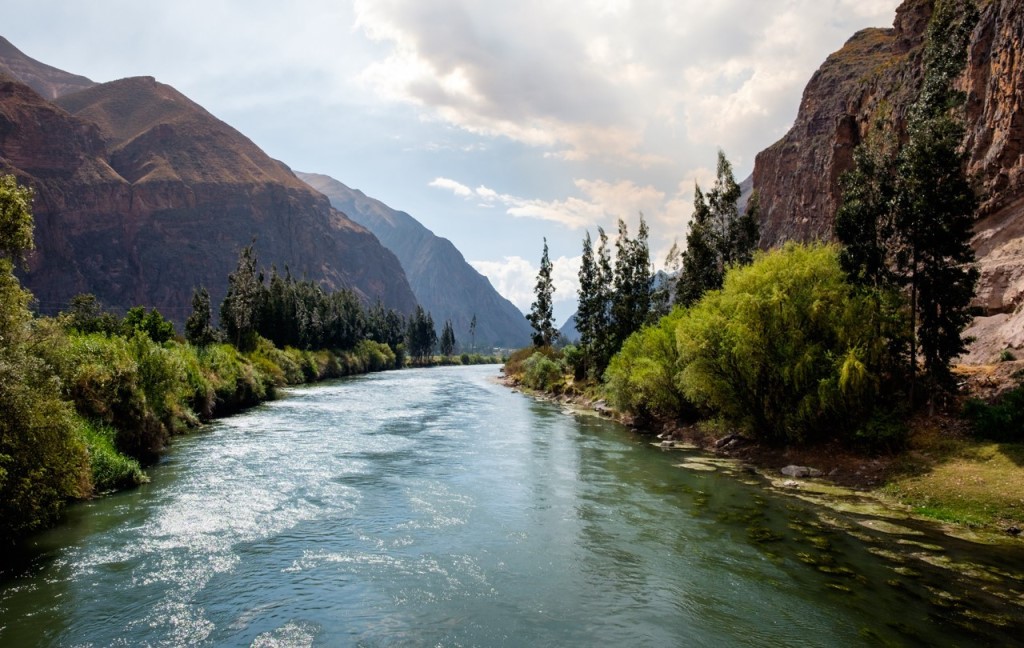
Photo Tours and Expeditions/Daniel Korzeniewski
I’m a big fan of making traveling as easy as possible...
That’s why I like to visit new locations with a photography tour as often as I can. I’ve been on tours in many parts of the U.S. and abroad, and not having to worry about things like in-country transportation, food, or my itinerary is quite freeing!
What’s more, going on a photography tour means that you can rely on experts who know the area like the back of their hand to get you to the must-see places (and the off-the-beaten-path areas) for the best shots.
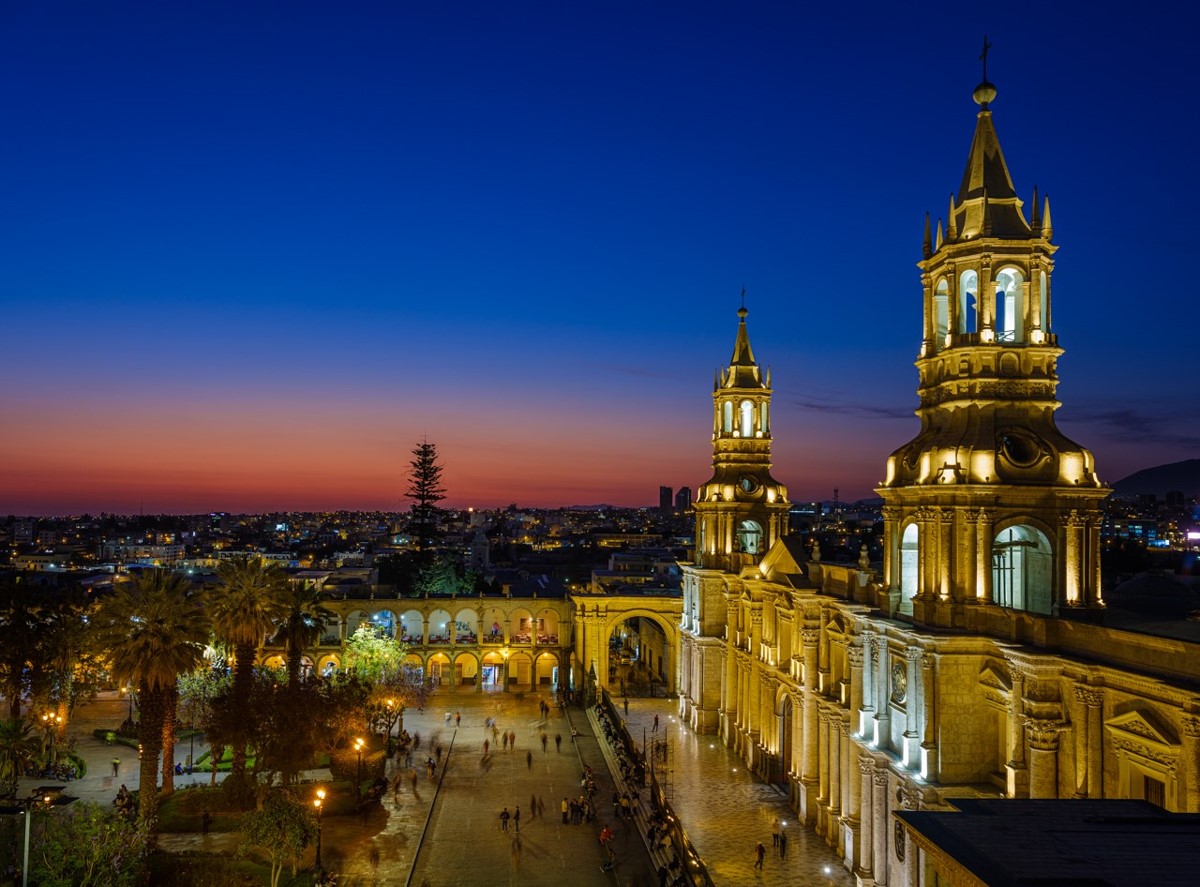
Photo Tours and Expeditions/Daniel Korzeniewski
If you’re thinking about visiting Peru, the photography tour company I recommend is Photo Tours and Expeditions.
They’ve got a 14-day Peru photo tour coming up in the summer of 2021 that takes you from Lima to Arequipa, Cusco to the Sacred Valley and points in between.
You’ll have an opportunity to photograph people, places, cities, and landscapes, and hone your photography skills in a small group setting (no more than 12 participants).
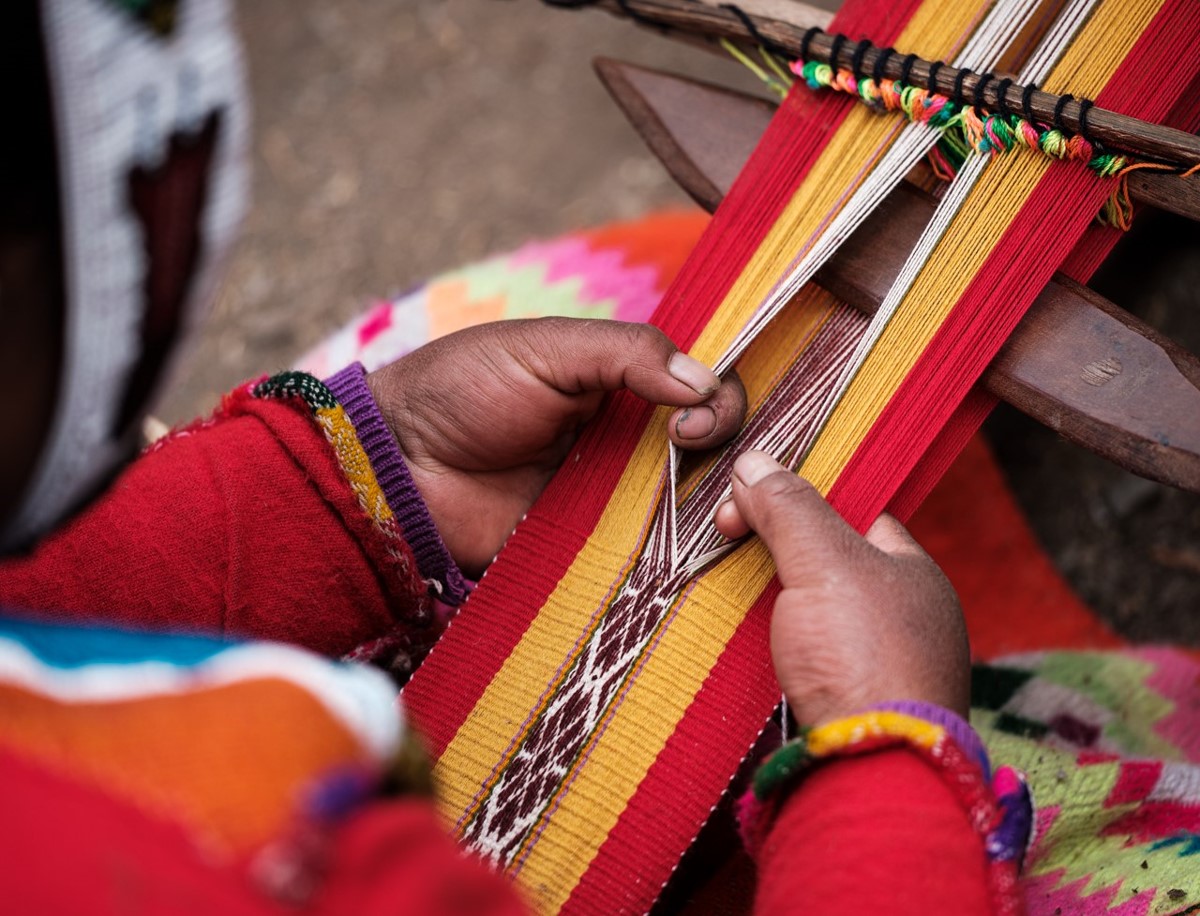
Photo Tours and Expeditions/Daniel Korzeniewski
This is an all-inclusive trip, so you don’t need to worry about where you’ll stay, how you’ll get from Point A to Point B, what you’ll eat, or tickets to attractions like Machu Picchu.
Instead, you can relax in the air conditioned ground transportation as you’re whisked from one location to another, learning more about Peru’s rich history from a local English-speaking guide, and getting feedback on your images from the tour leaders and your tour mates.
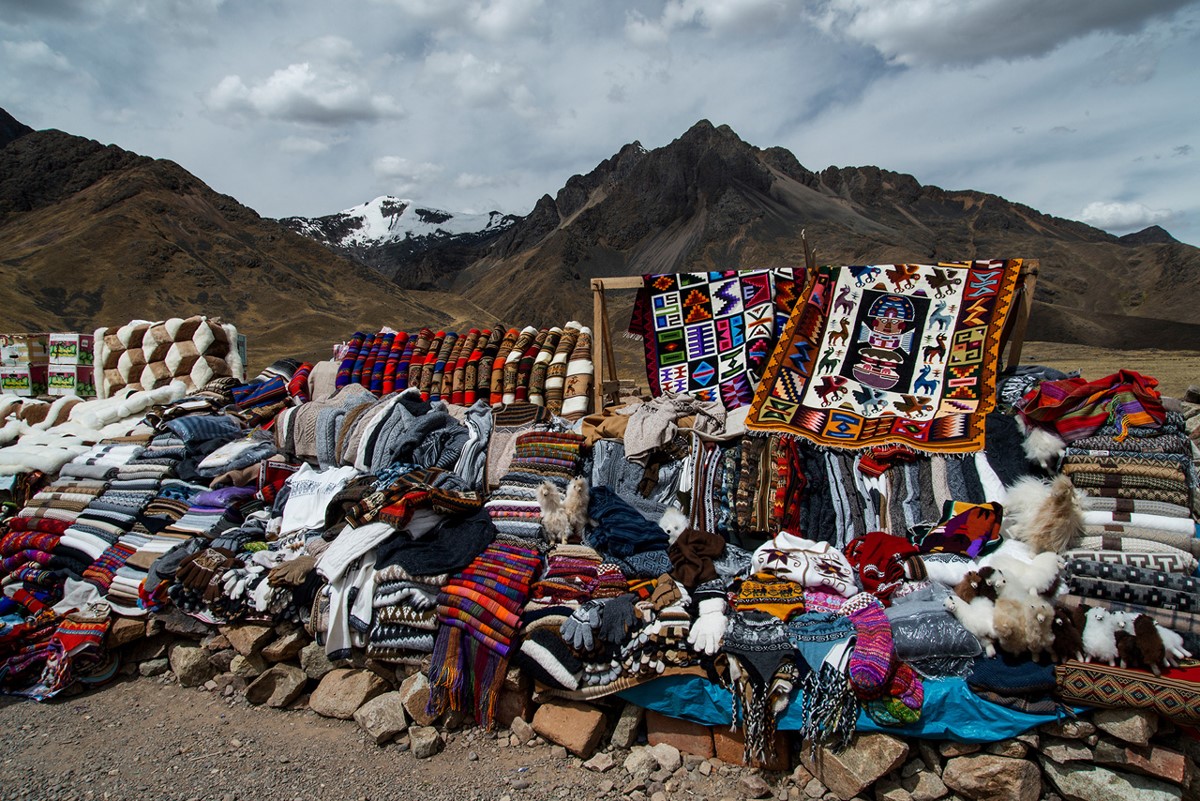
Photo Tours and Expeditions/George Plucienkowski
For my money, there is simply no better way to explore this mysterious place than as part of a photography tour.
If you’re ready to take the plunge and take a true South American adventure, visit Photo Tours and Expeditions for details about this once-in-a-lifetime Peru photo tour.
We Recommend
Photography Gear for Traveling Solo
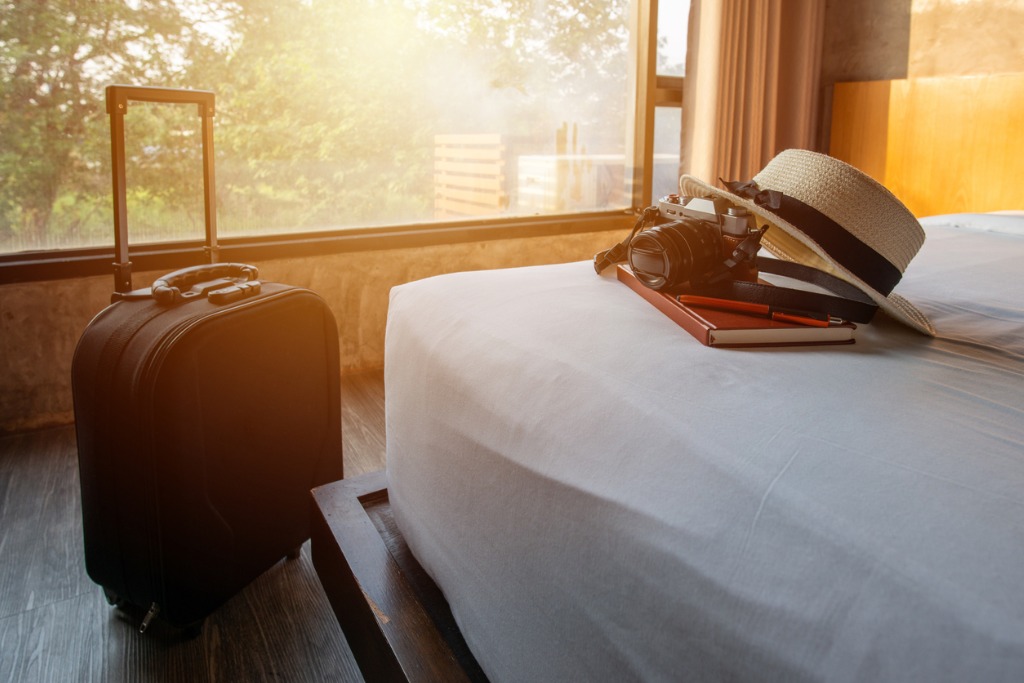
photo byBoyloso via iStock
While nobody is doing much of anything nowadays, let alone participating in travel photography, I’ve definitely spent quite a few sleepless nights frantically Googling when researchers think it will be safe to travel again.
I’ve also spent quite a bit of time trying to figure out where the next trip is going to take me. And I don’t think I’m alone. Although I’ve recently heard a lot about how the coronavirus pandemic is going to create a huge boom in domestic travel, I know I’m excited to leave the country again.
So, since I’m already doing all of this research, I figured I may as well share some of the info I’m collecting. Since I obviously can’t recommend which trips to take just yet, one thing I can recommend is photography gear for your next vacation.
Keep in mind all of this travel photography gear is gear that I have either already used on a solo trip or plan to just as soon as all this madness is over. So, in order to make the cut, the photography gear had to be lightweight and easy to carry, relatively inexpensive (except for my main camera), and sturdy.
Let’s dive in.
Top Travel Camera: Sony a7S II
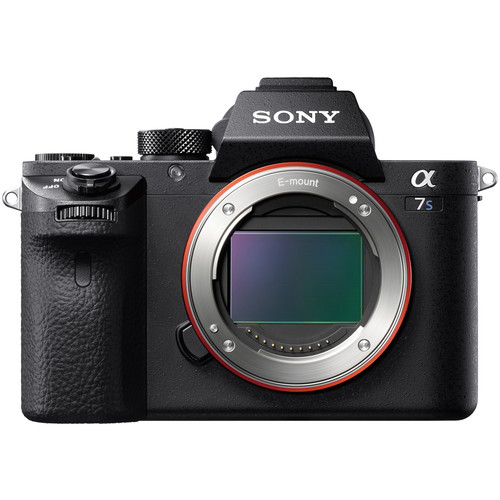
I’ve written a full review of the first item on this photography gear list and you can read it here.
The Sony a7S II is a full-frame mirrorless camera with a 12MP sensor and 4K video. While it’s best known for being a great low-light shooter, it’s also one of my favorite pieces to pack for all of my trips because of its weather-sealed body. It’s built with more magnesium alloy than any other Sony a7S, so it’s also really sturdy.
It also lasts for forever. This camera is rated at 500,000 cycles, which is plenty to last you for years of traveling.
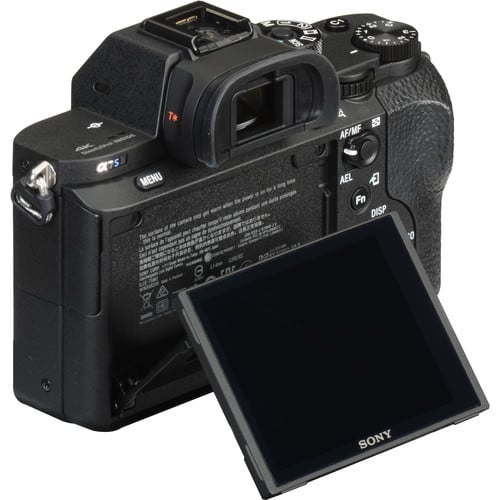
It’s 3” tilting LCD screen comes in handy when photographing people on the street, or when photographing in crowded tourist areas.
It comes with 100% viewfinder coverage.
Some other specs include its ISO range of 100-102,400 and its 5fps burst mode.
Plus, it weighs just over 1.3 lbs so you can throw it in your carry on and not even realize it’s there.
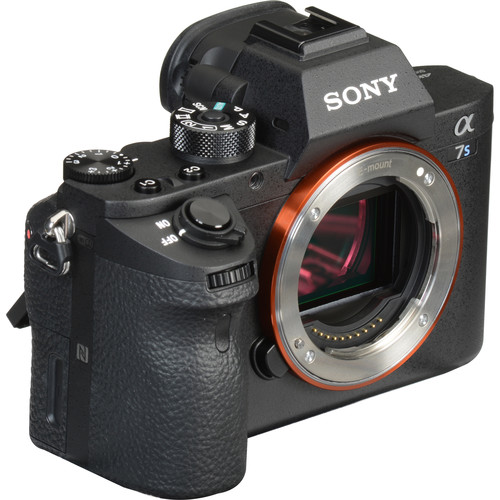
Unfortunately, all of these specs do come at a price. Since this is one of those essential photography gear pieces, I allowed myself to pick something a bit more expensive. The Sony a7S II is $2,400 if you opt to purchase it new.
But, no travel photography tips list would be complete without a few money hacks. Instead of buying the Sony a7S II new, you should purchase it off of MPB used.
Why? Well, the Sony a7S II starts at just $1,000 on MPB. Or, you can opt for one in excellent shape for just $1,500.
Inexpensive Backup Camera: Sony a6000
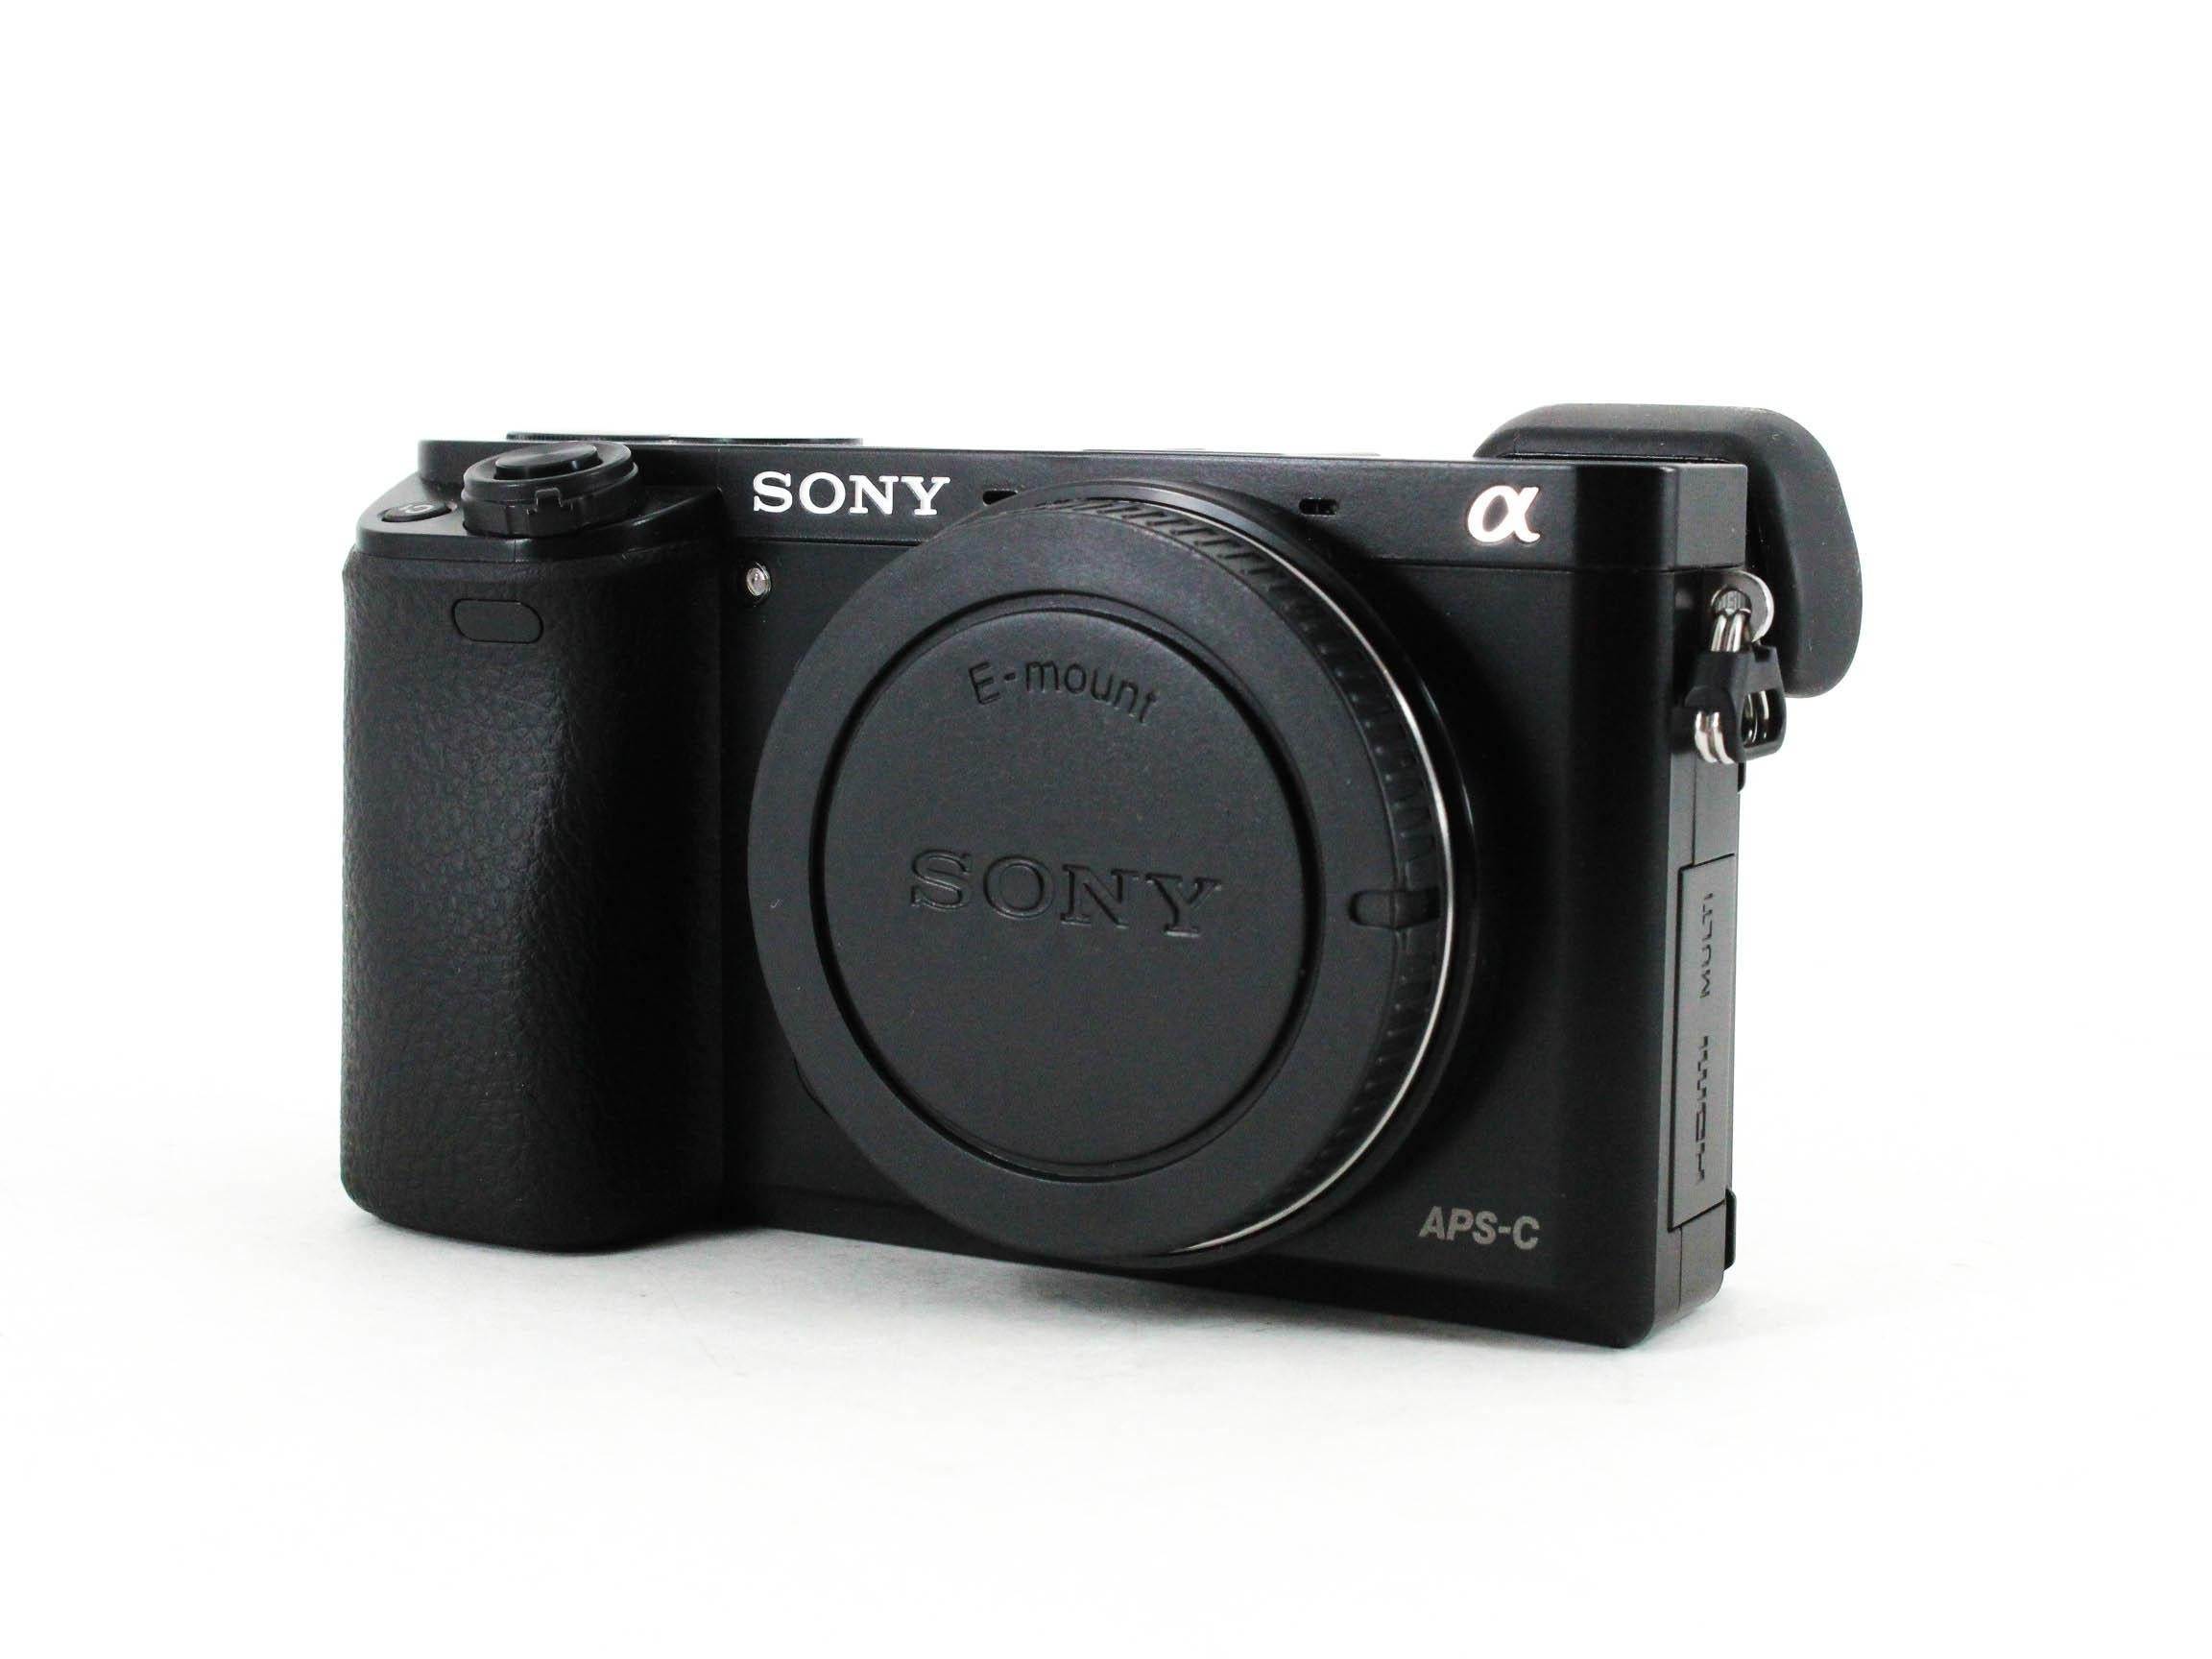
Okay, your photography gear bag definitely needs a backup camera when you’re traveling and let me tell you why: problems happen all the time, and if something goes awry with your primary camera (or God forbid it gets stolen), you don’t want to be on your trip without a camera.
The Sony a6000 works really well for me as my backup because it’s incredibly inexpensive. I purchased my used Sony a6000 off of MPB for a little over $400, but prices have fallen since then and you can now pick one up for as little as $325.
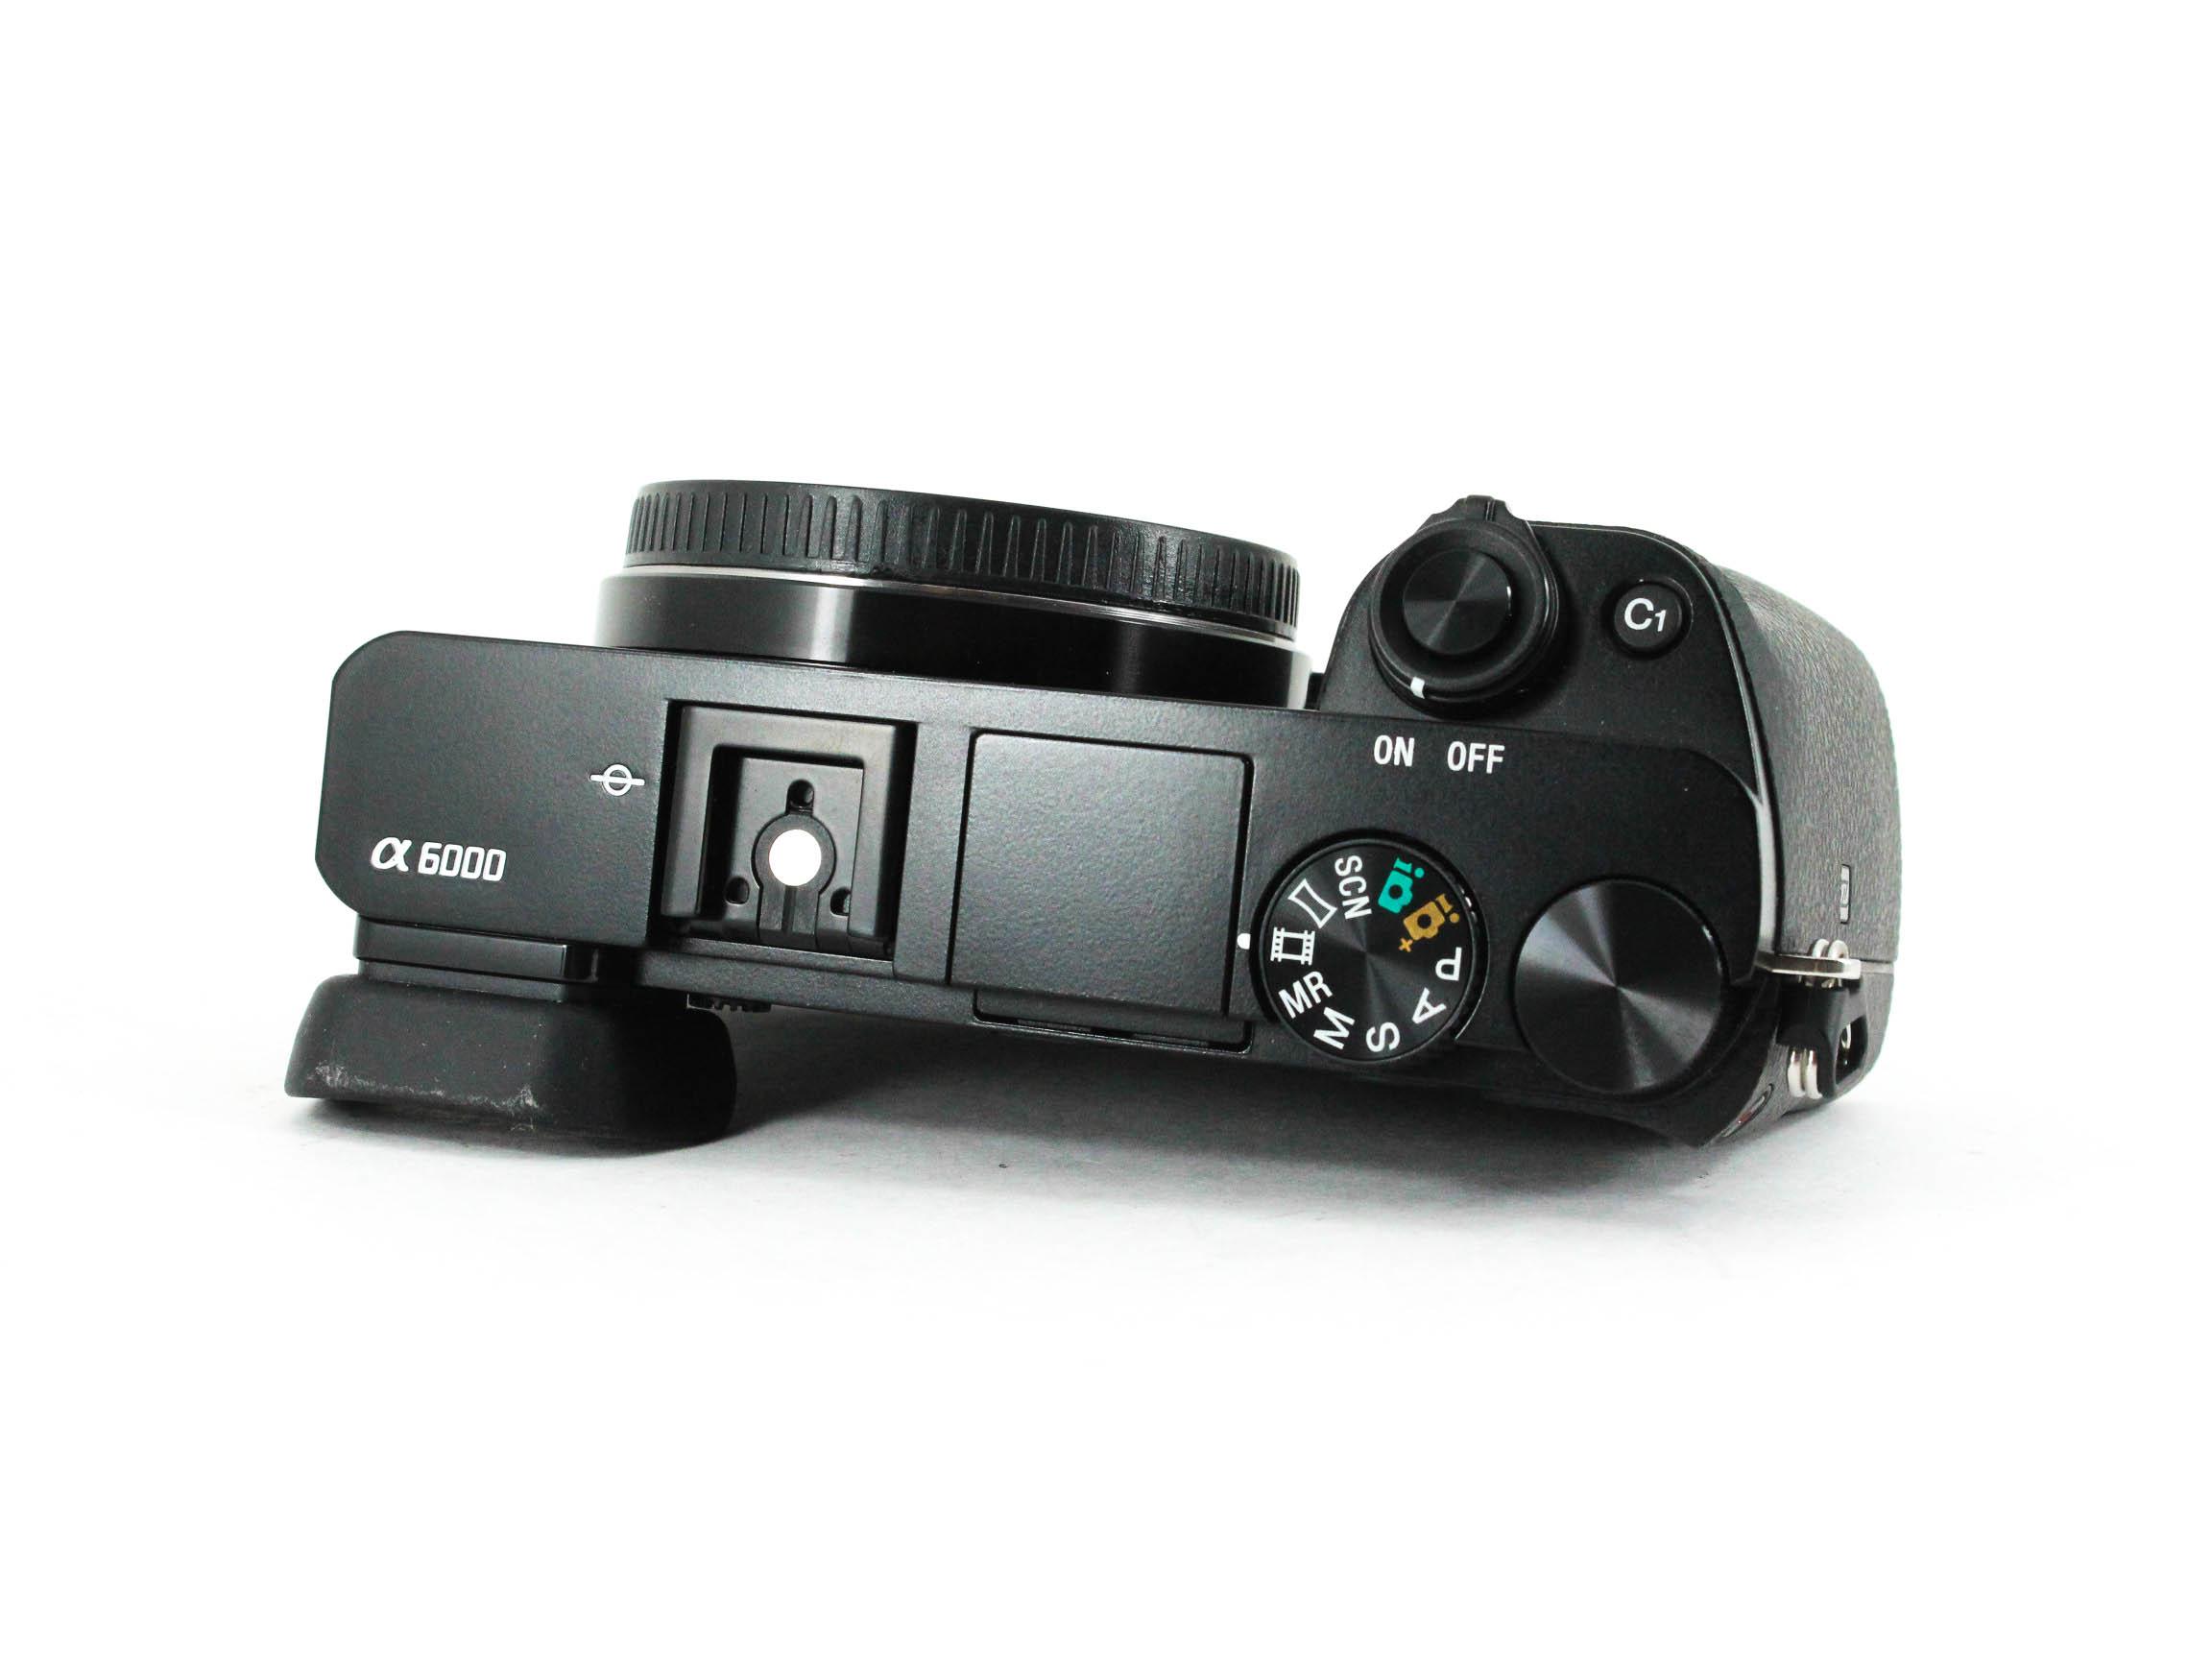
And I know that this camera is 6 years old and that’s why it’s so cheap, but this mirrorless camera comes with all the specs I need for traveling (except 4K video).
It features a 24MP sensor, 11fps burst mode, and a 3.0” tilting screen with 921.6K dots, which is just a step down from the screen on the Sony a7S II. While the screen isn’t a touchscreen, this really doesn’t bother me if I’m not going to be shooting with it very often.
It’s also really small, which means I can leave it in a locker at my hostel or hotel until the moment I need it.
Learn More:
Small But Mighty Tripod Alternative: Octopad
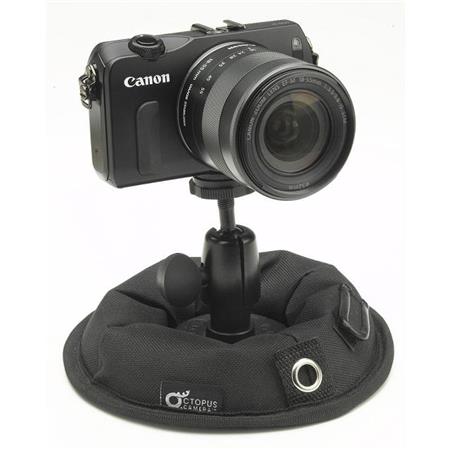
I talk about the Octopad a lot on PhotographyTalk (I did a full review a while back that you can read here) because I’ve yet to find a tripod that does as much as this does for this price point.
Obviously, my favorite part of any inexpensive photography gear is its price. The Octopad is just $27. At that price point, you’re going to be finding tripods that will break within the month and won’t do a great job of doing much else in the meantime.
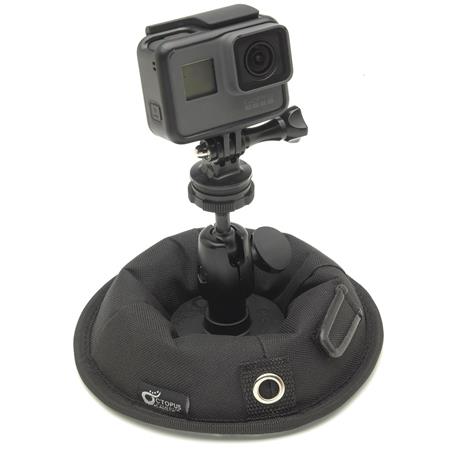
The Octopad, on the other hand, is incredibly small and lightweight while maintaining complete balance. Since it’s bottom heavy, you will never have problems shooting with it in extreme weather conditions. It’s sturdy as you need in a small package like you want for traveling.
You also don’t have to use the Octopad to hold your camera because it works well with a GoPro, or simply as a way to support an off-camera light to light the scene absolutely perfectly.
The only downside to the Octopad is that you aren’t going to be using it to keep your camera at eye level since it only works to hold your camera in place.
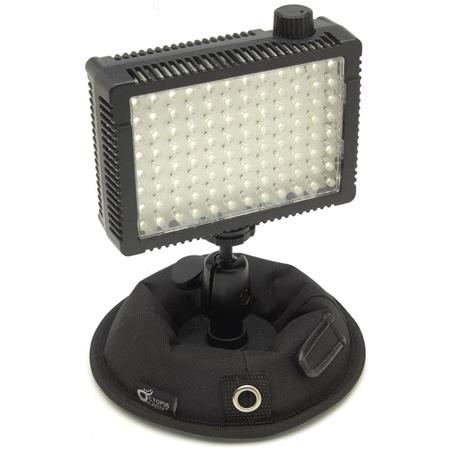
But, I don’t know of any tripods that can hold your camera or light at a 45 degree angle on any surface without tipping over.
It also weighs just 1.6 lbs and is 6.5” in diameter, so you can easily stick it wherever you need to in your luggage.
It definitely helps to have an Octopad in your photography gear bag when you need to shoot while hanging off of a cliff or participating in any other action sports.
A Bright, Portable Light: Hakutatz Pocket Size AW RGB LED Light

There’s no way for me to do a travel photography gear tips list and not include a pocket-sized light.
The Hakutatz Pocket Size AW RGB LED Light has got a name to match its capabilities. This light features amber, white and RGB LEDs so you can add drama to any scene with millions of possible colors.

It also comes with an app so you can adjust the lighting from your phone, which comes in handy when you’re watching your photography gear like a hawk.
You can also change the saturation or brightness from your app, which means you’ll have more room in your luggage for souvenirs since you won’t need to drag diffusers or softboxes with you everywhere you go. There’s a reason why I named it one of the best lights of 2019!
You can grab a Hakutatz Pocket Size AW RGB LED Light for $130.
Something to Carry It All In: HEX Back Loader Backpack
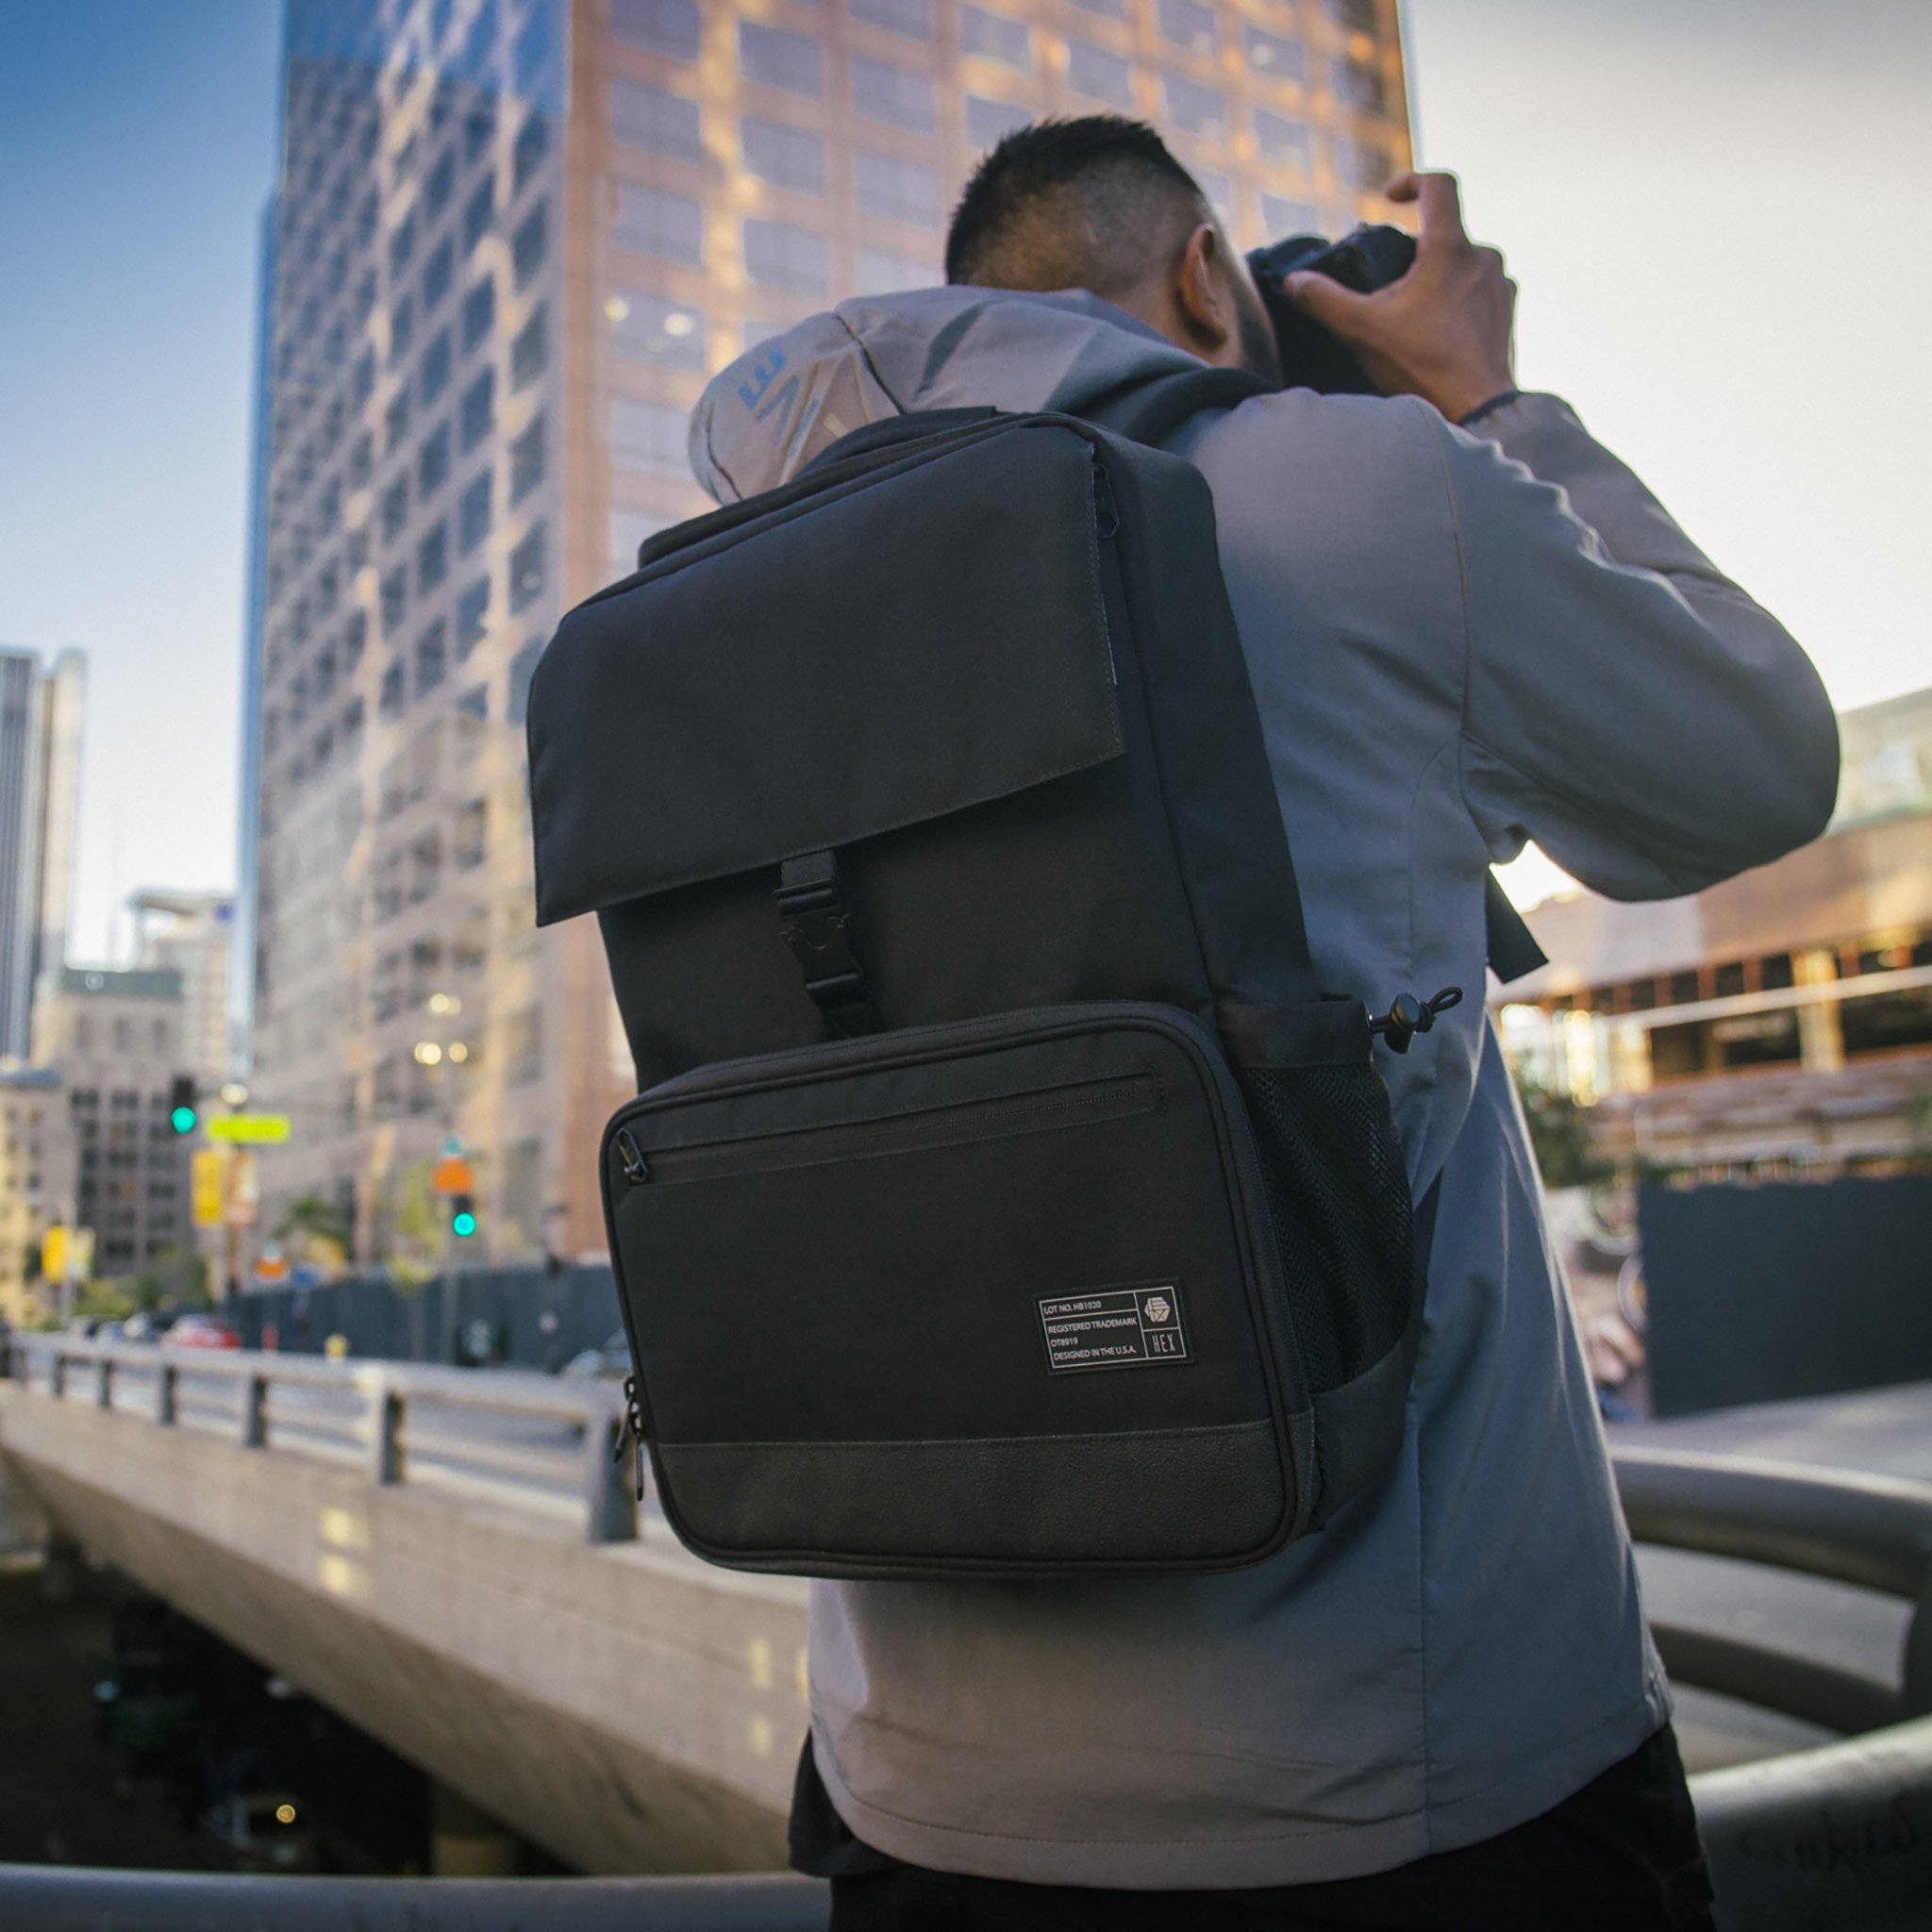
You’re obviously going to need a bag to carry all of your new photography gear in and the HEX Back Loader Backpack is just the one.
For starters, I’ll never recommend a bag that I don’t think is aesthetically appealing. Maybe this has something to do with the fact that my parents always said you should look your best because first impressions last, but I find I get more jobs when I look put together.
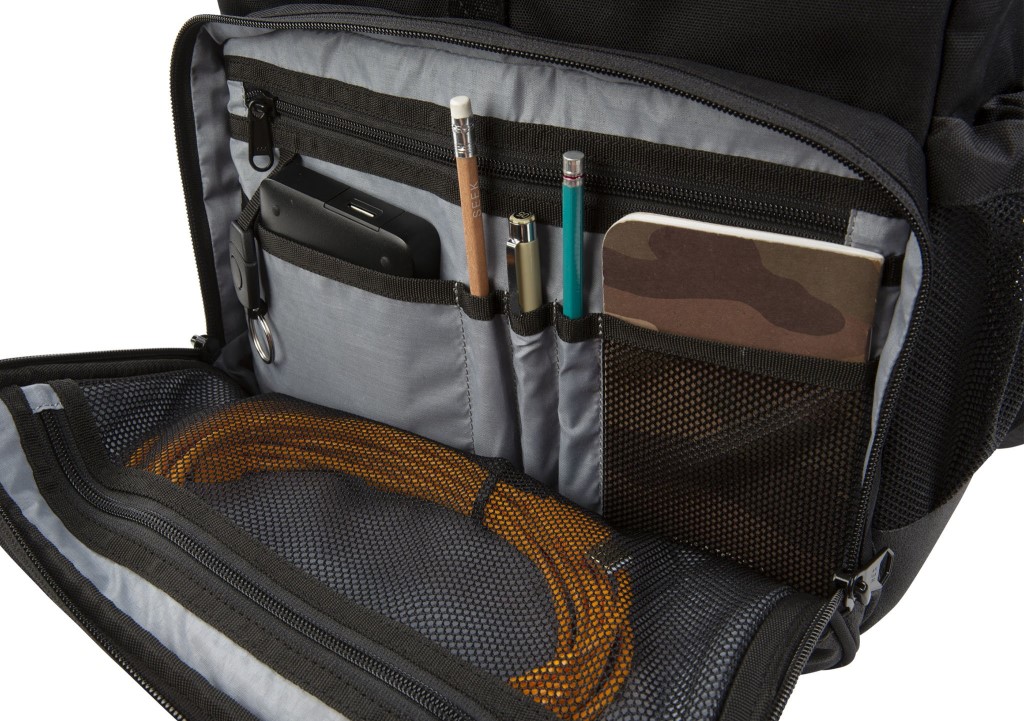
This bag is a sleek and modern black. It also happens to be pretty discrete, so nobody will know it is filled with thousands of dollars of photography gear.
I also won’t recommend a bag that isn’t comfortable because there’s nothing worse than running around London with a shoulder strap digging into your skin.
This bag features shoulder straps that are well-padded, a chest strap to more evenly distribute the weight of your photography gear, and, most importantly, really fast access to your gear.
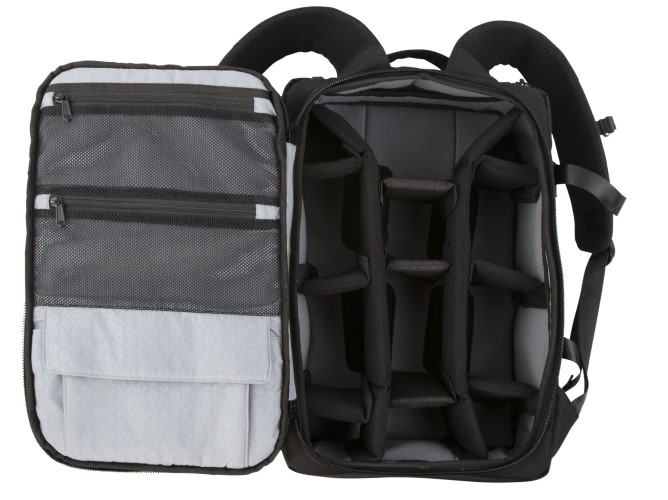
It’s also water resistant, so you won’t need to be worried about freak storms.
If you want to pick up a HEX Back Loader Backpack, they’re currently available for $190.
Learn More:
We Recommend
Plan Your Next Photography Trip With These Simple Tips
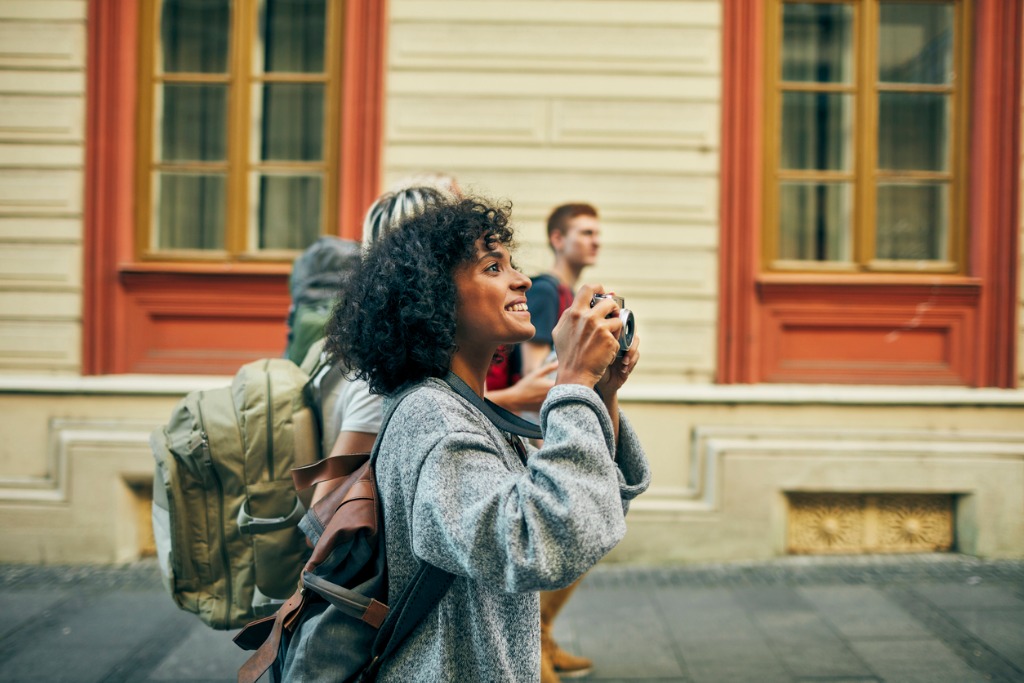
photo byvgajic via iStock
One of the first questions I ask a lot of photographers I meet is where they took their favorite photography trip. I think it tells me a lot about them. Plus, it means I constantly get lots of tips about where I should take my next photography trip. If I wasn’t asking other photographers about where they’ve enjoyed going, I likely wouldn’t have ever taken a photography trip to some of my favorite locations, like Peru or Morocco.
I know that a lot of people are desperate to get back into travel photography after a very long couple of years with the pandemic. So, I figured I should share some of the travel photography tips I’ve collected over the years, especially since so many people have so much riding on their next photography trip.
In this article, I have a few tips about how to plan a photography trip and a few more tips about how to stay organized when you’re on the go.
Plan Your Route
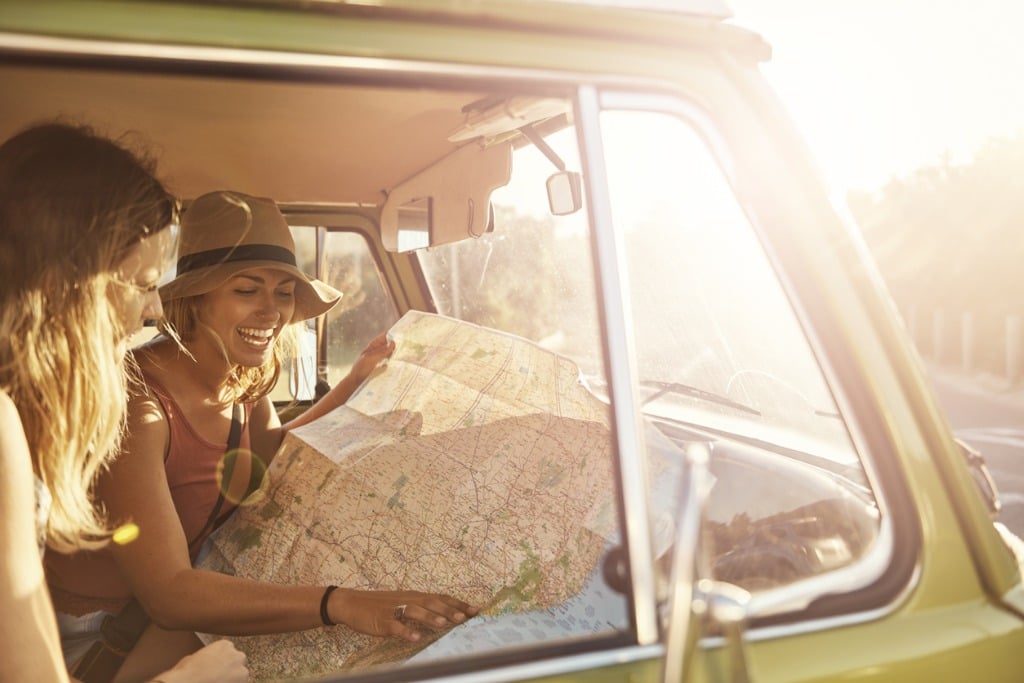
photo bypixdeluxe via iStock
If you’ve ever gone on a photography trip before, then you know how important planning is. One of the best tips for planning a photography trip I’ve ever received was to plan out my route on a good, old-fashioned paper map.
I prefer to use a paper map when I’m routing out my photography trip because I’m usually not stationed in one small part of a city. For instance, when I took a photography trip to Mexico City a few years ago, I had to map out all of the points I wanted to hit within Mexico City (which is huge all by itself) and I also had to map out some points I wanted to hit outside of Mexico City, like the pyramids at Teotihuacán and the canals of Xochimilco.
If I had to do this without a paper map, I likely would have crafted a route that wasn’t as efficient.
However, if you are totally set on staying digital, then I recommend that you plan your route using the Waze app. Waze works through crowdsourced information, which means that you can use it internationally and, so long as you are in a populated area, it is usually pretty effective.
Make Sure You Have Easy Access to Your Photography Gear
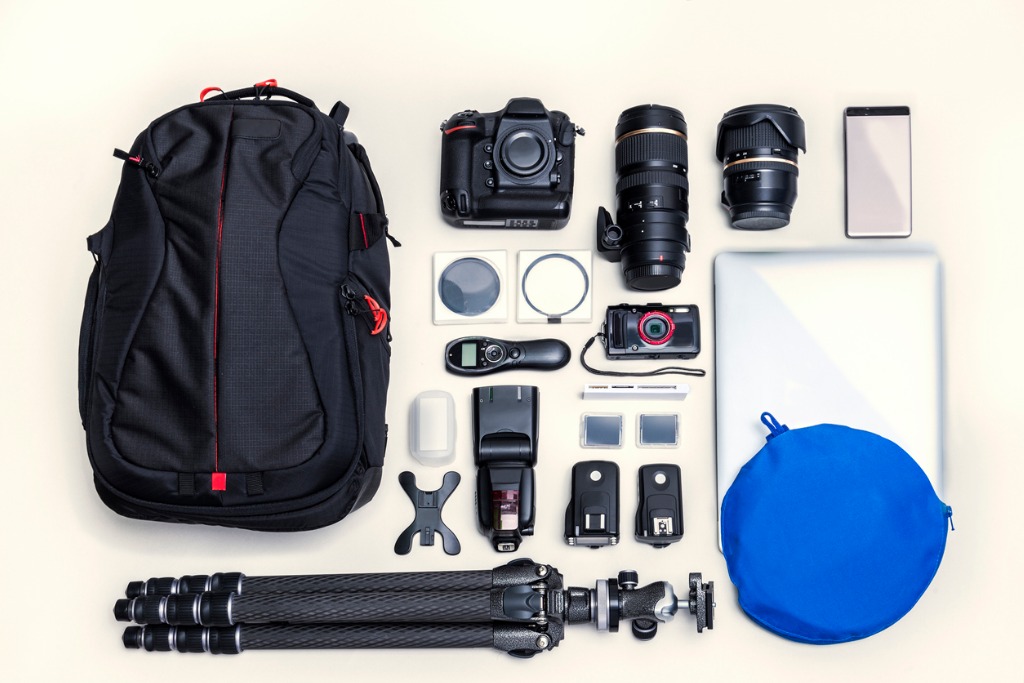
photo byugurhan via iStock
It would be a cardinal sin to go on your next photography trip without easy access to your gear. I’ve been in a bind before and had to put some of my cheaper photography gear in cargo and I’ve also been dumb enough to leave my photography gear in the trunk of my rental car. Don’t make these mistakes.
Travelling, especially travelling abroad, is so exciting and when you have easy access to your photography gear, you can capture all of those little moments you don’t see coming.
For instance, when I got off the train platform in Aguas Calientes, Peru, which is at the base of the mountain where Machu Picchu is located, there was a water festival going on. I pretty much immediately started watching little kids throwing water balloons at each other. If I didn’t have my camera out already, I likely would have missed some incredible shots.
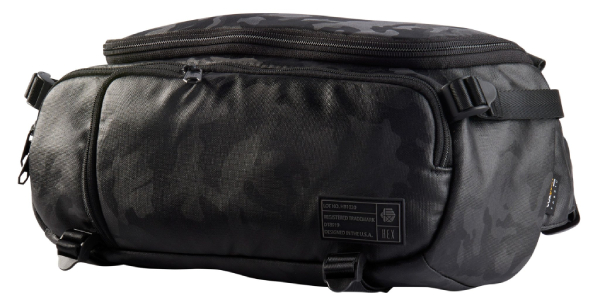
If you don’t currently have a good way to carry your essential photography gear, then I recommend you get the Hex Ranger DSLR Sling before your next photography trip.
This bag can be worn across your chest so that you have immediate access to your camera at all times. It is just big enough, at 14.5” x 7.5” x 4.75” to carry your DSLR camera, a tripod, your phone, and some lenses, yet it’s small enough that it isn’t obtrusive as you work or navigate busy areas full of tourists.
Plus, it’s pretty cheap at $100.
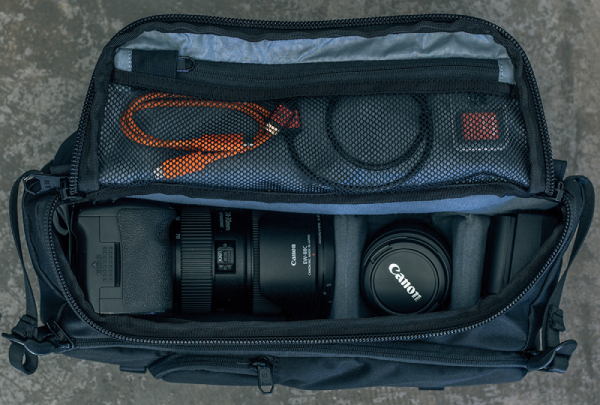
But don’t let the small price tag fool you - this bag is impeccably designed and built.
It has features like a hideaway rain fly, a front access organizer for small items, a faux fur-lined pocket for your phone or sunglasses, and a faux fur-line tablet pocket.
There’s also adjustable bottom carry straps for your tripod, a double buckle strap to give you plenty of sizing options, and a water-resistant Cordura covering with antimicrobial technology.
Like I said, don’t let the small price tag fool you! This bag is loaded for bear for your next trip!
Learn More:
- Get Into the Habit of Taking More Photos With These Easy Tips
- This is the Sling Camera Bag You’ve Been Waiting For
Bring Your Own Power

photo byrichardnazaretyan via iStock
Another photography trip cardinal sin is to run out of battery. One really easy way to prevent yourself from making this mistake is by buying a power bank and a USB charger. While most hotel rooms, no matter how small, usually have power in even the smallest cities all across the globe, you should never count on this. Power outages happen. By having a backup at all times, you can save yourself a lot of regret.
Use Instagram for Research

photo bygrinvalds via iStock
While I talked about planning your route with a more traditional method, I don’t believe your entire planning process should be this traditional.
Instagram is an excellent resource for helping to plan your photography trip, especially if you’re visiting a city that is overrun with tourism, or one that has very little tourism. When there are so many articles online about places you absolutely have to photograph in Paris or in London, it can be really frustrating reading the same advice over and over again. Photographers who are actually on the ground in Paris or London will give you far better spots to photograph.
Conversely, if you are going to a city that isn’t as well known, you may have trouble finding any information online at all. Instagram can also help you in this scenario because you can go see the spots that locals are photographing.
Create Your Own Brief

photo byRossella De Berti via iStock
If you’ve ever worked as a travel photographer before, then you know that an agency will give you a brief before you head out on your trip. This brief will include specific shots that the agency wants you to get, specific types of shots that they want you to get, and the general mood that they’re looking for.
However, if you’re heading out on a photography trip by yourself, it can still be helpful to create a brief for yourself. Try and figure out what types of shots you want to get and why. You can create a mood board before your trip, if that’s something you’re into.
The important thing is that you do enough planning for your photography trip. If you show up without a route, or if you show up without a shot list, the images you do get could end up being all over the place and this won’t look good on your portfolio.
Learn More:
We Recommend
Pura Vida: Costa Rica is a Photographer's Paradise
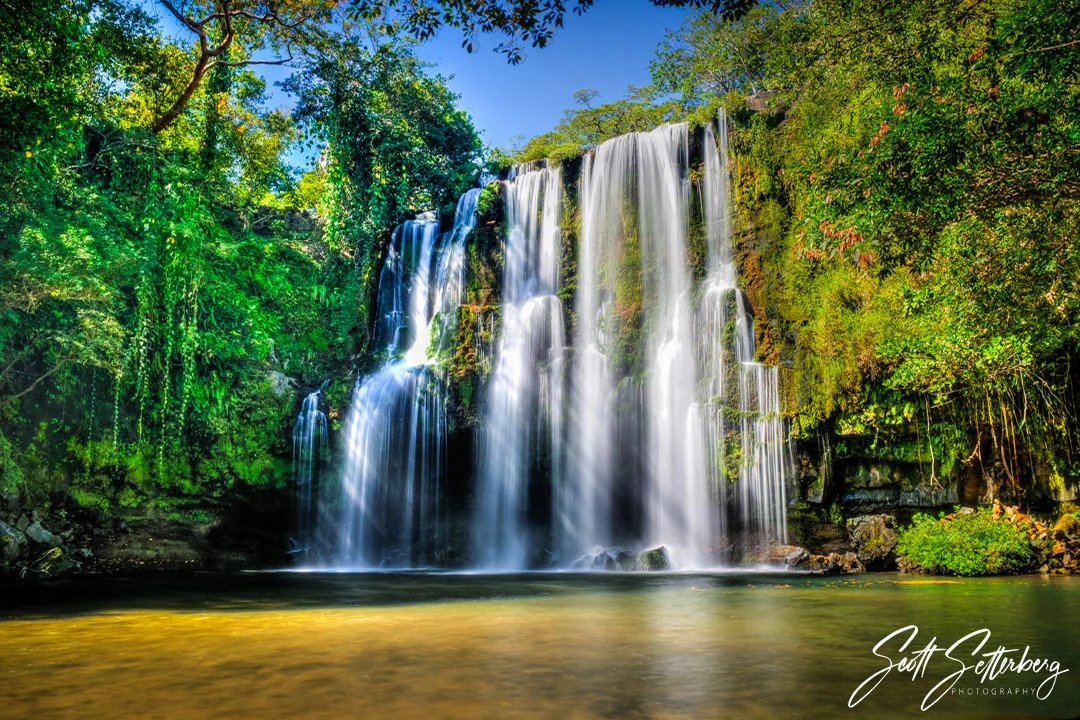
Pura Vida! Costa Rica is an awesome place for photographers with many and interesting sights including jungles, waterfalls, and wildlife. While the photographic opportunities are fantastic, it may sometimes be a little difficult to reach certain spots or get permission to be in these places, which is why Costa Rica photography tours are such a good idea.
Pura Vida Costa Rica
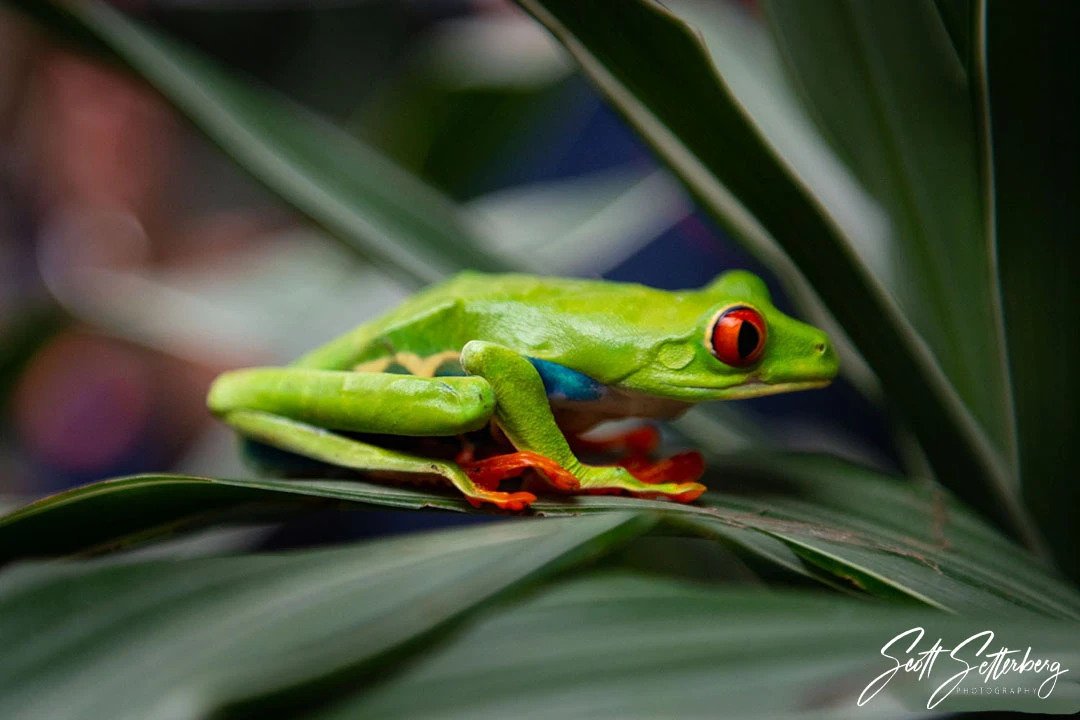
Pura Vida means “pure life” and a Costa Rica photography trip will live up to that phrase in a large way. Costa Rica photography is exciting, refreshing, and a great experience for any level of photographer.
ColorTexturePhotoTours is my choice for experiencing everything photographic that can be described as Pura Vida Costa Rica. For early 2021, they have several Costa Rica photography tours scheduled that offer a great experience.
Costa Rica Photography Tours
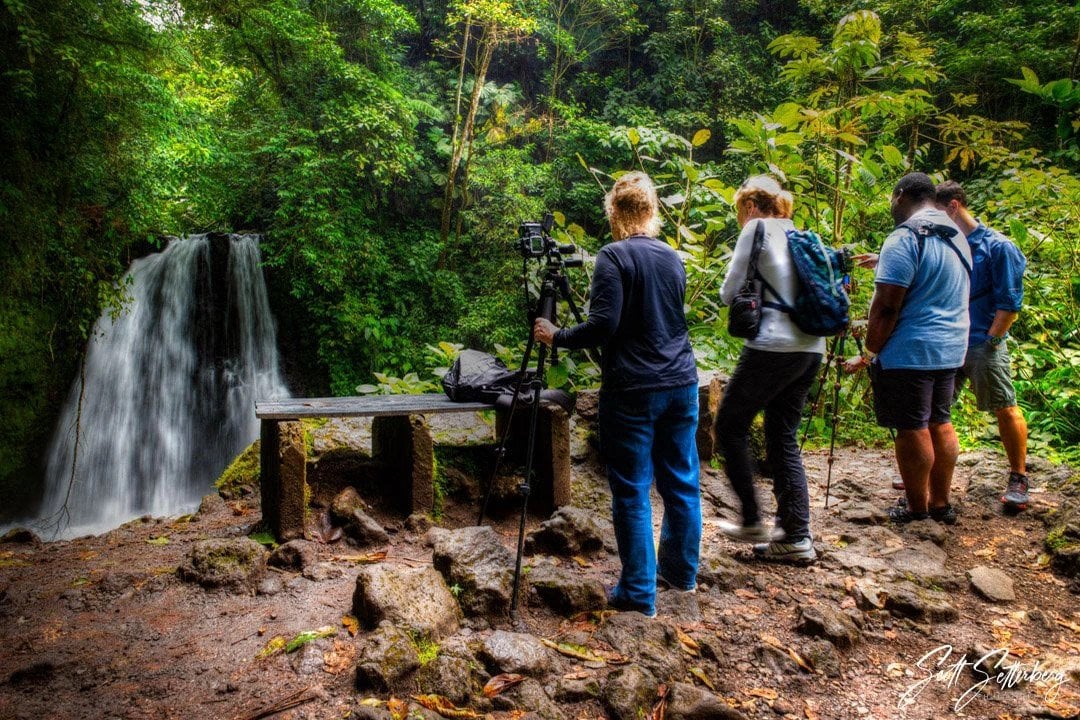
Some of the reasons for using a guided Costa Rica photography tour company for your trip is that the tour companies have experience in the area and are often given access to spots that aren’t available to the general public.
Some other reasons, especially in regards to ColorTexturePhotoTours, are personalised photography assistance, Lightroom training, comfortable hotels with great restaurants, and private transportation, to name but a few.
ColorTexturePhotoTours

ColorTexturePhotoTours has been a favorite photographic tour company for me ever since I first discovered them. For 2021, they currently have 8 Costa Rica photography trips planned that you join. They also have done several Oregon tours with an emphasis on gorgeous waterfalls.
Bookmark their website, you’ll want to see what’s coming up and some examples of the gorgeous scenery you will witness on their guided tours.
Learn More:
- It’s Time to Start Planning a Costa Rica Photography Trip
- 10 Things to Photograph in Costa Rica
- Photographing Colorful Costa Rican Frogs
Your Costa Rica Photography Trip
So, what are you going to see on your Pura Vida Costa Rica photography trip? Well, you are going to see so much in a few days that you will be busy sharing your images for a long time. Here are some of the places and sights you will visit.
Catarata Llanos de Cortez
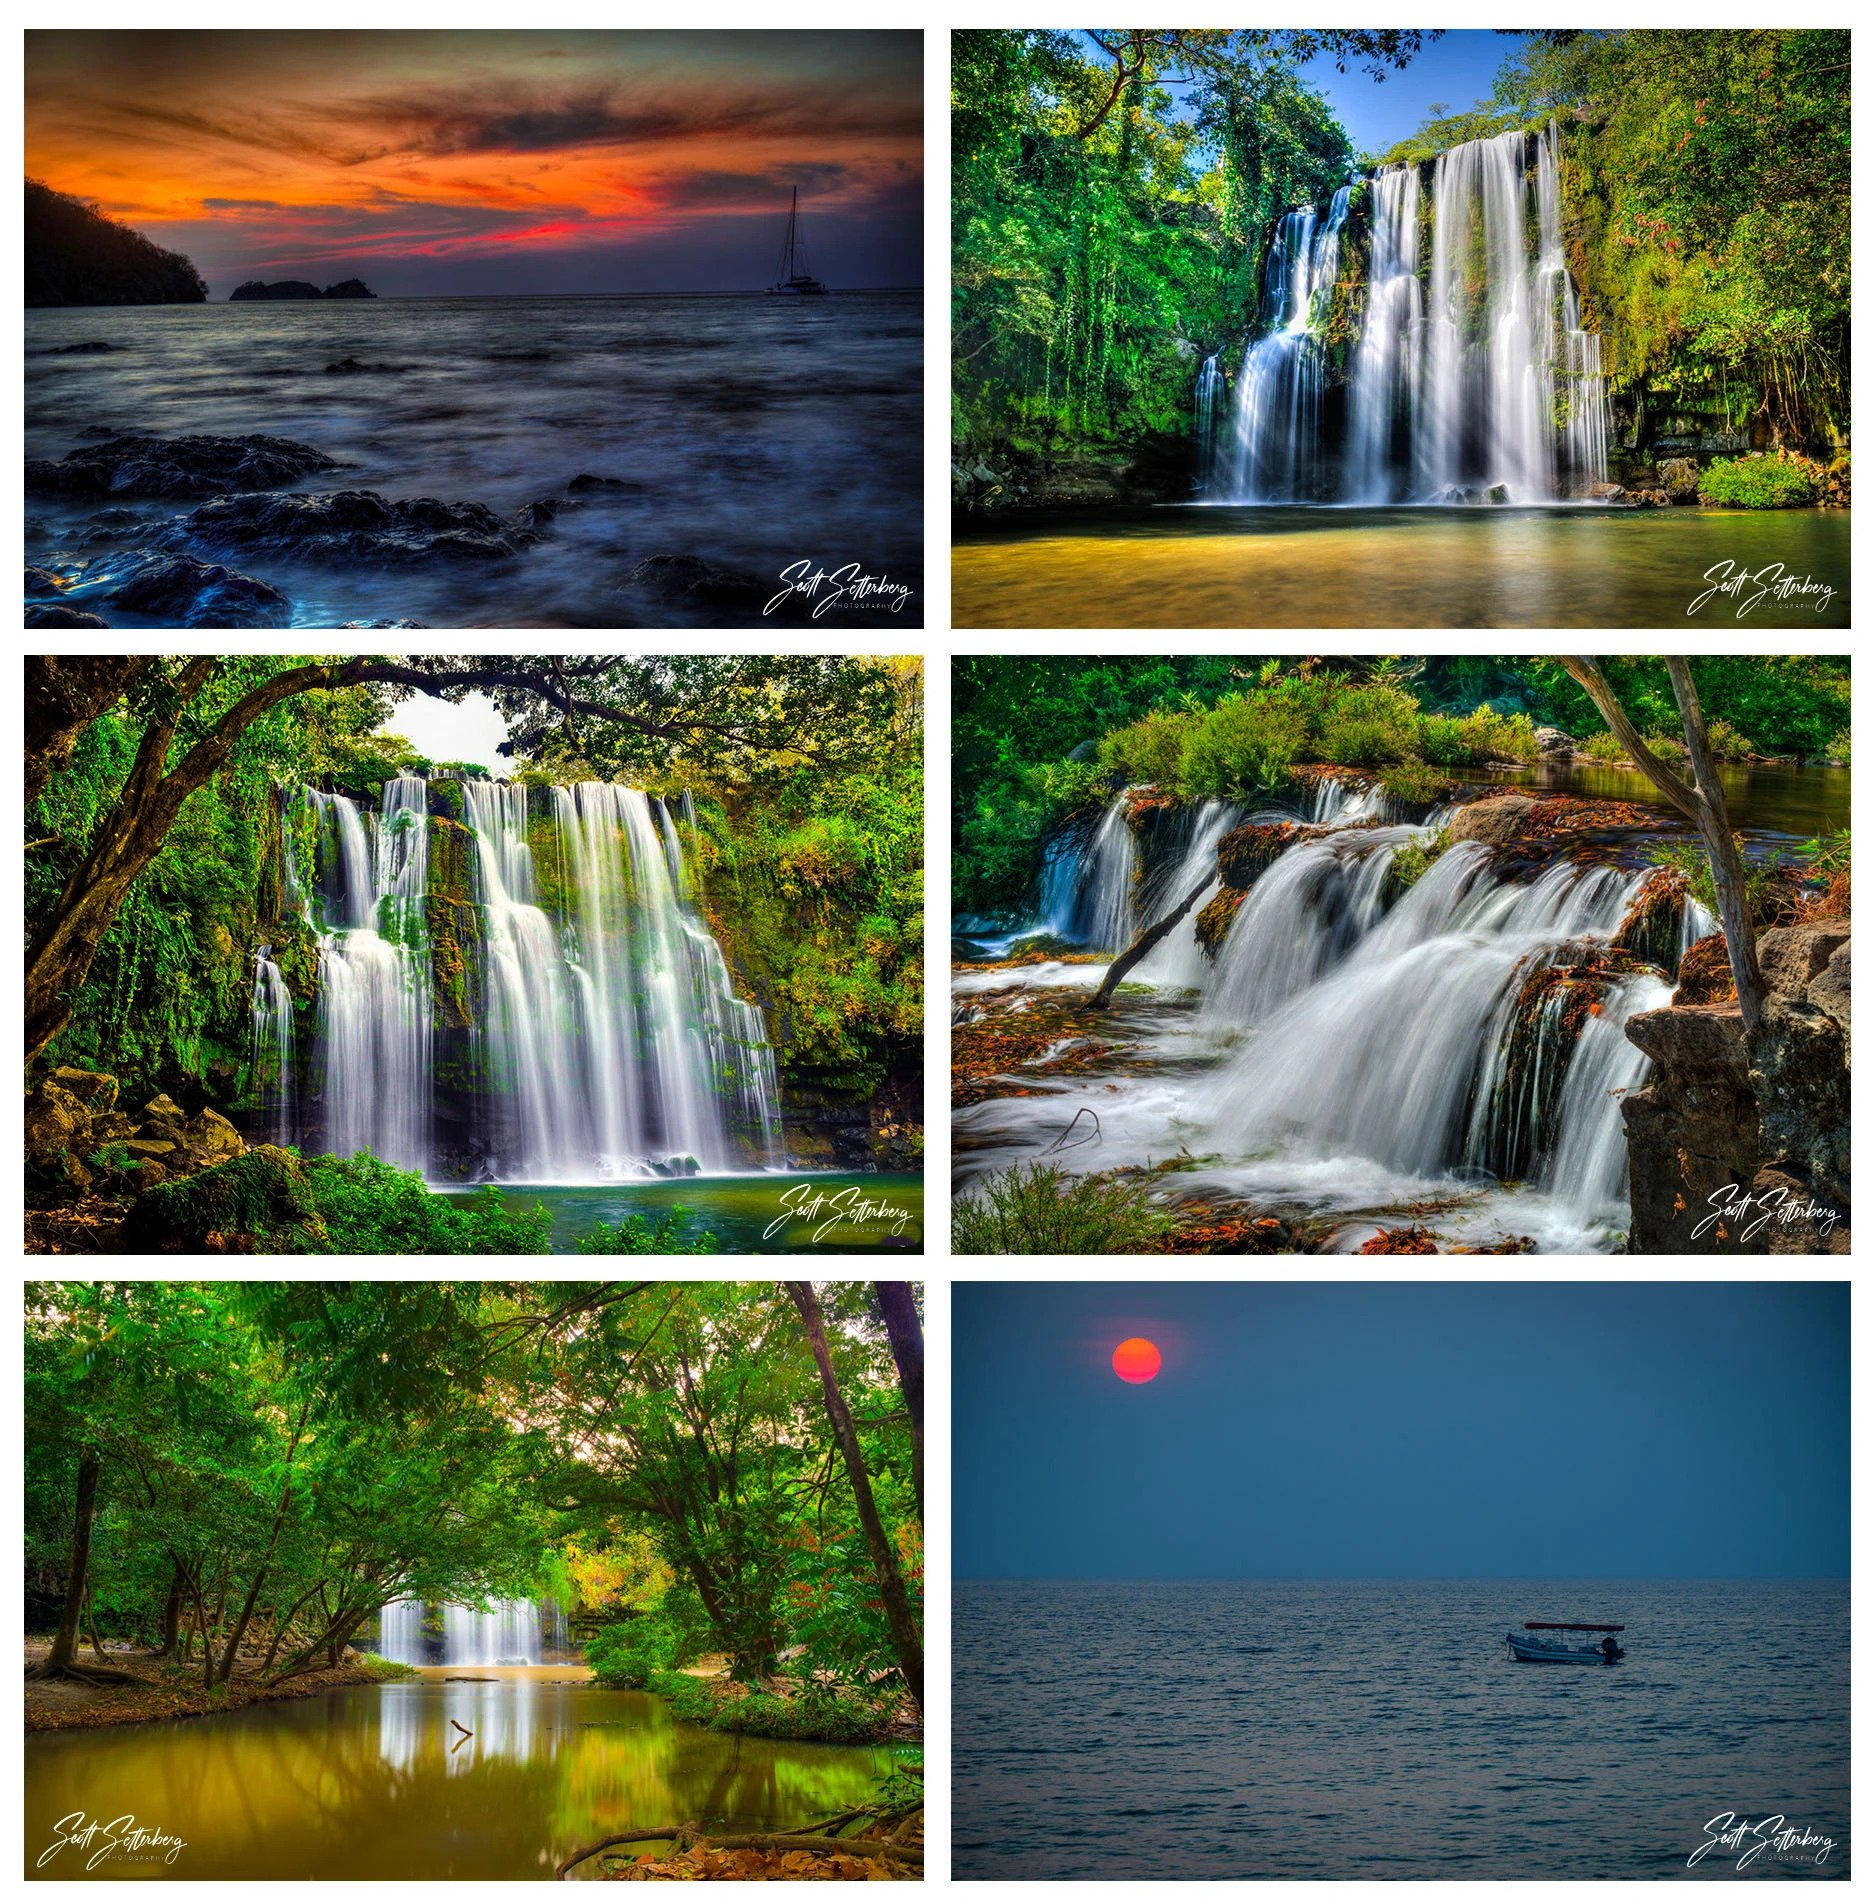
One of the premier waterfalls in Costa Rica is Catarata Llanos de Cortez. Sixty feet tall and almost that wide, Catarata Llanos de Cortez looks amazing and sounds wonderful. It cascades into a very shallow pool and is surrounded by lush tropical growth.
There are actually two parts to the waterfall, accessible by short hikes from the road you’ll drive on to get into the area. Besides the photography, you might also enjoy playing in the pools or under part of the falls.
At times, you’ll also be treated to colorful birds that can be their own photographic subjects or included in the waterfall images. Listen to the hints and clues from the photo guides for capturing the best views.
Rincón de la Vieja Volcano National Park
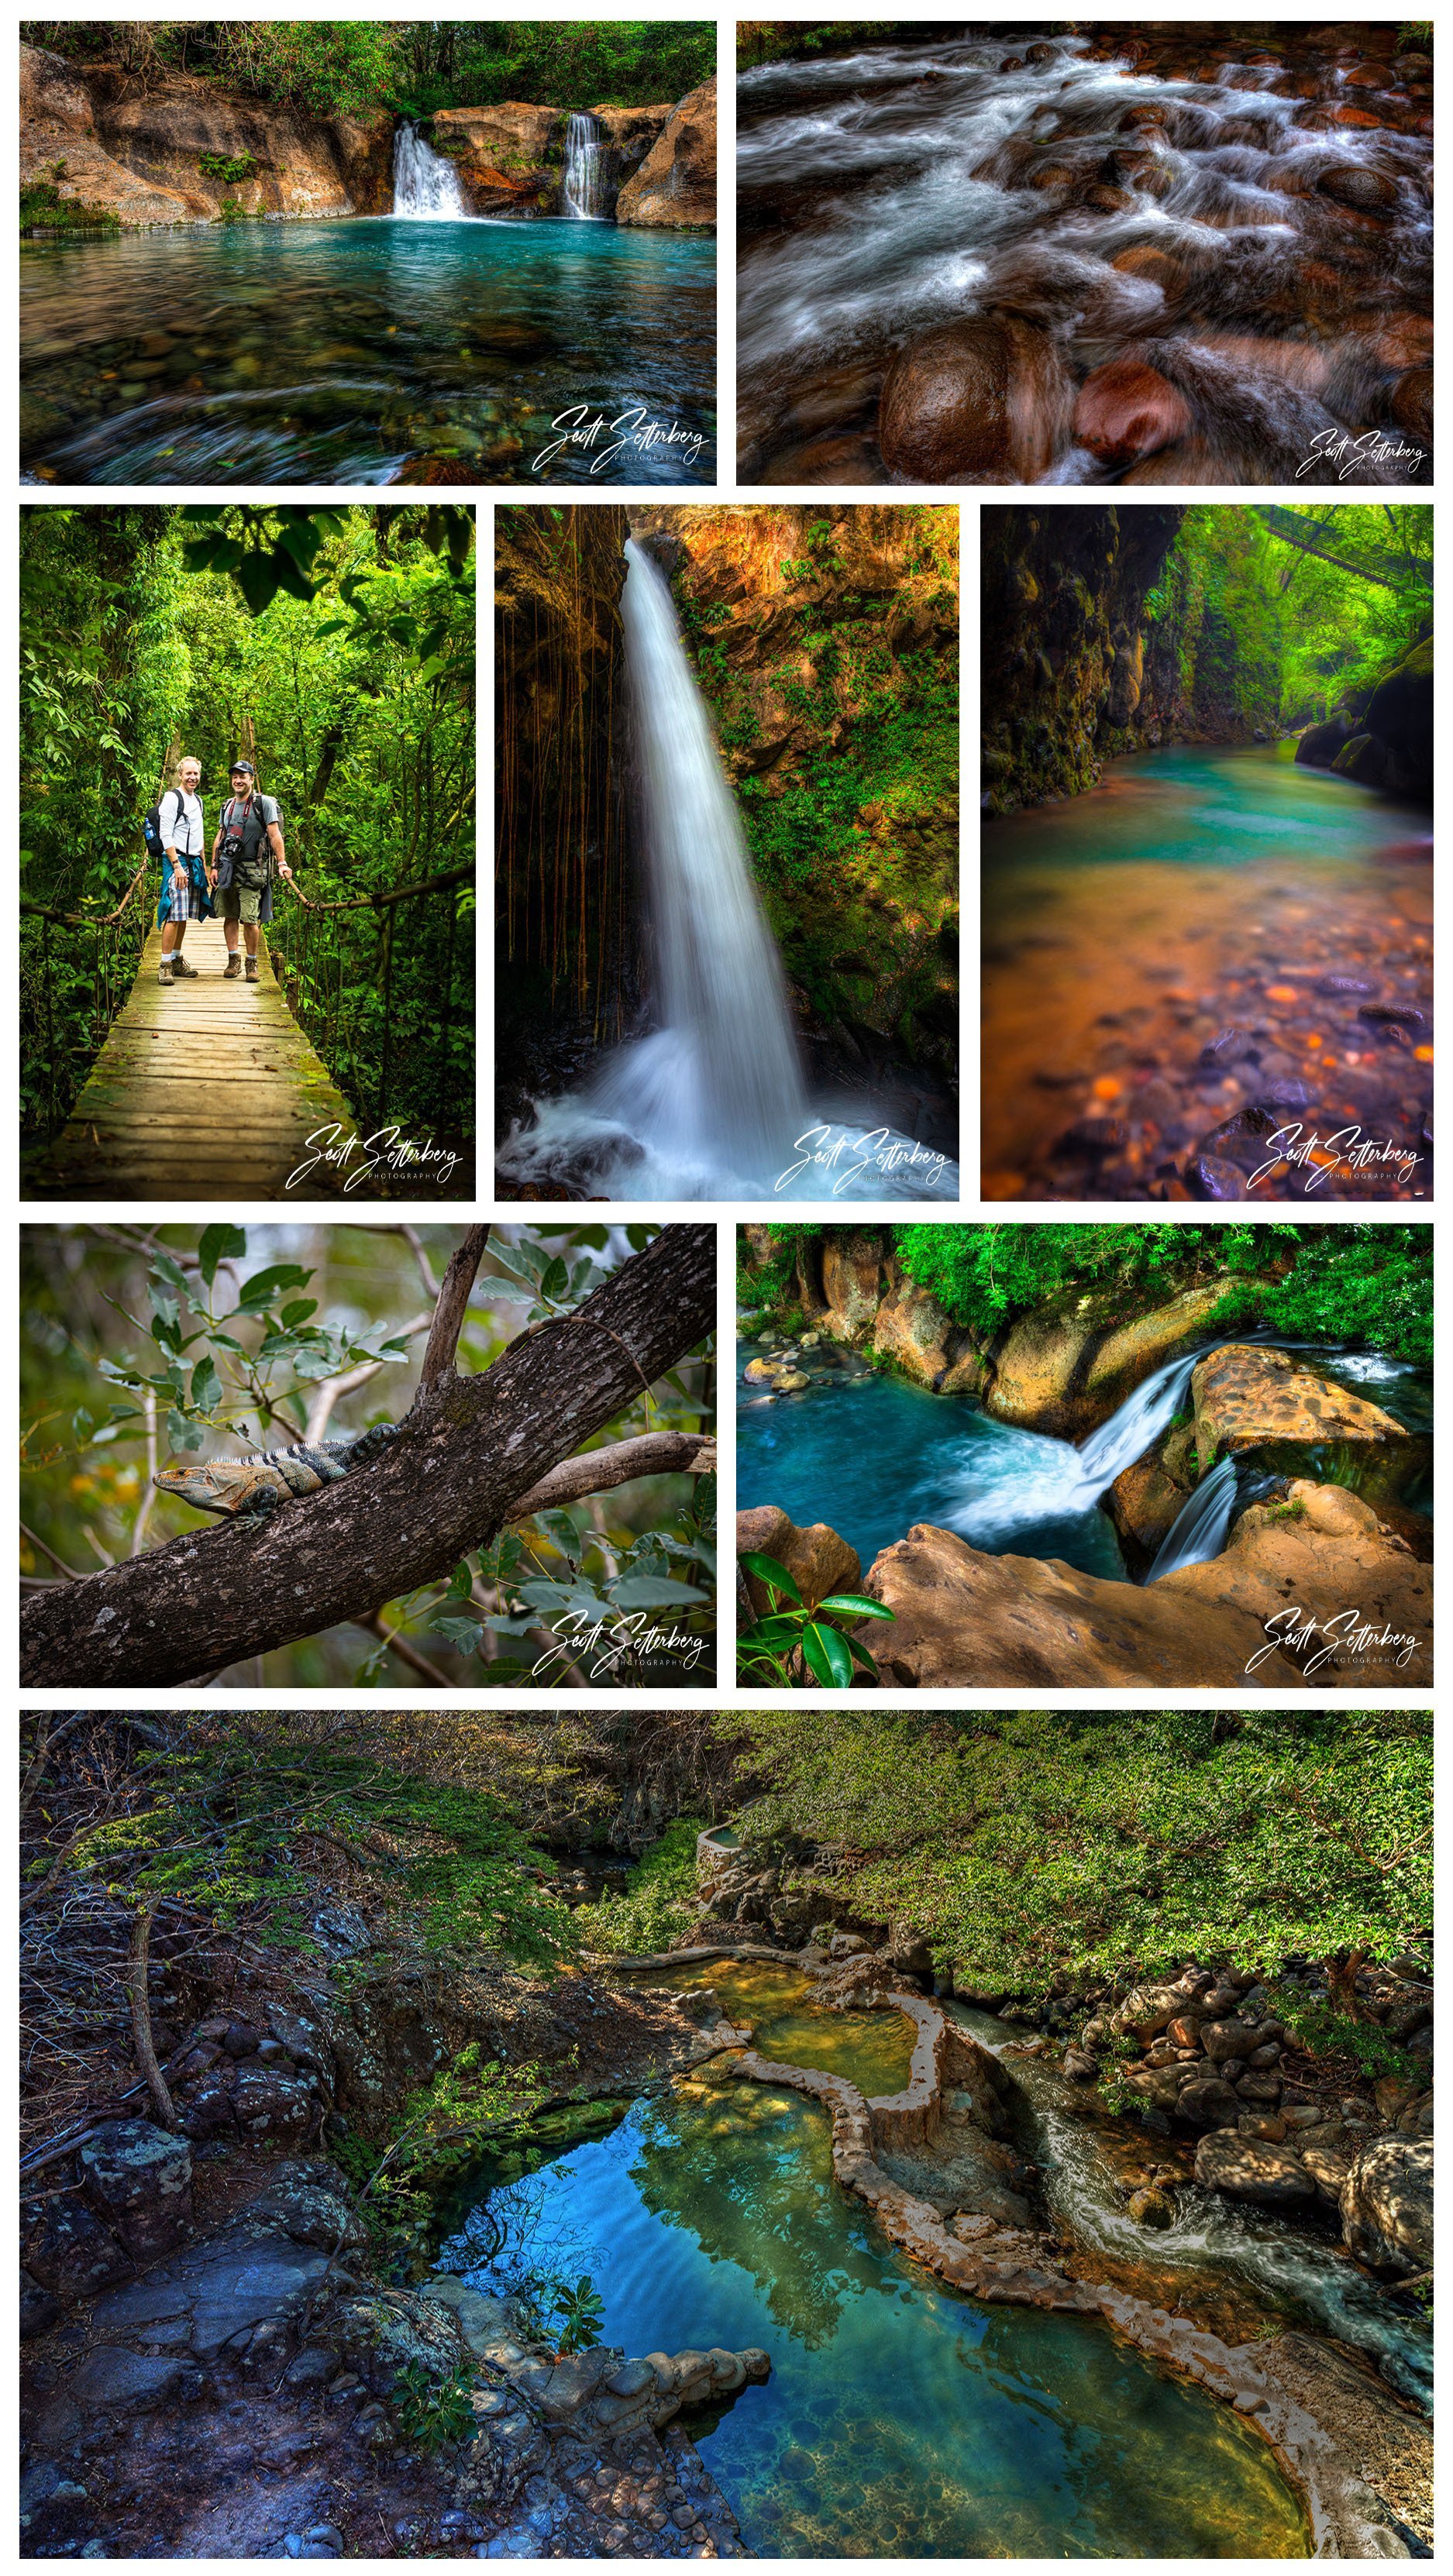
Volcanoes! A fun trip by itself, this area has multiple beautiful waterfalls and their accompanying pools including Oropendola Waterfall which plunges 80 feet into the lush canyon carved out by Rio Blanco. You’ll also see Las Chorreras, a unique double waterfall with its own gorgeous scenery surrounding the falls.
La Fortuna and Lake Arenal
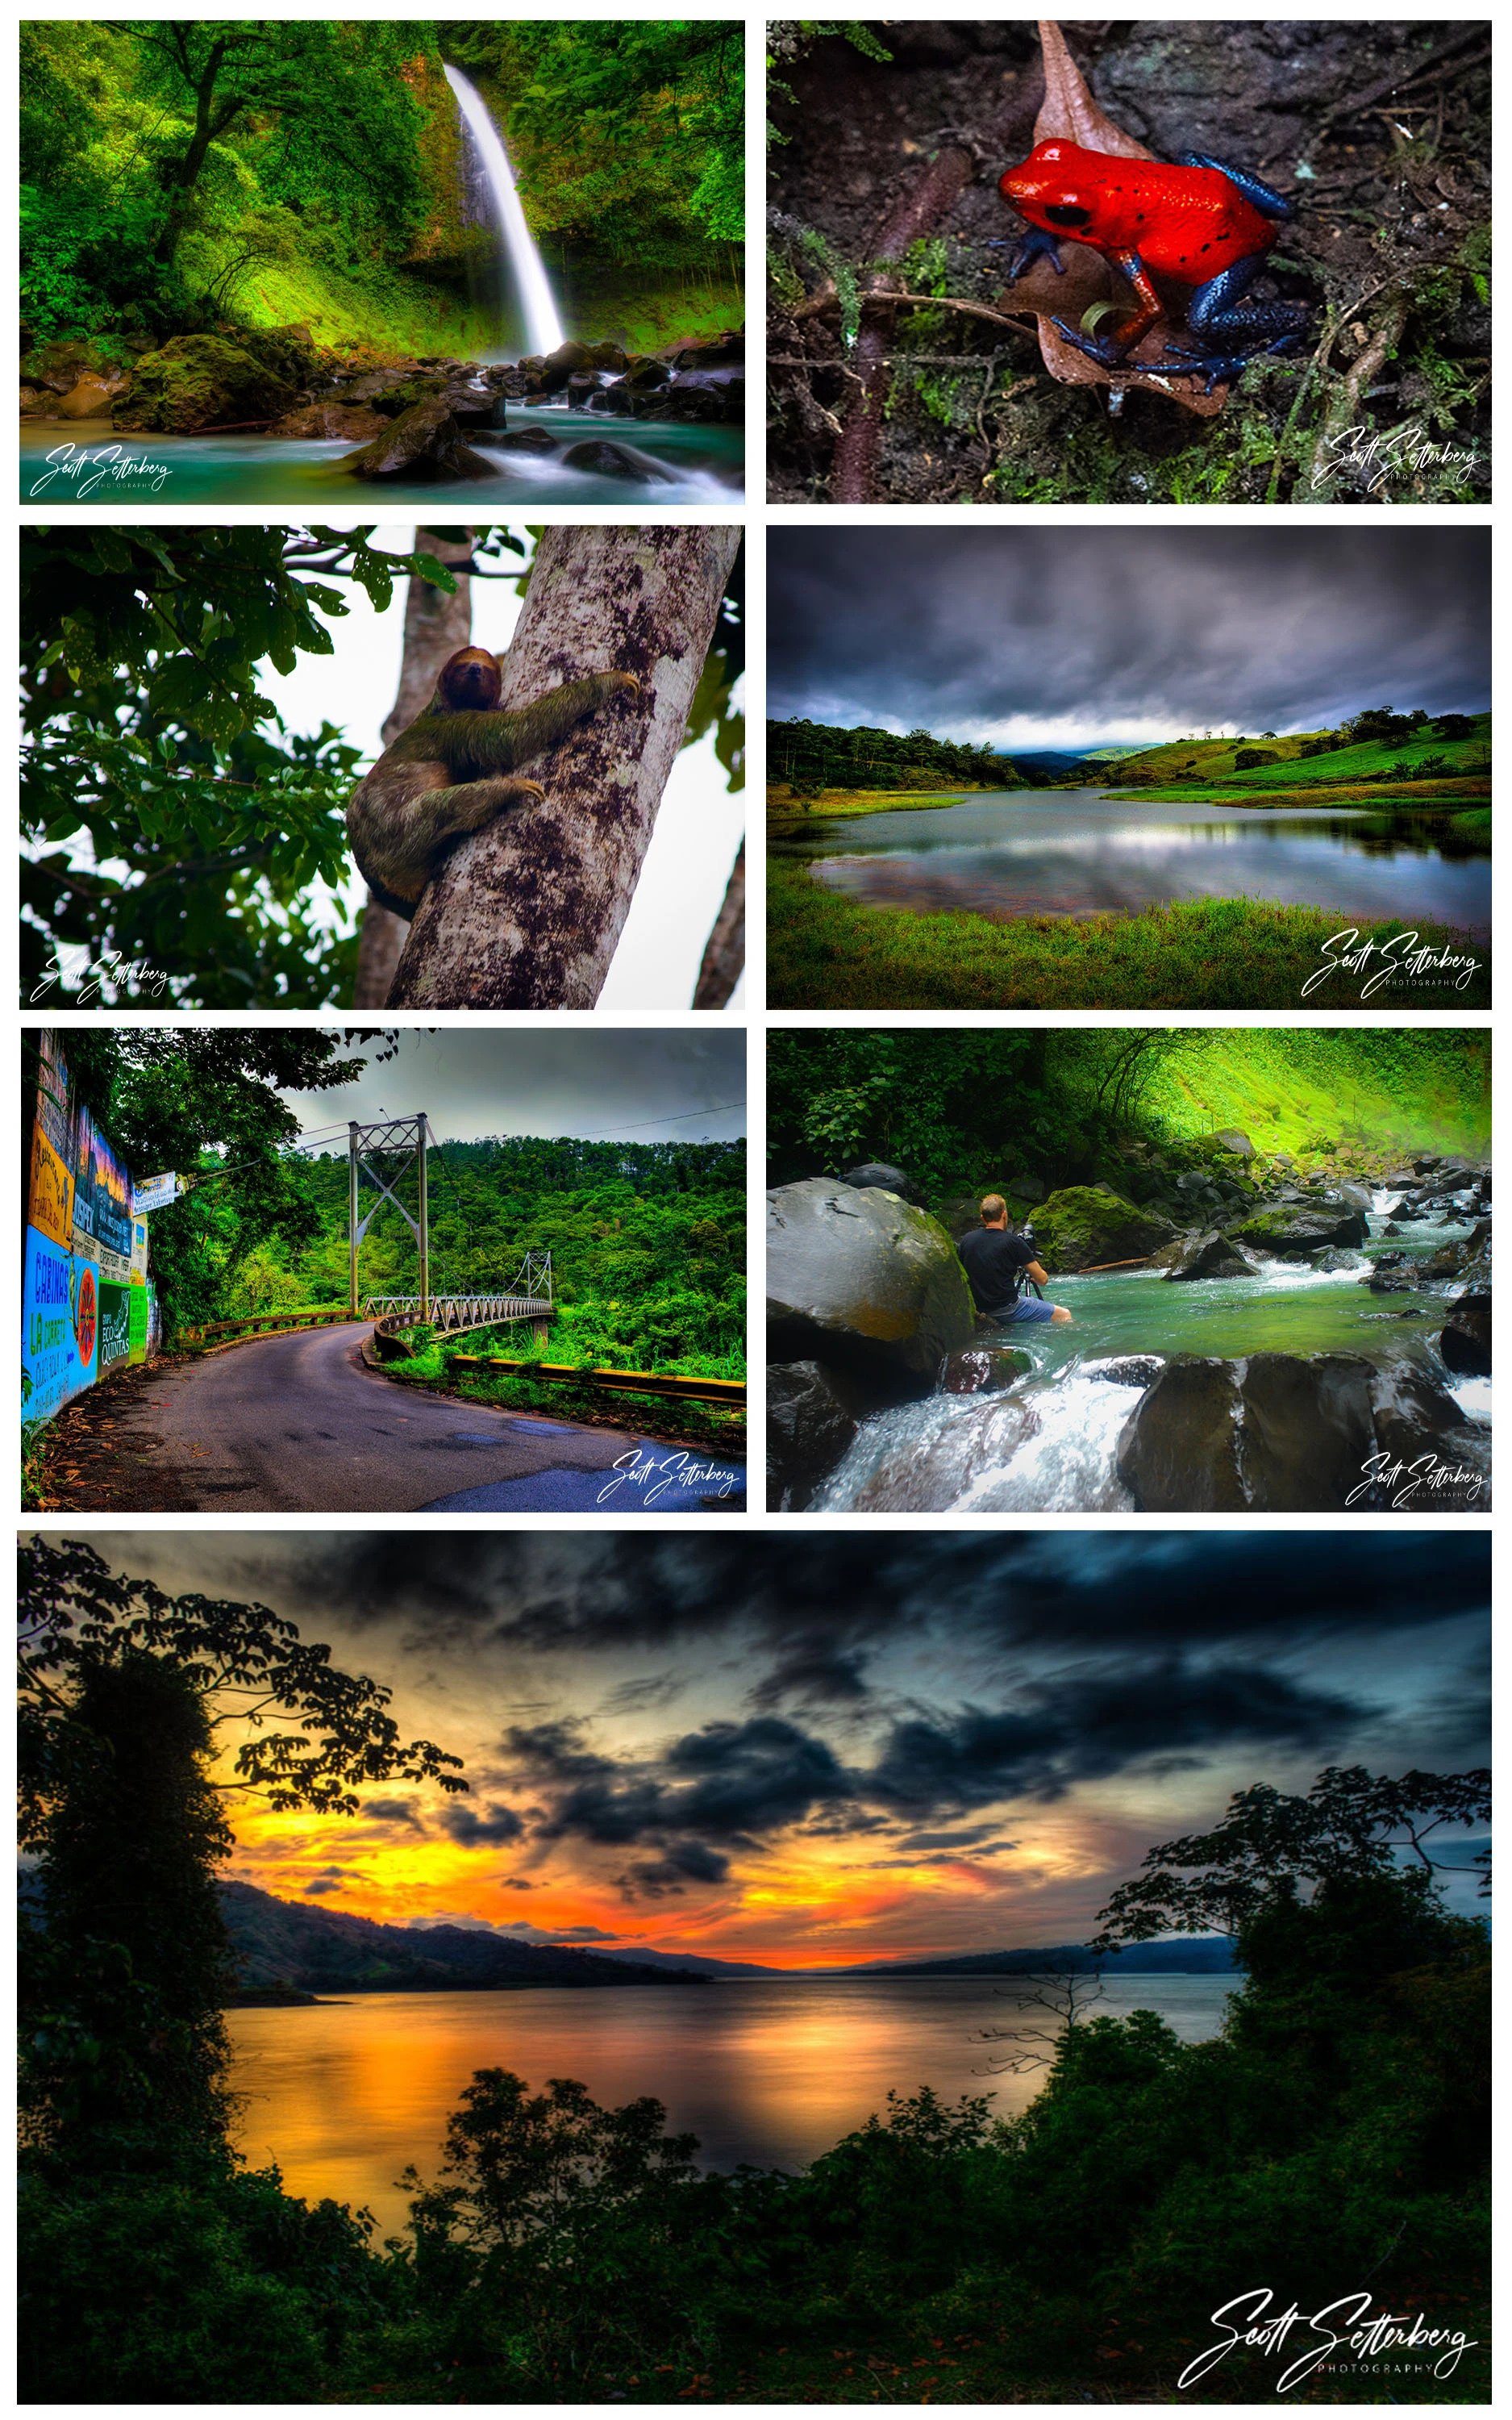
Costa Rica photography tours don’t feel complete if you miss La Fortuna, one of the most famous waterfalls in Costa Rica. It’s a tall, gorgeous waterfall and Lake Arenal has lots of variety in views and wildlife to photograph.
All-Inclusive
A huge factor in choosing a leading Costa Rica photography tour provider like ColorTexturePhotoTours is the all-inclusive nature of these trips. All-inclusive means that all you need to be concerned with is your gear and your clothing, and even with those, tour companies will offer guidance and suggestions.
With ColorTexturePhotoTours, your lodging, meals, and the photography treks are part of one package. This really provides Pura Vida Costa Rica for you since you can concentrate on the experience, having details planned out by experts.
Some of the best parts on a Costa Rica photography tour will last far beyond the trip itself. You’ll have an amazing photographer to guide you for sure, and you will also have wonderful memories and maybe even some new friends.
The next tour is scheduled for January of 2021 with several others after that into early Spring. Experience Pura Vida Costa Rica for yourself with ColorTexturePhotoTours.
Learn More:
We Recommend
The Best Travel Photography Lens

photo byDieterMeyrl via iStock
When you’re traveling, the last thing you want to do is take all of your camera gear.
Aside from the obvious benefits of not having to carry around a ton of stuff, airlines have made it maddeningly difficult (and expensive) to get your stuff from one place to the next.
So, if you could only take one lens with you on the trip of a lifetime, what would it be?
For me, and many other photographers, for that matter, it would be the 24-70mm f/2.8.
Let’s explore just a few benefits of this best travel photography lens.
Editor’s Tip: Get geared up for your travels and save some money at the same time. Buying a used 24-70mm f/2.8 allows you to stretch your gear budget without sacrificing the quality of the lens you use. Find the perfect 24-70mm lens now.
The 24-70mm f/2.8 is Enormously Versatile

photo by kunchainub via iStock
One of the biggest 24-70mm f/2.8 benefits is its sheer versatility.
On a full frame camera, it gives you wide-angle to nearly telephoto range, which allows you to snap large landscapes, close-up portraits, and everything in between without having to do a single lens change

photo by PeopleImages via iStock
What’s more, you can get many different looks of the same subject thanks to being able to reframe the shot with a simple twist of the focus ring.
In both cases, this lens helps you minimize the time you’re fiddling about with your gear and maximize the time you’re actually taking photos. When you’re traveling, that’s a definite bonus!
Learn More:

The 24-70mm f/2.8 is a Great Size

photo by nortonrsx via iStock
I enjoy shooting with my 70-200mm lens, but it’s a behemoth that has no place in my travel photography bag.
Instead, the 24-70mm f/2.8 is a great size: usually in the range of about 3.3 inches wide and less than 5 inches long.
Additionally, many of these lenses weigh around two pounds, so they’re relatively lightweight too.
Granted, the 24-70mm is heavier and larger than a typical kit lens, but the image quality you get with the 24-70mm f/2.8 is far superior than what you get with a kit lens, irrespective of the brand. Besides, being a relatively small and lightweight lens makes it easy to carry, easy to handle, and easy to travel with. That’s certainly something you want in the best travel photography lens.

photo by Brian Williams via iStock
Quick Tip: Many camera lens manufacturers have weather-sealed 24-70mm f/2.8 lenses with robust builds that can handle the rough-and-tumble world of travel photography. These pro-level lenses are more expensive than non-weather-sealed versions, but are certainly worth the added expense if you’ll be shooting in inclement weather. To save money, look for used 24-70mm f/2.8 lenses, as you can often find them in good to like new condition at a greatly discounted price.
The 24-70mm f/2.8 Lacks Much Distortion
The focal range of this lens closely mirrors that of the human eye, and as such, photos taken with these lenses lack much distortion at all.
This is certainly a benefit from the standpoint of how your images look, but it’s also a great benefit for learning how to improve your composition.
That is, with the natural-looking results you get with this lens, you can concentrate more on things like composition and framing and less on how the lines in the photograph bend and bow.
On the wide end at 24mm, you’ll find that there is little or no ultra-wide-angle distortion, yet you can still get those beautifully wide shots of landscapes as you travel. It’s the best of both worlds!
Get more details about why the 24-70mm f/2.8 is such a great lens in the video above by Tony & Chelsea Northrup.
Learn More:
- 3 Lenses Every Photographer Should Have in Their Camera Bag
- Landscape Photography Tip: How to Master Wide-Angle Lenses
The 24-70mm f/2.8 Takes a Common Filter Size

photo by Dimitris66 via iStock
If you shoot with a Canon or Nikon system, their 24-70mm f/2.8 lenses take a 77mm filter, which is extremely easy to find. Furthermore, many other lenses from these manufacturers take 77mm filters, so you can utilize your filters with multiple lenses.
What’s important when searching for the right filter for this lens is getting one with a slim housing, that way there’s no vignetting when shooting at 24mm.

Filters like the Kenko Smart Slim Polarizer shown above are ideal for 24-70mm lenses for this very reason. And, of course, polarizing filters like this offer tons of benefits for your outdoor photos:
- They reduce glare off of water and other non-metallic surfaces.
- They boost the contrast in the sky, making the white clouds pop on a deeper blue sky.
- They minimize atmospheric haze and reduce the softness of distant elements.
So, with the right filter paired with your 24-70mm lens, you can get outstanding photos on your travels, and do so without having to spend a ton of money or use up all your time making filter or lens changes!
Editor's Tip: Get Kenko's Latest Updates and Access to Promos for Discounted Gear. Click Here to Sign Up.
We Recommend
The Best Waterfalls in Costa Rica
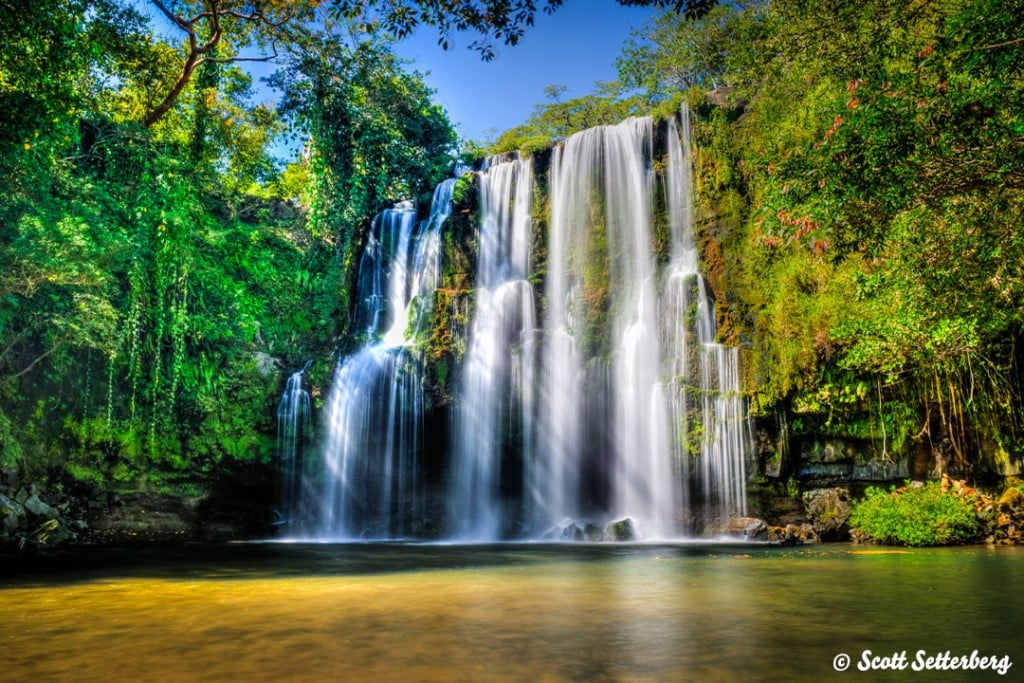
Because of its tropical climate and seven-month rainy season, Costa Rica is filled with hundreds of waterfalls, which makes compiling a list of the best a bit challenging. Despite that, there are several Costa Rica waterfalls that stand out from the rest, and here's a detailed list that should be on every photographer's radar.
Note: There are many articles written about the best waterfalls in Costa Rica, and with the exception of a few travel bloggers, most have copied and pasted incorrect information and mislabeled photos from other articles and websites that make me question whether the author has even been to Costa Rica. Since I live in Costa Rica for half of each year, and have traveled extensively throughout the country since 2012, I can honestly say that I have been to each of the locations described in this article and the information and photographs contained here are accurate.
10. La Paz
Located roughly 75 minutes from the capital city of San Jose, La Paz is the fifth of five tropical waterfalls at La Paz Waterfall Gardens. La Paz waterfall is the most well-known of the group, primarily because it is accessible without paying the hefty park entrance fee, and is one of the most popular waterfalls in all of Costa Rica.

Standing 110' tall, La Paz is powerful and spills into a fast moving, rocky river below, and many visitors miss the trail that leads behind the waterfall that is easily accessible from the roadway.
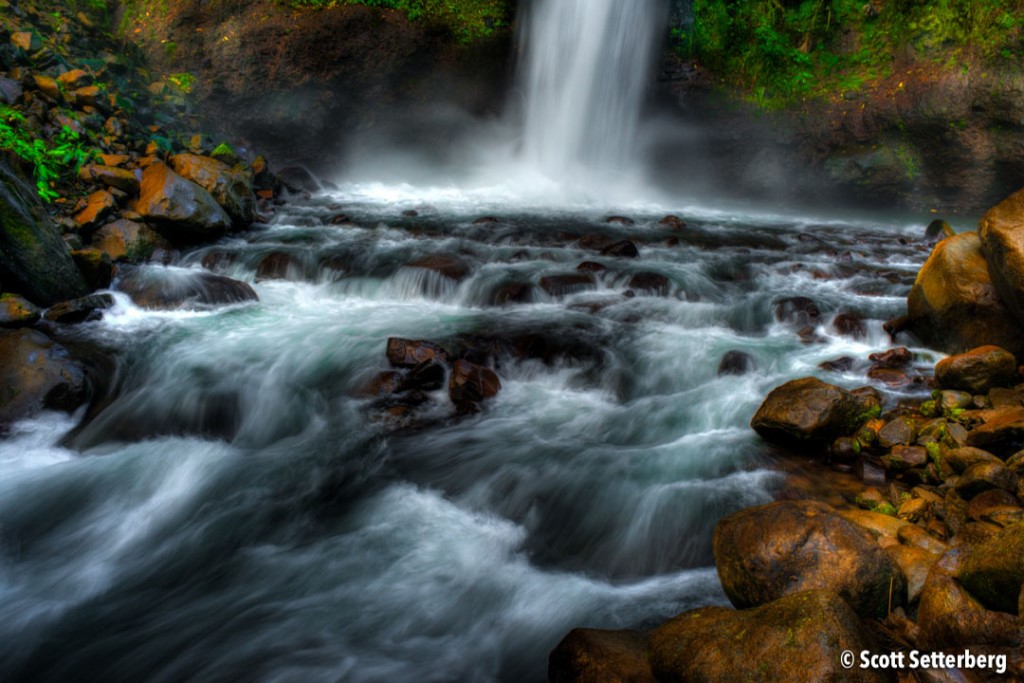
9. Los Chorros
Near the small city of Grecia, Los Chorros translates as "The Jets," and can be difficult to find. There are two main waterfalls, each approximately 130' tall, and a very unique wall of mini waterfalls that you won't find anywhere else. Downstream from the first waterfall, there's a nice picnic area with tables scattered along the water's edge.
If you want to capture great images at Los Chorros, you need to get wet. There's no getting around it. The main viewing area is very small and off to one side and the perspective from there is extremely limited. Also from there, you can only see the first waterfall, and miss out on the second cascade as well as the wall of mini waterfalls.
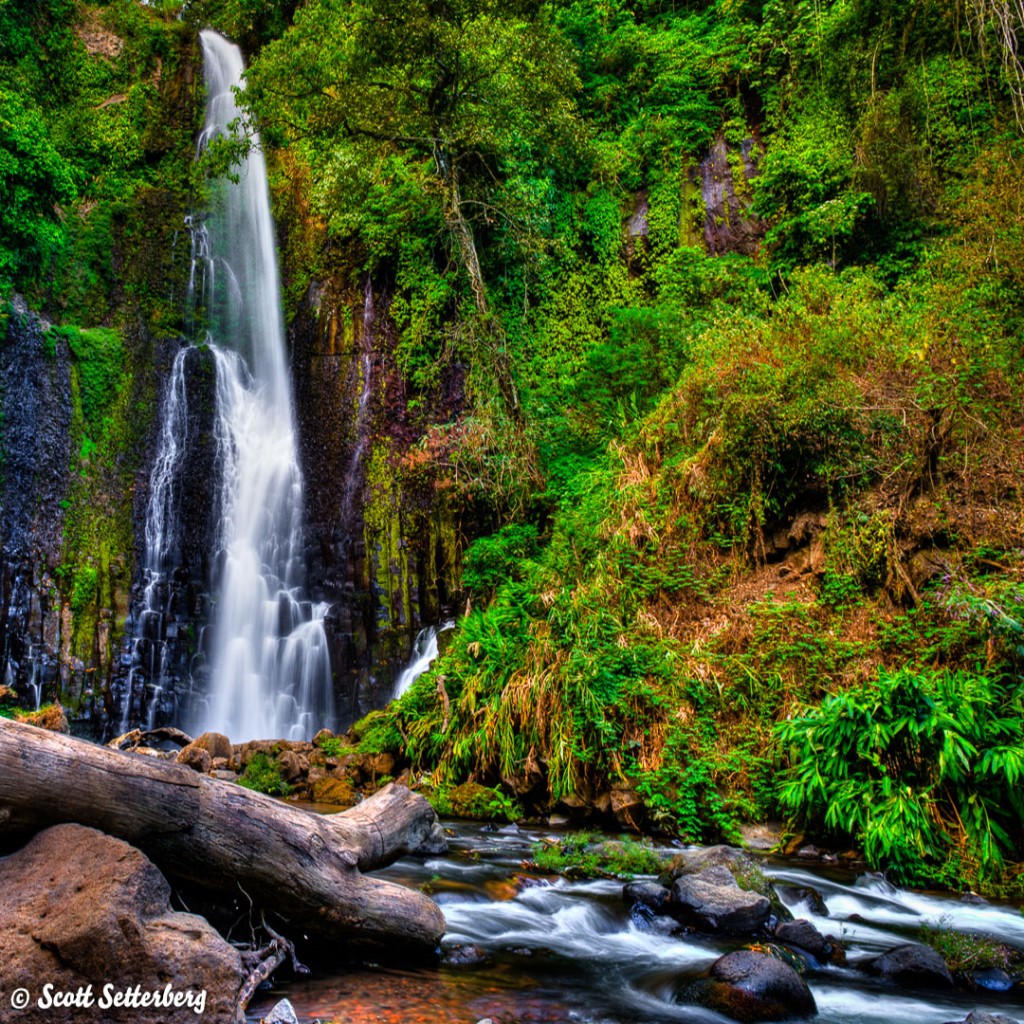
Note: Depending on how high the water is, the second waterfall might be out of reach, but when the water is low, it's easy to wade through to discover the hidden gem.
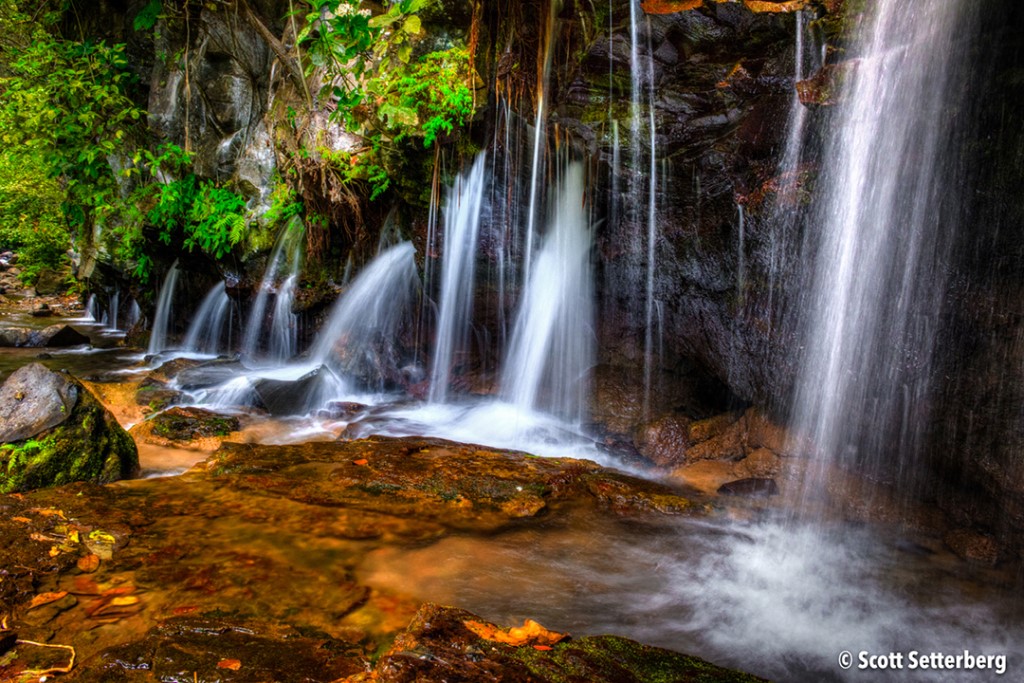
8. Templo
Because Templo is located at La Paz Waterfall Gardens, it is often mislabeled as La Paz, yet the two waterfalls are very different. Templo is the first of five rainforest waterfalls at La Paz Waterfall Gardens, and like I mentioned earlier, La Paz is the last. While not the tallest of the five, Templo is my favorite, due to the surrounding area that allows for close ups and wide-angle perspectives that are both equally amazing. There are several viewing platforms, a bridge, and small beach area that provide endless photo opportunities.
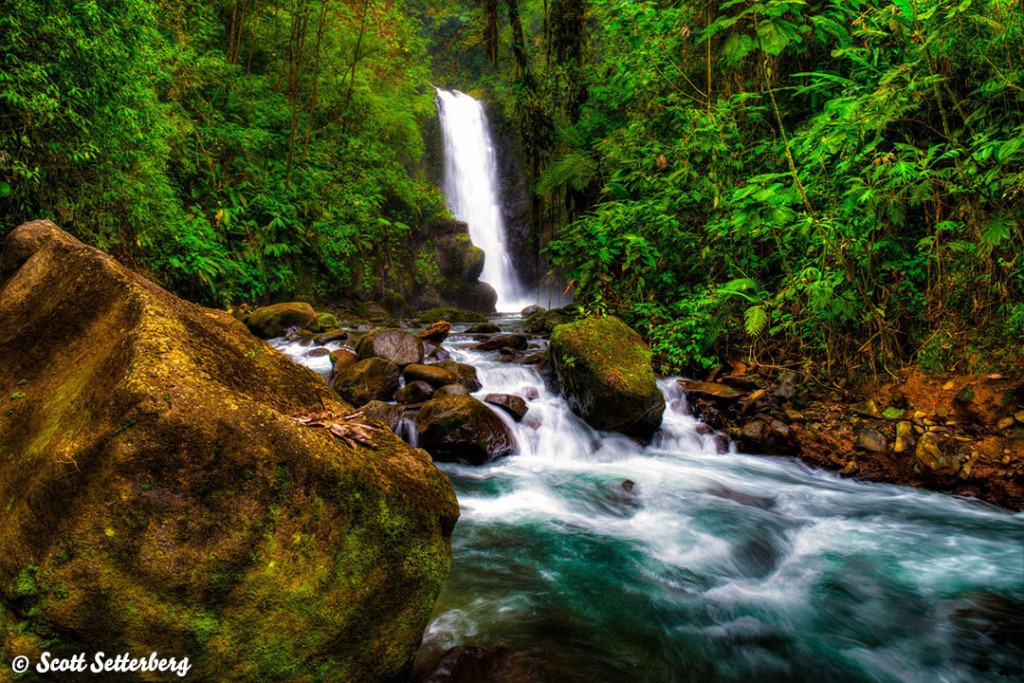
Warning: Although the stream below Templo is shallow, the current is swift, and caution is particularly advised under the bridge as it is only a short distance to the top of Magia Blanca, the tallest and strongest waterfall at La Paz Waterfall Gardens. A misstep here could prove to be fatal.

7. La Cangreja
The hike to La Cangreja is not for the weak and begins at the visitor center near the base of the active Rincón de la Vieja volcano. The six-mile round-trip hike takes you through thick forests, across jungle streams, and into wide-open, sun-drenched spaces. And it's hot. Very, very hot. Add in a backpack with thirty pounds of camera gear and a tripod and you can expect to be completely exhausted at the end of the day.
La Cangreja translates to "The Crab" and measures 130 feet tall. For a waterfall of this height, it is surprisingly gentle, and cascades softly into a gorgeous green-blue pool. La Cangreja is surrounded by unique rock formations and hanging vines and late afternoon sunlight creates stunning streaking patterns across the face of the waterfall. Although technically not permitted, swimming is common at La Cangreja, and the beautiful water is a refreshing relief after the strenuous hike.
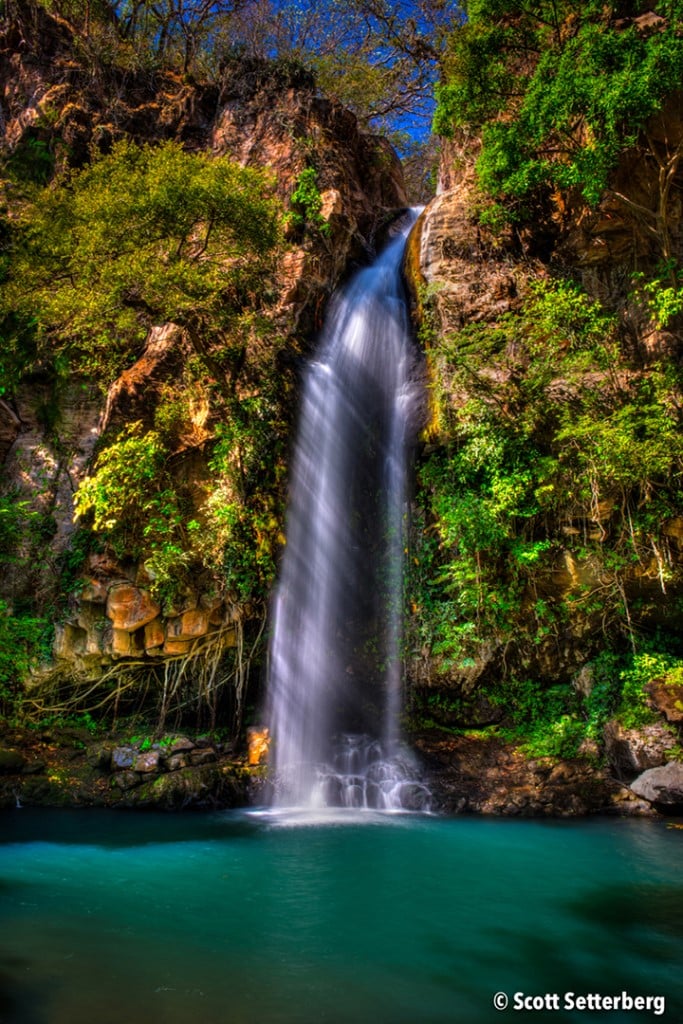
Note: La Cangreja is well worth the effort. Just be prepared to spend a full day and take lunch and plenty of water because there are no services available after leaving the visitor center. Trust me, you'll be glad you did.
6. La Fortuna
Catarata La Fortuna is one of Costa Rica's most popular waterfalls, and at 230' tall, is quite powerful. Located ten minutes outside the small bustling tourist town of the same name, La Fortuna waterfall is surrounded by lush, vibrant foliage, large rocks, and a small beach area downstream. There's also an excellent restaurant and nice gift shop near the park entrance.
The hike to the base of falls consists of 400 stairs, which are easy to descend but challenging upon return. Fortunately, there are rest areas with benches and water fountains to make the ascent a little easier.

5. Las Gemelas
Las Gemelas translates as "The Twins" and these two fraternal beauties deliver the goods. I've yet to see a "best of" list featuring the twins and for the life of me, cannot figure out why. Perhaps it's because Las Gemelas are located in Bajos del Toro and are overshadowed by Catarata Bajos del Toro (see #4 below). There's really no other explanation as the twins are simply sensational.
After walking 30 minutes through expansive sloping pastures, you arrive at the entry point to the thick jungle environment that hosts the twins. A few steep metal stairs take you to the river's edge and then suddenly, the first twin appears. Made up of bright orange rock and sky-blue water, the first twin stands 80’ tall and spills into a rocky river below. A rich turquoise pool, surrounded by huge boulders, forms downstream before the water continues on to feed other waterfalls below.
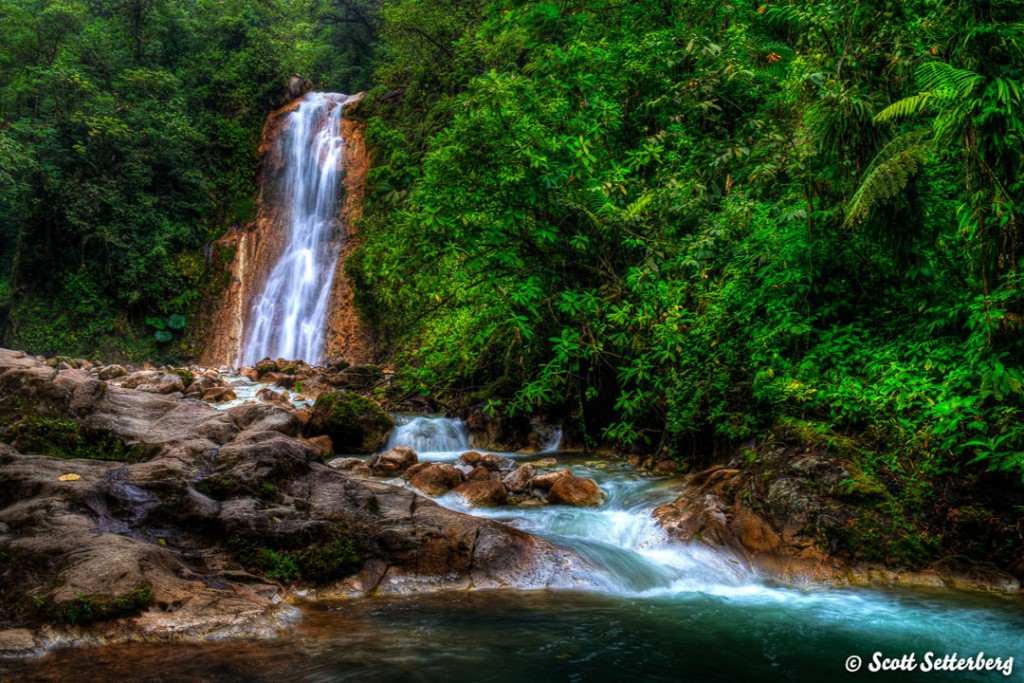
As you approach the first twin, the second twin emerges from a deep canyon to the left. The second twin is slightly smaller and completely different than the first but is equally impressive. The water from the second fall is much bluer than the first, and contrasts beautifully against the other colors in the scene.
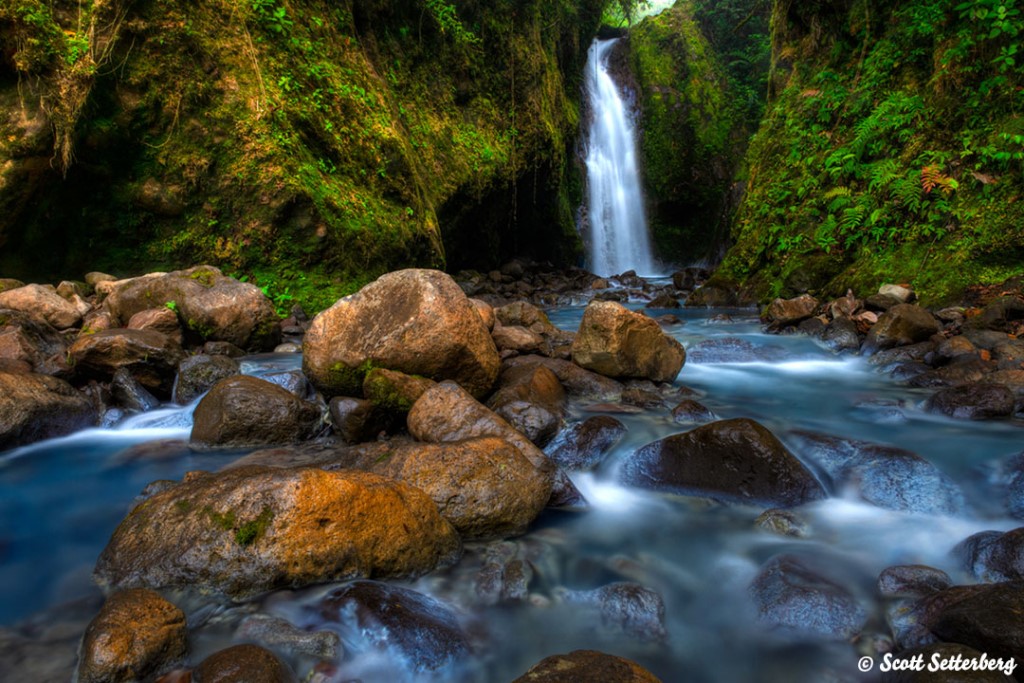
4. Bajos del Toro
Buried deep in Costa Rica's vast Central Valley, Bajos del Toro is one of Costa Rica's tallest waterfalls, plunging 300' into an ancient volcano crater below. The rock walls surrounding the towering cascade are scarred with vibrant orange, red, and yellow mineral deposits and bright green mosses, and the scene is absolutely awe-inspiring.

The path to the base of the falls is a mixture of dirt trails and 700 concrete stairs with many incredible viewpoints on the way down. Because of the elevation, clouds often roll in and add drama to photos, and if you're lucky, you might even see howler monkeys swinging on tree branches and vines.
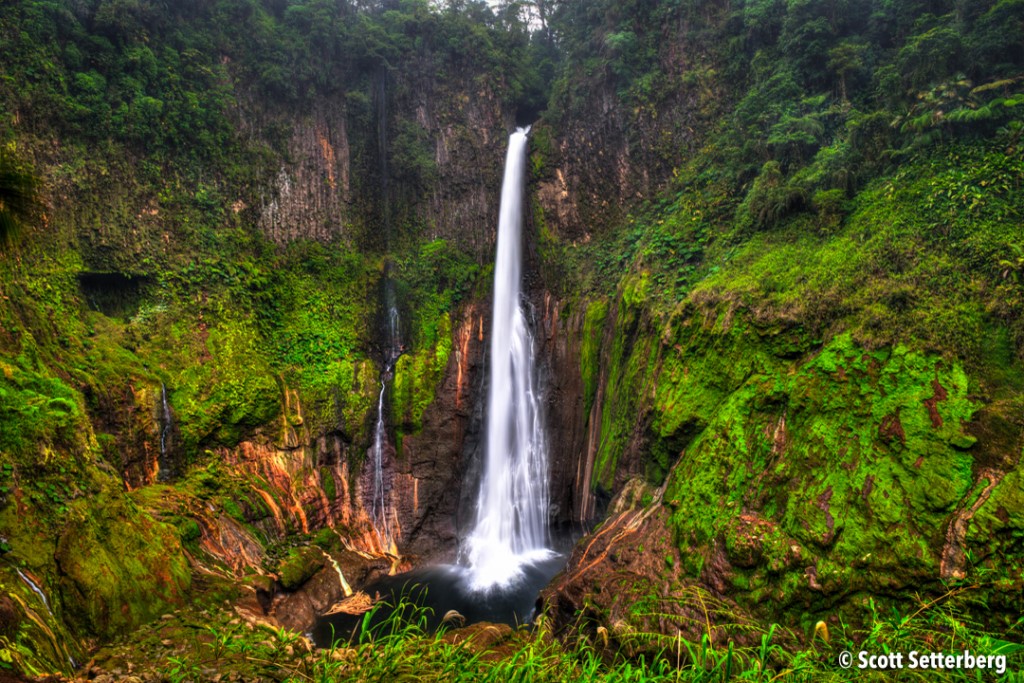
3. Rio Celeste
Due to its magnificent turquoise water, Rio Celeste is without question, Costa Rica's most famous waterfall. Rio Celeste is the main attraction at Tenorio Volcano National Park, and ancient legend has it that while painting the sky, the gods dipped their paintbrushes into the water of Rio Celeste, causing it to turn turquoise. The scientific explanation is that aluminosilicates on rocks along the river bottom absorb all colors of light, except blue, which is reflected and creates the river's incredible color.

Visiting the Rio Celeste waterfall requires a 30-minute hike through the jungle and descending three hundred stairs to a viewing platform. Many visitors are disappointed to find that swimming is not allowed, but the sensational vista more than makes up for the restriction, and keeps the water pristine. It's also beneficial for photographers since there's no waiting around for people to get out of your shot.
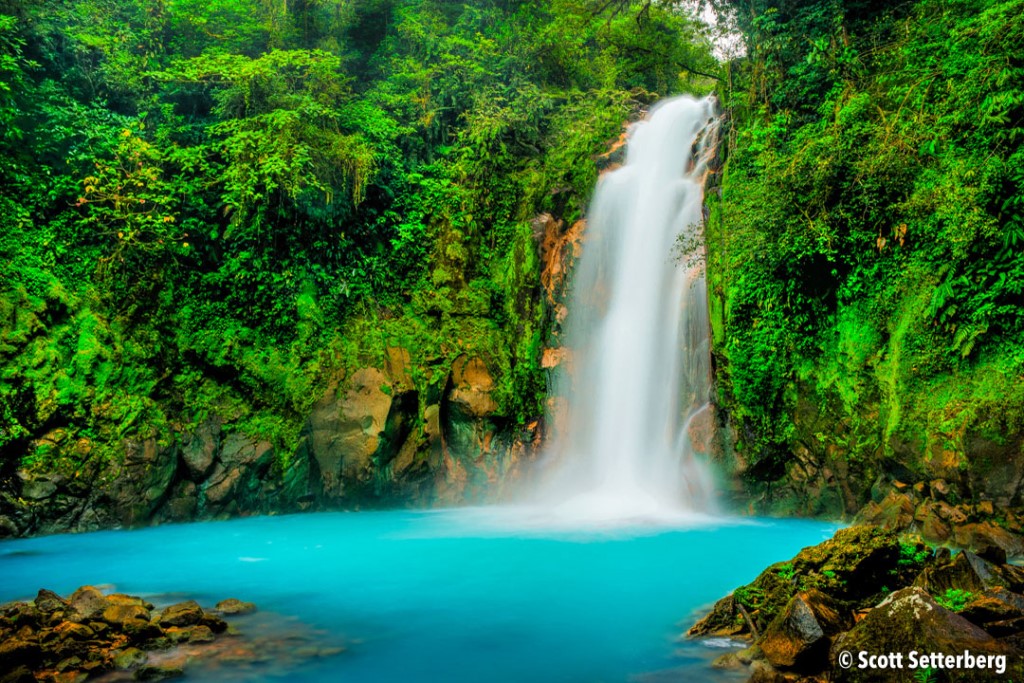
2. Llanos de Cortez
While Costa Rica is known for its misty rainforests, dense jungles, and sunny beaches, there's also a region in the northwest part of the country called Guanacaste with a hot, dry climate. Within that atmosphere, it’s hard to believe that a spectacular waterfall could survive year-round, but there is one that does, and it’s called Llanos de Cortez.

Standing sixty-feet tall and falling into a shallow, golden-green pool below, the waterfall is nearly as wide as it is tall and lush vegetation and flowers accentuate the cascade with vivid colors. Due to easy access, many creative compositions can be captured at Llanos de Cortez, like the shot below looking through the trees.
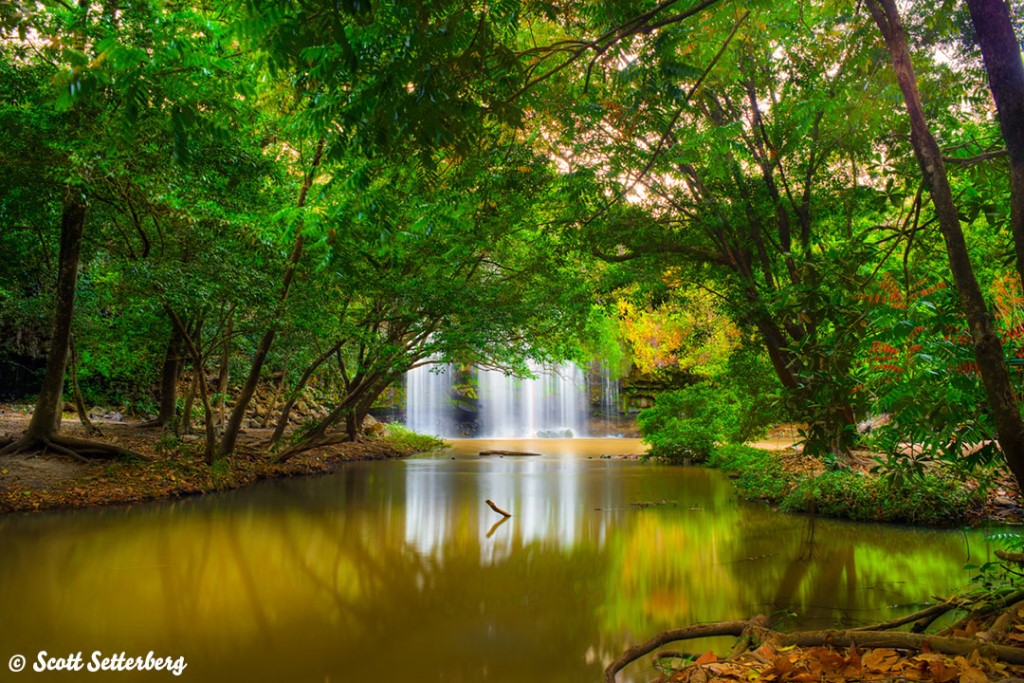
Note: Llanos de Cortez is located twenty minutes outside Liberia, the second-largest city in Costa Rica, and the turnoff can be easily missed if you're not paying close attention.
1. Nauyaca Falls
In the southern region of Puntarenas, Nauyaca Falls thrives in the mountains above the small surf community of Dominical. Made up of two jaw-dropping tiers, Nauyaca Falls stands 200' tall and is simply breathtaking. The upper falls consist of three 135' thundering plumes that crash onto giant, sedan-sized boulders. In comparison, the lower falls are calmer and it's common for visitors to jump from rock ledges on the face of the lower tier into the sparkling green pool below.
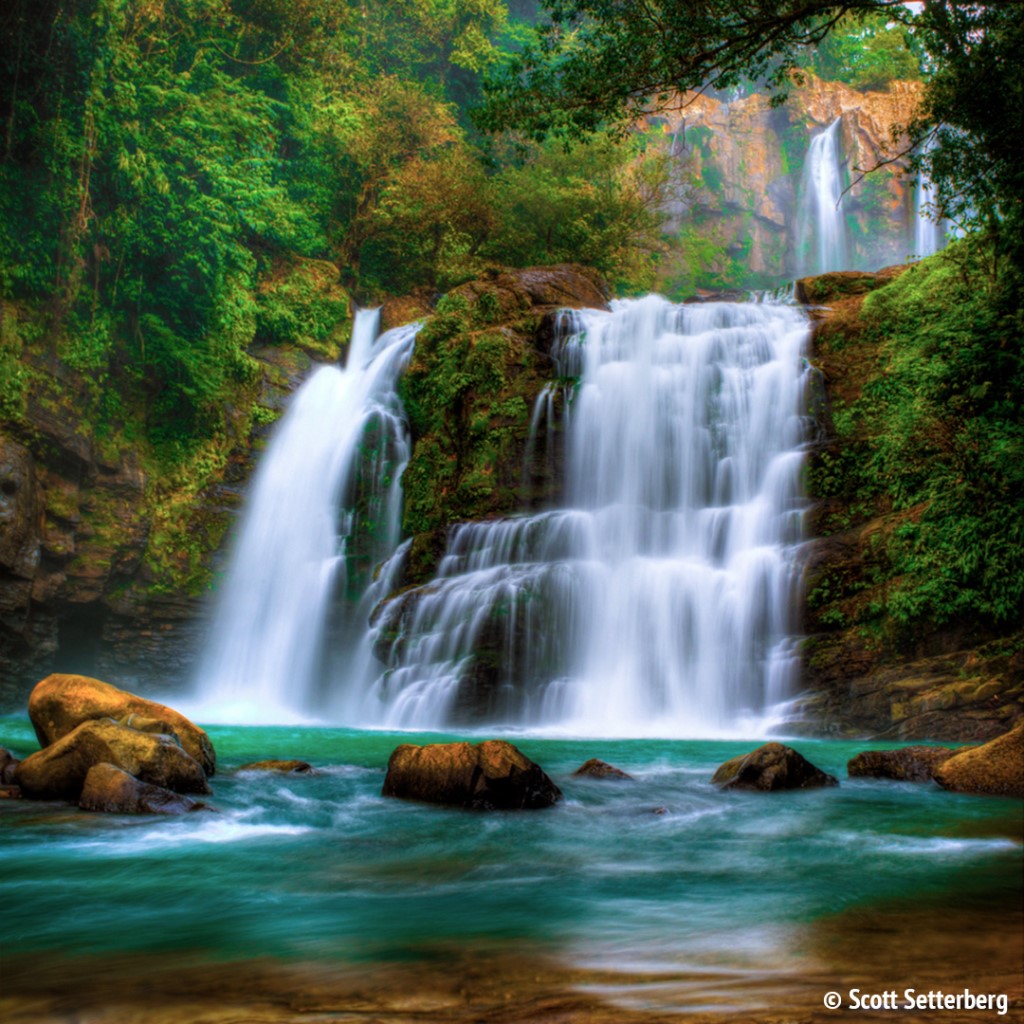
Depending on the time of year, the water at Nauyaca Waterfalls can be raging or a very light flow. In order to capture both tiers in one image, crossing the lower pool is necessary, and when the water is high, it can be challenging and dangerous. For the shot below, I hesitantly waded waist deep through the rushing water, using my extended tripod for support, until reaching a semi-submerged rock on the other side that I used for a base.
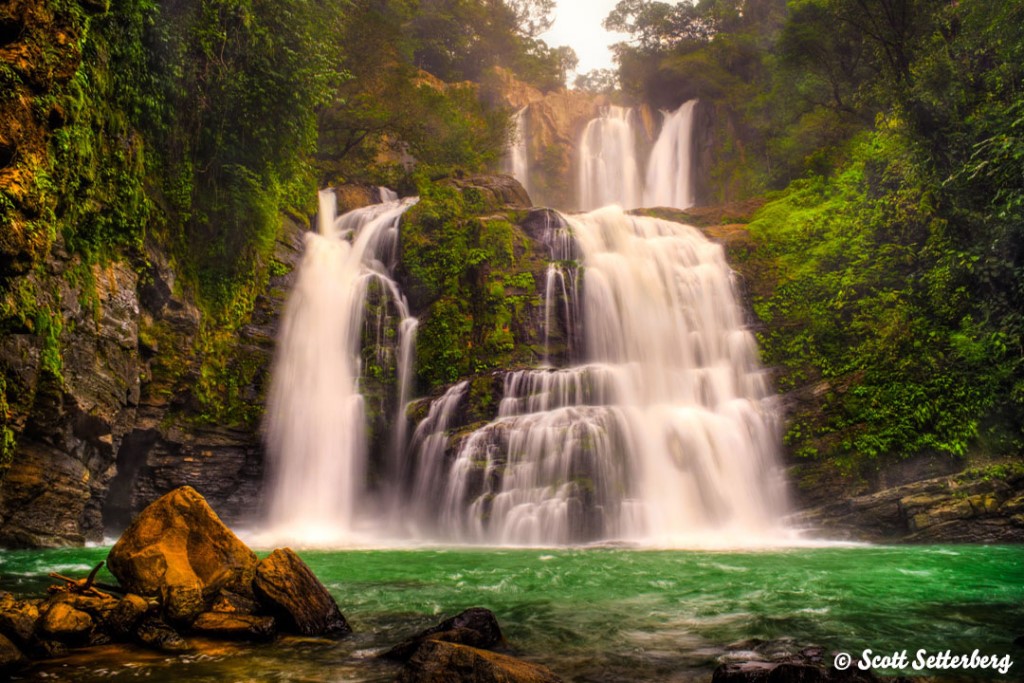
There are three options for getting to Nauyaca Falls, all handled through the office before entering the property. The first is by horseback, second by 4x4 vehicle, and the third is to hike. I've hiked to the falls, which takes about 75 minutes, and it's extremely hot and humid and every step is relentlessly uphill. Toting heavy camera equipment, the hike to Nauyaca Falls was by far, the most difficult I've ever done. Yes, even tougher than La Cangreja (see #7 above), which was brutal. Consider yourself warned.
Note: If you arrive in the morning, the horseback and 4x4 options offer traditional Costa Rican breakfast and lunch at the home of Don Lulo, the property's original owner.
Conclusion
Due to its lengthy rainy season and tropical climate, Costa Rica is home to an endless supply of spectacular waterfalls that survive year-round. Depending on personal tastes, the order of this list could be rearranged slightly and still be accurate, and I continue to struggle between Nauyaca Falls and Llanos de Cortez for the #1 position. Regardless of order, these are still the best waterfalls in Costa Rica, and every photographer should do what it takes to explore them. The effort will be rewarded with fantastic memories that last a lifetime and photographs that live on forever.
---
Scott Setterberg is an award-winning professional photographer with nearly 30 years of landscape photography experience. When not in the Pacific Northwest, Scott lives in the tropical paradise of Costa Rica where he operates exceptional, all-inclusive photo tours for photographers of all skill levels. For more information, visit: https://www.colortexturephototours.com
We Recommend
These Breathtaking Photos Show Why Photographers Flock to Africa
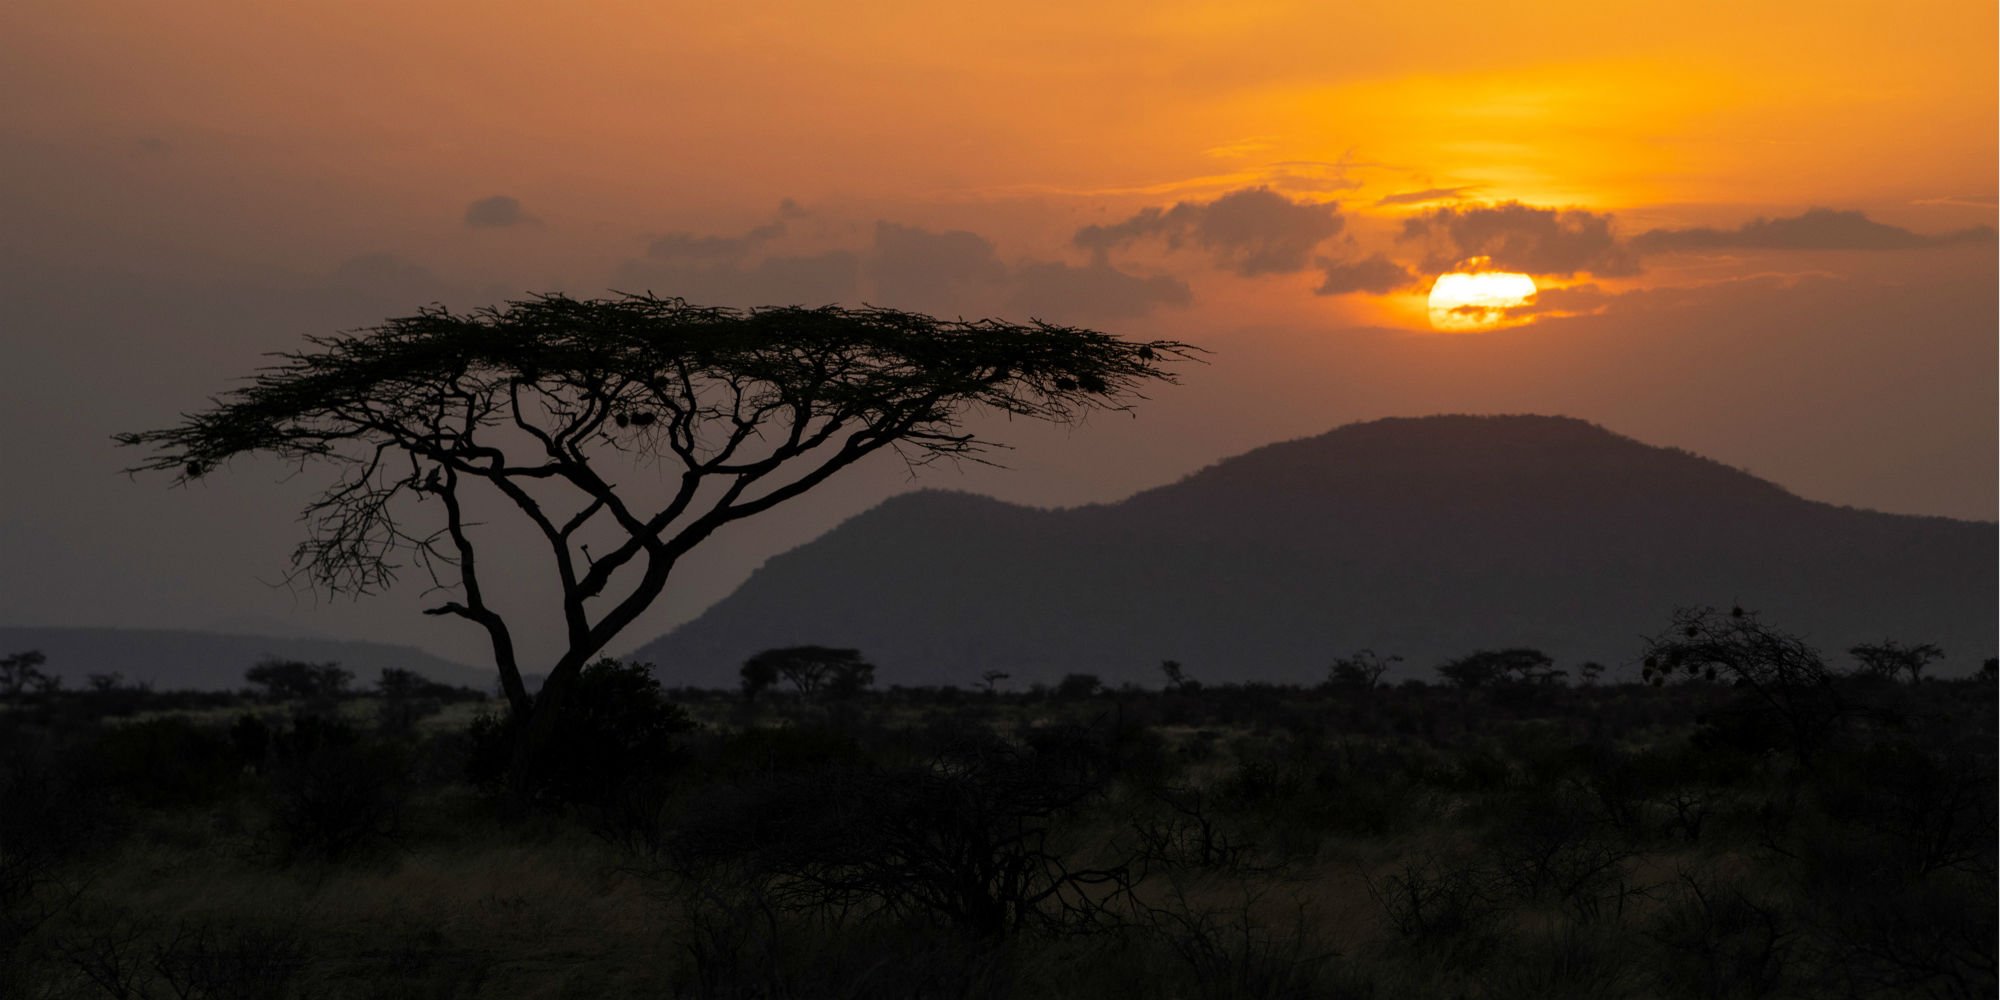
It's easier than ever before for those of us that love photography to travel to locations far and wide to train our cameras and lenses on breathtaking scenery.
When I think of the places I would love to photography, places like Iceland, with its black sand beaches, gorgeous waterfalls, and impressive glaciers immediately come to mind.
Norway is near the top of my list as well, with stunning mountains that come down to meet the sea and quaint fishing villages with bright red buildings dot the shoreline.
But topping my list (and the list of many other photographers) is the Goliath of all photography locations - Africa.
Africa is like nowhere else on earth, with tremendous subjects to photograph, including wildlife, varying climates, and jaw-dropping landscapes.
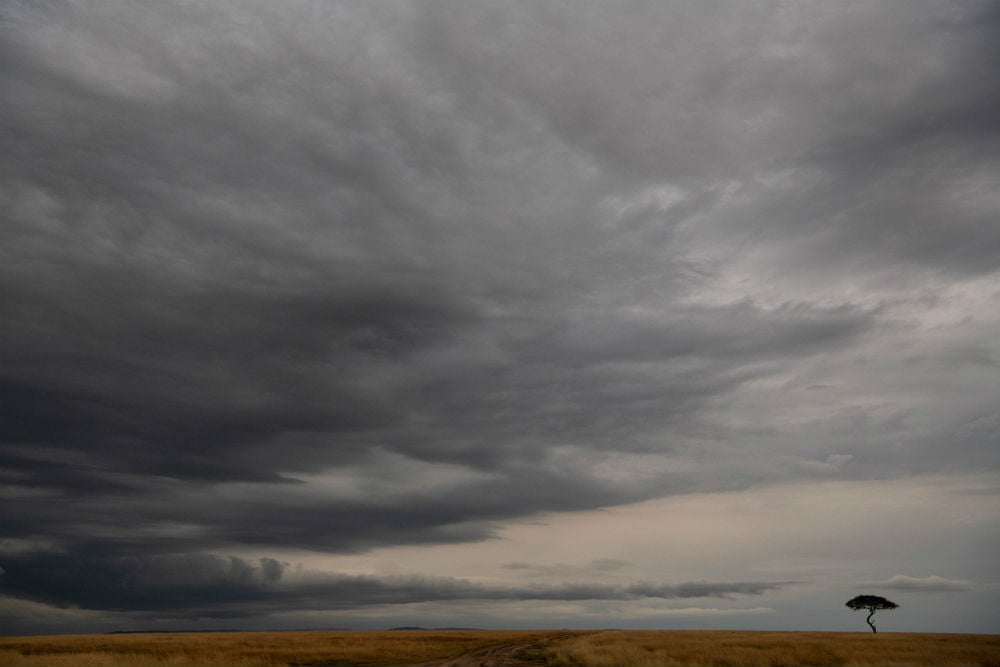
You might be wondering why I'm suddenly writing about my desire to go to Africa...
My love affair with Africa goes back a long, long way.
I remember watching Wild Kingdom and other such shows when I was growing up and being completely mesmerized by the scenes I saw of the people, places, and wildlife in Africa.
And while I haven't managed to get to Africa yet, my interest in that continent has not diminished in my adult life.
There's another reason why Africa has been on my mind lately as well...
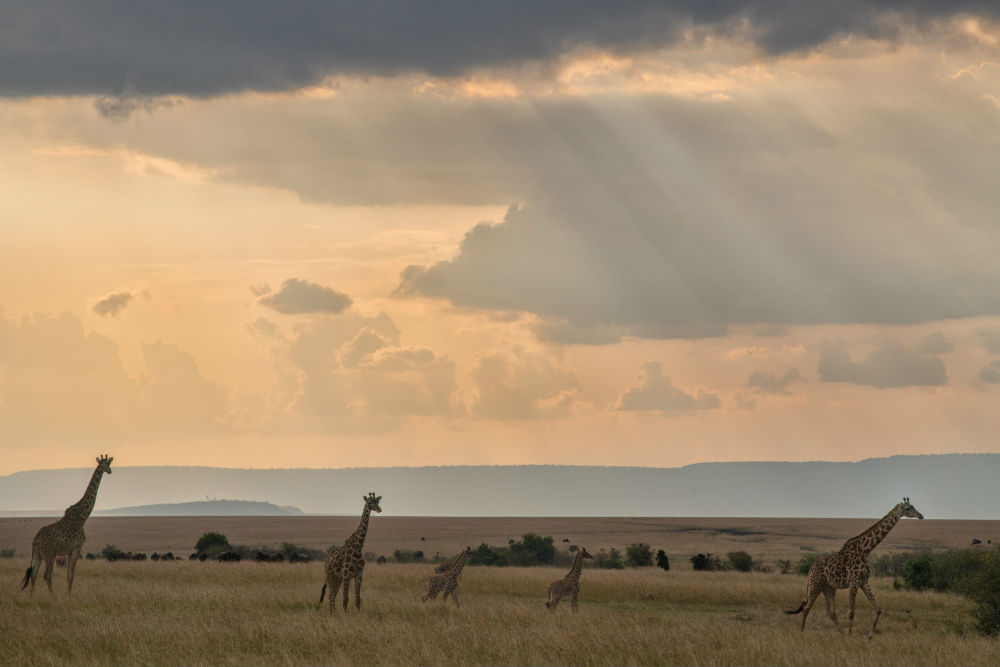
I've been following Mark Comon for the last few months now.
Mark is the founder of Creative Photo Academy, and I had a chance to meet up with him at his Ansel Adams-inspired workshop in Yosemite not that long ago.
I came away from that workshop utterly impressed with Mark's knowledge and the quality of his instruction. He's a great photographer, too, so I started following him.
Recently, Mark led a photography adventure in Africa, and the images he shared from that trip were so incredible that I had to share them with you. So, I got ahold of him, asked if I could use some of his photos and write a quick article about why Africa is the ultimate photographer's paradise.
Learn More:
For starters, the diversity of animal life in Africa is certainly a primary reason why I'd like to travel there someday.
As you can see in Mark's photos, there's no shortage of lions, leopards, cheetahs, and elephants, as well as giraffes, rhinos, zebras, impala, wildebeests, antelope, and more.
In the shot above, for example, was taken at the Buffalo Springs Conservation Area in Kenya. Pictured is a herd of approximately 50 elephants being led across the river by the matriarch of the herd.
What's more, photography adventures in Africa put you in a position in which you're able to capture breathtaking (and up-close!) images of these gorgeous animals (all from a safe distance, of course).
Above, these lions play and cavort in the afternoon before their pride's evening hunt on the Masai Mara National Reserve in Kenya.
These images not only show the beauty of the wildlife in Africa, but also offer photographers a chance to see how these animals behave in the wild - both as groups and as individuals.
I can't imagine what it must've been like to be there in person, watching this big cat stalk its prey!
But Africa isn't just about the abundance of wildlife, like these flamingos on the waters of Lake Nakuru, nor is it just about the incredible scenery.
Instead, it is a continent rich in human history, tradition and culture.
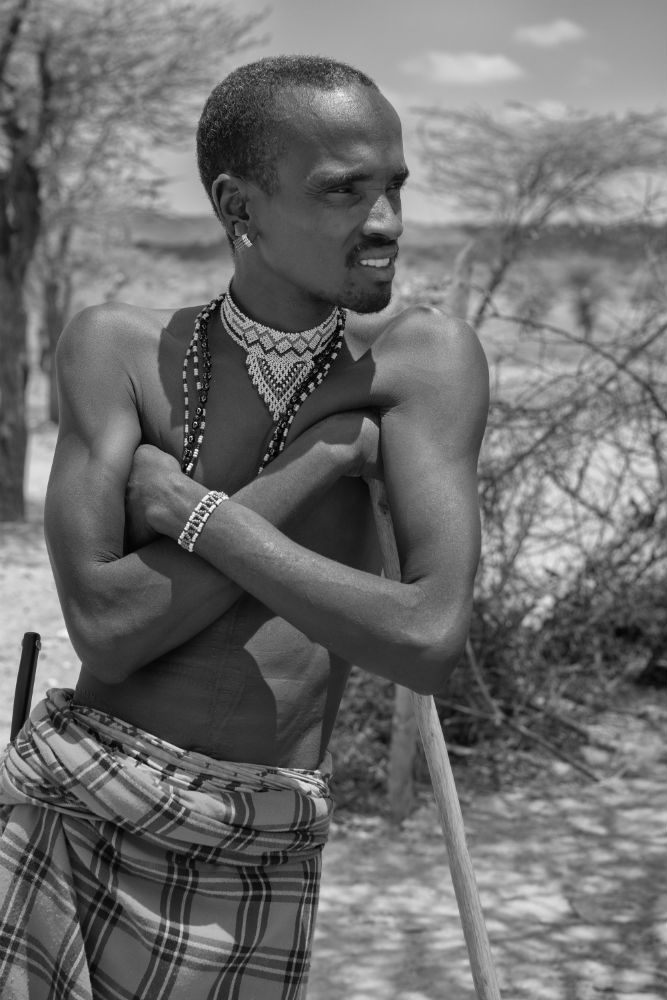
Many photo tours and workshops in Africa give you the opportunity to interact with the locals and share in their traditional ways of life.
The man pictured above is a Samburu warrior, who has a watchful gaze over his livestock near Archer's Crossing in Kenya.
The Samburu people are semi-nomadic and herd cattle, sheep, goats, and camels in the north-central region of Kenya.
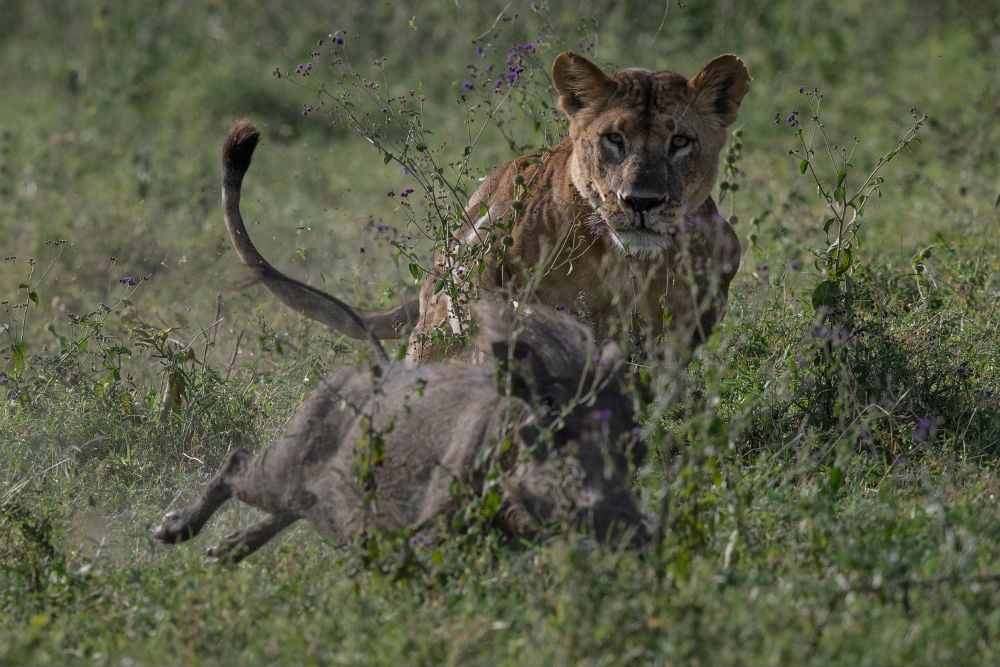
So, Africa has breathtaking landscapes, abundant wildlife, and a rich tapestry of human history...
If that doesn't make you want to visit Africa, I don't know what will!
If I make the trek to Africa, I know how I'll be doing it.
As it turns out Mark and the fine folks at Creative Photo Academy will be returning to Africa next year, August 21-30, 2019.
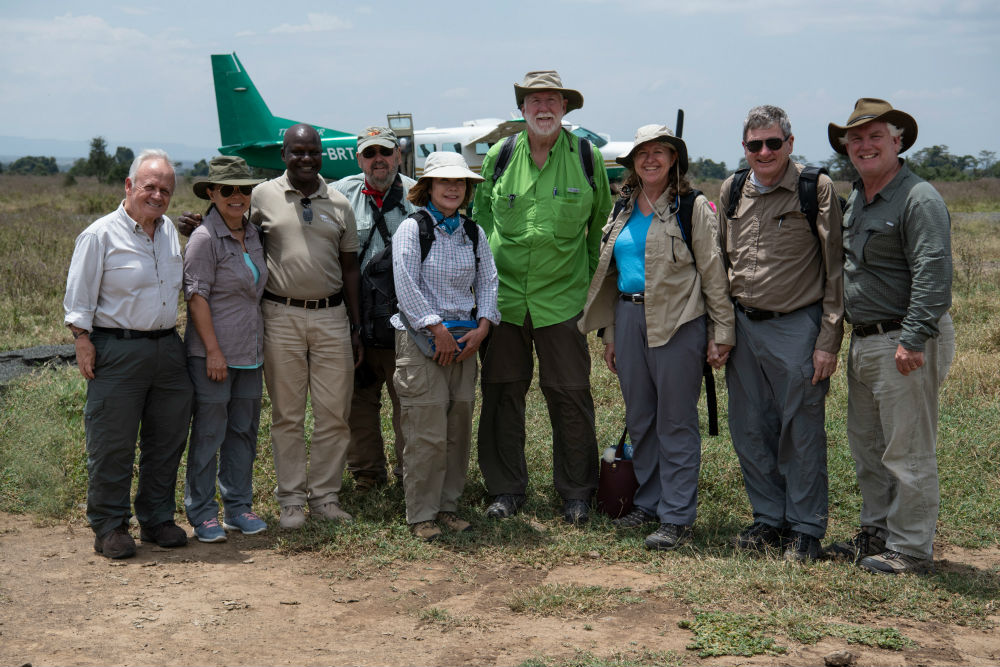
Mark will be joined by Simba Marara to guide you on a safari in the heart of Africa during the great migration, an annual movement of both predators and their prey.
In addition to staying in luxury accommodations and enjoying incredible food, you'll be led by Oscar Mwangi, Africa's foremost guide, in two daily game drives in customized safari vehicles in which there are a maximum of three photographers to ensure you have the room you need to get the best shots.
I don't know about you, but all that sounds absolutely amazing!
For more information about this African safari adventure and other photography outings and classes offered by Creative Photo Academy, visit their website.
All images in this article are courtesy of Mark Comon and are used with permission.
We Recommend
This Camera Travel Bag is Functional and Stylish
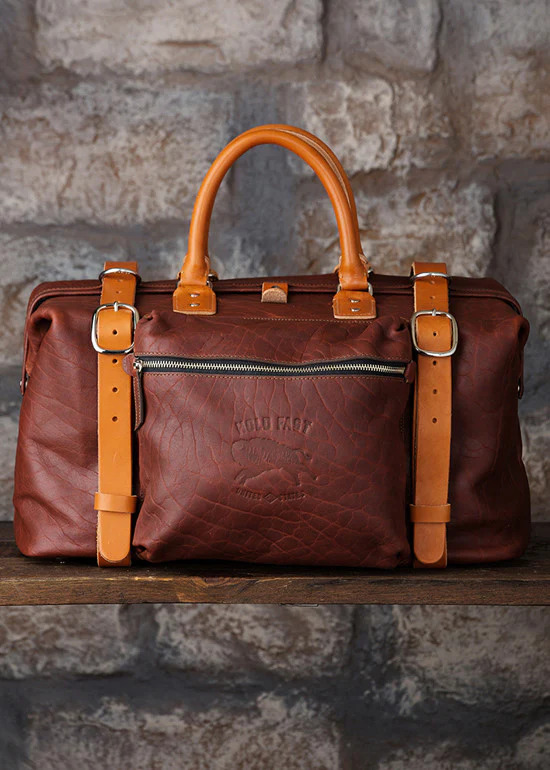
A good camera travel bag is as essential an item as memory cards for a serious photographer.
What should you demand in a camera travel bag? I look for several things…
I need it to hold my gear. I want it to reasonably protect my gear. I need it to be high quality. I want it to look good.
One of my favorite bags that meets these wants and needs is the Roamographer camera travel bag from HoldFast Gear, maker of fine leather goods such as straps, holsters, bags, photo journals, and accessories.
Table of Contents:
- Roamographer Camera Travel Bag
- Small Camera Travel Bag
- Protective Versatile Insert
- Fine Leather Styling
- HoldFast Gear Camera Travel Bags and Accessories
Roamographer Camera Travel Bag
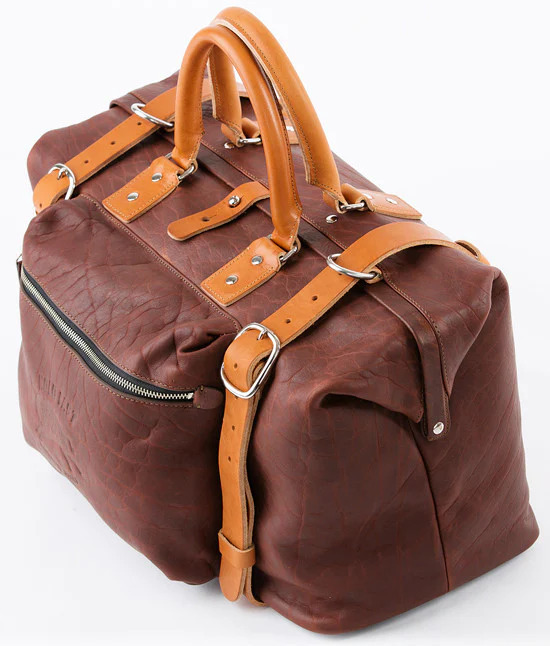
What is a roamographer? If you’re a serious photographer, and you enjoy traveling to different places in order to find interesting photographic subjects, then you are a roamographer, a roaming or traveling photographer.
Really, any photographic outing can be seen as a roamographer situation, since anywhere we go outside of our studio, office, or home will require us to transport and carry our camera and lens equipment.
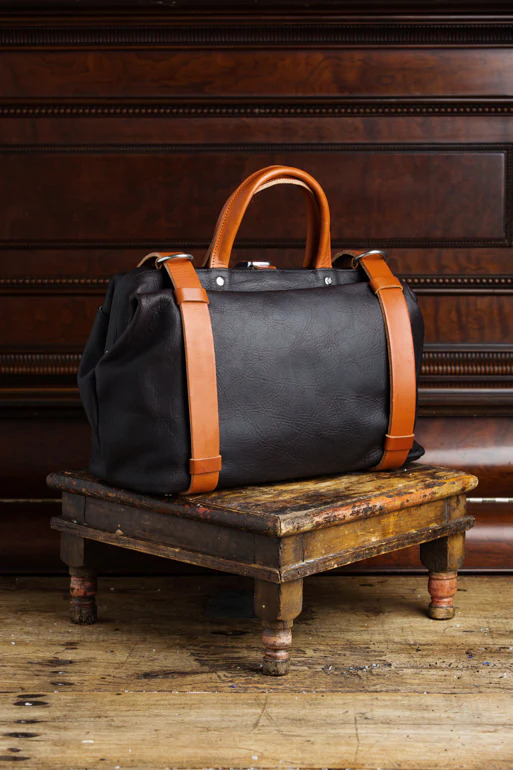
The Roamographer camera travel bag is a nice bag for traveling to the local park for environmental portraits, taking to a wedding photo shoot, or traveling cross country or internationally. The regular size Roamographer can hold a large DSLR or two, a couple of lenses, a large tablet or up to 15” laptop computer, and many accessories such as filters, flash units, or video lights.
The external straps are capable of securely and comfortably holding a medium to heavy tripod, and the carrying strap of this camera travel bag is super sturdy and comfortable with its shearling-lined shoulder pad.
Small Camera Travel Bag
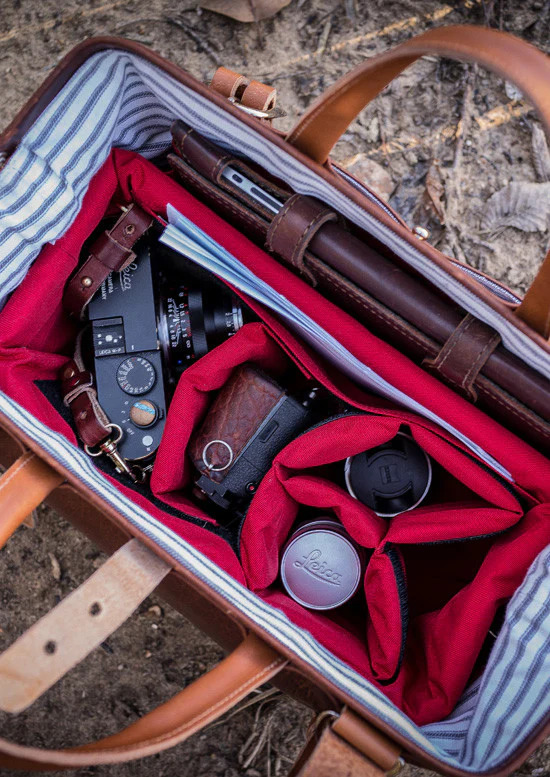
The small-size Roamographer camera travel bag is perfect for mirrorless interchangeable lens camera systems. It has all of the same great features, high quality, and versatility of the regular size Roamographer but in a slightly smaller size.
It can hold a mirrorless body or two, 2 or 3 lenses, and other necessary photography gear such as filters, a flash, and a tablet. In both size bags, there are internal and external pockets for miscellaneous items such as your key fobs, an energy bar, or some flyers you picked up at the hotel.
Learn More:
- How to Carry Gear for Wedding Videography
- What to Look for in a Good Camera Strap
- Tips for Traveling with Photography Gear
Protective Versatile Insert
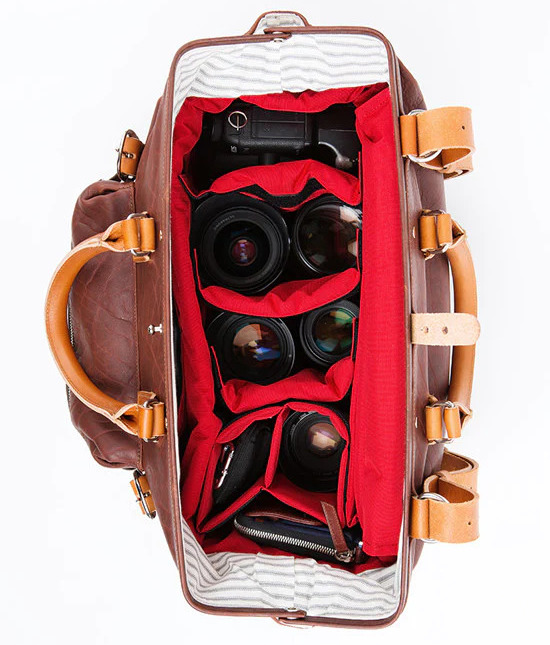
The insert is what gives this camera travel bag its extra protective capability, also making it a simple task to organize all of your essential items for easy access.
Look at it as a padded bucket with padded and moveable dividers that give your gear protection from the usual wear and tear we all give our camera gear when out on location taking pictures. Since you can move the dividers around, you can customize the bag for your shooting style or for different jobs and excursions.
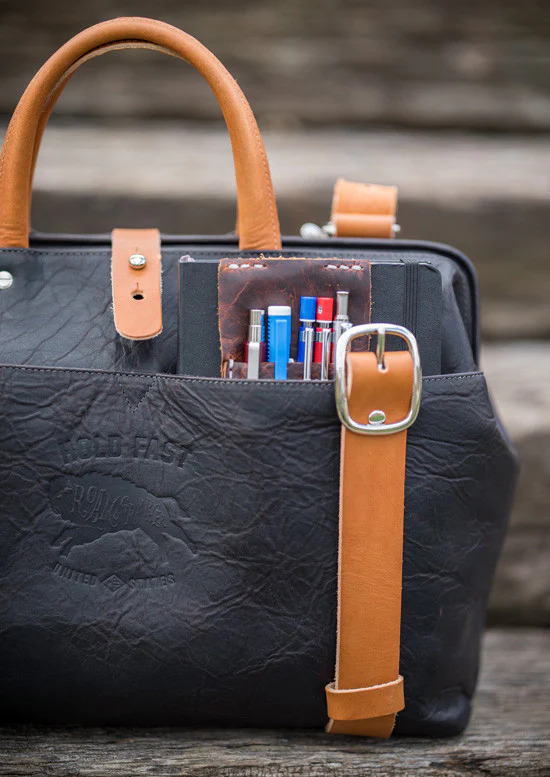
Added to the built-in inner pockets and the large exterior pocket, you have a lot of room for your gear plus the ability to arrange it all as you wish. Don’t forget the exterior straps for a tripod, monopod, or an Indiana Jones-type bullwhip, whatever you feel most comfortable with while capturing images on the go.
Fine Leather Styling
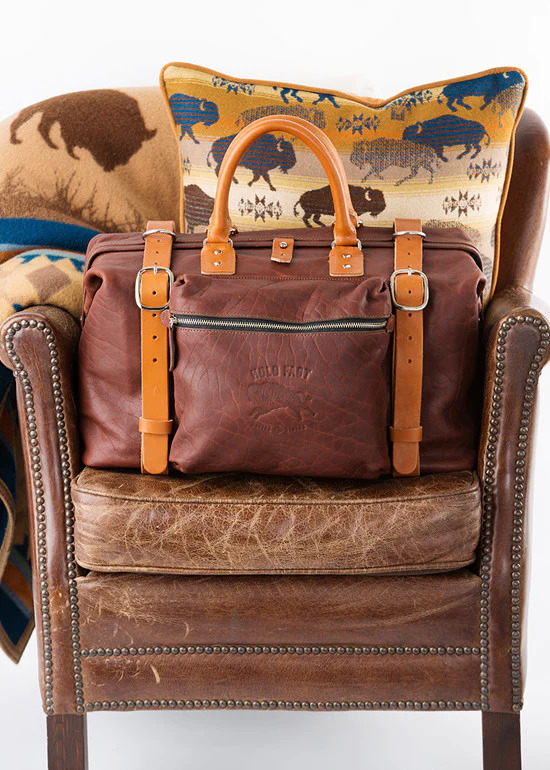
A major plus for me when deciding on my next camera travel bag is attractive styling. I don’t need to be fancy like I’m James Bond wearing a tux in Monte Carlo, but I do enjoy my camera bags being stylish. The Roamographer camera travel bags do not disappoint in this regard.
As with all HoldFast Gear products, the materials chosen are first class all the way. The bag itself is American Bison leather, a fine leather that takes on a beautiful appearance the more it’s used, each bag aging in its own unique way for a stunningly beautiful and classic appearance.
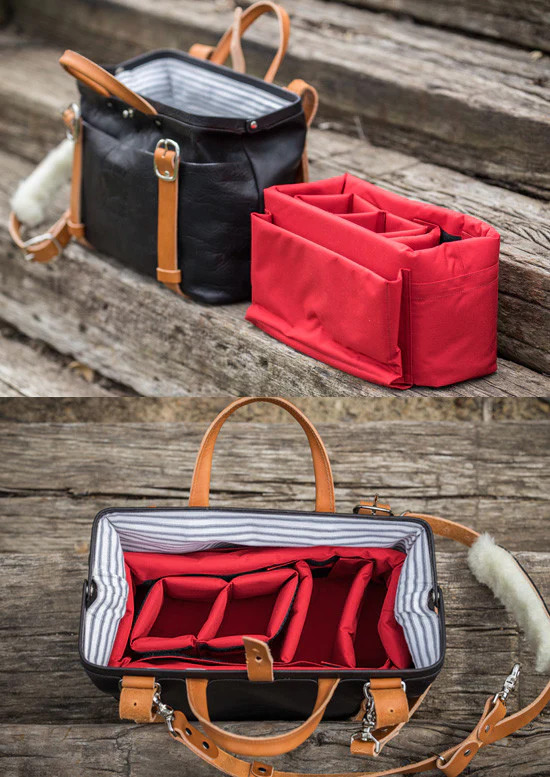
The straps are beautiful and strong bridle leather and the shoulder pad is lined with shearling wool. Interiors and the insert are high-quality material that gives good looks plus extreme durability.
It’s a great bag that will be as welcome at a fancy wedding event as well as touring the streets of Paris, Dubai, Tokyo, Seattle, or Monte Carlo. The American Bison leather main construction protects your gear marvelously, and the bag flap fastens securely.
HoldFast Gear Camera Travel Bags and Accessories
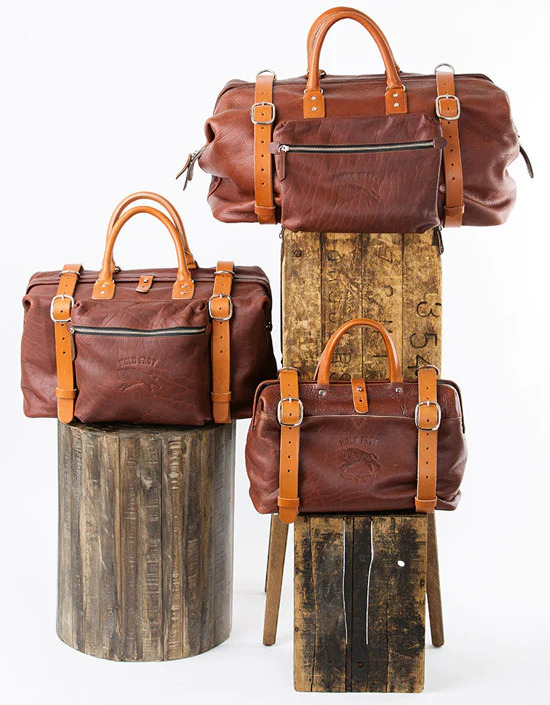
The Roamographer camera travel bag fits in well with all of the fine leather goods made by HoldFast Gear. In the Roamographer Collection, you’ll also find a duffle bag which you can use as luggage or for holding a very large kit of photography gear (fill it with a couple of Roamaographer bag inserts), and some of the most comfortable everyday wear boots I’ve tried.
While you’re at HoldFast Gear, take a close look at the best camera harness/strap solution for active, traveling photographers, the Money Maker Dual Camera Strap, the item that first brought me to HoldFast Gear.
Use the Money Maker together with the Roamographer camera travel bag for a versatile, rugged, and stylish way to hold your cameras, lenses, and photographic accessories while out capturing beautiful images.
All images by Brandon Burk
Learn More:
- How to Comfortably Carry Multiple Cameras
- How to Find Your Personal Photography Style
- Essential Travel Photography Tips
We Recommend
This is the Camera Bag for Your Next Photography Trip
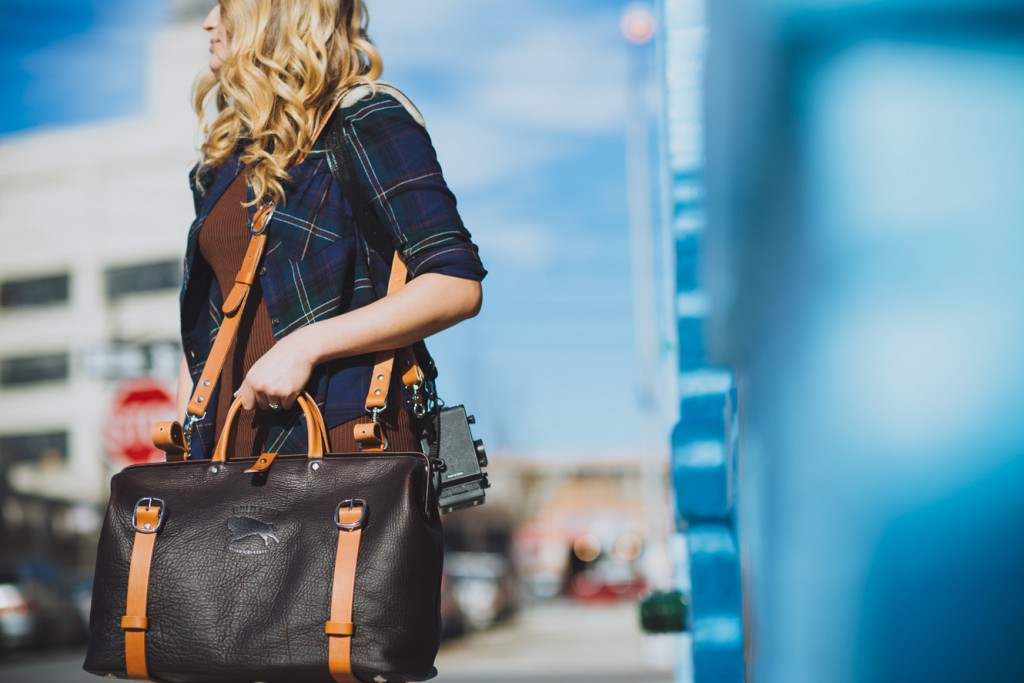
All I do when I’m stuck at home is start planning my next photography trip. So, you can imagine that I’ve been doing a lot of planning lately.
I was cleaning out my photography gear, making sure I had everything I needed, when I realized that one of my camera bags I’ve had for around a decade had a puppy-sized hole in it. My dog had chewed right through the leather.
Since I won’t be able to get very far without a camera bag, I went in search of the best leather camera bags on the market today and of course I started with Holdfast.
If you’re in the same boat as me and you need a new camera bag for your next photography trip, you should think about picking up a Holdfast Roamographer.
HOLDFAST ROAMOGRAPHER FEATURES
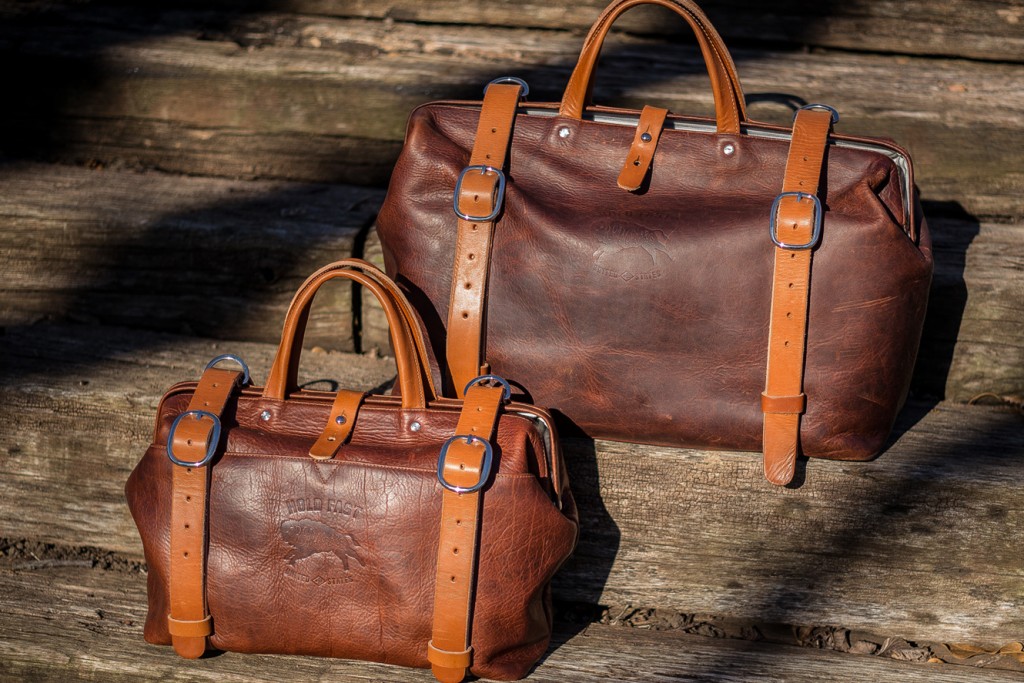
It is essential that my camera bag is large enough to carry all of my equipment, yet still comfortable which is why I was drawn to the Holdfast Roamographer in the first place.
It features a highly customizable interior so the camera bag can grow with my photography gear collection.
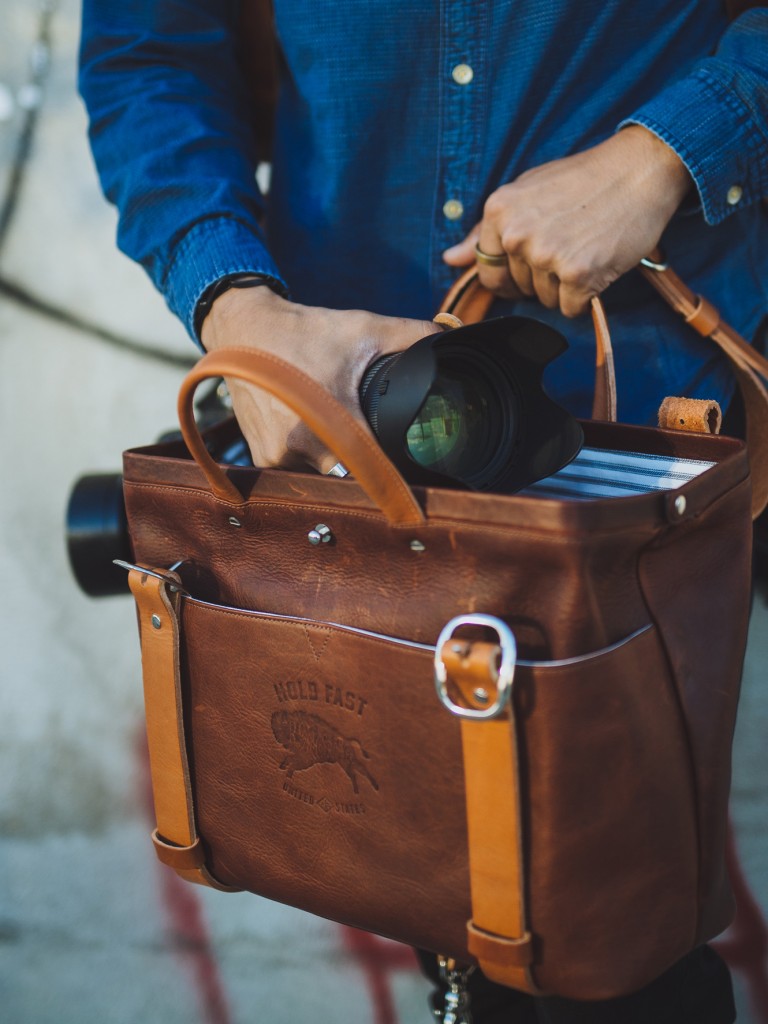
The traditional Holdfast Roamographer is built for a DSLR kit, but if you shoot with mirrorless cameras then there is a smaller version of the Holdfast Roamographer built just for you.
This camera bag features two exterior leather straps, which you can use to carry your tripod, and D-Rings on the shoulder straps just in case you need to carry a camera within shooting distance during your travels.
Recommended Photography Reading
- National Geographic Photo Basics: The Ultimate Beginner's Guide to Great Photography
- Photography: The Definitive Visual History
- Read This if You Want to Take Great Photographs
Holdfast Roamographer Construction
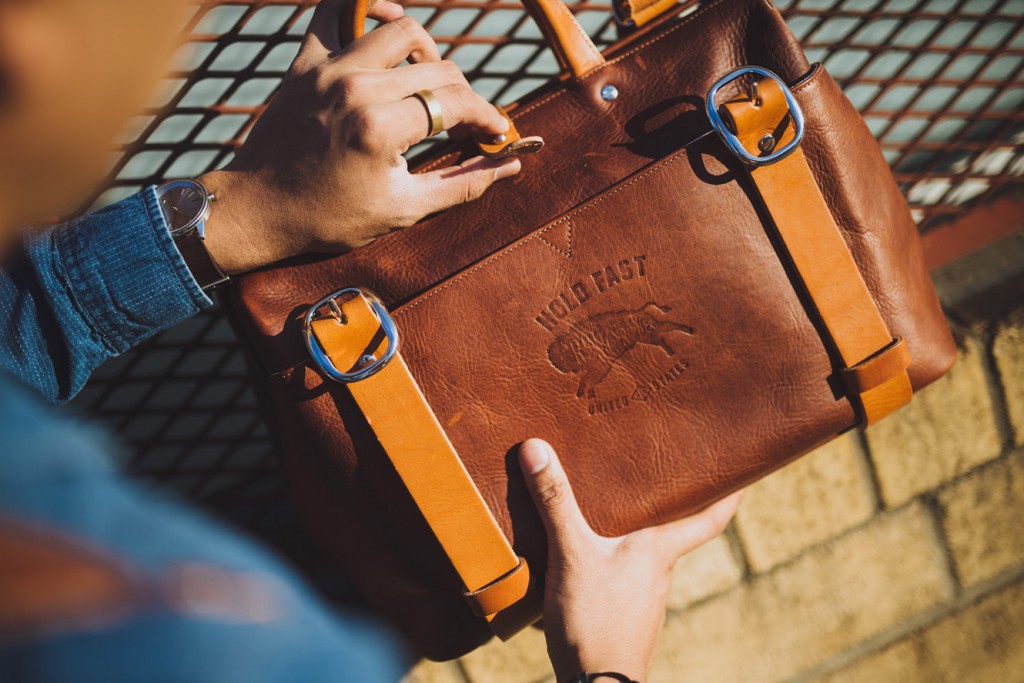
As with all of Holdfast’s leather camera bags, the Roamographer is made from true American bison leather, sturdy rust-resistant D-rings, and has a shearling-lined shoulder strap to ensure it’s comfortable no matter how much gear it’s stuffed with.
I’m also always a fan of getting my leather camera bags from smaller manufacturers because you can tell they put the time into every detail.
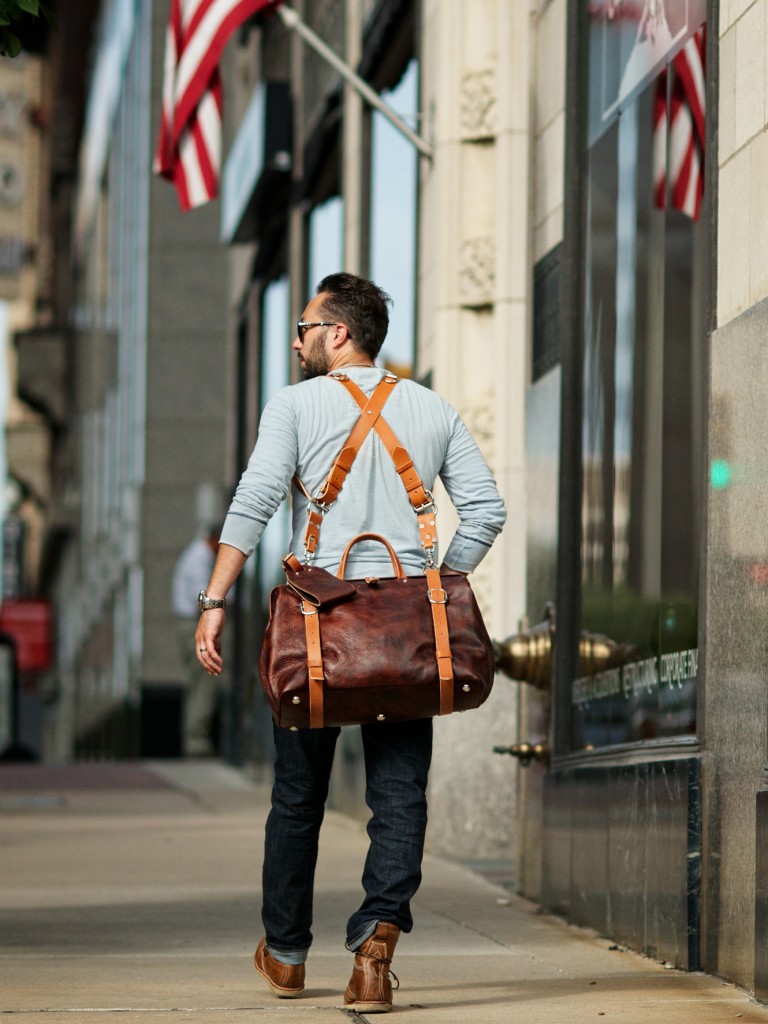
For instance, each Holdfast Roamographer is a little different because the leather is never dyed or not used because of branding marks. Your camera bag will be as unique as the animal that provided it.
But, the number one reason why this is my favorite camera bag for your next photography trip is that you can carry it one of two ways to make it more comfortable for you: as a shoulder bag or attached to the Holdfast MoneyMaker camera harness.
Learn More:
Holdfast Roamographer Dimensions
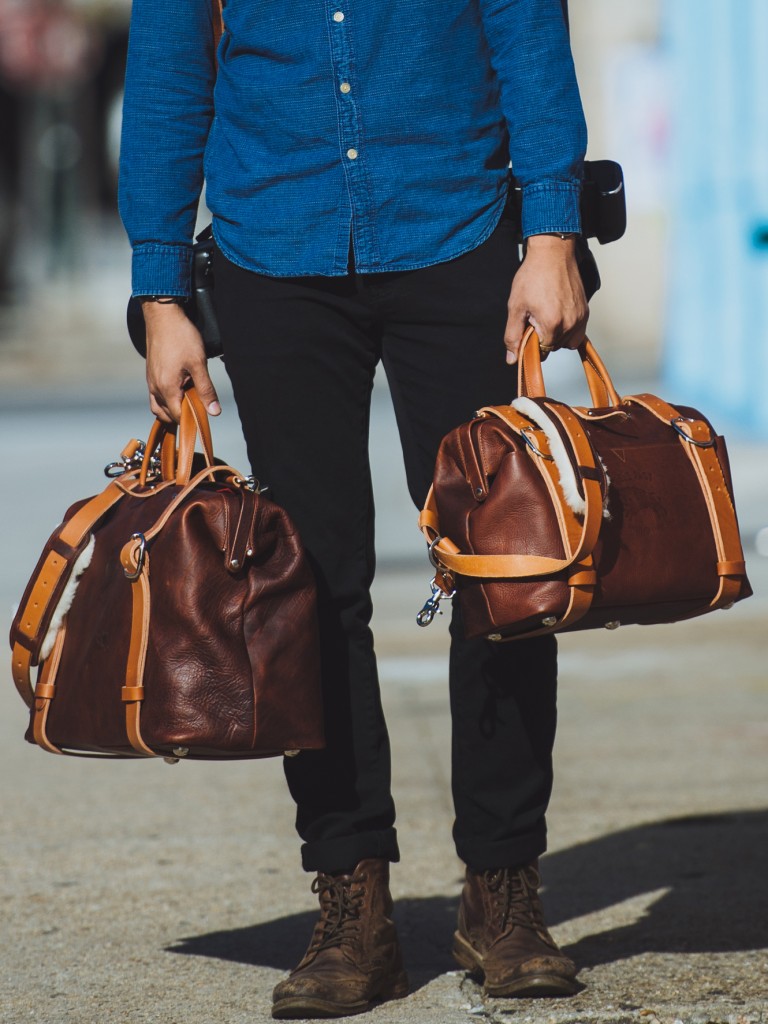
As I mentioned, this camera bag comes in two sizes-small and regular.
The small bag measures 14.5” long, 9” tall, and 8” deep on the exterior with a removable insert that is 13” long, 7” tall, and 7” deep. This insert comes with six pockets, two dividers, and one lens chassis.
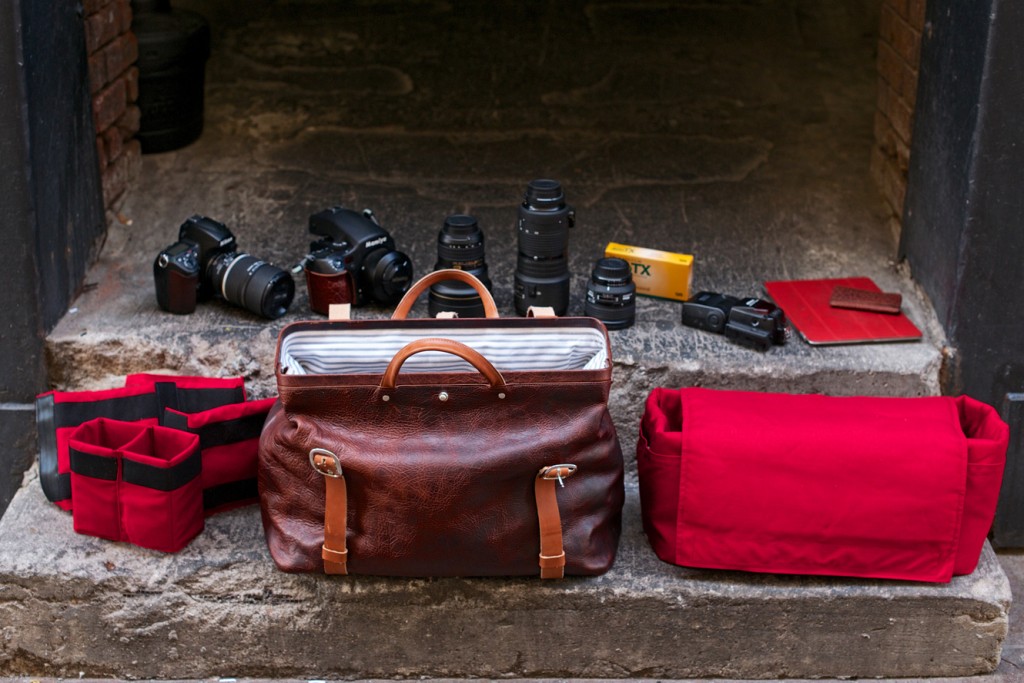
The regular bag, on the other hand, measures 18” long, 14” tall, and 10” deep, while its removable insert measures 17.5” long, 8” tall, and 8” deep. The insert on this one features eight pockets, three dividers and one lens chassis.
And, since Holdfast caught on to the fact that everybody can’t get enough of their fully-customizable dividers, you can now purchase a divider by itselfto put in your well-loved camera bag.
Holdfast Roamographer Added Benefits
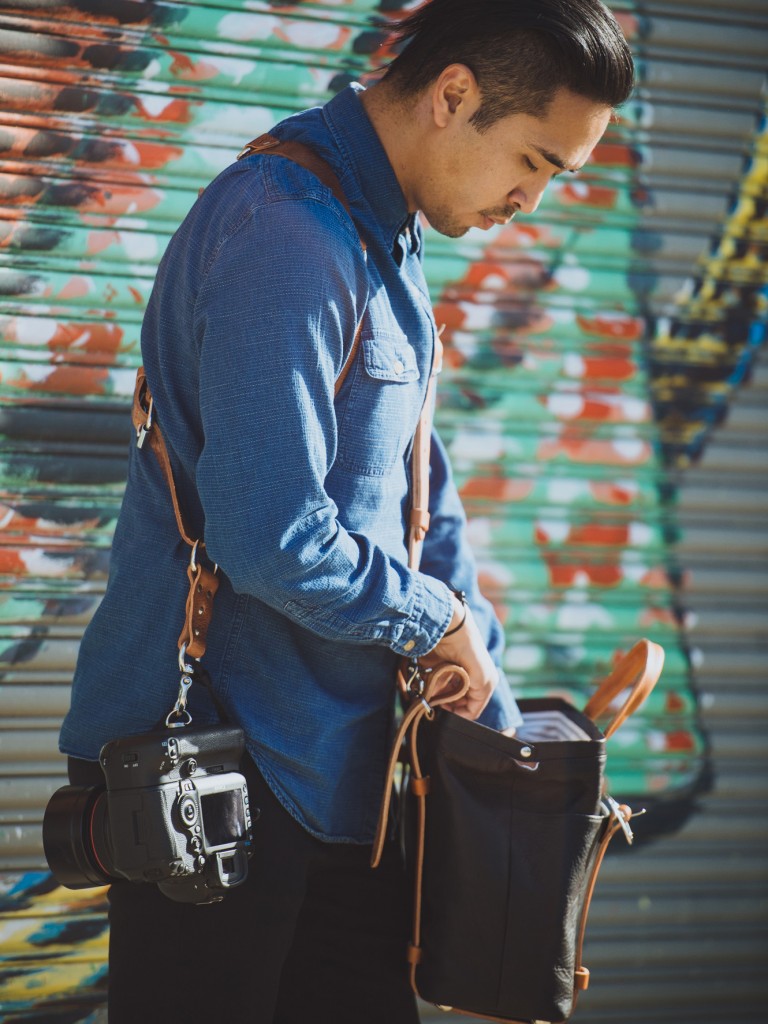
For anyone that’s followed my website for long, they know I’m a huge Holdfast fan and here’s the reason: every piece of Holdfast gear works seamlessly with the others.
As I mentioned above, you can use the Holdfast Roamographer with the original MoneyMaker or the brand-new Vegan Leather MoneyMaker.
These harnesses not only allow you to carry your Roamographer bag in total comfort, but they also give you the capability of carrying up to three cameras simultaneously!
Additionally, the hand-crafted leather construction means your investment in the Roamographer will last for years and years to come. These bags are durable as the day is long, and they’re stunningly beautiful too!
Holdfast Roamographer Price
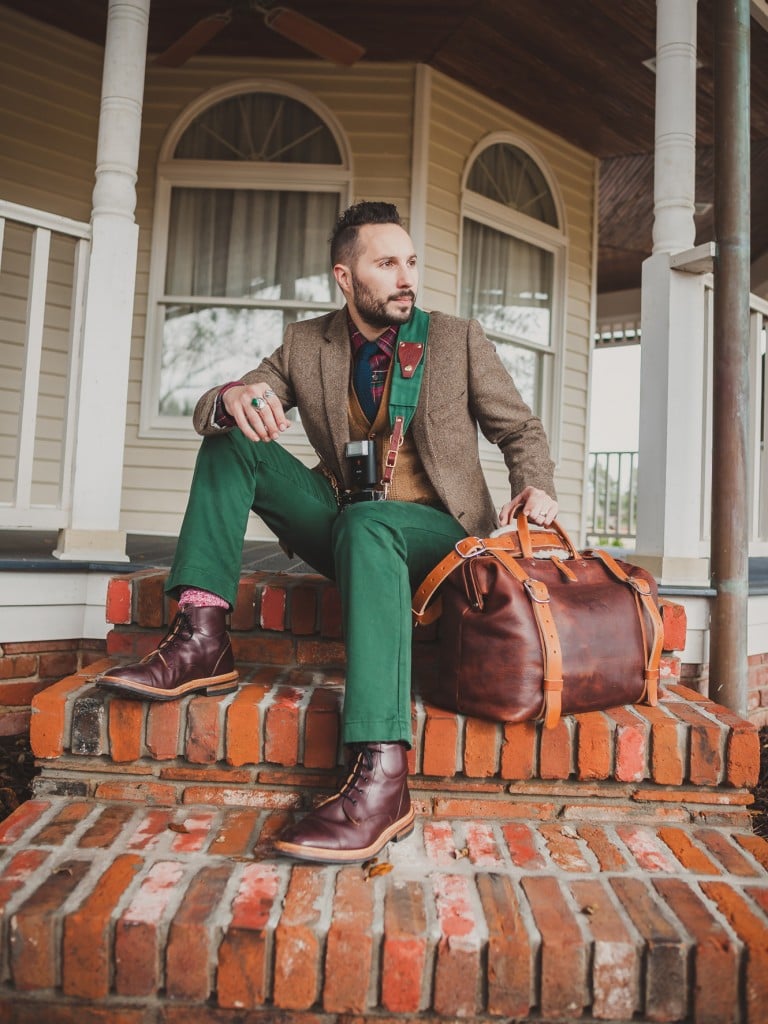
A camera bag that is going to last you a lifetime (literally, it comes with a guarantee) isn’t cheap. But, it’s much cheaper than buying a new bag every two years.
The Holdfast Roamographer can be purchased for $725. If that isn’t exactly in your budget right now, though, Holdfast participates in Afterpay which means you can split your payment and pay $180 four times over the course of a few months.
The small Holdfast Roamographer is also a little cheaper at $600, or four payments of $150.
Learn More:
We Recommend
Three Must-Visit Locations in Patagonia
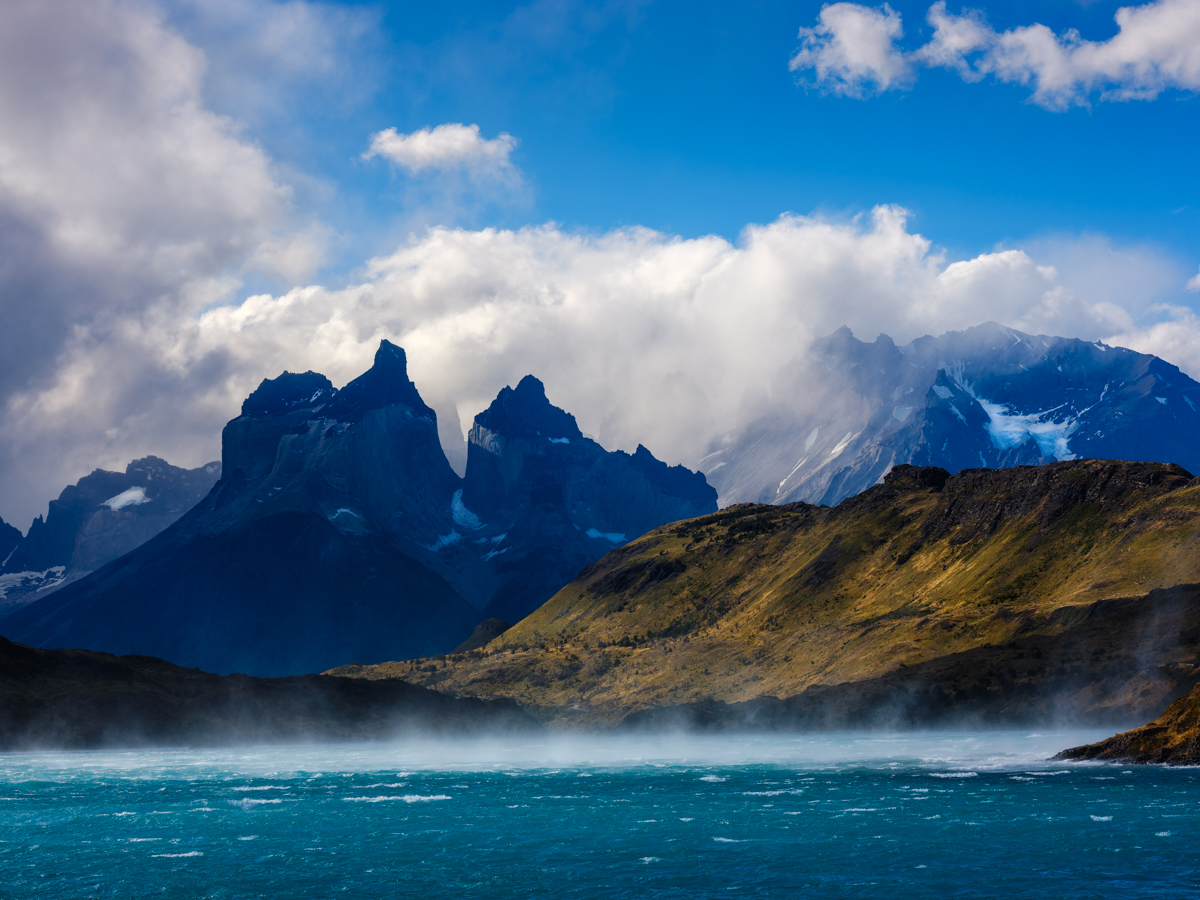
Photo by Daniel Korzeniewski/Photo Tours and Expeditions
Let’s be honest...there are far more than three must-visit locations in Patagonia. It is a region full of breathtaking landscapes and opportunities to create gorgeous photos.
But you can’t photograph everything in Patagonia, so it’s worth taking a look at some iconic locations you don’t want to miss when you visit this magical place.
Here are three top recommendations for places you need to see with your camera on your visit to Patagonia.
Torres del Paine National Park
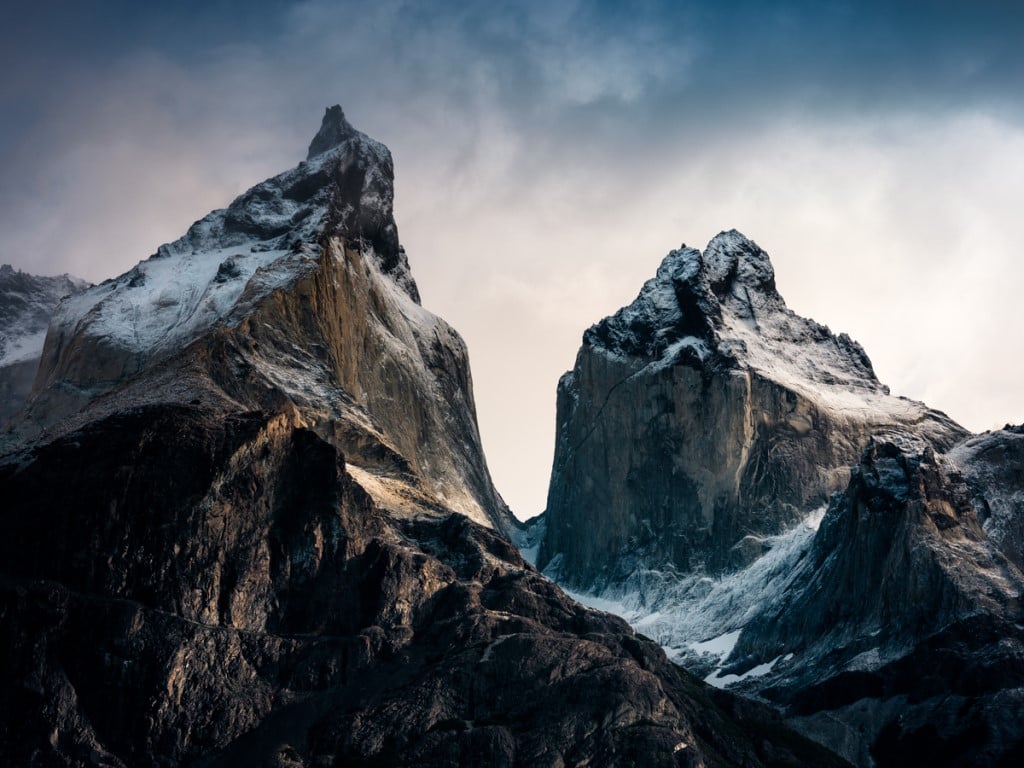
Photo by Daniel Korzeniewski/Photo Tours and Expeditions
Tucked in the far southern reaches of Chile, the Puerto Natales region offers some of the most rugged landscapes you can photograph in Patagonia.
Perhaps the most breathtaking landscape of them all is Torres del Paine National Park, home to the iconic towers seen above.
There is beauty everywhere you turn here - soaring peaks, raging rivers, and placid lakes - whose beauty changes as daybreak turns to day and again as day turns to night.
While there, be sure to hike to the top of Mount Ferrier - a short and steep hike - but one that’s well worth the effort. The view from this particular lookout is absolutely breathtaking.
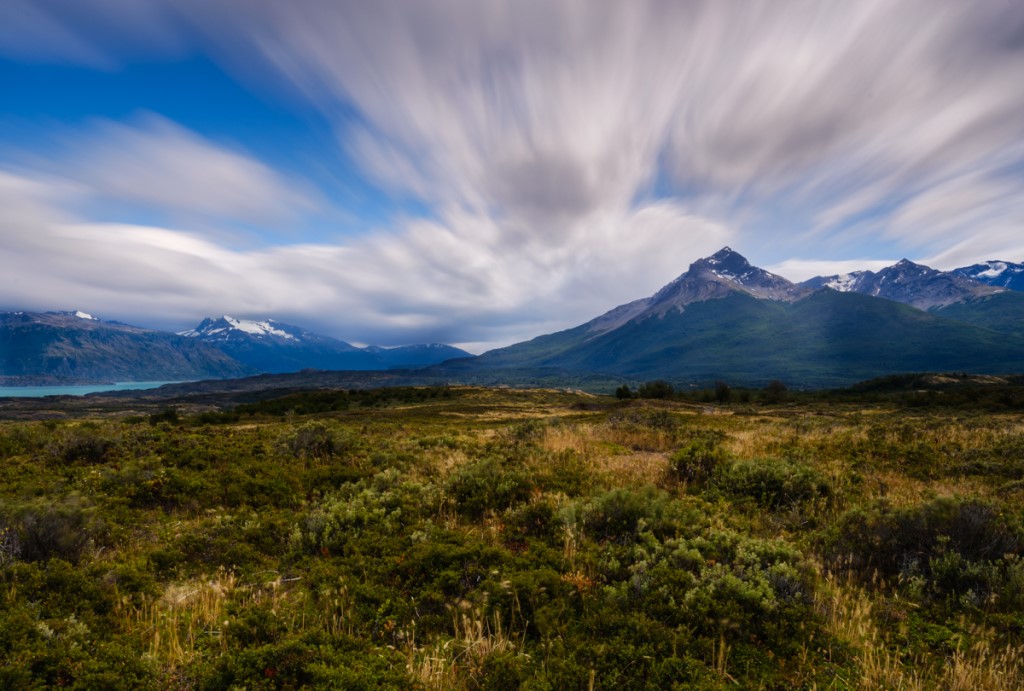
Photo by Daniel Korzeniewski/Photo Tours and Expeditions
The Lake Pehoe area is worth some time as well. Centrally located in the park, it makes a great basecamp for daytime forays to photograph the Salto Grande Waterfall, Horns Lookout, Mirador del Condor, and more.
Likewise, the lake is a great place to explore on foot and find vantage points for photographing the mountains that surround it. As far as Patagonia photography locations in Chile go, this area should be at the top of your list!
El Calafate Region
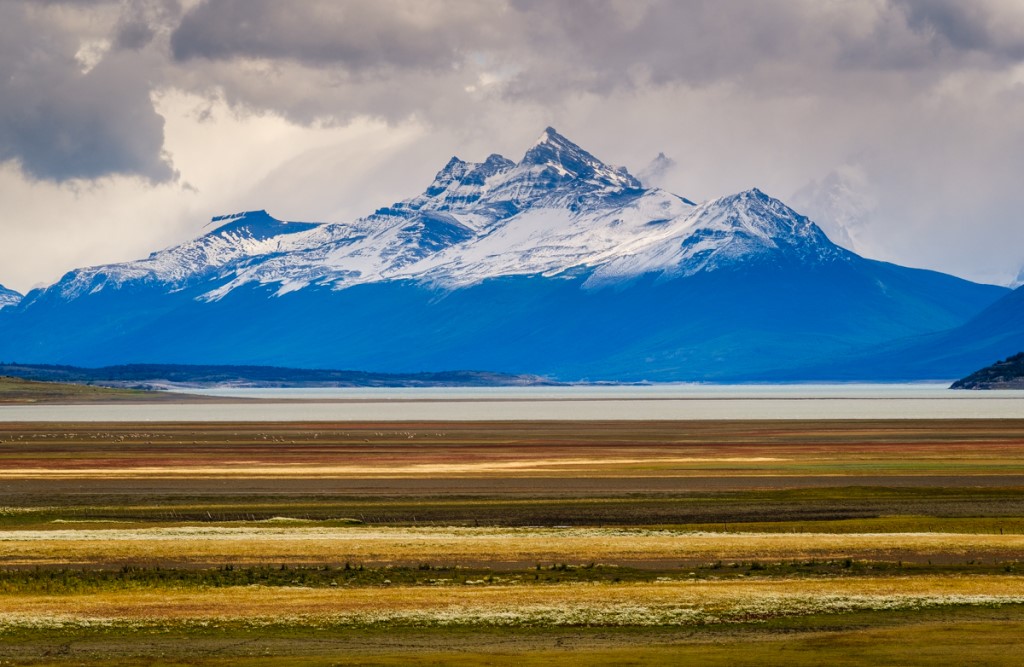
Photo by Daniel Korzeniewski/Photo Tours and Expeditions
Located on the southern end of Lake Argentino in Argentina, El Calafate is a prime area to explore due to its proximity to mountainous regions, particularly Glaciares National Park.
The lake itself is worthy of some of your time as it attracts thousands of flamingos who feed and rest in its waters.
But the prime location you need to see in the El Calafate area is the Glacier Perito Moreno, shown below.
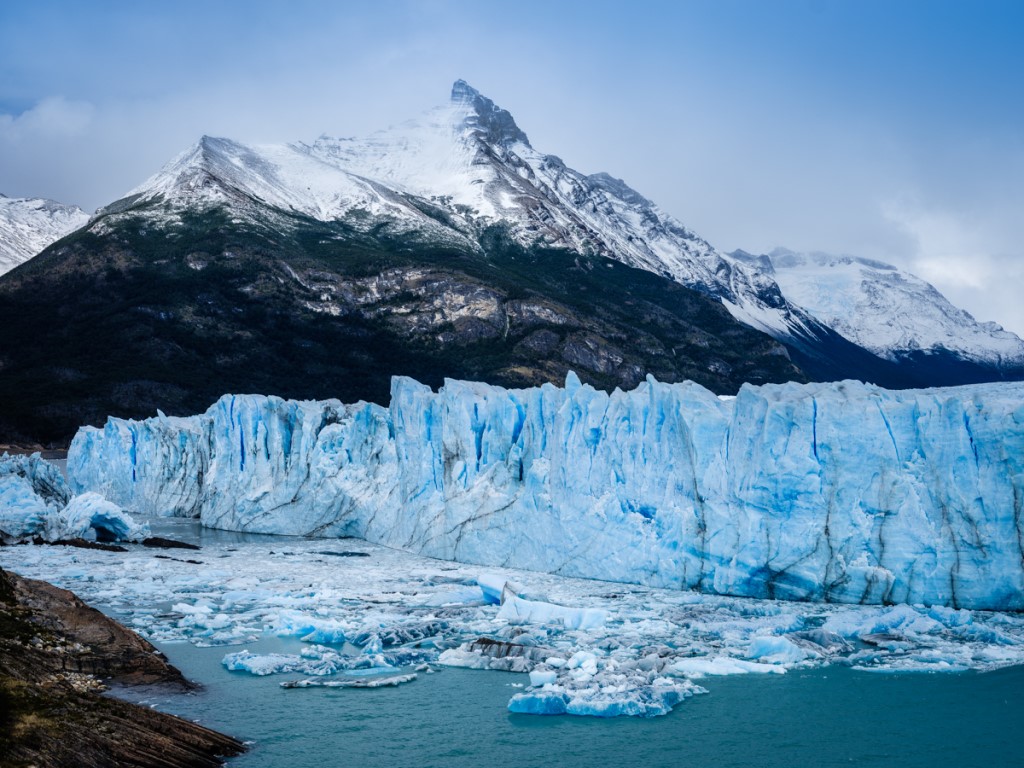
Photo by Daniel Korzeniewski/Photo Tours and Expeditions
The glacier is breathtaking on its own, but set against the backdrop of soaring mountain peaks, this nearly 100-square-mile chunk of ice takes on an even more impressive stance in the landscape.
Perito Moreno is just one of nearly 50 glaciers in the Southern Patagonian Ice Field, which is the third largest collection of freshwater on the planet.
The walkways through the ice fields bring you to eye-popping lookouts, but if you want to get even more spectacular views, get up close to the walls of the glaciers as you explore the side of Argentino Lake.
El Chalten Region
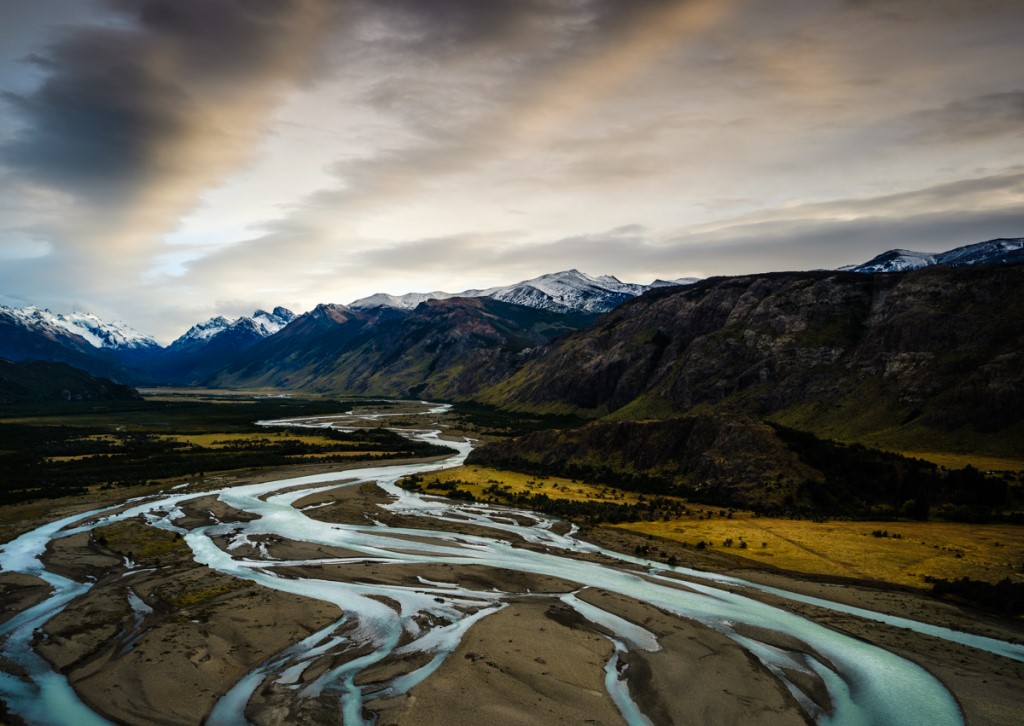
Photo by Daniel Korzeniewski/Photo Tours and Expeditions
Also located in Argentina, the El Chalten region is the trekking capital of Patagonia.
Not only is this quaint village situated on the banks of the Rio de las Vueltas inside Los Glaciares National Park, but it’s also located near the Fitz Roy, one of the most iconic and beautiful mountain spires in the world.
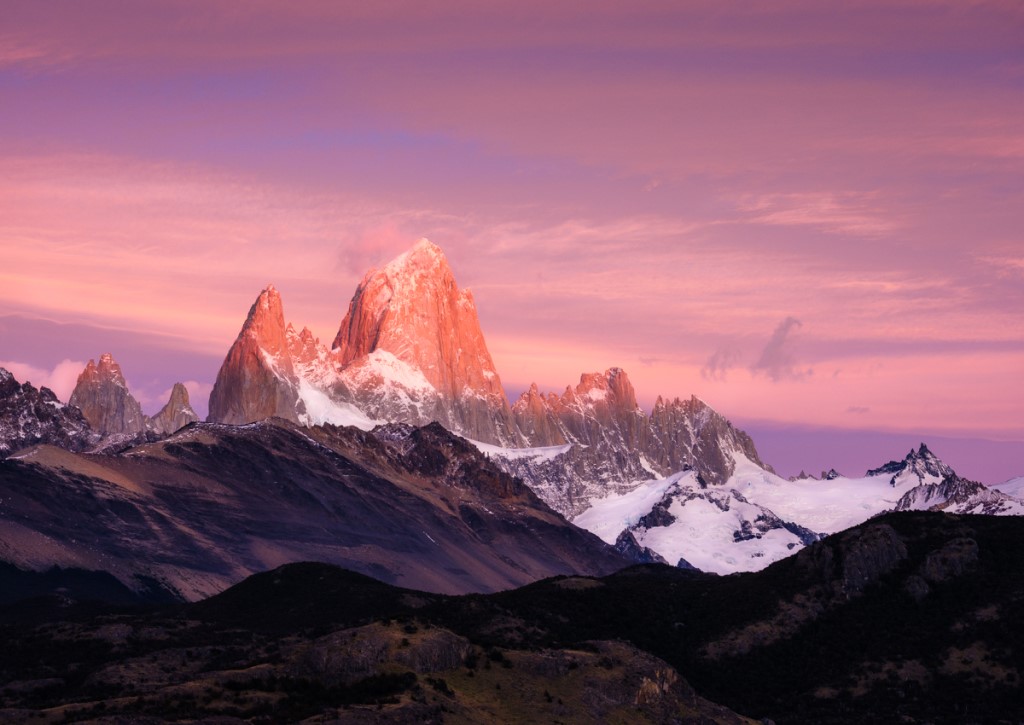
Photo by Daniel Korzeniewski/Photo Tours and Expeditions
Though Fitz Roy is “just” 11,073 feet tall, it’s nonetheless an impressive sight as it extends upward from the landscape.
The rugged mountain is a target for many photographers and climbers alike, although the first known climber to summit the peak didn’t accomplish the feat until quite recently in 1952.
When exploring this area, be sure to visit Rio Blanco, Laguna de Los Tres, and Lookout Cerro Torre for gorgeous views of the Fitz Roy.
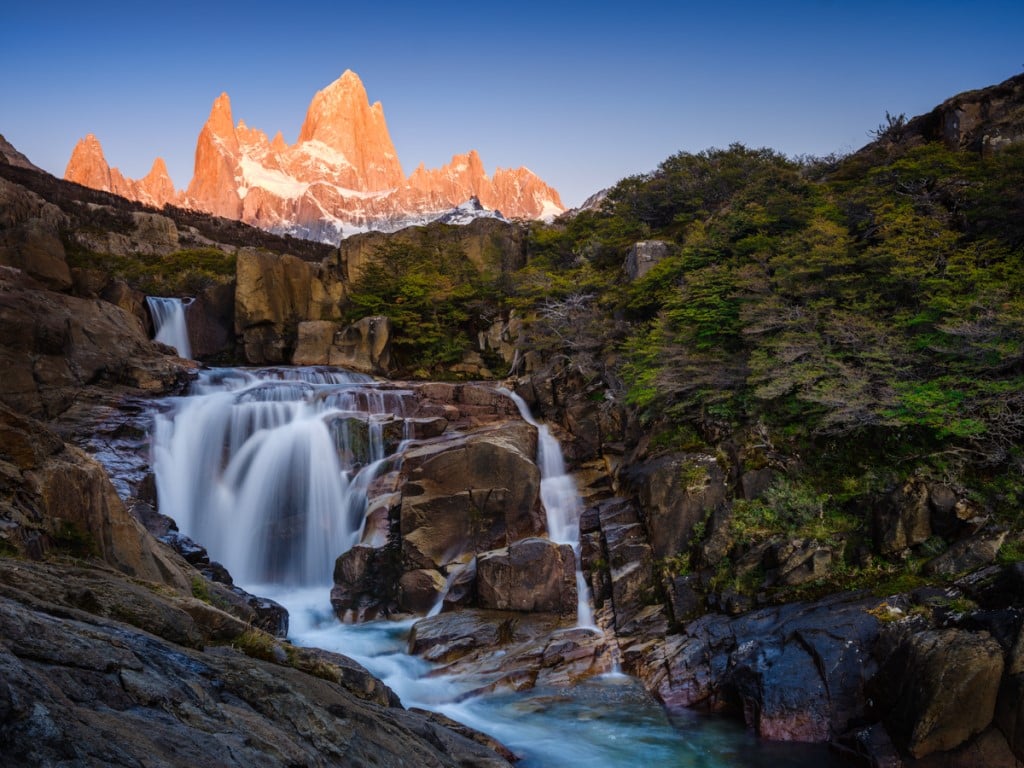
Photo by Daniel Korzeniewski/Photo Tours and Expeditions
But, Fitz Roy is not alone as an incredible spot for photography in Argentina. The El Chalten area is also home to wonders like Lago del Desierto, Huemul Lagoon and glacier, the Huemules Reserve, and more.
In fact, a visit to Patagonia could be spent entirely in this one region, and you’d have plenty of fodder for your camera!
Planning a Patagonia Photography Trip

Photo by Daniel Korzeniewski/Photo Tours and Expeditions
The toughest part of planning a photography trip to Patagonia is simply deciding when you’ll go and what areas you’ll photograph while you’re there. It’s not a question of “What is there to see?”, but “What must I see while I’m there?”
For my money, there’s no better way to explore such a diverse and incredible place than as part of a photography tour.
I recently got to know the fine folks at Photo Tours and Expeditions, and I was struck by not only their knowledge of Patagonia but also their passion for photographing this wonderful place.
Photo Tours and Expeditions has a Patagonia photo tour coming up in 2021 that visits the locations discussed here.
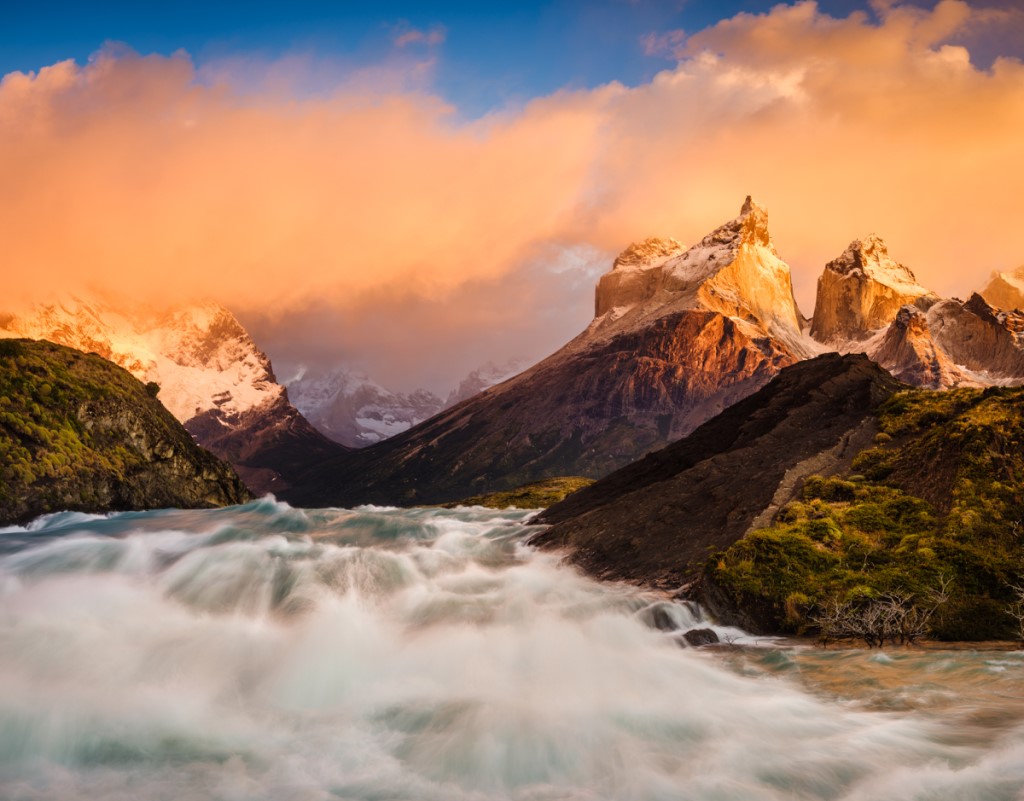
Photo by Daniel Korzeniewski/Photo Tours and Expeditions
You’ll be pampered in a small group of between 4-12 people as you travel through Patagonia’s best locations in Argentina and Chile.
Once you’re in-country, virtually everything is taken care of for you, from the itinerary to the accommodations to the meals.
You’ll be guided by Daniel Korzeniewski, George Plucienkowski, and various local guides on this nearly two-week adventure in Patagonia. There will be time for taking photos, of course, but also time to interact with Daniel and George to get feedback on your work. You’ll have plenty of time to interact with the other people on the tour, and even get some free time to explore locations as you wish.
Think about it...you can head to Patagonia with your camera and not have to plan a thing. All you’ll need to do is concentrate on taking photos of the epic landscapes before you!
We Recommend
Tips for Traveling With Photography Gear

photo byLordHenriVoton via iStock
Traveling during covid is stressful enough as it is, but traveling with photography gear right now just piles it on.
Not only are you attempting to keep yourself and others safe, but you’re also trying to keep your expensive camera gear safe. Unfortunately, when you’re traveling with photography gear, this also means that you’re likely going to be even more stressed out.
However, there are a lot of easy tips for flying with camera gear that I see photographers neglecting regularly. So, I decided to dedicate this article to fighting this educational gap.
Don’t Underestimate the Power of TSA PreCheck

photo byRawpixel via iStock
Every time I’m at my local airport I recognize that very few people actually use TSA PreCheck. Maybe it’s because they’re uneducated about the cost of the program or maybe it’s because they’re uneducated about its benefits, but TSA PreCheck has saved me from waiting in 2 hour lines at the airport before and it’s likely helped me catch some flights I would have otherwise missed.
TSA PreCheck only costs $85 (which you can deduct as a business expense if you only use it while traveling with photography gear for work). That $85 gets you a whole 5 years of benefits. You will never have to take off your shoes at security again. Likewise, you won’t ever have to take your laptop out of your bag either. But, the best benefit to TSA PreCheck is the fact that 100% of fliers using TSA PreCheck wait less than 5 minutes to get through security.
This is obviously only a tip for traveling with photography gear in the United States, since TSA PreCheck only works if you’re departing from an airport within the country. If you find yourself regularly traveling with photography gear overseas, then you’ll need to splurge on the Global Entry program instead.
If you’re interested in signing up for TSA PreCheck you can do so here.
Communicate Well With TSA Agents

photo byIPGGutenbergUKLtd via iStock
If you opt out of TSA PreCheck, then you’re likely going to be waiting in long lines at security checkpoints and the only way to make this wait less painful for yourself and others around you is to communicate clearly with the TSA agents.
If they say that they need to inspect your carry on bag, just state clearly and calmly that you are traveling with photography gear that is expensive, so you would appreciate it if they handled your bag carefully.
If you yell at your agent, your trip is only going to be made more difficult. Plus, you’re definitely not the first person to air travel with photography equipment, so if you communicate clearly, your agent should understand how to handle your equipment.
Buy a TSA-Approved Lock
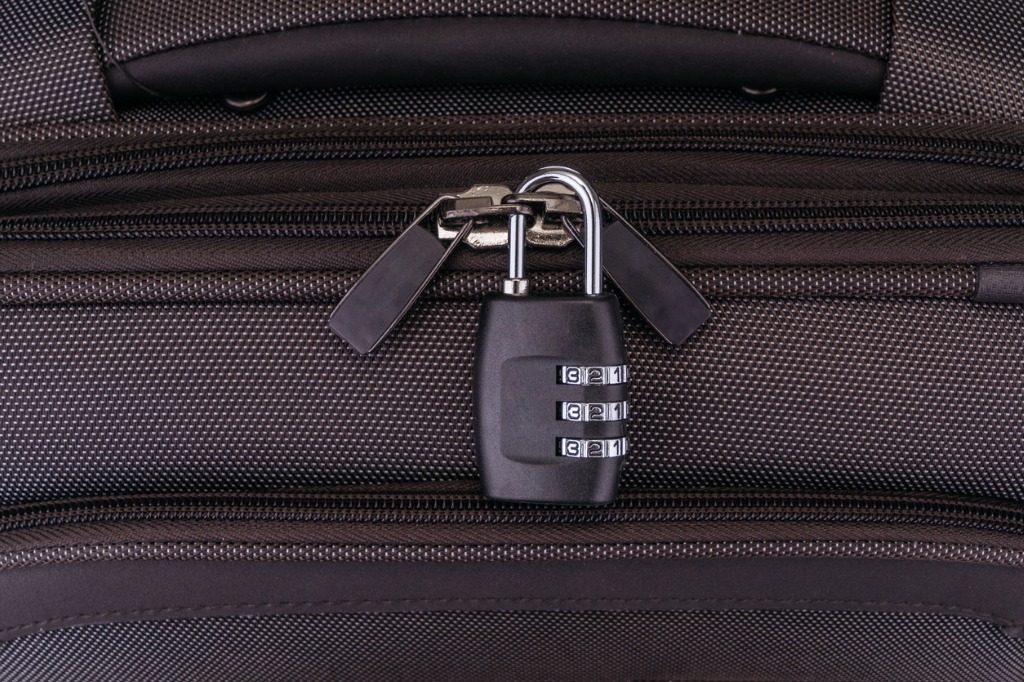
photo byULU_BIRD via iStock
I promise this is my last TSA tip for traveling with photography gear. It will make your trip so much easier if you buy a lock that is TSA-approved.
While you should pack all of your expensive camera gear in your carry on (more on that later), you may still need to pack additional camera equipment in your checked luggage. If this is the case, you don’t want your bag full of tripods, batteries, and memory cards to be stolen, so you’ll want to lock it. The problem occurs if and when TSA decides to inspect your checked luggage further.
If you aren’t using a TSA-approved lock, then they will simply cut the lock you are using which will leave all of your camera gear exposed.
Learn More:
Pack Your Carry On Neatly
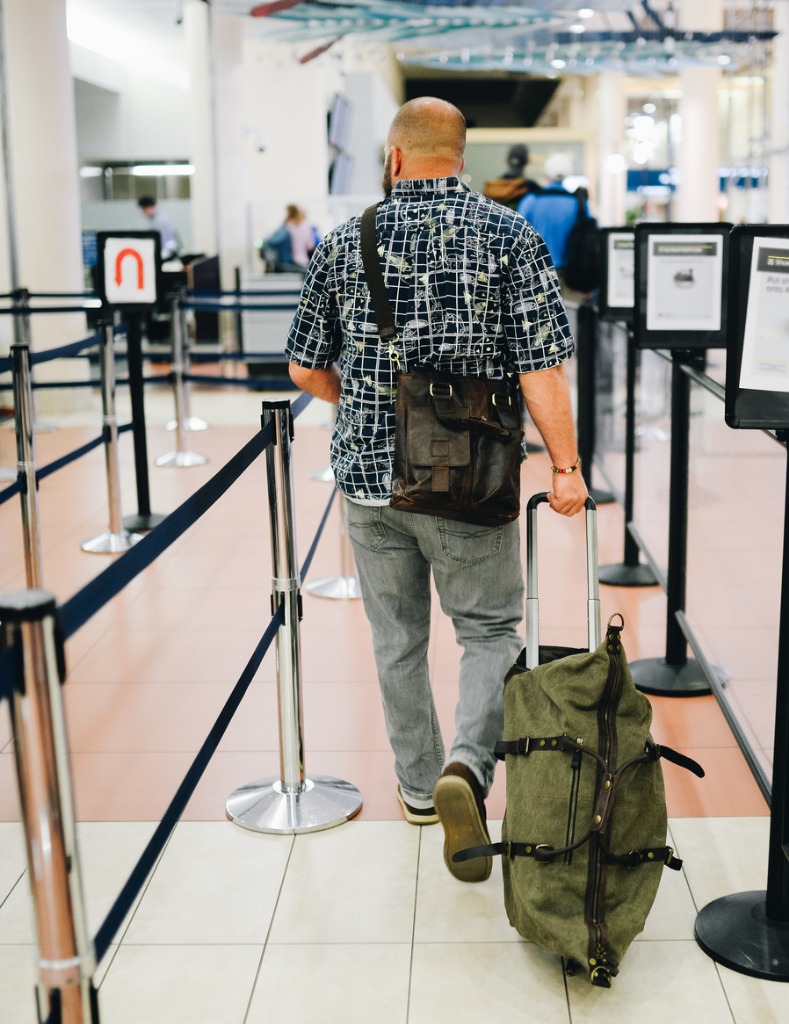
photo byLisa5201 via iStock
While traveling with photography gear, you should only put one layer of gear in your carry on bag. This helps you do a few things. For starters, if you begin stacking your photography gear on top of each other in your bag, then the likelihood of that gear banging up against one another goes up and you will be wildly frustrated if you accidentally damage your camera or lens because of careless packing.
But, it will also help you to speed through any security checkpoints. Since TSA agents are using machinery to see into your luggage, it will simply make it easier for them to recognize each piece of equipment in your bag if they aren’t trying to decipher what is on the top and bottom layers.
Pack Expensive Photography Gear in Your Carry On
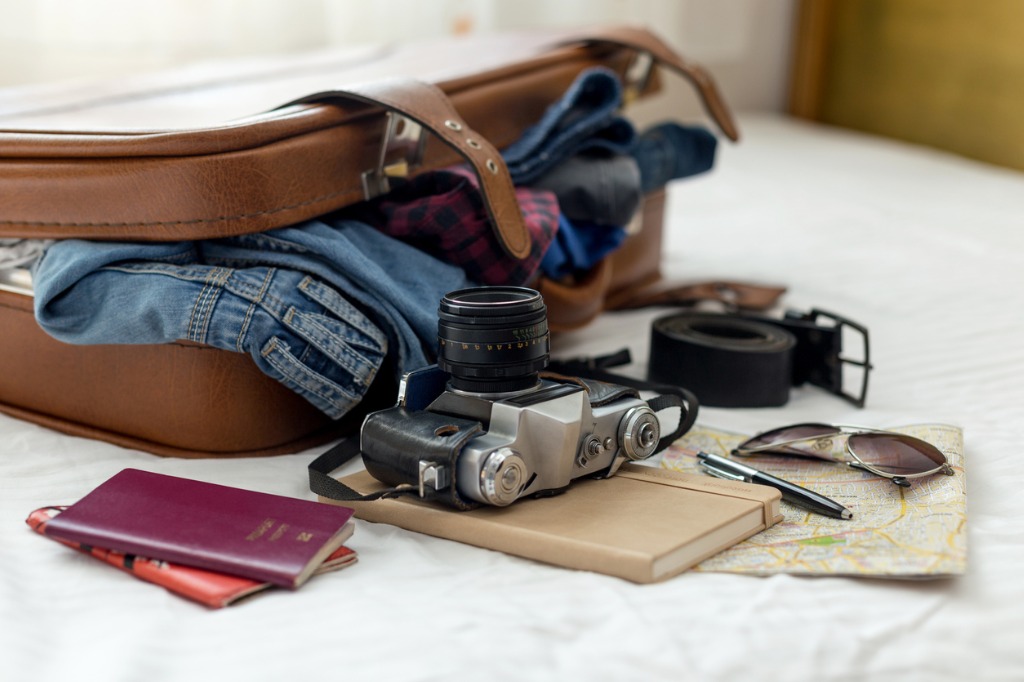
photo bybymuratdeniz via iStock
I was quite lucky in my early adulthood and never had any of my luggage lost or stolen while traveling with photography gear. But, in my early 30s when my first piece of luggage was lost by an airline, I never made that mistake again.
Anything that you cannot replace, or that you cannot replace with the amount of money in your checking account right now, needs to be placed in your carry on. Each airline’s policies are very different when it comes to replacing whatever was in your bag if they were to lose it while it was in their care. But, most airlines have a very lengthy process that is a total pain to go through.
Plus, at least in the United States, no airline is required to replace more than $3,500 worth of personal items in your luggage. Since I know that my camera equipment is worth much more than this, it makes sense to keep it with me at all times while traveling.
Pack Cameras and Lenses Separately
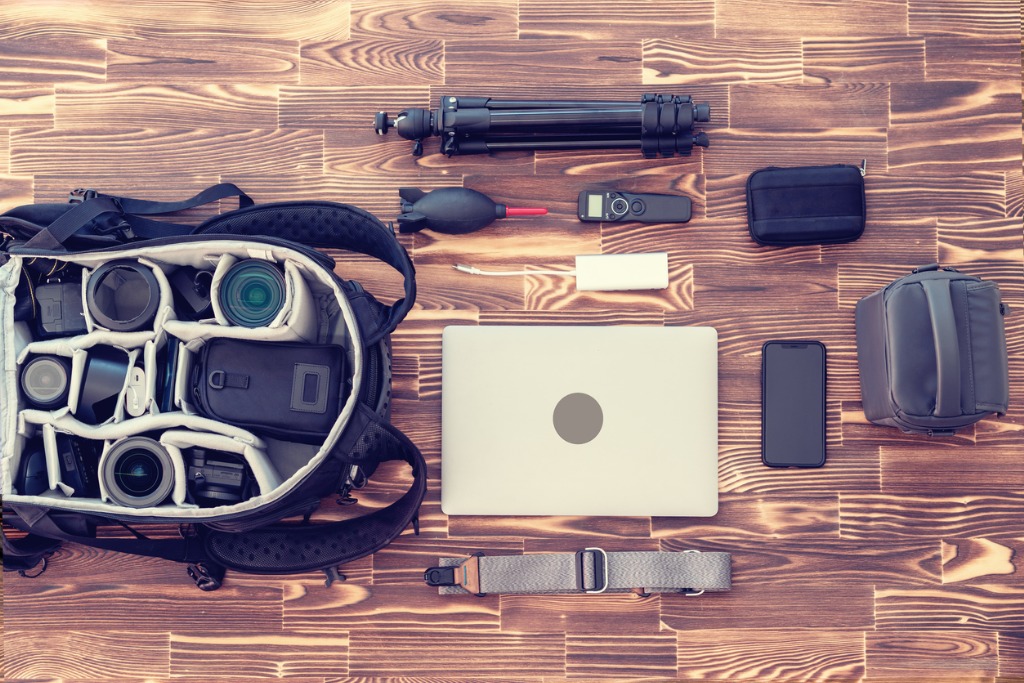
photo bySonerCdem via iStock
This may be something that most professional photographers understand about traveling with photography gear, but I see people traveling for vacation doing it all of the time. You cannot leave your lenses on your camera in your carry on bag.
Or rather, you could, but the chances of your lens or camera being damaged while you’re traveling will go way, way up.
Ideally, you would not only pack your cameras and lenses separately, but you would pack them separately in different compartments of your carry on bag. This way there is no chance that they bang up against each other during transit.
Don’t Overpack
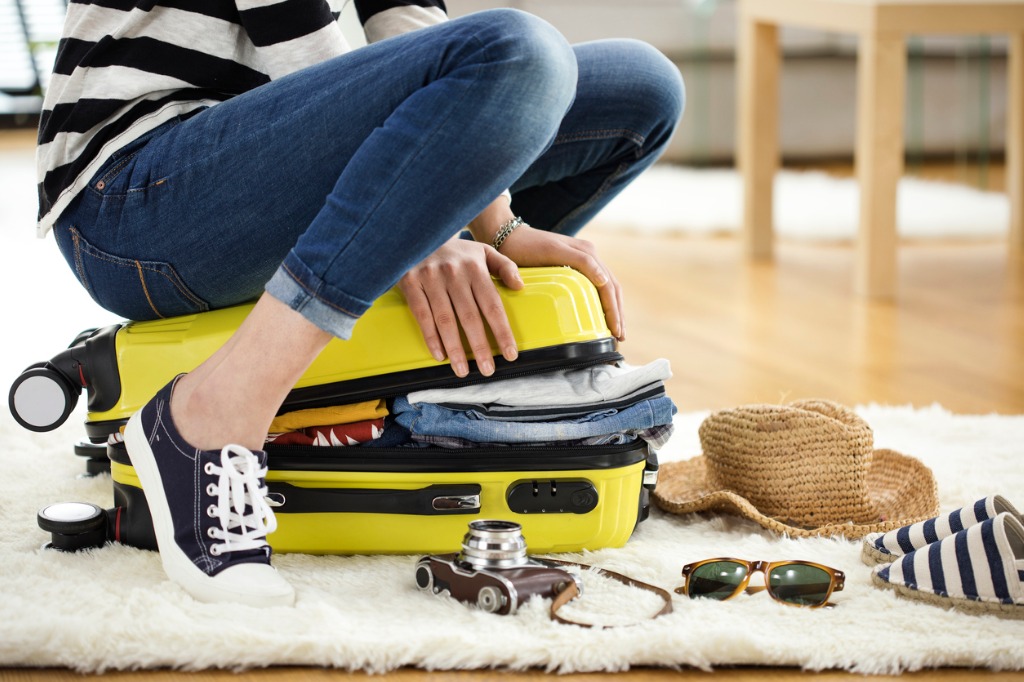
photo byseb_ra via iStock
The first trick you need to use when learning how to travel with camera gear on a plane is to not overpack.
When you overpack your carry on bag, you’re going to be miserable lugging it through the airport. Not to mention the fact that, although most airlines don’t check the weight of your carry on, they do have weight maximums for them. While the chances are slim, if you overpack your carry on, the airline may force you to either not fly that day or check your carry on, which means your expensive equipment is at risk of being lost.
Have a Good Camera Bag
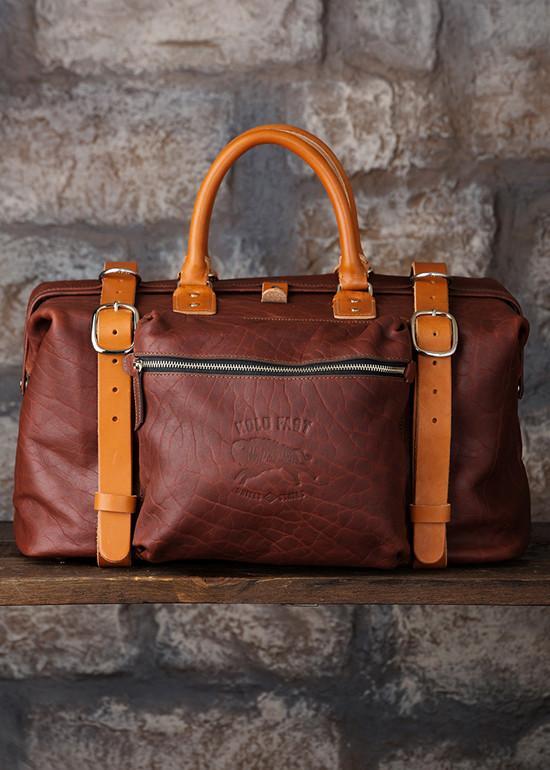
Image by Brandon Burk
I cannot overstate how much easier my life became after I bought myself a good camera bag. There are a few things in life I am willing to spend good money on. Shoes are one of them and camera bags are another.
I purchased the Roamographer camera bag a few years ago specifically for traveling with photography gear. It is a camera bag made of American bison leather, a shearling-lined strap, and the most intuitive camera insert I’ve ever found.
Image by Brandon Burk
The bag comes in two sizes. A large for your DSLR gear or a small for your mirrorless gear. Since I mainly use mine for traveling, I bought the larger size so that I could fit in extra personal items if I was only traveling with my mirrorless setup.
The materials that the bag is made out of means that it only gets better with age and the company behind the Roamographer, Holdfast, promises that each of their products will hold up for life or they will replace it for free. So, while the price of this bag may be a bit expensive upfront, the large is $725 and the small is $610, you have to remember that you’re buying it for life.
Learn More:
We Recommend
Tips to Prepare for a Costa Rican Photography Trip
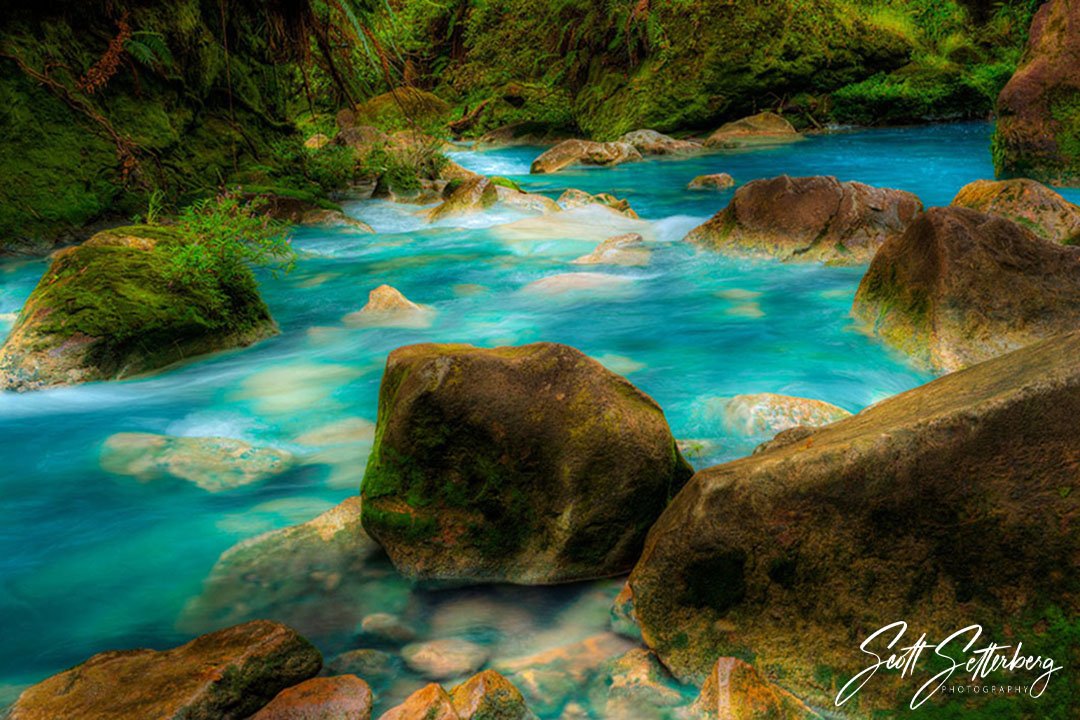
Costa Rican photography trips are super popular for good reasons. Costa Rica is full of outstanding scenery, amazing wildlife, is close to the USA, is budget friendly, and is very friendly to photography tours.
We love Costa Rica, so we came up with some Costa Rica photography tips and suggestions for your own Costa Rican photography trip.
Do Some Research
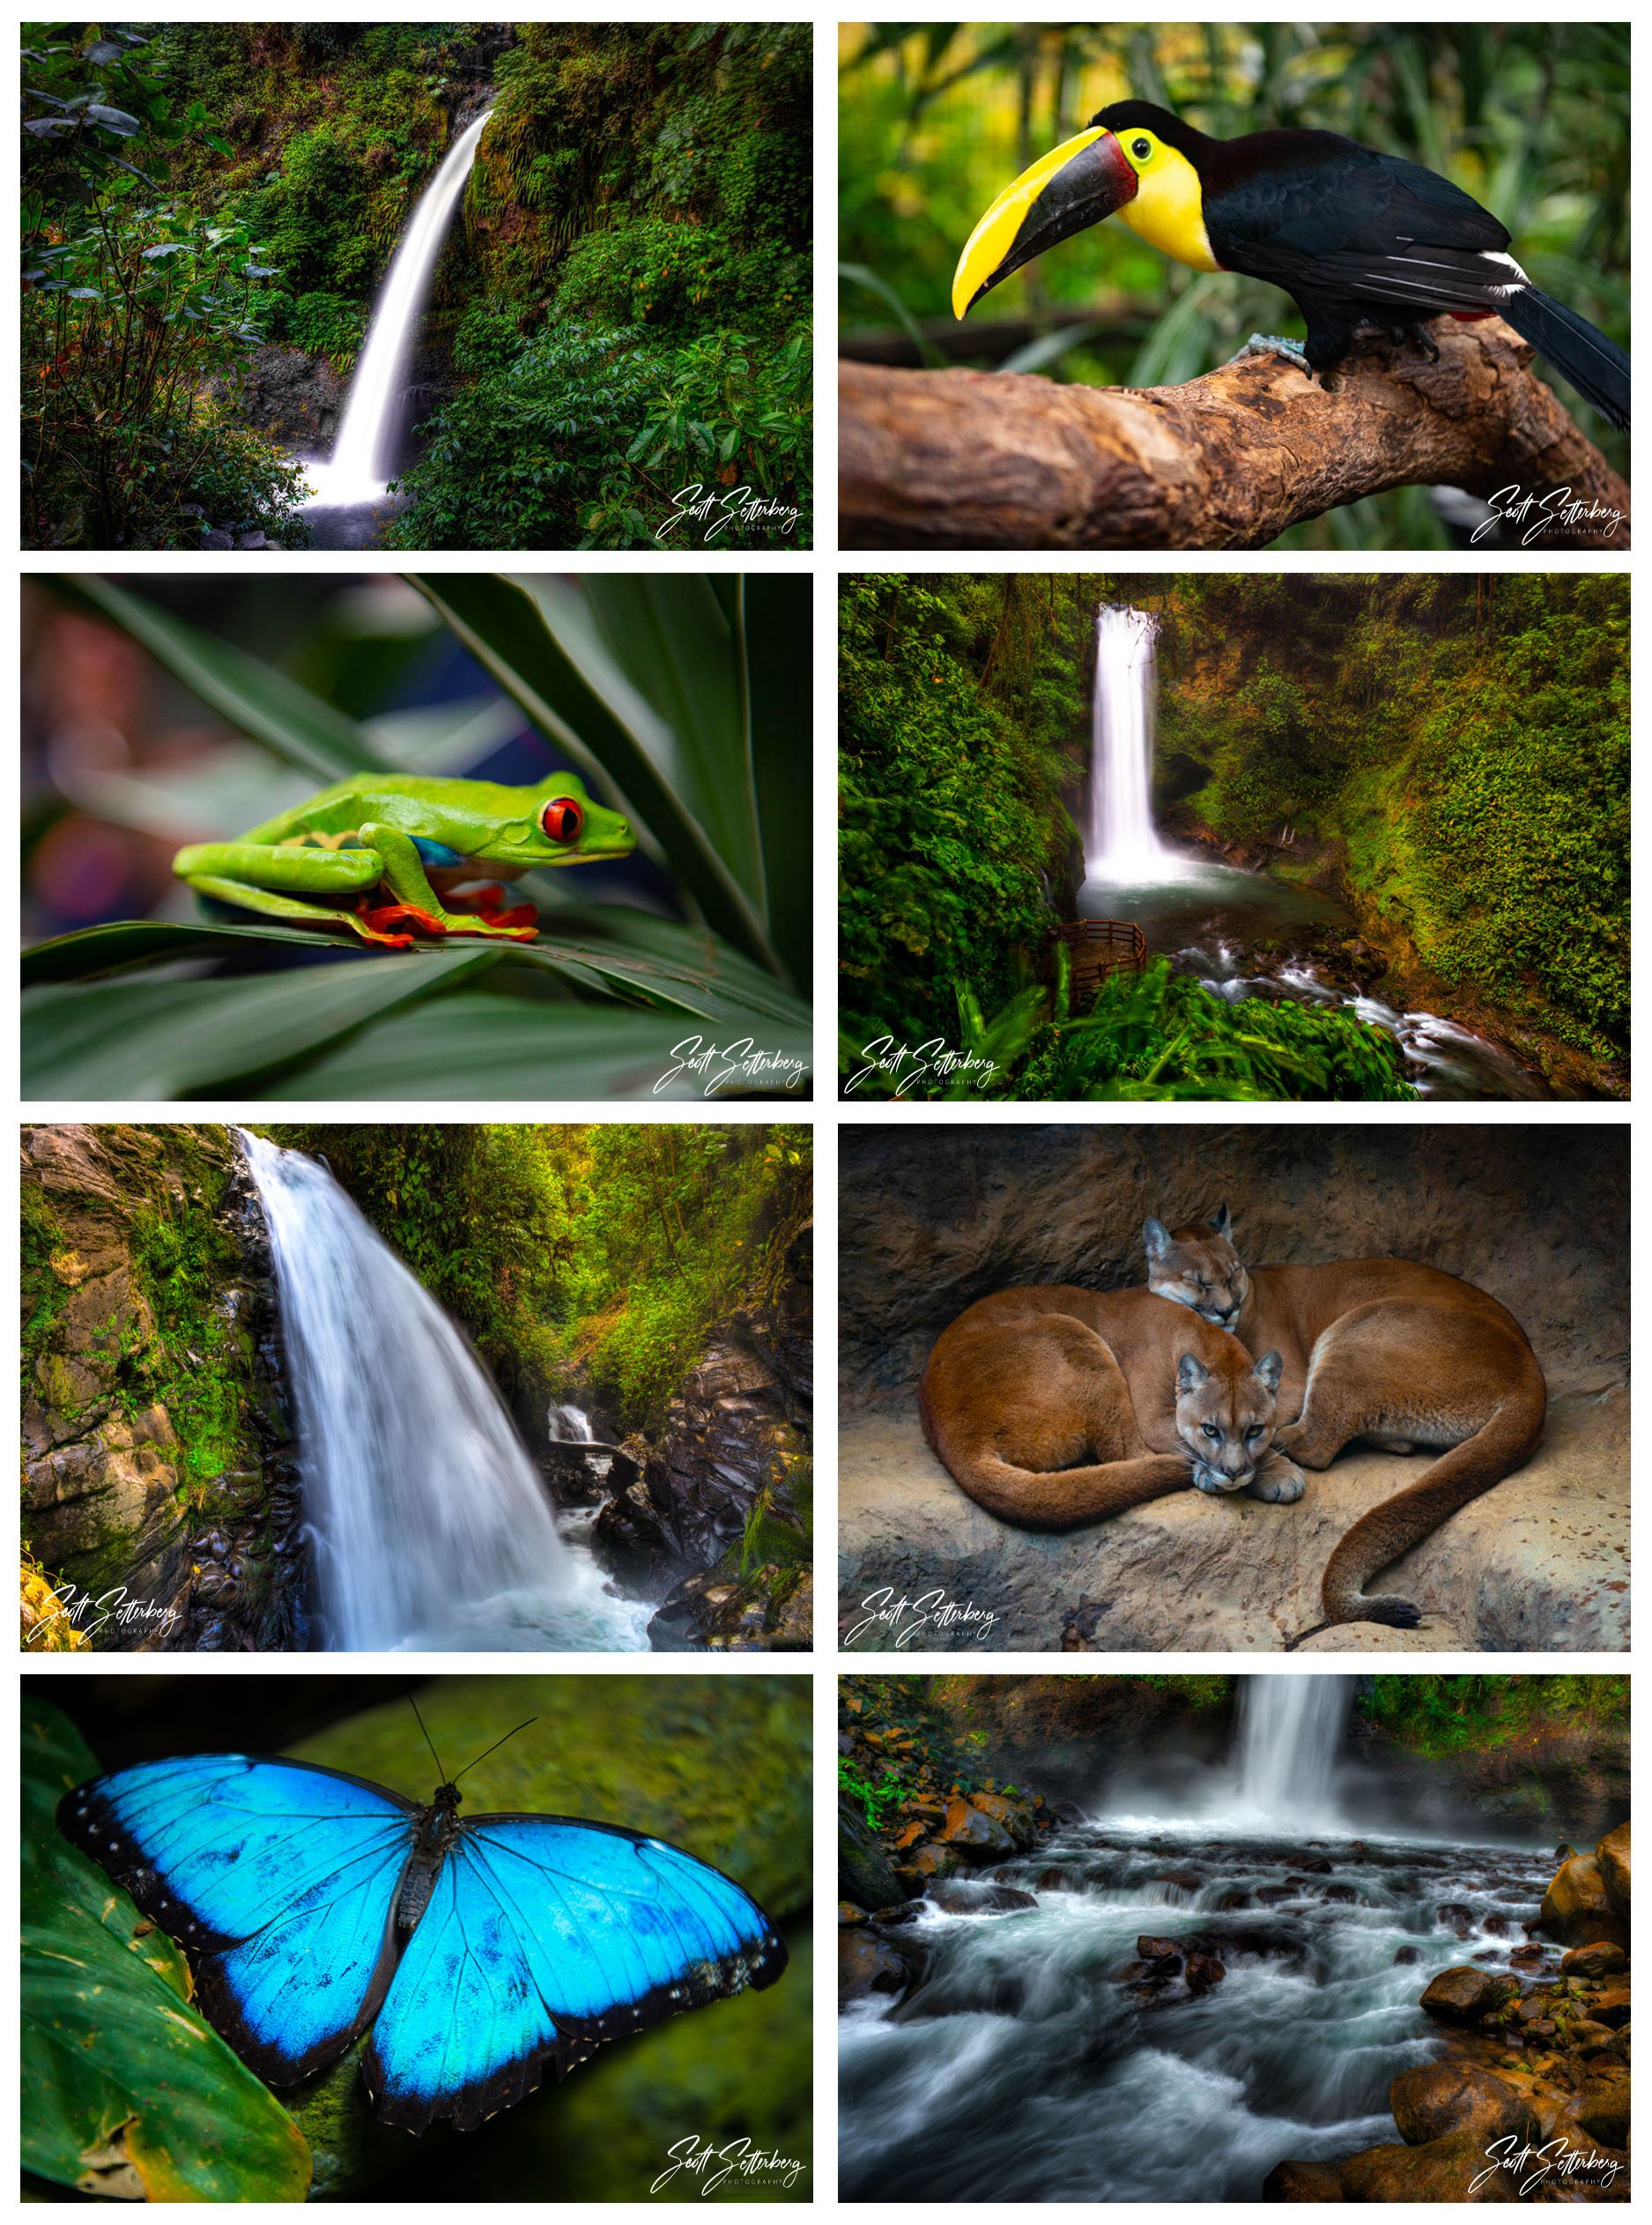
Before travelling anywhere for a photography trek, you need to learn what you can about the place. This applies to nearby locations as much as it does Costa Rican photography trips.
Google and other online sources are a good place to start. Not only will you learn things about where you’re going, you’ll also see pictures others have taken of local areas. Reading the accompanying commentary can also be enlightening to us in regards to local customs, ideas, and possible dangers.
Amazon and other booksellers will have Kindle and paper books full of Costa Rica wildlife photography tips and images that might provide some ideas and inspiration for your own photography as well.
Narrow Down Your Gear
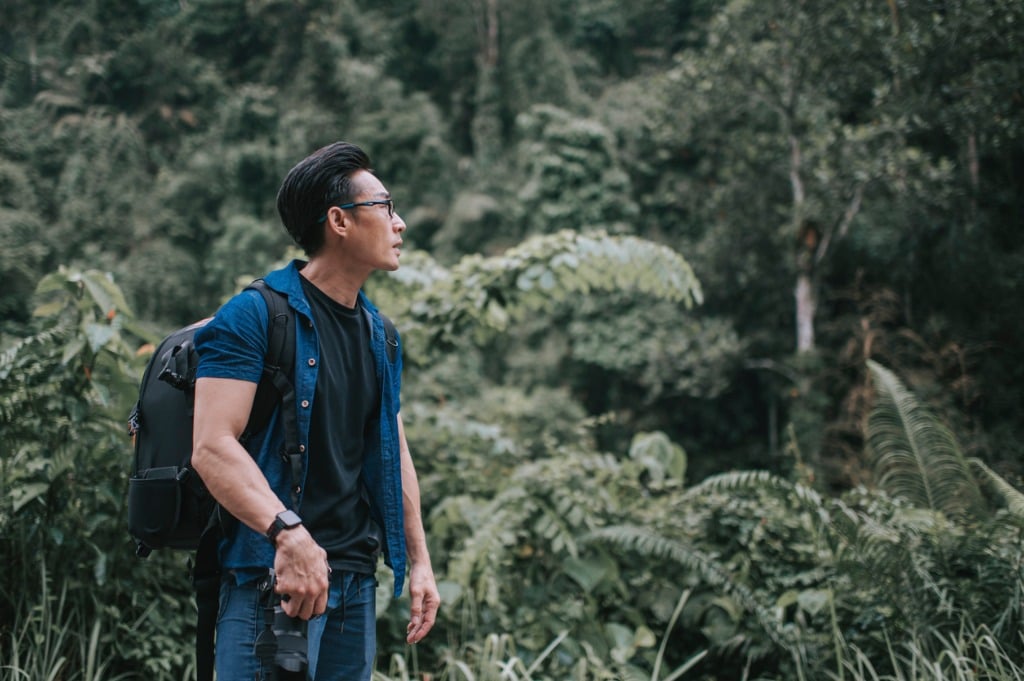
photo bychee gin tan via iStock
Costa Rican photography trips will involve a lot of hiking, sometimes over terrain that is challenging. Carrying all of your cameras and lenses probably won’t be a good idea.
The research you did will give you some idea of what gear you won that might be the most useful for your own Costa Rica photography. You’ll want to use the best quality cameras and lenses you have and if that gear is pro or prosumer level gear with weather sealing, that will be a plus.
Since much of the trip will be in the wilderness, you might be further away than you were expecting (unless you’re on a guided tour), so longer lenses are a good choice. You may also be under some extremely varied lighting conditions, so fast lenses might also be in order.
Even if I’m planning on using long, fast telephoto lenses most of the time, though, I rarely go on a trek without a good wide angle option and my trusted Nifty Fifty. Your previous research will help you decide.
Protection
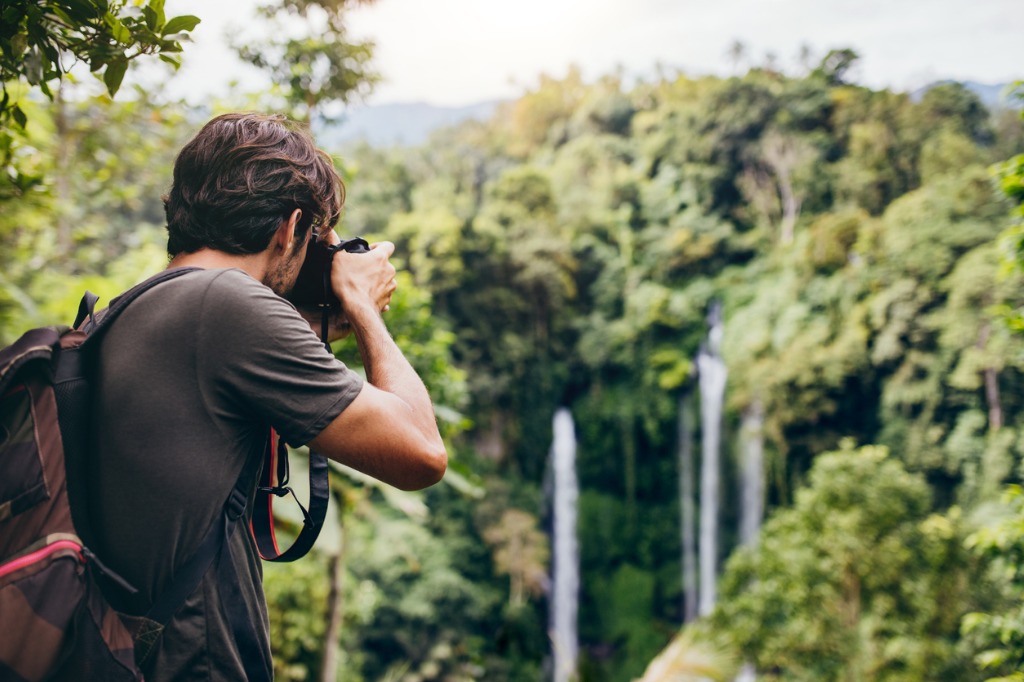
photo byjacoblund via iStock
Your gear will need special protection when on a Costa Rican photography trip, and you should also consider your personal protection as well.
First and foremost for the protection of your photography gear is choosing a really good bag. I like to use a backpack or sling pack style for comfort while hiking. An essential couple of features are weatherproofing and padding.
Rain shields or bags are a good idea since you may be alternating between intense sunlight and instant heavy downpours within mere minutes. Humidity alleviation for your bag and storage area is a great idea, too.
Your personal comfort and safety are vitally important. First on my mental list is always footgear. You want them to be strong, comfortably fitting, and providing excellent stability. Don’t skimp on the footwear!
The Sun, the humidity, the bugs, the plants, all of these are issues to watch out for and prepare for with sunscreen, repellents, emergency medication, and protective wearable gear.
Learn More:
- It’s Time to Start Planning a Costa Rica Photography Trip
- 10 Things to Photograph in Costa Rica
- Photographing Waterfalls: Tips for Success
Try It All Out Before You Leave
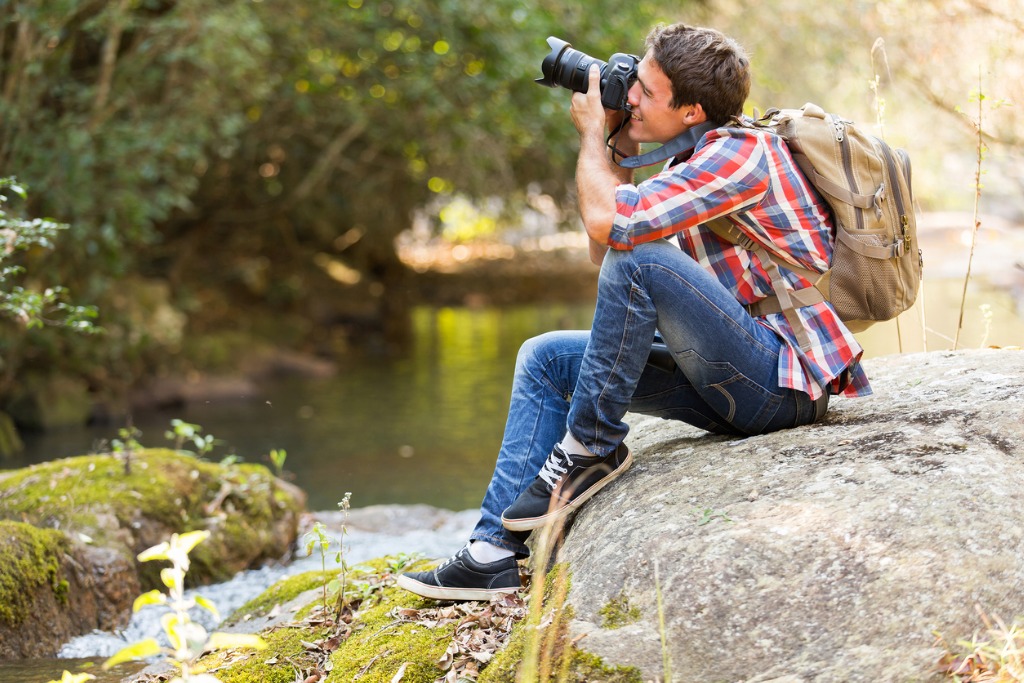
photo bymichaeljung via iStock
There’s a lot to consider when planning a Costa Rican photography trip, you really don’t want any unwanted surprises in the middle of it. What I like to do with any new or unfamiliar gear or clothing is to try it out in the comfort of my home or studio.
You really don’t want to be figuring out camera controls while a fleeting wildlife subject flies, runs, or slithers by. Plus, you don’t want to learn that your new footgear hurts like the dickens after the first hour when that hour puts you an hour hike away from the vehicle or camp.
Try a Guided Tour
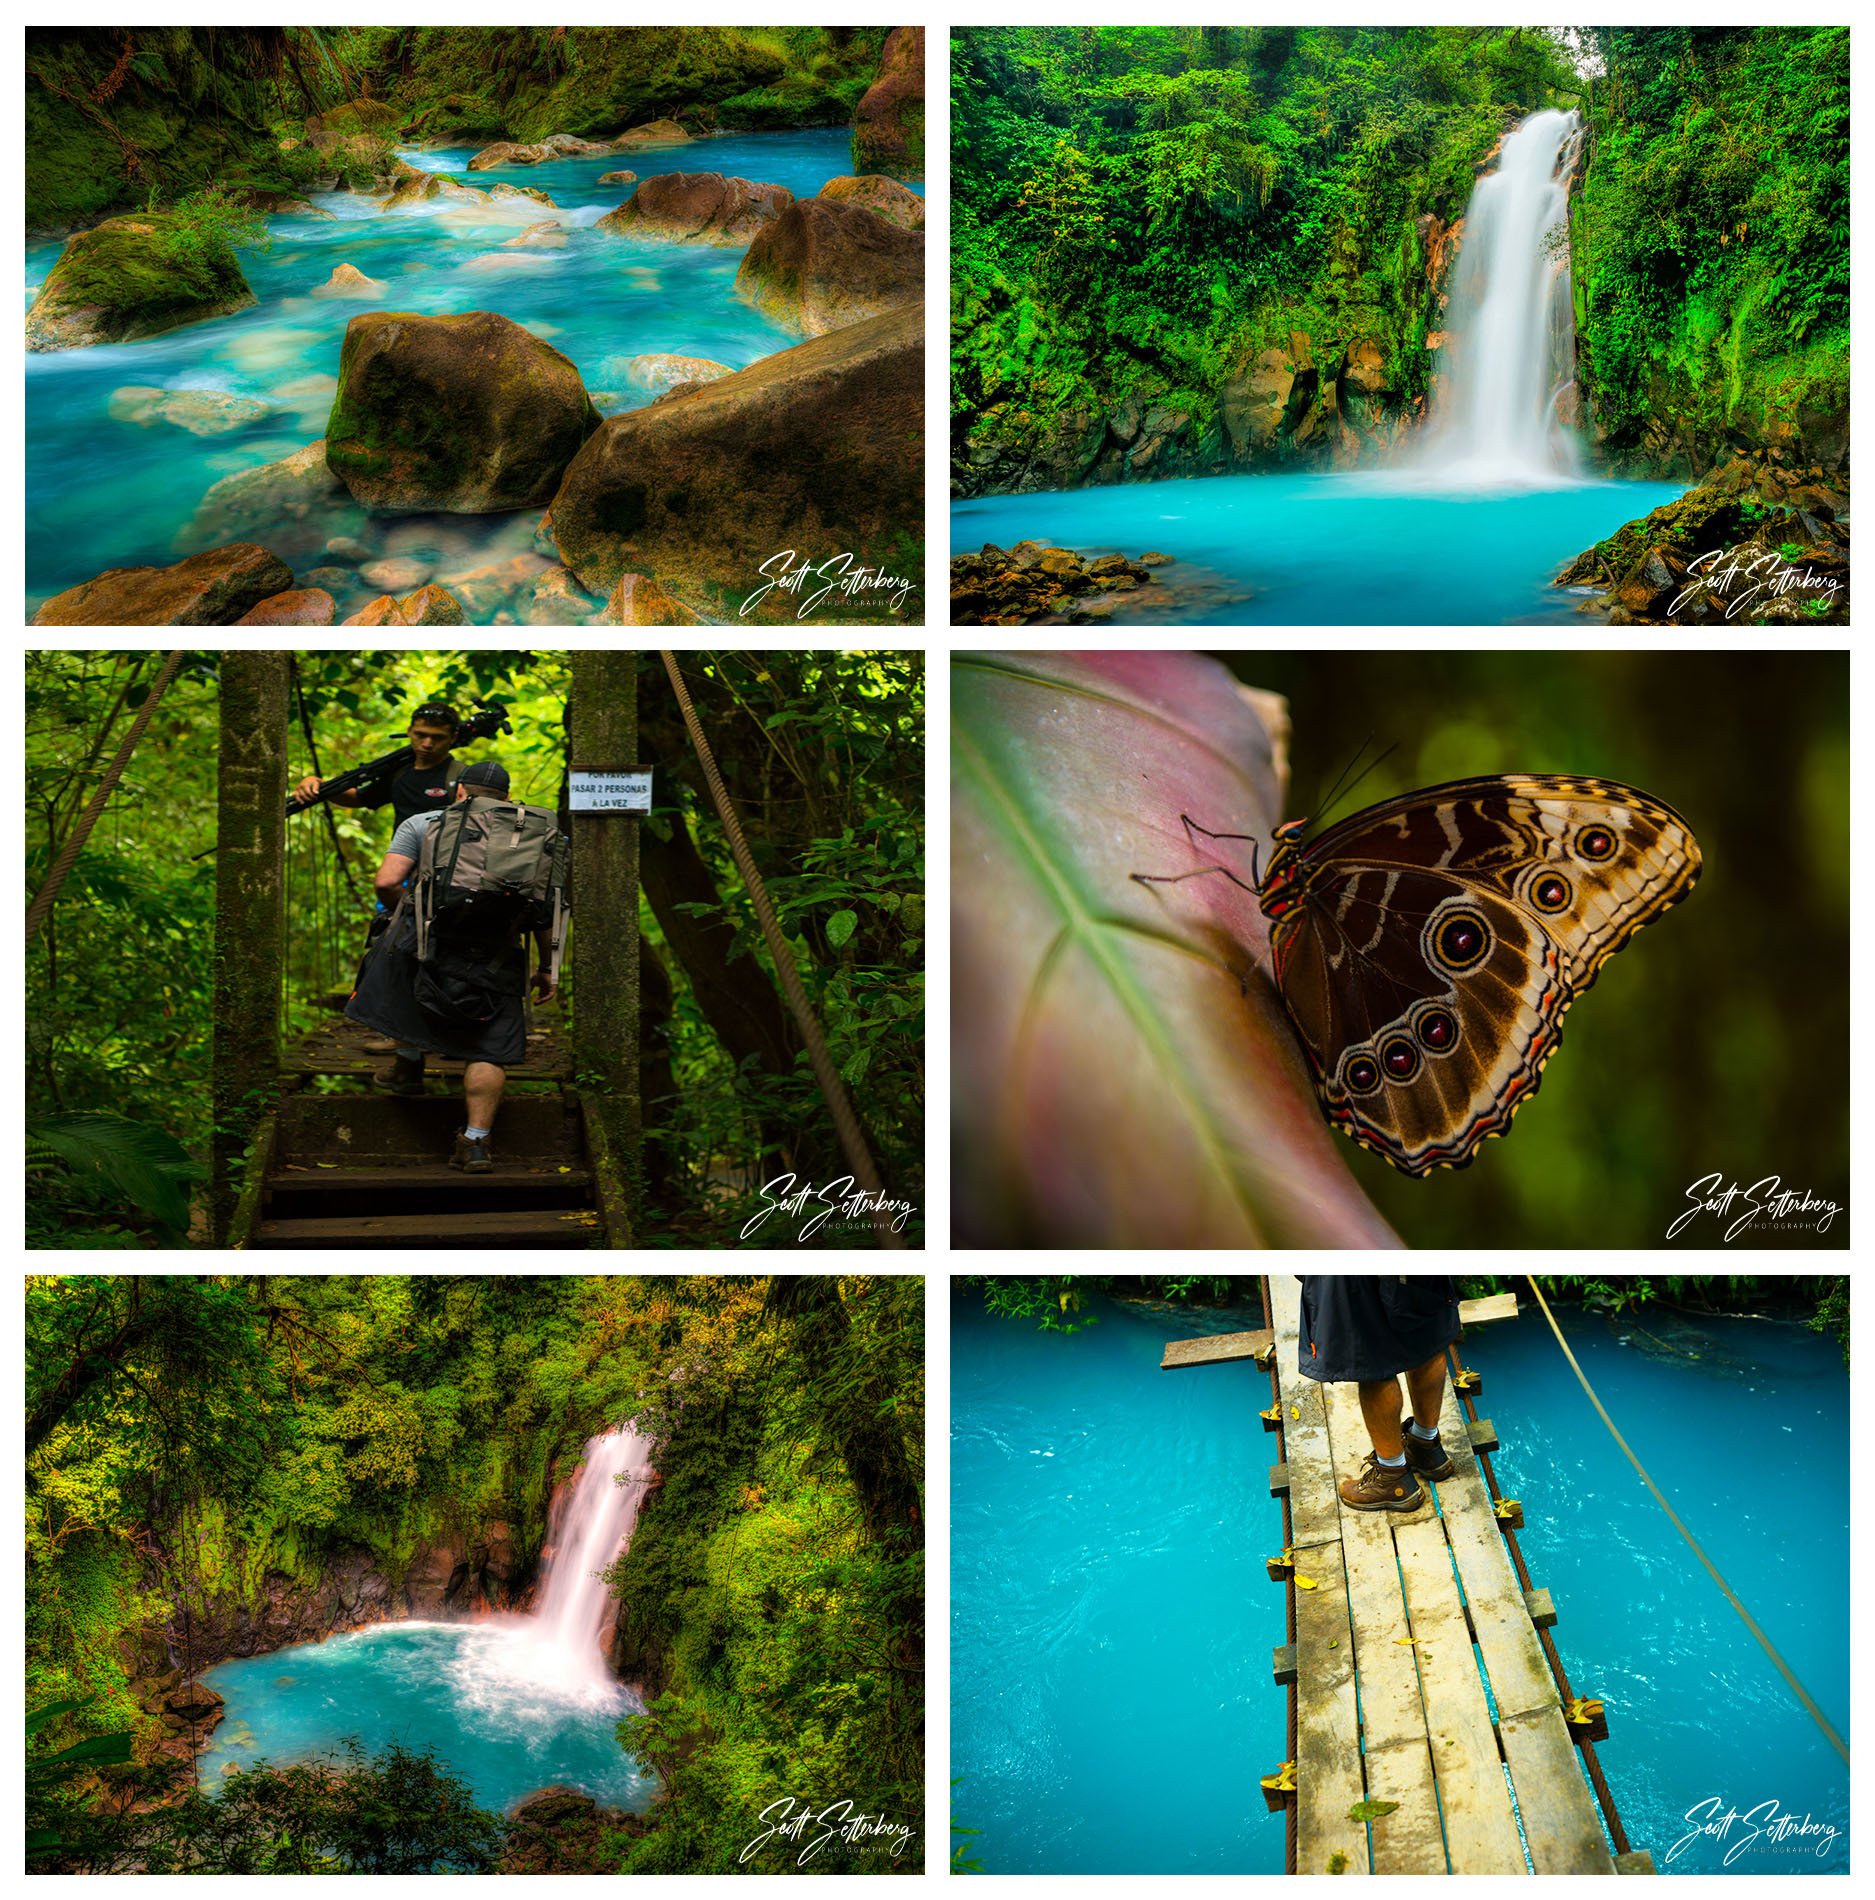
To help alleviate any of the issues we’ve discussed, you might want to look at taking a guided photography tour, especially for your first Costa Rican photography trip.
One of my favorite tour companies is ColorTexturePhotoTours, they have a Costa Rican photography trip guided tour planned for April of 2021 that you should consider.
ColorTexturePhotoTours organizes various photography treks several times a year to multiple locations. Their Costa Rican photography trip will cover just about everything we discussed above.
They provide guidance for your preparation to travel and arrange the transportation down to Costa Rica plus guide you through a wondrous wilderness to show you wildlife and scenic views you probably couldn’t find on your own.
Guided photography tours are incredible values when you add together all they provide, including consulting guidance, transportation and accommodations, and the wonderful guides leading you to where you want to be for amazing images.
Enjoy Your Costa Rican Photography Trip!
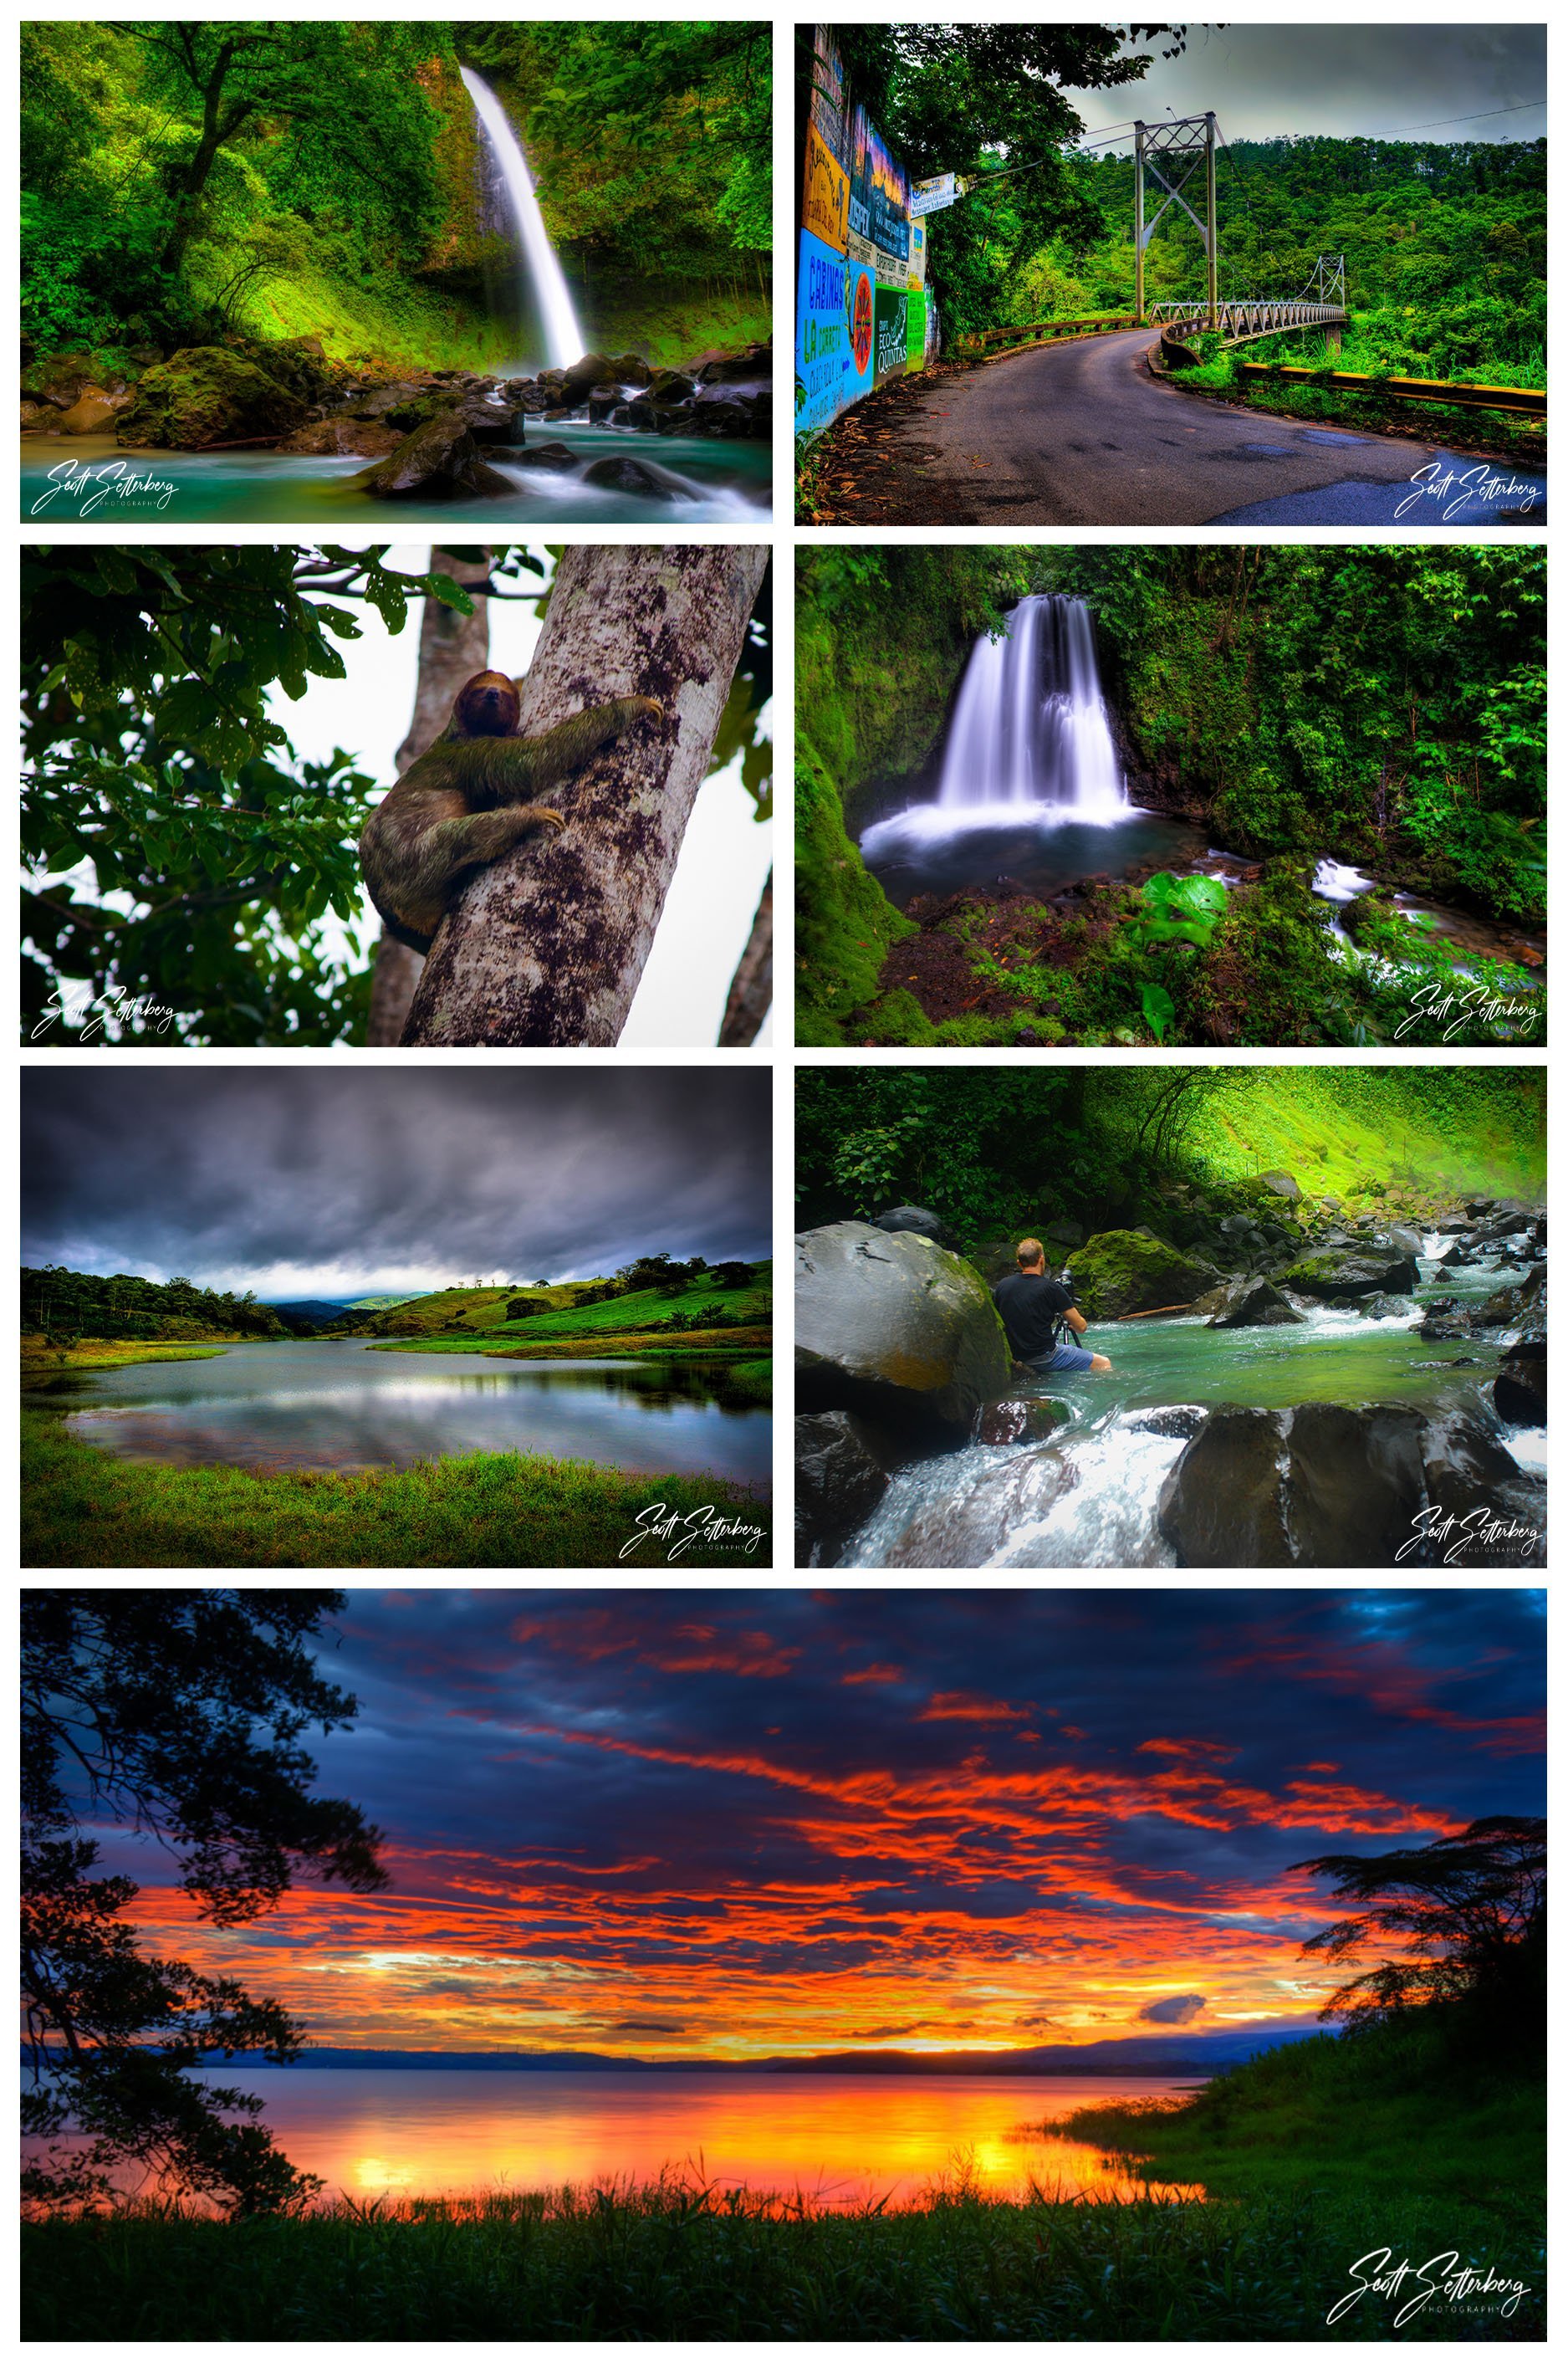
Whichever way you go about planning your Costa Rican photography trip, the one most important thing is to have fun with it. You WILL get amazing images, you will have an amazing experience, you may even make some new friends.
When you get back, visit our PhotographyTalk forums and show us your pictures. Enjoy the experience and enjoy your images for a long time.
Learn More:
- 3 Must-See Locations in Costa Rica
- Photographing Colorful Costa Rican Frogs
- Top Waterfalls To Photograph Around the World
We Recommend
Top Photography Travel Bags
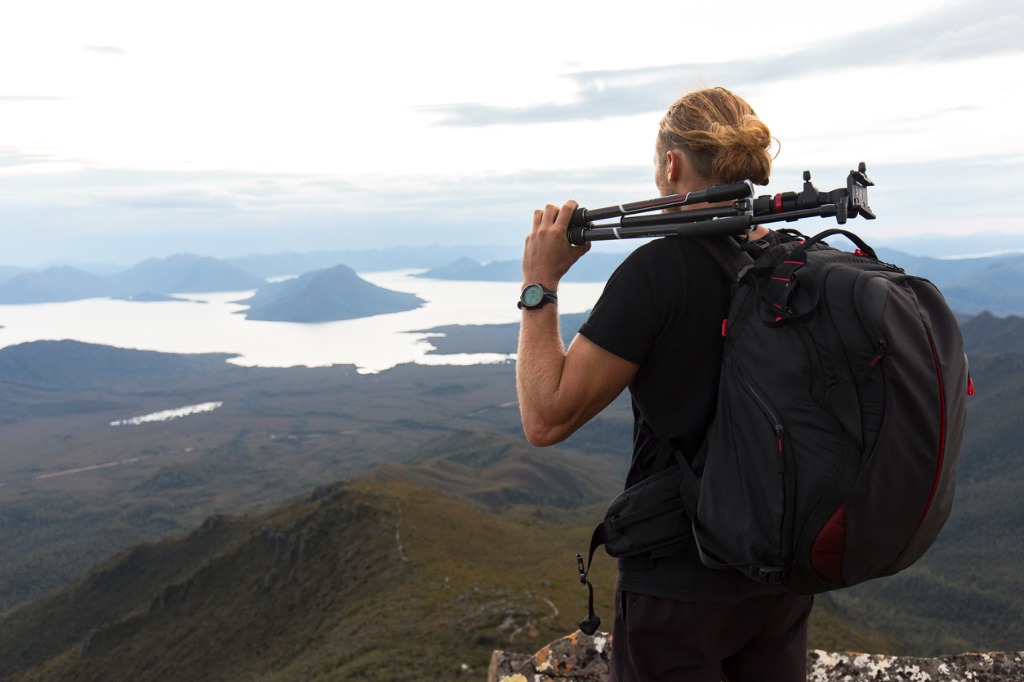
photo bylindsay_imagery via iStock
Photography travel bags come in all shapes and sizes and it can be almost impossible to decide which one is the best for you! No worries, that’s why this article is here!
The first thing you need to decide is how much space you need. Once you’ve figured that out, it’s time to start researching bags!
Are you a hobbyist who travels with a camera and a spare lens? A small backpack, holster case, or messenger bag might work great for you.
Or, are you a professional traveling with multiple cameras and a ton of super expensive photography equipment? If that’s the case you will probably want to opt for a larger and more protective bag like a roller case, sturdy duffel bag, or hard case.
Are you somewhere in between, don’t stress there are amazing bags for you too! Let’s take a deeper look at some of the top photography travel bags and see if any of them fit what you are looking for.
Top Photography Travel Bags: Backpack
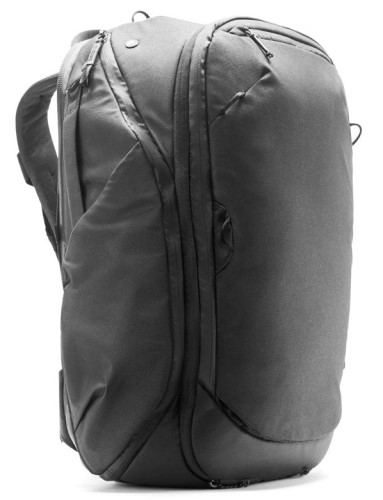
The Peak Design 45L Travel Backpack is the newest bag from one of the most innovative photography companies in the world. It was designed with the knowledge that “no two trips are the same,” and it’s one of the most versatile photography travel bags ever created!
It expands and collapses to meet your exact needs as a traveler, converting from a sleek 35L bag that meets all carry-on requirements, to a more robust 45L bag that safely stores tons of gear! The shoulder straps and hip belt can even be tucked away in order for the backpack to be as compact as possible when needed.
Internally, the main compartment is fully customizable thanks to a zippered mesh sleeve that can be arranged however you prefer, and you can access the bag through zippers at the top, front, rear, and sides of the pack.
If all that wasn’t enough, the pack's shell is made out of weatherproof 100% recycled 400D nylon. Who wouldn’t want this fabulous eco-friendly backpack?! There’s no doubt in my mind this is the best photography travel backpack on the market today!
Top Photography Travel Bags: Roller Bag
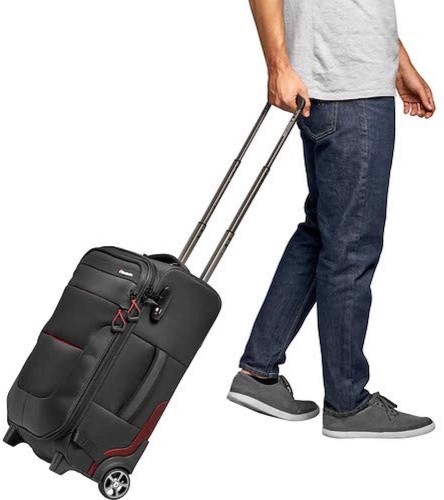
The Manfrotto Pro Light Reloader Switch-55 is the top travel photography bag for those of you who want a bag with wheels! This bag was designed for professionals, by the professionals at Manfrotto.
It’s one of the most spacious photography travel bags I’ve come across, and comes with 14 adjustable spacers so you can perfectly customize it according to your kit. It easily stores two camera bodies and four or five lenses, with plenty of space leftover for extra gear.
One of the coolest features of this photography roller bag is the fact that it has the ability to transform into a backpack when needed! From the airport to the beach, this photography travel bag can go anywhere!
Learn More:
Top Photography Travel Bags: Messenger Bag
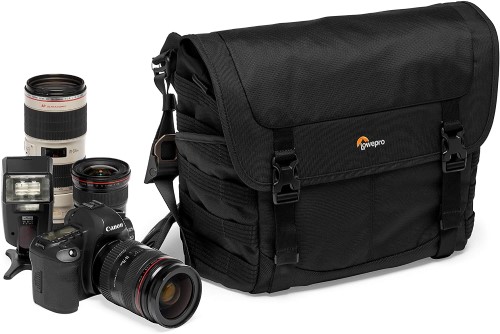
The Lowepro ProTactic MG 160 AW II is a fantastic photography travel bag for those who want quick and easy access to their camera gear. This messenger bag can be worn one of three ways, and fits all the photography essentials you need when out shooting.
If you like exploring cities by foot or by bike, this is the photography travel bag for you! It can be secured with a stabilizing strap when biking in order to keep everything nice and snug, but at the same time it’s still super easy to get in and out of whenever you want to stop and snap a quick photo or video.
It’s small enough to be carried on an airplane as additional handheld luggage, or it can be packed into a larger checked bag when flying. There's lots of padding inside the bag so if you do decide to pack it into another bag, all of your gear will be fully protected even if it’s a bumpy flight.
Top Photography Travel Bags: Duffel Bag
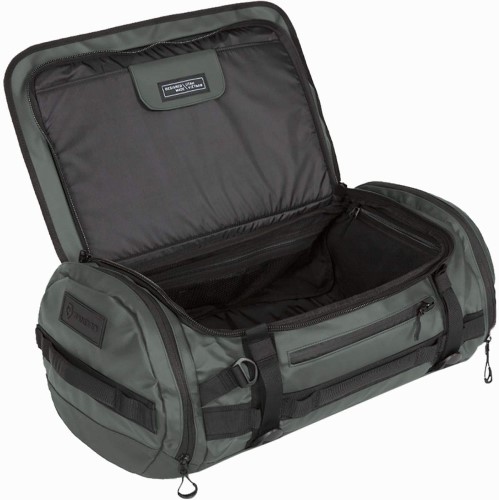
The WANDRD Hexad Carryall Travel Duffel Bag is one of the best photography travel bags in circulation if you love the ease of traveling with a duffel bag. While technically it’s not a bag made specifically for photography, it turns into one with the help of WANDRD’s camera cubes (or any other camera cubes for that matter!).
With the camera cubes, you can choose to dedicate as much or as little space as you need for your photography gear, while using the rest of this huge bag to pack all your other travel essentials. The padded laptop sleeve at the top of the bag is also a terrific feature.
I absolutely love this photography travel bag because we all know that 100% of the time we aren’t traveling for photography, and there are times when we inevitably need to leave the camera behind. In that situation, you can remove the camera cubes and have a giant space to throw in whatever you may be bringing on a given trip!
Top Photography Travel Bags: Holster Bag
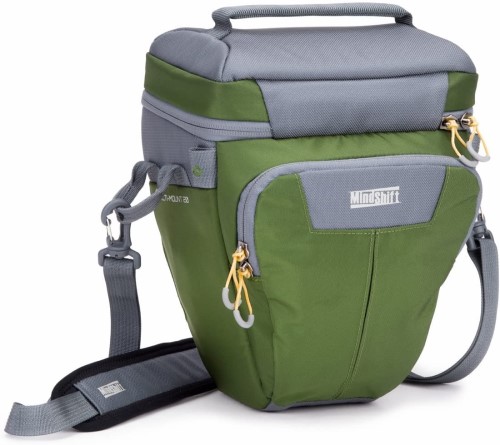
The MindShift Gear OutBound Holster 20 is unquestionably my favorite holster photography travel bag! Unlike many small camera bags, this bag is incredibly diverse and can be mounted in five different locations: front, shoulder, chest, key, and belt. It can even easily be attached to a backpack using the included straps!
The OutBound Holster 20 is built to house a camera with a standard lens attached, as well as one additional zoom lens, or two prime lenses. If you like traveling light, this is an excellent choice!
Furthermore, it has an expandable front pocket, it stands on its own, and it has a built-in raincover.
Top Photography Travel Bags: Hard Case
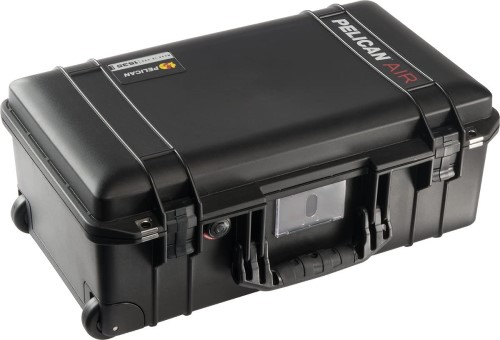
If total protection is what you desire most, the Pelican Air 1485 is the best photography travel case! If you are traveling with super expensive cameras and lenses, such as cinema equipment, I would always recommend using one of these when traveling.
It comes with foam inside which you can cut to perfectly fit your gear and make sure it never budges. On top of that, it’s constructed out of heavy-duty plastic that can handle the roughest and most extreme situations.
Just in case you needed more convincing, it’s also dust and shock resistant and has an automatic “bleed valve” which ensures the air pressure inside the case is never out of balance.
More Top Photography Travel Bags

photo bybrytta via iStock
If you still aren’t sold on any of those top photography travel bags, check out these additional amazing bags:
- Shimoda Designs – EXPLORE 40
- Lowepro Tactic 450 AW II Camera Backpack
- Peak Design Everyday Sling Bag
Learn More:
We Recommend
Travel Photography Do’s and Don’ts
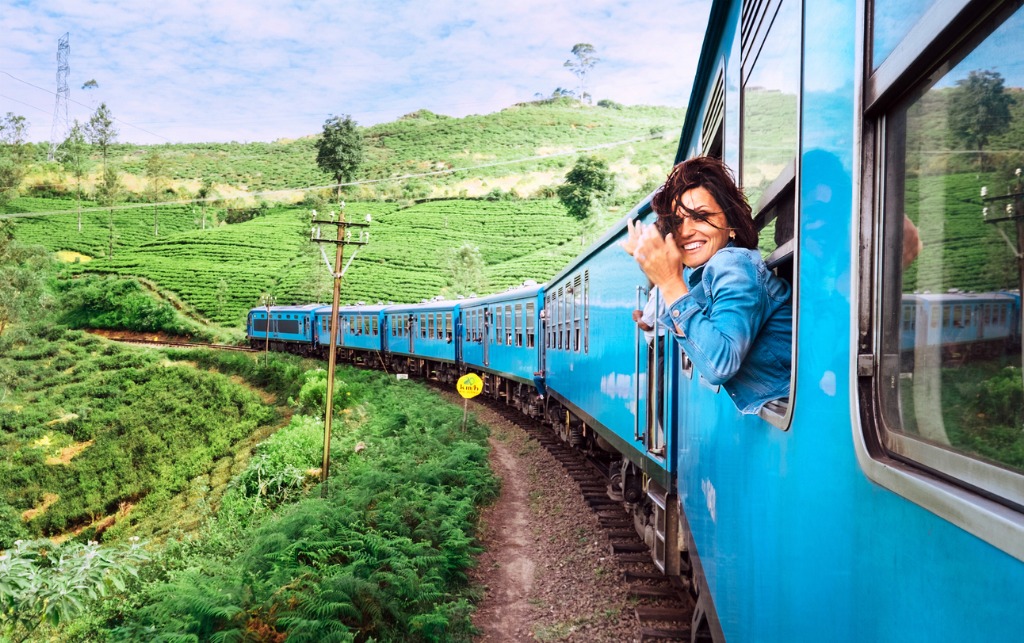
photo bySolovyova via iStock
I’m asked for my list of travel photography do’s and don’ts a lot. In fact, it’s one of the questions I’m asked most frequently. People are genuinely curious how I can afford to live the lifestyle that I do, but moreover they want to know how to get the most of their own travel photography trips.
Most of my travel photography tips are easy and not terribly sexy, like being overly cautious when walking with your equipment or being overly polite so as not to give your home country - or photographers - a bad name.
But everyone once in a while I see somebody do something so cringey, I have to write it down. This is that list.
Ask Permission in Their Language

photo bynito100 via iStock
With technology nowadays, it takes 30 seconds to Google how to say, “May I take your photo,” in hundreds of languages. Use this power.
This protects you as much as it protects the privacy of someone who may not feel comfortable being in a ton of strangers’ photos.
For example, in many areas with high rates of tourism, people will dress up in the traditional garb of that country and expect payment if you take photos of them. So, if you take their photo without asking, they’ll chase you down for money.
Plus, it’s simply polite. More often than not, you’ll find plenty of people willing to pose for you. And if someone says no, move on!
Recommended Travel Photography Reading:
- The Enthusiast's Guide to Travel Photography: 55 Photographic Principles You Need to Know
- Destinations of a Lifetime: 225 of the World's Most Amazing Places
- Lonely Planet's Guide to Travel Photography
Don’t Get Stuck Behind Your Camera
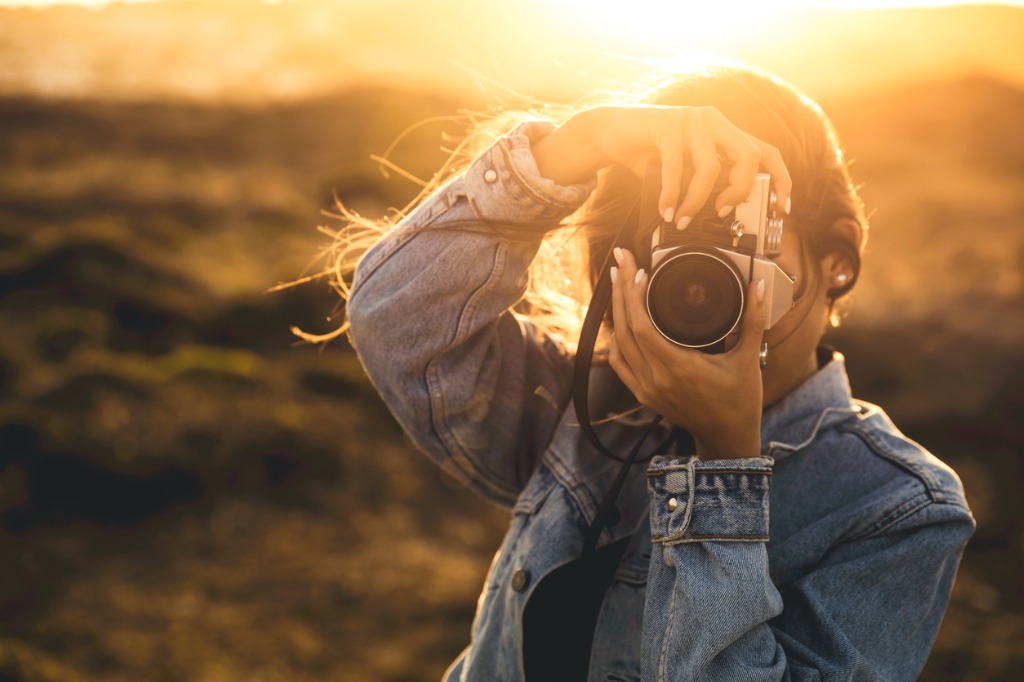
photo by erikreis via iStock
Travel photography is only half about the photography. It’s also about the travel. You’ll never find incredible scenes to shoot, or incredible food to capture, if you’re stuck behind your lens all day every day.
A good rule of thumb is to set a timer when you are shooting, either for a half hour or hour at a time, and to then go enjoy the rest of whatever that place has to offer you.
A good photographer knows when to pick their camera up, but a great photographer knows when to set their camera down.
There’s no better way to practice this than with travel photography, because you will be so tempted to capture all of the exciting, new things you’re experiencing.
Learn More:
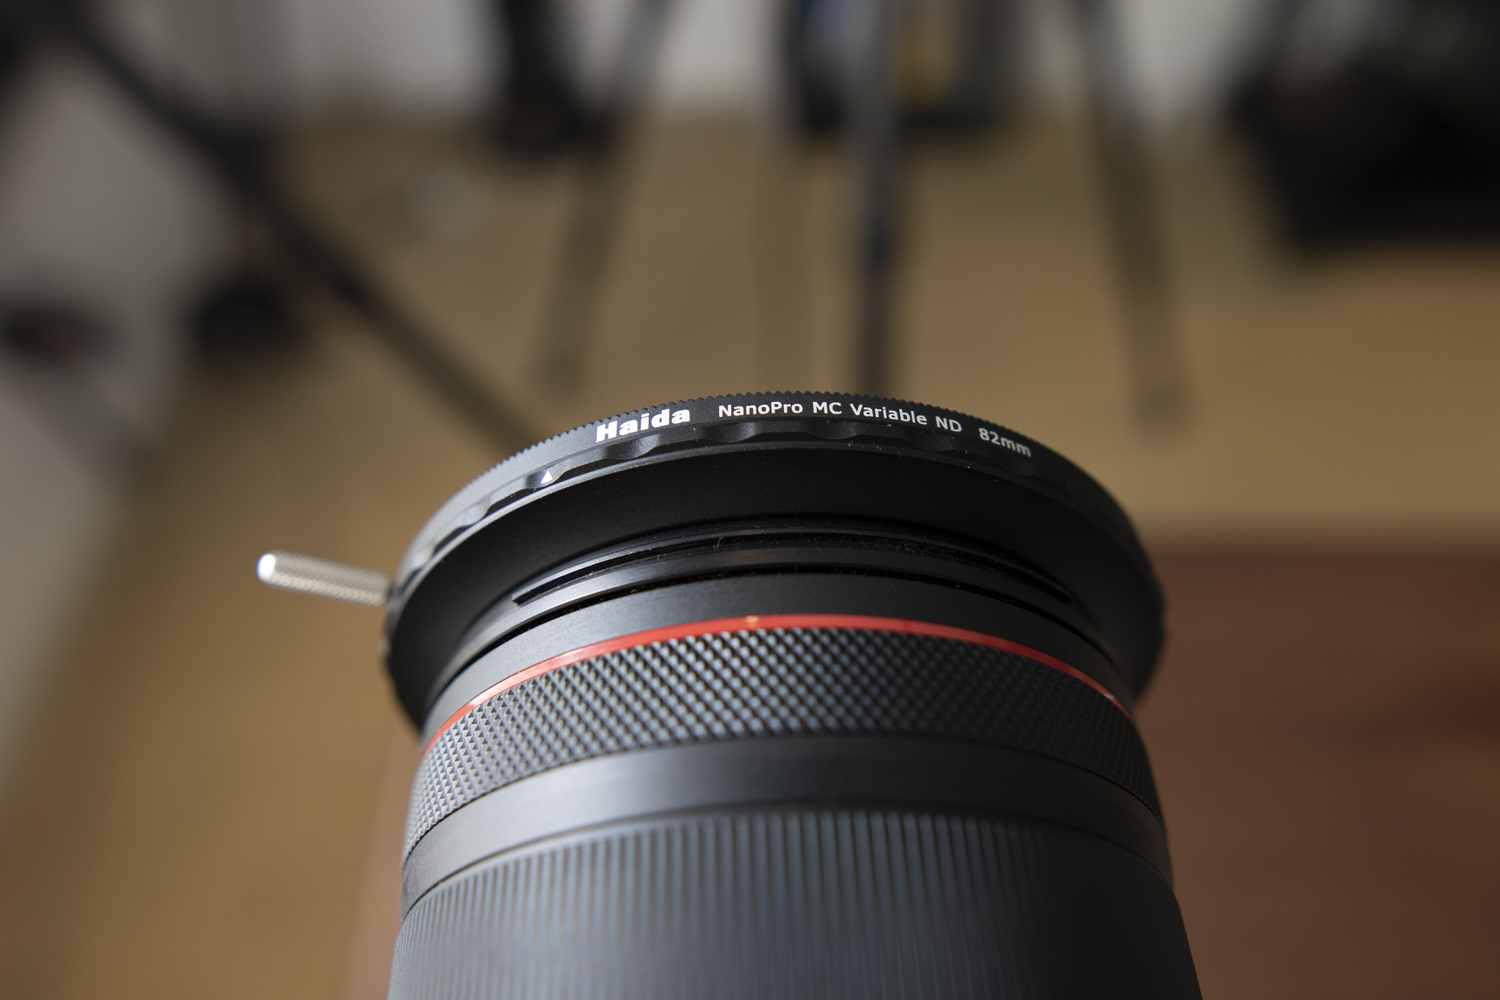
Editor's Tip: Rather than carting around a whole set of ND filters as you travel, bring along one variable ND filter! Variable ND filters like my Haida NanoPro MC(shown above) offer tons of versatility in a small package. You get light-stopping power from 4-stops to 9-stops in a single filter, which saves space in your bag while also saving you time in the field. Rather than having to constantly swap out ND filters, all you do is turn the housing to adjust the darkness of the filter. I especially appreciate the knurling on the filter housing because it makes it SO easy to adjust. It's simply a far better setup for slowing the shutter or opening the aperture if you ask me!
Be Patient
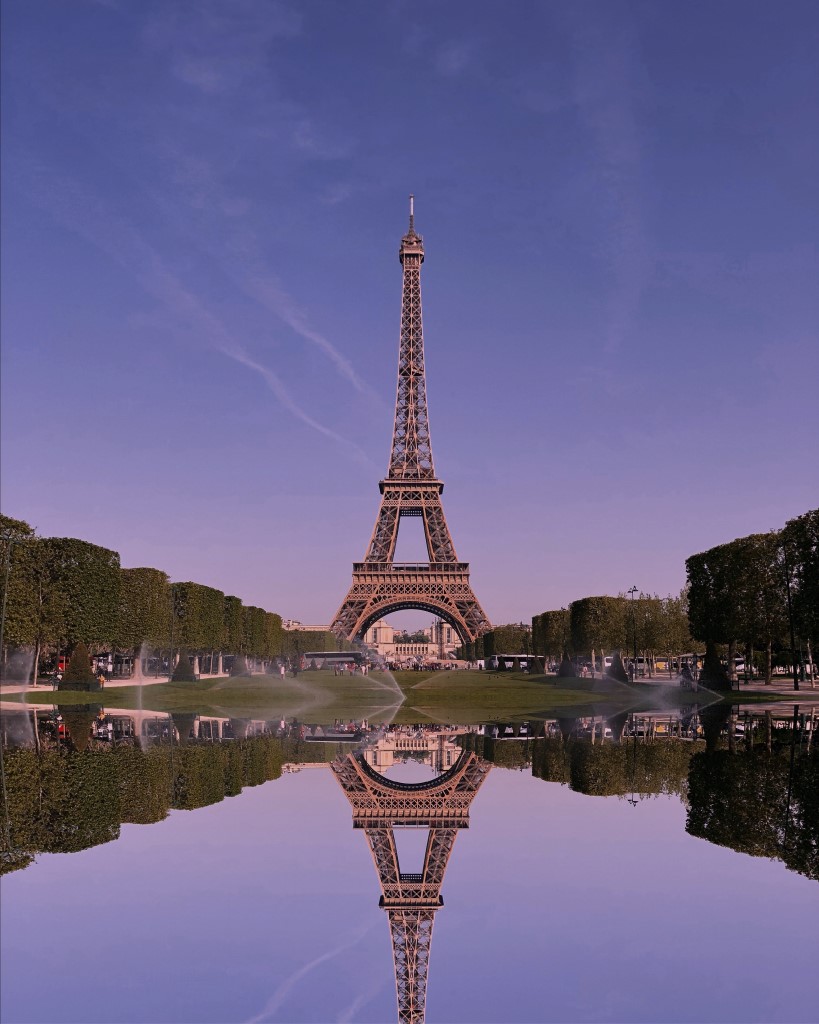
Photo by Alex Ovs on Unsplash
Do you want to know how this person snapped this photo of the Eiffel Tower? They were out during a period of time nobody else was (most likely during August, when many Parisians escape the city for their summer breaks).
They also exhibited incredible patience. If you’re planning to take a travel photography trip to a part of the world where everyone takes their travel photography trips, then you’re going to be fighting crowds 75% of your day.
It can get exhausting, which is why remembering to get out from behind your camera lens is essential. You never want to be that photographer yelling at tourists to get out of your shot.
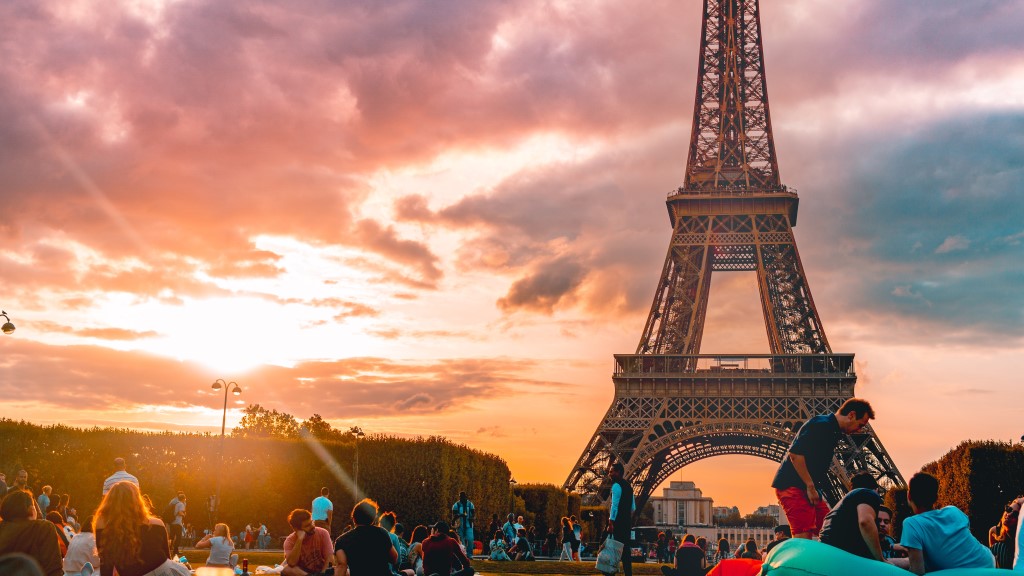
Photo by Michael Grant on Unsplash
This is what the Eiffel Tower truly looks like. There are crowds of people in the park below, tourists climbing up and down it, and vendors hawking whatever it is the tourists will buy.
The last time I was in Paris it took a 4:00 am alarm, a grueling hike, and about an hour of shooting to get that perfect shot I wanted. I promise you, this patience will pay off.
Don’t Injure Yourself Chasing the Perfect Shot
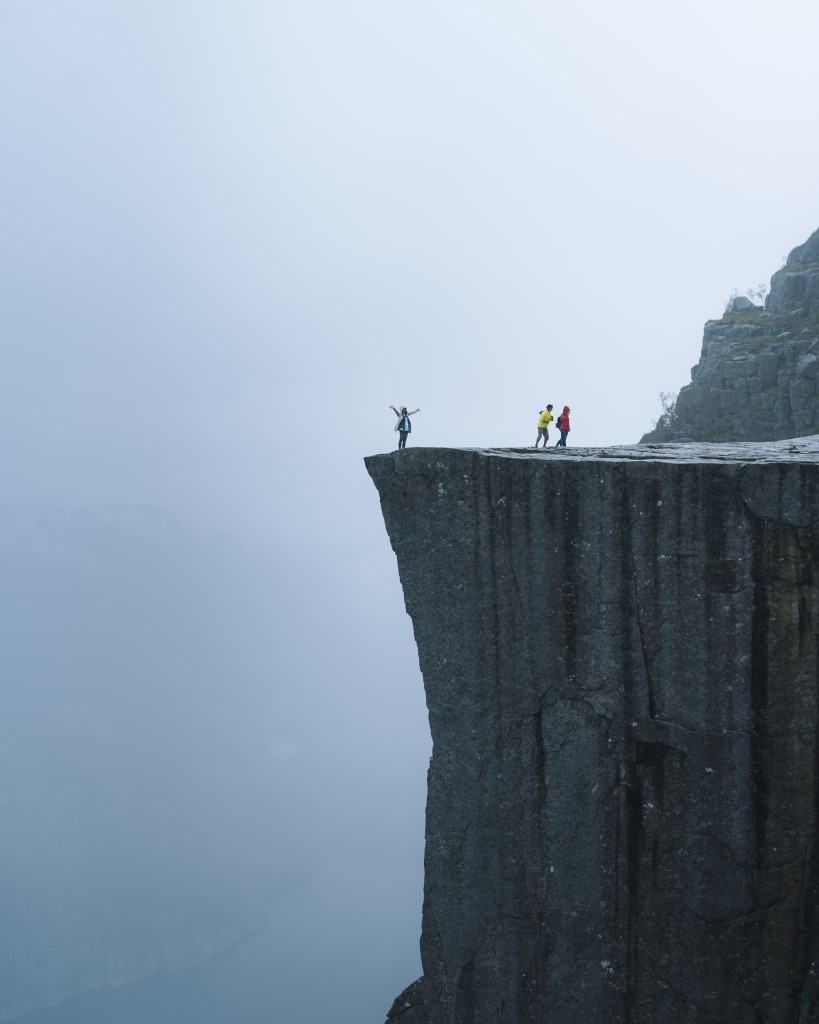
Photo by Valdemaras D. on Unsplash
By this point, we’ve all heard about selfie deaths when people are trying to take their perfect travel photography shot and end up falling off a cliff or falling in front of a bus instead.
I have a few travel photography tips about getting the “perfect shot.” I never approach animals, I don’t break cultural norms, and I don’t let my need for one photo injure myself or others.
Generally, if there’s a sign warning you not to do something, you can bet it’s because it would be dangerous for you to do that thing.
If you’re uncomfortable while taking the shot, that’s your intuition warning you. Listen to it!
Learn How to Make Money While Traveling
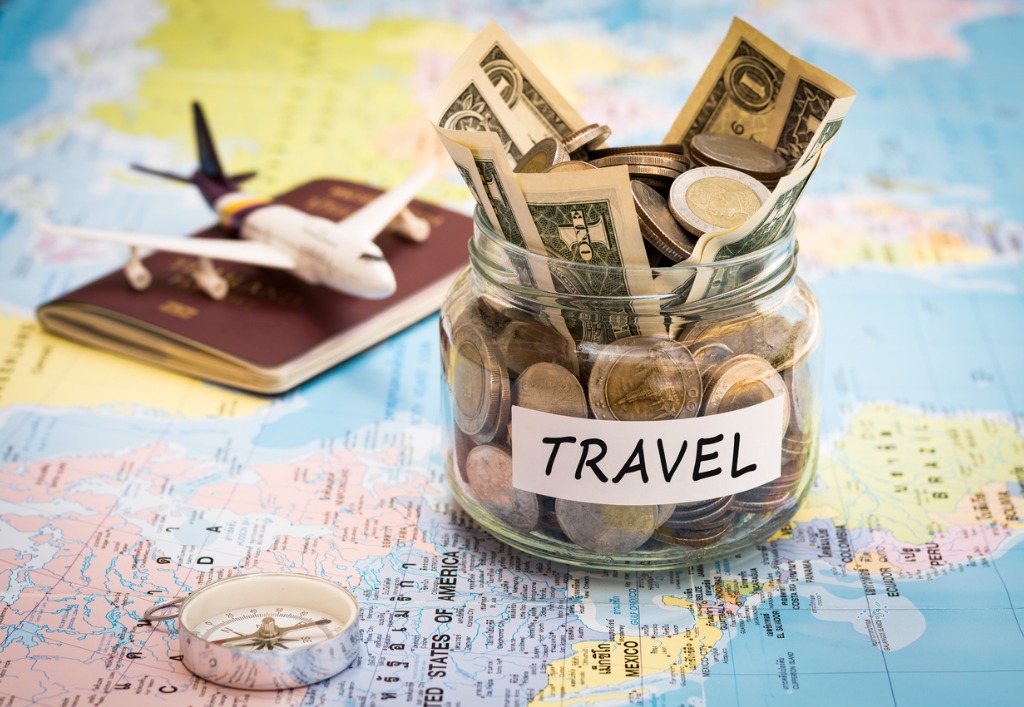
photo by surasaki via iStock
My beginner trips for travel photography list always includes some information about affiliate marketing, because affiliate marketing has allowed me to live the life of my dreams and I don’t know why more people aren’t doing it.
Basically, affiliate marketing is when you include links to products on your photography blog and if any of your readers purchase that product from that link then the company pays you for the referral.
The problem with learning affiliate marketing for travel photography is that it’s difficult. You not only need to learn all of the affiliate marketing basics, but you then have to learn how to apply it to whatever niche you’re interested in.

However, there are schools for affiliate marketing, and Travel School was established specifically for travel photographers.
The company’s founder, Emilian, learned all of the tips he needed to learn about scaling his business, creating multiple revenue streams, and marketing, so you don’t have to.
You can learn from his mistakes and start doing travel photography full-time. Yes - full-time! With the support and guidance of TravelSchool, you can pursue the passion that you love with less worry about how you’re going to pay for it.
The tips, tricks, and techniques you learn with TravelSchool will prove invaluable to you as you build your affiliate marketing business. Check it out, and I’m sure you’ll see the value TravelSchool offers!
Learn More:
We Recommend
Travel Photography Tips for Beginners: How to Make the Most of Your Photos
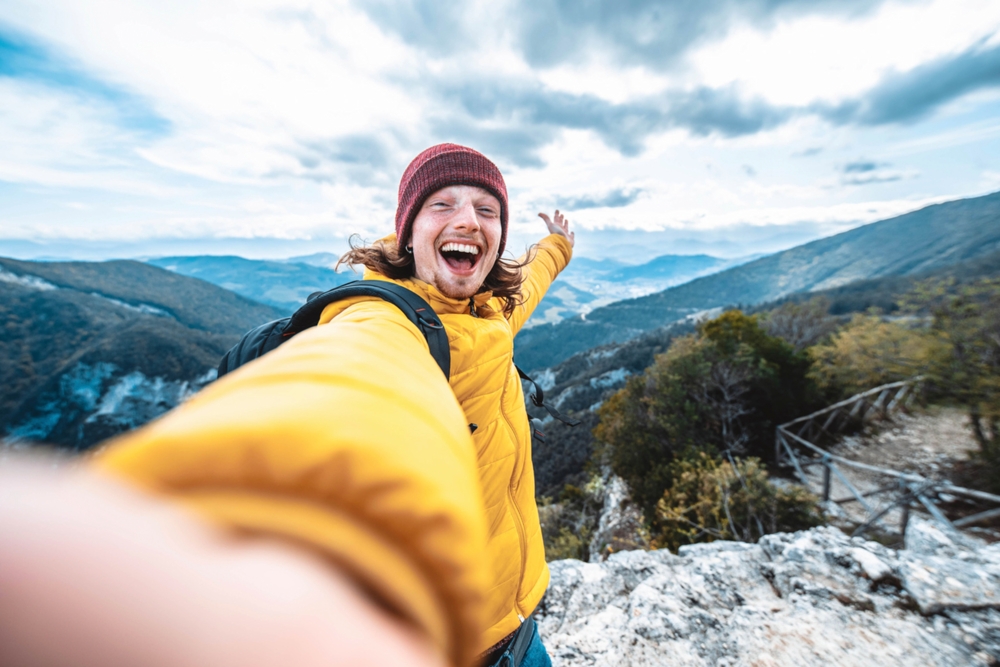
Photo by Kar-Tr via iStock
Traveling is an eye-opening experience that allows us to visit beautiful places, try exotic foods, meet new people, learn about foreign cultures, and make unforgettable memories. But how do we ensure those memories and experiences stay with us forever? By taking photos while we travel!
In the past, you needed a dedicated camera to take good travel photos, but not anymore. Thanks to the rise of smartphones with built-in high-resolution cameras, anyone can take great photos nowadays. That said, we still recommend investing in a DSLR or mirrorless camera for traveling if you are serious about photography and want to grow as a photographer.
In this article, we’ll share five travel photography tips for beginners designed to improve your skills and help you make the most of your photos. We’ll cover various topics, including planning and packing for a trip, the best camera settings for travel photography, how to display your travel photos once you’ve returned home, and more.
OK, what are we waiting for? It’s time to dive in and discover how to start taking better travel photos today!
Check out the video above by Andrew Lanxon Photography to learn how a professional travel photographer takes his best photos when on vacation.
Table of Contents
- Travel Photography Tips for Beginners: Make a Plan Before You Travel
- Travel Photography Tips for Beginners: Don’t Overpack
- Travel Photography Tips for Beginners: Have Your Camera With You at All Times
- Travel Photography Tips for Beginners: Shoot RAW Photos
- Travel Photography Tips for Beginners: Invest in a High-Quality Album to Showcase Your Photos
- Recommended Photography Gear
Travel Photography Tips for Beginners: Make a Plan Before You Travel
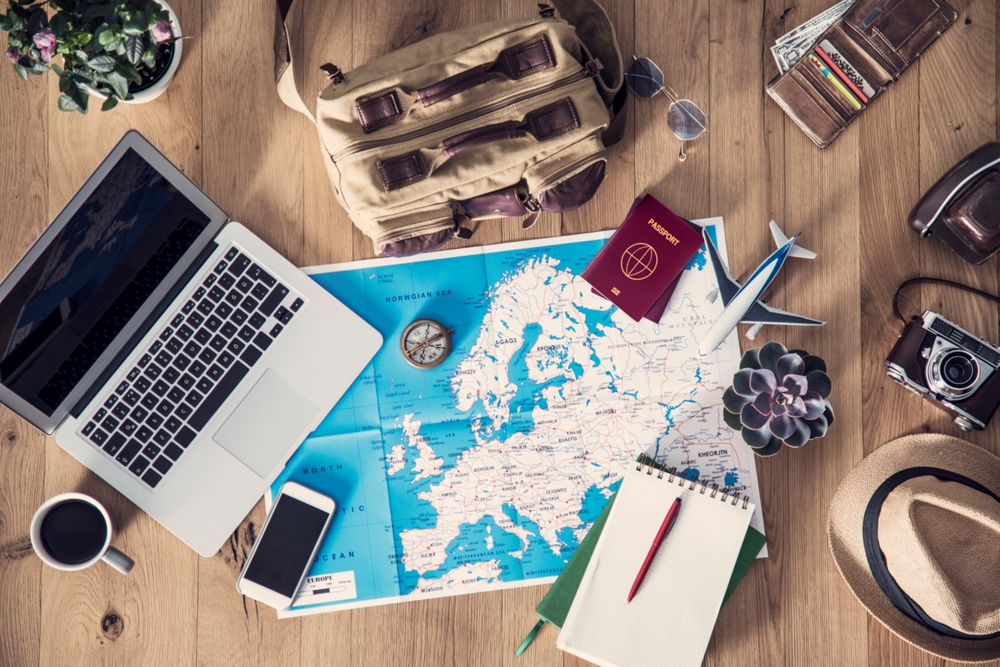
Photo by seb_ra via iStock
Researching and planning before traveling will not only make your vacation smoother and more enjoyable, but it will also help you take better pictures. Find the best photo destinations where you are going, and be sure to include them on your travel itinerary. If you want to go a step further, you can create a detailed shot list of all the photos you want to capture.
Other ways to plan for a photography trip are preparing the right photography gear, getting accustomed to your camera before you go, and staying up to date with local weather forecasts.
Travel Photography Tips for Beginners: Don’t Overpack
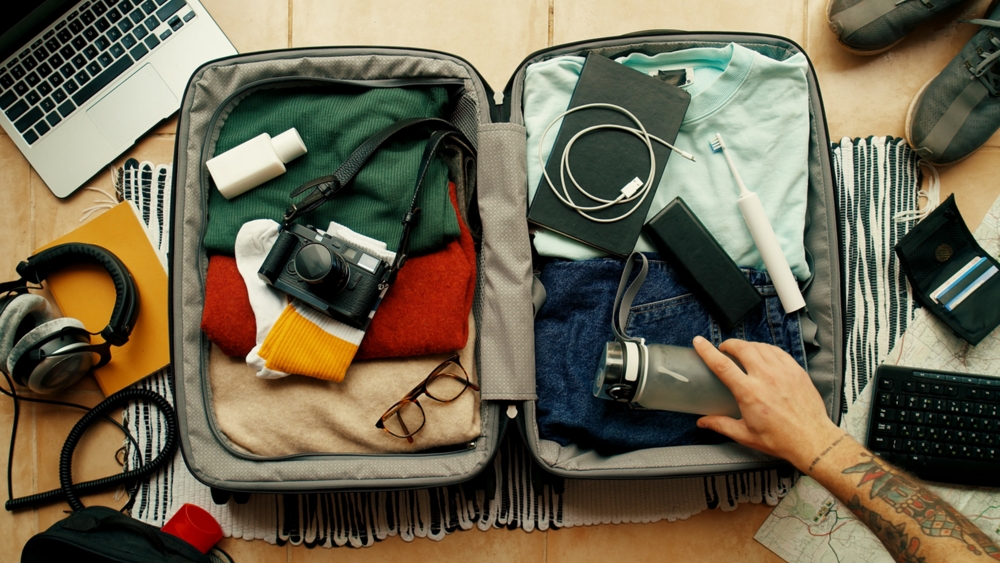
Photo by DeRepente via iStock
Photographers love gear, and while having lots of photography equipment at home is convenient, it’s completely the opposite when traveling. Lugging around a heavy suitcase is a giant burden and an easy way to make yourself miserable while on the road. That’s why we recommend practicing minimalism and only packing the true essentials for your next trip.
That means your travel camera, one or two lenses (max), a lightweight travel tripod, and spare batteries/memory cards. Depending on the type of images you enjoy shooting, you might also want to throw in a small camera cleaning kit and some lens filters. The less you have, and the easier it is to carry, the more likely you are to take photos.
Learn More:
- Capturing Memories: How to Tell Personal Stories Through Photographs
- 5 Tips for Beautiful Holiday Photos
Travel Photography Tips for Beginners: Have Your Camera With You at All Times
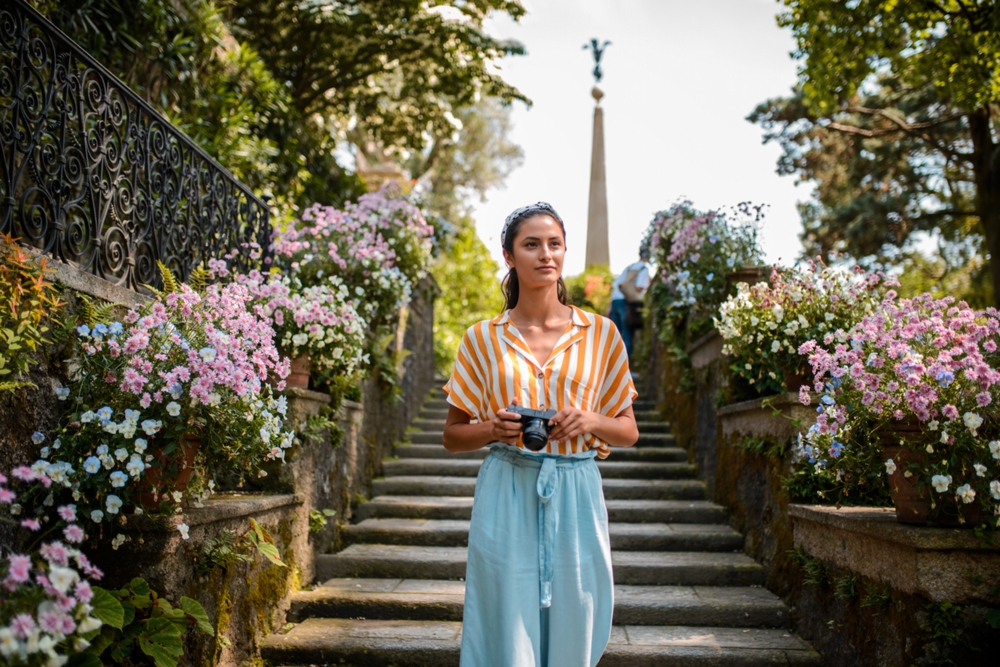
Photo by MStudioImages via iStock
That leads us to our next travel photography tip for beginners—always carry your camera, no matter what. You never know when something unexpected will happen, and you want to be prepared to capture it on camera when it does. Even if you are only popping out to grab a quick morning coffee, think twice before heading out without your camera.
Following this rule is easier than ever in the current age of smartphone photography. Better yet, you can instantly share photos from phones with loved ones back home or upload them to social media.
Travel Photography Tips for Beginners: Shoot RAW Photos

Photo by scyther5 via iStock
Another one of our top travel photography tips for beginners is to take RAW images instead of JPEGs. RAW photos store much more information in them than JPEGs, which gives you more control when it comes to editing them. Editing is an easy way to enhance the quality of your photos, as long as you don’t overedit.
When shooting in RAW, we recommend investing in memory cards with more storage and an external hard drive since the files take up more space. Other important camera settings for travel photography to monitor include the shooting mode, autofocus mode, drive mode, and exposure settings.
Travel Photography Tips for Beginners: Invest in a High-Quality Album to Showcase Your Photos

Photo by Sinenkiy via iStock
Once you are back home, the real work begins. You must think of a good way to showcase all those amazing travel photos you just took. For us at Photography Talk, there’s no better way to do that than by creating a lay-flat photo book. These gorgeous photo albums look great in homes and offices and make excellent gifts.
Photo Book Press is our go-to place to customize and order lay-flat photo books. This trustworthy online print shop has satisfied customers with its high-quality products for nearly forty years. Furthermore, it has a friendly and helpful customer service team and unbeatable low prices.
Want to showcase your photos differently? They also have hardcover photo books, hand-sewn photo books, softcover photo books, wall art, and more!
Recommended Photography Gear
A quick heads-up: If you snag something through our affiliate links or check out our sponsored content, we might earn a commission at no extra cost to you. But fear not, we're all about recommending stuff we're truly stoked about!
Learn More:
- 4 Things to Keep in Mind When Designing a DIY Photo Book
- What to Look for When Ordering a Photo Book
We Recommend
Travel Photography Tips for New Travelers
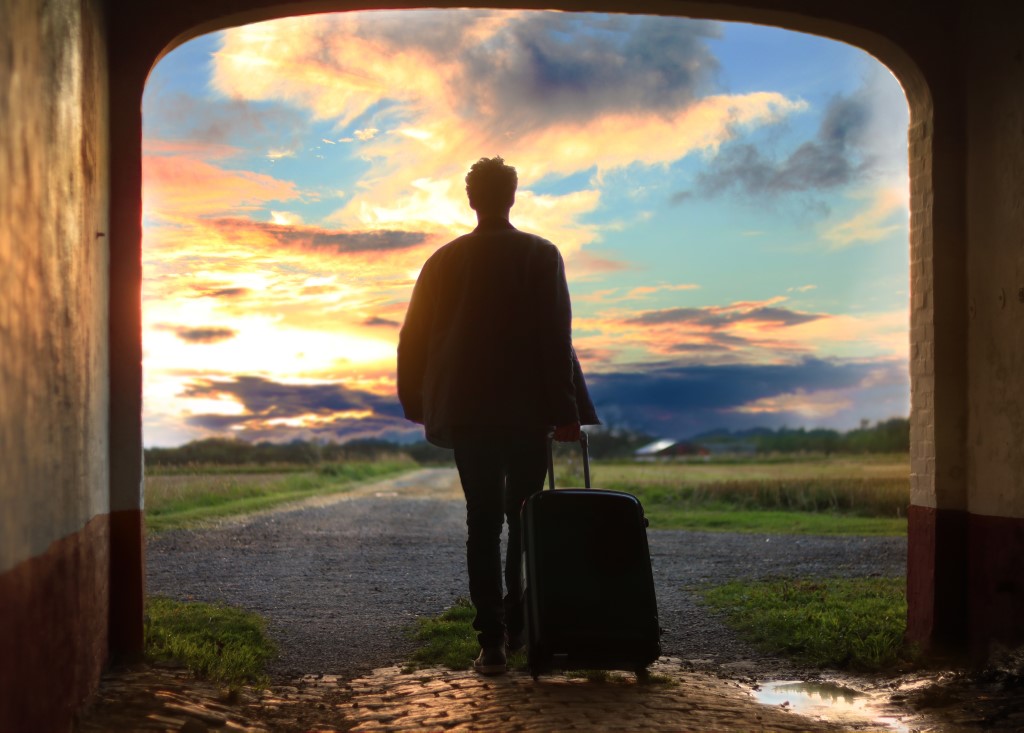
Photo by Mantas Hesthaven Unsplash
I love writing about travel photography tips because traveling while doing something you love is one of the most exciting things in the world.
This list is going to cover everything from how to earn money while you travel to how to remain organized while traveling to tips for capturing the best photos of your travels.
Let’s get started!
Table of Contents
- Earn Money While You Travel
- Find the Path Less Travelled
- Scout Your Locations, Just Like You Do at Home
- Keep a Shots Diary
- Pack Less
Earn Money While You Travel
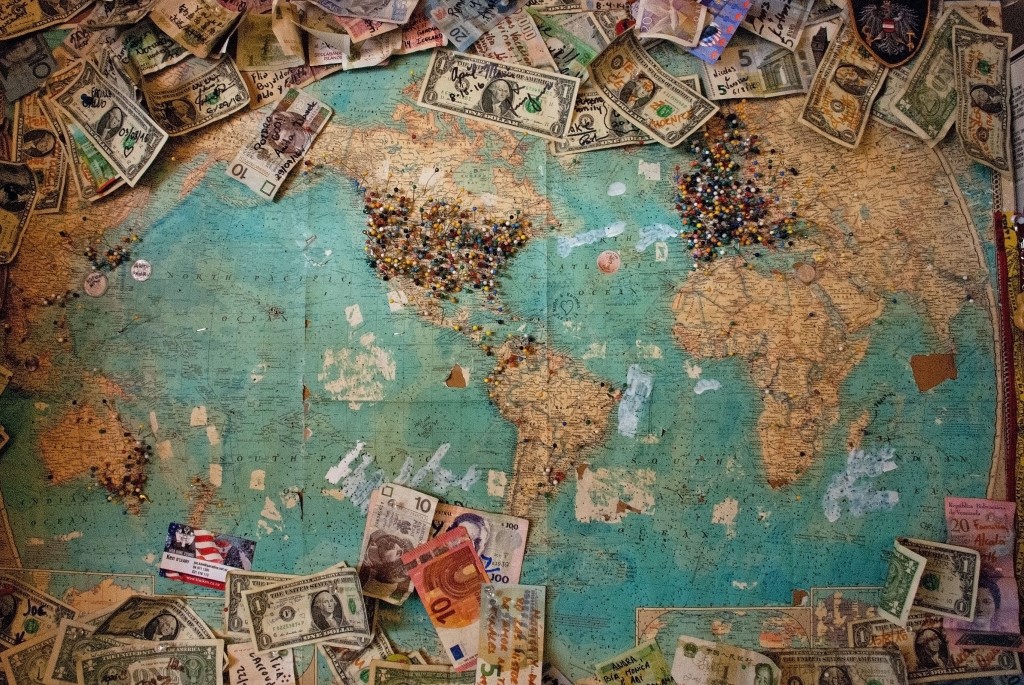
Photo by Christine Roy on Unsplash
Sure, your travel photography will probably make you money eventually, but eventually doesn’t pay the hostel bills.
There’s no simple answer to how to earn money while you travel, but there are a few tried-and-true methods.
For example, you can do a work trade program and work in a hostel’s bar or front desk for free lodging. You can also pick up work in the tourist industry in almost any country where English speakers regularly travel.

photo by CarmenMurillo via iStock
But, by far the easiest way to earn money while you travel is through affiliate marketing on your website.
For those of you who are unfamiliar with affiliate marketing, it’s a way for people to make money off of their websites and blogs by including links to products or services.
These companies will in turn pay you if someone buys their product or service off of that link.
Affiliate marketing is a phenomenal way to earn money while you travel because it doesn’t require you to be in any one place at any specific time.

Our friends at Travel School makes affiliate marketing really easy to learn too.
There’s no reason to reinvent the wheel; let the professionals teach you what affiliate marketing is and how it can help you travel further and longer than you ever thought possible.
Their comprehensive educational program offers you proven, actionable steps to follow that enable you to continue making money in the long run while also building immediate revenue.
If you’ve always wanted to work remotely, you need to check out this site and get started earning money sooner rather than later!
Find the Path Less Travelled
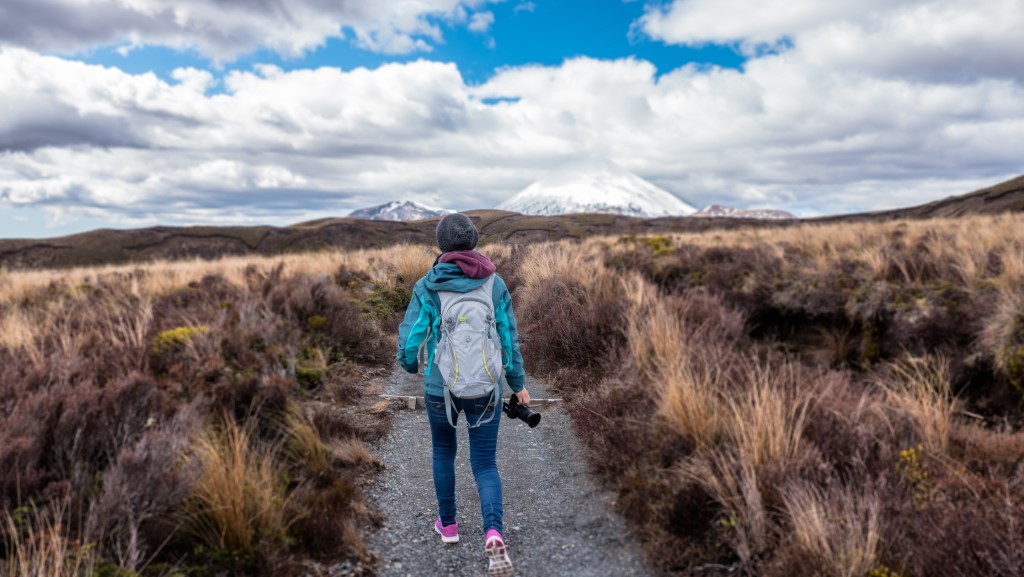
Photo by Thomas Schweighofer on Unsplash
Travel photography tips for beginners are nothing more than reteaching yourself how to lose yourself like a child again.
If you’re visiting well-established photography locations, like Rome for example, then you will be tempted to visit the same travel photography locations as everyone else.
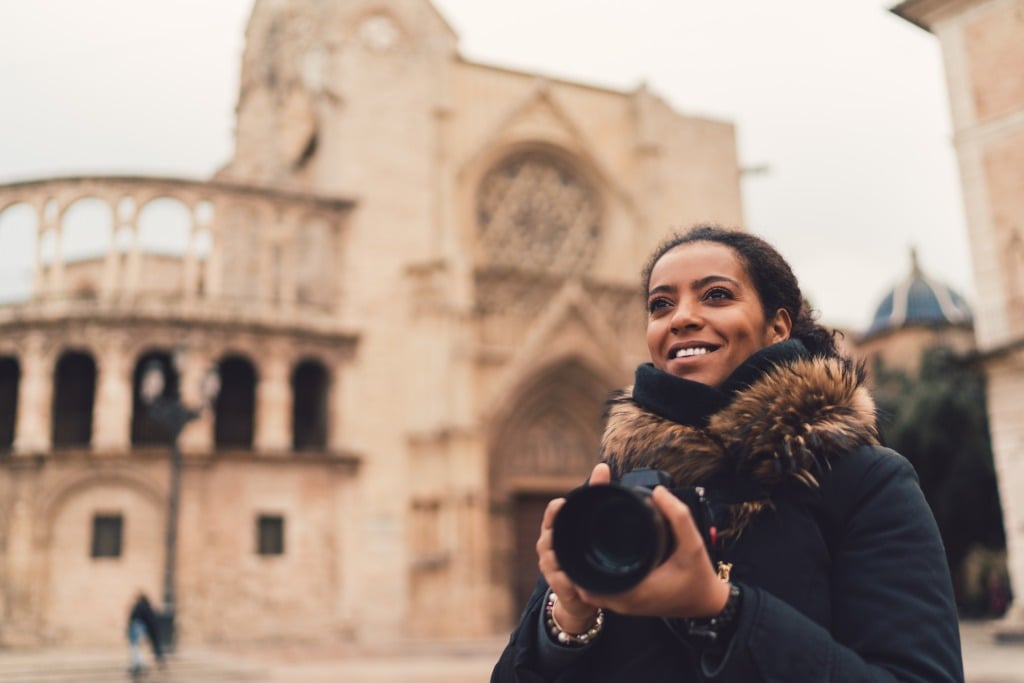
photo bymartin-dm via iStock
And sometimes this temptation is too much to bear, so I use a system for my travel photography. I will allow myself 5-10 shots that look like everyone else’s. I will focus on my lighting and composition for these shots, while understanding the subject matter is nothing new.
Then, I will try to travel the city to find views I haven’t seen on a postcard before.
Getting off the beaten path isn’t just invigorating, but it also challenges you to find new things to see, experience, and photograph.
And you’ll often find that when you get away from the tourist-filled areas, your experiences will be much more memorable and authentic.
Plus, getting away from the crowds never hurts!
Scout Your Locations, Just Like You Do at Home
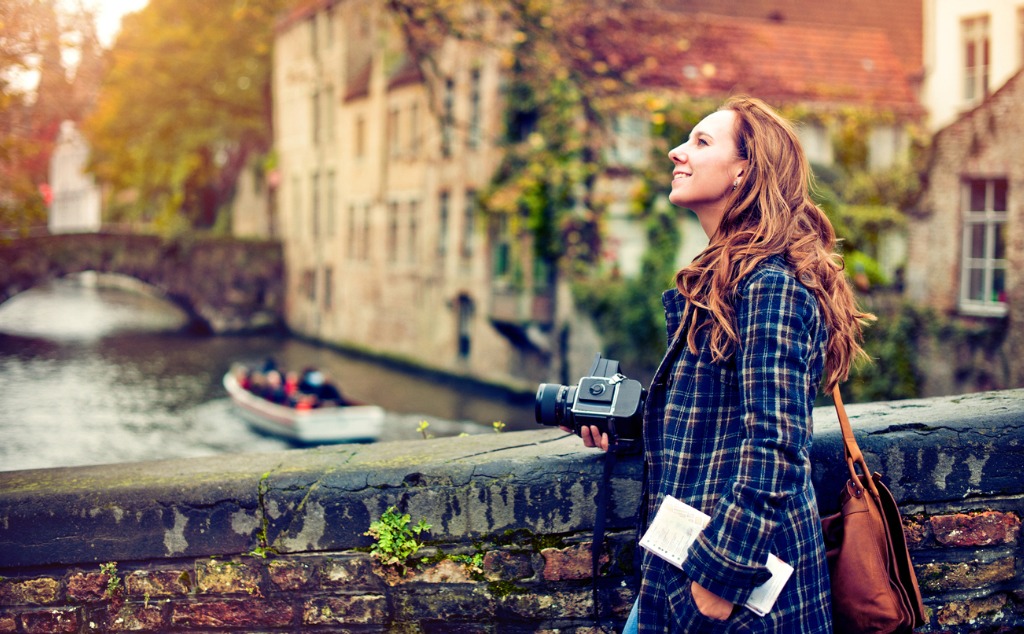
photo by ArtMarie via iStock
When you’re in a brand-new, exciting location, it’s sometimes easy to stray from the rigor of location scouting. Fight this urge.
Most travel photography tips for beginners are all about learning to stick to the routine you had set up at home so that you don’t forget anything. This one is no different.
One of the best steps you can take to location scout in another country is by asking the locals. Most will be more than willing to tell you about undiscovered areas, many will even take you there (just be sure to be aware of your surroundings).
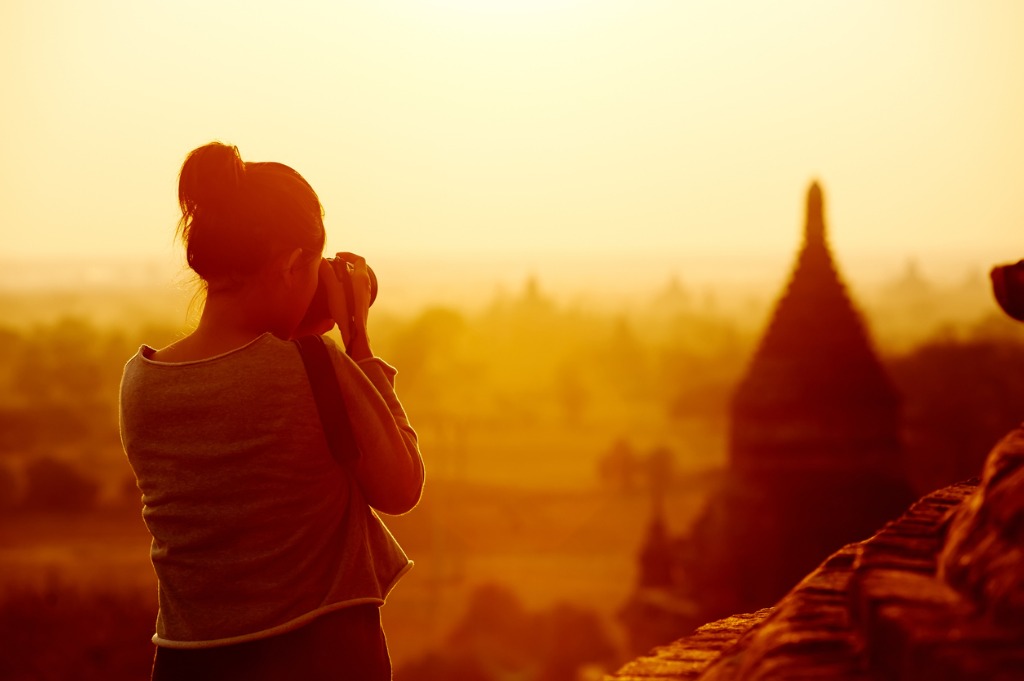
photo by warrengoldswain via iStock
There are also plenty of apps you can use to find local photographers who would be more than willing to share their expertise with you.
Start with Facebook, and see who might be based in the location you’re visiting. More often than not, you’ll find a willing compatriot to show you the sights.
Learn More:
Keep a Shots Diary
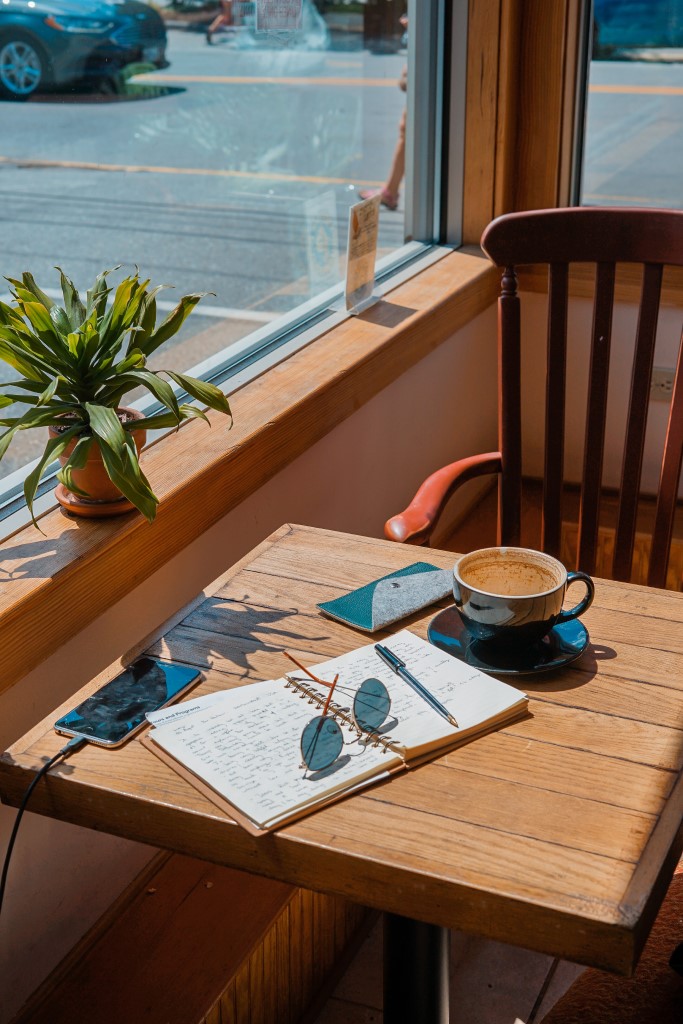
Photo by Toa Heftiba on Unsplash
I’m one of those people who can’t live without a morning cup of coffee (and sometimes an evening glass of wine). When I’m traveling, I’ll take the time to write down notes from the day or previous day over some coffee or a martini.
You’ll thank yourself later when you’re trying to add keywords to each photo, but it’s also a really great way to think back on your travels.
If you’re like me, you’ll find so many wonderful places and experience so many incredible things that you can’t possibly remember them all.
Keeping a shots diary will help you keep things straight as you’re reviewing your images. And since photography is all about telling stories, the more details you can remember about each shot, the better story you can tell with your photos.
Pack Less
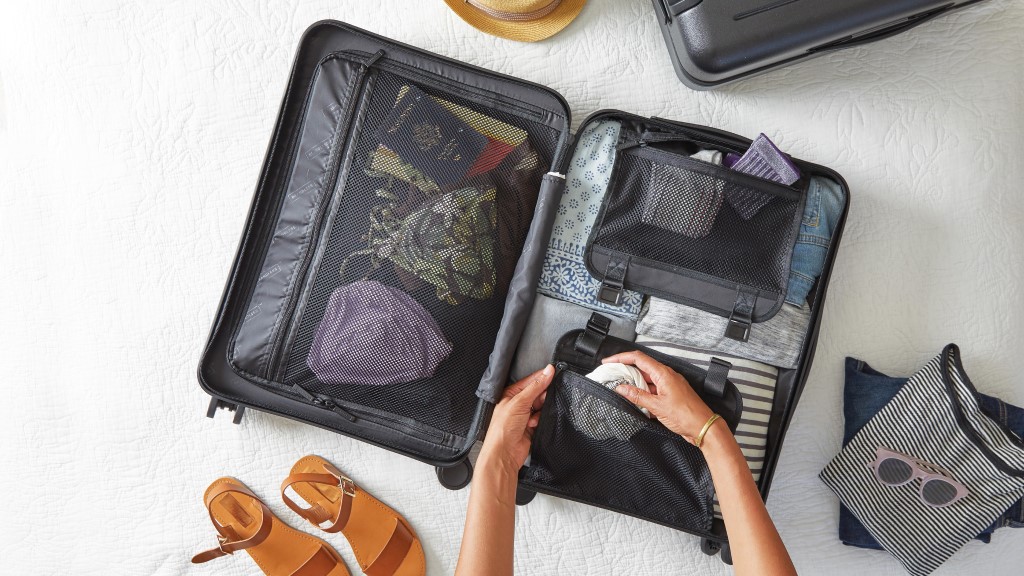
Photo by Brandless on Unsplash
Out of all travel photography tips, this is the one you will learn fastest: pack light or you’ll regret it.
Of course, it’s 2019 and companies like NannyBag exist, so if you’re visiting Europe for a month like I did earlier this year and you absolutely need to pack more than a carry on, you can pay someone to watch your extra equipment while you take a day flight from London to Dublin.
Granted, this isn’t an ideal situation, but at least it’s an option!
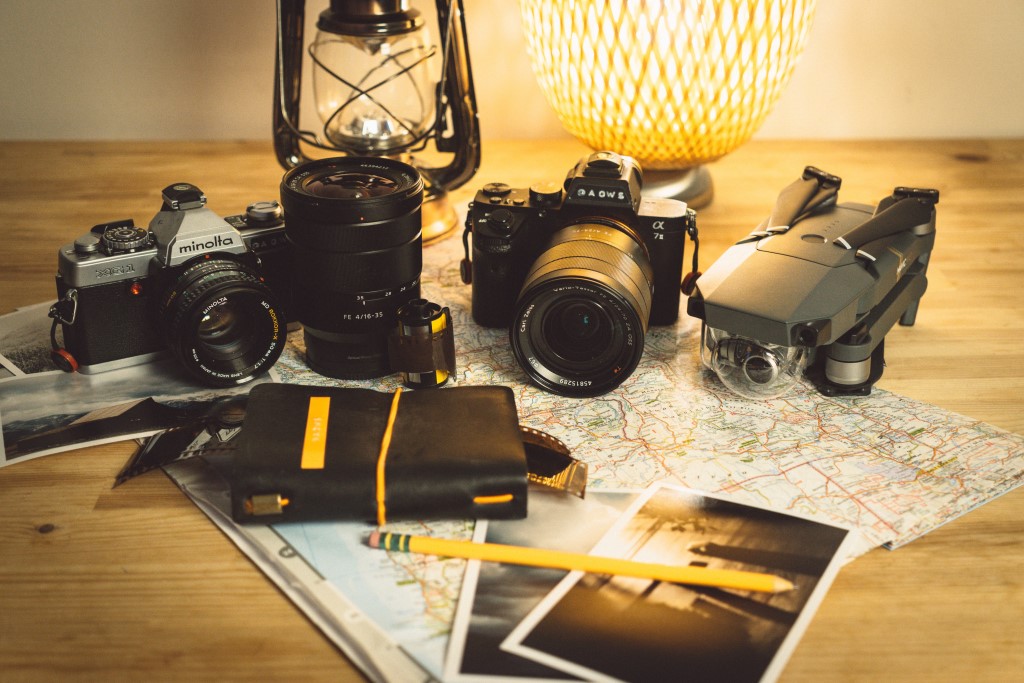
Photo by adrian on Unsplash
Every time I take a travel photography trip, I bring one camera body (and my phone), a mini-tripod, way too many memory cards, one flash, two or three lenses and my camera bag.
It hasn’t failed me yet.
This kit is versatile, lightweight, and easy to carry, and that being the case, I won’t have to pay for NannyBag again!
There are many other travel photography tips for new travelers out there, but if you follow the advice I’ve outlined here, you’ll be in a good position to have a great (and productive) trip!
We Recommend
Types of Photography: 19 Popular Photography Genres You Can Try
 Photo by Christian Holzinger on Unsplash
When you're just starting out in photography, there can be many things that might overwhelm you.
Learning to use your camera is certainly one of them. Developing your creative eye is another. But with practice, these things become second-nature.
A different type of struggle that some photographers experience is simply trying to figure out what kind of photographer they want to be.
Is landscape photography the best type of photography? Or is it portraits? What about macro or street photography?
The answer is that there is no "best" genre of photography. Instead, you have to figure out which popular photography genre is the best fit for you.
Below, I've outlined 19 different types of photography to help you quickly explore which of these genres might be most appealing.
Table of Contents
- Landscape Photography
- Weather Photography
- Astrophotography
- Underwater Photography
- Wildlife Photography
- Aerial Photography
- Travel Photography
- Architecture Photography
- Real Estate Photography
- Street Photography
- Portrait Photography
- Wedding Photography
- Event Photography
- Fashion Photography
- Newborn Photography
- Documentary Photography
- Still Life Photography
- Macro Photography
- Pet Photography
TYPES OF PHOTOGRAPHY
Landscape Photography

One of the most popular types of photography styles, landscape photography is all about capturing the beauty of nature.
Though many landscape photos are wide-angle, sweeping shots of a landscape, there are plenty of opportunities for vertical landscape photography and even photos of very small vignettes in a larger landscape that highlight the details of the natural environment.
Landscape photography is also perhaps the most accessible as well. All you have to do to find a subject is head outside!
Explore our collection of landscape photography tips.
Recommended Landscape Photography Books:
- The Landscape Photography Book: The Step-by-Step Techniques You Need to Capture Breathtaking Landscape Photos Like the Pros
- National Geographic Greatest Landscapes: Stunning Photographs That Inspire and Astonish
- The Art, Science, and Craft of Great Landscape Photography
Weather Photography

I like to think of weather photography as landscape photography on steroids.
Instead of focusing on the serenity of nature, weather photography puts extreme weather events front and center.
Though most people think of tornadoes and thunderstorms when they think of this type of photography, it also includes blizzards, sandstorms, rainbows, and hurricanes, just to name a few.
Needless to say, photographing weather can be very dangerous, but if you play your cards right, you can get spectacular photos and keep yourself safe at the same time.
Astrophotography

The misconception about astrophotography is that you have to have a mountain of expensive gear to get high-quality shots. That's just not the case!
Instead, you can take epic photos of the night sky with essential astrophotography gear, like a DSLR or mirrorless camera, a fast lens, a tripod, and a remote shutter release.
Common problems with this type of photography include getting stars nice and sharp and understanding how to compose astro photos in a way that's compelling. It helps to have mad post-processing skills too.
But, as you can see above, when it all comes together, there are opportunities to create truly incredible photos.
Use these astrophotography tutorials to get started!
Underwater Photography

Of course, not all landscapes involve mountains, rivers, foul weather, or stars - there's a whole other world to explore with your camera underwater.
Granted, you'll need some additional gear to make underwater photography a possibility, but the reward waiting for you beneath the surface of the water can be epic.
So, grab a GoPro and a snorkel and see what you can find just under the water's surface!
Wildlife Photography

If you ask me, wildlife photography is one of the most difficult photography types to master.
That's because more than just about any other kind of photography, photographing wildlife requires an abundance of patience, and that is not something I have.
Though you might have to wait for hours and hours in a blind for that perfect moment, the payoff can be truly magical and breathtaking photos of animals.
Fortunately, to get started in wildlife photography, you don't have to trek to some distant mountaintop. Start practicing in your backyard with your dog or the local park with birds to develop your skills.
Recommended Wildlife Photography Books:
- Wildlife Photography: An Expert Guide
- Wildlife Photography: Proven Techniques for Capturing Stunning Digital Images
Aerial Photography

It seems like not that long ago, the types of photography shots that were available to most of us were those found while standing on the ground (unless you had a plane or helicopter handy).
But, with the development of drones in recent years, now any of us can take to the skies and get started in aerial photography.
For me, this type of photography involves photographing landscapes from a much different perspective than I normally do.
But aerial photography isn't limited to landscapes. Instead, you can use drones to take killer photos of anything from wildlife to weddings, real estate to sports.
Travel Photography

One look at Instagram and you'll quickly realize that one of the most popular photography types is travel photography.
Travel photography encompasses all sorts of other types of photography - landscapes, portraits, wildlife, and street photography among them - and as such, it has broad appeal.
The beauty of this kind of photography is that it helps showcase different places and peoples and helps us all feel a little more connected to one another in this big, beautiful world. It's not all that difficult to get started in travel photography, either.
Besides, who wouldn't like to travel the world taking photos? Talk about one of the most ideal photography careers!
Architecture Photography

I like to think of architecture photography as urban landscape photography. By that, I mean that instead of photographing natural elements, you're capturing the beauty of manmade structures and exploring how they've changed the urban landscape.
Though I enjoy a good shot of a city's skyline, there's something even more compelling about the detail-oriented shots of buildings.
Whether it's a beautiful arch or a gargoyle perched on high, there are plenty of opportunities to accentuate the beauty of humankind's architectural wonders.
Real Estate Photography

There are many types of photography jobs that one can pursue, including real estate photography.
Obviously, the purpose of real estate photography is to make residential and commercial properties as appealing as possible.
This involves everything from perfecting the staging of the property to finding the right angles to highlight interesting features or architecture.
Fortunately, there isn't an excessive amount of gear required for photographing real estate - in some instances, you might just need your smartphone!
Get all the real estate photography tips you need to kickstart your career photographing properties!
Recommended Real Estate Photography Books:
- The Business of Real Estate Photography: A Comprehensive Guide to Starting your own Real Estate Photography Business
- Photographing Real Estate Interiors and Architecture: A Comprehensive Guide to Equipment, Technique and Workflow for Real Estate Photography
Street Photography

Much like I think of architecture photography as urban landscape photography, I think of street photography as being urban portrait photography.
The whole point of street photography is to portray what life is like in the city. Often, it's done with quick snapshots without the subject knowing that they've been photographed.
The challenge with street photography is to turn simple, everyday scenes into something meaningful and beautiful. That is, you have to concentrate on how the composition, framing, lighting and so forth help you tell a compelling story about the people in your photos.
Portrait Photography

Even taking selfies out of the equation, portraiture is likely the most popular photography niche in the world.
But portrait photography is much more than simply pointing your camera at someone and taking a photo.
Instead, portraiture is all about telling the story of the person being photographed and highlighting what makes them unique.
But there are many more types of portrait photography than solo portraits, including family portraiture, fashion photography, professional headshots, graduation photos, and even sports photography as well.
Regardless of the type, for the best portraits, you have to master the camera settings for portrait photography in addition to learning the types of lighting in portrait photography.
Discover more ways to improve your portraits with our collection of portrait photography tips.
Recommended Portrait Lighting Books:
- Picture Perfect Lighting: An Innovative Lighting System for Photographing People
- The Dramatic Portrait: The Art of Crafting Light and Shadow
- Portrait Photography: From Snapshots to Great Shots
Wedding Photography

Getting married is a big deal, and so is being hired to photograph that event. Needless to say, no matter the type of wedding photography, wedding photographers have an immense responsibility, and that makes this kind of photography among the most stressful.
But being a wedding photographer isn't just about having the right skill set behind the camera. Instead, wedding photographers must be storytellers, problem solvers, and have tremendous people skills.
Perhaps the most difficult aspect of wedding photography is finding ways to get practice so you can minimize your wedding photography mistakes. Working as a second shooter is a prime option for learning the ropes as it takes some of the pressure off of you while giving you an opportunity to learn from a more seasoned wedding photographer.
Event Photography

From concerts to birthday parties, corporate events to the county fair, event photography encompasses a huge range of subjects.
This might include portraits of the people at the event, the food they're eating, the event space in which they're gathered, and so on.
In other words, event photography is a fast-paced and challenging genre of photography that is not for the faint of heart. You have to be ready for anything and have an array of gear (especially a range of lenses with different focal lengths) if you're to be a successful event photographer.
Ultimately, though, event photography is all about helping the people in attendance relive the event years and years down the road through the photos you create.
Fashion Photography

Fashion photography primarily exists for branding and advertisements, though as photography has become more accessible and social media has risen to prominence, fashion photography is becoming more broad-based.
Whether the purpose of the photo shoot is to create photos for a magazine or to post on Instagram, the point of fashion photography is to highlight clothing, makeup, and other fashion accessories in a way that makes them highly desirable for consumers.
Because of the need to showcase these items, a lot of fashion photos are full-body shots. What's more, fashion photographers must be experts in types of lighting in photography and have excellent portrait posing skills too.
Newborn Photography

Whether you know it as newborn, infant, or baby photography, this genre is perhaps the most rewarding.
Capturing what a newborn is like in the first days after their birth is a huge honor - and a big challenge.
Babies are unpredictable, so photographing them while they sleep is one of the top newborn photography tips to follow.
You'll find that they are sensitive to temperature fluctuations, sensitive to light, and might have accidents that require a diaper and a wardrobe change.
Being prepared for these eventualities is a must, and despite those challenges, the reward at the end of the shoot is well worth the time and effort!
Get easy-to-understand instruction on maternity and newborn photography tips.
Documentary Photography

Along with photojournalists, documentary photographers strive to depict newsworthy events in a way that helps people better understand or connect to the event that's occurring.
The focus of documentary photography is on emotionality - evoking a feeling in the viewer that makes the event more real.
Though war type photography is likely the best-known subgenre of documentary photography, many other events - presidential activities, state gatherings, and national celebrations - might fall under the purview of a documentary photographer. Additionally, many documentary photographers simply seek to capture daily life, history, culture, and so forth.
Still Life Photography

Still life photography is all about creating images of objects.
In many instances, just a single object or a few objects - a bowl of fruit, for example - might serve as the subject of a still life photo.
The key to a successful still life image is having excellent lighting that casts an even light on the subject while also minimizing shadows.
Even though it might not be the most popular type of photography, by focusing on the lighting, you can create an interesting scene out of even the most mundane of subjects - silverware, items on a desk, kids' toys, and so on.
Macro Photography

If you've got a keen eye for detail, macro photography might be for you.
Photographing small objects - flowers and insects, for example - is actually a lot easier than it looks, provided you have the right gear and the right approach.
In fact, you can use your smartphone for macro photography and get pretty awesome results!
Like any type of photography, becoming a pro at macro takes time, but if you commit yourself to practicing and learning, you can create some truly breathtaking photos.
Pet Photography

When you're just starting out in photography, your pets are one of the best subjects with which to work.
After all, they're easy to access, they'll listen to your direction (hopefully!), and you can photograph them in the comfort of your own home.
Better still, because many of the same principles of portrait photography apply to pet photography, it's a great primer for flexing your portraiture muscles down the road.
So, put your dog in his favorite costume, grab your camera, and start working on your composition skills, mastering camera settings, and storytelling abilities!
For a humorous look at these and other types of photography, be sure to check out the video above by Antti Karppinen.
In the meantime, use the information I've provided above to think about the type of photography that best suits your interests and skills.
Don't be afraid to test out multiple genres or different types of photography as well!
We Recommend
Vietnam Photography and Travel Guide
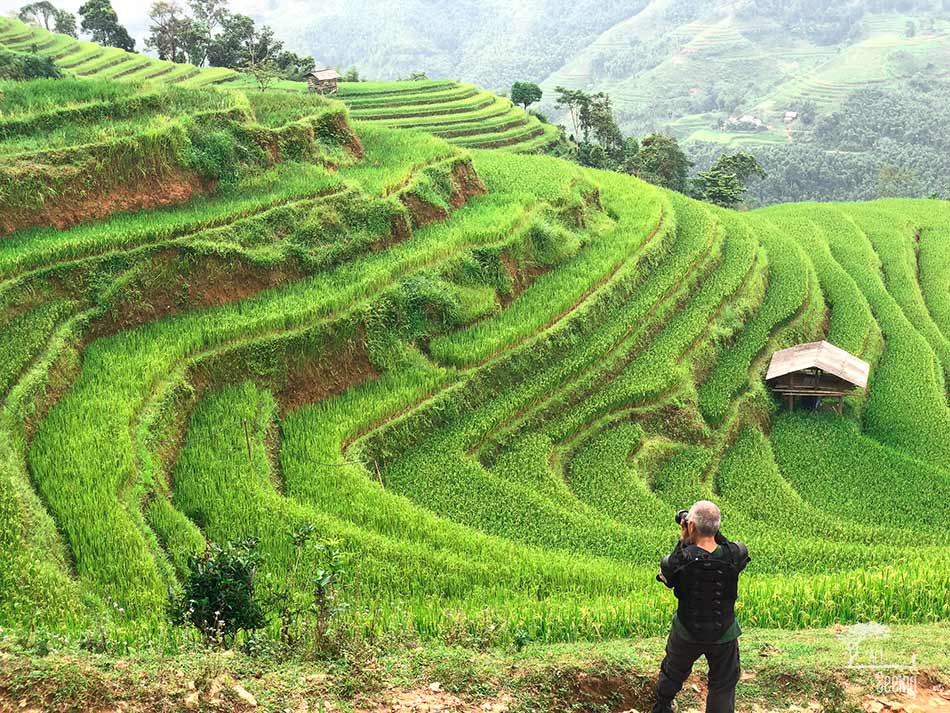
Photo by Ken Lee/Art of Seeing Photography Adventures
Vietnam has emerged as a prime tourist destination in recent years, and one that photographers of all skill levels and abilities regularly visit to seek out unique photographic opportunities.
Aside from its breathtaking landscapes, Vietnam has a vibrant culture with many different ethnic groups that call this country home.
As you prepare to visit Vietnam, be sure to consult our photography and travel guide for some insider tips on where to go and what to photograph.
What to Photograph in Vietnam: Mountains
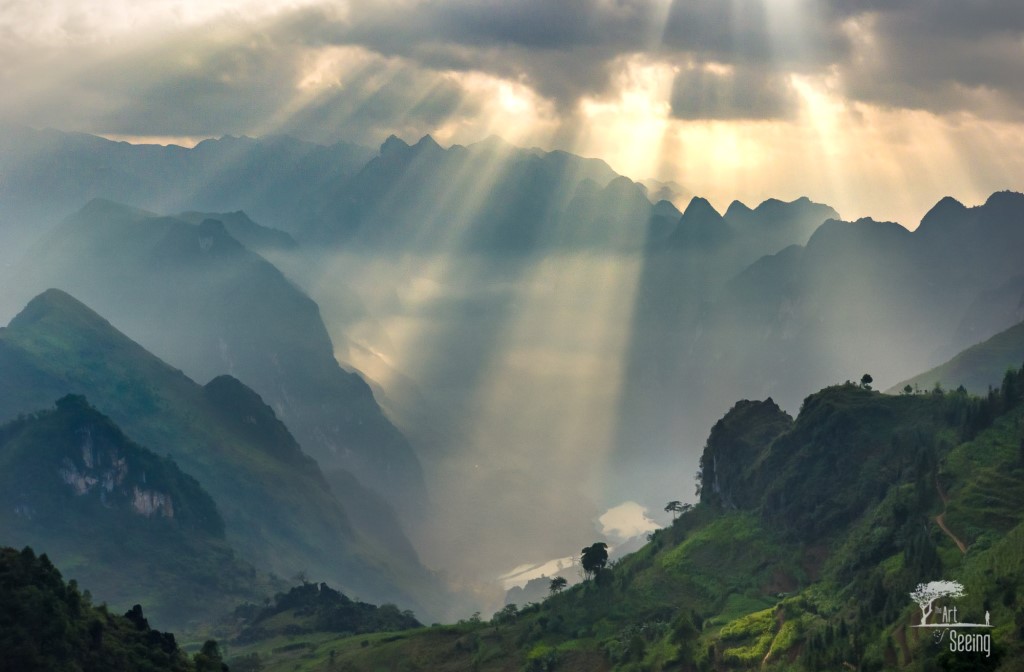
Photo by Ken Lee/Art of Seeing Photography Adventures
When many people think of mountains, they probably think of snow-capped peaks, like the Rocky Mountains, the Alps, or the Andes.
But Vietnam’s mountains - like Pu Ta Leng Peak in the North - are covered with thick jungles, their peaks vibrant and green with lush vegetation.
The sheer number of mountain peaks is astounding, and when paired with deep valleys and canyons covered with trees, it makes for a breathtaking sight, even if the mountains are no more than a distant backdrop, like in the image below.
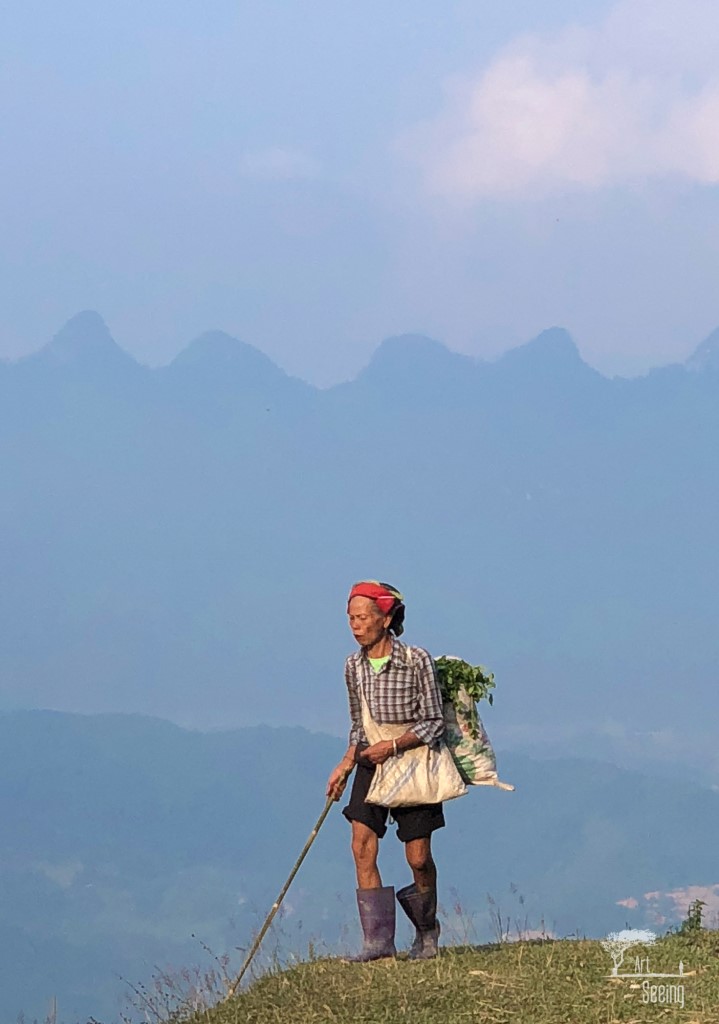
Photo by Ken Lee/Art of Seeing Photography Adventures
Of course, many Vietnamese landscapes have been changed by rice farmers, whose fields are in and of themselves worthy of your attention (more on that in a moment…).
The interesting interplay between the unspoiled jungles and the carefully manicured rice fields is a beautiful compositional opportunity in which you can highlight the relationship between man and the environment.
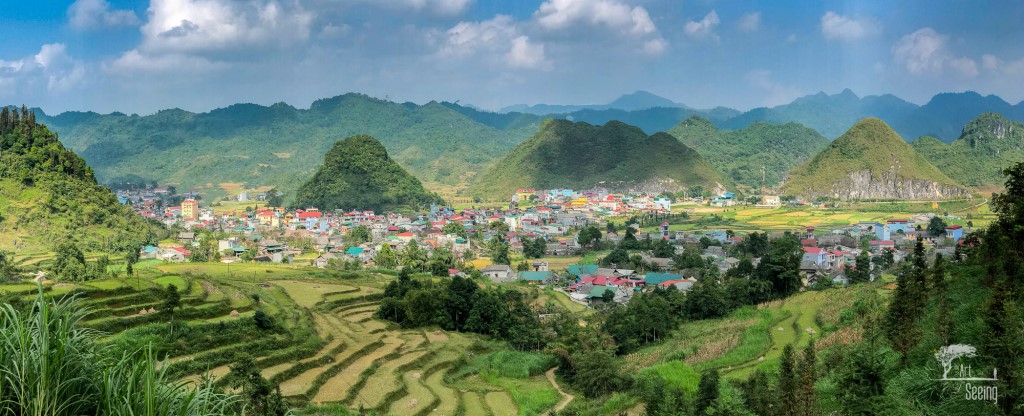
Photo by Ken Lee/Art of Seeing Photography Adventures
Likewise, the small villages that dot the Vietnamese landscape - like the one above - are spectacular in their own right, their brightly-colored buildings adding color variation to an otherwise green landscape.
By getting away from the city centers and into the countryside, you can find hidden gems like these - beautiful and inviting villages tucked up against soaring mountain peaks.
What to Photograph in Vietnam: Rice Fields
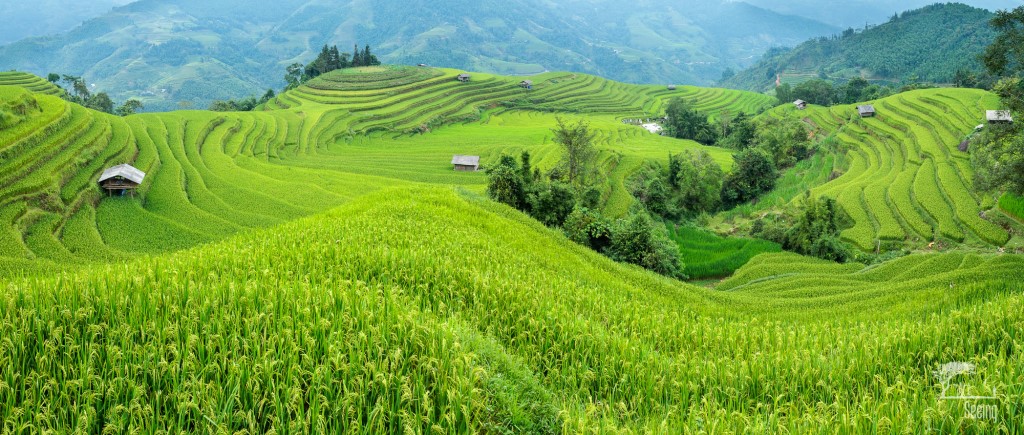
Photo by Ken Lee/Art of Seeing Photography Adventures
The rice fields of Vietnam represent an interesting subject for your photos on a couple of different levels.
First, if you visit Vietnam just before the harvest, you’ll find the rice fields in their peak form - gorgeous, green vistas whose lines undulate with the changing topography of the landscape.
As shown above, this is the ideal chance for trying your hand at a panorama that allows you to highlight those interesting vistas, their shapes taking center stage in the shot.
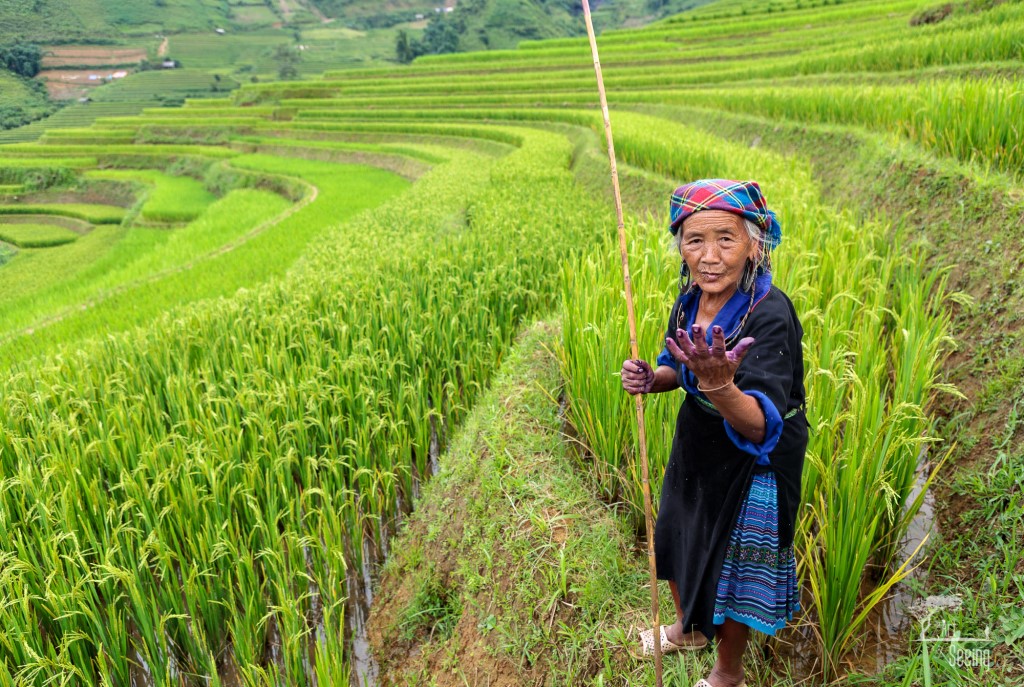
Photo by Ken Lee/Art of Seeing Photography Adventures
Secondly, the rice fields are an ideal location to tell a deep and meaningful story about the people that grow and harvest the rice.
That is, set against the backdrop of the rice field, you can create a telling portrait of farmers like the woman pictured above.
Her weathered and stained hands tell the tale of a woman that has worked hard her entire life in this field, but who nonetheless appreciates all the land has given her and her family over the years.
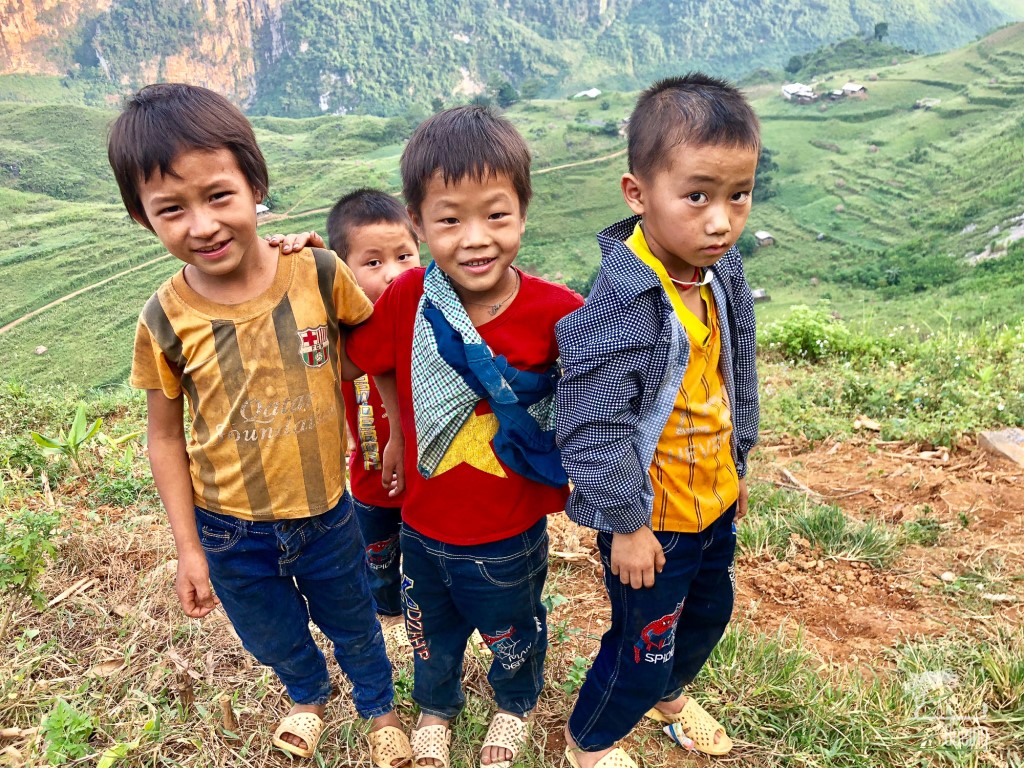
Photo by Ken Lee/Art of Seeing Photography Adventures
It’s the people of Vietnam - who are wonderfully welcoming and friendly - that make these landscapes so beautiful.
In fact, as noted in the introduction, you’d be remiss if you didn’t travel to Northern Vietnam, where you’ll find many ethnic minorities - the Red Dao, Black Tay, Flower Hmong among them.
These unique people can be found tending their crops and sharing their goods in local marketplaces. And if you visit Vietnam the right way, you might even be welcomed into their home in the rural countryside to experience just a taste of what life is like for them.
What to Photograph in Vietnam: Marketplaces, Coasts, and Cities
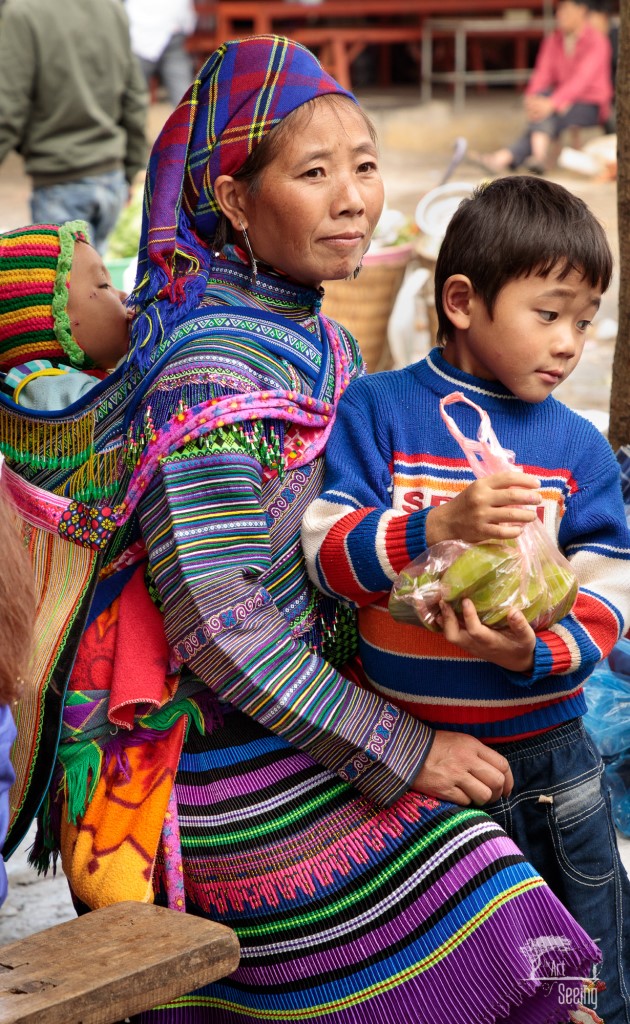
Photo by Ken Lee/Art of Seeing Photography Adventures
While there is certainly something to be said for venturing into the countryside of Vietnam, there are many reasons to spend time in the more populated areas of the country as well.
Its many marketplaces are bustling with life and sights that are prime subjects for an interesting photograph, be that the goods that are offered for sale or the many different people patronizing the market.

Photo by Ken Lee/Art of Seeing Photography Adventures
One of the most spectacular areas of Vietnam, Halong Bay, should certainly be on your list of must-see places when visiting Vietnam.
Here, you’ll find towering tree-covered rock formations called karsts jutting out of the blue waters of the bay where fishing villages and boats dot the water.
This is an extremely popular area to visit, but if you take the time to explore, you’ll find small enclaves away from tourists where you can enjoy a more authentic experience.
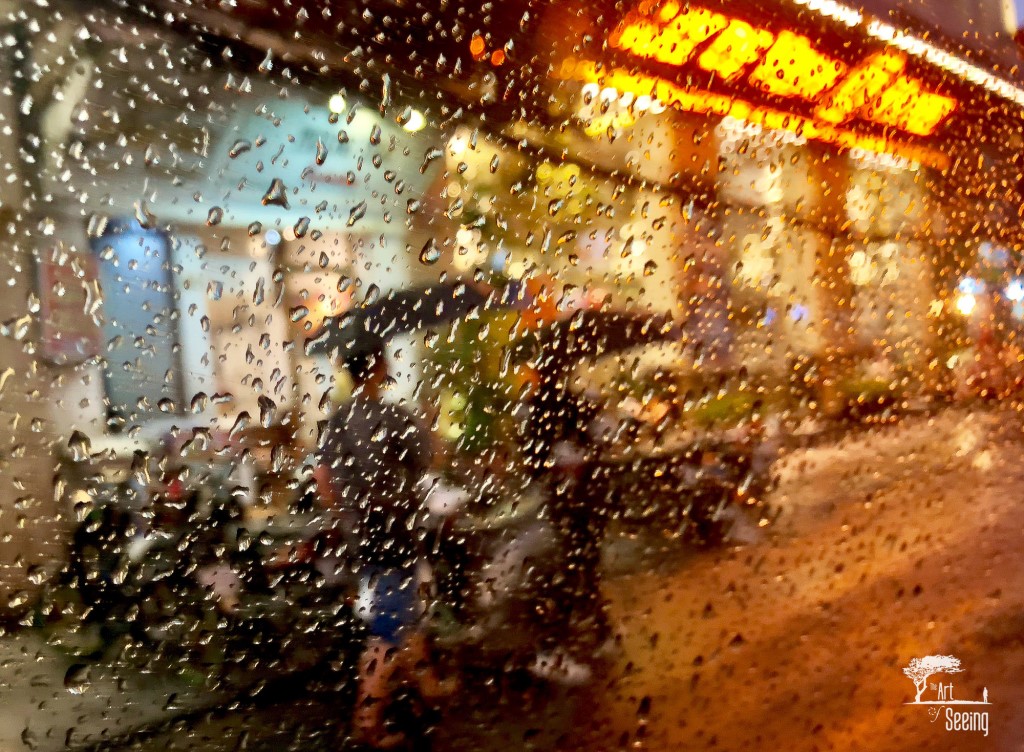
Photo by Ken Lee/Art of Seeing Photography Adventures
Likewise, exploring cities like Hanoi should be done off-the-beaten path. Wander far and wide. Visit markets and squares. Head out at night to capture the vibrant street scenes of the bustling city.
Rain or shine, day or night, urban or rural, Vietnam has much to give you to experience and photograph!
Planning Your Vietnam Photography Trip

Photo by Ken Lee/Art of Seeing Photography Adventures
Vietnam isn’t a large country by any means, but the sheer diversity of the landscape and its people can make planning a photography trip a difficult task. Deciding where to go and when, and how long to stay there are decisions that can cripple the planning process.
What’s more, you don’t just want to scratch the surface of Vietnam when you’re there exploring. Instead, you want to wrest as much out of the experience as possible by immersing yourself in the sights, sounds, culture, and people you encounter.
And the way to do this is by visiting Vietnam as part of a photography tour.
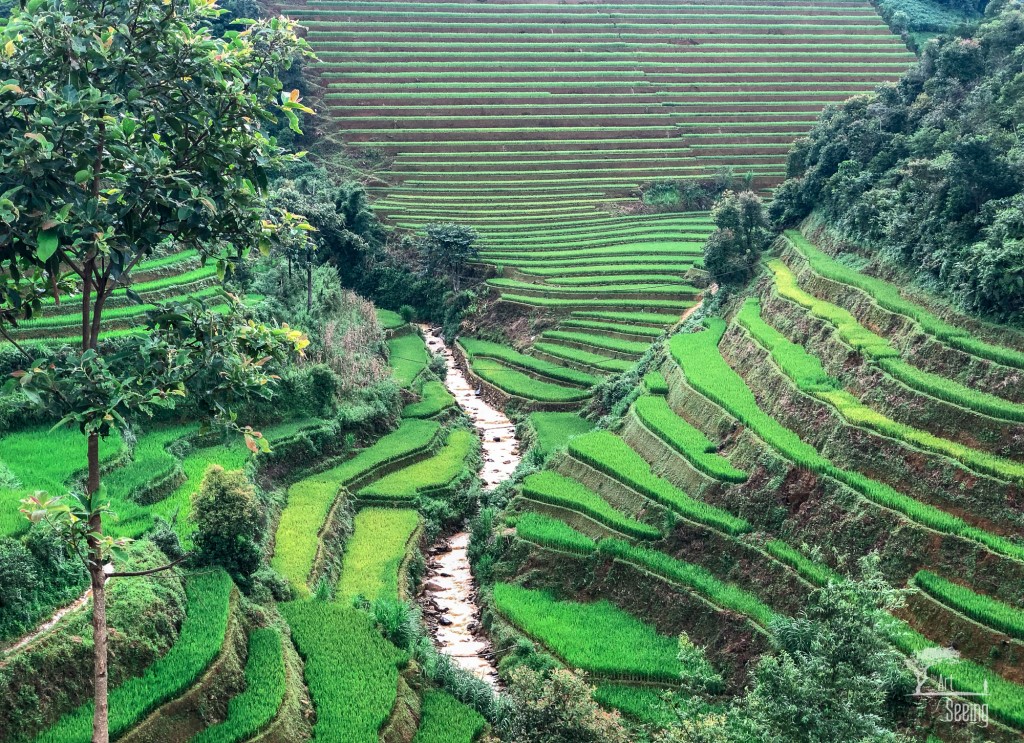
Photo by Ken Lee/Art of Seeing Photography Adventures
When selecting a photography tour, it’s important to really dive deep into what they offer, how many people will be on the tour, where you will visit, and so forth.
I say this because some photography tours only give you a few days to experience Vietnam, and even then it’s only to the tourist hotspots where you can immerse yourself in the beauty of Vietnam.
Likewise, some photography tours are large groups that make it difficult to get much time with the photography leader to get feedback on your work.
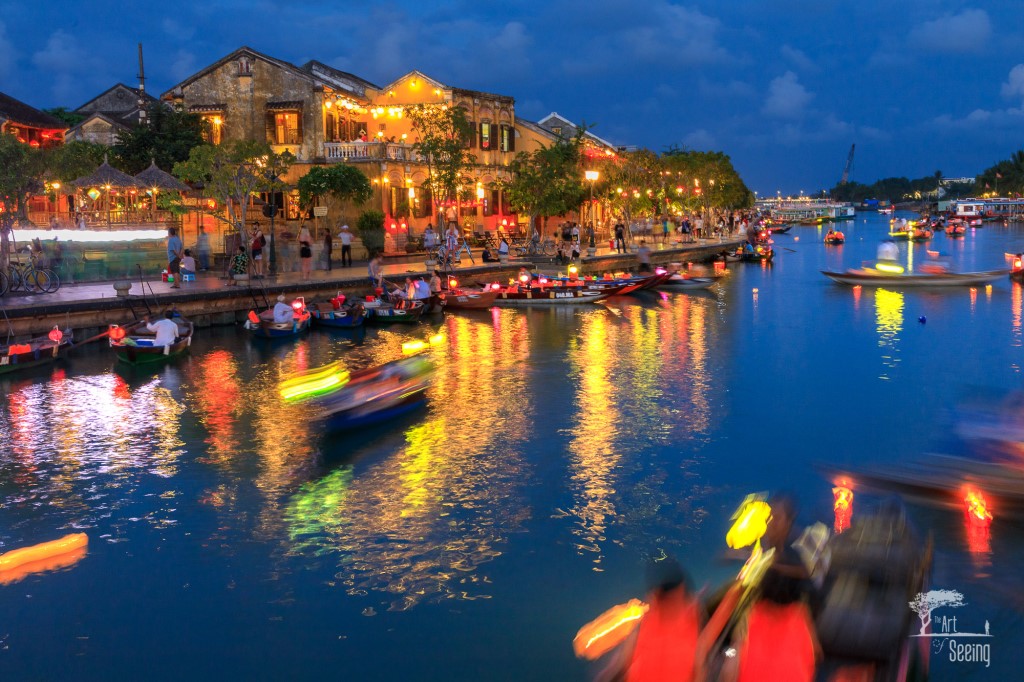
Photo by Ken Lee/Art of Seeing Photography Adventures
That’s simply not the case with The Art of Seeing Photography Adventures.
If you travel to Vietnam with The Art of Seeing, you’ll be one of no more than 10 participants, so you can be assured that you won’t just be a number, but instead a valued participant in the workshop.
Additionally, once you’re in-country, everything is taken care of for you, from the itinerary to the meals, lodging to transportation, and of course, photography instruction while you’re there.
In fact, you’ll spend two weeks there - September 13-26, 2020 - on an authentic, immersive travel experience that will be unforgettable.
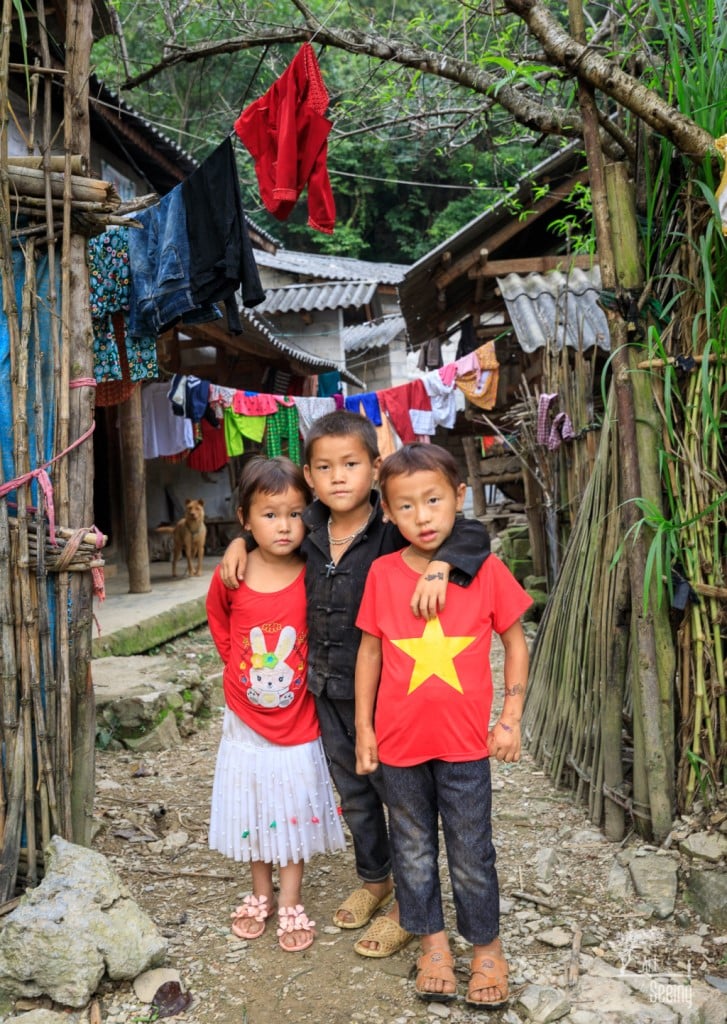
Photo by Ken Lee/Art of Seeing Photography Adventures
Ken Lee, the expert photographer who will lead this Vietnam Backroads & Byways 2020 Photography Workshop & Tour, loves helping other photographers grow in their craft as much as he enjoys taking his own photos.
It’s that kind of leader you want on a photography tour - someone that’s genuinely invested in your development behind the lens.
You’ll learn both technical and creative aspects of photography from Ken, and come out of the workshop a more skilled and creative photographer.
The deadline to sign up for this incredible tour is May 24, 2020, but with limited space, you don’t want to wait too long. Sign up for this Vietnam photography workshop now.
Other Tips for Planning a Vietnam Photography Trip
- Where to fly into: Noi Bai International Airport in Hanoi is your best best.
- Best luggage: For a trip of this length, the Nomatic Check-In roller bag is the ideal choice. It offers polycarbonate construction that stands up to the rigors of travel, silent wheels, low-profile handles, and a three-stage aluminum handle to fit your height. With space for 78 liters of gear, this bag has plenty of room for a 5-day trip or longer.
- Attractions & Things to Do: Visit the Old Quarter in Hanoi and enjoy the 2,000-year-old history of the oldest area of the city. The Lotte Observation Deck is a must-see for breathtaking views of the city.
- Best Time of Year to Visit: Generally speaking, the winter months are best for visiting Vietnam. The temperatures and humidity are lower and the chance of rain is less, too.
- Check the weather in Hanoi right now.
We Recommend
Visiting Myanmar? Don’t Miss These Photography Hot Spots

Photo by Sébastien Goldberg on Unsplash
While I’m not doing a lot of traveling right now, I’ve been dreaming about visiting Myanmar.
Myanmar is one of the most culturally diverse places on Earth. You can find over 130 different ethnic minorities there. The food is incredible, although it can be challenging for folks not used to it. But, most importantly, there are dozens of wonderful photography spots in Myanmar.
You can photograph natural beauty at Inle Lake, opt to take photos of architecture in Bagan, or participate in street photography.
If you’re planning on visiting Myanmar anytime soon, this Myanmar photo guide is for you.
Yangon
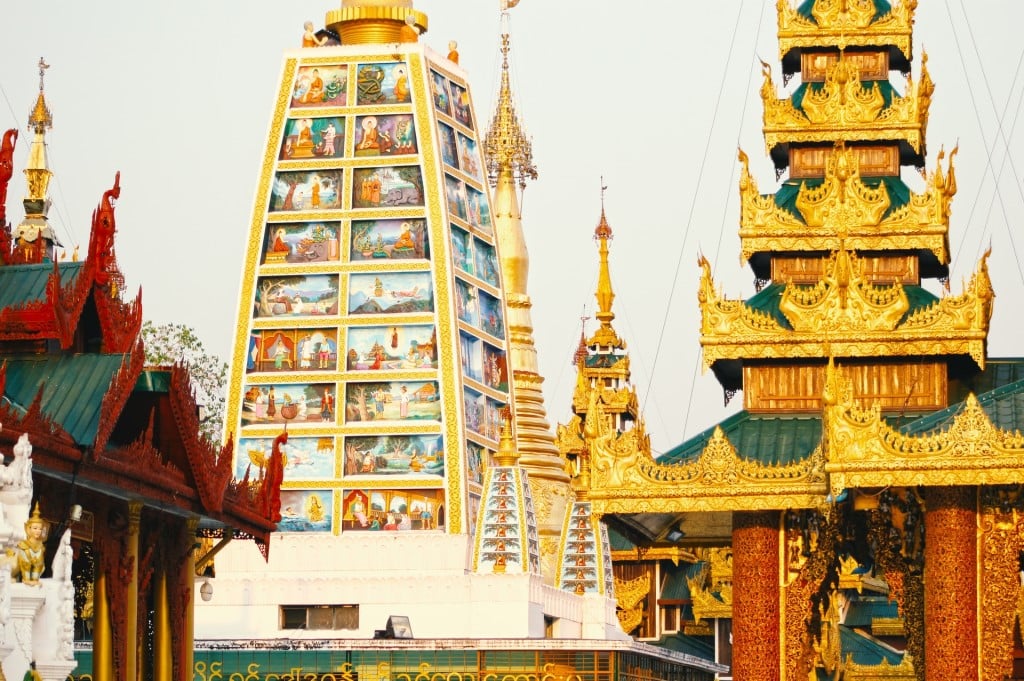
Photo by Isabel Retamales on Unsplash
Yangon is an often overlooked city in Myanmar, because many tourists only think of it as the way to get into and out of the country since it's the largest city in Myanmar.
But, Yangon features some of the best photography spots in the country. For starters, the Shwedagon Pagoda is located in Yangon. While very few western tourists have heard of this pagoda, it’s actually the largest of its kind in the world.
There are also plenty of monasteries located in Yangon. One of the most beautiful is known as Naga Hlaing Gu Monastery. Thousands upon thousands of Buddhist monks congregate at this monastery, reciting Buddhist scripture and living out their day to day lives.
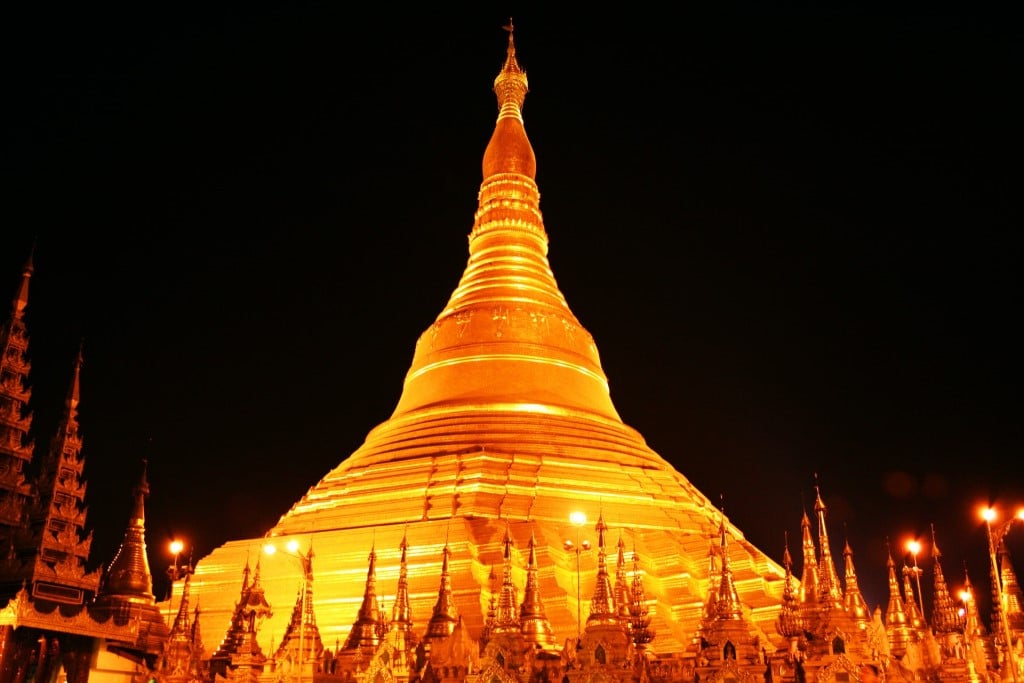
Photo by Si Thu Aung on Unsplash
There are also a plethora of other places to photograph in Yangon when visiting Myanmar. There’s the Yangon Central Fish Market, although you’ll need to head out at 4am to get the best photos when the fish are coming in from the harbor. There’s also a large collection of colonial buildings from the British occupation.
Since Yangon is so large, it is definitely helpful to participate in a Myanmar photo trip, like this one happening in 2021 with Photo Tours & Expeditions.
Being guided through Yangon is much less stressful than planning the trip for yourself, since public transit can get hectic. Plus, it can be incredibly frustrating to miss a great photo opportunity because you were too busy with logistics!
Bagan
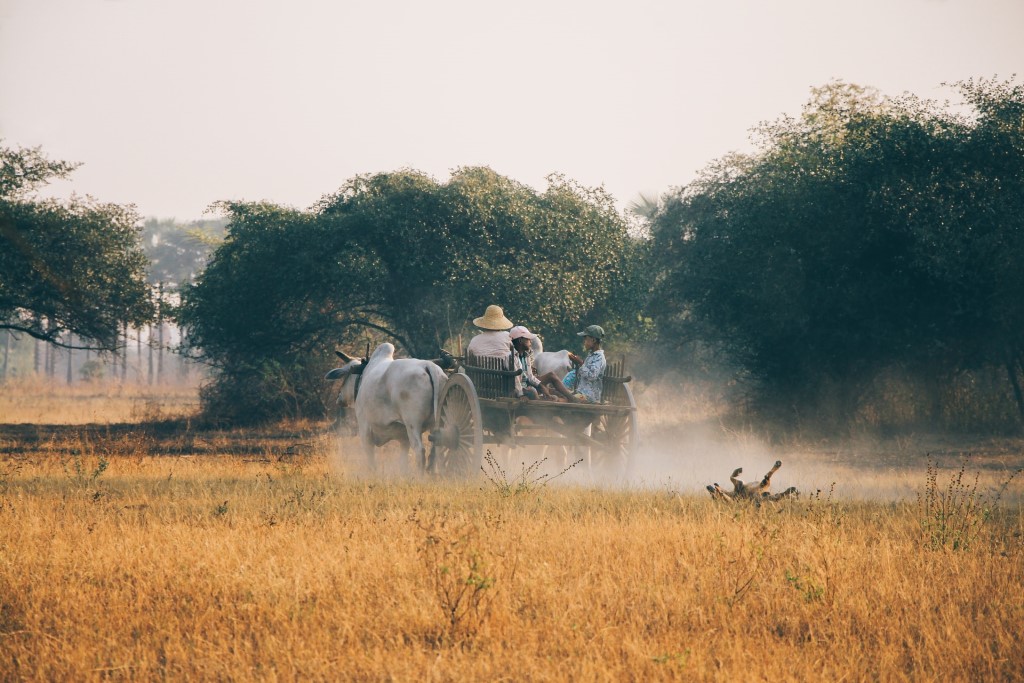
Photo by Si Thu Aung on Unsplash
When visiting Myanmar, you cannot miss Bagan. Bagan is quite possibly what you think of immediately when you think of Myanmar because Bagan houses gorgeous, towering Buddhist pagodas. There are actually over 2,000 of them across the area.
Bagan is a UNESCO World Heritage Site. Many of the temples were built between the 11th and 13th centuries, so it is also a popular spot for those interested in ancient history.
But, as anyone who has picked up a map of Bagan quickly realizes, there’s no possible way to visit everything you might want to in Bagan.
Of all of the Myanmar photo spots, this is the one I recommend everyone use a tour guide for. Joining a group like the Photo Tours & Expeditions Myanmar trip will ensure you use each of the golden hours for the day perfectly to catch sunrise and sunset photos of gleaming pagodas over an ancient landscape.
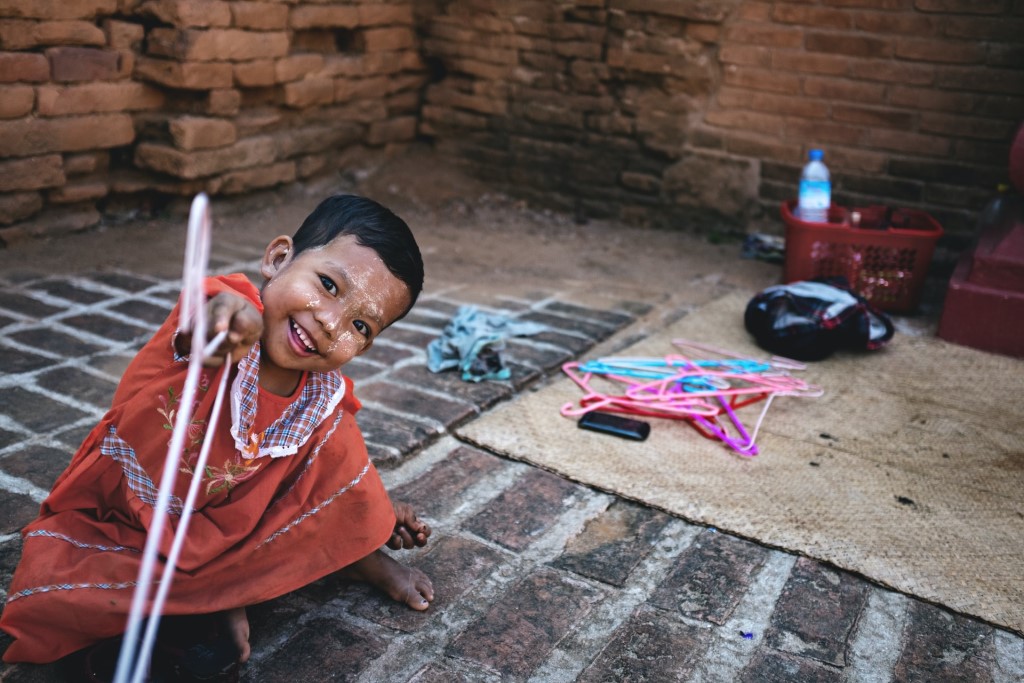
Photo by Jesse Schoff on Unsplash
As someone who wasted this opportunity when I was first visiting Myanmar as a rather broke 20-something, make sure you take a hot air balloon ride over Bagan.
It will probably be the most expensive thing you do on your whole trip, but you will never take a better aerial photograph in your life. Plus, you don’t want to end up like me and spend another few grand visiting Myanmar again because you felt like you missed out the first time.
Inle Lake
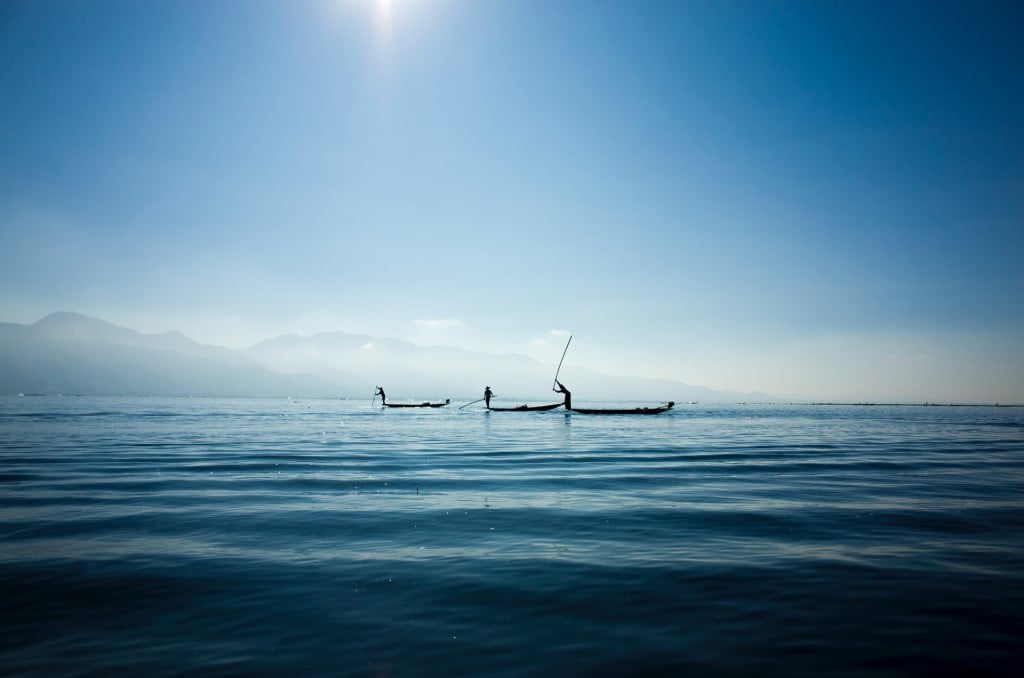
Photo by Mega Caesaria on Unsplash
Visiting Myanmar without stopping at Inle Lake should be a cardinal sin.
Inle Lake is one of the most pristine lakes in the world. It’s located high in the mountains of Myanmar, so it’s also one of the cooler regions in the country.
There are over 30 different tribes of people who live around Inle Lake and make their living from either tourism or fishing.
While Inle Lake is known for its natural beauty, it is also known for the unique fishing techniques of these tribes. The tribes steer their boats with just one leg and one oar. I’ve never seen anyone move faster on a boat.
Plus, many of the tribes live on man-made islands of vegetation on top of the lake and many floating markets are created on top of the water’s surface.
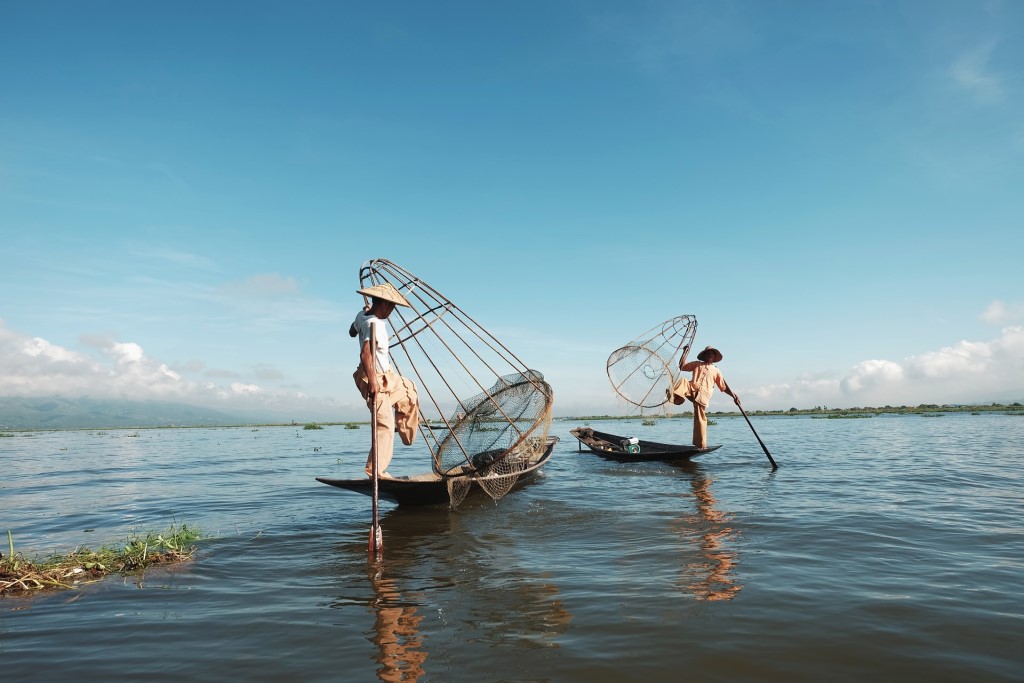
Photo by Edmundas Stundzius on Unsplash
If you’re seriously thinking about visiting Myanmar, the Photo Tours & Expeditions Myanmar trip is happening in November of 2021. Each Photo Tours & Expeditions trip is relatively small. This one will be kept between 4-12 participants, so you know you’re going to get specialized attention throughout.
This trip, in particular, will last two weeks and is all-inclusive. You’ll visit all three of the regions I already discussed to photograph the traditions of the people in Myanmar and to photograph the past traditions, archaeology and religions of the many people who have called it home over the centuries.
Myanmar is a warm country, but you’ll never be uncomfortable since you’ll be staying in gorgeous resorts and will have private transportation the whole trip.
This trip costs $5,900. Since it won’t happen until November 2021, the COVID-19 pandemic most likely won’t affect it. However, your money is 100% refundable in the case that the pandemic is not yet over at this time.
Learn More:
We Recommend
What is the Best Travel Camera Bag?
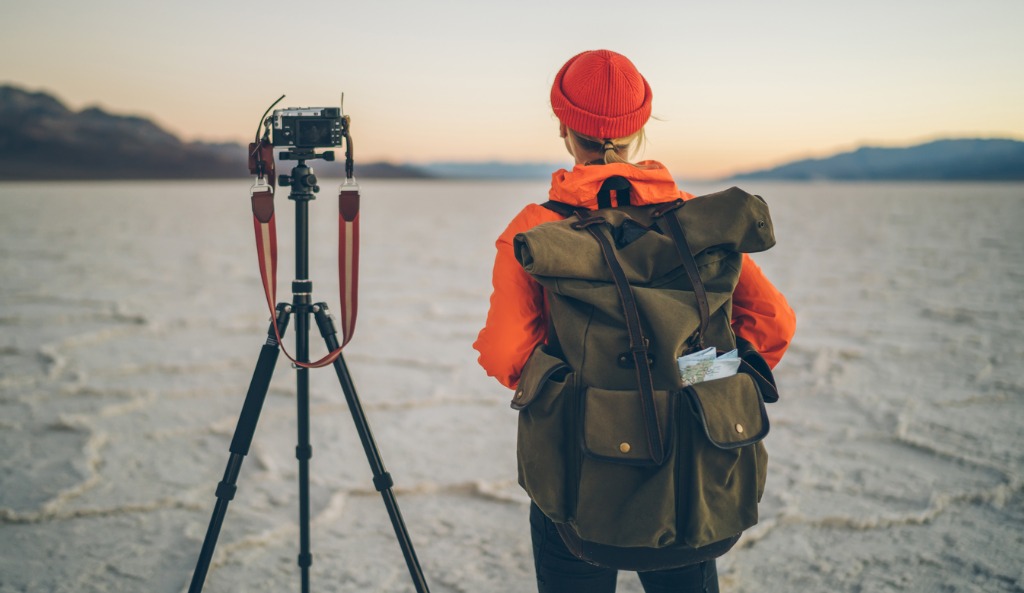
photo byGaudiLab via iStock
One of the best things you can do as a photographer is invest in a high-quality travel camera bag. It will give you some much-needed peace of mind when traveling, and at the end of the day, a good bag can often mean the difference between a functioning camera and a damaged one.
Important things to keep in mind when shopping for a new travel camera bag are size, material, how you carry them, and how protective they are.
Now, what is the best travel camera bag? The exact answer to that question depends on you and your needs, but here are a few terrific options to help you start your search!
Table of Contents
- All-Around Best Travel Camera Bag
- Best Travel Camera Bag for the City
- Best Travel Camera Bag for Adventure
- Best Travel Camera Bag for Budget Travelers
- Best Travel Camera Bag for Professionals
- More Marvelous Travel Camera Bags
All-Around Best Travel Camera Bag
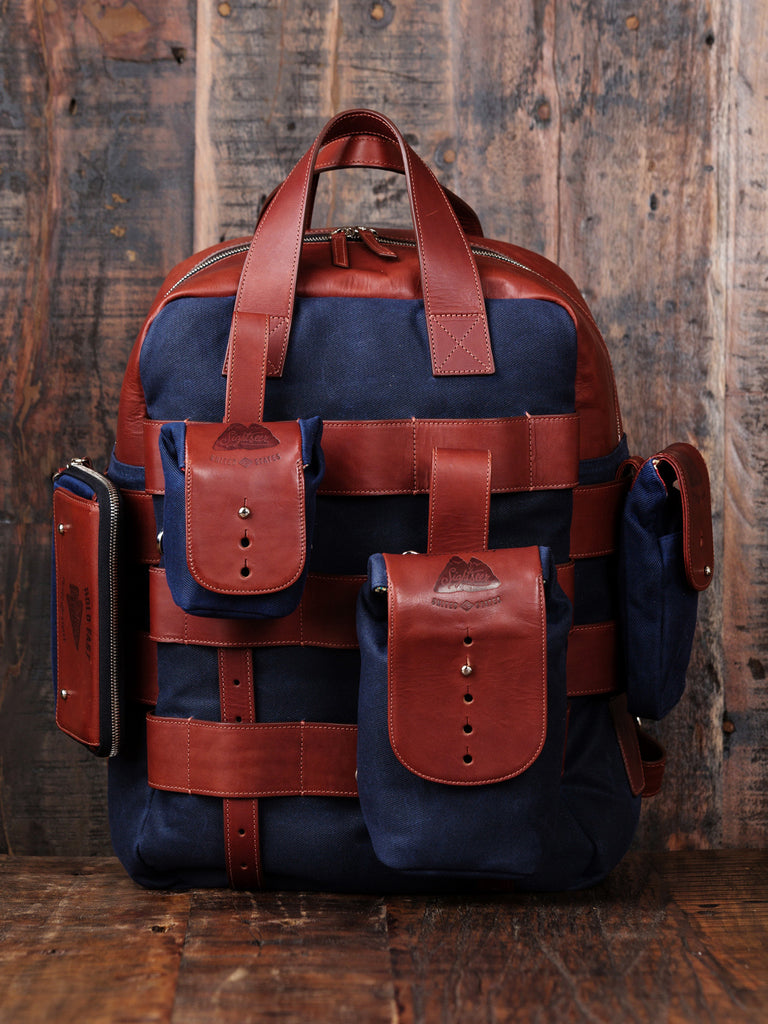
The Holdfast Sightseer Backpack is a truly one-of-a-kind travel camera bag perfect for wherever the road may take you.
Constructed out of Waxed Canvas, American Bison, or Bridle Leather and lined with a beautiful Aztec flannel fleece, this backpack is designed not only to protect your gear but to make you look good while doing it.
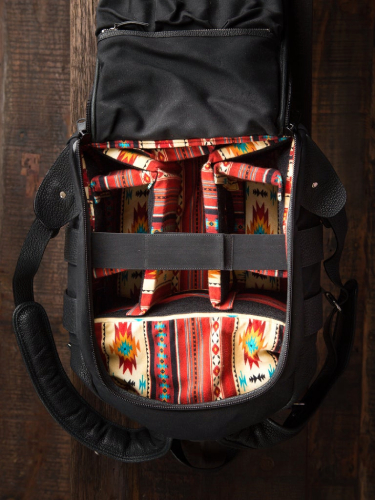
Thanks to removable velcro dividers, the spacious camera compartment is completely customizable and can be arranged specifically to meet your needs.
The main compartment also features a separate top section ideal for holding items like food or a jacket. Additionally, there’s a built-in sleeve that can fit up to a 15” laptop or tablet and a zippered pocket where you can safely store small and delicate items.
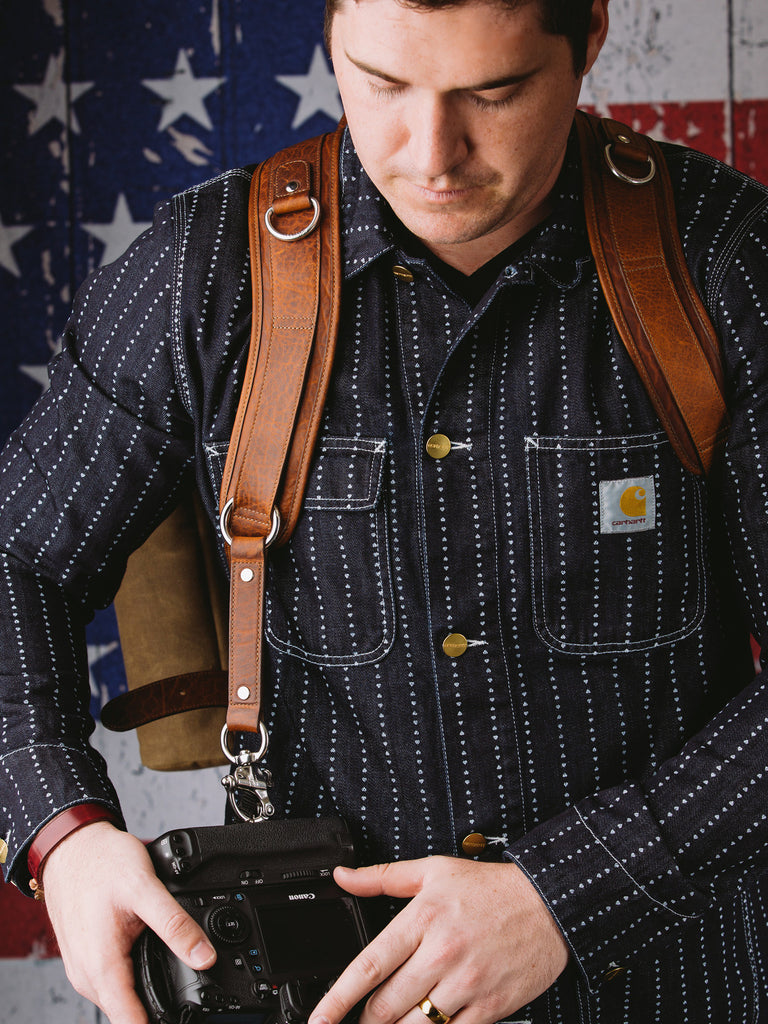
Another fantastic travel feature you’re sure to love is the integrated camera slider. It allows you to conveniently and comfortably keep your camera outside the pack and ready to shoot at all times.
My favorite characteristic, though, and what makes this without a doubt the best camera bag for travel, is the compatibility with Holdfast’s other amazing products.
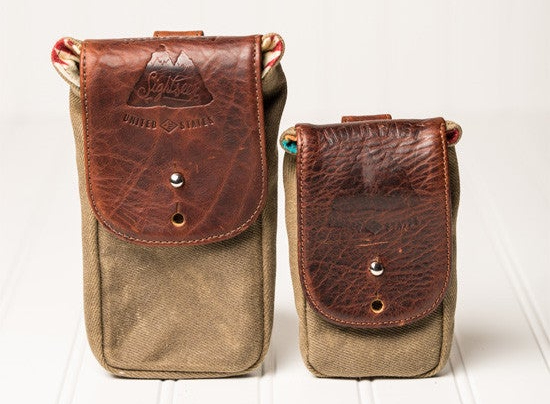
For example, the entire line of Sightseer pouches can be attached directly to the backpack whenever you want easier access to specific items or need to carry more gear.
No other bag on the market today can match the comfort, durability, protectiveness, and stylish design of the Holdfast Sightseer backpack! So, if you’re looking for the overall best travel camera bag, look no further!
Best Travel Camera Bag for the City
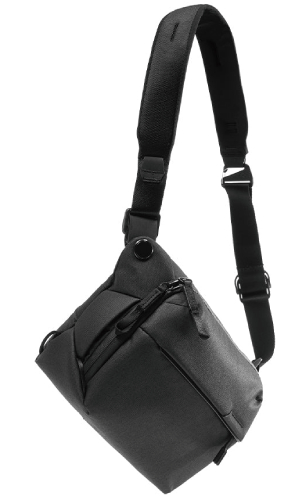
Peak DesignPeak Design is one of the most innovative and forward-thinking photography companies in the world, and their excellent line-up of camera bags confirms that. While all their bags are incredible, the one I want to highlight here is the Peak Design Everyday Sling.
It comes in three different sizes: 3 liters, 6 liters, and 10 liters. The 3-liter bag is designed to hold a mirrorless camera with an attached lens, the 6-liter bag is for DSLRs, and the 10-liter bag works for both while also providing plenty of additional space for lenses and gear.
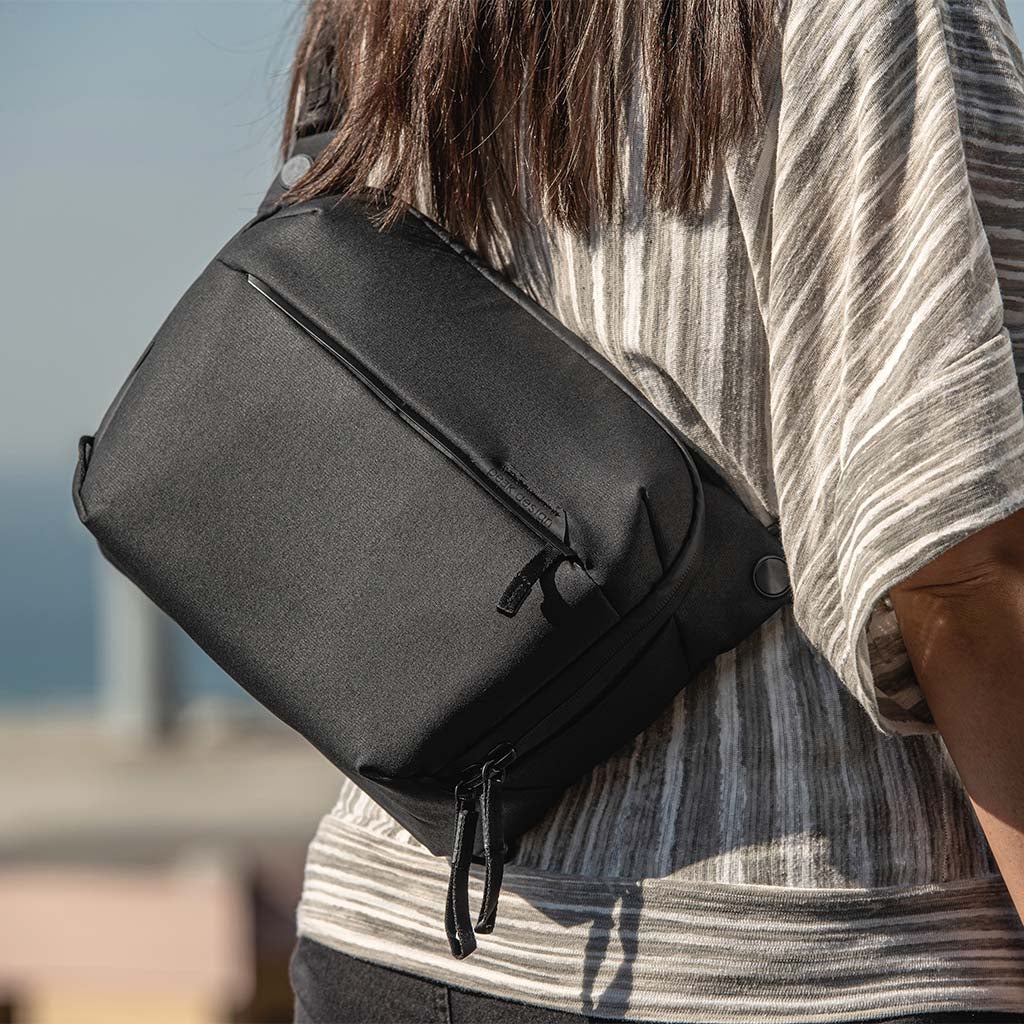
It’s an extremely portable and lightweight bag that's comfortable to wear and comes in three stylish colors: black, ash, and midnight. Furthermore, the cross-body strap has a quick-adjust feature that can be tightened when doing vigorous activities like walking or biking and loosened when you need to get in and out of the bag.
Another great travel feature is that the dividers can be completely removed if needed, which transforms the bag into a spacious and useful day or computer bag whenever you want to leave the camera behind. If you mainly travel to cities, this is the best travel camera bag for you!
Learn More:
Best Travel Camera Bag for Adventure
Are you an adventure lover who travels more to the mountains than to cities? If that’s a resounding yes, the Lowepro Flipside Trek BP 350 is certainly the best travel camera bag for you.
It’s an extraordinarily comfy 15-liter backpack built to be worn for extended periods of time when hiking, walking, skiing, or biking. It uses patented ActiveZone suspension technology, along with a vented back panel and a sturdy hip belt, to distribute the weight evenly and ensure maximum comfort even when doing extreme sports.
Inside the pack, you’ll find a large camera compartment that is accessed via the back of the bag, as well as a separate top section for storing all your other outdoor essentials. This design lets you best maximize the space while simultaneously keeping everything organized and protected.
The coolest thing about this camera bag for travel, though, is that you can access the camera compartment without removing the backpack entirely. With the hip belt securely fastened, spin the bag to your front and it will balance perfectly at waist level and give you instant access to everything inside. This is super useful when you need to change lenses quickly and don’t have a lot of time.
Best Travel Camera Bag for Budget Travelers
If you’re on a budget and are looking for a lightweight bag to protect your camera, the Manfrotto Holster XS Plus is the perfect small camera bag for travel. This holster bag has a unique compact design, is made out of durable water repellent nylon, and holds way more than you would think.
The main compartment is made for small mirrorless cameras like the Sony Alpha A6000 or A6500 and fits the camera with an attached lens. In the same space, you’ll notice there’s a separate pocket for storing spare memory cards.
What makes it stand out from other travel holster bags, though, is the separate lens pouch at the bottom of the bag. It allows you to safely carry an extra lens when traveling and gives you more freedom as a photographer. An example of two great travel lenses you could fit in this bag are the Sony Vario-Tessar TE 16-70mm F4 and the Sony 35mm F1.8.
Additional things you will love about this small camera bag for travel are the reverse opening which provides easy access, the detachable shoulder strap, and the two large side pockets. This is for sure the best travel camera bag if you are on a budget and looking for a steal.
Best Travel Camera Bag for Professionals
The Lowepro Pro Trekker RLX 450 AW II is built for professionals with large kits, and it’s an unrivaled DSLR camera bag for travel.
It can hold a camera with an attached lens, another camera body, 4-5 additional lenses, a laptop or tablet, a professional tripod, and incredibly still has space for more accessories. With adjustable dividers and tons of pockets, you have the ability to create the perfect setup for you and your gear.
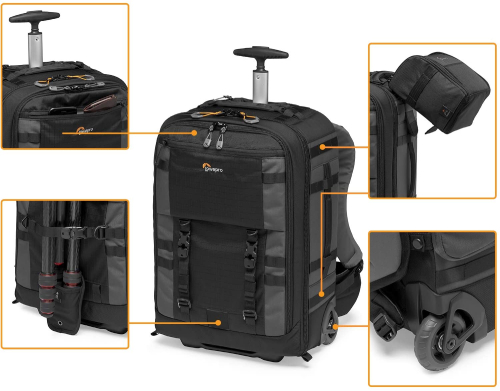
As a convertible bag, it has comfortable padded shoulder straps, which allow it to be worn as a backpack, but it also has wheels and can be rolled like a suitcase. This versatility is unbelievably useful and means you can travel comfortably through the airport but also reach the most remote destinations with the same bag.
When traveling by plane, the shoulder straps and waist belt can be tucked away into the bag, and it will meet all carry-on requirements. A few more perks of this DSLR camera bag for travel include a built-in AW cover, water bottle pockets, and lots of exterior straps for attaching gear.
More Marvelous Travel Camera Bags
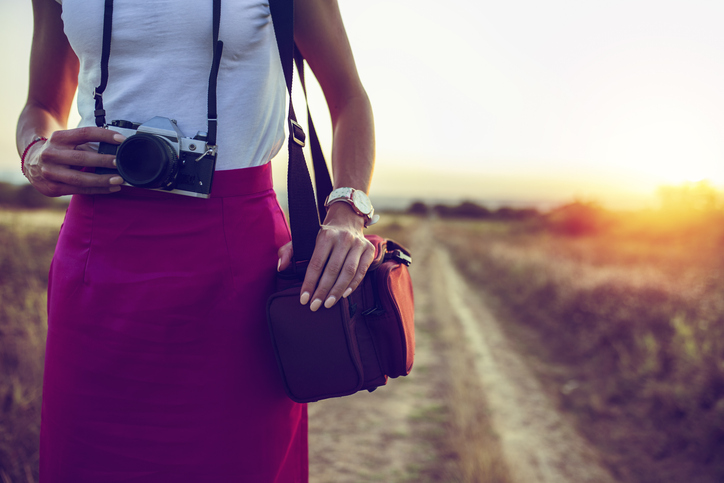
photo byDusan Ilic via iStock
I’ve shared some fantastic options with you so far, but if you want to continue researching, here are some more of the best travel camera bags money can buy:
- Holdfast Sightseer Camera and Lens Modular System
- Peak Design 45L Travel Backpack
- Pelican Air 1485
- Shimoda Designs – EXPLORE 40
- Lowepro Photo Sport 200 AW II
Learn More:
We Recommend
What Kind of Photography Travel Bag is Right for You?
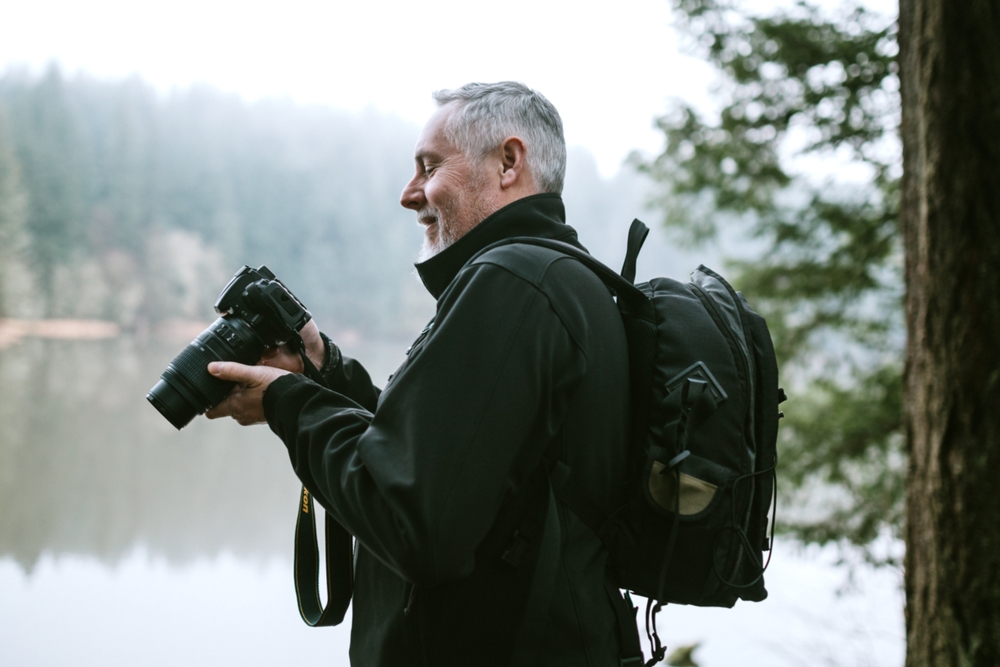
Photo by RyanJLane via iStock
Owning a good photography travel bag is crucial whether you are a casual, enthusiast, or professional photographer. Not only do they carry and protect your gear, but depending on your experience and the type of photos (or video) you shoot, the right camera bag can make a huge difference in your workflow speed and the quality of your content.
Keeping that in mind, we wrote this article to help you find the perfect photography travel bag for your needs. We’ll discuss three different options: a small, medium, and large bag. Moreover, at the bottom of the page, there is a list of a few other excellent photography bags for traveling.
One thing to note is that all the photography bags recommended in this article are by Vanguard. Why Vanguard, you may ask? It’s simple. We have used their bags for years, and their attention to quality, comfort, and versatility has blown us away.
That said, join us as we dive in and discover what kind of photography travel bag is right for you!
Table of Contents
- A Small Photography Travel Bag
- A Medium-Sized Photography Travel Bag
- A Large Photography Travel Bag
- Final Thoughts on Photography Travel Bags
- Other Recommended Photography Gear<
A Small Photography Travel Bag
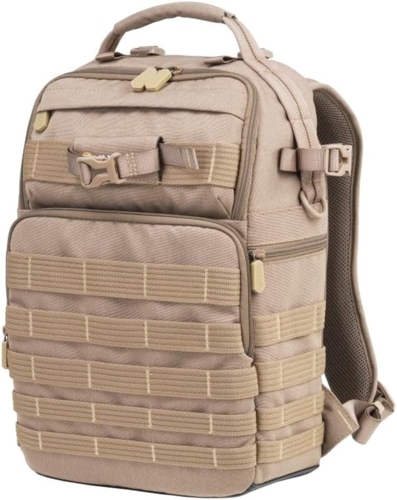
The Vanguard VEO Range T37M is a great choice for people looking for a lightweight, simple photography travel bag. Its small size and comfortable design make it a wonderful backpack for day trips and beginner photographers. The back and shoulder straps have generous padding, allowing you to walk for hours less likelihood of experiencing pain.
The bag has a main compartment for bigger gear, a separate top section for snacks or clothes, and a front pocket for small items (memory cards, batteries, pens, etc.). Additionally, you can access the backpack from the top, side, or back. And if you need more space, you can attach items to the exterior using the bag's innovative webbing.
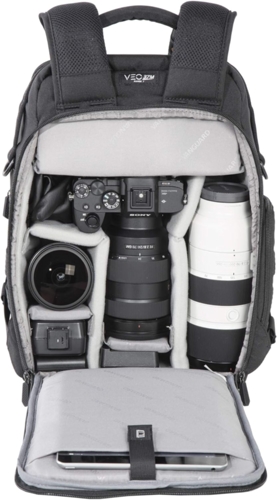
Here’s an in-depth look at the key features and specs of this small photography travel bag:
- Bag Type: Camera Backpack
- Material: Polyester
- Volume: 11 liters
- Exterior Dimensions: 10” x 7.13” x 15.75”
- Interior Dimensions: 12.6” x 4.5” x 14.63”
- Weight: 3.02 lbs
- Load Capacity: 15.4 lbs
- Laptop/Tablet Compartment: Yes
- Tripod Compatible: Yes
- Rain Cover Included: Yes
- Price: $199.99
Learn More:
- Camera Bag or Camera Case: Which Do You Need?
- Get Ready for Summertime Travel Photography With This Crucial Gear
A Medium-Sized Photography Travel Bag
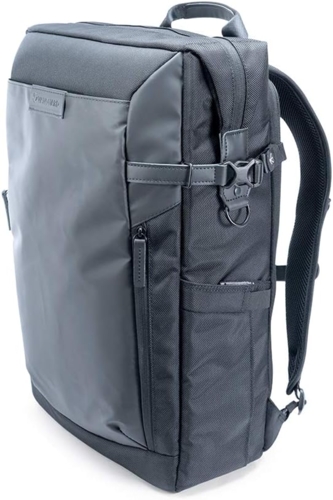
OK, you are starting to take photography more seriously and have decided to exchange your point-and-shoot camera for an interchangeable lens camera like a DSLR or mirrorless camera. Next, you need a bigger bag to accommodate the extra gear—enter the Vanguard VEO Select49. It’s a spacious, stylish camera backpack that is great for photography adventures in cities, on the trails, and points in between.
Another huge plus is its versatility. At any point, you can tuck away the backpack straps and turn it into a comfortable over-the-shoulder messenger bag. It’s like getting two unique photography travel bags for the price of one! Wearing it as a messenger bag is ideal for portrait and street photography.
Here’s an in-depth look at the key features and specs of this medium-sized photography travel bag:
- Bag Type: Camera Backpack / Messenger Bag
- Material: Polyester
- Volume: 18 liters
- Exterior Dimensions: 13.3” x 8.1” x 20.2”
- Interior Dimensions: 11.3” x 4.9” x 19.2”
- Weight: 3.66 lbs
- Load Capacity: 20.28 lbs
- Laptop/Tablet Compartment: Yes
- Tripod Compatible: Yes
- Rain Cover Included: Yes
- Price: $219.99
Check out the video above by G2Shoots to learn more about the Vanguard VEO Select49 and what makes it a fantastic travel photography bag.
A Large Photography Travel Bag
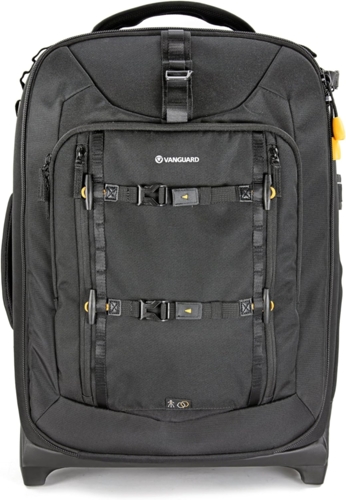
For the gearheads out there who don’t like leaving home without all of their things, our favorite photography travel bag is the Vanguard ALTA Fly 62T. It boasts 36 liters of internal storage space, which can hold 2/3 camera bodies, up to 11 lenses, and more. It’s also a terrific bag for videographers and filmmakers since they typically travel with more equipment.
Other highlight-worthy features include its wheeled design, endless pockets, and removable dividers. The wheels make it easy to carry around the airport. The many compartments improve organization. And the removable divider allows you to seamlessly transform the bag into a standard suitcase whenever you need to travel without photography equipment. And if that wasn’t enough, it also meets all domestic and international carry-on requirements!
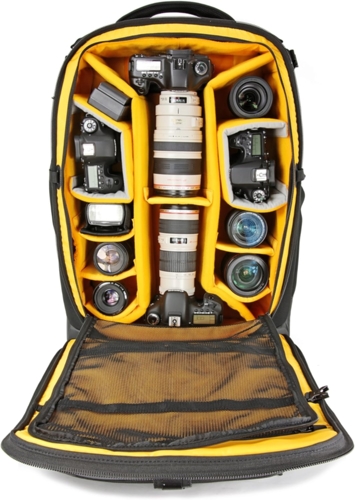
Here’s an in-depth look at the key features and specs of this large photography travel bag:
- Bag Type: Rolling Camera Bag
- Material: Polyester
- Volume: 36 liters
- Exterior Dimensions: 17.5” x 11” x 26”
- Interior Dimensions: 13.75” x 7.5” x 21.625”
- Weight: 11.4 lbs
- Load Capacity: 44 lbs
- Laptop/Tablet Compartment: Yes
- Tripod Compatible: Yes
- Rain Cover: Yes
- Price: $399.99
Final Thoughts on Photography Travel Bags
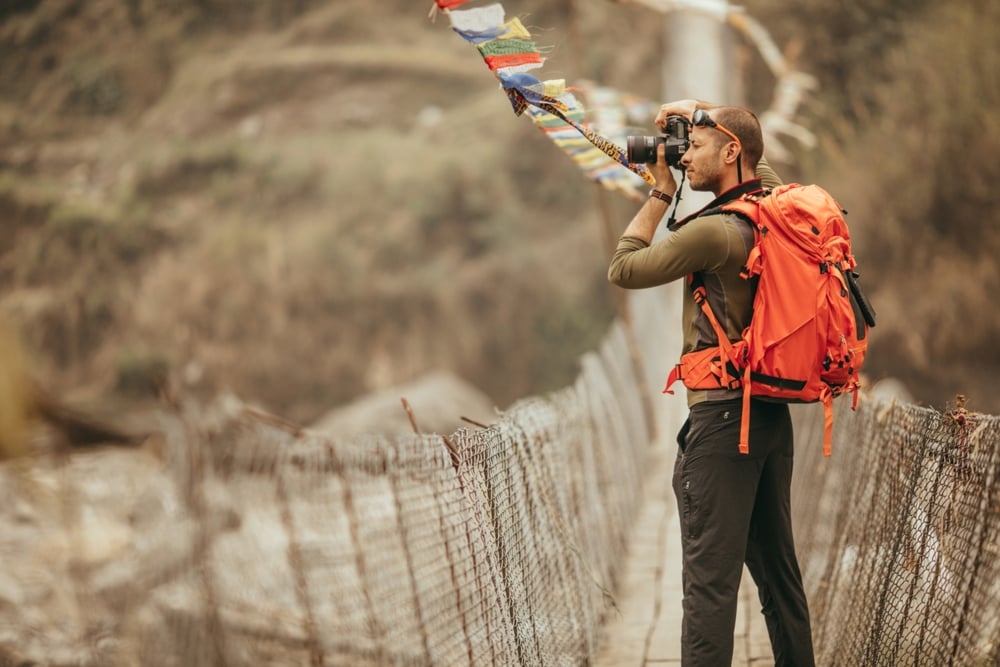
Photo by AleksandarNakic via iStock
Now that you’ve had the time to look over the three photography travel bags above, here are our final recommendations.
The Vanguard VEO Range T37M is best for casual photographers with a small camera and minimal gear. The Vanguard VEO Select49 is a good fit for enthusiasts who prefer to travel with multiple lenses. Lastly, the Vanguard ALTA Fly 62T is ideal for professional photographers and videographers who must transport lots of equipment (lighting, stabilization, drones, etc.).
Please don’t feel obligated to stick to those guidelines, though. Depending on your needs and budget, one bag might be a better choice than another. Furthermore, if you aren’t convinced any of them are your dream bag, here are a few more amazing Vanguard camera bags to consider.
- Vanguard VEO City CB29 Urban Crossbody Camera Bag
- Vanguard VEO Adaptor S41 Side Opening Camera Backpack
- Vanguard VEO Active 53 Camera Backpack
- Vanguard Alta Rise 28 Messenger Bag
- Vanguard VEO Select 42T Roller Case
Other Recommended Photography Gear
Disclaimer: A quick heads-up: If you snag something through our affiliate links or check out our sponsored content, we might earn a commission at no extra cost to you. But fear not, we're all about recommending stuff we're truly stoked about!
Learn More:
- Which of These Vanguard Camera Bags is Best for Your Needs?
- Monopod vs Tripod: Which is Best for You?