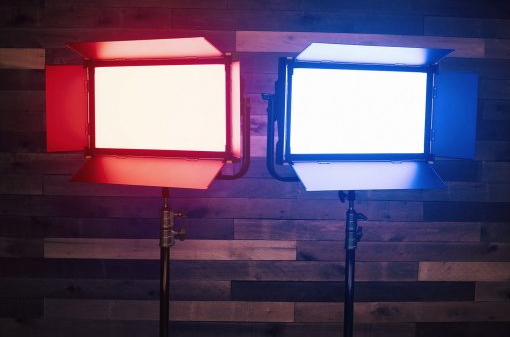
2019 Best Lights for Photographers

Since photography is all about good light, one of the most important things you can have in your camera bag is a top-notch light.
Now, I know what you’re thinking - using artificial lights is expensive and time-consuming and difficult to learn.
And maybe that was true back in the day when you had to invest in big, heavy lighting gear to get the job done.
But these days, there are all kinds of small, portable, and affordable lights for photographers that make it far simpler to get just the right light for your photos.
That being the case, let’s check out the best lights for photographers that we’ve tested in 2019.
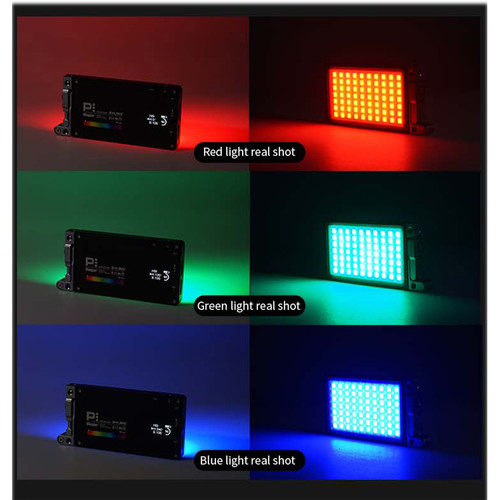
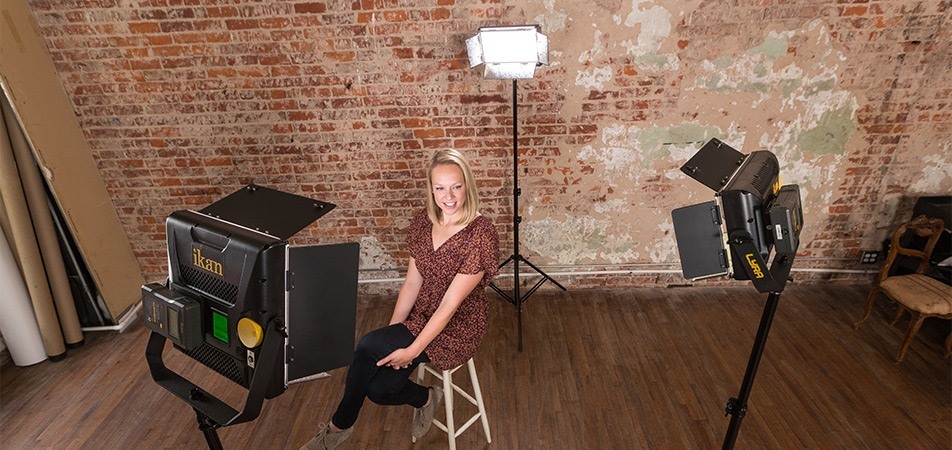
Hakutatz Pocket Size RGB+AW LED Light

As its name indicates, this little light fits in your pocket, but don’t let its small size fool you…
With amber, white, and RGB LEDs, you can come up with virtually any kind of light you need for your photos.
Add visual interest and drama with any color of the spectrum using the RGB lights or get the perfect white balance using the amber or white lights.
Editor's Note: The Hakutatz Kickstarter campaign was a huge success! Their Amazon store will be open and ready for orders in early December.
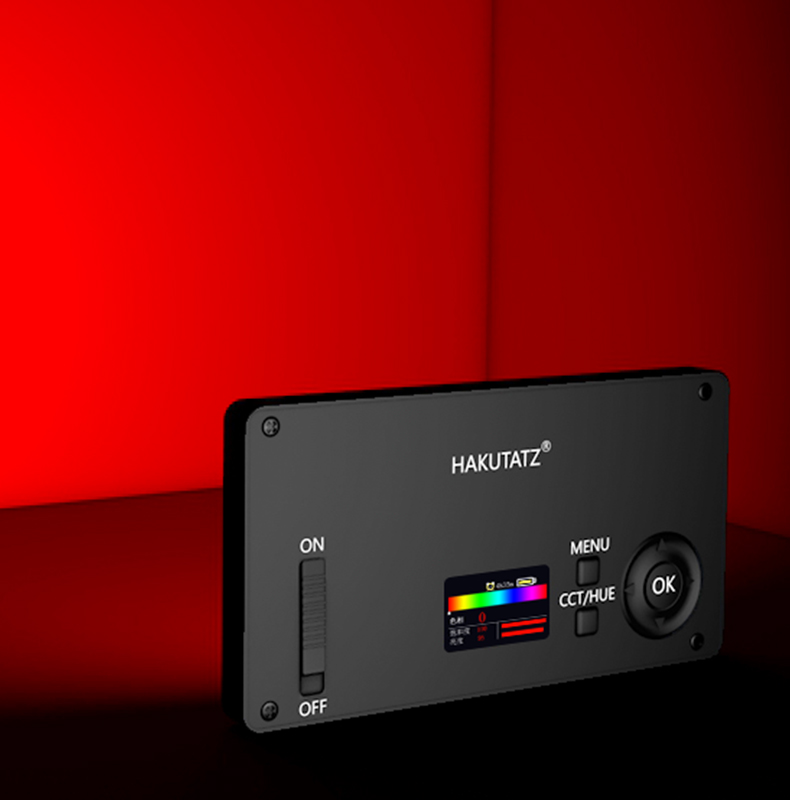
Whatever the case, you can fine-tune the settings using the companion app. That means that with a simple touch or swipe of your finger, you can adjust the RGB color, the color temperature, special effects, and even control multiple lights at the same time.
You can adjust saturation and brightness, too, so you don’t need to invest in other lighting gear like diffusers or softboxes. All you need is in this one little portable light!
Learn more about the Hakutatz Pocket Size RGB+AW LED Light
PilotFly AtomCube RX1 RGBCW LED Video Light

When considering what lights made this list of the best lights of 2019, one of the first to come to mind is the little guy shown above.
The AtomCube RX1 from PilotFly is another excellent example of how far lighting for photography and videography has come in the last few years.
Not only is this a key light in your pocket, but it’s also packed with features that will help you achieve your creative vision.
For example, it has nine common lighting scenarios built right in, that way you can quickly and easily implement a lighting scheme. Likewise, it offers tons of adjustments, from the color temperature to the brightness to the color saturation.
This light is also fully dimmable from 0-100 percent, so you can truly get the precise level of light you need for the shot or video sequence you’re working on.
If you need to create a more elaborate lighting setup, PilotFly has you covered because you can link up to 255 AtomCubes together via Bluetooth. And don’t worry about the light not being consistent - these lights are calibrated so you get color tone and brightness that looks the same across multiple lights, especially when they’re mounted together using Magic Cubes.
You can then control all those lights using the AtomCube smartphone app. Literally with just a few taps of your phone, you can adjust brightness, change the color temperature, and create an unlimited number of groups of lights, all in real-time. It doesn’t get much more convenient than that when you’re multitasking at a photo shoot!
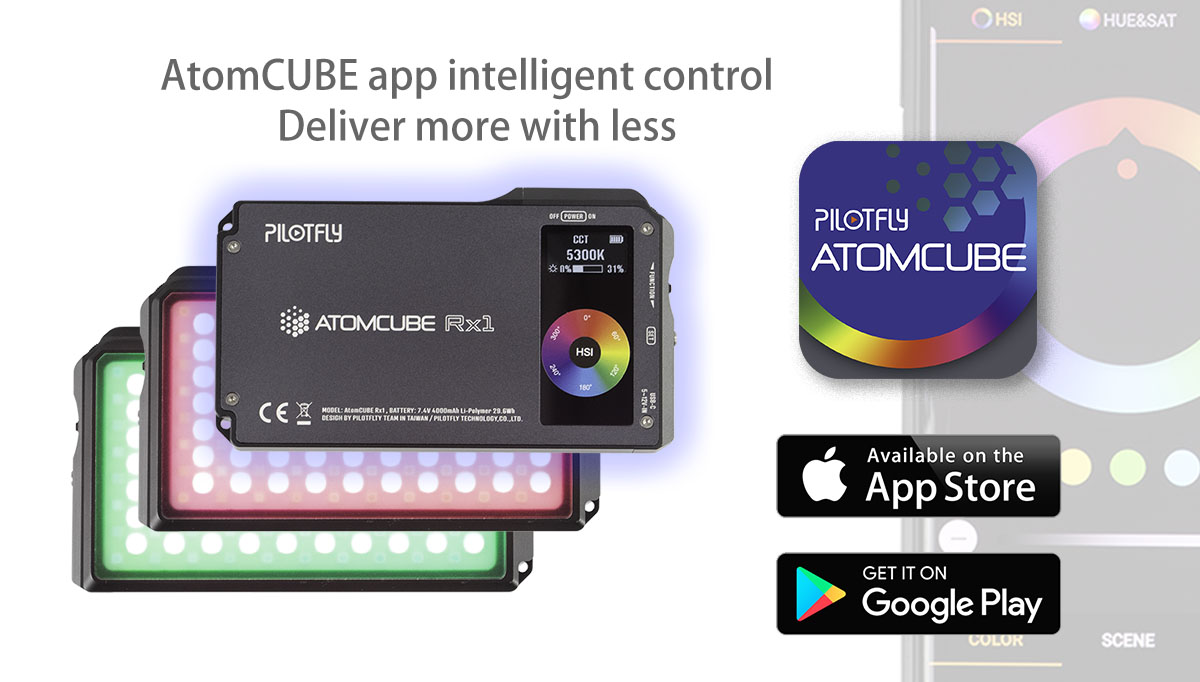
The high-strength, all-aluminum frame makes this light super lightweight, yet incredibly durable, so it’ll be a solid companion and workhorse for you for years to come.
Add in a three-hour battery life on full power, a CRI of 95+, a TLCI of 97, and a variety of lighting accessories to expand your creative possibilities even further, and you begin to see just what a high-quality, reliable light this thing is!
Learn more about the AtomCube RX1 RGBCW LED Video Light
Litra Studio

Weighing in at just 33.5 ounces and measuring 5.5" x 3.9" x 2.9", this light is ultra-compact for easy transport, yet is capable of producing up to 3,000 lumens of continuous light and up to 6,00 lumens of flash. Nice!
Better still, the light is fully dimmable, tunable, and offers CCT, HSI, RGBWW, gel presets, flash modes, and effects as well.
It CCT mode, the light gives you 2,000-10,000K adjustable bi-color lighting with a green and magenta color shift control to allow for tunable blue and green screen optimization.
It also offers flicker-free lighting at all shutter angles and features a 97 CRI and TLCI color accuracy.
With a rugged, waterproof design, efficient passive thermal management, and up to 20 hours of battery life on the lowest setting, this light is one of the best lights for photographers this year, hands down.
Learn more about the Litra Studio
Andycine Boling P1 RGB Pocket LED Light
Designed for video use, the Andycine Boling P1 is pocket-sized for easy transport and has a 360-degree mount to make manipulating the direction of light a quick and simple task.
In RGB mode, the light gives you 360 unique colors so you can get just the right light for each situation.
Color temperature is adjustable - from 2500-8500K - giving you the ability to match any ambient light sources. There are also nine built-in special effects, including candles, car lights, and lightning.
The rechargeable battery will give you over two hours of continuous use and has a built-in feature that prevents overheating.
This light is fully dimmable, has a CRI of 96 and a TLCI of 97, and has a ¼-20” shoe mount for easy mounting.
Learn more about the Andycine Boling P1 RGB Pocket LED Light
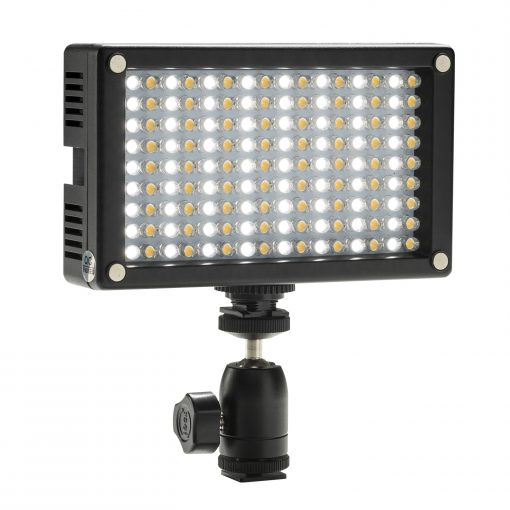
iLED 144 Bi-Color Flood Light
Another option for an affordable light for your photography work is the iLED 144 Bi-Color Flood Light.
This unit is just over 5 x 3 inches in size, so it offers excellent portability while also offering high-quality LED lighting.
Its solid construction means you get a light that's durable and reliable, and that will offer professional-grade performance for the long-term.
It utilizes energy-efficient bi-color LEDs and a 60-degree angle that gives you the reliable, consistent lighting you need to elevate the quality of your photos.
You can quickly and easily adjust the dimmer as well as the color temperature (from 3200-5600K) so you can dial in just the right lighting too!
This stackable on-camera light is also an affordable option that won't break the bank. What's not to like about that?!
Learn more about the iLED 144 Bi-Color Flood Light
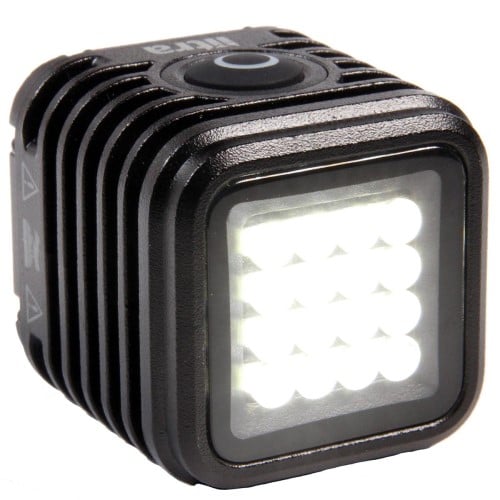
Litra Torch LitraPro

As I noted in my LitraPro review, this little light is one of the smallest you can buy at just 6 ounces and measuring 2.75 x 2 x 1.2 inches.
But Litra has packed 60 LEDs into this light, which gets you 1200 lumens of light for your photos.
The light is flicker-free, crisp, even, and very clean, which is just what the doctor ordered when it comes to getting high-quality light for your photos and videos!

The LitraPro offers bi-color light and has an adjustable color temperature of 3,000-6,000K so you can customize the lighting for each specific shot.
It has a 70-degree beam angle, is waterproof up to 90 feet, and has a 10-hour battery life on low output.
Add to that MIL-SPEC 810 durability, a bright OLED display, and Bluetooth control, and you have the makings of one of the best small photography lights you can get your hands on!
Learn more about the Litra Torch LitraPro
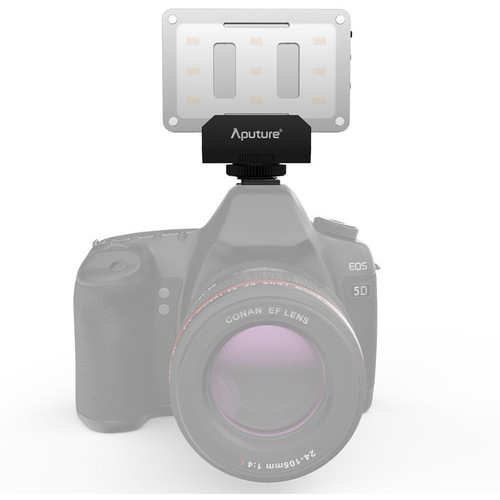
Aputure 120D II

If it’s a powerful studio light that you’re after, the Aputure 120d II performed very well in our review.
With a 1000-watt tungsten equivalent, fully dimmable light, and a CRI & TLCI of 97+, this light gives you beautifully clean output.
It comes with many different built-in lighting effects that enable you to create a more custom and interesting look in your images.

It has an integrated power and control box, which helps minimize clutter in your studio, and with an 18dB quiet fan, you won’t have to listen to a loud fan as you try to work with your clients.
I had the original 120d and while it was an excellent light, this one takes its spot on this list of the best lights for photographers because it’s 25 percent brighter than the original. It’s color temperature is also slightly warmer (5500K rather than 6000K) which I particularly like.
Add in a wireless remote, DMX controls, and good portability, and you have a light that ticks all the boxes for a quality addition to your studio.
Learn more about the Aputure 120d II
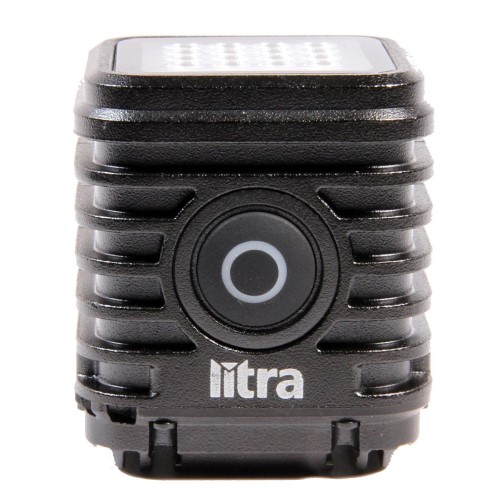
LitraTorch 2.0

This is yet another light I’ve reviewed this year that left me really impressed.
Not to be outdone in the smallness department, the LitraTorch 2.0 is by far the smallest light on this list, measuring 1.5 x 1.5 x 1.65 inches and weighing just 3.17 ounces.
In terms of portability, that’s hard to beat!
This light has 16 LEDs that offer 100, 450, or 800 lumens depending on what you need for the shot.

Regardless of the lumen output, you’ll get clean, crisp, flicker-free light with a 70-degree beam angle. As you’d expect from one of the best lights for photographers in 2019, this one offers a CRI of 90+ and a TLCI of 92.
You can use the light on its low setting for up to four hours or get about 35 minutes of output on the maximum brightness.
It’s also waterproof to 60 feet in case you need to do a little scuba diving, has a magnet for easily attaching to metal surfaces, and two ¼-20 mounts too.
Like the other lights on this list, the LitraTorch 2.0 is simply a versatile, do-anything light!
Learn more about the LitraTorch 2.0
Aputure Amaran AL-M9
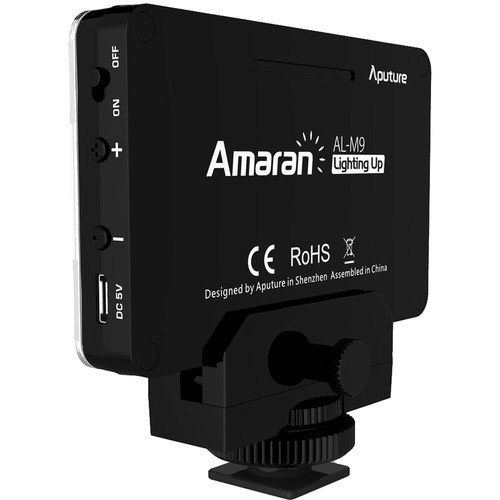
Rounding out my list of the best lights for photographers in 2019 is this little guy, the Aputure Amaran AL-M9.
This daylight-balanced LED light offers surprising brightness for such a small fixture.
It has a color temperature of 5500K and comes with a removable diffuser, CTO, and CTB filter. There are 9 steps of dimming as well.
The integrated battery gives you about two hours of runtime on full brightness when fully charged, and it can be charged quickly using the optional USB charger.
There are multiple mounting options as well, including as a cold shoe accessory or on a ¼-20 mounting point.
And at $45.00, it’s the cheapest light on this list!
Learn more about the Aputure Amaran AL-M9
We Recommend
3 GoPro Video Accessories You Need in Your Bag
photo byDmitrii Guldin via iStock
GoPro and GoPro style action cameras are fantastic tools for videographers. Being rugged and water resistant make them the perfect video gear for many situations in which it may not be advantageous for us to use our DSLR or mirrorless digital cameras.
GoPro action cameras are pretty small so matching them up with some GoPro video accessories such as a GoPro mount to hold the camera or other GoPro accessories such as mics or lights works out well.
To find GoPro video accessories and other general and specialized video gear, I like to use Ikan Corp. They make and sell all sorts of video gear for advanced videography. Here are three GoPro accessories you need in your bag.
GoPro Shoulder Rig
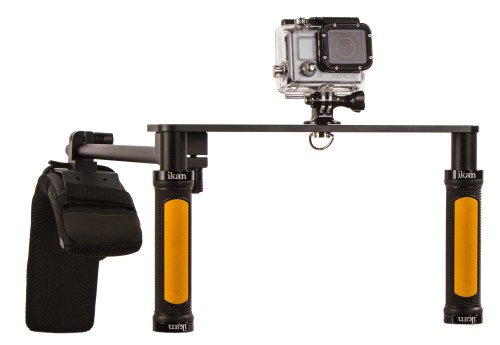
GoPro and other action cameras are quite small compared to most DSLRs and mirrorless cameras, which means we can mount them virtually anywhere. Holding them steady for videography with only our hands can be somewhat difficult, though, due to that small size.
A shoulder rig mount like the GoPro Handheld Shoulder Rig model ELE-GOFLY will allow for steady shooting on the fly and is configured to be able to hold two GoPro cameras at once for stereoscopic 3D applications. The extra mounting points can also be used for mounting lights or microphones.
The shoulder pad part of the mount can be moved from one side to the other or removed completely and the rest of the mount used as an action mount.
GoPro Grip Handle
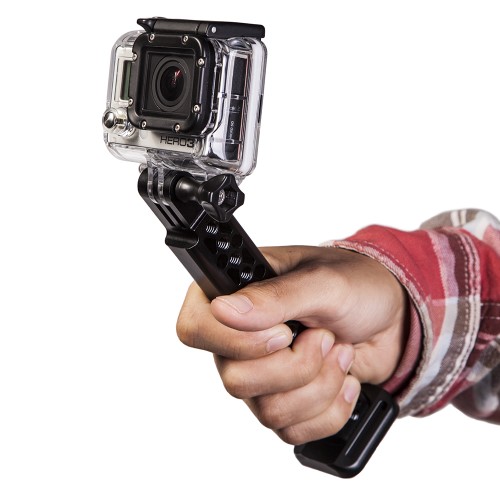
Perhaps you want a more simplified method of holding your GoPro video gear, if so a handle might fit your needs. The GoPro Grip Handle ELE-GPH lets you hold the action camera comfortably and even has a flat foot on the bottom side so you can use it as a stand on a table or brick wall or something similar. It is an item that many action cam videographers consider to be in their must have GoPro video accessories bag.
This GoPro mount grip allows for 90 degrees of tilt and has strap slots which you could use to secure it to a surface, an object, or around your wrist. For on the move filming, which is what most action cam footage is, attaching your camera to this video gear grip is a very good idea as it gives you more security and stability than trying to hold the camera on its own.
Learn More:
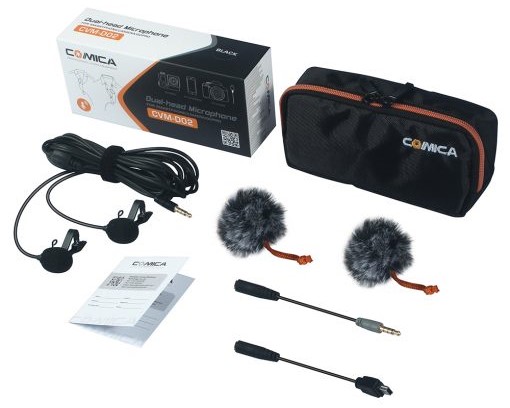
Dual-Head Lavalier Mic
One of the most important GoPro video accessories used to turn your action cam into a regular use video camera are auxiliary microphones. In order to record the spoken word, such as in a voiceover or an interview, lavalier mics are used by many videographers.
There are multiple options for lavalier mics including whether to use wired or wireless mics, but the least expensive and easiest to use are wired. Ikan’s Dual-Head Lavalier Mic, the Comica CVM-D02, is an excellent choice for GoPro video accessories.
It has two microphone heads, an 8 foot cord, wind socks, and two different types of connectors. The microphone has very low distortion and a wide dynamic range for natural sounding audio recording in our GoPro video recordings.
What Other GoPro Video Accessories Are Useful?

photo byYURII HAVRYKOV via iStock
The GoPro cameras and other action cameras are great for photographers and videographers, allowing shooting and recording in situations otherwise inaccessible to regular cameras. Other accessories that we can use include housings, cases, lights, and a huge array of different mounts.
Whatever your GoPro kit includes, you have the ability to capture truly breathtaking images and videos, particularly if you have a newer GoPro, like the Hero 9 Black. Good luck shooting!
Learn More:
We Recommend
3 Must-Have Video Accessories for the Sony a6500
Photo by Aman Upadhyay on Unsplash
Your Sony a6500 camera is a great tool for both still photography and video. There are some must-have video accessories for Sony a6500 that can assist you to get the most out of its video capabilities.
Accessories for video fall into several categories, camera handling, lighting, and audio. It’s important to keep in mind that video accessories won’t automatically improve your video, that’s still the work of gaining experience and skill.
What these Sony a6500 video accessories can do for you is make certain jobs either easier to do well or add capability that you can exploit. So we came up with a very short list of 3 must-have video accessories that can benefit your video efforts, specifically tailored to your Sony a6500 mirrorless camera.
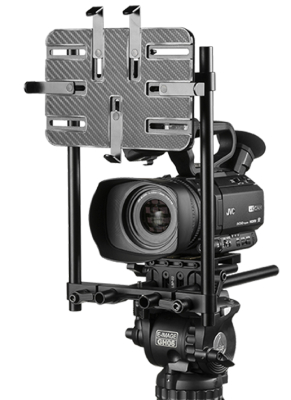
Camera Cage
What is a camera cage? It’s a housing, bracket, or grip for your camera that protects it and adds mounting points for all the various accessories for video that we add to our cameras to increase their capabilities and improve handling.
Some of those other must-have video accessories that would overwhelm this small camera without a camera cage are external mics, external monitors, follow focus systems, teleprompters, wireless transmitting gear, follow focus system, and matte boxes.
Attaching one external microphone to your Sony a6500 via the hot shoe pretty much takes up all the room available on the camera itself. A camera cage offers multiple mounting points, none of them attaching directly to the camera.
That’s an important thing to consider, because if we attempt to add more and heavier items to our camera hot shoe, we put extra strain on the camera’s top plate. Any drop or even a slight bump to a show mounted bracket with multiple items on it could damage the camera.
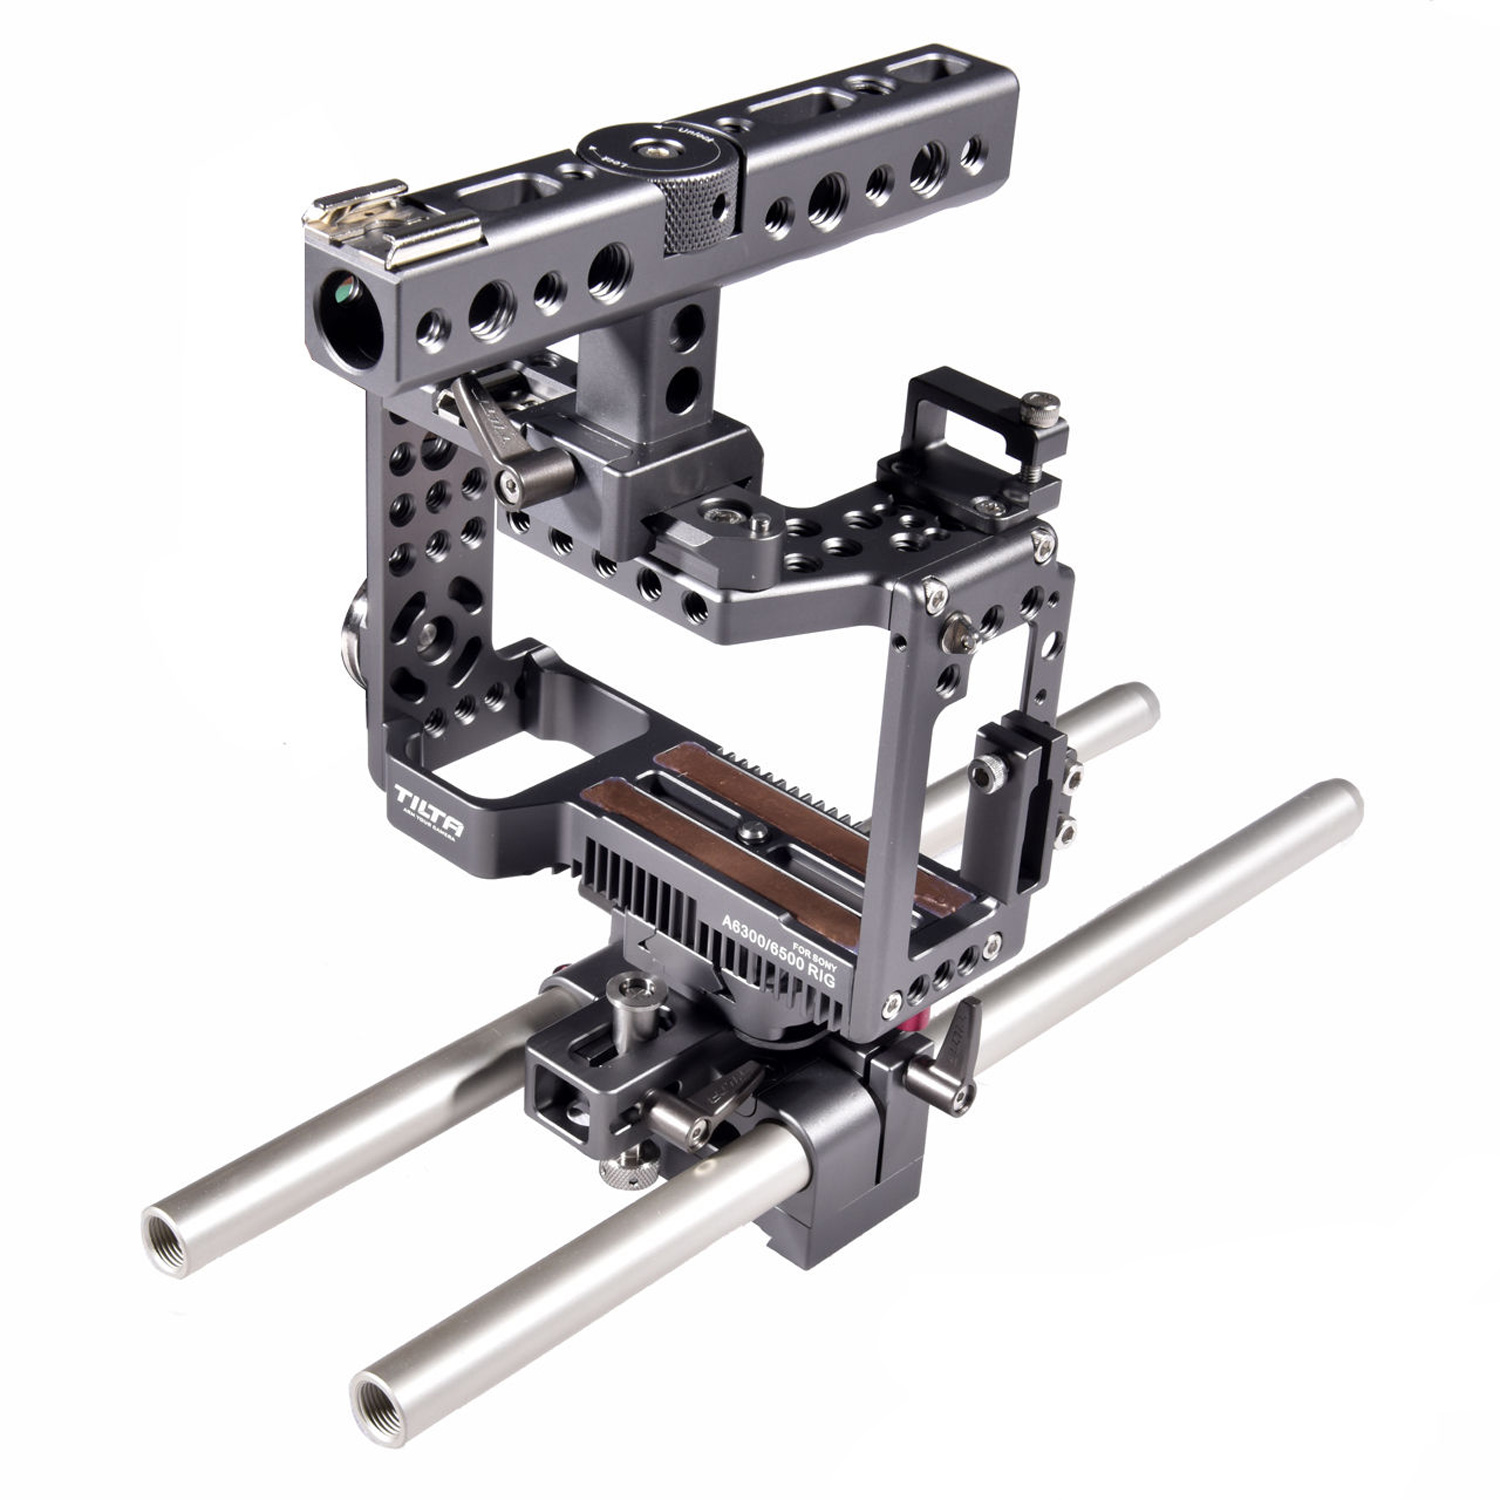
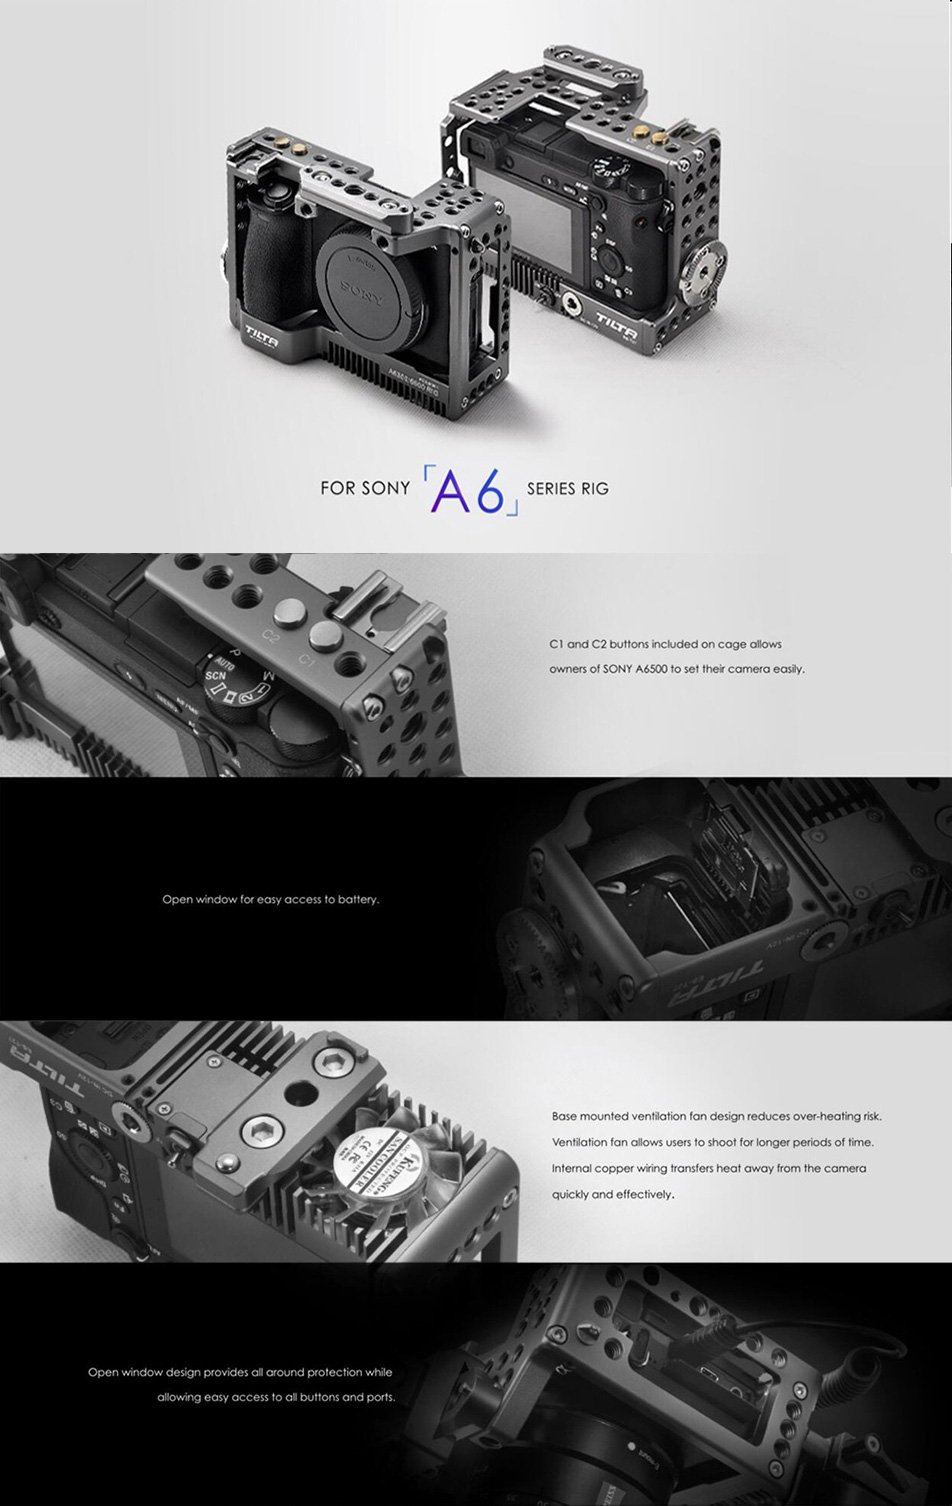
Looking at an example of a cage designed for this camera, such as the TILTA ES-T27 from Ikan, we see all of these considerations factored into its design. Since the Sony a6500 is the same basic body as the other Sony a6xxx series of cameras, it will also fit them.
Machined from a single piece of aluminum for the cradle art of the cage, it provides excellent damage protection for the camera.
Some other features are the multiple very secure mounting points for added gear, an integrated 15mm rail system for lens accessories, quick release for the entire rig, and full access to all buttons, doors, switches, and slots. It even has a cooling system to combat the problem of hot operation during long shoots.
Portable LED Light
Now we move on to the lighting category of our must-have video accessories for Sony a6500. Compared to photographic lighting, cinematography lighting can seem confusing at the start. But it isn’t difficult to figure out.
Many of the same lighting configurations we use for portraits and product photography can be adapted directly to video. The biggest change that we need to adapt to ourselves is movement. Videos move, with camera movement and subject movement, sometimes both at once. Even if we’re simply panning across the scene with a fluid head, that’s still movement.
Which is why having a light mounted to the camera cage is often a good practice. We can use the camera mounted light as a catch light or as the primary light source. Since we want it on camera, battery powered LED lights are a great fit.
The iLED144 Bi-Color Flood Light from Ikan is a good example of the type of portable light that can be used this way. Not only is it small and lightweight, it also has adjustments for color temperature and power level so we can seamlessly blend it in with the ambient light or the rest of our lighting rig.
LED lights are good for both video and for still photography. Continuous light is provided, the LED bulbs are cool and very efficient, and the quality of the light is very high.
Learn More:
Shotgun Microphone
Filling the audio portion of our must-have video accessories for Sony a6500 is a shotgun mic. There are other types of microphones such as wireless lavaliers and boom mics we can use for improving the audio portion of our videos, but a high quality shotgun mic mounted to the camera is a very versatile tool for many styles of videography.
One model that will work very well with your Sony a6500 camera is the Comica CVM-CP2 super cardioid condenser shotgun mic. It also comes from Ikan, designer, maker, and retailer of high end accessories for video. Ikan designers are videographers themselves, so the gear is well thought out. Being their own manufacturer, they can offer their high end gear for lower prices than many other brands.
What makes the Comica shotgun mic so useful is that it can be powered by its own battery or by phantom power, has built-in low noise circuitry, and has a frequency range of 20Hz to 20KHz and a signal-to-noise ratio of greater than 65dB. It can mount to most cameras and fits on any camera cage. It can even be used as a boom mic with an extension pole.
Helpful Hints and Instruction

Another category of must-have video accessories is quality instruction. The new cameras are incredibly capable which means we really should try to get the best out of them.
Keep coming back to PhotographyTalk.com for helpful hints, equipment reviews, and in-depth instruction for various techniques for all skill levels from beginner to advanced.
Learn More:
- How To Shoot Quality Video Footage
- 3 Types of Lights for Video Production
- Shotgun Mic or Lavalier Mic: Which Is Right for You?
We Recommend
3 Tablet Teleprompters for Any Budget

Do you want to improve the quality and viewability of your vlogs, podcasts, and YouTube videos? Using a teleprompter will provide you with videography gear and techniques that can help you out. We found 3 of the best teleprompters for any budget.
Whenever I am looking for new, upgraded, or needed videography gear, such as teleprompters for YouTube videos, I pull up Ikan Corp first or at least early in my search.
Ikan products are made, designed, or procured by people who are videographers themselves, so the items are always useful and high quality. Since they design and make much of the videography gear themselves, we can find high quality equipment at much lower prices than similar items from other brands.
Budget Option
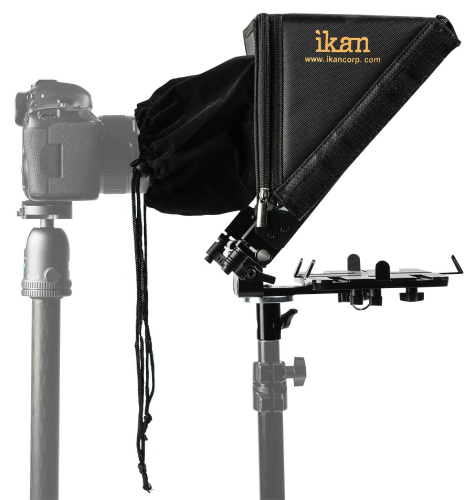
The Ikan PT-TAB Above-the-Lens Universal Tablet Teleprompter is an ideal beginner’s choice of teleprompters for any budget since it costs about the same as a high capacity memory card for your camera or a similar flash drive.
It holds a tablet or large smartphone, being adjustable from 5x7.5 inches to 9X13 inches, so most Android or Fire tablets and most iPads will fit just fine. The specs say it’ll hold 7 inch to 12 inch tablets, but it goes both a little bit smaller and larger than that.
The PT-TAB mounts onto the 15mm rods that either come with or fit into a camera cage or other videography gear such as specialty dove-tail mounts. If you aren’t already using a camera cage yet, take a look at the advantages of having a camera cage for your DSLR or mirrorless camera.
There are apps available for tablets that enable you to easily scroll through the script or outline you’re using for your vlogging presentations. Some let you scroll manually, others use an automatic crawl with you setting the speed ahead of time.
Mid-range Option
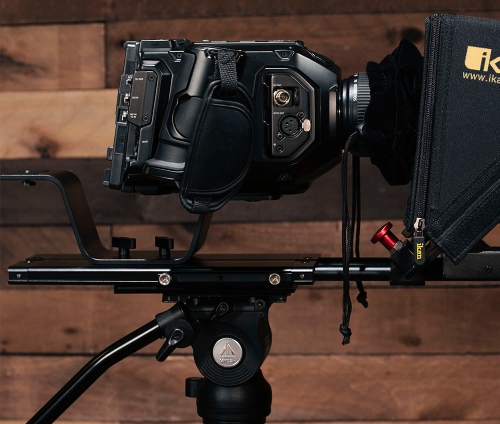
An all around top buy and a great mid-ranged price option is the Ikan PT-Elite-LS Universal Tablet & iPad Teleprompter for Light Stands that requires no camera cage since it mounts on a light stand.
For some users who don’t already have or aren’t planning on getting a camera cage, this actually becomes a better choice for them as a budget option. It’s priced at about the same or a little lower than the budget model PT-TAB plus a camera cage or around the same price as a 32GB Apple iPad 8 which can still be found brand new online.
Being able to fit it onto a light stand is a nice option for many vloggers setting up in their home studio or on location with the DSLR or mirrorless camera they regularly use for both still photography and video.
The construction of glass, aluminum, and vinyl allows for easy reading and great viewability in a wide variety of ambient lighting conditions. Compatible with tablets from 6x9 inches to 9x13 inches.
Learn More:
Professional Option
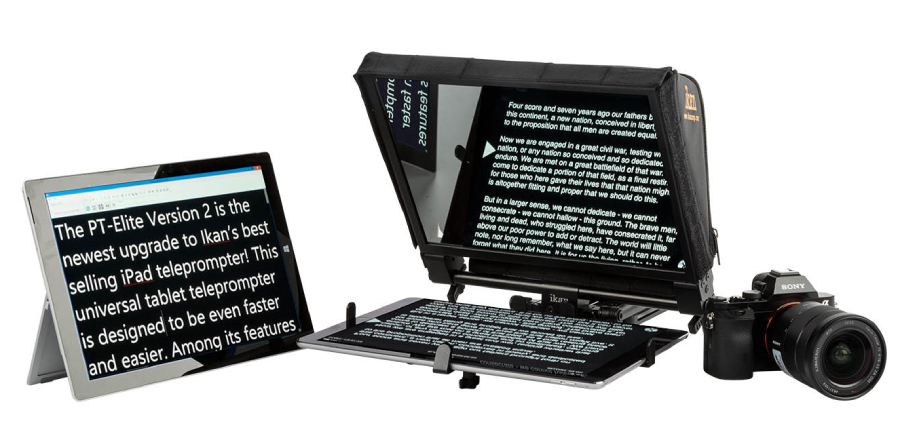
A professional solution for larger cameras is the Ikan PT-Elite-Pro2 TK Teleprompter Travel Kit with Rolling Hard Case which costs about double the mid-priced option above or around the same price range as an Apple iPhone X.
It’s superbly designed, completely adjustable, and will accommodate cameras from lightweight mirrorless crop format cameras to Full Frame DSLRs and even larger camcorders. Made from aircraft aluminum, this mounts directly to a video tripod head and includes a rolling hard shell case for easy transportation.
The PT-Elite-Pro2 will work with tablets as large as an iPad Pro but is still light enough to be used on a smaller video tripod or any other of tripod you might be using.
Why Use a Teleprompter?
Our main reason for recommending teleprompters for YouTube videos and other vlogs or podcasts is to provide your viewers with eye contact which tends to make people very comfortable when viewing your videos.
The number one method for maintaining eye contact with a remote audience is to create a script or a script outline and read it through a teleprompter so that it appears that you are looking straight into the lens. This is how newscasters seem to be talking directly to you without ever looking down at notes.
Since there are teleprompters for any budget, your videos can also benefit from the advantages of using a teleprompter.
Learn More:
- 4 Signs You Need a Camera Cage
- Tips for Teaching Online Photography Classes
- 5 Tips for More Professional-Looking Videos
We Recommend
3 Things to Look for in a Field Monitor

photo by monkeybusinessimages via iStock
Working professionally in video requires you to be on top of all the technical aspects of the project, a field monitor for videography provides many benefits for pro or other advanced videographers in monitoring the video as you’re filming.
There are good reasons for using an external field monitor for video productions. A few of them are:
- Larger viewing area for better monitoring of focus and composition
- Brighter view for working under very bright light such as outdoors in full sunlight
- Allows other crew to see what is on camera
- Added features give more feedback and control to the filmmaker
- Can be set up for wireless monitoring
With those thoughts in mind, here are 3 things I usually look at when considering an external field monitor for photography and videography:
- Size
- Brightness
- Battery Life
Larger Screen
The demands for professional video, including wedding videography, are higher than for casual video making. The view screen on our DSLRs, mirrorless cameras, or dedicated video cameras and camcorders are much bigger than what we had just a few years ago, but even the smallest external field monitor provides a lot more image area to look at.
Why is this important? It’s important because there are sometimes small little errors we make during filming that we might have avoided if we had a bigger view of what we’re recording. Focus is one procedure that is easier to take care of with a bigger view.
A step up from the built in view screen is the 5 inch screen of the Delta DH5e-V2 LCD field monitor from Ikan. The large screen size and a feature called false color assist you in making sure that the focus is spot on.
Learn More:
- Awesome Camera Accessories
- Plan a Solid Video Shoot with These Pre-Production Tips
- How To Shoot Quality Video Footage
Bright View
Filming outside in sunlight or indoors under certain types of ultra bright artificial lights such as in a sports stadium can cause issues with viewability. Bright sunlight will wash out the view screen built into our camera, but an external field monitor combats this issue in several ways.
First, the larger screen of an external field monitor is brighter overall simply because of its size. Second, the field monitors come with sunscreens that help manage excess glare. Third, you can readjust the position of the field monitors so that the bright light isn’t directly on the screen.
Being able to see clearly will help you with good composition and also avoiding any crew members or other unwanted elements being in the recording.
These reasons make it beneficial to use a field monitor for still photography too, since we may be shooting still images in similar conditions from time to time.
The 9 inch Ikan VX9w-S is a field monitor that is an excellent choice for working under extremely bright lighting conditions like what you might find in bright sunlight or certain indoor venues. An added feature of some field monitors like this one is the ability to convert signals for HDMI to SDI or the other way around, SDI to HDMI.
Long Battery Life
A field monitor is only useful for professional videography for as long as it has power. Sometimes we have the option of plugging in our equipment to a wall socket, such as if we’re filming an interview for our YouTube channel. But most of the time, we will rely on battery power.
An external field monitor such as the Ikan VXF7-V2 7 inch monitor is powered by Sony L style camcorder batteries. These batteries are common power sources for field monitors since they are inexpensive and can be charged quickly. Since they are relatively cheap, we can keep several charged up for longer videography projects.
Other Features and Benefits

photo by magical_light via iStock
The ability to monitor wirelessly, see waveforms and histograms, and convert from one signal to another are other great reasons to use external field monitors for videography. If you film professionally or need professional quality video for your personal productions, a field monitor is a valuable asset.
Not only do you gain valuable functions, but you also ease your workflow and enable yourself to capture better video since you have a bigger, brighter, clearer view of what’s being filmed.
Learn More:
We Recommend
3 Types of Lights for Video Production
photo byAzmanL via iStock
What types of lights for video production are best for the type of videography gear that we have? Some often chosen types of lights for video are LED panel lights, ring lights, fresnel lights, soft boxes, and HMIs.
What are the best lights for shooting video? We like softboxes a lot for still photography but a higher intensity light is often desired for good video. HMI lights are very intense, but also very expensive and quite hot, a little overkill for most video productions unless you’re filming for theatrical release or broadcast TV.
So let’s look at some examples of the other 3 types of lights, LED panel lights, fresnels, and ring lights. Ikan Video Production Equipment & Accessories is a fantastic source for your high quality videography gear such as DMX, lighting, tripods, cages, and mics. They make or design what they sell on their website so their prices can stay reasonable while delivering superb quality.
LED Panel Lights
One of the most versatile of all the lights for video production is the panel light design. Modern LED bulbs have made these compact, lightweight, and cool operating while providing very true color in adjustable color temps and intensity.
Ikan’s Lyra Bi-Color LB5 LED Panel Light is a good fit for many videographers for several reasons. Like any panel light, it emits a broad swatch of light, 110 degrees for this light. Just one or two panel lights can be configured to light up many of the situations in which a videographer might be filming.
Bright enough for most needs, panel lights are also relatively soft (compared to a flood). Not as diffused as a softbox, but really easy to work with. The Lyra LED panel light is switchable between 3200K and 5600K, has adjustable power settings, and includes the barn doors for precise shadow control. It can be powered by AC power or batteries.
Learn More:
Fresnel Lights
Fresnel lenses let you shape the light cone to your exact needs, form a tight spot to a broad flood. It is focused like a lens might be by moving the fresnel or the bulb in order to change the light shape. The bulb may be tungsten, CFL, incandescent, or LED, with LEDs being the easiest to use and coolest to operate.
White Star 4” LED Fresnel Light from Ikan is a professional light with a lot of power and very useful features. It is 100 watt and can focus into a very bright and tight spot or widened out to a full flood. In addition to the fresnel adjustment, the 5600K light produced can also be modified by the included barn doors or by the dimming control.
It’s extremely well made and robust and also has 512K DMX for precise control in a total lighting system. It can be used on its own or as part of a lighting studio ensemble.
Ring Lights
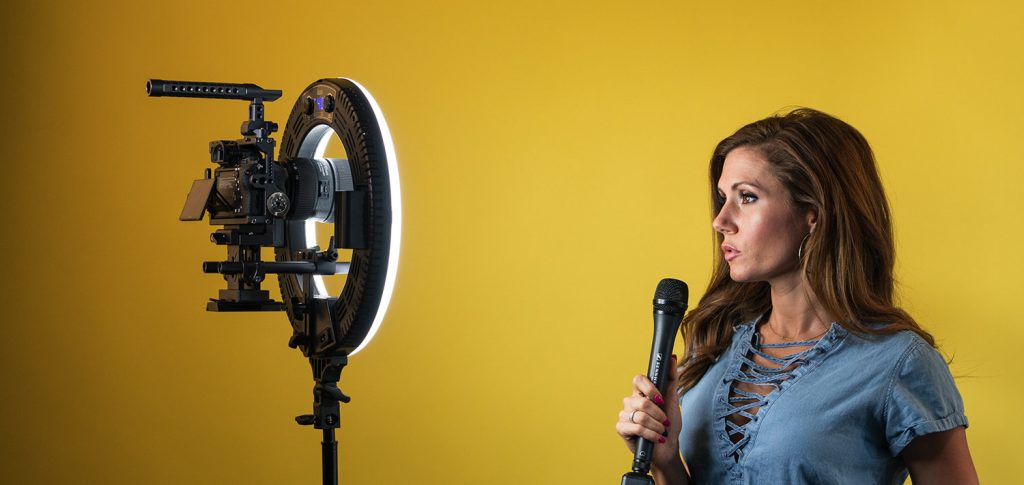
Ring lights are well suited for product photography or macrophotography but they are also invaluable for certain types of videography. A ring light is one of the best lights for shooting video of people, especially YouTube or other vlogging of a single person such as an interview or an instructional video.
A ring light, used coles to the subject, provides a virtually shadowless light on the subject. You’re shooting through a ring of light surrounding the camera, so there is no directionality at all to the lights, meaning no shadows. Another way to use ring lights for video is to add it into an already existing lighting configuration to add a catchlight for the subject’s eyes.
The Oryon RLB40-M Ring Light is a 14 inch circle of light that can be switched between 3200K and 5600K color temperature, has mounts for smartphones or cameras, and a remote control
Which One For You?
photo bykovaciclea via iStock
So, then, which light is the best one for your video productions? Hopefully, the descriptions and uses listed above will help narrow it down for you. You can also take a look at some of our more detailed tutorials on video lighting.
Actually, if you’re like most videographers, you’ll find that a nice kit of lights for video will probably include one than one type of video light. In fact, I’m envisioning a particular lighting configuration for all three lights we just discussed. Should be fun!
Learn More:
- What Is DMX Lighting?
- How To Grow Your YouTube Channel In 2021
- Essential Camera Accessories for Vlogging
We Recommend
4 Must-Have Accessories for Shooting Video

Photo by Chris Murray on Unsplash
I’ve been building my camera equipment stockpile for well over a decade now, and I never feel like I have enough equipment for videography.
Not only is there constantly something new and interesting I want to buy, but I always have new clients that want really specific, niche videos.
But over the years, I’ve perfected my basic videography equipment set. Here are the things I think a videographer can’t live without.
Table of Contents:
- A Solid, Yet Portable Tripod
- A Quality Variable ND Filter to Control Exposure
- A Durable, Bright Light
- A Cinema Backpack to Carry It All
A Solid, Yet Portable Video Tripod

Photo by Wendy Wei from Pexels
Tripods are incredibly important to a film shoot. They lend stability to your shots, allow you to pan and tilt your camera with ease, and prevent you from getting so wrapped up in your camera that you can’t direct the shoot.
But, as we all know, all tripods are not alike.
I prefer my tripods to be on the lighter end of things, which allows me to save weight for more important equipment like my lenses.

You’ll also want to look out for a tripod with a fluid head that connects to a bowl (as shown above), which allows for your tripod to bear more weight while keeping your shot level on uneven ground.
Rubber feet are the most typical feet you’ll see on a tripod, since they allow for a good grip on a variety of surfaces, but if you’re constantly shooting out of doors you may want to purchase spiked feet to keep in your bag too.

Ikan’s EK630 Tripod comes with all these features and more for just $170. It’s adjustable from 29” to 65”, comes with a carrying bag, and can support up to 8.8 pounds of equipment.
It’s the perfect addition to my camera bag, along with my Canon EOS R and my growing collection of RF lenses.
With a small mirrorless system, I don’t need a big, bulky, heavy tripod to support my gear. Instead, the lightweight design with a mid-level spreader to add stability is just what the doctor ordered!
Recommended Videography Reading:
- How to Shoot Video That Doesn't Suck: Advice to Make Any Amateur Look Like a Pro
- The DSLR Filmmaker's Handbook: Real-World Production Techniques
A Quality Variable ND Filter to Control Exposure

When it’s a bright, sunny day outside and you need to get some footage, you usually have to close the aperture way down to control the exposure of your video.
There’s a problem with this strategy, though - the smaller the aperture, the larger the depth of field.
This isn’t a huge crisis, but depending on the type of video you’re shooting, you might want a nice, blurry background that helps separate the subject in the footage.
To keep the aperture nice and wide, and thereby minimize depth of field, you need a variable ND filter.

The Kenko PL-Fader is an excellent option because it’s inexpensive, yet durably built to last you for years and years of shooting video.
It has two high-transparency polarizing film layers that give you control over how much light passes through the filter and into the lens.

This is advantageous for controlling aperture, as mentioned above, but it’s also helpful for controlling the shutter speed. Specifically, if you want to slow down the shutter speed, the PL-Fader will help you do that.
The easy adjustment knob makes changes to the filter’s light-stopping power a breeze, too, so you can concentrate on capturing the best-quality footage and not worry about complicated changes to your filter!
Editor's Tip: Get Kenko’s latest updates and access to promos for discounted gear. Click here to sign up.
A Durable, Bright Light

photo by goir via iStock
I have this way of ending up in situations either without my lighting, or with a dead light. So, when you’re shopping for your lighting, make sure to choose one that has a long battery life.
You’ll also want to choose a light that you can throw around a bit. I’ve never dropped a camera, but pretty much everything else in my bag I’m really clumsy with. The problem is that most portable lighting feels really cheap. They’re made out of plastic and they break easily.

To combat this, use a light from an established company, like Litra. They’re a go to for many videographers for a reason.
When you’re shopping around for your lighting, some other helpful features are waterproofing, different types of camera mounts, and warranties.
I use the Litra Torch LitraPro, which I purchased off of Adorama for $220.

I use this light, and specifically this company, for its 1-year warranty. Plus, the light is waterproof at up to 90 feet, it creates bright light across an entire room, and it lasts for up to 10 hours on one charge.
Add to that full spectrum bi-color, Bluetooth compatibility, adjustable color temperature, and the ability to fully dim, and you have the makings of a top-quality light for video work!
Learn More:
A Cinema Backpack to Carry It All

There’s no reason for you to buy all of this gear if you don’t have a way to carry it around. I’ve extensively covered different videography bags over the years on PhotographyTalk, and found that, for the price, the Hex Glacier Cinema Backpack is my absolute favorite.
Importantly, it’s large enough to fit all of my equipment, which is an asset I’ve struggled to find in the past.

And no matter how much equipment I’m carrying, the backpack is comfortable because of its thick, padded straps that refuse to dig into my shoulders.
It’s water resistant, has an abundance of pockets and other organization methods, and is completely customizable to your body type, too.

This bag is beautifully built, impeccably designed, and offers easy access to all your gear for quick lens changes, swapping out batteries, and so forth.
I can tell that this backpack was created by a fellow videographer, and for $240 I wouldn’t recommend anything else.
Learn More:
We Recommend
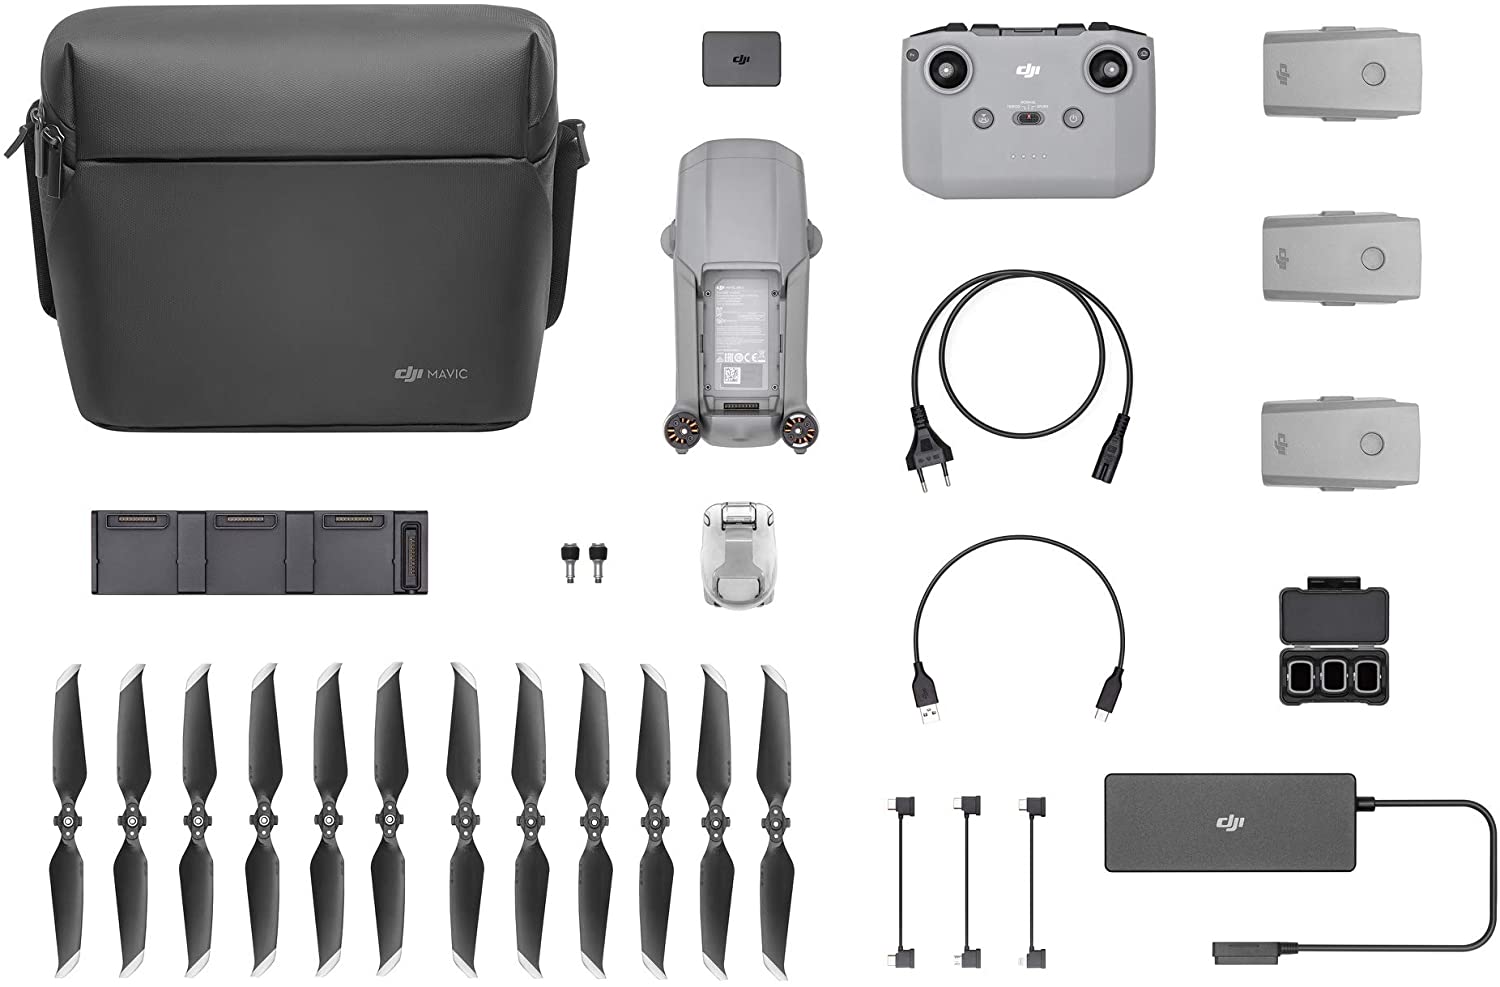
4 Must-Have DJI Mavic Air 2 Accessories
The DJI Mavic Air 2 is a fantastic drone camera with some fairly high end specs and yet selling at a reasonable price point for serious photographers and videographers. It has a 48MP still photo mode, 4K video, 8K time lapse video, intelligent flight modes, and a very efficient power system allowing flights of over 30 minutes and maximum air speeds over 40 MPH.
As capable as the drone is, there are some Mavic Air 2 accessories that will be needed for extending its features and capabilities. In addition to DJI brand items, there are also excellent Mavic Air 2 aftermarket accessories available from other sources.
ND Filters
At the top of our list of recommended Mavic Air 2 accessories that extend and expand the capabilities are ND filters. Especially for video mode, using ND filters is one of the more important drone photography tips.
ND filters or a combination of ND filter and circular polarizer (C-POL) filter are used in photography to capture usable images with proper exposure in brighter light or to allow for a specific range of shutter speeds or lens apertures for certain creative techniques.
When shooting video, Mavic Air 2 accessories such as ND filters enable you to record the video with a frame rate and shutter speed that results in a more natural appearance in the final video, especially when filming in brighter lighting conditions.
Ikan Corp markets a set of filters designed as Mavic Air 2 accessories with 3 different filters. It’s the Haida Nano Pro ND-PL kit HD4602. This filter kit fits perfectly on the DJI Mavic Air 2 and the strengths are a 3-stop ND filter, a 4-stop combo ND and C-Pol, and a 5-stop combo ND and C-Pol filters.
Made from high quality optical glass with multi-coated surfaces, these filters are lightweight and very low profile so your camera and flying operations aren’t affected in any negative way. You want to be sure to use high quality filters with the DJI drone cameras to maximize their excellent image and video quality.
Intelligent Flight Battery
Yes, it comes with a battery, kits may come with 2 or more, but with the relatively limited filming time open to drone users, it seems you can never have enough batteries. When out in the field on a job or having fun, 34 minutes doesn’t feel very long at all.
Thankfully the DJI Mavic Air 2 has one of the most efficient motors for extending the real flight time to 34 minutes, so your flights don’t feel limited. Still, carrying extra batteries is a fact of life for all digital photography. Being without power means no images, no video footage, no flying.
The battery of choice as DJI Mavic Air 2 accessories is the rechargeable lithium-ion Mavic Air Intelligent Flight Battery. Depending on what charger you use, batteries recharge in 1 to 2 hours.
Learn More:
DJI Smart Controller
Of all of the Mavic Air 2 upgrades, the DJI Smart Controller is one of the most sophisticated. The basic controller works with a later model Android or iOs phone and provides all of the camera and drone functions and features. Upgrading to the DJI Smart Controller provides you with a more sophisticated interface.
The Smart Controller also upgrades the range between stone and controller, up to 10 kilometers. The display is brighter, clearer, and very large, making it easier to fine tune certain controls.
Buying this smart controller almost doubles the price, so many drone users will be content with using their own smartphone and the basic controller, but when you need more range, a brighter view, and better control, this is the upgrade to look at.
Propeller Guard

Adding a propeller guard and carrying replacement propellers is a smart decision, since both of these are a protection against not being able to operate the drone due to something happening to the propellers.
Since we’re getting more propellers as part of our kit of DJI Mavic Air 2 accessories, we might as well make the upgrade to their low-noise propellers. An added benefit of these propellers is improved flight time along with lower noise levels and slightly better aerodynamic performance.
Lots of Accessory Options
As far as DJI Mavic Air 2 accessories, we have some other options of beneficial gear from DJI and from aftermarket manufacturers.
Some other Mavic Air 2 aftermarket accessories to consider for your photo or video outings are high capacity microSD memory cards, battery chargers including a car charger or multiple battery charger, and a hard case or semi-rigid sling pack to carry everything in.
Learn More:
We Recommend
4 Signs You Need a Camera Cage
photo bydemaerre via iStock
As a photographer, shooting for video adds opportunities for extra income and extra fun. It also means we may need to learn some new ways of doing things and learn how to use some equipment specially made for video production.
An essential accessory for shooting serious video is a camera cage. A camera cage for photography and videography adds several benefits.
Let’s have a look at some of the reasons you probably have for using a camera cage, as well as some thoughts on how to choose the best camera cage for your camera and shooting style.
More Mounting Points
photo byRowan Jordan via iStock
One of the first things I noticed as I made a rapid transition into professional videography is that my super sophisticated, extremely high quality digital camera was lacking something very essential for high end, paid, or serious videography. Namely, it didn't have nearly enough mounting points for essential gear and the mounting points I could use made me nervous.
Here’s the thing - unlike still photography, videography requires us to add on extra equipment to our rig in order to capture the best audio and video, and also to make capturing excellent video footage easier and more productively.
The first thing I noticed is that I definitely needed a better microphone. Regardless of the outstanding audio and video recording capabilities of our cameras, the tiny built-in mics simply aren’t capable of recording superior audio. Think of it in the same way as the built-in flash. Good enough for some things, but pretty much a compromise.
So, I added a high quality shotgun mic that fits in the camera flash hot shoe. Problem solved! But then, I noticed I really needed a good light on camera to provide a good catchlight or as a primary light when on location for filming vlogs or events.
The camera shoe already has my microphone. Where do I put the LED light? I looked at shoe accessory brackets to multiply my mounting points, but I soon noticed something about that, as well.
Stronger Mounting Points
Putting a double or triple extension in my hot shoe gave me more places to add accessories such as lights and shotgun mics or wireless lavalier mic receivers.
Then I realized something that made me nervous. This added a lot of weight to that small fitting. Any movement of the camera rig also seemed to add stress because of the position of the accessoires adding possible leverage for twisting, pulling, or even breaking the either the camera hot shoe itself or the camera top plate. Yikes!
I couldn’t imagine adding more things to that poor, tiny hotshoe, such as a larger video monitor for better workflow, wireless video options, or other useful accessories. And where do I add my follow focus system or matte box?
A camera cage takes care of that and more. Plus, you take away all possible stress from the camera hot shoe. A camera cage mounts to the camera tripod mount and everything else fits on the cage.
The tripod mount is one of the strongest mounting points of any camera, besides, it’s not actually adding stress and weight to that mounting point either. Consider it as the camera fits into the camera cage, and not as attaching the cage to the camera.
Once it’s in the cage, the camera cage pretty much provides our grabbing spots, too. Let’s take a look at an excellent example at a mirrorless camera cage so you see these things we just discussed.
Learn More:
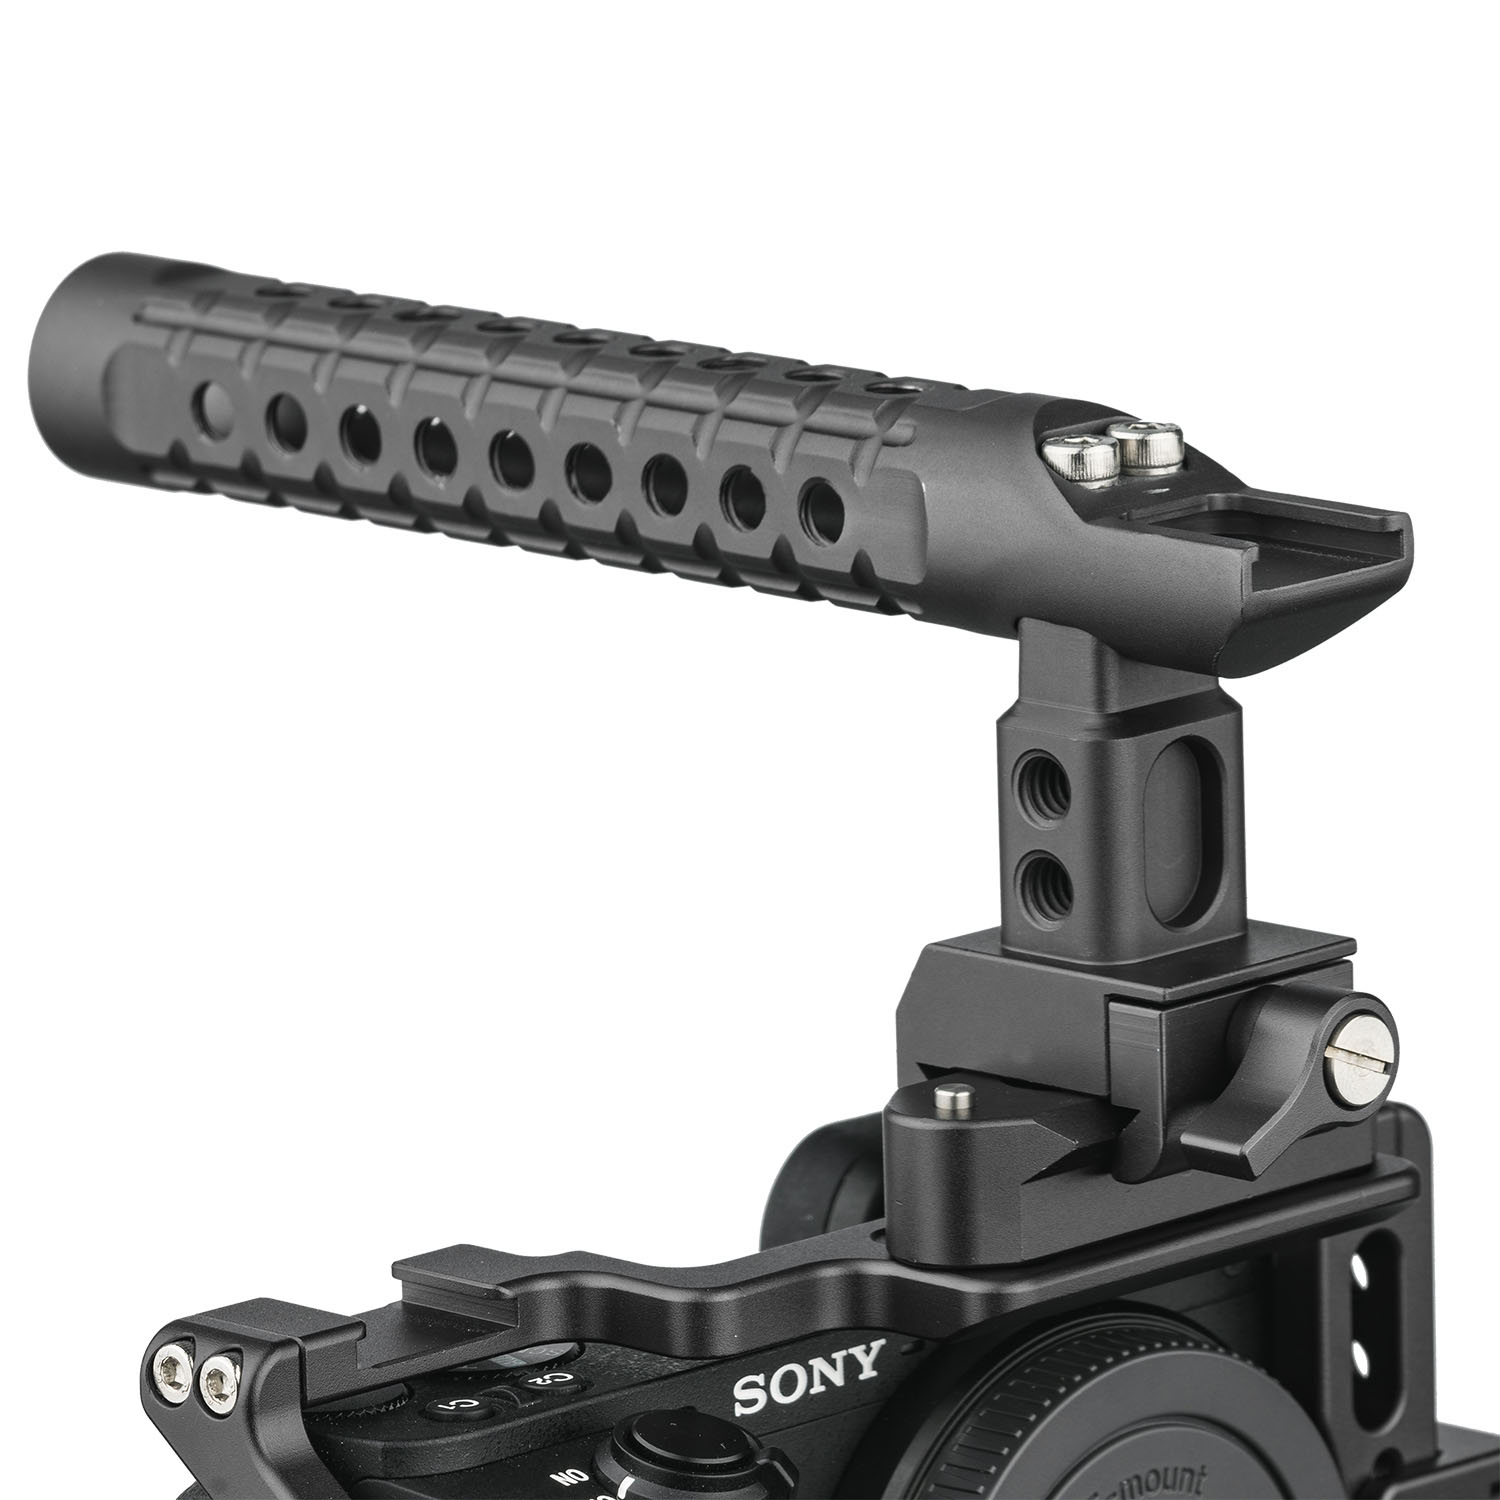
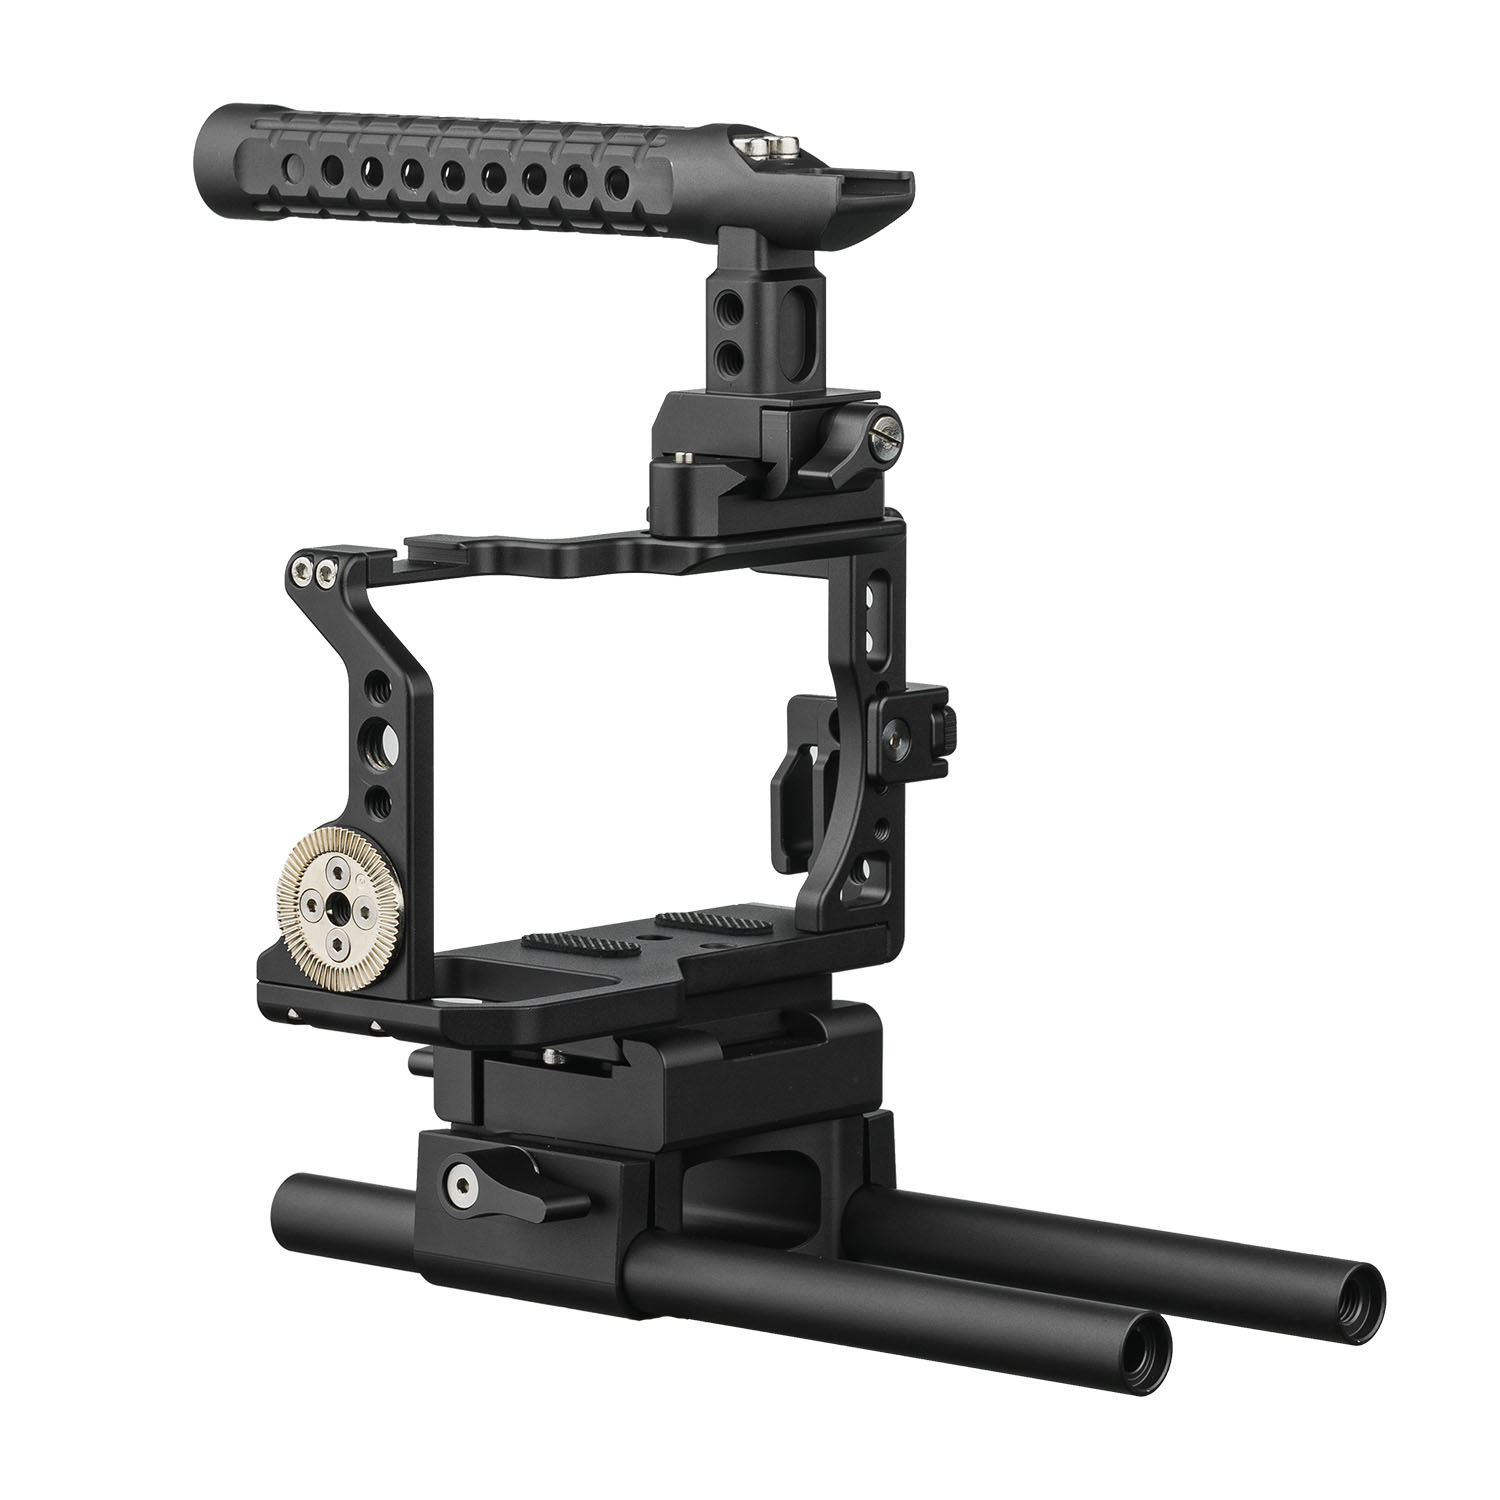
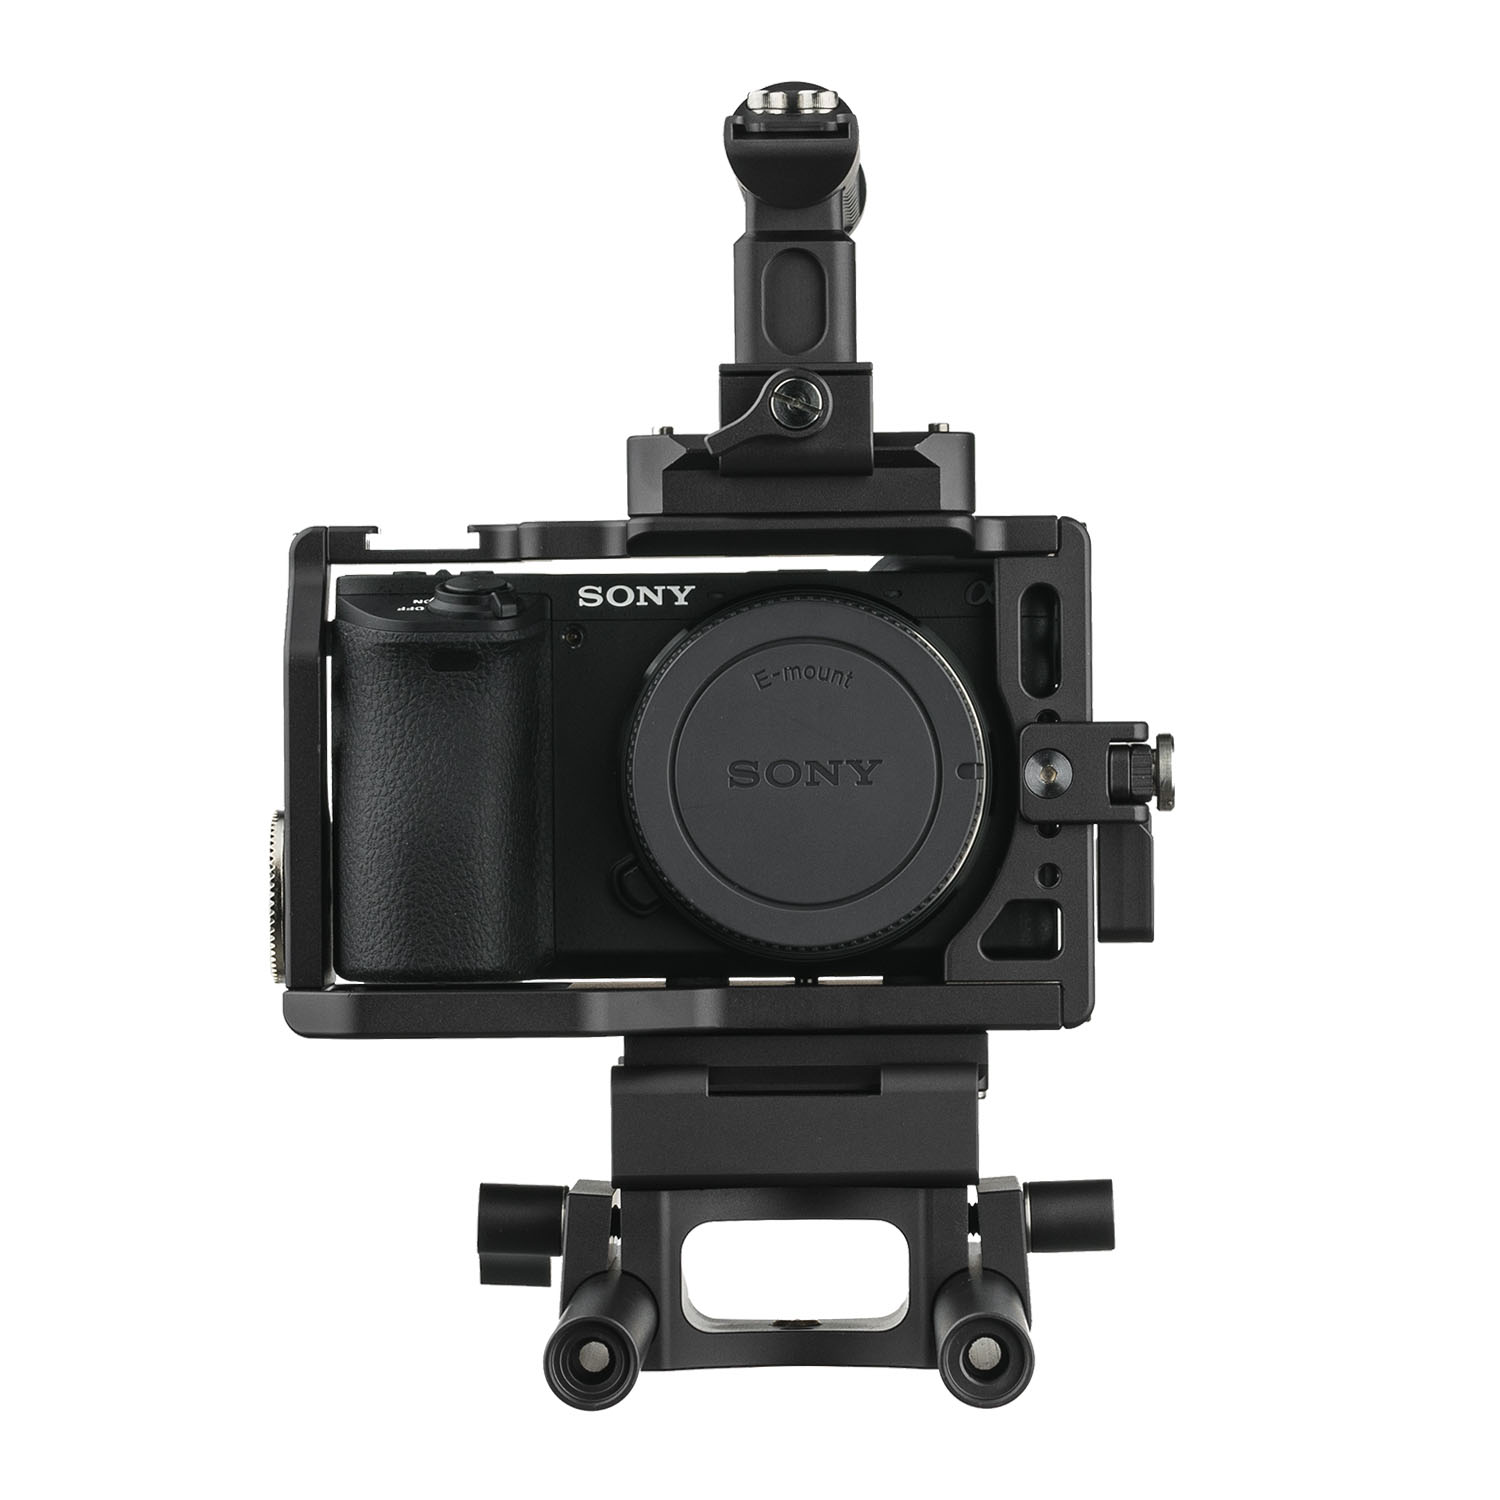
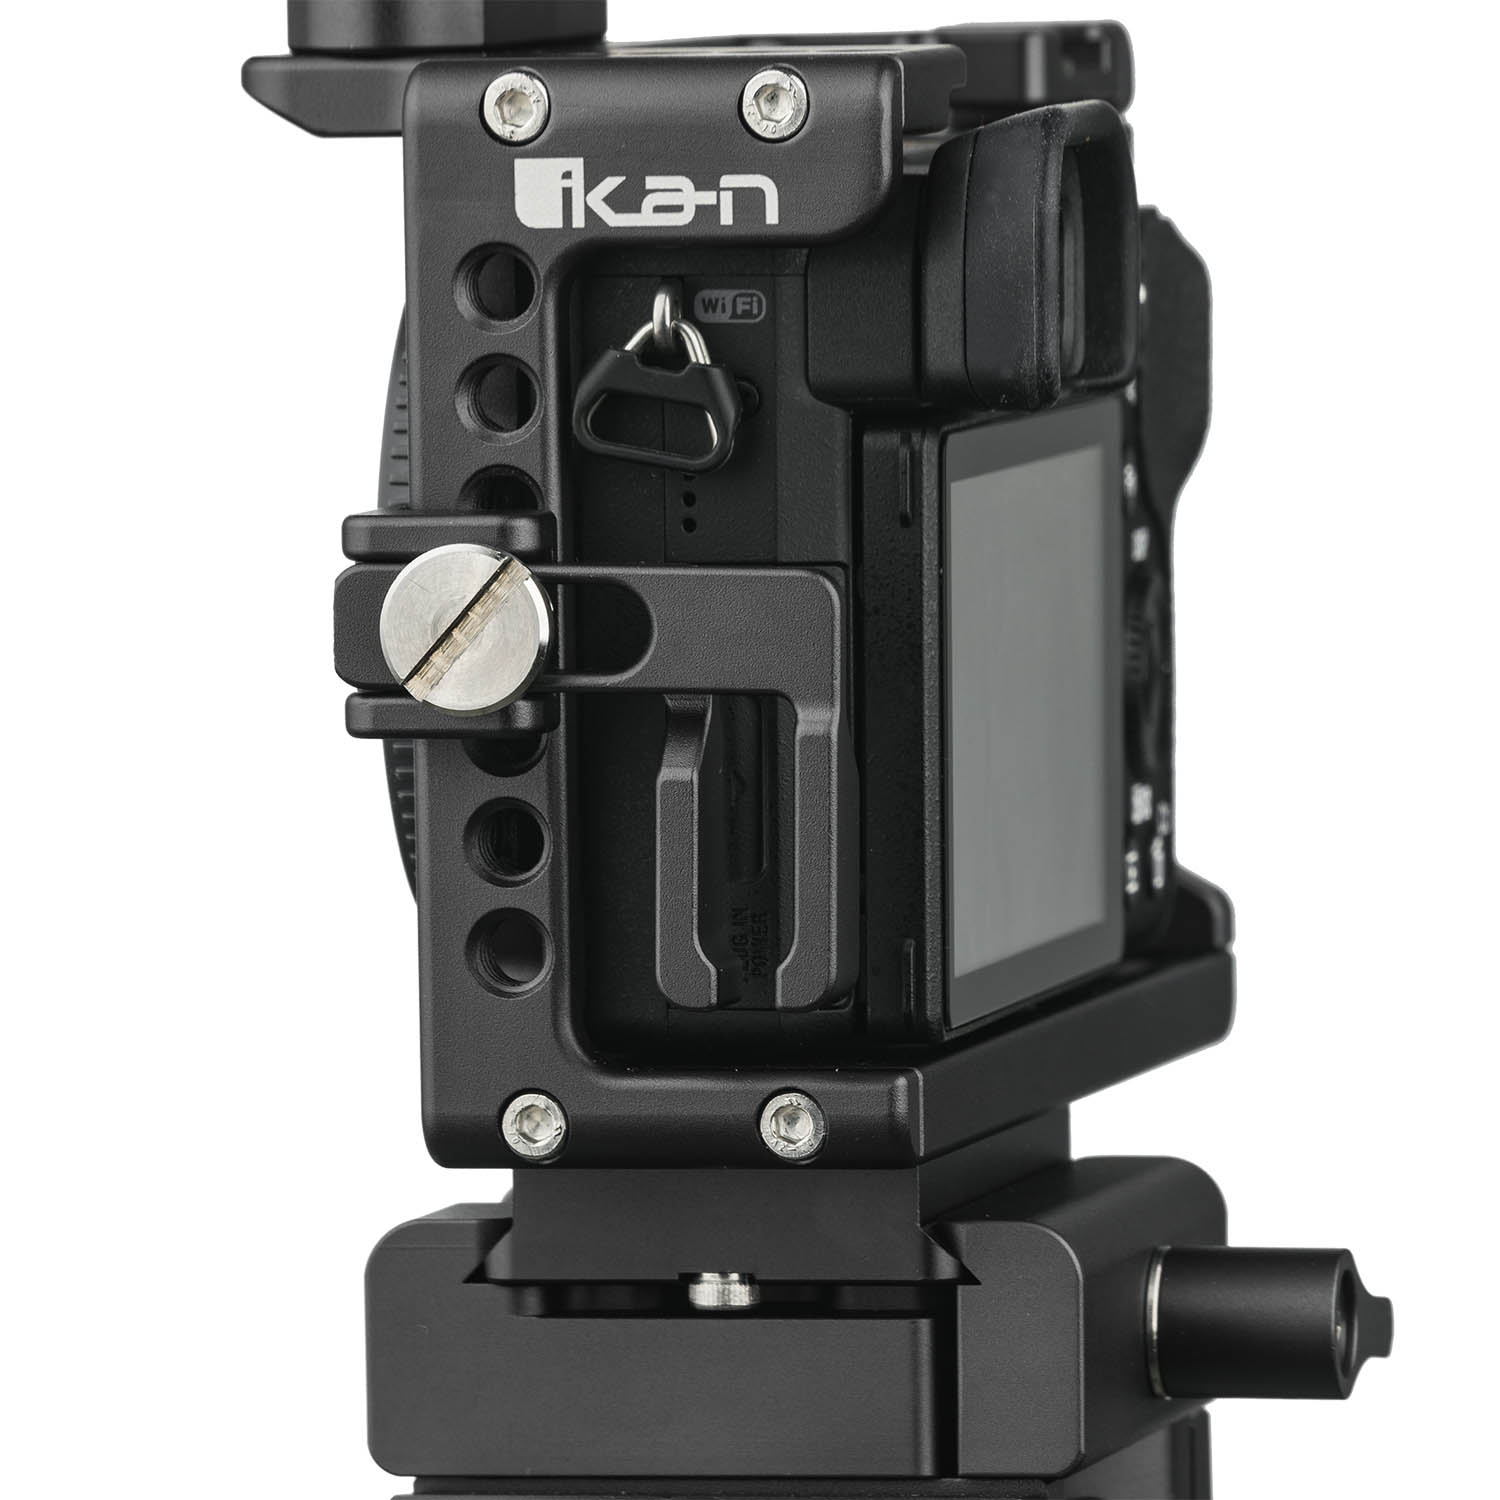
Ikan Cage for Sony a6500 Mirrorless
Sony mirrorless cameras are awesome machines, capable of professional results for still photography and video productions. Being mirrorless, they have a relatively compact form and you can use them with all sorts of lenses.
Sony E-mount has scores of lenses made by Sony and third parties plus you add virtually any lens from any maker by means of optional lens mounts adapters.
So, a Sony APS-C mirrorless camera is an awesome tool for video or still photography. Adding the important accessory items, such as an external monitor, microphone system, lights, or anything else is made better and safer with theStratus STR-a6 Mirrorless Camera Cage from Ikan.
It fits closely around the camera and includes a top handle (with its own mounting points), cut outs for accessing battery, memory cards, and A/V connections, has numerous strong mounting points, includes rails for lens accessories, and can fit on any tripod.
Though strong and secure, it is still relatively compact and lightweight. Since it is lightweight, you can also mount it onto a slider or a shoulder mount, nullifying any concerns of choosing a camera cage vs shoulder rigs. You can also expand the camera cage with other accessory handles and mounts, customizing your rig to exactly what you need.
The Stratus STR-a6 camera cage is very reasonably priced, too, so it should fit into a modest and realistic budget for videography gear making it a good candidate for the best camera cage for most needs. Let’s continue with the reasons for using a camera cage.
Adds Protection
In addition to the protection from over-stressing our camera hot shoe, a camera cage also adds a layer of protection to our camera by essentially being an extra outer layer of our camera. A lot of video is shot with action in mind, meaning our cameras may need to be in motion (controlled and steady motion) as well.
A camera cage isn’t a force field, we should still treat our equipment with due care, but it’s nice to be protected from bumps, bangs, scrapes, and maybe even a short fall or two.
Looks Cool
photo bycoffeekai via iStock
I’m being a little factious with the wording, but being perceived well by clients and others is an important part of our branding as a videographer. An air of professionalism is provided by how certain gear is expected to look.
You can provide exceptional video with most of the newer DSLR and mirrorless cameras, but for a certain group of people, let’s call them lay people, looking the part makes an impression that allows us to do our job. It may be silly, but it’s a fact of life for smaller video protection teams or individuals.
So you could label this reason as a protection also. Protection from misconceptions of possible clientele.
These 4 signs you need a camera cage are good reasons to look at what’s available for your own camera. Check out camera cages for other camera brands and models at Ikan Corp.
Learn More:
- How To Transmit Video Wirelessly
- Types of Microphones for Vlogging
- Beginner Videography Terms You Need to Know
We Recommend
5 Gadgets to Upgrade Your Mirrorless Camera
Photo by Michael Soledad on Unsplash
Your mirrorless camera is an incredible photography and videography tool. The capabilities of many of the current mirrorless cameras seem virtually boundless. In reality, though, they can’t do it all, not by themselves anyways. Adding some basic accessories can unlock more or your new camera’s potential.
There are several formats of mirrorless cameras: MFT, such as cameras from Olympus, Panasonic, and Blackmagic. APS-C, with cameras from Fujifilm, Nikon, Sony, Canon, and others. Full-Frame, including Panasonic, Leica, Nikon, Sony, Canon, and Sigma. And several medium format sizes from Fujifilm, Hasselblad, and others.
These accessories will fit and function on most of the mirrorless cameras. They will also fit, function, and enhance your DSLRs, too. Here are my top five picks for gadgets to upgrade your mirrorless camera.
Table of Contents:
- A Small But Mighty Filter Set
- A Top-Shelf Gimbal for Video Work
- A Next-Generation Camera Cover
- A Durable (and Budget-Friendly) Camera Strap
- A Pocket-Sized LED Light
- Mirrorless Camera Upgrades Equal Upgraded Use
A Small But Mighty Filter Set
The Haida M7 Filter Holder and Drop-In CPL filter is first on the list.
The Haida M7 filter system is an excellent way to have high-quality filters of several types to use on all of your different lenses regardless of the filter diameter of each lens.
A kit would include the holder itself, whatever filters you choose such as a circular polarizer (CPL) and neutral density (ND) or graduated neutral density (GND), and the lens adapters for each size needed.
Instead of buying separate screw-in filters of each type for each lens size, you can get just one each of these high-quality filters and use them on each lens.

A circular polarizer is one of the most useful items in our gear for improving our photos. Polarizers remove reflections from water, glass, plant leaves, and water vapor and dust in the sky. This results in darker skies with good contrast between sky and clouds, and it gives great color saturation and detail in landscape scenes with lots of foliage or water in the view.
There are many reasons for using Haida ND and GND filters, too. Anytime you need to reduce the exposure value of a scene or balance the light and dark areas of a scene with a huge dynamic range, a neutral density filter will come in very handy.
Learn More:
A Top-Shelf Gimbal for Video Work
Ikan EC1 Beholder 3-Axis Gimbal is our next item. Our new mirrorless camera likely has a superb video mode, the only thing holding us back from truly outstanding video is probably our technique.
High up on our technique concerns is camera stability. When shooting video, unnecessary camera movement during scenes can lower the appeal of our finished video. There’s not much you can do to fix that after shooting either, getting in right while filming is the best procedure.
While you likely already have a good video tripod, it’s when trying to film handheld that the issue is of greatest concern. One of the best options available for filmmakers is a gimbal stabilizer.
Ikan’s EC1 is a powered 3-axis gyro stabilizer that can hold a camera rig weighing up to 4.5 pounds. Much better than the friction type inexpensive stabilizers, the next step up from this gimbal is a SteadyCam type of stabilizer which costs more than my wife’s car.
The difference in using this gimbal than not is apparent right from the very start. Your videos will be so much smoother than simply holding it by hand could ever be. The cost is a bit more than you might have expected for a good-quality video tripod, but the payback is huge in terms of freedom of movement capturing usable footage.
Recommended Videography Reading:
- How to Shoot Video That Doesn't Suck: Advice to Make Any Amateur Look Like a Pro
- The DSLR Filmmaker's Handbook: Real-World Production Techniques
A Next-Generation Camera Cover
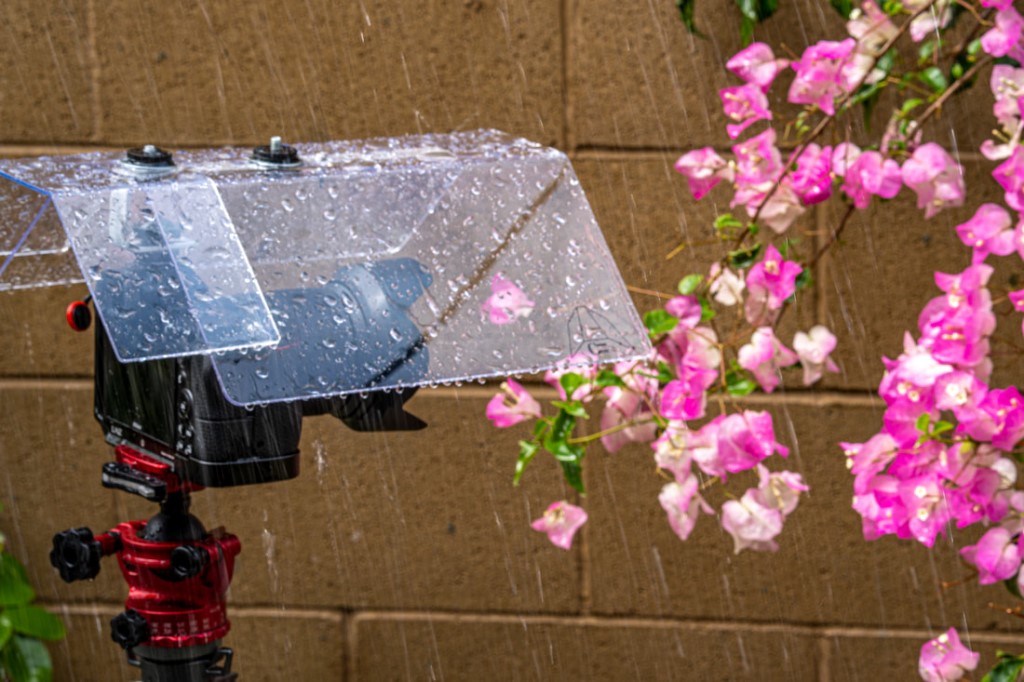
Camera Canopy for mirrorless cameras is such a fantastic idea, I wonder why I didn’t invent it myself! Traditional rain covers can be a little bit fiddly to work with. What makes this rain cover so good is that it isn’t a big plastic bag you stuff the camera in. It’s more like an umbrella for your camera.
Since your camera is not stuffed in a bag, you actually have clear access to all the regular controls, even a clear view of the viewscreen. My camera is water resistant, for the most part, but I’m still not comfortable with holding it under a running faucet, which is what rainstorms around here can be like.
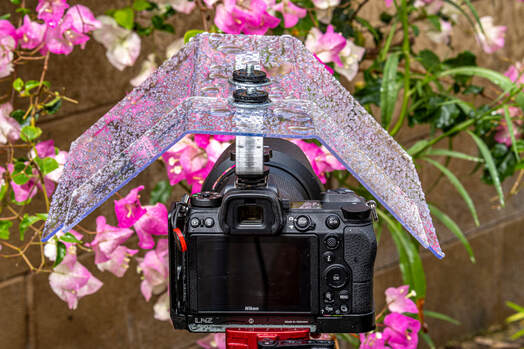
But for a typical downpour type of rain, this canopy works great!
A Durable (and Budget-Friendly) Camera Strap
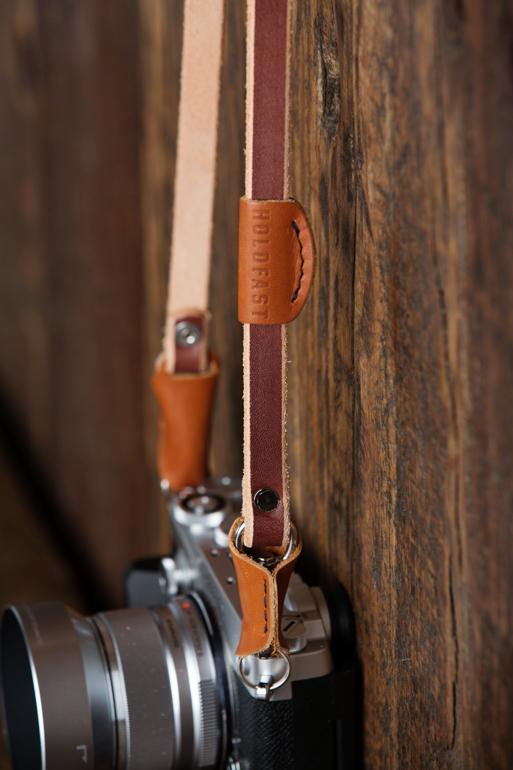
The Holdfast HF Classic Strapis one pretty strap. It comes in two widths - a wide width that distributes the weight better and a slim width that some find more fashionable.
One of the nice features of these straps is a leather shroud that fits over the stainless steel clasp. This keeps the metal away from your camera body while also adding an extra layer of security concerning the quick release.
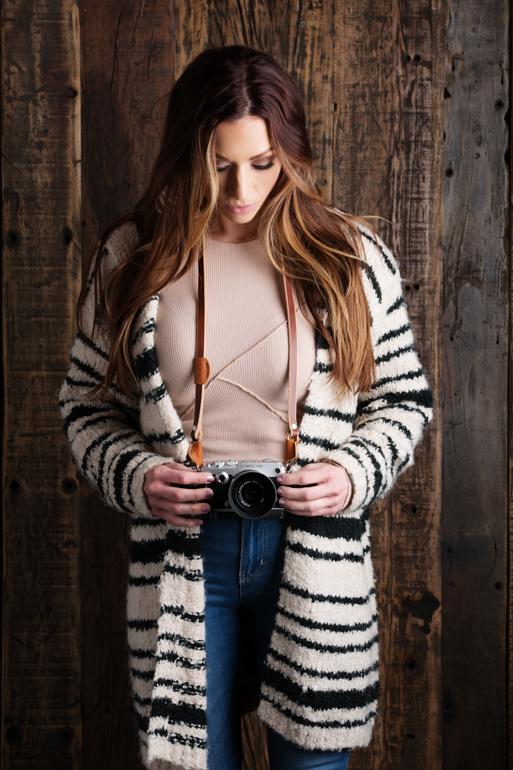
Holdfast also makes a sling strap and a series of classic style camera bags. Most of their bags and straps are made from full-grain leather, some are made from synthetic material, depending on intended usage and style choices.
Whatever accessories you choose to buy from Holdfast, you’ll get a premium product that was hand-made in the U.S.A. And when you shoot with a small mirrorless camera, one of their hand-made HF Classic Straps is a must!
A Pocket-Sized LED Light
The LitraTorch 2.0is a compact, battery-powered continuous LED light that is necessary for video recording since the built-in flash on your camera is not useful for video, only for still imaging.
The charge can last up to 7 hours in low power mode, about a couple of hours on high. It recharges via a USB cable. LED lights are the choice for most videographers needing portable lighting. They operate much cooler than quartz or incandescent bulbs and have a steady color balance.
The LitraTorch is also very compact. If needed, you could mount this on the camera itself by means of the accessory/hot shoe. A small bracket is another option that videographers can use to hold the light in line with the camera. Since it runs cool, you could hold the light yourself in a pinch.
As an added bonus, you can also pair this tiny light with a GoPro style action cam on a multi mount or a grip. I guess the GoPro counts as mirrorless, doesn’t it?!
Mirrorless Camera Upgrades Equal Upgraded Use
Photo by Andrew Seaman on Unsplash
The primary reason to implement any of these upgrades is to better your ability to gather excellent video and superb still images.
Many mirrorless cameras have superior video capabilities compared to the DSLRs of the same brand. It doesn’t matter how long you’ve been using your mirrorless camera, improvement is always available. Same thing applies to our still photography.
Some of these gadgets are a virtual necessity for certain styles of videography and photography. Others make using an existing capability easier to accomplish. Try them out!
Learn More:
We Recommend
5 Landscape Photography Accessories You Can’t Live Without

Photo by Ales Krivec on Unsplash
There’s nothing like a crisp, cool morning, a cup of coffee and hours of shooting landscapes. I’m lucky enough to have travelled all over the world shooting landscapes for my clients, and I’ve picked up a few tricks along the way.
Namely, the landscape photography accessories you bring on any trip can make or break it. But, since there are thousands of landscape photography accessories, it can be difficult to choose which ones are important enough to drag all the way to Bolivia, or on an 8-hour hike through Glacier National Park.
This is an overview of the accessories for landscape photography that I always bring with me.
Snaptiles just released a plastic-framed photo tile that allows you to swap out the photo in each tile. See it here!
Table of Contents
- A Good Polarizing Filter
- Protection From the Elements
- A Sturdy Tripod
- A Bright, Compact Light
- A Weather-Resistant Camera Bag
- Bonus: A Fun Way to Display Your Favorite Photos
A Good Polarizing Filter

photo by Алексей Филатов via iStock
I write so much about polarizing filters on PhotographyTalk because they’re important in an age of Photoshop and Lightroom.
Though I process my images as much as the next guy, nothing can replace the effect a polarizer can have on your images.
Polarizing filters make the sky a deeper blue, reduce glare off of water and other non-metallic surfaces, and they reduce atmospheric haze.
And there’s a reason you can now purchase a polarizing filter for your iPhone camera.
Now, it’s also important to remember that not all polarizing filters work the same…

I always recommend Kenko when I’m discussing polarizing filters. The Kenko Nyumon Slim Circular Polarizer is cheap for its quality at $45. This polarizer is multi-coated to protect itself from the environment, think harsh wind that throws sand at it or inadvertent finger prints.
It also features a mounting ring that never gets snagged, which is a godsend considering what working with cheaper polarizers means (spending 30 seconds screwing and unscrewing the filter onto your lens).
This is a great example of “you don’t have to spend a lot to get a lot.” A great polarizer is something everyone needs, and at this price point, you can afford it!
Editor's Tip: Get Kenko’s latest updates and access to promos for discounted gear. Click here to sign up.
Protection from the Elements

photo by Sandra Dombrovsky via iStock
When you think about landscape photography accessories, chances are you’re thinking about how to prevent yourself from getting soaked and thinking less about how to prevent your equipment from getting soaked.
After all, everyone just uses that big plastic bag to prevent their cameras from getting rained on and you’re going to be miserable all day if you’re wet in near freezing conditions.
But, there are better options to protect your camera from the rain.

I bought a Camera Canopy a few years ago and never looked back.
Camera Canopy is a technology that prevents both your DSLR and your mirrorless camera from getting rained on, snowed on or sleeted on. It’s made of two retractable shields, meaning you can adjust the length of protection as easily as you adjust your lens.
It easily fastens onto your camera’s hot shoe and it gives you a complete free range of motion that plastic bags will never accommodate.
Plus, Camera Canopy is a relatively cheap investment into your landscape photography at just $88 for your DSLR or $60 for your mirrorless.
Learn More:
A Sturdy Tripod

Photo by insung yoon on Unsplash
Have you ever had your tripod fall over with your camera attached? Sadly, I have and I’m now on a personal mission to make sure it never happens to another photographer.
When you’re on top of a mountain, facing 40mph wind, just about anything can happen and I’m going to be more concerned for my own safety than the safety of my camera if it comes down to it.
While I’m of course not advocating for shooting in dangerous weather conditions, sometimes these conditions produce the best photos, and for these times you need a heavy duty tripod in your landscape photography gear.

Ikan’s 2 Stage Aluminum Tripod is by far the best tripod for landscape photography I’ve ever found.
First of all, it’s solid and structurally sound. It has multiple leg stages with individual leg locks at each.
It also features incredible anti-slip pads/spike covers on each leg that can be removed when they aren’t needed.
At $170, this tripod will last you a lifetime and do so without breaking the bank.
A Bright, Compact Light

Photo by 2 Bro’s Media on Unsplash
While golden hour is the hotspot for landscape photographers, sometimes you just need to keep shooting.
After all, there’s no sense in traveling as much as you do if you aren’t going to take complete advantage of it.
While I use my LED light to fill the foreground for beautiful twilight shots, I also use LED lights to be a little more creative with light painting.

Photo by Sean Pierce on Unsplash
Light painting is the art of lighting up specific portions of your landscape at night, usually with an array of different colors, while capturing the night sky in the background.
It’s beautiful and a very specific niche in landscape photography that I think everyone should try at least once.
But, in order to do so you first need the light.

Litra sort of rules the compact lighting game. Their Torch LitraPro is no different. It’s the LED light I have and it’s the one I recommend to all of my friends.
Firstly, you can control the light from an app on your phone, which is one of the first qualities I look for in a compact light. I want the equipment to do as much work as possible so I can focus on the photography.
It’s only 5” long, so I can throw it in my camera bag, and it’s bi-color. It’s also a fully dimmable light.
Plus, Litra understands remote shooting better than most companies, so this light can last for up to 10 hours on one battery charge on low, or up to 1 hour on high.
Finally, it’s waterproof. What’s not to love?
Learn More:
A Weather-Resistant Camera Bag

While your canvas camera bag might work in the city, it’s not going to work in the snowy mountains of Colorado, and if you’re planning to do landscape photography for a long time then it may be time to upgrade.
Out of all of these must-have landscape photography accessories, you’re not going to get very far without a weather-resistant camera bag. Think about it… there’s no point in protecting your camera while you’re shooting if you’re not protecting it while you’re traveling to and from your shoot site.

Holdfast’s Sightseer Backpack is made out of waxed canvas and comes with waterproof zippers, so it keeps the rain out while still protecting your gear with fleece lining.
This backpack is also the only camera bag in the world that comes with an integrated camera slider which allows you to have access to your camera at all times.
While any Holdfast purchases are an investment, this Sightseer backpack, which is sold for $800, comes with a lifetime warranty. If you ask me, it’s a much better idea than buying a $100 bag every year for the rest of your life.
Bonus: A Fun Way to Display Your Favorite Photos

Don't get me wrong...I love a nice, big print of a landscape photo.
But sometimes you need to switch things up a little bit and have ways to show off your best shots in a unique way. For me, that means using Snaptiles.
Just a couple of months ago, I talked about why Snaptiles won me over on my Best of 2019 list. In short, Snaptiles photo tiles offer an innovative way to display multiple photos without damaging your wall.
Here's how they work...
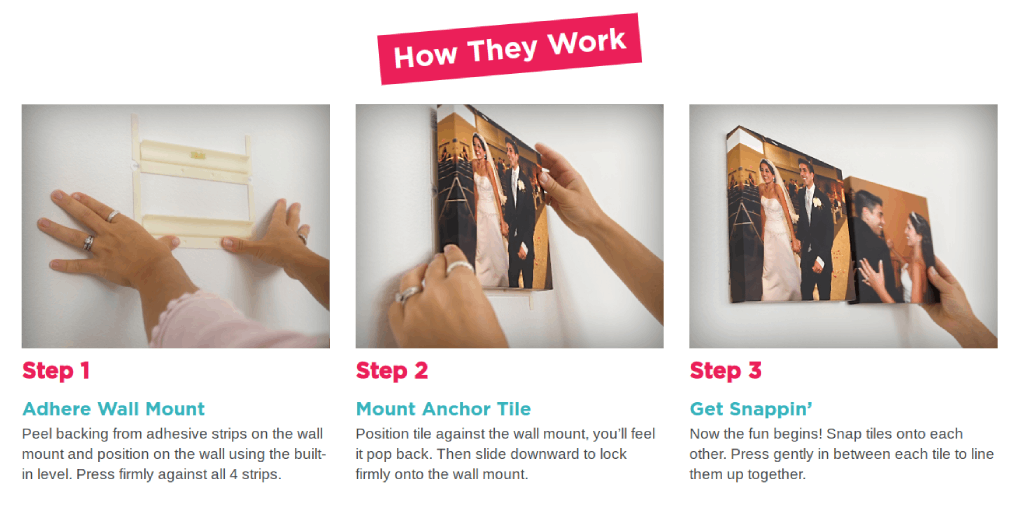
You attach an anchor piece to the wall using four adhesive strips. Then, you can add up to 12 Snaptiles photo tiles to the anchor image using the rare earth magnets in the tiles. In other words, you can have a complete photo display with zero holes in the wall to show for it. Nice!
If you want to create a much larger display of photo tiles, you can simply use the four thumbtacks you get with your Snaptiles to add more support. And those four thumbtacks enable you to display up to 30 images. That's not bad at all!

What's more, since the Snaptiles photo tiles are connected with magnets, you can create all kinds of shapes in your photo display. You can also change the way the photos are displayed as often as you like.
So, with a traditional large format print, you're "stuck" looking at the same image each day, which isn't a bad thing! But having the ability to look at up to 30 of your favorite landscape photos and having the ability to change how that display looks in a matter of minutes is an awfully attractive proposition, don't you think?
Get all the details on Snaptiles and see why these photo tiles are a must for displaying your landscape photos.
Learn More:
We Recommend
5 Tips for More Professional-Looking Videos
photo byTzido via iStock
Creating professional-looking videos is available to anyone who wants to learn how to make professional videos at home by using simple video techniques and basic video lighting and equipment.
With that in mind, we came up with some simple to implement video tips to give you the ability to create professional-looking videos with just a little bit of extra effort.
What’s cool about these video tips is that you really don’t have to spend any extra money to take advantage of these video techniques if you already have a videography kit. We’ll also give you some recommendations for gear if you don’t have a full kit yet.
Stabilize Your Filming

photo bymeatbull via iStock
A lot of videographers like me have started out as photographers and we tend to carry over certain techniques and mindsets from still photography to our new efforts in videography. In many types of photography, we rely on our well trained hand holding technique and camera features such as image stabilization for combating camera motion for capturing sharp images.
When engaging in videography, we should support our cameras almost all the time instead of relying on hand holding techniques and tech features. Shaky camera footage is one of the most common and obvious differences between good professional-looking video and video that doesn’t look professional.
The solution is to put our camera on a good video tripod. In addition to keeping the camera steady, video tripods have fluid heads which smooth out any panning and tilting motion that you may have to make while filming.
If you are shopping for an excellent video tripod with a fluid head for helping you make professional-looking videos is the Aluminum Tripod Kit with GH08 fluid head with counterbalancing and twin tube legs, shown above.
Light It Up
photo bylapandr via iStock
When looking at professional videos or motion picture scenes, our brains go into the mode that we are seeing realism, regardless of how realistic it is, because of the live action nature of motion pictures makes us feel like real life viewing.
Since our brains compensate rapidly and automatically for variations in lighting, when filming a scene for video, we need to consider that our audience is expecting, consciously or not, to see most of the objects in the scene.
This subliminal expectation of realism requires our video lighting to be excellent to qualify as professional-looking video. Once you have the right lights or some kind of light modifiers, the setup becomes rather straightforward for most scenes, unless you’re trying for some sort of artsy look which is also professional-looking.
A good assist is to have the right type of video lighting. If you haven't settled on a video lighting kit yet, take a good look at the Ikan Mylo Mini B-Color 2-Point LED Light Kit with stands and barn doors. It is very clean video lighting with a CRI of 95 for professional video results.
Learn More:
Use Natural Composition
photo bymixetto via iStock
Professional-looking video tends to follow the same rules of composition as still imaging. The main one we all learned even before picking up our first camera is the Rule of Thirds.
Other rules will work too, but most professional video leans heavily on the Rule of Thirds composition technique easily obtained natural feeling harmony and balance. Partly because it keeps us from looking to the edges of the frame, instead, keeping our attention fairly centered but with a realistic appearance.
While those other rules will also provide interesting video, sticking with the Rule of Thirds for most of the scenes keeps the feel very natural and balanced which results in professional-looking video footage.
Edit for Short Scene Length

photo byEvgeniyShkolenko via iStock
Average scene length and average shot length are interesting concepts to learn about. You can really spend a lot of time editing for professional-;looking videos, but the results are worth it. Be careful with the cuts and dissolves, though. The idea is to hold the viewer’s attention without drawing attention to the method used.
Average scene and shot length are important concepts for professional-looking videos, but simply adding in B-Roll footage can be a good start for creative editing that holds the attention of your audience. Be careful not to over edit or make very obvious edits.
Edit Sound, Too
photo bybrightstars via iStock
One of the top things that separates amateur video from professional video is the quality of the audio track. Using an off camera microphone of some sort is part of the cure for poor or average audio recording.
While editing audio is vitally important, you need to have good audio recorded in the first place so you have something worth working with. A shotgun mic, cardioid mic, or wireless lavalier mics will record much better than our camera’s built-in microphone.
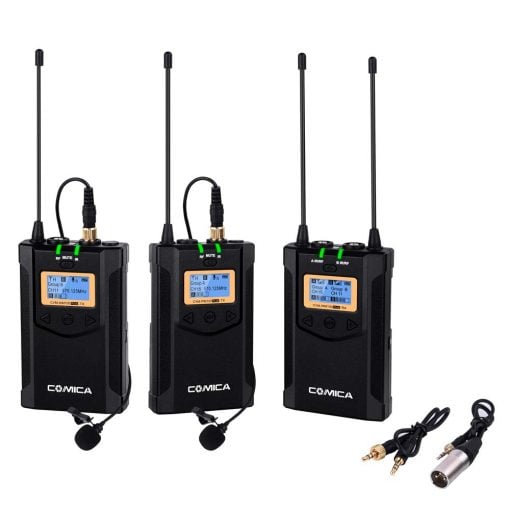
If you are still searching for your off camera microphone, consider wireless lavalier mics like the Comica Wireless Dual Mic System with two transmitters and one receiver.
Let’s See Those Eyes

photo byfizkes via iStock
When interviewing someone for your vlog or YouTube channel, or when filming some sort of creative scene, be careful of your subject’s eyes. A common trick for naturalness and professional-looking video is to be sure we can see both eyes of the subject.
It’s another one of those odd video tips that seems trivial and ntpicky at first, but if you compare footage of a scene with the subject showing only one eye to the camera with footage of both of their eyes being visible, the more professional-looking video will have both eyes showing, which makes the viewer feel more comfortable when watching. Try it out for yourself.
You can, and should, still vary the placement of the subject and their position and where their gaze is directed, simply try to show both eyes (or at least part of the second eye) when arranging your scene composition and subject position and posing.
Other Video Tips
photo bybrightstars via iStock
Other tips for how to make professional videos at home can be found in other articles on our website. Some of the subjects are capturing B-Roll solo, using different lenses, and creative editing techniques.
Some of the techniques will include buying guides of suggested equipment, but almost all of them can probably be accomplished with the equipment you already own. Your own projects can be professional-looking videos with just a few minor adjustments to your video techniques.
Learn More:
- How To Shoot Quality Video Footage
- Beginner Videography Terms You Need to Know
- Tips for Better DSLR Video
We Recommend
Add a Soft Panel LED Light for Your Studio and On-Location Work
I love soft panel LED lights, they’re some of the most versatile studio lights for photography and videography.
As photography lights, it’s hard to beat a good LED panel light. Not only are they dual duty since they can be used as studio lights for photography and for a video production, but the best soft panel LED lights are also adjustable, oftentimes continuously variable, with regards to both power levels and color temps.
Benefits of LED Lights for Photography
Besides those benefits of LED lights for photography already mentioned above, some other features that make them so wonderful are that they are generally smaller and lighter than other lighting counterparts and they run so much cooler.
If you’ve ever tried using continuous light quartz lamps or incandescent photo floods, you know how quickly these lamps can heat up. And wow are they hot! Hot enough to make human subjects uncomfortable and virtually unusable for pets or newborn photography.
LED lamps are so much cooler in operation, plus they are also more efficient. Being efficient means that many of them can even run off of batteries, making them a great choice for in the field lighting. Usually these will make use of Sony camcorder style lithium-ion batteries, offering usage times varying from 30 to 90 minutes.
Ikan Corp Video Accessories
When shopping for or recommending professional or other serious use video accessories, I like to look at Ikan Corp first for a couple of reasons.
The company is run and staffed by professional photographers and videographers, so all of the items they sell have already been vetted by serious users. In fact, many of the items were either designed or made by Ikan themselves or found from other makers for very specific uses and needs.
Another benefit of this business model is that we, the consumer, will be able to find extremely high quality accessories at very reasonable prices. In fact, many items may be up to about half the price of comparable items from other brands.
Learn More:
Lyra LCX21 Soft Panel LED Light with DMX
An excellent example of all that is the soft panel LED light from Lyra, the LCX21. It’s a soft panel light with a beam angle of 110 degrees and is variable in both power and color temperature. Plus it’s able to be used within a DMX studio system.
DMX is a useful way to control lighting and lighting effects with everything balanced and controlled from a central control panel or program.
The Lyra LCX21 has a CRI of 97, meaning that the color and quality of light is extremely high. This also helps in repeatability from session to session, since a higher CRI tends to stay consistent during the lifetime of the lighting fixture.
Color temperature variation is from an extremely warm 2800K all the way up to a very cool 10,000K. So you can blend this light into any ambient light situation or use this variability to create a specific look or feel for your still images or video productions.
Being a professional use model, the Lyra LCX21 is larger, heavier, and more expensive than lights designed for casual use. But being an LED panel from Ikan, the size, weight, and price is still very reasonable considering how powerful and rugged this lamp is.
You are sure to find many uses for this soft panel LED light in your studio for either still photography or videography and it will also liven up any in the field on location photo or video shoots of yours.
Learn More:
We Recommend
Advantages of LED Lighting for Portrait Photography
photo byPeopleImages via iStock
Lighting for portrait photography can be simple, sophisticated, or anywhere in between. It’s really a wide open field of possibilities, equipment, techniques, and configurations. Recently I’ve been incorporating LED lights into my portrait photography lighting to take advantage of several benefits.
As I see it, there are several nice advantages of LED lighting for portraits. They are bright and clean, LED lights run cool, they are continuous lights, and LED lights are efficient enough to be powered by battery or wall current.
Bright and Clean Light Output

One of the top reasons I like LED lights for portraits as well as for my videography is because the high quality LED lights are very bright for their power consumption and the color emitted is clean.
When I say a light source is clean, I’m referring to what is measured by the CRI, color rendering index, of the light. CRI tells us how natural the light allows colors to appear. A higher CRI is better than lower, with 100 being the best score.
Lights used for photography and videography should have a CRI in the 90 and above range, with many fine studio and portable LED lights coming in at 96 and 97. TheStryder Fanless Bi-Color LED Fresnel Light from Ikan is an excellent example of a high quality studio with a CRI of 96 and 97 defending on the color temp used.
Cool Operation
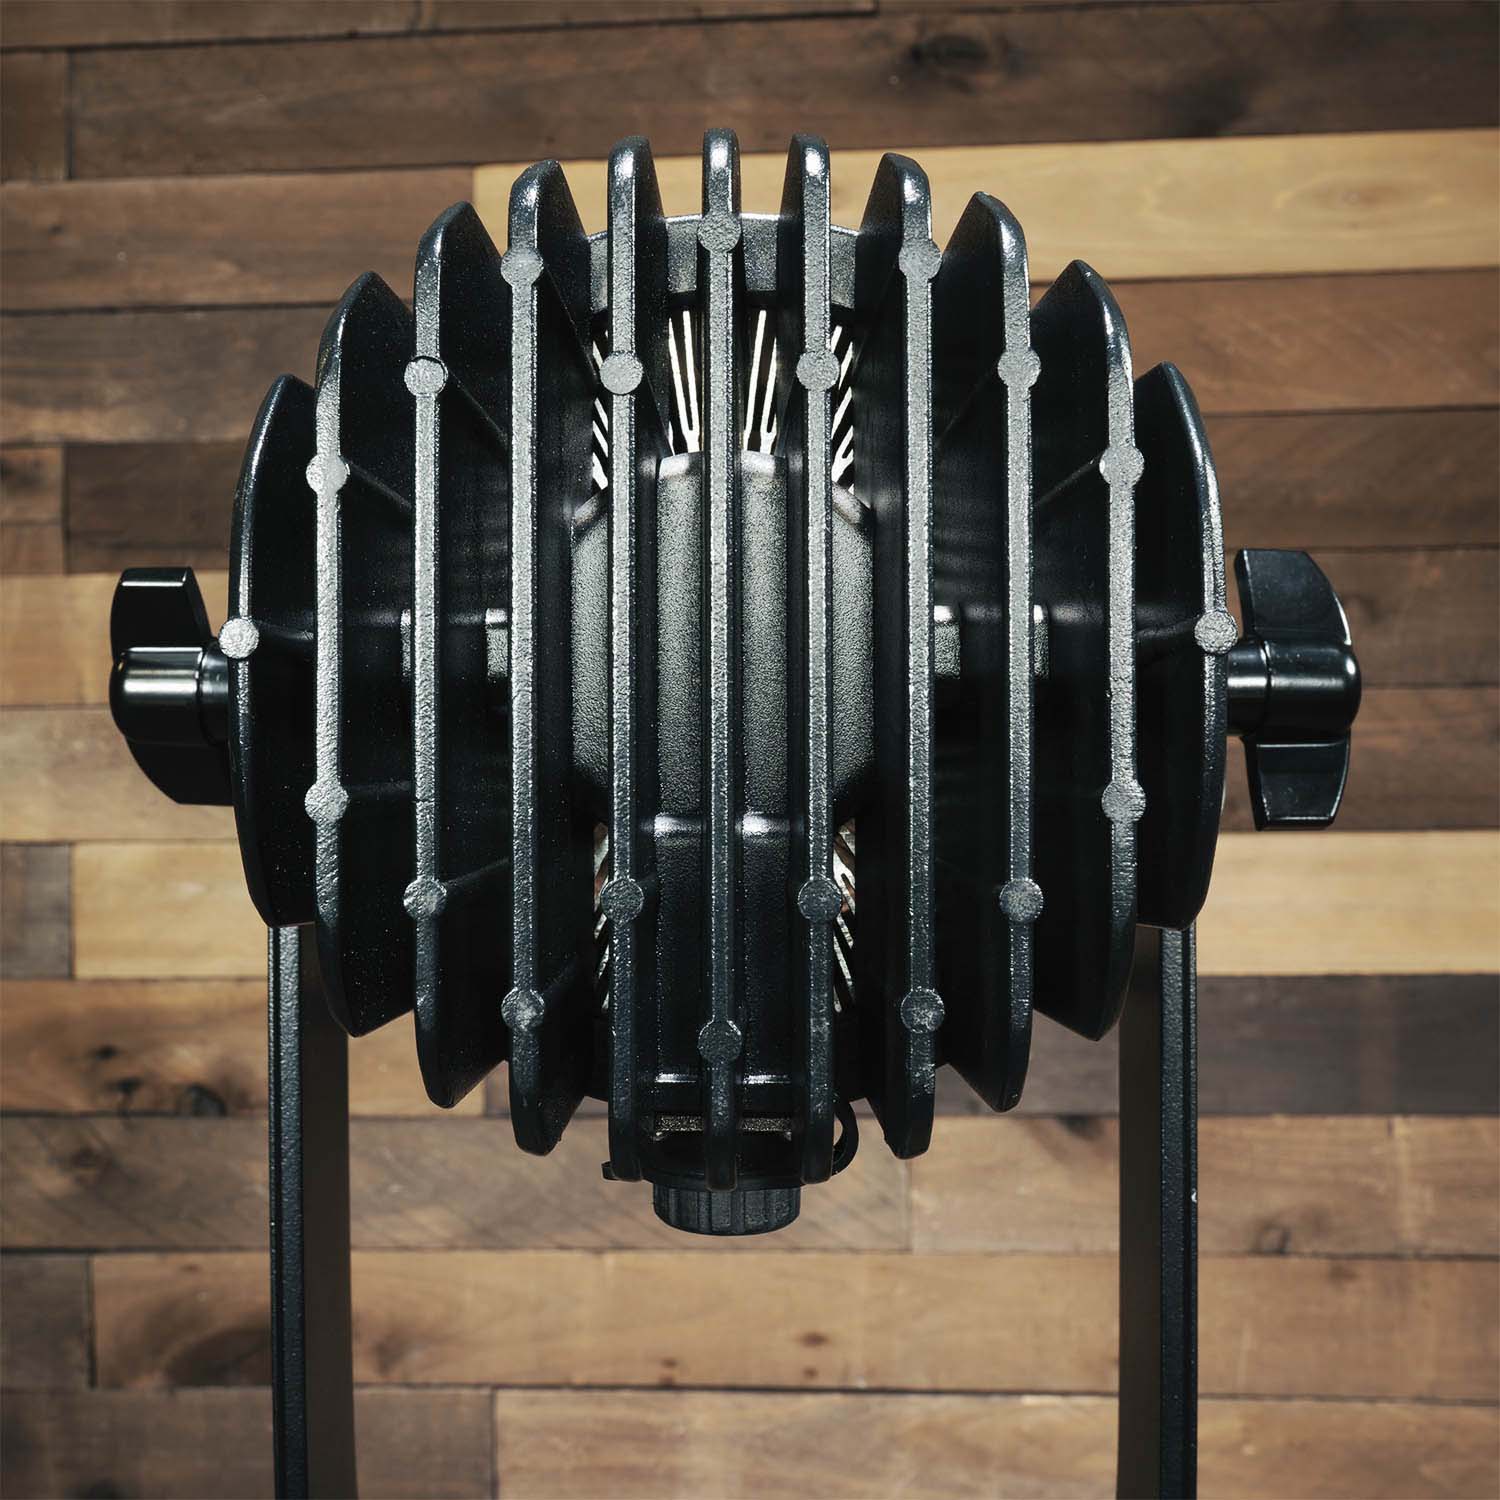
With continuous lights, the longer they stay on, the hotter they get. If you’ve ever worked with incandescent floods or HMI lights, they can get so hot that you could injure yourself if you touched the bulb. Plus, the bulb life is often very short.
LED lights stay safe to the touch and they last a long, long time. Even the versions of lights such as the Fresnel light mentioned above, which use a lens system to concentrate the light beam, will stay comfortable to handle when they’re made with LED bulbs.
Learn More:
Continuous Lighting
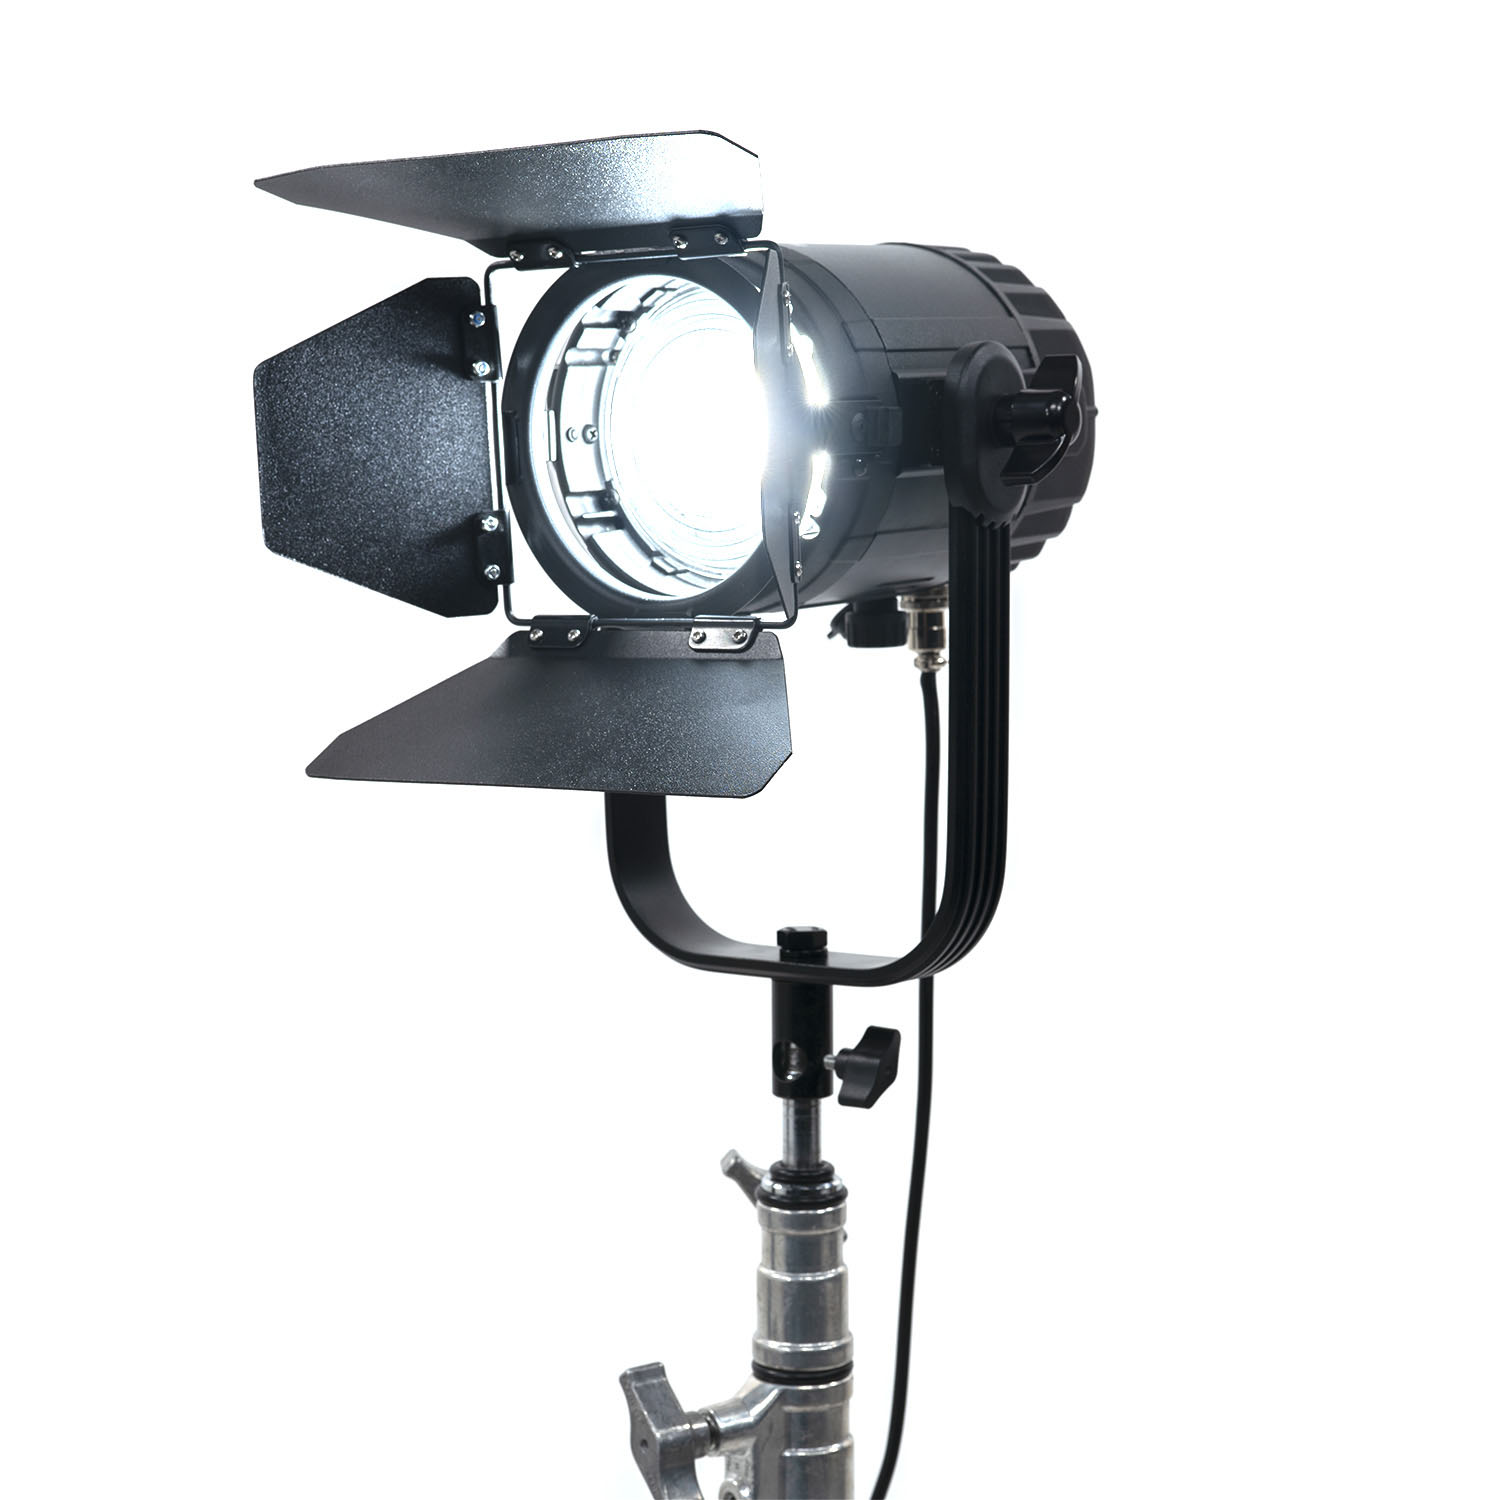
Continuous lighting for portrait photography has a great benefit for beginners to lighting, which I also enjoy a lot. One of the main advantages of LED lighting for portraits is that you can see the effect of your lighting choices as you set up.
Many studio strobes have modeling lights, but a lot of compact portable flash units don’t. Being able to see exactly where a shadow falls or how much brighter one light is than the other makes varying lighting configurations much easier and quicker to do.
Before LED lights became common in photography, using any continuous light source for portrait work was not often recommended, primarily due to the heat involved which would make portrait subjects uncomfortable. Especially would be problematic with kids or pets as the subjects.
But with the cool running LED lights, that issue is pretty much eliminated. This is really advantageous with multiple light configurations, such as when adding in a fresnel light like the DMX controllable Stryder Fanless Bi-Color LED Fresnel Light which opens up many possibilities of lighting variations in portrait photography.
DMX controlled continuous lighting is a standard for digital videography studios, as it allows precise control and timing of light levels and special effects.
Flexible Power Options
Continuously on lighting with incandescent bulbs or HMI lights consumes a lot of power, so plugging in to the wall socket is often the only choice with many of these types of lights. Portable flash units are portable because of their being operated by batteries.
Going back to the Stryder Fanless Bi-Color LED Fresnel Light from Ikan, since it’s an LED light, the power consumption is efficient enough that it can be powered by either wall plug-ins or by batteries.
Price
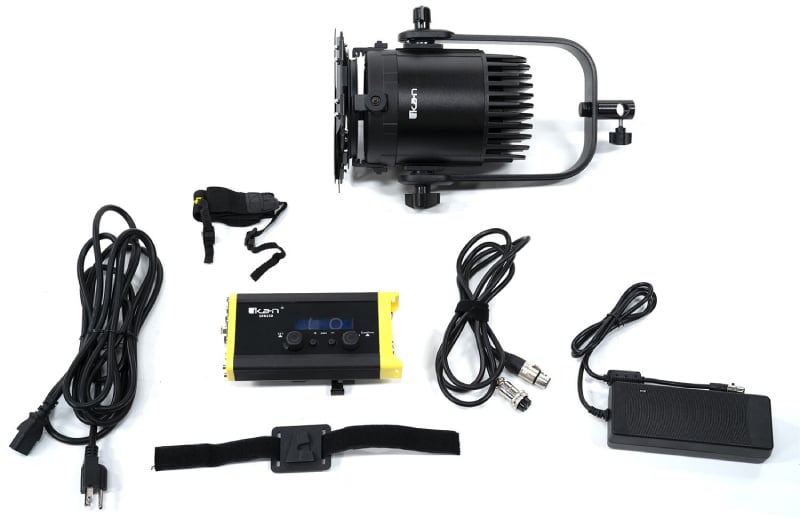
I find that the professional portrait photography lighting options of LED lights are usually much more reasonably priced than some of the other gear cinematographers like to use.
Large HMI lights like what you see on TV and movie sound stages can easily soar into a high figure per light and even the smaller ones intended for more modest studios are still quite expensive. When you absolutely need what those lights offer, though, usability triumphs over pricing concerns.
Most of the LED lighting for portrait photography and videography are much more budget friendly. I have enjoyed using, reviewing, and even purchasing for my own use the top notch gear from Ikan. The company was set up by active videographers and photographers, so the gear is designed to meet the needs of these shooters.
Since they either make or design their own equipment, Ikan is able to bring to the market very high quality gear for lower prices than many of the other brands out there. Check out their full line of lights, filters, tripods, and specialty gear.
Learn More:
We Recommend
Advantages of Using a Softbox for Portrait Photography
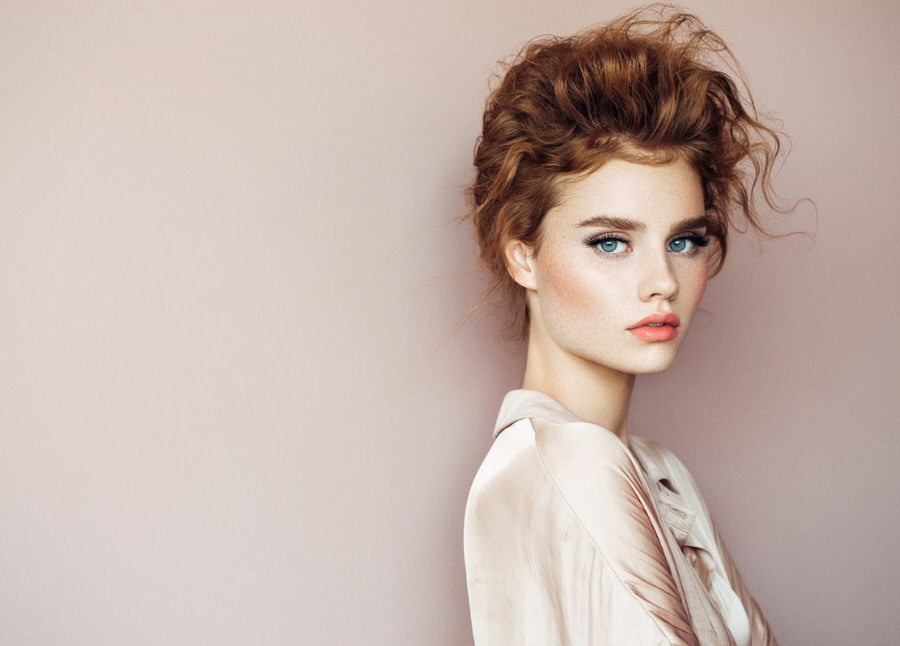
photo byCoffeeAndMilk via iStock
Using a softbox for portrait photography will result in pleasant lighting for most subjects, plus the gear and techniques used can also be applied to other types of photography such as small product photography for online listings.
In this tutorial, learn a few key benefits of investing in a softbox for your portrait photos.
Portrait Photography Tips
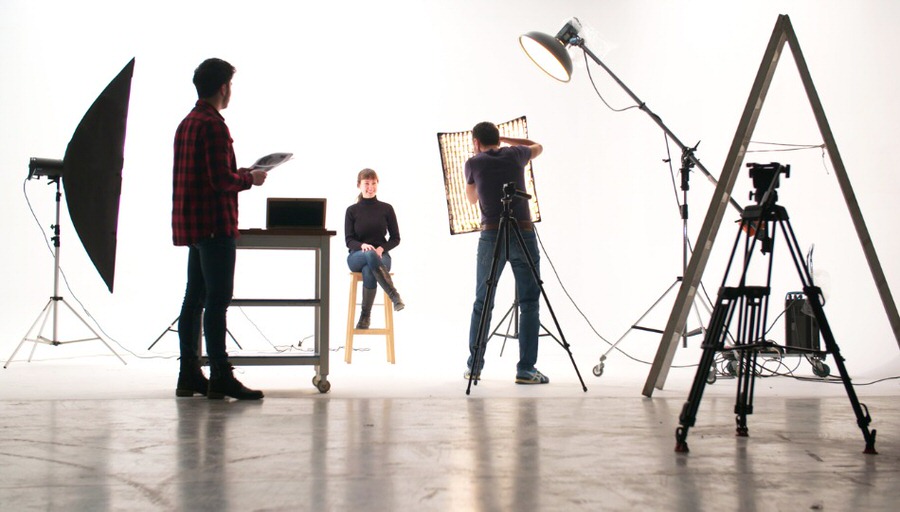
photo bybrightstars via iStock
Making great portraits of any subject is within the grasp of any photographer with proper implementation of portrait photography techniques and using good portrait photography gear.
It is a definite rule in photography that it’s not the gear that makes a photo, it’s the photographer. But sometimes certain types of equipment make the job easier. Some portrait photography gear allows us to use certain techniques for creating better portraits.
The lighting equipment for portrait photography can be used in various different configurations for several styles of portrait lighting. A softbox is one of the best lighting tools for many portrait lighting uses.
What is a Softbox?
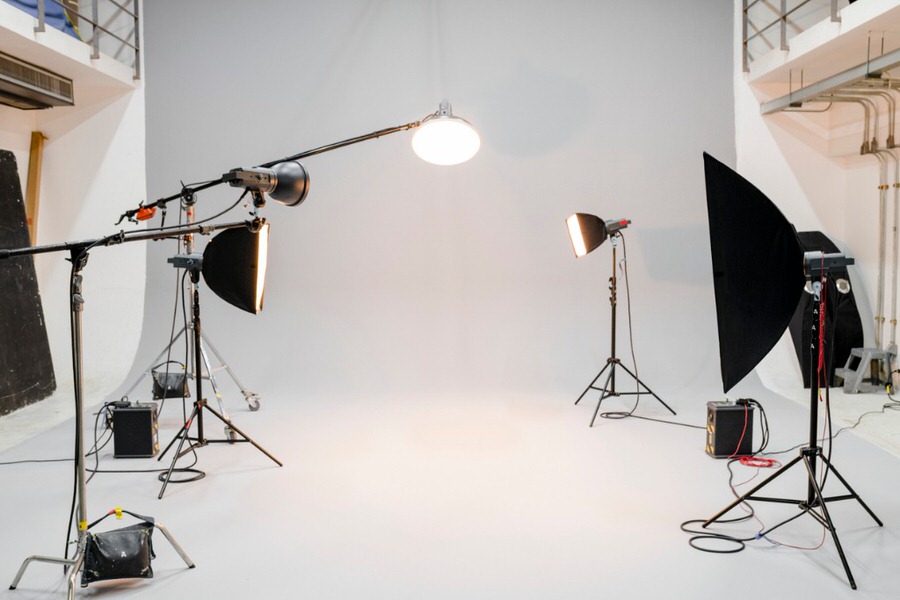
photo byRawpixel via iStock
Light comes in many flavors, photographically, these differences can really affect our images. Besides the color temperature of a light source, being hard or soft sources will also alter the end results.
Hard light creates distinct or hard shadows, while soft light diminishes the harshness of the contrast between light and shadow. Instead of the word soft, you might think about it as being diffused. A broader light source is often more diffused than a pint light source.
One way to create softer light is to make a light both broader and more diffused, which a lightbox does by means of how it’s made. A softbox is a frame of diffusing material surrounding a light that makes the resulting light emitting unit bigger and softer.
Here is an example of a softbox from Ikan for a specific light used by many videographers and portrait photographers, the Rayden Half X1 LED light.
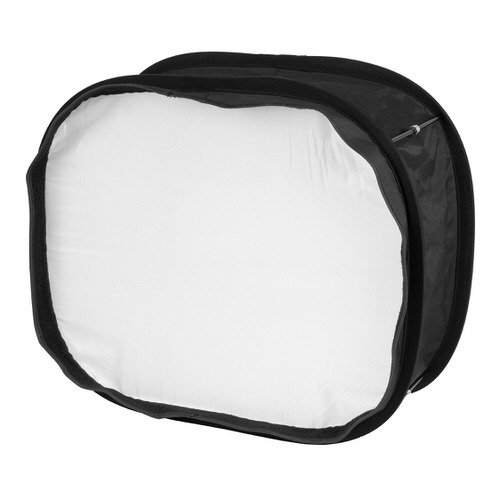
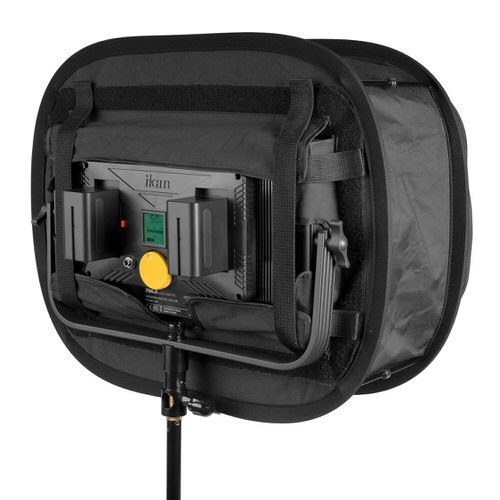
You can get a softbox for almost any size and style of lighting equipment you might already have. Here is another softbox, this one made for a compact iLED144 light from Ikan that fits directly on a camera or on a camera cage.

What you see is a large front panel of diffusing material, some internal reflective material to maximize the output of the light, and a frame to hold it all together. That is the essence of how to make a softbox for portrait photography.
Learn More:
Why Use a Softbox?

photo byAzmanJaka via iStock
Why would we use a softbox for portrait photography or for the other types of photography and videography we might do? A softbox makes light softer which means it can be very flattering for many subjects and can eliminate or lesson contrasty shadows which can either obscure or greatly exaggerate features.
When discussing lighting equipment for portrait photography and the term features comes up, we’re usually talking about the nose and chin. Eyebrow ridges, cheekbones, lips, ears, and hair also factor in, as well as the lines on faces that naturally occur with certain expressions or wrinkles and blemishes caused by damage or age.
Softening the light doesn’t blur the subject like a soft focus filter would, but it does mean that those harsh shadows that make a nose look larger than it really is or the shadows inside the skin wrinkles that accentuate them are lessened. Thus the resulting images will be more flattering for the portrait subject.
Of course, some portrait lighting configurations are designed around harsher, harder light, such as Rembrandt lighting, but for the general portrait portrait market, softer light set ups are often favored.
How to Use a Softbox

photo byalvarez via iStock
Learning how to use a softbox for portrait photography is simple. Simply replace whatever you’re using as a key light, the main light, with a softbox. Using a softbox on both the key light and the fill light will result in a flatter light than other lighting configurations, so you might do some experimenting, see how soft you need to go.
A two light setup with softboxes is a good method for many types of small products, such as you might be shooting for listing on a shopping website. It’s useful for product photography since the softer light shows details of the items better than contrasty lighting.
A softbox can be used with any type of light, either a flash or continuous light, but you should monitor closely when using one with incandescent bulbs since they can increase heat build up. Using LED continuous lights or a flash greatly reduces that concern.
There are many advantages to using a softbox for portrait photography, try it out yourself to see how it can improve your portrait and small product images.
Learn More:
We Recommend
Awesome Camera Accessories for On-the-Go Photographers
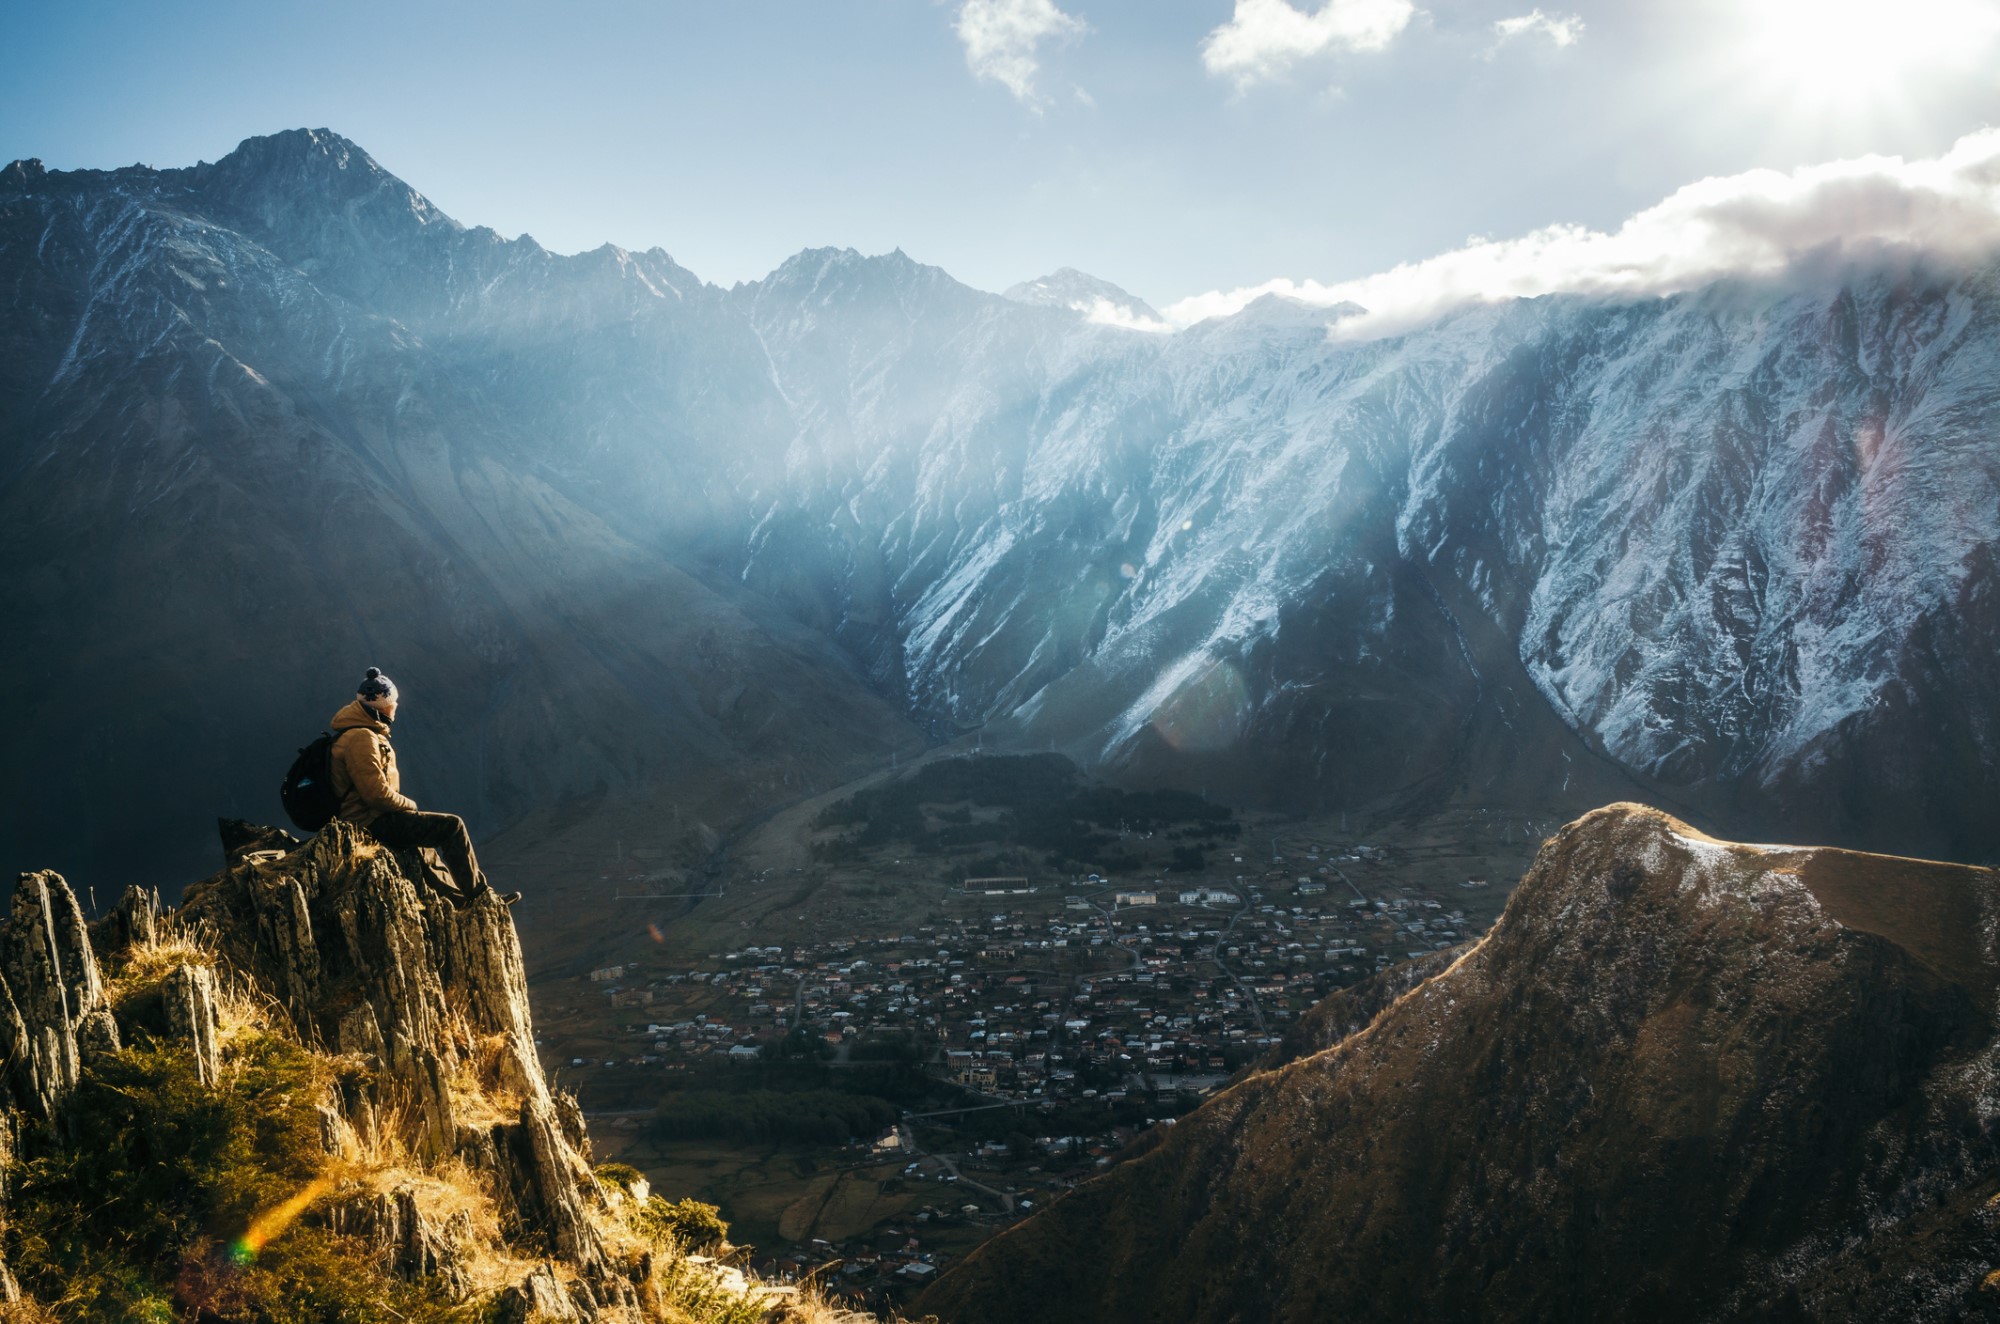
photo bybortnikau via iStock
Camera Accessories
Whether you’re on the road because you love to travel or you’re doing it out of necessity for work, you want to have camera accessories that can come along with you without being a burden.
Fortunately, recent years have seen awesome camera accessories made available that are small and portable, yet still pack a mighty punch.
Below, I’ve outlined a few of my favorite on-the-go camera accessories that will make your photography trips much easier.
Table of Contents
- LitraTorch 2.0
- E-Image EK610 Professional Compact Tripod
- Haida NanoPro Circular Polarizing Filter
- HEX Ranger Sling Bag
- Exposure X5
The LitraTorch 2.0 is a Must-Have for Travel Photographers
If you’ve spent any amount of time learning about photography, you know that good light is the key to getting a good photograph.
And while it’s perfectly fine to label oneself as a “natural light photographer,” there are times when natural light just won’t cut it.
But if you need to be highly mobile, the last thing you want to do is carry around light stands, softboxes, diffusers, and all sorts of lighting gear.
Instead, stay mobile and use the LitraTorch 2.0, an absolutely incredible light that will shock you with its power and quality of illumination.
I have this little guy (that’s it in the photo above, just above the lens) and it has been a Godsend as I get more and more into on-location work.
It has 16 LEDs that put out 800 lumens of light. Considering it’s just 1.5 inches square, that’s an incredible amount of light!
Since it weighs just three ounces, it’s not like you’ll be bogged down with heavy gear, either.
In fact, you can pick up a handful of these things, throw them in your camera bag, and not notice a difference in the weight you’re carrying.

Better still, the LitraTorch 2.0 is adjustable, so you can set it at 100 lumens, 450 lumens, or 800 lumens to suit the situation.
No matter the light output, this thing has beautiful, crisp, flicker-free light at a color temperature of 5700K.
With a CRI of 90+ and TLCI of 92, you begin to get a picture of just how superb this little light really is!
Add in durable construction, waterproofness to 60 feet, a magnet for mounting it to metallic surfaces, and two ¼-20 mounts, and you have the makings of the perfect little light.
Learn more about the LitraTorch 2.0
Learn More:
Save Space With the E-Image MA600 Monopod

A means of stabilizing the camera is a must for every photographer, but what you don’t want is a big, bulky, heavy tripod that you have to carry around from one shoot location to the next.
The E-Image MA600 Monopod is a great solution for on-the-go photographers that simply don’t have room for a traditional tripod.
At just 3.1 pounds, this monopod is lightweight, and with just a single leg, it’s form factor is much smaller than a tripod, thereby giving you more room in your camera bag for other gear.
This monopod can support an astonishing 44 pounds of gear, so whether you have a DSLR, mirrorless camera, or a large video camera, you’ll get all the support you need.
Made of aluminum, the MA600 monopod is strong and durable, yet more budget-friendly than carbon fiber options.
The flip-lock design of the leg locks makes setup a breeze and quick adjustments easy as well.
There’s a soft foam grip and a strap at the top of the monopod to give you multiple points of securing it while shooting.
It can extend to nearly 75-inches yet folds down to little more than 25-inches for easy transport. And with a base that spreads 16-inches, this monopod offers superb stability, even if you’re panning to track a subject.
Learn more about the E-Image MA600 Monopod
Learn More:
Step Up Your Photography Game With a Haida NanoPro Circular Polarizing Filter

When you’re on the move, it’s important to shed weight when you can.
One of the ways I’ve done that as of late is to ditch my giant filter kit and roll with just one filter - my Haida NanoPro Circular Polarizer.
Of all my filters, this one is the most invaluable simply because of the many benefits I gain from using it.

photo by DieterMeyrl via iStock
As all polarizers do, this thing boosts contrast in the sky, minimizes glare off of water and other non-metallic surfaces, and reduces atmospheric haze.
In all these cases, my landscape photos benefit from stronger colors, improved clarity, and gorgeous contrast.
But not all polarizers are made alike, so it’s important to invest in one that offers the highest-quality results. Haida does just that.
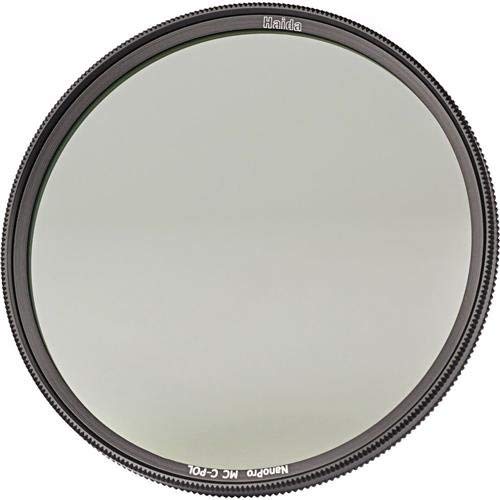
The NanoPro coating on this filter offers a number of benefits, including making cleaning an easier task. That’s because dust, dirt, smudges, and moisture are repelled thanks to ten (yes...ten!) layers of coatings.
What’s more, the NanoPro coating has anti-reflective properties to ensure your photos are as clean and crisp as possible.
With high-quality optical glass, a lightweight 5mm aluminum mount, and side knurling that allows for easier and more precise adjustments, this polarizer is definitely a camera accessory that takes up very little space in your bag, but is worth its weight in gold.
Learn more about the Haida NanoPro Circular Polarizing Filter
Learn More:
Carry Tons of Gear Without Feeling Weighed Down With the HEX Ranger Sling Bag
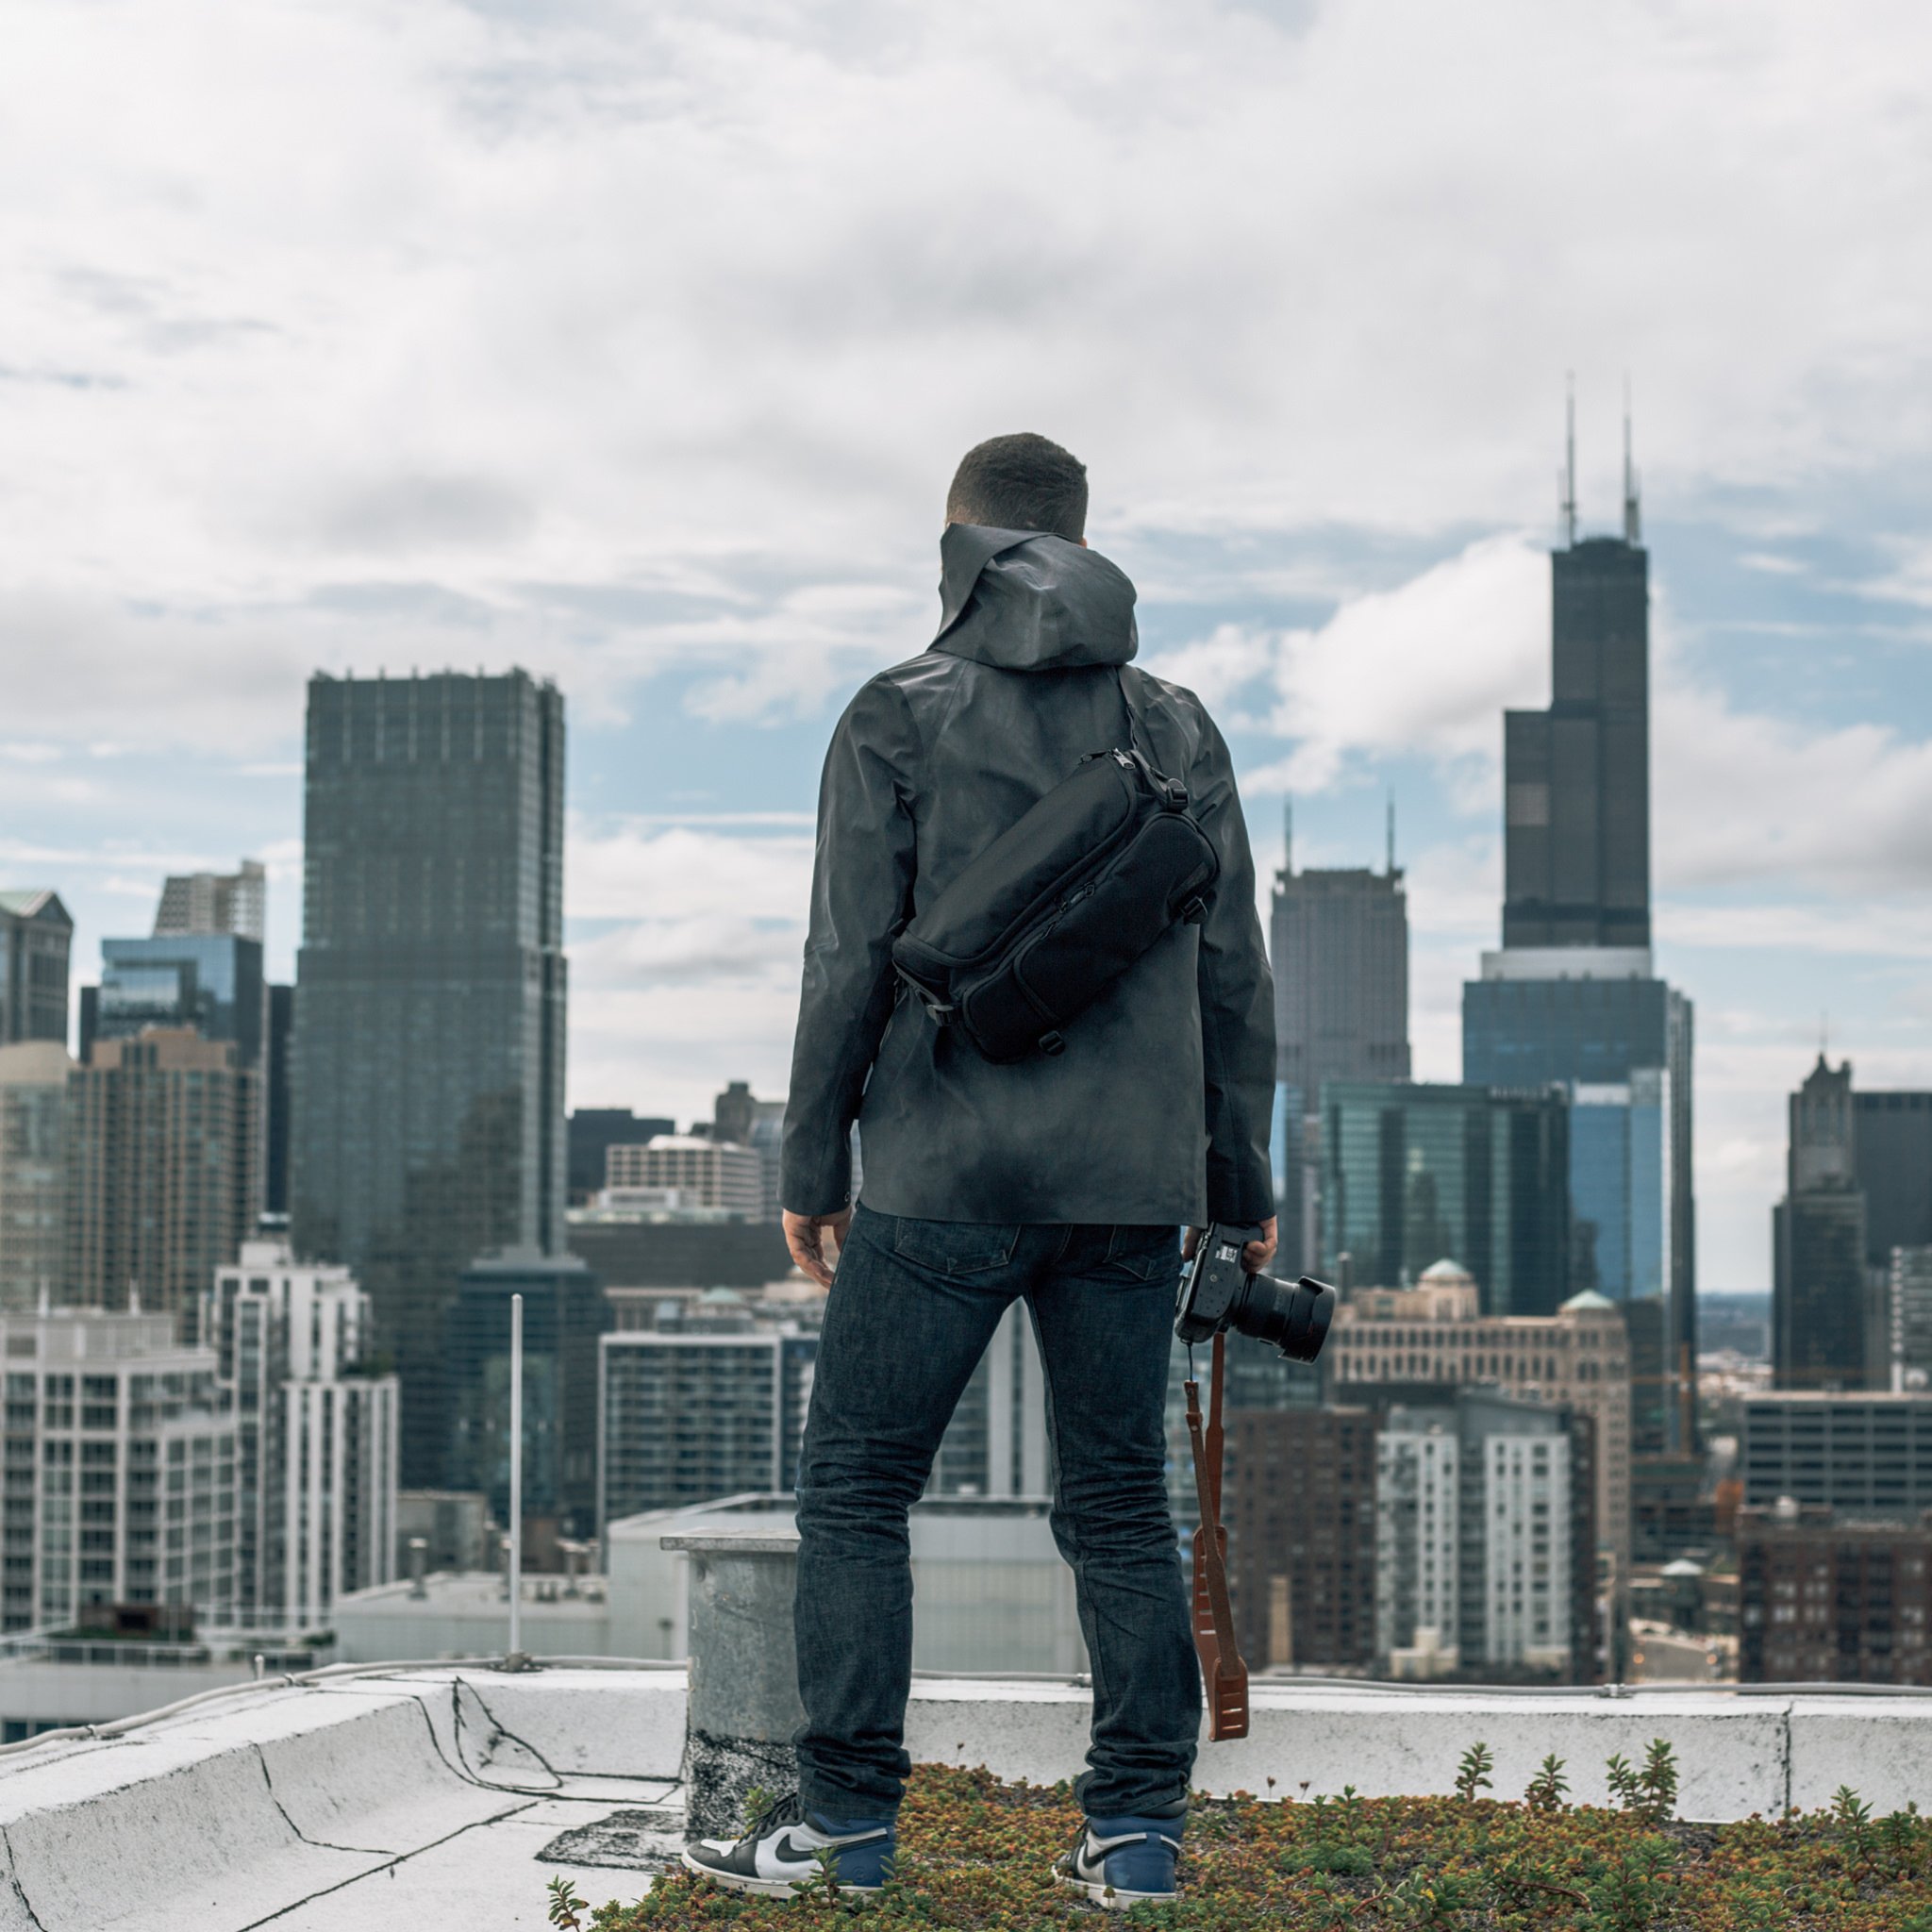
When you’re ready to head to points unknown, you need a camera bag that can fit loads of gear, but that isn’t big and bulky and difficult to carry.
Enter the HEX Ranger DSLR Sling Bag…
I have to say that I was completely blown away by this bag the first time I laid eyes on it when I met the folks behind HEX at their Los Angeles offices.
I’ve been a Peak Design guy for a long time, and if you know Peak Design, you know the quality that they put out.
But, man, HEX has taken it to another level!
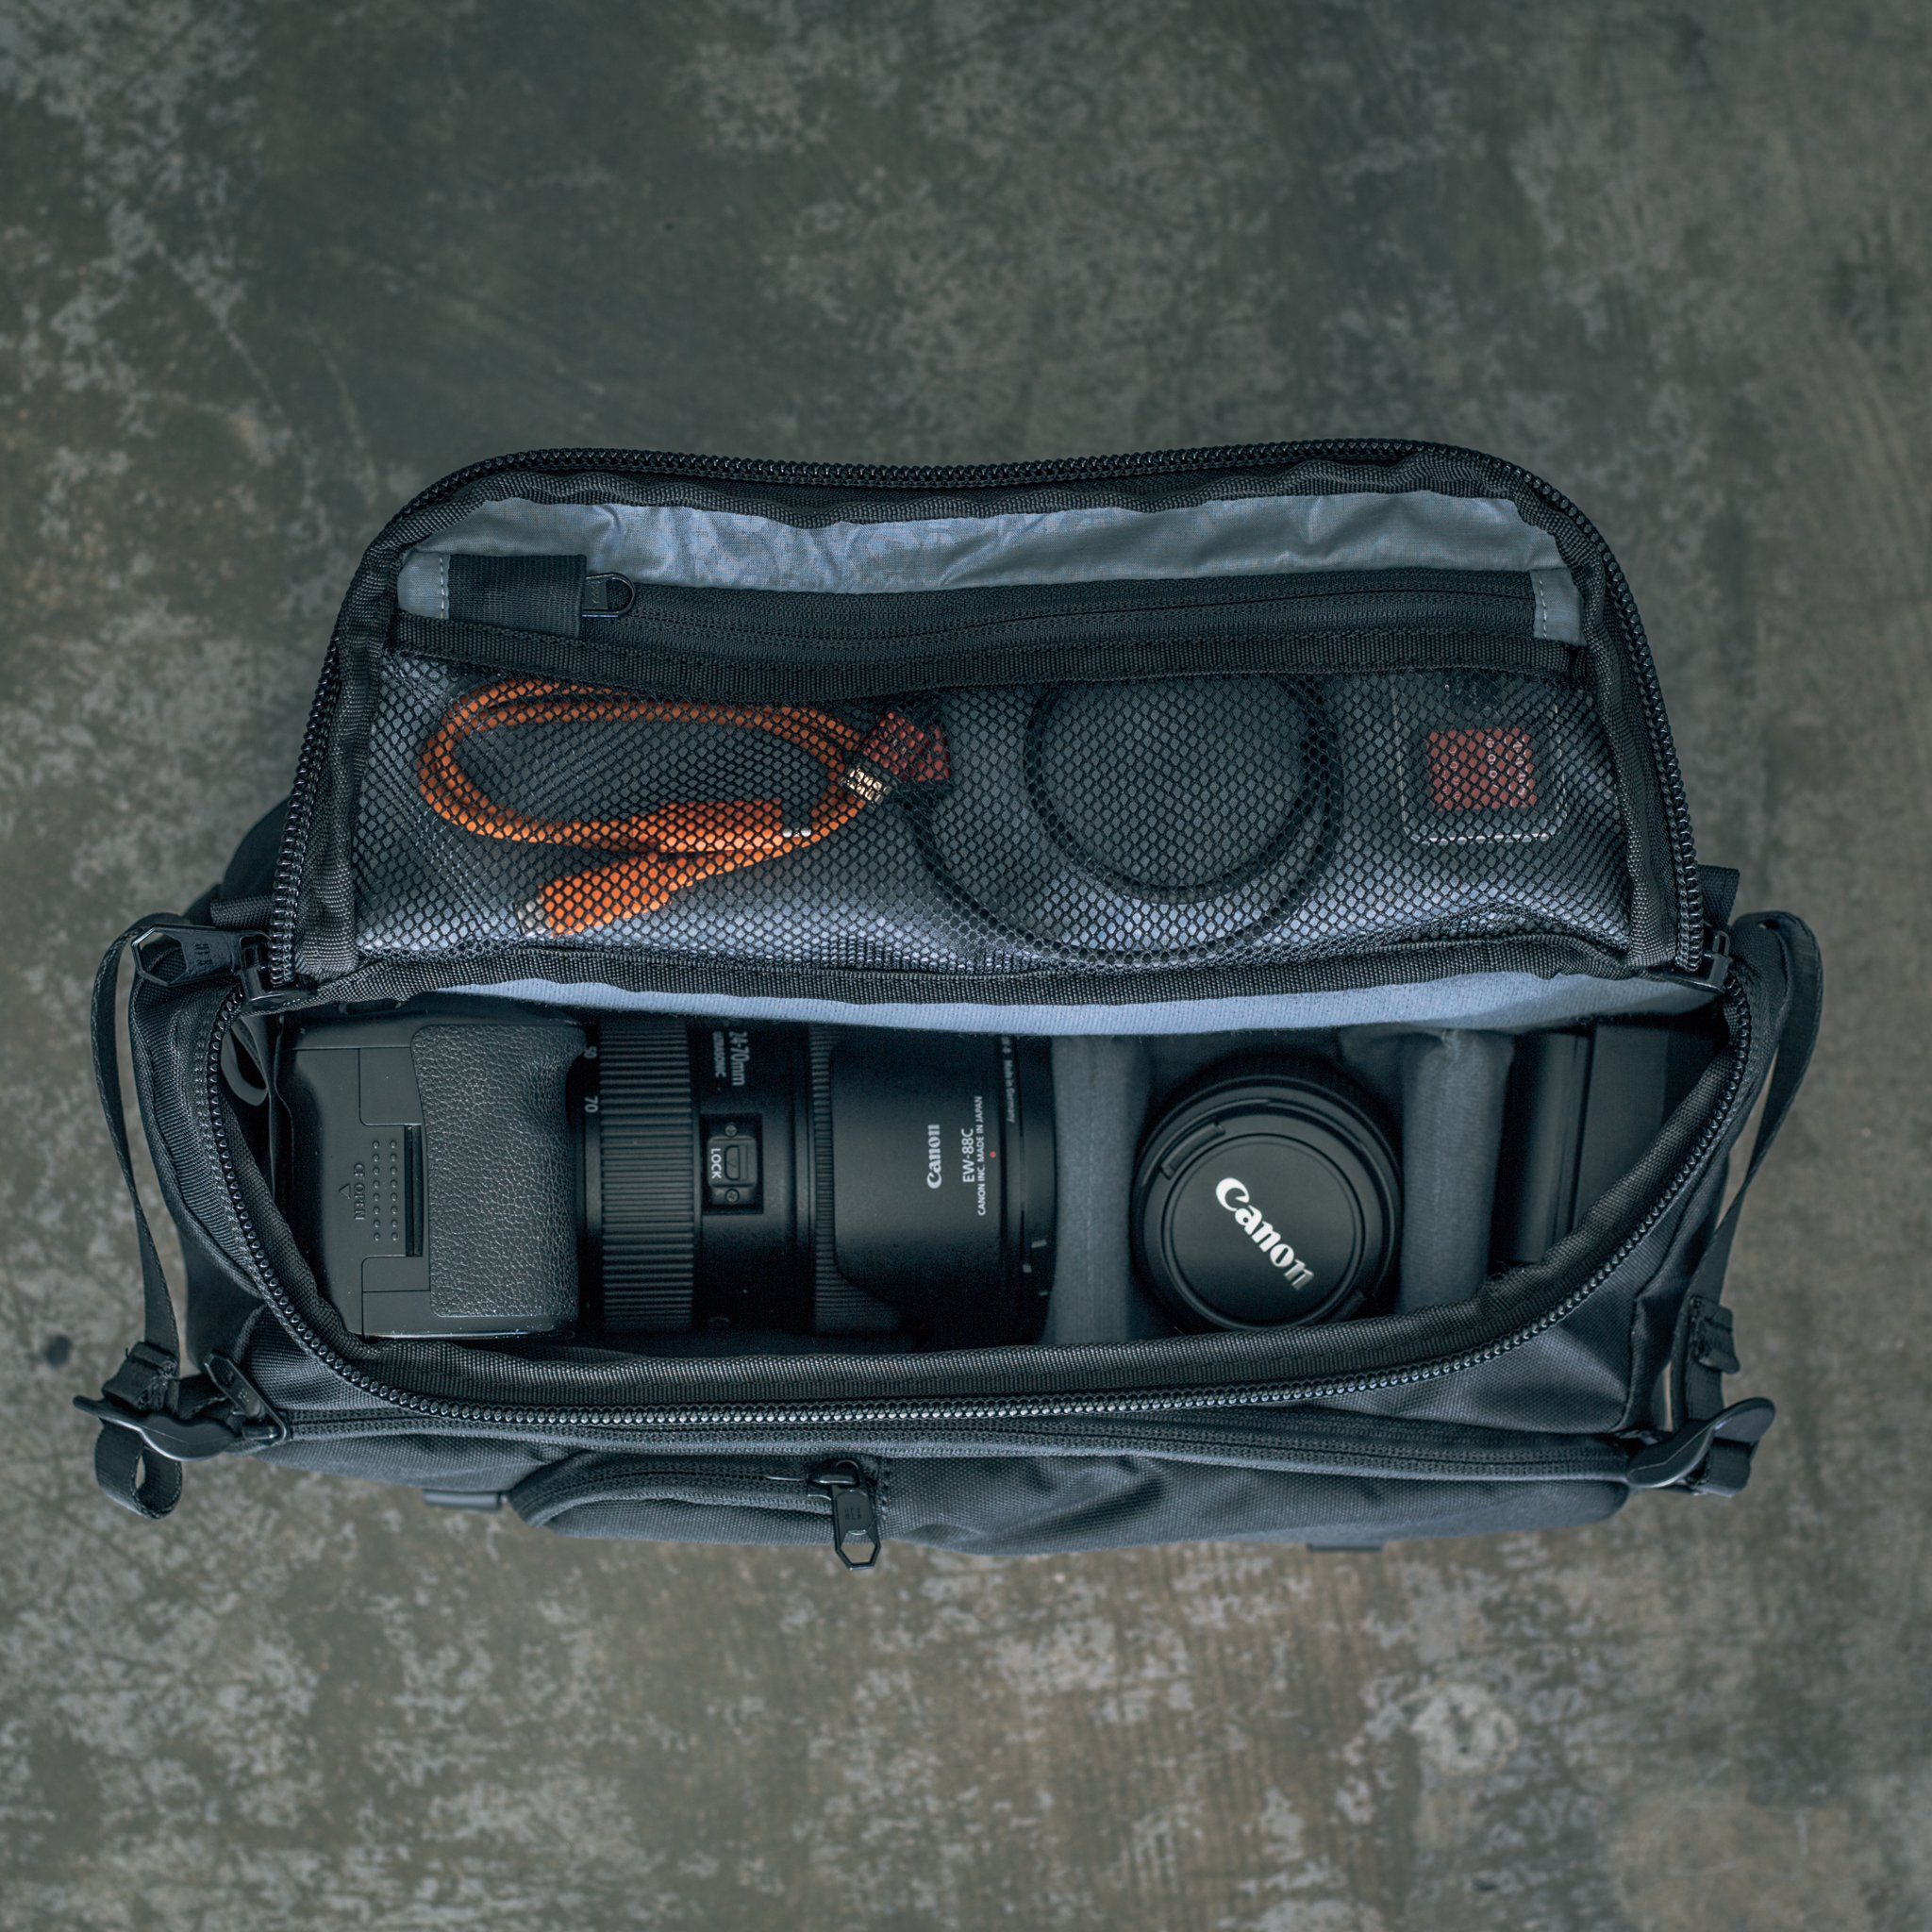
For starters, it’s a compact bag at just 1.3 pounds and 14.5"L x 7.25"W x 4.75"H, yet I can fit everything from my 10 liter Peak Design Sling Bag into this 8 liter Ranger bag.
Why?
It’s simple - HEX has eliminated all the unused space from this bag, which gives you tons of carrying capacity without the bulk.
But don’t think that because it’s slim and trim that it isn’t loaded with features.
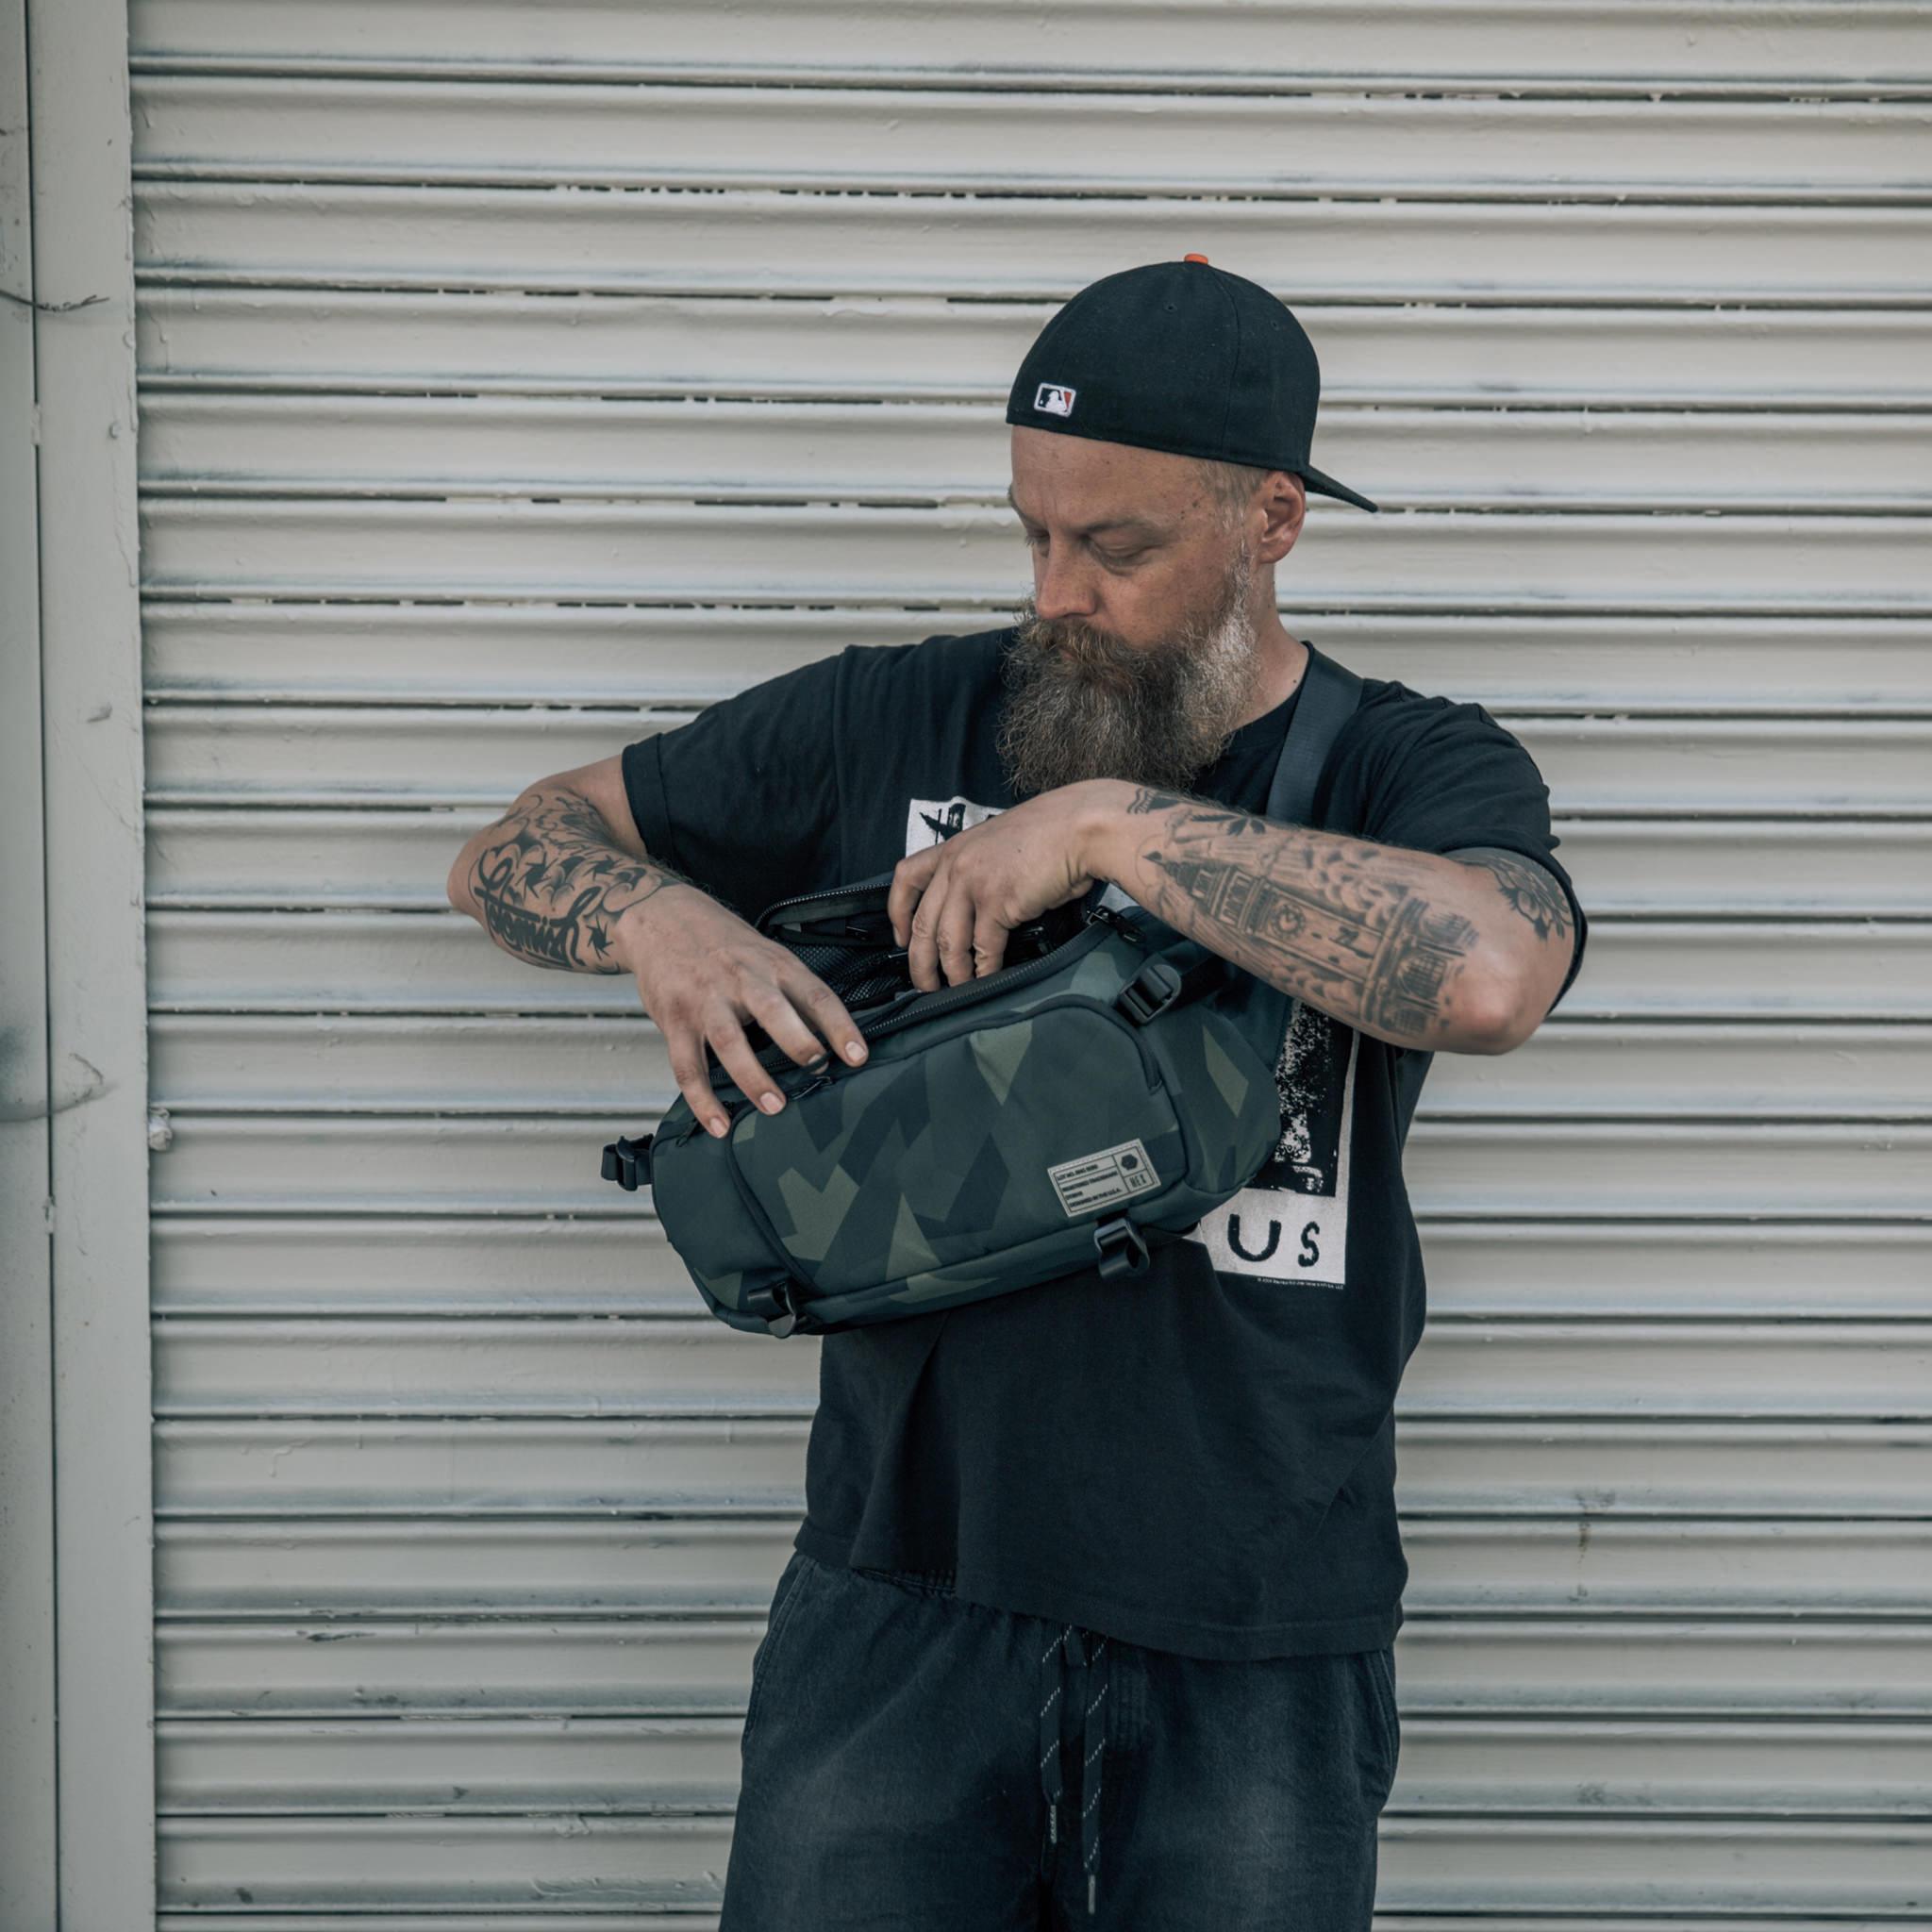
This bag has collapsible interior dividers that allows you to customize what gear you carry. The dividers can fold up or be removed completely, which allows the bag to lay completely flat. That’ll come in handy on your travels, for sure!
There are pockets galore, too, including a front-access organizer for the small things you need, a faux fur-lined sleeve for your tablet, and tons of velcro stash pockets. There’s even side adjustable load straps and an adjustable bottom carry strap to bring along more gear when you need it!

Perhaps the best thing about this bag is how it fits.
It’s snug to your body, so it doesn’t knock around as you walk, nor does it pose a threat to slide off and hit someone as you pass by.
It’s super easy to adjust and grab your gear thanks to the YKK zippers with metal pulls. The genuine Cordura material is great looking and durable too.
HEX simply impressed the heck out of me with this bag, which is why it’s my go-to travel bag now!
Learn more about the Hex Ranger DSLR Sling Bag
Learn More:
Save Time Editing With Exposure X5
 photo by lechatnoir via iStock
I enjoy editing my photos as much as the next guy, but when I'm on the go, I don't want to be in the hotel room slumped over my computer editing photos for hours on end. Instead, I want to be out exploring and shooting!
Exposure X5 lets me do that thanks to its ability to streamline my workflow when it comes to organizing and editing my photos.
In particular, there are three features (there are many, many more features, by the way) I especially like that make this some of my favorite photography software...
First, I appreciate the fact that Exposure includes hundreds of presets (like the one shown below). This enables me to add looks to my photos with just one click. In many situations, the presets are just what the doctor ordered, but if I need to tweak them, I can do so quickly and easily.
I can also save the presets that I customize and reuse them again in the future. How cool is that?!
Second, Exposure is just dead-easy to use with an intuitive layout that makes editing images a breeze.
If need be, you can customize the workspace to better suit your needs, too. On top of that Photoshop and Lightroom plug-in support is included so you can more seamlessly migrate your images into Exposure.
The third feature I really love about Exposure X5 is that it allows you to quickly transition from editing images to organizing images without having to switch modules.
Speaking of organizing, you can create smart collections of images based on criteria you specify and use keywords for further organization. You can even choose to retain or remove keywords during image export and import keyword sets directly from Lightroom.
In other words, Exposure X5 is simply a well-designed, beautifully thought-out photo editor and management system all bundled into one easy-to-use workspace.
When you're on the go and time is of the essence, you can't ask for more from your imaging software!
Get a free 30-day trial of Exposure X5 to see just how awesome it is.
We Recommend
Basic Slider Techniques
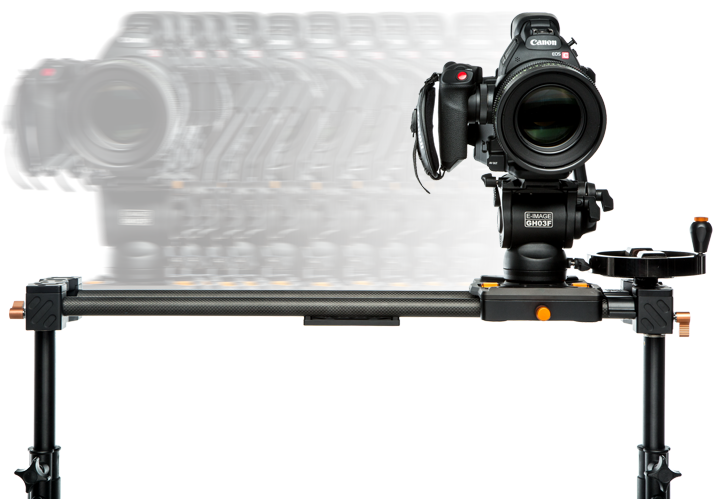
Digital photographers have many amazing options opened up to them by advancing camera technology. One of the greatest things I love about this new age of digital cameras is the fantastic videography capabilities of our new cameras.
Now, some of you are already videography experts, so you may not need to learn all about sliders and basic slider techniques. But if you were like me and an expert in still photography who jumped into doing simple video shots somewhat recently, read on.
What Is a Slider?
photo byselimaksan via iStock
A slider is a device that allows your camera to move while you are recording. The motion is different from the panning or tilting motion, it is movement across a path. That path can be from side to side, front to back, or diagonally.
Essentially, a camera slider is a small scale dolly with its own built in track for movement along a short path. Camera dollies are used in major motion picture or television productions that use large crews. A slider can be used by a one man operation.
photo bygdagys via iStock
Cinema camera sliders can cost from thousands of dollars to multiple tens of thousands of dollars and require an extra person, sometimes two or three, to operate them. Now, here is an example of a single person operation camera slider:
Camera sliders like the Ikan ES70 27” carbon fiber slider are light enough to be easily transported and set up all by ourselves, can be operated with easy to implement camera slider techniques, and cost about the same as a decent simple prime lens or a high quality video light.
Why Use a Slider?
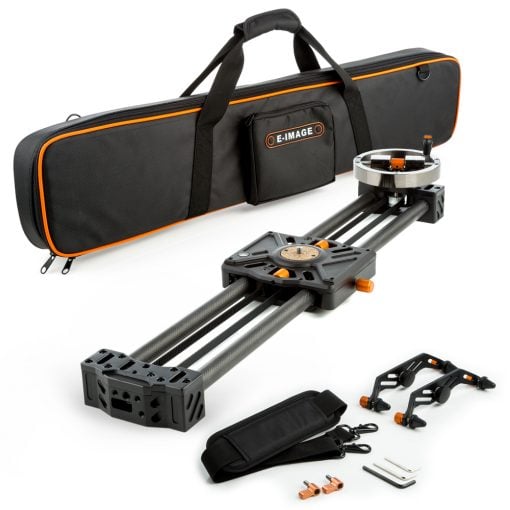
In one word: motion. Videography is a modern evolution of motion picture photography or cinematography. It is movie making. Back in the mid to late 1800s when this art and science first started, it was a big deal. Motion pictures present on screen a realistic representation of the world that even the best still image can never do.
With much of my still photography, I am striving to keep my camera still. For motion filming, videography, I am presenting movement to my audience and smooth camera movement can add to the art of the motion picture.
Why not simply lock the video camera down like I do with still photography? That would ensure a steady view. But, unlike a still image, a video recording interacts differently with the viewer’s brain.
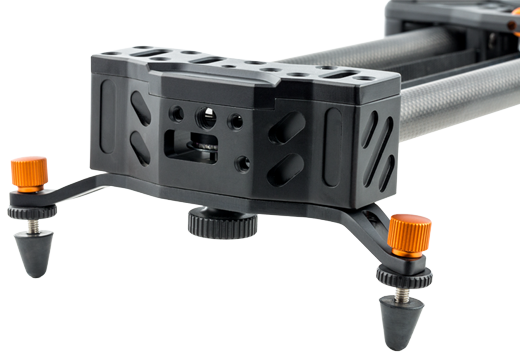
As we watch the world in action around, we are constantly moving ourselves, even if in very small ways. For instance, you may be sitting in a chair but your head is moving, your eyes are moving, you probably adjust yourself from time to time in the chair.
When viewing a video that is a static view, we tend to get bored pretty quickly. No matter how exciting or interesting the dialog is, the visual element also needs to adequately engage the viewer. Panning, tilts, zoom, and physically repositioning the camera can accomplish this task for us. (Shooting B-Roll and good editing also helps.)
Learn More:
- How to Shoot Quality Video Footage
- Tips for Better DSLR Video
- Plan a Solid Video Shoot With These Pre-Production Tips
Scene Length / Shot Length
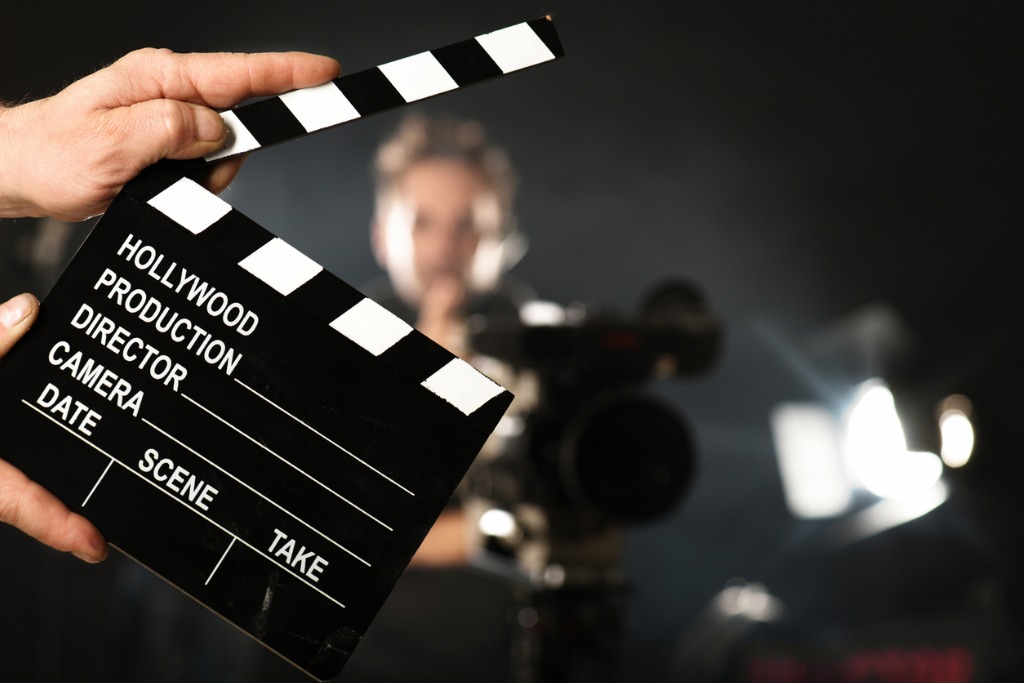
photo bylisegagne via iStock
Most of our simple video shots won’t need to adhere to the finely tuned crafting of scene and shot lengths like we see on TV or in the theater, but we can still incorporate some ideas from these disciplines.
Despite what our preconceived notions may tell us, scene length and shot length in cinema and TV are very short. A scene is a part of a story or or production that is somewhat like a subheading in an article or outline. A shot is a piece of the action filmed without a cut.
The average scene length in the last 40 years of movies varies from 1 to 20 minutes but evens out at about 3 minutes. The average shot length within the scene is much shorter, 2 to 12 seconds. That’s right! Less than 12 seconds.
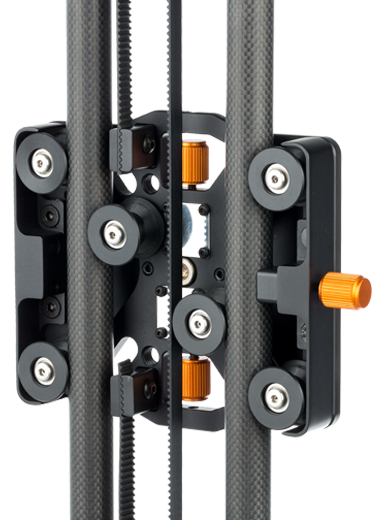
Now, for my own video productions, I’m not going to edit that heavily. It would take me weeks to create a 5 minute instructional video all by myself if I tried. That’s where a camera slider like the Ikan ES70 comes in.
By adding dollying slider motion to my shots, I can get away with much longer shot lengths for my type of video productions. Camera slider footage allows me to edit less and yet still have good viewer engagement.
How to Use a Slider
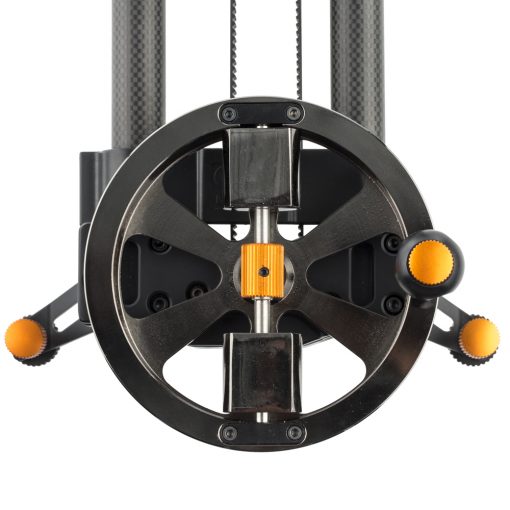
Now that we studied the films of Martin Scorsese, Bong Joon-ho, and Greta Gerwig for shot and scene length, let’s look at camera operation and basic slider techniques.
The Ikan ES70 slider can be mounted on a tripod, a table, or the ground. We attach our camera to it with a geared or fluid video head and then we’re ready to shoot. There are three main types of slider or dolly shots we can readily incorporate into our videography workflow.
Side to Side
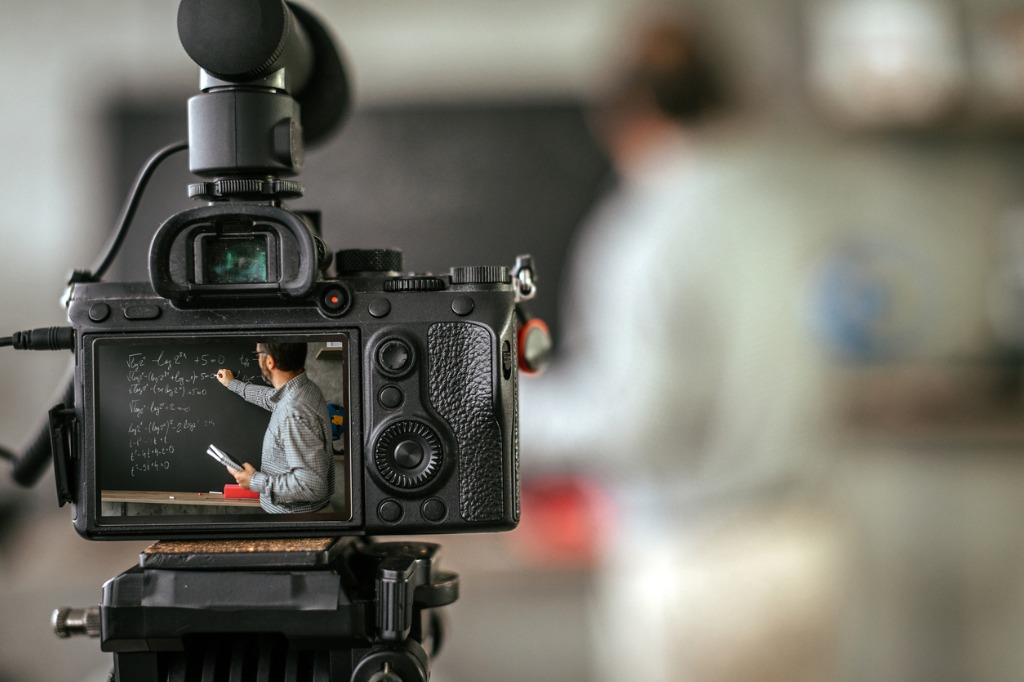
photo bymixetto via iStock
Perhaps the most simple of basic slider techniques, moving the camera from one side of the slider to the other accomplishes a lot of viewer engaging motion with little effort and fuss for us.
In an instructional video, we could slide over to the next subject or the next part of an item we're teaching. Having a longer slider like the 27” of the ES70 is very beneficial as the longer slide appears more natural.
Front to Back
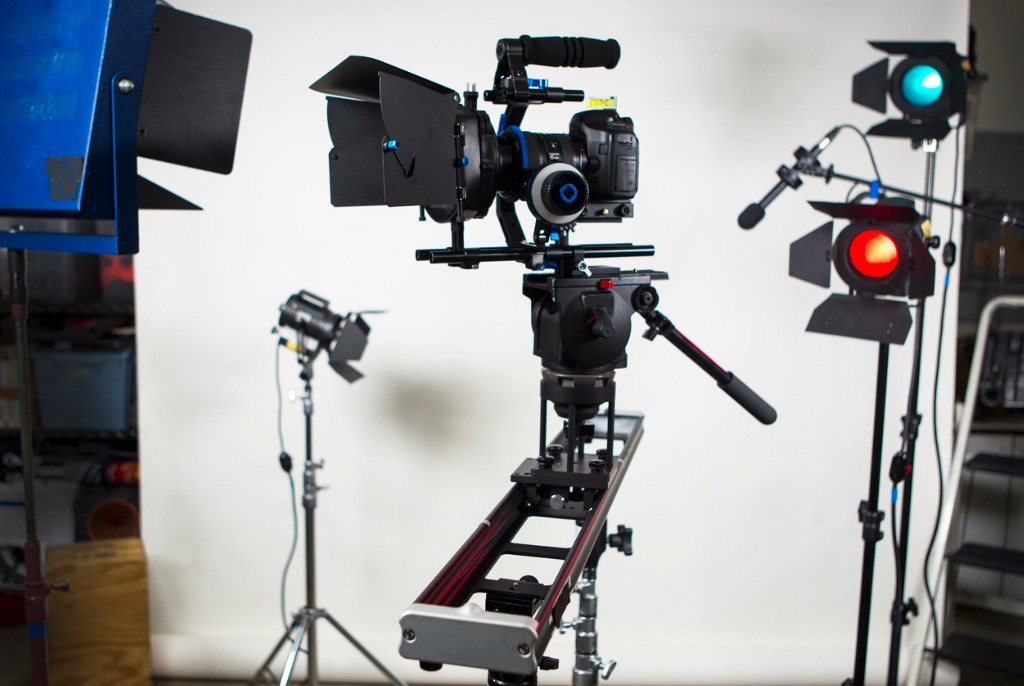
photo by dpmike via iStock
Or vice versa, this movement can replace or enhance zooming in or out. It’s really useful for transitioning from an opening or establishing shot to the actual action of the scene.
Diagonal
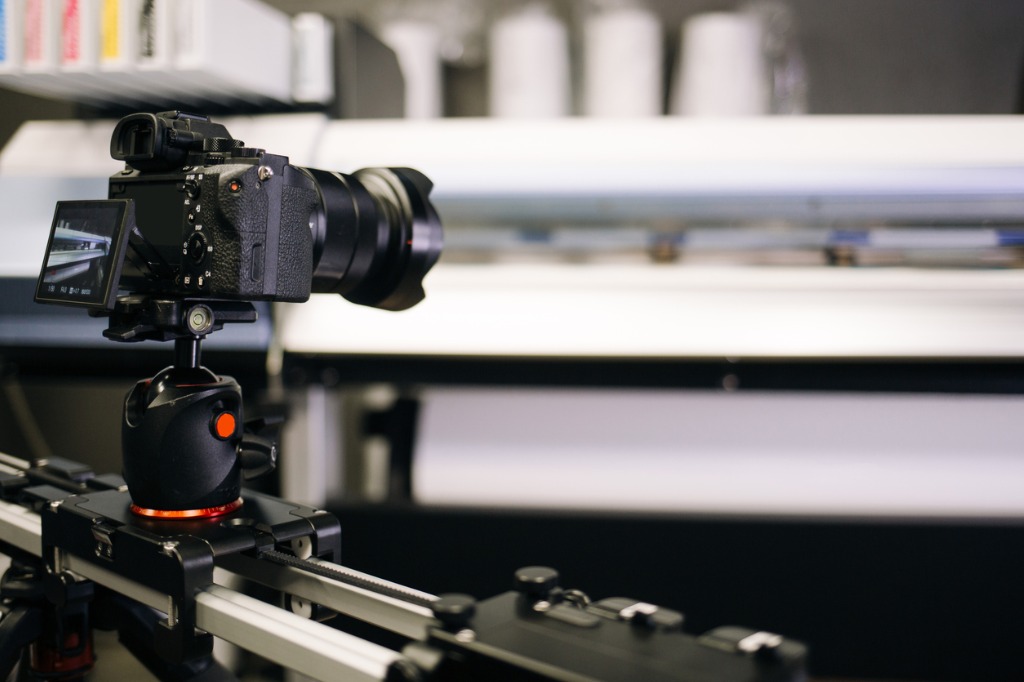
photo byAnton Minin via iStock
Adding an interesting twist is diagonal movement, either deep or shallow angles in addition to the 45 degrees that readily comes to mind.
Up and Down
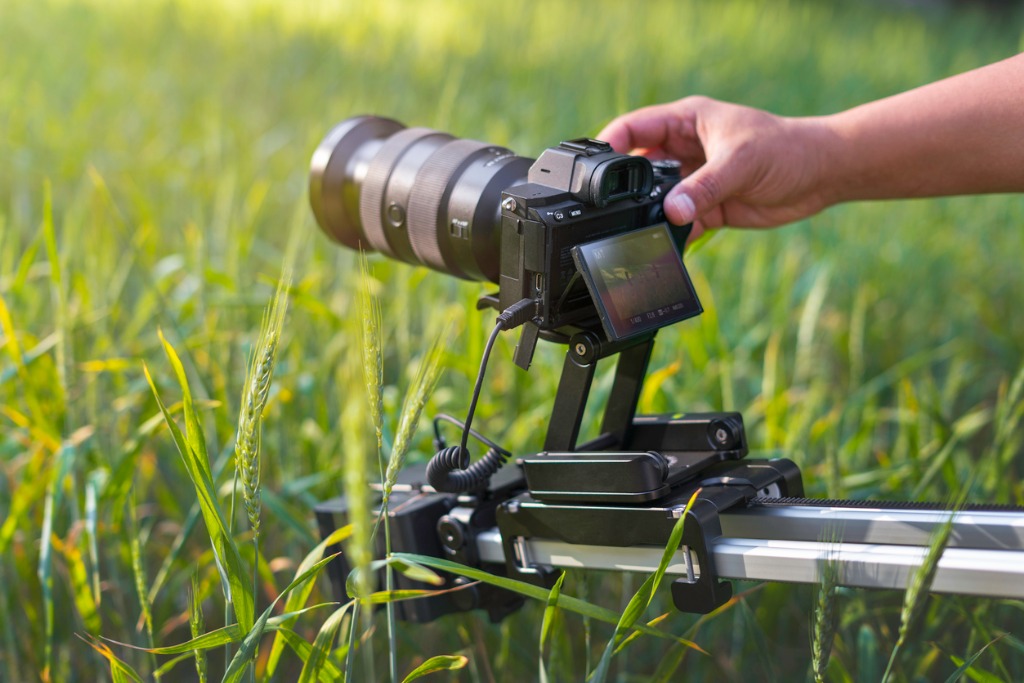
photo byisil terzioglu via iStock
Just like the side to side motion but in a vertical plane instead of a horizontal one. You will probably need to attach the slider to a tripod or camera stand for this camera slider technique.
Combining Motions
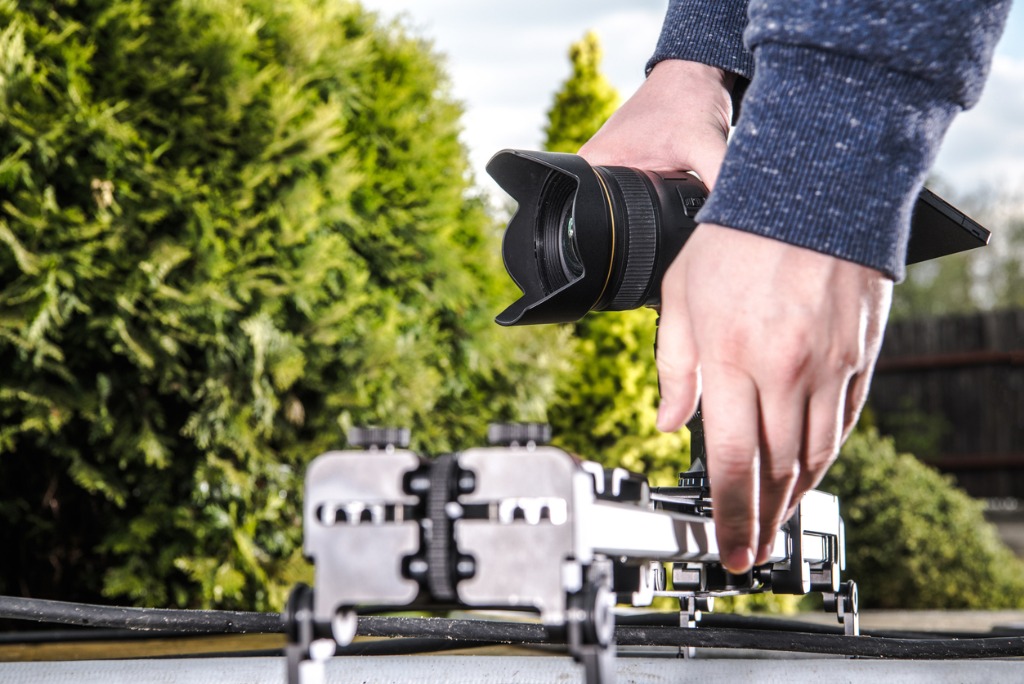
photo bywelcomia via iStock
Going beyond basic slider techniques, you can combine follow focus, zooming, panning, and slider technique for camera slider footage that will blow you away with how well it engages the end viewer compared to merely putting the camera on top of a tripod.

photo byOmadbek Nabiev via iStock
Current DSLRs and mirrorless digital cameras have outstanding quality and features which you can use to create fantastic video.
Learn More:
We Recommend
Beginner Videography Terms You Need to Know
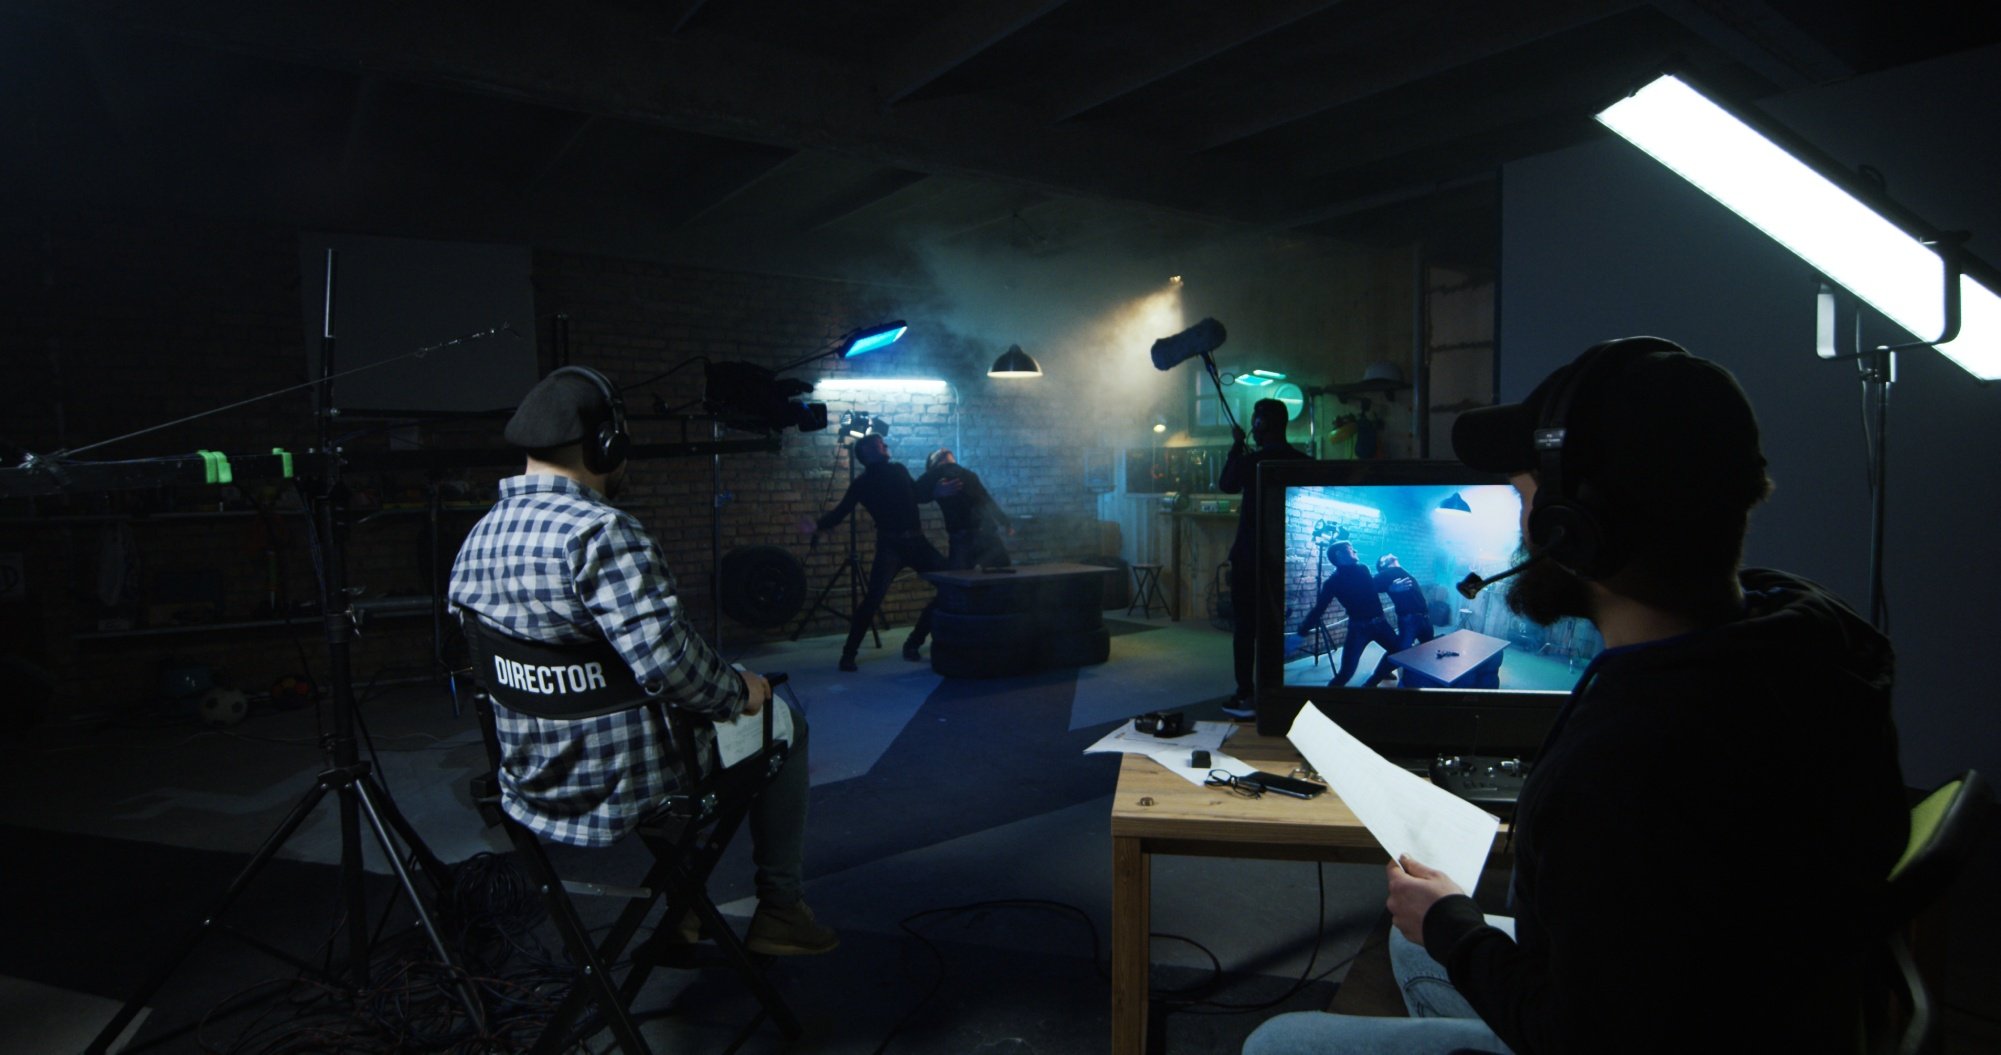 Photo by EvgeniyShkolenko via iStock
While making videos is certainly a creative process like photography, it also has a very technical side (just like photography!).
That means that when you're just starting out and exploring the possibilities of video, there are some essential videography terms with which you'll need to be familiar.
Below, I've outlined some of the most basic videography terms that you'll encounter as you explore filmmaking.
Aspect Ratio
Aspect ratio refers to the relationship between the width and height of a video, and is expressed in a ratio.
Common aspect ratios for shooting videos with a DSLR or mirrorless camera include 4:3 and 16:9. Common aspect ratios for feature films include 1.85:1 and 2.39:1.
In these ratios, the first number refers to the width and the second number refers to the height.
See the difference between these and other aspect ratios in the video above by Camber Motion.
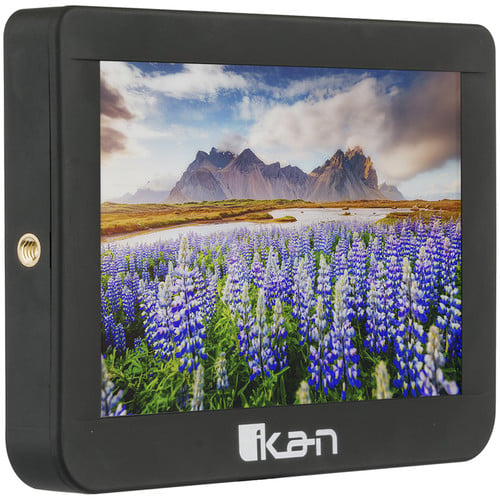
When shooting video, having a monitor that conforms to the selected aspect ratio can help you ensure that the footage is framed in the safe zone - or the area within which action and titles need to be contained for viewing on a screen.
Models like the Ikan Delta D7C shown above have this and many other features that are helpful for video production.
For example, you can toggle between mono colors (gray, red, green, and blue) and use color peaking for adjusting focus.
Additionally, frame markers allow you to superimpose a center crosshair as well as different frame lines over the image so you can perfect the composition of the shot.
B-Roll
B-Roll is supplemental footage you shoot that adds more details to the story. B-Roll also helps transition from one scene to the next such that it makes visual sense.
For example, if you're shooting an interview, and the interviewee is talking about a record-breaking fish they recently caught, B-Roll might include sequences of that person fishing that display while the voiceover of the interview is played.
BitRate
Bitrate refers to the amount of data that is used per second in the video. Bitrates are measured in megabits per second (mbps). The higher the bitrate, the better the quality of video.
Kellen Reck explains more about bitrates in the video above.
Close-Up
 Photo by mokuden-photos via iStock
Close-ups refer to footage that is shot with very tight framing of the subject.
These types of shots are used to provide richer detail to the video and bring a greater level of intimacy with the subject than medium and wide-angle sequences.
Color Temperature
Color temperature refers to the tones of the color of the visible light in video footage.
Color temperature is measured in Kelvin, where a lower value indicates warmer tones - oranges and yellows - while a higher value indicates cooler tones - blues and purples.
Crop Factor
Crop factor refers to the ratio of a camera's sensor size to a 35mm sensor.
Since 35mm sensors are full frame, they have a crop factor of 1:1. But many cameras have a crop sensor that might have a crop factor of anywhere from 1.3x to 2x.
For example, Nikon cameras that have a crop sensor have a crop factor of 1.5.
It's important to know the crop factor of your camera because it influences the effective focal length of the lenses you use.
So, if you have a 35mm lens, but you shoot with a camera with a 1.5x crop factor, that 35mm lens will have an effective focal length of around 53mm.
In the images above, you can see the view a 35mm lens might offer on a full frame camera (top) and what it might look like on a crop sensor camera (bottom).
Depth of Field
 Photo by borchee via iStock
The depth of field refers to how much of the frame is in focus.
If you want the viewer to see everything in the shot in sharp focus, you need a large depth of field, as shown above.
 Photo by fotostorm via iStock
On the other hand, if you want to bring attention to a specific element in the shot, minimizing the depth of field to maintain focus on the subject while throwing the rest of the shot out of focus is the way to go.
Manipulating the aperture of the lens is one factor that influences depth of field - the larger the aperture opening, the shallower the depth of field will be.
Exposure
 Photo by gradyreese via iStock
Exposure refers to the amount of time that the camera's sensor is exposed to light. The longer the exposure time, the more light that hits the sensor and the brighter the footage will be.
The exposure settings for video are the same as for photography - aperture, shutter speed, and ISO, which form the exposure triangle.
Checking the exposure on your camera's LCD can be tricky because they are both small and inaccurate in terms of displaying the exposure levels.
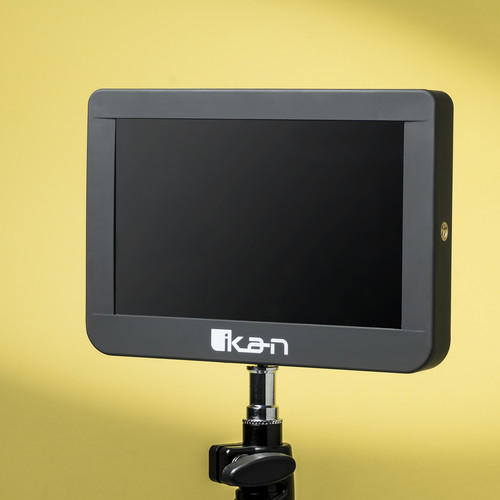
Instead, using an external monitor kit like the Ikan Delta D7C-DK gives you the ability to examine the exposure levels on a large, clear, and bright screen.
What's more, external monitors like this have false color and zebra bars for easy exposure reference as well as a histogram for making precise evaluations of the exposure.
For example, the histogram is a graphical display that shows you the number of pixels that are shadows, midtones, and highlights. If the graph is skewed to the left, there are many dark pixels, indicating that the footage is underexposed. If the graph is skewed to the right, there are many bright pixels and the footage is overexposed.
Get more details on how to use a histogram.
False Color
False color is a setting on video monitors that displays luminance values as different colors.
This tool is handy for seeing the exposure levels of each part of the image, say, to determine if any clipping (i.e., blown-out highlights) is occurring.
Learn more about false color and the benefits of using it in the video above by Ikan International.
Frame Rate
Frame rate refers to the speed with which the shutter opens and closes in a one-second period.
Common frame rates include 24, 25, 30, 50, 60, and 120. These frame rates are denoted in frames per second (fps).
The higher the frame rate, the smoother the footage will be. So, a frame rate of 16fps will look choppy, but 30fps will appear very smooth. At 120fps, footage has a slow-motion look to it.
Medium Shot
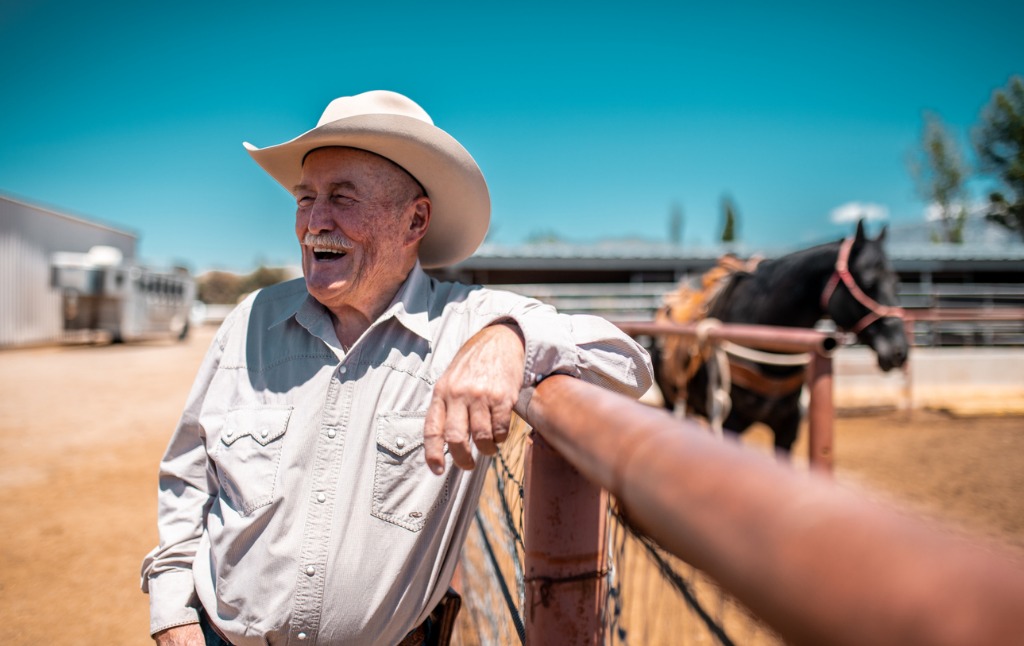 Photo by zmanL via iStock
A medium shot, also known as a waist shot, frames the subject's upper body.
This type of shot is intended to direct the viewers toward the subject or subjects while still showing some of the environment around them.
Pan
Panning refers to the act of moving the camera from left to right (or right to left) from a fixed position.
Think of panning like turning your head from one side to the other while keeping your body fixed in position.
Picture Profiles
Picture profiles offer different parameters that change a video's characteristics, such as the color, saturation, contrast, sharpness, and gradation (or how bright or dark the video appears to be).
These picture profiles are selected from a menu on the camera and allow you to customize the look and feel of the footage that's recorded.
For example, if you're filming a horror scene, you might manipulate the gradation to make the footage very dark and creepy.
Video profiles vary from one camera manufacturer to the next. Sony, for example, offers an S-Log profile while Canon offers a C-Log profile.
Many videographers use Look Up Tables, or LUTs, in conjunction with picture profiles to create specific looks.
LUTs are applied in post-processing and are a quick way to customize how the video footage appears.
Check out the video above by Peter McKinnon for more details about picture profiles.
Resolution
One of the most basic videography terms you need to know is resolution.
Resolution refers to the number of pixels contained in a video. This number refers to horizontal and vertical pixels, such as 640x480 (standard definition) or 1920x1080 (high definition).
In some situations, resolution is expressed as a single number, or the number of vertical pixels. In that case, the resolution would be expressed as 480p or 1080p.
Kingston Technology offers a quick and easy-to-understand tutorial on modern video resolutions in the video above.
Shot List
A shot list is simply a list of the types of shots you want to include in your video. By making a list of the desired footage and sequences, you ensure that you get everything you need before wrapping up shooting.
Storyboard
 Photo by smolaw11 via iStock
Storyboarding involves mapping out the specific scenes in the video.
In other words, many filmmakers will draw out the scenes and organize them in sequence, that way they can see how the film will unfold before a single frame of video is shot.
Making shot lists and storyboards helps define the direction of the video and will help you create a cohesive production.
Tilt
Tilts involve moving the camera up and down from a fixed position. Think of a tilt as moving your head up and down without changing the positioning of your neck or the rest of your body.
Wide Shot
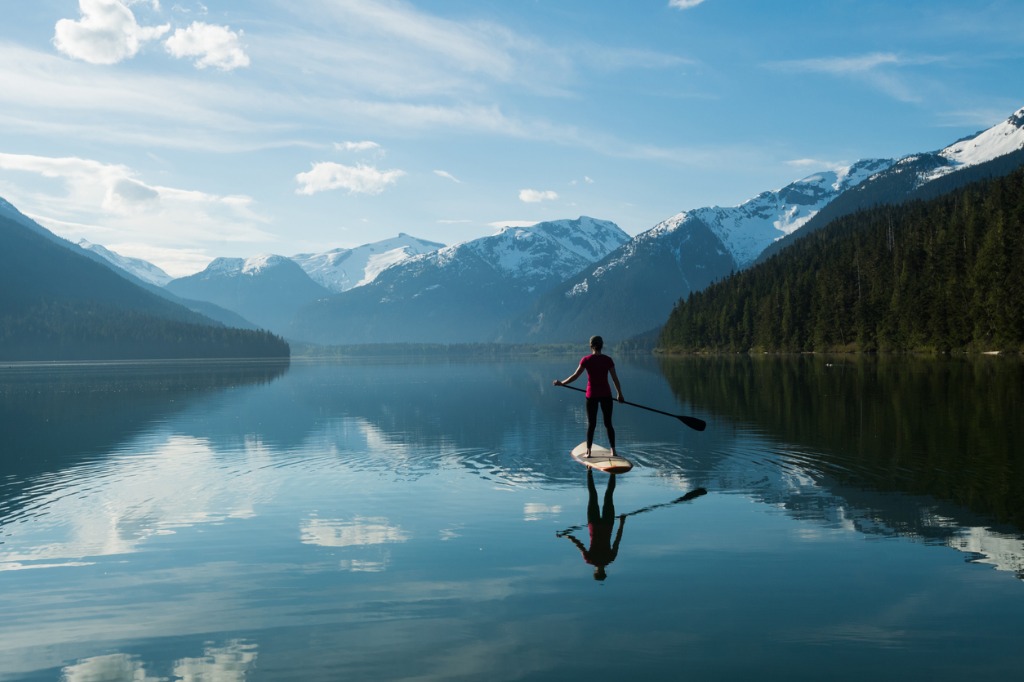 Photo by stockstudioX via iStock
Also known as full shots or long shots, these types of sequences show the subject in its entirety as well as its surroundings.
These types of shots are meant to introduce the audience to a subject by showing how it relates to the environment, people, and actions going on around it.
Typically, videos have a mixture of wide shots, medium shots, and close-up shots to enhance the visual interest of the video.
We Recommend
Beginner’s Advice for Using a Gimbal

photo bykrblokhin via iStock
What is a Gimbal?
If you’re inspired by your favorite YouTubers to produce better video content of your own, one of the best investments you can make is a gimbal.
Gimbals can assist you in getting beautifully smooth, cinematic footage, but they aren’t foolproof. They have their limitations, and as with everything, they require a good deal of practice before you start to reap the benefits of using one.
In this beginner’s guide for using a gimbal, you’ll learn a few quick tidbits for getting the most out of your gimbal.
You Don’t Need a Gimbal for EVERY Shot

photo bykrblokhin via iStock
One of the most basic pieces of advice for filmmakers is to avoid panning and zooming too much.
The same can be said for using a gimbal…
Just because you have a gimbal doesn’t mean you need to use it for filming every single sequence. Sometimes, a still shot from a tripod is exactly what you need!
For example, if you’re interviewing someone for a film, don’t do it while you hold a gimbal in your hand. An interview doesn’t need smooth footage of you circling around the interviewee - that’s just distracting.
So, one of your first tasks as a gimbal user is to understand when and when not to use it.
Learn More:
Make Sure Using the Gimbal Adds to the Story

photo byVershinin via iStock
Adding on to the previous point, not only do you need to be aware of when and when not to use a gimbal, but you also need to be aware when using one does and does not add to the story.
If, for example, you need to shoot a point of view sequence that gives the audience a view of what a dog might see as it runs through a park, a gimbal might be a great choice.
You can invert the gimbal, get it at a dog’s height, and get smooth footage as you run with the camera. Doing so will help the audience to put themselves in the perspective of the dog, which obviously adds to the depth of the story.
But, if you’re doing an instructional video on how to build a table, it might be distracting (to you and the audience) to circle around the carpenter as they work at their woodworking table.
Much like the interview example above, sometimes the footage you need calls for a simple fixed camera setup on a tripod. In this case, keeping the video sequence simple allows the story of how to build to table take center stage.
Invest in a Quality Gimbal

photo bymolchanovdmitry via iStock
You often hear photographers talk about how you should prioritize your budget for lenses rather than a camera body.
In videography, the same principle applies - some accessories are simply more important than others.
I’m not saying that a gimbal is the most important videography accessory for every shooter, but for me, having a quality gimbal has made all the difference in the world.

photo by ozgurdonmaz via iStock
There are some accessories you can skimp on and get away with it. But if you’re going to go all-in on using a gimbal, why not get one that has the features to help you get the shots you need while giving you long-lasting and durable performance in the long-term?
For my money, it doesn’t get much better than the E-Image Horizon One Gimbal.

This three-axis gimbal can handle up to eight pounds of gear, so even if you use a full frame DSLR with a light, a mic, and other accessories, this gimbal can take the load.
It has brushless motors to give you precise stabilization while the five built-in operational modes give you quick access to creative video sequences like 360-degree spin on the roll axis for a dream-like shot.

It has a 12-hour runtime, too, so you can shoot for hours on end without worry that the gimbal is going to run out of juice.
This thing is just a well-built, functional, and versatile gimbal that will help you get the job done!
Learn More:
Plan Your Shots in Advance

photo byVicheslav via iStock
When you see footage that’s filmed while using a gimbal, it looks so seamless and effortless. But that doesn’t mean that it’s effortless to use a gimbal.
By the time you add your camera, a lens, a microphone, lights, and other accessories, you’ll have several pounds of gear on the gimbal. And that might not sound like much, but after hours of shooting, it can start to feel like a lot!
That’s why it’s so important to plan your shots in advance. Doing so allows you to prioritize getting the sequences you need with the gimbal first, and then you can shoot other sequences later on.
By saving your energy for the gimbal shots, you’ll keep fatigue at bay and be able to maximize the gimbal’s positive effects on your video.
Planning never hurt anyone when taking photos or making videos, anyway!
Get a few more tips for using a gimbal in the video above by Ikan International.
We Recommend
Benefits of Using a Gimbal

Have you ever wanted to take your video camera off of the tripod for certain footage but were disappointed by the unsteady results?
If this style of videography is something you like to do, you would enjoy the benefits of using a gimbal as your camera support. A handheld gimbal opens you up to smooth and steady video footage when filming off of your tripod.
What Is a Gimbal?

The simplest description of a gimbal is a pivoted support that allows movement of an object about an axis. Photographically, a gimbal mount puts the axis at the nodal point of the lens.
How does a gimbal work for stabilization? What makes a gimbal work for stabilizing are motors. A gyroscope or a computerized version of one controls the motors which apply force internally in one direction or the other to counteract the movement applied externally.
With the camera and lens mounted properly, these motorized corrections dampen most motion. So the end result is that the object suspended in the gimbal mount resists motion. This smooths out the handheld jerkiness we are all prone to.
Why Use a Gimbal?
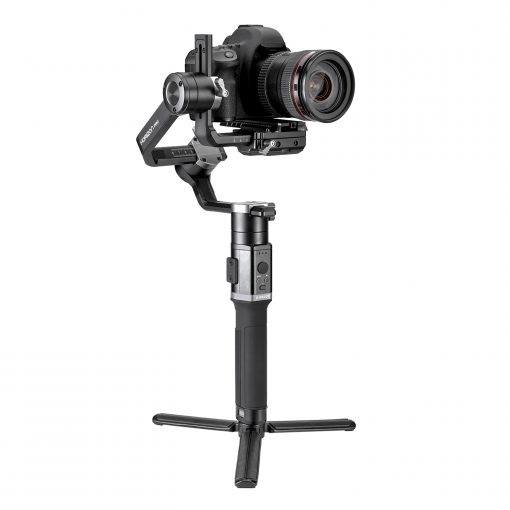
The number one reason for a videographer using a gimbal is to allow smooth, jerkiness-free handheld video. Our video tripods and sliders are fantastic tools, we should use them as often as we can for superior video.
But when we want to take our camera and follow action, we either will use a dolly or a stabilizing gimbal if we want smooth video. Since a dolly is limited to ether having a smooth surface to roll on or a track, a gimbal becomes a great option for putting our camera in motion.
A smooth recording from a gimbal is much more viewable than when we hold the camera in our hands without any stabilization. That’s one of the biggest advantages of a gimbal in our videography, making it smooth.
Learn More:
How to Use a Gimbal
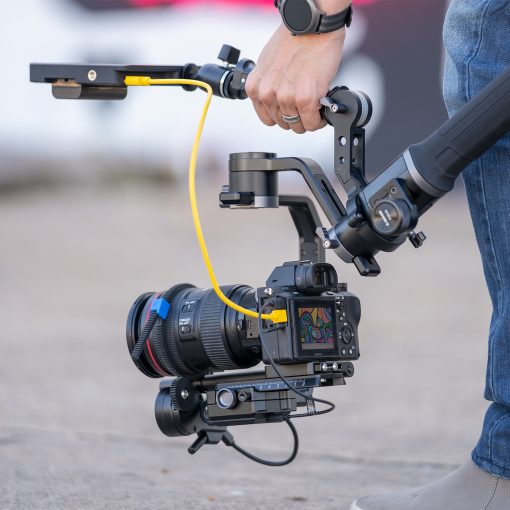
Instructions are pretty basic so we’ll also include some gimbal tips and tricks. To get the best benefits of using a gimbal, you’ll need to be careful to mount the camera and lens properly.
An important tip is to be sure to have the axis of the gimbal be matched to the nodal point of the lens. That way, the motion cancelation is centered on the optical center of the lens. Another tip is that, even though the motion is being dampened, you still want to use personal steadying techniques to minimize what excess motion the gimbal needs to stabilize.
Depending on the style of the gimbal, you may also want to limit how much weight you mount to it. Some optional accessories to consider if available are shoulder mounts and hand grips for two hands. A follow focus system is another great add on for your stabilizing gimbal mount.
Affordable Gimbals for Videography
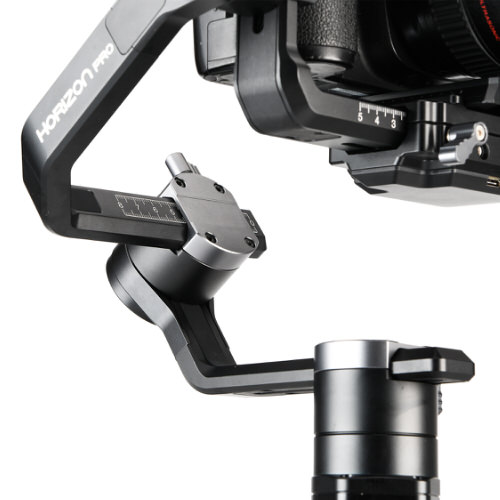
Perhaps you’ve seen professional Steadicam operators at sports events or working with major picture studios and thought how cool it would be to have one for your own videography.
Well, Steadicam is actually the brand name of a sophisticated piece of equipment that takes some specific skills to operate correctly. Just like Xerox, Kleenex, Coke, or Kodak, the brand name has pretty much become a catch-all descriptor for all similar products, but it is important to note the distinction.
A Steadicam can cost upwards of $50,000 or you could hire a Steadicam operator out of your video budget, but few of us have that type of budget to work with. Thankfully, there are excellent gimbals that we can afford and learn to use within their limitations to gain the benefits of using a gimbal for our own work. Some of them are really very good and highly capable videography accessories.
E-Image Horizon Pro by Ikan
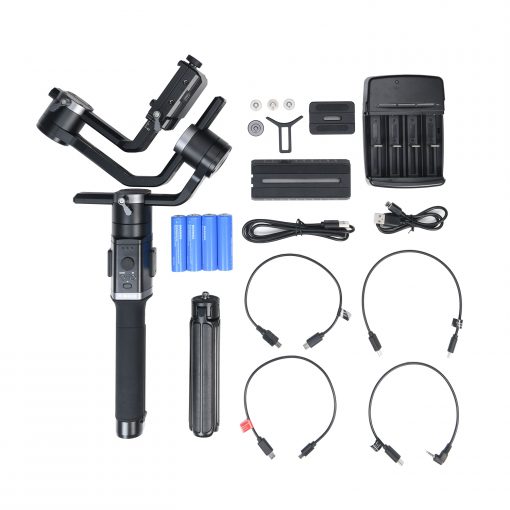
One of my favorite sources for high quality video accessories is Ikan. They design and make their own equipment so you can get extremely high quality videography accessories for very low prices compared to other brands. Ikan makes a handheld gimbal that provides all the benefits of using a gimbal at a very reasonable price, the E-Image Horizon Pro.
It is about 3.5 pounds of aircraft-quality aluminum and is rated as capable of holding 7 pounds of camera and lens, so it is lightweight enough to be comfortably held and can handle your mirrorless or DSLR camera and lens. It uses rechargeable lithium ion batteries which are capable of holding a charge for up to 16 hours of operation.
The mounting arms are angled so that you have an unobstructed view of the camera viewscreen while you’re recording video. It uses a quick release mounting system, has options for extra handles, rotates through a full 360 degrees, and has an option for a follow focus control.
The price is very budget friendly, around the same as a very good video light or a moderate aperture prime lens. Which is par for the course when dealing with video accessories from Ikan.
Benefits of Using a Gimbal
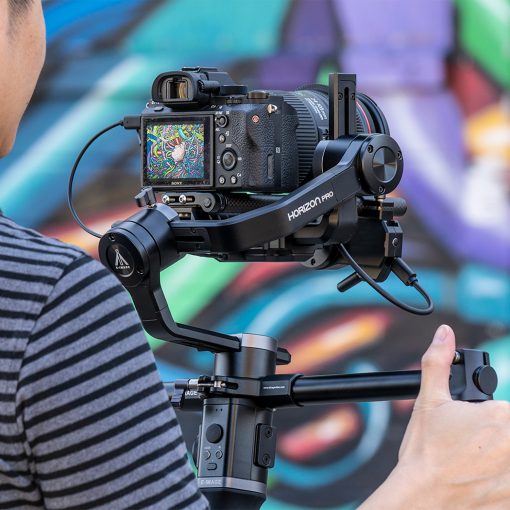
The benefits of using a gimbal are that your video productions will be more watchable and look more professional. Handheld video without the jerkiness and shakiness we’re prone to when shooting off of our tripod or other mount.
This smoothness will translate into viewers being more comfortable when watching our videos, more likely to subscribe to or stay on our YouTube channel, and will please our paying clients resulting in referrals and repeat business. So, as you can see, there are some great benefits of using a gimbal for our video productions.
Learn More:
- How To Transmit Video Wirelessly
- How To Shoot Quality Video Footage
- 4 Must-Have Accessories for Shooting Video
We Recommend
Best Cameras for Vlogging
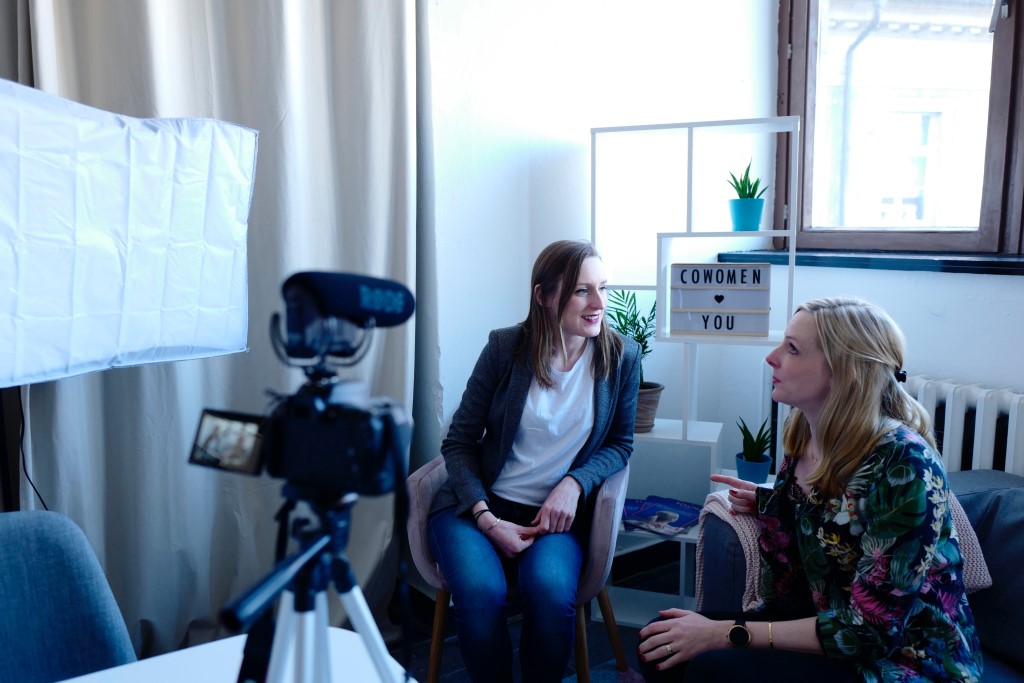
Photo by CoWomen on Unsplash
Vlogging is more than it used to be. Gone are the days where vloggers were teenagers sitting in darkly lit bedrooms complaining about their history teacher. In are the days where vloggers are technical experts in their field.
Vlogging is, in many ways, pertinent for photographers that want to grow their businesses nowadays, but if you’re going to begin vlogging, you’ll want to ensure you don’t look like a teenager in a badly lit bedroom. You’ll need the proper equipment, and that starts with a solid camera.
Here is our list of the best cameras for vlogging in 2019.
Sony a6400
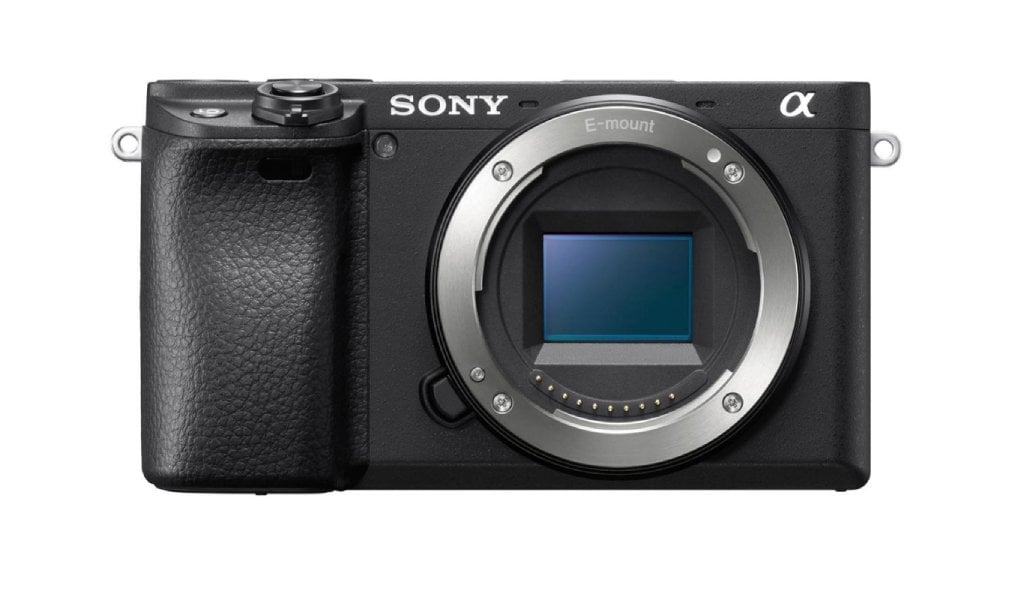
The Sony a6400 features 4K video, a front-facing screen (which is so incredibly useful, once you have a front-facing screen you’ll never go back), and and an eye-AF autofocus system to keep things nice and sharp. All of which makes it one of the best cameras for vlogging.
Huge shout out to DSI Pictures for the video above that puts the Sony a6400 through its paces.

Pros of Sony a6400:
- Insane image resolution and quality
- 4K video
- Crazy good AF system
Cons of Sony a6400:
- Not very aesthetically pleasing
- Can’t see all of the flip-up screen if you have accessories mounted to the hot-shoe
You can purchase the Sony a6400 for $900 on Adorama.

Quick Tip: Get around the flip-up screen issue with the Sony a6400 by using a field monitor.
Having a larger, brighter, more resolute screen like the Ikan Delta DH7-V2gives you a crisp view of what the camera sees, and with the 178-degree viewing angle, you get off-axis viewing for multiple people without color shifts.
You can attach the monitor to a cage, an arm, and various other attachments to put the screen right in your field of vision for an unimpeded view.

Monitors like this allow you to load 3D luts and custom cube files while also providing a huge set of tools for video making, including a histogram, clip guides, false color, peaking, and more. This monitor is also available in a kit, which adds two batteries, a dual battery charger, a power adapter, a D-Tap power cable, two HDMI cables, a ball head with shoe mount, and a soft case to carry it all!
Panasonic GH5

The Panasonic Lumix GH5 is one of my favorite vlogging cameras because it pairs in-body stabilization with 4K video at 60/50p and a 20.3MP sensor.
What I’m saying is, this is definitely the vlogging camera for the adventurer that needs a small body with a killer stabilization system.
The Panasonic GH5, as showcased by Colin Ross above, should definitely be considered a professional-level vlogging camera. It’s not for the faint of heart, but once you get familiar with this camera, the quality of video you can create is off the charts.

Pros of the Panasonic GH5:
- Crazy video specs with 4K compatibility
- Amazing stabilization system
- Is compatible with tons of lenses
Cons of the Panasonic GH5:
- Ergonomics aren’t the best
- Isn’t great at shooting with low light
- 2x crop factor
You can purchase the Panasonic GH5 for $1,300 at Adorama.
Learn More:
Canon EOS 90D

The Canon EOS 90D also features 4K video at 30p, with an incredible screen that faces forward. It also features mic input for that all-important shotgun mic you need to get high-quality audio.
There isn’t anything to hate about the uncropped 4K video of the Canon EOS 90D, either, and Dan Watsonproves it with this video test.
Besides, the 90D is compatible with dozens and dozens of EF and EF-S lenses, so there’s virtually untapped creative potential with wide-angle, standard, macro, and telephoto lenses.

Pros of Canon EOS 90D:
- Fully articulated screen
- Uncropped 4K/30p video capabilities
- Incredible sensor
Cons of Canon EOS 90D:
- Doesn’t feature image stabilization
You can purchase the Canon EOS 90D for $1,200 at Adorama.
Learn More:
We Recommend
Best Microphones of 2020
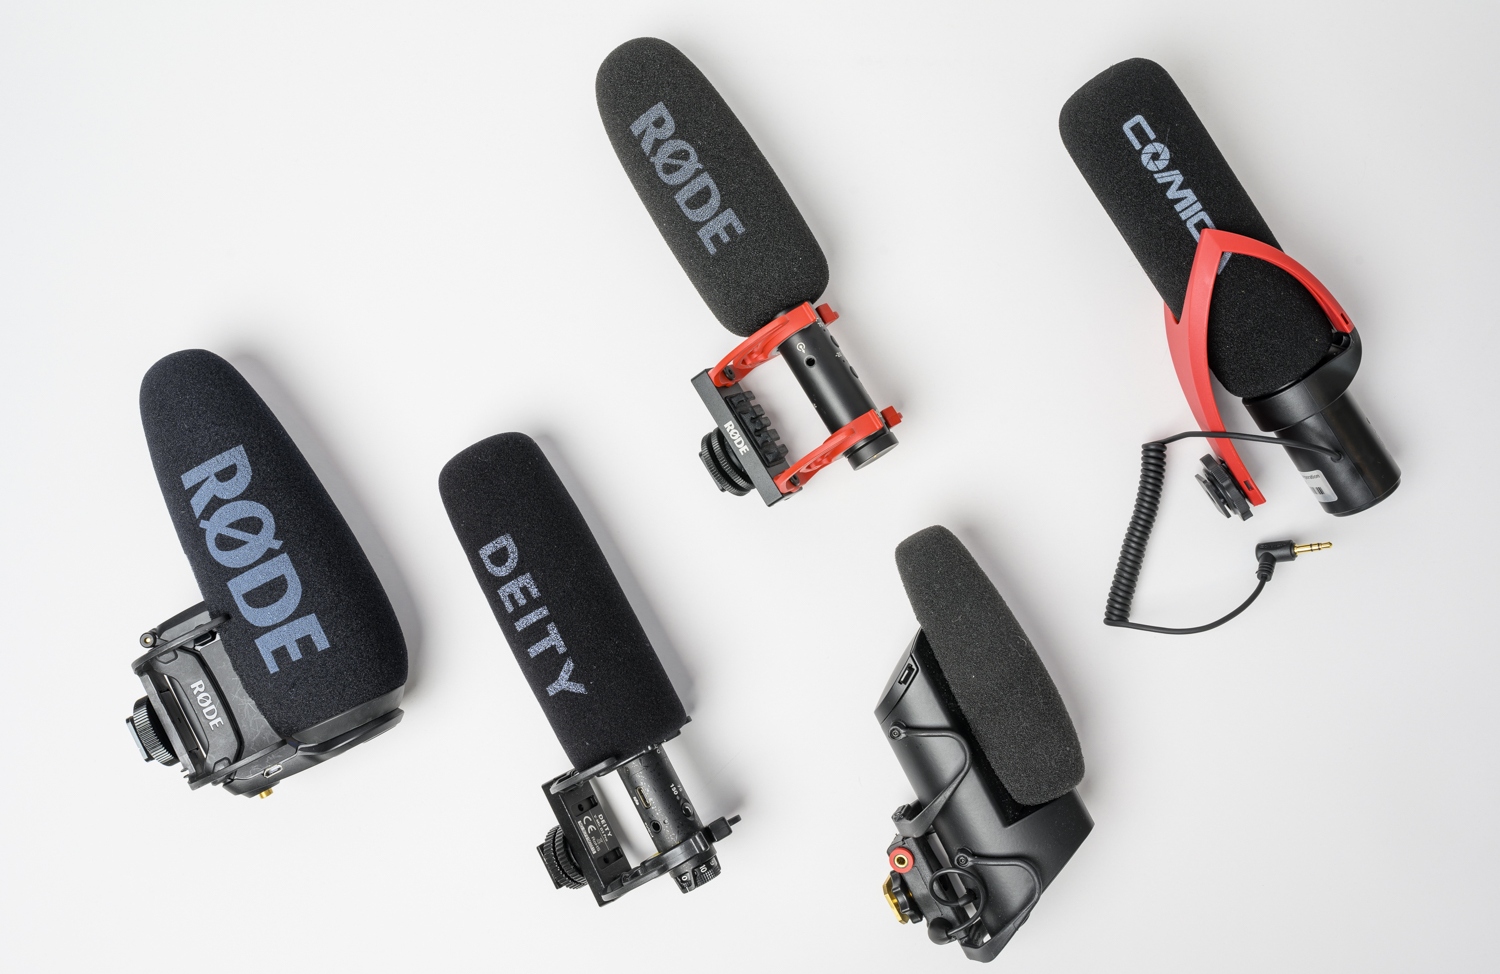
I've been producing video content for a while now, and in that time, I've used and tested a good number of microphones.
As with anything else, some of the mics I've used have been absolutely stellar. Others have been pretty bad. But most occupy the "perfectly fine" middle ground.
In this buyer's guide, I want to highlight some of the best microphones of 2020.
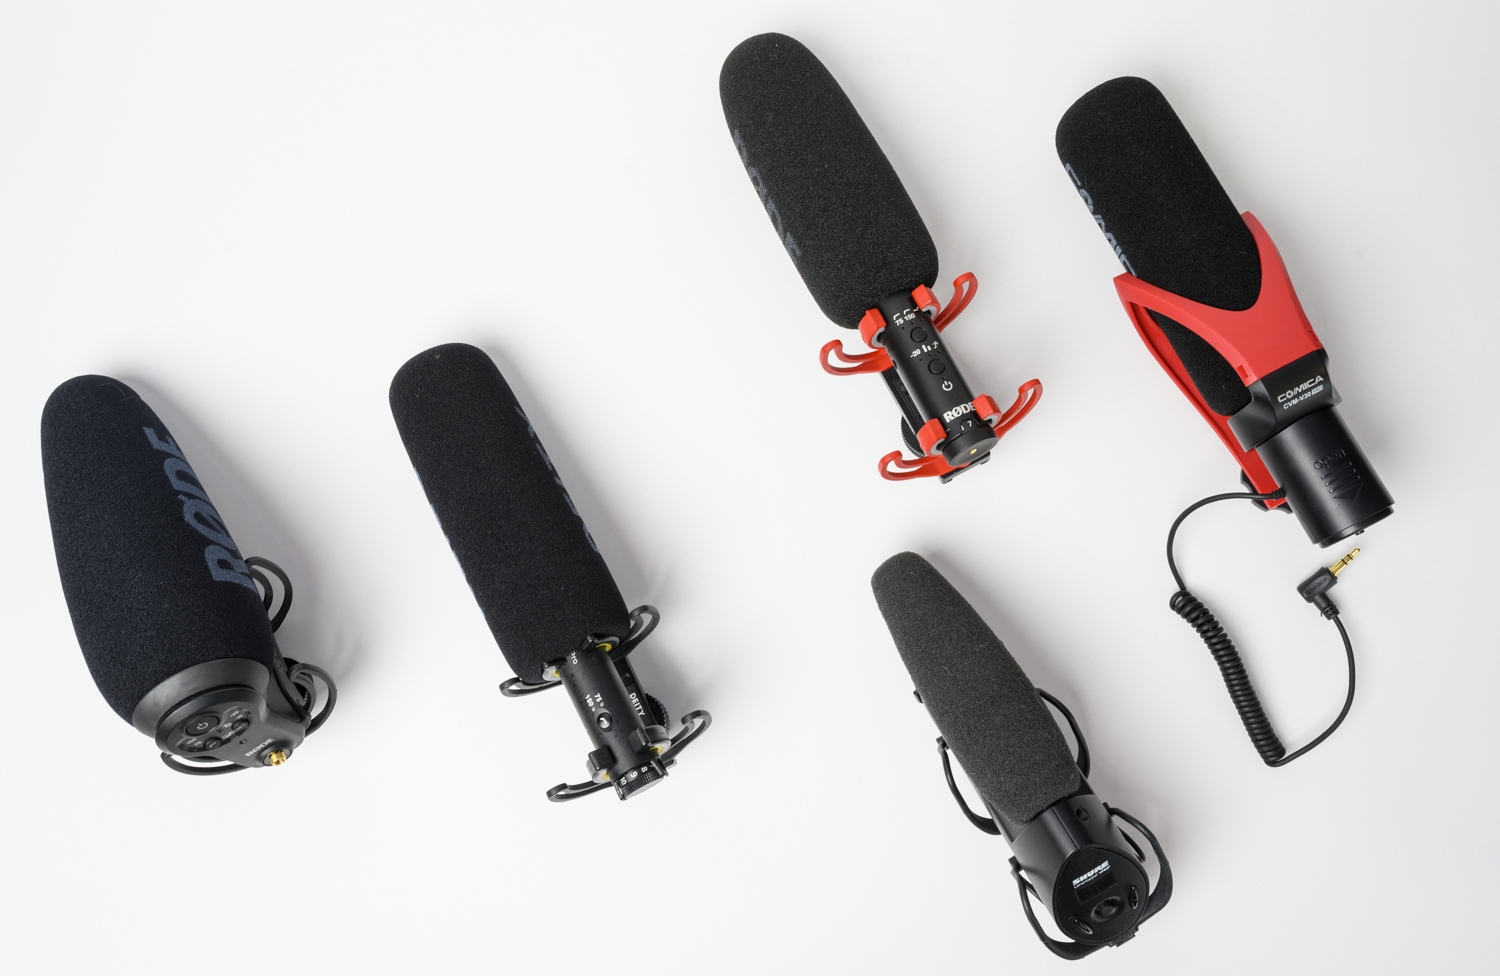
I've used each of these mics, I've tested them in various environments, and they have proven to be the cream of the crop for my audio recording needs.
You'll find microphones on this list at varying price points, the least expensive of which is barely more than $50! That means there are mics listed below for any and every budget.
Let's get to it!
Ikan Comica CVM-V30 PRO
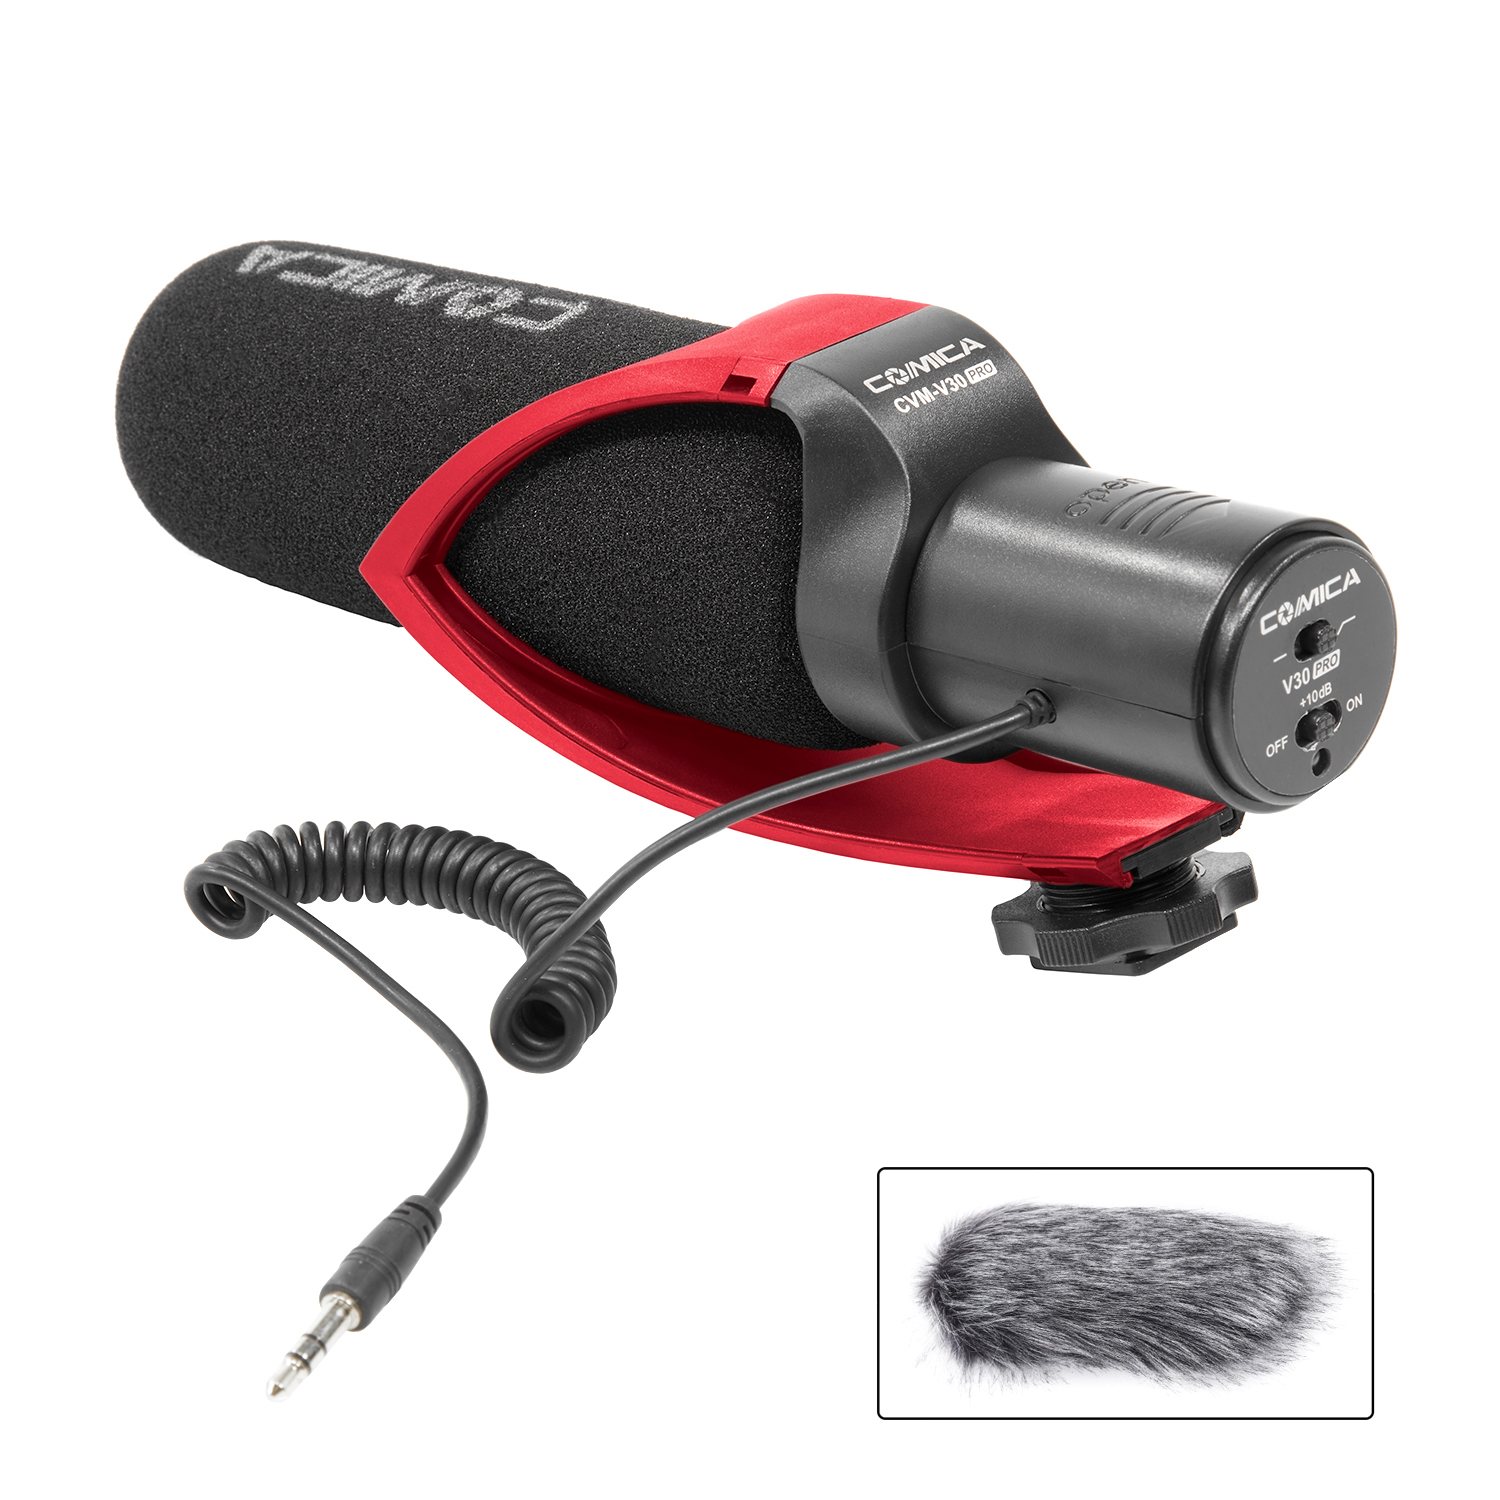
I have to say that of all the microphones on this list, this one surprised me the most.
At just $53.99 (at the time of this writing), it is by far the least expensive mic listed here. But don't let the price fool you...this thing hits way above its weight class.
I've tested inexpensive mics before, and by and large, it has not been a good experience. That's why I typically avoid recommending microphones at this price point.
But the Ikan Comica CVM-V30 PRO is different...
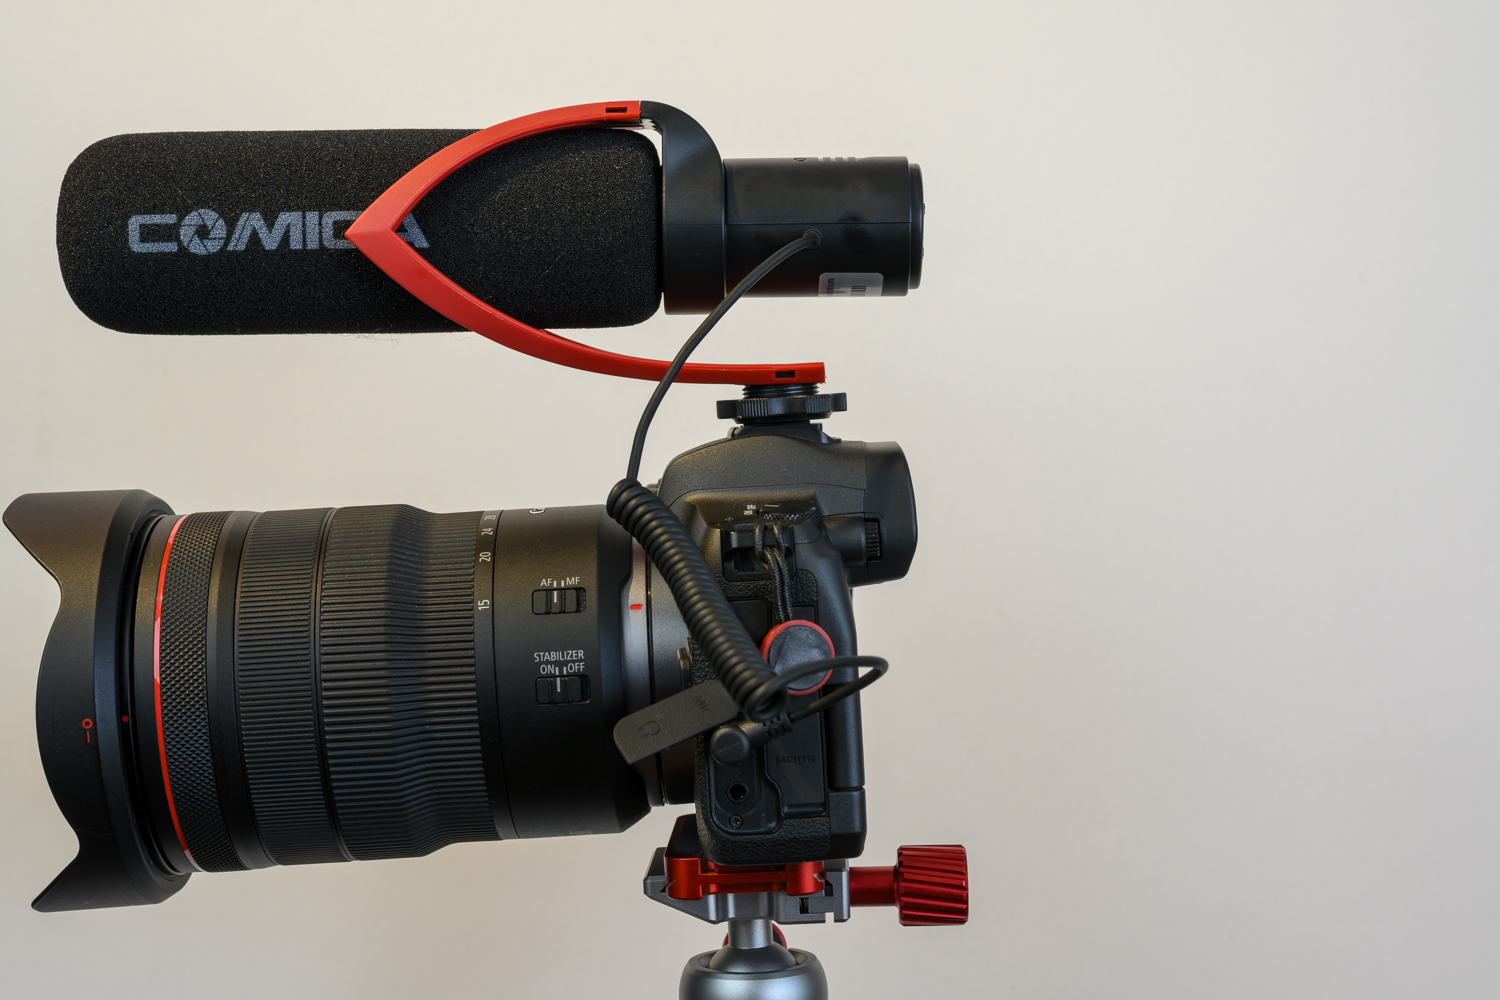
When you're filming in an environment with a lot of noise, you can put the mic in low-cut mode and adjust the sensitivity adjustment to minimize all the ancillary noise.
When you're filming on the go, as I often do, the shock-resistant structural design helps keep the noise from vibrations in check.
The super-cardioid polar pattern of this shotgun mic gives you superb off-axis rejection of unwanted sounds and allows the viewer to hear the subject with greater clarity.
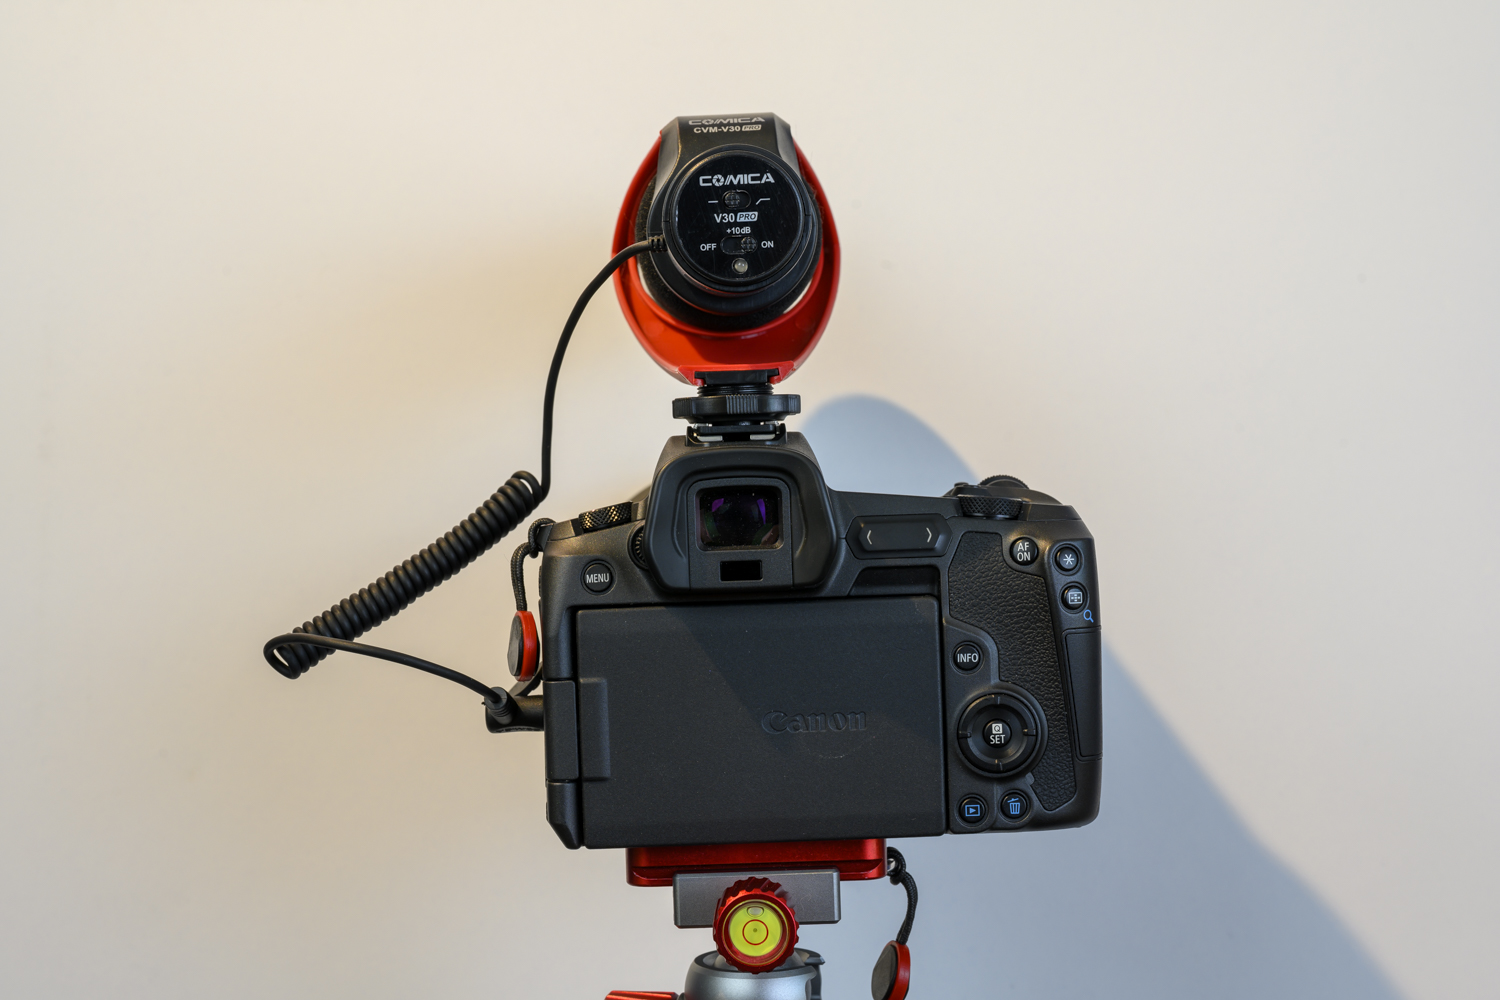
Truly, the audio quality I've gotten from this mic has surpassed many other microphones that cost double or triple the price - or more. In fact, the quality is excellent up to about 5-6 feet away. Not many budget mics like this can make that claim.
I create a lot of YouTube content, so high-quality audio is a must. This microphone delivers! With excellent build quality, technical specs you'd expect in a much more expensive mic, and extras like an excellent filter and travel case, you have the makings of the ideal budget-friendly mic.
Learn more about the Ikan Comica CVM V-30 PRO
Learn More:
RODE VideoMic NTG

I began testing a pre-release version of the RODE VideoMic NTG about six weeks ago. I use the RODE NTG 4 for a lot of my studio work, and I was interested to see if this smaller, more portable mic could stand shoulder to shoulder with its bigger brother.
Needless to say, this mic has impressed!
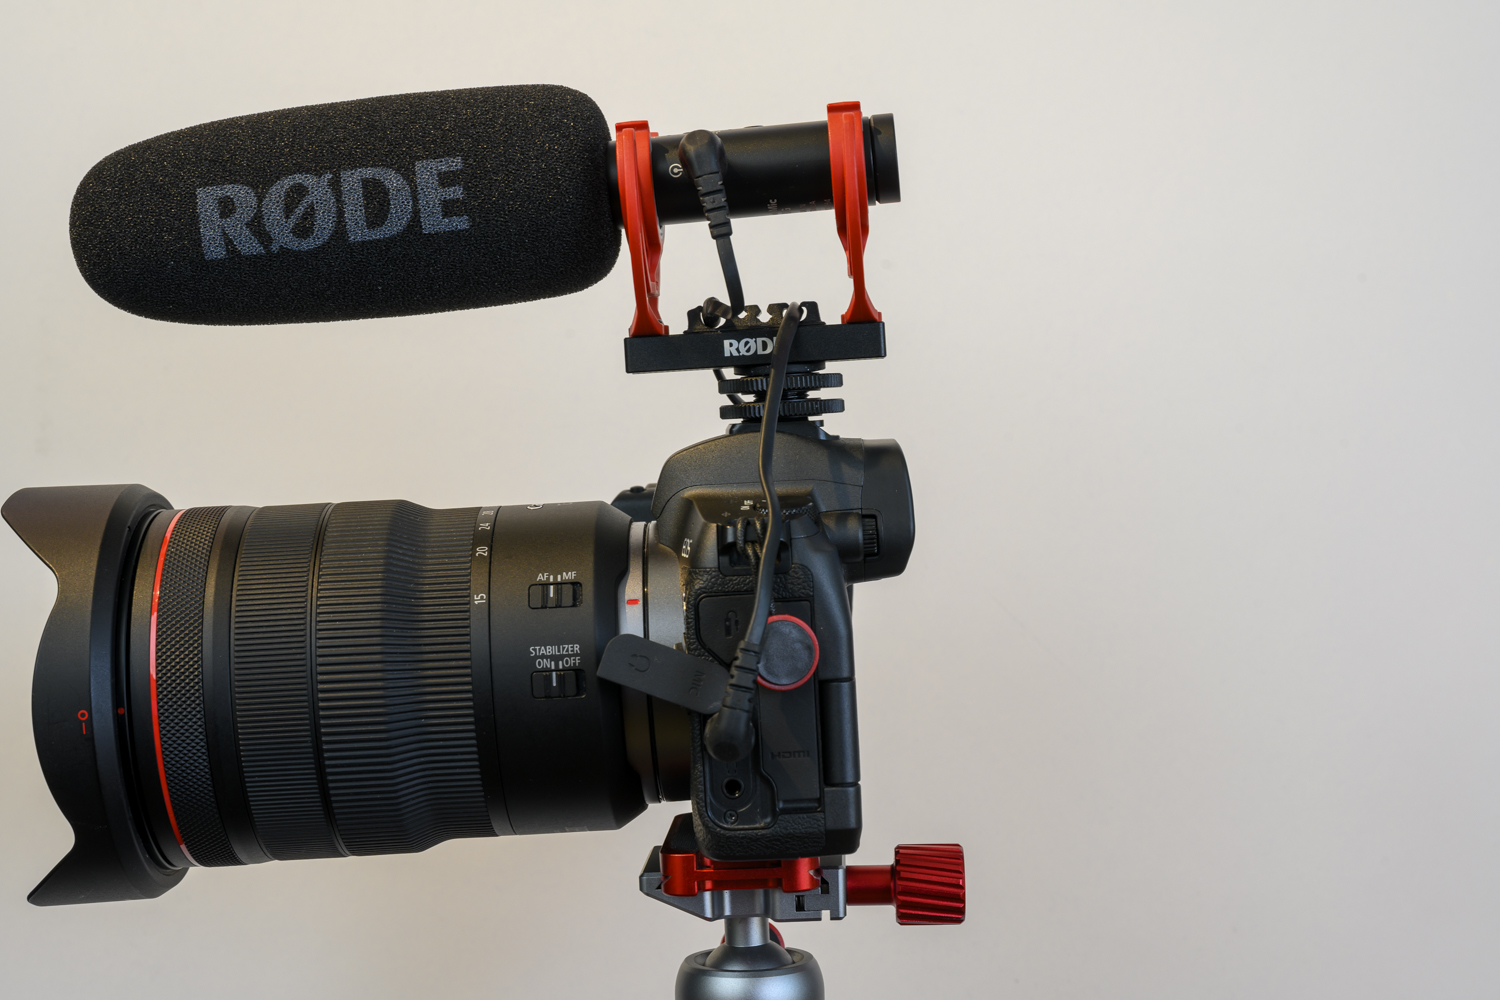
Like the larger NTG 4 studio mic, the VideoMic NTG captures gorgeous, natural sound. There are various controls to assist you in doing so, including an infinitely variable gain control, a digital switch for controlling high-frequency boost and the high-pass filter, and it has a headphone output for monitoring audio.
Additionally, there is a peak decibel warning light so you can avoid distortion.
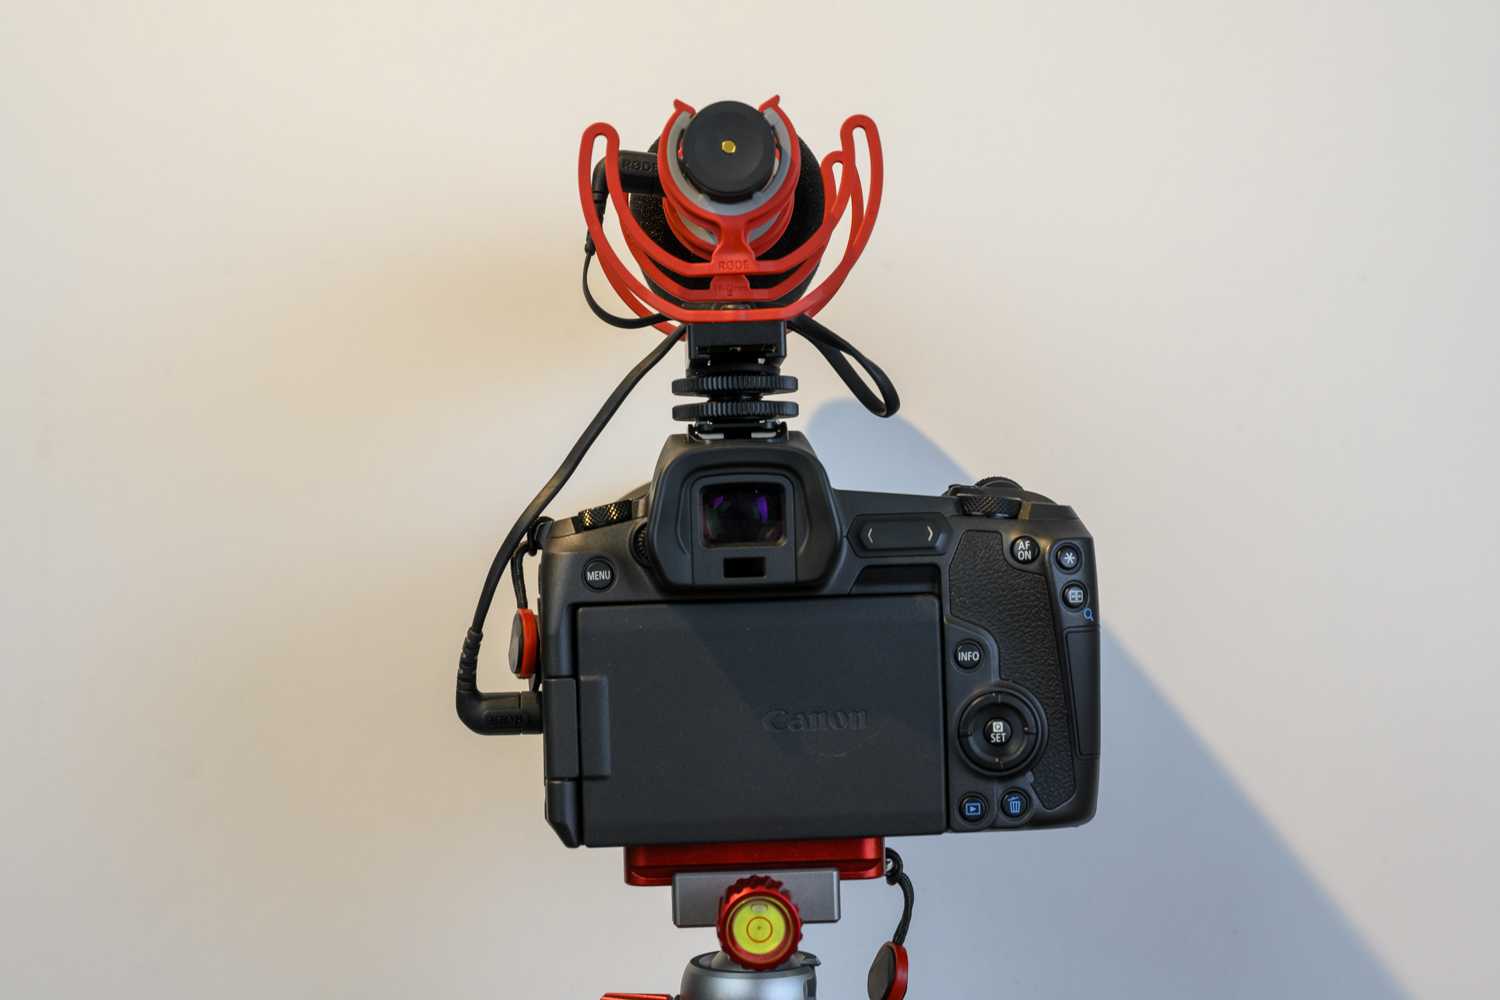
The best feature of this mic, though, is its sliding rail.
I've used RODE mics forever, and they are excellent. But my one complaint about them is that they protruded so far out from the camera that they can easily hit you in the face.
Well, the sliding rail system on the VideoMic NTG solves that problem, so if I'm shooting in selfie mode, I can slide the rail back and keep the microphone from hitting my face.
On top of all that, it has a battery that will last more than 30 hours on a single charge, it can be plugged into a USB port for recording on your computer, and it's price isn't bad at all, if you ask me - it's on sale for $249.00 at the time of this writing.
Learn more about the RODE VideoMic NTG
Deity D3 Pro
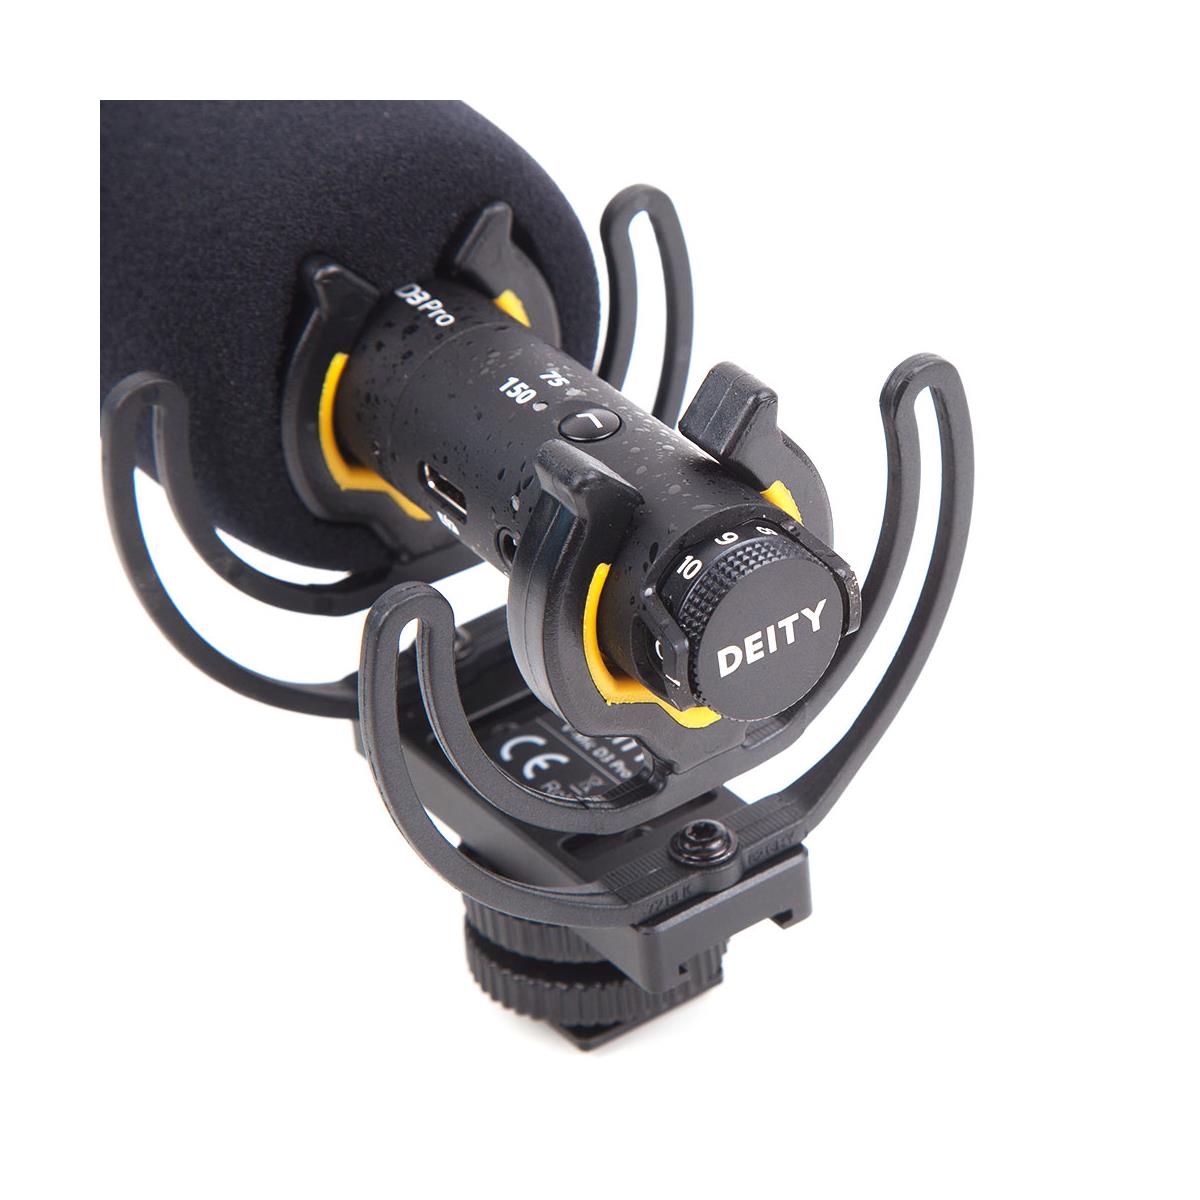
Yet another fine option for your audio recording needs is the Deity D3 Pro.
This super-cardioid directional condenser shotgun mic gives you a sensitivity range of -50dB to 28dB. It uses an on-board microprocessor that talks to the audio input it's connected with, which means it can work with your DSLR, mirrorless camera, smartphone, tablet...you name it! Basically, it's compatible with anything with a 3.5mm microphone jack. That's excellent versatility!
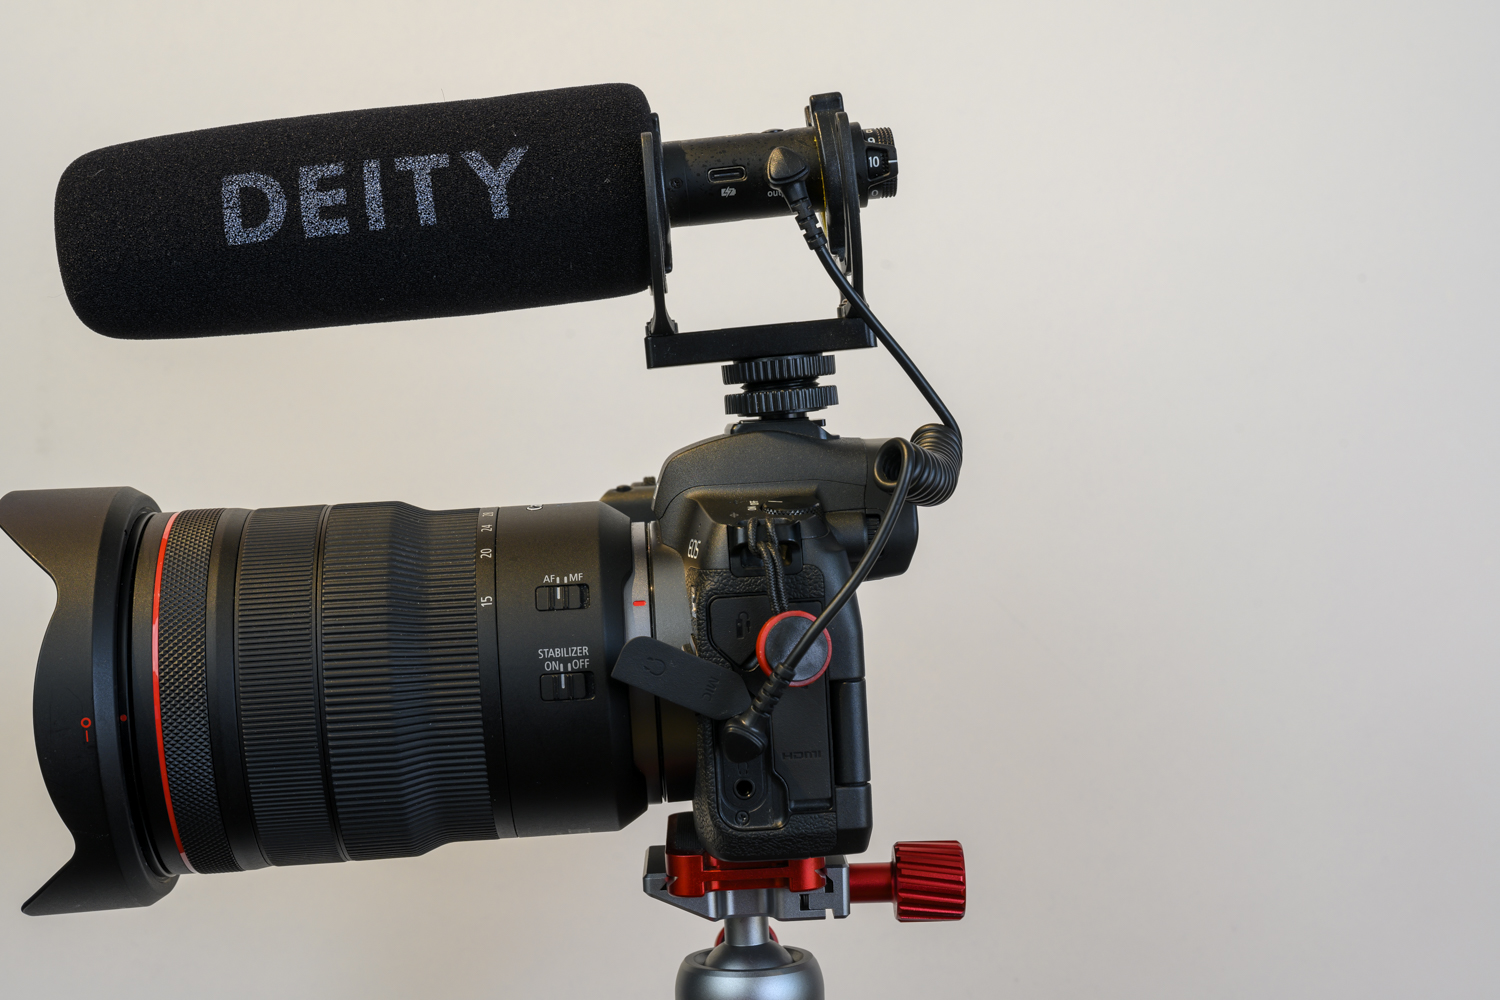
This mic has one of the best batteries in the business, too. You get up to 51 hours of runtime on a full charge. As an added bonus, it takes less than two hours to charge up!
The Deity D3 Pro has a stepless analog gain adjustment dial. It also has an on-board low-cut filter and a Rycote shock mount.
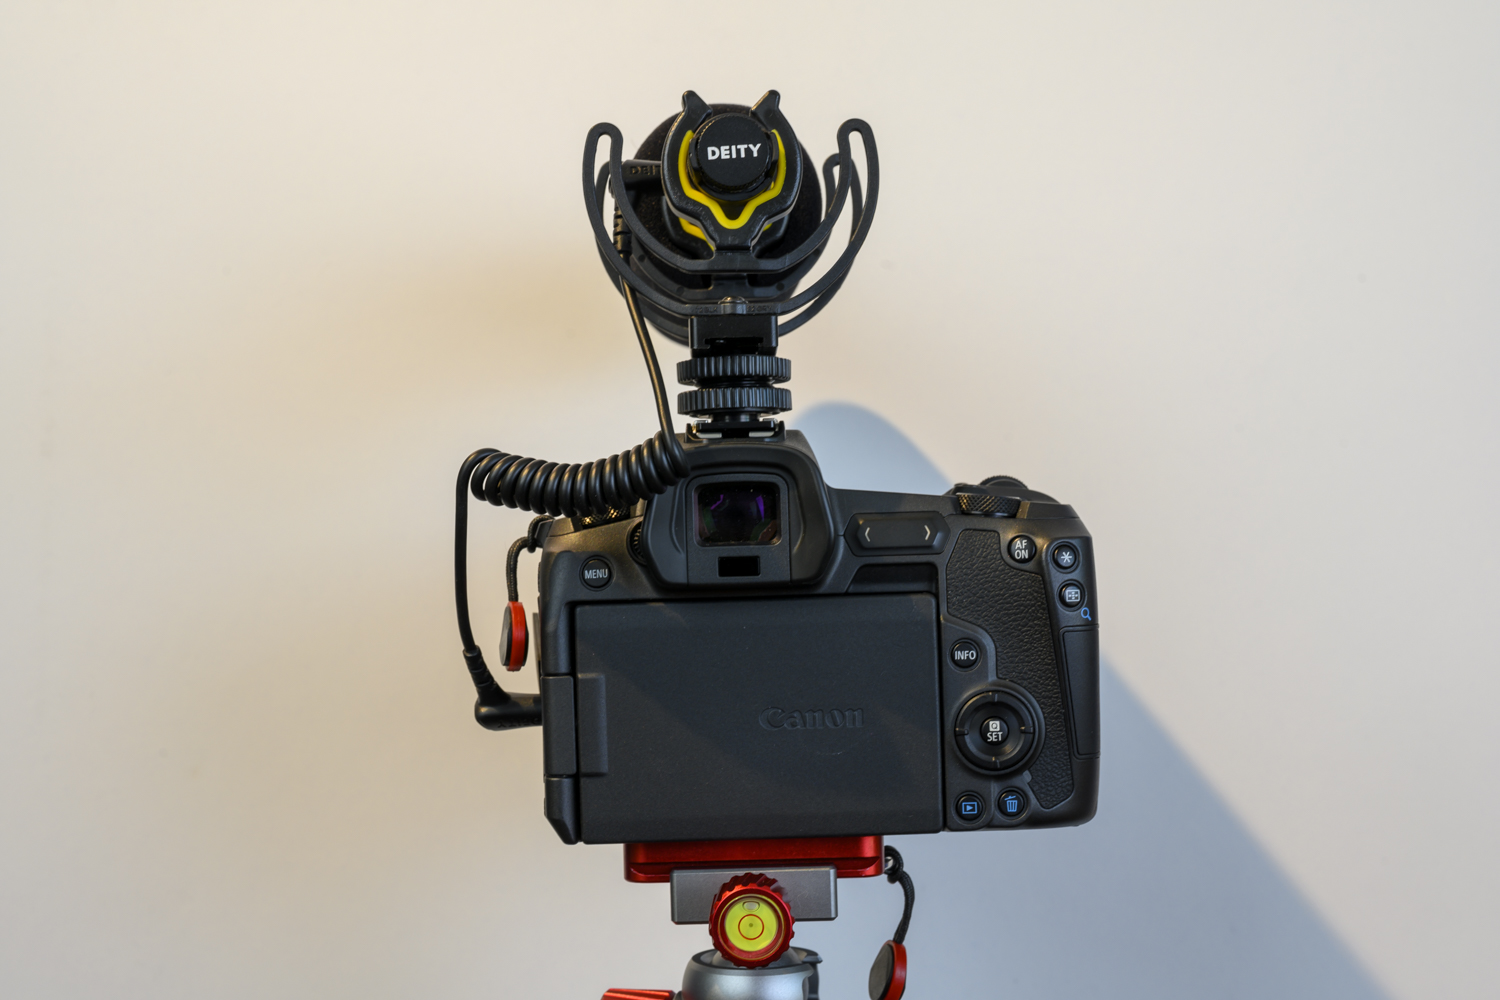
What all this means is that you get excellent audio (broadcast quality, in fact), that enables you to elevate the quality of your video productions.
It's priced at $199.00 at the time of this writing, so it's an excellent mid-range option.
Learn more about the Deity V3 Pro
Learn More:
SHURE Lenshopper VP83F
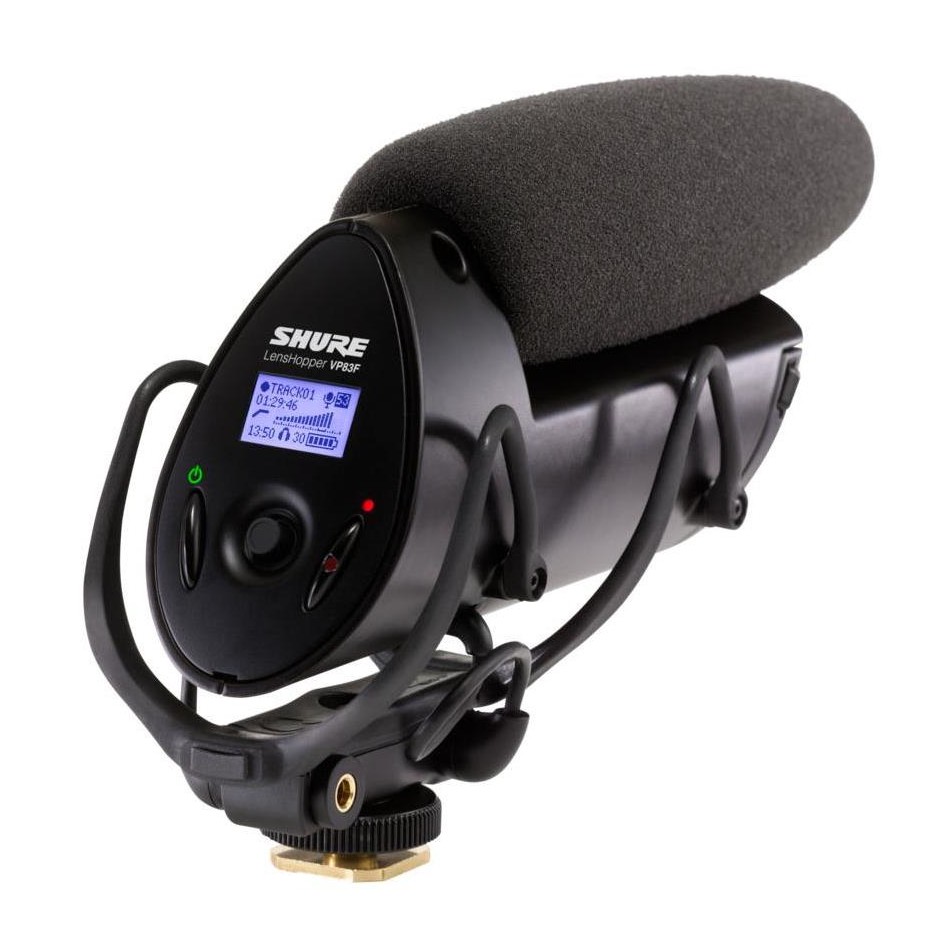
One of the neatest features of this microphone is that is has integrated flash recording.
Just add a MicroSDHC card, and you can record and play back audio while the mic is mounted to your camera.
It has an electric condenser cartridge with a super-cardioid/lobar polar pattern for optimal audio quality and an integrated shock mounting system the helps isolate the mic from unwanted noise.
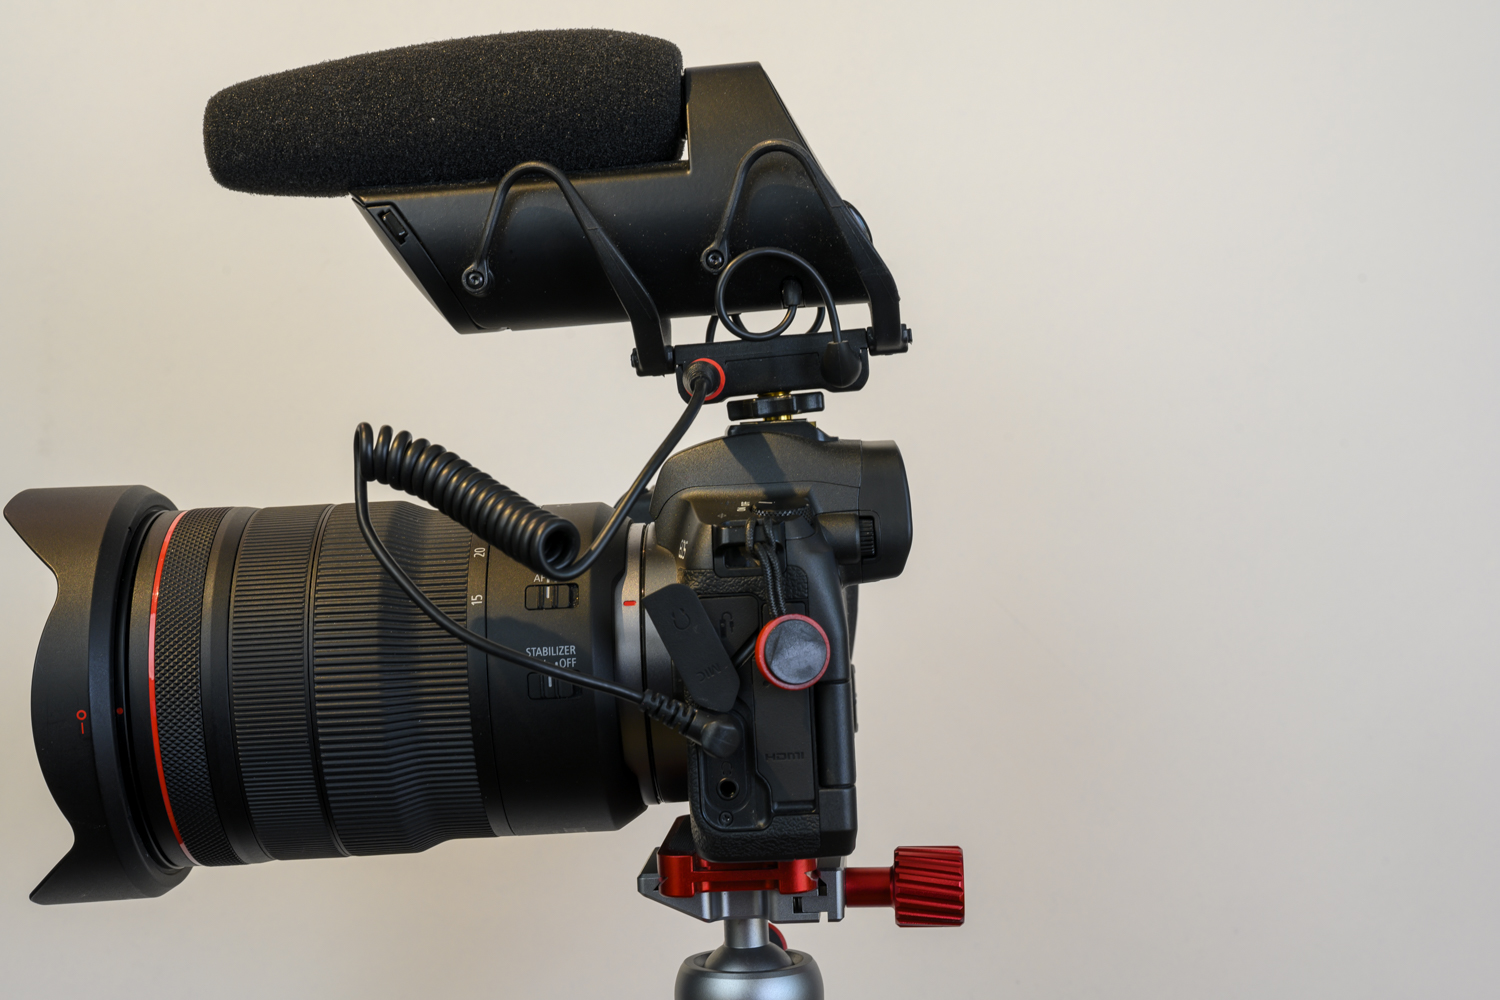
As you'd expect from Shure, this mic is well built, rugged, and offers an intuitive and easy-to-use design.
Speaking of the design, this is a small and compact shotgun mic that doesn't take up too much space or get in your way.
The high-definition audio has excellent low-end response while the single-button recording option allows you to initiate recording quickly and easily.
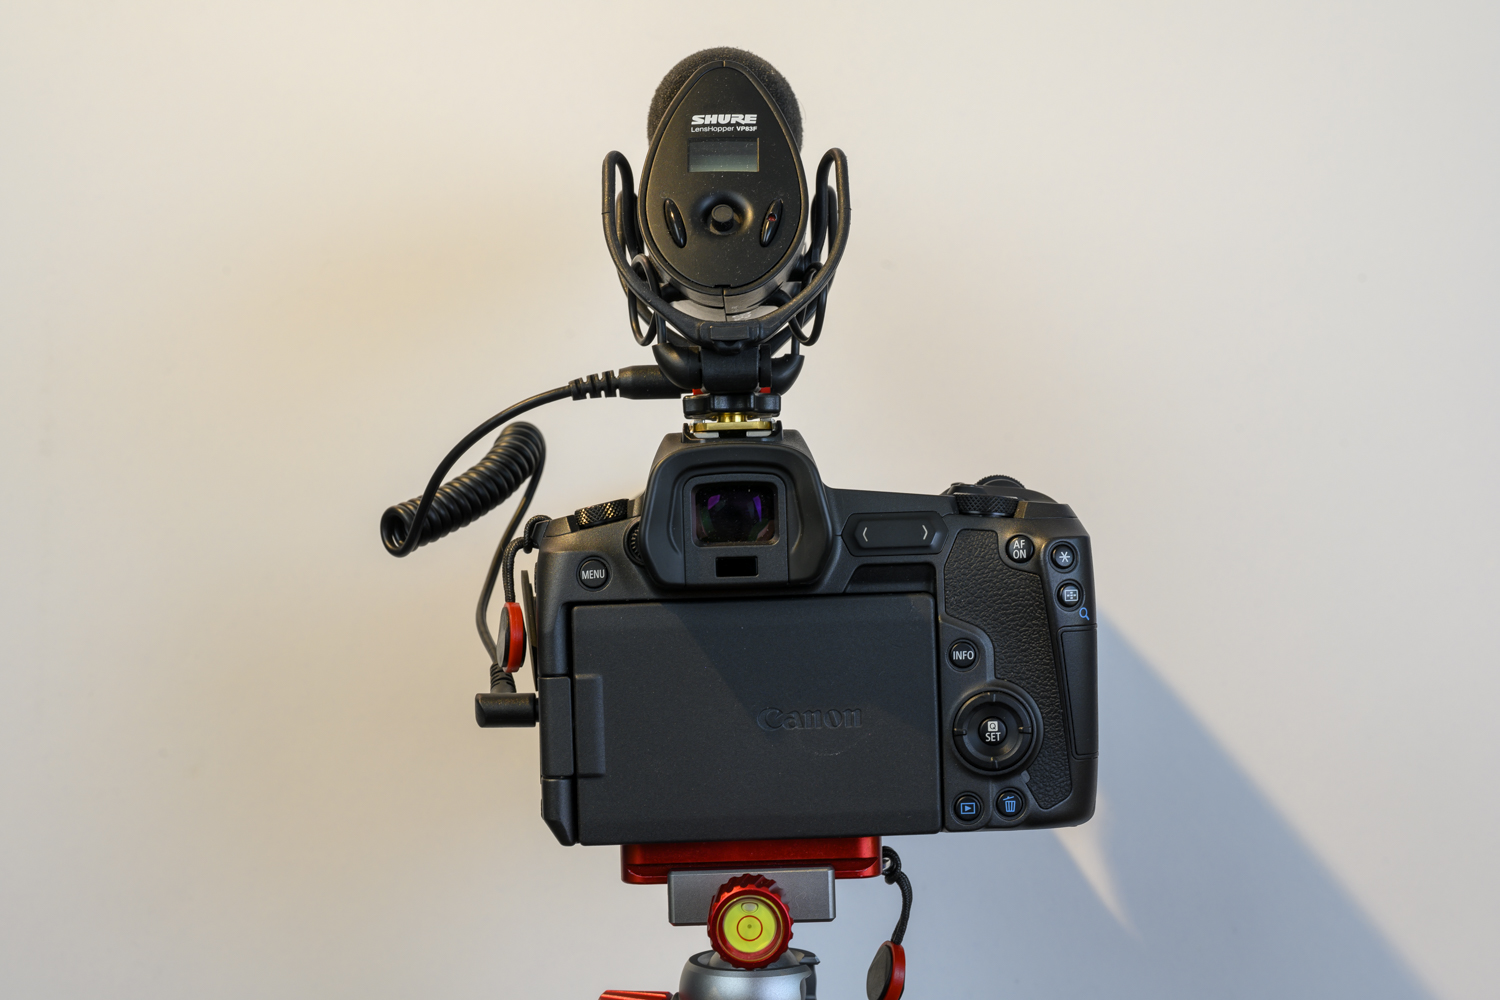
I appreciate that Shure integrated a headphone audio output, which makes it easier to monitor recording.
I also like how natural the audio sounds, which is thanks to its high sensitivity, low self-noise, and wide frequency range.
At $299.000 (at the time of this writing), this is one of the pricier mics on this list. However, the audio quality and features you get make it well worth the price tag.
Learn more about the Shure Lenshopper VP83F
RODE VideoMic Pro+
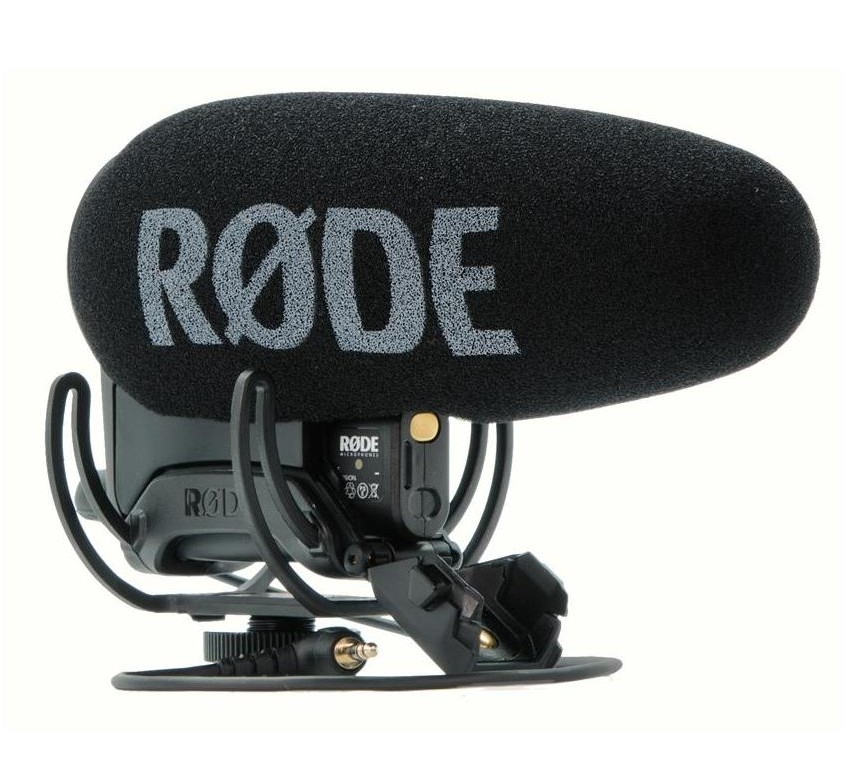
I've had the RODE VideoMic Pro+ in my kit for quite some time, and I have enjoyed using it with a variety of cameras in a variety of situations.
This true shotgun-style mic records super clean, broadcast-quality audio. That's thanks in part to digital switching that includes a two-stage high-pass filter that reduces low frequencies and a three-stage gain control with a +20dB functionality, which improves audio quality on DSLR and mirrorless cameras.
There is also a safety channel to ensure the signal doesn't clip with spikes occur, and a high-frequency boost to enhance the detail and clarity in the recording.
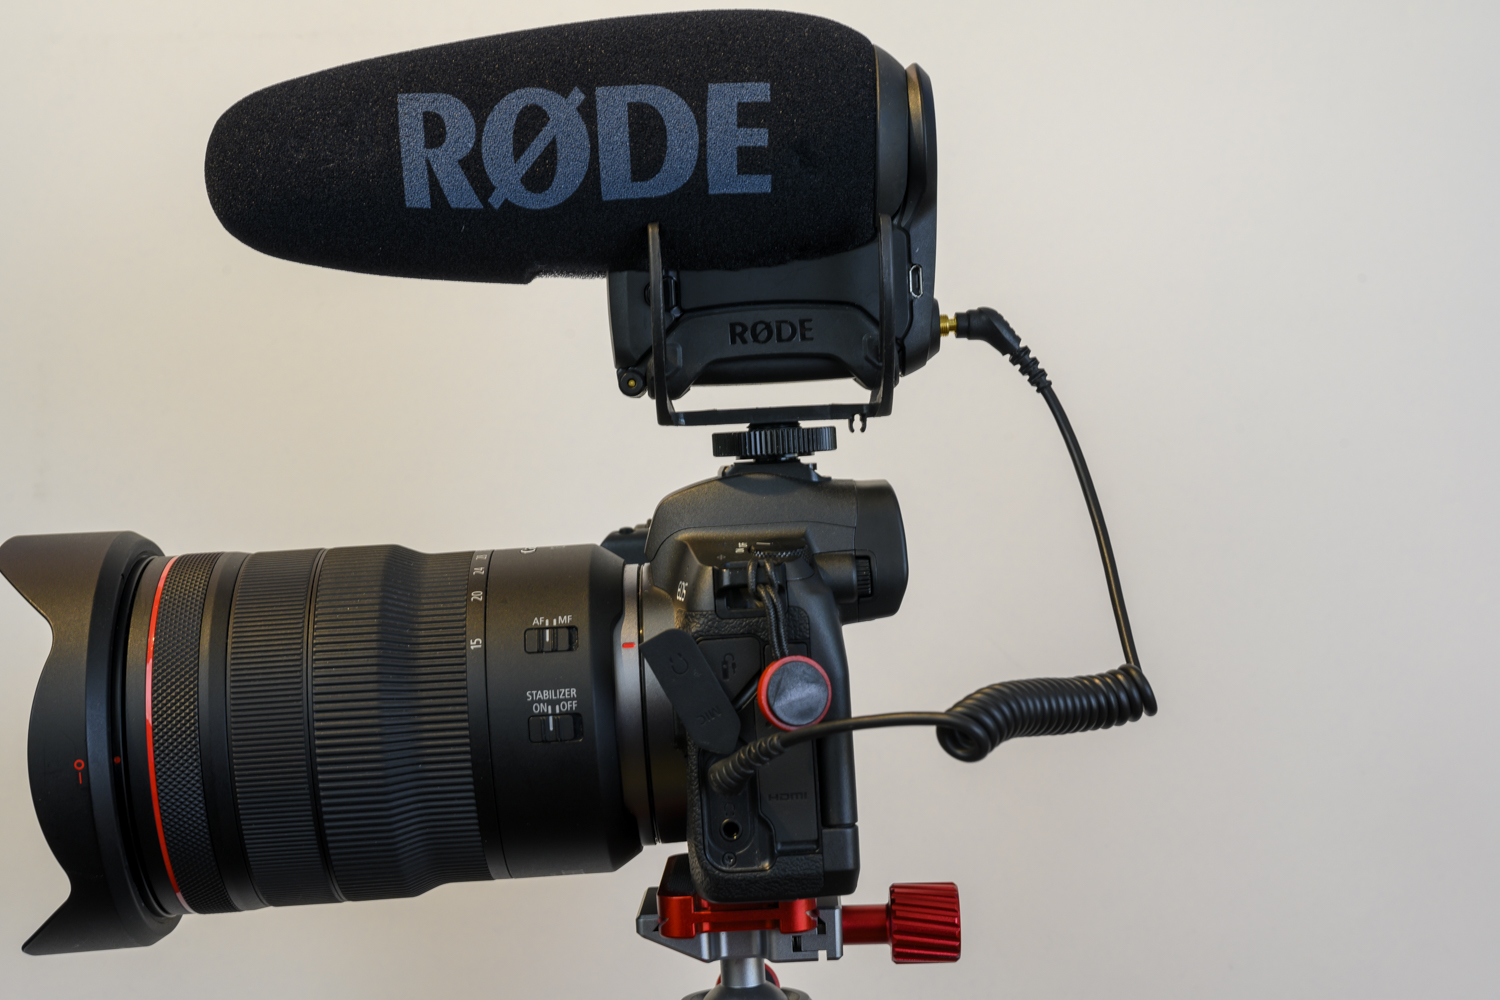
Like other mics on this list, the VideoMic Pro+ has a Rycote Lyre shock system that buffers the microphone capsule and electronics and the microphone mount.
In turn, the result is fewer vibrations of the mic that helps improve the quality of the audio recording that much more.
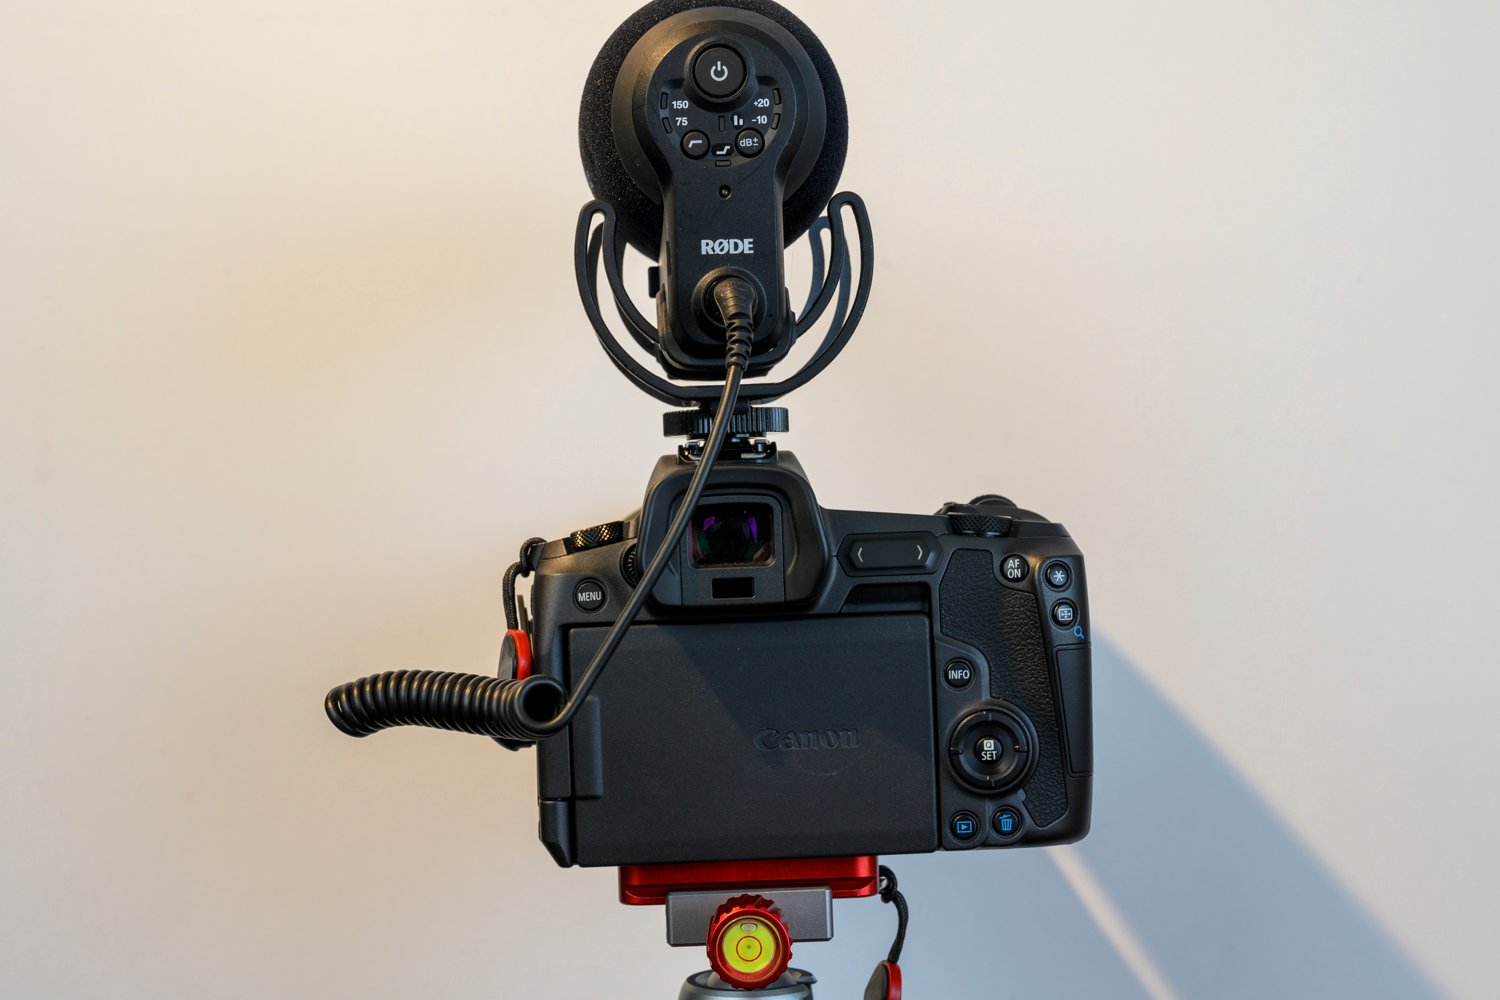
This mic has easy-to-use controls, intuitive operation, and excellent sound. It's simply a hard-working, lightweight mic!
Normally, all that performance would set you back about $400.00, but at the time of this writing, this microphone is on sale for just $249.00. That's not a bad deal at all!
Learn more about the RODE VideoMic Pro+
We Recommend
Best Teleprompters of 2019
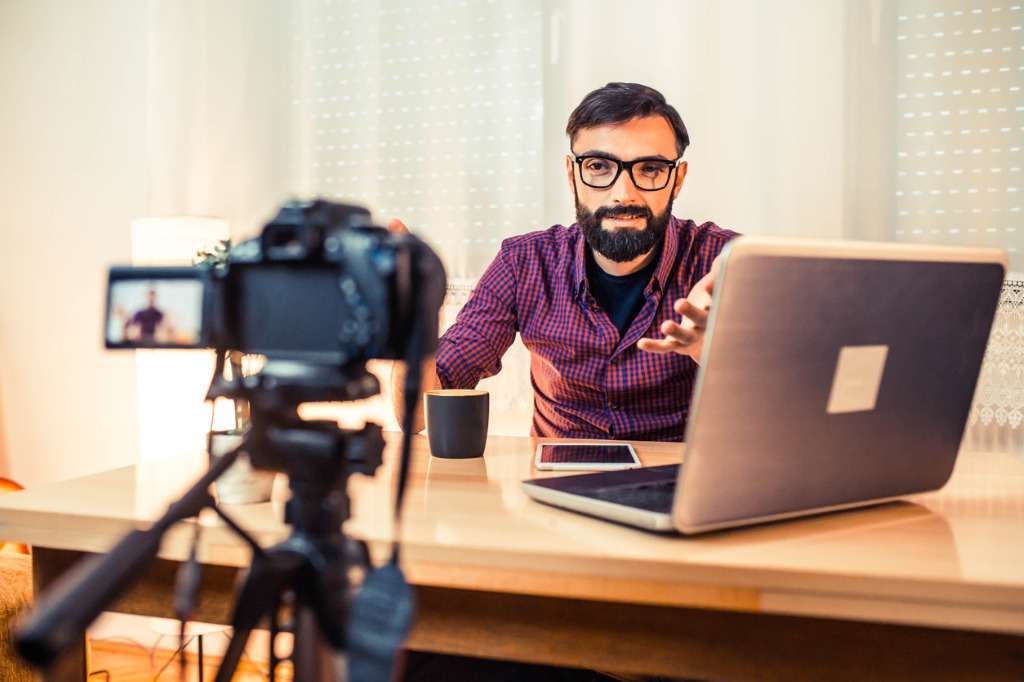
photo byLordHenriVoton via iStock
No matter how much of an expert you are on a topic, if you’re making a video, a teleprompter will help you deliver your message much more effectively.
Teleprompters put the word-for-word message you want to get out right in front of your eyes. It’s like hand-delivering a precisely worded letter to your audience.
Is using a teleprompter a guarantee that you won’t mess up? No. But the likelihood of you delivering a well-worded and passionate message is greatly increased when using one.
You don’t have to have a giant teleprompter like what’s used on the evening news, either. In fact, there are many small, portable, and affordable options for vloggers and videographers today.
Let’s take a look at some of the best teleprompters on the market.
Best Teleprompters of 2019: mPrompter

Even though this teleprompter by mPrompter isn’t going to be available until early in 2020, it still makes this list of the best teleprompters of 2019. Why?
That’s easy…
I’ve had my hands on a prototype model the last couple of months and have found that it’s highly portable for shooting video on the go and it’s extremely durable, so it can stand up to use and abuse while on-location or in the studio.

This rig has a stainless steel body and frame with a textured black coating to minimize reflections and glare.
It has a 3mm glass mirror with a 70/30% reflective coating, and the mirror is permanently attached and free floated in a protective stainless steel bezel.
mPrompter is compact and ideally suited for use with a smartphone, but it is adjustable to any kind of camera, so you can use it with your small mirrorless camera or your big DSLR too.

This teleprompter was developed with bloggers in mind: it’s small, easy to set up (it takes less than a minute!), and comes with aluminum adapter rings to ensure it’ll work with your existing smartphone or camera.
On top of all that, mPrompter is affordable! It really is the best of all worlds - portable, easy to set up, durable, and easy on your pocketbook!
Learn more about the mPrompter teleprompter
Best Teleprompters of 2019: iKan PT-Elite-Pro
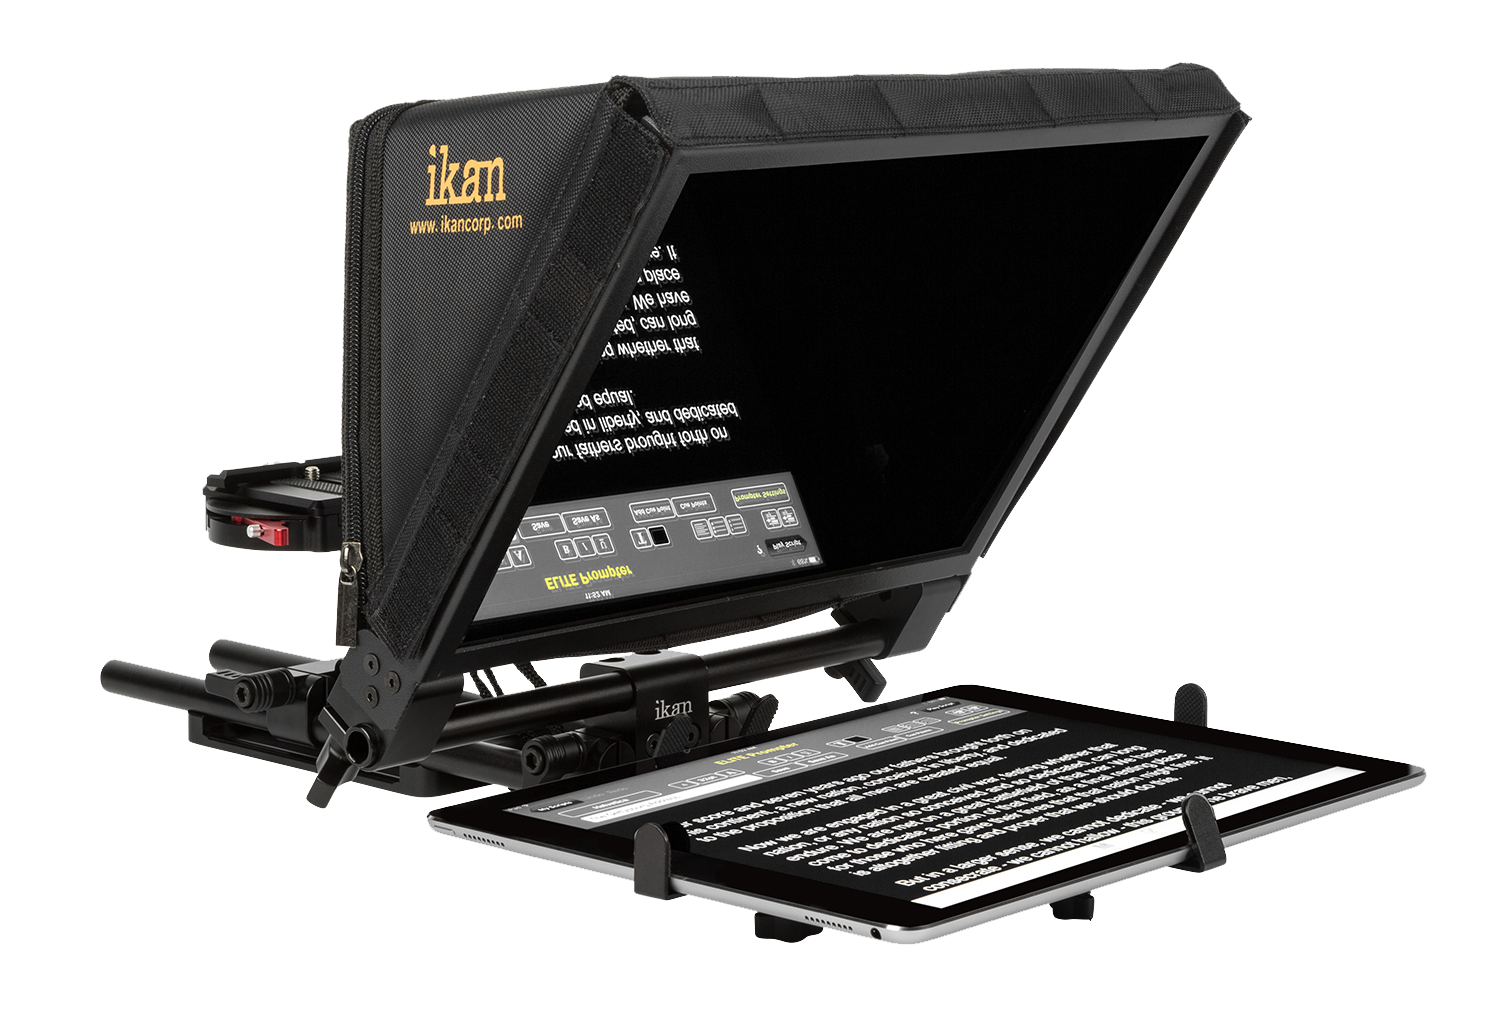
Ikan’s PT-Elite-Pro teleprompter is specifically designed for larger tablets like the Apple iPad Pro, Microsoft Surface, and Samsung Galaxy tablets as well as any tablet from 6 x 9 inches to 9 x 12.
But even though it’s designed for larger tablets, it’s still an easy and quick setup to save you time.
It features an adjustable, foldable glass frame, a quick-release base plate, and a much lighter design that makes it more portable than its predecessors.

In fact, the solid CNC machined aluminum construction makes it super lightweight so you can take it from the studio to locations in the field with ease. The custom foam hard case for carrying the teleprompter enhances its portability.
This unit has a 15mm rod base for versatility and ease of use, and includes an elite remote as well.
The scientific-grade 70/30 teleprompter glass ensures high clarity and sharpness for an easy reading experience while the adjustability to various types of camera sizes makes it an excellent option whether you shoot with a DSLR, a mirrorless camera, or a video camera.
Learn more about the Ikan PT-Elite-Pro teleprompter
Best Teleprompters of 2019: Little Prompter
Another one of our favorite teleprompters of 2019 is the Little Prompter.
As its name indicates, it's a compact teleprompter that you can use to deliver polished talking points to the camera no matter where you’re recording.
It’s a versatile setup that’s also easy to use, so you can use it with a wide range of cameras without having a long setup time.
This unit can be used with your smartphone, and when paired with a teleprompter app, the Little Prompter can operate with your computer’s built-in camera and microphone.
Little prompter can also easily pair with a mirrorless camera or DSLR, a webcam, or even a handycam.
The lightweight body measures just 6 x 6 x 6 inches and is made of durable expanded PVC. It has an adjustable tripod attachment support bar, spacers, and screws to give you versatile setup options. All these components are manufactured using 6061 aluminum for durability.
The teleprompter glass is made of high-quality 70/30 BeamSplitter glass that gives you beautiful sharpness and excellent transparency as well.
This is just a smartly designed and well-made teleprompter that might just be the ideal fit for your teleprompter needs.
Learn more about the Little Prompter teleprompter
Best Teleprompters of 2019: Padcaster Parrot

Next on our list of the best teleprompters of 2019 is the Padcaster Parrot, another multi-functional, affordable teleprompter.
This teleprompter fully sets up in just a few minutes’ time, which makes it a solid choice for videographers that need to run and gun.
Just attach any camera system to the unit, insert your phone, and read the text that shows on the teleprompter. The companion Parrot app makes it super easy to set up.

Like the other teleprompters on this list, the Parrot uses 70/30 BeamSplitter glass for the highest-quality view of your script.
This unit also comes with 13 mounting rings so you can easily attach it to almost any type of camera lens.
There is a Bluetooth remote to improve ease of use via the Parrot app and there's a glass cleaning kit included in the bundle as well.
Learn more about the Padcaster Parrot teleprompter
Best Teleprompters of 2019: Datavideo TP-300B

Last but not least, the Datavideo TP-300B is a great teleprompter option for videographers that use an iPad or Android tablet for reading scripts.
The scripts or cue sheets that you create can be quickly and easily transferred into the DV prompter application software and scrolled at a set automatic rate. Additionally, it can be controlled via an optional remote if a set rate is not desired.
The prompter software gives you plenty of options for customizing the text size, colors, and fonts so you can make the script as easily readable as possible from a variety of distances.

The unit has a versatile mounting system that enables you quickly and easily mount many different-sized tablets to it.
The strong prompter frame affixes to any standard tripod and gives you the option of using it as a standalone, in front of the camera, or below the lens. Whatever the positioning, you’ll appreciate the 60/40 glass that allows you to see the script clearly.
Learn more about the Datavideo TP-300B teleprompter
We Recommend
Best Tripods Under $200
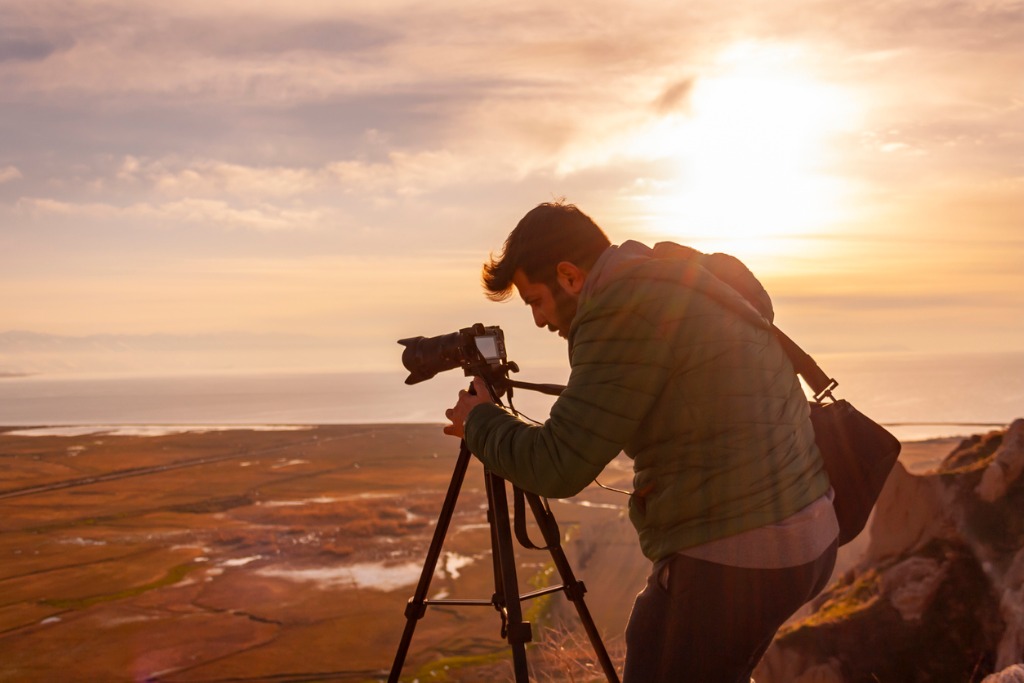
photo by0804Creative via iStock
Whether you’re into real estate photography, vlogging, or photography as a hobby, you need a tripod.
Tripods don’t just provide stability for your camera.
Instead, they enable you to take creative shots, like long exposures.
Having a tripod also helps you slow things down as you set them up - even just a few seconds to survey the scene as you get the tripod ready might help you notice better compositions.
Plus, the best tripods are light and easy to carry with you all day.
But, I’d much rather spend my hard earned money on new camera bodies and lenses, which is why I created this best tripods under $200 list.
E-Image EK610
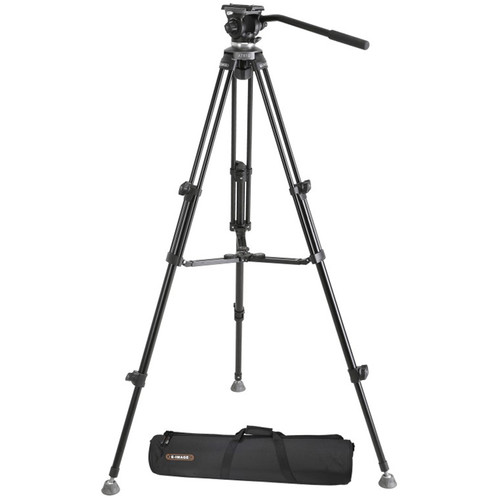
The E-Image EK610 is probably the easiest to use of all best budget tripods thanks to its easy leg locking mechanism. The E-Image EK610 uses dual-stage aluminum legs to allow you to shoot at the exact height you want to, but the legs also deploy quickly and efficiently.
So, if you’re a wildlife photographer or a portrait photographer this may be one of the top tripods you should be looking at.
You can use this tripod with plenty of gear, too - the included head can accommodate up to 6.5 lbs of camera gear.
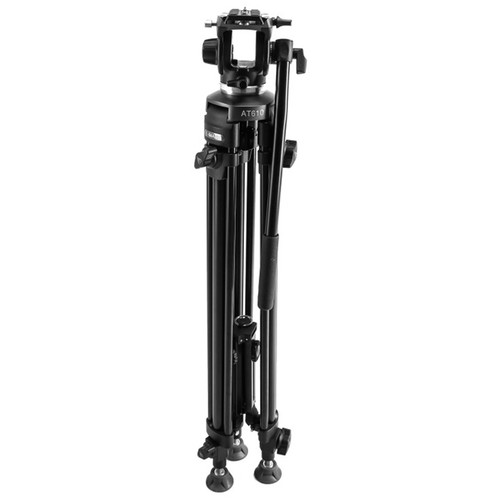
This is all thanks to the 65mm half-ball fluid head which provides stability to your equipment through the counterbalance system.
This is one of our best tripods under $200 for another reason: it is incredibly stable.

It’s stable even at its highest height because of the integrated mid-level spreader that works to keep your equipment balanced at all times.
My favorite quality about this tripod, though, is its rubber feet paired with metal spikes which ensures it stays put, even if your shooting on uneven or slippery terrain.
The E-Image EK610 is available at Ikan for $129.99.
Learn More:
Manfrotto Befree
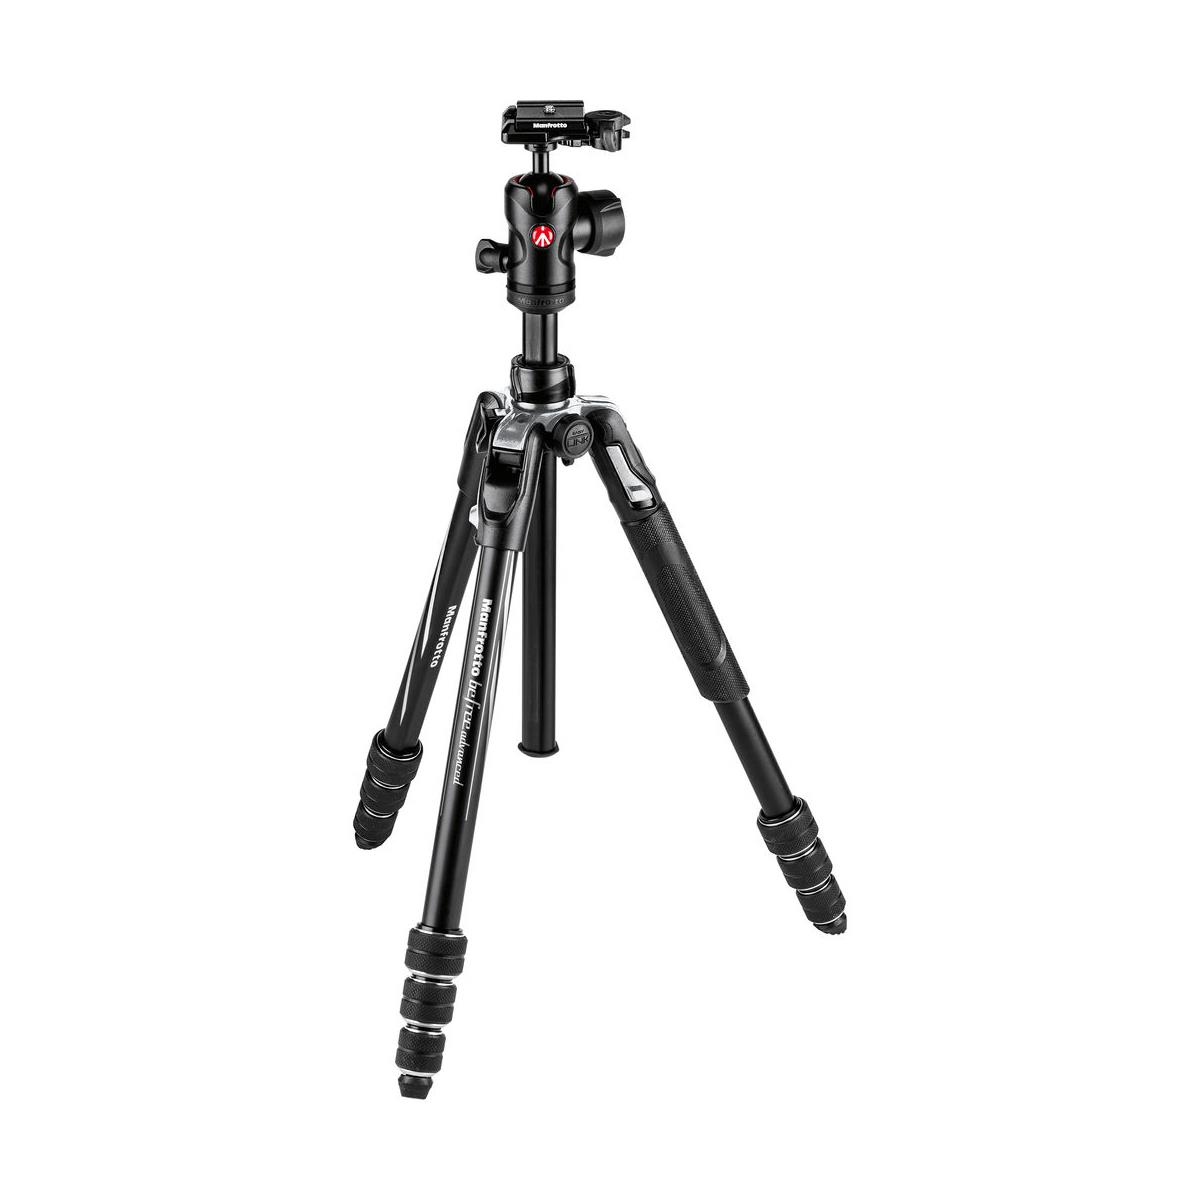
The Manfrotto Befree is one of the best budget tripods for travellers because it is incredibly compact.
This tripod is built from aluminum, so its light enough to fit in your carry on at just over 3 lbs. But, you aren’t trading weight for stability with the Befree because it’s built for your mirrorless or otherwise lighter camera setup. It can hold up to 8.8 lbs of gear.
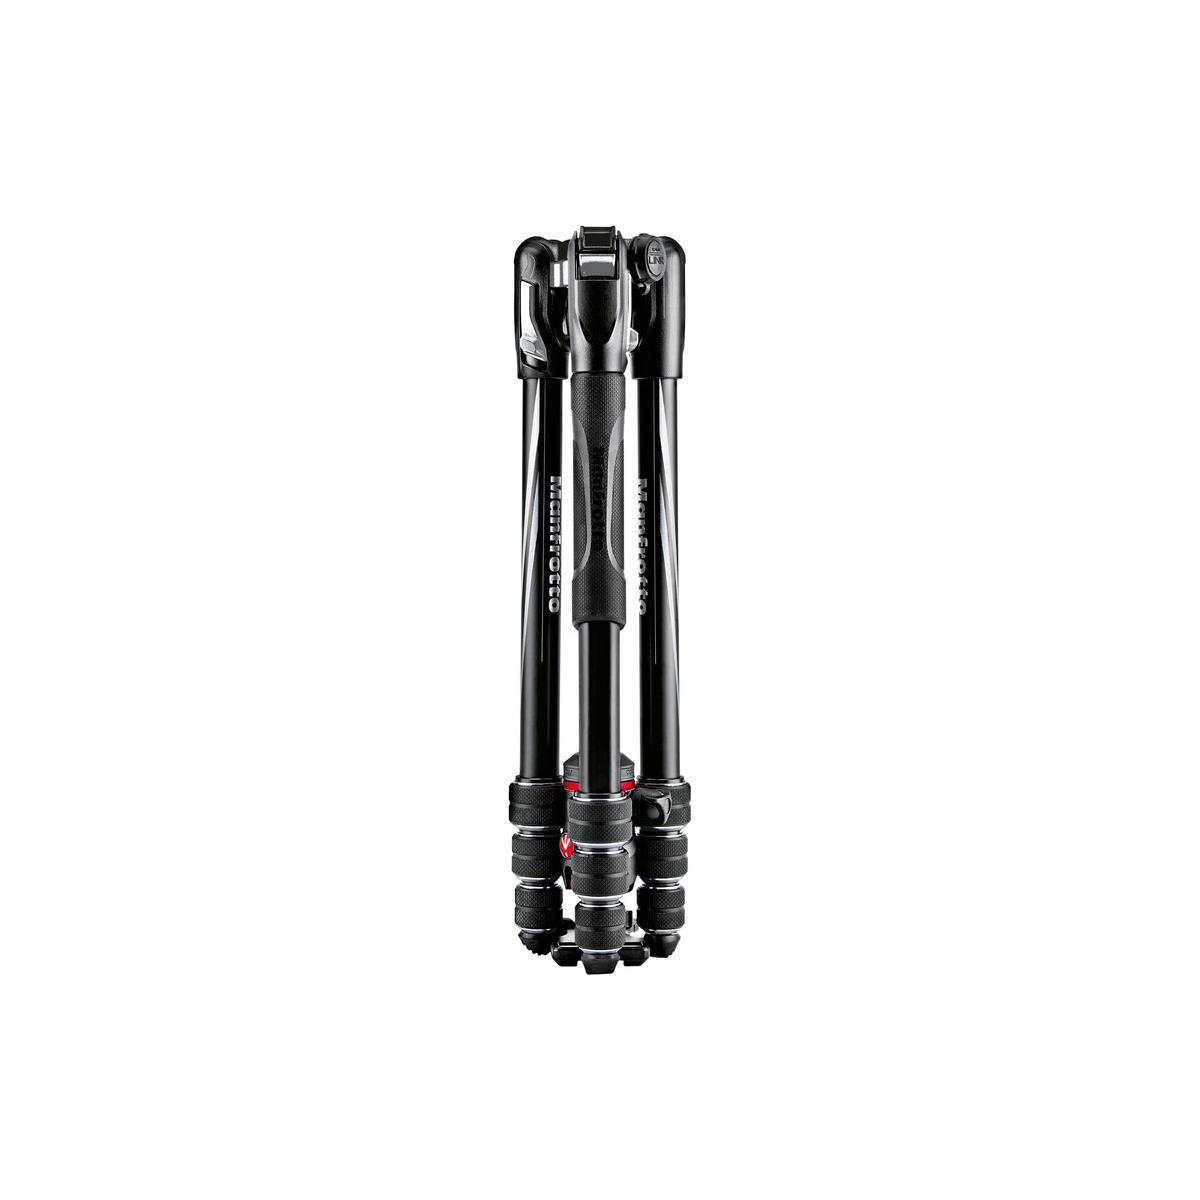
It features a maximum height of 56.6 inches, a two-way locking mechanism on the ball head to keep your camera in place, and it can break down into less than 16 inches when you’re on the move. That’s a huge bonus for you travel photographers out there!
The Manfrotto Befree Travel Tripod is available on Adorama for $190.
MeFOTO Roadtrip Classic
You cannot create a list of the top tripods and not include something by MeFOTO, but out of all of MeFOTO’s tripods, the Roadtrip Classic is, indeed, a classic.
This tripod weighs in at just over 3.5 lbs and features a maximum height of 61.1 inches. However, none of this is the most impressive part of the Roadtrip Classic because it actually doubles as both a tripod and a monopod.
MeFOTO is quickly making a name for itself in the camera gear world because of innovative products like this one.
Much like the Manfrotto Befree, this tripod is made out of aluminum (with customizable colors). While it is in use it stands at over 60 inches, but can fold down to around 15 inches for travel.
You can also carry a whopping 17.6 pounds on the MeFOTO, which is more than most of the best tripods under $200. You usually need to be in the $300-$400 range to fit these specs.
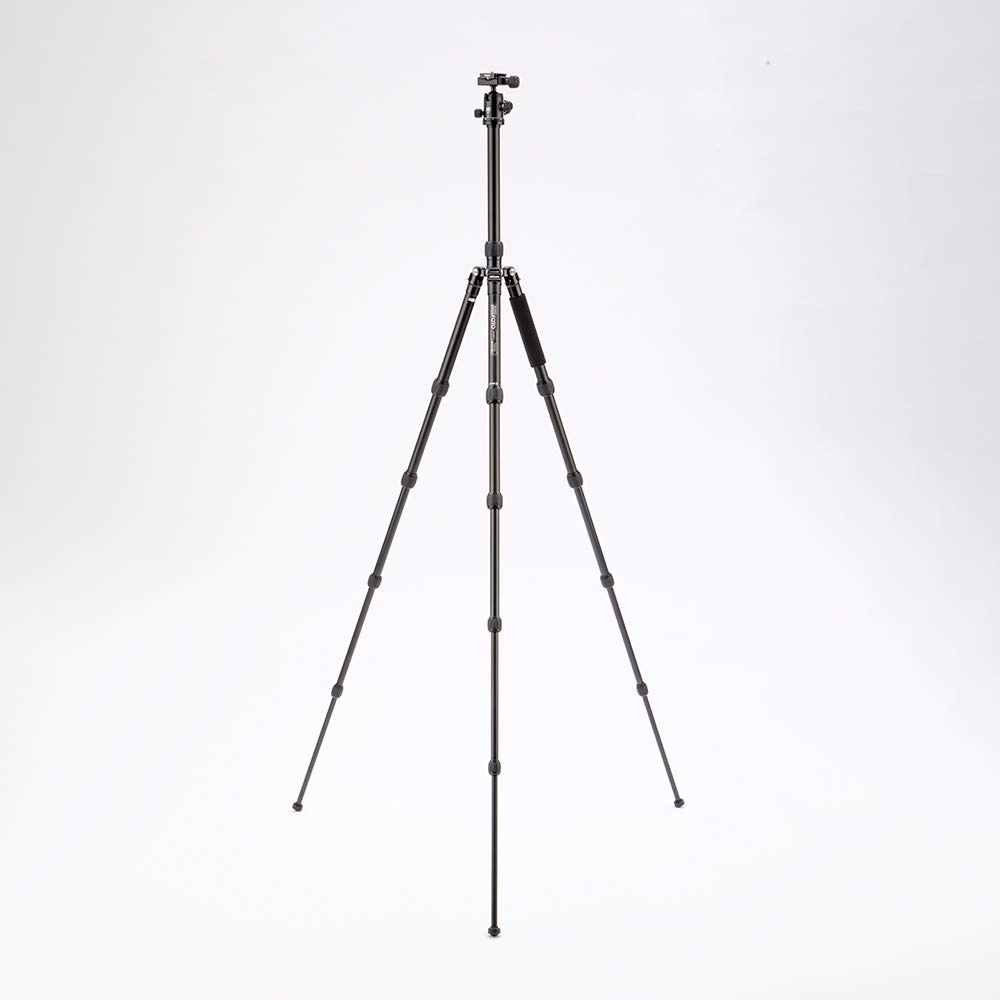
The transition from tripod to monopod is also quite simple as you remove one of the legs and screw it into place on the base.
The MeFOTO Roadtrip Classic tripod/monopod is available on Amazon for $160.
With that, you have a quick list of three of the best tripods under $200. As you can see, you don’t have to sacrifice quality or features when you shop for a less expensive tripod!
Learn More:
We Recommend
Budget-Friendly Real Estate Photography Gear
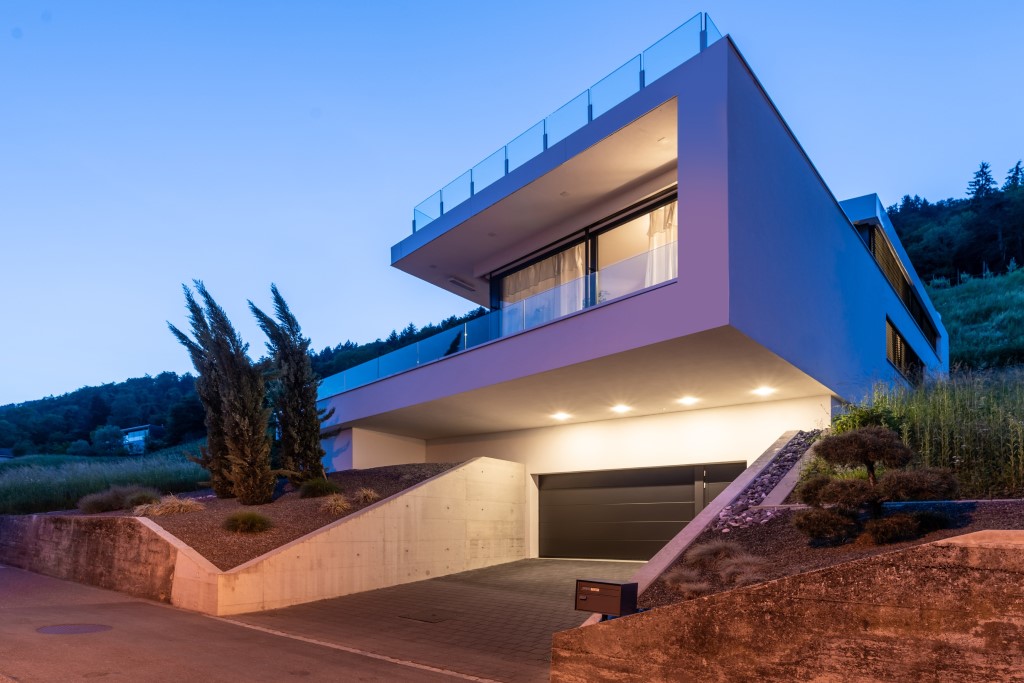
Photo by AVANTECTURE on Unsplash
Whether you’re new to the real estate photography game or have been at it for years, we all know one thing: real estate photography gear is not cheap.
In fact, real estate photography is one of the most expensive photography niches to start out in, strictly because of the amount of additional gear you need.
However, if you know where to find inexpensive real estate photography gear, then you will already have a leg up on your competition.
Table of Contents
- Powerful Post-Processing Software on a Budget
- Learn Business Skills on the Cheap
- Inexpensive Photography Insurance
- Budget-Friendly Camera and Lens
- A Fully-Featured (Yet Inexpensive) Tripod
- Low-Cost Gimbal
Powerful Post-Processing Software on a Budget
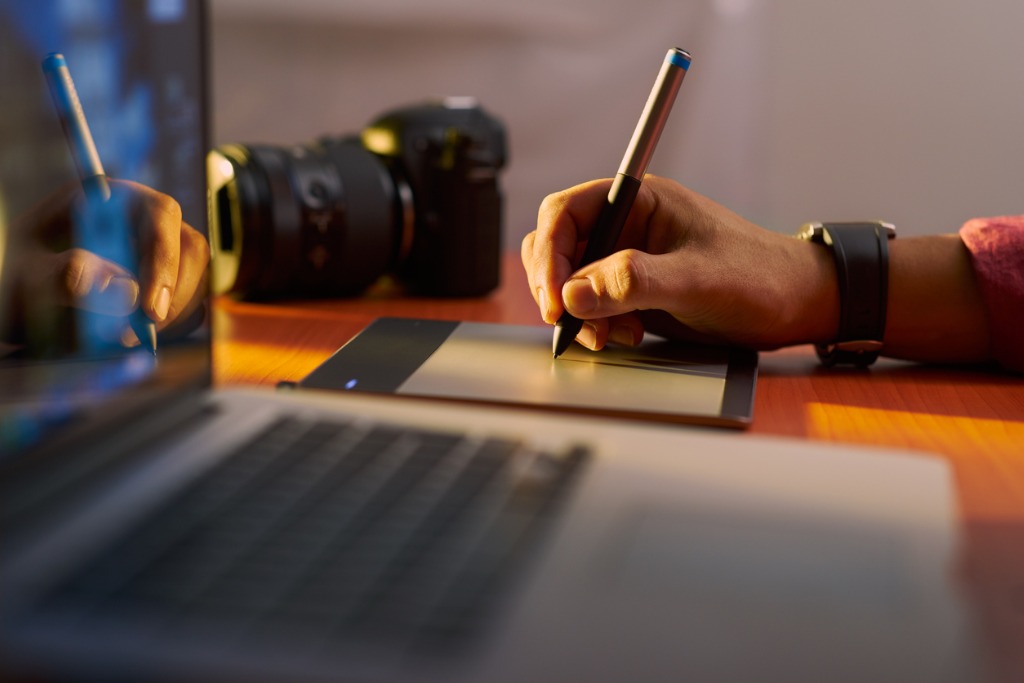
photo bydiego_cervo via iStock
One of the biggest challenges for real estate photographers is dealing with dynamic range that’s simply too much for their cameras.
This is a particular problem when photographing dark interior spaces with bright windows.
Some real estate photographers rely on the bracketing technique discussed here, which is a great way to create well-exposed images that have nice details in the highlights, midtones, and shadows of interior rooms.
But you have to merge these images together to get the final composite. This process can be streamlined if you utilize software like Photomatix Pro. See what I mean in the video above.
You get over 70 HDR settings and 40 HDR presets along with six HDR styles to fine-tune your photos.
What’s more, you can batch process images, use the presets and tools specifically for real estate photography, and utilize features like advanced ghost removal and automatic alignment of handheld photos.
Time is money in the real estate photography business, and with Photomatix Pro, you can save time so you can make more money!
Recommended Real Estate Photography Books:
- The Business of Real Estate Photography: A Comprehensive Guide to Starting your own Real Estate Photography Business
- Photographing Real Estate Interiors and Architecture: A Comprehensive Guide to Equipment, Technique and Workflow for Real Estate Photography
Learn Business Skills on the Cheap

Photo by The Climate Reality Project on Unsplash
I’ve spent my fair share of both money and time on conferences and conventions. I was told it was the best way to learn real estate photography tips and to network at the same time, and while I have met some people through these expensive means, it never seems to quite be worth it.
I mean, I meet more people in local photography groups that are free anyways!
And, I learn all of my new real estate photography skills through Real Estate Photographer Pro’s online courses.
Real Estate Photographer Pro was founded by a real estate photographer who realized there were absolutely not enough online resources for real estate photographers when he first entered the business.
The courses here are budget-friendly. They’re totally online so you can get to them when you get to them (I’m a late night learner myself). Plus, they build the exact same type of community that a traditional convention does through a members Facebook group and a weekly Q & A.
Additionally, whereas real estate photography courses on YouTube only give you just enough to try and attempt a new skill, the videos on Real Estate Photographer Pro come with downloads like templates, raw photos and presets to truly walk you through every step.
Inexpensive Photography Insurance

Photo by sturti via iStock
One of the essentials of owning a photography business is having the proper insurance to cover you in times of need.
Equipment insurance certainly comes to mind given that you likely have multiple cameras, lenses, a drone, and other very expensive photography gear that travels with you from one property to the next.
And covering all that gear doesn't have to be time-consuming or expensive....

At Full Frame Insurance, for example, you can get coverage day or night on their website, and do so quickly and easily.
Plus, with equipment coverage that starts at just $55 a year, you can get the coverage you need without breaking the bank.
Whether the properties you need to photograph are right next door to one another or in locations around the world, your policy is designed to respond to equipment insurance claims during transit and while you're on and off premises.
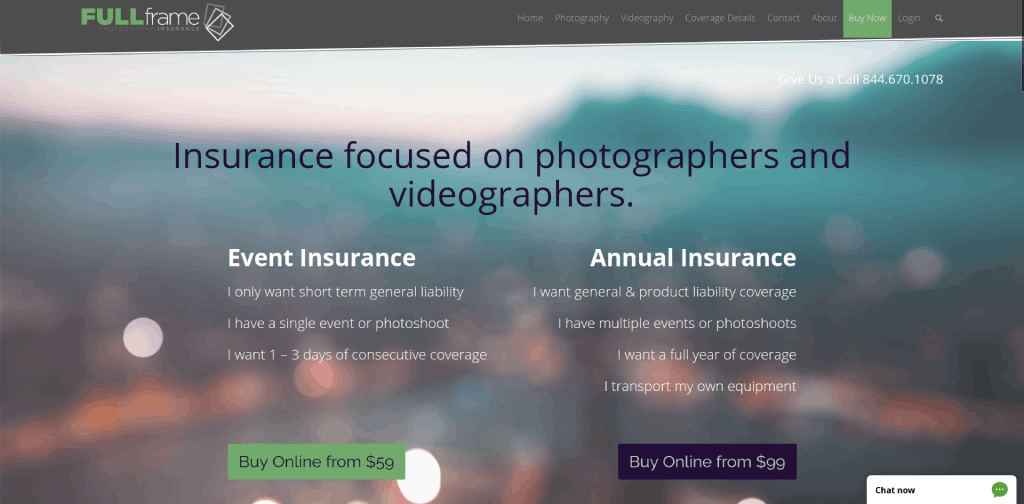
Full Frame also has general liability insurance that starts at just $99 per year.
The policy covers all sorts of eventualities, from medical expenses to property damage, personal injury, and even advertising injury.
When the scope of your work is to enter people's homes to take photos, it's critical that you have the proper insurance coverage. And Full Frame Insurance makes getting the right coverages a painless and inexpensive process!
Budget-Friendly Camera and Lens
Photo by Tim Graf on Unsplash
We all know that your camera and lens are the most expensive real estate photography gear you need.
But, if you’ve read the site for very long, you know all of the editors on PhotographyTalk love buying these expensive items used to save the cash.
Usually, when photographers think about buying used cameras they think about the process of going through a shady website like Craigslist to try and do so. But, it’s 2020. There are better options for inexpensive real estate photography gear.
One of our favorites, Gear Focus, is a used gear community built by photographers, for photographers.
Buyer and seller safety is paramount, so you can rest assured that you get the best deals on gear, and that if something goes awry, Gear Focus will work hard to rectify the situation.
Additionally, if you have gear to sell, Gear Focus gives you unlimited free listings, and when an item sells, their seller fees are just 3.5 percent - among the lowest in the business.
Gear Focus is all about building a community for creatives where buying and selling gear is fair and safe. If you need a budget-friendly camera body, an additional lens, or other kinds of gear, Gear Focus is the place to look.
Learn More:
A Fully-Featured (Yet Inexpensive) Tripod
Photo by ISO Republic on Unsplash
Another incredibly expensive real estate photography piece is the tripod. You can find tripods into the thousands of dollars range, and frankly I’d rather buy myself a well-deserved vacation.
I’ve been a fan of Ikan for years because they have top-shelf products that won’t break the bank. That includes high-quality, sturdy tripods you can use for real estate photography.
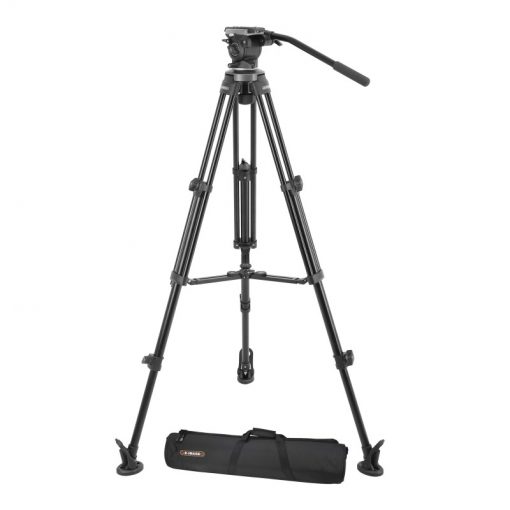
I’m a particular fan of Ikan’s professional camera video tripod which is under $200, can hold up to 8.8 lbs of equipment, and provides an ease of use you normally can’t find in a tripod under $500.
This tripod comes with separate locking mechanisms for panning and tilting, can stand anywhere from 30 inches to nearly 66 inches (which is more than enough height for real estate photography), and comes with a carrying bag I can sling under my normal camera bag.
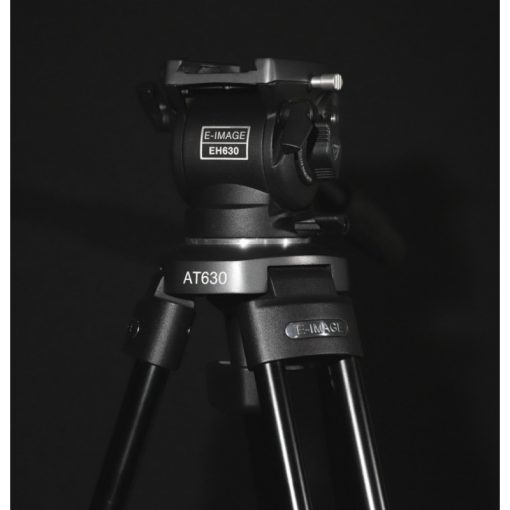
What’s more, the fluid head has a fixed counterbalance that helps balance out heavy loads, and the middle spreader gives the tripod additional stability.
The last thing you want when you’re taking photos or videos of a property is have your tripod fail you.
I’ve used Ikan tripods for years, and can attest to their build quality and features. The best part is the budget-friendly price!
Low-Cost Gimbal
photo by Gustavo Muñoz Soriano via iStock
While a tripod helps you to shoot videos of properties with your camera, sometimes you need a hand-held option for your smartphone and that’s when a gimbal comes in handy.
But, again, gimbals can be incredibly expensive for those just starting out in the real estate photography game, and I’d rather spend that money on other parts of my business.

Again, I think Ikan is one of the best manufacturers for gimbals for real estate photography on the market today.
Ikan’s FLY-X3-PLUS 3-Axis Smartphone Gimbal is just $75, features 3-axis stabilization, and supports a wide range of smartphones and GoPros.
Plus, it comes with an extra battery!
This rig is simple to set up and operate so you can start shooting straight away. And with its 3 axes of active stabilization, your videos will have a smooth, cinematic feel that entices buyers to want to learn more about the property.

photo by scyther5 via iStock
And that’s what this is all about...equipping yourself so you can tell each property’s story to get it sold.
But creating those stories doesn’t have to be expensive!
As you’ve seen here, there are many inexpensive photography accessories you can buy that will help you achieve better-looking photos without busting your budget.
Learn More:
We Recommend
Camera Gear Upgrades With a Lot of Bang for the Buck
Photo by Pedro Sandrini from Pexels
While you’re sitting at home with nothing better to do, why not start researching for your next camera gear upgrades?
Online shopping quickly passes the time, and there are so many camera gear upgrades available for under $100, so you don’t need to totally break the bank.
While the camera gear upgrades on this list are going to be a little more expensive, they’re going to save you a ton of money in the long run because once you make these camera gear upgrades, you’ll never need to make them again.
An Upgraded Camera Strap
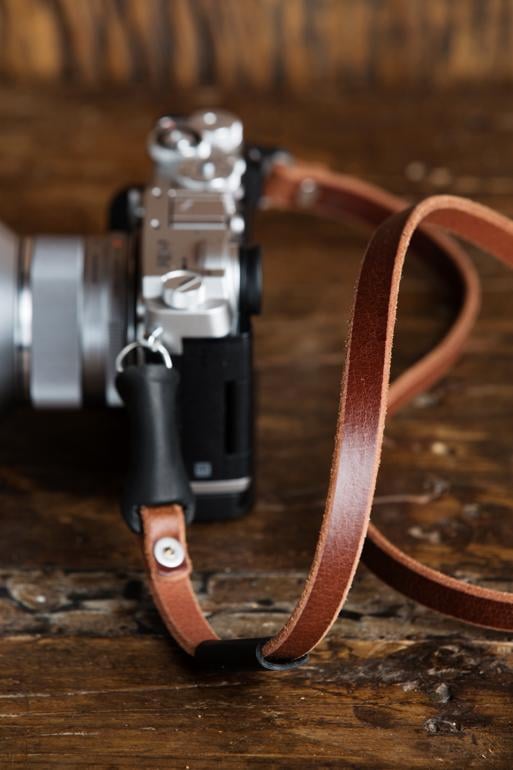
The Holdfast Classic Strap is the perfect example of how camera gear upgrades don’t need to break the bank.
This camera strap is made of high-quality leather in a variety of colors to make you look like a professional while remaining comfortable during long shoots.
You can tell that the Holdfast Classic Strap was made by a photographer from the details. All of the rings are made of stainless steel so they will never rust, and your camera is protected from the steel by an additional strip of leather to keep it protected.
My favorite part about this camera strap is that it is fully customizable. You can choose the color, the width of the leather and the length of your strap so your camera falls precisely where you want it to.
The Holdfast Classic Strap is available for just $95, which I’ll consider inexpensive camera gear because you’ll only ever need to buy it once. Holdfast features a lifetime guarantee on all of their products.
Recommended Photography Reading
- National Geographic Photo Basics: The Ultimate Beginner's Guide to Great Photography
- Photography: The Definitive Visual History
- Read This if You Want to Take Great Photographs
A Tripod Built Like a Tank
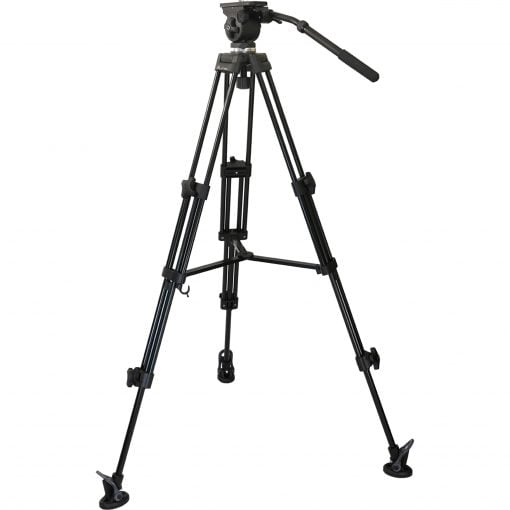
When you start to think about camera gear upgrades, you’re probably thinking about buying new lenses, new filters or additional batteries. Tripods never get any love.
But, once you try Ikan’s E-Image EK50AAM Tripod, you’ll wish you had purchased it years ago.

This tripod can carry up to 13.2 lbs of equipment while remaining fluid. It features 360-degree panning and can tilt 90-degrees down and 75-degrees up.
It has a working range of 31” to 64”, folds down to 32” and comes with foot spikes so you’ll never need to purchase them separately.
For $180, the Ikan E-Image Tripod is definitely one of the best camera upgrades you can make in 2020.
Learn More:
A Nifty Fifty Lens
Is it time for you to upgrade from your kit lens? If I had to guess, I’d say yes.
Canon EF 50mm f/1.8 STM Lens
The Canon EF 50mm f/1.8 STM lens is one of the most lightweight nifty fifty lenses on the market at just 5.5 oz.
It features an impressively low minimum focusing distance of just over 13”, and will ensure your photos are bright and sharp, with beautiful bokeh-filled backgrounds.
Plus, you can use this lens for still portraits or video because it is optimized for both.
For $125,this lens will pay for itself in no time. Besides, what’s the point in making camera gear upgrades without ensuring you have the basics.
Nikon NIKKOR Z 50mm f/1.8 S Lens
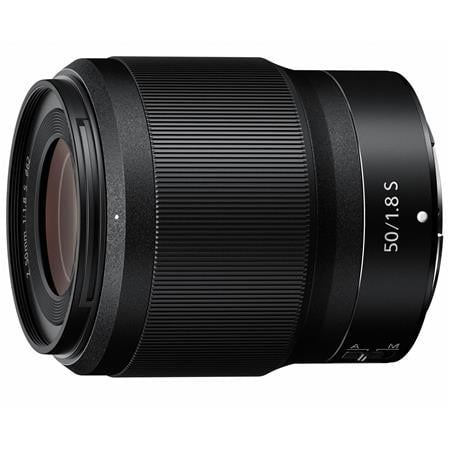
If you prefer Nikons to Canons, we have the perfect nifty fifty lens for you as well.
The Nikon NIKKOR Z 50mm f/1.8 S lens is definitely not beginner camera gear, but it is a lens you will keep for a lifetime.
It features an incredibly quiet stepping motor, to ensure your autofocus is unwavering, and a 9-blade rounded diaphragm to create incredible bokeh. This lens will also work just as well for video as it does for stills and works best when paired with Nikon cameras that are optimized for low-light shooting.
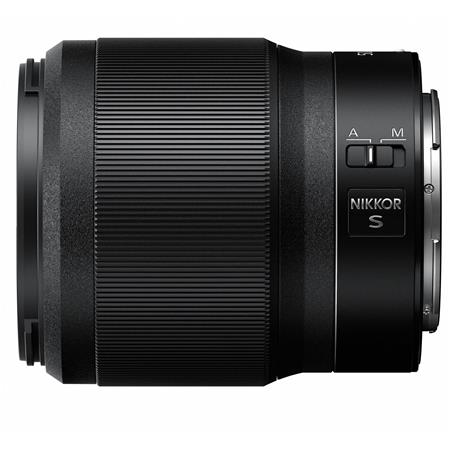
The Nikon NIKKOR Z 50mm f/1.8 S lens also features a fluorine coat which repels dust, water droplets and grease and will help you maintain the quality of the lens for decades to come.
At $600, the Nikon NIKKOR Z 50mm f/1.8 S lens isn’t inexpensive camera gear, but it is a wise investment in your future.
Learn More:
We Recommend
Common Videography Mistakes You Need to Avoid

Photo by Jakob Owens on Unsplash
I have made my fair share of filmmaking mistakes, and I’m not going to pretend like I’ll never make any more video mistakes in the future.
Videography is a journey, and it’d be a pretty boring one if you didn’t need to learn anything the whole time.
But, a bunch of these are common videography mistakes that you don’t need to make because people already have and those people can save you. So, you can read this article like a personal journal of videography mistakes I’ve made so you don’t need to!
Using Poor Sound Quality

Photo by Denisse Leon on Unsplash
Poor audio quality in videography is almost as bad as poor audio quality in podcasts. Of course, it’s something you’re willing to live with if your favorite podcaster gets way better audio quality and they don’t post enough episodes so you have to go back and start the podcast from the beginning.
But, poor audio quality turns off so many viewers (or listeners) and it’s totally preventable.
DSLRGuide gives a few easy-to-follow tips for fixing poor audio quality that you can try this week.
Not Investing in High-Quality Lighting

Lighting is essential for video as much as it is for still photography. If you want to create videos that have lasting, positive impact, invest in quality lighting gear!
Using an on-camera light will do wonders for eliminating unwanted shadows and brightening up the scene. Lights like the Ikan Onyx shown above and below provide bi-color light that’s adjustable from 3200K to 5600K so you can customize the color temperature to your needs.
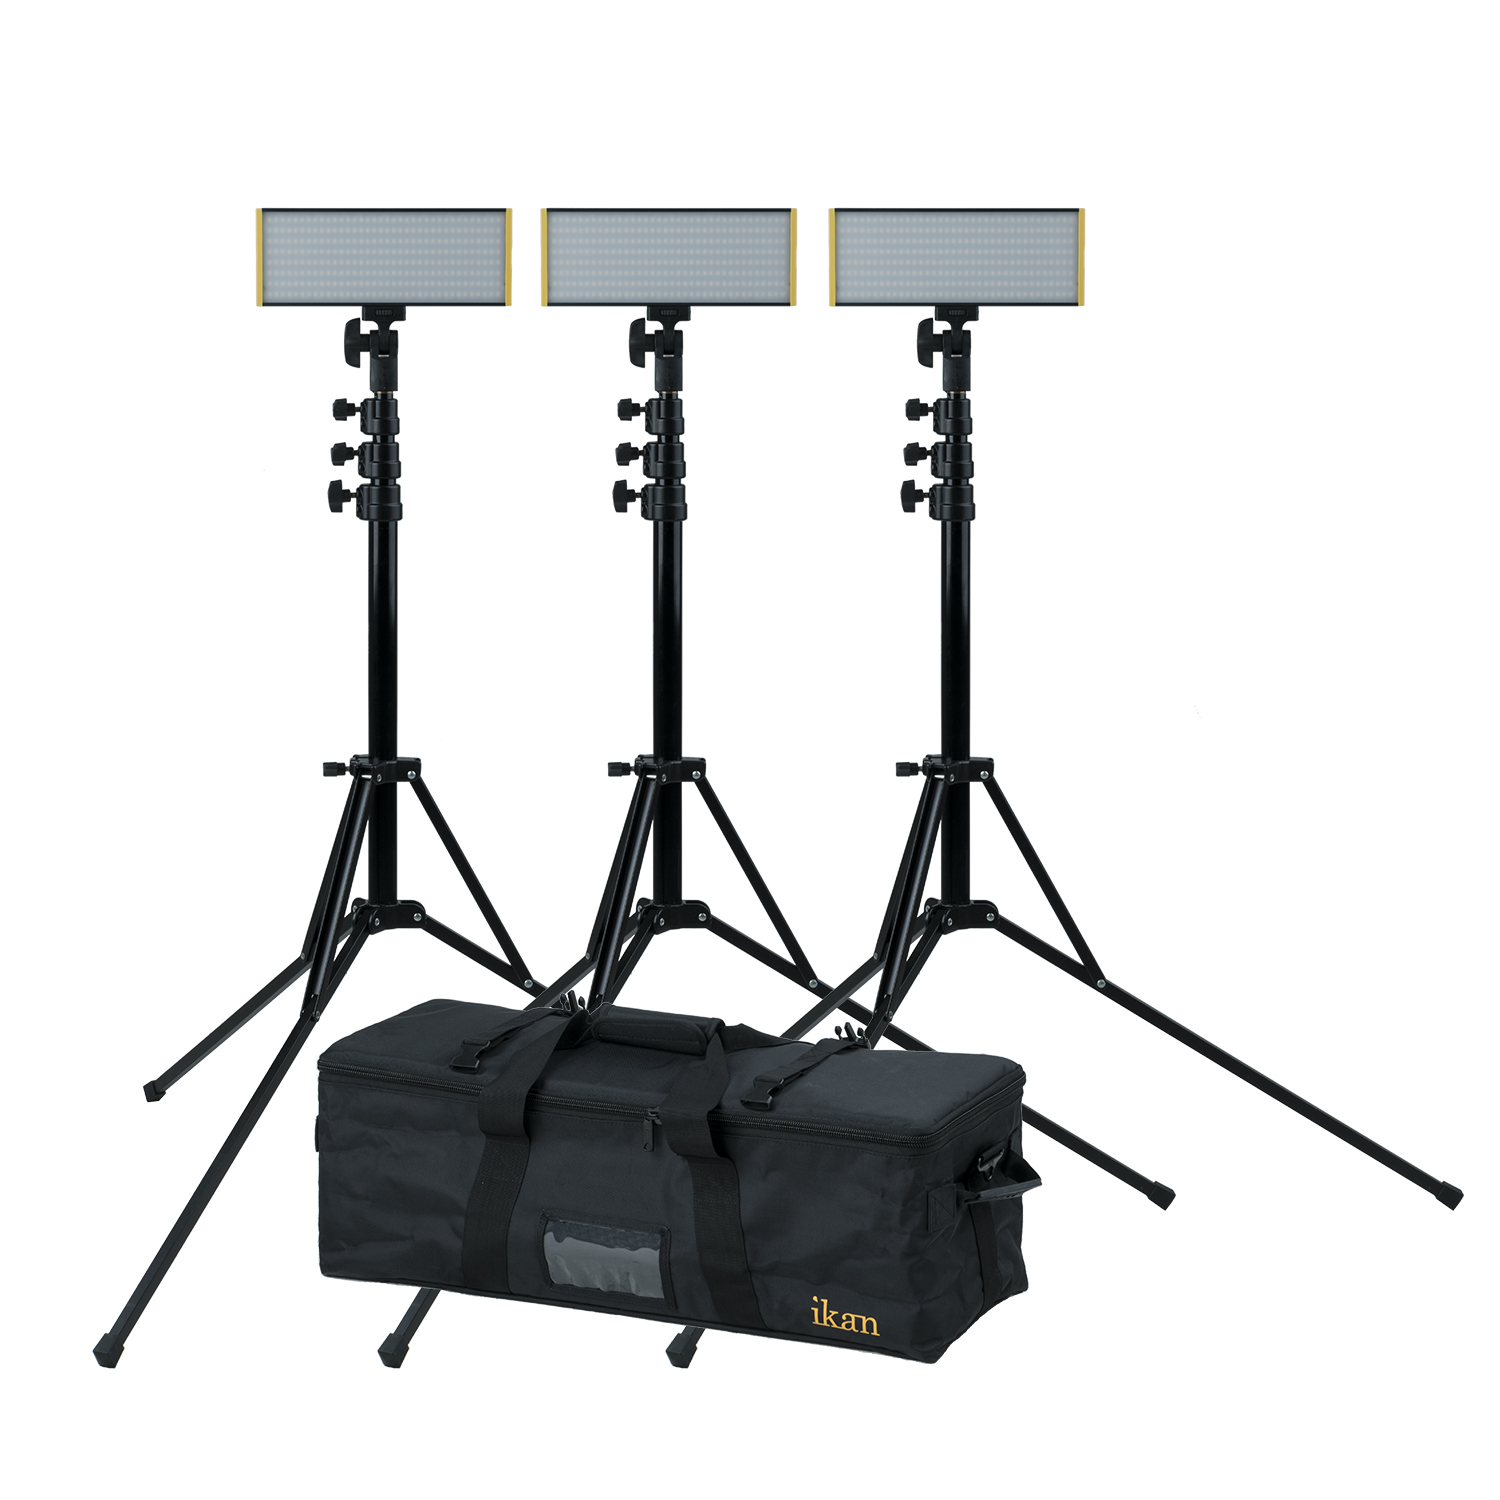
What’s more, these lights have a CRI of 95 and TLCI of 96 in both Tungsten and Daylight, so you know the quality of the light is top-notch.
Simple lighting setups with one light are available, but you can expand your lighting capabilities with a two-light setup or even a three-light setup if need be.
Don’t let poorly lit scenes ruin your video production. Invest in good lighting, and you’ll be one step closer to realizing your creative vision!
Not Focusing on Your Shot Composition

Photo by Kane Reinholdtsen on Unsplash
I don’t know why people get in the habit of only focusing on shot composition when they’re shooting pictures because shot composition is so important in video as well.
The use of dead space, or wasted space as you should start to think of it, is one of many common videography mistakes I see, which is so sad since you can fix this problem just by remembering your rule of thirds.
Another issue with videography shot composition is flat video. Stop filming yourself against walls and in corners. It makes your video look boring. Create depth in your videos by placing your subject in the context of a scene with interesting elements in the foreground, midground and background.

Quick Tip: Compose better shot sequences with the aid of an on-camera monitor like the Ikan Saga shown above. This unit features tons of tools that help you capture better footage, including a histogram, false color, peaking, clip guides, audio meters, guides, crosshairs, and grids. The bright, detailed, seven-inch screen offers a much more robust view of the scene than your camera’s LCD as well!
Lingering

Photo by Paul Dufour on Unsplash
I’m going to make an educated guess and say 90% of your shots that include people walking should have been edited out of your final project.
Lingering, or improper editing, is when you are showing uninteresting shots. These shots could be shots where no action is taking place. These shots could also be shots that you think you need for spatial consistency, which is where the long shots of people walking around comes from.
Give your viewers some credit. If your script could plausibly lead the viewer to understand where you’re headed next, you probably don’t need shots of the actors walking to that place.
Learn More:
Bad Quality Scripts

Photo by Gianandrea Villa on Unsplash
I understand the old saying, “it’s not what you say, it’s how you say it.” However, sometimes it really is what you say.
Have you ever opened up a YouTube video and the vlogger is either talking in the most disinterested monotonous voice, or is talking themselves in circles?
How long did you stay on that video? Statistics say that most viewers give a video 10 seconds to decide whether they want to continue watching that video.
Plus, this number is only getting shorter with younger generations who barely have the patience to wait out a 5 second ad before receiving their content.
As such, make sure you spend as much time on your script as you do on your editing. Also, think about taking a college class on script writing if you’ve never worked in the writing medium before. The tools and skills you gain from a little bit of script-writing education can make all the difference in the quality of your final product.
Boring Music

Photo by Alphacolor on Unsplash
In the same way as I won’t watch your video if the script sucks, I also won’t watch your video if you have awful fair use jazz music blaring.
We are almost in 2020, which means we are entering an era where there is so much free music you can use on the web. You just need to know where to find it.
Think Media gives three incredible resources for fun music in the video above. Save your viewers, and use music that doesn’t contradict the theme you are trying to convey in your video.
Learn More:
We Recommend
Composition Tips for Shooting Video

Photo by Sam McGhee on Unsplash
I was a still photographer for years before transitioning to videography, so I never figured I’d need to learn how to shoot video. I suspected it would come naturally. In some respects I was correct. In others, I was incorrect.
Sure, some tried-and-true photography tips apply to video just as well. But I didn’t realize how different some composition tips for video are from composition tips for still photography and it made me grow an entirely new respect for the niche.
Here are five composition tips for video I think are most important for beginners to hear.
Composition Tips for Video: Rule of Thirds

Photo by Sonnie Hiles on Unsplash
The rule of thirds applies to film in much the same way as still photos. Most DSLRs have guided settings that will split your screen into nine sections to help you learn to shoot video with the rule of thirds.
Basically, you want to make sure you are filling up all nine sections of the screen with some action to help you balance your shots.
Learn Online Video gives a great breakdown of the rule of thirds in videography and they also pull scenes from some of the biggest box office hits to show you how it works in practice.

Quick Tip: Using a field monitor can help you compose better video sequences and expands your creative possibilities at the same time. Rigs like the Ikan Saga S7P shown above offer a super-bright 7-inch screen for framing up your shots while also giving you the ability to preview LUTs in real time, inspect a histogram, and review clip guides. This unit also has waveform, RGB parade, vectorscope, false color, peaking, and audiometer capabilities, just to name a few. It 1:1 pixel mapping feature lets you move through the entire image and see each section of the shot at up to 4K quality. If you want to elevate the quality of your videos, using a monitor like this is an excellent step!
Composition Tips for Video: Create Proper Headroom

Photo by Omar Lopez on Unsplash
Okay, before you start quoting different movie scenes that are incredibly famous and don’t follow this rule, the headspace rule can be broken creatively on purpose, but generally should be followed.
Headspace is just the amount of room an actor has over their head in the shot. It’s especially important for documentary makers to focus on headspace, because otherwise the shot looks cramped and uncomfortable.
Lights Film School walks you through how to properly use headspace in this video, as well as how to remember to focus on it while trying to focus on other rules as well.
Learn More:
Composition Tips for Video: Keep the 180 Degree Line in Mind
You never want to cross the 180 degree line in a video, because if you do then the continuity of the shot will be ruined because the actors will suddenly be facing the incorrect way.
This can be difficult to understand, so I’ll let Studio Binder show you what the 180 degree line is and how disorienting it can be for the viewer if it gets crossed by a videographer.

Quick Tip: One of the most useful tools in a videographer’s toolkit for creating interesting video compositions is a camera slider. Sliders like the E-Image ES50 shown above offer the capability of getting smooth tracking sequences that add visual interest to your final video. This slider has 29 inches of range, which is perfect for videographers that want to incorporate tracking motion without lugging around a big, heavy slider. The 16-layer carbon fiber frame and CNC machined components cut down weight without sacrificing durability, so this is a slider that will work for you for years and years to come. It can accommodate up to 22 pounds of gear, too, so as your videography kit grows, this slider can grow with you!
Composition Tips for Video: The Foreground and Background are Important Too

Photo by Ole Witt on Unsplash
In much the same way as with still photography, there are simple composition tips for video that will make your shot immensely more interesting immediately.
One of these rules is paying attention to the entire shot, which includes the objects in front of the actor and the background they’re acting in front of.
Jonathan Hughes has an incredible archive of filmmaking tips, but his video on depth of field is especially insightful.
Composition Tips for Video: Break the Rules

Photo by Jack Sloop on Unsplash
My favorite part of photography is learning how to break the rules. Life is incredibly boring if you follow all of the rules all of the time and the same can be said of videography.
In fact, I would argue the directors behind most movies that win awards and are generally considered some of humanity’s best work broke many rules in those movies.
CineFix pretty much proves my point in this video. You need to learn how to find a balance in rule breaking, because if you break too many rules your film will feel chaotic and disorganized, but if you don’t break any, your film could feel like a low-budget film.
Learn More:
Bonus Tip: Get Equipped With Proper Lighting

You can compose beautiful scenes all you want, but without the proper lighting, your video won't have the impact and visual appeal it should.
One of my favorite lights is the PilotFly AtomCube RX1 because it's small enough to fit in your pocket, but powerful enough and feature-rich to help you get that high-quality video you strive for.
It’s hard to believe how far photography lighting has come, even in just the last few years. Yet, here we are with lights like this one that slide into your pocket, yet provide you with studio-quality lighting on the fly.
You can use this as a key light for portraits, as a video light for capturing video footage, as an accent light in the background of your photos and videos, and more. With a CRI of 95+ and a TLCI of 97, you know you’re getting excellent quality lighting for your projects.
PilotFly has incorporated 12 common lighting options into the light. This gives you quick and easy access to lighting schemes and plenty of adjustments to get the lighting just right. With a three-hour battery life, you can tackle photoshoot after photoshoot, too.
This light is completely dimmable and you can adjust the color saturation, color temperature, and brightness, too. Wrapped in an all-aluminum frame, these lights are supremely light but incredibly durable for years and years of use.

But the most innovative feature of the PilotFly AtomCube is its ability to work with other lights.
Using Bluetooth, you can connect up to 255 of these lights together. With that many lights - which are calibrated for consistent results from one light to the next - there is virtually no end to what you can do lighting-wise.
You can also mount multiple lights together using Magic Cubes and control everything in real-time via the AtomCube smartphone app. That’s a huge bonus for when you’re multitasking during a photo or video shoot.
It really doesn’t get much easier to get high-quality lighting for your photography and video projects. With products like the AtomCube, photography and videography definitely got a little easier in 2019!
Learn more about the AtomCube RX1 RGBCW LED Video Light
We Recommend
Essential Camera Accessories for Vlogging
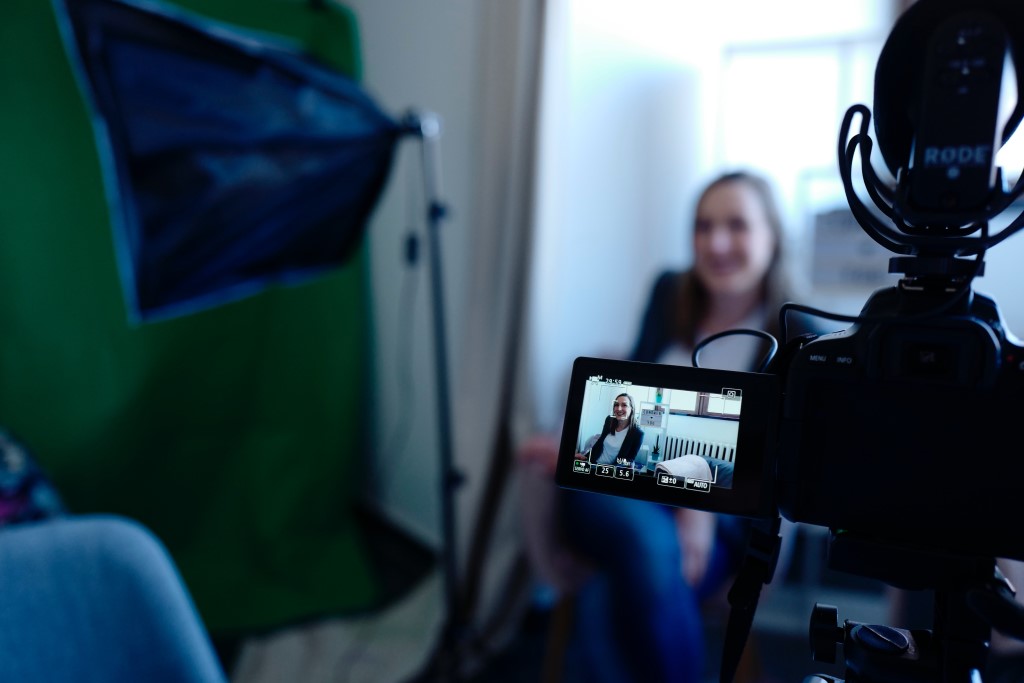
Photo by CoWomen on Unsplash
When I first started foraying into vlogging, I was overwhelmed with the amount of camera accessories for vlogging there is on the market.
How was I supposed to know which products worked and worked well on a budget?
Thankfully, I had mentors in the industry to walk me through all of these vlogging accessories (and mentors willing to tell me when I was going overboard on a project). As it turned out, I was going way overboard.
In an effort to prevent you from spending incredible amounts of money on vlogging accessories you really don’t need, I’m going to break down the bare minimum equipment you can get away with as a beginner vlogger.
Lighting
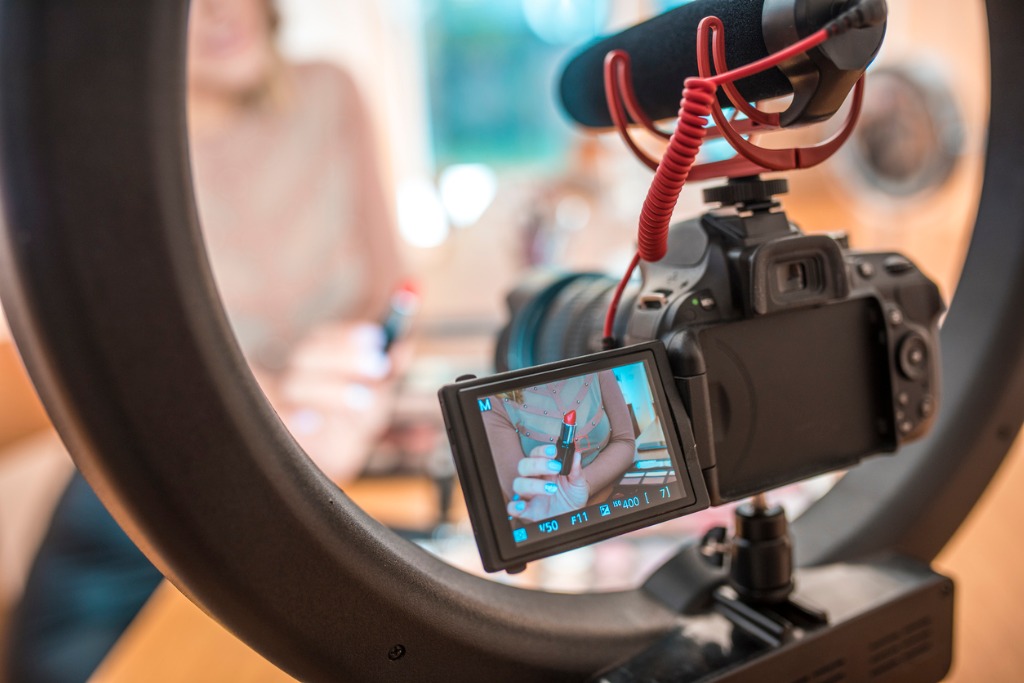
photo by AzmanL via iStock
People ask me, “what do you need for vlogging,” all the time and my answer is the same across the board: lighting. If you aren’t worrying about your lighting, you’re probably doing it wrong.
But, here’s the thing, you don’t need fancy lighting you just need good lighting that will properly frame you or your subject as the center of attention. I do not recommend relying on natural lighting for one reason: weather and humans are unpredictable.
The chances that it’s going to be overcast when you need to shoot an episode are high, as are the chances that your schedule could get thrown off and you may need to shoot at night.
So, one of the best accessories for vlogging are natural-looking light kits that are inexpensive.
That’s where the Oryon 18” Bi-Color Ring Light shown above comes in…
This light offers the perfect amount of illumination for your vlog (and creates a beautiful catch light, too!).
It has a large opening in the middle to accommodate a range of camera sizes while the rear control knobs give you quick access to change the brightness and color of the light.
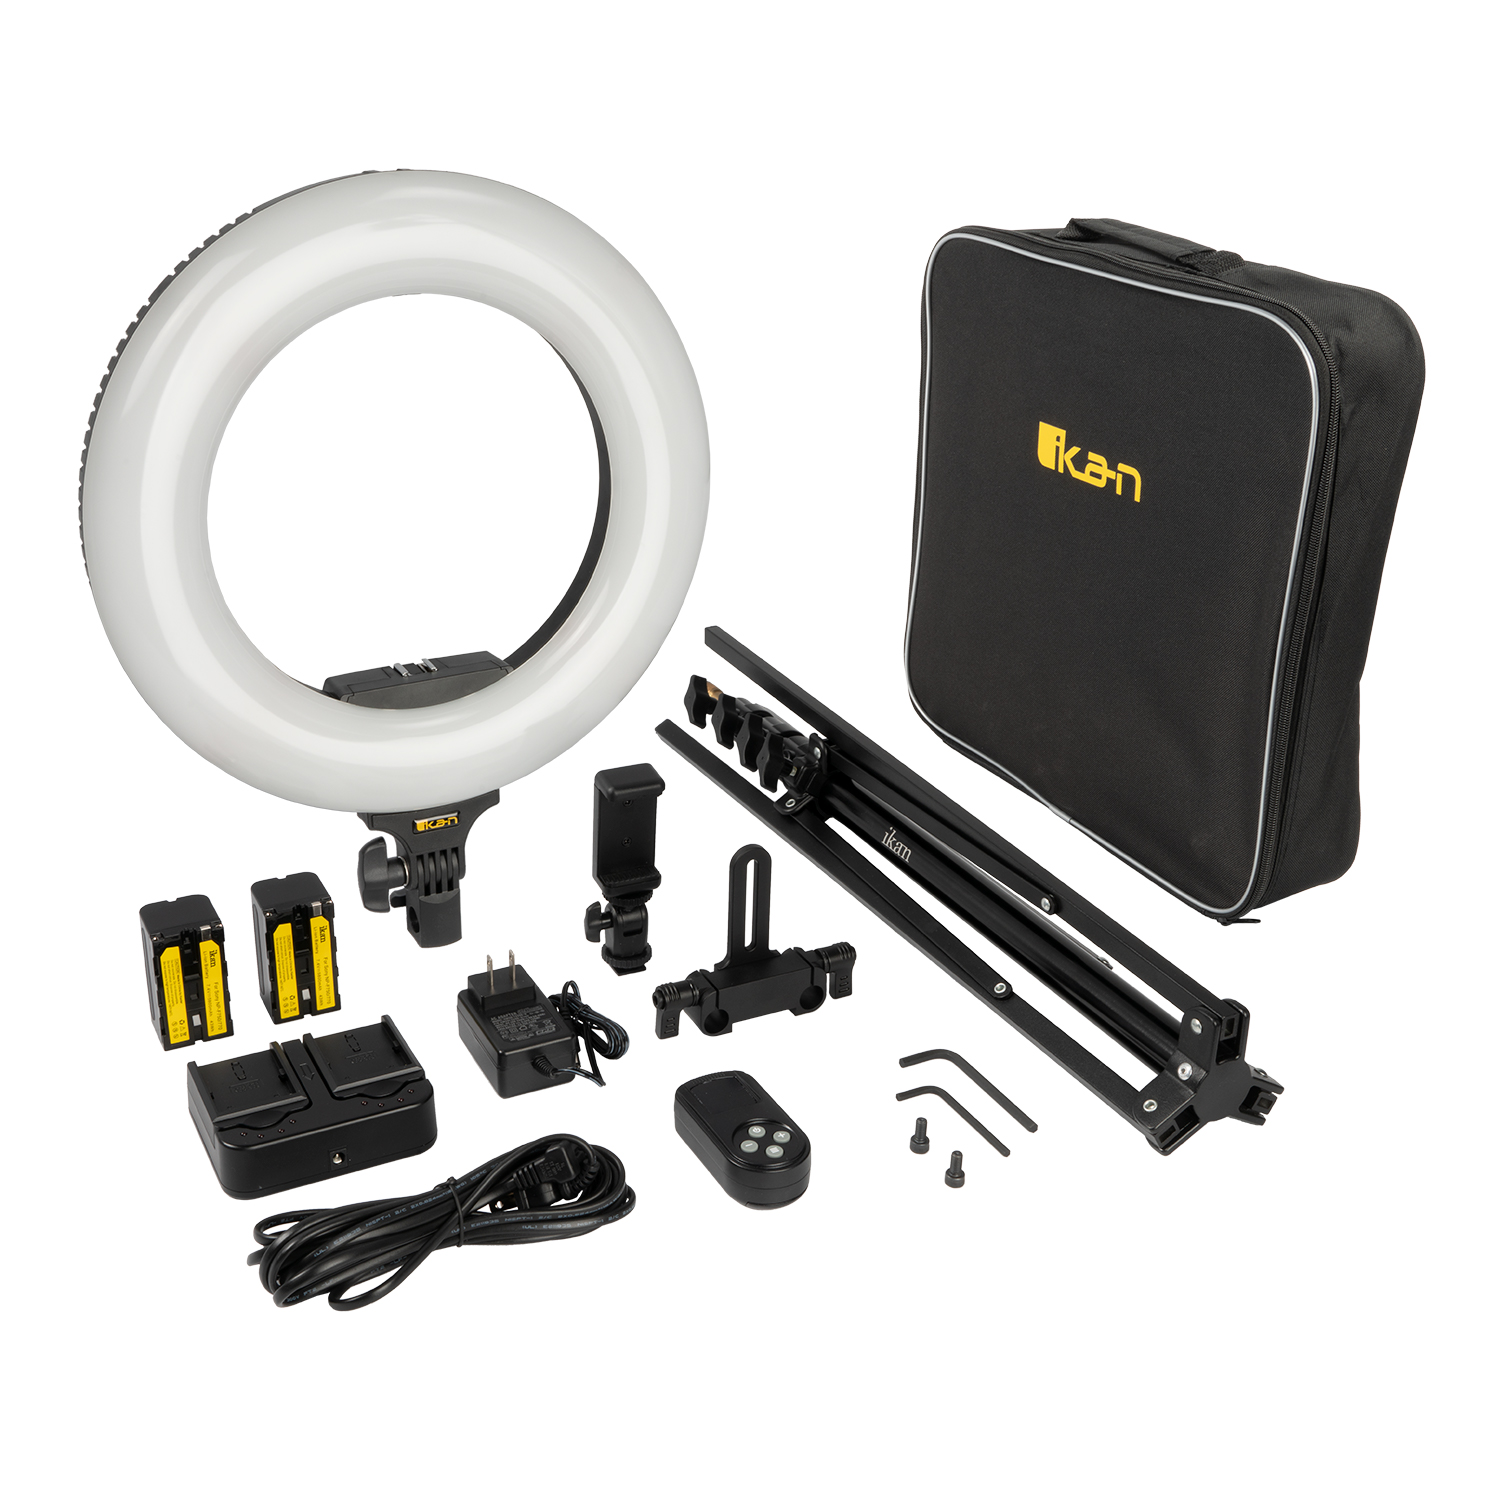
There are multiple mounts on the light for customized positioning, while the soft diffused LEDs emit bright, clean light that envelops you as you film.
And since this is a kit, it comes with multiple goodies, like a heavy-duty, yet compact light stand, two batteries, a dual battery charger, and a carrying case.
If you need fewer accessories, you can get a smaller kit with the light, a smartphone adapter, and a remote, and save a little money too!
Just like with photography, videography depends on good lighting. And when you’re vlogging, a ring light is a great option for getting that high-quality light you need.
Tripod

photo by RapidEye via iStock
If you’ve ever piled your camera on top of a stack of books ever so precariously, then you’re suffering from needing to buy a tripod syndrome.
I know. I’ve been there, but tripods allow you to fully express your creativity through your vlogging. They also keep your camera steady and out of the reach of any nuisances (like animals or kids).
You’ll need to purchase different tripods depending upon what type of vlogging you’re planning on doing. For instance, if you’re a travel vlogger, you might want a tripod that folds up and is light, or if you’re only planning on vlogging out of your home or studio, you might want a mini-tripod that you can stick on your desk and forget about.
Gimbal

photo by Mumemories via iStock
Your vlogging accessories kit also isn’t complete without a gimbal. Gimbals allow you to rotate your camera on multiple axes. They basically allow you to get the same shot from 360 degrees and are used frequently in travel vlogging.
While you don’t necessarily need an expensive gimbal if you’re just starting your vlogging journey, I purchased my favorite gimbal about a year into my vlogging journey and I’ll never go back.
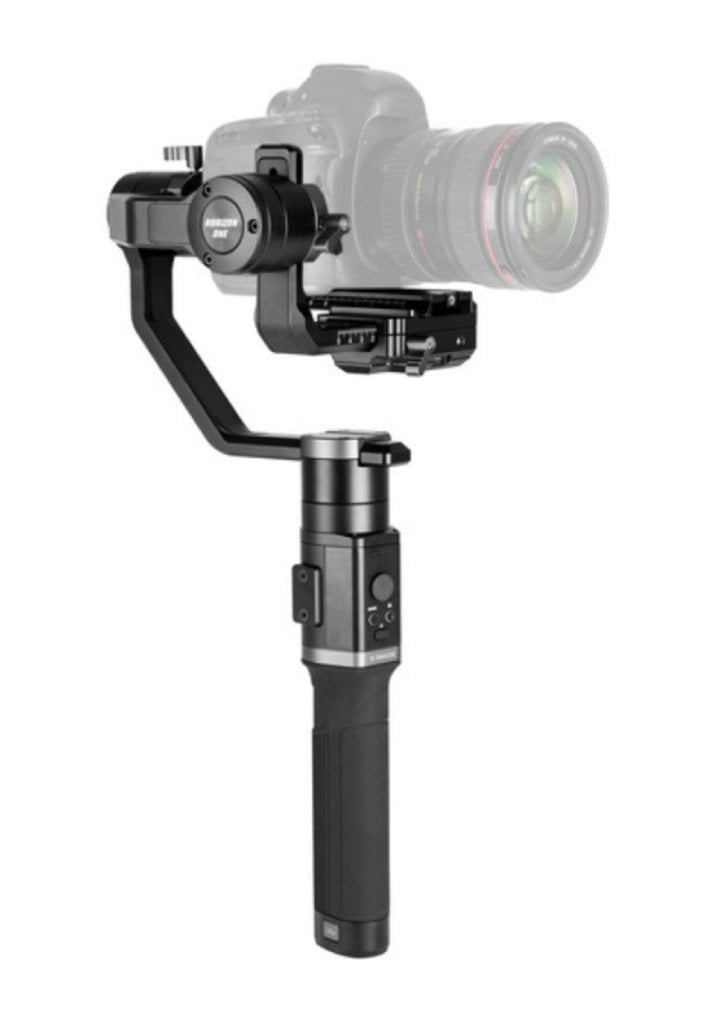
The E-Image Horizon One gimbal is incredible because it features a universal quick release plate, it allows you to shoot full 360 degree shots on 3 different axes, and it carries up to 8 lbs (which is more than enough for almost any vlogger).
In the video above by Ikan International, you can see how valuable a good, solid gimbal can be for vlogging and other videography pursuits.
You can purchase the E-Image Horizon on B&H for $400.
Learn More:
Camera Cage
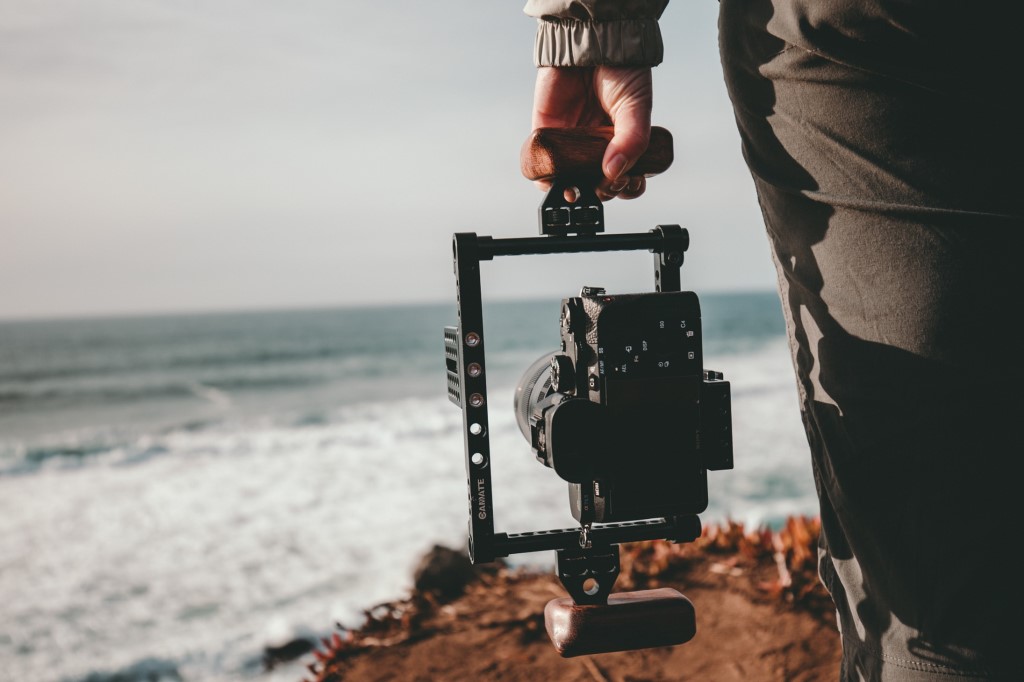
Photo by KAL VISUALS on Unsplash
As you get more and more into vlogging and have more and more of the needed accessories for upping the production value of your videos, you’ll find that having a camera cage is a Godsend.
A camera cage is exactly what it sounds like - it’s a metal cage that surrounds the camera body and gives you multiple points of attachment for accessories like microphones, lights, monitors, and so forth.
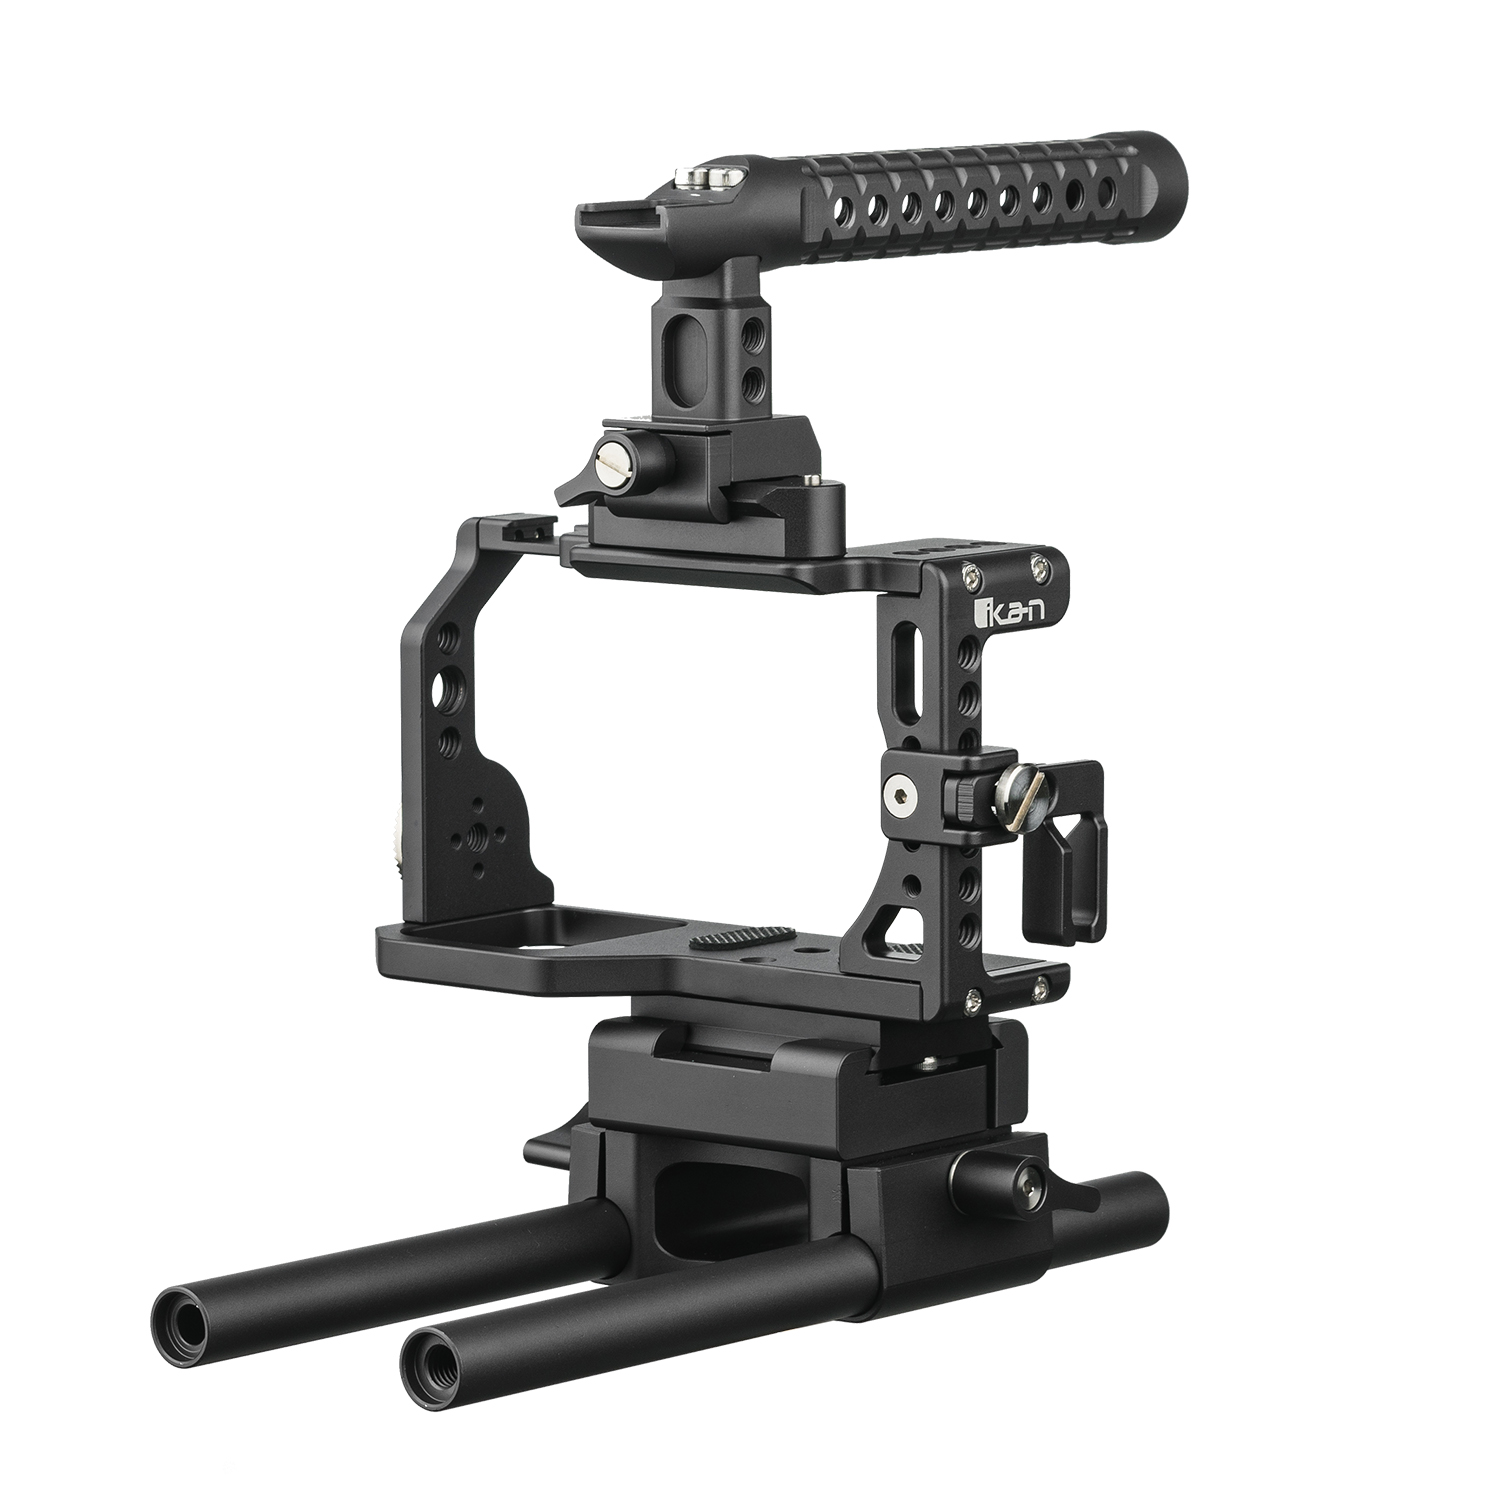
The Ikan Stratus Cage for the Sony a6500, 6400, a6300, and a6000 shown above also gives you a top handle, rods, a base frame, and a cable clamp to keep all the accessory cables out of your way.
Cages like this are form-fitted to your camera, so you have to be sure to select a cage that was designed for your specific camera body. With cutouts for the battery door and memory card slot, a perfect fit is a must!
Once you have your camera mounted to the cage, you can go about adding the accessories you need to create vlogs with high production value.
Cages aren’t necessarily cheap. However, they are definitely worth the investment because they expand the capabilities of video production so much.
Microphone
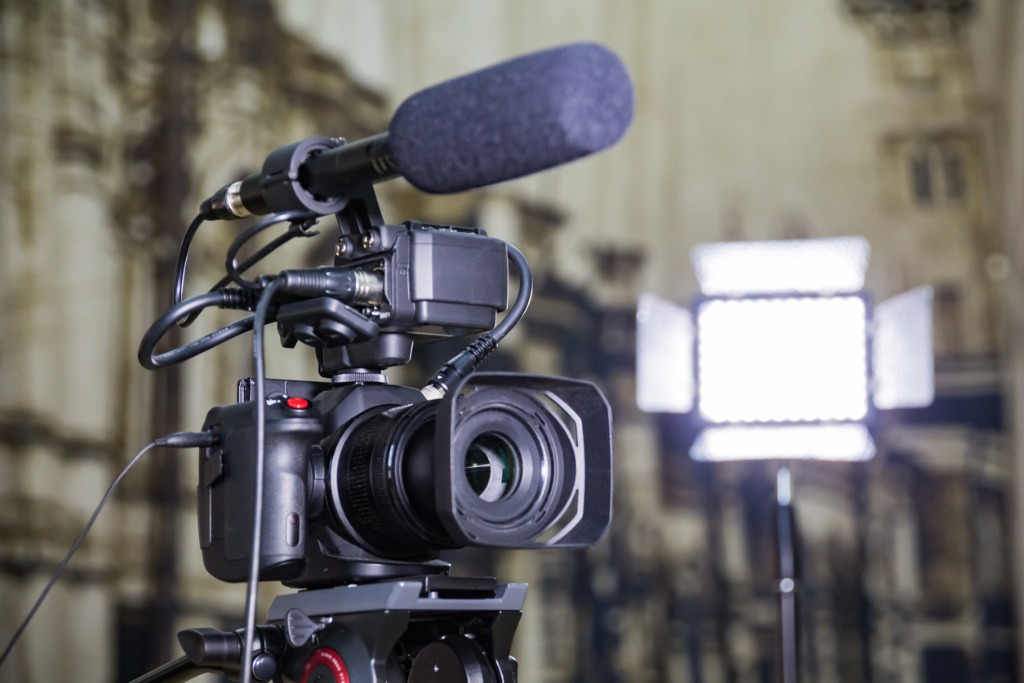
photo by lapandr via iStock
This is the section of vlogging accessories where I feel tons of people get ripped off because there are so many types of microphones, beginner vloggers think you need one of each.
I think there are four main types of microphones people should consider adding to their vlogging accessories kit: the lavalier microphone, the shotgun microphone, the USB microphone, and the portable audio recorder.
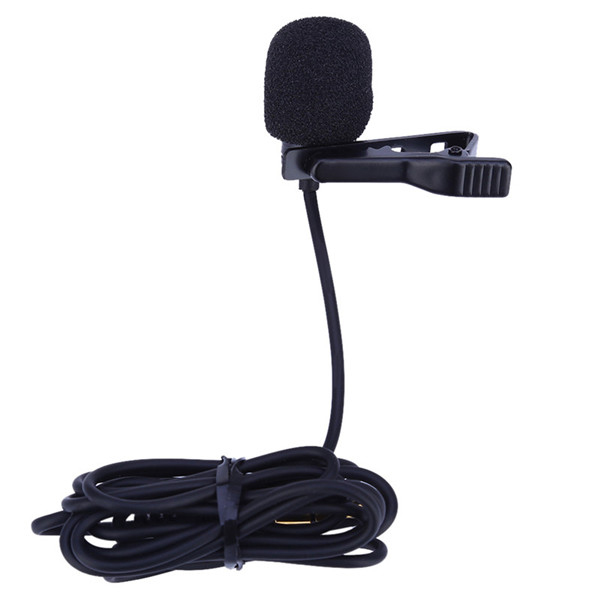
The lavalier microphone, also recognized as the broadcast journalism microphone, allows you to easily interview people without needing to take a ton of time to check your audio levels because the lavalier gets strapped directly on their chest.
If you’re going to be interviewing anyone in your vlogging journey, definitely invest in a lavalier microphone (especially since you can get the one pictured above on B&H for a whopping $15).
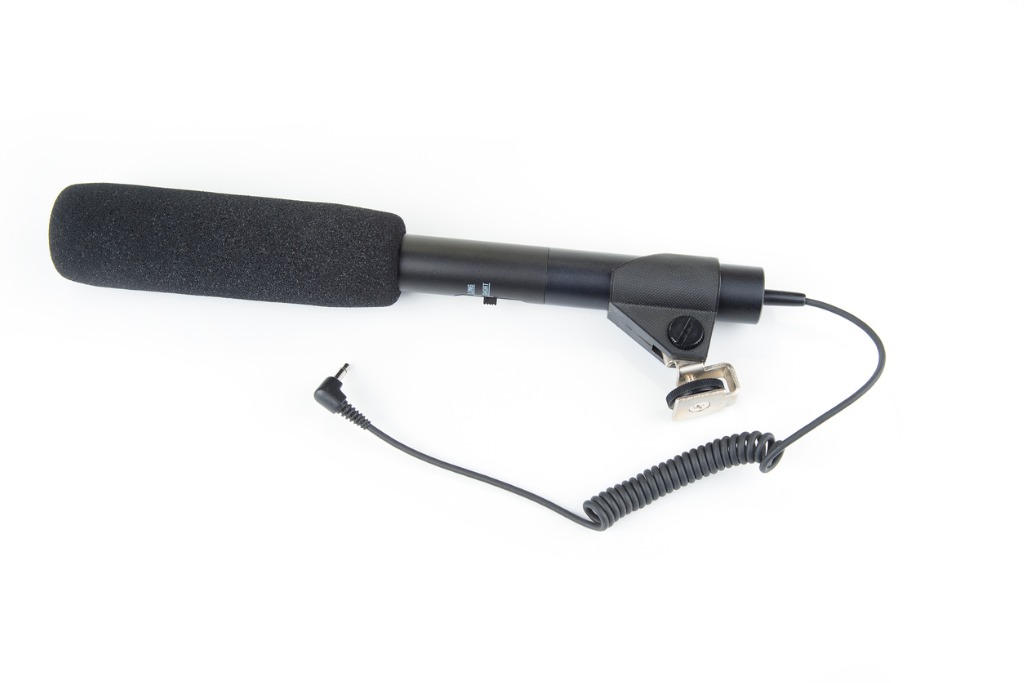
photo by undefined undefined via iStock
The next type of microphone, the shotgun microphone, can either be placed a few feet above you or it can be placed directly on your camera. Shotgun microphones are great at only picking up audio from the area where they are pointed at.
The third microphone type, the USB microphone, is perfect for voice-over work for transitions in your vlogs. Just sit one on your desk in your studio and get to work!
Finally, the portable audio recorder allows you to replace the audio from your camera. It does this by separately recording your audio. You can then sync this audio with your video with your editing software. The ability to record audio separately from your camera can come in handy in many situations, including when your camera is a good distance away from the subject.
Editing Software

Photo by Wahid Khene on Unsplash
You’re not going to get very far in your vlogging career if you don’t own editing software, but figuring out which editing software to purchase can be difficult.
Adobe’s line-up of products is universally recognized as among the best editing software, so if you can afford to splurge on Adobe Premiere Pro, you should.
But, if you don’t want to spend money on a monthly subscription for any of Adobe’s lineup, there are still options for you.
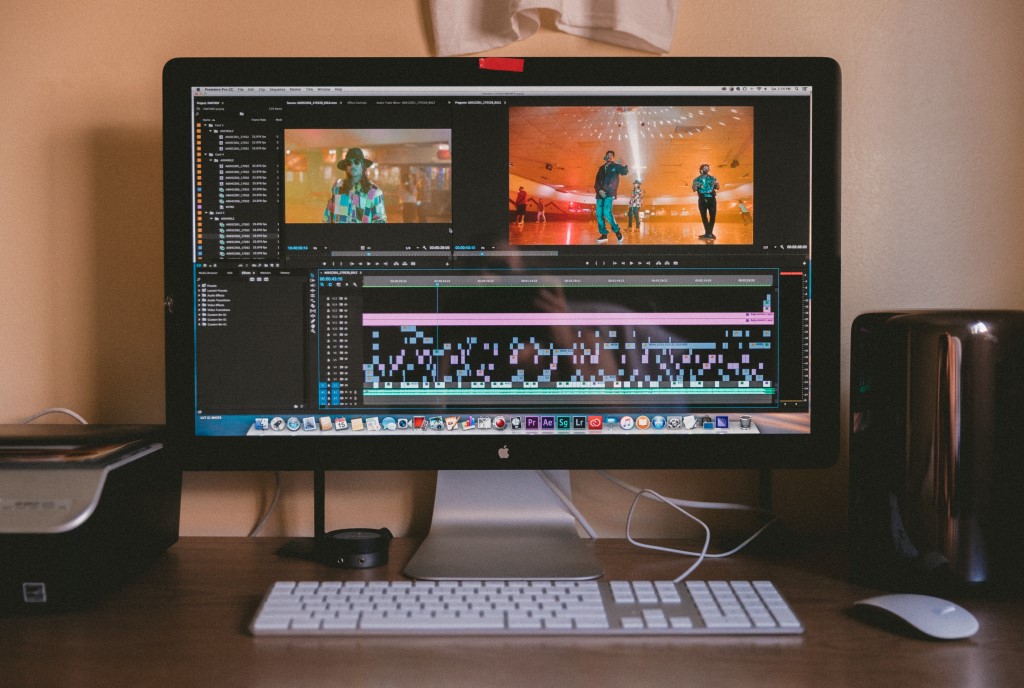
Photo by Jakob Owens on Unsplash
Take a look at this article on the top 10 Adobe Premiere alternatives for ideas in case Adobe’s products aren’t in your price range.
When it comes down to it, there are just a few must-haves for vlogging if you want to create the best content (and who doesn’t want to do that?!).
If you invest smartly in the accessories outlined here, you’ll have a great setup for producing engaging videos that look good, sound good, and engage viewers!
Learn More:
We Recommend
Get the Most Out of Your Shotgun Mic With These Top Tips
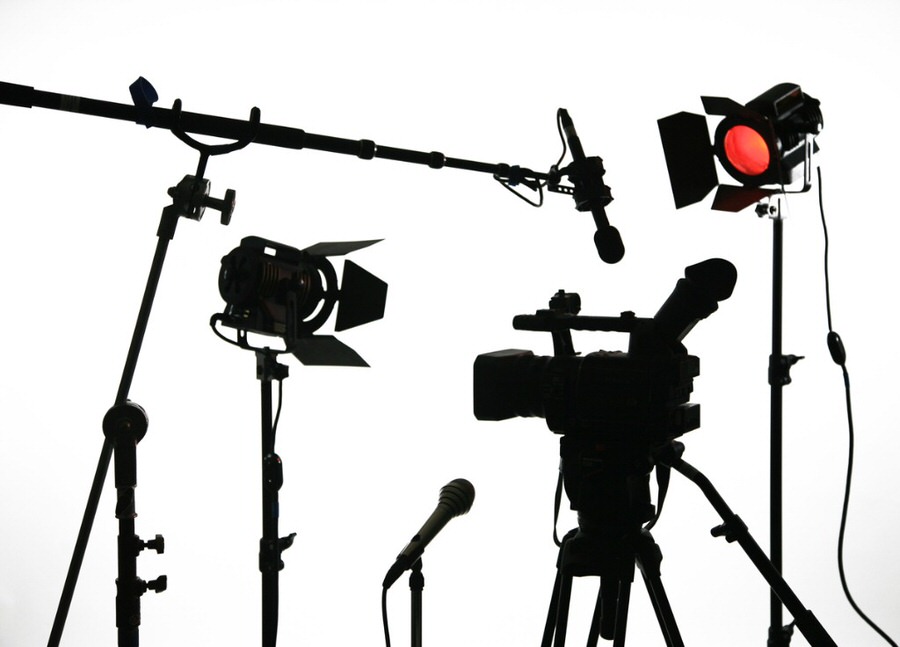
photo bydpmike via iStock
If you are among the many serious photographers who have decided to step into video with our fantastic new cameras and their awesome video capability, you have likely already learned how to use a shotgun mic. But perhaps you want to improve your knowledge of how to get good audio with a shotgun mic, really good audio.
For still photographers entering video, how to get good audio is an important skill to have. Our shotgun mic tutorial will give you some ideas and techniques for capturing high quality audio as you record video. Practicing these shotgun mic tips will improve your videos and make them more viewable.
The Shotgun Mic
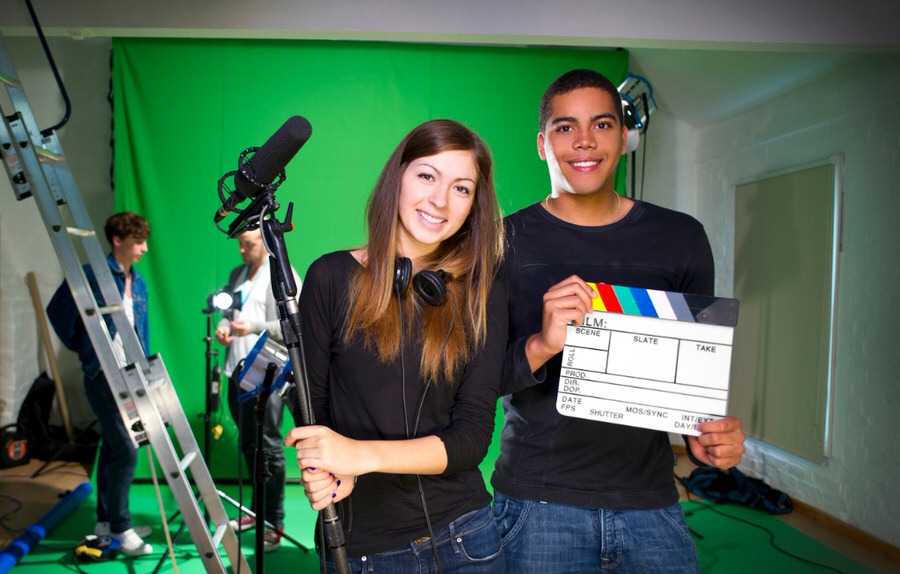
photo bysturti via iStock
Think about your audio in the same way you already view capturing images. In order to get higher quality images, we use the highest quality lenses and techniques to maximize their potential.
The same thoughts apply to the audio audio component of your videos. Just as you don’t want to limit your fine lenses by using lower quality filters, or just like you have more to work with when using external flash or other lighting versus the camera built in flash, supplementing or replacing the built in mic of our cameras is a good idea for recording superior audio.
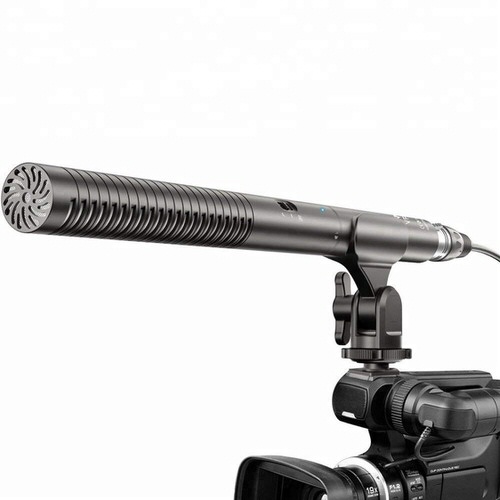
The newest cameras do have very nice mics, but they are limited. A shotgun mic of very high quality such as the Comica CVM-VP2 shotgun mic from Ikan will provide extremely high quality audio. Ikan is a great source for high quality video accessories. Since they design and make the items they sell, you can find very high quality equipment for reasonable prices.
The advantages of using a high end shotgun mic like the Comica CVM-VP2 is that they have excellent signal-to-noise ratio, are electromagnetically shielded for minimizing interference, and have multiple power options, all of which result in superior sound compared to a built in microphone.
Adjust the Levels
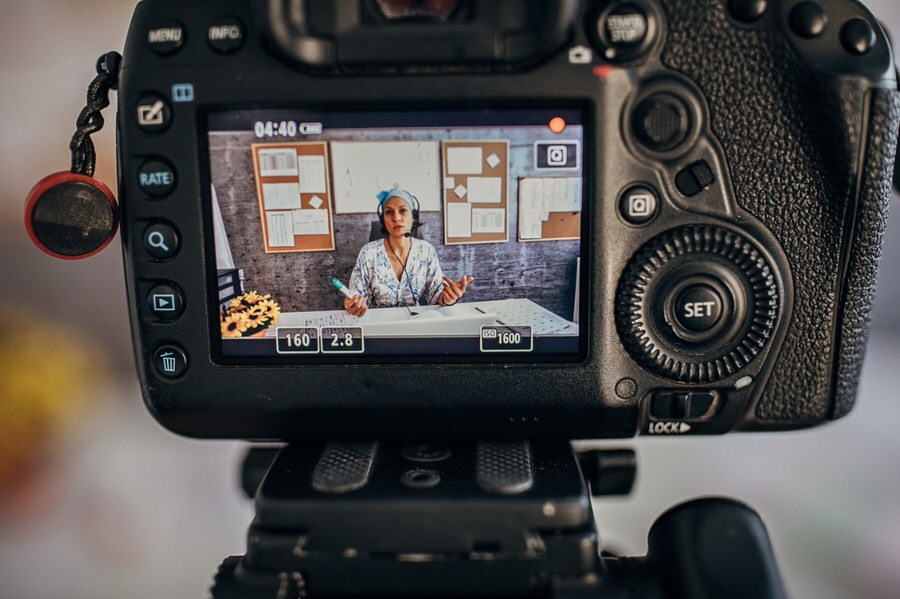
photo bySouth_agency via iStock
Let’s again compare mics and good audio to the photographic terms and techniques we know so well. When adjusting exposure, we are careful about blocking up the shadows, blowing out the highlights, and the contrast.
Well, those same principles apply to recording audio. The shotgun mic will have a range of frequency that it will capture. Sounds below or above that range won’t sound quite right. Knowing our equipment’s specs will allow us to change audio recording levels and parameters that will work best for the situation.
Many of the newest cameras have these controls in the menu functions accessed from the viewscreen. It’s important to be familiar with all of the settings before getting into the field since they are not as intuitive as photographic controls. Which segues into the next point.
Use Headphones

photo bylapandr via iStock
Think again of exposing an image photographically. You can see what the image looks like in preview and there is an option of viewing the histogram. Using headphones is much like that. Your camera may have a meter showing audio levels but there’s nothing like having instant feedback of hearing it for yourself.
The camera or other recording device for audio should have a jack that produces the feed actually being recorded. This gives you the sound that is going to be on the file, that is adjusted, attenuated, and flavored by the camera’s audio processor.
If possible, use a style of headphones that covers the entire ear and blocks out most of the ambient noise around you so you can concentrate on the audio feed being recorded. When you use headphones and a shotgun mic, you can really tell how important it is to put the mic in the proper place.
Learn More:
- Shotgun Mic or Lavalier Mic: Which Is Right for You?
- How To Get Top-Quality Audio With a Shotgun Mic
- What is a Camera Cage?
Position Matters
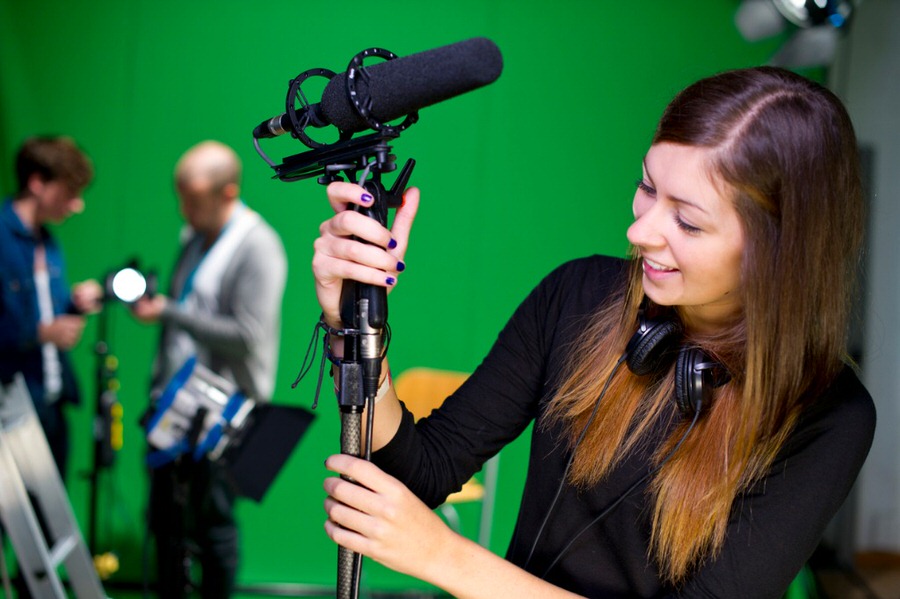
photo bysturti via iStock
A shotgun mic has a narrow pattern compared to the built in mic of the camera. Compared to visual photography again, it’s like using a telephoto lens for your audio. You can narrow what is being “seen” by the shotgun mic.
Sometimes this may mean that you should remove the shotgun mic from the camera or camera cage. A mic stand, a clamp, or a boom can accomplish that positioning for you. Which means also that the headphones from the above shotgun mic tips become vitally important.
The closer the shotgun mic is to the subject being recorded, the better the audio will be most of the time. The sound is fuller and will have a wider tonal range than sound being picked from very far away, even if the focus of the shotgun mic is extremely narrow.
It’s Baffling

photo byfizkes via iStock
Reflected sound can cause audio degradation much like light reflections in an image can cause contrast issues. A shotgun mic automatically helps a lot with this by narrowing the area that is being recorded.
If you are making a fulltime studio area for video productions, investing in some baffling for the walls is a very helpful step. If unable to baffle walls, simply changing the furniture used as props can also make a difference. A big table reflects a lot of sound, a soft couch baffles.
Using a photo backdrop on a flat wall will reduce audio reflections, too. Since you’re already using backgrounds for a lot of the videography and photography done in a studio, this is an added benefit to that. And if you’re on location and can hang background material on a large wall, even one not in the visual part of the recording, it’s good practice to do so when allowed.
Process for Sound
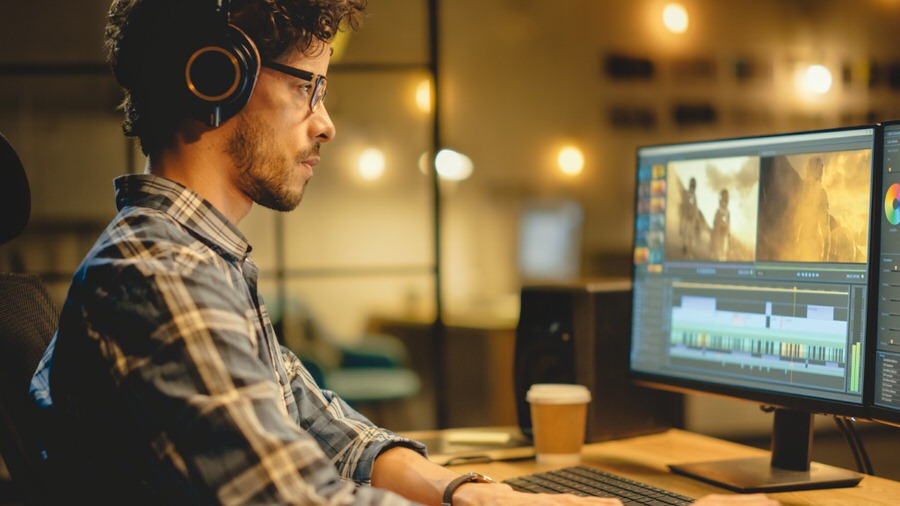
photo bygorodenkoff via iStock
Processing the audio file recorded in your video is every bit as important as editing for visual content. Many times, the same program can be used. This is another place to make use of those high quality headphones listed in the earlier shotgun mic tips.
The shotgun mic has given you a file with great sound but it’s still similar to a RAW photo image file until it’s processed and edited. This step also gives you the option for adding or enhancing audio for the final video.
You’re In Control
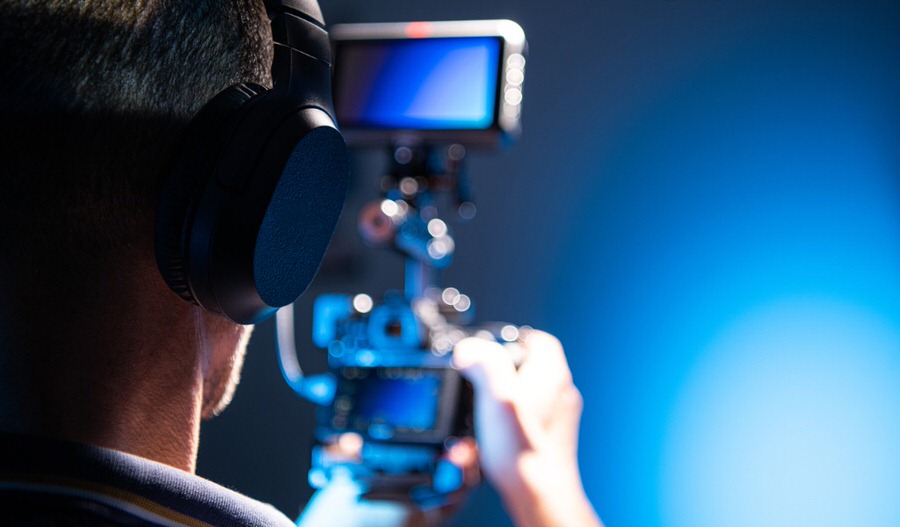
photo bywelcomia via iStock
The reason we compared audio for video recording to familiar photographic processes we know like the back of our hand is to emphasize that the camera operator for audio/video recording can be completely in control. Try out the tips in this shotgun mic tutorial to enhance the audio in your final productions.
Learn More:
We Recommend
Gifts for Photographers Under $1,000 - 2021 Edition

Photo by Eugene_EM via iStock
The holiday shopping season is in full swing, and you know what that means...
It's time to discuss more great gifts for photographers, this time with a budget of $1,000.
While a lot of photography gear is expensive, there are all kinds of gear options for photographers with a price tag under $1,000.
From tripods to cameras, photography lighting to gimbals, the following list has it all!
Gifts for Photographers Under $1,000: Colorado Tripod Company Centennial Tripod
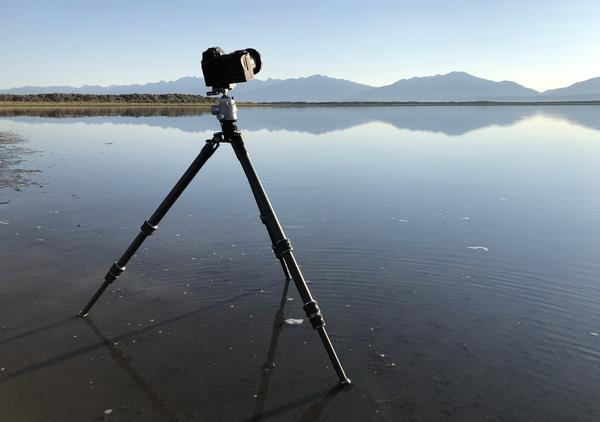
Every photographer needs a great tripod, and for that I recommend the Colorado Tripod Company Centennial Tripod.
One look at this thing and you know that it's been beautifully designed and built to last a lifetime.
The new 4-series version of this tripod extends to a height of 70 inches yet weighs just 4.9 lbs. and collapses down to 24 inches, making it a highly portable option for all kinds of photographers.
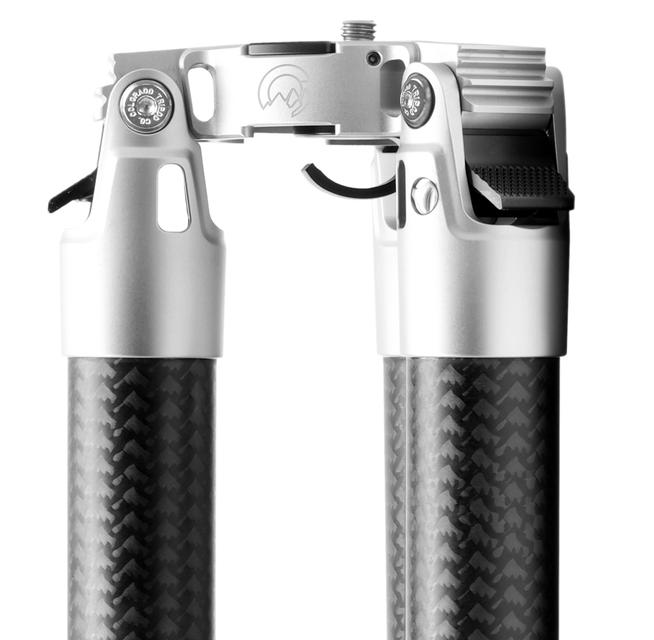
Part of what makes this tripod so lightweight is the Japanese carbon fiber legs that provide the ultimate in rigid support for your camera gear without adding unnecessary weight.
The legs are also waterproof, so if the person you're shopping for enjoys landscape photography that involves water, they can be confident in setting up this tripod at the beach or in a stream without worry of what the water will do to the tripod's legs.
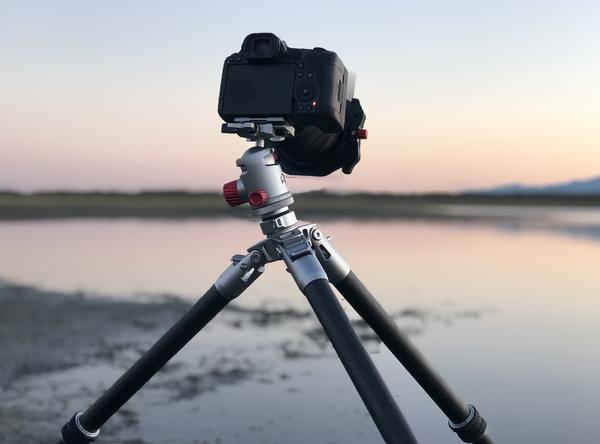
This tripod is easy to set up, too...
The quarter-turn leg locks mean you can get the tripod in place and locked down in a flash, that way you don't miss any shots.
I like the fact that the Centennial Tripod comes in gunmetal or black finishes as well.
I've used various Colorado Tripod Company products over the years, and they have always impressed. This tripod is no different, and I'm sure the lucky photographer on your list would find it to be just as impressive!
Besides, at just $499, this tripod is way under budget!
Learn more about the Colorado Tripod Company Centennial Tripod
Gifts for Photographers Under $1,000: Rode Microphones RODECaster Pro Integrated Podcast Production Studio
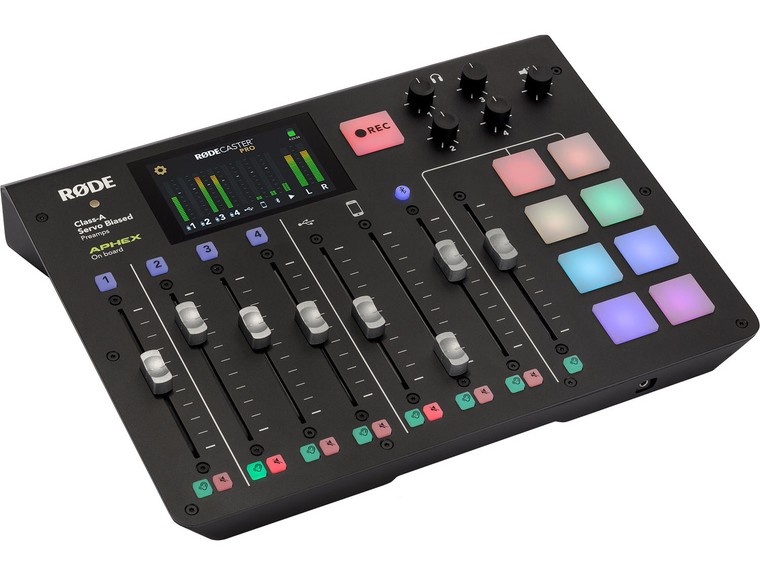
If the photographer on your holiday shopping list has their sights set on expanding their creative footprint into podcasting, then the RODECaster Pro should be on your radar as a perfect gift idea.
This gadget is the first fully integrated podcast production studio and can be used for producing beginner to advanced podcasts.
There are four high-quality microphone channels that can power studio condenser microphones and traditional dynamic microphones as well.
Connecting the microphones is quick and easy, and you get automatic level setting, one-touch recording, and many other convenient features as well.
The RODECaster Pro also allows you to have remote guests call in for an interview. Just connect a smartphone to the unit via Bluetooth or a TRRS cable, and it will automatically provide "mix-minus" audio to prevent the caller hearing an echo.
Additionally, this unit provides preamps and outputs with Class A circuitry for top-of-the-line gain structure and ultra-low distortion, just like you find in broadcast consoles!
RODE loaded the RODECaster Pro up with eight programmable sound effects as well.
There's music, jingles, applause, and other sounds that help give your podcast a more professional sound.
In other words, this is the perfect setup for getting a podcast off the ground!
Learn more about the RODE Podcaster
Gifts for Photographers Under $1,000: Atomos Ninja V With Accessory Kit
Another great gift for photographers that are expanding into audio and video production is the 5-inch Atomos Ninja V portable monitor/recorder.
This gadget works with both mirrorless and DSLR cameras and provides 4K 60p 10-bit recording with a 1000nit display.
Video recording is done directly from the camera's sensor via HDMI 2.0, so you can bypass the camera's internal compression and its record time limits as well.
The ProRes or DNxHR files are edit-ready and can be easily stored on an SSD drive.
In fact, a 1TB AtomX SSDmini drive gives you 2.5 hours of recording in 4K. This drive is just 3 inches long and 1/4 inches tall and is backward compatible with previous Atomos drives.
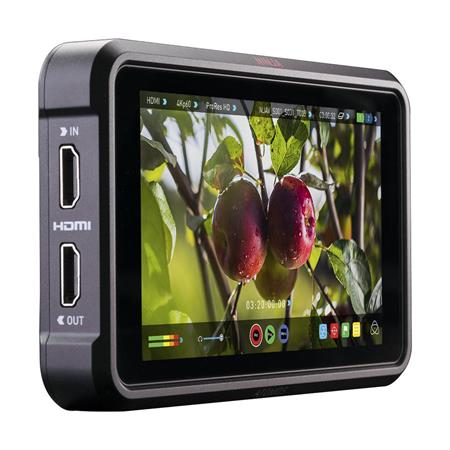
The monitor is a super-bright 5.2-inch 10-bit HDR screen with 1,000 nits of output. It's encased in a 1-inch aluminum body that's ultra durable while weighing just 11 ounces.
Additionally, the screen offers 10+ stops of dynamic range in real-time from various signals, including Log, PQ, and HLG.
The anti-reflection screen allows you to clearly see what's happening, even on the brightest of days.
With one-touch operation, recording couldn't be easier. You also get speedy playback, slow motion, and frame-by-frame analysis with AtomOS
Of course, that's just the start. This little guy offers much more in the way of utility for your favorite photographer!
Learn more about the Atomos Ninja V
Gifts for Photographers Under $1,000: Zhiyun Weebill 2 Handheld Gimbal Stabilizer
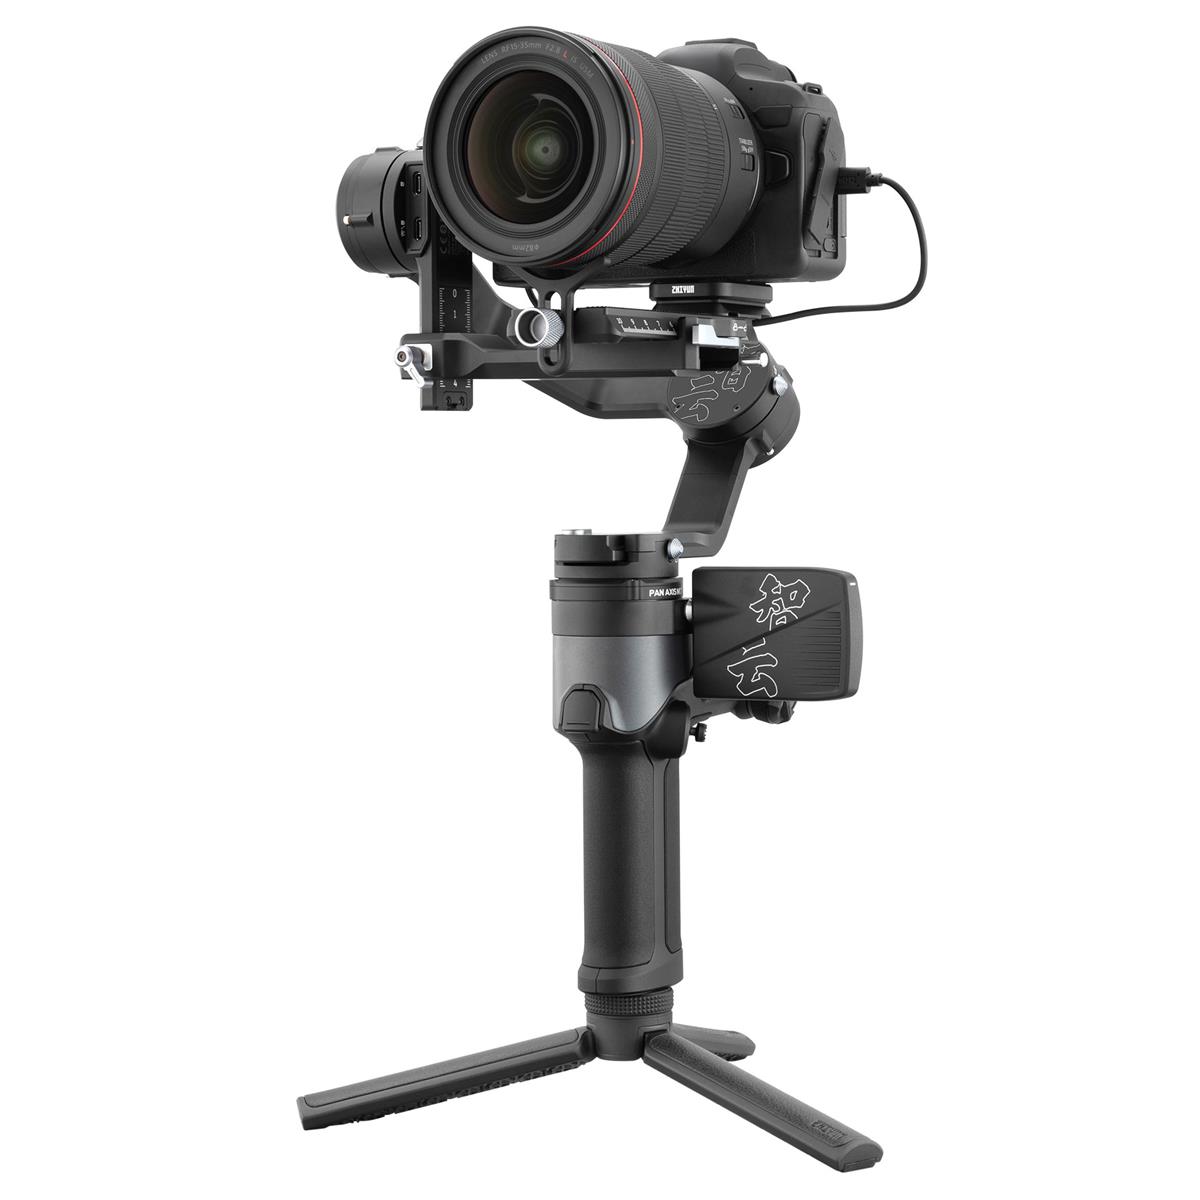
A handheld gimbal like the Zhiyun Weebill 2 is a must-have for photographers that also produce videos.
This is the upgraded version of the Weebill S, and boasts many features that enable the creation of beautifully smooth and steady video.
The Weebill 2 has a dynamic stabilization system at the chip and algorithm level that enables lightning-fast adjustments by the gimbal to ensure smooth video capture.
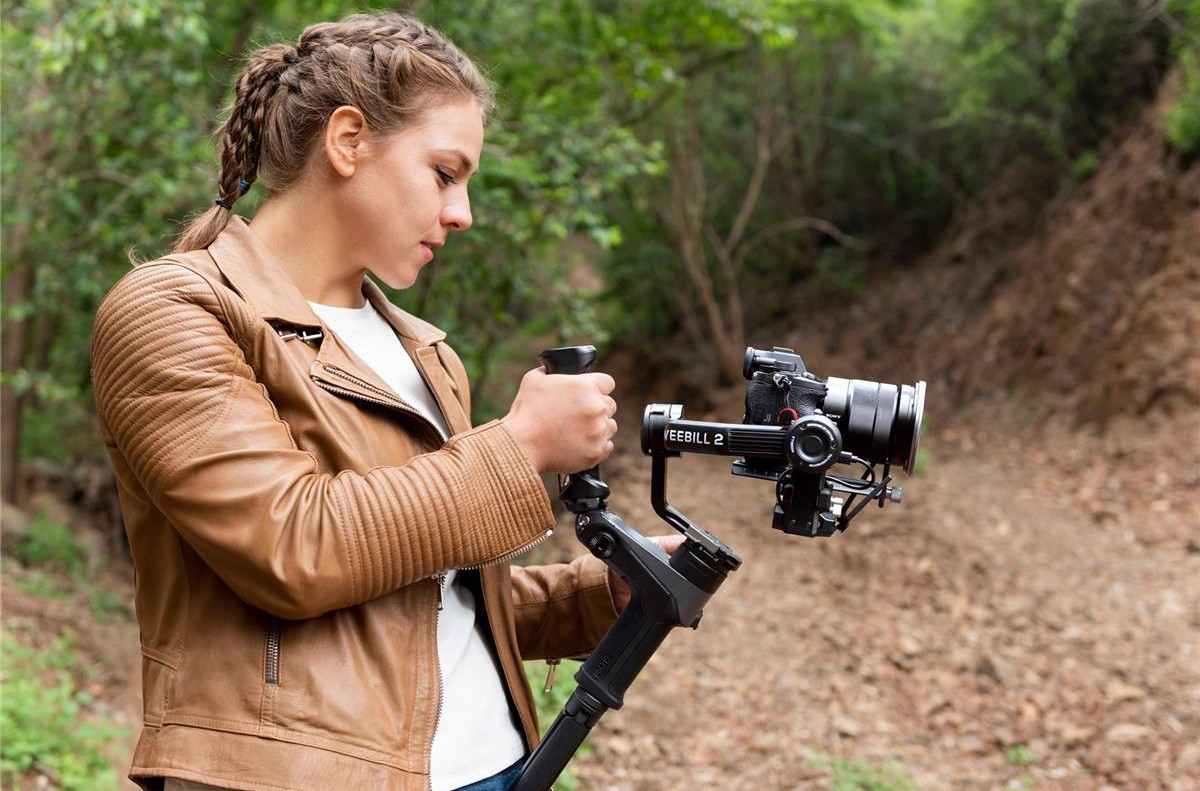
The gimbal has a 2.88-inch color touch display that offers real-time video monitoring and the ability to instantly adjust settings.
The user interface is easy to navigate and easy on the eyes as well - its operation is completely intuitive so videographers can focus on recording video, not on trying to figure out how to work the gimbal.
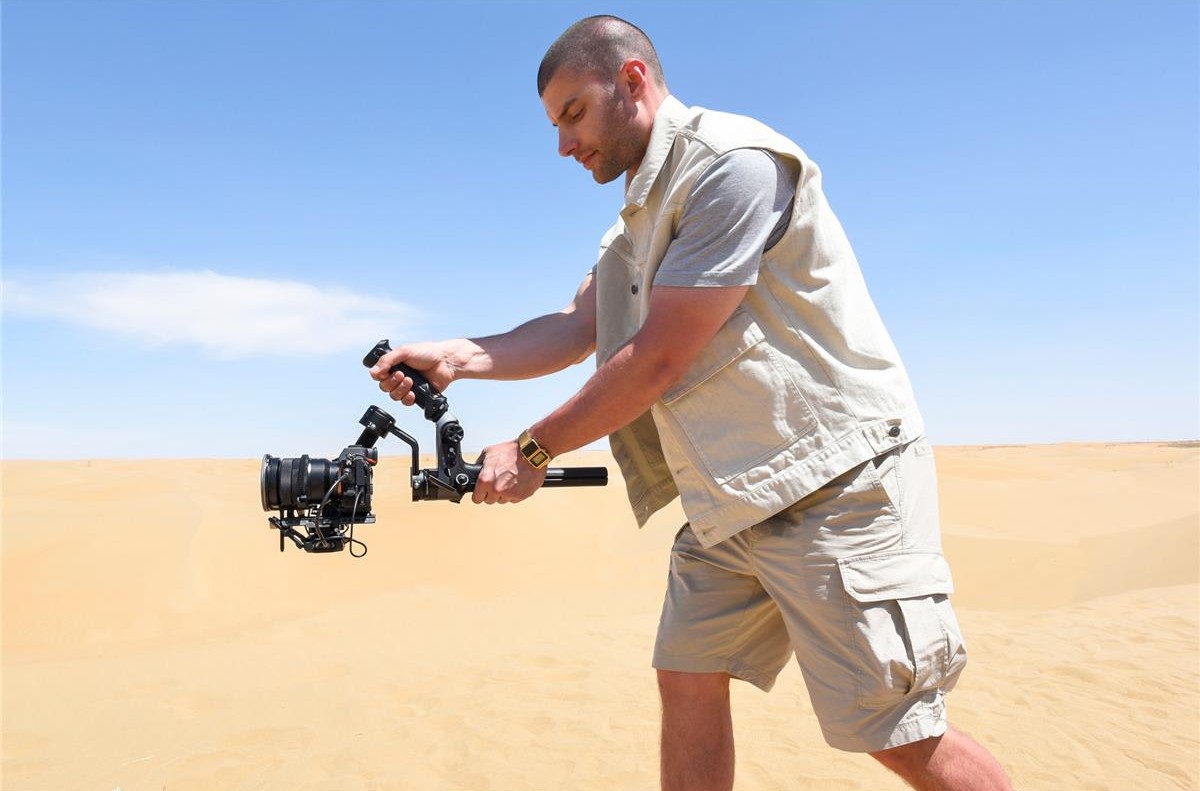
Another feature of this gimbal that's worth mentioning is that it has an underslung design. This allows you to get ultra-low-angle shots
Additionally, you can use it handheld, in portrait mode, and in storage mode, and there are multiple ways to grip or hold the gimbal to get the desired results.
Other features include SmartFollow, which supports target marking and gesture control, follow focus controls, aperture and ISO controls, and focus control wheel supports.
In other words, this gimbal is loaded up and ready to roll!
Learn more about the Zhiyun Weebill 2 Handheld Gimbal Stabilizer
Gifts for Photographers Under $1,000: Panasonic Lumix DMC-GX85 with 12-32mm Lens & 45-150mm Lens
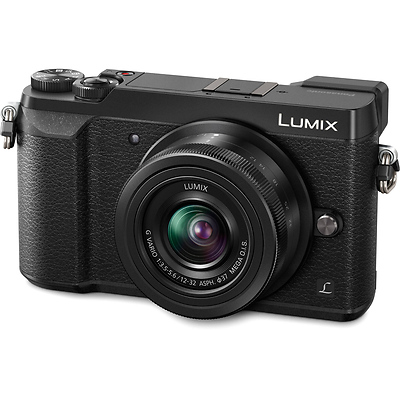
When you give a gift to someone for the holidays, you want it to be something that wows them, but that doesn’t cost you an arm and a leg either…
Well, Samy’s Camera has an incredible deal that ticks both of those boxes - the Panasonic Lumix DMC-GX85 with not one, but TWO lenses bundled with it.
This kit is normally just under $1,000, but with a $400 instant rebate, you’ll pay $597.99. Not bad, right?!
The GX85 features a 16-megapixel micro four-thirds sensor, 4K video, and 5-axis in-body image stabilization that helps enable the capture of sharp photos and smooth video, even when shooting handheld.
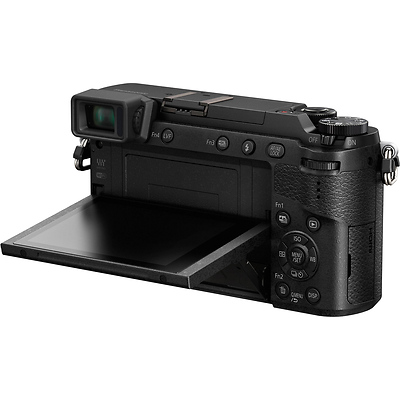
Because this camera lacks a low-pass filter, it generates images that have better image quality and sharpness. The photographer on your list will certainly appreciate that!
Other features of this camera include a 2764-dot electronic viewfinder, a 3.0-inch tilting touchscreen LCD, and an ISO range of 200-25600. Additionally, the GX85 has WiFi and continuous shooting of up to 40 fps. All of those features are wrapped inside a small, lightweight mirrorless camera body.
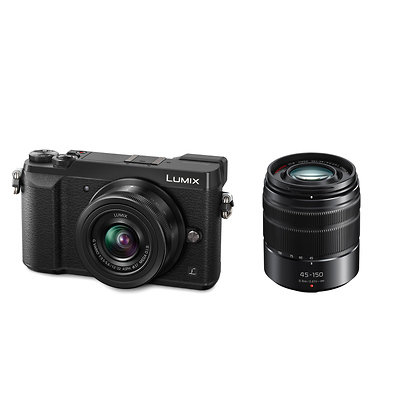
Of course, we can’t forget that there are two lenses as part of this package: a 12-32mm f/3.5-5.6 wide-angle zoom lens and a 45-150mm f/4-5.6 zoom that gives photographers the option of shooting throughout both standards and telephoto ranges.
That means that the special photographer that you’re shopping for will have a complete setup for tackling all kinds of photography and videography needs, from landscape and portrait photography to making dynamic videos in high-quality 4K resolution. If that isn’t an awesome gift idea, I don’t know what is!
Learn more about the Panasonic Lumix DMC-GX85 with 12-32mm Lens & 45-150mm Lens
Gifts for Photographers Under $1,000: Onyx Digital Color LED 1 x 2 Soft Light
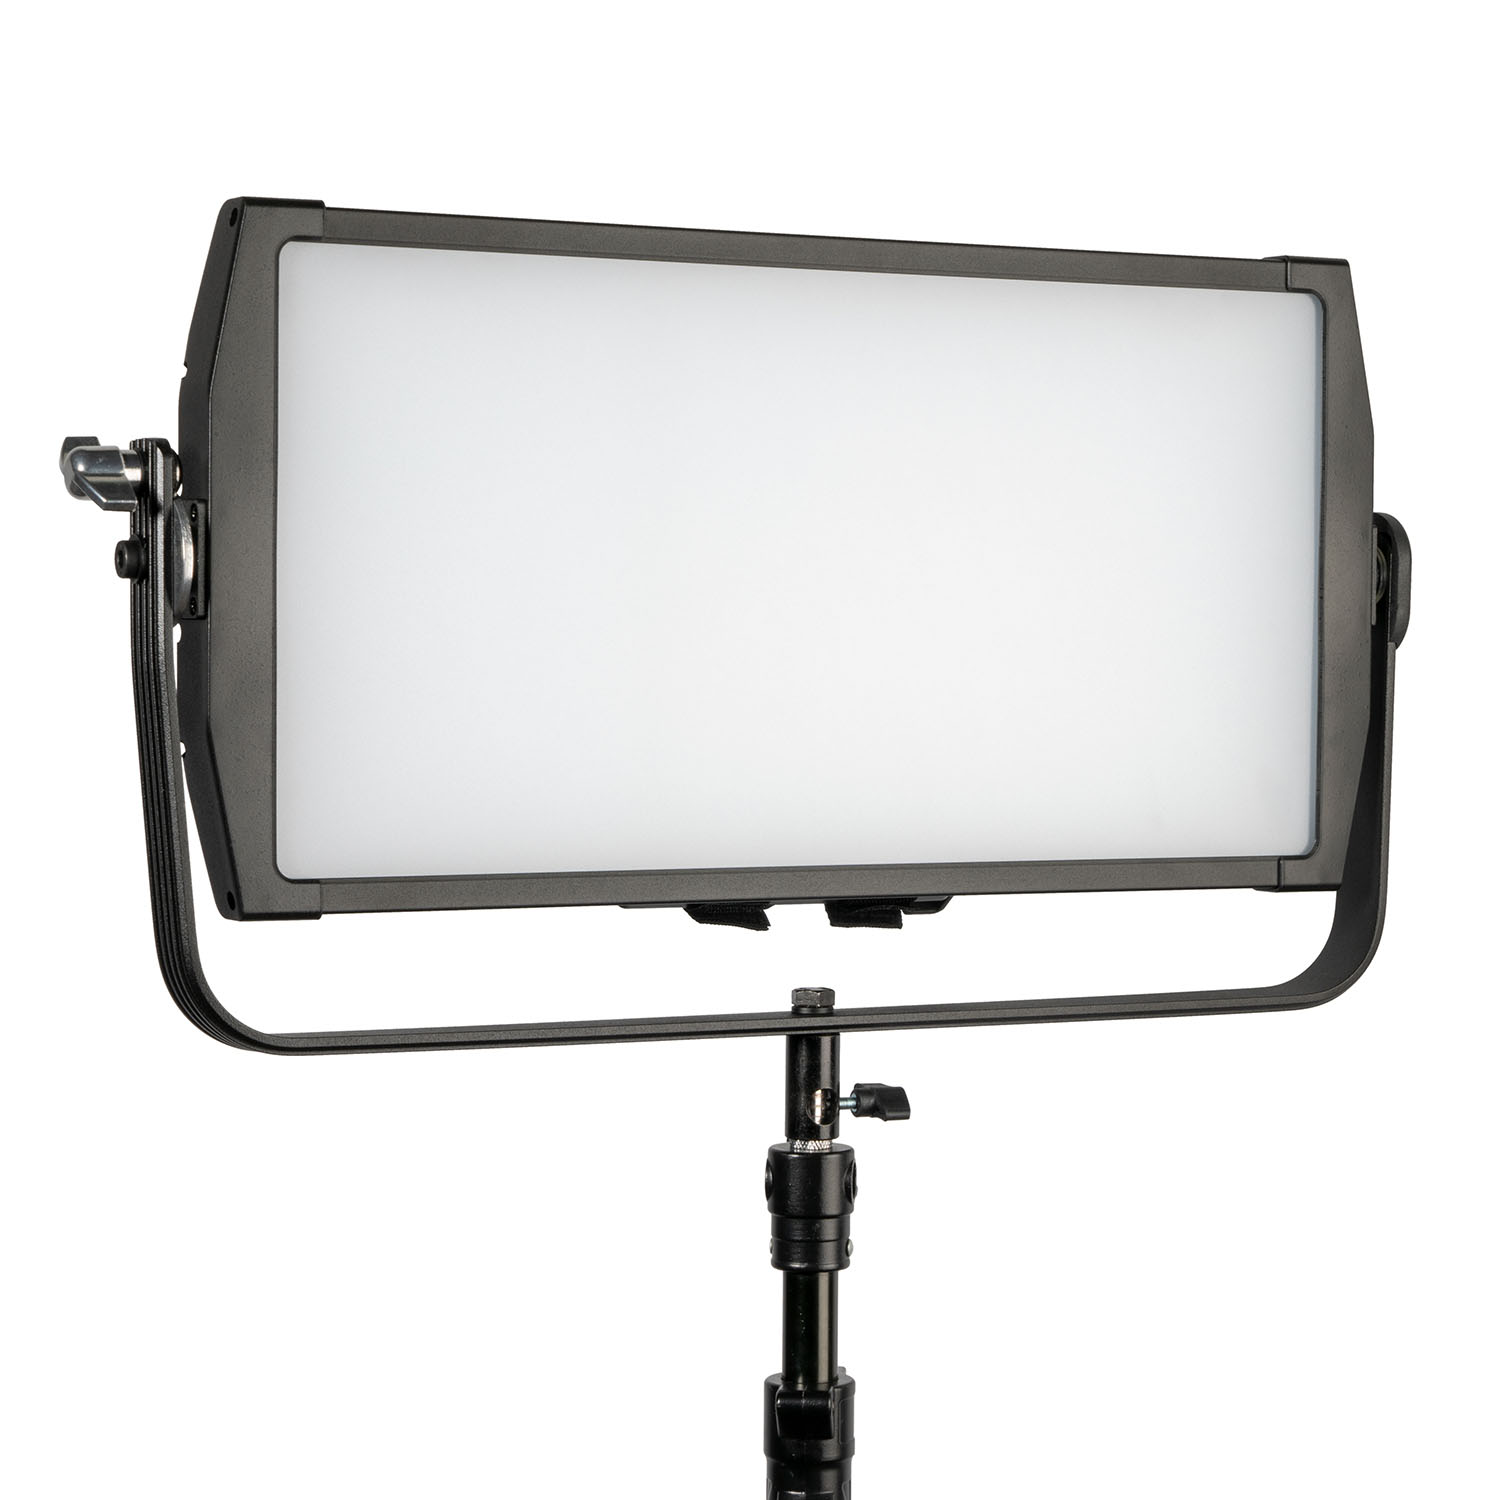
The Onyx Digital Color Light from Ikan is an RGBWA LED panel that offers five color modes for getting the lighting just right for photography or videography pursuits.
With separate controls for red, green, and blue, the photographer or videographer on your list can get the precise look they want for their creations. And, of course, with independent controls for each channel there are millions of color options!
Add in amber and white LEDs, and you have a light with more accurate color temperatures when recreating daylight or tungsten lighting.
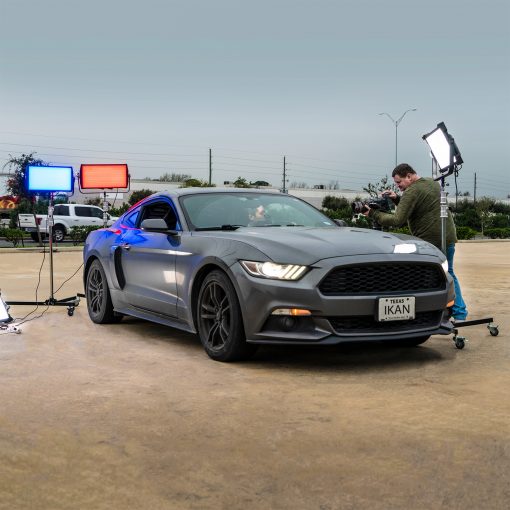
This light also offers CCT mode, which gives you color temperature controls from 2800K up to 10000K.
There is a hue shift of magenta and green, too, so the user has better matching control when using this light in addition to other LED light fixtures.
The light offers CRI/TLCI of 95 as well, so you get beautiful quality lighting.
Throw in 33 different gels and 8 different special effects, and you have a recipe for an all-purpose light!
Learn more about the Onyx Digital Color LED 1 x 2 Soft Light from Ikan
Gifts for Photographers Under $1,000: Really Right Stuff TFC-33 Versa Series 3 Mk2 Carbon Fiber Tripod
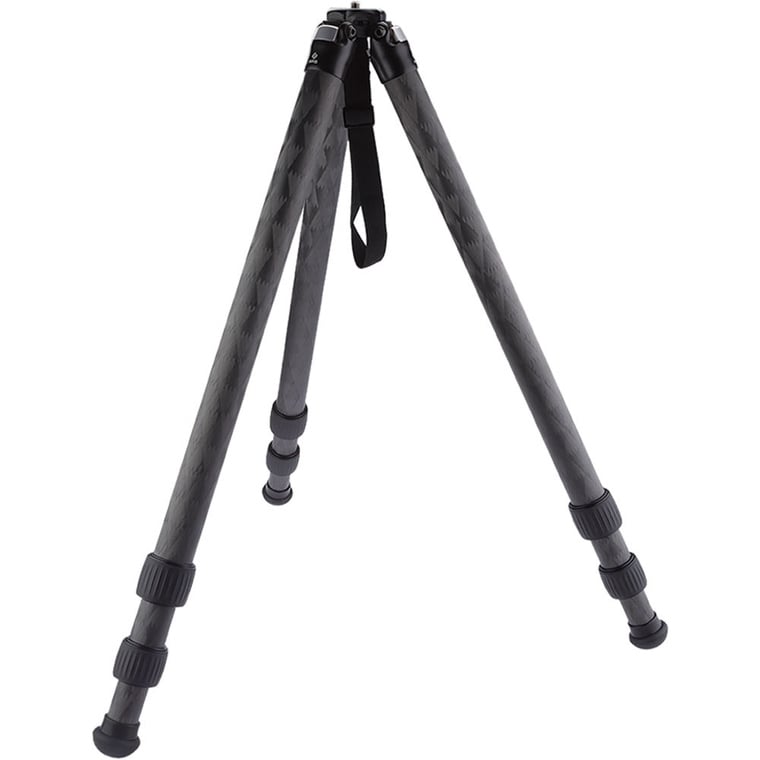
This carbon fiber tripod from Really Right Stuff has improved ergonomics that make the tripod easier to use than ever before.
In fact, this tripod is so easy to use that it will easily become a seamless part of your favorite photographer's workflow...
There are 1/4"-20 sockets on the outside of the tripod's apex that allows for adding accessories to expand the functionality of the photography or videography setups.
Furthermore, this tripod is ultra-fast to lock and unlock, that way the photographer on your list can deploy the tripod to get a shot and quickly unlock it, fold it up, and move on to the next shot without any fuss.
The twist locks on the legs have been redesigned to hold up better to contaminants like debris. This tripod also holds up better to the elements than previous versions, so you get the ultimate in reliability and functionality, too.
At just 4.3 pounds, this is a nice and compact tripod that can accommodate up to 50 pounds.
And you get the same attention to detail and high-quality craftsmanship that you expect from Really Right Stuff.
As I mentioned earlier, every photographer needs a good tripod. This is a great option!
Learn more about the Really Right Stuff TFC-33 Versa Series 3 Mk2 Carbon Fiber Tripod
Gifts for Photographers Under $1,000: Godox AD600Pro Witstro All-In-One Outdoor Flash
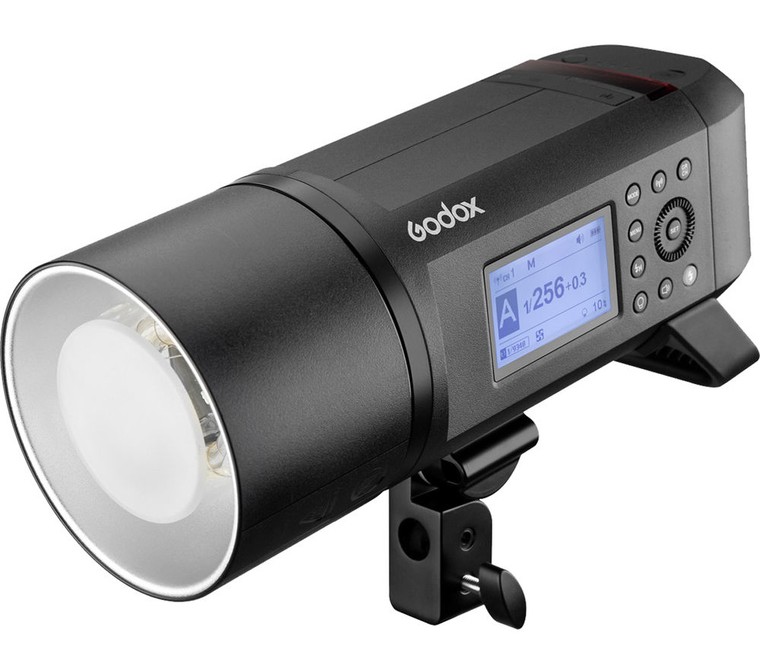
This Godox all-in-one flash is the perfect gift idea for photographers that do a lot of outdoor portraiture, event photography, and the like.
It has a 2.4GHz wireless X system that offers a range of up to 328 feet.
And since it's compatible with various TTL systems like Nikon, Sony, Canon, Olympus, Fujifilm, and Panasonic, the chances are good that the photographer on your holiday shopping list has a compatible camera.
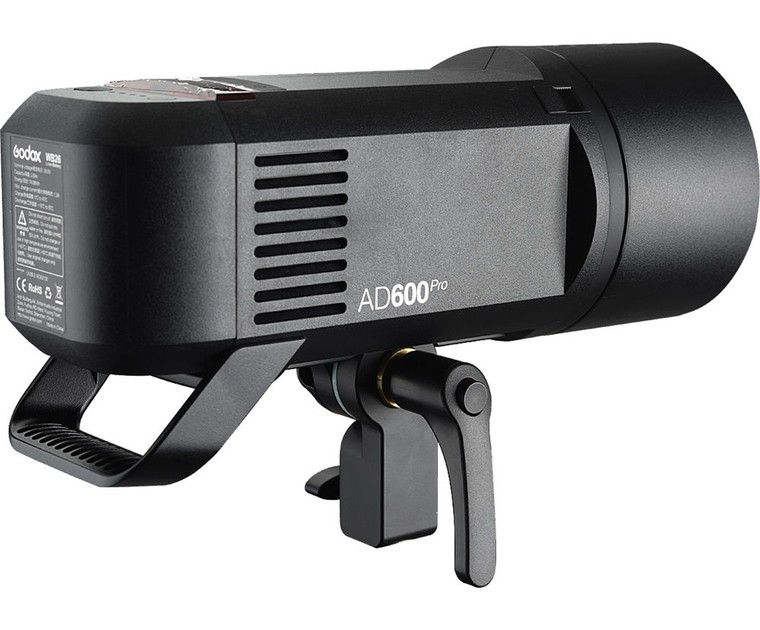
The light offers up to 600Ws with nine steps of power output that range from 1/1 to 1/256.
In addition to plenty of light output, you also get incredible battery life with a 28.8V/2600mAh lithium-ion battery pack that provides up to 360 full-power flashes.
There's an optional AC adapter for this light as well, which gives photographers the ability to run the flash off of AC power for long-lasting performance.
Learn more about the Godox AD600Pro Witstro All-in-One Outdoor Flash
Gifts for Photographers Under $1,000: Pre-Owned Sony Alpha a6300
A great holiday gift idea for the photographer on your list is a Sony camera.
By opting for a pre-owned camera, you can save a ton of money while still giving an awesome gift this holiday season.
The Sony a6300 offers lots of features, including a 24.2-megapixel Exmor CMOS sensor, a BIONZ X image processor, 4K video at 30p, HD video at 1080p/120, and continuous shooting at 11fps.
Add to that a spectacular 425-point autofocus system with tracking AF, excellent image quality, and a small, lightweight body, and the a6300 is a perfect gift for a photographer that needs a capable yet highly portable camera.
Plus, with the a6300, you give the gift of a small, yet mighty camera with superb photographic and video capabilities, but that can easily slide into a camera bag with loads of room to spare.
There are also many different lenses that work with this camera, so if you wanted to expand the gift-giving, you could potentially find a nice pre-owned E-mount lens to add to the mix.
Whether the photographer on your list photographs people, buildings, landscapes, wildlife, or something in between, this camera will be a welcome addition to their camera bag!
Learn more about the Sony a6300
Gifts for Photographers Under $1,000: Phottix Indra500 TTL GameChanger 2-Light Kit for Canon
Yet another lighting option you might consider as a great gift idea for a photographer is this Phottix Indra500 TTL Gamechanger 2-light kit for Canon.
This is a perfect kit for photographers that don't have access to AC power while on location because it has Li-ion batteries and chargers.
The kit includes two Indra500 TTL 500 Ws monolights as well as an Odin II TTL trigger transmitter for canon cameras.
Additionally, you get a 32-inch Easy Up Octa Softbox with grid and a 24x35-inch Easy Up Softbox With Grid.
There are two nine-foot air-cushioned stands for supporting the light and softboxes as well.
With all the lighting elements that a photographer needs, this is a perfect holiday gift idea!
Learn more about the Phottix Indra500 TTL Gamechanger 2-Light Kit for Canon
We Recommend
Gifts for Photographers Under $100 - 2021 Edition

photo byTom Merton via iStock
I know what you’re thinking…you can’t get a truly awesome gift for a photographer with just $100.
But you’re wrong!
Not only are there plenty of gifts for photographers with a price less than $100, but there are also lots of amazing gifts for that price.
While a lot of photography gear is admittedly expensive, these gift ideas will keep you on budget - and impress the photographer on your list, too.
Gifts for Photographers Under $100: Artbeat Studios HD Metal Print

If you ask me, one of the best gifts for photographers is a print of one of their favorite photos. It's a great way to honor their craft while also giving them a gift that truly keeps on giving!
And I know what you're thinking...metal prints for under $100 must be pretty low quality. Happily, though, that's just not the case!
Artbeat Studios is known as an industry leader for high-quality metal prints. One of the reasons for this is because Artbeat Studios’ HD metal prints have the image heat infused directly into the metal. The result is unsurpassed resolution and color vibrancy.
Metal is a gorgeous substrate for all manner and type of photos, too. The crisp, clean detail and modern look is just what the doctor ordered for highlighting a beautiful image.

What’s more, Artbeat Studios uses Chromaluxe® brand aluminum sheets. This brand of aluminum has a 3x better permanence than Kodak Silver Halide Prints and resists fading for more than 65 years. So not only is an HD metal print a great gift for this holiday season, but it’s a gift that will keep on giving for decades!
You can also customize the look of the print by choosing different finishes, surfaces, and mounts. One of the newest additions to the options list is the textured matte surface for a true fine art look.
Whatever options you choose, the result is a breathtaking and custom print that your favorite photographer is sure to love that won't bust your budget! And since Artbeat Studios won our 2020 Metal Print Shootout, you know you’re getting a high-quality product!
Learn more about Artbeat Studios’ HD Metal Prints
Gifts for Photographers Under $100: An SD Card (or Several!)

Photo by nicolas_ via iStock
Is the photographer on your holiday shopping list difficult to shop for? Then a great gift idea is something that offers utility now and in the future, like an SD card.
All photographers need memory cards, so giving the gift of a memory card or two will be much appreciated.
Memory cards can be expensive, though, so you’ll want to maximize your budget by finding the best deals on top brands.

I use SD Card Express to find great deals on memory cards, and I think you’ll find that their selection is just right for finding the photographer on your list the cards they need.
From microSD cards to Class 10 cards, TF Cards to U3 cards, SD Card Express has you covered.
There’s a huge selection of different brands, too, so if the photographer you’re shopping for likes Lexar, SanDisk, Western Digital, or something in between, you should be able to find what you need.
For example, you can get a SanDisk Ultra 512GB MicroSD Memory Card for $86.64. As another example, you can get a Lexar Professional 633x 256GB SD Memory Card for $48.13. You can mix and match types and brands to give your favorite photographer a nice collection of cards while staying under your $100 budget.
Learn more about SD Card Express
Gifts for Photographers Under $100: CanvasHQ Print

It's tough to beat a large-format canvas print as a holiday gift...
Canvas prints offer a classic look with an interesting texture that helps bring the image to life.
What's more, when it's a well-made canvas, like those from CanvasHQ, the print can become a family heirloom - something that you cherish for decades to come. What a powerful gift!
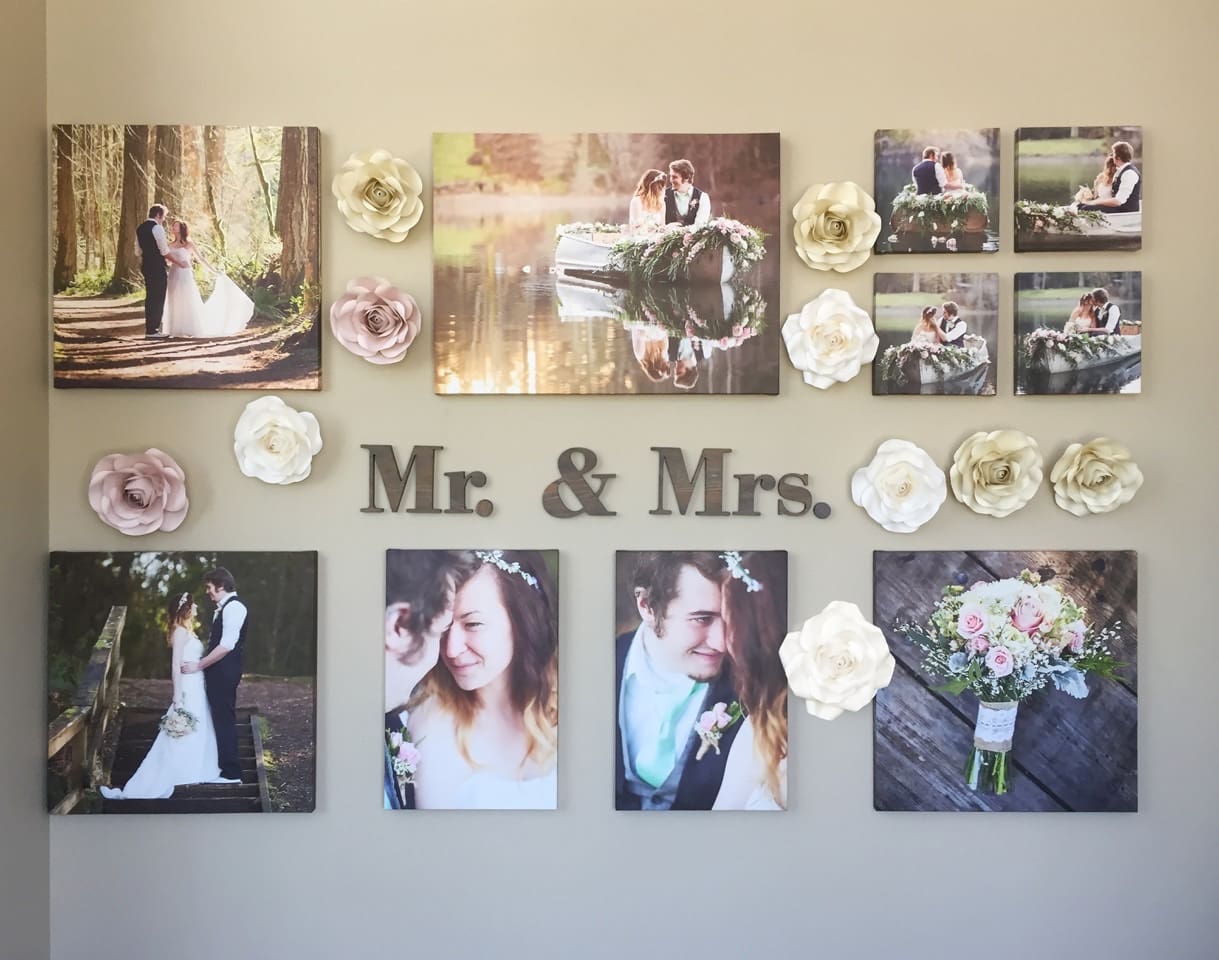
I have tons of canvases in my home, the vast majority of which are from CanvasHQ.
What appeals to me about these prints is the impeccable quality. There is a great level of detail and sharpness, beautiful color accuracy, and the frames on which the print is stretched are handmade with kiln-dried wood to ensure the frame stays square and true for years to come.
Additionally, these guys use archival-grade canvas and commercial-grade inks to ensure long-lasting durability.

They also have a new product - a variety of floating frames - that add a touch of elegance and depth to canvas prints.
The floating frames extend along the sides of the print and don't obscure the front of the print, that way you can see 100 percent of the image. It's a clean, dynamic finish that looks great!

But CanvasHQ isn't just tops in the quality department...
They have excellent customer service that makes you feel heard and as though you're the only customer they have to worry about at that moment.
These guys are committed to getting it right, so if something doesn’t go as planned, you won’t be hung out to dry.
If you have questions, they’ll answer them. If you have a problem, they’ll fix it. If you need assistance with uploading your photo or even picking the best finishes for your canvas, they’ve got your back! That’s just a few reasons why CanvasHQ was a repeat winner of our 2019and 2020Canvas Print Shootouts!
Learn more about CanvasHQ Prints
Gifts for Photographers Under $100: RODE VideoMicro

This tiny shotgun microphone is perfect for a GoPro (or DSLRs or mirrorless cameras, for that matter).
It's compact and lightweight, but audio quality isn't sacrificed. In fact, it has a high-quality cardioid condenser mic capsule so you can get clear, crisp audio.
And since it's a directional mic, it minimizes sounds from the periphery so your video has focused audio from the subject. That’s just the kind of audio performance you want to match the high-quality video footage that you can capture with modern cameras.
Add to that a thermoplastic suspension structure for minimizing vibrations as you adventure around with your GoPro, and you have the ideal audio companion for the best adventura camera on the market!
If the photographer on your list is an adventurer and utilizes a GoPro, this is the perfect gift idea!
Learn more about the RODE VideoMicro
Gifts for Photographers Under $100: Holdfast Mini EDC Fieldbook

If you’re shopping for a photographer that was alive in the 1990s or earlier, they probably have a habit of carrying a notebook with them to write down camera settings, site information, and other details about the shots they take. I know I do that…
And while some folks have transitioned to taking notes on their phones or other devices, there’s something about having handwritten notes about your photos that is so satisfying.
With the Mini EDC Fieldbook from Holdfast, your favorite photographer can take all the notes they want and protect them in style.

This leather journal cover is beautifully made of leather and is sized perfectly to fit the Rite in the Rain spiral-top 3x5 notebook.
This gorgeous fieldbook also has room to fit pens or pencils, your ID, business cards, and other small items that photographers might need on a photo shoot. In fact, there are six pockets and two hand slots for carrying the essentials.
Not only is this fieldbook supremely useful, it’s also impeccably made right here in the U.S. Talk about a wonderful gift idea!
Learn more about the Holdfast Mini EDC Fieldbook
Gifts for Photographers Under $100 - Ikan ILED 120 Daylight Flood LED Light

As modern cameras become more and more about photography and videography, and as more and more photographers add videography to their list of services, it makes sense to get the photographer on your list a quality light for video work.
The Ikan ILED 120 Daylight Flood LED light is a perfect option, given its performance and its price tag.
At just 3¾” x 3⅓”, this tiny light won’t burden photographers with extra size and weight. But don’t think that it doesn’t pack a punch despite its small size…

There’s a 60-degree beam pattern and 5300K-5900K LEDs that put out clean, beautiful light. And since it’s an Ikan product, you can trust that this light is solidly built, packed with features, and field tested to ensure long-term reliability.
This light comes with an on-board rechargeable lithium battery, a battery charger, a camera bracket, a shoe mount, and a diffuser, so it’ll be ready to go right out of the box!
Learn more about the Ikan ILED 120 Daylight Flood LED Light
Gifts for Photographers Under $100: PhotoRepairPro

I've said it before, and I'll say it again...
The best gifts are the ones that offer long-lasting joy and utility. For the photographer on your list, a way to provide that is by restoring one of their favorite photos.
We all have printed photos that have seen better days, but fortunately there is a way to bring those photos back to life - PhotoRepairPro.
For $34.99 - which is obviously way under the $100 limit - you can give your favorite photographer a repaired photo.
Not only that, but PhotoRepairPro also throws in an online proof, a JPEG download, and two 5x7 prints of the image. It's five gifts in one!
And don't worry if the source image has water damage or is faded, or if it has cracks or creases. PhotoRepairPro can bring it back to its original beauty.
You can get the process started now online. In a few days' time, you'll have the perfect gift for your favorite photographer!
Learn more about PhotoRepairPro
Gifts for Photographers Under $100:Hex Ranger DSLR Sling Bag

One of the best gifts you can give the photographer on your list is a new camera bag.
But not all camera bags are made alike...
Honestly, I’m a bit of a camera bag snob, so I look for things that others might skim over.

For instance, I check the stitching inside and out to see how well put together it is, and with this bag, it’s very well put together.
It’s part of the thoughtful construction and design processes that also make this bag an excellent choice for a gift for the photographer on your holiday shopping list.
One of the things I like most about the bag is the collapsible interior dividers - including the bottom divider. This gives you a bag that can not only be customized to your gear for each photoshoot, but you can also fold up or remove the dividers to allow the bag to be packed totally flat for travel inside another bag.
Speaking of customizations, this bag has side adjustable load straps and adjustable bottom carry straps so you can carry even more gear when needed.
This bag is also packed full of pockets to help you keep track of your stuff. There’s a front access organizer for small items, a faux fur lined pocket on the front for your phone or a pair of shades, a faux fur lined pocket for your table, and multiple hidden velcro stash pockets. And the bag sits very well when worn. It’s comfortable and easy to access your gear and really hugs your body.

With genuine Cordura material and YKK zippers with metal pulls, this bag will stand up to use and abuse, too. And since it’s so compact (just 1.3 pounds and 14.5"L x 7.25"W x 4.75"H), you can rock it in the urban jungle without worrying that it’ll be knocking into people as you move from shot to shot.
Something that really stood out to me was that, although the bag is listed at 8 liters, there is no wasted or negative space. In fact, I easily transferred all the gear I would normally carry in my Peak Design 10L Sling into the HEX Ranger Sling. I have to say that I am a big fan of the efficient use of space in this bag and the collapsible potential of the HEX bag certainly gives it a leg up.
With eight liters of storage space, a streamlined design, and looks that don’t quit, this is definitely a gift for photographers that will put a smile on their face!
And there’s also an updated Version 2 of this bag that offers tons of upgrades, like like a hideaway rain fly, upgraded padding, and a double buckle strap for additional sizing options. It’s under $100 too!
Learn more about the Hex Ranger DSLR Sling Bag
Gifts for Photographers Under $100: Camera Canopy

I don’t know about you, but I’m all about giving gifts that are functional, and functional is a perfect word to describe Camera Canopy.
If the photographer on your list spends any time outdoors, they need something to help protect their camera gear. As a photographer that falls into that category, I understand that when it rains, my day of shooting could be over if I don’t have the protection I need. That’s because even weather-sealed gear isn’t completely water-tight.
There are all kinds of rain guards for cameras, but most of them are plastic bags that make using your camera a huge pain. It’s hard to adjust your lens. It’s hard to see the rear LCD. It’s hard to use the viewfinder too! That’s why Camera Canopy is a much better alternative.

Camera canopy attaches to a camera via its hot-shoe mount. Once attached - which takes just seconds to do - it shields the camera and lens from rain. It even protects the glass on the end of the lens so there’s no worry that good shots will be ruined by water droplets on the glass.
Better still, it’s adjustable for lenses up to 500mm in length, and there’s even a smaller version for mirrorless setups (shown above). Add in a 30-day money-back guarantee, and you’ve got the perfect gift for this holiday season!
Learn more about Camera Canopy and Mini Camera Canopy
Gifts for Photographers Under $100: Pre-Owned Canon EF 50mm f/1.8

Photographers can never have too many lenses, right?
Okay, so maybe there’s a limit, but one of the best lenses a photographer can have in their camera bag is a good Nifty Fifty.
What makes Nifty Fifties so great is that they’re versatile - they can be used for portraits, landscapes, and video work.
Plus, Nifty Fifties like the Canon EF 50mm f/1.8 have a nice, big aperture for getting beautiful background blur and for shooting in low-light conditions.

And since you can get a pre-owned 50mm lens for under $100, they’re also an economical gift idea!
Don’t be scared off by the word “pre-owned,” either…
You can buy with confidence from MPB because each item in their inventory is thoroughly reviewed and tested before it’s put up for sale.
That means that if you find a 50mm lens listed in good condition, that lens will be in good condition! There are no surprises, no scams...just a quality used product that comes with a six-month warranty.
So, this holiday season, help your favorite photographer fill out their kit with a new-to-them lens!
Learn more about the Canon EF 50mm f/1.8
We Recommend
Gifts for Photographers Under $150 - 2021 Edition

Photo by monkeybusinessimages via iStock
Christmas is just three short months away, and that means it’s time to start thinking about the gifts you’re going to give this year.
Photographers can be notoriously difficult to shop for, though, so we’ve put together a fantastic list of ten gifts for photographers, all of which are less than $150.
With that kind of budget, you can give all kinds of gifts, from a handy photography vest to a beautiful print to a must-have filter for shooting landscapes. Have a look at these and many other options below!
Gifts for Photographers Under $150: The Vest Guy Traveler Photo Vest
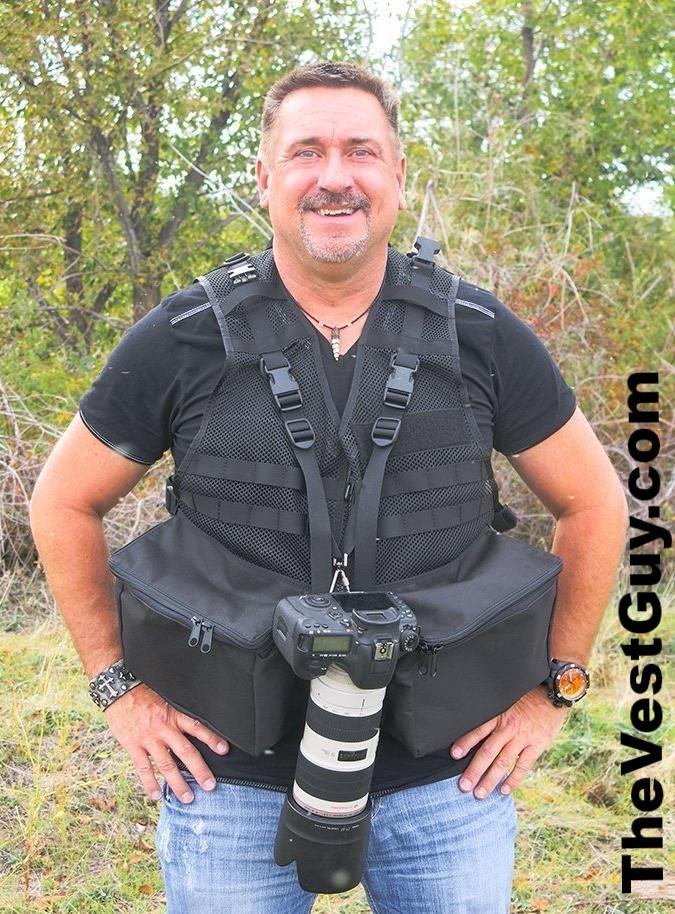
If the photographer on your holiday shopping list enjoys traveling, this Traveler Photo Vest from The Vest Guy would be an ideal gift.
With this vest, your photography gear is both easy to carry and easy to access at a moment’s notice when it’s time to take a shot.
The vest has many features that make it a comfortable and functional way to carry camera gear. There’s one camera strap and two large cargo pockets that are perfect for carrying items like a lens or a flash. There are also two interior soft-sided adjustable cargo pocket dividers and nylon MOLLE loops for carrying additional gear.
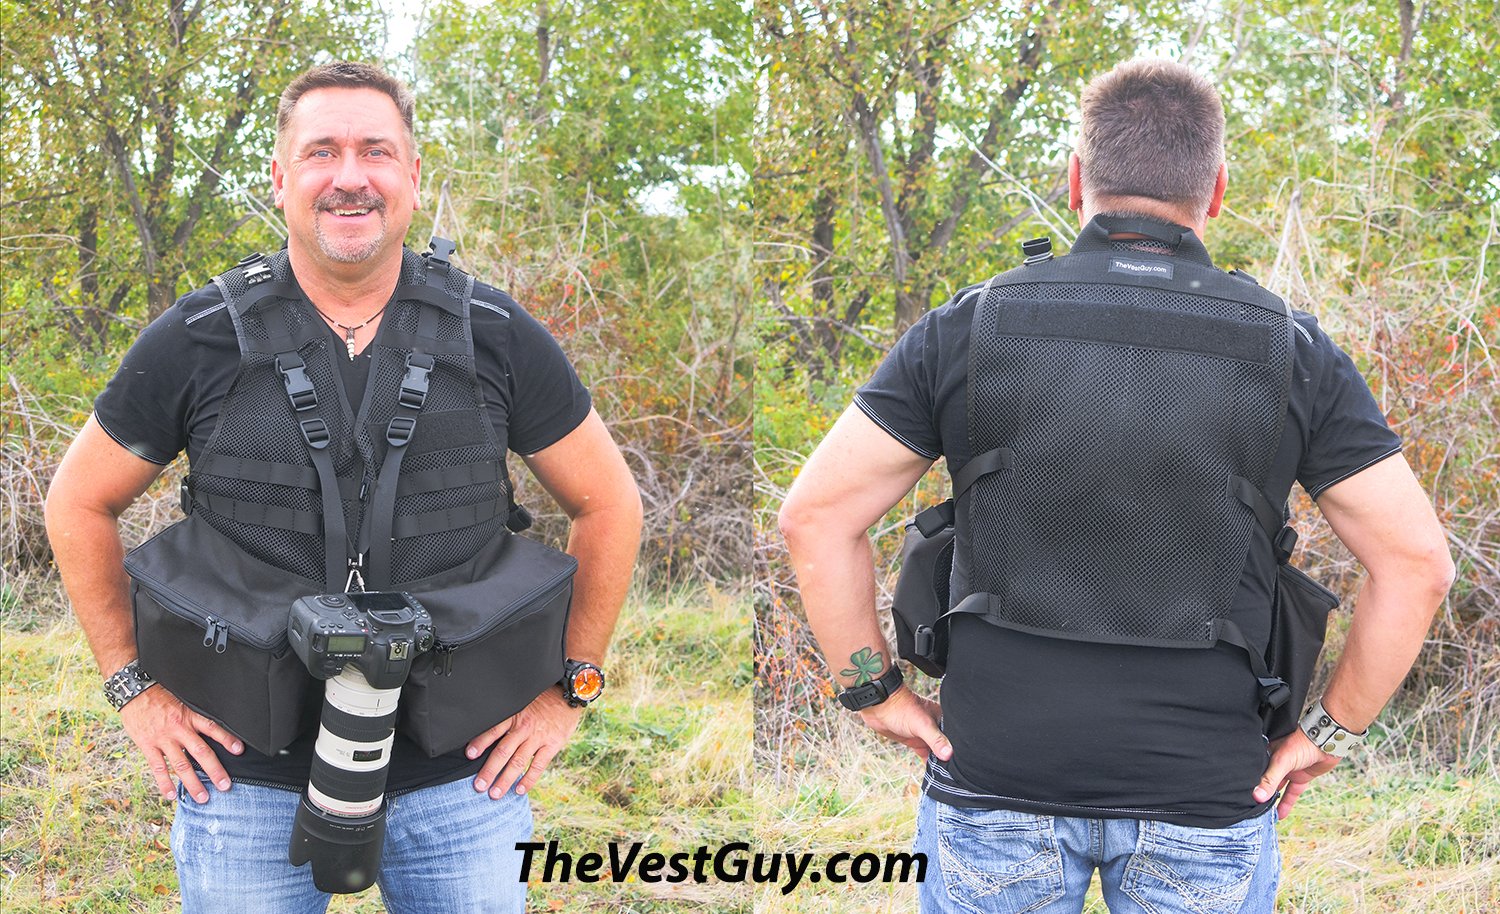
There is a hydration sleeve, a convenient carry handle, and the vest is available in a variety of sizes and colors. You can add a second camera strap and a name tag (which is great for advertising) if you wish.
On top of all that, these vests are made in the U.S.A. and there’s a lifetime workmanship warranty!
Learn more about The Vest Guy Traveler Photo Vest
Gifts for Photographers Under $150: PhotoRepairPro
Why not give the gift of making old new again this year?
If the photographer on your list is anything like me, they likely have tons of old photos in boxes in the basement or the attic. Some of those photos have probably seen better days, too.
That being the case, a great gift idea is to have a photo restored to its original glory!
For $34.99, you can give your favorite photographer a repaired photo, including an online proof, a JPEG download, and two 5x7 prints of the image. You even get free shipping on the prints!
No matter if the original image is faded, has creases, or needs to be colorized, PhotoRepairPro has your back.
What's more, they'll improve portraits by removing glare from eyeglasses, smoothing skin, or even changing the background.
There are simply a wealth of possibilities for breathing new life into old memories!
Learn more about PhotoRepairPro
Gifts for Photographers Under $150: Deity V-Mic D3
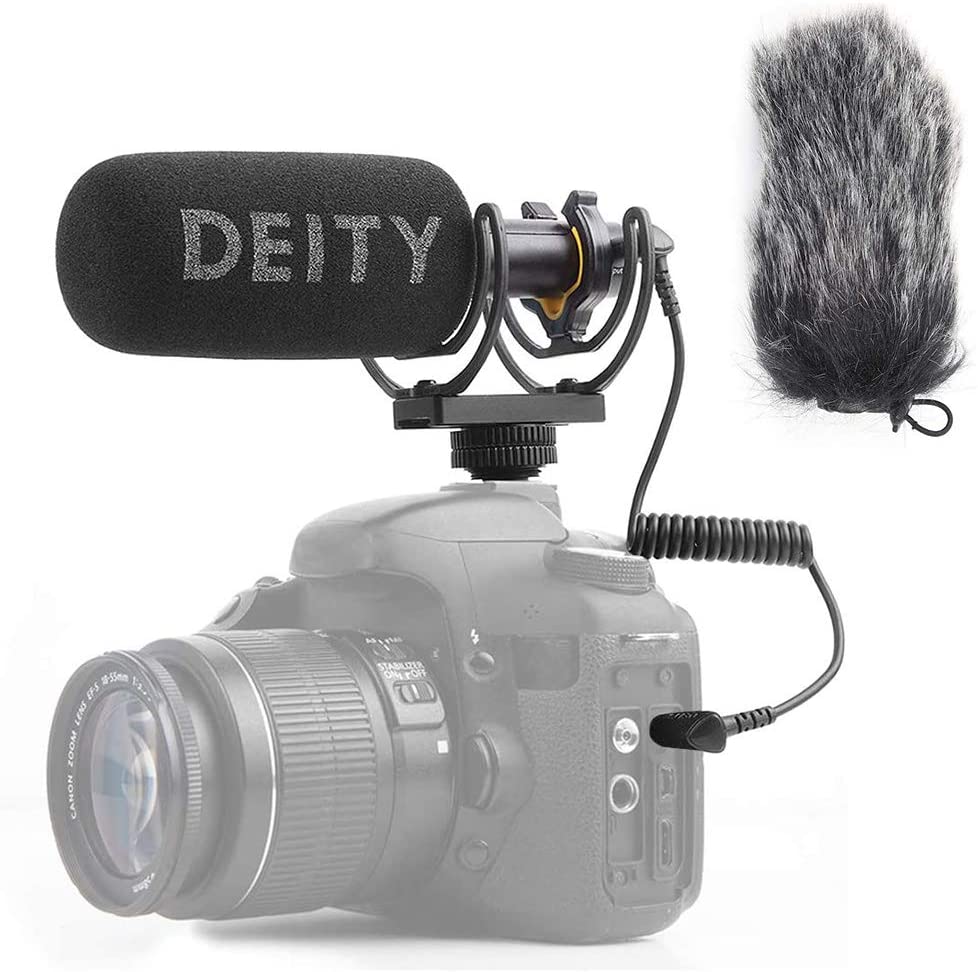
With more and more photographers like myself getting into videography, the chances are good that the photographer on your holiday shopping list could stand to get a few video-related gifts this year.
Well, a great video requires great audio, and for that, the Deity V-Mic D3 is an excellent option.
This little mic offers broadcast-quality sound thanks to its low noise circuitry, extremely low distortion, and high-grade SNR. All that technology combines for top-notch off-axis sound performance.
The mic has a smart 3.5mm mic output and is compatible with any device that has a 3.5mm jack, including mirrorless and DSLR cameras, smartphones, and laptops.
Other features include one-button on/off, the ability to mount on a camera, and a 166-hour battery life off of a single AAA battery. Add in a unibody aluminum chassis for durability and you have the makings of the perfect gift for a photographer for under $150.
Learn more about the Deity V-Mic D3
Gifts for Photographers Under $150: Artbeat Studios HD Metal Print
If you ask me, one of the best gifts for photographers is a print of one of their favorite photos. It's a great way to honor their craft while also giving them a gift that truly keeps on giving!
And I know what you're thinking...metal prints for under $150 must be pretty low quality. Happily, though, that's just not the case!
Artbeat Studios is known as an industry leader for high-quality metal prints. One of the reasons for this is because Artbeat Studios’ HD metal prints have the image heat infused directly into the metal. The result is unsurpassed resolution and color vibrancy.
Metal is a gorgeous substrate for all manner and type of photos, too. The crisp, clean detail and modern look is just what the doctor ordered for highlighting a beautiful image.
What’s more, Artbeat Studios uses Chromaluxe® brand aluminum sheets. This brand of aluminum has a 3x better permanence than Kodak Silver Halide Prints and resists fading for more than 65 years. So not only is an HD metal print a great gift for this holiday season, but it’s a gift that will keep on giving for decades!
You can also customize the look of the print by choosing different finishes, surfaces, and mounts. One of the newest additions to the options list is the textured matte surface for a true fine art look.
Whatever options you choose, the result is a breathtaking and custom print that your favorite photographer is sure to love that won't bust your budget! And since Artbeat Studios won our 2020 Metal Print Shootout, you know you’re getting a high-quality product!
Learn more about Artbeat Studios’ HD Metal Prints
Gifts for Photographers Under $150: PolarPro QuartzLine 82mm ND64 Filter
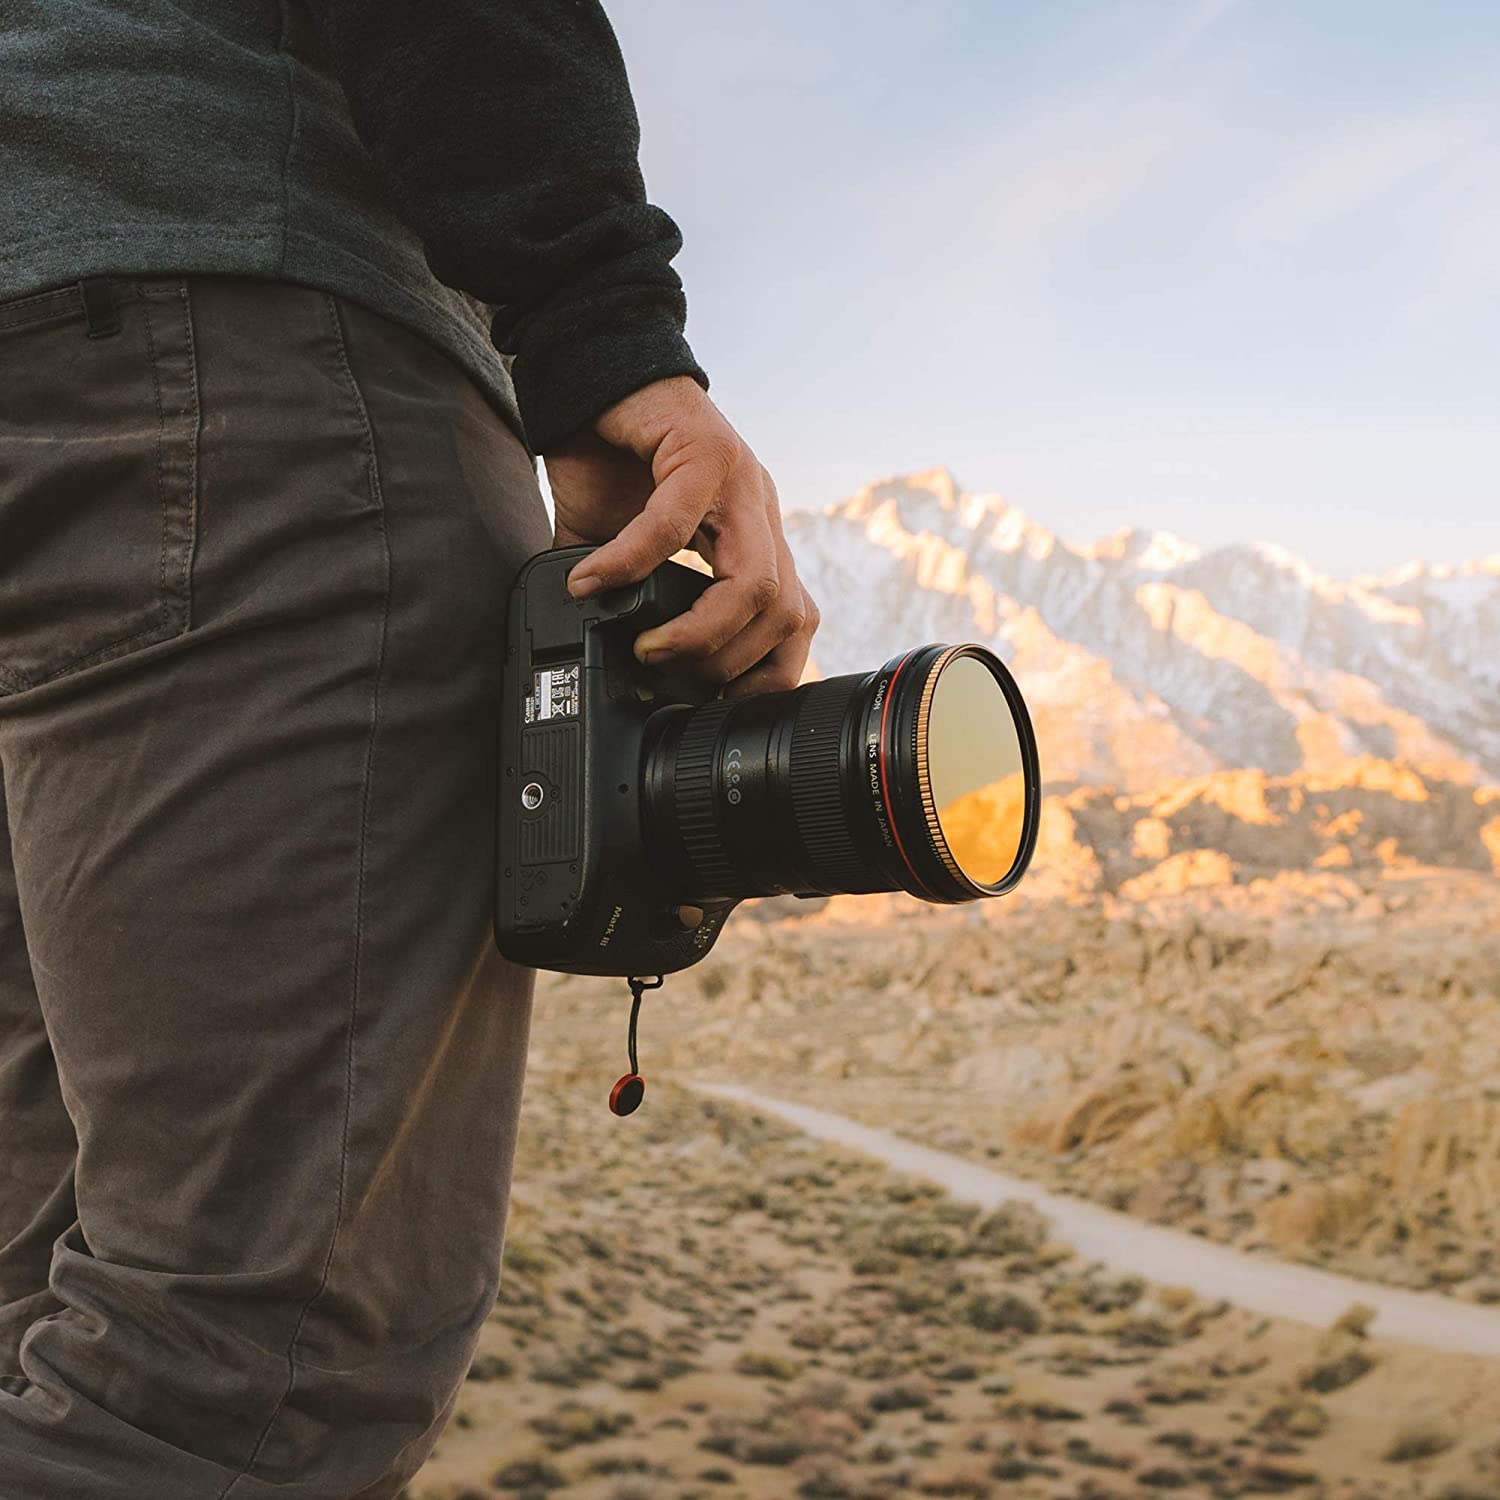
When it comes to filters for photography, it’s tough to beat PolarPro…
I’ve used PolarPro filters for years and they have proven to be well-made, durable, and supremely functional filters for my landscape photography exploits.
This particular filter is a 6-stop neutral density filter with a glass element that’s made of 99.9 percent pure fused quartz. As a result of the high-quality glass, this filter ensures that you can have supreme shutter control while getting zero image degradation and maintaining excellent sharpness throughout the image.
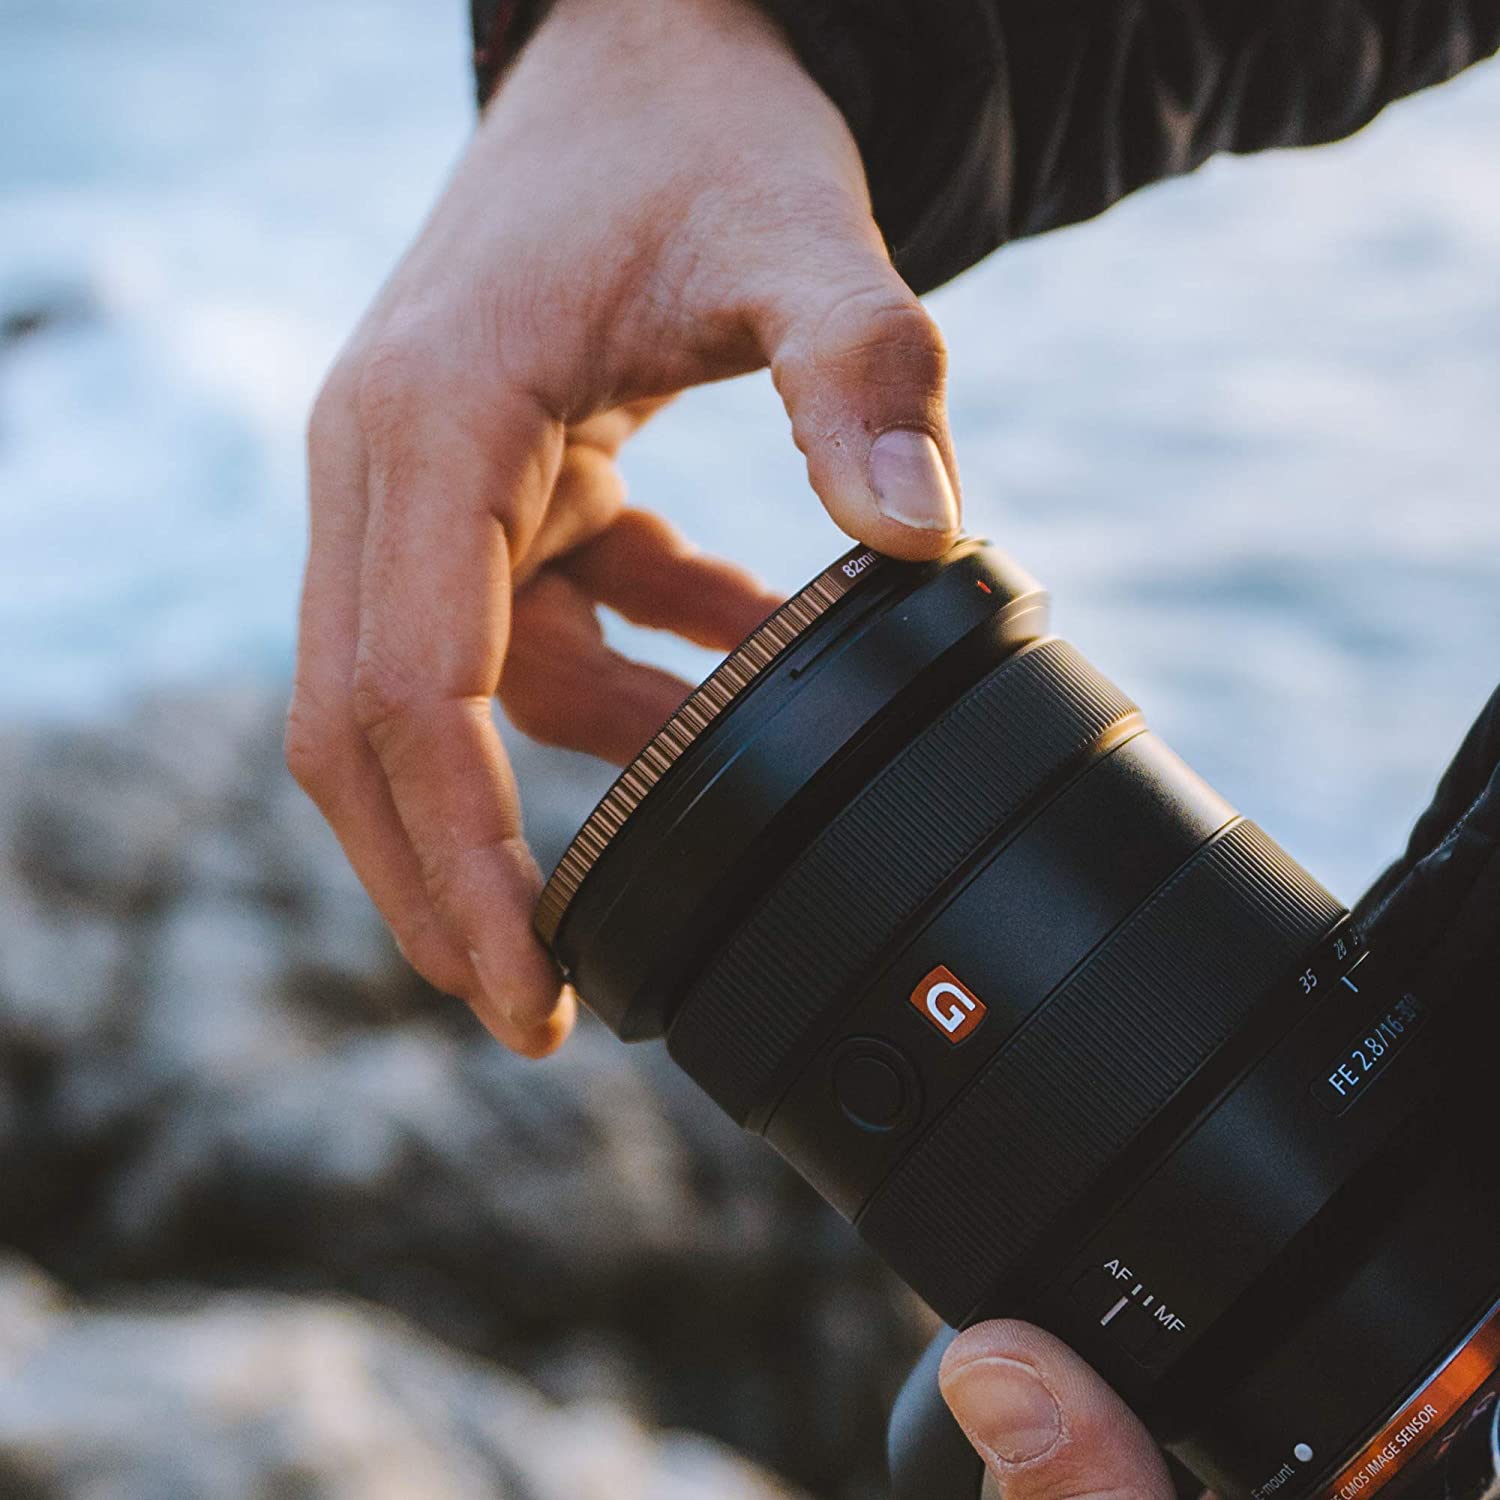
The frame is made of highly durable brass while the glass has optical coatings that offer nearly perfect light transmission without altering the color profile.
Likewise, the glass has abrasion-resistant and hydrophobic coatings that improve resistance from scratches while making cleaning super easy.
And since this filter comes with a lifetime warranty, should something ever go wrong, the photographer on your list has the peace of mind that PolarPro will make it right!
Learn more about the PolarPro QuartzLine 82mm ND64 Filter
Gifts for Photographers Under $150: Holdfast Sightseer Small Lens Pouch

One of the best features of the Holdfast Gear Sightseer line of bags is that they are modular, so as your kit grows, your bag system can grow along with it.
Part of that modular system is the Sightseer Small Lens Pouch shown above.
These beautifully crafted lens pouches are constructed of waxed canvas and American Bison leather. Inside, the Aztec flannel fleece looks like a million bucks while providing a soft, secure environment that cradles your lens.
The outside of the pouch is weather resistant while the Aztec flannel on the interior is scratch resistant, which means your favorite photographer won’t have to worry about their gear getting wet or scratched no matter how many times they go out and shoot.
These pouches can be worn on any belt, on the Holdfast MoneyMaker, or on the exterior of the Holdfast Sightseer Bag, so there’s a ton of different ways for photographers to have their favorite lens right at their fingertips.
What better gift to give this holiday season than one that’s super functional, looks great, and is supremely versatile too?!
Learn more about the Holdfast Sightseer Small Lens Pouch
Gifts for Photographers Under $150: Ikan HomeStream 6-Inch Light With Tabletop Stand
What’s so great about the Ikan HomeStream light is that it can be used for multiple purposes. The photographer in your life can use it for studio lighting for videography work, as an accent light for portrait photography, and even as a light for taking self-portraits.
The light is 6-inches in diameter and has edge-lit LED technology for pure, clean light emission.
It comes bundled with a desktop stand and a ball head that enables you to tilt and rotate the light as needed. The included stand can be adjusted from 13.75 inches up to 21.5 inches to ensure the user has the flexibility they need to perfectly position the light.
With a color temperature range of 3200-5600K, brightness of 1050 lux at 0.5 meters, and a CRI of 95, this light puts out bright, pleasing light for any task in front of the camera.
Learn more about the Ikan HomeStream 6-Inch Light WIth Tabletop Stand
Gifts for Photographers Under $150: Ikan iLED 144 Bi-Color Flood Light

For another lighting option, you can opt to get the photographer on your list the iLED 144 bi-color flood light.
This little light is just 5.75 inches by 3.25 inches yet delivers bright, beautiful light that can be used for photography or videography pursuits.
With a bi-color LED array, this light offers color temperatures that range from 3200-5600K. It has a 60-degree beam angle, intensity dimming, and an on-board battery indicator. It’s also stackable for ease of setup with other accessories.
Learn more about the Ikan ILED 144 Bi-Color Flood Light
Gifts for Photographers Under $150: Pre-Owned Nikon AF-S 50mm f/1.8G
If you’re shopping for a photographer that has a Nikon DSLR, this 50mm lens is an ideal gift.
This focal length offers loads of versatility. It can be used for portraits, landscapes, and street photography, just to name a few. It can even be reverse mounted (with an optional adapter) to be used for macro photography work. The 50mm focal length is also ideal for videography.
Additionally, this is a fast lens with a maximum f/1.8 aperture that enables better low-light performance. The bokeh it produces is also extremely pleasing to the eye.
Nikon lenses are well-made and durable, and this particular model is also highly compact and lightweight. This makes it a perfect all-day lens that doesn’t weigh photographers down or get in the way.
And since this is a pre-owned lens, you can save a good deal of money - perhaps enough to get your favorite photographer a second gift!
Learn more about the Nikon AF-S 50mm f/1.8G
Gifts for Photographers Under $150: Amazon Gift Card
![]()
Totally stumped regarding gift ideas for photographers on your list?
Why not go the easy route and get them an Amazon gift card?
Though a gift card isn't exactly the sexiest gift, when the photographer in your family sees that you have given them carte blanche to get what they want, they'll be stoked!
With an Amazon gift card, they can put the card amount towards whatever they want - a new lens, a second camera body, lighting gear, a laptop - you name it!
As far as flexibility goes, there's nothing better to give a photographer than a gift card.
Learn more about Amazon gift cards
We Recommend
Gifts for Photographers Under $2,500 - 2021 Edition

photo byPekic via iStock
We're getting down to the wire with the holiday shopping season...
If you're in a rush to find the perfect gift for the photographer on your list, don't fret - we've got some great ideas!
With a budget of $2,500, you can find all sorts of epic gifts for photographers including cameras, lighting, office equipment, and much more.
Let's get to the list!
Gifts for Photographers Under $2,500: iMovR Lander Standing Desk
One of the great things about the holiday season is that you have an opportunity to really change a loved one’s life for the better.
And this isn’t hyperbole - with a gift like the iMovR Lander Standing Desk, you can help your favorite photographer be more comfortable, healthier, and more productive.
Think about it…
Sitting at a desk editing photos all day isn’t good for your neck, shoulders, or back. You need to move your positioning as you work, varying from sitting to standing, to ward off the negative effects of sitting for hours and hours on end. The iMovR Lander desk lets you do that with ease. So, how is this accomplished?
The Lander desk has electric motors that can lift up to 365 pounds and do so with whisper-quiet operation. The motors are engaged in one of two ways: the height-control paddle on the underside of the desktop or the companion smartphone app. With a simple double-tap of the paddle or a tap of your finger on your smartphone screen, you can move the desk up and down as you please.
And unlike many desks, the iMovR Lander doesn’t require a ton of time or tools to assemble.
In fact, this desk arrives 98-percent assembled, so you’re not only giving an incredible gift, but one that comes without a huge investment of time required to put it together. In about three minutes the legs can be attached to the desk (with no tools!) and the photographer on your list can go about setting up their workspace.
iMovR gives you peace of mind with the desk, too. There’s a five-year warranty on the desktop and a 10-year warranty on the base components. On top of that, the desk is beautifully engineered and constructed, so you can give the gift of something that will be durable and functional for the long term.
The desktop is made of 3D laminate material that is highly durable. There are also hundreds of color and size combinations to choose from, so you can truly design the perfect desk for your loved one (or yourself!).
Best of all, this desk starts at just over $1,000, so with a $2,500 budget, you’ll have a lot of money left over. Perhaps you can buy two desks!
Learn more about the iMovR Lander Standing Desk
Gifts for Photographers Under $2,500: Ikan Professional 15-Inch High Bright Beam Splitter Teleprompter With Travel Kit
If you're shopping for a photographer that wants to start a YouTube channel or is otherwise interested in producing video content, a professional teleprompter is certainly a gift that they will get a lot of use out of.
This 15-inch beam splitter teleprompter from Ikan is what I personally use in my home studio, and I couldn't be happier with it.
One of the best features of this teleprompter is its bright 1000 nit monitor. No matter if I have the studio lights on full blast with the window shades open or if I'm shooting at night with low light, I can clearly see the monitor and see the text I need to read.
Another nice feature you get with this teleprompter is its compatibility with different camera mount options. Whether you're using a small mirrorless camera or a dedicated video camera or something in between, this teleprompter can accommodate most rigs.
Setup is easy, too, with simple balancing and a quick-adjust base. The lightweight and compact design are also nice for small studios like I have, as well as for traveling. Speaking of which, this teleprompter comes with a handy travel case for easy transport.
Add in high-quality American-made 70/30 beam splitter glass, the ability to flip the image on the monitor, and the ability to read the monitor from up to 17 feet away, and you have the makings of a fantastic addition to your favorite photographer's or videographer's home studio!
Learn more about the Ikan Professional 15-Inch Bright Beam Splitter Teleprompter With Travel Kit
Gifts for Photographers Under $2,500: Canon RF 50mm f/1.2L USM Lens
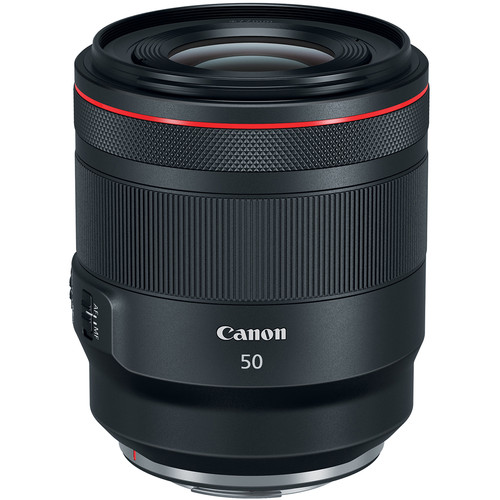
Ask any photographer what the most versatile focal length is, and many will likely say it's 50mm
You can use a 50mm lens for all sorts of pursuits - portraiture, landscape photography, street photography, and videography, just to name a few.
Heck, you can even reverse-mount a 50mm and use it for macro photography!
In this case, the Canon RF 50mm f/1.2L USM goes above and beyond what a normal 50mm f/1.8 offers and gives photographers a bigger maximum aperture for light-collecting capabilities and improved bokeh.
And since this is a L-series lens, you get the advantage of improved optics for superb image quality.
That image quality is thanks in large part to the three aspherical and one UD element inside the lens. These elements help generate high image quality from center to corner with reduced aberrations and distortion.
This lens is also vibration-resistant, weather-sealed, and has fluorine coatings on the front and rear elements that help repel water and dust.
In other words, this lens was built to last to provide photographers with reliable service for years and years to come.
Learn more about the Canon RF 50mm f/1.2L USM Lens
Gifts for Photographers Under $2,500: Aputure Light Storm LC 120d II
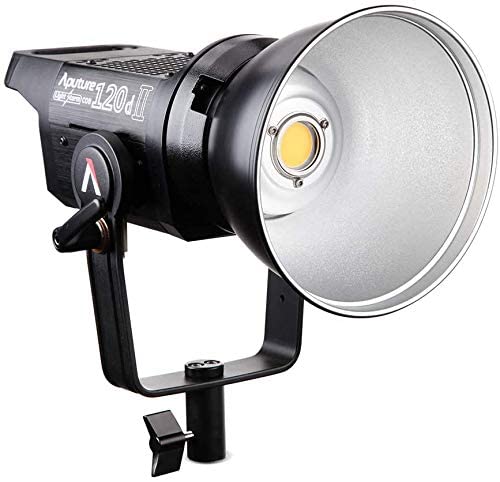
Photography (and videography, for that matter), are all about good lighting. And when it's good lighting you're after, it's tough to beat the Aputure 120d II.
I have these lights in my home studio, and as I explain in my review of this light, I couldn't be happier with their features, performance, and ease of use.
One look at the spec sheet and you can see why I've been so impressed with the Aputure 120d II:
- 1000-watt Tungsten equivalent
- Integrated power and control box
- CRI & TLCI 97+
- Dimmable from 100 percent to just 1 percent
- Built-in lighting effects, including fireworks, fire, lightning, paparazzi, and TV flicker
- 18 dB quiet fan
- DMX Capability
- Wireless remote (328-foot range)
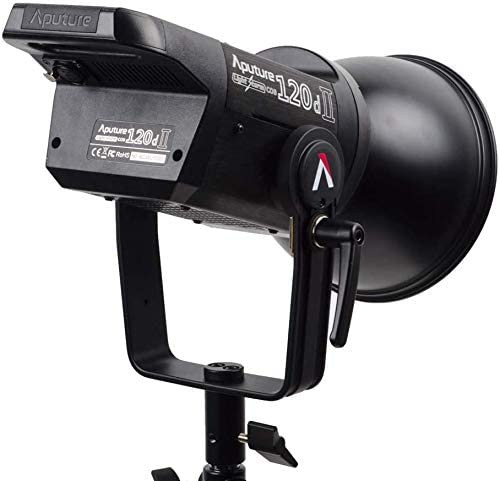
With this light, you get clean, beautiful lighting, the option to dim or brighten it from 1 to 100 percent, and you can select from a range of special effects, all in a light that offers quiet operation. Nice!
If you're shopping for a photographer or videographer that needs to upgrade their lighting setup, this is the one that should be at the top of your shopping list!
Learn more about the Aputure Light Storm LC 120d II
Gifts for Photographers Under $2,500: Pre-Owned Nikon Z6
The Nikon Z6 is a fantastic mirrorless camera, and since it's been a couple of years since its release, its price has dropped - especially for pre-owned models.
Whether you're shopping for a Nikon shooter who could use an upgrade to a "new" camera or you're shopping for a photographer that wants to get into the Nikon Z ecosystem, this is a great choice.
The Z6 has a 24.5-megapixel full frame back-illuminated sensor that offers top-notch image quality with excellent detail, clarity, and sharpness.
The 12fps burst shooting speed is ideal for action photography while the 273-point autofocus system helps you keep track of moving targets.
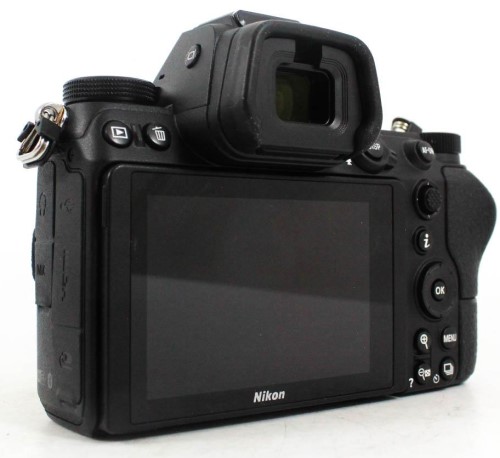
On the back is a large 3.2-inch variable-angle touchscreen LCD with 2.1 million dots of resolution, so you can easily see the camera's menu system and take a peek at images you've shot.
The Z6 has Bluetooth and Wi-Fi, shoots 4K video, and has a battery life of 310 shots.
This camera is an excellent option for photographers that want a solid rig that can tackle still photos and videos all in one package!
Gifts for Photographers Under $2,500: CanvasHQ Print
One of my favorite gifts to give (and to get, while we're at it) is a big, beautiful print.
Personally, I like canvas because of the texture the canvas gives to the print. Besides, a canvas print is something that will continue to give joy to the person that receives it for years and years to come!
Now, I know what you're thinking...canvas is so old-school.
But if you order your canvases from the right printers, you can get something that is beautiful, well-made and looks modern, even if the substrate is perhaps a bit old-school.
I have tons of canvases in my home, the vast majority of which are fromCanvasHQ.
These are some of the best canvas prints I've ever purchased. The sharpness of detail, the color accuracy, and the overall build quality of these prints is next-level good.
Part of the reason for this is the materials CanvasHQ uses. We’re talking archival-grade canvas, commercial-grade inks that are water and UV resistant, and kiln-dried pine frames to keep everything straight and true.
But CanvasHQ isn't just tops in the quality department...
They have excellent customer service that makes you feel heard and as though you're the only customer they have to worry about at that moment.
These guys are committed to getting it right, so if something doesn’t go as planned, you won’t be hung out to dry.
If you have questions, they’ll answer them. If you have a problem, they’ll fix it. If you need assistance with uploading your photo or even picking the best finishes for your canvas, they’ve got your back.
In the video above, you can see how one of my CanvasHQ prints stacks up against similar prints from other printing companies. I think you'll see why I'm so loyal to CanvasHQ!
Start shopping for your favorite photographer today on CanvasHQ.
Gifts for Photographers Under $2,500: Holdfast Roamographer Duffle Bag, Camera Bag, and MoneyMaker
This might just be the ultimate photography setup...
If you want to impress a photographer, go ahead and give them a bundle of products from Holdfast.
Holdfast's venerable Roamographer bags not only look incredible, but they're also incredibly functional, too.
Give them the Roamographer Duffle Bag for those long weekends out taking photos.
The duffle is handcrafted out of American Bison hide and has a shearling-lined shoulder strap for easy carrying. It's the perfect bag for a quick trip, and with a metal frame that keeps the bag open during packing and unpacking, two boot bags to keep your shoes away from your clothes, and tons of pockets for small items, it'll become their favorite getaway bag.
To carry their gear, you can include a Holdfast Roamographer Camera Bag as well.
Like the duffle, the camera bag has a vintage aesthetic but with modern features.
The camera insert cradles each camera item, ensuring their safety during transit.
The carrier straps accommodate a tripod for easy carrying, and the shearling-lined shoulder strap makes it easy on your favorite photographer's shoulder to carry the bag, too.
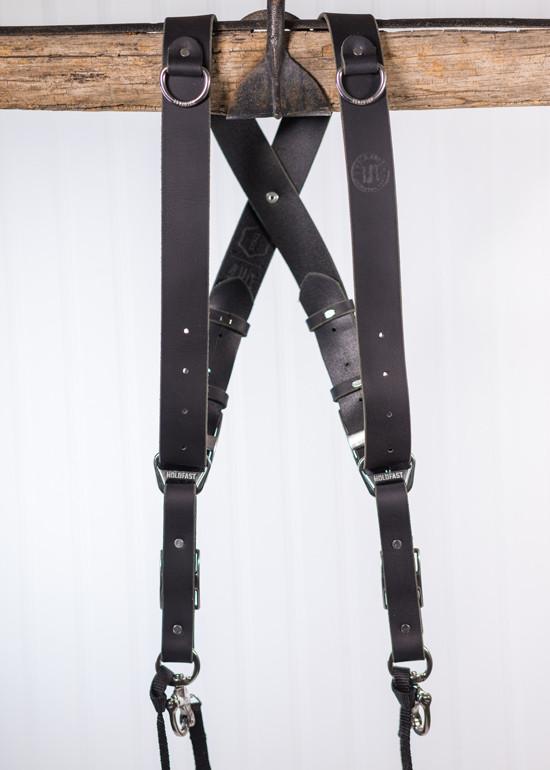
While you're at it, you can throw in a Holdfast MoneyMaker dual camera system.
The dual straps mean that a photographer can carry up to three cameras in ultimate comfort, and with their gear right at their fingertips for safe carrying.
What's more, for quick shots, their cameras are easy to reach, making the MoneyMaker just about the most functional gear you could give a photographer this holiday season.
And, like all other Holdfast products, the MoneyMaker looks like a million bucks.
You can pick up all three of these products and still have money to spare with a $2,500 budget!
Learn more about Holdfast products
Gifts for Photographers Under $2,500: Pre-Owned Canon EOS R
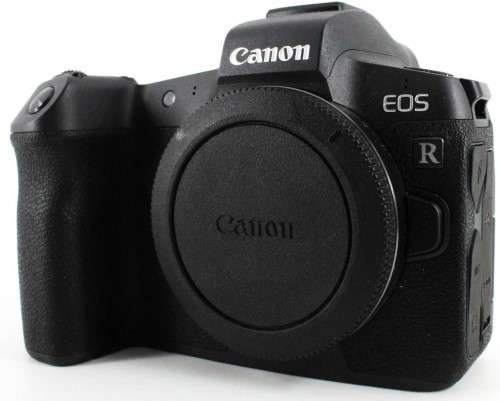
Back when the EOS R came out, it was groundbreaking for Canon since it was their first mirrorless camera.
It was the first Canon camera I owned, and it served me well - it will do the same for the photographer on your list!
The EOS R offers loads of features that include an ultra-resolute 30.3-megapixel full frame CMOS sensor.
Paired with a DIGIC 8 image processor, this camera is capable of shooting at 8fps and up to a native ISO range of 40000.
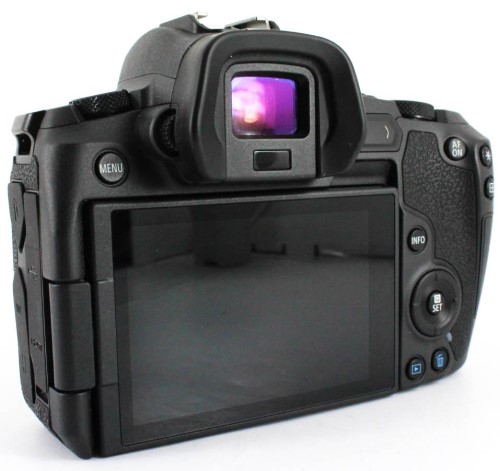
What's more, Canon gave the EOS R excellent video capabilities with UHD 4K video recording at 30fps.
One of this camera's best features, though, is the Dual Pixel CMOS autofocus system.
All told, it has 5,655 selectable autofocus points that allow photographers to quickly and accurately select where the focus of the image will be.
With a small, lightweight body, excellent build quality, great handling, and an increasingly large selection of lenses, the EOS R is definitely a fantastic gift idea this Christmas!
Learn more about the Canon EOS R
Gifts for Photographers Under $2,500: ProMediaGear Pro-Stix TR424L Carbon Fiber Tripod
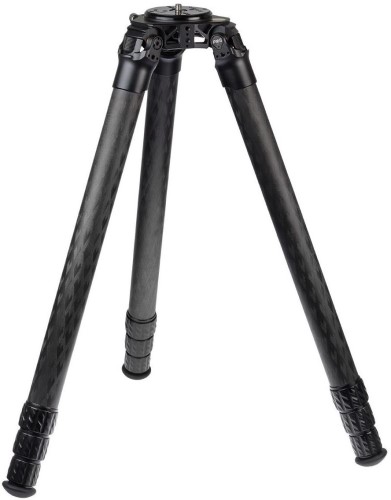
ProMediaGear tripods are among the best on the market. And that’s not just lip-service, either.
I’ve used ProMediaGear tripods, including the TR424L, for quite some time, and I can assure you that they are well-made, durable, and extremely functional.
These are professional-grade tripods, without a doubt. It can hold up to 125 pounds of gear thanks to its 42mm-thick carbon tripod legs.
Even when I’m out shooting video and I have a ton of accessories, it still doesn’t come close to that 125-pound mark!
From a functionality standpoint, the legs have three-position angle locks so you can adjust the tripod to be perfectly level, no matter how uneven the terrain. The built-in bubble level helps in that regard as well.
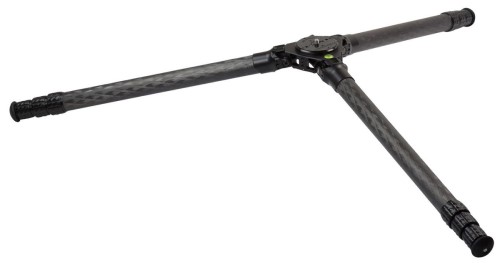
Deploying the legs is simple, too - just a quarter-turn locks them in place.
This tripod also has huge rubber feet, which as a landscape photographer is a favorite feature. The tripod doesn’t sink into soft soil and it doesn’t slip when things are wet or frozen. The metal spikes in the bottoms of each leg offer even more stability for truly rough shooting conditions.
You get all this in a tripod that folds down to just 26.3-inches tall, which can easily fit into a camera bag.
This isn’t a lightweight tripod by any means, but if the photographer on your list needs a go-anywhere, do-anything tripod, this is definitely it!
Learn more about the ProMediaGear TR424L Carbon Fiber Tripod
Gifts for Photographers Under $2,500: Amazon Gift Card
![]()
Totally stumped regarding gift ideas for photographers on your list?
Why not go the easy route and get them an Amazon gift card?
Though a gift card isn't exactly the sexiest gift, when the photographer in your family sees that you have given them carte blanche to get what they want, they'll be stoked!
With an Amazon gift card, they can put the card amount towards whatever they want - a new lens, a second camera body, lighting gear, a laptop - you name it!
As far as flexibility goes, there's nothing better to give a photographer than a gift card.
Learn more about Amazon gift cards
We Recommend
Gifts for Photographers Under $25 - 2020 Edition

photo byfcafotodigital via iStock
With so many people experiencing tough financial times due to the pandemic, it’s necessary to both think ahead about how to handle the holidays and to consider the gifts you can afford to give the photographers in your life.
Though a $25.00 budget might not seem like much, it can still get you some pretty awesome gifts that any photographer will love.
Let’s dive into our list of the top 10 gifts for photographers under $25.
Gifts for Photographers Under $25: CanvasHQ Print
One of my favorite gifts to give (and to get, while we're at it) is a big, beautiful print.
Personally, I like canvas because of the texture the canvas gives to the print. Besides, a canvas print is something that will continue to give joy to the person that receives it for years and years to come!
Now, I know what you're thinking...canvas is so old-school.
But if you order your canvases from the right printers, you can get something that is beautiful, well-made and looks modern, even if the substrate is perhaps a bit old-school.
I have tons of canvases in my home, the vast majority of which are fromCanvasHQ.
These are some of the best canvas prints I've ever purchased. The sharpness of detail, the color accuracy, and the overall build quality of these prints is next-level good.
Part of the reason for this is the materials CanvasHQ uses. We’re talking archival-grade canvas, commercial-grade inks that are water and UV resistant, and kiln-dried pine frames to keep everything straight and true.
But CanvasHQ isn't just tops in the quality department...
They have excellent customer service that makes you feel heard and as though you're the only customer they have to worry about at that moment.
These guys are committed to getting it right, so if something doesn’t go as planned, you won’t be hung out to dry.
If you have questions, they’ll answer them. If you have a problem, they’ll fix it. If you need assistance with uploading your photo or even picking the best finishes for your canvas, they’ve got your back.
In the video above, you can see how one of my CanvasHQ prints stacks up against similar prints from other printing companies. I think you'll see why I'm so loyal to CanvasHQ!
Start shopping for your favorite photographer today on CanvasHQ.
Gifts for Photographers Under $25: f-stop Coffee
I know you might be looking at this list of the top photography gifts for photographers and wonder why I’m including coffee, but just hear me out…
Who doesn't like a good cup of coffee? Each morning whether I'm out on an adventure or at home, I make my coffee one of four ways:
- Chemex (preferred way)
- French Press
- Mr. Coffee machine (when my wife makes the coffee)
- Keurig - when I'm in a rush and need a quick cup
f-Stop Coffee has you covered regardless how you prepare it...
As the name indicates, f-stop coffee brings the art of photography and a good cup of joe together into one harmonious experience.
f-stop Coffee uses aperture sizes to name each type of brew. There’s f/1.4 Light Roast, f/11 Medium Roast, and f/22 Dark Roast, to name but a few.
"I've had the opportunity to sample the f-stop Light Roast, and it knocked my socks off. I'm a coffee snob, so I don't throw out superlatives for coffee that often, but this coffee is tremendous! What a way to start the morning!" - Alex Schult, Founder & CEO, PhotographyTalk
And just like creating the perfect photo requires time, patience, and know-how, so too does creating f-stop Coffee.
These guys work hard to give their customers the highest-quality coffee that’s roasted to perfection and delivered right to your door - anywhere on earth.

If you’re in the market for a photography gift that keeps on giving, just pick your roast, select the coffee beans, decide how much to buy, choose the grind size, and place the order. It’s quick, simple, and will bring a smile to the face of any photographer!
Learn more about f-Stop coffee and take a peek at their #coffeeandphoto page to see how other photographers have combined their love of photography and coffee!
Gifts for Photographers Under $25: Colorado Tripod Company Highline Mini
One of the ball heads that has surprised me the most in recent years in this little guy, the Colorado Tripod Company Highline Mini.
The funny thing is that this company has been sending me their ball heads to review, and when this one arrived, I didn't look at the details - I just started using it.
And after using it, I thought it would be something that retailed for $60-80 based on its build quality and features.
However, when I was on the phone with these guys to give them my feedback, the subject of price came up, and I was shocked to learn it's about a $20 ball head.
Not only is this ball head incredibly affordable, but it's a perfect size that fits on top of my SwitchPod tripod. It's also super strong and does the job great with my Canon EOS M6 Mark II and my Canon EOS R.
Basic Specs:
- Universal knob clamp
- Integrated bubble level
- Panning knob
- Laser engraved degree markings
It’s not often you can find such a functional photography gift for this price, but the Highline Mini ball head definitely fits the bill!
Learn more about the Colorado Tripod Company Highline Mini ball head
Gifts for Photographers Under $25: Comica Omni-Directional Lavalier Mic
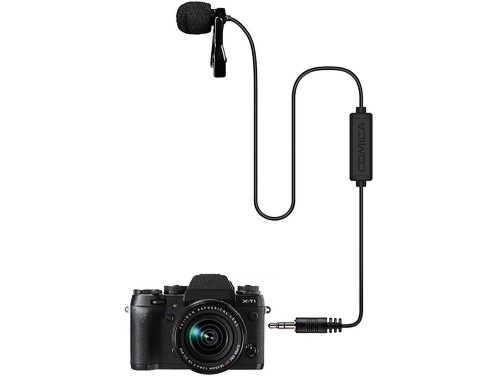
If the photographer on your 2020 holiday shopping list is also into videography, they might appreciate having an upgraded microphone for their video productions.
You can have the most gorgeous 4K video footage in the world, but if the audio stinks, the final video will stink too! Fortunately, you don’t have to spend an arm and a leg to give the gift of better audio…
The Comica Omni-Directional Lavalier mic is just what the doctor ordered for videographers that need high-quality audio to record their voice.
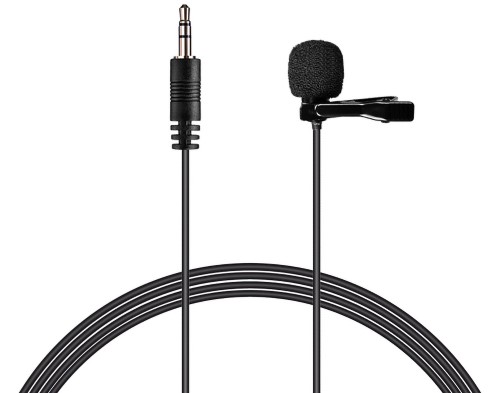
It can be used with DSLRs and mirrorless cameras and offers a built-in metal shield and windscreen for improved audio performance.
Speaking of audio performance, it has an omni-directional polar pattern and a 50Hz to 20kHz frequency response.
All this in a package that costs less than $25!
Learn more about the Comica Omni-Directional Lavalier Mic
Gifts for Photographers Under $25: Fotodiox Pro 42" 5-in-1 Reflector
A reflector is one of the most useful gifts for photographers that take portraits.
This 5-in-1 reflector pack offers even more versatility with a translucent diffuser to filter light and a black anti-reflector to block light or change the contrast of light on the subject.
Additionally, there's a soft white reflector to reduce shadows, soft silver for brightening the image and increasing contrast, and a soft gold reflector that warms up light in the portrait.
In other words, the photographer on your list can reflect light, diffuse it or even block it!
The reflector pack collapses into itself for easy transport in the accompanying carrying case too.
Learn more about the Fotodiox 5-in-1 Reflector
Gifts for Photographers Under $25: Giottos Rocket Air Blaster
Every photographer needs the proper tools to clean their gear.
This holiday season, give the gift of a Giottos Rocket Air Blaster so your favorite photographer can keep their camera's sensor free of dust and debris.
The 7.5-inch-long blaster has a 2.5-inch nozzle that produces a large blast of clean air to get rid of particles on the camera's sensor.
The one-way valve brings in clean air instead of sucking up dust that it's just dislodged, too.
It's easy to carry, durable, and invaluable for keeping photography gear operating at its best!
Learn more about the Giottos Rocket Air Blaster
Gifts for Photographers Under $25: Anwenk 18% Gray Card
Getting the white balance just right in a photo is imperative to it having its maximum impact. The photographer on your list can do that with an 18% gray card.
This gray card pack has a matte finish that makes it scratch resistant and non-reflective. It's also waterproof, so even in the rain, sleet, and snow, if your favorite photographer is out shooting, they can get the correct white balance in their shots.
Sized at 5x4 inches, these cards are ideally suited for daily use. They're compact, lightweight, sturdy, and can be slipped easily into a camera bag, a pocket, or worn around the neck with the included lanyard.
Learn more about the Anwenk 18% Gray Card
Gifts for Photographers Under $25: SanDisk 128GB Ultra SDXC UHS-I Memory Card
All photographers need memory cards, so why not oblige with the SanDisk 128GB Ultra SDXC UHS-I memory card?
This card offers loads of space, Class 10 speed for full HD video recording, and fast read/write speeds of up to 100 MB/s.
SanDisk is one of the most trusted memory card brands, and for good reason. After all, this card comes with a full 10-year warranty! Besides, a memory card is a gift the photographer on your list will actually use, and they’ll use it over and over and over again!
Learn more about the SanDisk 128GB Ultra SDXC UHS-I Memory card
Gifts for Photographers Under $25: Amazon Gift Card
![]()
Totally stumped regarding gift ideas for photographers on your list?
Why not go the easy route and get them an Amazon gift card?
Though a gift card isn't exactly the sexiest gift, when the photographer in your family sees that you have given them carte blanche to get what they want, they'll be stoked!
With an Amazon gift card, they can put the card amount towards whatever they want - a new lens, a second camera body, lighting gear, a laptop - you name it!
As far as flexibility goes, there's nothing better to give a photographer than a gift card.
Learn more about Amazon gift cards
We Recommend
Gifts for Photographers Under $25 - 2021 Edition

Photo by mapodile via iStock
I know what you’re thinking…
Photography gear and accessories are expensive, so what could I possibly get for the photographer on my list for under $25?
It turns out, there’s a lot of options!
From camera cleaning kits to canvas prints, memory cards to coffee, you can find all sorts of great gifts for photographers in the list below.
Gifts for Photographers Under $25: CanvasHQ Print
It's tough to beat a large-format canvas print as a holiday gift...
Canvas prints offer a classic look with an interesting texture that helps bring the image to life.
What's more, when it's a well-made canvas, like those from CanvasHQ, the print can become a family heirloom - something that you cherish for decades to come. What a powerful gift!
I have tons of canvases in my home, the vast majority of which are fromCanvasHQ.
What appeals to me about these prints is the impeccable quality. There is a great level of detail and sharpness, beautiful color accuracy, and the frames on which the print is stretched are handmade with kiln-dried wood to ensure the frame stays square and true for years to come.
Additionally, these guys use archival-grade canvas and commercial-grade inks to ensure long-lasting durability.
They also have a new product - a variety of floating frames - that add a touch of elegance and depth to canvas prints.
The floating frames extend along the sides of the print and don't obscure the front of the print, that way you can see 100 percent of the image. It's a clean, dynamic finish that looks great!
But CanvasHQ isn't just tops in the quality department...
They have excellent customer service that makes you feel heard and as though you're the only customer they have to worry about at that moment.
These guys are committed to getting it right, so if something doesn’t go as planned, you won’t be hung out to dry.
If you have questions, they’ll answer them. If you have a problem, they’ll fix it. If you need assistance with uploading your photo or even picking the best finishes for your canvas, they’ve got your back!
Start shopping for your favorite photographer today on CanvasHQ.
Gifts for Photographers Under $25 - Black Rifle Coffee
I don’t know about you, but when I start my day - whether it’s out in the field for a landscape photography shoot or here at home in my office - I absolutely have to have some coffee to get me going.
While coffee isn’t just a gift for photographers, it sure can give the photographer in your life the boost they need to get the day started.
What’s great about Black Rifle Coffee (apart from being really, really good) is that you can get a coffee club subscription and enjoy all kinds of coffee each month. But to get things started, you can give the gift of a 12 oz. bag of coffee that your photography loved one will enjoy.
There’s a huge selection, too - light, medium, and dark roasts and flavors that vary from The Headless Horseman’s Roast to Gunship Roast.
Just beware - whoever you give this coffee to will want to share, and then you’ll want to buy some for yourself!
Learn more about Black Rifle Coffee
Gifts for Photographers Under $25: Colorado Tripod Company Highline Mini
One of the ball heads that has surprised me the most in recent years is this little guy, the Colorado Tripod Company Highline Mini.
The funny thing is that this company has been sending me their ball heads to review, and when this one arrived, I didn't look at the details - I just started using it.
And after using it, I thought it would be something that retailed for $60-80 based on its build quality and features.
However, when I was on the phone with these guys to give them my feedback, the subject of price came up, and I was shocked to learn it's about a $20 ball head.
Not only is this ball head incredibly affordable, but it's a perfect size that fits on top of my SwitchPod tripod. It's also super strong and does the job great with my Canon EOS M6 Mark II and my Canon EOS R.
Basic Specs:
- Universal knob clamp
- Integrated bubble level
- Panning knob
- Laser engraved degree markings
It’s not often you can find such a functional photography gift for this price, but the Highline Mini ball head definitely fits the bill!
Learn more about the Colorado Tripod Company Highline Mini ball head
Gifts for Photographers Under $25: Comica Omni-Directional Lavalier Mic
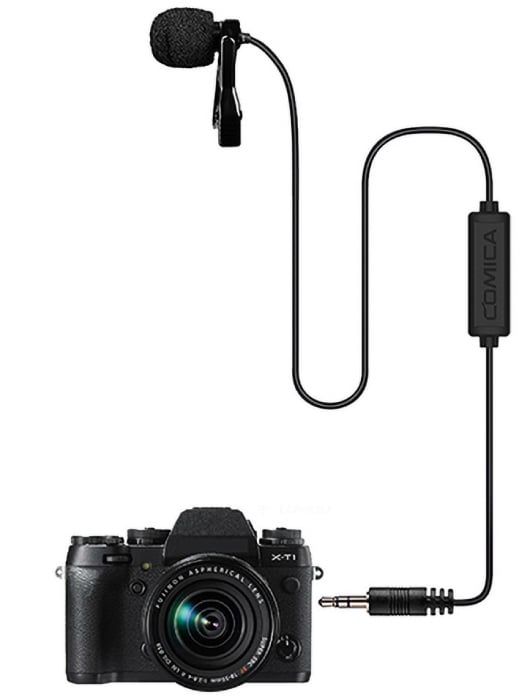
If the photographer on your 2020 holiday shopping list is also into videography, they might appreciate having an upgraded microphone for their video productions.
You can have the most gorgeous 4K video footage in the world, but if the audio stinks, the final video will stink too! Fortunately, you don’t have to spend an arm and a leg to give the gift of better audio…
The Comica Omni-Directional Lavalier mic is just what the doctor ordered for videographers that need high-quality audio to record their voice.
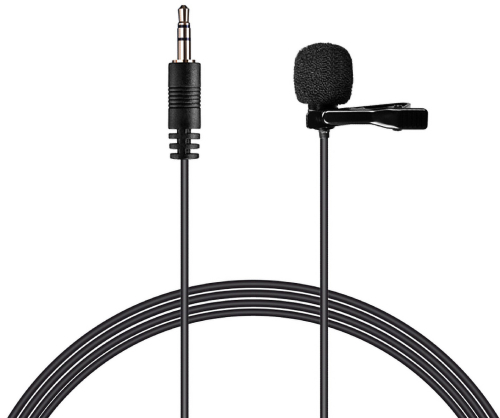
It can be used with DSLRs and mirrorless cameras and offers a built-in metal shield and windscreen for improved audio performance.
Speaking of audio performance, it has an omni-directional polar pattern and a 50Hz to 20kHz frequency response.
All this in a package that costs less than $25!
Learn more about the Comica Omni-Directional Lavalier Mic
Gifts for Photographers Under $25: Altura Photo Professional Cleaning Kit
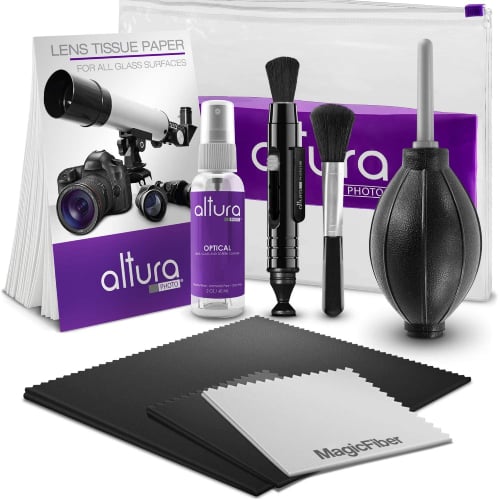
Every photographer needs a good cleaning kit for their camera and lenses, and that’s exactly what you get with the Altura Photo Professional cleaning kit.
This kit has everything the photographer on your list needs to keep their gear clean…
There’s a lens cleaning pen and a lens brush, an air blower and 50 sheets of lens cleaning tissues as well. There’s also a 2 oz. bottle for lens cleaner and a three-pack of oversized microfiber cleaning cloths.
There’s even a 90-day, 100 percent satisfaction guarantee!
Don’t let the photographer in your life take photos with a dirty lens or a sensor that needs to be cleaned. Instead, give the gift of clean gear with this cleaning kit!
Learn more about the Altura Photo Professional Cleaning Kit
Gifts for Photographers Under $25: SanDisk 128GB Ultra SDXC UHS-I Memory Card
All photographers need memory cards, so why not oblige with the SanDisk 128GB Ultra SDXC UHS-I memory card?
This card offers loads of space, Class 10 speed for full HD video recording, and fast read/write speeds of up to 100MB per second.
SanDisk is one of the most trusted memory card brands, and for good reason. After all, this card comes with a full 10-year warranty! Besides, a memory card is a gift the photographer on your list will actually use, and they’ll use it over and over and over again!
Learn more about the SanDisk 128GB Ultra SDXC UHS-I Memory card
Gifts for Photographers Under $25: SanDisk 32GB Ultra SDHC UHS-I Memory Card 3-Pack

Just like every photographer needs a cleaning kit, every photographer needs lots of memory cards.
This three-pack of 32GB Ultra SDHC UHS-I memory cards from SanDisk will give your favorite photographer the backup options they need to ensure their photos and videos are safe and secure.
These cards are good options for photographers that don’t shoot a lot of video (though they can accommodate full HD recording). They are ideal for compact and point-and-shoot cameras and offer transfer speeds of up to 90MB per second
Learn more about the SanDisk 32GB Ultra SDHC UHS-I Memory Card 3-Pack
Gifts for Photographers Under $25: Fotodiox Pro 22" 5-in-1 Reflector
A reflector is one of the most useful gifts for photographers that take portraits.
This 5-in-1 reflector pack offers even more versatility with a translucent diffuser to filter light and a black anti-reflector to block light or change the contrast of light on the subject.
Additionally, there's a soft white reflector to reduce shadows, soft silver for brightening the image and increasing contrast, and a soft gold reflector that warms up light in the portrait.
In other words, the photographer on your list can reflect light, diffuse it or even block it!
The reflector pack collapses into itself for easy transport in the accompanying carrying case too.
Learn more about the Fotodiox 5-in-1 Reflector
Gifts for Photographers Under $25: Amazon Gift Card
![]()
Totally stumped regarding gift ideas for photographers on your list?
Why not go the easy route and get them an Amazon gift card?
Though a gift card isn't exactly the sexiest gift, when the photographer in your family sees that you have given them carte blanche to get what they want, they'll be stoked!
With an Amazon gift card, they can put the card amount towards whatever they want - a new lens, a second camera body, lighting gear, a laptop - you name it!
As far as flexibility goes, there's nothing better to give a photographer than a gift card.
Learn more about Amazon gift cards
We Recommend
Gifts for Photographers Under $250 - 2021 Edition

Photo by GMVozd via iStock
Shopping for a photographer can be a tough task. Heck, shopping for yourself can be a difficult task!
It's not that there aren't all kinds of gifts for photographers under $250...it's simply trying to decide which ones are the best.
In this holiday gift guide for photographers, we've got 10 great gift ideas, all of which come in at less than $250. That means you have many options for giving an awesome photography gift without blowing your budget.
Let's get to the list!
Gifts for Photographers Under $250: Colorado Tripod Company Highline Ballhead
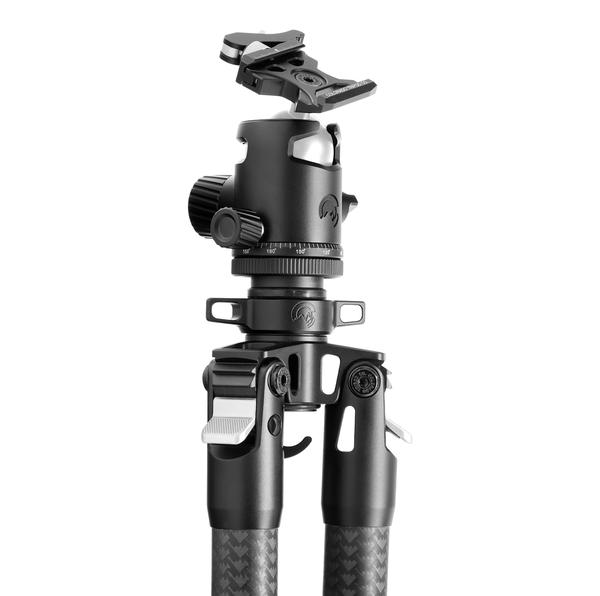
The great thing about the Colorado Tripod Company Highline Medium Ballhead is that it's a fantastic addition to my kit whether I'm working in my home studio or I'm out in the field.
When I'm in the studio, I use this ballhead with Colorado Tripod Company's lever clamp (which is compatible with L-brackets and Arca-compatible plates) doing overhead shots. There is a distinct clicking noise that tells me that the ballhead is 100 percent locked in, that way I don't have to worry if the camera is going to crash down on my head as I'm recording.
And, as you'd expect with a product from Colorado Tripod Company, the Highline Ballhead is beautifully made using high-quality materials. It's smartly designed, too, with a universal knob clamp, a drop-in window, dedicated friction control, and independent locking and panning knobs. Addin a 10-year warranty, six available colors, and two different sizes, too!
It's just an easy-to-use, go-anywhere ballhead that any photographer on your holiday shopping list would appreciate!
Learn more about the Colorado Tripod Company Highline Medium Ballhead
Gifts for Photographers Under $250: CanvasHQ Print
It's tough to beat a large-format canvas print as a holiday gift...
Canvas prints offer a classic look with an interesting texture that helps bring the image to life.
What's more, when it's a well-made canvas, like those from CanvasHQ, the print can become a family heirloom - something that you cherish for decades to come. What a powerful gift!
I have tons of canvases in my home, the vast majority of which are fromCanvasHQ.
What appeals to me about these prints is the impeccable quality. There is a great level of detail and sharpness, beautiful color accuracy, and the frames on which the print is stretched are handmade with kiln-dried wood to ensure the frame stays square and true for years to come.
Additionally, these guys use archival-grade canvas and commercial-grade inks to ensure long-lasting durability.
They also have a new product - a variety of floating frames - that add a touch of elegance and depth to canvas prints.
The floating frames extend along the sides of the print and don't obscure the front of the print, that way you can see 100 percent of the image. It's a clean, dynamic finish that looks great!
But CanvasHQ isn't just tops in the quality department...
They have excellent customer service that makes you feel heard and as though you're the only customer they have to worry about at that moment.
These guys are committed to getting it right, so if something doesn’t go as planned, you won’t be hung out to dry.
If you have questions, they’ll answer them. If you have a problem, they’ll fix it. If you need assistance with uploading your photo or even picking the best finishes for your canvas, they’ve got your back!
Start shopping for your favorite photographer today on CanvasHQ.
Best Ever Backdrops Mix and Match Backdrop
Ever since the pandemic started, many photographers have been looking for ways to supplement their income from home. For many people, that means getting involved in product photography and food photography because both are easy to do from the comfort of your own home, provided you have the necessary gear.
Of course, the photographer on your holiday shopping list already has a camera, lenses, a tripod, and so forth, but they might not have the kind of backdrops that make product photography and food photography an easier task.
That’s where Best Ever Backdrops come in!

Now, if the photographer on your list is a portrait photographer, they undoubtedly have a collection of backdrops already. The problem is that those big, bulky, heavy backdrops aren’t well-suited for small scenes like product or food photography.
But since Best Ever Backdrops are just 24 x 36 inches, they are perfect for making small subjects stand out against the non-glare matte finish. These backdrops are also waterproof and stain resistant.
In addition to being just the right size, these backdrops are double-sided which means each backdrop comes with TWO textures! You choose the color or pattern you want for both sides which maximizes the utility of the backdrop for the lucky photographer who will get them as a gift.
And if you know photographers, you know that we have tons of gear all over the place, so storage is often an issue. But since these backdrops are small, lightweight, and just 1/8th of an inch thick, they can be stored under the bed, behind a door, in the corner of a closet - you name it!
To top it all off, these backdrops are virtually indestructible, so this is a gift that will literally keep on giving for years and years to come. PLUS...the more you order, the more you save. For example, if you order two backdrops you get four textures. Each backdrop is $124.50, but if you order four, the price drops to $104.75 each.
Giving a great gift is all about being thoughtful and giving your loved one something that they will use over and over again. That’s exactly what you get with a backdrop that pulls double duty and allows the photographer on your holiday shopping list to expand the footprint of their business
Learn more about Best Ever Backdrops
Gifts for Photographers Under $250: RODE VideoMic NTG
I've used the RODE VideoMic NTG for well over a year and a half now.
Needless to say, this mic has impressed!
Like the larger NTG 4 studio mic, the VideoMic NTG captures gorgeous, natural sound. There are various controls to assist you in getting beautiful sound, including:
- Infinitely variable gain control
- Digital switch for controlling high-frequency boost and the high-pass filter
- Headphone output for monitoring audio
- Peak decibel warning light to avoid distortion
The best feature of this mic, though, is its sliding rail.
In the past, a difficulty with my RODE mics is that they stuck out so far from the camera that you might find yourself with a face full of microphone.
But the sliding rail on this mic means that problem is solved - if I'm shooting in selfie mode, I can slide the rail back and keep the microphone from hitting my face.
Add to that a battery that gives you more than 30 hours of runtime on one charge and you have a recipe for an excellent microphone for the photographer or videographer on your holiday list.
Learn more about the RODE VideoMic NTG
Gifts for Photographers Under $250: Nanlite FS-150 AC LED Monolight
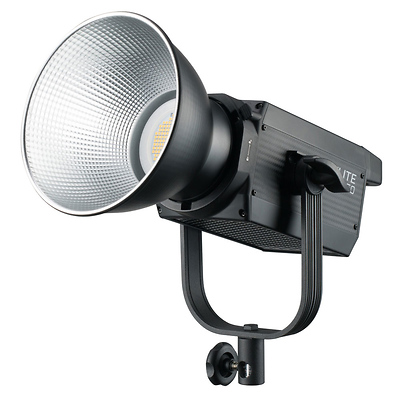
One of the most critical pieces of equipment in a portrait photographer’s arsenal is a good LED light. After all, without good lighting, the task of creating captivating images is difficult, if not impossible.
This year for the holidays, you can ensure the photographer on your shopping list has that all-important good lighting by giving them the Nanlite FS-150 AC LED Monolight.
This AC-powered light from our friends at Samy’s offers a beautifully even light spread thanks to a large LED array and a high-quality reflector. The light puts out 26380 Lux at 5600K and boasts a CRI of 96 and a TLCI of 98. What all that means is that this light emits beautiful, color-accurate light that falls evenly across the scene.
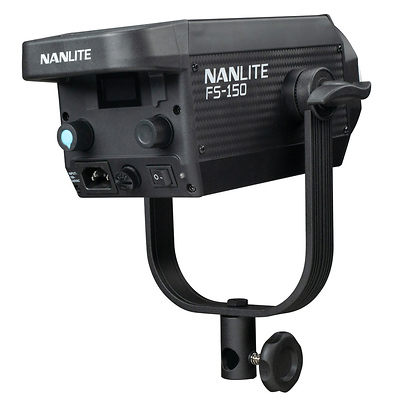
This light is an all-in-one device as well. It has a control unit, power adapter, and lamp body all in one compact unit. So, not only does this light offer beautiful lighting, but it’s also lightweight and easily portable. The in-body cooling is a further advantage because it enables easier heat dissipation for longer-lasting performance.
Since Nanlite incorporated a Bowens-style light modifier mount and an umbrella holder into the yoke, this light also gives photographers the ability to use a wide array of light modifiers. Additionally, this light offers customizable pre-programmed special effects to give photographers additional leeway in terms of how the light is used.
In other words, this is a gift that offers all sorts of functionality and utility; it’s truly something a photographer can use everyday!
Learn more about the Nanlite FS-150 AC LED Monolight
Gifts for Photographers Under $250: Refurbished SideTrak Slide Portable Monitor
One of the best gifts you can give the photographer in your life is the ability to streamline their workflow and make it more functional.
And a great way to do that is to give them a monitor that allows them to double the workspace of their laptop screen…
That’s where the SideTrak Slide Portable Monitor comes in.
At 12.5-inches, this portable monitor offers loads of additional real estate for working photographers. It simply attaches to the back of a laptop with a semi-permanent metal plate and gives photographers the ability to work with two screens or to mirror to the second screen if desired.
The Slide can be rotated 270-degrees, which means it can be used to share what’s on screen with clients. The monitor can be used on the left or right side of a laptop and can be used in portrait mode as a standalone monitor as well.
As a photographer that often travels, I know that space can often be at a premium which makes having a complex computer setup next to impossible.
But with Slide, you don’t need any extra table or desk space because it attaches directly to the back of a laptop. And since Slide is a lightweight, portable monitor, it can be brought along on field assignments with ease.
This is definitely one of those “gifts that keeps on giving” situations…
Giving gifts that can be used over the long-term gets you more bang for your buck while giving the photographer on your list tons of utility. This holiday season, make sure they have all the utility they need with the SideTrak Slide!
Learn more about the SideTrak Slide
Gifts for Photographers Under $250: Onyx 30W Bi-Color On-Camera LED Light
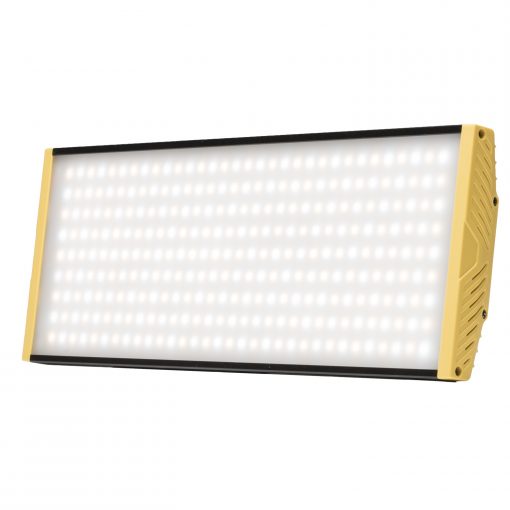
With more and more photographers getting into video production, it makes sense to get the photographer on your list a high-quality LED light for their video shoots.
The Onyx Bi-Color LED light is a great option because it features 30-watt high-quality LEDs, high brightness, and beautiful clarity for giving video sequences the light they need to stand out.
With an aluminum frame, the light is both lightweight and durable. Likewise, there is minimal heat release because the aluminum frame allows for excellent ventilation.
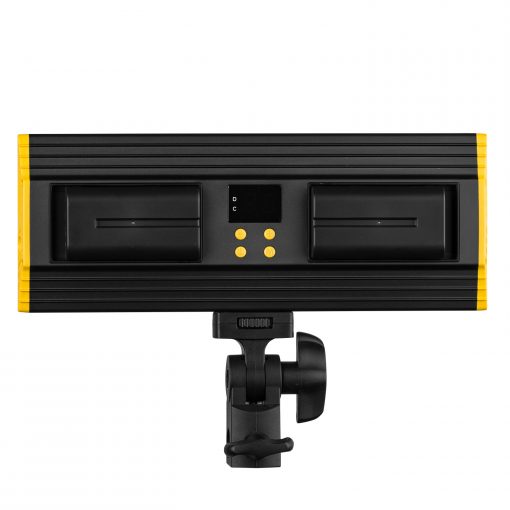
The light can be mounted on-camera or a tripod. It comes with a bracket that can attach to any light stand with a baby 5/8-inch receiver.
Best of all, the Onyx Bi-Color light has easy-to-use controls. The LED display gives you the ability to make quick and accurate adjustments of brightness from 10 percent to 99 percent and color temperature from 3200K to 5600K.
Of course, this light can also be used for photography, so it's a gift that offers multiple benefits for the person on your list!
Learn more about the Onyx 30-Watt Bi-Color On-Camera LED Light
Gifts for Photographers Under $250: PolarPro Peter McKinnon Edition II Variable ND Filter
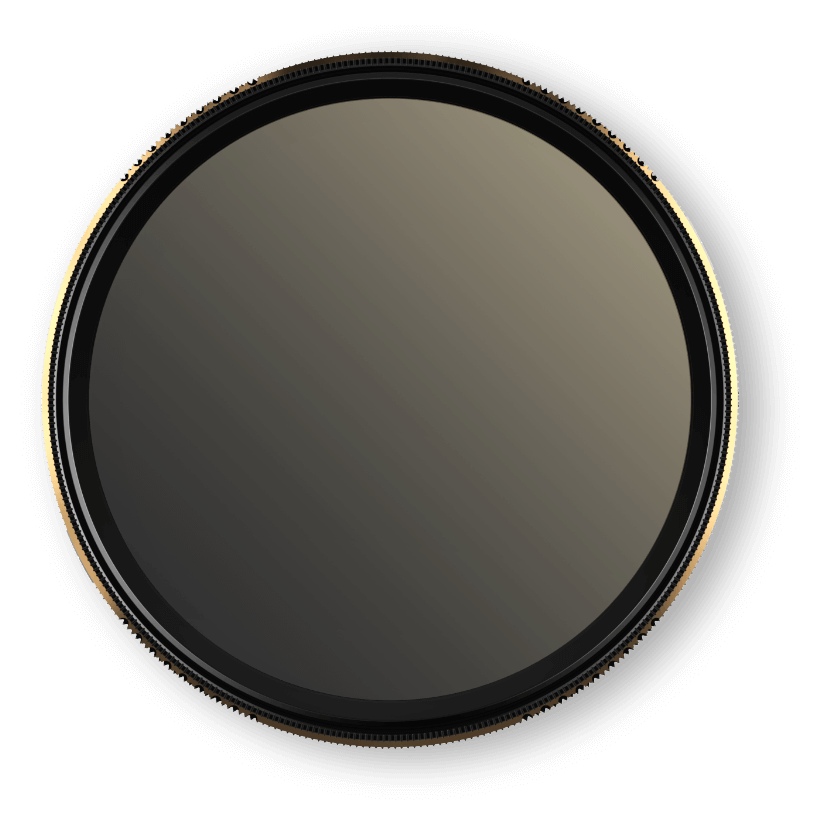
PolarPro Signature Edition II
A variable ND filter is a crucial component of a photographer's kit because it's such a versatile piece of kit.
You can use a variable ND filter for photo and video work, and since this filter is variable, it gives you the ability to adjust from 2-5 stops or 6-9 stops depending on which version you opt to get.
What's so innovative about this filter is that it has preset stop ranges that eliminates the all-too-frequent occurrence of cross-polarization.
Likewise, this filter displays zero vignetting down to 16mm focal lengths. That means your favorite photographer can get a lot of utility out of this filter with a lot of different lenses.
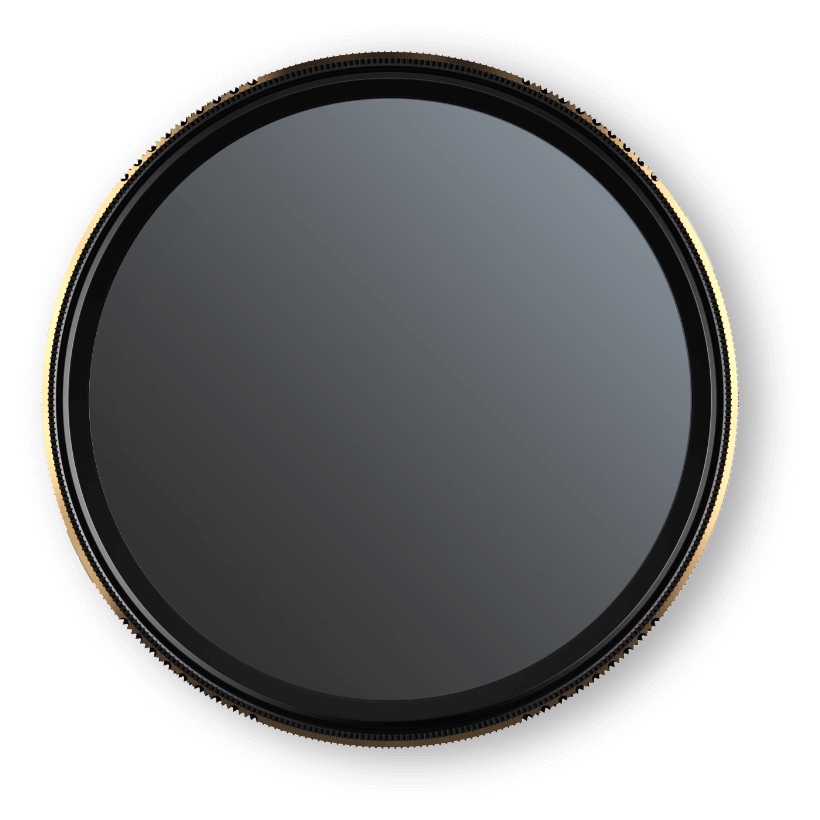
PolarPro Mist Edition II
This updated version includes PolarPro's new Defender360 system, too. It's a 360-degree protection system for the filter, including a waterproof and dustproof seal.
PolarPro has also developed a new haptic feedback mechanism that gives photographers the ability to make quick and easy stop-value changes without taking their eye off the viewfinder.
On top of that, PolarPro offers Adventure Assurance, so if the photographer on your list isn't satisfied with the performance of the filter, you get your money back.
PolarPro has demonstrated a commitment to quality over the years, and this filter is no exception. With two versions (Signature II and Mist II) it's a great gift idea if you want to spend less than $250!
Learn more about the PolarPro PeterMcKinnon Edition II Variable ND Filter
Gifts for Photographers Under $250: Aputure Amaran AL-MX Bi-Color LED Mini Light
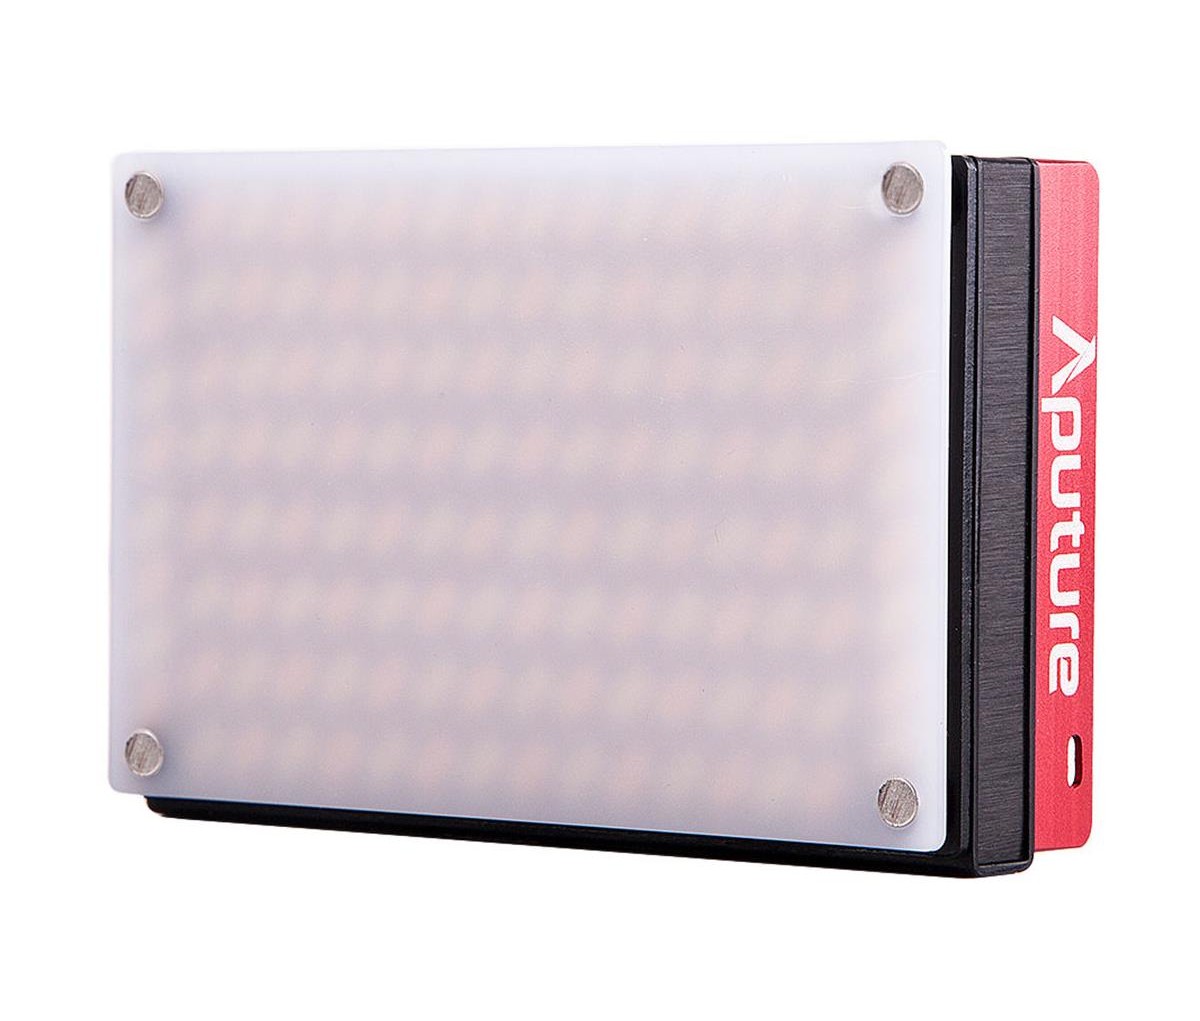
This pocket-sized light might be small, lightweight, and portable, but it packs a mighty punch with 128 LEDs, 3200lux of brightness, and a "boost mode" that increases brightness by 30 percent for bursts of 60 seconds.
Add to all that power the ability to tune the light from 2800-6500K so the photographer on your list can make fine adjustments to how the light looks to suit each and every photograph.
The quality of the light is top-notch, too - it offers a CRI of 95+ and a TLCI or 95+ as well.
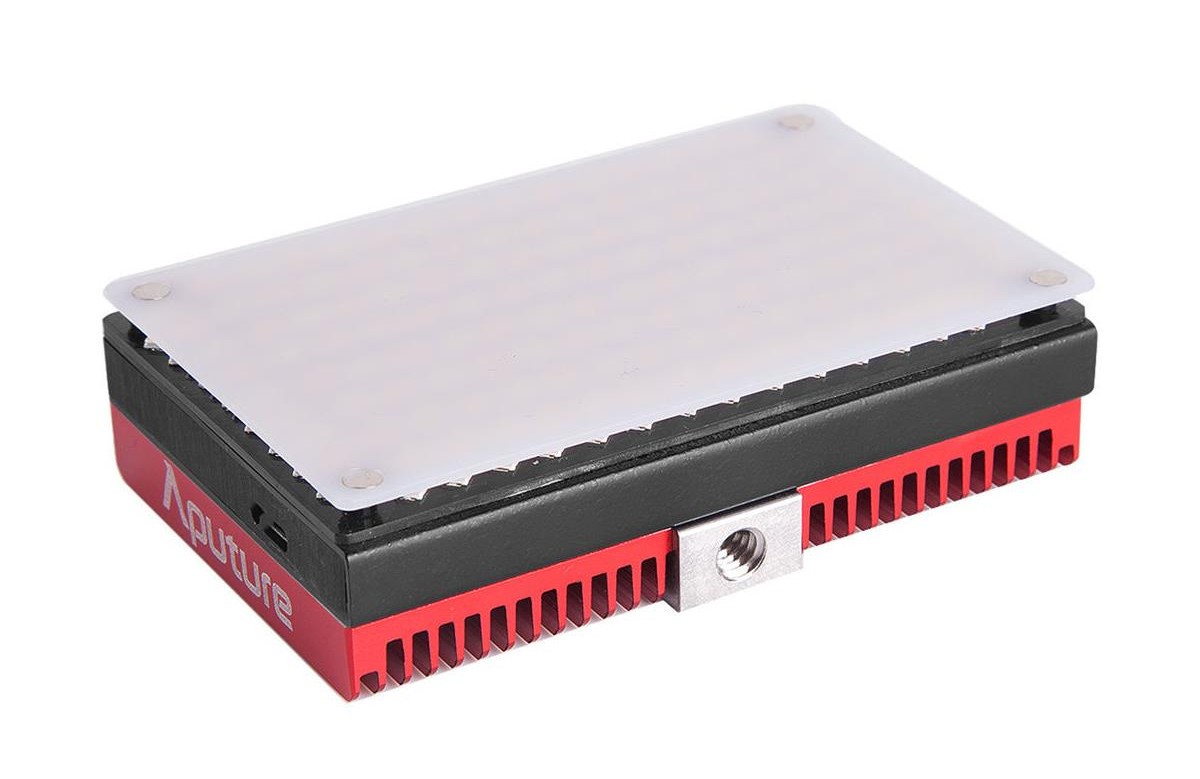
This light has a wide beam angle of 120-degrees, a portable design that's about the width and height of a credit card, and a durable metal body that's crafted of aircraft-grade aluminum.
It has a 1/4 screw and a universal cold-shoe mount so it can be mounted on a camera, a tripod, a light stand, and so forth.
This unit has a built-in battery that offers about an hour of runtime at full power and four hours of runtime at minimum power. The battery is rechargeable via a USB-C cable.
This is simply a well-built, bright, easy-to-use light that any photographer would appreciate in their stocking this holiday season!
Learn more about the Aputure Amaran AL-MX Bi-Color LED Light
Gifts for Photographers Under $250: Nomatic Peter McKinnon Cube Pack
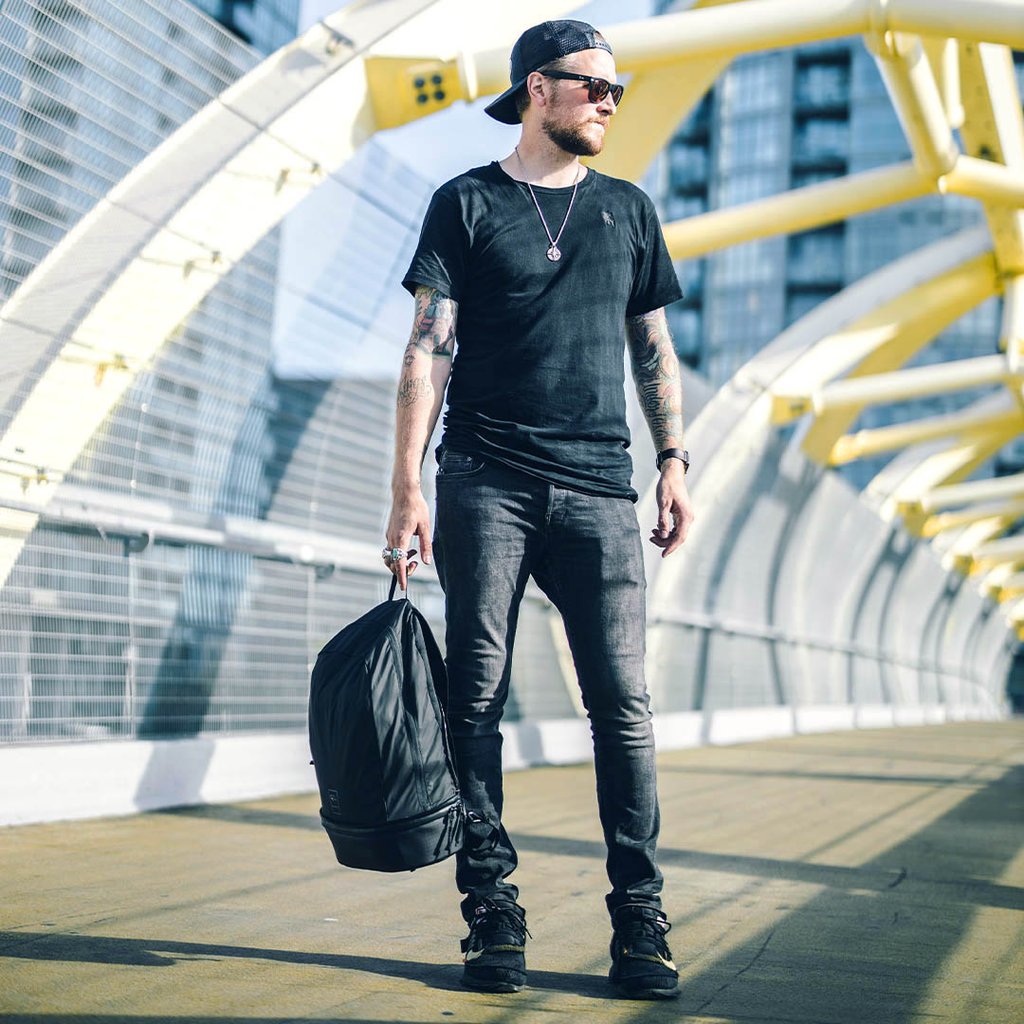
Nomatic has forged a reputation for being innovative and focused on developing high-quality, high-utility bags, and the Peter McKinnon Cube Pack is certainly no exception.
The Cube Pack holds 21 liters of gear and offers complete customization thanks to the customizable dividers inside. That customizability comes from the input of Peter McKinnon, who as a photographer and videographer understands the need to be able to customize your bag to fit the specific needs of each shoot.
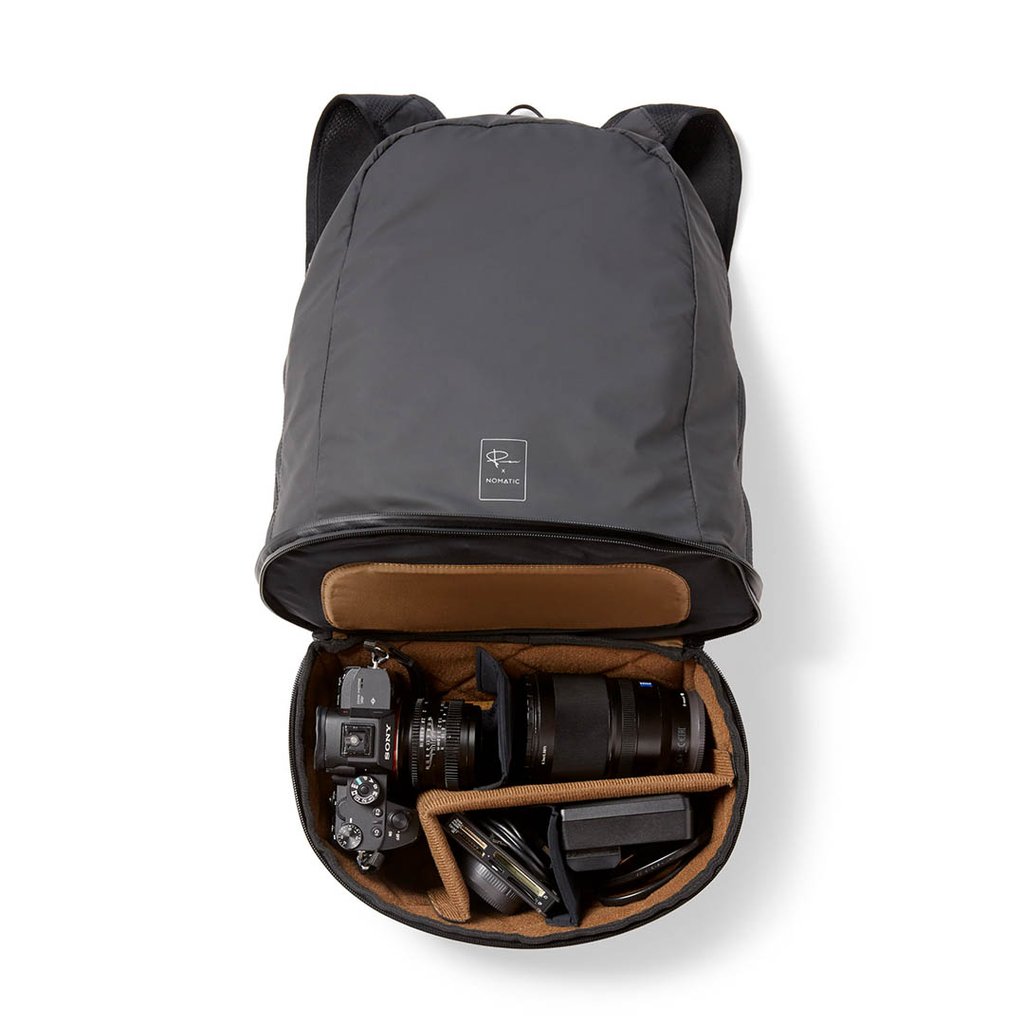
On the exterior of the bag is a durable and water-resistant finish. There are also external attachment loops for carrying additional gear.
And since this bag fits inside the Nomatic McKinnon Camera Pack, it can pull double-duty as a standalone bag or as an organizational tool for the larger Camera Pack.
Plus, at a price of $125.00, this bag is one of the least expensive items on this list! What's not to like about that?
Learn more about the Nomatic Peter McKinnon Cube Pack
Gifts for Photographers Under $250: Zoom H4n Portable Audio Recorder
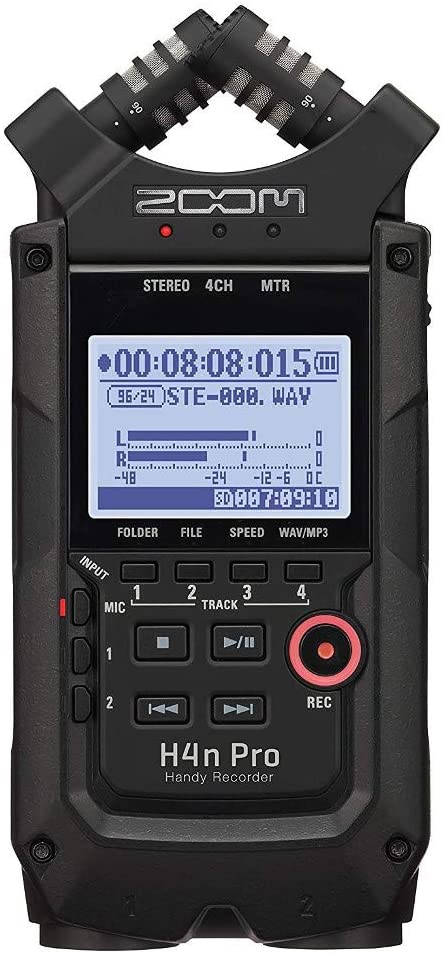
As I noted earlier, since many photographers are now fully invested in also making videos, having proper video equipment is a must.
And one of the best gifts for a photographer that's shooting videos is a high-quality audio recorder like the Zoom H4n.
I've used Zoom products for years, and I can't express enough how pleased I have been with their performance.
In this case, the H4n offers four-channel recording up to 24-bit and 96 kHz. It has 2 XLR/TRS inputs with locking connectors and built-in stereo X/Y microphones that are adjustable from 90-120 degrees.
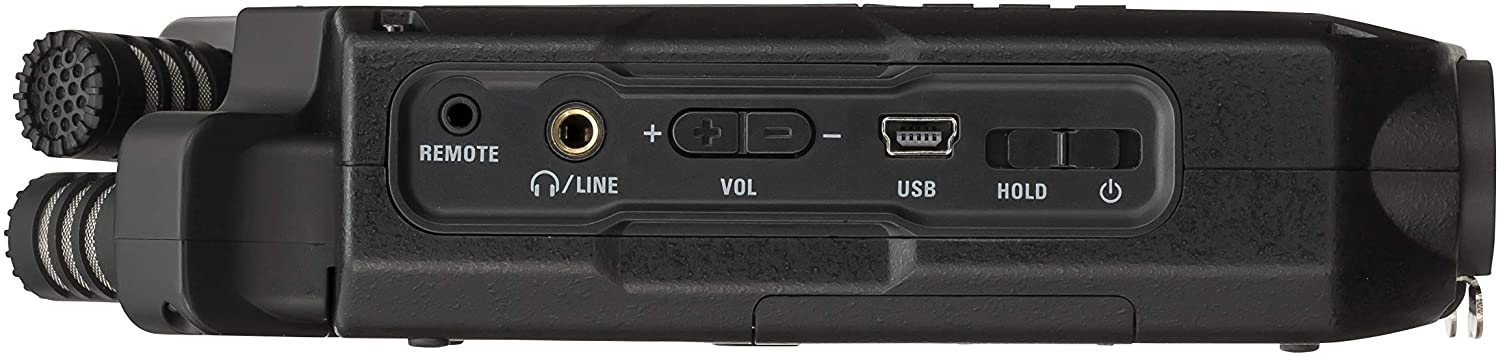
It has 4-in and 2-out USB interfaces and can record directly to SD or SDHC cards up to 32GB in size.
The H4n is portable, has professional-grade preamps, three recording modes, and many other features that make it an ideal holiday gift for the photographer on your list.
Learn more about the Zoom H4n Portable Audio Recorder
Gifts for Photographers Under $250: E-Image EK650 Tripod
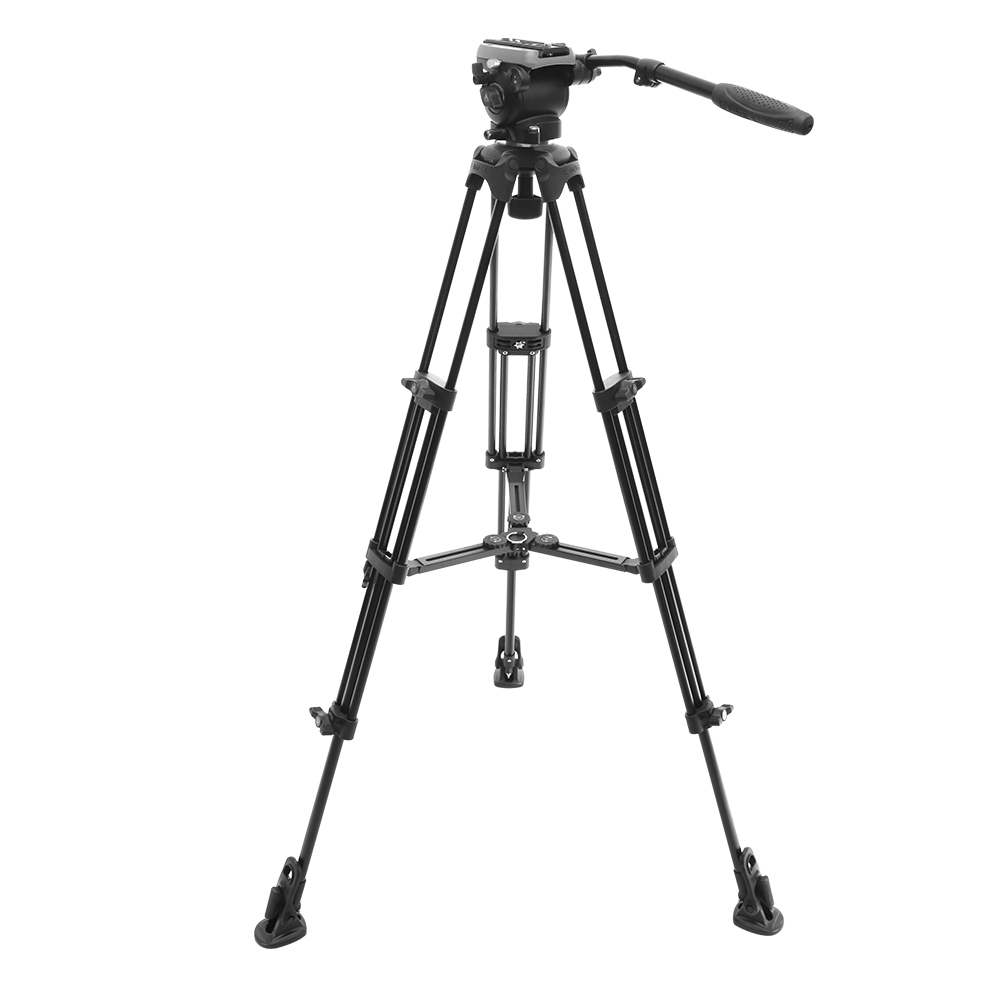
A solid tripod is a must-have for any photographer, and that's exactly what you can give them in the E-Image EK650.
This professional tripod kit is ideal for photographers that shoot with DSLR or mirrorless gear.
It has a fluid head with a 75mm bowl that can support up to 11 pounds thanks to its fixed counterbalance.
The tripod's legs have plastic leg locking frames which reduce the overall weight of the tripod, making this a great option for photographers that travel a lot.

The mid-level spreader offers increased stability for shooting on uneven terrain too. The anti-skid pads and highly stable aluminum legs also help in that department. You get fixed pan drag, variable tilt drag, and continuous adjustable tilt drag options as well.
This is simply a fantastic all-in-one package (with a carrying bag included) that will bring a smile to your favorite photographer's face!
Learn more about the E-Image EK650 tripod
We Recommend
Gifts for Photographers Under $250 - 2022 Edition

Photo by LukaTDB via iStock
Whether you're looking for a gift for yourself this holiday season or you've got a fellow photographer that deserves a nice gift, a $250 budget can go a long way.
From microphones to camera bags to memory cards, there's all sorts of gadgets that make excellent holiday gifts. You can also give gifts that keep on giving, like a beautiful canvas print. The possibilities are endless!
Below, we've compiled a short list of the best gifts for photographers under $250 to consider this holiday season.
Gifts for Photographers Under $250: Canvasprints.com canvas print
I don’t know about you, but I find that there are two common problems when searching for gifts for my loved ones. First, I have a lot of people in my life that are difficult to shop for. And second, it can be difficult to find gifts that have long-term utility.
I think I’ve found a solution for both problems, though…
This year, I’m giving canvas prints to many of the people on my holiday shopping list. Why? Well, it’s easy! Even the most difficult of people to shop for enjoy a good photo. What’s more, the chances are high that they have wall space to put a printed photo.
On top of that, a canvas print is something that can be enjoyed for years - decades, really - to come. It isn’t a one-and-done gift that offers flash-in-the-pan excitement during the holidays, then finds its way into a closet somewhere.
Instead, by giving someone a gorgeous photo that’s been hand-crafted just for them, you can give them the gift of time - time to enjoy the print each and every day.
So, the question is, where do you get a good canvas print?

Earlier this year, I ordered a canvas print from CanvasPrints.com. It was my first such order, so I wasn’t completely sure what to expect.
Well, what I got in the mail was a superb canvas print!
As I shared in this post, the canvas I got from CanvasPrints.com ticks all the boxes in terms of quality:
- The printing process was flawless, with no ink smudges or stains.
- The high-quality canvas is tightly wrapped around the frame, with no waves or puckering.
- The frame is well-made with square corners and a center support to ensure it stays square.
- The canvas is attached to the frame with plenty of staples to further ensure the canvas remains tight.
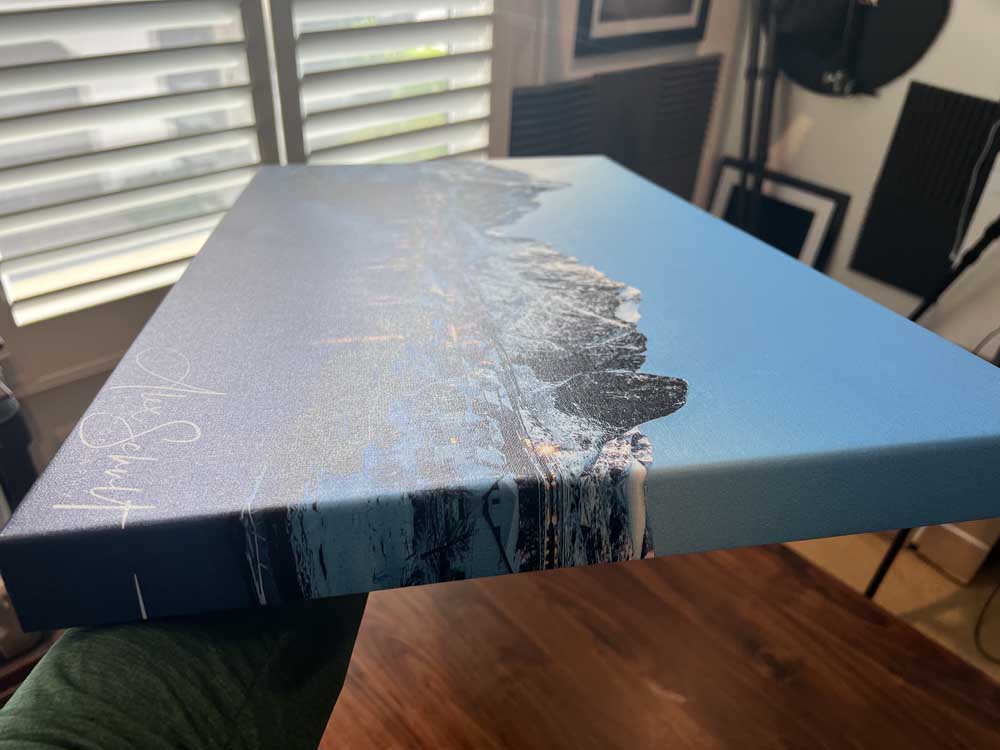
Additionally, I like that CanvasPrints.com uses a wire hanger on the back rather than the more typical sawtooth hanger. I find that sawtooth hangers are often not attached to the frame in the center (and often aren’t level, either), which obviously complicates hanging the print level. With a wire hanger, there’s no concern there!
In other words, my first experience with CanvasPrints.com could not have gone better. As a result of that, they’ve earned my business for additional prints for myself and for my loved ones this holiday season. You should entrust them to create a beautiful print of your images as well!
I should note that the materials used to create these prints are American-made and of the utmost quality to ensure the print that arrives at your door looks incredible. If something goes awry, no worries - CanvasPrints.com offers a 100-percent money-back guarantee with your print.
So, what are you waiting for? Get your holiday shopping done, get a fantastic gift that keeps on giving, and give the gift of a special moment in time with a CanvasPrints.com print!
Learn more about CanvasPrints.com
Gifts for Photographers Under $250: f-stop Dyota 11 Camera Sling Bag
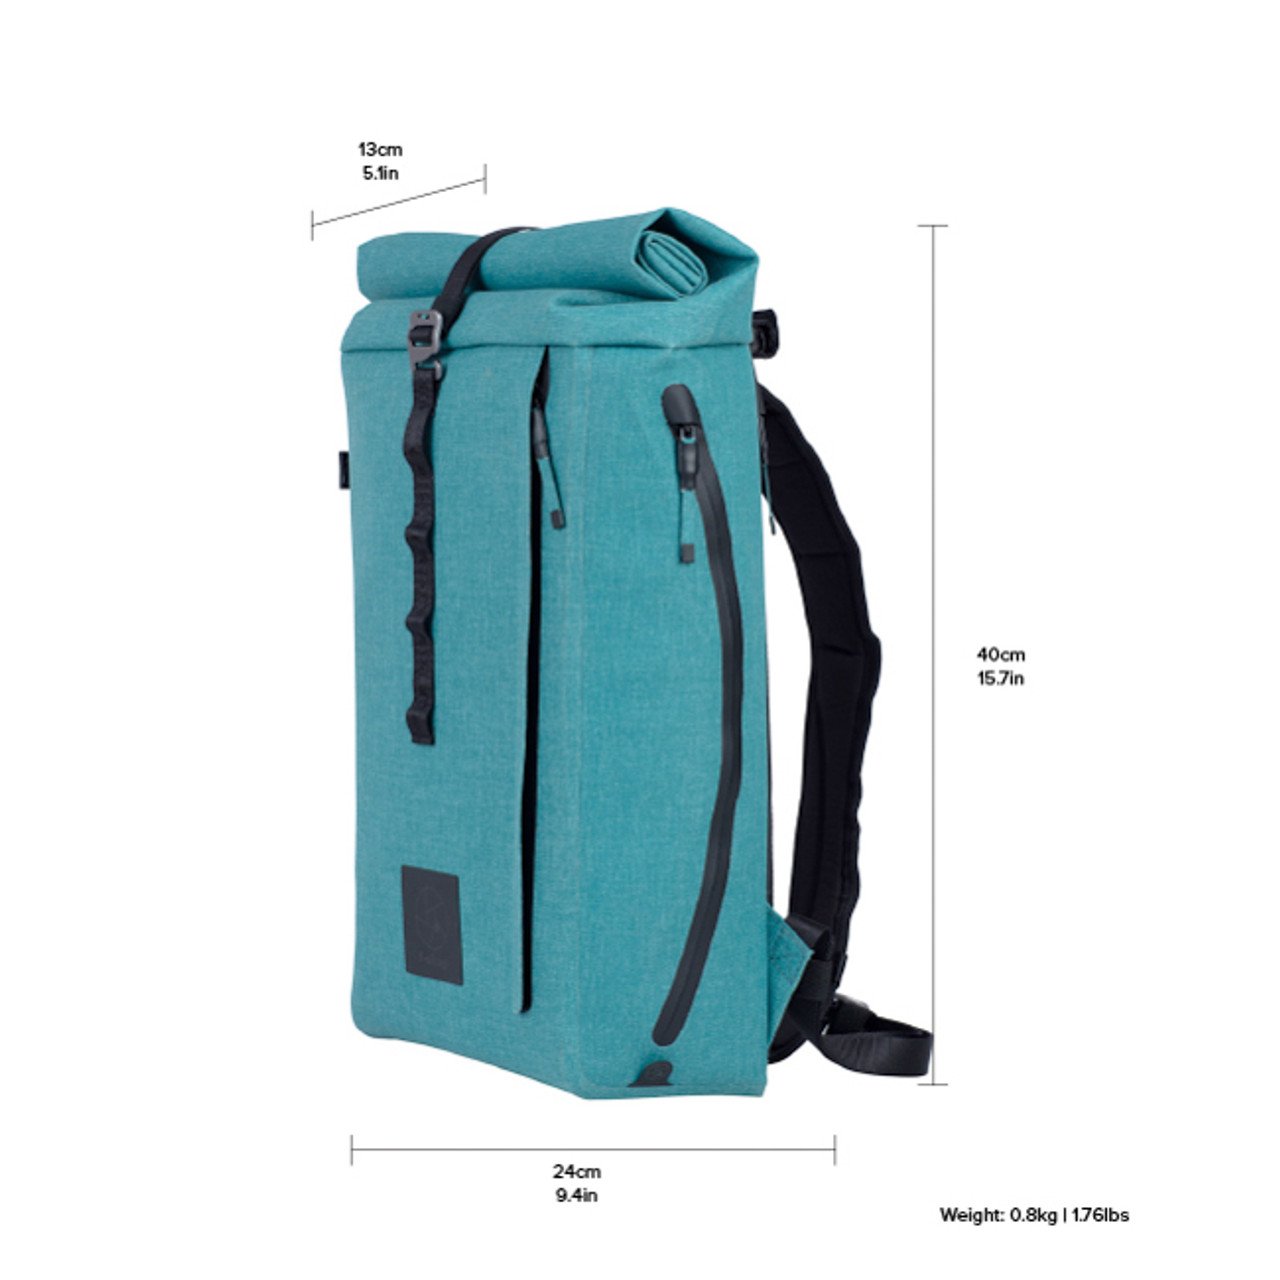
A durable, functional, and comfortable camera bag is a great gift for photographers under $250. And one of the best options is the Dyota 11 Camera Slings bag from f-stop.
At just 15.7 inches tall, 9.4 inches wide, and 5.1 inches deep, this bag is a small, everyday carry for quick photography outings. It weighs just 1.8 pounds empty, so the bag is lightweight, has a slim form factor, and can easily move with you as you navigate through crowds.
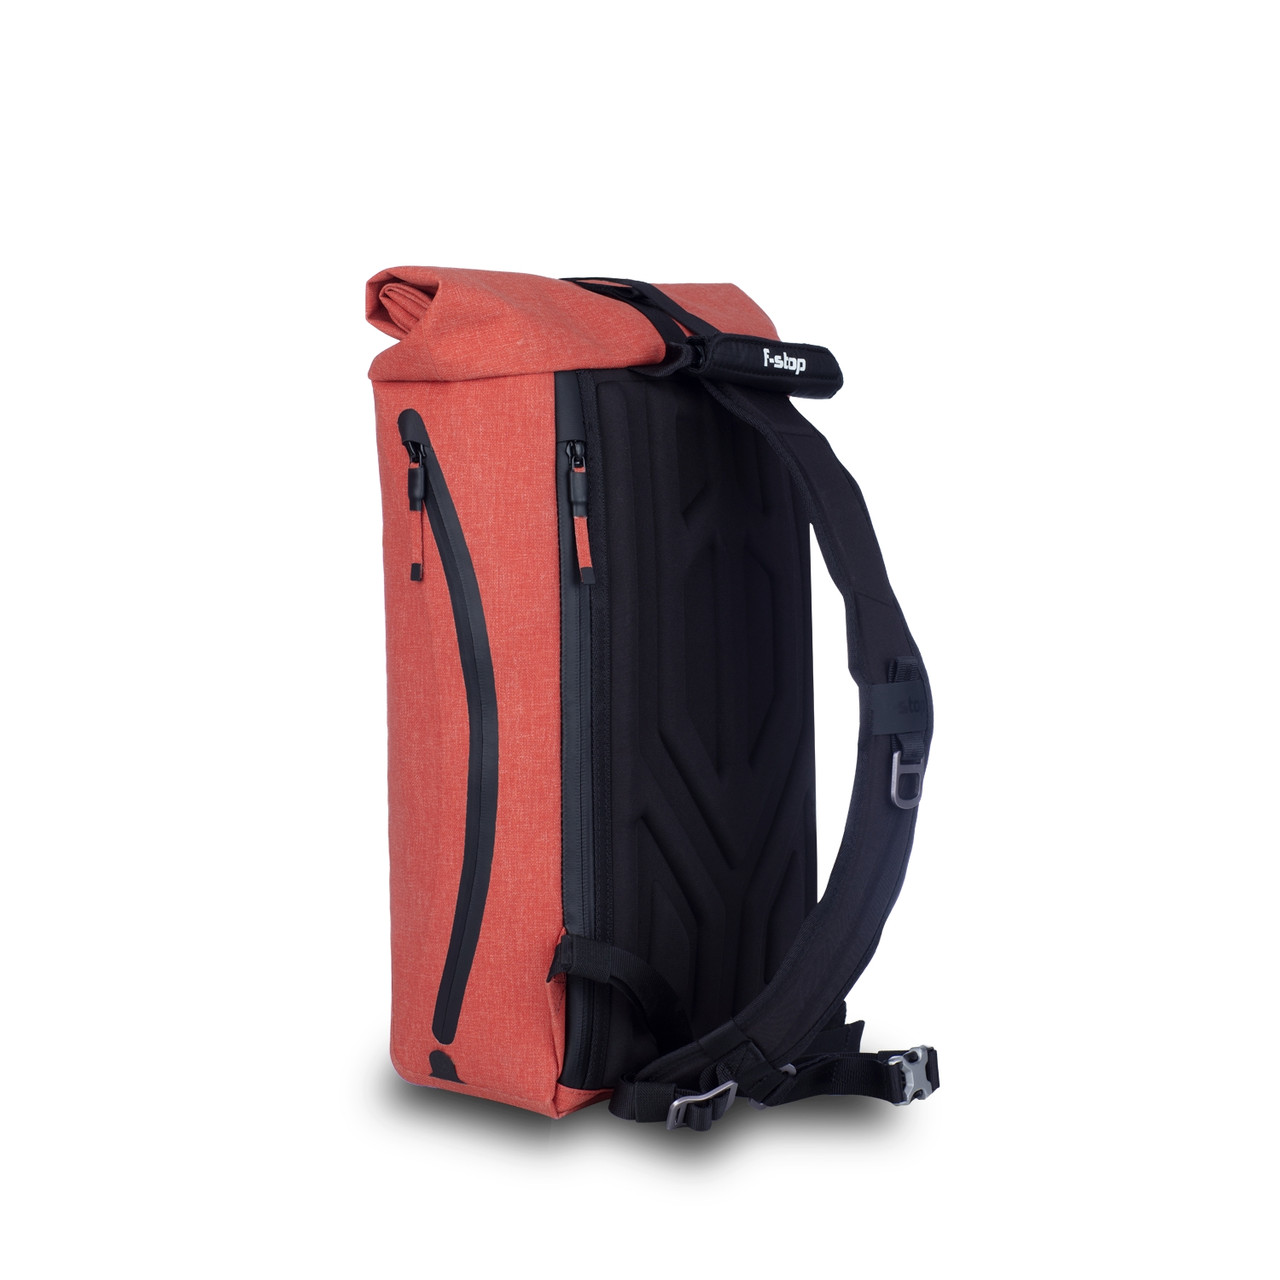
The 11-liter capacity is all you need for your camera, a lens or two, and other required accessories. You can access the gear quickly and easily via the expandable roll-style top. There's also a curved weatherproof zipper that allows easy access to the main body of the bag.
Like all f-stop bags, the Dyota is impeccably designed and manufactured. The bag's material is RF welded for a seamless design, and the interior storage insert can be removed when not needed.
That means that the Dyota 11 can pull double duty as a camera bag and an everyday carry bag when you're not on photography adventures.
It's a great option to give yourself this holiday season or to give to a loved one!
Learn more about the f-stop Dyota 11 Camera Sling Bag
Gifts for Photographers Under $250: iMovR Gymba
One of the worst things about being an office worker is being in a sedentary position all day. Thankfully, you can use many strategies to help offset the adverse effects of sitting or standing for long periods.
iMovR specializes in American-made sitting-standing desks that utilize brushless motors for easy adjustments to the desk height. With features like a built-in health coach to remind you to change position, iMovR’s desks are a dream come true for people that work from home or in an office environment.
But iMovR doesn’t just make desks…
If you or a loved one need an additional way to stave off the deleterious effects of long work days, Gymba is an ideal gift option this holiday season.
Gymba is a balance board that’s a perfect complement for working at a standing desk. You can “walk” while standing at your desk and activate various body parts for a workout while you work.
In fact, Gymba allows you to work on various aspects of your body, including your core and leg muscles. What’s more, by being more active throughout the day, you’ll improve your posture and circulation.
Now, I know what you’re thinking - won’t this “workout at work” distract you from what you’re doing? After using Gymba for a while now, I can tell you that it absolutely does not interfere with your work!
Once you get used to standing on it, Gymba really settles into the background. I don’t even think about it anymore, yet as I’m writing this, I’m working my core and leg muscles. It’s a much better way to work, to say the least!
And, unlike other balance boards, Gymba doesn’t damage your floors. That means you can get your work done, be healthier, and not worry about what your floors look like at the end of the day. Best of all, Gymba is less than $250, so it’s a budget-friendly holiday gift!
Learn more about the iMovR Gymba
Gifts for Photographers Under $250: RODE VideoMic NTG
I've used the RODE VideoMic NTG for well over a year and a half now.
Needless to say, this mic has impressed!
Like the larger NTG 4 studio mic, the VideoMic NTG captures gorgeous, natural sound. There are various controls to assist you in getting beautiful sound, including:
- Infinitely variable gain control
- Digital switch for controlling high-frequency boost and the high-pass filter
- Headphone output for monitoring audio
- Peak decibel warning light to avoid distortion
The best feature of this mic, though, is its sliding rail.
In the past, a difficulty with my RODE mics is that they stuck out so far from the camera that you might find yourself with a face full of microphone.
But the sliding rail on this mic means that problem is solved - if I'm shooting in selfie mode, I can slide the rail back and keep the microphone from hitting my face.
Add to that a battery that gives you more than 30 hours of runtime on one charge and you have a recipe for an excellent microphone for the photographer or videographer on your holiday list.
Learn more about the RODE VideoMic NTG
Gifts for Photographers Under $250: Holdfast Moneymaker Solo
One of my favorite camera accessories is my Holdfast Moneymaker Solo leather camera strap. This thing looks great, is built like a tank, and is a comfortable carry for my camera. That's why I'm recommending it!
If you aren't familiar with Holdfast, you're missing out. This Oklahoma-based company makes some of the finest leather camera accessories you can find. For example, the Moneymaker Solo is crafted of beautiful leather and stainless steel hardware, which make it eye-catching and supremely durable.
In fact, the longer you use the strap, the more aged it will become, and the better it will look!
The Moneymaker Solo has a big, curved shoulder pad that helps lessen the blow to your shoulder as you carry your camera. Also helping in making it a smooth and easy carrying experience is the Belt Anchor, which attaches your camera to your hip to prevent it from clanking around as you walk.
Disengaging the Belt Anchor is a simple one-handed motion, so you can quickly bring your camera to your eye to get the shot. Reattaching the Belt Anchor is also a one-handed job so you can return it to its secure spot on your hip without any fuss.
The stabilizer strap offers further insurance that the strap and camera stay in place on your shoulder.
Another benefit of the Moneymaker Solo is that you can add accessories to it. For example, there's a front D-ring that's a perfect location for attaching a Holdfast Cell Pouch or lens pouch.
These straps also come in various sizes (small, medium, and large) and are offered in right-handed or left-handed configurations.
If you or someone on your holiday shopping list likes to run and gun with a single camera, this is a great option for doing so in comfort and style!
Learn more about the Holdfast Moneymaker Solo
Gifts for Photographers Under $250: Vanguard VEO Active 46 Camera Backpack
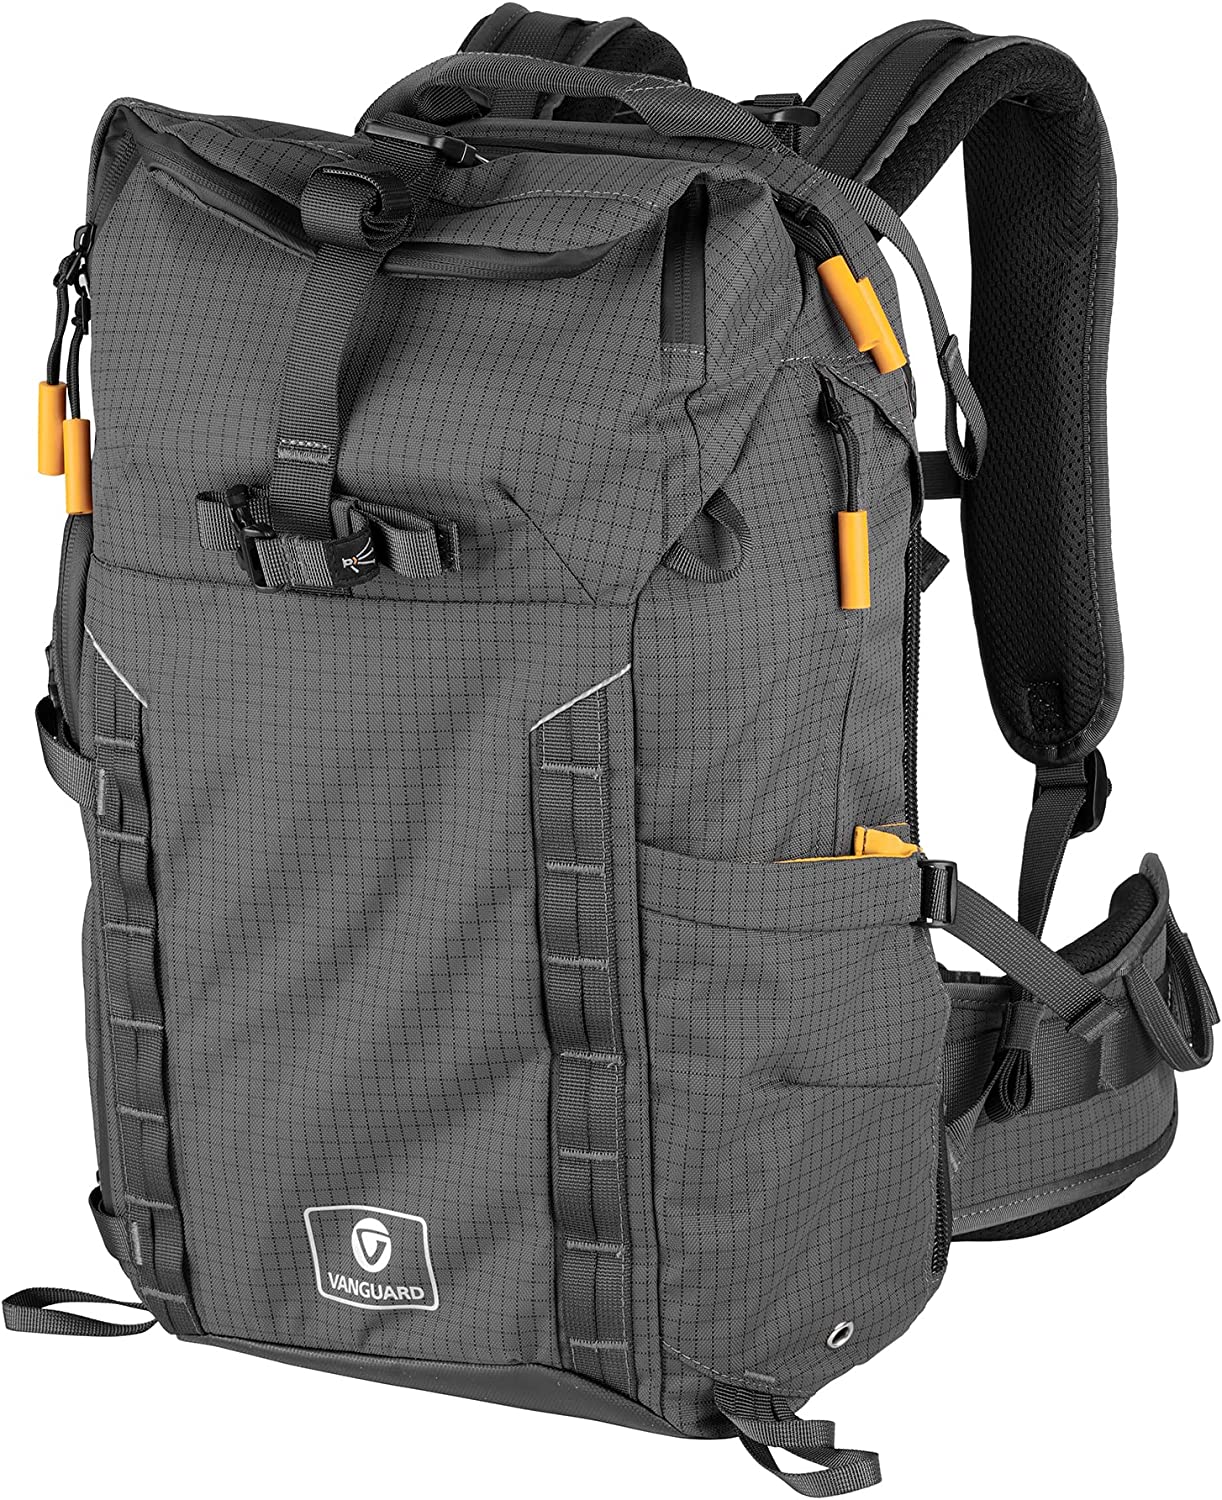
When I started in photography many, many years ago, I carried my camera gear in a regular backpack. Not only was this a big mistake from a gear care perspective, but it was also impossible to find anything inside the abyss of the backpack.
Don’t let your favorite photographer make the same mistake…
An ideal camera backpack is the Vanguard VEO Active 46. This bag keeps photography gear organized with a removable camera box insert. The insert has space for a camera with a lens attached, plus various cubbies for other lenses, an external flash, and other accessories. There’s no hunting around in a dark bag for what’s needed - instead, it’s all right there in its own protected space.
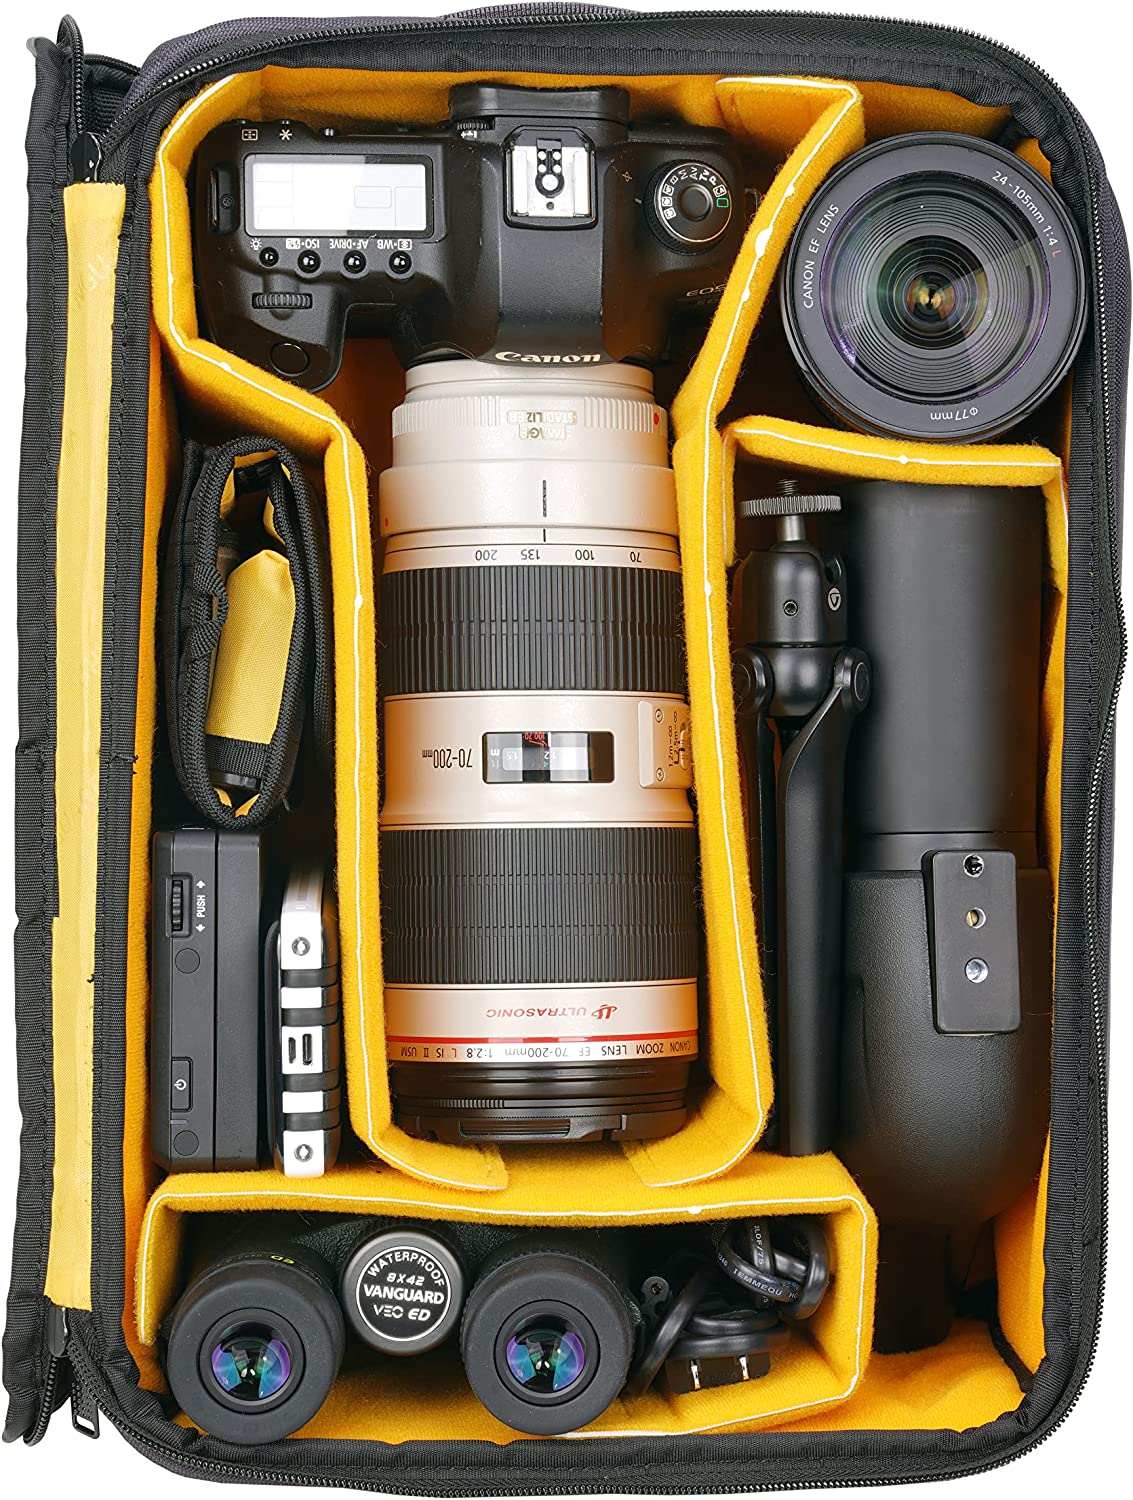
Plus, the camera box is brightly colored, so it’s even easier to see where your gear is. That’s just one of the ingenious design choices from Vanguard, though.
For example, this bag has top, front, and rear access to make grabbing the needed gear as quick and efficient as possible. You’ll also find a protective sleeve for a tablet or laptop. There’s even a built-in USB charger connection for an optional power bank!
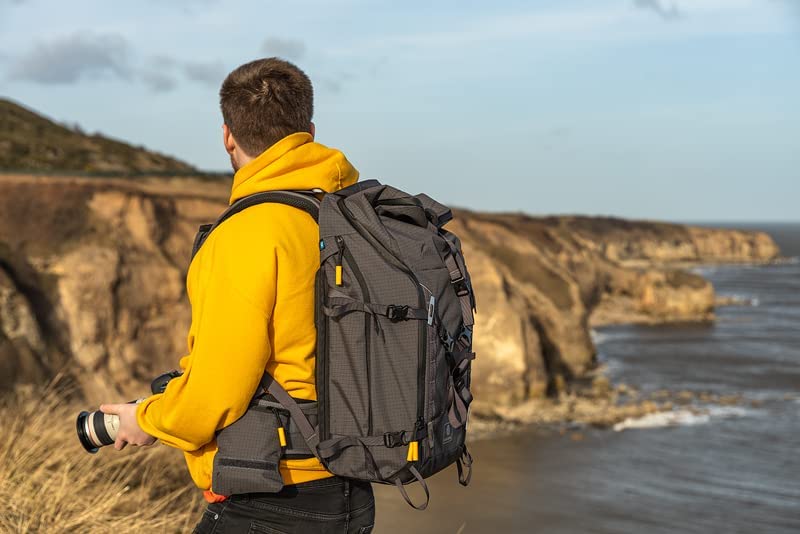
The Active 46 is made for, well, an active lifestyle. It has an ergonomic design with a metal frame and waist belt, breathable material to help you keep cool, and a trolley handle for easier transport in airports. There’s even a rain cover that offers total coverage for those days out taking photos when the weather just won’t cooperate.
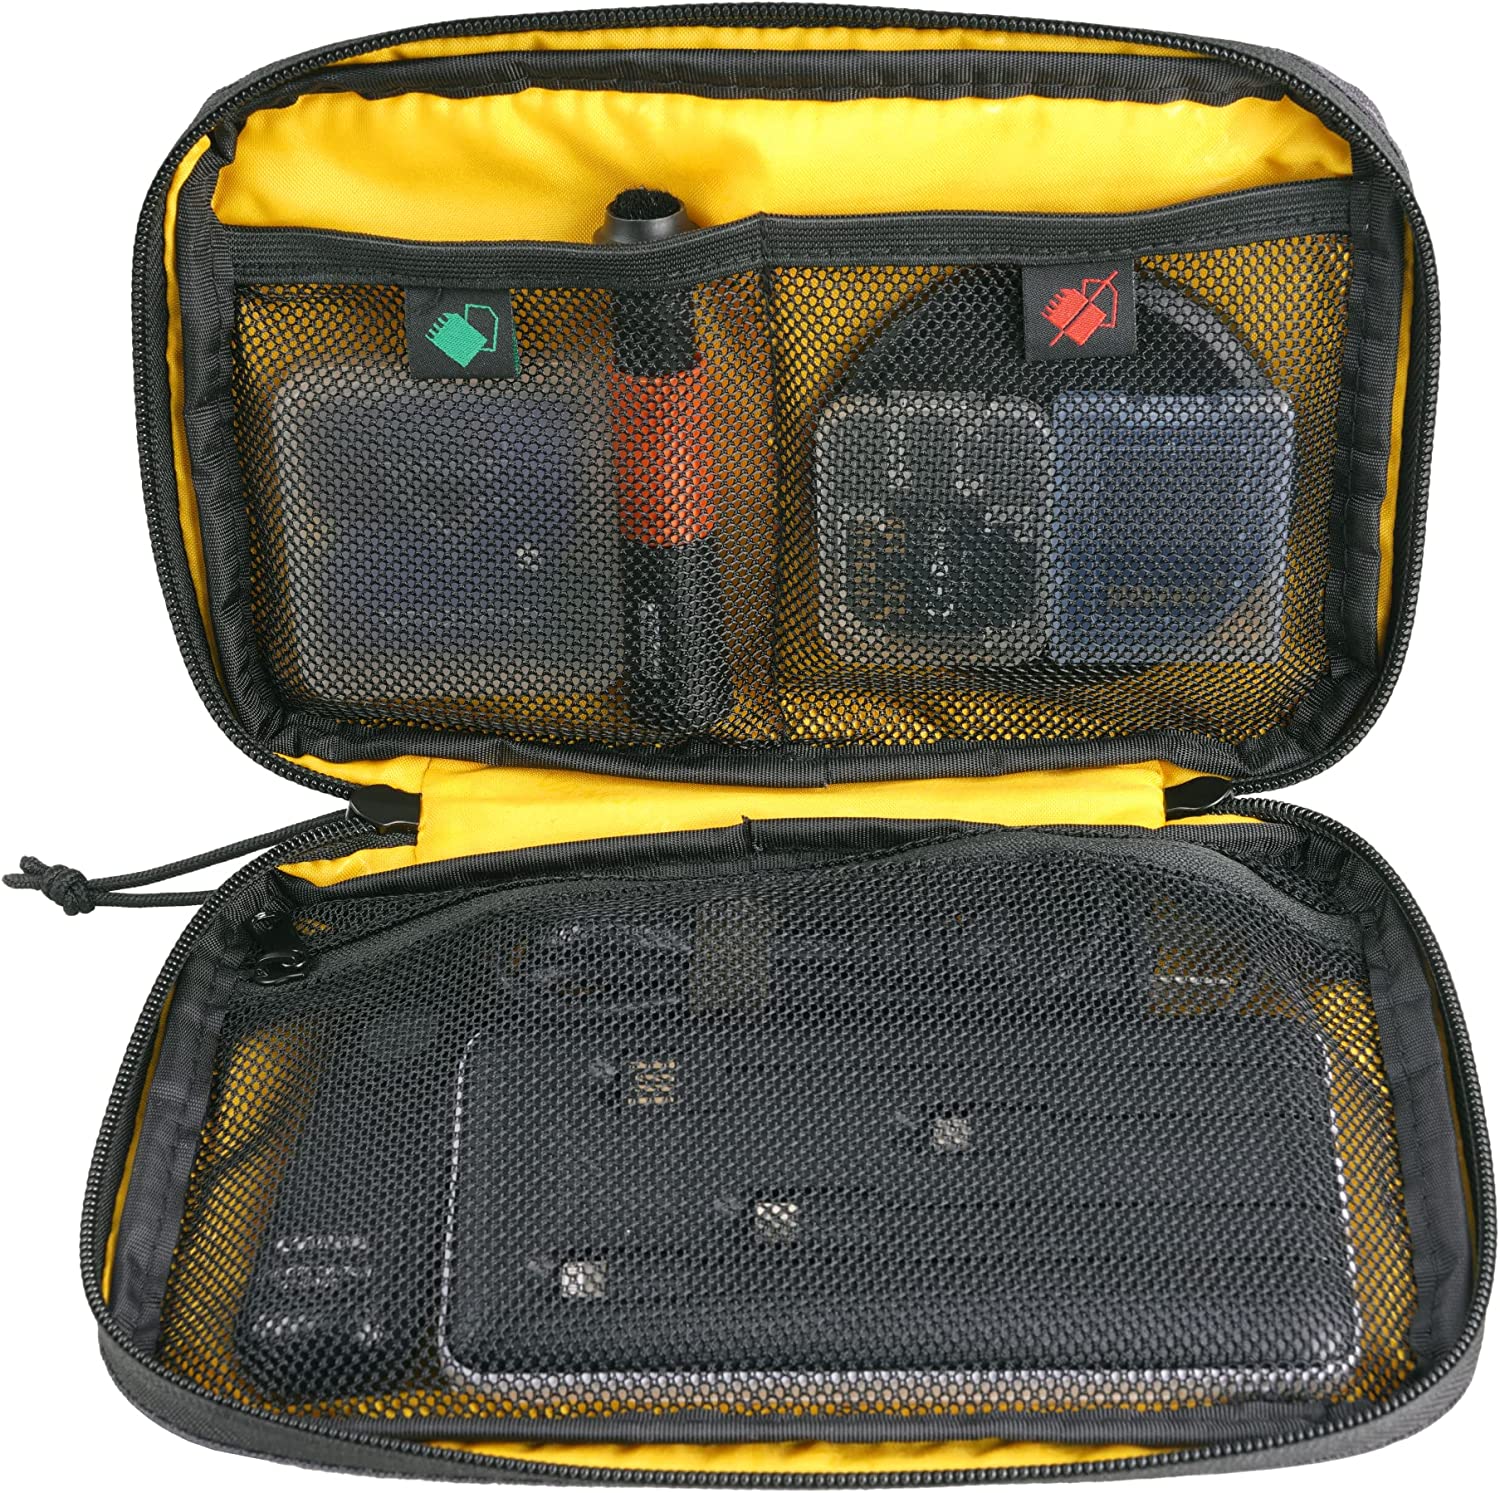
Other features include a multifunction pouch and an accessories pouch for added storage, expandable pockets, and a waterproof sleeve for your water bladder to stay hydrated.
Truly, Vanguard has thought of everything with this bag. It’s hugely functional, super comfortable, and smartly designed. And it’s priced at less than $250!
Learn more about the Vanguard VEO Active 46 Camera Backpack
Gifts for Photographers Under $250: Pre-Owned Canon EF 24mm f/2.8
If the photographer on your list shoots with a Canon DSLR with an EF or EF-S lens mount, a great gift idea is a fast wide-angle lens. The EF 24mm f/2.8 certainly fits the bill!
The 24mm focal length offers a nice wide-angle view on a full frame camera while providing a standard view on a crop-sensor camera. The constant f.2.8 aperture enables improved results in low-light situations while also enabling faster shutter speeds when needed.
This is an autofocus lens, but there is a manual override switch on the lens barrel.
This is an ideal lens for portraits, street photography, architecture, and landscapes, to name a few. Its small size and relatively light weight make it a good "walkabout" lens for Canon DSLR shooters.
You can buy with confidence from MPB because each lens is thoroughly inspected and graded. An explanation of the grade (e.g., "excellent," "like-new") is provided directly on the listing page for each lens.
Likewise, MPB offers a generous six-month warranty on most lenses to give you peace of mind in your purchase. There's a seven-day return window as well!
I've purchased, sold, and traded gear on MPB on many occasions, all with great success. Save a little money this holiday season by investing in quality used gear from MPB!
Learn more about the Canon EF 24mm f/2.8
Gifts for Photographers Under $250: Onyx 30W Bi-Color On-Camera LED Light
With more and more photographers getting into video production, it makes sense to get the photographer on your list a high-quality LED light for their video shoots.
The Onyx Bi-Color LED light is a great option because it features 30-watt high-quality LEDs, high brightness, and beautiful clarity for giving video sequences the light they need to stand out.
With an aluminum frame, the light is both lightweight and durable. Likewise, there is minimal heat release because the aluminum frame allows for excellent ventilation.
The light can be mounted on-camera or a tripod. It comes with a bracket that can attach to any light stand with a baby 5/8-inch receiver.
Best of all, the Onyx Bi-Color light has easy-to-use controls. The LED display gives you the ability to make quick and accurate adjustments of brightness from 10 percent to 99 percent and color temperature from 3200K to 5600K.
Of course, this light can also be used for photography, so it's a gift that offers multiple benefits for the person on your list!
Learn more about the Onyx 30-Watt Bi-Color On-Camera LED Light
Gifts for Photographers Under $250: Lumina AI Webcam
A webcam is a great tool for photographers of all kinds, but particularly for photographers that are in business for themselves. Having a reliable, high-quality webcam enables "meeting" clients who live far away, in addition to creating video content for social channels or a website.
The Lumina AI webcam works with Windows and Mac-based systems and captures video in 4K resolution. The DSLR-quality video is enhanced with Lumina's proprietary AI technology, which makes you look your best on video calls. You can even use the Lumina Studio app to apply more than 30 settings to the video, including changing the white balance, exposure settings, and background blur.
The ultra-wide 4K camera captures a 95-degree field of view while the dual microphones capture excellent sound. And with an AI auto-framing feature, the photographer on your list will always be front-and-center in their video calls!
Learn more about the Lumina AI Webcam
Gifts for Photographers Under $250: Pre-Owned Sigma 30mm f/2.8 DN ART - Sony E Fit
One of the great things about Sony E-mount cameras is that there is a huge array of lenses you can use. This includes many excellent third-party lenses from companies like Sigma.
The 30mm focal length and f/2.8 aperture make this an excellent standard prime lens for the Sony shooter on your holiday shopping list. The f/2.8 aperture is a nice feature for low-light shooting while also enabling beautiful background blur.
Sigma has included technology that reduces flare and ghosting, so the resulting images are sharp, high in contrast, and beautifully detailed.
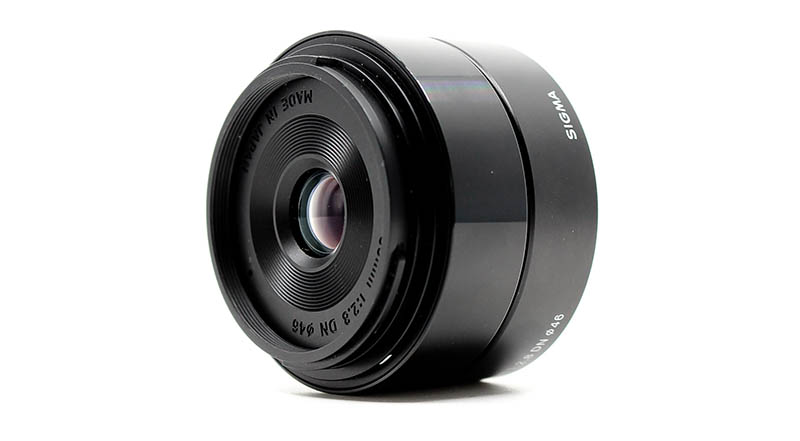
For what it's worth, this lens looks incredible, too. The metal construction means that it will provide durable service for years to come.
It's a small lens as well, and since it has an internal focusing system, the lens doesn't extend when zooming in. The linear autofocus motor gives you precise control while also being whisper quiet.
This is an all-around excellent lens, and a great gift idea for the photographer on your list! And with excellent pre-owned options available at MPB, you can give a fantastic gift backed by a six-month warranty while saving yourself some money at the same time. It's a win-win!
Learn more about the Sigma 30mm f/2.8 DN ART Sony E Fit
Gifts for Photographers Under $250: ProGrade Digital SDXC UHS-II V90 300R Memory Card (256GB)
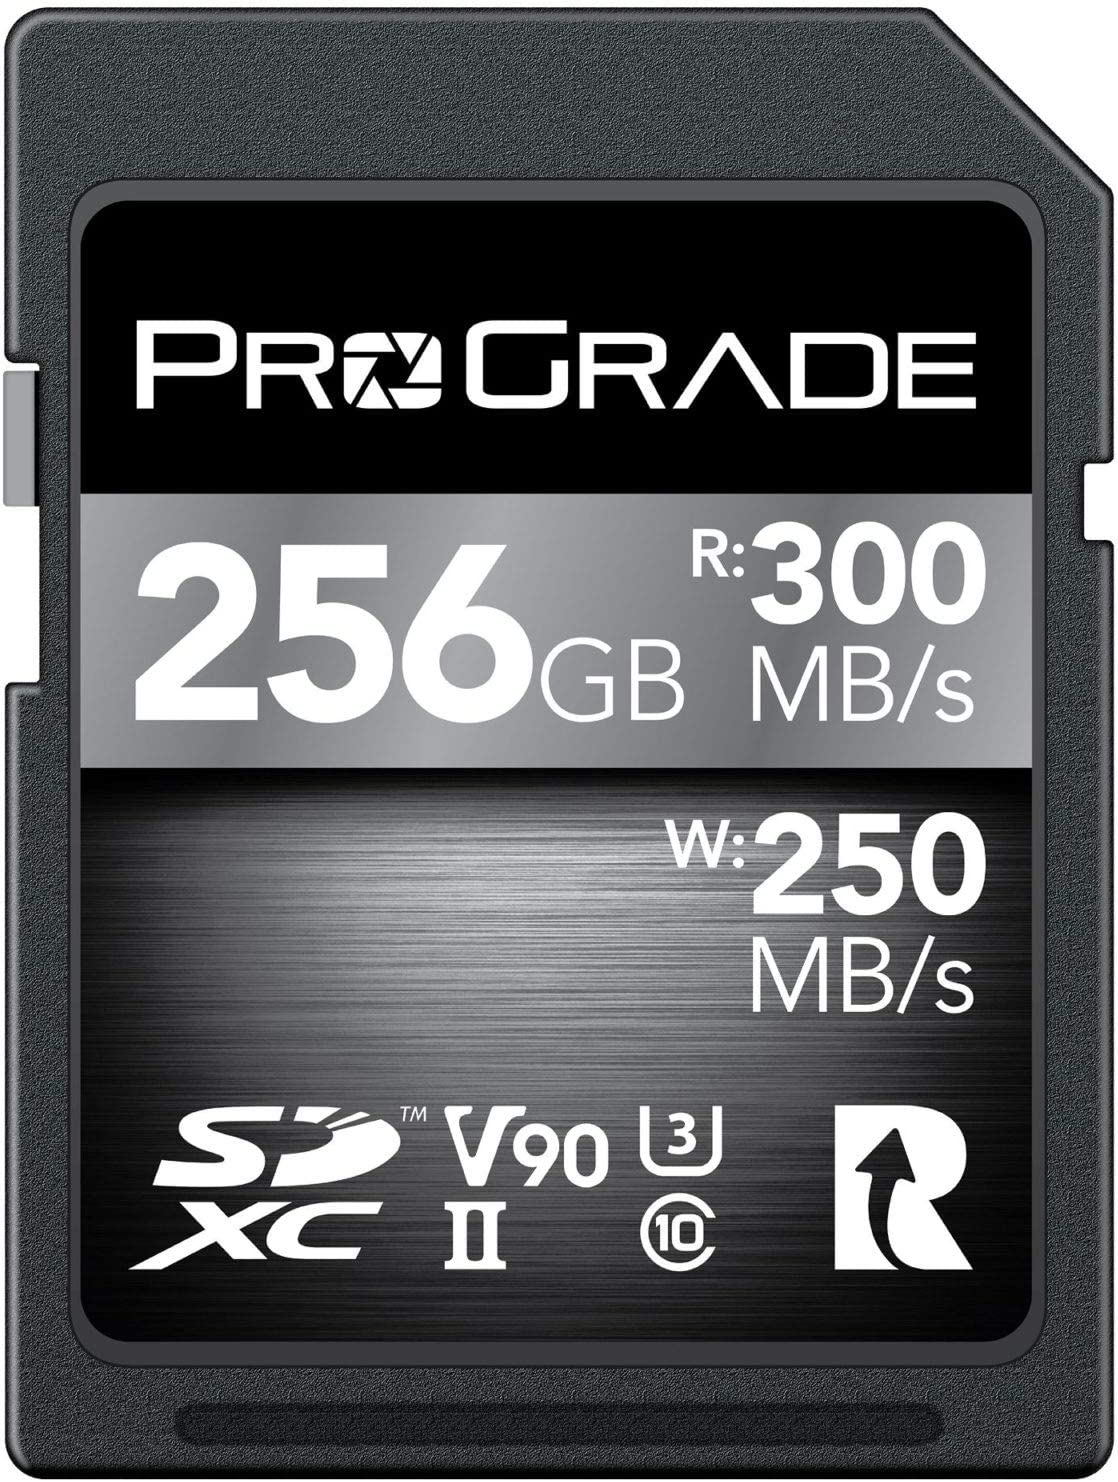
A memory card might not be the flashiest gift for photographers, but it's certainly one of the most useful!
This ProGrade card is a fine choice with 300 MB/s read speed and up to 250MB/s write speed. The SDXC UHS-II U3 format works with many different types of digital cameras from Sony, Canon, Nikon, Panasonic, Olympus, Fuji, and Samsung. It can be used for capturing still images or videos. In fact, it's compatible with cinema cameras and can record various video formats including 4K, 8K, RAW, and RAW HD.
ProGrade rigorously tests its cards to ensure the highest quality and the most dependable performance. There's a three-year warranty on the card as evidence of that!
Learn more about the ProGrade Digital SDXC UHS-II V90 300R Memory Card (256GB)
Gifts for Photographers Under $250: Amazon Gift Card
![]()
Totally stumped regarding gift ideas for photographers on your list?
Why not go the easy route and get them an Amazon gift card?
Though a gift card isn't exactly the sexiest gift, when the photographer in your family sees that you have given them carte blanche to get what they want, they'll be stoked!
With an Amazon gift card, they can put the card amount towards whatever they want - a new lens, a second camera body, lighting gear, a laptop - you name it!
As far as flexibility goes, there's nothing better to give a photographer than a gift card.
Learn more about Amazon gift cards
We Recommend
Gifts for Photographers Under $50 - 2020 Edition

photo byelenaleonova via iStock
The holidays are coming in hot, and for many of us, finding gifts for the photographers in our lives is a tough task.
Photographers can be a finicky bunch. We’re loyal to certain brands. Many of us already have an ocean of photography gear, too.
So what do you buy the photographer on your list with a budget of $50?
We’ve curated a list of top options that will hopefully make your holiday shopping a little easier.
Gifts for Photographers Under $50: H&Y 37-49mm RevoRing
One of the most innovative photography gadgets of 2020 is also one of the most inexpensive!
A couple of months ago, H&Y unveiled RevoRing, which is a variable step ring. This is so innovative because it eliminates the need to carry a bunch of individual step rings to make filters and filter systems work with different lenses.
Instead, the photographer on your list can have this one variable step ring in their camera bag and use it to adapt their filters to a variety of lenses.
This particular RevoRing is 37-49mm in range, giving your favorite photographer lots of leeway in terms of which filters they use with which lenses.
It’s dead simple to use too - just twist the RevoRing, attach it to the lens, and it’s ready to rock!
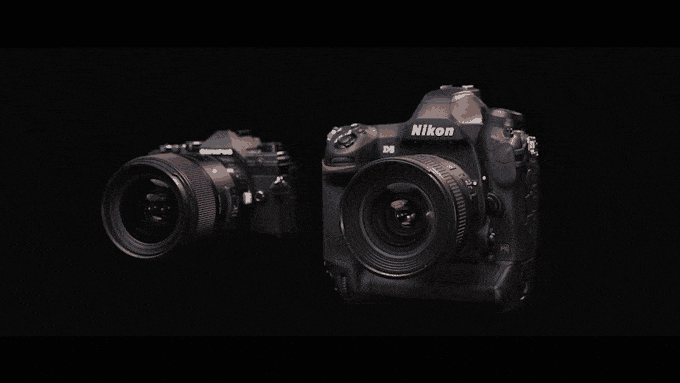
There simply aren’t that many truly innovative photography gifts for under $25, but RevoRing certainly fits the bill.
If you want to surprise your loved one with a gift that is unique, functional, and will legitimately help them improve their photography workflow, look no further than RevoRing!
Learn more about the H&Y RevoRing
Gifts for Photographers Under $50: CanvasHQ Print
One of my favorite gifts to give (and to get, while we're at it) is a big, beautiful print.
Personally, I like canvas because of the texture the canvas gives to the print. Besides, a canvas print is something that will continue to give joy to the person that receives it for years and years to come!
Now, I know what you're thinking...canvas is so old-school.
But if you order your canvases from the right printers, you can get something that is beautiful, well-made and looks modern, even if the substrate is perhaps a bit old-school.
I have tons of canvases in my home, the vast majority of which are fromCanvasHQ.
These are some of the best canvas prints I've ever purchased. The sharpness of detail, the color accuracy, and the overall build quality of these prints is next-level good.
Part of the reason for this is the materials CanvasHQ uses. We’re talking archival-grade canvas, commercial-grade inks that are water and UV resistant, and kiln-dried pine frames to keep everything straight and true.
But CanvasHQ isn't just tops in the quality department...
They have excellent customer service that makes you feel heard and as though you're the only customer they have to worry about at that moment.
These guys are committed to getting it right, so if something doesn’t go as planned, you won’t be hung out to dry.
If you have questions, they’ll answer them. If you have a problem, they’ll fix it. If you need assistance with uploading your photo or even picking the best finishes for your canvas, they’ve got your back.
In the video above, you can see how one of my CanvasHQ prints stacks up against similar prints from other printing companies. I think you'll see why I'm so loyal to CanvasHQ!
Start shopping for your favorite photographer today on CanvasHQ.
Gifts for Photographers Under $50: GoPro Light Mod for Hero 8 Black
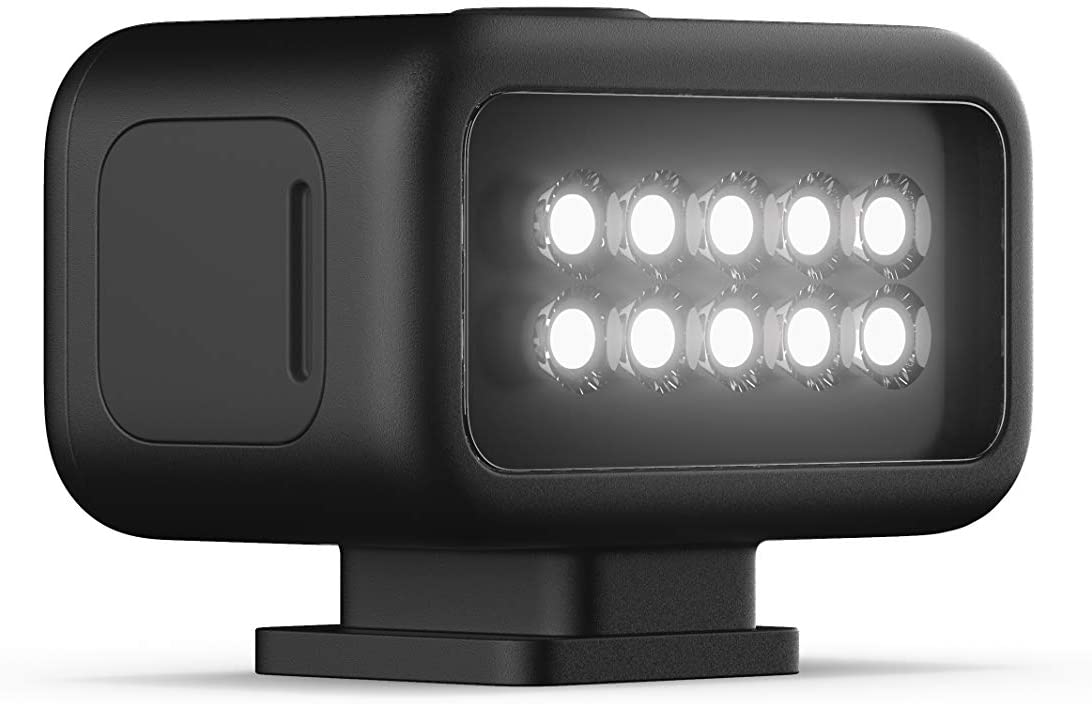
The GoPro Hero 8 Black is an awesome camera for still photography and videos. It’s functionalities and flexibility are undeniable, and with a wide array of add-ons, mods, and accessories, you can extend the usefulness of this camera even further.
If your favorite photographer has a GoPro Hero 8 Black, a great holiday gift idea is the GoPro Light Mod.
This little guy connects easily to the Hero 8 Black via the Media Mod (sold separately) or it can be attached to multiple GoPro mounts and other accessories for off-camera lighting.

It has four levels of brightness up to 200 lumens so you can easily highlight the subject with crisp light.
As you’d expect, the light is built to tough GoPro standards and is waterproof up to 33 feet. The built-in rechargeable battery offers up to six hours of runtime, so whether the photographer in your life is shooting stills, videos, is working underwater or above, they’ll have reliable, clean light to help them achieve their creative vision!
Learn more about the GoPro Light Mod for Hero 8 Black
Gifts for Photographers Under $50: Artbeat Studios 11x14 HD Metal Print
Nothing says happy holidays like a gorgeous metal print, especially when the person you’re buying for is a photographer! So why not surprise the photographer on your list with an incredible HD metal print from Artbeat Studios?!
Metal is a gorgeous substrate for all manner and type of photos. The crisp, clean detail and modern look is just what the doctor ordered for highlighting a beautiful image.
Artbeat Studios’ HD metal prints are so impressive in part because the image is heat infused directly into the metal. The result is unsurpassed resolution and color vibrancy.

What’s more, Artbeat Studios uses Chromaluxe® brand aluminum sheets. This brand of aluminum has a 3x better permanence than Kodak Silver Halide Prints and resists fading for more than 65 years. So not only is an HD metal print a great gift for this holiday season, but it’s a gift that will keep on giving for decades!
You can customize the look of the print by choosing different finishes, surfaces, and mounts. Additionally, you can choose from two different hanging systems and two different mounts. The result is a breathtaking and custom print that your favorite photographer is sure to love!
Learn more about Artbeat Studios’ HD Metal Prints
Gifts for Photographers Under $50: Octopus.Camera OctoPad

If you’re rushing around trying to find that perfect gift for your favorite photographer, you might consider the Octopus.Camera OctoPad as an excellent choice.
The OctoPad offers what many other stabilization devices don’t - it doesn’t collapse under the weight of gear it’s supporting and it doesn’t slide around, even if it’s placed on a smooth or an uneven surface thanks to its weighted non-slip mat design.
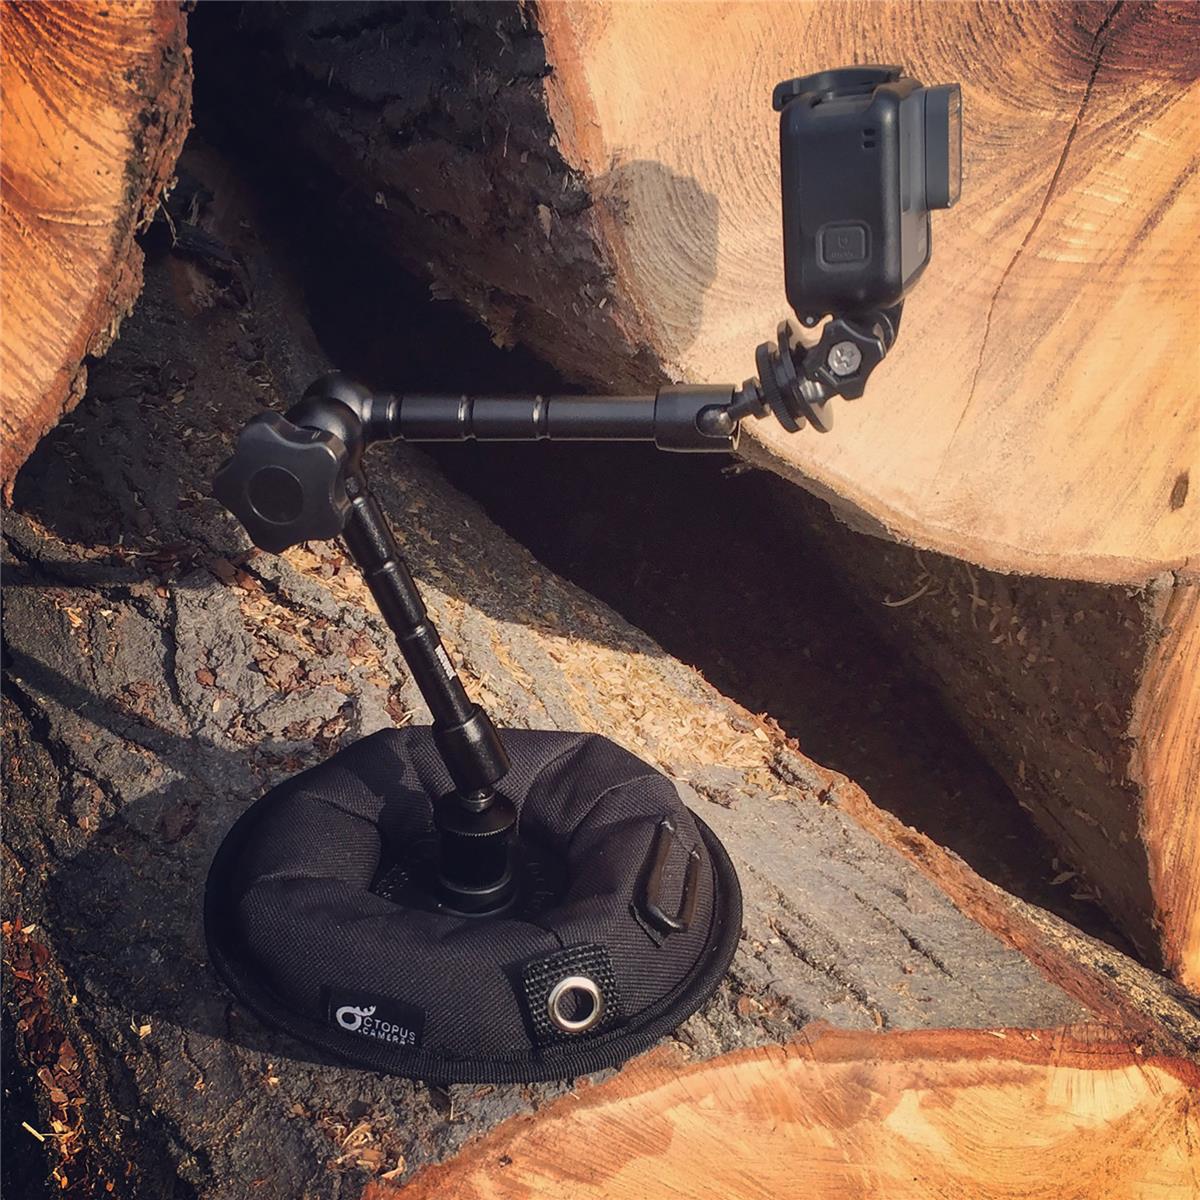
The OctoPad has a built-in male 1/4-20 inch threaded bolt for attaching accessories and a high-capacity removable ball head that also has an adjustable 1/4-20 inch threaded male bolt.
That means that not only is the OctoPad well-equipped to stay in place, but it can also support a wide range of gear, from a GoPro to a smartphone to a light or microphone.
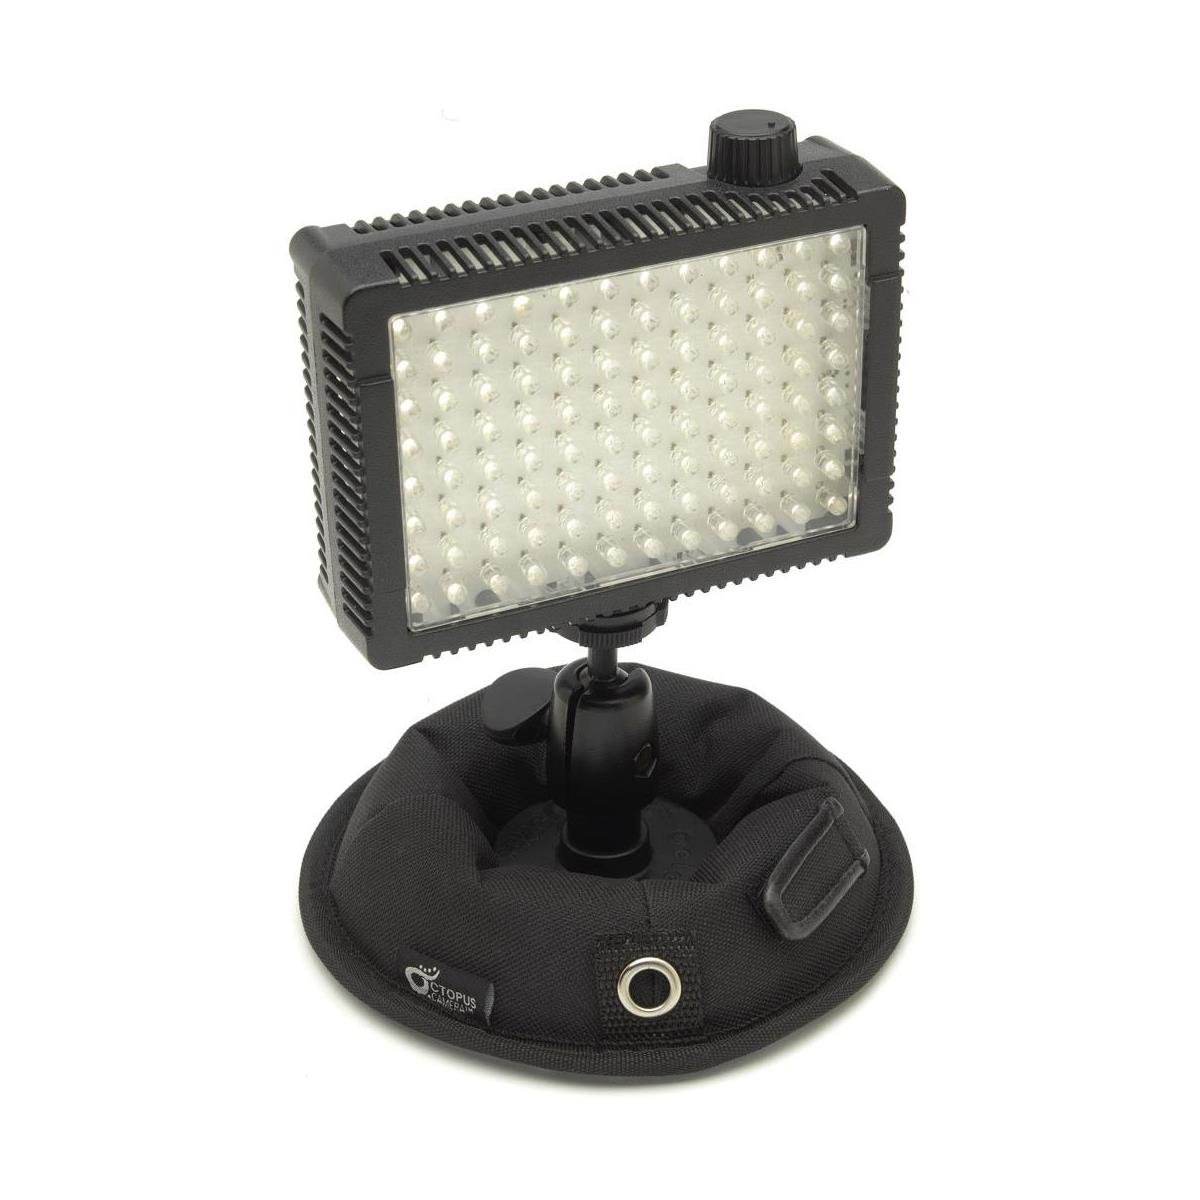
There’s even a built-in cable strap to keep cables from getting in your way and a clip grommet for attaching a lanyard to easily carry the OctoPad.
What photographers want in a gift is something that’s versatile and functional, and the OctoPad is definitely both. Best of all, it’s well below the $50 threshold, so you can give an awesome gift without busting your budget!
Learn more about the Octopus.Camera OctoPad
Gifts for Photographers Under $50: Ikan Stratus 15mm Static Lens Support
If the photographer on your list has a bunch of accessories for their camera, an Ikan Stratus Cage is all but a must.
And to make the Stratus cage even more functional, you can give the gift of a 15mm static lens support this holiday season.
The support attaches to the non-rotating part of a lens and helps support its weight.
With 7/8-inches of vertical leeway, this gadget can support a lens in a number of positions.
It's easy to use, too - one of the 15mm rod mounts is open and angled, so it can be slid onto the rods from above or from the front.
And at $34.99, it's a bargain gift as well!
Learn more about the Ikan Stratus 15mm Static Lens Support
Gifts for Photographers Under $50: Holdfast Camera Leash Leather Wrist Strap

Not every photographer wants or needs a neck strap or camera harness, so why not give them the gift of a tough, useful, and gorgeous leather wrist strap?
The Camera Leash by Holdfast is impeccably made and comes in a variety of materials, including bridle leather, water buffalo leather, American bison leather, and python skin. There are also several colors available to suit your favorite photographer’s specific tastes.
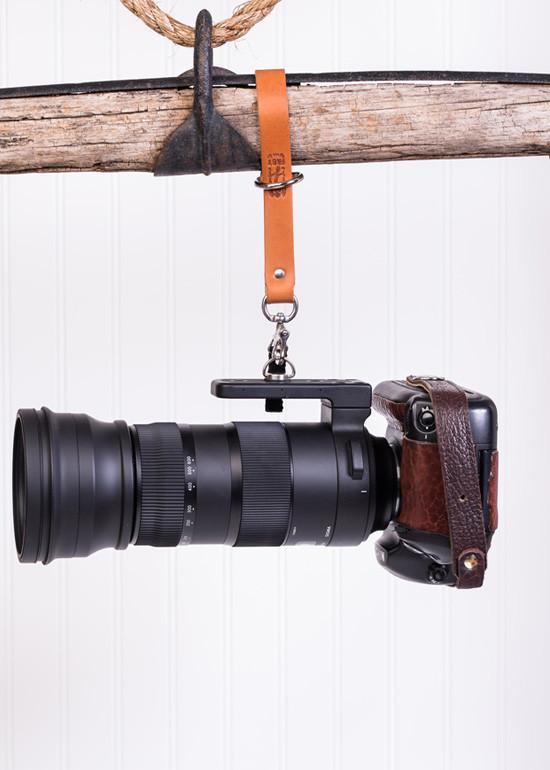
This strap is multi-functional, too.
Use it to carry your keys and attach them to a belt loop. Secure a water bottle to your backpack. Use two of them together to carry a third camera on the Holdfast MoneyMaker harness. There’s few products under $50 with that much functionality!
Plus, these things look absolutely incredible with fine details that scream, “I’m handcrafted!”
It’s a photography gift that your favorite photographer is sure to love.
Learn more about the Holdfast Camera Leash
Gifts for Photographers Under $50: HandlePod 3-Axis Action Cam Mount
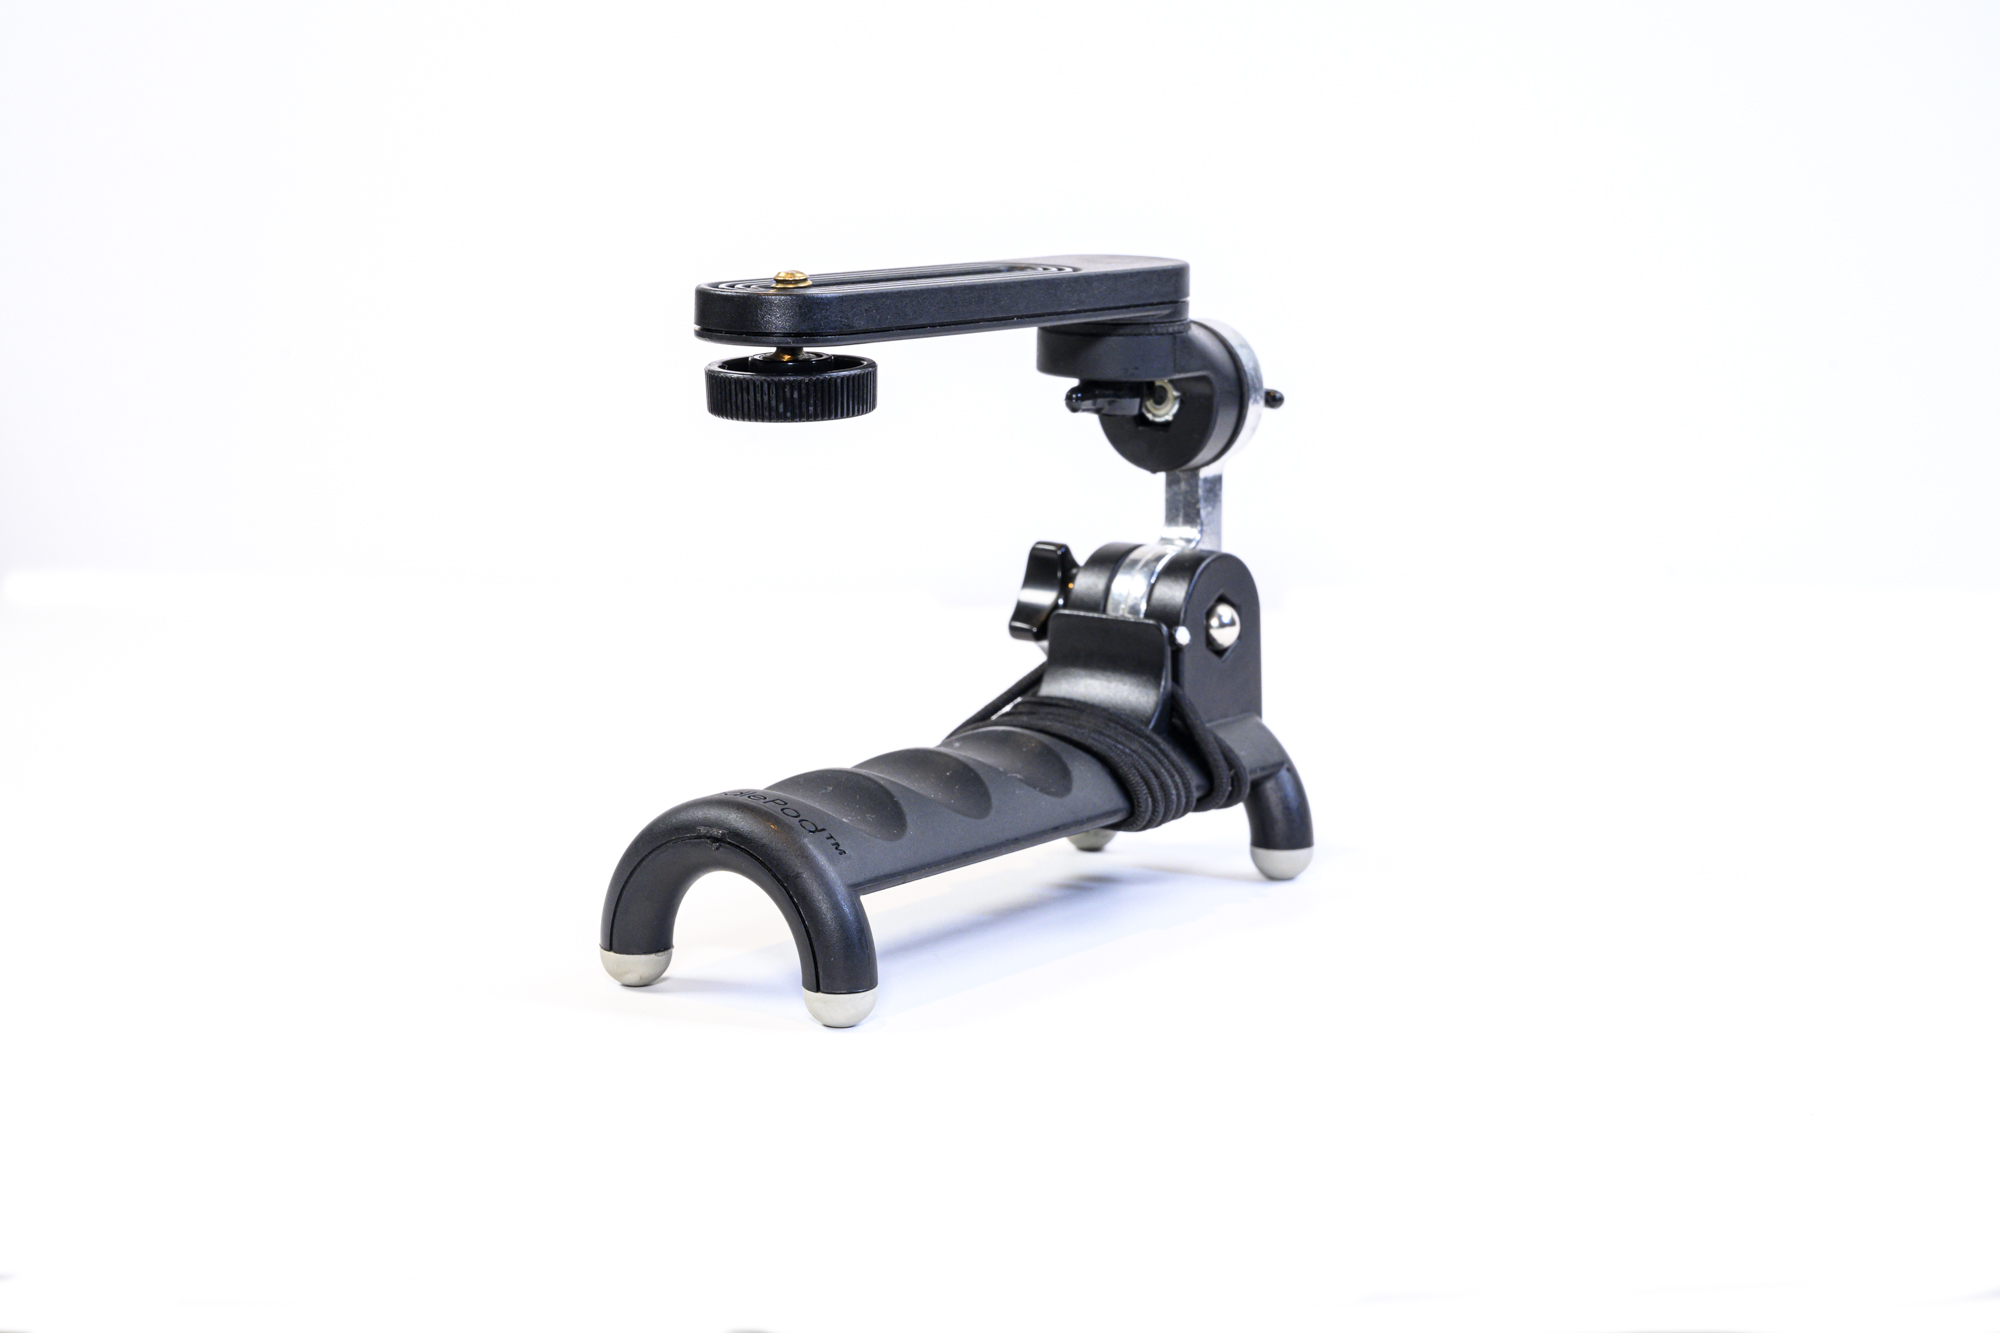
Does the photographer on your shopping list like to go out and adventure with their GoPro or other action cam?
I have the ideal gift idea for them - the HandlePod 3-Axis Action Cam Mount.
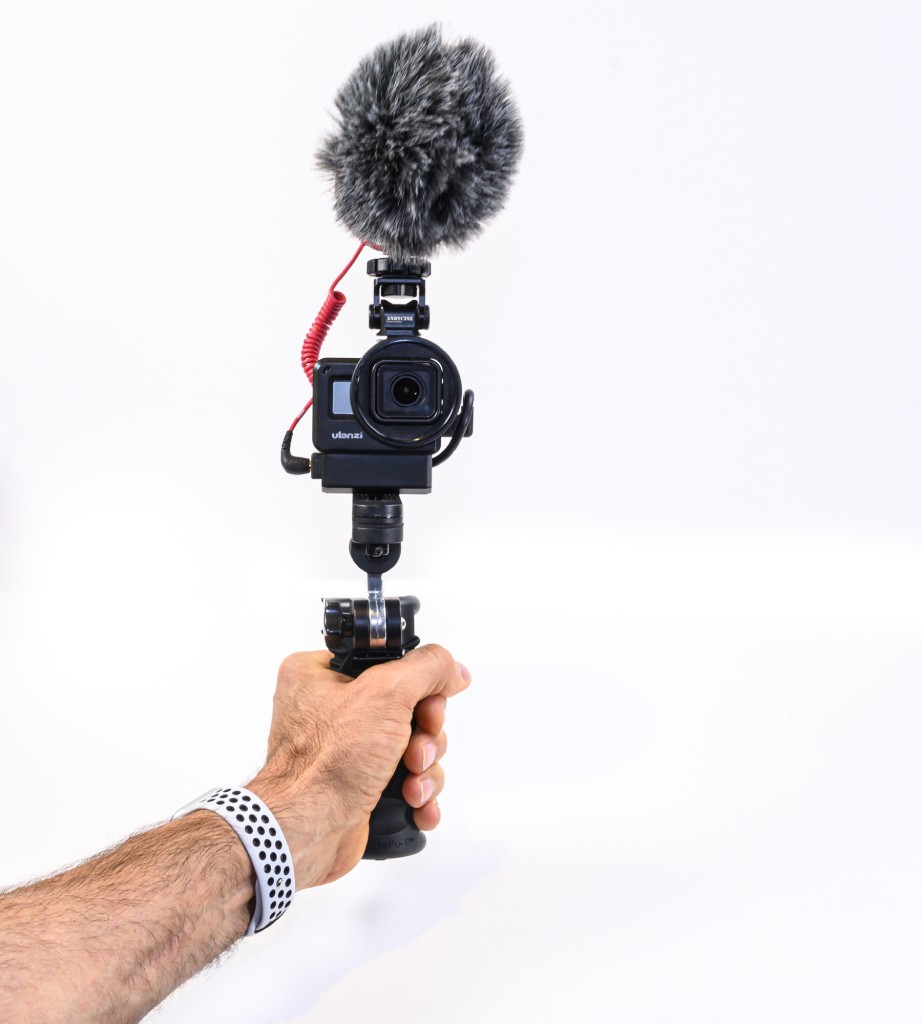
This ingenious gadget is a comfortable grip for shooting handheld video as well as a handy tabletop stand (or a stand for any horizontal surface for that matter).
Furthermore, it has an integrated elastic cord so you can lash it to stationary objects (i.e., a lamp post) for super steady hands-free recording.
The mount has 360-degree movement so you can capture smooth video and easily position it for the ideal still image as well.
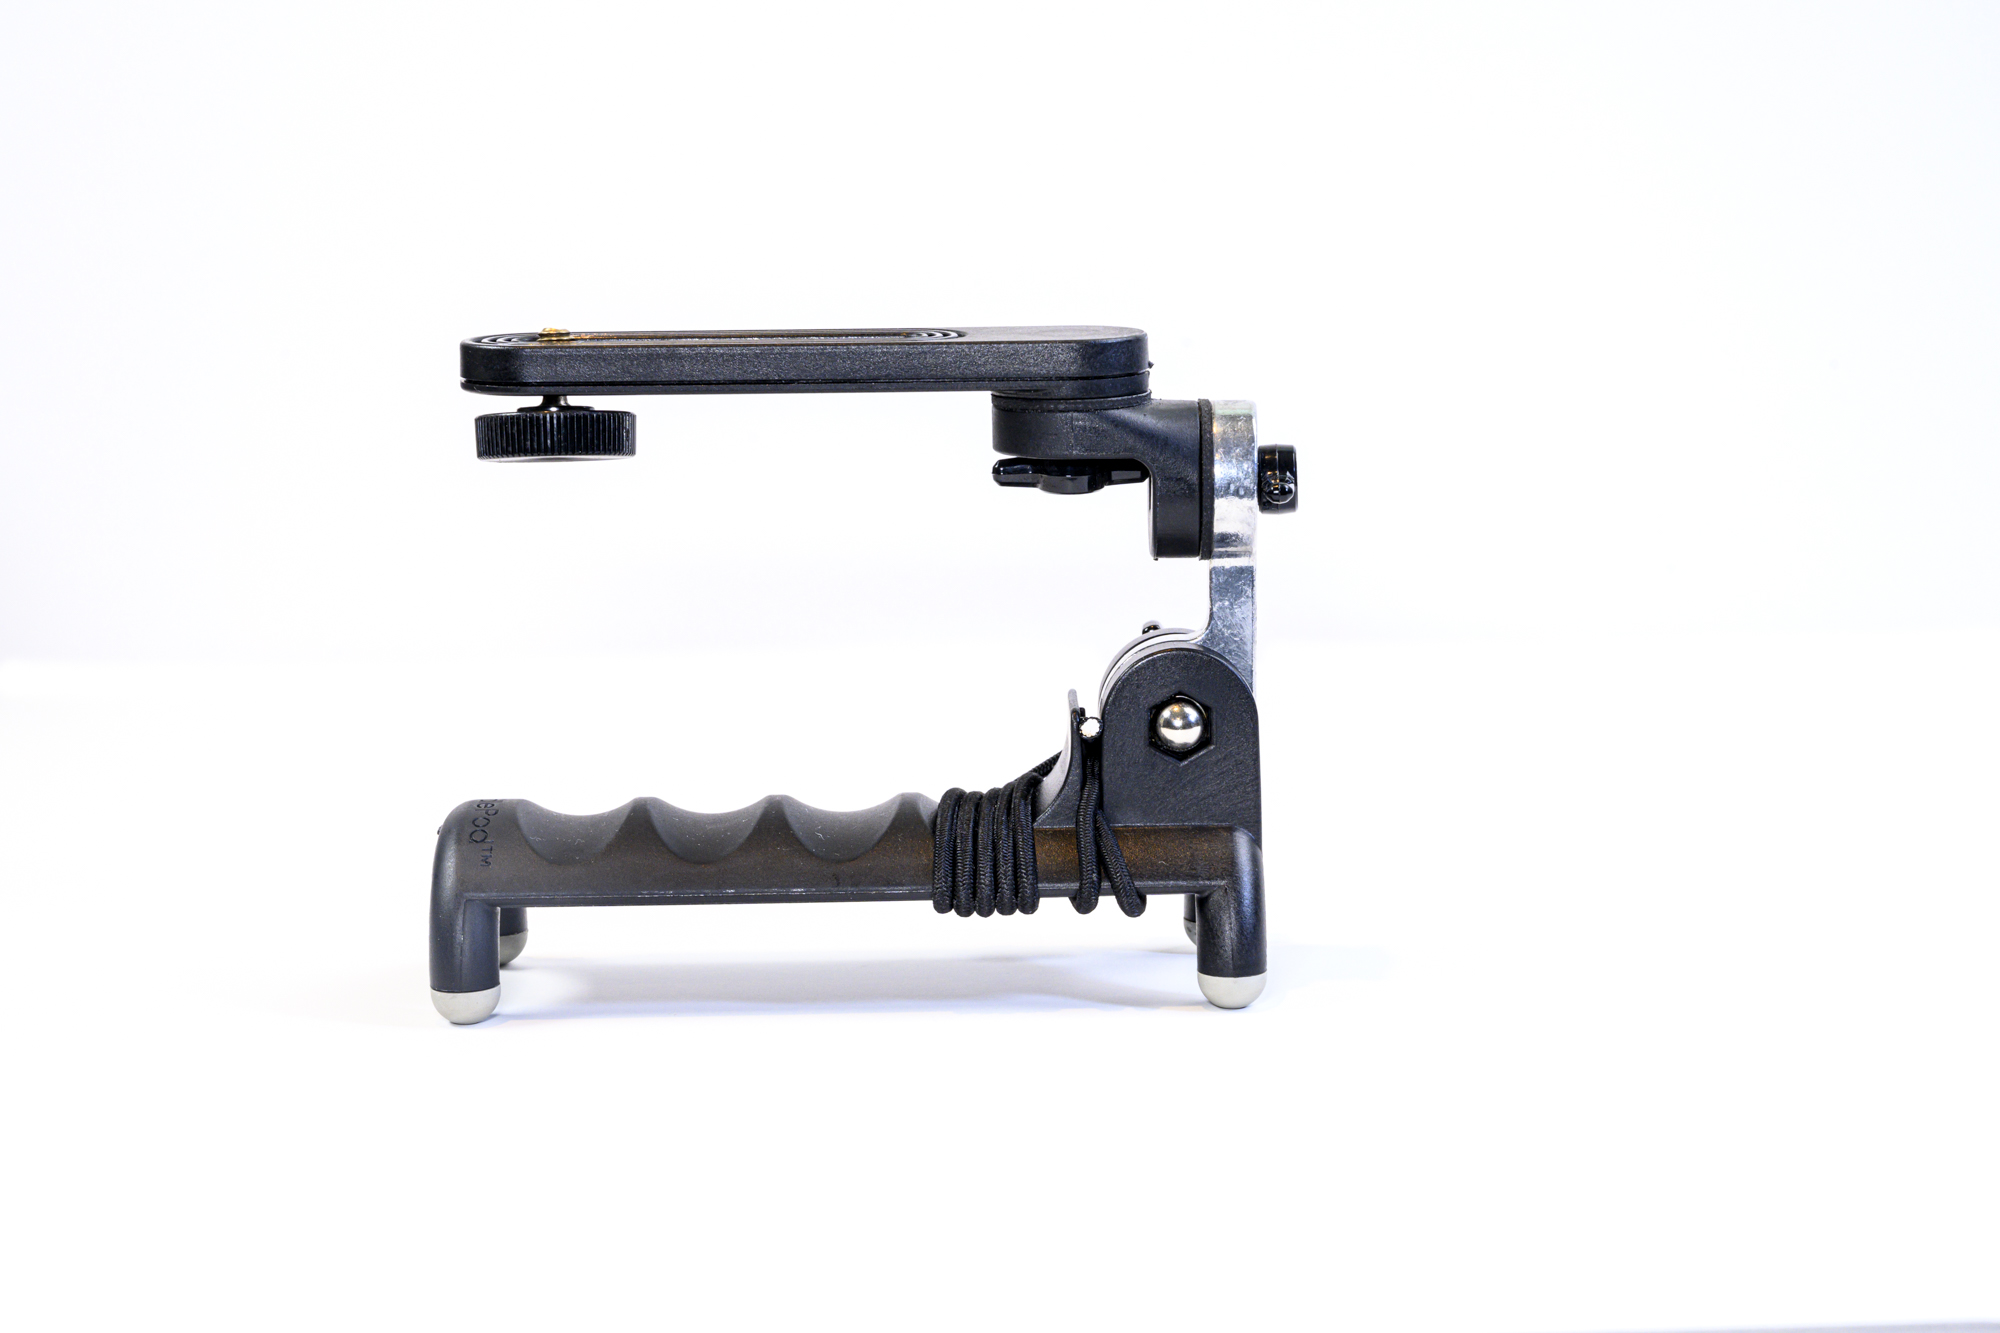
When used as a tabletop stand or lashed to a vertical surface, its four rubber feet keep it in place for anti-slip performance.
Perhaps best of all, it weighs just 4 ounces and fits in your pocket, so your favorite photographer can always have a stabilizing mount with them for their GoPro activities.
Learn more about the HandlePod 3-Axis Action Cam Mount
Gifts for Photographers Under $50: Snaptiles
If you’re in need of a killer photography gift, look no further than Snaptiles. Snaptiles are a patented Magnetic Photo Tile that is 8”x8”x1” and super lightweight.
This innovative system uses a single wall mount with a built-in level to anchor a central print to the wall. Then you can snap together the other tiles onto the first! The wall mount uses four adhesive strips that don’t damage the wall, yet offer all the support that’s needed to display up to 12 tiles. Just make sure you press down firmly for 10 seconds. You can also push in the 4 included thumb tacks for additional support, then mount up to 30 tiles on the first tile! Not a bad tradeoff for 4 little pin holes in your wall.
The process is simple: just attach the wall mount to the wall, mount the anchor tile to it, and then begin to create an array of mixed tiles by adding additional Snaptiles.

Each tile connects with strong magnets, so there’s no worry of the tiles sagging or slipping.
Best of all, though, this system enables you to swap images out as you get new photo tiles, rearrange them in the display, and create different shapes with an array of images.
It really couldn’t be any easier!
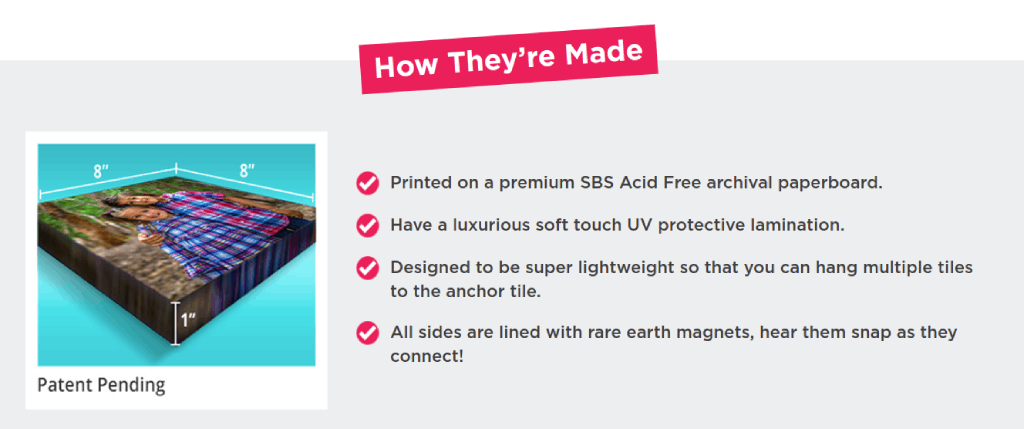
The images are printed on a premium SBS Acid Free archival paperboard to give you long-lasting durability. On top of that, the UV protective lamination on the tiles has a beautifully soft touch.
I just ordered 25 of these photo tiles for my son’s room. He loves art and he loves building, and I think he will love putting his Snaptiles together (with my help of course!) on his bedroom wall.
This isn’t just a great last-minute gift, but it’s also a fun project you can share with whomever you give them to. It’s a win-win!
Gifts for Photographers Under $50: HDRsoft Photomatix Essentials
Ask any photographer, and they’ll probably tell you that the toughest part of photography to master is exposure.
All too often, you get photos that have highlights that are too bright or shadows that are much too dark.
But by using the power of HDR photography - high dynamic range - photographers can combine multiple exposures into a single shot, thereby getting a well-exposed image throughout.
Photomatix Essentials by HDRsoft makes that process super easy with dozens of HDR settings and presets for getting the perfect HDR photo.
HDRsoft has even incorporated multiple HDR styles to give photographers further control over how their HDR images look. Truly, creating eye-catching photos has never been easier!
PLUS...HDRsoft is giving Photomatix Essentials away at the moment as part of their Quarantine Giveaway. You can’t get cheaper than free!
Learn more about HDRsoft Photomatix Essentials
Gifts for Photographers Under $50: Amazon Gift Card
![]()
Totally stumped regarding gift ideas for photographers on your list?
Why not go the easy route and get them an Amazon gift card?
Though a gift card isn't exactly the sexiest gift, when the photographer in your family sees that you have given them carte blanche to get what they want, they'll be stoked!
With an Amazon gift card, they can put the card amount towards whatever they want - a new lens, a second camera body, lighting gear, a laptop - you name it!
As far as flexibility goes, there's nothing better to give a photographer than a gift card.
Learn more about Amazon gift cards
We Recommend
Gifts for Photographers Under $50 - 2021 Edition

Photo by SDI Productions via iStock
If you're looking for the ideal gift for the photographer on your holiday shopping list, but you have a smaller budget of $50, don't worry - there are plenty of gift ideas for photographers for 2021.
In our latest collection of gifts for photographers, we have all sorts of useful gadgets that any photographer will love.
From a camera wrist strap to photo restoration services to beautiful metal prints, you can't go wrong with these options!
Gifts for Photographers Under $50: Artbeat Studios HD Metal Print
If you ask me, one of the best gifts for photographers is a print of one of their favorite photos. It's a great way to honor their craft while also giving them a gift that truly keeps on giving!
And I know what you're thinking...metal prints for under $50 must be pretty low quality. Happily, though, that's just not the case!
Artbeat Studios is known as an industry leader for high-quality metal prints. One of the reasons for this is because Artbeat Studios’ HD metal prints have the image heat infused directly into the metal. The result is unsurpassed resolution and color vibrancy.
Metal is a gorgeous substrate for all manner and type of photos, too. The crisp, clean detail and modern look is just what the doctor ordered for highlighting a beautiful image.
What’s more, Artbeat Studios uses Chromaluxe® brand aluminum sheets. This brand of aluminum has a 3x better permanence than Kodak Silver Halide Prints and resists fading for more than 65 years. So not only is an HD metal print a great gift for this holiday season, but it’s a gift that will keep on giving for decades!
You can also customize the look of the print by choosing different finishes, surfaces, and mounts. One of the newest additions to the options list is the textured matte surface for a true fine art look.
Whatever options you choose, the result is a breathtaking and custom print that your favorite photographer is sure to love that won't bust your budget!
Learn more about Artbeat Studios’ HD Metal Prints
Gifts for Photographers Under $50: Holdfast Camera Leash Leather Wrist Strap

If you really want to impress the photographer on your list, you might think about gifting them a beautiful (and functional!) camera strap.
A prime option is the strap shown above and below - the Holdfast Camera Leash.
As you can see, this camera strap is made of the finest materials, including high-quality leather and stainless steel hardware. There are multiple colors to choose from as well, so you can customize the look of the strap to best fit the photographer on your list.

This strap is multi-functional, too.
Use it to carry your keys and attach them to a belt loop. Secure a water bottle to your backpack. Use two of them together to carry a third camera on the Holdfast MoneyMaker harness. There’s few products under $50 with that much functionality!
Plus, these things look absolutely incredible with fine details that scream, “I’m handcrafted!” - because they are! They're individually hand-tooled and painted in Oklahoma.
It’s a photography gift that your favorite photographer is sure to love!
Learn more about the Holdfast Camera Leash
Gifts for Photographers Under $50: Octopus.Camera OctoPad
One of the best gifts you can give the photographer on your list is versatility, and that's exactly what the Octopus.Camera OctoPad delivers.
You can use the OctoPad with a camera, a light, a GoPro, a microphone - you name it! And unlike many other small stabilization devices, it doesn't collapse under the weight of the gear.
Instead, it offers a sturdy, stable base for photo and video equipment. It doesn't slide around, either, because of its non-slip mat design.
The OctoPad has a built-in male 1/4-20 inch threaded bolt for attaching accessories and a high-capacity removable ball head that also has an adjustable 1/4-20 inch threaded male bolt.
There’s even a built-in cable strap to keep cables from getting in your way and a clip grommet for attaching a lanyard to easily carry the OctoPad.
The functionality, size, portability, and price of the OctoPad are just too good to pass up. If you want to truly impress your favorite photographer this holiday season, serve up an OctoPad!
Learn more about the Octopus.Camera OctoPad
Gifts for Photographers Under $50: GoPro HERO9 Black Protective Housing
While GoPros are ruggedly built, having a little added protection will give your favorite photographer additional peace of mind that they can capture the action without worry about their camera.
This case was purpose-built to keep water, mud, dirt, and other debris from contacting the GoPro. In fact, it's waterproof down to 196 feet, so if the photographer on your list has deep-sea diving on their schedule, this GoPro accessory is a must!
The cover offers a skeleton backdoor that gives easy access to the touchscreen. It also enables improved audio capture.
The flat glass lens ensures that users can still get high-quality, sharp images whether they're above or below the water.
Likewise, they'' be able to see what they're doing thanks to the accessibility of the front LCD screen, even with the cover on.
And since it's an official GoPro accessory, you know it will fit the GoPro HERO9 like a glove!
Learn more about the GoPro HERO9 Protective Housing
Gifts for Photographers Under $50: Snaptiles
A unique gift idea for the photographer on your holiday shopping list is Snaptiles.
Snaptiles are a patented Magnetic Photo Tile that is 8”x8”x1” and super lightweight.
What makes Snaptiles so unique is that they use a single wall mount that enables you to hang multiple prints without having to put tons of holes in the wall. Here's how it works:
- Place the wall mount on the wall and use the built-in level to anchor a central print to the wall.
- Then you can snap together the other tiles onto the first! The wall mount uses four adhesive strips that don’t damage the wall, yet offer all the support that’s needed to display up to 12 tiles.
- Just make sure you press down firmly for 10 seconds. You can also push in the 4 included thumb tacks for additional support, then mount up to 30 tiles on the first tile! Not a bad tradeoff for 4 little pin holes in your wall.
Each tile connects with strong magnets, so there’s no worry of the tiles sagging or slipping. Instead, they'll give your favorite photographer a clean, crisp photo display to enjoy year-round.
Best of all, though, this system enables you to swap images out as you get new photo tiles, rearrange them in the display, and create different shapes with an array of images.
It really couldn’t be any easier!
The images are printed on a premium SBS Acid Free archival paperboard to give you long-lasting durability. On top of that, the UV protective lamination on the tiles has a beautifully soft touch.
Aside from being well-made and easy to install, Snaptiles offers you the chance to enjoy designing wall displays with the photographer on your list. The manner in which you hang the tiles is really limited only by your imagination. It's a fun way to hang out and enjoy each other's company!
Gifts for Photographers Under $50: PhotoRepairPro
Why not give the gift of making old new again this year?
If the photographer on your list is anything like me, they likely have tons of old photos in boxes in the basement or the attic. Some of those photos have probably seen better days, too.
That being the case, a great gift idea is to have a photo restored to its original glory!
For $34.99, you can give your favorite photographer a repaired photo, including an online proof, a JPEG download, and two 5x7 prints of the image. You even get free shipping on the prints!
No matter if the original image is faded, has creases, or needs to be colorized, PhotoRepairPro has your back.
What's more, they'll improve portraits by removing glare from eyeglasses, smoothing skin, or even changing the background.
There are simply a wealth of possibilities for breathing new life into old memories!
Learn more about PhotoRepairPro
Gifts for Photographers Under $50: HDRsoft Photomatix Essentials
Ask any photographer, and they’ll probably tell you that the toughest part of photography to master is exposure.
All too often, you get photos that have highlights that are too bright or shadows that are much too dark.
But by using the power of HDR photography - high dynamic range - photographers can combine multiple exposures into a single shot, thereby getting a well-exposed image throughout.
Photomatix Essentials by HDRsoft makes that process super easy with dozens of HDR settings and presets for getting the perfect HDR photo.
HDRsoft has even incorporated multiple HDR styles to give photographers further control over how their HDR images look. Truly, creating eye-catching photos has never been easier!
Learn more about HDRsoft Photomatix Essentials
Gifts for Photographers under $50: Pre-Owned SanDisk 32GB Extreme PRO 300MB/s SDHC Card
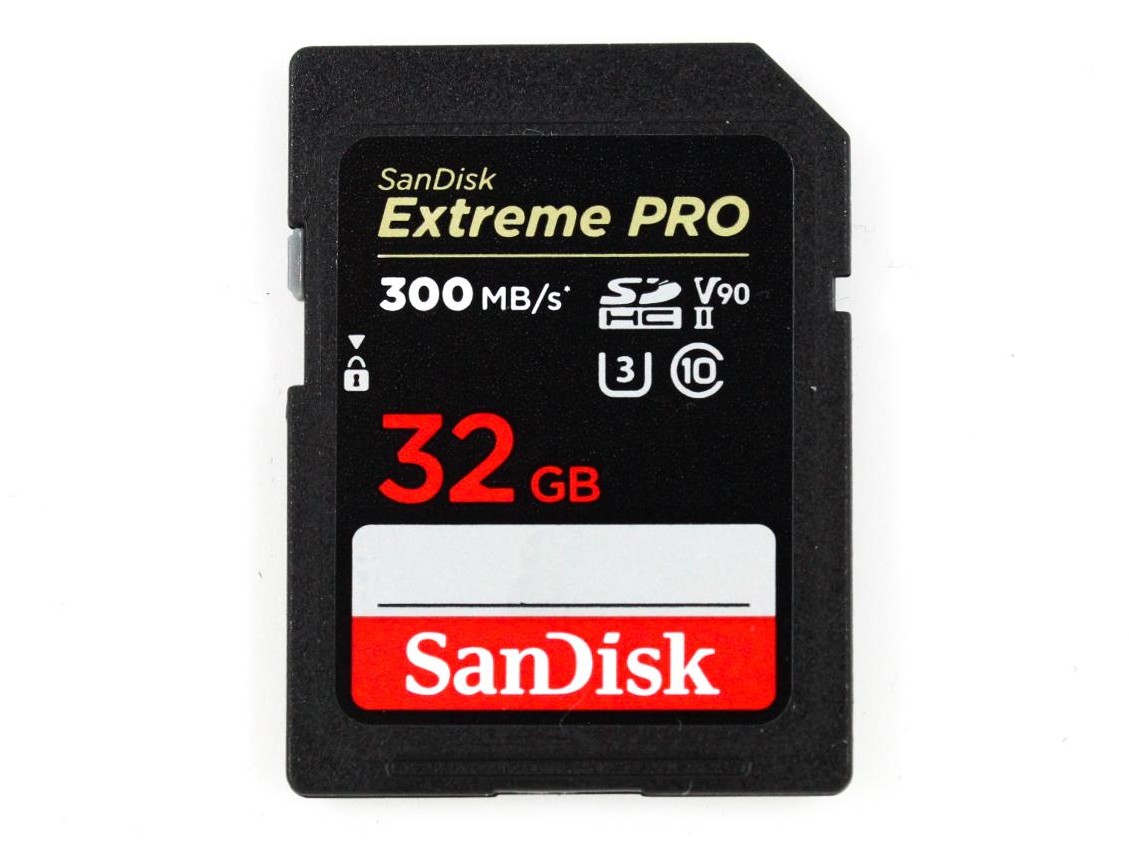
Every photographer needs reliable memory cards, and multiple memory cards at that!
With MPB's great deals on pre-owned memory cards, you can help the photographer on your list ensure they have the storage capacity they need without spending an arm and a leg.
This SanDisk Extreme PRO SDHC memory card offers up to 300MB/s transfer speeds and shot speeds up to 260MB/s. That kind of speed is what photographers demand!
These cards aren't just ideal for photography, either...
They offer sustained video capture of 30MB/s with up to 128GB of full HD video and cinema-quality 4K video.
In other words, these cards will give photographers the uncompromising performance they demand.
Learn more about the SanDisk Extreme PRO 32GB SDHC Memory Card
Gifts for Photographers Under $50: Ikan Stratus 15mm Static Lens Support
If the photographer on your list has a bunch of accessories for their camera, an Ikan Stratus Cage is all but a must.
And to make the Stratus cage even more functional, you can give the gift of a 15mm static lens support this holiday season.
The support attaches to the non-rotating part of a lens and helps support its weight.
With 7/8-inches of vertical leeway, this gadget can support a lens in a number of positions.
It's easy to use, too - one of the 15mm rod mounts is open and angled, so it can be slid onto the rods from above or from the front.
And at $34.99, it's a bargain gift as well!
Learn more about the Ikan Stratus 15mm Static Lens Support
Gifts for Photographers Under $50: Amazon Gift Card
![]()
Totally stumped regarding gift ideas for photographers on your list?
Why not go the easy route and get them an Amazon gift card?
Though a gift card isn't exactly the sexiest gift, when the photographer in your family sees that you have given them carte blanche to get what they want, they'll be stoked!
With an Amazon gift card, they can put the card amount towards whatever they want - a new lens, a second camera body, lighting gear, a laptop - you name it!
As far as flexibility goes, there's nothing better to give a photographer than a gift card.
Learn more about Amazon gift cards
We Recommend
Gifts for Photographers Under $500 - 2021 Edition

Photo by Pekic via iStock
With a $500 budget, there are a lot of incredible gifts for photographers you can buy this holiday season.
From used cameras in excellent condition to camera bags to monitors to improve their workflow, you can give gifts to your favorite photographer that just keep on giving.
And while it seems a little early to be talking about holiday shopping, with so many disruptions to our way of life from the pandemic, it certainly doesn't hurt to start your shopping a little early this year. Let this guide help you zero in on the perfect gifts!
Gifts for Photographers Under $500: reMarkable 2
There are plenty of photographers that enjoy writing notes, brainstorming, and otherwise keeping their thoughts organized by using paper notebooks. I'm certainly one of those people.
But at some point, it becomes a little impractical to use paper notebooks, both because of the environmental impact and because of the space you need to store dozens of notebooks in your studio or office.
I, for one, had dozens of Moleskine notebooks floating around my office and it simply became overwhelming trying to keep them organized. So, I switched to paper-like writing on the reMarkable tablet a few years ago. The reMarkable 2 has since been released, and it's even better than the first!
The reMarkable 2 is super thin (the world's thinnest tablet!), lightweight, and has a great feel to it. The marker also feels great in your hands and gives you that tactile experience of writing with an actual pen and paper. I have no doubt that was a difficult thing to achieve, but boy, did the mad scientists at reMarkable figure it out!
The tablet has a 1.2 GHz dual-core ARM processor, 1GB of LPDDR3 SDRAM, 8GH of internal storage (that can accommodate around 100,000 pages of notes), and a marker with tilt-detection capabilities, 4,096 levels of pressure, and a high-friction tip. The marker doesn't require charging, setup, or pairing, either!
Since the tablet has a Linux-based Codex that's optimized for e-paper applications, there is ultra-low latency. You really do get the feeling that you're writing on paper!
You also get 2.4GHz and 5GHz Wi-Fi, USB-C connectivity, and an accessory port, in addition to a 3000mAH battery that is rechargeable via USB-C and will last up to two weeks on a single charge.
It has a beautiful screen, too. The second-generation CANVAS display gives you 10.3-inches of diagonal viewing space with 1872 x 1404 resolution at 226 DPI. Add multi-point capacitive touch, a gorgeous monochrome display, and a writing latency of just 21 milliseconds to the list.
I've had my reMarkable 2 for several months now and have enjoyed it profusely. You can read more about my experience with it in this review.
Learn more about the reMarkable 2
Gifts for Photographers Under $500: SideTrak Solo 4k 15.6-Inch Touchscreen Freestanding Portable Monitor
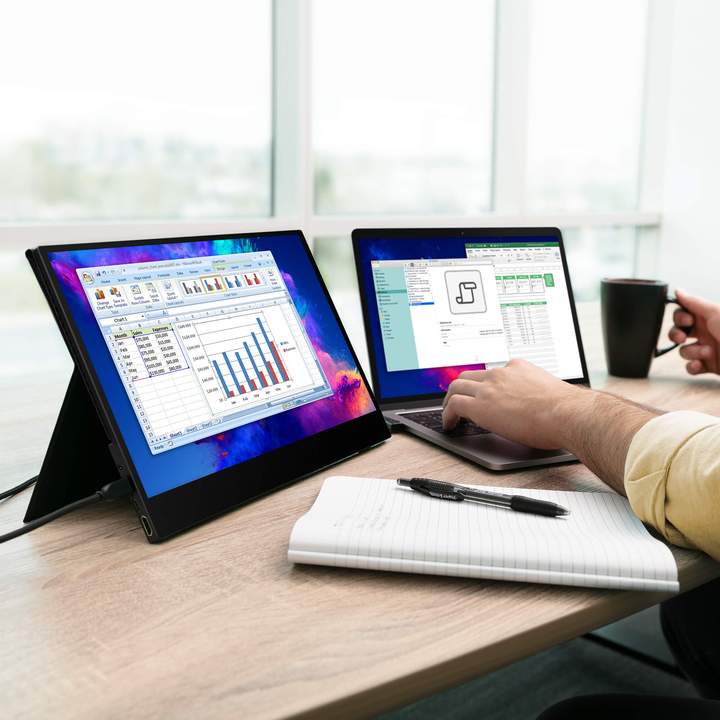
One thing that photographers require to get their work done is a high-quality monitor.
Good monitors have clear, sharp displays, beautiful colors, and an immersive viewing experience. And for many photographers, having touchscreen capabilities is a must as well. You get all these things (and more!) with the SideTrak Solo 4K 15.6-inch Touchscreen Freestanding Portable Monitor.
Aside from the features listed above, this monitor offers the benefit of being incredibly compatible with other devices. It will work with both Mac and PC, as well as Chrome. It can even be used with gaming consoles!

The 15.6-inch 4K IPS LED screen offers gorgeous color rendition, thin bezels for a seamless picture, and a matte finish to reduce glare. Add to that 10-point touch G+FF technology that enables users to be more productive and multi-task.
You get adjustable settings for brightness, display settings, volume, and the screen orientation too.
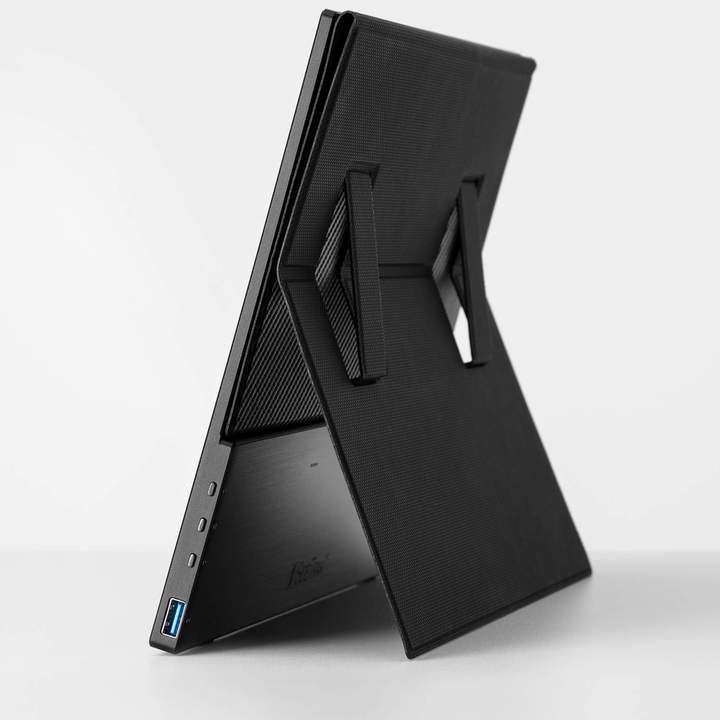
And at 14.5” x 9” x 0.35” and 2.9 pounds, this is a lightweight, ultra-portable monitor that can go from the office to home to the field without issue.
With a budget of $500, you can get a lot of great gifts for the photographer on your list. Speaking from experience, a portable monitor is one of the best additions I’ve made to my kit - the photographer you’re shopping for will think the same when they unbox this monitor!
Learn more about the SideTrak Solo 4k 15.6-Inch Touchscreen Freestanding Portable Monitor
Gifts for Photographers Under $500: CanvasHQ Print
It's tough to beat a large-format canvas print as a holiday gift...
Canvas prints offer a classic look with an interesting texture that helps bring the image to life.
What's more, when it's a well-made canvas, like those from CanvasHQ, the print can become a family heirloom - something that you cherish for decades to come. What a powerful gift!
I have tons of canvases in my home, the vast majority of which are fromCanvasHQ.
What appeals to me about these prints is the impeccable quality. There is a great level of detail and sharpness, beautiful color accuracy, and the frames on which the print is stretched are handmade with kiln-dried wood to ensure the frame stays square and true for years to come.
Additionally, these guys use archival-grade canvas and commercial-grade inks to ensure long-lasting durability.
They also have a new product - a variety of floating frames - that add a touch of elegance and depth to canvas prints.
The floating frames extend along the sides of the print and don't obscure the front of the print, that way you can see 100 percent of the image. It's a clean, dynamic finish that looks great!
But CanvasHQ isn't just tops in the quality department...
They have excellent customer service that makes you feel heard and as though you're the only customer they have to worry about at that moment.
These guys are committed to getting it right, so if something doesn’t go as planned, you won’t be hung out to dry.
If you have questions, they’ll answer them. If you have a problem, they’ll fix it. If you need assistance with uploading your photo or even picking the best finishes for your canvas, they’ve got your back!
Start shopping for your favorite photographer today on CanvasHQ.
Gifts for Photographers Under $500: Canon EOS Rebel T7 with 18-55mm Lens
If you have a photographer on your holiday gift list that wants to upgrade from using their cell phone or an older digital camera, the Canon EOS Rebel T7 is a great option.
The fine folks at Samy’s have the T7 bundled with an 18-55mm kit lens for just $449, so you can help your loved one advance their photography skills while being well under the $500 mark.
The Rebel line of cameras from Canon are aimed at beginner photographers, so they feature easy-to-use controls, yet they also offer features that will allow your loved one to learn new skills, perfect their photographic approach, and take high-quality images.
This camera has a 24.1-megapixel CMOS sensor that generates images that are resolute enough to create large-format prints. If instant sharing is preferable, you can do so easily with built-in WiFi and NFC to share images quickly and easily with family and friends.
Other features include a 3.0-inch LCD display, full HD video recording, up to 3 fps continuous shooting for action shots, and an ISO range of 100-6400. The Canon T7 also comes equipped with a built-in flash, a fast autofocus system, and the camera can be used as a webcam.
And since this bundle includes an 18-55mm zoom lens, your loved one will be able to begin using the camera right off the bat - no need for them to spend their own money on a lens. In other words, this is a perfect gift idea for the photography enthusiast on your list!
Learn more about the Canon EOS Rebel T7 with 18-55mm Lens
Gifts for Photographers Under $500: SideTrak Swivel Portable Monitor
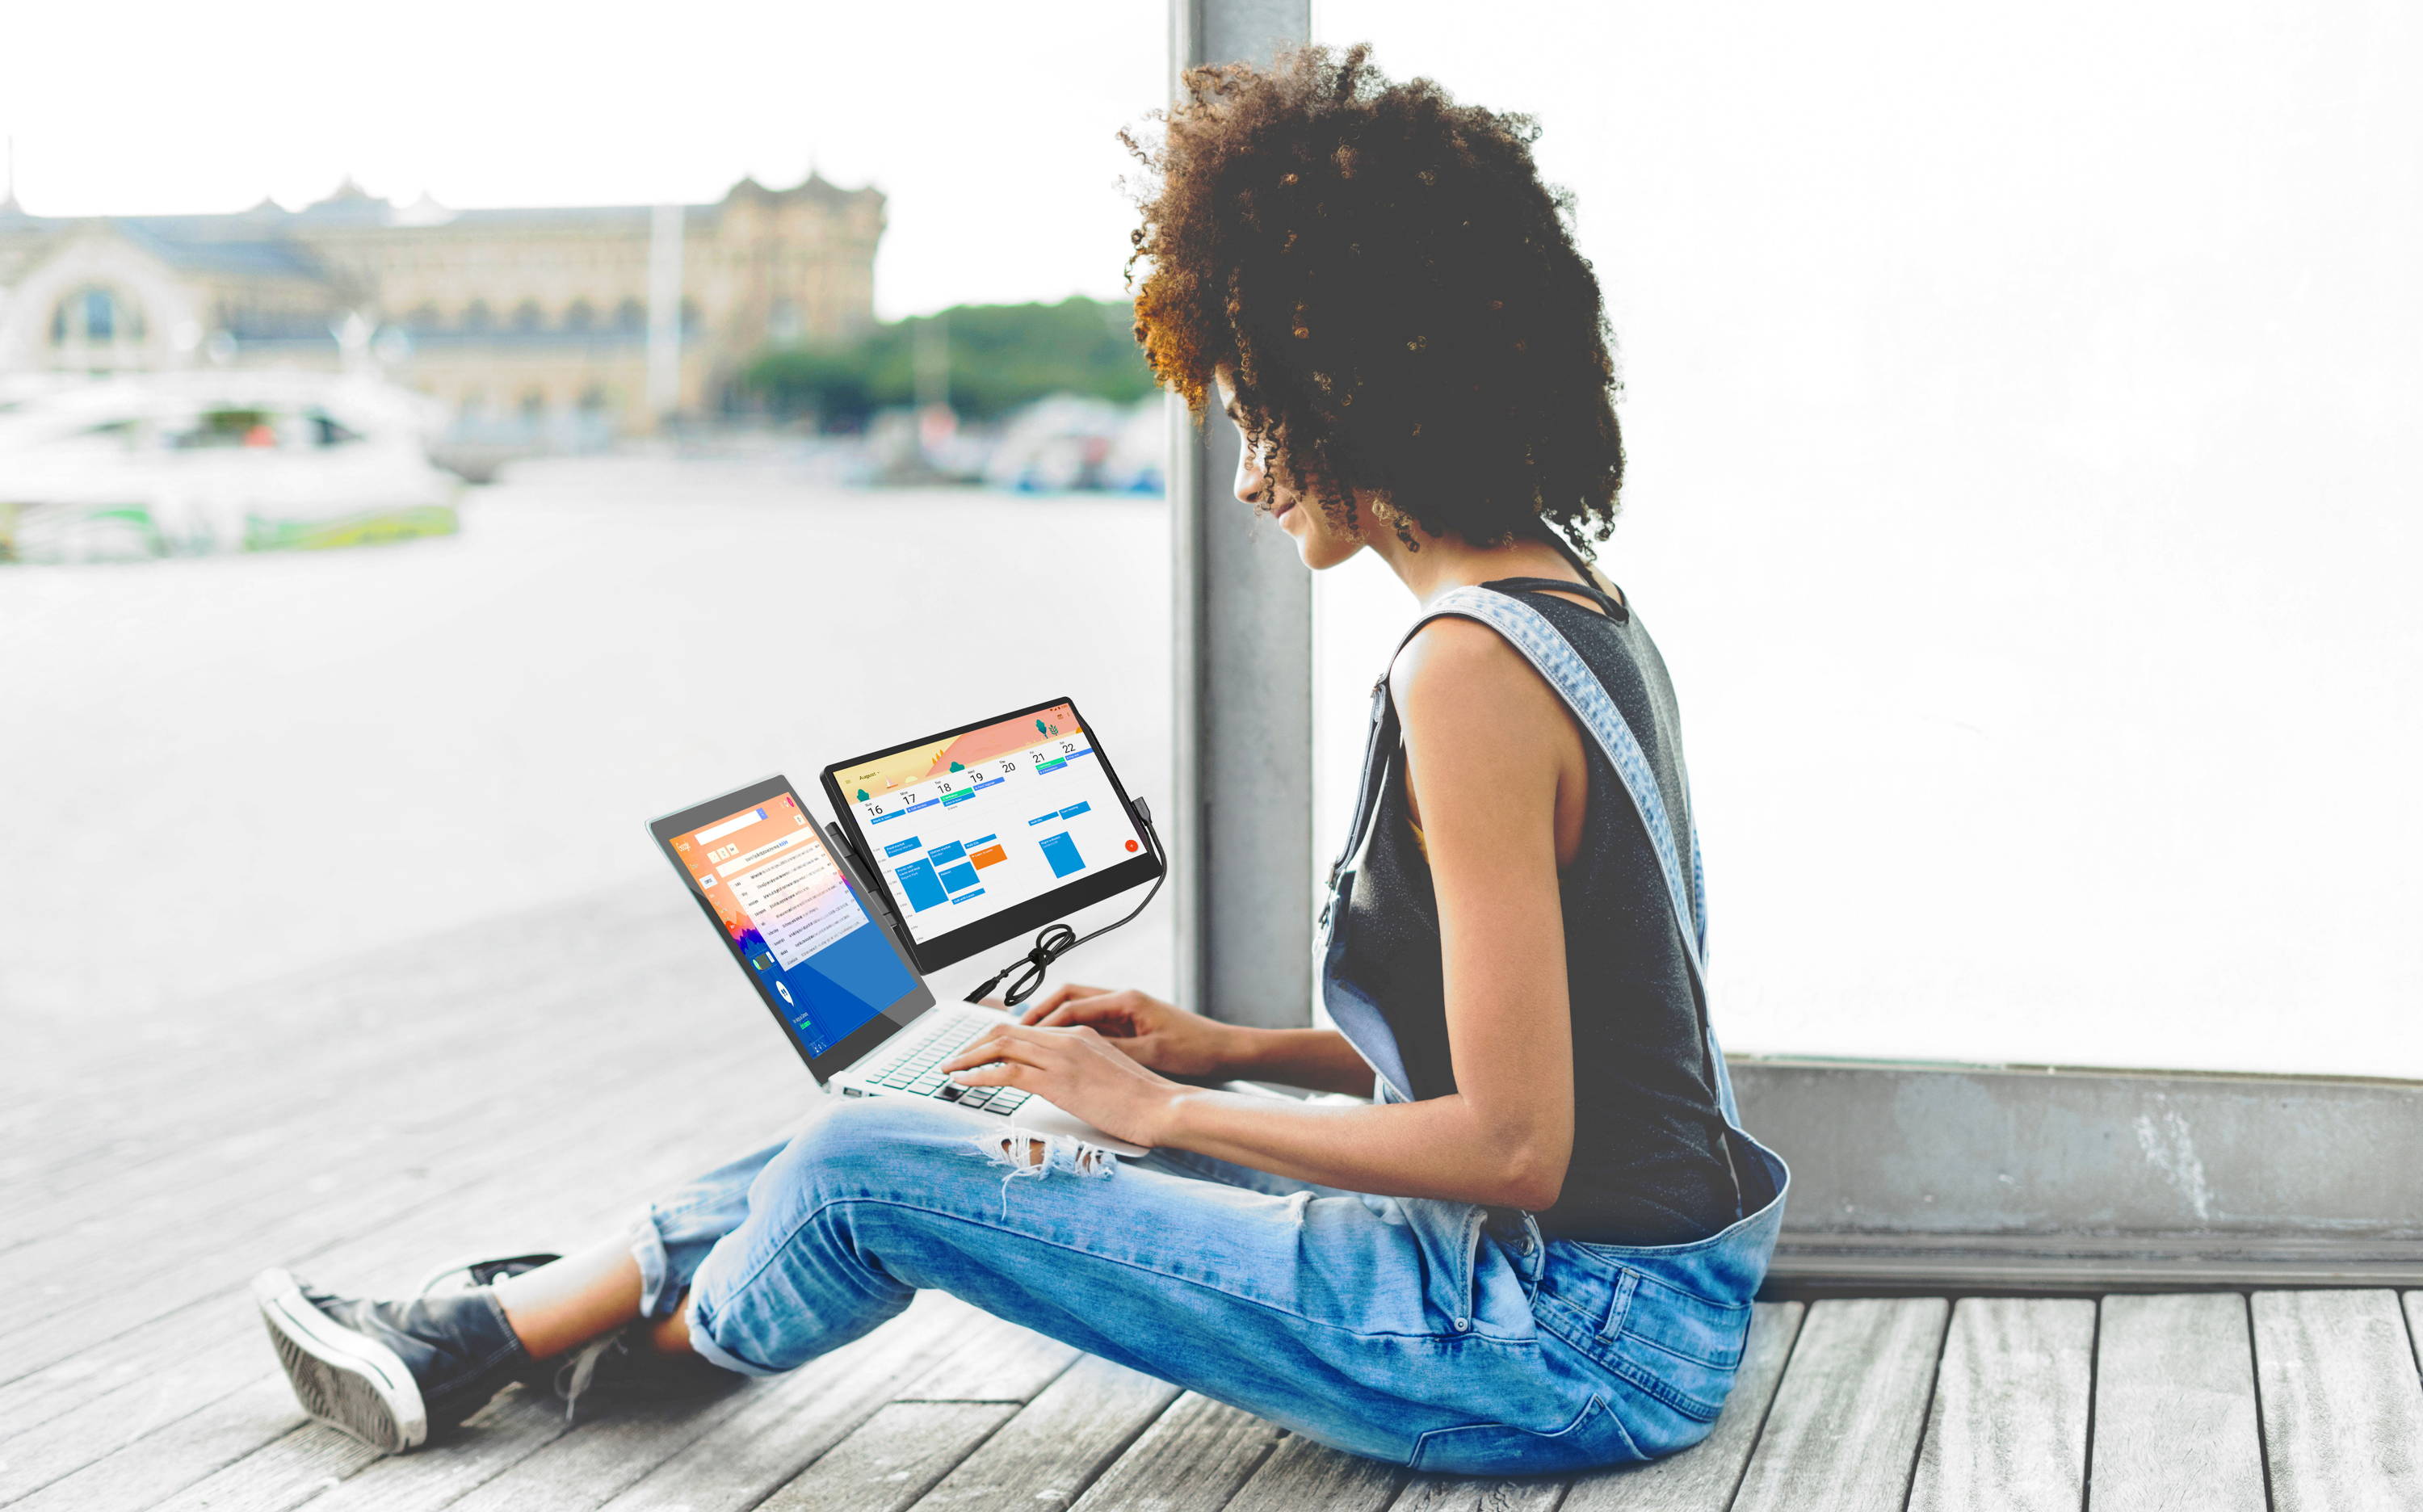
As a photographer that has a laptop as my primary computer, I know the struggles of having enough screen space to get things done.
And my guess is that you have a photographer in your life that struggles with the same thing…
But the SideTrak Swivel Portable Monitor is a great solution to this problem.
You can instantly double the amount of screen space that’s available by attaching the SideTrak Swivel to the back of a laptop. It’s easy, too!
The Swivel attaches securely to the laptop screen using a device-safe metal plate and is compatible with any laptop size or operating system.
Once attached, the photographer on your holiday list will reap the benefits of having a 12.5-inch full HD screen in addition to the laptop screen. The Swivel can either mirror what’s on the laptop screen or extend it - whatever is needed!
Plus, the Swivel rotates 270-degrees and swivels 360-degrees for greater functionality and ease of use. Speaking of ease of use, it can be used while attached to a laptop or with the built-in kickstand in either landscape or portrait mode.
With features like auto screen rotation, adjustable brightness, and an anti-glare screen, this is a gift that’s loaded up with benefits.
Plus, at just 1.2 pounds, this monitor is something that can slide into a camera bag or briefcase and be taken on the road with ease.
SideTrak offers free standard shipping, a one-year warranty, and a risk-free 30-day program, too. That’s the kind of peace of mind you want when shopping for a gift for a loved one!
Learn more about the SideTrak Swivel Portable Monitor
Gifts for Photographers Under $500: Sound Shark
The video capabilities of today's cameras have come a long way - I mean, we can record in 8K now!
But where modern cameras still lack high-quality performance is in their audio recording capabilities. That's why something like the Sound Shark from Klover Products is such a great gift idea for the photographer on your list.
The Sound Shark offers incredible clarity at a greater distance than a standard mic. So, if you're recording video, the person speaking doesn't even need to wear a microphone if they're within about six feet of the Sound Shark. The sound is truly amazing - it sounds like you're wearing a lavalier mic even when you aren't!
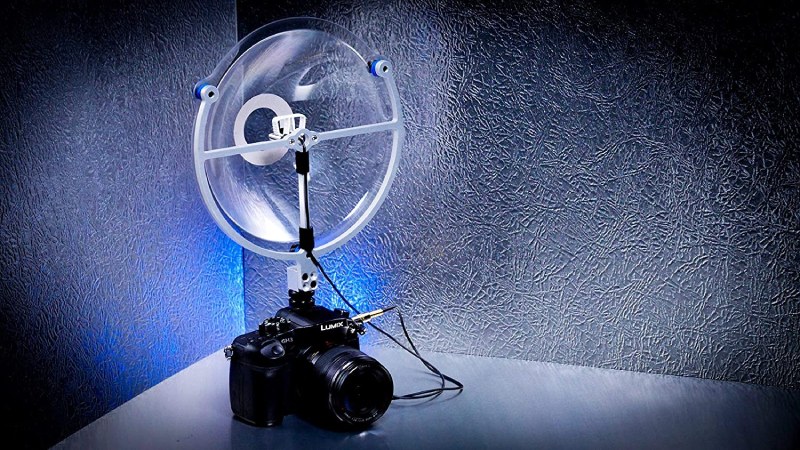
The parabolic design also helps eliminate background noise, so your video has clear, crisp audio to go with beautiful high-resolution video footage.
On top of that, the Sound Shark is water and weather-resistant, so if you get caught in an afternoon drizzle, you won't have to worry about your microphone getting damaged.
At just 10 ounces and 11” x 9” x 3” in size, this mic is lightweight and easy to use, too. It truly is an incredible gift idea if the photographer you're shopping for has aspirations to be a videographer.
Learn more about the Sound Shark
Gifts for Photographers Under $500: f-stop Tilopa 50L DuraDiamond Travel and Adventure Camera Backpack
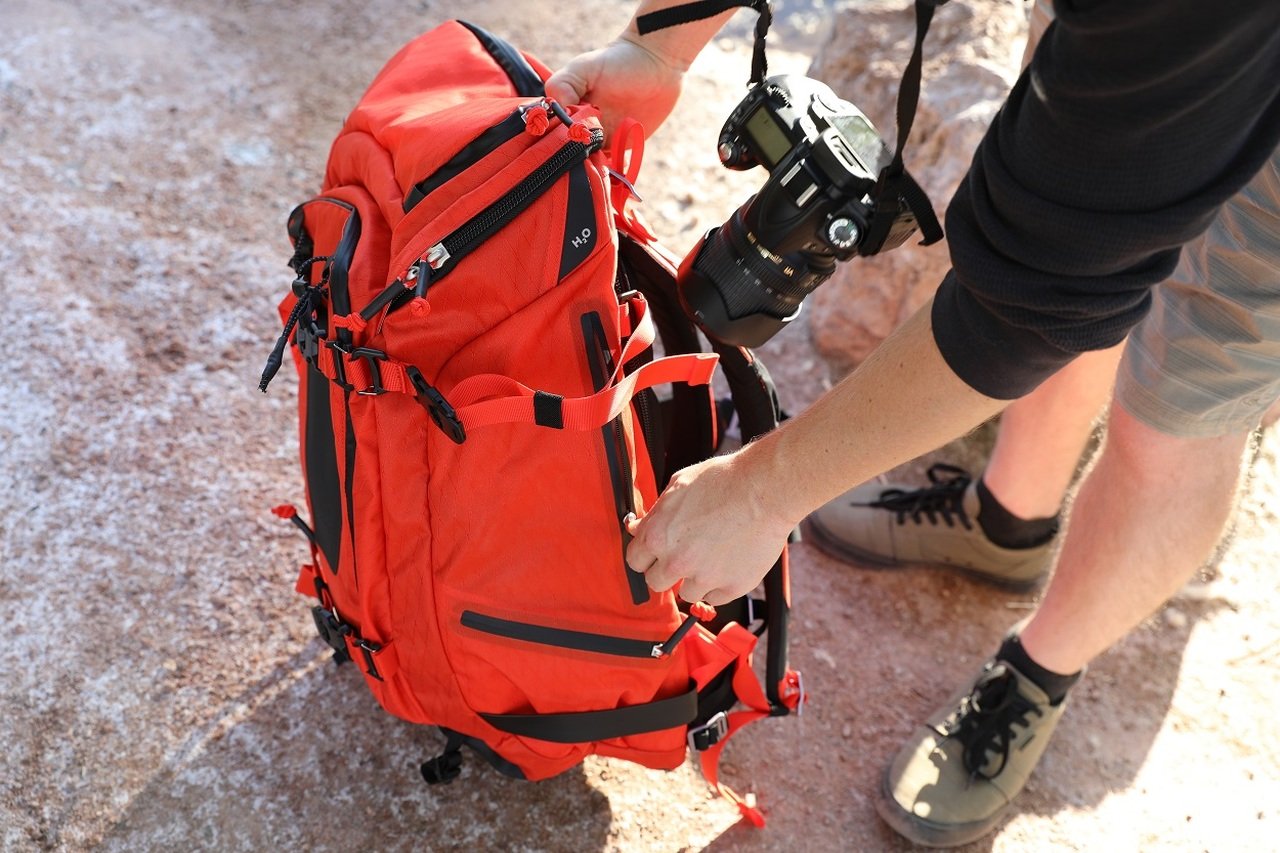
If the photographer on your holiday shopping list has a lot of gear that they need to carry easily, there's no better solution than this 50L bag from f-stop.
This new-and-improved Tilopa comes with all sorts of features like DuraDiamond 315D HT nylon ripstop material, an internal metal frame, and Contoured BLOOM EVA padded hip belt and shoulder straps for making it a comfortable carrying experience.
The bags by f-stop are always impeccably designed and built, and the new Tilopa is no exception...
It features 700 Nylon Ripstop lining fabric, 500mm Polyurethane coating, and heavy-duty stitching with industrial-bonded thread. There's even weatherproof heavy-gauge zippers that help ensure whatever photography gear is inside the bag stays nice and dry.
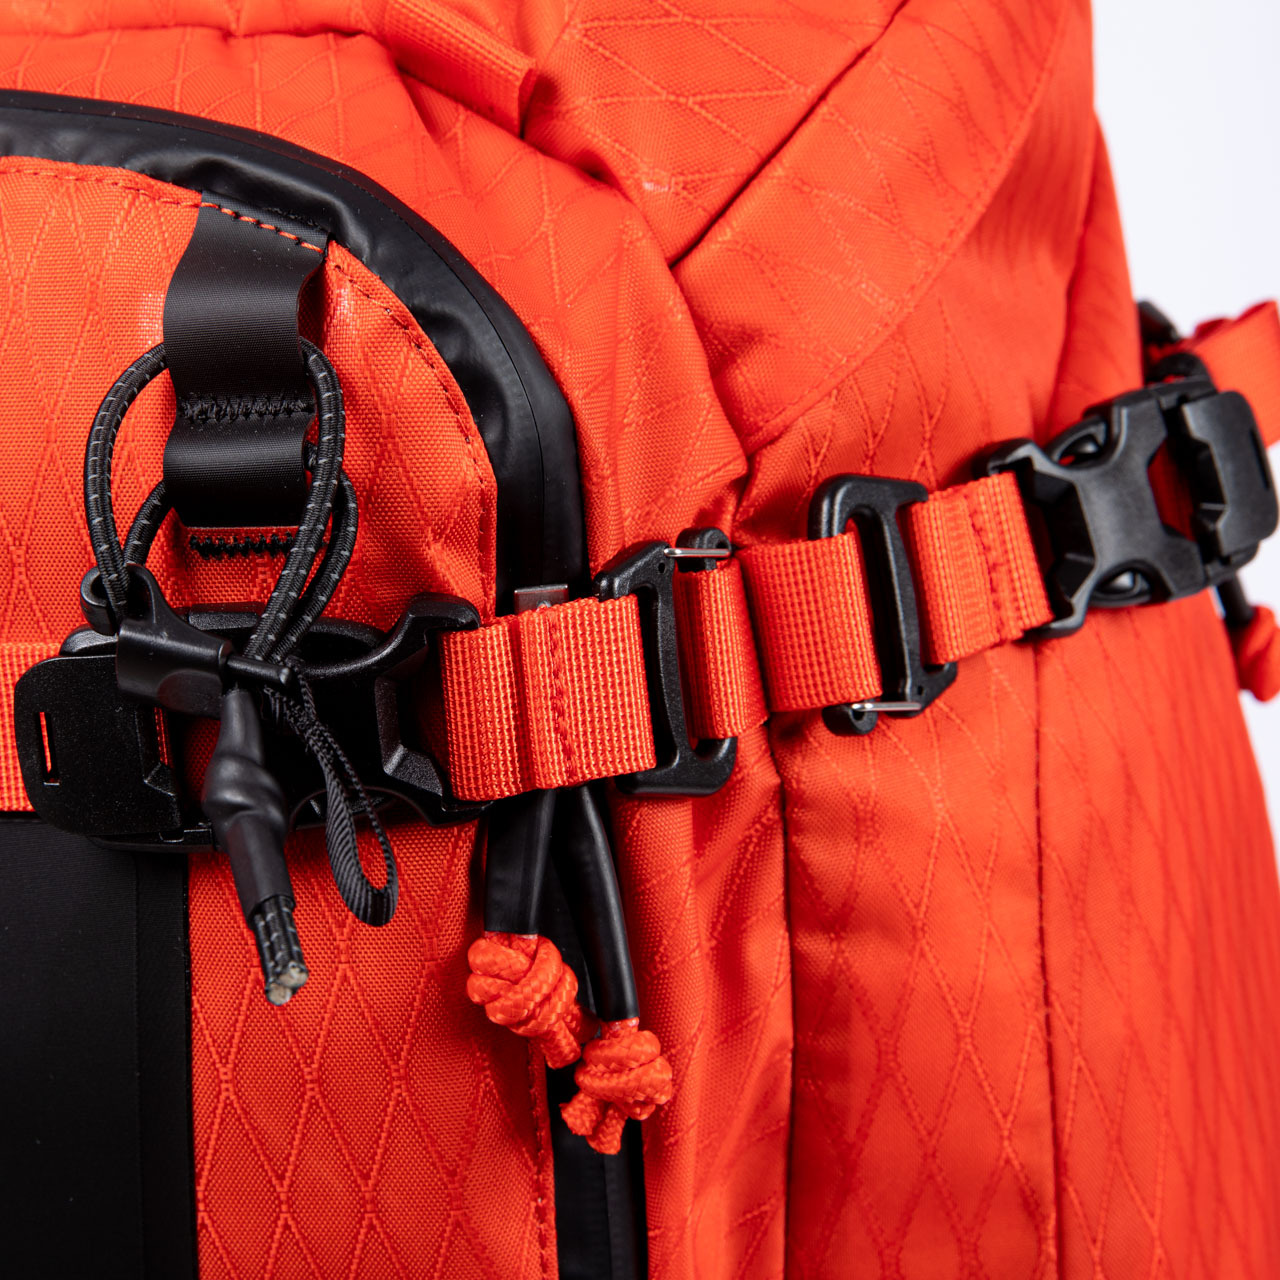
With 50 liters of capacity, this bag can accommodate a heck of a lot of gear. And all that gear can be neatly organized in a number of different f-stop ICUs that fit inside the bag.
And as if all those features aren't enough, the bag comes with a 45-day full satisfaction guarantee. If you don't like the bag, you get a full refund!
There's also a 20-year warranty against manufacturer defects for added peace of mind.
This is simply an incredible bag and one that any adventurous photographer would love to call their own!
Learn more about the f-stop Tilopa 50L DuraDiamond Travel and Adventure Backpack
Blackfire 500W Portable Power Station
I know what you’re thinking...why is there a portable power station on a gift guide for photographers?
Well, it’s simple! When your favorite photographer is out on a photo shoot and needs to charge their phone, tablet, drone batteries, camera batteries, or run their laptop or another small appliance like photography lights, they need a power source to do so. And this 500W Portable Power Station from Blackfire certainly fits the bill.
What’s so nice about this power station is that photographers can charge it up at home before they head out and have hours of clean, silent power for their devices. Better still, this power station can be charged in the car or with an optional solar panel, giving you three different ways of topping off the battery.
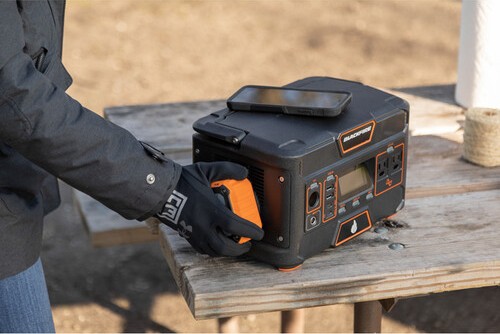
Keeping track of battery power and output is simple with the large, easy-to-read display on the front of the unit. There, you’ll find details about the battery like input and output data as well as how much time is needed to charge the battery (or how much time is left until the battery is empty).
In terms of power outputs, this power station packs a punch with a 12V DC port, two 120V AC ports, and four USB ports (two Type-A, one Type-C, and one Type-C PD). In other words, no matter what the photographer on your holiday list needs to charge up, this power station will have them covered.
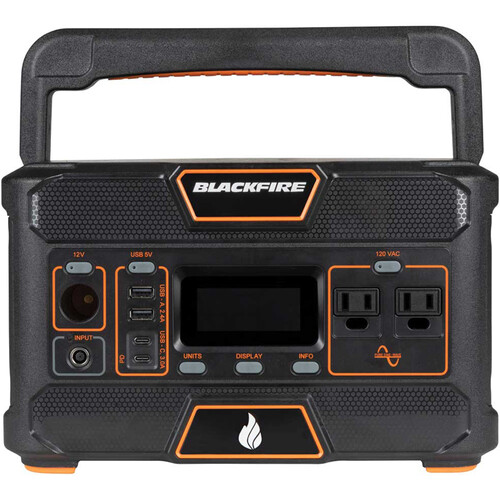
I also really like the size of this power station. It weighs just 12.1 pounds and measures 11.8'' × 7.5'' × 7.3”, so it’s supremely portable. When you have a ton of camera gear to lug around, you don’t want to add a big, bulky power station to the mix. But since this one is so small and lightweight (and has a nice, big handle), it’s easy to carry from the car to the shoot location.
Whoever you give this to will appreciate the pedigree that’s associated with Blackfire. While Blackfire is new to the power station space, it’s owned by Klein Tools, which have been making high-quality tools for well over 150 years. It’s that kind of experience that you want behind a product you invest your hard-earned money in!
There are plenty of great gift ideas for the photographer in your life, but with a budget of $500, it’s tough to beat the versatility and functionality of this power station!
Learn more about the Blackfire 500W Portable Power Station
Gifts for Photographers Under $500: DJI Mini SE
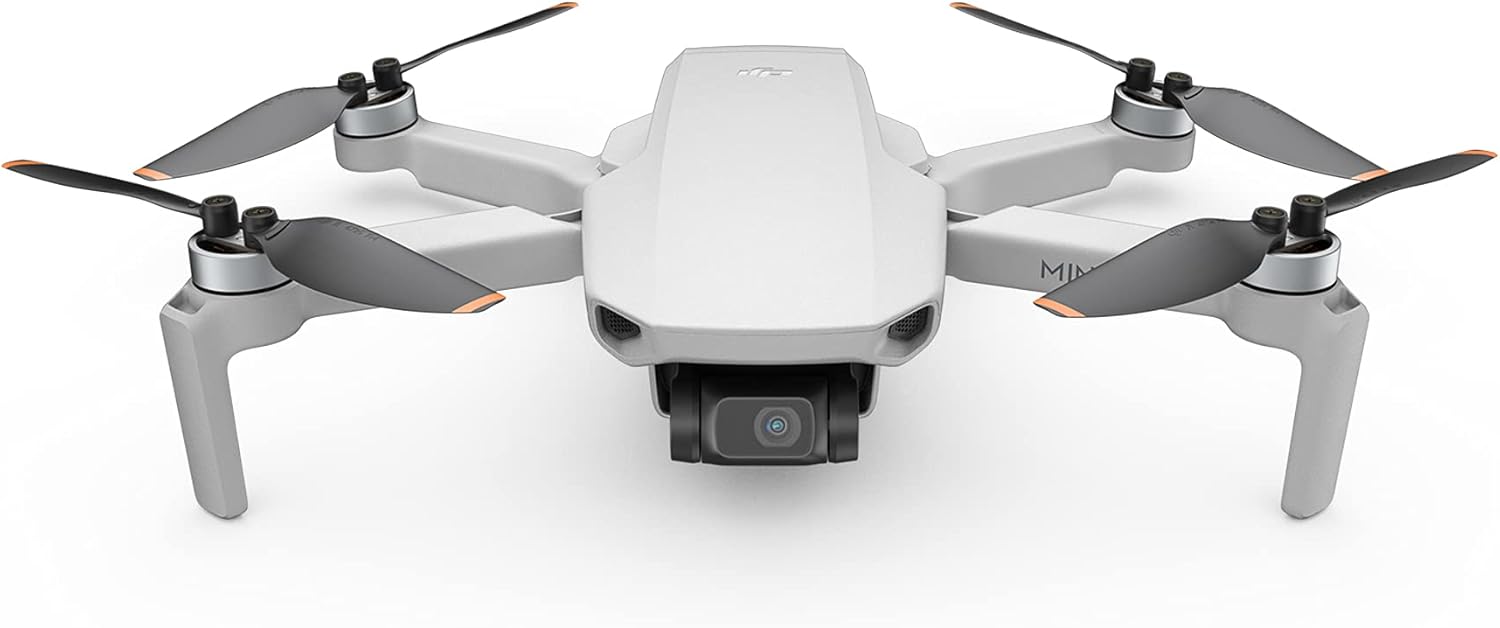
If you live outside the United States you may have already had access to the DJI Mini SE for a while now, but for those of us in the U.S., it only recently became available.
This little drone weighs about as much as a smartphone, yet has a 30-minute flight time, a 2.7K camera, the ability to take 12MP photos, and a 3-axis gimbal. It’s also equipped with DJI’s QuickShot functions, including “circle,” “helix,” “rocket,” and “dronie.”

The Mini SE offers upgraded wind resistance as well. It can resist winds from 18 mph up to 23.6 mph. It can also take off at altitudes of 13,100 feet, so whether you're at the beach on a windy day or high in the mountains, this little drone will service you well.
The best news is that the Mini SE is priced at just $299. That’s a lot of bang for your buck, especially when you have a budget of $500.
Learn more about the DJI Mini SE
Gifts for Photographers Under $500: Holdfast Sightseer Camera and Lens Modular System

One of the things that gets in the way of taking great photos is not being able to carry all the gear that you need in comfort. Additionally, problems arise when you aren’t able to easily access your gear when you need it.
The Holdfast Sightseer solves both of those problems for the photography lover on your shopping list this holiday season.
The Sightseer holds a crazy amount of gear for a small bag. That includes up to a 13-inch laptop, a camera with lens attached, two additional lenses, and all the needed accessories inside the bag.
But because it’s a modular system, you can add even more gear by adding Lens Pouches that attach to the exterior of the bag (or you can carry them on the Holdfast MoneyMaker or even on your own belt). That means that the big zoom lens that won’t fit in the bag can be carried safely in a padded Lens Pouch attached to the outside.

Since the Sightseer is a truly modular system, you can mix and match lens pouches as you need to carry as much or as little gear as the situation calls for. What’s more, this system can grow with you as you get more gear - start out lean and mean with just the Sightseer bag, and as more lenses are accumulated, add Lens Pouches as needed.
Better still, because your gear is easily accessible, you don’t have to worry about missing a shot.
It’s easy to carry, too. Just use the two sets of carrying handles, the shoulder strap, or attach it to the Holdfast MoneyMaker dual camera strap for a super easy way to get your gear from point A to point B.
These bags look amazing, too, with a waxed canvas and American Bison leather exterior and an Aztec flannel fleece interior. In other words, the Sightseer is the complete package!
Learn more about the Holdfast Sightseer
Gifts for Photographers Under $500: Pre-Owned Canon EOS M50
A pre-owned camera is an ideal gift for a photographer because it saves you money and gives them a like-new gift that serves every purpose and function that the same brand-new camera would provide.
In this case, the Canon EOS M50 is a nice option for a beginner photographer's first camera or a more advanced photographer that needs a second camera body.
The M50 sports a 224.1-megapixel APS-C CMOS sensor that's paired with Canon's DIGIC 8 processor. If the photographer on your list likes to photograph wildlife or action, the 10 fps burst shooting rate will be a nice bonus.
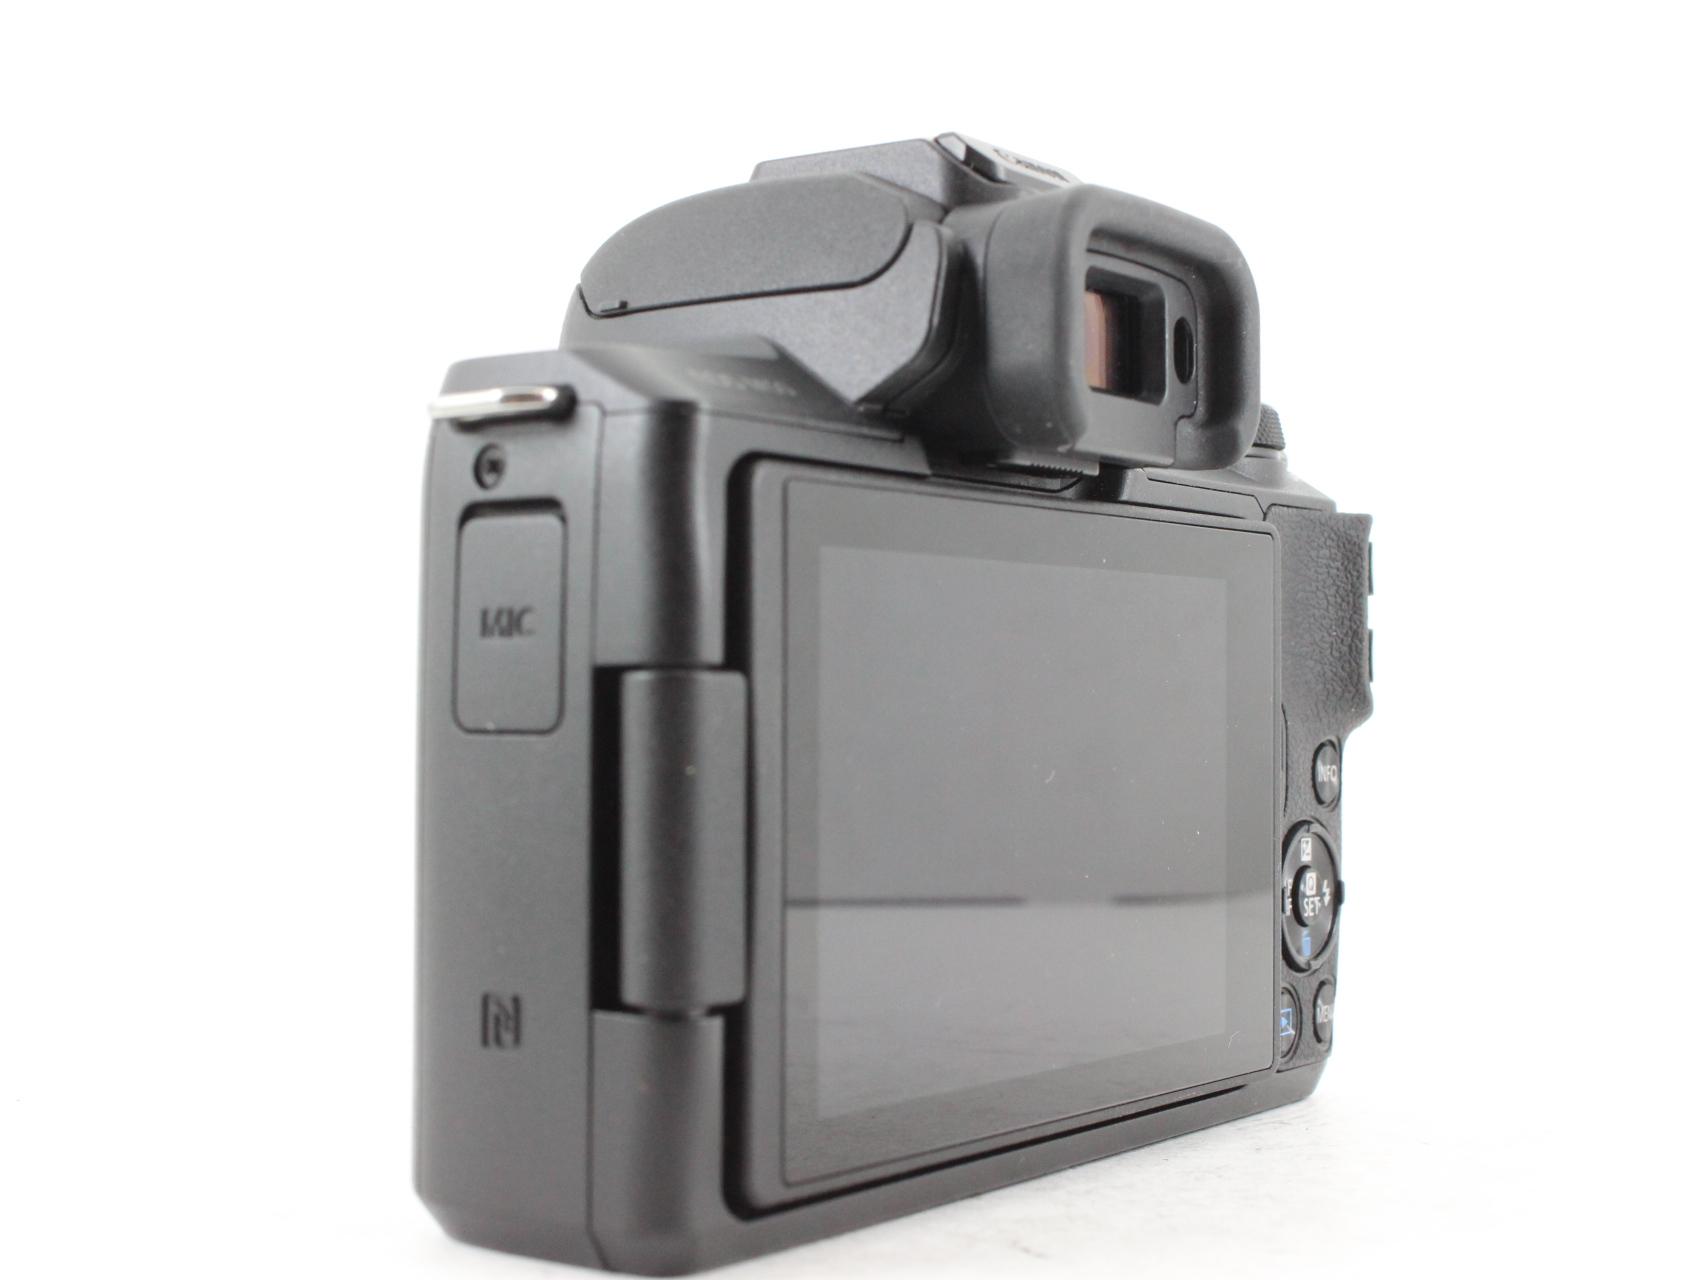
This camera boasts a host of other features, too.
For example, it has a native ISO range of 100-25600 that's expandable to 51200 for shooting in low-light situations. It has a host of video capabilities as well, including UHD 4K video at 24fps, full HD video at 60fps, and 720p video at 120fps for slow-motion video capture.
For still imagery, the M50 has Dual Pixel CMOS AF, which helps generate accurate, sharp images thanks to quick autofocu performance. This feature also works for shooting video.
Add in 5-axis image stabilization to the mix and you have the makings of a well-featured camera for still photography and videography use!
Learn more about the Canon EOS M50.
Gifts for Photographers Under $500: f-stop Anja 37L DuraDiamond Travel and Adventure Camera Backpack
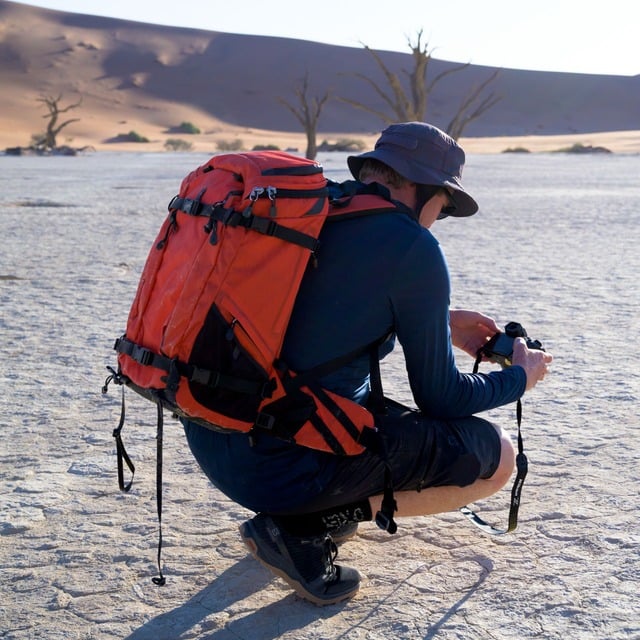
If the f-stop Tilopa 50-liter bag is a bit too big for your loved one's needs, the Anja 37-liter bag might just do the trick.
While this bag is smaller than the Tilopa, it offers many of the same upgrades and benefits discussed earlier.
For example, the outer shell is crafted of the same highly-durable DuraDiamond fabric that's also lighter, stronger, and more weather resistant than other materials.
The Anja also features weather-resistant zippers that are woven in for much greater strength.
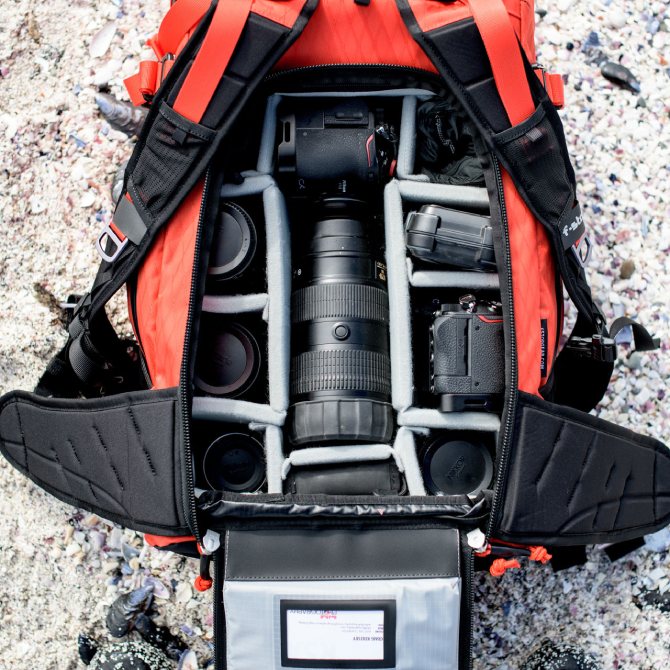
The structure of the back is a combination of T6 aluminum and plastic that gives the bag loads of strength without adding weight. The aluminum frame shifts the weight of the pack to the hips for improved all-day comfort.
The bag has all kinds of organization and storage features inside, in the pockets, lid, and back panel.
And, like the Tilopa, the Anja can accommodate various ICUs, including the Slope Medium and the Pro Large.
Again, this bag is beautifully designed, impeccably crafted, and offers smart storage and organization for tons of gear. Talk about a great holiday gift idea!
Learn more about the f-stop Anja 37L DuraDiamond Travel and Adventure Camera Backpack
Gifts for Photographers Under $500: Nomatic x Peter McKinnon Camera Pack
What photographer doesn't want or need an awesome camera bag?? As such, a camera bag is a fantastic idea for the photographer on your list.
My primary bag is thePeter McKinnon Nomatic Camera Pack, and I can't say enough about what an incredible bag this thing is.
As I explain in the video above, not only is this a beautiful bag, this is also incredibly versatile and full of features. Just take a look at some of its primary features:
- Holds 35 liters of gear (and expands to hold a whopping 42 liters)
- Water-resistant
- External straps to carry items like your tripod
- Removable interior dividers for customizing the bag to your needs
- Easy side access for quickly grabbing your camera
- Comfortable straps (including chest strap and waist belt) for a more comfortable carrying experience
- Space for your clothes too!
You can tell that this bag was designed by a photographer. It is simply fantastic from the standpoints of size, customization, comfort, and ease of use.
This bag is $400, and while that might seem like a lot, when you consider that this is a bag that you’ll have for YEARS, it’s really a long-term investment. Besides, since there's compartments for camera gear and clothing, it's the perfect weekend bag!
Sure, you can buy a cheap bag, but when you are carrying around gear on your back, don’t you want the most comfortable bag you can get?
Learn more about the Nomatic x Peter McKinnon Camera Pack
Gifts for Photographers Under $500: Colorado Tripod Company Aspen Ballhead

If you've never heard of Colorado Tripod Company, you've been missing out...
I've tested a number of their products, and regardless of whether it was a tripod or a ballhead, these guys have impressed the heck out of me.
If you have a photographer on your list, I strongly urge you to consider the Aspen Ballhead as a great gift idea for under $250. Here's why...
This ballhead has a capacity of 30 pounds, so even photographers with the largest camera and lens combination will be able to use this bad boy.
It's made of aluminum and comes in two different ball designs - standard and hollow - the latter of which weighs just .97 pounds.
The ballhead has an adjustable level clamp on top that's compatible with L-brackets and Arca plates. There's also dedicated friction control and replaceable locking knobs. On top of that, the patent-pending design eliminates panning drift.
I've used this ballhead in all sorts of scenarios taking photos and videos, and it has proven to be a durable, reliable, and easy-to-use ballhead that improves my workflow.
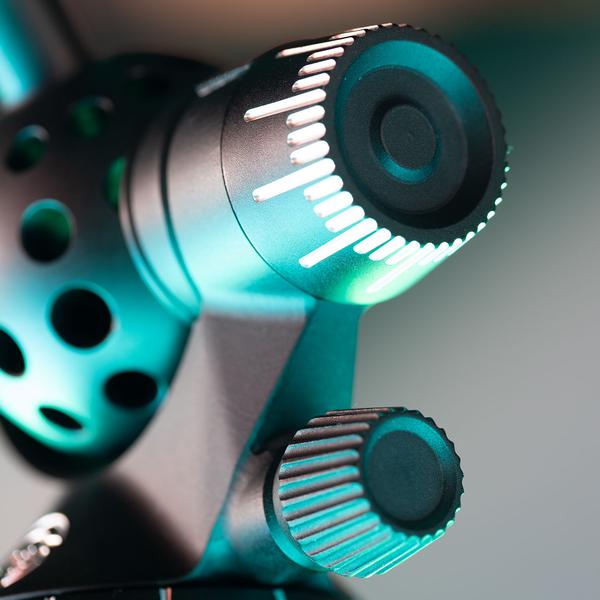
Plus, that hollow ball design is simply genius - it's one of those things that makes you say, "Why didn't someone think of that before?"
The hollow design helps save weight, which for landscape photographers is a BIG deal. Plus, this ballhead has an incredible range of motion that gives photographers all the versatility they need to capture their photos and videos. In fact, you can adjust the Aspen ballhead beyond the 90-degree limit, so you can likely move from vertical to horizontal orientation without having to adjust the tripod's legs. That's a HUGE benefit!
Learn more about the Colorado Tripod Company Aspen Ballhead
We Recommend
Gimbal Mistakes You Need to Stop Making

Learning how to use a gimbal can help us make better videos and is also useful for some still photography situations. We can avoid the more common gimbal mistakes by looking at gimbal techniques in general. By being more informed and well-practiced, improved techniques with gimbals will follow!
What is a Gimbal?
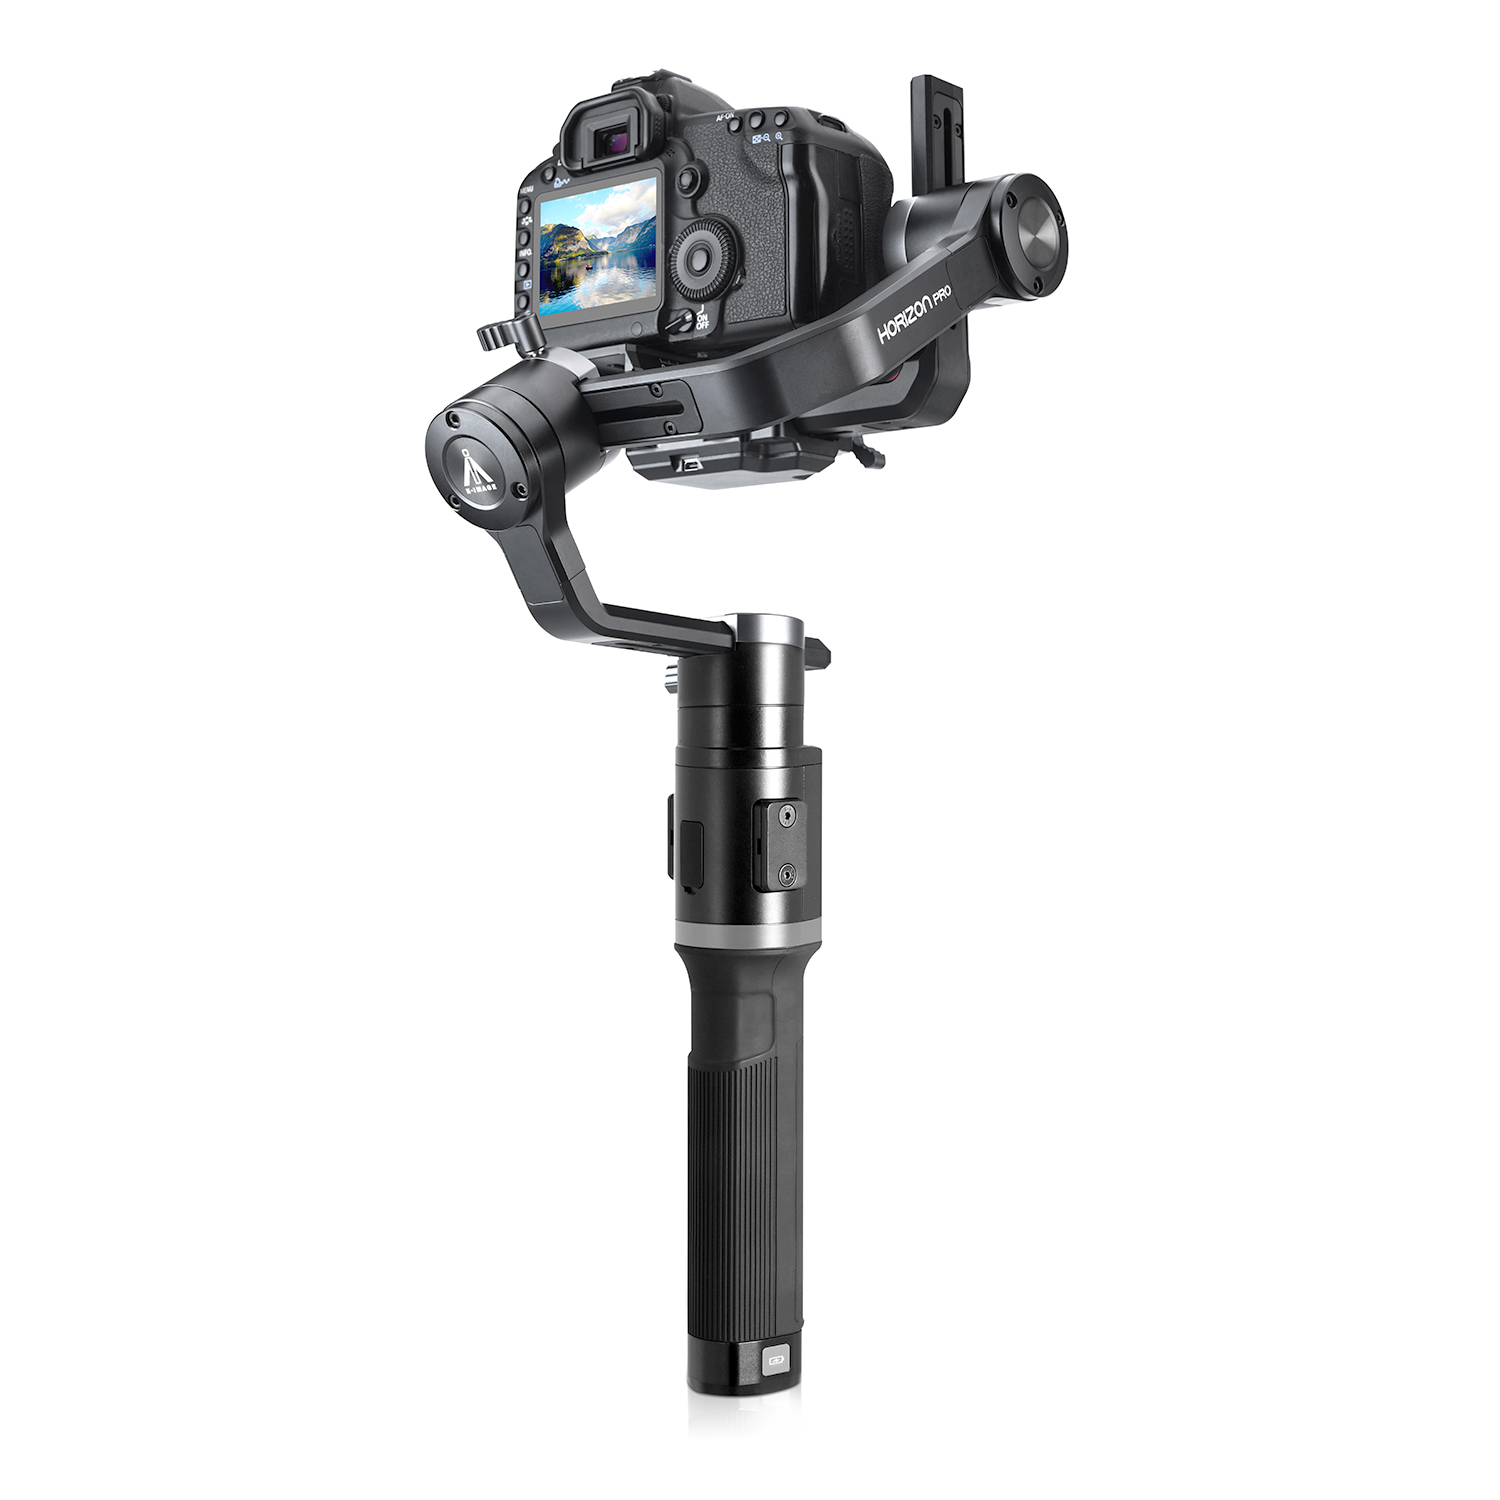
What is a gimbal, and what is a gimbal used for?
As you look online at gimbals, you might be a little confused at what different manufacturers call a gimbal. Don’t worry, you’re not seeing things, there are two very distinctly different types of mounting accessories called gimbals.
One type of gimbal is a tripod head used by nature and sports photographers using large telephoto lenses to shoot moving subjects. It’s an interesting hinged mount that allows for camera and lens repositioning while still giving good support for these heavy lenses.
The other type of gimbal is what we’re discussing in these gimbal tips. It’s a stabilizing mount used for dampening excess movement and is most often employed for creating smoother videos.
Some have a simple balanced dual or triple axis pivot that works passively, while others have active dampening, either by a gyroscope or computer-controlled electronic motors like the E-Image Horizon Pro from Ikan pictured above.
If you’ve ever seen the large Steadicam rigs used in TV and motion picture production, that’s what these types of gimbals are most like. Steadicam is a brand name from Tiffen, so the term gimbal is used for describing the mounts and their actions.
Can You Use a Gimbal for Still Photography?

Since we usually see gimbals for videography, it’s natural to wonder, can you use a gimbal for still photography?
Sure you can. The same reasons for wanting one in videography can apply to still photography. Any type of photography that requires to be mobile are good candidates for using a gimbal as we follow various types of action.
Some examples of these types of activities are wedding photography, street photography, sports events, concerts, or an active day out with our family or pets at a park.
Learn More:
Gimbal Mistakes to Avoid
photo bySergei Chuyko via iStock
As good tips to use a gimbal, let’s look at a few common mistakes and how to avoid or correct them.
Some of the mistakes we’ve seen or made ourselves include not balancing the gimbal, not readjusting when changing lenses, forgetting to charge the batteries for a powered gimbal, expecting too much from a gimbal, and being impatient.
Balance the Gimbal
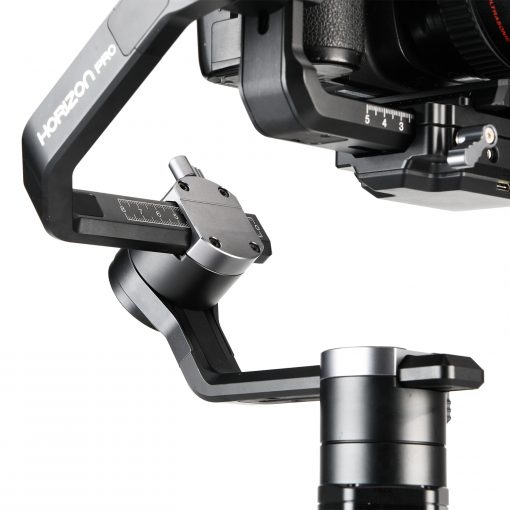
For the gimbal to operate properly, it must be set up properly. For some gimbals this will be done electronically, but for others it’s done by moving counterweights. The E-Image Horizon Pro can be set up by a very simple adjustment to center the rotational axis of the arms. You can see that in the picture just above.
Readjust With Different Lenses
photo by66North via iStock
Since the weight and the Colorful Camera Lens Elements Photography Graphic Zoom Fixed Lenses Stock Photo - Download Image Nowcenter of gravity for a camera and lens rig depend on both the camera and the lens, anytime we change lenses we should rebalance the rig on the gimbal.
A fast wide-angle zoom weighs significantly more than a standard kit lens or a normal lens, and a fast telephoto zoom might weigh even more. Plus, the center of gravity will likely change even if the lenses are near the same size and weight. So, don’t neglect this vital step.
Charge Your Batteries
One of the biggest gimbal mistakes we see over and over is neglecting to charge the batteries for a powered gimbal. Really, since almost everything we use for modern digital photography and videography uses some form of electrical power, recharging and checking battery levels should be a regular habit. Perhaps a checklist could help if anyone is prone to forgetfulness.
Be Patient

Sometimes when we get a new piece of equipment, we have unrealistic expectations of what it is actually able to do for us. A gimbal can really smooth out our movement when shooting videos and also helps for some still photography, but we should also practice being as smooth as we can ourselves.
Also, we can be patient by learning all of the features of our gimbal. The E-Image Horizon Pro has some interesting capabilities such as low angle shooting and also has optional extra handles which can increase our overall steadiness and provide more comfort when filming.
Follow these gimbal tips and you’ll avoid most of the gimbal mistakes we tend towards, making for better, smoother movies and also for sharp still images in active situations.
Learn More:
We Recommend
Gimbal Tips for Improved Videos

You’ve been using a gimbal for video for a while now and you may be wondering how to get smooth video, or smoother video, with your current videography gear.
Here are a few gimbal tips as well as some general videography tips to help you get what you want out of your new gimbal.
Walk Smoother

One of the more important gimbal tips is to realize just how much a gimbal can help with stabilization and what limitations there are for gimbals.
One of the biggest things for a new gimbal user to appreciate is that a gimbal does not eliminate all camera movement. I know! I had the same problem, and still get that way sometimes. The absolute first thing to learn with gimbal tips is to try to walk or move more smoothly.
I like to imagine it this way: If I didn’t have a gimbal, how steady and smooth would I try to be? Then, I keep that same level of smoothness as I move with my camera rig on a gimbal.
In other words, I walk without any up and down movement, I stay as level as I can, and I keep all of my personal movements steady, deliberate, and slow. Especially that up and down walking motion. On playback, even with the gimbal smoothness, it can give the viewer the impression of floating on the ocean with all the swells lifting us up and down.
So, without the gimbal, practice all of your freehand videography movements, get them as smooth as possible. Then. adding the gimbal for video will smooth it all out even further, resulting in a virtually seamless and unnoticeable level of dampened camera movement.
Balance the Gimbal

While the gimbal is an awesome piece of videography gear, it still requires some input from us to get the best results from it. It has to be set up for the specific weight and shape of our videography gear.
Many gimbals do this with counterweights, an electronic balancing, sliding the center of gravity, or a combination of all of that.
As an example, take a look at the configuration of the gimbals I like to recommend, the E-Image Horizon Pro from Ikan. Part of the balancing tool is shown above, the slider mechanism which allows you to set up the gimbal for the optical center of the rig which may not exactly correspond to the center of gravity of the rig, both of which are important.
So, you also use the electronics, (the built-in microprocessor pictures above), in addition to the mechanical settings. It won’t be as full-featured as a multi-thousand dollar SteadiCam, but it does an amazing job, especially when considering how budget-friendly Ikan videography gear always is.
All of this setting up your rig would normally be done before you start your first gimbal video project. Make a mental note too, whenever you change camera or lens, you will have to repeat these steps to balance the rig for the changed centers. It might help to make a note of what the physical marks are for each configuration and let the E-Image Horizon Pro electronics save the other settings.
Learn More:
Keep Your Other Videography Gear
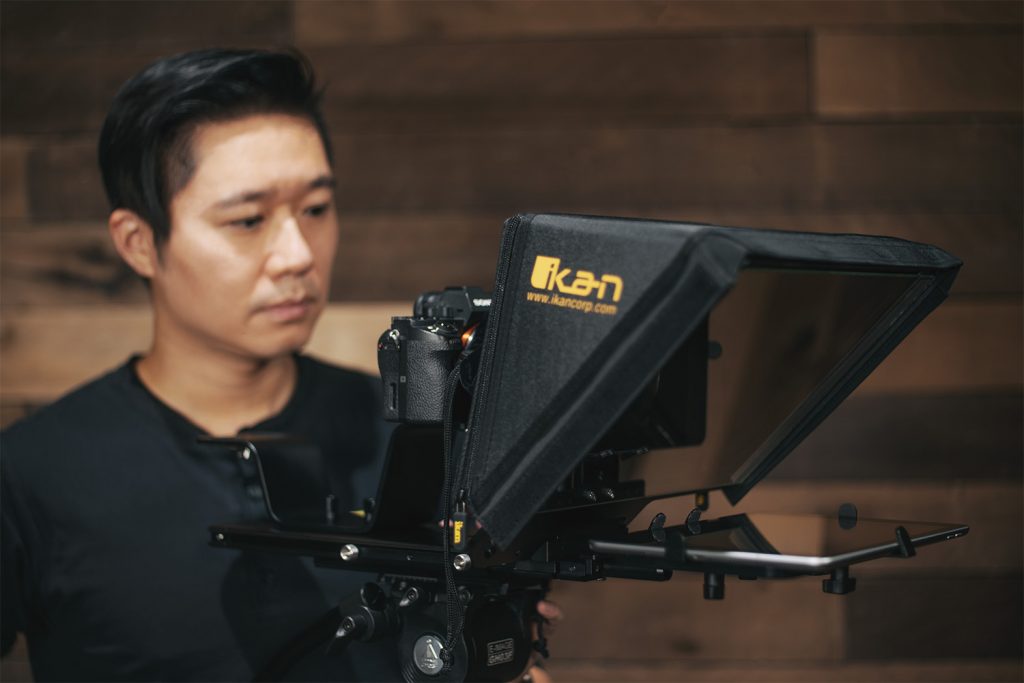
We get lost sometimes in all of our gimbal tips and learning, that we still have and need our other videography gear. Go ahead and plan out a video shoot using only the gimbal and all of the features of the gimbal, that’s the best way to get used to it, learn how to get smooth video using only the gimbal.
After that, put it in your regular rotation of gear to use when you write out your storyboard. Having a gimbal is awesome for the versatility and freedom it allows for certain types of video shots. It becomes part of our gear set, not an all-in-one replacement for all of our other tripod and shooting accessories.
We still need our fluid head, our dollies, our sliders, our teleprompters, our jibs, our camera cages, our external monitors, our follow focus system, our boom mics, and our DMX lighting in order to capture the shots we planned out while storyboarding our script or shooting outline.
Practice a Lot

You could say this goes without saying, but we do have to say it, because we can easily get distracted by everything we do as videographers, lighting specialists (aka: cinematographers), scriptwriters, audio engineers, set designers, actors, editors, directors, and executive producers.
Most of us are either one-man operations or maybe a small crew of 2 to 5 people, so we end up taking care of multiple roles. Have fun practicing these gimbal tips and then use them with your other videography gear and your fine skills and abilities to get smooth video.
Learn More:
We Recommend
Gimbals 101
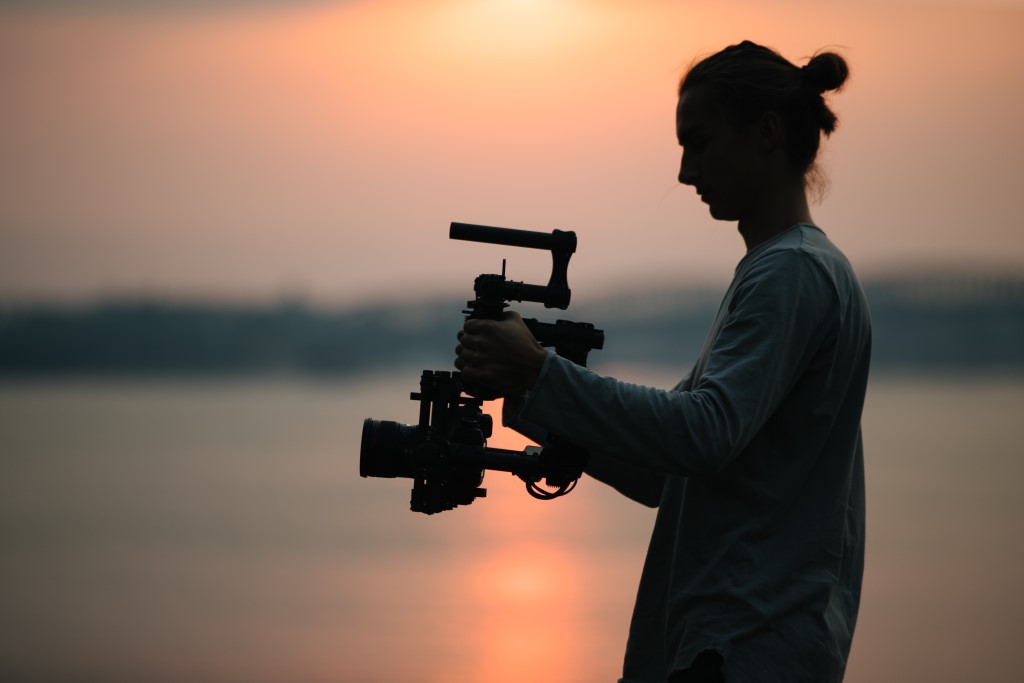
Photo by Avel Chuklanov on Unsplash
If I’m being honest, gimbals were the last tools I learned how to use for my photography business, primarily because I put buying one off for so long since I didn’t think I needed one.
But, once I bought one and learned how to use it, gimbals were my best friend. Now I use my gimbal on a daily basis.
In this Gimbals 101 article, I’m going to explain the science behind gimbals, how to use one properly, and give you some of my favorite gimbals for every budget.
What is a Gimbal?
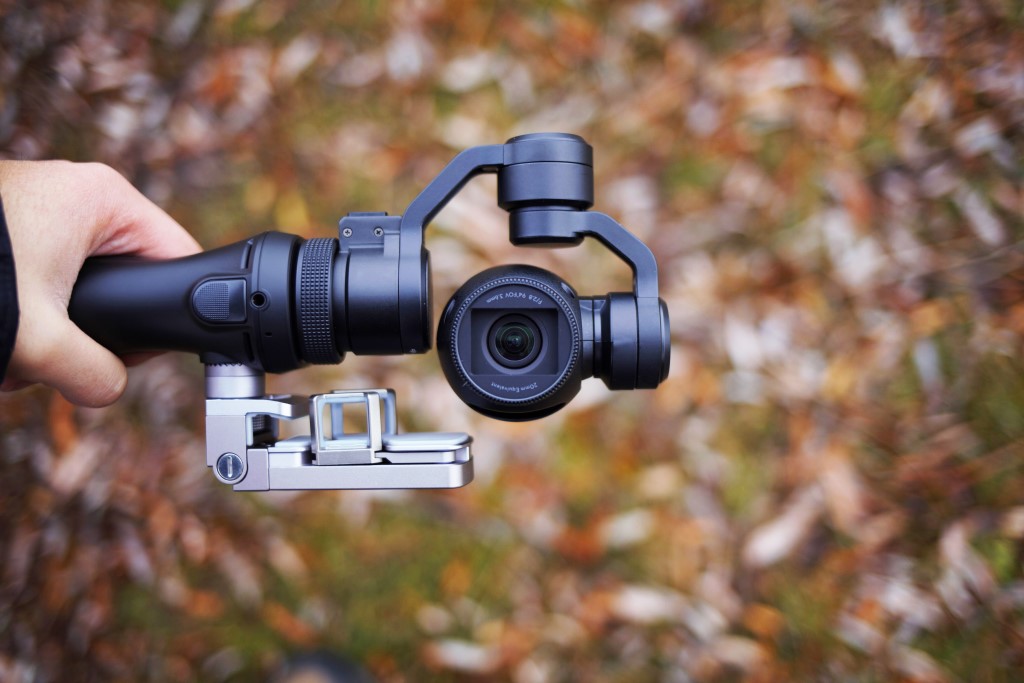
Photo by Frank Zhang on Unsplash
A gimbal is a type of stabilizer. It pivots to allow you to rotate your camera and do so independently from you.
Gimbals are used to stabilize your camera when it moves left or right, up and down, or pretty much any other direction you can think of, which is why videographers love them.
The traditional 3-axis gimbal, which is the type of gimbal I’m covering here, has the pitch axis (up and down movement), the yaw axis (left and right movement) and the roll axis (unleveled movements).
Techquickie explains all of the technology behind how a gimbal works in the video above.
Give it a watch, and you’ll come away with a much better understanding of the technology that makes gimbals so valuable.
Recommended Videography Books:
- How to Shoot Video That Doesn't Suck: Advice to Make Any Amateur Look Like a Pro
- The DSLR Filmmaker's Handbook: Real-World Production Techniques
How to Use a Gimbal

photo by molchanovdmitry via iStock
The first thing you need to do before trying out your gimbal for the first time is balance your gimbal.
First, you will attach your camera to your gimbal. Then allow your camera to fall as it will in the gimbal. Does it fall forward? Does it fall backward?
Chances are it will fall forward because your lens is where most of your camera’s weight is. In order to adjust the tilt, move the tilt bracket up or down until your camera feels balanced.
Then, just to double check, point your camera straight up to see if it is truly balanced.
Learn More:
Tips for Shooting With a Gimbal
Aputure’s video on shooting with a gimbal is pretty awesome because they quickly cover every move you will need to know to get started.
But, you’ll also need to keep traditional rules of photography in mind while playing around with your gimbal.
For instance, keep objects in the foreground of your shots. Doing so will allow you to put emphasis on the way the camera is moving. It makes the scene much more dynamic!
Get Close to Your Subject
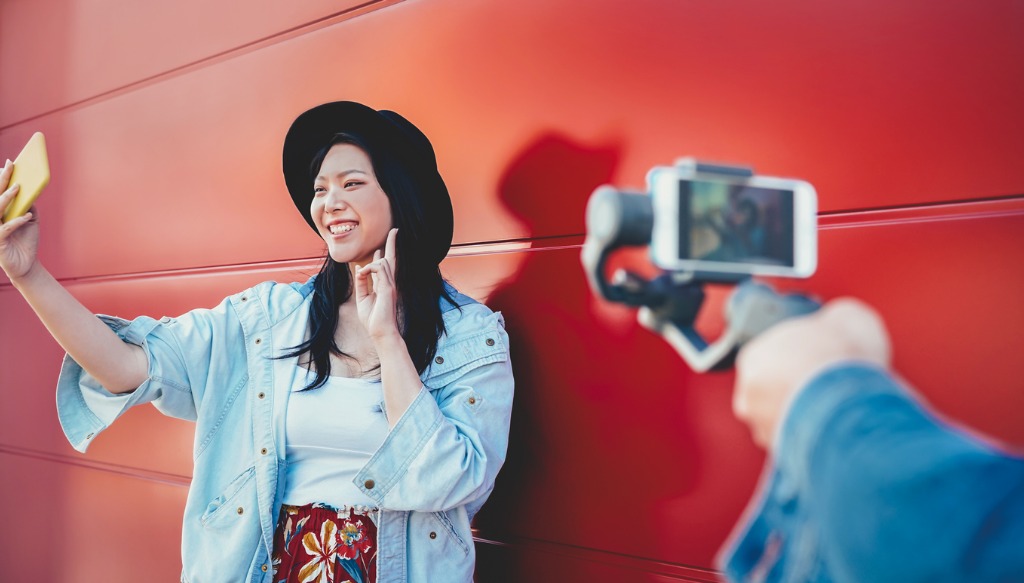
photo by Alessandro Biascioli via iStock
When you’re closer to your subject it’s also easier for you to show off the way your camera moves.
Plus, you can track subjects easier with this type of stabilization so you can follow a character from behind.
Another way to both keep something in the foreground and get close to your subject is to get close to the ground and track the subject from behind. This low-angle tracking view can be extremely visually interesting.
Plan Shots
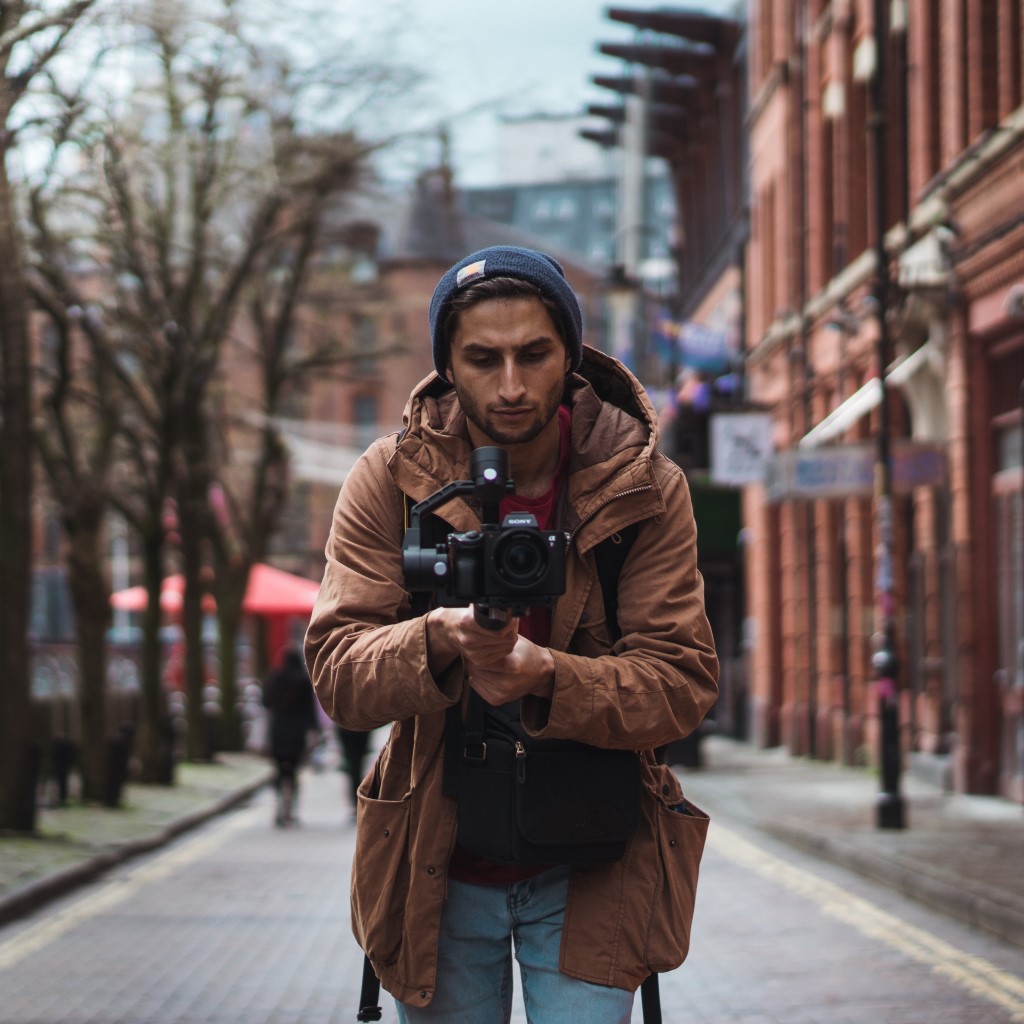
Photo by Warren Berchie on Unsplash
Planning your shots when using a gimbal is even more important than planning your shots with your typical equipment.
One way to do so is to shoot all of your gimbal shots together so you don’t waste time balancing your gimbal more times than you need to.
Plus, while you’re going through the process of planning your shots you can make sure that you’ve used the tips we’ve already mentioned like keeping objects in the foreground of your shots and getting close to your subjects.
Best Gimbals for All Budgets
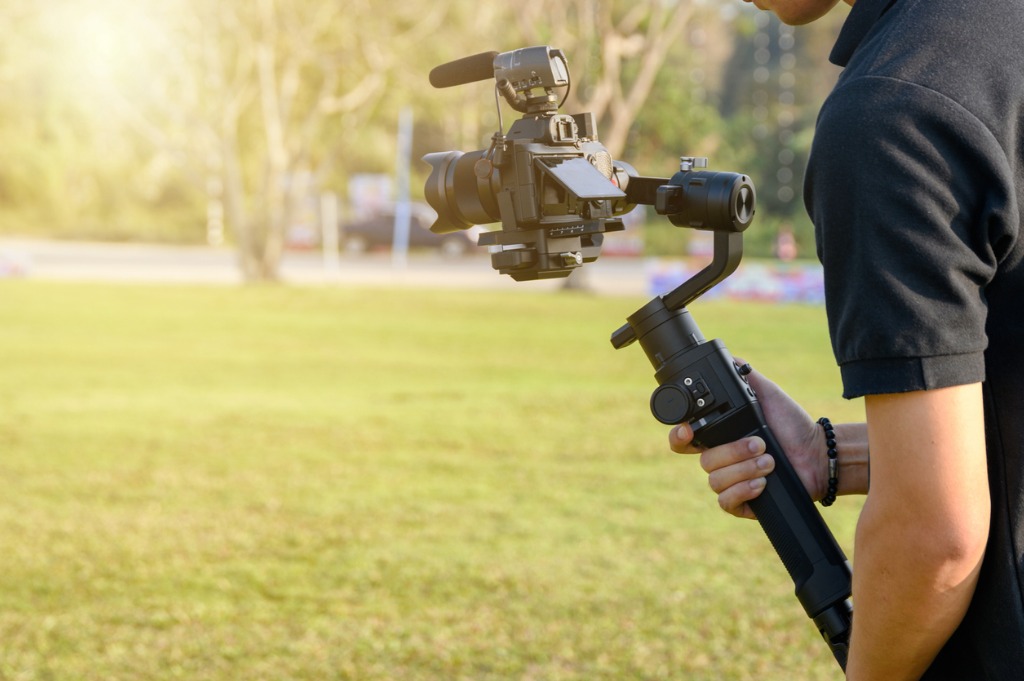
photo by Mumemories via iStock
You can have all the gimbal tips in the world, but if you don’t own one then there’s not much you can do.
Thankfully, like most camera technology, gimbals are being produced at cheaper and cheaper prices. So, I’ll start with the cheapest option and head on to the more expensive versions.
Zhiyun-Tech Smooth-4 Smartphone Gimbal (Best Smartphone Gimbal)

The Zhiyun-Tech Smooth-4 Smartphone Gimbal is just $100 and it works with every single smartphone.
This gimbal has a battery life of 12 hours, and if your phone doesn’t quite have a battery life that long (I’m looking at you, Apple lovers), your gimbal can charge your phone directly during shooting, which is the most fun quality about this gimbal.
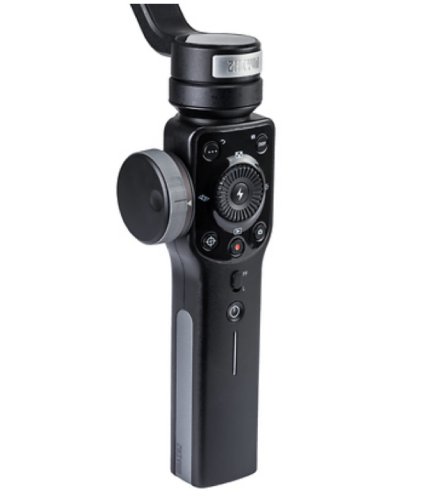
This gimbal has a 300-degree pan angle, and a 240-degree tilt and roll angle, and weighs just over 1 lb at 19 oz.
It can hold a phone up to 7.4 oz, and since most smartphones weigh under 5 oz. there’s an incredibly good chance it will work perfectly for you.
Ikan MS-Pro Beholder (Best Mid-Range Gimbal)
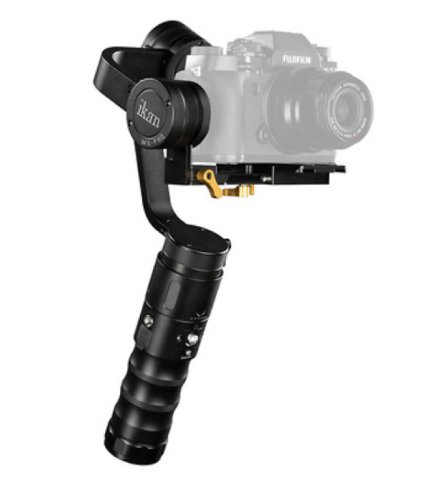
The Ikan MS-Pro Beholder is more expensive at $360, however for specs this great, the price is worth it.
The Ikan MS-Pro Beholder has a load capacity of 1.98 lbs, so it will work best with light DSLRs or mirrorless set ups, as well as smartphones and GoPros. It features a 360 degree pan angle, and a 355 tilt and roll angle.
The battery lasts anywhere from 8 to 10 hours of continuous shooting and it weighs just 2 lbs.
Think Media did a review of Ikan’s MS-Pro Beholder that shows you all of the features in action.
DJI Ronin-S (Best Expensive Gimbal)
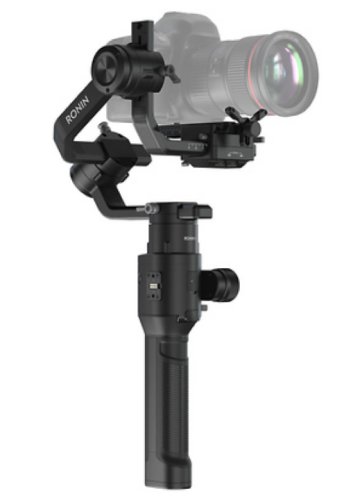
The DJI Ronin-S is not for the faint of heart given its price tag of $750, but if you need a gimbal that provides the most flexibility, this is it.
It features 360-degree pan, tilt and roll angles, can carry up to 8 pounds of equipment and lasts for 12 hours of continuous shooting.
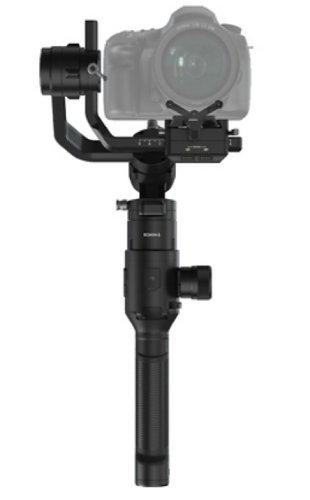
It weighs just over 4 lbs itself, and can act as a stabilized remote head when mounted to a jib. Plus, it can mount to an RC buggy to grab really low-angle shots.
So, no matter what your budget might be, there is a gimbal out there ready to help you get beautifully smooth video footage.
Check out the sample gimbals I’ve listed above, do some more research, and get the gimbal that best suits your needs.
Learn More:
We Recommend
Here's What You Missed From WPPI

Just a couple of weeks ago I caught a flight over to Las Vegas to spend the day at WPPI.
I caught up with a ton of friends in the industry, and had a chance to check out a bunch of vendor booths as well.
There are a lot of great companies at WPPI that have fun, interesting, innovative, and helpful products and services for photographers.
While I was there, I put together a short list of companies that really impressed me.
Unfortunately, I came down with the flu soon after WPPI, so I'm a little late getting this out. Better late than never, though!
Sew Trendy Fashion & Accessories
As you can see in the photo above, the folks at Sew Trendy had a busy expo with a non-stop flow of people checking out their product line.
I met the Founder and CEO of Sew Trendy, Valerie Best, a year or so ago, and I have to say that the way she's grown the company and her commitment to providing photographers with the highest quality products is really impressive. It's not surprising that Sew Trendy has been so successful and that their products are so in demand because Valerie is one of the hardest working people in our industry.
I managed to elbow my way through the crowd to scope out some of Sew Trendy's newest products, and they certainly didn't disappoint.
Their J'Adore Velvet Collection of maternity gowns really impressed with Sew Trendy's signature beautiful lines, impeccable construction, and, of course, that awesome stretch velvet material!
 Belly Beautiful Photography
Sew Trendy has some new newborn photography offerings as well, including the Newborn Mesh Wrap shown in the image above.
This wrap is made of a stretchy knit that's not only soft, but is extremely easy to work with, so you can snuggle the baby up and get beautiful shots.
But the most impressive product I saw at Sew Trendy's WPPI booth was the Charity Rainbow Skirt.
The skirt is crafted of gorgeous, bright rainbow colors that give an expecting mom a light, airy aura in her photos.
These handcrafted skirts not only look great, but 20% of the proceeds of each skirt (and all of Sew Trendy's Rainbow Baby items, for that matter) are donated to Primary Children's Hospital to help families offset the costs of pediatric ailments.
Sirui

A lot of people recognize the name Sirui, and associate it most often with tripods.
I have a long history with Sirui. They're one of my favorite companies. In fact, I have a W-Series tripod from these guys that I wouldn't trade for the world.
It's waterproof and dustproof, which is awesome since I take a lot of shots at the beach. Additionally, my W-2004 model has a built-in monopod that comes in handy when I want to travel fast and light.
And while Sirui makes some really, really good tripods, they certainly have more to offer than that.

Sirui offers a complete line of photo and video monopods, like the EP-224S monopod shown above.
Like their tripods, Sirui monopods are well-built, easy to use, and have handy flip leg locks that make setup and breakdown a breeze.
These things are incredibly sturdy, too, and give you smooth panning rotation and swiveling.
But my favorite Sirui item I saw at WPPI is their new Three Lens Mobile Phone Kit.
The kit has you covered with an 18mm wide-angle lens, a 60mm portrait lens, and a fisheye lens to capture creative, mind-bending shots.
Each lens has multi-layer anti-reflection coating so you get high light transmission and precise colors with 4K image quality.
And with minimal vignetting and distortion, these things will help you snag some awesome photos with your phone!
Holdfast

I've gushed about Holdfast many times in the past...
Every time I run into Matt Swaggart, founder of Holdfast, I feel like I'm running into an old friend. That's because Matt's developed a company that focuses on the relationships with its customers as much as it focuses on creating incredible products.
And even though I own some of their gear, I'm always surprised how taken aback I am when I see their stuff at expos like WPPI. It's simply some of the most beautiful photography gear I've ever seen.
You can see the sheer volume of selection in their MoneyMaker line in the image above. But that's not Holdfast's only claim to fame...

If you've never experienced the joy of seeing and feeling (or using!) one of Holdfast's Roamographer bags, man, are you missing out!
Like the MoneyMaker (and everything else Holdfast makes), the Roamographer bag is gorgeously designed and beautifully made.
Not only is it an eye-catching bag, but it's incredibly durable, made of Great American Bison leather that only looks better and better with time.
Add in a removable camera insert that cradles your gear, carrier straps to carry your tripod, and a shearling-lined shoulder strap for comfortable carrying, and you have the makings of a piece of gear that will quickly become your new best friend!
Ikan

One of my favorite booths to visit at any expo is Ikan because they have a mountain of gear available and I love checking out the latest, greatest stuff that will help me take better photos.
At WPPI this year, Ikan had a huge display of NiSi filters, which I've been using for about three months now.
Let's just say that I'm really glad that I picked up a NiSi V5 Pro Filter Kit, as it has not disappointed thus far!

Not only are these filters made of cinema-quality glass that gives you clear, sharp results with spot-on colors and minimal aberrations, but the V5 kit also comes with a filter holder, adaptor rings a carrying case, and cleaning supplies.
Add to that a soft-edge grad, a reverse grad, and a 3-stop, 6-stop, and 10-stop ND filters, and you have the makings of a complete filter pack for landscape photography.
I've only had a chance to use my new NiSi filters a couple of times, but I can tell you this - they are among the best filters I've ever used, and they will be part of my kit for a very, very long time.
On top of that, the new faces I met at the Ikan booth at WPPI impressed the heck out of me. This company is in good hands, that's for sure!
Skylum

If I were to describe the people at Skylum using just one word, that word would be fun.
Don't get me wrong - they aren't just a great group of people to hang out with. They also take their work very seriously.
I'm a huge fan of Lightroom, if for no other reason than it helps me keep my photos nicely organized. For someone that isn't the most organized sometimes, that's a godsend.
But I have to say that when it comes to editing my photos - most of which are landscapes - I turn to Skylum for their superb Aurora HDR 2018 and Luminar 2018 software packages.

There's plenty of reasons why Skylum's software is my go-to these days.
But chief among those reasons is that it's simple and effective.
I can literally cut my editing time in half by using Luminar because it comes preloaded with presets that make editing my photos a breeze.
There's over 40 non-destructive filers, LUTs that offer one-click options for simulating color grades and film stocks, and the ability to make your own custom presets, too.
It's a truly innovative program from a truly innovative company. If you want to boost your productivity in post-processing, give Skylum a Look!
Calotype

The fine folks pictured above are from Calotype, one of the most innovative photography companies around today.
If you've never heard of Calotype, get ready to be impressed...
I first met these guys at Photo Plus in 2017, and I have to say that I admire their dedication and hard work as much as I admire their product.
Speaking of which...Calotype is a web-based suite of tools for professional photographers that improves your management of day-to-day tasks that helps you streamline how you spend your precious work day.
In particular, Calotype is geared towards photographers that work in high-volume areas like sports photography or school photography. Why? Because Calotype tracks all that client data for you - names, dates, photo packages - you name it!
Calotype even helps you organize images, create encrypted image galleries for your clients to view, customize pricing lists, manage email marketing, and so much more.
In short, it's like having an office manager without having to pay one!
Spider Holster

I've known Spider Holster's CEO for the better part of eight years now, and the dude is an absolute machine.
He's always on the forefront of innovation, coming up with new and exciting products that the photography industry needs. He's a bit of a mad scientist in that regard...
It's hard to capture the essence of Spider Holster's gear in a simple photo like the one above.
That's because their stuff is something you really need to see and use to believe just how good it is.
Their Spider Pro dual camera holster is a feat of engineering and design that makes shooting a much simpler, streamlined task.

With your cameras on your hips, you not only have easy access to your camera to take quick shots, but they're also out of your way. No more worrying about stupid shoulder straps getting in the way!
What's really impressive about the Spider Pro is that it moves with you. In other words, you don't feel bogged down by your gear, nor do you feel restricted in how you move around.
Even with a long lens attached to your camera, you have excellent freedom of movement to get the shots you want with the confidence that your Spider Holster has your gear safely secured.
If you're a wedding photographer, I can't think of a better piece of kit to have. It's that good!
Learn more about Spider Holster
Iris Works

I've known the CEO of Iris Works for a few years, now, and I can say that her winning attribute is the laser focus she brings to the photography industry.
You can see that laser focus in Iris Works - it's a software package that is specifically designed to help you get a handle on everything you need to do.
Iris Works has tools that address every part of your business. It's got a calendar, billing and invoicing programs, and automated messaging so you can keep track of your appointments, invoices, and communications with clients.
Not only that, Iris Works gives you the ability to create contracts, galleries for individual clients, and maps with your favorite shoot locations.
You even get a daily snapshot of what's going on in your business, so you can see on a single screen each task you need to complete for the day.
Not bad, right?
We Recommend
How to Edit Videos Like a Pro
Photo by Jakob Owens on Unsplash
Your awesome new camera has an amazing video mode and you’ve been shooting footage for a while. But you want your finished video to look as good as your still photography does. You had to learn post-processing for still imaging, now you should take some time to learn how to edit videos.
Just like we had to adjust our thinking when we started shooting video after mastering our still photography, a similar change in how we approach editing has to happen. These video editing tips will help you get started or will help you improve your video editing skills.
Start Out with Good Footage
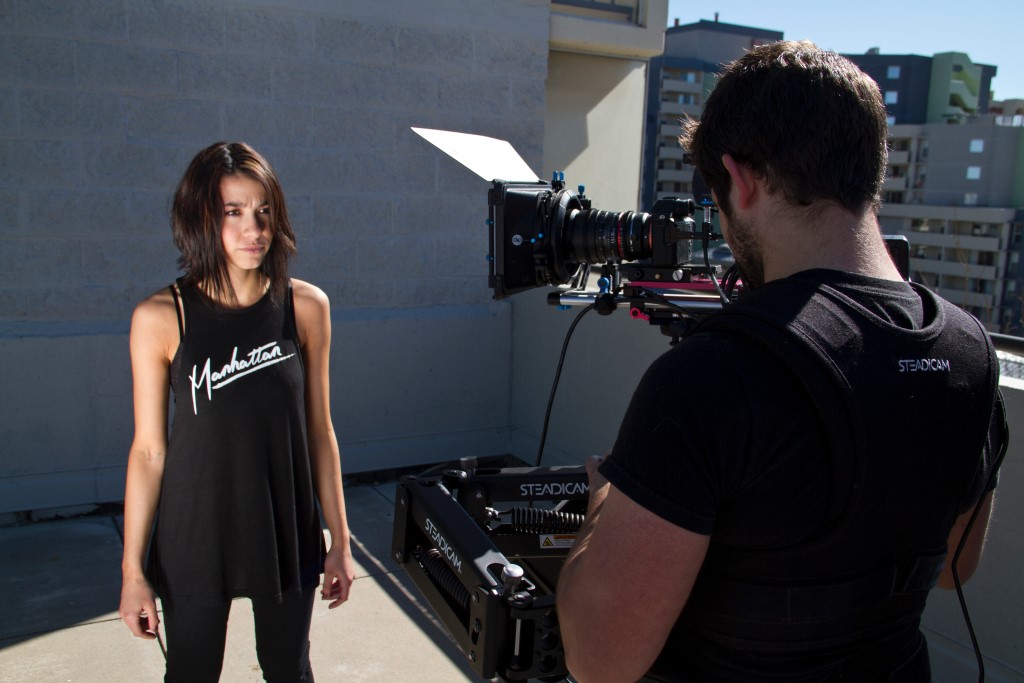
Photo by Skycraft Studios on Unsplash
You know you can save a still image by heavy post-processing, but you can take a good RAW image and enhance it to perfection. Same thing with video. For professional results, start out with the best video files you can produce is one of the most important tips for editing videos.
Besides your high quality cameras and lenses, there are some accessories regularly used by cinematographers and videographers that allow you to control your video production results while shooting.
Lighting is essential, so is using filters. In fact, many of the lighting, filter, and matte box techniques you already know were originally conceived by cinematographers. Interestingly, if you ever saw a feature film being made, the cinematographer was responsible for lighting effects and configuration. Someone else was employed as the camera operator.
We are usually handling all of our own production, lighting, camera operation, directing, and editing.
Shake-free camera support is also vital. In addition to a high quality video tripod, a gimbal for stabilizing handheld footage goes a long way to making your editing easier. You don’t have to break the bank to have the right tools, either. Companies like Ikan have a huge array of equipment at various price points.
Learn More:
Use an Advanced Video Editing Program
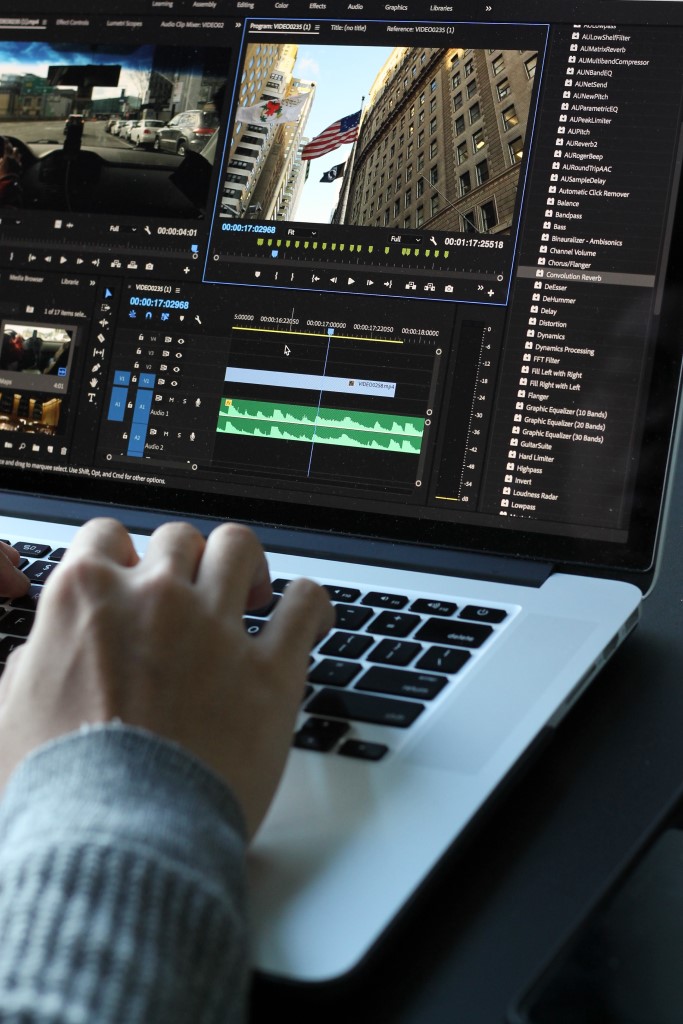
Photo by Matthew Kwong on Unsplash
I’m not trying to take your money, I promise! But as an established photographer and videographer, you know that in order to accomplish certain things, you need the right stuff. Pro and prosumer-level gear and software may cost a little more than entry-level, but it’s worth the added expense.
The basic video editing software that came with your camera is pretty good, but in order to get the most out of your high quality footage, a professional level program is required. On Adobe’s Creative Cloud platform, you can either purchase or subscribe to one of the ultimate editors for video, Adobe Premiere Pro.
As an optional video editing tip, I’ve found that the prosumer level of video editors are fantastic programs and often all we may need for our own video projects. Adobe Premiere Elements, Apple Final Cut Pro, and Vegas have advanced features and controls for creating pro quality videos.
Sound Is an Essential Video Element
Photo by Cristian Newman on Unsplash
In addition to motion, audio is an essential element of videography. Our camera may have an okay built in mic, but a high-quality external microphone will let us take full advantage of our camera’s audio capabilities.
When you start editing audio, you’ll be glad you chose a fully capable video editing program. An important tip for editing video along with audio is to use secondary audio. This could be either a second live feed during recording or adding audio files during the editing process.
Be careful about balancing sound. Background noise can add realism, but it can also be distracting. Using all the features of your A/V editor gives you complete control over sound.
Audio editing is where you add in a musical score, too, if that’s part of your finished product goal. Many free sources of audio and music are available online, or you can purchase licensing permissions for specific needs. If you plan to put your finished video online, make sure you have properly licensed audio for anything that is not your own property.
Make Clean Transitions
photo byokugawa via iStock
Nothing takes a viewer out of a video quicker than uncomfortable cuts or gimmicky editing. You want to have your own personal style, or brand, of videography. But some types of cuts or certain techniques can easily be overused.
This is true in the visual part of your video and in audio. Unless you’re trying to create a certain feel, smooth seems to work very well.
There are a wide variety of editing techniques to use. Play around with them, get used to them.This where we drop this video editing tip: watch other people’s videos!
Search online, perhaps on YouTube, or take a favorite film of yours, and watch it with the mindset of trying to figure how they made the scene effective. Before long, you’ll be annoying your friends and significant others by doing this all the time! Seriously, though, it’s a great way to open up your own creativity.
Learn More:
Take a Course

photo by pixelfit via iStock
In our online world, you can find out virtually anything with a focused search. Online video editing instruction can be found at low cost and even for free.
This is one of the best video editing tips I ever got. Try as we might, some things just elude our grasp without adequate assistance. Many introductory video classes are as short as 20 minutes, yet are packed full of helpful tips.
Longer courses on videography, lighting, editing, and storytelling are available from established professionals and from accredited universities. You could even get a degree in one or more aspects of filmmaking. How far you want to go is up to you.
Tell Your Story
Photo by Chris Murray on Unsplash
Film your video footage, edit it, add sound, make it interesting. Just tell your story. Your story may be guided by what a client needs at that time or it may be a personal project. The main thing is, by developing good editing skills, you are in complete control.
We Recommend
How to Get Top-Quality Audio With a Shotgun Mic
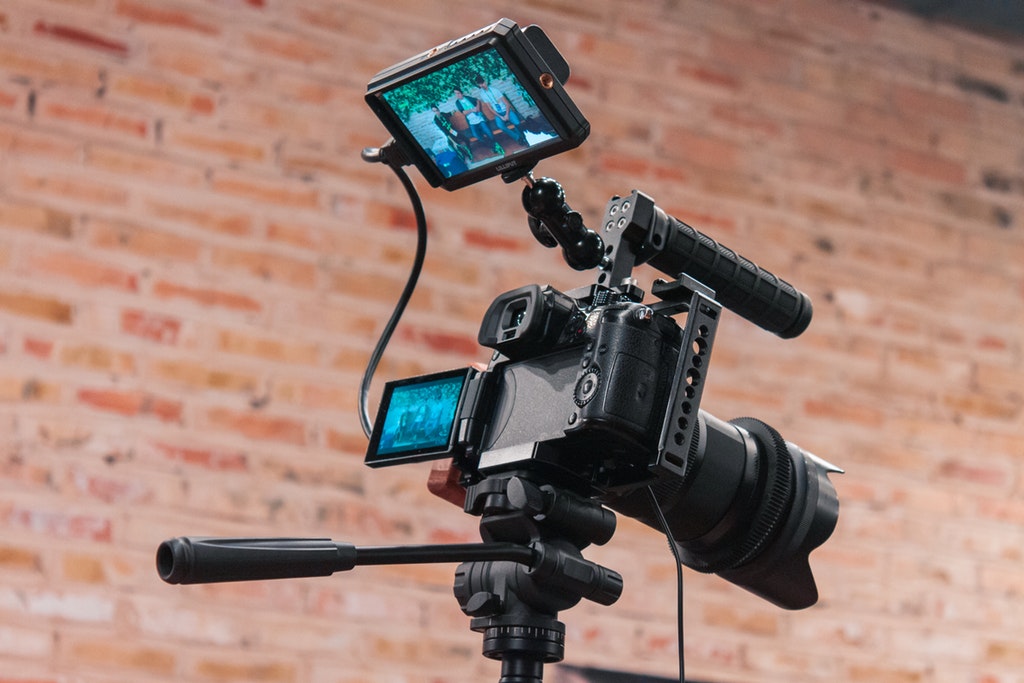
Photo by Roman Koval from Pexels
An on-camera shotgun mic is one of the best ways to supplement the tiny built-in microphone on your digital camera. Especially so if you are filming handheld video. Another method for how to use a shotgun mic is as a boom mic, either with a handheld pole or some other type of mount.
The reason for using an external microphone in the first place is to be able to record better audio for your A/V projects. So some audio tips concerning external mics is a good subject to consider for beginners or more advanced videographers.
Why You Should Use a Shotgun Mic
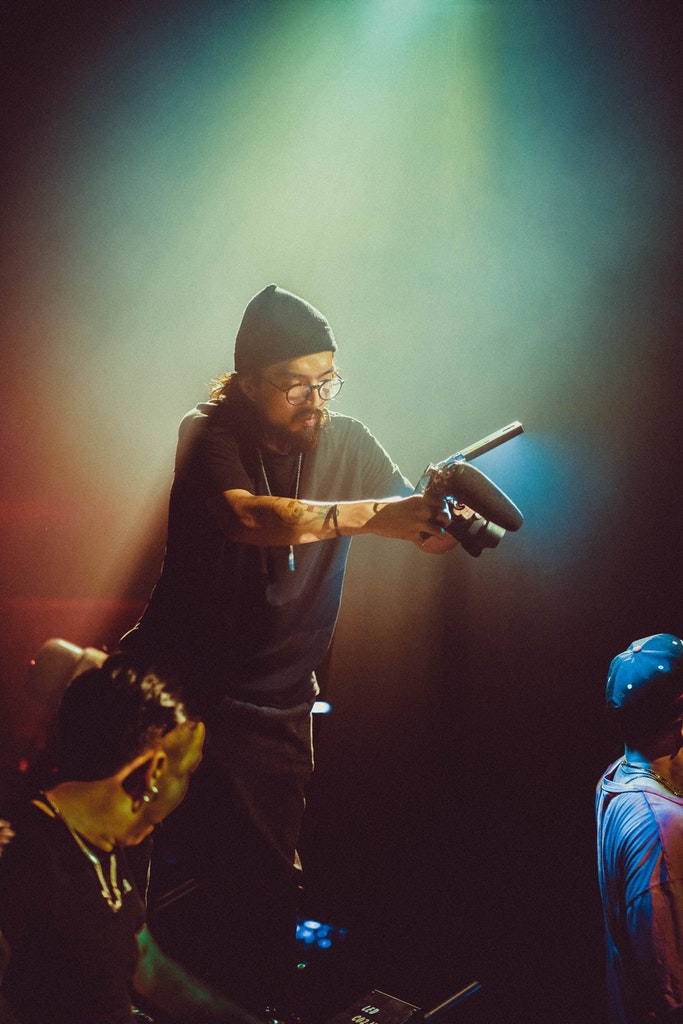
Photo by Clam Lo from Pexels
External mics are an essential part of your DSLR or mirrorless camera gear if you want high-quality audio to go along with the superb video quality that your camera records.
A built-in mic is prone to capturing camera noise such as focusing noise from the lens or just general handling of the camera. An external mic mounted on the camera or elsewhere will eliminate or at least reduce these problems.
Another reason for using a shotgun mic is that they have better specs than built-in mics. Three major areas where they are significantly better are frequency response, dynamic range, and signal-to-noise ratio.
All of this means you capture better audio. As with the image quality of your files, if you capture better audio in the first place, you will be better able to edit and enhance it with your editing program.
Recommended Videography Reading:
- How to Shoot Video That Doesn't Suck: Advice to Make Any Amateur Look Like a Pro
- The DSLR Filmmaker's Handbook: Real-World Production Techniques
Choose a High Quality Shotgun Mic
You are basically looking for an upgrade so it makes sense to get the best upgrade you can. Fortunately, that doesn’t mean breaking your budget. Very high-quality shotgun mics can be picked up for pricing similar to that of video lighting kits. In other words, more than a low-end Android smartphone but less than an iPhone.
Our friends at Ikan have an excellent shotgun mic, the E-Image PM-527, that will do everything you were hoping for and probably more.
It’s a longer mic than you may have seen when shopping budget mics. It comes with a windscreen and can be mounted on the camera, on a camera stabilizer grip, on a boom pole, or on a portable camera and accessory mount.
The windscreen that comes with the shotgun mic is a vital accessory. Since we are using the mic for better audio, we don’t want wind noise to interfere. Wind noise can sound extremely loud in the audio recording, even if it's not much wind.
Learn More:
Watch Where You Point That Thing!
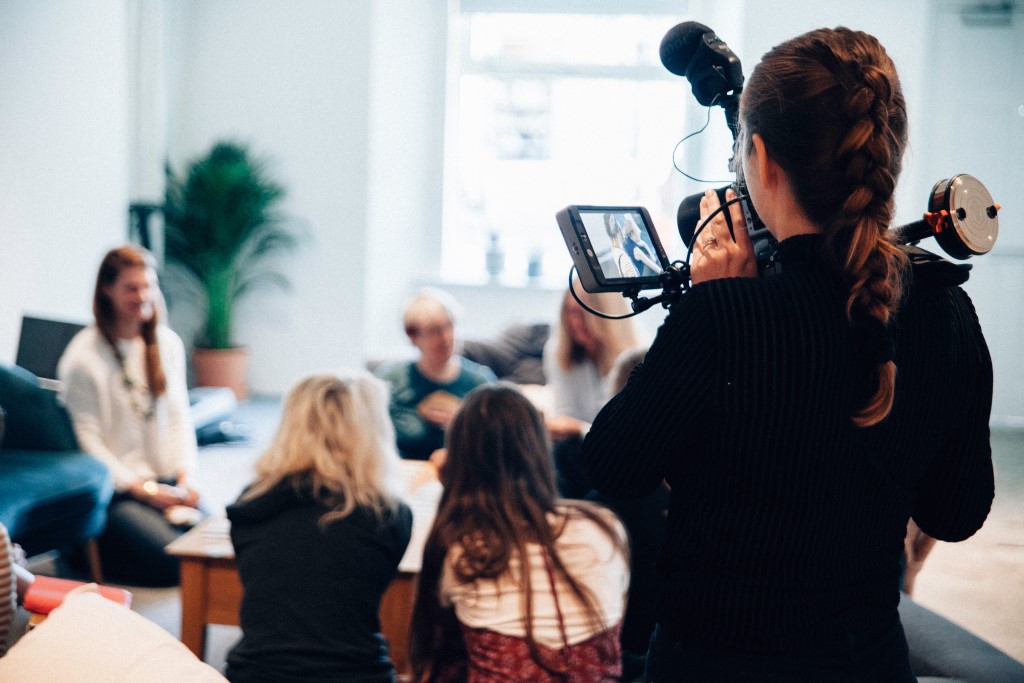
Photo by Vanilla Bear Films on Unsplash
Part of the characteristics common among shotgun mics is a narrow pickup pattern. This means you will be required to point the microphone carefully in order to have the sound source within the mic’s pickup pattern.
Mounted on the camera or on a camera grip, your shotgun mic will be pointing directly at whatever you are filming. Using a boom pole or an accessory mount like the OctoPad, you should line up the mic to point at the source of audio. Which brings up the next of my amazing shotgun mic tips.
Monitor Your Audio
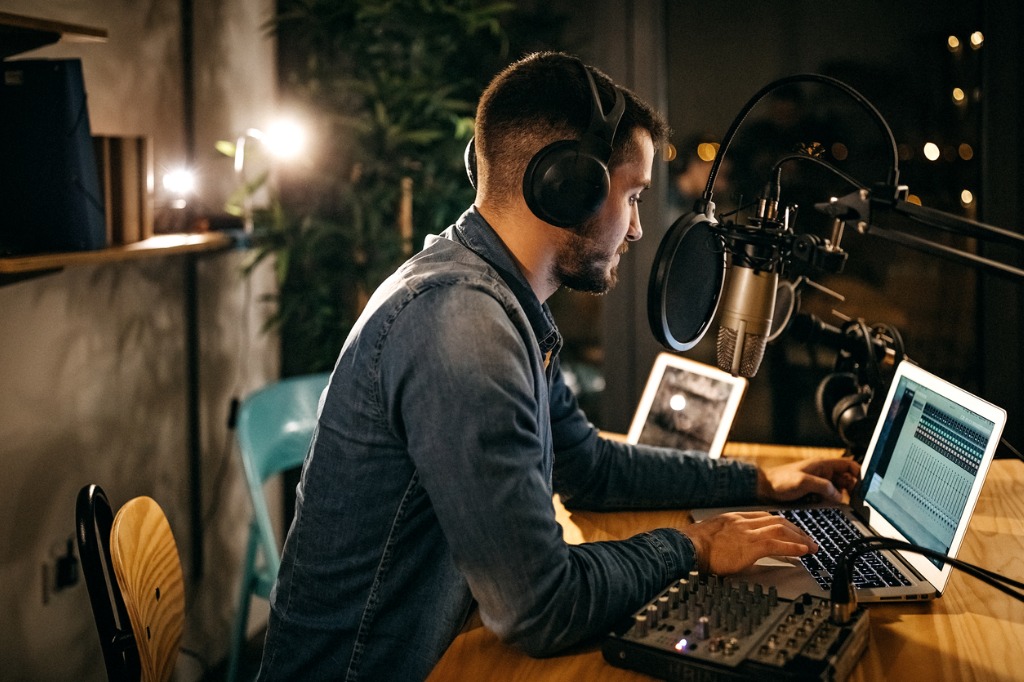
photo by eclipse_images via iStock
Mounted on-camera, you can be pretty sure that your shotgun mic is capturing the sound from the subject in view. When using the mic on a boom pole or a small mount, using headphones to monitor the audio as it comes in allows you to optimize mic placement.
It’s a good idea to monitor your audio anyways. We get instant review of the visual aspect of our videos, so hearing the audio feed can enable us to maximize the use of our new shotgun mic.
When using the shotgun mic off-camera, it’s good practice to get as close as possible to the subject with the mic. Of course, you don’t want it to show in your finished video, so watch out for those goofs!
Take Control of Your Audio
photo by Rakesh Gohil via Pexel
Our cameras can be set to adjust exposure, focus, and audio automatically, but taking control of these settings manually allows us to create the best finished video we can. High quality video will get us more views, more subscriptions to our YouTube channels, and more paying gigs if that’s our intent.
A decent shotgun mic and the knowledge of how to use it properly is one part of that situation that we can easily master.
Learn More:
We Recommend
How to Grow Your YouTube Channel in 2021
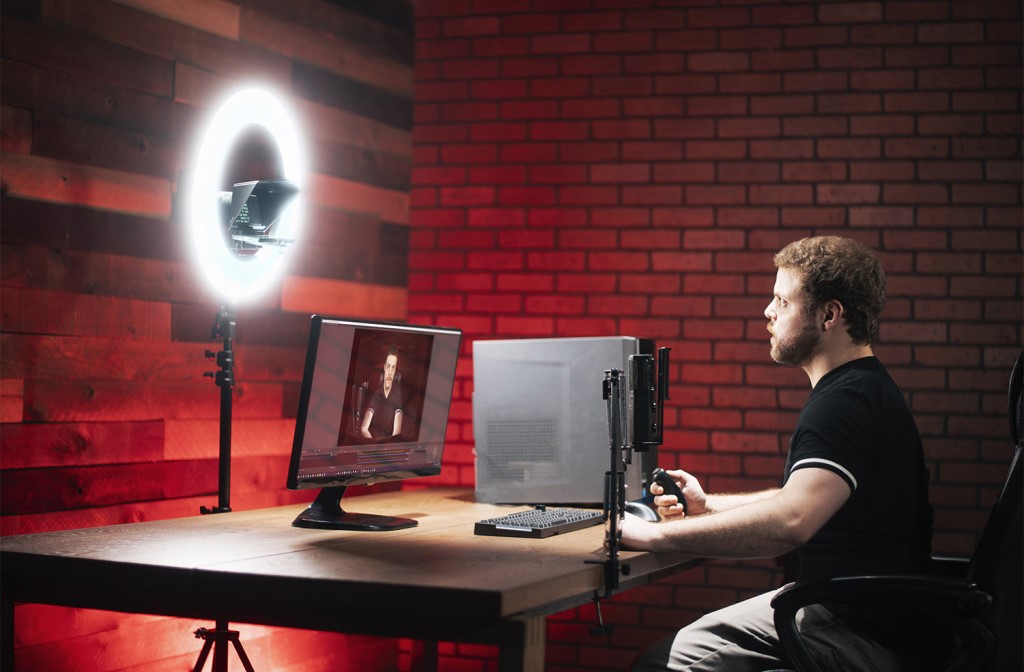
Social media promotion is a great way to increase your business visibility, YouTube is one of the best social media sites for promoting photography businesses. Learn how to grow your YouTube channel with these simple YouTube tips for 2021.
Using a YouTube channel isn’t a one and done effort, you have to keep adding content to grow your YouTube channel by getting repeat viewers and new subscribers. Here are five methods how to get your youtube channel noticed and how to get more youtube subscribers:
- Brand your channel
- Add branded thumbnails
- Call to action subscribe
- Craft a great welcome trailer
- Use a teleprompter
Brand Your Channel
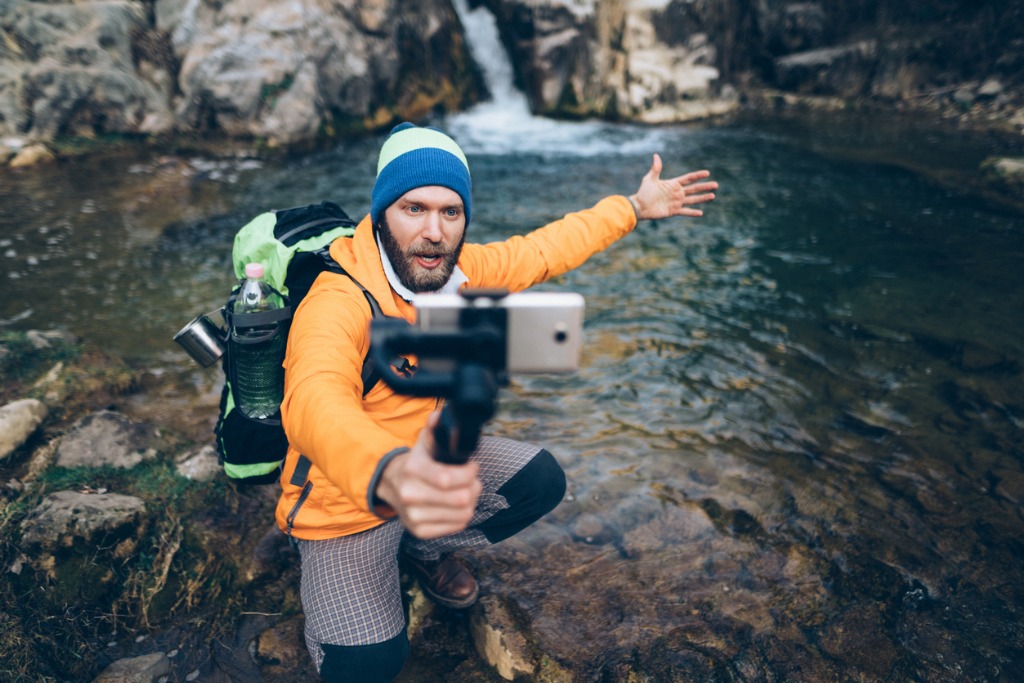
photo bymartin-dm via iStock
What does it mean to brand your YouTube channel? The same thoughts for creating your business brand applies as tips for YouTubers. Your business already has a niche (or maybe two), and turning that niche into branding makes your business presence more memorable. Being more memorable leads to more business opportunities which leads to more business success.
Carry that existing branding onto your YouTube channel by creating high-quality videos that highlight to your viewers what your business is all about and show a consistency of content. Most of the best methods to grow your YouTube channel will center around branding and quality content.
Add Branded Thumbnails
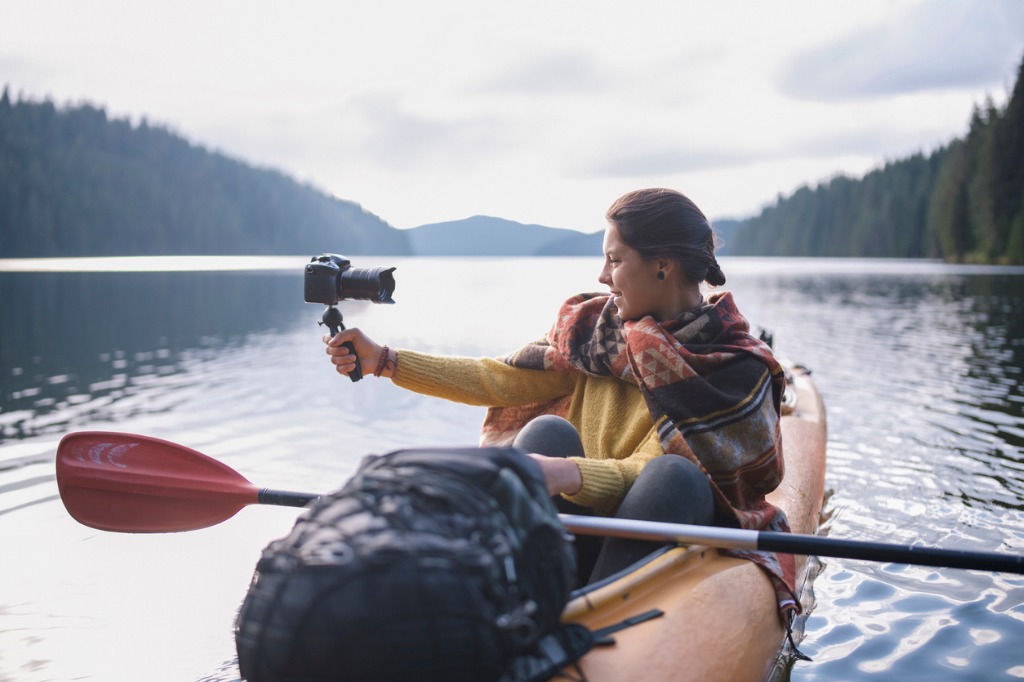
photo byArtistGNDphotography via iStock
Adding branded thumbnails to your videos can cement your brand in the minds of viewers. Every time a video shows on your YouTube channel, if viewers see your brand as a thumbnail, it will stick in their mind and make them more likely to remember you.
In order to imbed thumbnails into your videos, you will need to have quality images that say something about your brand, niche, or business. Make them interesting, something that grabs a viewer’s attention.This is a fantastic way how to get your YouTube channel noticed.
Learn More:
Call to Action: Subscribe

photo byfizkes via iStock
Now that you have your viewer’s attention with branding and thumbnails, give them something to do as a call to action. A call to action means you guide a potential client to doing something that benefits your business.
On a business website, a call to action could be a click to buy or book a session. On your YouTube channel, a call to action that asks for a subscription is one of the best ways of how to get more YouTube subscribers. Having more subscribers means more people will see your videos and thus more likely to fulfill another call to action later.
To grow your YouTube channel, you want to hang on to those who are already seeing your videos, which is accomplished by having them complete a call to action of subscribing to your channel.
Create a Great Welcome Trailer
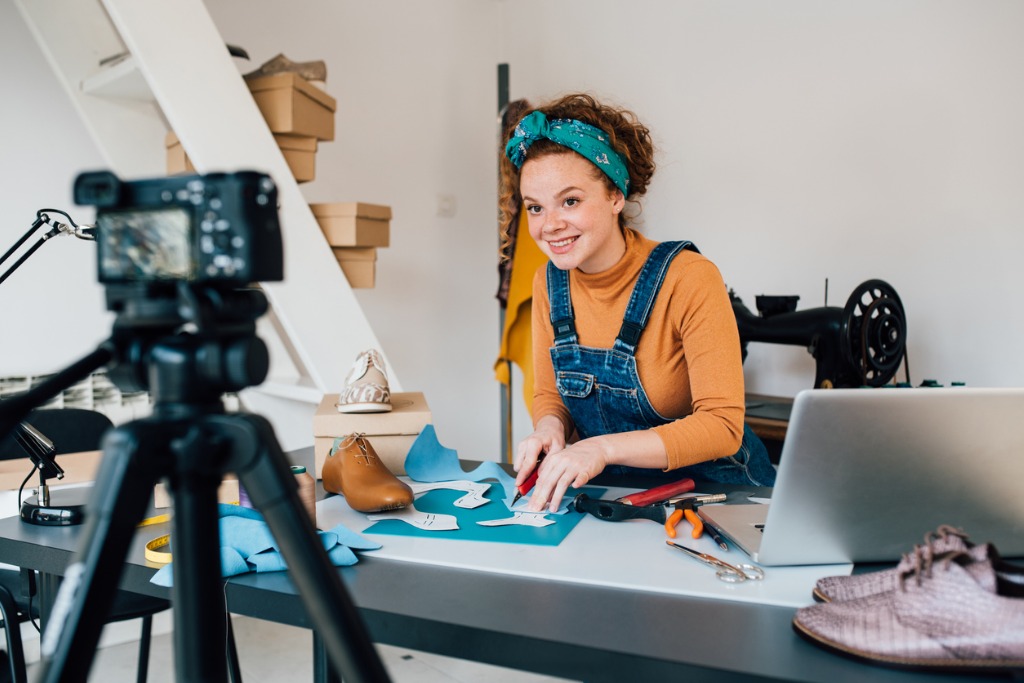
photo byRgStudio via iStock
Before you can get people to subscribe to your YouTube channel, you must grab their attention through the search engine and by having a superb welcome trailer. The welcome trailer is that short introductory video that is the first thing many searchers will see about you or your business on YouTube.
A welcome trailer should be very high quality, clearly state something about you and your brand, and it only needs to be about a minute long or even shorter. The main goal is to get them to see you and then stay and look at your other videos.
Use a Teleprompter
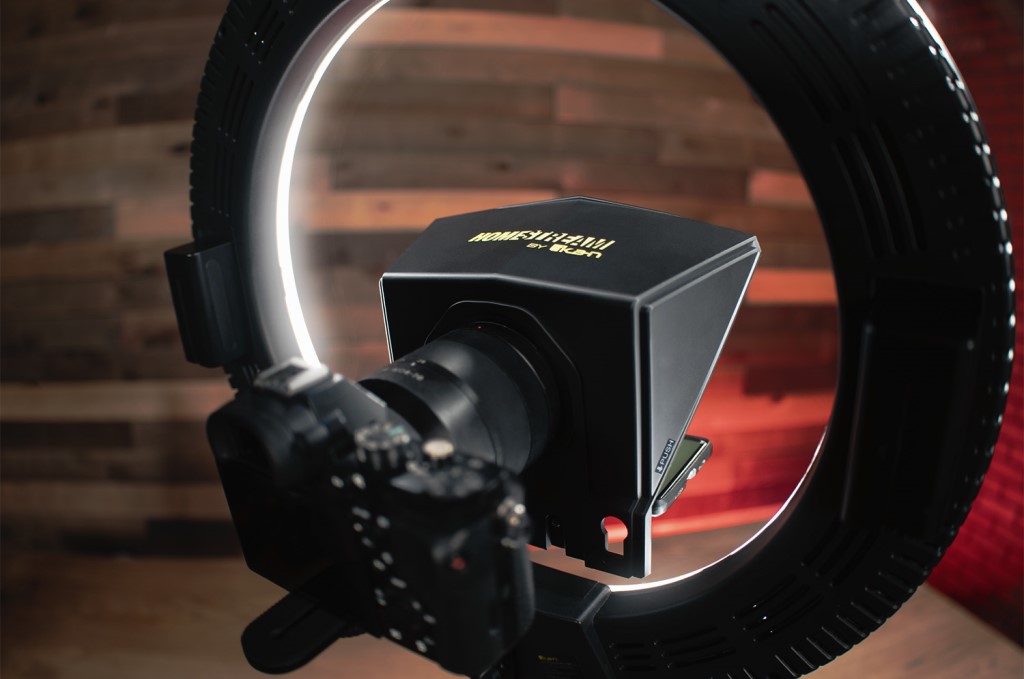
One of the most effective techniques for making excellent YouTube videos is to increase the professionalism of your YouTube videos by maintaining eye contact with the viewer. Think about eye contact. If you were speaking to a client in person, you would naturally have eye contact. A teleprompter allows you to have eye contact on camera with viewers you can’t see, the end result being a very professional appearance.
Teleprompters have been used by newscasters, politicians, and actors for decades, and now there are cost effective teleprompters you can use with your existing vlogging equipment. Ikan’s HomeStream Smartphone Teleprompter HS-Prompter-RL is a fantastic addition to your vlogging rig.

It is only about the price of a good accessory lens and includes an 18-inch ring light which gives shadowless light for filming yourself talking to your audience.
Any size camera from a smartphone to a medium-size DSLR fits in the bracket for filming and a smartphone or small tablet fits into the bottom part of the teleprompter. A beam splitter allows the camera to shoot through a screen onto which your script is displayed, letting you have perfect viewer eye contact while recording your YouTube video.
Social Media Marketing

photo bypixelfit via iStock
Social media marketing techniques such as the five YouTube tips presented here will help you grow your YouTube channel in 2021 and increase your business success. We have many other marketing and vlogging tips that could help you grow your business. Be sure to check out the articles in the Learn More sections for additional tips!
Learn More:
- 4 Must-Have Accessories for Shooting Video
- Types of Microphones for Vlogging
- Essential Camera Accessories for Vlogging
We Recommend
How to Make Better YouTube Videos
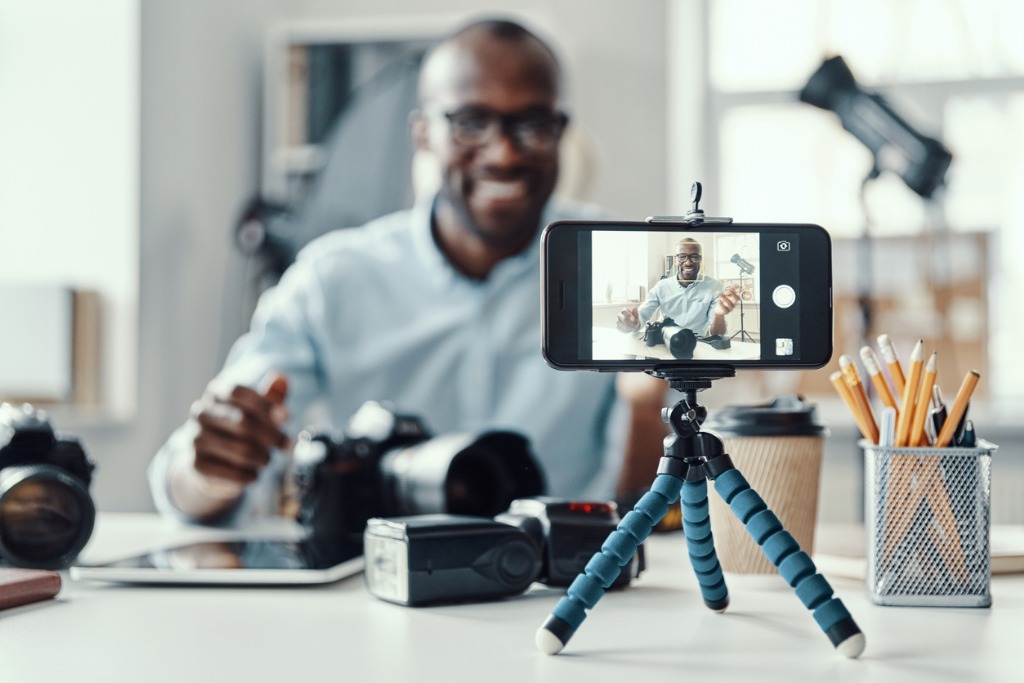
photo byg-stockstudio via iStock
YouTube gives us the potential to reach a huge audience. There are over 1 billion followers on all of the YouTube channels combined. One Billion! So, we want to be on YouTube.
With so many vloggers already vying for attention, we should also be concerned with how to make better YouTube videos so our brand stands out, gets followers, and gives us the results we desire.
We’ll cover 5 beginner YouTube video tips plus some general YouTube tips and tricks to improve the quality of your YouTube videos.
Plan It Out

photo byFangXiaNuo via iStock
One of the most important YouTube tips for beginners is that in order to make a good video for any purpose, we need a plan. While we may often be able to take a good photo on the spur of the moment and use our knowledge, technique, and equipment features to have it turn out pretty good, an enjoyable video rarely happens that way.
Depending on what your style and intent for your YouTube channel or videos are going to be, two general tips for how to make YouTube videos that will engage the viewer and bring them back for more are storyboarding and writing a script.
A storyboard can be thought of as a comic book / graphic novel condensed form of your video. At its simplest, a dry erase whiteboard can be used to show a representation with simple graphics and brief comments which might include dialog. Additionally, there are many fine storyboard programs and apps to assist our efforts.
Some may be more comfortable writing out a script. A good script could be written out word for word or we could use an outline form. Both styles of scripts can also include helpful directorial comments such as subject or camera movements.
Gear for YouTube Videos
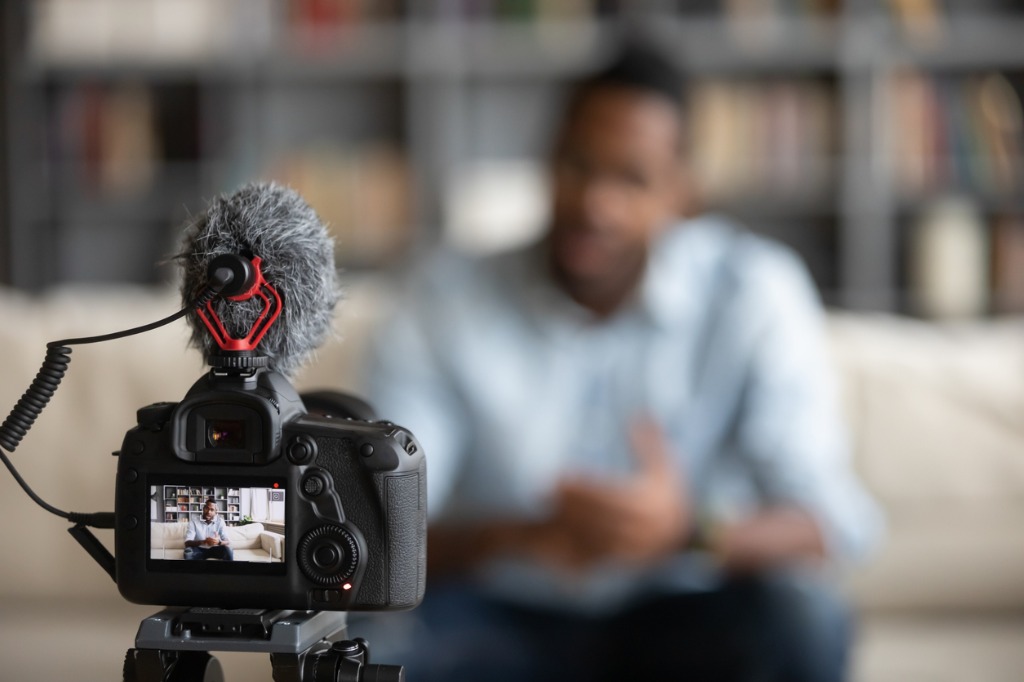
photo byfizkes via iStock
Another of the primary tips for how to make better YouTube videos concerns our choice of gear for YouTube videos. We have many good options available to us from the more advanced smartphones up to professional video cameras.
Many excellent YouTubers use cameras in MFT, APS-C, and Full Frame formats that have video capabilities. Since many of us already have a camera like this, all it takes is switching it into video mode.
Some of our other choices of gear for YouTube videos will likely include a good video tripod, LED lights, and a teleprompter. We’ll cover use of these items with our next three YouTube tips for beginners.
For a lot of my video accessory needs, I usually turn to Ikan Corp first. They are avid videographers themselves who design and make their own equipment which means we get superb quality gear for very reasonable prices.
Learn More:
- How To Grow Your YouTube Channel in 2021
- Quick & Simple Video Lighting Tips
- 4 Must-Have Accessories for Shooting Video
Smooth and Steady
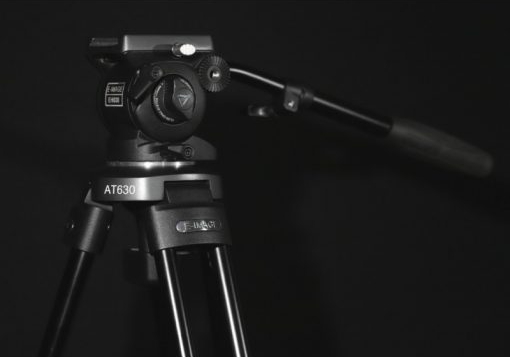
Motion pictures, such as our videos, are different from our still images in that motion pictures move. A static set up for shooting video might become boring for our viewers. However, too much or the wrong type of movement can detract from our videos.
A video tripod with a fluid head is the gear that will allow us to use video motion techniques to enhance interest while maintaining an easy viewing experience for those watching our videos. Here is an example from Ikan, the E-Image EK650 professional video tripod.
The idea is to add just enough smooth movement into our YouTube videos while keeping the camera steady. As we get more advanced, adding dollies, sliders, and a follow focus system gives us even more options.
Cinematography IS Lighting
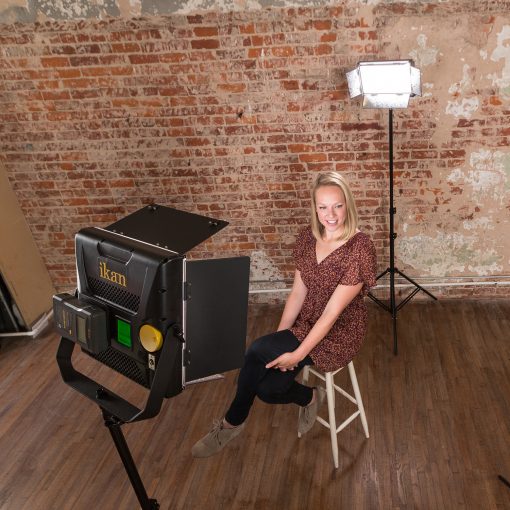
On a movie, TV, or advertising set, the cinematographer is the artist in charge of lighting. The camera operator, sound engineer, and director are all separate jobs. In our beginner video productions, we’re likely going to be handling most of those jobs all on our own.
Learning good lighting techniques for video is similar to still photography, such as portraits or small product photography, but there are some differences to get used to. Having high quality, easy to set up and use lights is a great boon.
Portable, battery powered LED lights such as the Lyra LB5 flat panel LED lights make the lighting configurations simple to set up and these types of light give us smooth and even light with good color rendition and lots of creative control.
Eye Contact and Naturalness

How does one maintain eye contact with an audience we never see? The eye contact in a YouTube video is actually camera lens contact. Looking directly into the camera lens will feel like eye contact to anyone watching the video.
A surefire method for having this type of eye contact when shooting yourself or someone else on video is to use a teleprompter. A teleprompter puts the script from Tip #1 in a position where you are reading it from lens position instead of cue cards off to the side or notes down on a desk or lectern.
One excellent style of teleprompter for modest budgets is the Elite PRO2 Tablet Teleprompter. It mounts to the camera and lens and lets us use a tablet or large smartphone to display our script. The PRO2 comes with an app for our Android or iOS device which allows manual control of the scrolling or an automatic scroll can be pre programmed at various speeds.
A teleprompter encourages better naturalness in our dialogue. Even if we’re reading a script we wrote word for word, the eye contact and self assurance makes it seem very natural which is quite advantageous for connecting to our viewers.
How To Start

photo byAnchiy via iStock
One of the best things about YouTube is that the forum itself has tons of tips for starting a YouTube channel, how to make better YouTube videos, and many beginner YouTube tips on subjects such as lighting, storyboards, gear for YouTube videos, and so much more.
After all, there are billions of videos to watch on YouTube, making it a great source of instruction and entertainment.
Learn More:
- Types of Microphones for Vlogging
- How To Edit Videos Like a Pro
- Simple Tips for Vlogging: How To Create Better Content
We Recommend
How to Master the Use of a Teleprompter
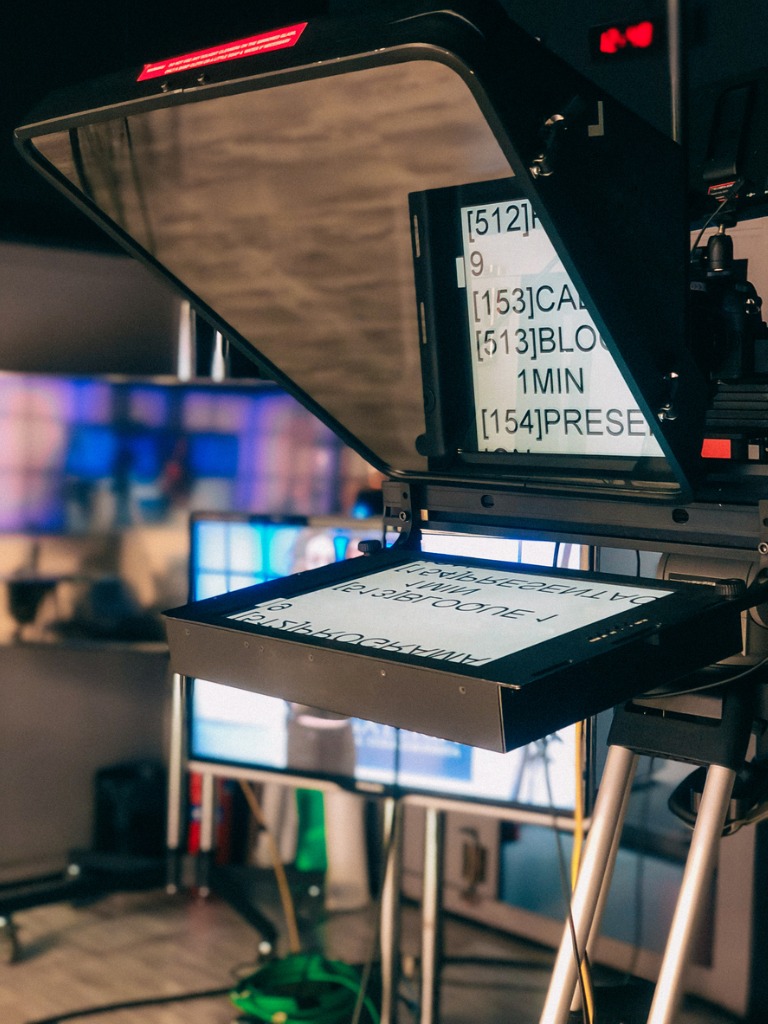
photo byDavid-Prado via iStock
Whether you’re giving a big presentation at work or trying to shoot YouTube videos, a teleprompter can help you give your best performance but only if you know how to use one.
A teleprompter works by reflecting the words in a monitor to allow you to simultaneously read them while allowing a camera to film you through the screen.
When used effectively, teleprompters allow you to remember long speeches, but there are some teleprompter tips you need to be aware of.
Teleprompter Tips for Beginners

Photo by William Moreland on Unsplash
Write Everything Out
It’s pretty simple to begin relying so heavily on your teleprompter that you are focusing more on your delivery of the words than on the words themselves.
This is great so long as you are a good copy editor. But, if for example, you use roman numerals or numbers in place of phrases, you can accidentally confuse your audience.
You can also catch any potential errors with your teleprompter text by running through it once or twice (or more) before recording.
The old saying that “practice makes perfect” definitely applies here...the more you practice, the more natural you will sound.
Believe What You’re Saying
There’s no better way to immediately confuse your audience than by preaching something you don’t believe in. Teleprompters are already unnatural enough, so by only writing things you completely stand behind you can make your delivery more realistic.
Recommended Videography Books:
- How to Shoot Video That Doesn't Suck: Advice to Make Any Amateur Look Like a Pro
- The DSLR Filmmaker's Handbook: Real-World Production Techniques
Rehearse, Rehearse, Rehearse
It’s easy to think you’re going to look natural on screen, but there’s no way for you to become familiar with your text if you don’t practice beforehand. As I said before, practice makes perfect!
Focus on your Presentation
The words are not as important as your energy or your body language. Practice eye contact and natural hand movements.
Also, practice including inflections and emphasis into your teleprompter text. For example, underline words you want to emphasize and include an ellipsis where you need to dramatically pause.
Don’t Let Your Teleprompter Set Your Pace
A teleprompter operator’s job is to follow you. If you get into the habit of following your teleprompter, you’re going to be speaking unnaturally fast.
If you’re nervous, you’ll probably already be speaking too quickly, so take a breath and remember that you’re in control.
For some more helpful tips on teleprompter use, check out the video above by Justin Brown-Primal Video.
Things to Keep in Mind About Your Teleprompter Performance

photo by RichLegg via iStock
There are two things to keep in mind while using a teleprompter: your audience and the information you’re trying to convey.
If you’re using a teleprompter for your vlog, are you sure your audience doesn’t want a more natural delivery? You could break your video down into a few segments and piece them all together if that’s the case.
If you’re using a teleprompter for a speech, make sure your audience is large enough and the space you’re in is spacious enough to make the use of a teleprompter more natural.
Also, make sure to use a teleprompter during long speeches or videos, or speeches and videos that require the use of statistics.
If the information you’re conveying is more formal, that’s an appropriate time for a teleprompter. It will help you deliver the information more accurately and you’ll be less prone to conflating numbers and data in your head.
Learn More:
What to Look for When Buying a Teleprompter

The most important thing I look for when I’m purchasing a teleprompter is what devices the teleprompter is compatible with.
In the case of my favorite teleprompter, Ikan’s PT Elite LS, it supports Apple, Android, and Windows tablets between 7.5 x 5 inches and 10.5 x 8 inches (which is essentially every tablet all three of these manufacturers have released in the past 5 years).
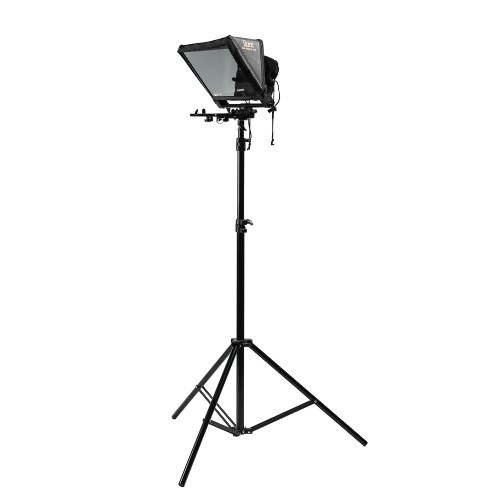
You’ll also want to ensure that your teleprompter is light enough to travel with you. This particular model has a lightweight design so it won’t weigh you down when you hit the road. Other features include an adjustable glass frame and a quick-release base plate for fast setup and takedown.
Another useful feature that the PT Elite LS has is it can be mounted on light stands, which is hugely convenient for those of you that already have light stands in your kit.
You can purchase Ikan’s PT Elite LS Teleprompter on their website for $430.
Learn More:
We Recommend
How to Position Lights for Photography
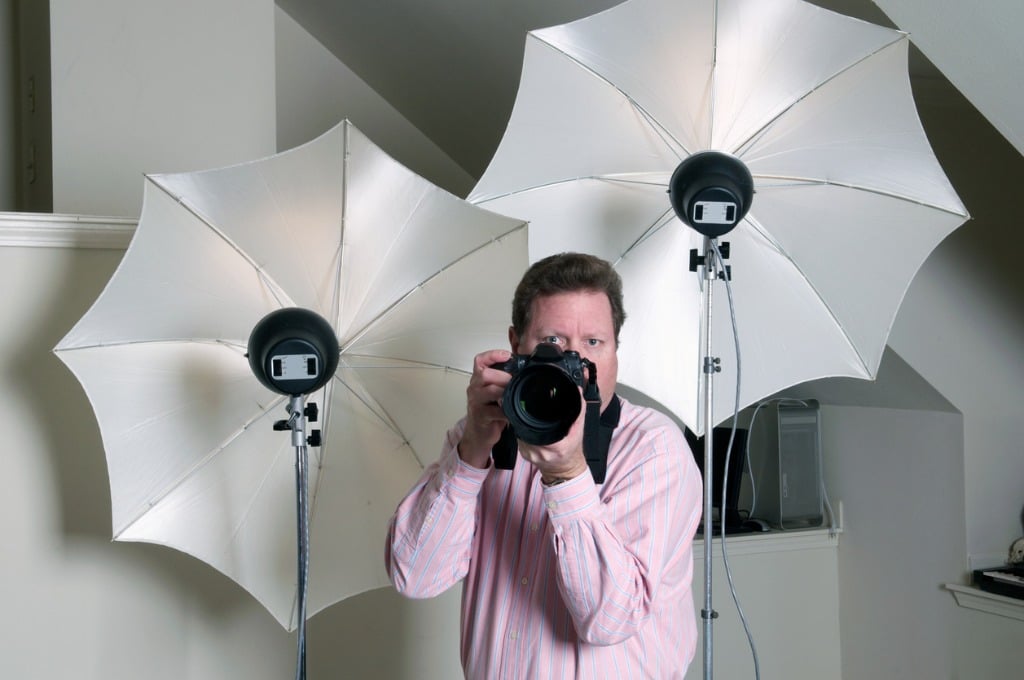
photo bydlewis33 via iStock
Knowing how to position lights for photography and videography are important skills for beginner photographers to learn. Many intermediate and advanced photographers might also benefit from a refresher covering photography lighting techniques.
There are as many photography lighting setups as there are types of photography lights. Some of the most used photography lighting setups have their own name, such as Rembrandt lighting or butterfly lighting. Check out our specific photography lighting guides to learn how to position lights for photography with those configurations, today we’ll take a more general approach.
When to Use Photography Lighting
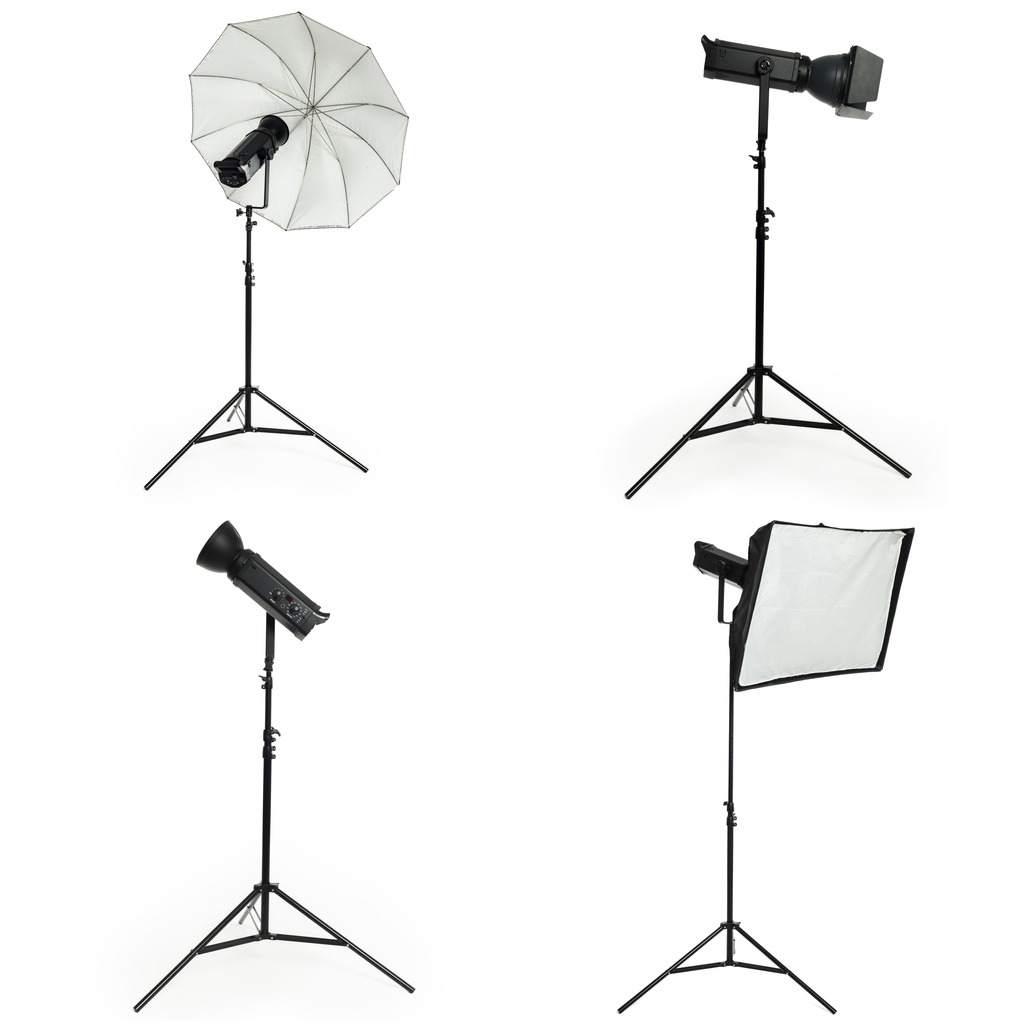
photo byFabrikaCr via iStock
There’s a running joke among some photographers I know that if someone says they prefer natural light, it’s because they haven’t learned how to position lights for photography yet. That’s actually understandable because we’ve all seen the difference between a well lit scene and one that looks either flat or harsh because the lighting was not positioned properly.
Photography lighting for beginners is actually easy to learn and put into practice right away. After all, lighting is one of the basic elements at the heart of photography and videography, so here are some situations when photography lighting is a good option.
- Portraits
- Group Portraits
- Small Product Photography
- Vlogging
- Documentation for Insurance
Portrait Photography Lighting

photo bykupicoo via iStock
I put this at the number one position because most beginners want to know how to position lights for photography of their friends and family. An on camera flash is convenient to use but can provide flat or harsh light which may not be very flattering to the subject.
One of the first photography lighting configurations we can learn and use is to simply put the light off to one side. For a simple setup, I like to position the subject with their body posed to one side a bit, maybe 45 degrees, and have them turn their face toward the camera.
Place one light on a stand about 45 degrees to their side and 30 to 45 degrees above them. With the posing position they’re in, this simple setup provides loop lighting, meaning there’s a small loop of shadow from their nose. Use a soft light for a flattering modelling effect, a harder light will provide drama.
Learn More:
- Types of Portrait Lights
- Advantages of Using a Softbox for Portrait Photography
- What Is Fresnel Lighting?
Types of Portrait Lighting

photo byPortra via iStock
With this basic photography lighting equipment and a few adjustments in light position and subject posing, you can also create board lighting, with the light falling on the side of the face closest to the camera you have broad light, if the light is falling on the side away from the camera, you have short lighting.
Adjust the light position and their pose just right and you can achieve Rembrandt lighting. For portraits of an individual, creating a shadow is key to modeling the facial features. Adjust power, hardness or softness, and the positions to get as much or as little modeling as desired.
All of this can be accomplished with one light. Plus, if that one light is a continuous light, then you can get double duty from it by using it for video, too.
Group Portrait Lighting

photo bymonkeybusinessimages via iStock
Group portraits are one of the situations when a flatter light is often more desirable than any of the modeling effects of general portrait photography lighting setups. This is because the different poses and facial positions could cause all sorts of odd shadow effects.
Depending on how large a group it is and what the posing and positioning of everyone is going to be, you might have one large diffused light centrally placed or several soft lights fanned out from the camera position.
A small group like a family or several friends can be posed in a semi circle or a triangle and lit similarly to the first portrait method we listed above. A larger group, such an office staff or theatre troupe may be arranged in more of a line formation. A bank of softboxes laid out in a line, equidistant from each other is a good method of how to position lights for photography of large groups which will result in few obscuring facial shadows.
Small Product Photography
photo byNeha S via iStock
Selling things online requires clear images of the items, so photography lighting is important for this, too. An excellent method of how to position lights for photography of small products is to use a light tent and one or two small continuous lights.
I like to recommend continuous LED lights as photography lighting for beginners shooting small product photography since it’s easy to see where the obscuring shadows are falling. Using softer lights, such as a soft box, is often more desirable for small product photography.
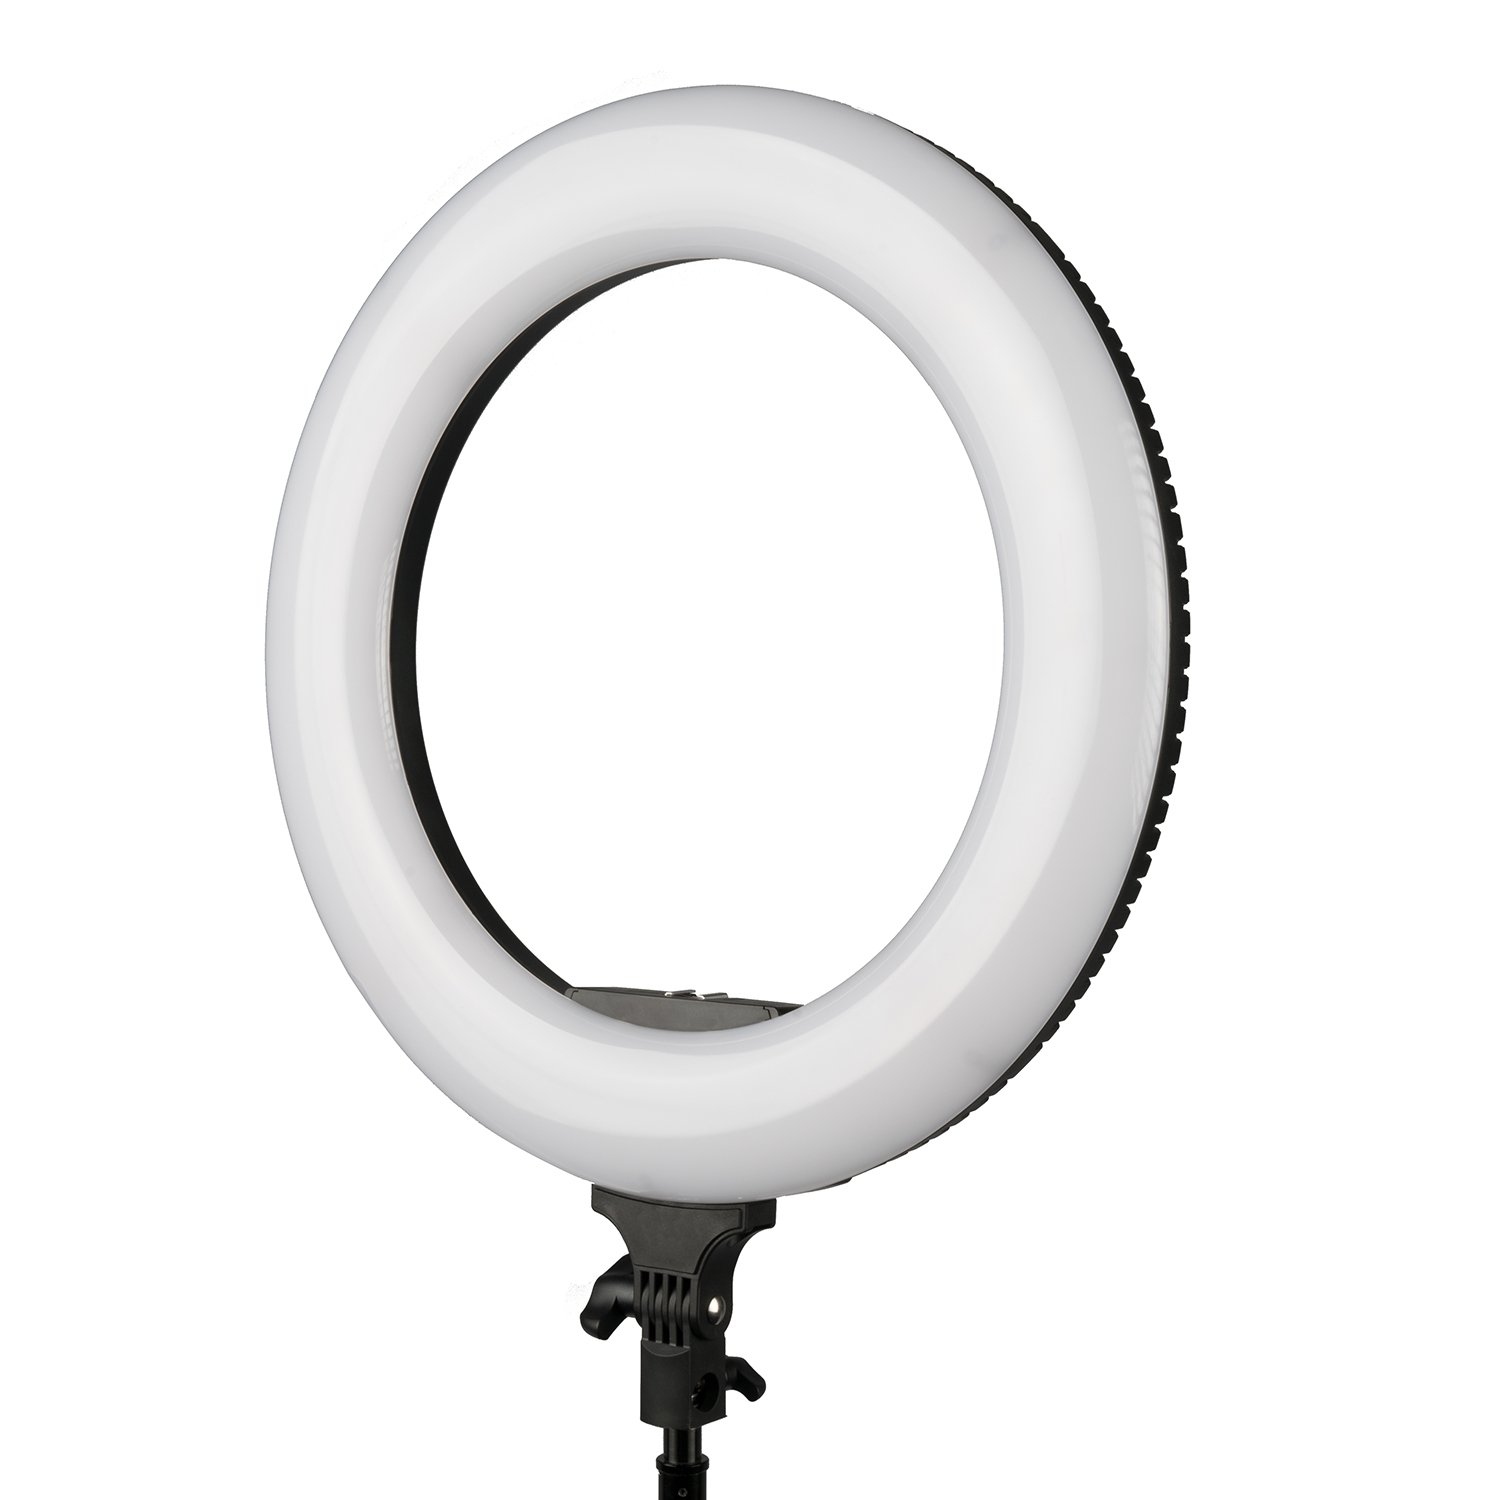
For really small items, a ring light is a fantastic option. A ring light allows you to shoot through a circle of light, allowing virtually shadowless photos of your tiny subjects captured close up. The Oryon RLB40-M 14” ring light from Ikan is a good example of this style of light.
Lighting for Vlogging

Sometimes an on camera light is our best option. Filming yourself or someone else for a vlog is an example of one of those times. You won’t need to wonder how to position lights for photography when the light is mounted on your camera, but it’s nice to have some versatility in adjustment available with the light.
Again, I like to recommend continuous LED photography lighting for beginners since it’s a simple process to calculate exposure and you can see what’s going on as you adjust the lighting. Ikan makes a great light for this purpose, too, the Onyx OYB120 LED light is compact, powerful, and versatile, making it a great option.
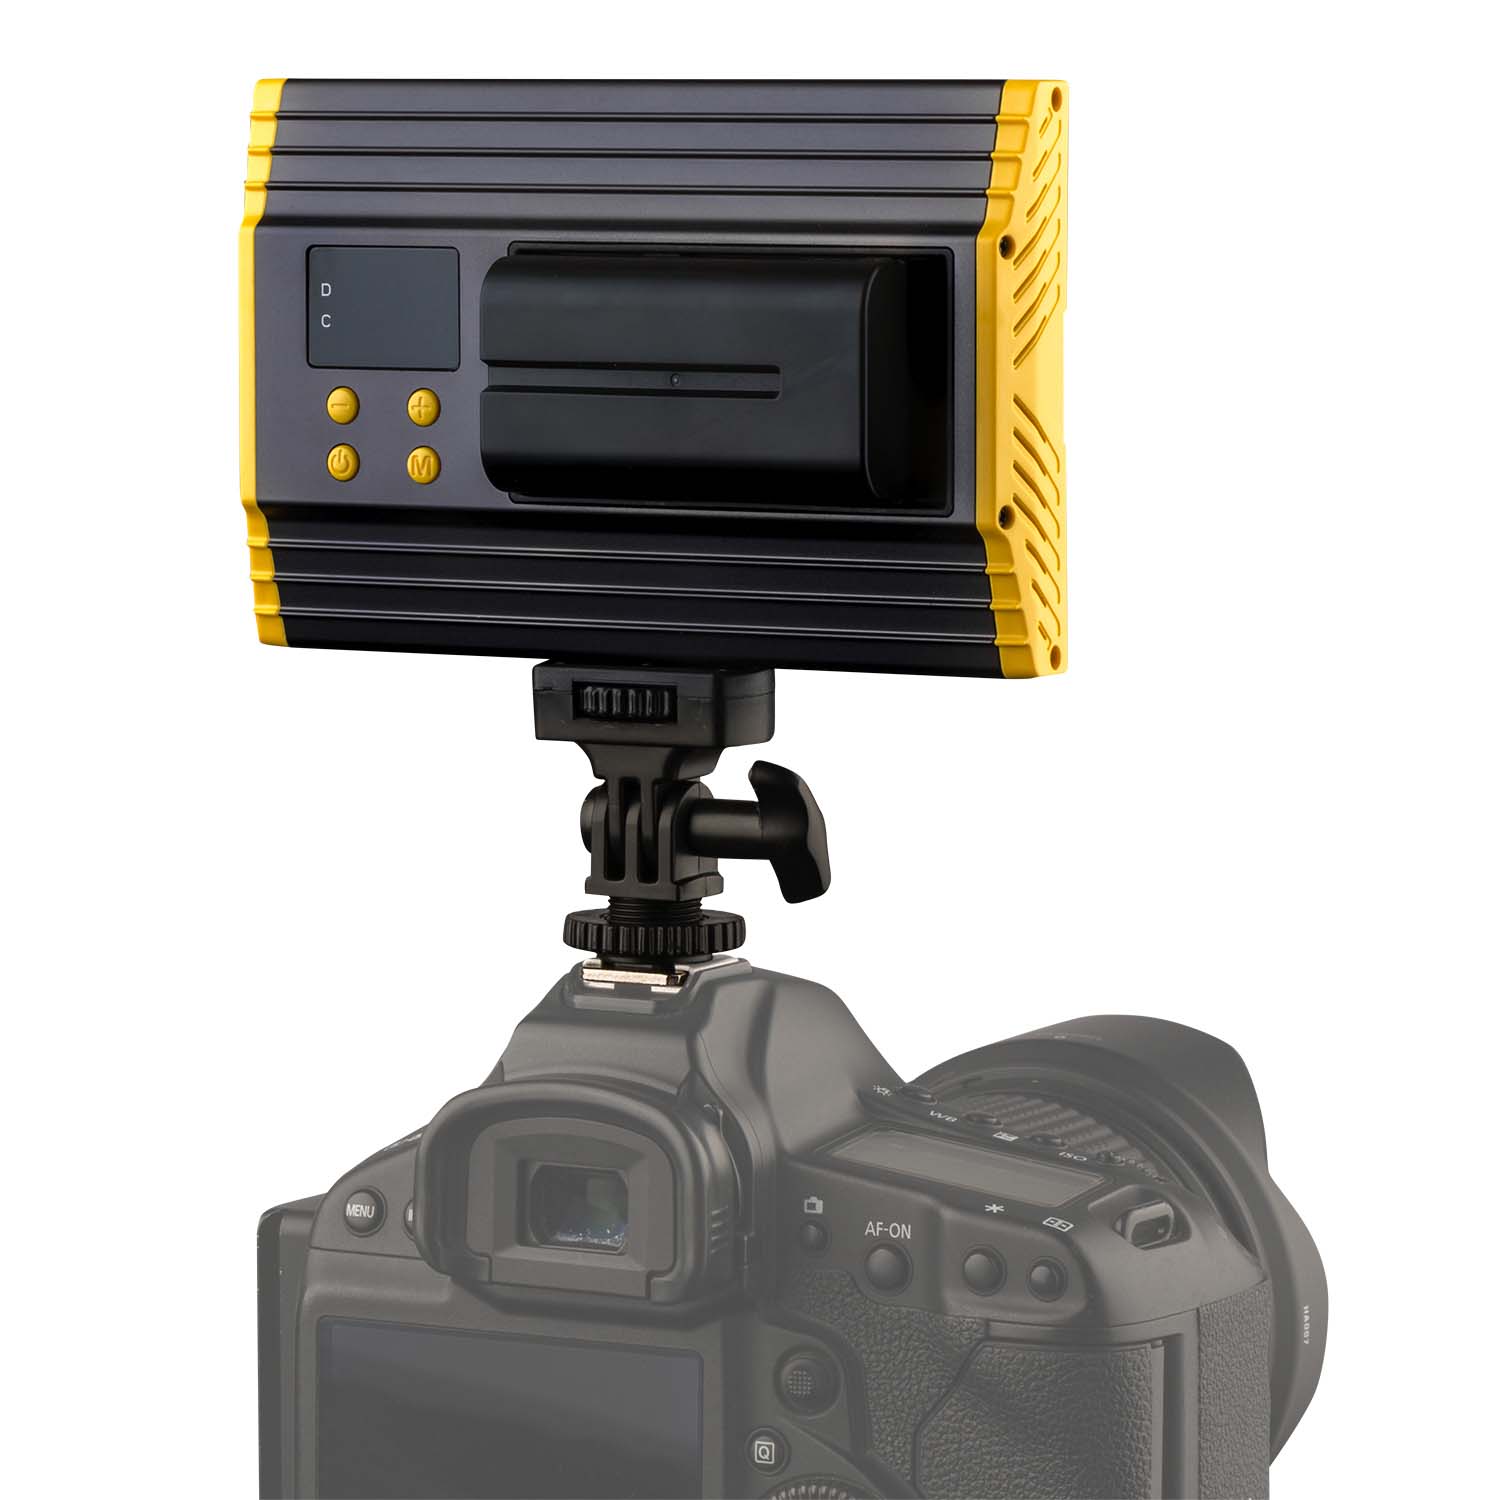
This battery powered LED light is compact in size and weight, making it a good fit for most of the entry level and intermediate DSLRs and mirrorless cameras I’ve reviewed recently. It’s battery powered, very bright, and has adjustments for changing power levels and the color temperature of the light to balance with ambient lighting.
I like using Ikan for photography, videography, and audio accessories for my own use and for recommending to others. Since Ikan designs and makes their own equipment, they are able to provide very high quality, innovative, and useful equipment for lower prices than other brands.
Since we’re using one light on camera for many of our vlogging sessions, being able to tilt the light up for bouncing off a ceiling or varying the power level gives us the control we want for better looking videos and still images.
Documentation for Insurance

photo byWichitS via iStock
An added benefit of having a digital camera and decent lighting is that we can make a video or a series of still images of our properties and belongings which can be used as insurance documentation. It’s a simple video shoot to use an on camera LED light like the Onyx OYB120 and our entry level camera with kit lens to make a walk through video we can upload to the Cloud.
How to Position Lights for Photography and Videography
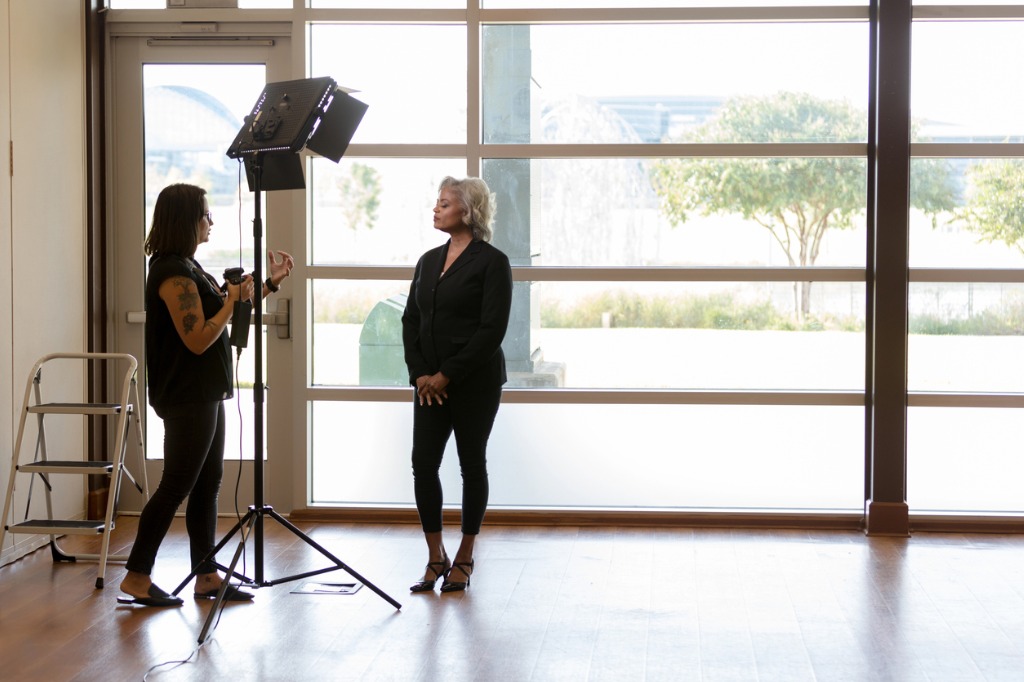
photo bySDI Productions via iStock
It really isn’t that difficult to learn how to position lights for photography and videography of all sorts of subjects from portraits to products to vlogging. Using continuous lights helps us see immediately what the changes we’re making are doing for the scene we’re photographing or recording.
Have a look at some of our other articles discussing photography lighting techniques for lots more information of how to position lights for photography.
Learn More:
- Quick & Simple Video Lighting Tips
- Video Tripod Buying Guide
- Lighting Options for Recording Video at Home
We Recommend
How to Shoot Quality Video Footage
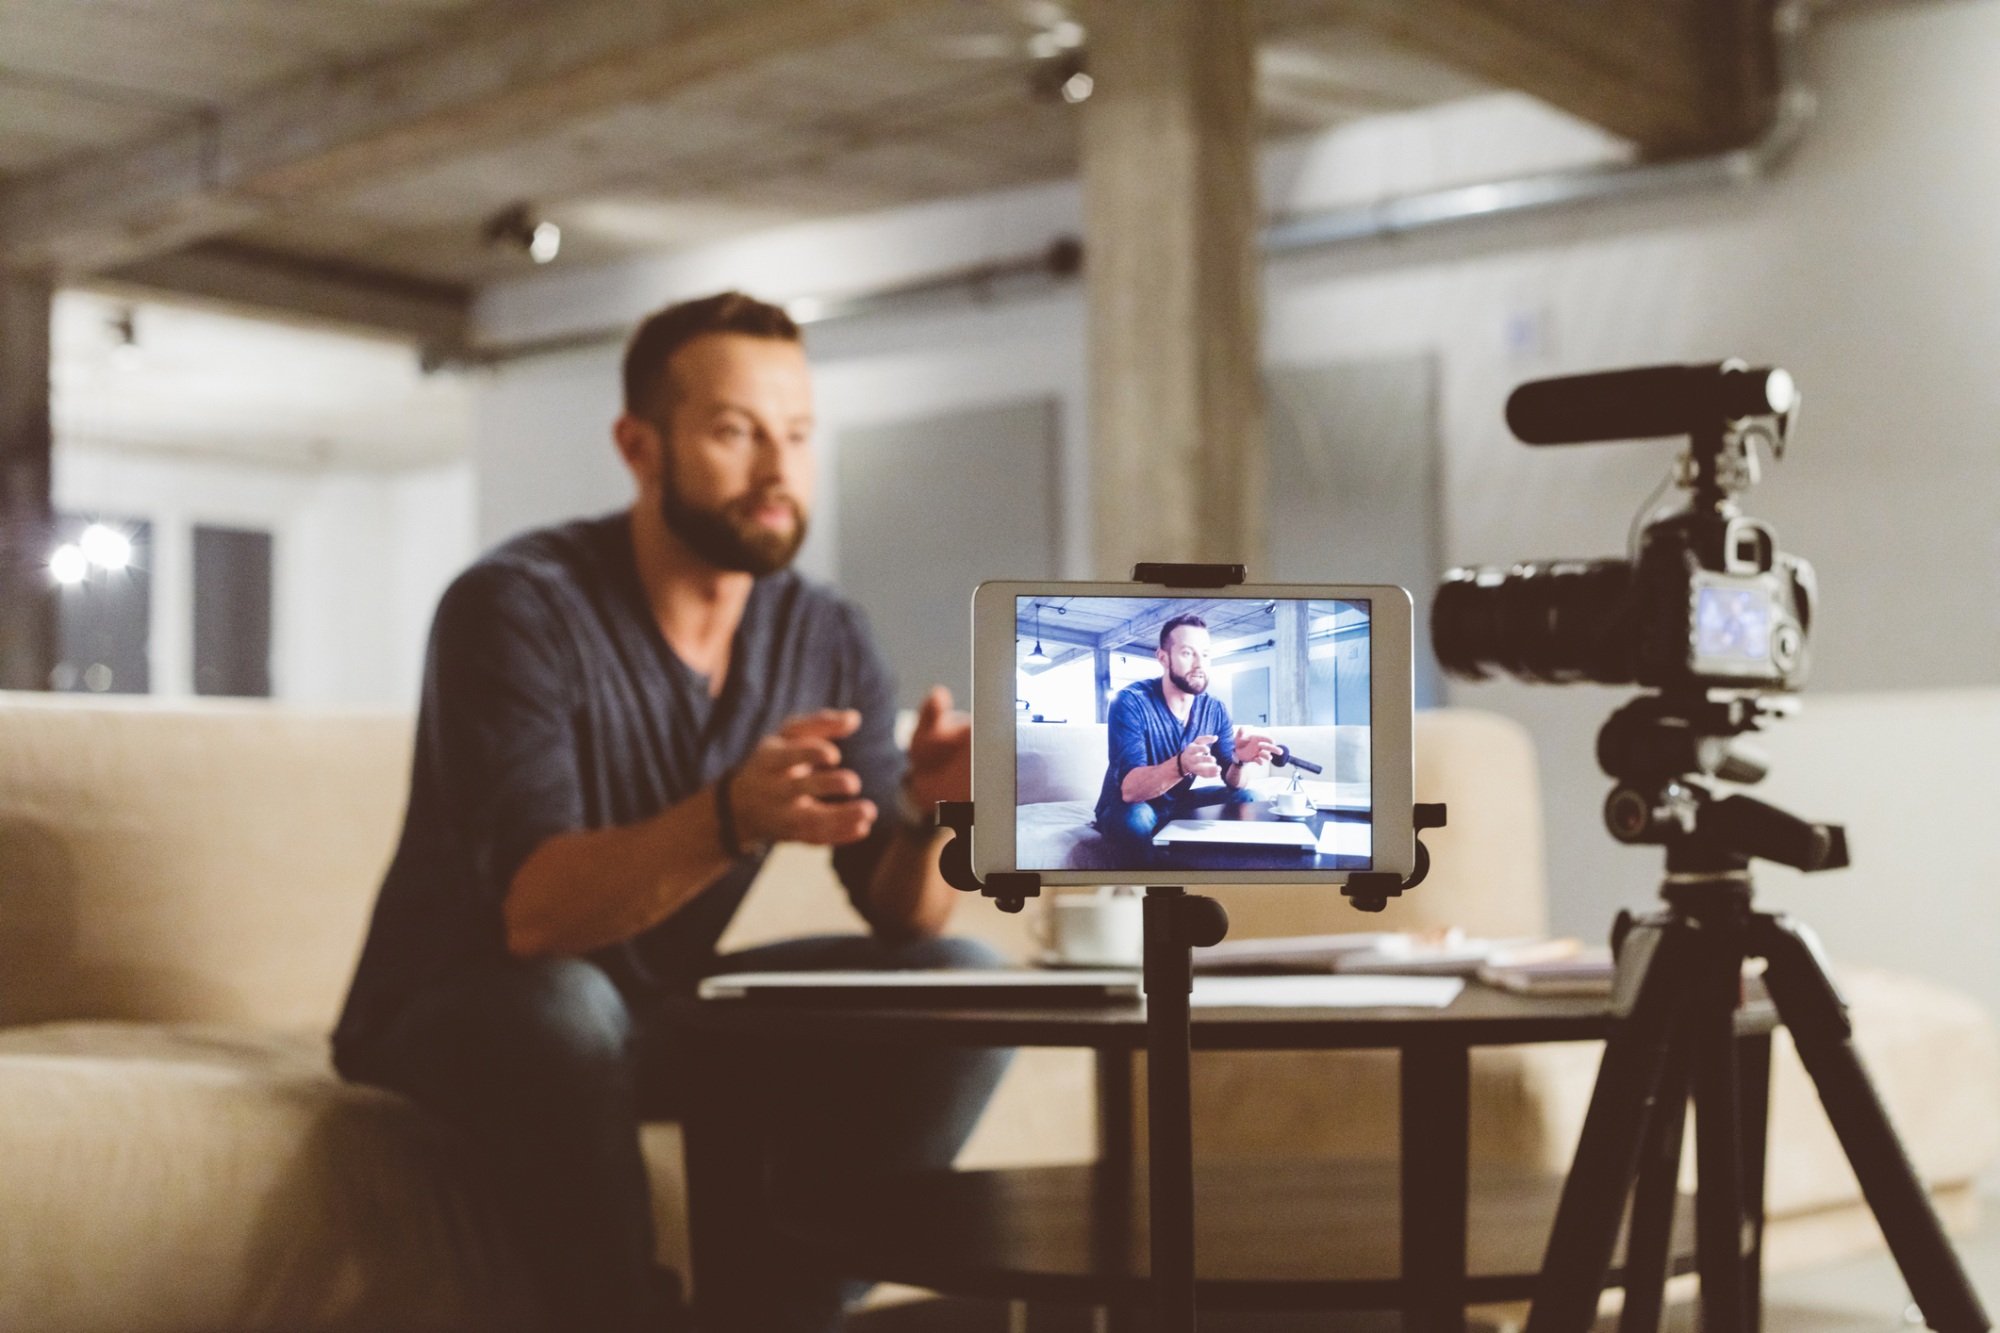 photo by izusek via iStock
Sure, you can stand in front of a scene, put your camera in video mode, and record stuff pretty easily.
But if you want to shoot high-quality footage that’s visually appealing, compelling, and tells a unique story, then you have to put in more time and effort than that.
But shooting quality video footage doesn’t have to be difficult. Instead, if you follow these essential videography tips, you’ll be well on your way to creating top-notch videos.
Beginner Videography Tip: Take It Easy With Zooming
 photo by DigitalSoul via iStock
Watch any feature film and you’ll notice that zooming from a wide shot to a close-up is quite gentle. What’s more, there isn’t a ton of zooming to be found in professionally-produced videos.
That’s because too much zooming and zooming in and out too quickly can be incredibly distracting to the viewer.
Not only that, but sequence after sequence of zooming in and out can make people sick to their stomachs, even if the zooms don’t light up the radar gun. Get a quick tutorial on how to pan, tilt, zoom, and more in the video below by Shutterstock Tutorials.
When you think zooming is necessary, consider how to best incorporate it into the video sequence. Also consider if you’d be better served by creating a sequence of footage in which you have a wide shot and then a separate sequence with a close-up with no zoom in between.
As is the case with many things, simpler is often better, so take the time to think about whether you need to zoom, and if you don’t, you might just end up with a better-looking sequence.
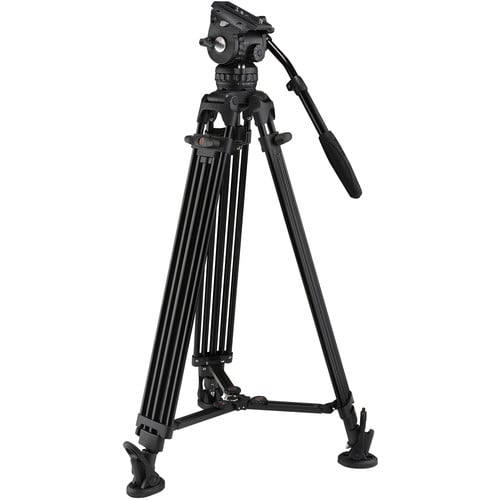
The same advice goes for panning shots. Moving the camera too much or too quickly from left to right or right to left can feel overdone, chaotic, and unnecessary.
To get beautiful smooth panning shots, you need a tripod with a fluid head like the E-Image GA752 shown above.
This tripod kit includes a GH06 fluid head that features three drag settings that enable you to adjust the fluid head to fit the needs of the shot and your particular shooting style.
What’s more, tripods like this hold a lot of weight (13 pounds, in this case) and have a wide height range (32.5-72.5 inches) to vary the eye level of the footage you shoot.
With the support of a solid tripod like this and the functionality of a smooth fluid head, you’ll be able to create gorgeous panning shots that add production value to your videos.
Invest in a Good Microphone
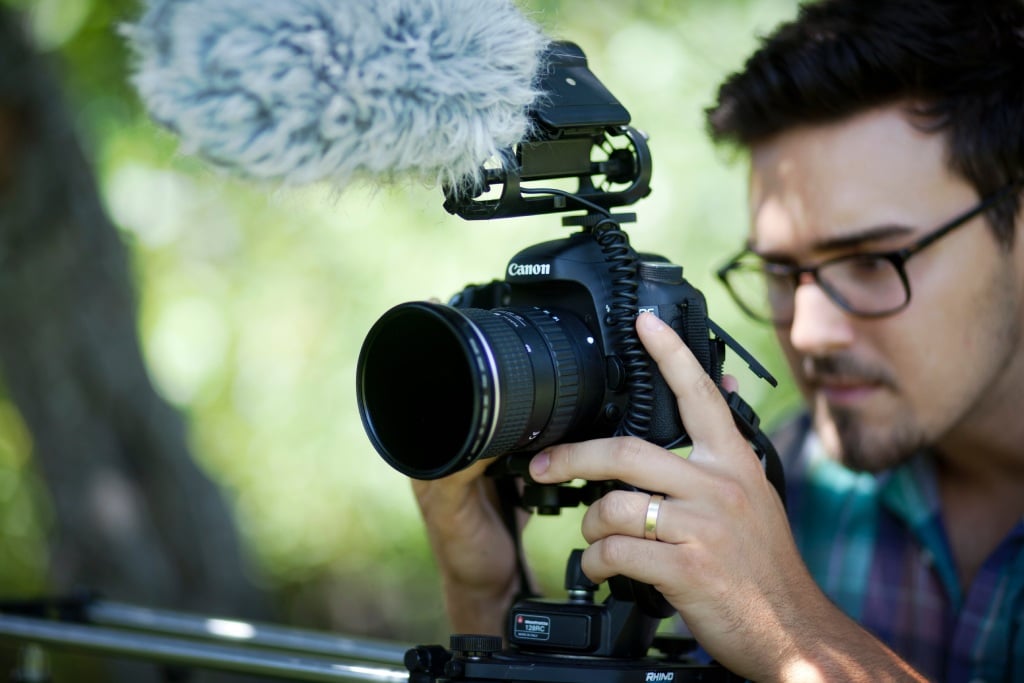 Photo by Maddy Baker on Unsplash
One of the keys to producing excellent video content is excellent audio, and you can’t get excellent audio with the built-in microphone on your phone, DSLR, or mirrorless camera.
This doesn’t mean you have to spend an arm and a leg on a professional mic and a boom and other audio accessories, either. Just get started with a quality mic you can attach to your camera.
A great option is the Comica CVM-V30-Pro-R Shotgun Mic.
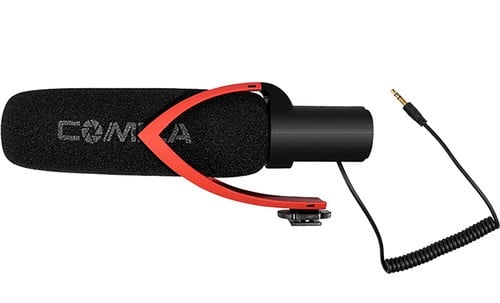
This professional supercardioid mic is ideal for filming in noisy environments in which you need to eliminate background noise and noise coming from the sides of the shot. This enables you to get crisper, cleaner audio from your subjects.
It is compatible with any camera with a 3.5mm audio jack, and can easily mount to the camera's hot-shoe.
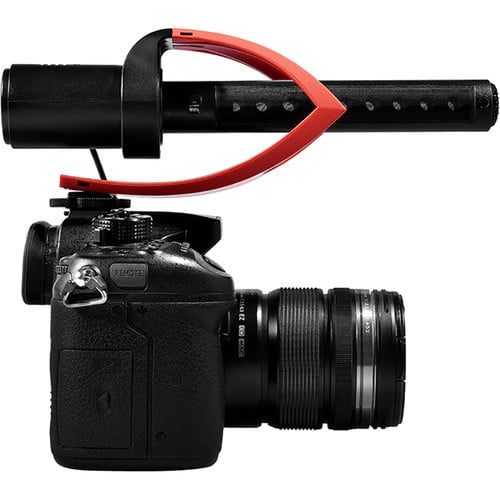
With a low-cut filter, 10 dB sensitivity adjustment, and a shock-absorbing design that reduces vibration noise, this is an excellent choice for beginner videographers. The price of less than $55.00 isn’t bad either!
No matter how beautiful the video footage you capture might be, if you pair it with subpar audio, the video will fall flat.
By investing in gear that helps you improve the production value - as a shotgun microphone will certainly do - you set yourself up for greater success as a videographer.
Learn More:
Vary the Types of Shots
 photo by gradyreese via iStock
If you’re wondering how to shoot high-quality video, varying the types of shots you record.
While there are more than a dozen basic cinematography techniques, from bird’s eye shots to close-ups to tilt and pan shots, there are three primary types of footage you absolutely need to learn: wide shots, medium shots, and close-ups.
Wide Shots
 photo by Jacob Ammentorp Lund via iStock
Commonly known as full or long shots, wide shots serve the purpose of showing the subject in the context of their surroundings.
The wide shot gives the audience a feel for what’s going on in the scene and how various actors relate to one another in space. But these shots are far enough away that the actors’ emotions and feelings are not necessarily evident.
Wide shots are framed up with the subject’s entire body in view. Doing so makes the audience feel almost like a fly on the wall, able to take in the totality of the scene from a point of view that makes you feel as though you’re right there with the actors.
Wide shots are often used as an introductory sequence, again, to give the audience a lay of the land. From there, medium shots often follow to provide deeper details with close-ups coming after that for sequences in which the actor’s emotions or feelings need to be on full display.
See what I mean in the video above by StudioBinder.
Medium Shots
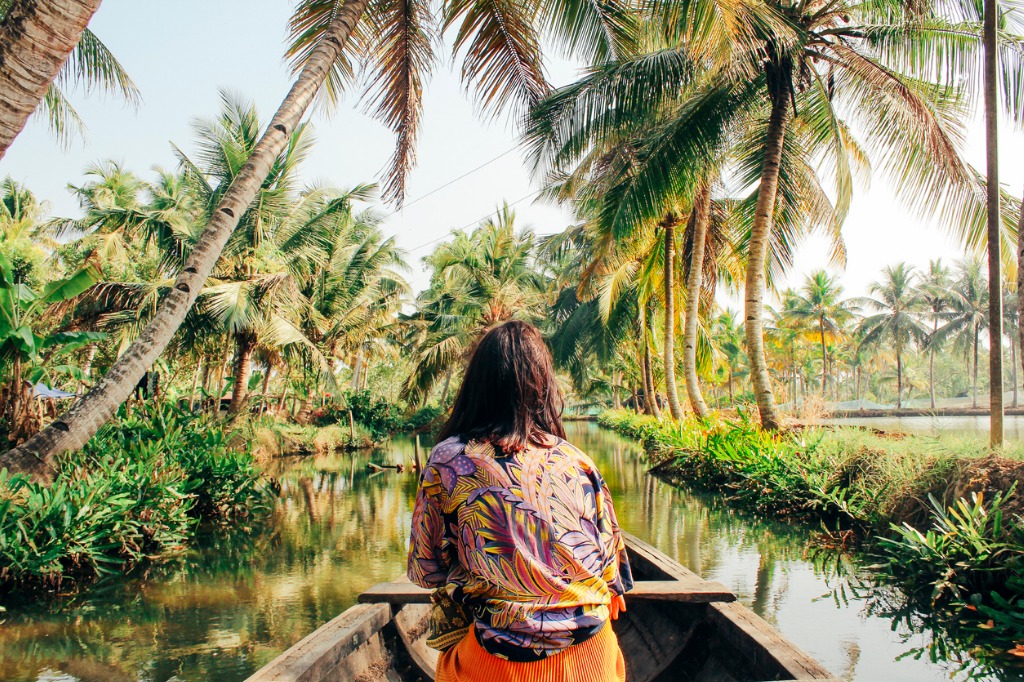 photo by SolStock via iStock
The purpose of a medium shot is to create a more intimate look at your subject that a wide shot just can’t produce.
Medium shots usually highlight a person from the waist up and are typically used in an informative manner, such as showing scenes in which there’s a group of people or when two or more people are engaged in dialogue. Many interviews are also shot at medium length.
Medium shots help viewers focus more on the subject or dialogue at hand, but in a way that still shows some of the surroundings. Doing so helps viewers gain a better understanding of the relationship between the subject and their surroundings.
See how medium shots look (and learn how to implement them) by checking out the video above by StudioBinder.
Close-Ups
 photo by gawrav via iStock
Close-up shots get the audience right into the action. When framing the shot on an actor, you often see nothing but their face, though sometimes their neck shows too.
The purpose of a close-up shot is to help viewers feel more engaged in the video. Likewise, close-ups permit you to see the emotions expressed by the actor in a way that isn’t quite as intense as in a medium shot, and especially a wide shot.
Since close-ups show virtually nothing but the actor’s face, their facial expressions become most important. This is what helps convey the feelings and emotions of the moment.
In the video above, StudioBinder offers their take on how to create the perfect close-up.
With that, you have some essential videography tips that will help you create more impactful videos.
Give each of these tips a try, incorporate them into your workflow, and reap the rewards of creating videos that have an improved look and feel.
We Recommend
How to Stabilize a Camera for Vlogging
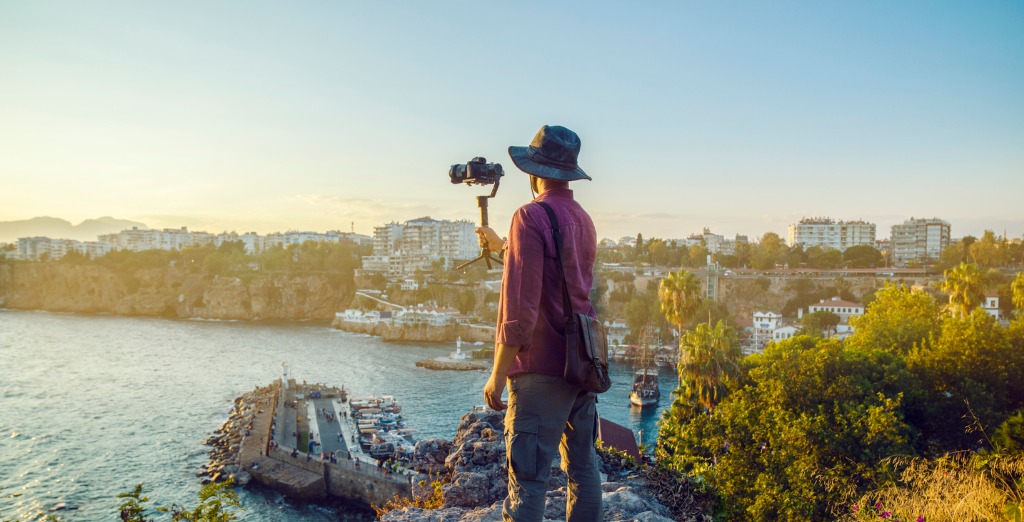
photo byozgurdonmaz via iStock
Part of the process of creating a vlog that’s engaging and that draws viewers is having footage that doesn't make viewers seasick.
That means you need a means of stabilizing your camera as you shoot.
Fortunately, there are a variety of methods you can use to capture ultra-smooth video for your blogs, from tripods to dollies to gimbals.
Let’s get to it so you can learn how to stabilize a camera for vlogging.
Use a Tripod to Stabilize Your Camera

Chances are you already have a tripod of some sort, so it might be the best and easiest option for you.
Tripods like the E-Image EG01A2 shown above give you the stability you need for the camera while offering a host of features that make getting better footage a reality.
For example, this tripod has a payload of up to 11 pounds, so you can add an on-camera light, a shotgun microphone, and other camera accessories for capturing better-quality video.
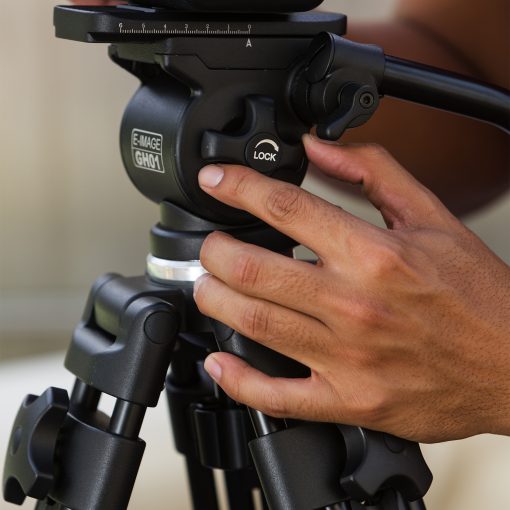
The included pan/tilt fluid head enables you to get nice, fluid B-roll with a range of 360-degrees for panning and 135-degrees for tilting. The quick-release baseplate system makes for easy work of attaching and removing your camera from the head.
Tripods like this also give you a range of heights (in this case, 31.5-inches up to 63.25-inches) so you can vary the eye level of your video sequences to create more visual interest.
This tripod in particular has an integrated mid-level spreader that aids in keeping the legs stable, and with removable anti-slip pads and metal spikes on the feet, you don’t have to worry about the tripod sliding around as you film.
Obviously, a tripod for vlogging is a great option if you’re filming in a home studio or out in the field when you aren’t moving around. But what other options are there for more mobile support?
Learn More
Try a Dolly for Vlogging
Dollies and camera sliders have been used forever by filmmakers to get smooth tracking shots.
And while this might not be a traditional type of shot for vlogging, there’s no reason why you can’t jazz things up a bit and use a dolly to incorporate beautifully stabilized video sequences into your vlog.
As this awesome tutorial discusses, there are a plethora of options when it comes to sliders and dollies, including building your own budget-friendly dolly system.
In the video above by Premium Beat, you can see that it’s really not that difficult to put a DIY dolly together, and you can do it for only $50!
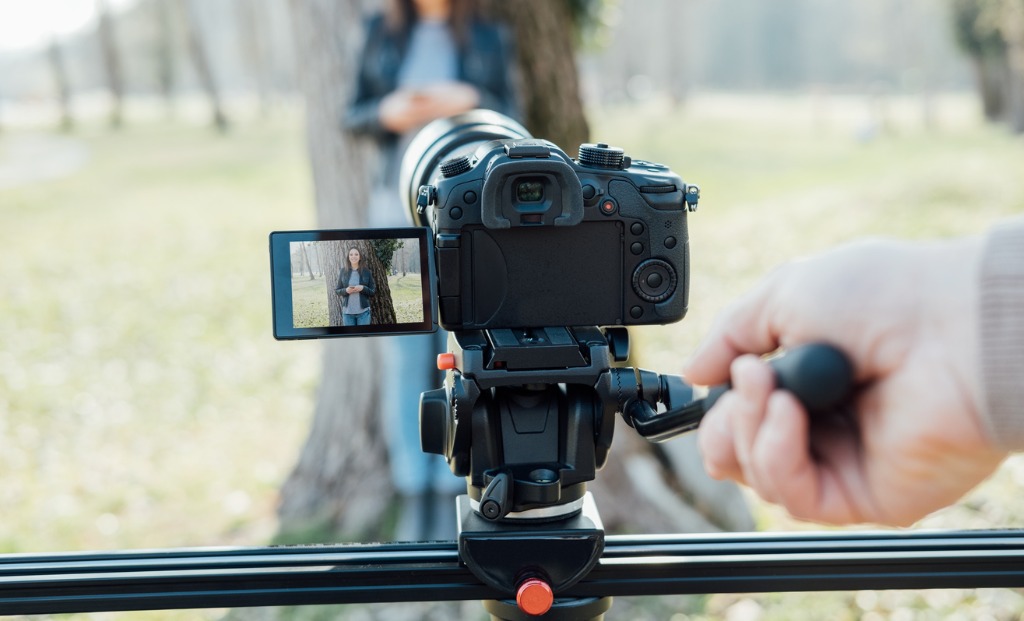
photo by cyano66 via iStock
The advantage of using a dolly or a slider (as shown in the photo above) is the unique tracking shots I mentioned earlier. This can certainly add a layer of polish to your vlogs while also giving viewers a little more visual interest than simply watching handheld or tripod-based videos.
The problem with a slider or dolly is that it’s a lot to carry around and set up, at least when compared to using a simple tripod or gimbal. Nevertheless, if it’s stable video footage you’re after, a dolly is a slam dunk!
Smooth Out Handheld Video by Using a Gimbal
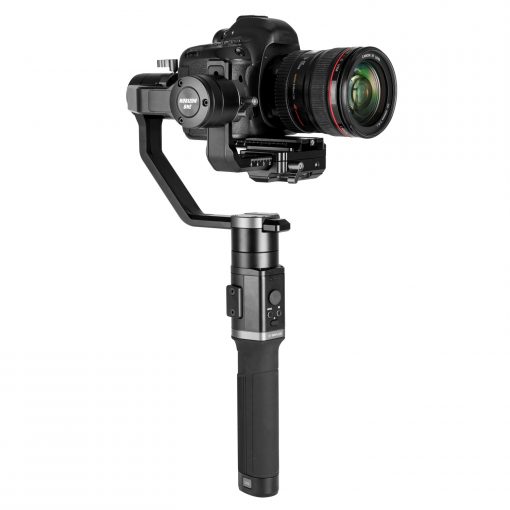
Of course, the most popular option for shooting nicely stabilized vlogging footage is using a gimbal.
Gimbals like the E-Image Horizon One shown above use brushless motors combined with steady computing technology to ensure your video footage is beautifully smooth.
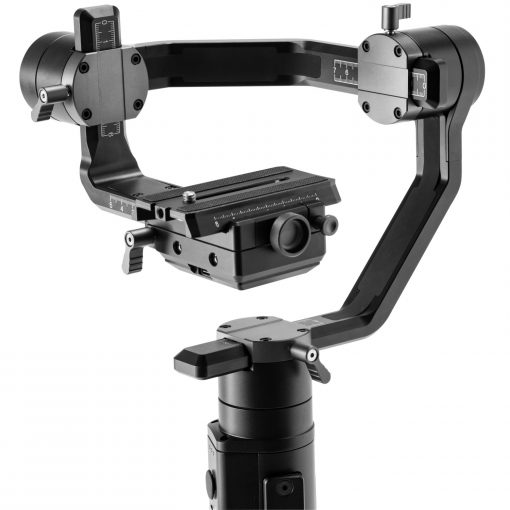
Gimbals can’t hold as much gear as a tripod, but some, like this one, have a payload up to 8 pounds. That means you can use a wide range of cameras, lenses, and other accessories without exceeding the maximum payload.
This particular gimbal featured three-axis image stabilization and multiple operational modes, including pan follow, free follow, all locked, sport follow, and dream follow.
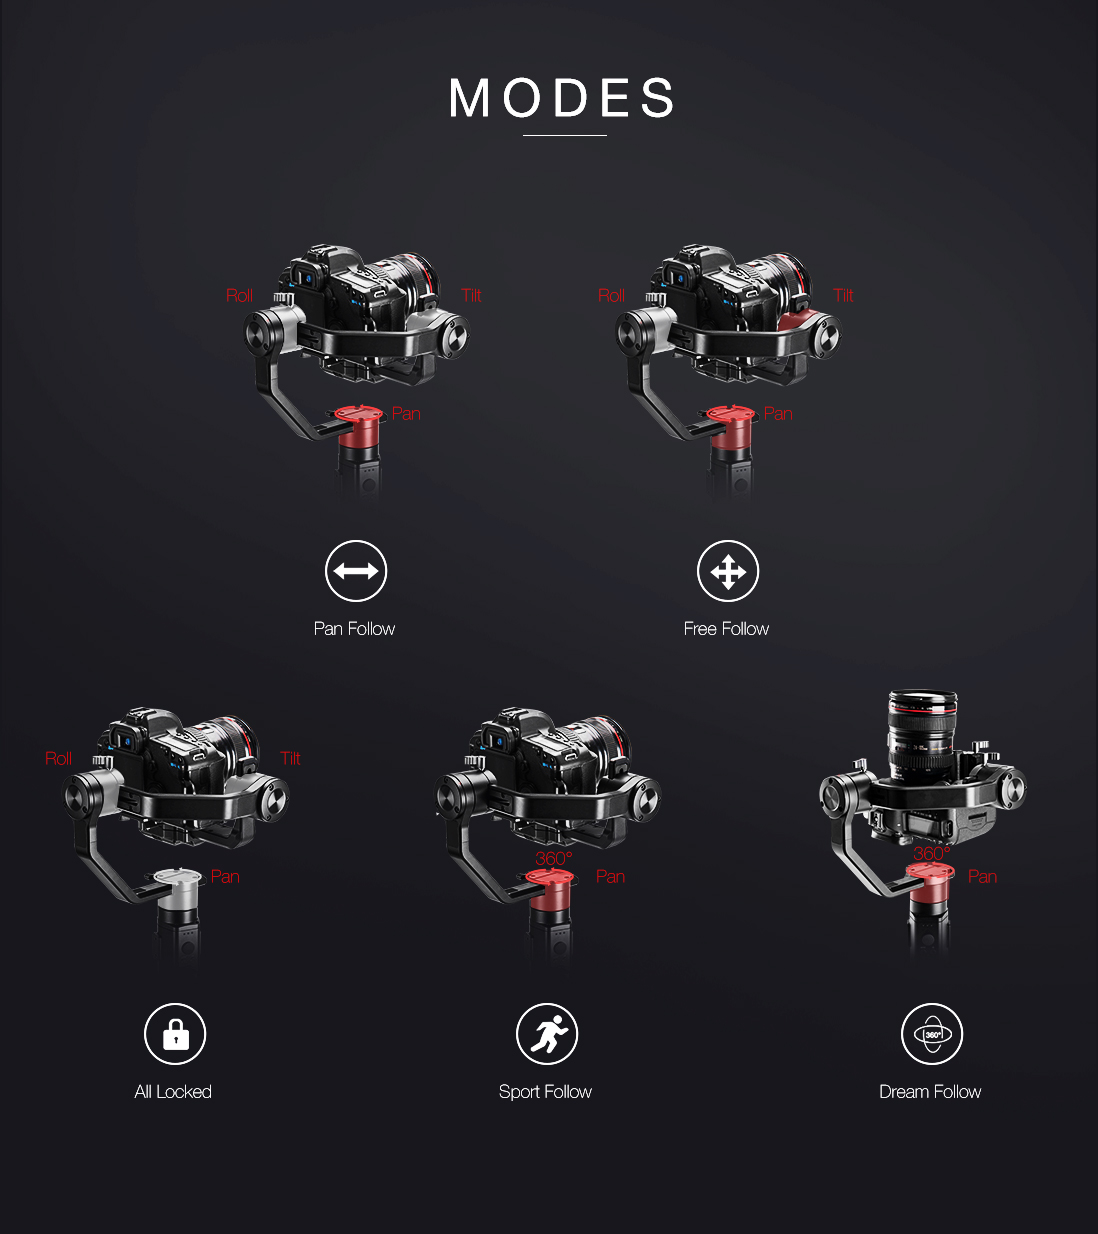
With that kind of versatility, you can vary the look and feel of your video footage for a higher-quality final product.
And with 12-hour runtime, a companion smartphone app for easy control, a universal quick-release plate for rapid gear changes, and full 360-degree movements on all three axes, this is certainly a gimbal for vlogging that can help you improve the production value of your vlogs.
Additionally, you can pair a gimbal with a monopod to create shots that look like they were taken on a dolly or slider.
The video above by Ikan International is a great example of how you can “fake” a shooting style by using nothing more than a gimbal. While this video features a product that is at the end of its product life, the point is that you can utilize these methods with any gimbal to get improved results.
And, really, that’s all we’re after here - improved results.
While simply holding your camera in your hand as you move around or setting it on top of a solid surface to get your shots works fine when you’re just starting out, creating engaging content requires that you have the means to vary the types of shots you get.
With a tripod, a dolly or slider, and a gimbal, you can do just that!
Learn More
We Recommend
How to Transmit Video Wirelessly
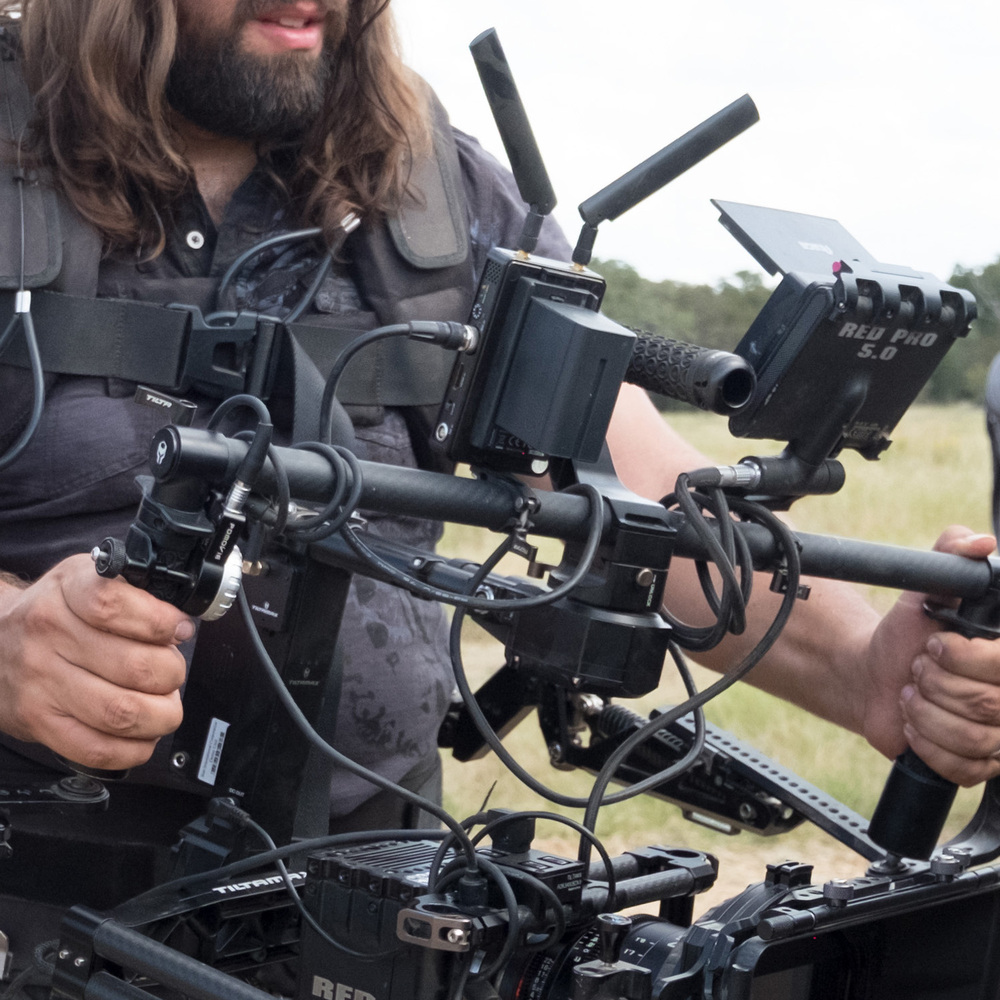
One of the many challenges for small video production teams is monitoring and controlling what is going on around you, in the scene itself, and what actually makes it to video. Some of us are one-man video production teams at times so we need to be able to monitor without too much fuss.
Wireless video monitoring might be the answer for you. It is easier and less expensive to transmit video wirelessly than many of us may be thinking. Wireless video feeds can also be used for remote recording.
What is Needed to Transmit Video Wirelessly?

Photo by Jakob Owens on Unsplash
This is a gear review article, so let’s review our gear. As either a cameraman in a crew or as our own small video production team of one, we end up with a lot of stuff. But that's fine, we like our stuff and we like what it allows us to do.
- Camera - DSLR, mirrorless, or cinematographic
- Lenses - a variety of fast primes and a multi-use zoom or two
- Lens accessories - matte box, filters
- Mics - on camera, wireless lavalier, boom mic, desk mic
- Tripod - fluid head and quick release system
- Camera cage - part of your mounting system
- External monitor - gives a larger view than the on camera screen
- Lights - complete with stands and various modifiers
- Audio recorder - for better sound quality
- Mixing board - balances sound recording
- DMX controller - controls lighting and other effects
- Background and stand - vital for green screen
- Bags and cases - transportation and storage
- Batteries, adapters, media cards, props, and lots of cords
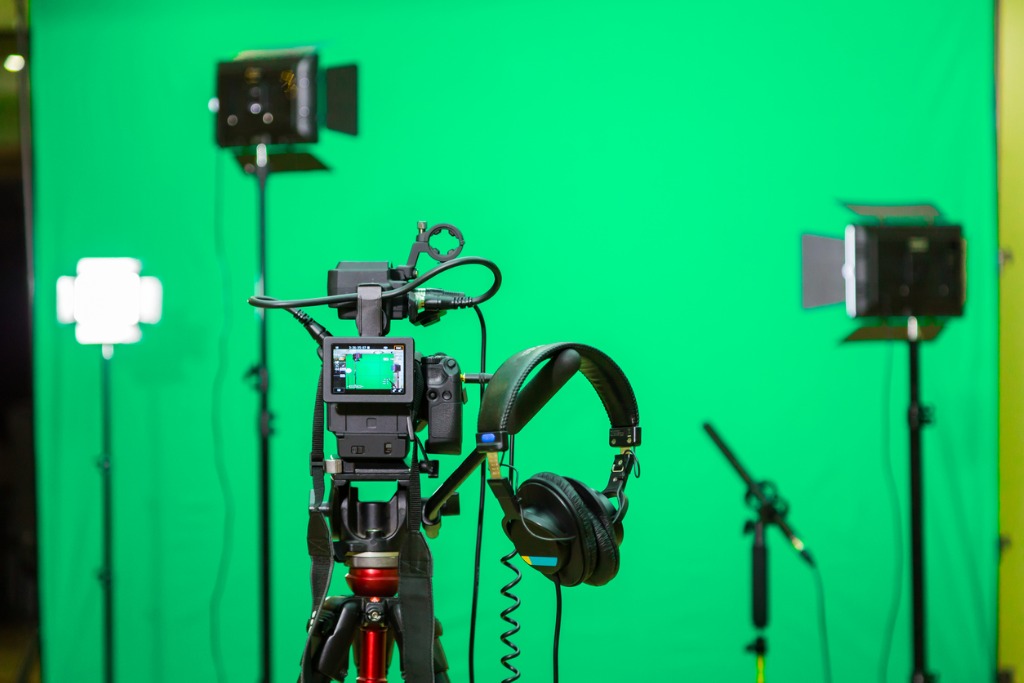
photo bylapandr via iStock
That’s a lot of stuff to take care of. And we’re suggesting more stuff? Yes. For two important reasons. If you transmit video wirelessly, you increase your freedom of mobility and you eliminate some of those pesky cords.
Before I wrote out that list above, I didn't think it was such a big deal, but knowing how to send video wirelessly can really ease up our workflow burden. All that is needed for wireless video are transmitters, receivers, and monitors. We’ll examine how to transmit video with a professional series kit and a budget friendly option.
Budget Option: Blitz Lite 300
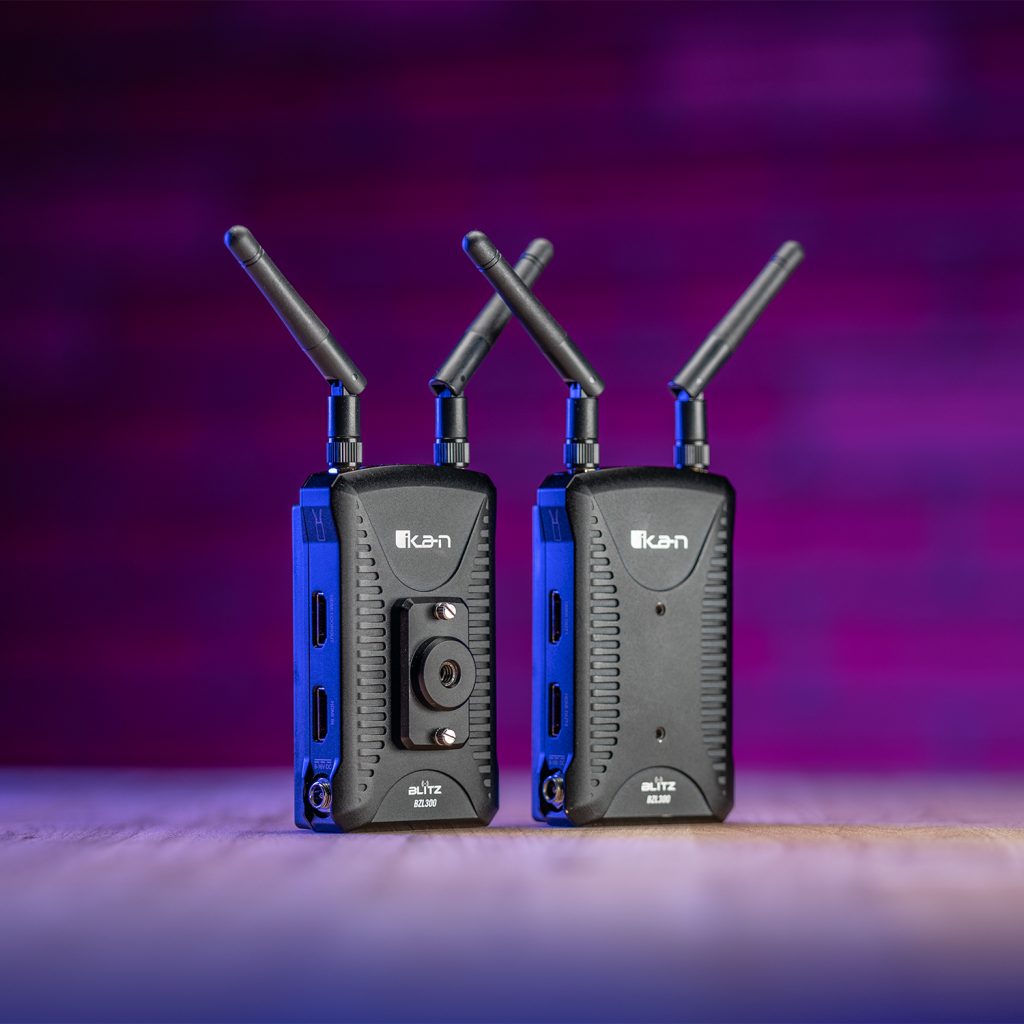
If you’ve been considering how to send video wirelessly but have been concerned by some of the prices you’ve seen, the Blitz Lite 300 from Ikan may be just the thing you need.
Both the transmitter and receiver are battery powered with Sony camcorder style batteries and the range of the kit is 300 feet. It can transmit video wirelessly as HDMI 1080p60 for high quality monitoring or remote recording.
It’s lightweight, even with the battery, and includes various mounting options. Battery charge can last up to 5 hours of wireless video transmission. The antennae are low profile and the transmitter has HDMI loop out for A/V and the receiver has 2 HDMI outs for monitoring or recording.
Learn More:
Professional Option: Blitz 1500 3G-SDI/HDMI
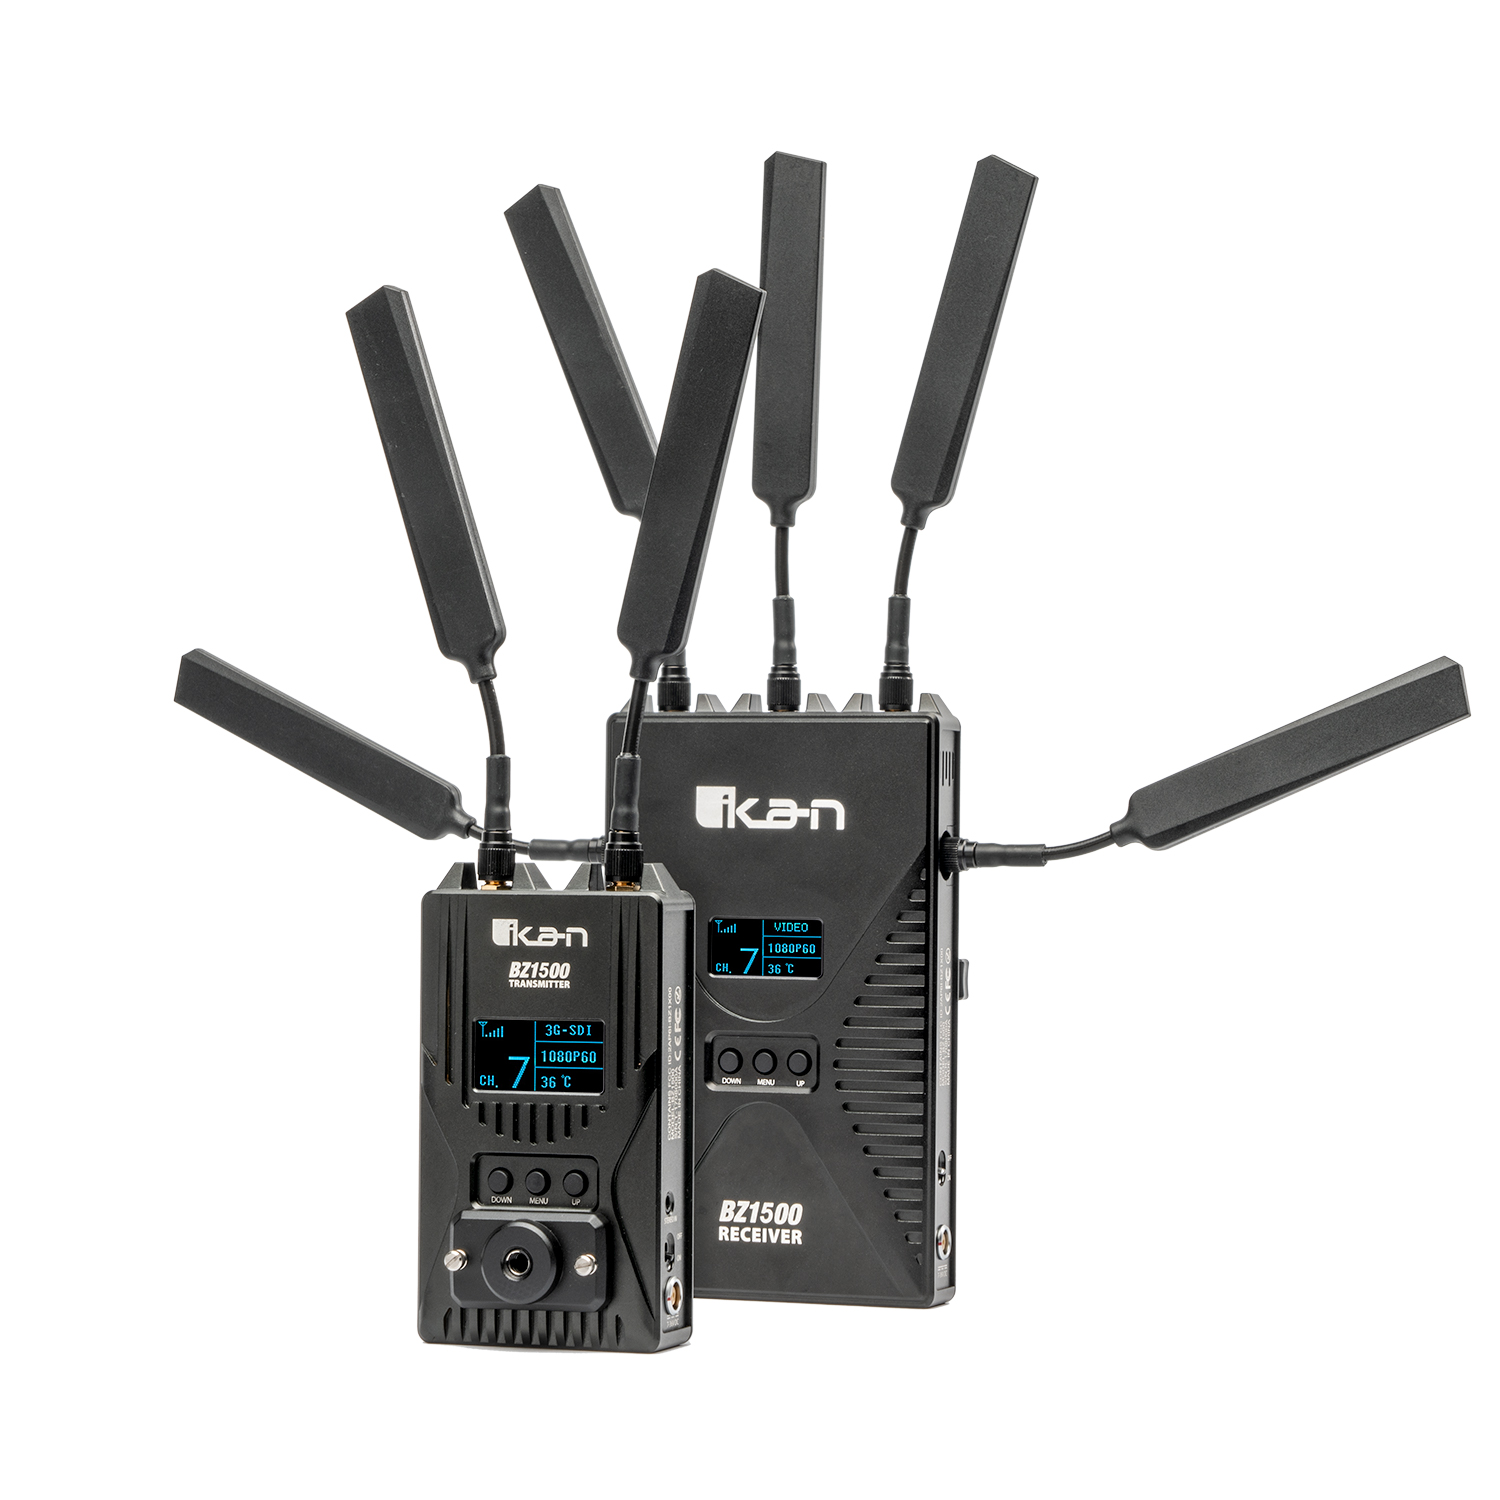
A little larger and heavier plus more than 5 times the price of the budget option, the Blitz 1500 3G-SDI/HDMI from Ikan provides filmmakers with an incredible array of features you can use to transmit video wirelessly with virtually no signal loss.
The Blitz 1500 can send wireless video over 3400 feet with best performance in the 1500 foot range. For videographers looking for how to send video wirelessly with virtual no delay, this unit is the solution. Zero, or near zero, delay is vital for remote monitoring when using remote wireless follow focus controls or other specialized professional cinema equipment.
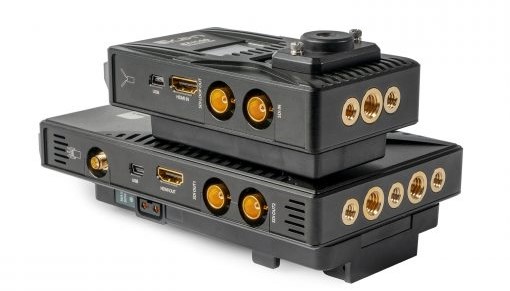
While it sends wireless video uncompressed for near zero delay, the Blitz 1500 can also convert from SDI to HDMI or vice versa so you can keep using this unit with the wide variety of professional videographic equipment that a small production company might bring to a production.
These units are incredibly rugged, too, and support a variety of power options to blend in with your existing equipment. Digital displays provide users with a clear idea of power level and signal strength.
How to Transmit Video Wirelessly
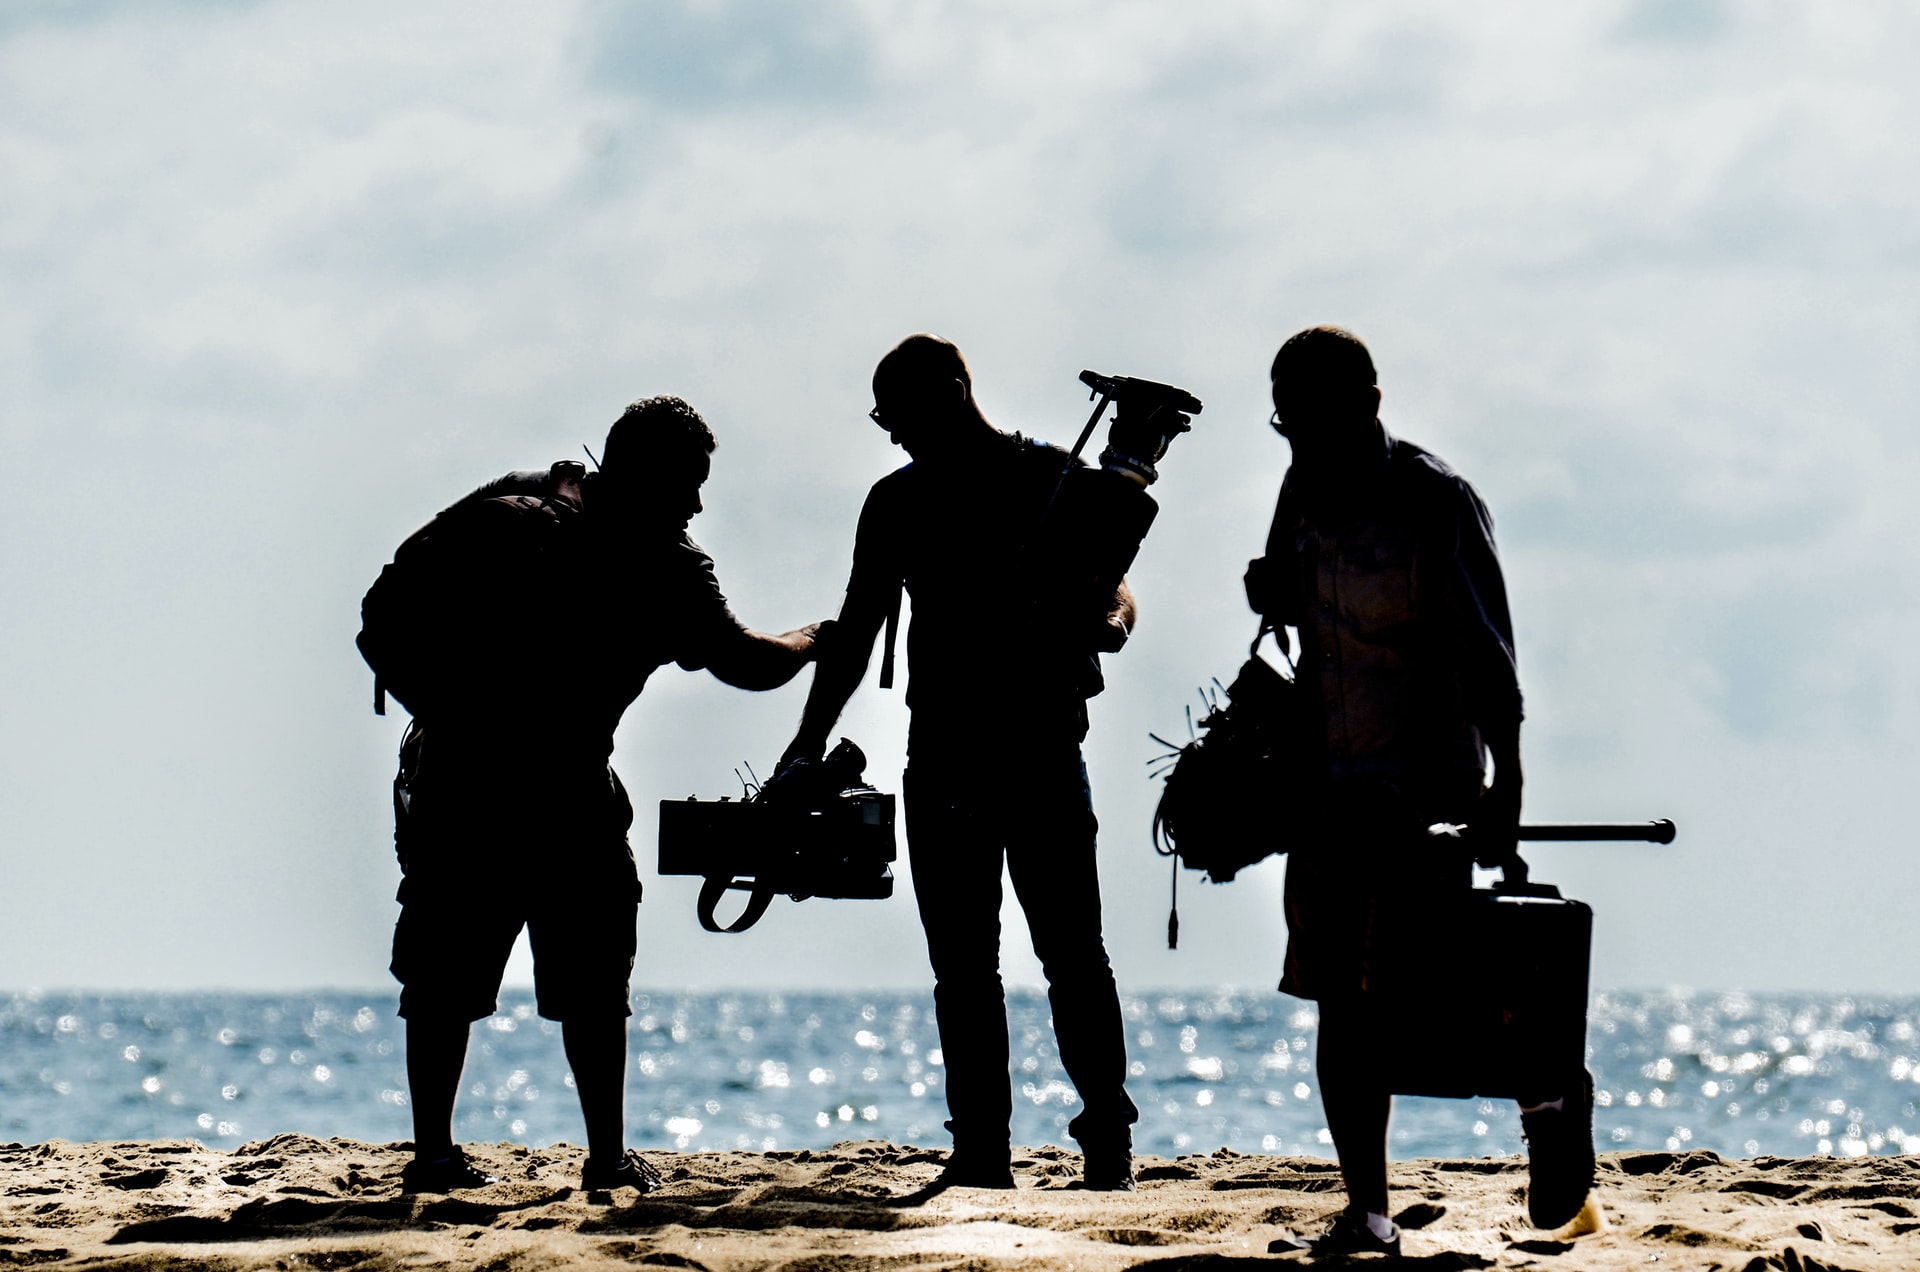
Photo by Stephane YAICH on Unsplash
It helps to use high quality gear when filming and producing high level video. The IKAN gear featured here are very good plus they are easy to use.
The two main things to keep in mind are signal strength and line of sight. Signal strength also takes into account finding a clear channel to use so you avoid any dropping of the wireless video feed.
Line of sight means exactly what it sounds like. Keep the transmitter and receiver connected by not blocking their view of each other. It may not be optical transmission, but there is a lot of data being transferred, the clearest feed possible is our goal with wireless video.
So there you have it. Charge up your batteries and eliminate a couple of pesky cords. Transmit video wirelessly while opening up all sorts of professional video production techniques.
Learn More:
- How To Use a Follow Focus System
- Common Videography Mistakes You Need To Avoid
- How To Shoot Quality Video Footage
We Recommend
How to Use a Follow Focus System
photo bySilvrshootr via iStock
Granted, you don’t need a follow focus system for every shot!
Let’s say you are capturing some unplanned moments with your DSLR or shooting a documentary with a handheld camera, where autofocus works just fine.
But what if you’ve carefully planned every shot? Imagine how much time and money you’ll save, simply by nailing focus every time.
Also, a follow focus system can save your life when the lens has a thin focus ring and/or an extremely short focus throw.
But wait! If you know zilch about a follow focus system, don’t worry! Here’s the complete low-down on what a follow focus system is, its various components, and how you should use it.
What is a Follow Focus System?
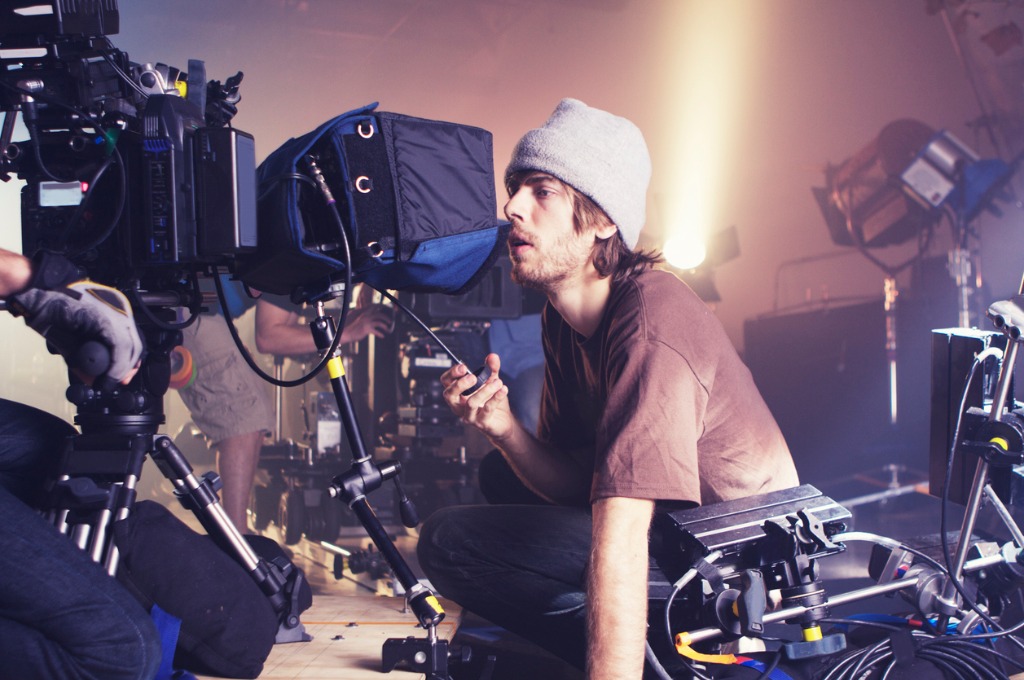
photo bybjones27via iStock
As the term suggests, a follow focus system is a set of mechanisms that enable the focus to move smoothly with the action. The act of pulling focus to follow the action is known as racking, and the person in charge of it is called a focus puller. Typically, the First Assistant Cameraman does the focus-pulling on a production set, but some camera operators prefer doing in on their own.
Using a follow focus system allows you to devote more attention to the creative aspect of video production. You no longer have to worry about unnecessary sound or vibration, just as the video above by creativecowofficial shows.
Parts of a Follow Focus System
photo bymady70 via iStock
In order to use a follow focus system, you first need to attach it to the teeth of your camera’s focus ring. Now all you need is to turn the knob on your focus controller device, and it will spin the teeth.
This may sound very simple but a lot of parts work together to make the follow focus system work. So, here’s a rundown on the parts of a follow focus system.
The rod clamp or mount: The base of a camera rig is formed of two rods, to which a rod clamp/mount is attached. To set it up, you need a base plate in addition to these two rods. These can either be 15mm rods, with a spacing of 60mm (the standard spacing for the cheapest variety) or 100mm, or 19mm rods placed 104mm apart.
The arm: This part attaches to the rod clamp, and you can either make it rigid or flexible, depending on the types of lenses you will need to work with. Experts recommend keeping it as flexible as possible, or at least one that can move laterally. If it pivots, even better, since it will allow you to accommodate the size of the lens.
The gear: This is arguably the most important component of the whole mechanism. It is connected to the arm, and is rotated with the help of teeth that link to the focus knob. Usually, 1-to-1 gears allow rotation to the same degree as the focus knob (known as ‘throw’). A focus puller may need different kinds of throws with their gears. A larger throw refers to getting a larger focus ring turn even with a small turn of the focus knob. However, when the focus marks have very fine spacing, to get a higher degree of focus smoothness, a smaller throw is more useful.

photo byFatanfilm via iStock
The lens gear ring: The gear attaches to this part of the rig, wrapping tightly around the lens where the focus ring is. A lens gear ring is necessary when the focus ring doesn’t have teeth. Those working with many different kinds of lenses require as many types of lens gear rings.
Focus knob: This is what you turn to focus with a follow focus system. Normally, when you don’t have a focus knob, you turn the lens’ focus ring using your arm bent at 90 degrees with respect to the camera. However, this is very inconvenient and can cause vibration in video. This is where the focus knob comes into the picture, since it allows you to avoid straining your arm. It also lets the focus puller stay clear of the way of the camera operator while racking focus.
White disc: This is another crucial component of a focus follow system. A good quality white disc allows you to write and erase focus marks on it as many times as you want. These days, glow-in-the-dark marking discs (pictured below) like the one that comes with the PDMovie Live Pro Three-Channel Focus/Iris Zoom Control System, are all the rage, thanks to their functionality in darker environments.
In addition to the components discussed above, you can use a few accessories to bring greater functionality to your focus follow system. For instance, you can attach a speed crank to the focus knob when need to turn focus very fast.
Learn More:
How to Use a Follow Focus System
The first step is to find the Greek letter phi (Φ) on your camera. Now, a DSLR won’t have it, since these cameras either use autofocus or manual focus with live view.
The next step is to carefully measure the distance between the point of focus and the phi mark. You will need to do it using a good measuring device. For distances up to 25 feet, you can use a sturdy measuring tape that comes with a locking mechanism. For tapes under 15 feet, a half-an-inch width will do. You will need a tape that is 1” wide if the tape is over 15 feet.
For distances up to 300 feet, you will need a fiberglass tape. Carry a 50-foot and a 300-foot roll but use the latter only when required. In case of even greater distances, it is necessary to use a laser rangefinder with a range of around 100 feet. But remember to never point the laser at another human being or the camera.
The above video by Felicia Smith talks about using a laser rangefinder when shooting at night, especially in situations where you cannot get closer to the action.
photo by AlexLMX via iStock
Now that you know the basics of a follow focus system, you may want to know what follow focus system you should choose. Of course, it depends on your needs. Ideally, you should look for one that….
- Comes with a highly functional geared mechanism for better focus throw
- Has no loose joints, so you can expect less vibration
- Allows the focus puller to stay out of the camera operator’s way while racking focus
- Comes with a clear white disc that allows you to write and erase markings easily
Another important thing to consider is your budget. Brands like PDMovie, for instance, offer a number of options to suit almost every budget.
For those looking for a budget option, the PDMOVIE Live Air Compact Wireless Lens Control System could be a great option. It is easy to set up and allows you to adjust focus from up to 33 feet away. All you have to do is to attach the mini motor to your camera’s focus ring and then adjust focus remotely with the wireless Bluetooth focus controller. You can attach the controller to a tripod or monopod or Glidecam.
If, however, you often need to adjust focus far away from the action, it would be a good idea to spend a little. You can find high-quality focus control systems in a mid-range budget. For instance, the PDMOVIE Remote Air 4 Single Motor Wireless Lens Control Kit comes with an additional handwheel for Wi-Fi. With that, you can adjust focus from up to 328 feet away.
If you wouldn’t mind paying for a high-end system, go for the PDMOVIE Live Pro Three-Channel Focus/Iris/Zoom Control System. It comes with three motors, so you can adjust not just the focus but also the zoom and the iris.
Learn More:
We Recommend
How to Use Your Camera as a Webcam
Photo by cottonbro from Pexels
With the rise of work from home and videoconferencing, many of you long time photographers are considering how to use your camera as a webcam.
After all, your DSLR, mirrorless camera, or action cameras are very high quality and are already set up for capturing amazing video. Using your camera as a webcam could open up a wide range of options for you as well. Especially when thinking about our different lenses and the photographic control we’re used to.
Computer Webcam Alternatives

Photo by Andrea Piacquadio from Pexels
Most of our computers and tablets have a decent enough webcam built into them. Webcam alternatives include accessory webcams that you can mount on your computer and plug in via the USB connection. Many of these are a step up from the built-in cameras in terms of resolution and overall quality.
The other webcam alternatives include using your existing digital camera as a webcam by means of an adapter or dongle. If you’re like me, you’re wondering why you just can’t plug in your camera like you may do for transferring files.
It’s partly a software issue, you need a different set of protocols to stream as opposed to simple file transfer. And also a hardware issue, you want to stream the highest quality feed from your camera so then the HDMI output is preferred, necessitating a specific connection type between camera and computer.
Video Capture Device
The key to using your existing camera as a webcam is allowing your computer to accept the video signal from your camera. You do this with an adapter commonly called a video capture device.
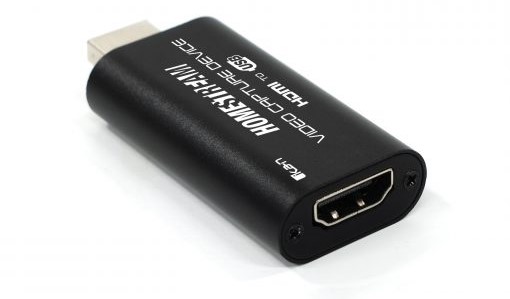
You can find one at Ikan, the professional video production equipment manufacturer and retailer, the HomeStream™ Video Capture Device. I like shopping for professional video equipment at Ikan because they manufacture what they sell and their equipment is designed by experienced videographers and cinematographers.
Install the software for the device and then simply plug in your camera’s clean HDMI feed to the video capture device and plug the device into your computer’s USB port.
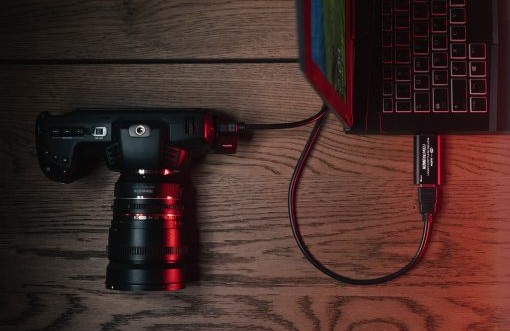
The HomeStream™ Video Capture Device can be installed on computers or devices using Windows, Linux, Android, and macOS. Its signal is compatible with various streaming services including OBS, Zoom, Skype, UberConference, Twitch, Facebook Live, Youtube Live, DLive, and others.
Learn More:
How to Set Up
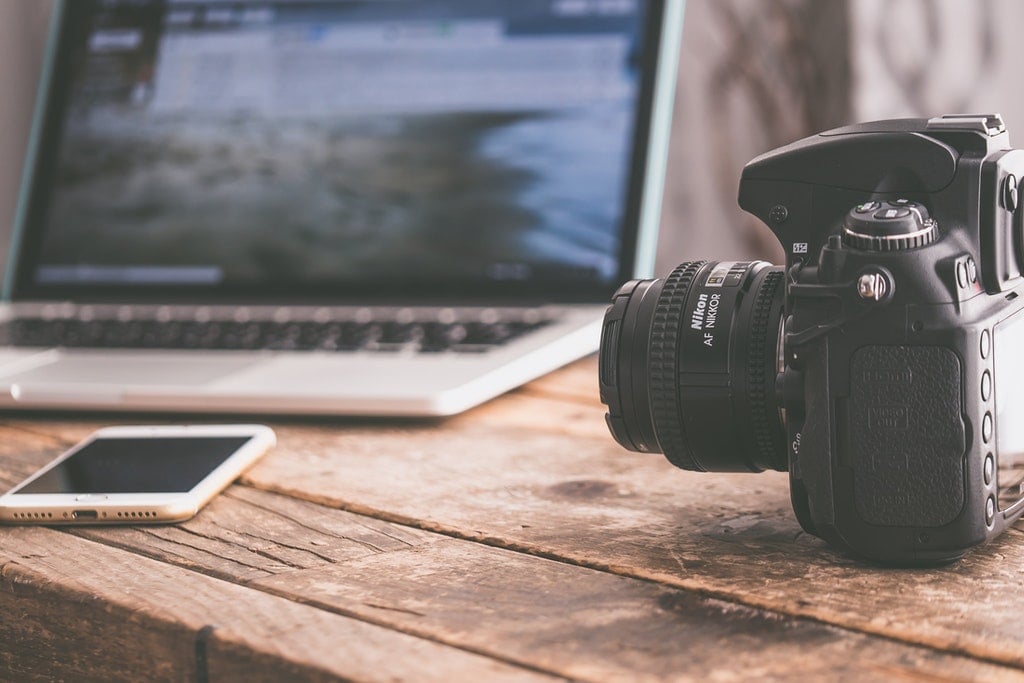
Photo by Jessica Lewis from Pexels
Once you have the capture device set up on your computer, you then set up your camera as a webcam. Turn it on and set it to the video mode. The camera needs to be capable of outputting clean HDMI or the results won’t be any better than the webcam you already have.
Change your camera’s display view because whatever is showing on your viewscreen is what is streaming. Adjust the display to show only the video with no camera settings unless you just want them to show to everyone.
Use the highest video quality your whole system can allow, 4K 30fps if your camera has that capability. The video capture device will convert it to a signal that the computer can handle and then the streaming software will convert also to what it can handle, but starting with the highest level will give you top quality end result.
It’s also a good idea to turn off autofocus and use a mode that allows you to control the lens aperture. You can see right on your computer screen what these adjustments do for your feed, it’s actually pretty cool.
Choose the menu option on your camera that allows for the longest time being on, it’s annoying to have your camera auto shut down in the middle of a streaming session. Also make sure your battery is fully charged or use an AC adapter to power your camera.
Don’t Neglect Audio
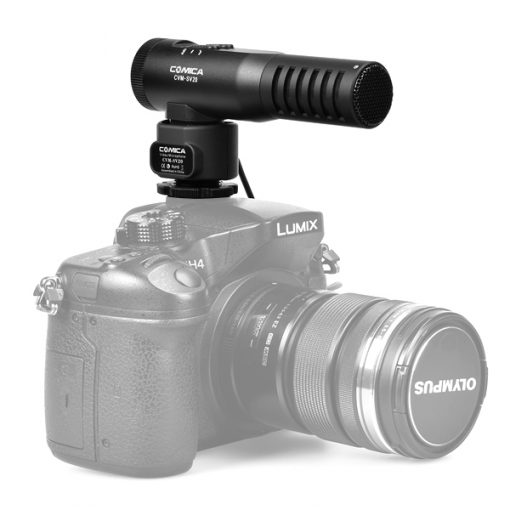
While our cameras have incredible visual capability, their built in mics aren’t really all that great, despite what the ad copy says about their awesome mics. You will either need to mount a really good shotgun mic on your camera or use other auxiliary microphones.
I like the shotgun mic option for using my camera as a webcam since it points right at the subject, usually me, when mounted on the camera. The shotgun mics I’ve found at Ikan have very good performance.
Alternatives to on camera shotgun mics are desk mics, lavaliers, and boom mics. Several options are also available from Ikan and other manufacturers. Some use the USB and others use 3.5mm jacks, both of which work well for streaming web broadcasts.
Put It All Together and Start Streaming Ultra High Quality Video
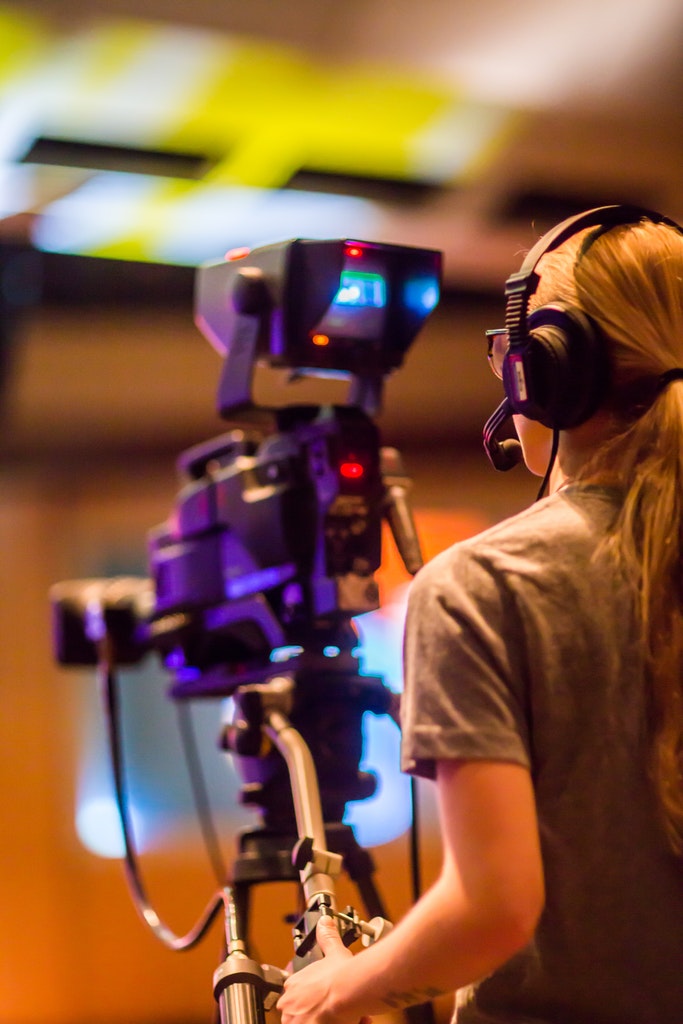
All it takes is one tiny device to go from wondering how to use your camera as a webcam to actually broadcasting top quality audio and video. Once you start, though, how do you ever go back? Now you have to step up your game in regards to lighting, composition, hair and make up. I’ll just say this, it’s worth it!
Learn More:
- Lighting Options for Recording Video At Home
- Types of Microphones for Vlogging
- Awesome Camera Accessories
We Recommend
Lighting Options for Recording Video at Home
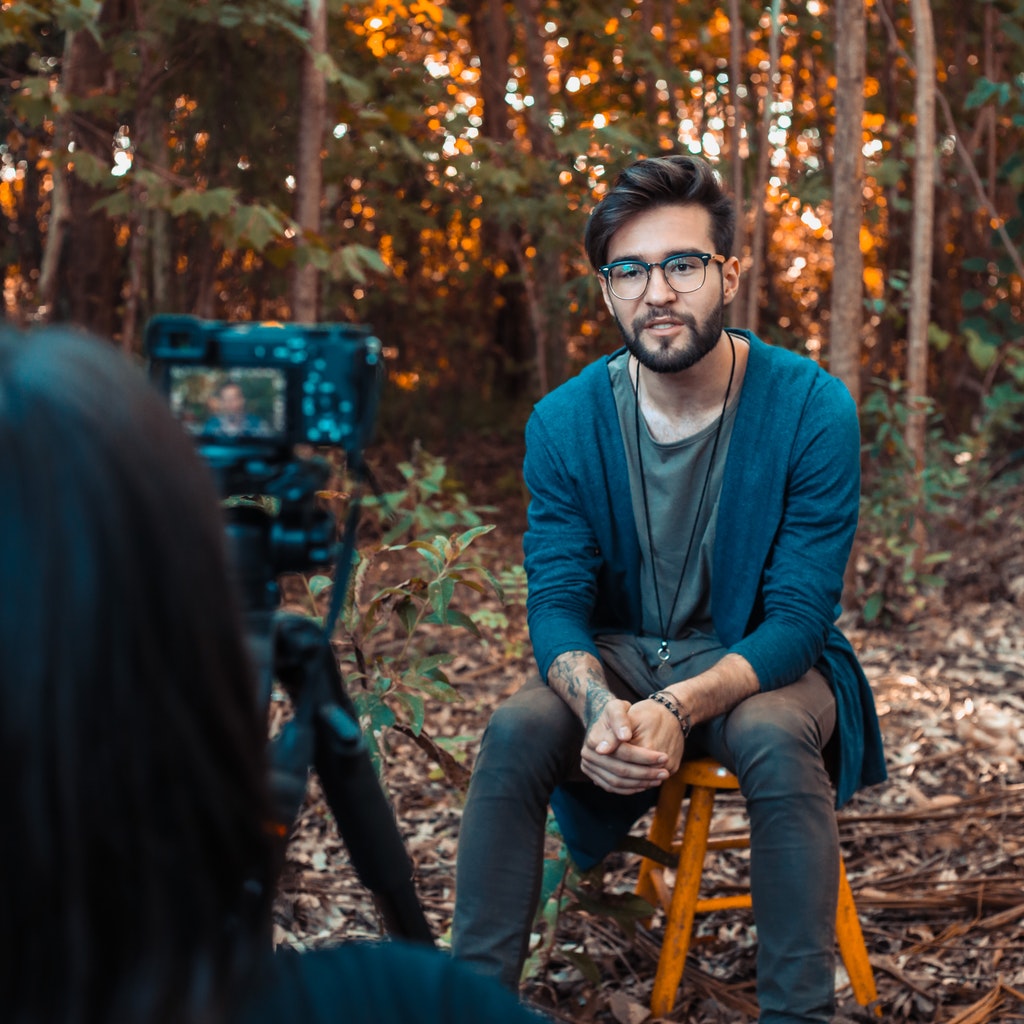
Photo by Rodrigo Souza from Pexels
Recording video at home requires good lighting in order for the finished video to have a natural appearance. You might at first think that the natural, ambient light in a home, office, or patio will record as a nice, natural look, but the truth of the matter is that ambient light can be difficult for good video recording. Learn more about photography at home on our website PhotographyTalk.com.
Being able to control the light will provide consistent, even results for your productions recorded inside, outside, or under mixed ambient lighting. When interviewing someone or filming your own instructional style video, maintaining a natural appearance will enhance the viewing of your videos.
How to Light for a Natural Look

Photo by Andrea Piacquadio from Pexels
Put a cinematographer in any room and area and they will start looking at how best to light it. Ambient light is fine for something spur of the moment, but controlling the lighting is how a cinematographer achieves those superbly well lit natural looking scenes we’re used to seeing.
There are several simple video lighting arrangements that can be set up for recording video at home. The best lights for video recording are easy to operate, offer good color, and are powerful enough to control the scene.
The main lights used by many record from home cinematographers and videographers are key lights, fill lights, rim lights, background lights, and ring lights. Any combination of these lights can give you total control over lighting ratios and exposure values. You can also check article about photography projects.
We will highlight three very basic configurations and some choices for the lights themselves from Ikan. When shopping for video equipment such as lights and accessories, Ikan is a premier retailer for equipment since they make a lot of the stuff themselves and it’s designed by videographers.
Single Ring Light
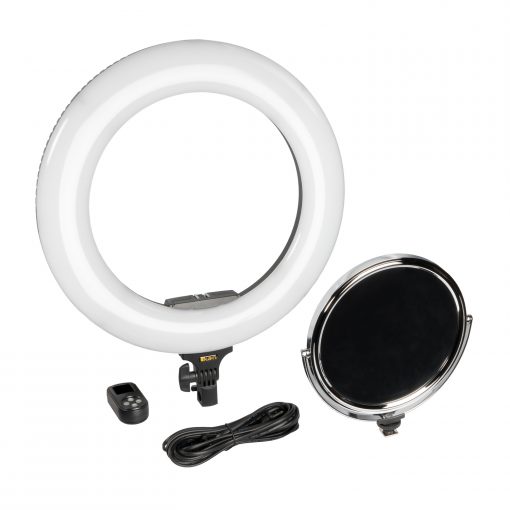
A ring light is a valuable tool for any videographer or photographer. Ring lights can deliver an almost shadowless light for relatively close up views. Figuring how to use a ring light is remarkably simple. You film through the ring of light itself.
This configuration is often used for close up shots or footage of an object you’re explaining or for recording a head and shoulder only view of an interview subject or yourself.
How to use a ring light: while the light is on, move the light closer or further away to vary just how shadowless it is. As with any other lights, the further away a ring light is, the more like a point source it becomes.
A couple of added benefits to ring lights is that they are excellent lighting for makeup artists and you can add a ring light to any other configuration for an eye catch light that results in a circular highlight in the eye.
The Oryon 18” ring light from Ikan is an excellent example of the type of ring light useful for recording video at home. The large ring emits a large swath of shadowless light and is also big enough to use with a full frame mirrorless or DSLR camera, a dedicated video, or a smartphone.
2-Point Light Setup
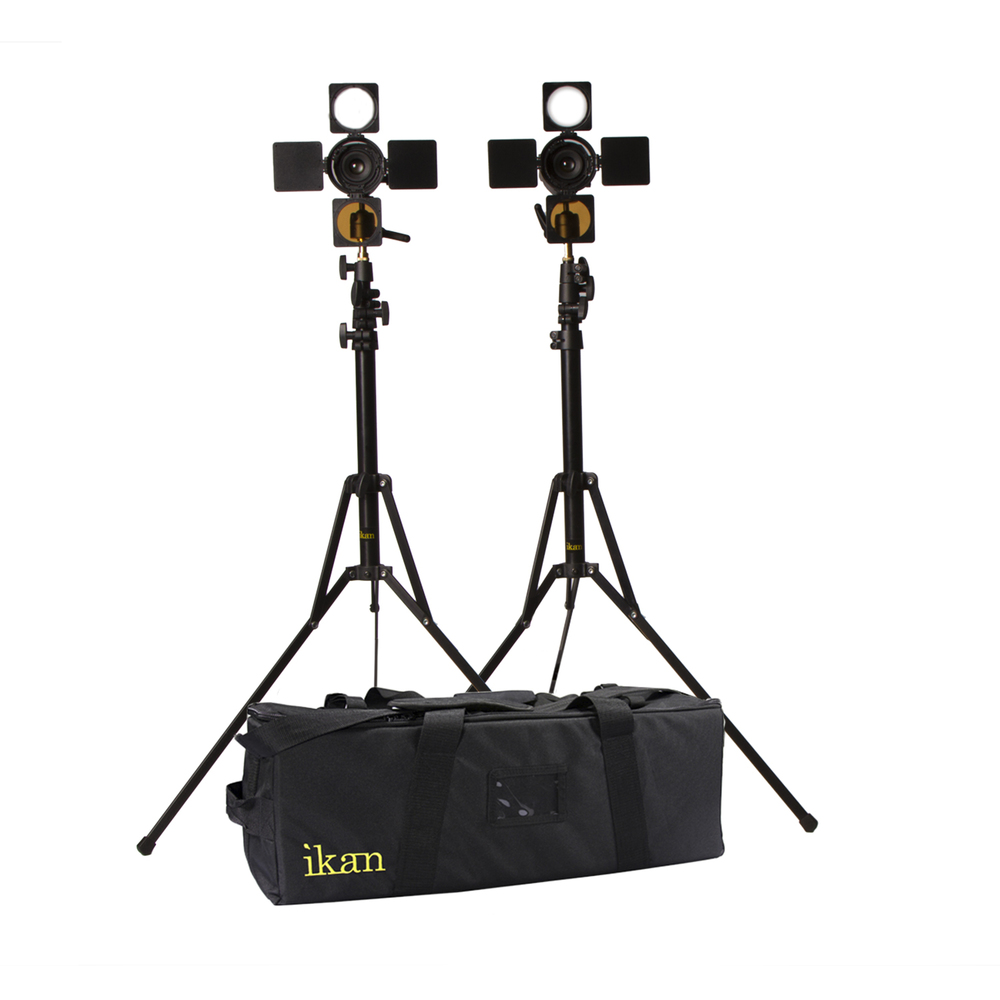
Perhaps the most common lighting configuration used in videography is the 2-point light setup. The two lights can be used in various ways. A couple of simple video lighting setups are a key plus fill light or a key plus back or edge light.
An easy way to get natural light when recording video at home is the key plus fill light configuration. The key light is the stronger light and the fill is less strong. The iLED 2-Point kitfrom Ikan comes complete with stands and can be adjusted with the included barn doors, gels, and diffusers.
In the common interview style of the subject looking slightly off the side of the frame, you can create either broad or short lighting by changing which side of their face gets the strong light. I like to have the stronger light on the side of the frame that the subject is not looking at, but either way works fine. You can also view another post about photography project ideas.
Using a 2-point light setup with a key light and edge light or backlight is also very easy to use and looks natural when recorded. An important tip with any interview video regardless of the light is to make sure you have both of the subject’s eyes visible, since having one eye hidden looks odd on screen.
3-Point Light Setup
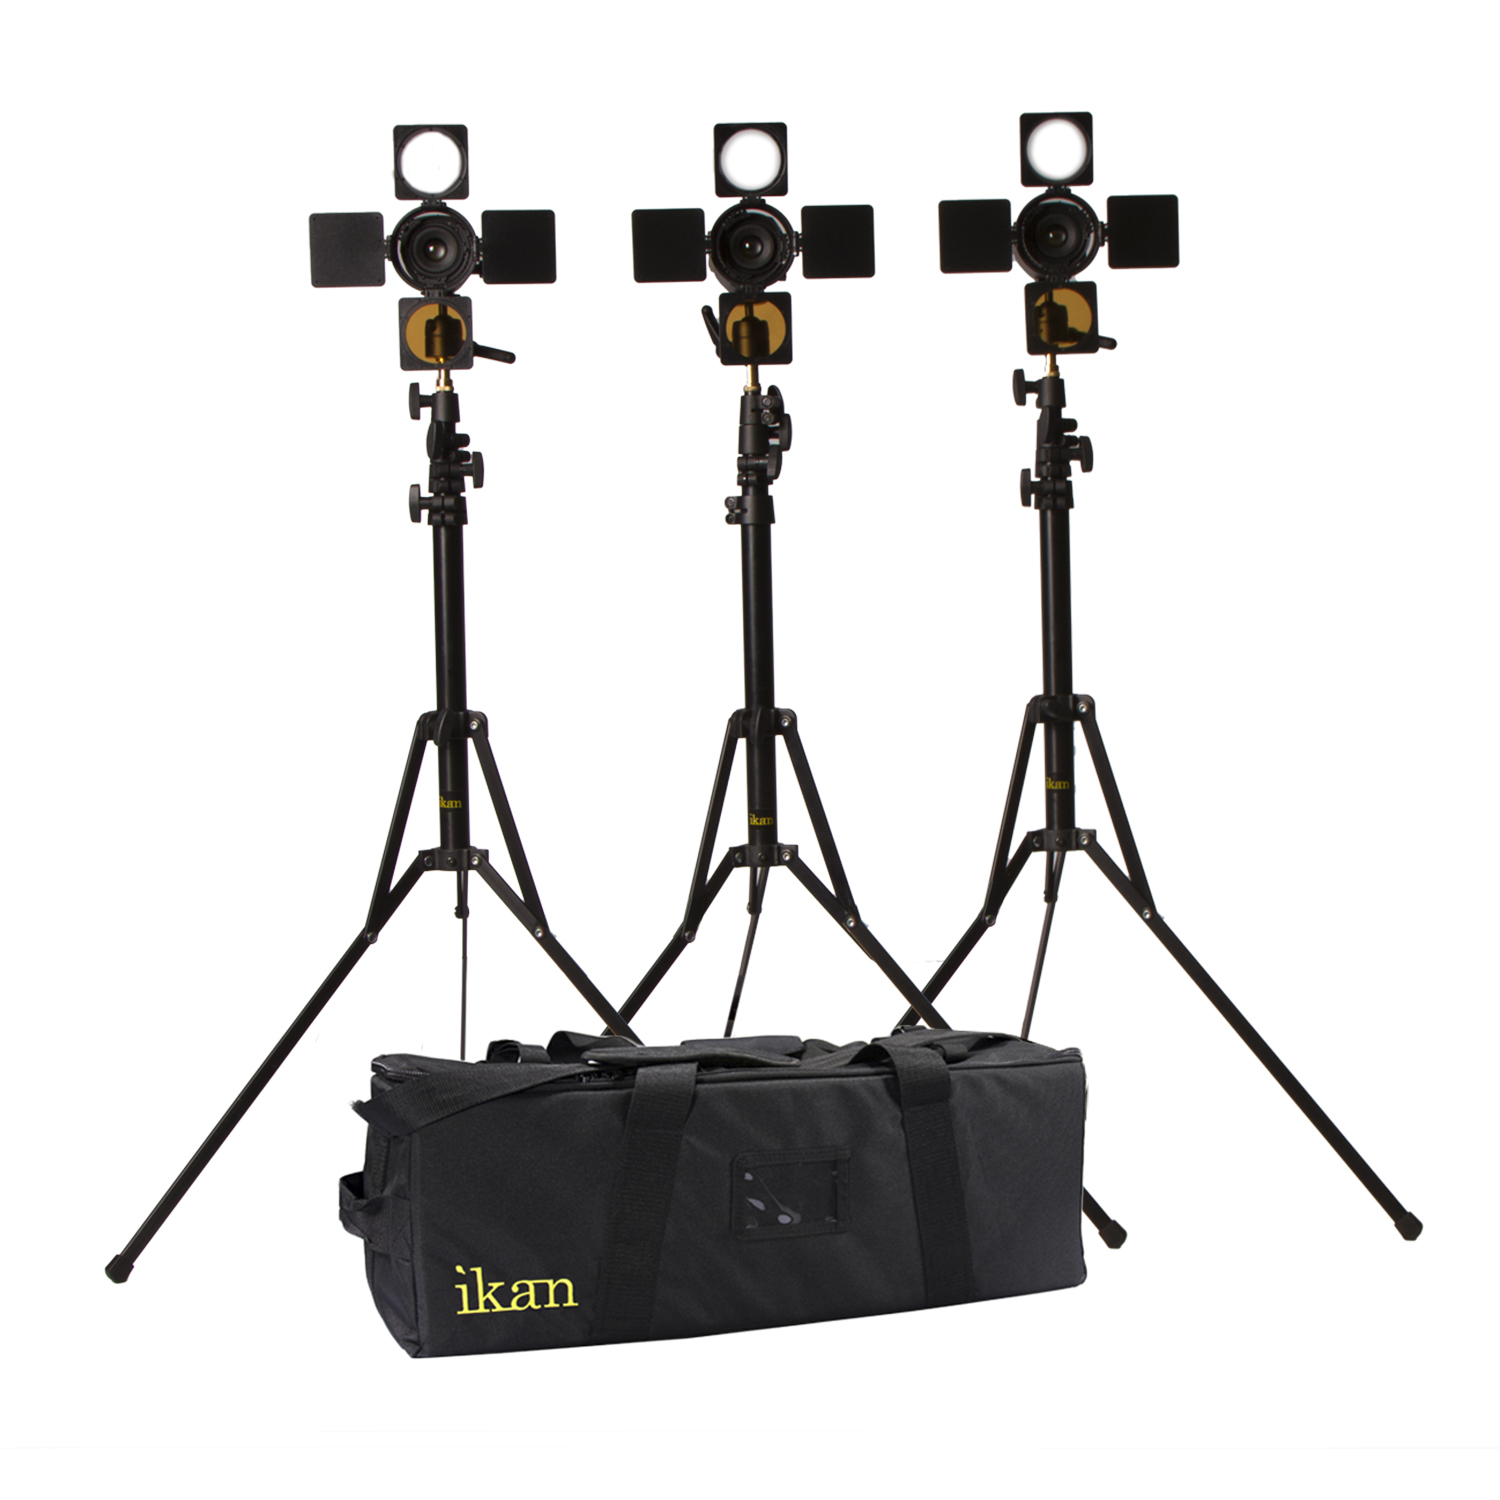
The 3-point light setup is extremely versatile and lets you configure the lights for key, fill, and back or edge light all at once. Alternatively, you could use the 3rd light to light up the background.
If you are planning on doing any chroma key or green screen effects, this lighting setup is the most useful since you need to light up the background for best results. The iLED 3-Point kit is the same as the 2-point light setup listed above, just with an added light, stand, and accessories.
Another alternative use for a 3-point light setup is to film a group interview or a larger scene. You can spread out the lights and balance them for even lighting or adjust lighting ratios for modeling effects. Raising one light higher than the other two is also an option for filming larger groups of people.
Control Is Key

Photo by Ketut Subiyanto from Pexels
The key light is your main light and how strong you have it shine will affect exposure and frame rate the most, adding the other lights will add exposure value as well as change up the ratios and balance of the scene.
Move the lights around, raise and lower them, and adjust the intensity for what exposure settings you want, all of which will also enhance the naturalness of the finished recording.
We Recommend
Lighting Options for Your Home Video Studio
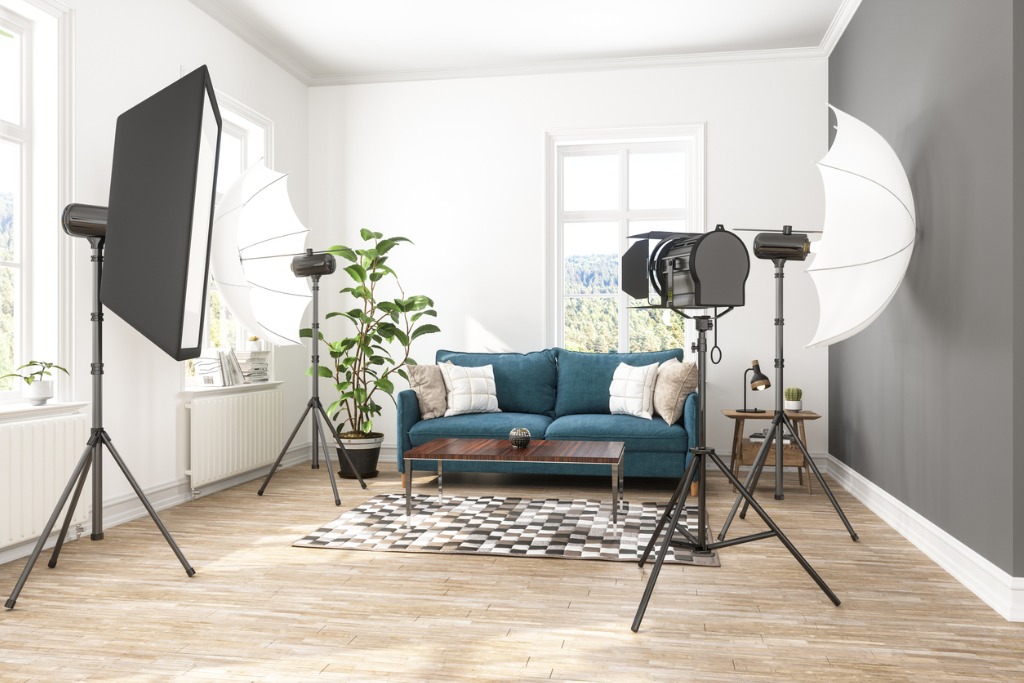
photo byonurdongel via iStock
Your home video studio can be as sophisticated as you want it to be without costing a fortune or heating up your place with lighting gear for video that uses incandescent or quartz bulbs. Our lighting options for video are numerous.
There are several types of home video studio lighting available for us to choose from, with LED lighting gear for video being at the top of my list. Learn more about home photography on our website PhotographyTalk.com.
Why LED? Several reasons, power efficiency, much cooler operating temperature, and good control over brightness levels and color temperature. The cool operating temps and the precise control of power and color make LEDs great choices as home video studio lighting.
Ikan Professional Video Production Equipment & Accessories
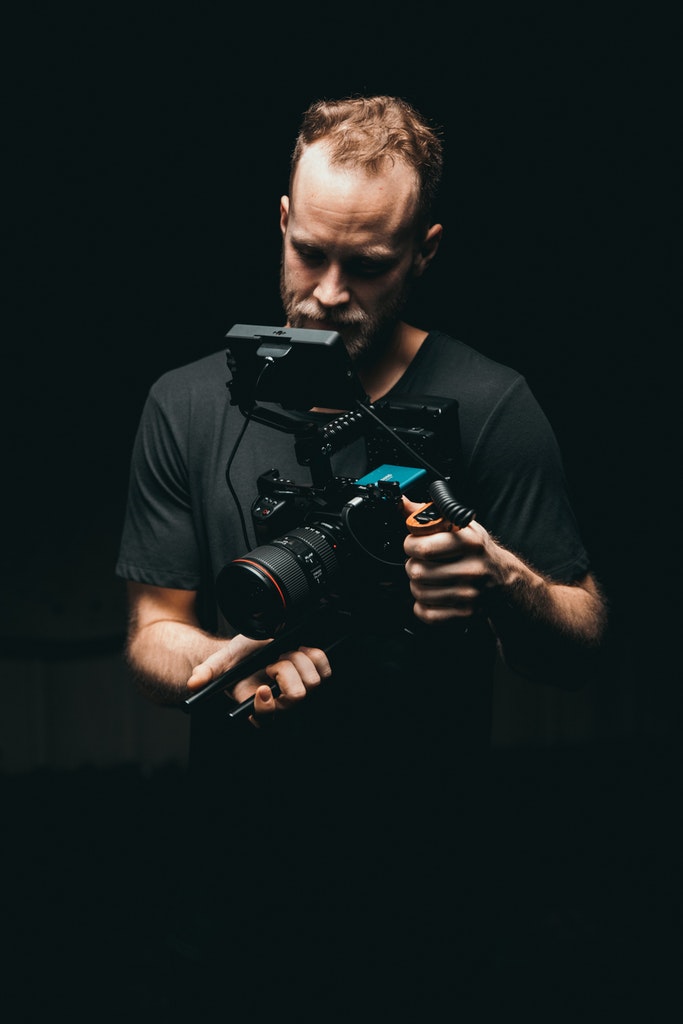
Photo by Kyle Loftus from Pexels
In order to find the proper equipment for specific A/V and videography needs, I’ve found specialty retailers often have a wider variety of better equipment than you see in general electronics stores.
Ikan Pro Video has the big things like lighting, filters, gimbals, and camera supports, plus those hard-to-find accessories that make video production workflow easier like cords, adapters, brackets, and other things. You can also check photography project ideas.
Here are three things I found on Ikan that could work for your own home video studio.
Lyra Half x 1 Bi-Color Studio & Field Light
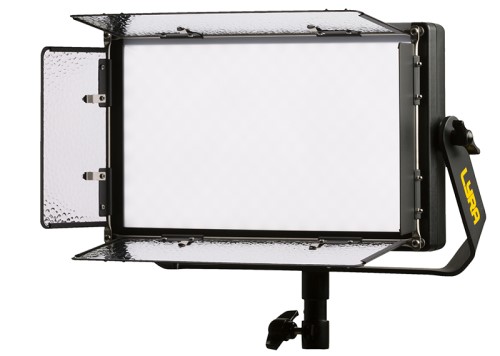
One of the soft panel lights from Ikan, the Lyra Half x 1 Bi-Color Studio & Field Light provides a soft wrap of light with adjustable brightness level and color adjustment available from 3200K to 5600K.
The light beam is a wide 110-degree angle that can be the main light, a solo light, or part of a light bank for large video studios. LED bulbs are consistent in the color setting regardless of the bright level setting and are also very cool in operation which helps in home studio applications.
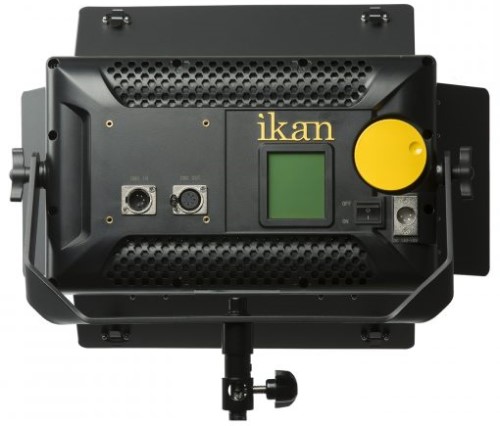
One of the features of this light is that it can be controlled via DMX. DMX is digital control of effects and lighting that can be accessed from a centralized control and can even be pre-programmed which is a great option for smaller one or two-man operations.
DMX is one of the better features of lighting gear for video in small studios. Controlling or pre-programming your light or light bank frees you up for other things like sophisticated camera operations that can add interest to your home studio video productions.
Helia 150 Watt 4-Inch Fresnel Bi-Color LED Studio Light
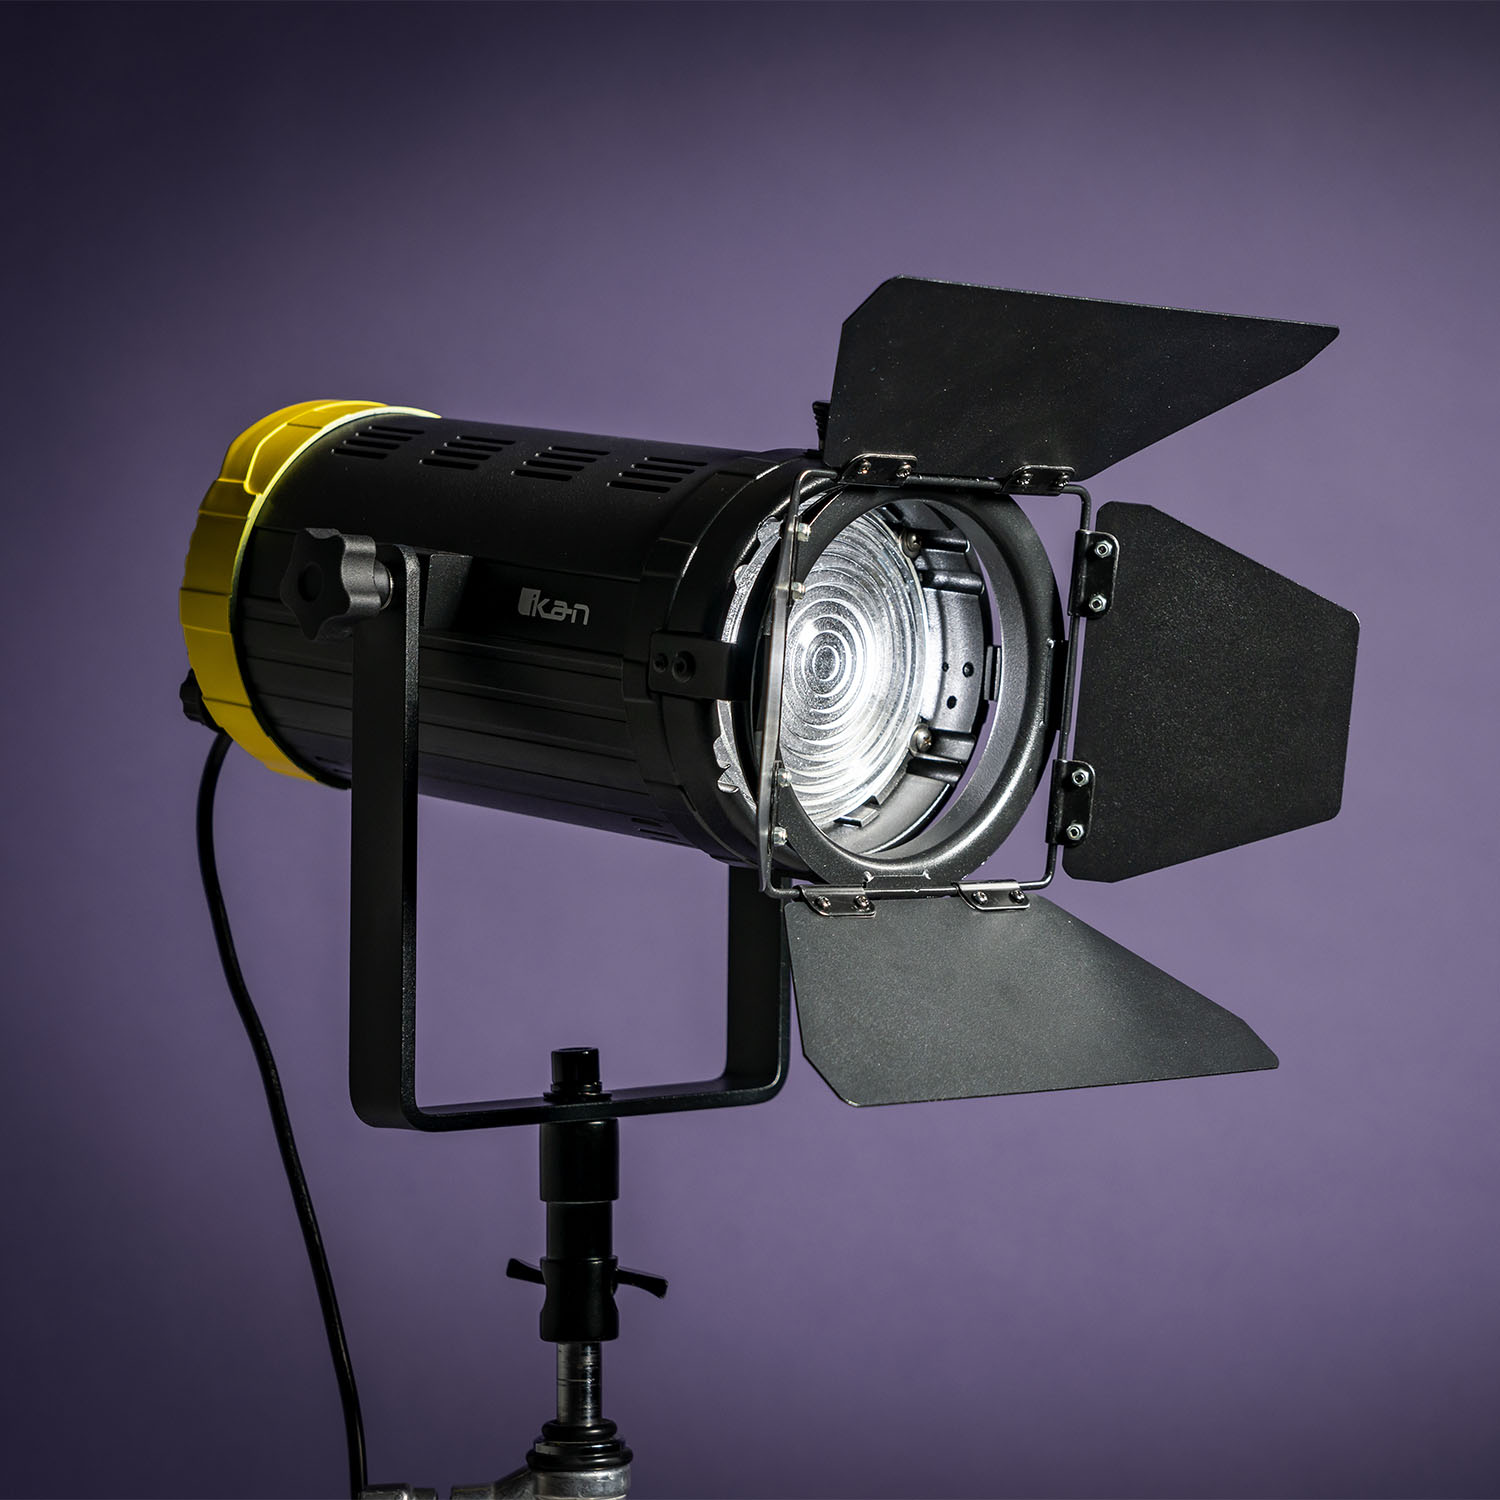
A fresnel light that is equally at home in a small studio or as part of a large production, the Helia 150 Watt 4-Inch Fresnel Bi-Color LED Studio Light is lightweight, very bright, and can be focused from a 70-degree angle to a tight 20-degree beam.
As part of a home video studio lighting setup, this light can be operated on its own or as part of a DMX controlled system. The LED bulbs are switchable from 3200K to 5600K so you can balance them with other lights in your studio. You can also view another post about creative photography ideas at home.
A fresnel lens on studio lights adds so much versatility to your home video studio lighting gear that you will wonder how you managed without one. A light like this can be used as an individual light source for spotlighting portions of the scene or to add light intensity to other video lighting configurations.

The secret to how a fresnel adds that light quality is the lens focuses the light emitted, just like a photographic lens focuses light coming in. The focused light from a fresnel has little loss on the edges of the beam, it’s a pretty hard edge, so you can plan certain effects around that light quality, too.
Fresnel lensed lights using bulbs other than LEDs produce so much heat that they are virtually unusable in small studio applications. The cooler running LED bulb lights make this a non-issue, so you can comfortably use this light in a spare room of your home or office that you set up as a home video studio.
Onyx 30W Bi-Color 2-Point LED Light Kit
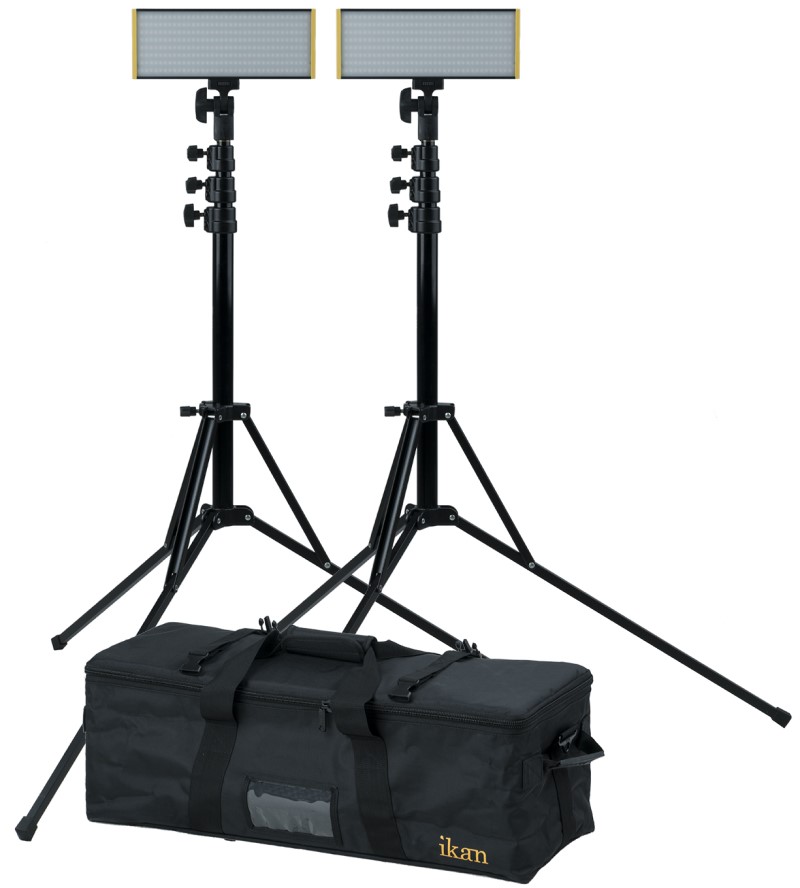
For anyone considering setting up a home video studio and wondering what types of home video studio lighting gear to obtain, consider a kit like the Onyx 30W Bi-Color 2-Point LED Light Kitwith 2 lights, stands, and a nice carrying case.
One of the fantastic features of this complete light kit is that the lights can be battery-powered, which opens up on-location video productions with excellent light quality.
First and foremost, these are good lights. The light quality is beautiful, with just the right mix of hard with soft. So you can easily modify them either way with simple accessories such as diffusers or barn doors, depending on which way you want to go.
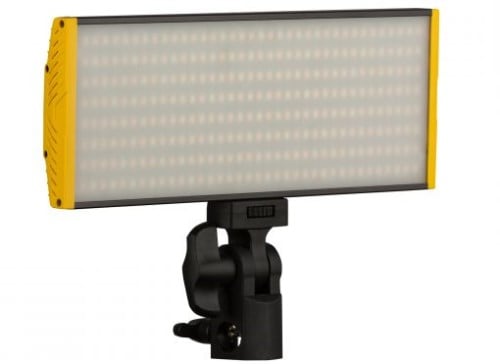
As beginner lighting gear for video, this is an excellent kit. It also works as part of a larger home video studio lighting configuration. The one feature I wish it had was DMX control capability, but with the simple to operate buttons and the clearly read digital rear display that isn’t a deal-breaker because these LED lights are very high quality.
Having the option of mounting one directly to the camera and not being tied down by power cords adds to the versatility of the kit as part of a larger system. So if you start out with a fine kit like this one you can incorporate them into any other lighting gear for video that you may end up with.
As a beginner home video studio lighting kit, as an on-location light kit, or as part of a larger set up, this is a good choice.
How Full Featured Do You Want Your Studio To Be?
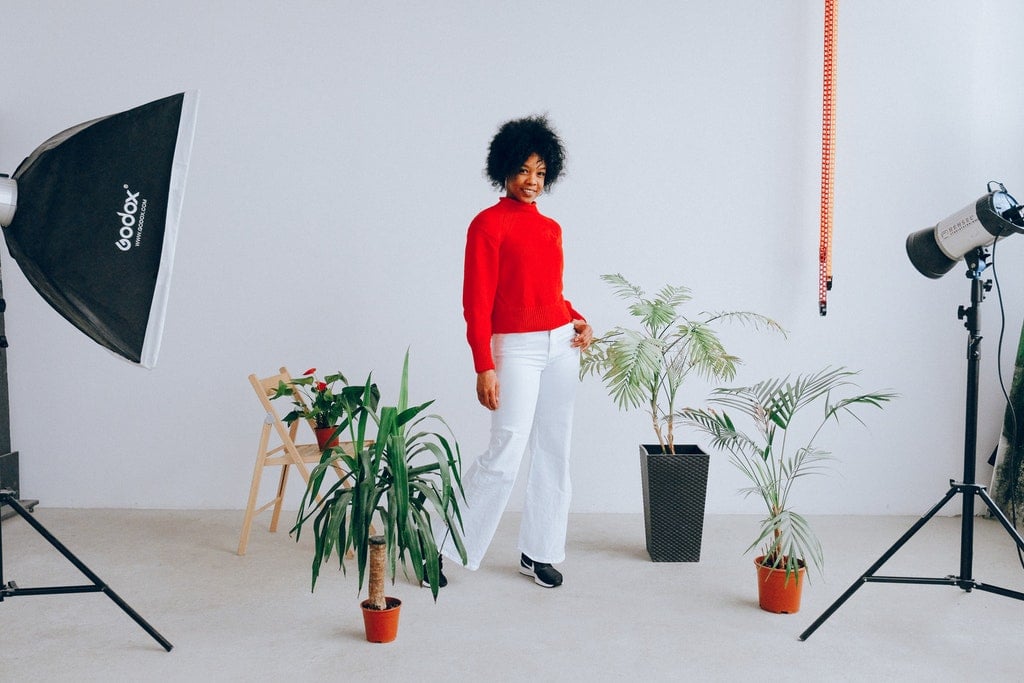
Photo by Anna Shvets from Pexels
The lighting options for video are truly outstanding with the availability of DMX control, cool LED bulbs, battery power, fresnel lens focusing, and extremely high quality. Your home video studio will certainly not be lacking the ability to light scenes creatively.
We Recommend
Lighting Tips for Landscape Photography

photo byRemedios via iStock
Landscape photography lighting is an interesting subject, there are many variables to consider. My lighting tips for landscape photography cover many of the common situations we all find in our landscape photography.
In these landscape photography tips covering lighting, we’ll discuss the types of landscape photography lighting including contrast and shadows, dynamic range control by HDR, dynamic range control by GND filters, Golden Hour, Blue Hour, inclement weather, and adding artificial lighting for landscape photography.
Contrast and Shadows

photo byMatthew Burke via iStock
Whether shooting for B&W or color, and even including videography, we are always concerned with and using contrast and shadow in our exposure calculations. It goes beyond exposure calculations, actually, since our composition choices can also impact our use or control of contrast and shadow.
A fantastic tool for understanding and controlling contrast, shadow, mid tones, and highlights is the Zone System designed and perfected by Ansel Adams and Fred Archer in the 1940s. While designed with B&W photography in mind, the Zone System is also usable in color imaging and videography.
I highly recommend that landscape photographers deeply examine the Zone System at least once. It will teach a lot about the nature of light and how we capture and control it photographically.
Another consideration about contrast and shadow is to consider the time of day we’re shooting. Late afternoon, early morning, and noon will all show a different contrast range and direction of shadow. Cloudy skies will also affect it.
HDR for Dynamic Range Control

photo bySmitt via iStock
At times, the dynamic range is just too much for our sensor to handle, even with our advanced exposure skills and composition choices. Digitally, we have an amazing option available, high dynamic range (HDR) photography.
Also known as the bracket and merge method or technique, HDR expands the dynamic range or final processed image by merging together different exposure value image files into one. We shoot some images for highlight detail, some for shadow detail (using a tripod to keep the images in register) and then post-process them in a merge to one balanced image.
You can find a lot of discussion about bracket and merge techniques in our various real estate photography articles, since it’s a major tool for that industry. A previous study of the ideas behind the Zone System will give insight into how to calculate the method for both shooting and processing.
ND & GND Filters for Dynamic Range Control

To capture a dynamic range challenged scene in one exposure, the use of ND filters, specifically graduated (GND) filters is often beneficial.
The reason I separate dynamic range control into two distinct sections is because some scenes will work best with one of the methods over the other. A scene type that greatly benefits from using GND filters is any type of scene that has a fairly distinct line separating one exposure value from the other. If there isn’t one, then HDR might be the better choice.
I like to use filter holder systems and a tripod when shooting with GND filters so that I can position the transition edge in the exact position I want it to be. The transitions from light to dark in the filters are different as well, some lines are hard or rapid, others are soft or more gradual.
Learn More:
Golden Hour and Blue Hour

photo byAleksandarNakic via iStock
There are two lighting conditions that both occur twice a day that can have a great impact on the landscape photography lighting, they all have to do with the position of the sun in the sky. They are Golden Hour and Blue Hour. Both can be seen either in the early morning or the late evening.
Golden Hour occurs when the sun is lower in the sky than throughout most of the day. Having more atmosphere to pass through causes sunlight to take on a very pleasant, warm color tone. It also softens it a bit, making it less harsh in regards to shadow/light transitions.
Depending on season and latitude, Golden Hour might range from 30 minutes to an hour and a half after sunrise or before sunset.

photo byMatthew Troke via iStock
Blue Hour is when the sun is below the horizon, just after sunset or before sunrise. It can also last a variable amount of time depending on season and latitude, though the light intensity and quality changes much more rapidly during Blue Hour than Golden Hour.
Blue Hour is a very cool light quality and color temp, evoking a much different mood than the warmth of Golden Hour photography.
While you're playing around with early morning or late evening lighting tips for landscape photography, you might also want to do some experimentation with sunset/sunrise images and astrophotography, both of which are enjoyable and exciting.
Shooting In Inclement Weather

photo byfotoVoyager via iStock
As you have heard from me before, don’t put your gear up when the weather turns. In snow, rain, fog, and other conditions from mild to extreme, there is an image just waiting to be captured.
The trick to shooting during weather is to have your camera protected from the elements and also to dress for comfort and safety ourselves. There are many products available for either concern from a variety of places. Besides our favorite camera stores, also check out outdoor equipment retailers that focus on recreation.
Artificial Lighting

Sometimes, all of the lighting tips for landscape photography still come up a little short and require us to add artificial lighting for landscape photography.
The types of landscape photography lighting that I prefer are portable LED continuous lights. I lean towards continuous lighting so that I’m not eliminating videography as one of options and also because I can see exactly what I’m doing in my still photography as I change positions, color temps, and intensity.
An excellent and very portable example of an LED light that can go with us into the great outdoors is the Onyx OYB240 LED Light from Ikan. It is small and lightweight, making it easy to carry with us, is durable, runs off of rechargeable batteries, and has variable power and color temperature.
The trick to using artificial lighting for landscape photography is to keep it looking natural. Which is why being portable is valuable, so you can place in just the right position. The variable power and color temp of LED lighting also lets us carefully blend in the added light to our scene. We usually only want to enhance the lighting, not overpower it.
Other Landscape Photography Tips

photo by tobiasjo via iStock
I have lots of other tips for landscape photography in general and for more detailed information on lighting tips for landscape photography covering GND filters, tripod choice and usage, Zone System, HDR, and so on. Flip through a couple of more articles while you're here.
Then, go out into the landscapes and start capturing them. Let us see what you’ve done and what techniques you like in our chat forums. See you there!
Learn More:
- How To position Lights for Photography
- The True Value of a Good Tripod
- 5 Landscape Photography Accessories You Can’t Live Without
We Recommend
Mirrorless Camera Accessories You Need Right Now
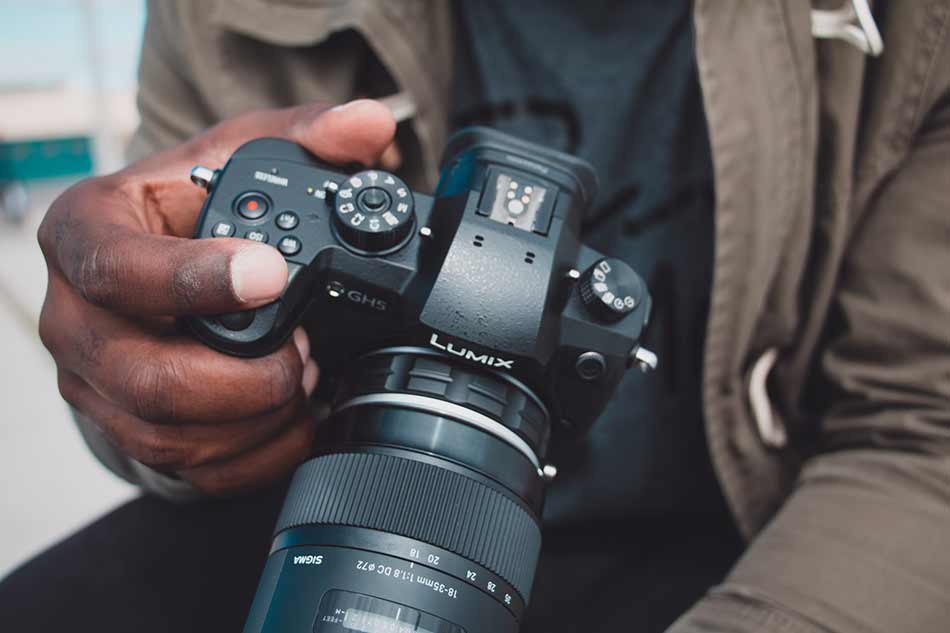
Photo by Jeff David King on Unsplash
I don’t want to say that the days of the DSLR are done, but I can’t help but wonder how many more years that the likes of Canon, Nikon, Sony, and other major companies will continue to make them.
With so many mirrorless cameras now available, and with Canon and Nikon jumping into the mirrorless deep end as of late, more and more photographers are bound to make the switch to mirrorless.
The question is, once you go mirrorless, what accessories do you need to complete your kit?
Here’s a few recommendations that I’ve enjoyed using with my Nikon Z7, Panasonic GH5, and Sony a6400 as of late.
Top Mirrorless Camera Accessories: Haida 77mm NanoPro Multi-coated Circular Polarizer Filter
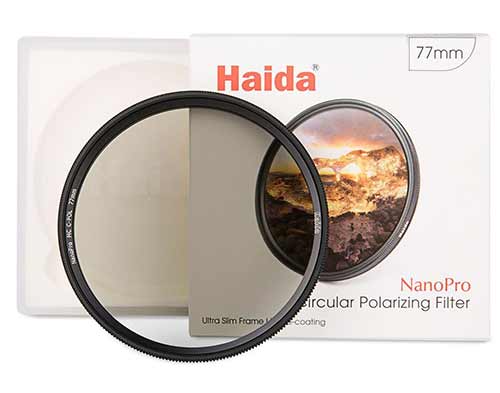
I picked up a Zeiss Batis 18mm f/2.8 lens a few months ago for my Sony a6400, and I enjoy using that combination of camera and lens for shooting landscapes.
On the a6400, which is a crop sensor camera, this lens has an effective focal length of 27mm, which isn’t as wide as I’d like for some landscapes, yet it still provides a pleasing view of the subject matter.
More to the point, this lens is ludicrously sharp, so elements from near to far are rendered in gorgeous detail.
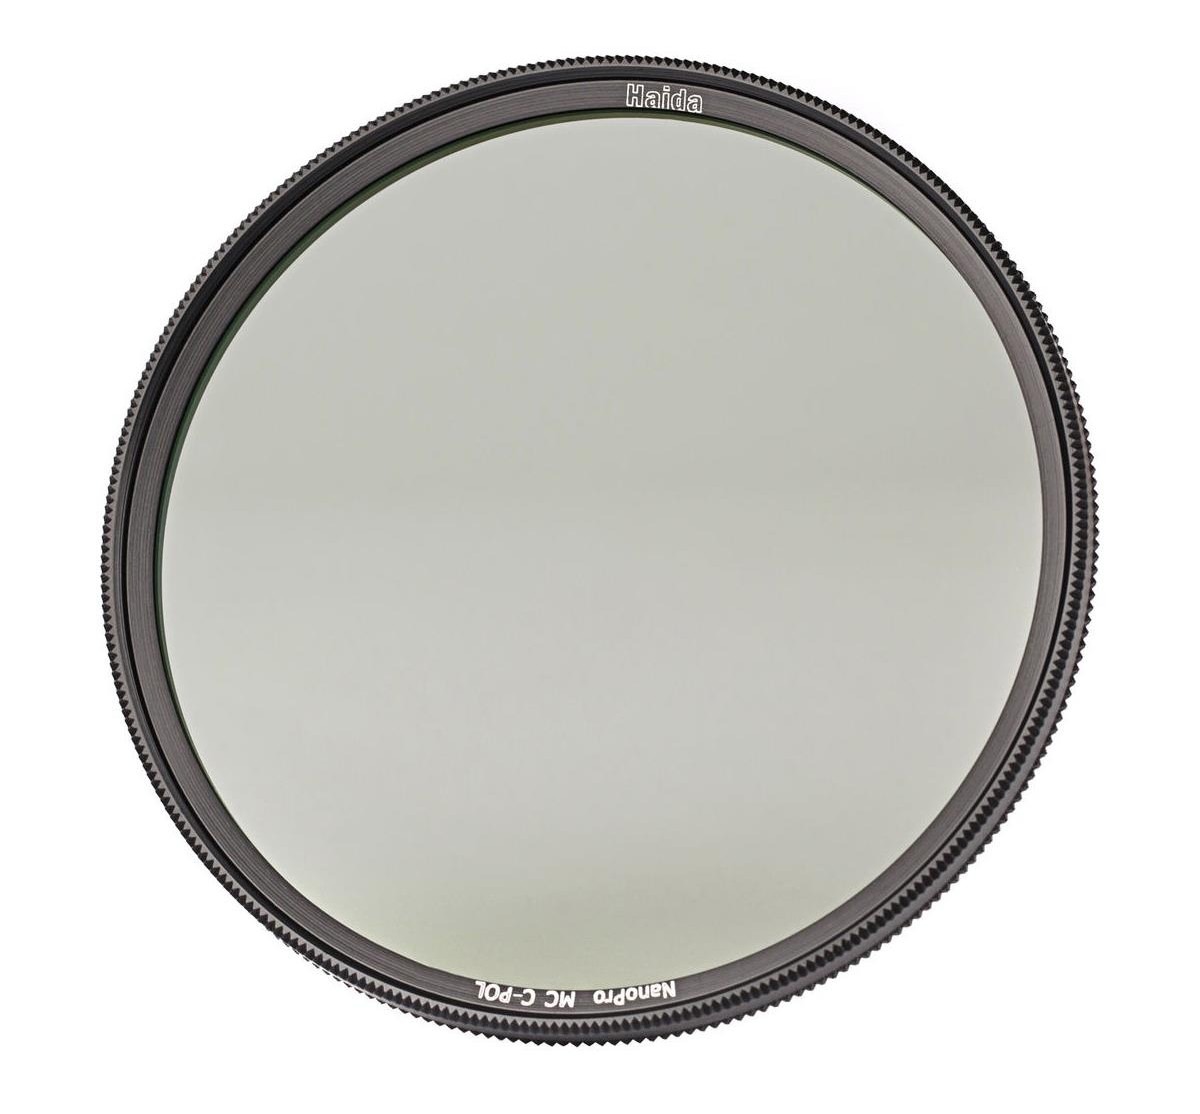
Helping matters is my Haida 77mm NanoPro circular polarizing filter.
At just $80, it won’t break the bank, which is a good thing since that Zeiss lens isn’t exactly cheap.
But just because it’s an affordable filter doesn’t mean that it skimps on performance…
Like any quality circular polarizer, this filter helps reduce reflections and glare off of water and non-metallic surfaces while also minimizing atmospheric haze.
On top of that, the filter boosts the contrast in the sky, making the white clouds brighter and the blue atmosphere deeper and more saturated.
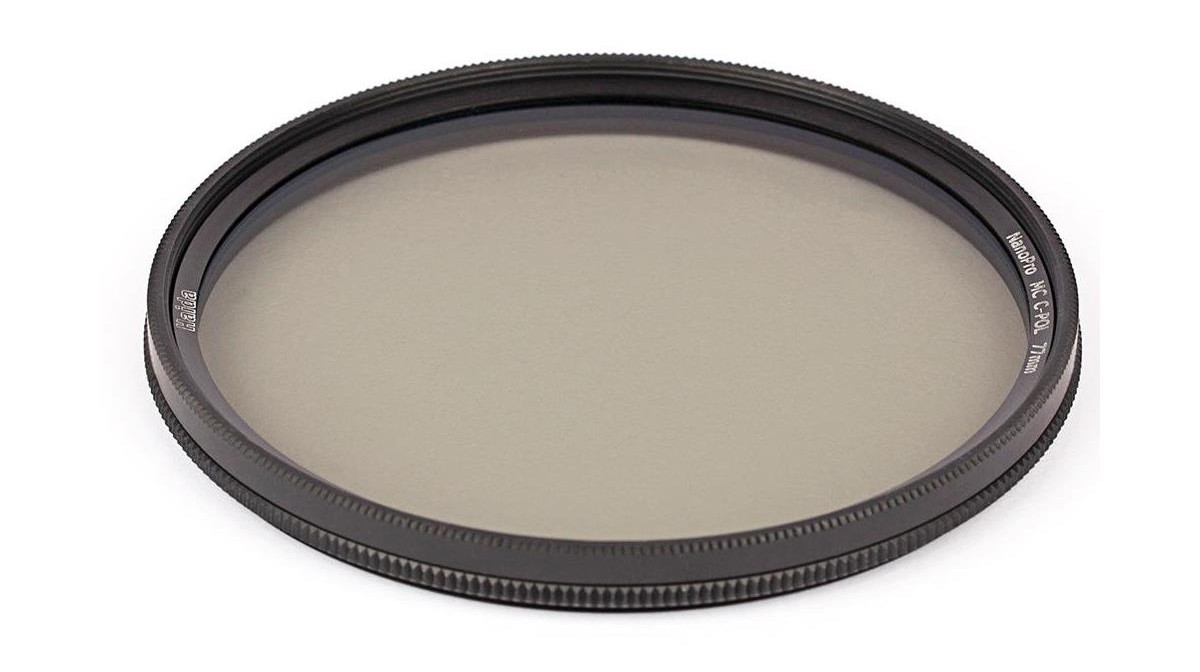
And since this filter is made of optical glass, I get excellent clarity, contrast, and color fidelity.
Additionally, Haida has incorporated 10 layers of multi-coatings to minimize reflections, protect the filter, and reduce the need for cleaning because oils and water bead off the surface of the filter.
I appreciate the thin mount on this filter, too - just 5mm thick, it doesn’t cause vignetting when used with a wide-angle lens.
This is just a well constructed and well-designed filter that will help you achieve improved photos with your mirrorless camera.
Learn more about the Haida 77mm NanoPro circular polarizing filter
Top Mirrorless Camera Accessories: E-Image EK650 Professional Video Tripod

When I’m out shooting videos with my Panasonic GH5, I need a good, solid tripod to support the camera, and for that, the E-Image EK650 is a great choice.
Not only does this tripod support up to 11 pounds of gear, but it also offers a nice height range of 30.5-66” so I can vary the eye level of the footage I’m shooting.
The fluid head that comes with the tripod has a 75mm bowl and a fixed counterbalance that allows it to support the weight of your gear. There are also independent pan and tilt locks, a quick-release plate, and a removable right-sided pan bar.

The tripod has twist leg locks that make for easy setup and help prevent accidental disengagement of the lock, as sometimes occurs with flip-lock mechanisms.
To give the tripod more support, there’s a removable mid-level spreader that improves stability as well as removable rubber feet with spikes underneath, which are perfect for uneven or slippery terrain.
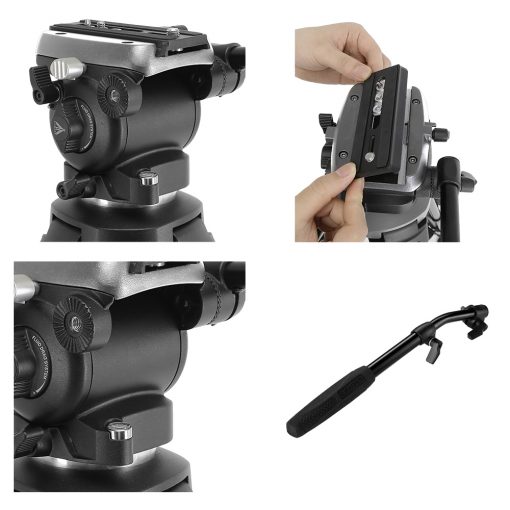
At around nine pounds, this tripod is lightweight enough to easily carry from one location to the next, too.
This tripod has been a durable, reliable rig addition to my kit and has proven its worth whether I’m filming in the studio, in the city, in the country, and points in between. And at $200, it’s well-priced!
Learn more about the E-Image EK650 Professional Video Tripod
Top Mirrorless Camera Accessories: HEX Ranger Sling Bag

Okay, okay, the HEX Ranger Sling Bag is marketed as a DSLR bag, but this thing is so versatile and so well put together that it can certainly be used to carry mirrorless gear like my Nikon Z7.
What makes this a great mirrorless bag is that it is designed with the utmost attention to detail and use of space.
Where other sling bags are on the bulky side and often don’t fit you all that well, the HEX Ranger fits snugly (but not too snugly!) and stays in place on your bag as you maneuver around.
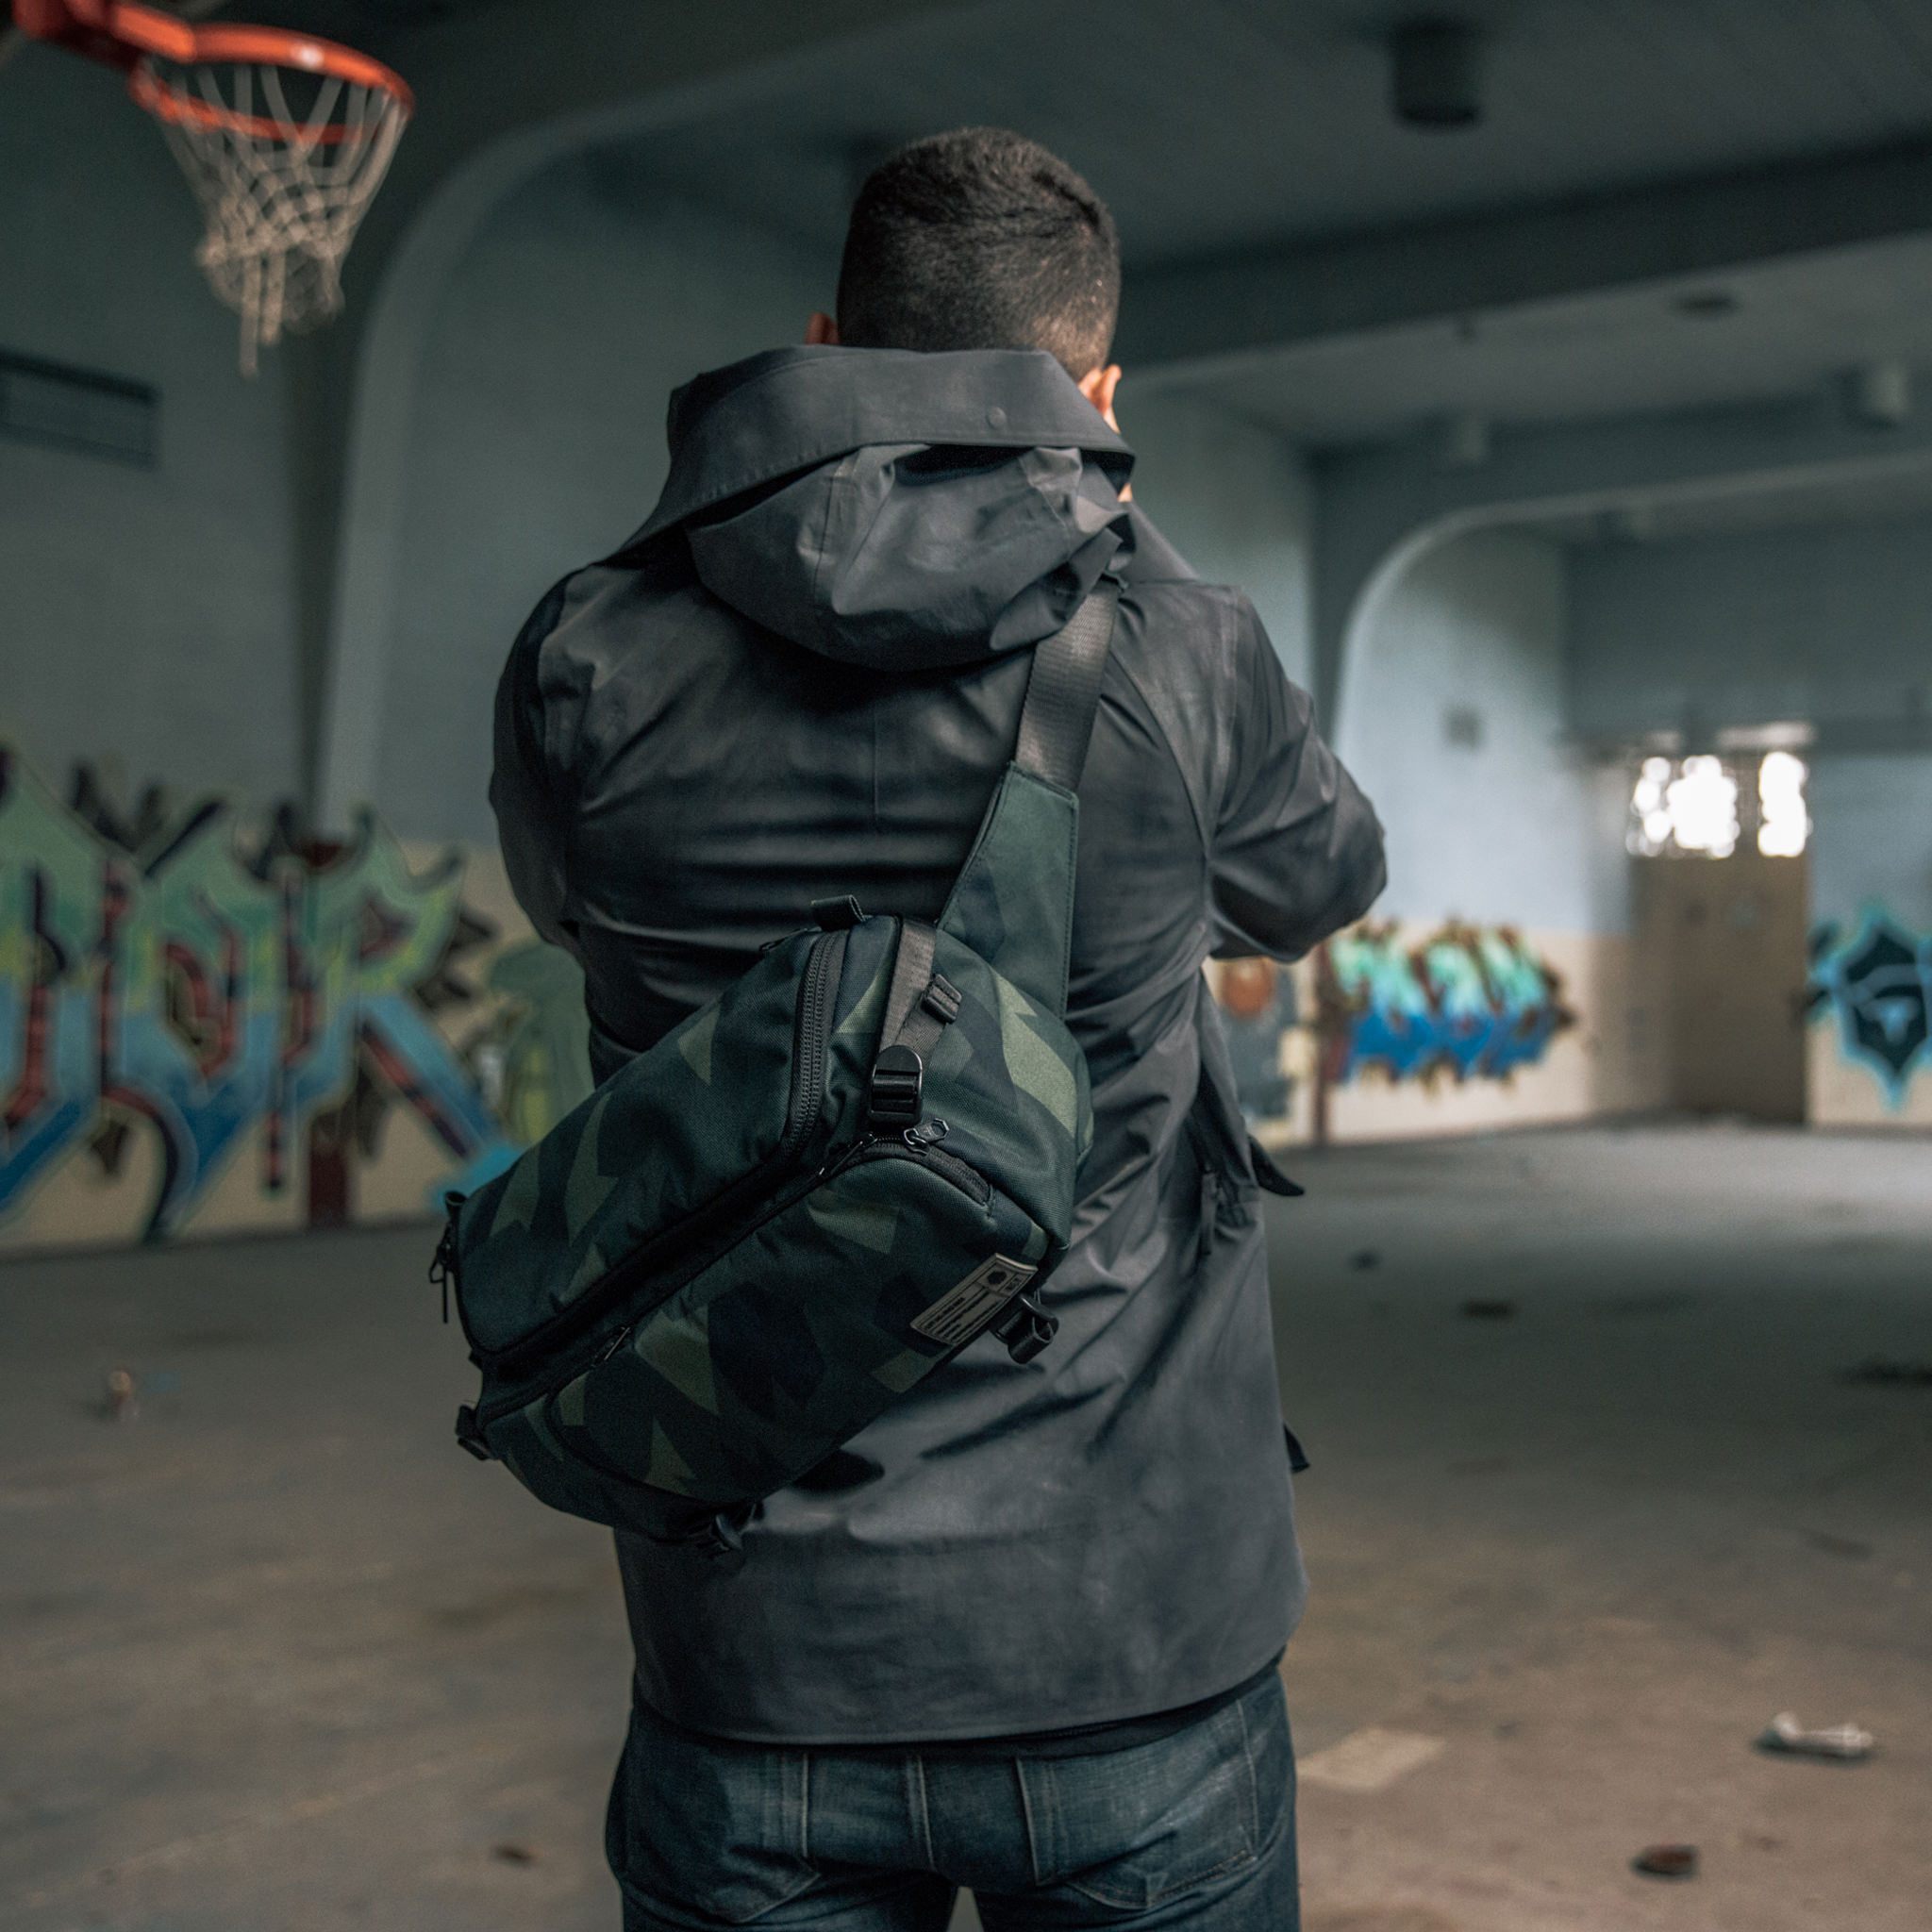
Shooting with a mirrorless camera is all about taking advantage of its small form factor and light weight, and this bag mirrors that.
It weighs just 1.3 pounds and measures 14.5"L x 7.25"W x 4.75"H. As you can see above, it hugs your body and is totally unobtrusive, yet easily accessible to get your gear.
Speaking of access, this bag has a large top opening to access your gear and tons of pockets for storing your phone, glasses, keys, tablet, memory cards and other items.
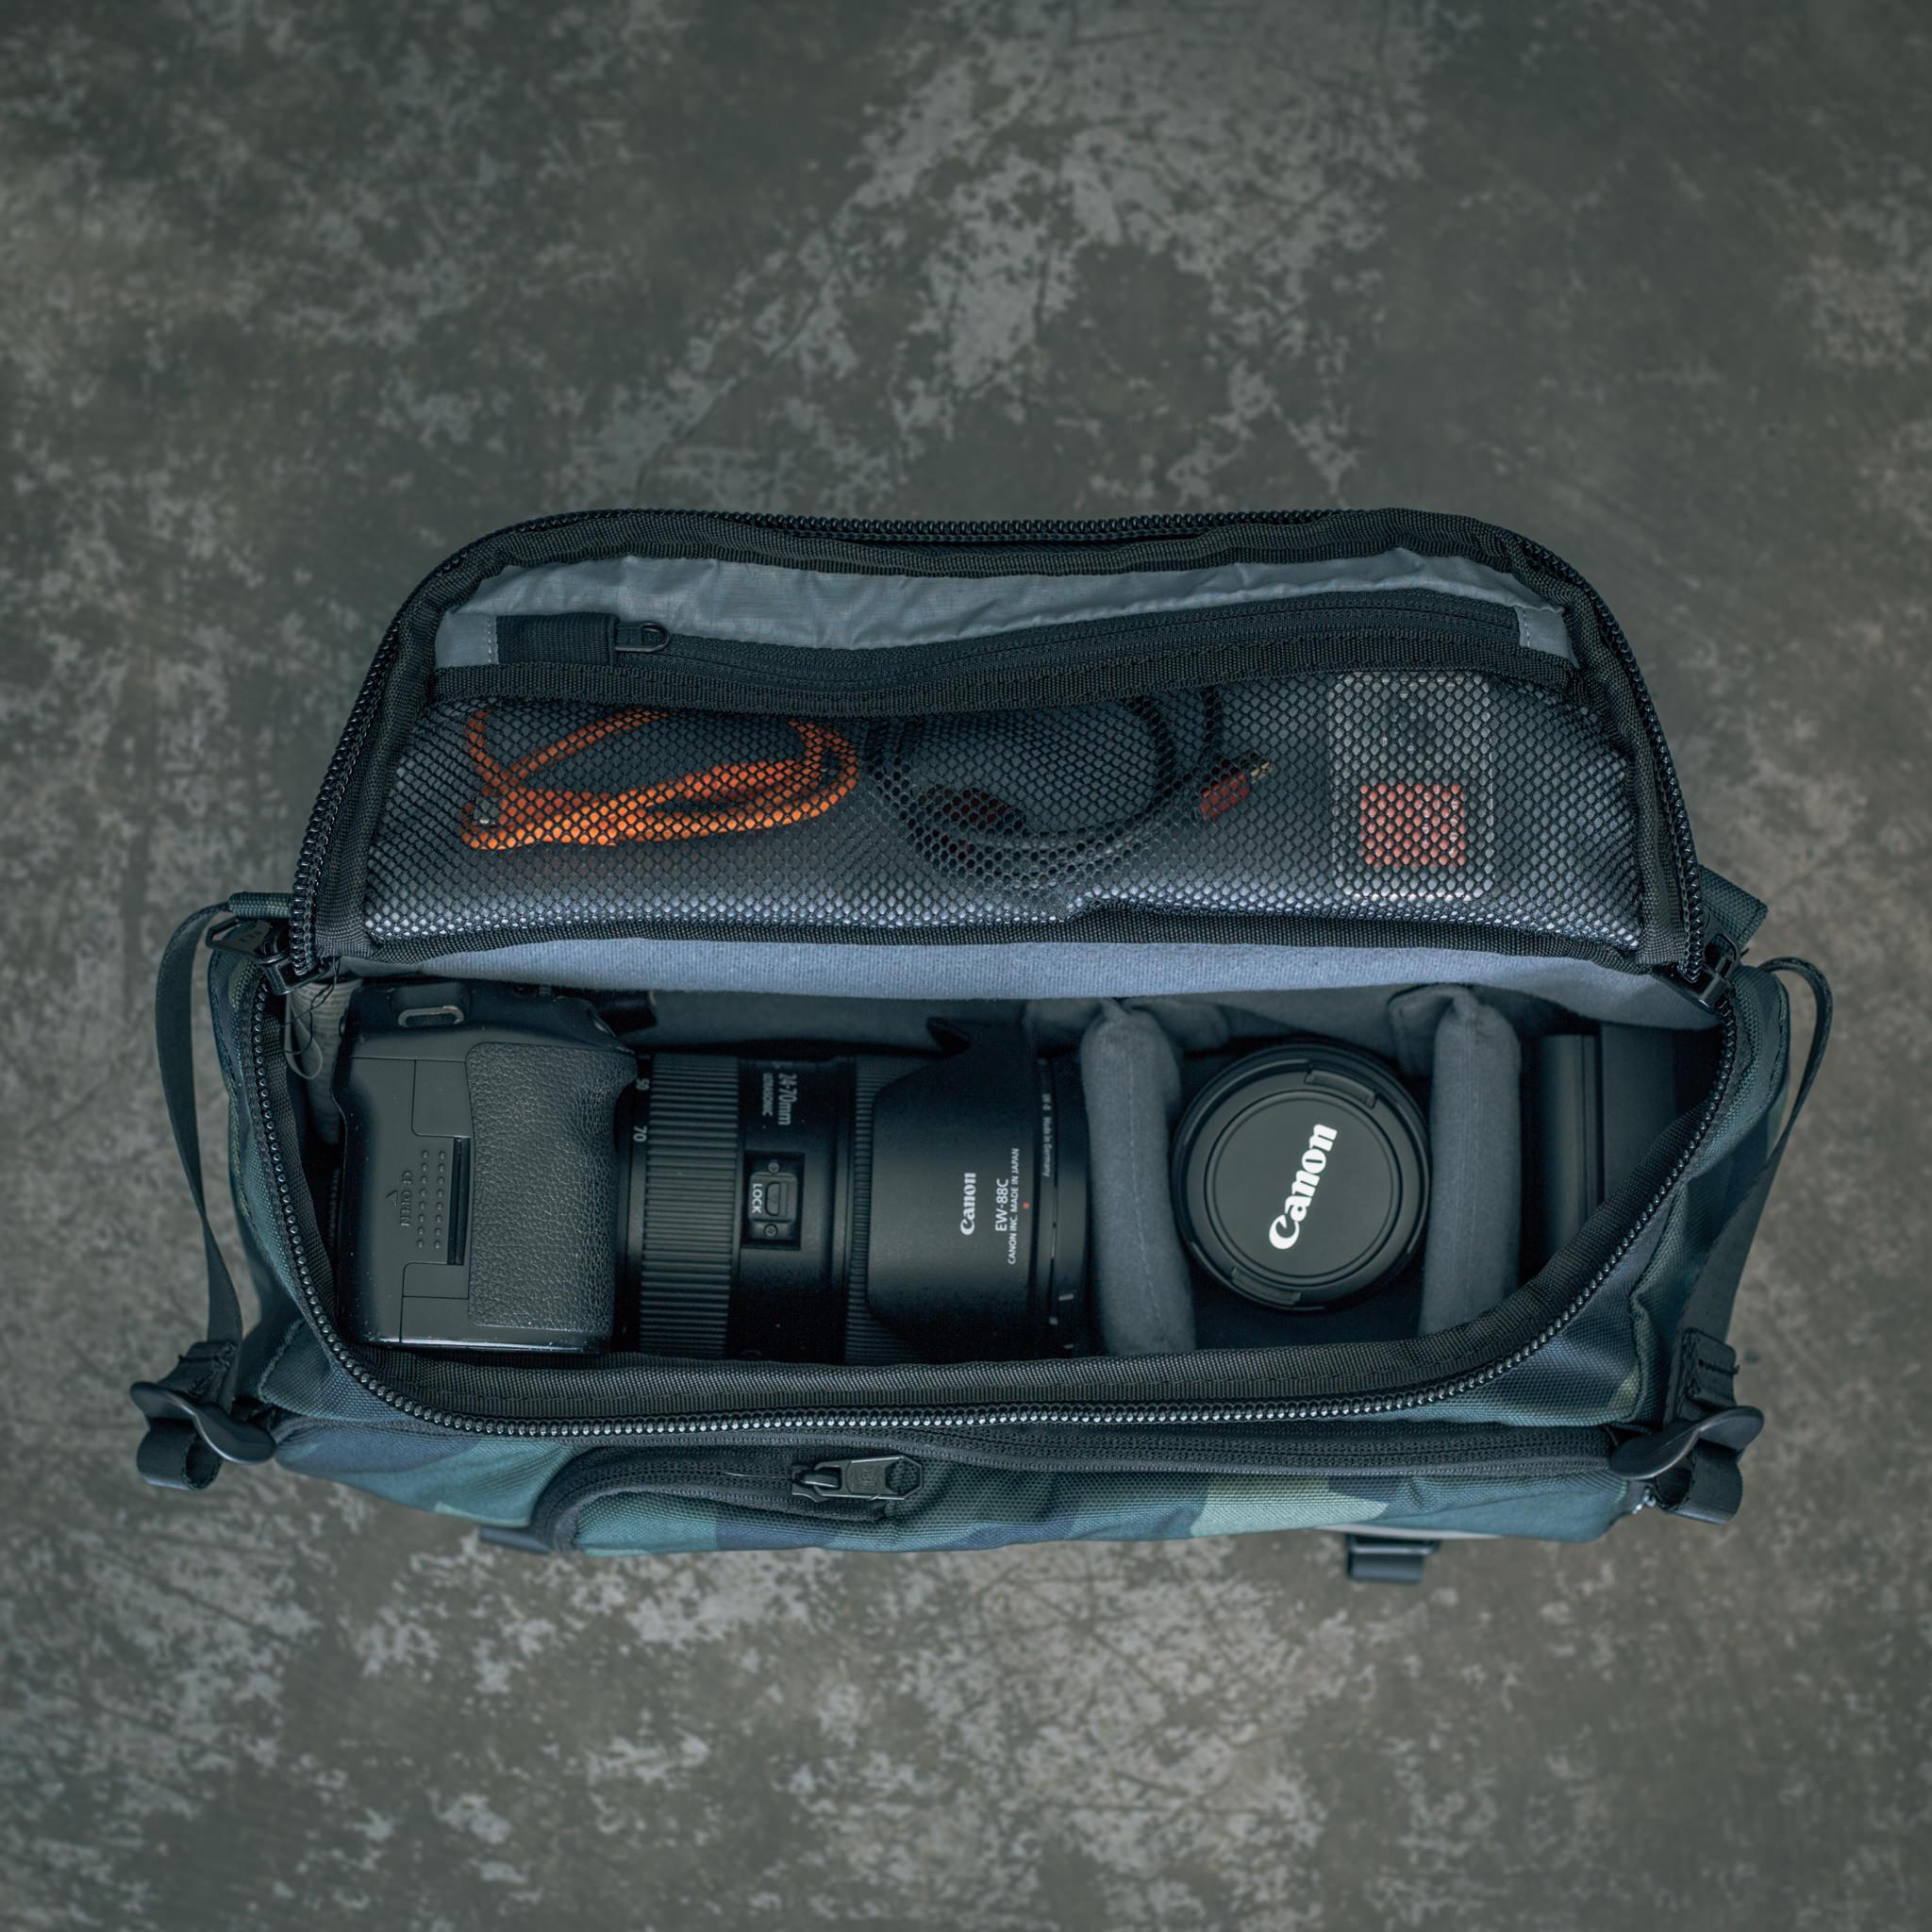
This bag is made of premium, water-resistant Cordura and has genuine YKK zippers with custom metal pulls that offer superior durability and performance.
Inside, the fold-out bottom panel allows the bag to be folded flat for packing while the fleece-lined main compartment offers configurable and removable partitions to keep your gear safe and sound.
HEX simply thought of everything when they designed this bag. And since it can hold eight liters of gear, you can bring your mirrorless camera, a couple of lenses, a tablet, and other accessories, no problem!
Learn more about the HEX Ranger Sling Bag
Top Mirrorless Camera Accessories: Camera Canopy

Try as you might to predict the weather and rely on the weather forecast, at some point you’re going to be out shooting and find yourself in a rain storm that wasn’t expected.
More to the point, there are many occasions when you might want to go out shooting, only to find that the weather is rainy and dreary. That shouldn’t stop you from going out to take photos, though.
A while back, I picked up a Camera Canopy for my Nikon Z7, and it has been a great addition to my kit for those days when the rain just won’t go away.

What’s so clever about the Camera Canopy is that it attaches to the hot-shoe mount of the camera and covers both the camera body and lens from above.
That means that you have unencumbered access to the camera’s buttons and LCD, which is certainly not the case when you use a typical bag-like rain cover.
What’s more, since the Camera Canopy extends beyond the end of the lens, it protects the lens glass from moisture so you can shoot during a downpour without worrying that water droplets are going to interfere with the shot.
If you’re a landscape photographer with a mirrorless camera, Camera Canopy is a must-have for your kit!
Learn more about the Camera Canopy for Mirrorless Cameras
Top Mirrorless Camera Accessories: Litra Torch LitraPro
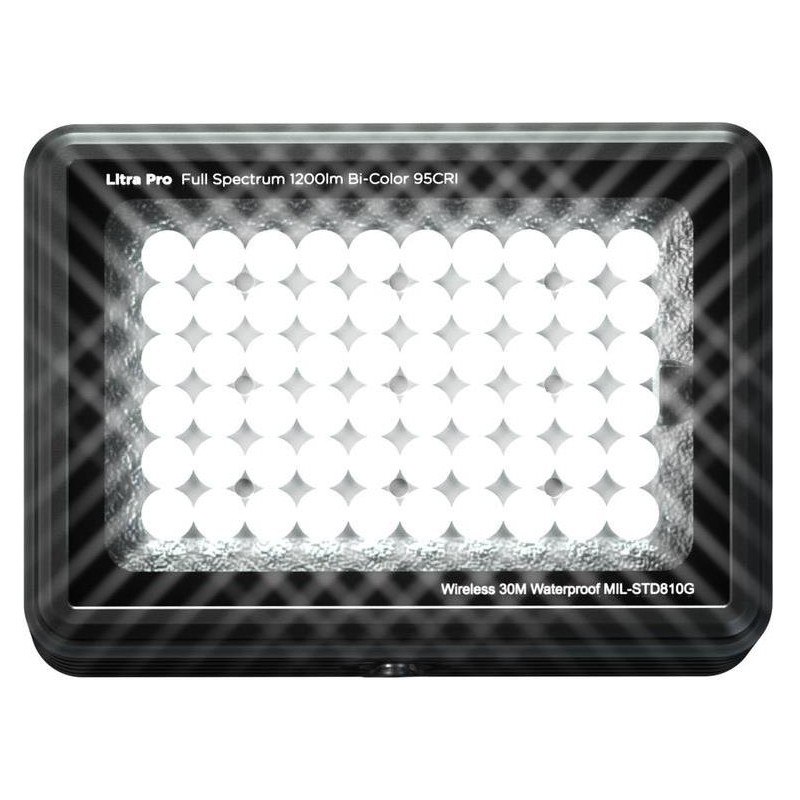
No matter if you’re taking still photos, videos, working in the studio, or working in the field, having a solid light source is a must.
But what you don’t want is to lug around big, heavy lighting gear, which is why the Litra Torch LitraPro is my go-to light.
Measuring just 2.8 x 2 x 1.2" and weighing 6 ounces, this little light is ultra-portable and won’t take up hardly any space in your camera bag (that’s it on top of my Sony a6400 below).
But don’t think that because it fits in the palm of your hand that it doesn’t pack a mighty punch…
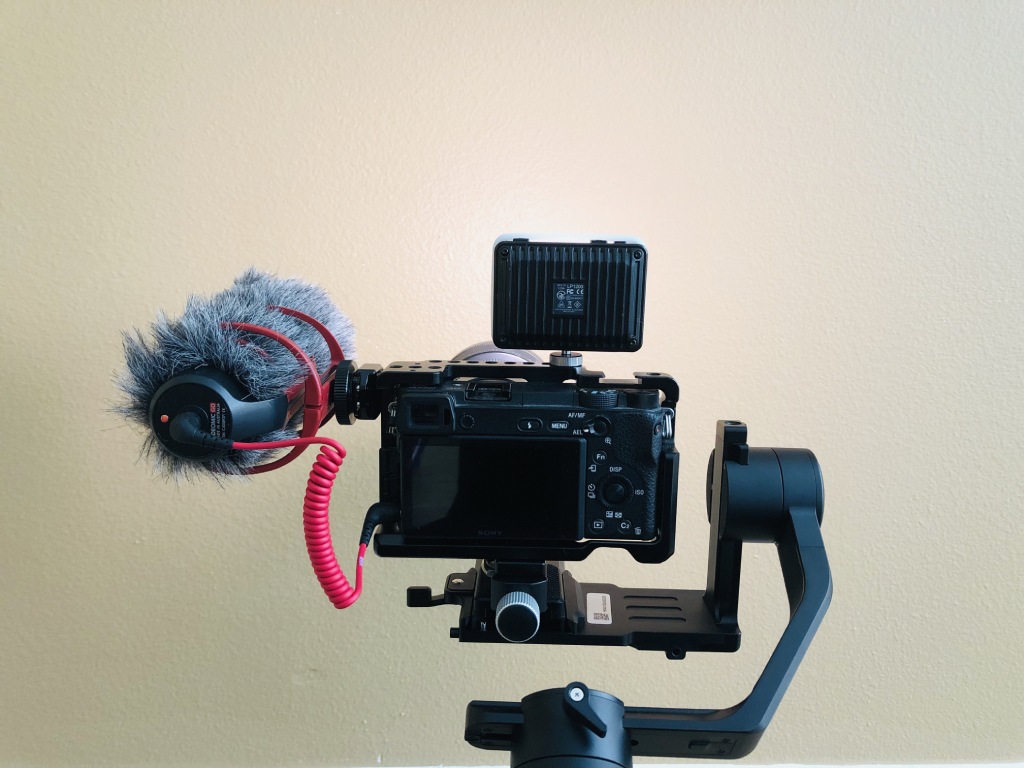
With 60 LEDs that can pump out 1200 lumens of brightness, this little light punches above its weight class.
Not only that, but the LitraPro is a full-spectrum bi-color light so you can adjust the color temperature (from 3000-6000K) to suit the specific shooting situation.
It puts out good quality light, too, with a CRI of 95.
On top of all that, this light has a 10-hour rechargeable battery, multiple mounting points, Bluetooth, and is waterproof up to 90 feet.
In other words, it’s a go-anywhere, do-anything light!
Learn more about the Litra Torch LitraPro
Top Mirrorless Camera Accessories: Batteries and Battery Chargers
Mirrorless cameras don’t offer the same battery performance as their DSLR cousins, so it’s important to have extra juice on your outings.
For all three of my mirrorless cameras, I have three spare batteries, all of which are fully charged the night before a shoot.
Likewise, a dual battery charger enables faster charging, that way they’re ready to roll for the next day.
Though batteries and chargers aren’t as sexy as the items outlined earlier, they’re still a necessity!
We Recommend
Must-Have Accessories for Panasonic GH5 Content Creators
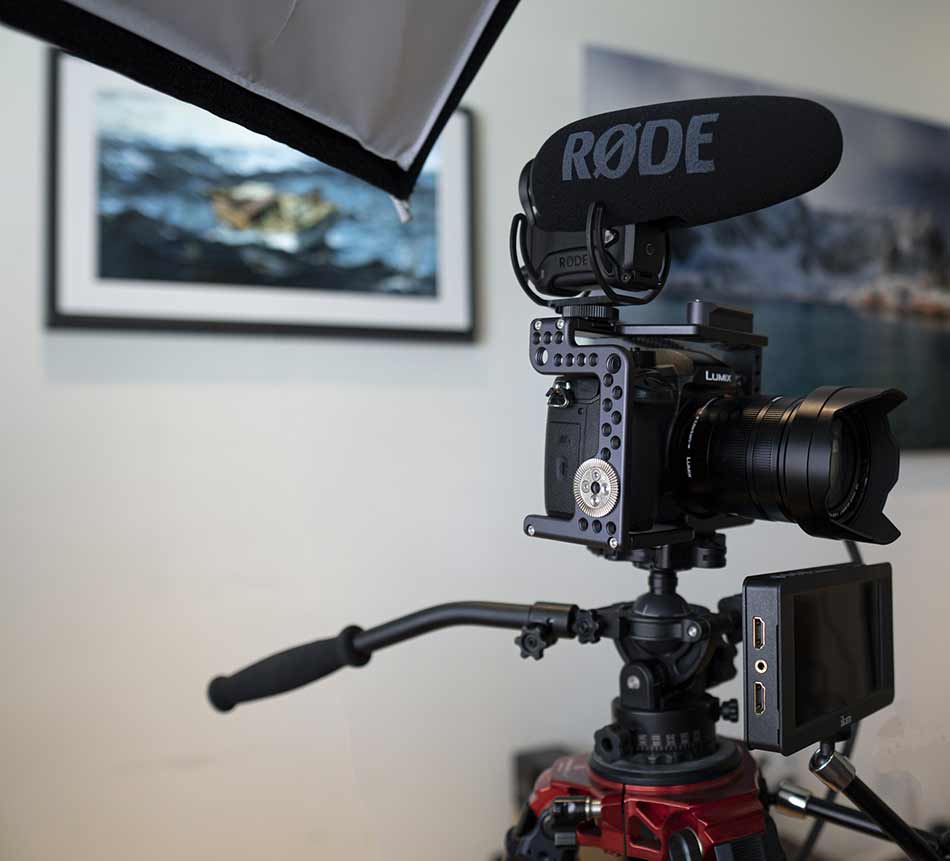
I picked up a Panasonic GH5 a few months ago, and as I explain in my Panasonic GH5 review, though this camera is a couple of years old, it's still one of the very best filmmaking cameras on the market today.
Combined with a host of lenses for the GH5 that work beautifully for both stills and videos, the GH5 has quickly become one of my favorite cameras. I'm saying that even though I've always been a Nikon shooter!
In fact, even though the GH5 is a couple of years old, I think it's still a solid buy in 2019. Find out why in my video below:
But no matter how good the GH5 does with video, you still need a few accessories to get the most out of this incredible camera.
Below, I've listed a few must-have accessories for Panasonic GH5 content creators.
Table of Contents
- First Things First: Panasonic GH5 Video Specs
- Must-Have Accessories for Panasonic GH5: Ikan Stratus Cage
- Must-Have Accessories for Panasonic GH5: RODE VideoMic Pro
- Must-Have Accessories for Panasonic GH5: Acratech GP Ball Head
- Must-Have Accessories for Panasonic GH5: Ikan Delta 5-Inch Field Monitor
- Must-Have Accessories for Panasonic GH5: Manfrotto 143 Magic Arm
- Must-Have Accessories for Panasonic GH5: Unitech USB Cable
- Must-Have Accessories for Panasonic GH5: ProMediaGear TR424L Tripod
- Bonus: Zoom H5 Recorder
First Things First: Panasonic GH5 Video Specs
If you aren't familiar with the GH5's video specs, let me enlighten you...
For starters, you can record in 4K at up to 60p and full HD at up to 180 fps to create incredible slow-motion videos.
This camera has no video crop, so you get the full sensor readout (which is oversampled from 5.1K, so your video footage is uber sharp). What's more, there's no time limit for video clips, either, though you're obviously bound by the size of your memory card and battery life.
The GH5 also has internal 8-bit 4:2:0 IPB encoding, which only improves if you use an external recorder.
At a lower frame rate, this camera will handle 10-bit 4:2:2 internal recording. Nice!
Learn how to set up a Panasonic GH5 for videomaking in the video at the start of this section by Griffin Hammond.
Must-Have Accessories for Panasonic GH5: Ikan Stratus Cage

Having a cage for your camera for video work is an absolute must, given all the accessories you need to produce high-quality videos.
I like the Ikan Stratus Cage because it's specially designed for use with the GH5. That means it fits like a glove and feels like an extension of the camera rather than a big, bulky one-size-fits-all cage that just gets in the way.
It's got an Arca-Swiss bottom plate for easy on and off, a NATO top handle to make carrying your gear that much easier (the handle also accepts bicycle grips), and there's cutouts so you can easily access the battery, SD card, and I/O doors.
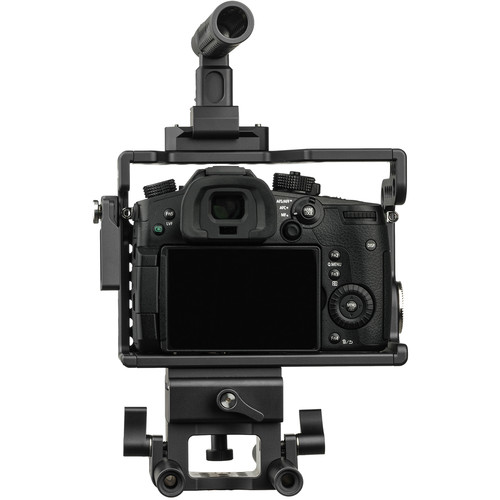
Ikan even includes a built-in lens adapter support and throws in a cable clamp, too.
And with connection points that include multiple 1/4"-20 and 3/8"-16 threaded holes, a shot mount, and an ARRI rosette, there's all sorts of gear you can attach to this thing for your video production purposes.
Learn more about the Ikan Stratus Cage for Panasonic GH5
Top Accessories for the Panasonic GH5: Rode VideoMic Pro

In photography, we always talk about how it's the lens that's the key to a great shot, not the camera.
Well, in video, the key to creating the highest-quality content is having excellent audio to match your clean, crisp video.
So, you can shoot video with a GH5 all you want, but without superb audio quality to go with that 4K video footage, your film isn't going to have the impact you want.
For that reason, I bought a RODE VideoMic Pro.

This little shotgun-style mic has a 1/2-inch condenser capsule, which results in ultra-clean audio that's broadcast quality. We're talking about a self-noise level of just 14db!
It has a super-cardioid polar pattern that reduces background noise while ensuring that it captures crisp audio of the source you want to record.
And, unlike lesser microphones, the RODE VideoMic Pro has a Rycote Lyre shock system that creates a buffer between the microphone capsule and electronics and the microphone mount. This, in turn, minimizes the vibrations of the mic and improves the quality of the audio even more.
Add in fantastic sound, easy-to-reach controls, and intuitive operation, and you have the makings of the ideal microphone for filmmaking with the Panasonic GH5.
Learn more about the RODE VideoMic Pro
Acratech GP Ball Head
To say that I'm a fan of Acratech is the understatement of the century...
I've used their GP ball head for years and years, and it's never disappointed.
The build quality of this thing is crazy good. It's built like a tank and gives you ultra-precise and smooth adjustments for fine-tuning the framing of your footage (and for smooth panning motion, too).
This rig has a quick-release clamp or a double speed rubber knob or locking lever. There's a large bullseye level to keep your videos nice and straight, and with a weight load of 25 pounds, it'll support the GH5 and all your accessories just fine!
Learn more about the Acratech GP Ball Head
Must-Have Accessories for Panasonic GH5: Ikan Delta 5-Inch Field Monitor
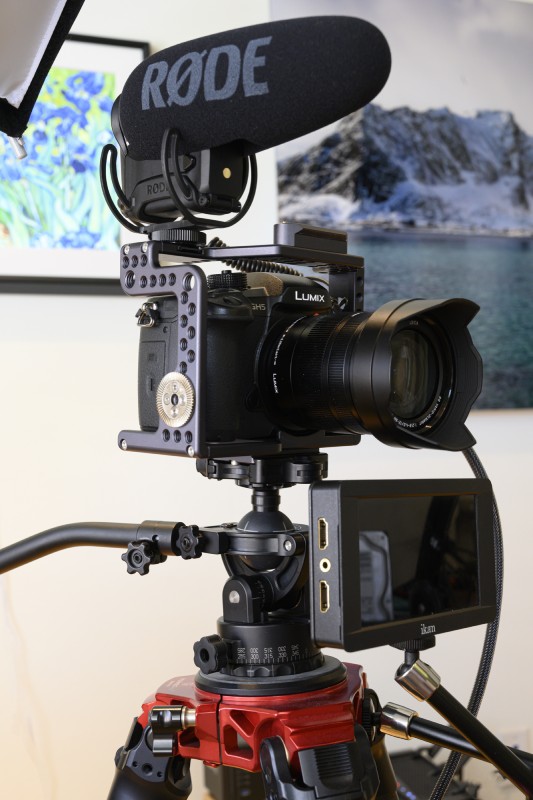
While the Panasonic GH5 has a cool swivel LCD screen that you can use to see yourself as you record, it's nice to have a larger monitor when recording video.
For that purpose, I use the Ikan Delta 5-inch field monitor (shown above, in front of the ball head).
This thing is big and beautiful and aids me in getting the exposure and focus just right.
Though it's got a gorgeous and large 5-inch screen, the overall unit is still small and lightweight, making it easy to add to my camera bag. It doesn't bog you down when filming handheld either.
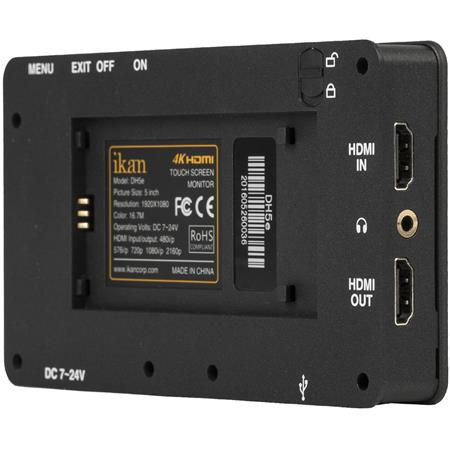
Ikan has stuffed it full of awesome features, too, like audio meters, guides, a histogram, zooming capabilities, false color, and peaking.
There's HDMI inputs and outputs, 4K UHD support, and a USB port for loading 3D LUTs.
If that doesn't scream "awesome field monitor," I don't know what does!
Learn more about the Ikan Delta 5-Inch Field Monitor
Must-Have Accessories for Panasonic GH5: Manfrotto 143 Magic Arm
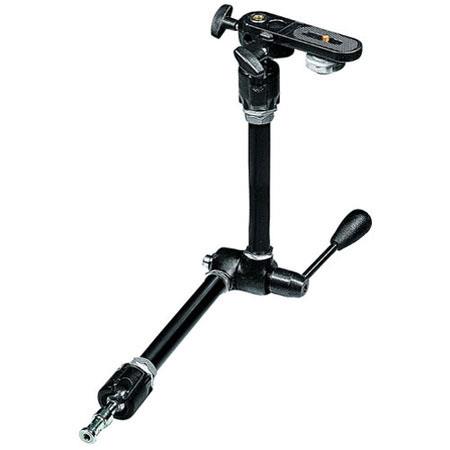
With so many needed accessories to produce videos, it's helpful to have another hand (or arm, is it were) to mount your accessories to.
For that, I use the Manfrotto Magic Arm, which has three pivot points, but just one lock to lock everything in place.
You can mount a light, a camera, or any other bit of gear to it at precisely the angle you need.
There's 5/8" male studs on the ball joints at either end with 3/8" and 1/4-20" female threads.
I use mine to hold my H5 Zoom (more on that later).
Learn more about the Manfrotto 143 Magic Arm
Must-Have Accessories for Panasonic GH5: Unitech USB Cable
You need a good cable to connect your field monitor to your camera.
In my case, I use a simple 5-foot cable from Amazon. It works great, gives me room to move around, and it set me back less than $12.
Learn more about the Unitech 5-foot USB cable
Must-Have Accessories for Panasonic GH5: ProMediaGear TR424L Tripod

To support all the weight of your video gear, you need a sturdy as hell tripod, and there's no better than the ProMediaGear TR424L.
This is hands-down the best tripod I've ever owned. It's built like a tank and can hold a whopping 125 pounds of gear.
At 6.4 pounds and 26.3-inches when it's folded, this isn't exactly a travel tripod, but for studio work, holy smokes...this thing is awesome.
The 4-section carbon fiber legs are easy to deploy and lock into place. The 3-position angle locks and quarter-turn twist locks make sure of that.

This rig also has big rubber feet to aid in stability.
Up to, the aluminum alloy head has a safety lock, a bubble level, and a tripod plate with a 3/8"-16 mount.
I also like the fact that it extends up to 77 inches to accommodate my videos whether I'm standing or sitting down.
No matter if you have it at its height maxed out, at its lowest height, or somewhere in between, this tripod offers rock-solid performance.
Learn more about the ProMediaGear TR424L Tripod
Bonus Accessory: Zoom H5 Recorder
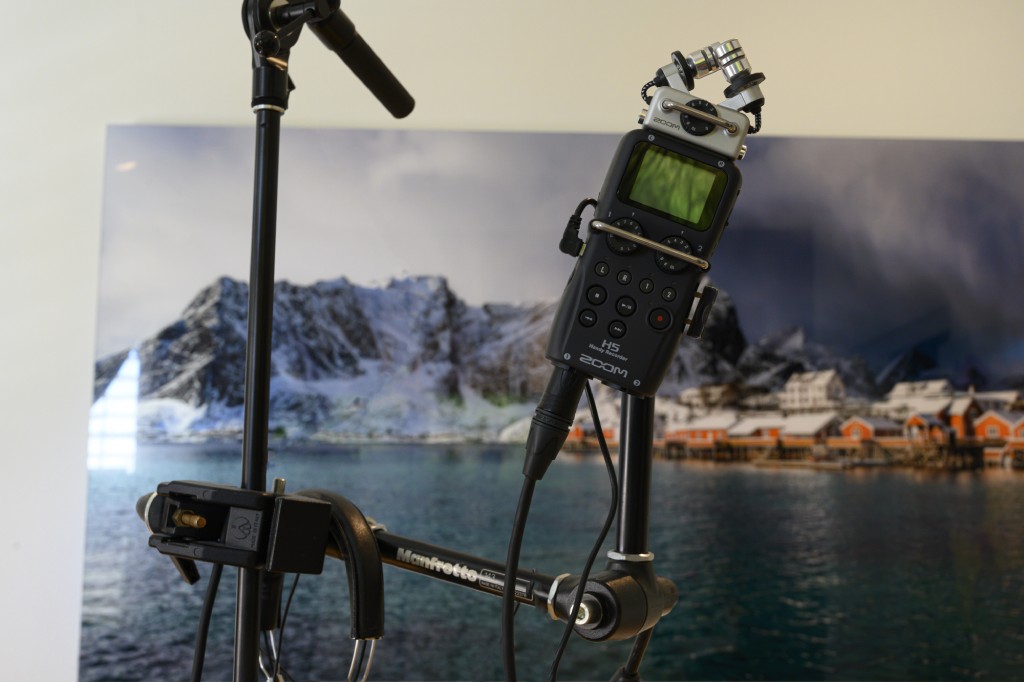
The Zoom H5 recorder might not be a must-have, when you hear the audio that comes from this, you'll consider a nice-to-have accessory for sure!
When I'm in my studio, I have my RODE NTG-4 plugged into the Zoom H5 virtually all the time.
When I'm out shooting B roll, the Zoom H5 performs masterfully for recording nature sounds and other ambient noise.
But it's the quality of the audio that's so astounding.
You can cover a huge area, yet still get beautifully crisp sound in the center with supreme clarity and sound definition.
Like I said before, great videos demand great audio, and you definitely get that with the Zoom H5!
Learn more about the Zoom H5 Recorder
We Recommend
Must-Have Gear for Handheld Video
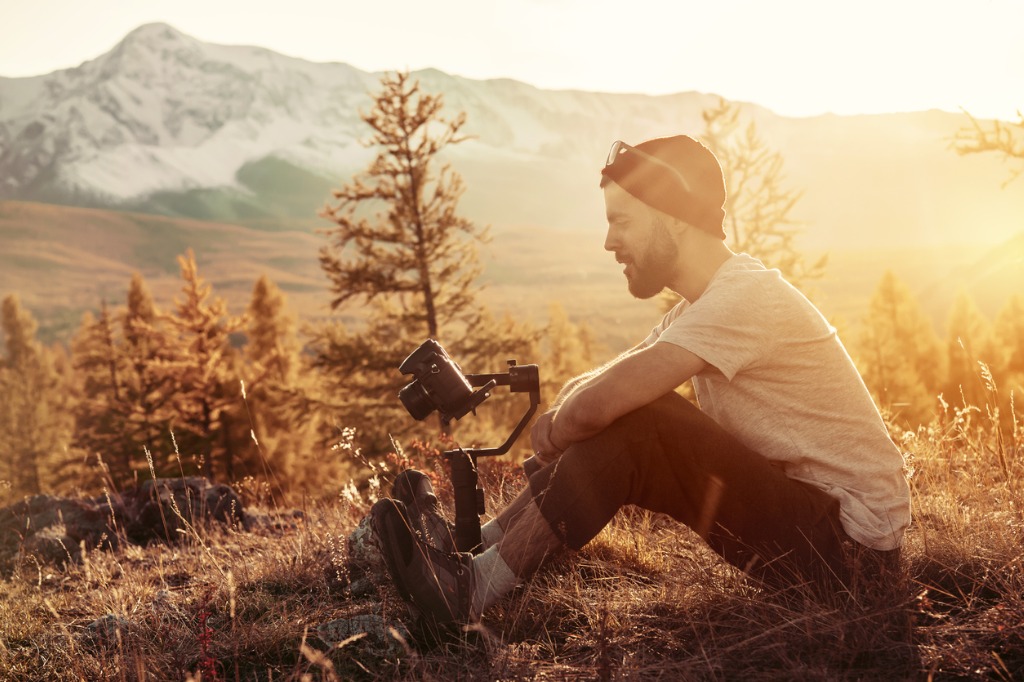
photo bymolchanovdmitry via iStock
I love that our modern digital cameras have amazing video capabilities in addition to their superb still imaging. Many of us may not have ever thought too much about shooting handheld video before but now that we have the ability, we should all be looking at adding video to our digital repertoire.
Since video is motion pictures, it makes sense for us to try to have our camera free to move about, too. Certain gear for handheld video will help make us more mobile and make that mobility usable for creating viewable handheld videos.
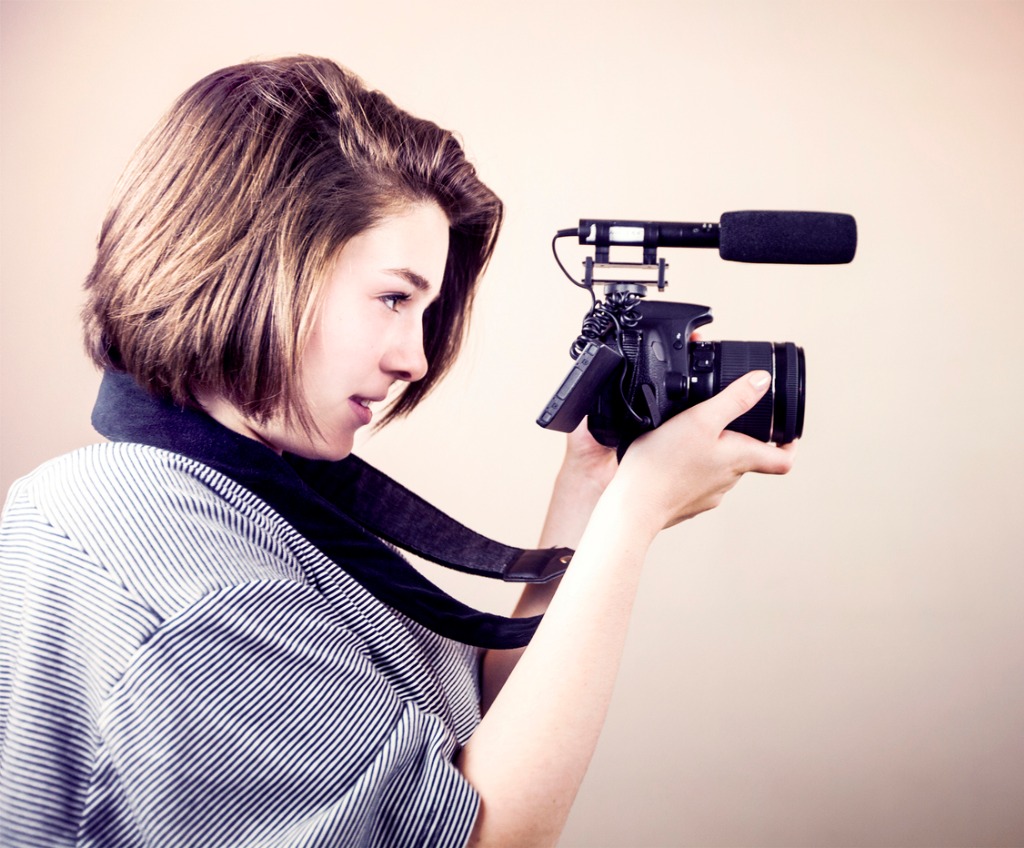
photo byRenphoto via iStock
What do you need for handheld video? Whether shooting video with a DSLR or shooting video with a mirrorless camera, there are few items that will definitely assist us in how to improve handheld video. Here are some great options of gear for handheld that I found:
- Handheld video stabilizer
- Shotgun microphone
- Portable LED light
- Huge memory card
- Sling-pack camera bag
Obviously, while proper technique is absolutely vital for great handheld video, using some of these accessories will give you options for techniques you may not have without them.
3-Axis Angled Handheld Gimbal Stabilizer from Ikan
When Steadicam first came out in the 1970s and saw widespread use in the 1980s for film and television, it revolutionized the industry for mobile cinematography. While Steadicam is an impressive and expensive brand name product, you can get results that increase the steadiness of your own handheld video productions by means of a gimbal.
The Horizon Pro 3-Axis Angled Handheld Gimbal Stabilizer from Ikan is an electronically balanced 3-axis gimbal that will smooth out most of your handheld video shots with modern DSLR and mirrorless camera rigs weighing up to about 7 pounds. It’s also relatively inexpensive making it a good fit for many serious videographers.

Being a 3-axis gimbal is an important aspect of how to shoot handheld video, since it dampens movement up and down, side to side, and yawing or pivoting. It comes from Ikan which makes and sells their own videography accessories for serious video cinematographers. Being their own manufacturer, they can offer extremely well designed gear for reasonable prices.
Editor's Tip: If you have a GoPro, you can easily use it as a handheld camera with The Handler Grip. This official GoPro accessory is just $30, yet gives you the functionality to do some selfies, record vlog-style videos, and give viewers your perspective as you shoot photos and videos. This grip floats, has a quick-release base for rapidly switching out mounts, and has a bright orange cap so you can easily spot it in the water. It's an ideal accessory for adventure-minded individuals that don't want to pay an arm and a leg to make their camera more functional!
Rode VideoMic Pro
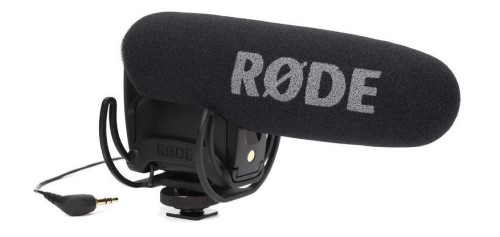
Shotgun style microphones are an excellent choice for shooting video with a DSLR or mirrorless camera handheld because it mounts directly to the camera and points in the direction of what’s being filmed.
I like the Rode VideoMic Pro for its compact size and excellent sensitivity, being just under 6 inches and 3 ounces and having a frequency response of 40 Hz to 20 kHz in a supercardioid pickup pattern.
What that all means for you and your handheld video is that you will capture excellent audio along with gimbal smoothed video. While some photographers may be under the impression that their fine camera has a good enough mic for serious video, the reality of the matter is that we need better mics for the highest quality video productions. Thankfully, they’re not very expensive, so it is a no brainer, more or less, to add one to our handheld video gear.
Learn More:
- Mirrorless Camera Accessories You Need Right Now
- Plan a Solid Video Shoot with These Pre-Production Tips
- How To Shoot Quality Video Footage
Aputure Amaran AL-MX LED Light
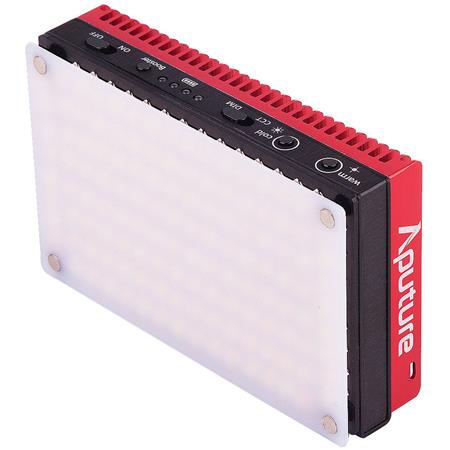
Next order of business is to light up our handheld video shoots with portable lighting equipment such as the Aputure Amaran AL-MX LED Light which is hardly bigger than a man’s wallet.
Handheld video has its own set of logistical problems, how to get enough light on the subject is an important one to handle. Handheld, portable, cool operating, battery powered LED lights are among the best alternatives for how to improve handheld video.
These lights are very small and lightweight, the face is about credit card sized and it weighs about 10 ounces. Their color output is variable from 2800K to 6500K so you can seamlessly blend the on camera light with ambient lighting. The built-in battery will power the cool temperature LED bulbs for about 30 minutes per charge.
ProGrade Digital 325GB Memory Card
In order to effectively capture high quality handheld video in the field, we want to use the best video capture mode our camera has, but that takes up a lot of card memory, so we want to have a very high capacity memory card.
CFExpress is the memory card choice for most of the higher end prosumer and professional digital cameras due to their fast read and write speeds and their near indestructibility. An excellent example of a high capacity CFExpress memory card to use during our handheld video shoots is the ProGrade Digital 325GB Memory Card that is also backwards compatible with XQD cards using cameras that have had the proper firmware update. With 1500MB/s read/write speeds, this card will be able to keep up with your high quality video mode recording.
Freelance™ Tactical Sling-Pack
Since you’re out shooting handheld video, you need something to carry all your gear for handheld video. The sling-pack style of camera bags is secure as well as being easy and quick to get into and out of for your gear.
Hazard 4® makes a fantastic series of tactical bags that are very durable, offer great equipment protection, and are easy to use. The Freelance™ Tactical Sling-Pack is small enough to be very comfortable while large enough to hold all your handheld video gear such as lights, batteries, and filters.
Now, you’re all set to go out and capture some great handheld video with your new DSLR or mirrorless camera.
Learn More:
- 4 Must-Have Accessories for Shooting Video
- Beginner's Advice for Using a Gimbal
- Tips for Better DSLR Video
We Recommend
Must-Have Gear for New Videographers
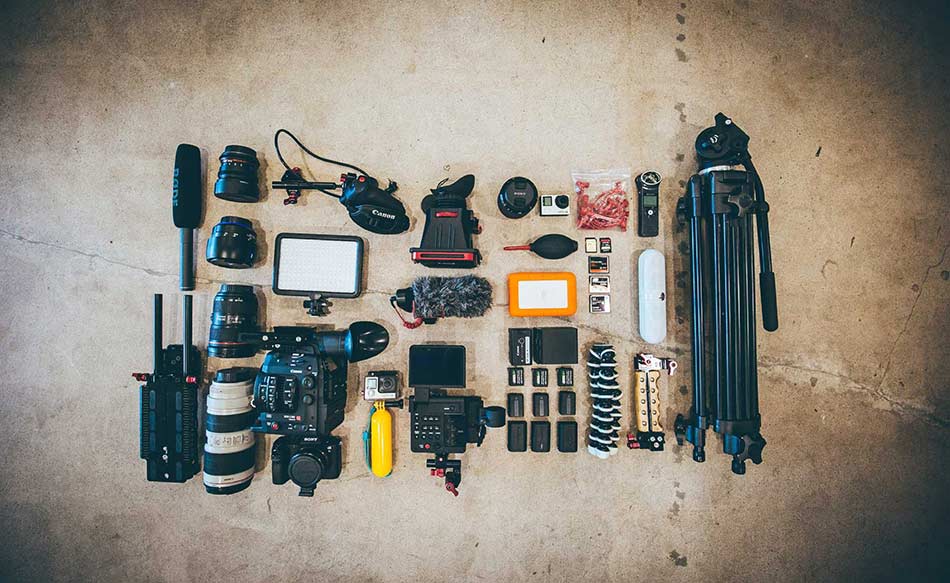 Photo by Jakob Owens on Unsplash
So, you're ready to make the leap from photography to videography...
The question is, what gear do you need to get started?
Thankfully, many DSLR and mirrorless cameras have excellent video capabilities, so a new camera might not be on your list of things to purchase.
But what about other important items for video work?
Here's a few suggestions for building a functional videography kit.
Editor's Tip: Though music isn't technically gear, it's something you definitely need to make the best videos. Adding sound effects and songs to your videos enables you to create a much richer viewing experience that reaches out and grabs people. For the best deals on audio for your videos, check out Epidemic Sound. With a huge library, they have everything you might need to take your videos to the next level with awesome audio.
Don't Neglect Your Video Editor
 Photo by Christin Hume on Unsplash
Before I dive into things like cameras and lenses for video, I wanted to address the video editor you use to make your creations.
You obviously want something powerful that offers you a lot of features for making professional-looking videos.
But you likely don't want to spend an arm and a leg that some video editors cost either.
I know plenty of photographers that rely on free software for their videos, but let's be honest - free software generally lacks the tools you need to make truly epic videos.
You don't have to spend a ton of money for a professional video editor though.

I started using Kizoa a few months ago, and I'm never turning back.
It's the ideal combination of power, performance, functionality, and ease of use.

Kizoa is loaded with tons of pre-made templates (including for holidays!), so you can get a head start on making your videos straight away.
What's more, you can add music, transitions, texts, and other effects to give your videos a polished look.

From an ease of use standpoint, Kizoa has a free iOS app, so I can create and edit videos right then and there after I record the footage.
On top of that, Kizoa has made it easy to share the videos I create - I can email them, burn them to a DVD, or upload them to social media in a matter of moments.

Kizoa truly is the best of both worlds - it's powerful and affordable, with premium plans starting at just $30.00 per month.
If you're ready to take your videography to the next level, give Kizoa a try!
Learn More:
What Camera is Best for Video?
 Photo by Stephen Kennedy on Unsplash
Maybe you already have a camera that shoots video.
But if you don't, or if you want to upgrade, what camera is best for video?
The answer, of course, depends on who you ask.
Personally, I'm a huge fan of Sony cameras for video work - like the Sony a7 III, which has 4K shooting capabilities at both 24fps and 30fps.

This camera is small, lightweight, easy to maneuver, and has improved battery life over previous Sony models.
What's more, there's a wide range of lenses you can use with this camera to get different types of shots and effects for your videos.
EDITOR'S TIP: NEED A NEW CAMERA BAG FOR ALL YOUR VIDEO GEAR? SHOP FOR GREAT DEALS ON TOP BRANDS.
The key here isn't brand - I like Sony, but if you like Canon, Nikon, Panasonic, or some other brand, that's okay! Just be sure you have a camera with interchangeable lenses, and preferably, 4K video capabilities.

I'd be remiss if I didn't give a shoutout to my new favorite camera for video, the Insta360 One X.
I've only had it for a week, but I can already tell you that I have had more fun shooting video with this thing than I have with any other camera in a long time.
Obviously, the video you get from a 360-degree camera is much different than what you get from a traditional camera, and that's part of the appeal of this tiny, handheld rig.

You can hold it in your hand, put it on a tripod or grip, strap it to your dog...you name it. The possibilities for angles of view and different vantage points are endless!
This camera weighs just .25 pounds and is super easy to operate via the companion smartphone app, so there's really no excuse for not always having it with you. Better still, you can do all kinds of killer things with it like HDR, time-lapse, and Bullet Time sequences (like from The Matrix) that results in mind-bending footage.

Helping matters is the Insta360 One X's FlowState image stabilization system.
It's a six-axis (yes, six!) gyroscopic system that does an incredible job of minimizing movement for ultra-smooth video.
Add to that a bevy of accessories you can buy for it, Wi-Fi, Bluetooth, and built-in shooting modes, and you have the makings of a fun and functional camera.
Seriously, give the Insta360 One X a try - you might find like I did that it becomes your favorite new toy!
Learn More:
A Field Monitor is a Must

If you want to step up your videography game, stop relying on your camera's puny LCD and invest in a high-quality field monitor like the Ikan Saga S7H-V2.
Using a field monitor like this 7-inch rig gives you a big, bright view of what you're shooting so you can perfect the composition, framing, and focus of your video sequences.
This particular model has HDMI and 3G-SDI inputs and outputs and Ultra HD video as well as DCI 4K video.

Don't let its large screen size fool you into thinking that this monitor is cumbersome, either.
It's slim and lightweight at just half a pound.
It has a gorgeous high-resolution (1920x1200), color-accurate screen with 1200 NITS of brightness, so it's a perfect companion for outdoor video work.
With software features like 3D LUT support, a histogram, audio meters, DSLR scaling, and more, you have the makings of a must-have item for your videography gear bag!
Top Video Lenses
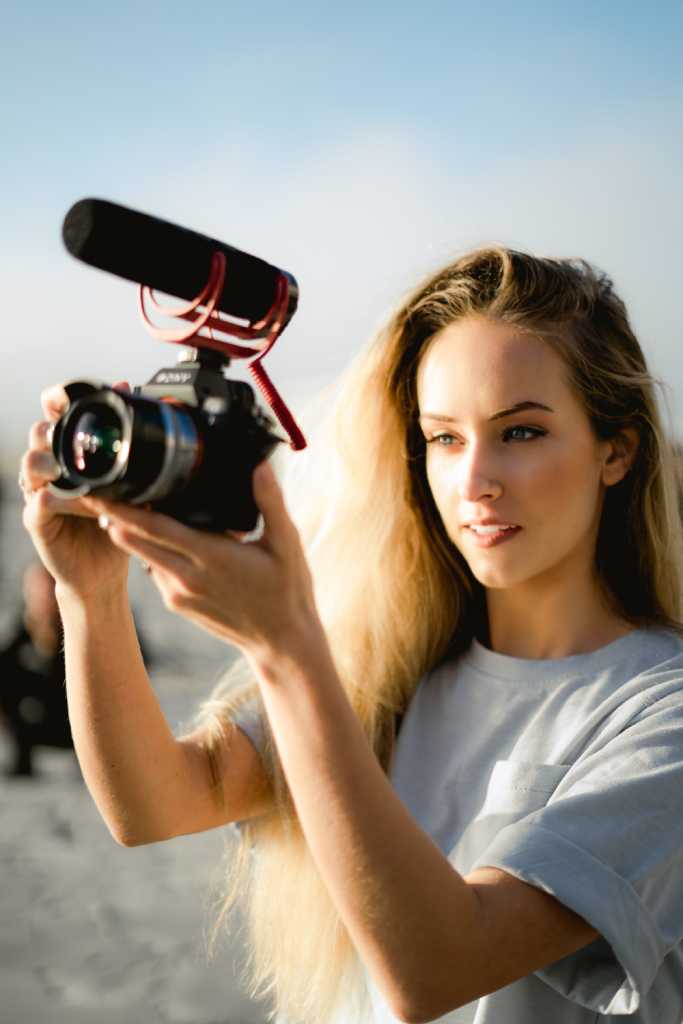 Photo by Courtney Clayton on Unsplash
Again, the question of what lens is best for video depends on a lot of different factors.
If you're already invested in the Canon ecosystem, then buying a Canon-fit lens is obviously advisable.
What's more, if you already have a 24mm lens, there's no sense in buying a 28mm lens, as the difference in focal length isn't worth the added expense.
When it comes to zooms or primes, both have their merits for video.

A good video kit would include both, actually, perhaps a 24-70mm zoom and a 50mm prime.
What's important to keep in mind is that lenses are the most important gear investment for videography (and for photography, for that matter).
Unlike your camera, which you'll eventually have to replace, you might have your lenses for decades. So, while good lenses (like the Sigma 18-35mm f/1.8) can be spendy, they will more than pay for themselves over the long-haul.
Things to Consider When Buying a Video Lens
 Photo by Jakob Owens on Unsplash
- Is it designed for crop sensor or full frame cameras? Is it compatible with your camera type?
- What type of video do you intend to shoot? Shorter focal lengths - like 35mm - are better-suited for travel videos while longer focal lengths - like 135mm - are best for wildlife videos.
- What is the widest aperture of the lens? If you intend to shoot in low-light situations, getting a lens with a large aperture is best.
- How much does the lens weigh? What is its form factor? Big, bulky lenses aren't ideal for things like travel videos.
Editor's Tip: Not sure what lens to get to make awesome videos? Consult the experts and get the right lens for you.
Video Work Requires a Legit Memory Card
 Image Credit: djedzura via iStock
Given the amount of storage required to save all that 4K video footage you'll be taking, you can't pull any punches with your memory cards.
Like with lenses, it's important to invest in quality here. Resist the urge to save a few bucks on off-brand cards and go for the well-established brands like Lexar or SanDisk.
Additionally, it's important to take factors like storage space, read/write speed, and the class of the memory card into account.
If you're not sure what any of that means, give this detailed discussion of memory cards a quick read before dropping money on a card. Doing your due diligence will help save you heartache down the road by avoiding sub-par memory cards.
Learn More:
Final Thoughts
Buying new gear is a very personal experience. That is, what you need for your video work might not be what I need for mine.
Having said that, there's common items every videographer needs - an interchangeable lens camera, a good set of lenses, and high-quality memory cards among them.
For more insights into the best gear for videographers, have a look at the video above by Matti Haapoja.
He's an experienced videographer that gives some great general tips on filling out your videography kit.
We Recommend
My Ideal Landscape Photography Kit

photo byMaridav via iStock
Over the years, I’ve tested all kinds of landscape photography gear. I’ve owned all kinds of landscape photography gear too…
But I keep coming back to the same gear as being part of my ideal landscape photography kit. There are tried-and-true items that I’ve found to be what works best for me, and there’s also relatively new items that I’ve only begun using recently that have quickly earned a spot in my kit.
Below, I’ve outlined some of my favorite landscape photography gear in the hopes that it sheds a little light on what gear might work for you as well.
Remember...these are just a few items that I personally use and that work great for me and my workflow. Some might work great for you but others might not. You’ll still need to do some research and experimentation with gear, but this should at least give you a compass for what direction to go!
Table of Contents
- Nikon Z7
- Nikon Nikkor Z 14-30mm f/4 S Lens
- E-Image EK650 Tripod
- Kenko Puro Circular Polarizing Filter
- Litra Torch LitraPro
- Holdfast Sightseer Backpack
My Pick for the Best Landscape Photography Camera: Nikon Z7

I’ve had the Nikon Z7 for about a year at the time of this writing, so it’s a relatively new addition to my kit. Before it, I had a Nikon D850, which I absolutely loved. In fact, I wrote this article about how it was the best landscape photography camera.
The only problem with the D850 is that it is big and heavy - two qualities you might not want if your focus is on landscape photography.
The Z7, however, is nearly a pound lighter and has a much smaller form factor than its D850 cousin. Those features alone make it a more useful camera for me when I’m out exploring landscapes because it’s easier to carry and easier to handle, too.

And don’t think that because it’s a smaller mirrorless camera that the grip is tiny and that your fingers will be dangling off the bottom…
The Z7 has a nice, chunky grip that feels good in the hand and is comfortable for all-day shooting of beautiful landscapes.
One of my other favorite features of the Z7 for landscape photography is its live view autofocus.

This system is the best Nikon has ever had - it’s fast, accurate, and honestly rivals the results I get when I manually focus. It’s that good!
It helps that the Z7 has a 3.2-inch LCD that has a 3:2 aspect ratio, so the LCD seems even larger and easier to see.
That’s just a few reasons why the Z7 is such a valued addition to my landscape photography kit. You can get all the details of the Z7’s landscape photography features here.
Be sure to check out my real world review of the Z7 in the video above too!
My Pick for the Best Landscape Photography Lens: Nikon Nikkor Z 14-30mm f/4 S

I personally love this lens because it gives me those frame-filling wide-angle views that really envelop the viewer in the scene.
I especially appreciate that Nikon extended the zoom range to 30mm rather than stopping at the more typical 24mm - that extra focal range is nice for framing up slightly narrower images.
It’s also a tiny lens - roughly the same size as the 24-70mm f/4 S kit lens and it weighs just over a pound. When you need to shed weight so your backpack isn’t full of 50 pounds of gear, having a small, versatile lens like this is a major bonus.

Of course, that weight savings is the result of lots of plastic parts, which are good-quality plastic, but still, that fact will scare some of you away from using this lens in a rough-and-tumble setting.
I’ve had no issues with the build quality of the lens thus far, so it’s performed like a champ whenever I have pressed it into service - even in extreme temperatures in Death Valley and Norway.
I like this lens’s autofocus accuracy, which is very quick and virtually silent, too.

I will say that this lens suffers from a crazy level of distortion. However, Nikon and Adobe alike have built-in lens profiles that corrects this issue.
But where this lens shines is in the sharpness department…

It’s a little soft at 14mm (as you’d expect), but dialing it back to 16mm improves things greatly. I’ve found it to be crazy sharp throughout its focal range.
And that’s just what you want in a landscape lens - beautiful sharpness, quick and accurate autofocus, and lightweight design.
Learn more about this lens in my Nikon 14-30mm f/4 S landscape review.
My Pick for the Best Landscape Photography Tripod: E-Image EK650 Tripod

I often use my ProMediaGear Pro-Sticks 34 Series tripod when I’m out for short jaunts to get landscape photos, but at $900, it’s not exactly cheap…
So to add a budget-friendly component to this list, I recommend the E-Image EK650 tripod shown above and below.
It weighs about the same as the ProMediaGear tripod and is close in collapsed size as well.
But it’s $700 cheaper, which is clearly a significant savings!

This isn’t a cheap tripod from a build quality standpoint, though…
The aluminum construction makes it durable yet lightweight, and the 11-pound load capacity is more than enough to securely support my Z7 and 14-30mm lens with other goodies attached, if need be.

The leg locking mechanisms make for quick set up and take down, while the mid-level spreader gives you that added degree of stability.
Speaking of stability, this tripod also has big anti-slip rubber feet and removable metal foot spikes for terrain that’s uneven or slippery.
The included fluid head with fixed pan drag, variable tilt drag, and continuous adjustable tilt drag is a nice bonus too!
My Pick for the Best Landscape Photography Filter: Kenko Puro Circular Polarizing Filter

I’m not sure I can remember how many different filter brands that I’ve tested over the years.
Like any kind of photography gear, there have been some really good filters along the way. But few have offered the level of performance and the budget-friendly price as the Kenko filters I’ve been using as of late.
Any landscape photographer needs a good circular polarizer, and Kenko’s Puro circular polarizing filter certainly fits the bill.

These filters are crafted from high-quality Asahi optical glass and feature 16 layers of multi coating that help repel water and dust while also making the filters extremely easy to clean.
The slim, low-profile ring is a nice touch as it helps minimize vignetting on the 14-30mm lens. The filter housing also has a black anti-reflective mounting ring that helps reduce reflections and flare from the housing.
It’s touches like that that you don’t often see in budget-friendly filters!
Editor's Tip: Get Kenko’s latest updates and access to promos for discounted gear. Click here to sign up.
I’ve also been using Kenko’s Variable NDX filter, and have been supremely pleased with the results.
Besides, it’s nice carrying around a single variable ND filter rather than an entire ND filter set!
My Pick for the Best Landscape Photography Light: Litra Torch LitraPro

I don’t do a ton of light painting, but I’ve found the small-yet-powerful Litra Torch LitraPro to be an ideal companion for light painting landscape scenes.
For starters, this thing is just 2.75 x 2 x 1.2 inches in size and weighs a whopping 6 ounces, so it’s a perfect, lightweight addition to my landscape kit.
And it puts out an incredible amount of light thanks to its 60 LEDs that are good for 1200 lumens.

The light is bi-color, clean and crisp, and you won’t find any flicker here, either.
It’s adjustable from 3000-6000K so you can dial in just the right color temperature for light painting your landscape subjects. It’s even waterproof for those messy spring and winter shoots in the rain and snow and offers 10 hours of battery life!
Sure, I use this light more in my studio and for portraiture, but, hey, who doesn’t like camera gear that’s super versatile?!
Get more details about this awesome little light in my LitraPro Review.
My Pick for the Best Landscape Photography Bag: Holdfast Sightseer Backpack

Photo by Brandon Burk
Of course, you need something to carry all your gear in, and one of my all-time favorite bags for landscape photography is the Holdfast Sightseer Backpack.
There’s several levels of awesomeness that this bag brings to the table…
First, the construction is off-the-charts with an attention to detail you just don’t find in many bags.
The waxed canvas and leather exterior is weather resistant, so rain, snow, and other elements won’t penetrate the bag and soak your gear. The zippers are even waterproof!
Inside, you’ll find a beautiful Aztec flannel lining that cradles your gear in the ultimate softness while also preventing scratches as you put your gear in and take it out.

Photo byBrandon Burk
The organization possibilities with this bag are also worth mentioning.
As you can see above, the flap unzips from top to bottom, allowing you to open it completely for a look inside. There, you’ll find multiple cubbies for your camera body, lenses, and other accessories.
You can customize the arrangement of these cubbies, too, so depending on your needs now and in the future, this bag can accommodate your gear.

Photo by Brandon Burk
I also appreciate the little things that Holdfast has integrated into this bag.
It has a breathable mesh back to help keep your back cool as you hike around finding those ultimate landscape shots.
The metal fixtures on the bag are stainless steel - not plastic made to look like stainless steel - so you get the benefit of something highly durable that won’t rust.
Of course, all those leather loops on the back of the bag are prime real estate for adding lens pouches and a cell phone pouch. With the ability to expand the carrying capacity of the bag, you have the makings of a modular system that you can customize to your specific needs.
What’s not to like about that?!
We Recommend
ND Filters for Beginners

photo byyuriz via iStock
Neutral density filters (ND filters) are some of the most useful optical accessories for photographers. ND filters for landscape photography can be used for a wide variety of effects and techniques. Introducing ND filters for beginners will open up new ideas for creating beautiful images.
As a beginner’s guide to ND filters for photography we will examine what are ND filters, how do ND filters work, and include a brief ND filter buying guide.
We will also look at some of the best ways to use ND filters for landscape photography and the types of situations and images you can use them for making outstanding images.
What Are ND Filters
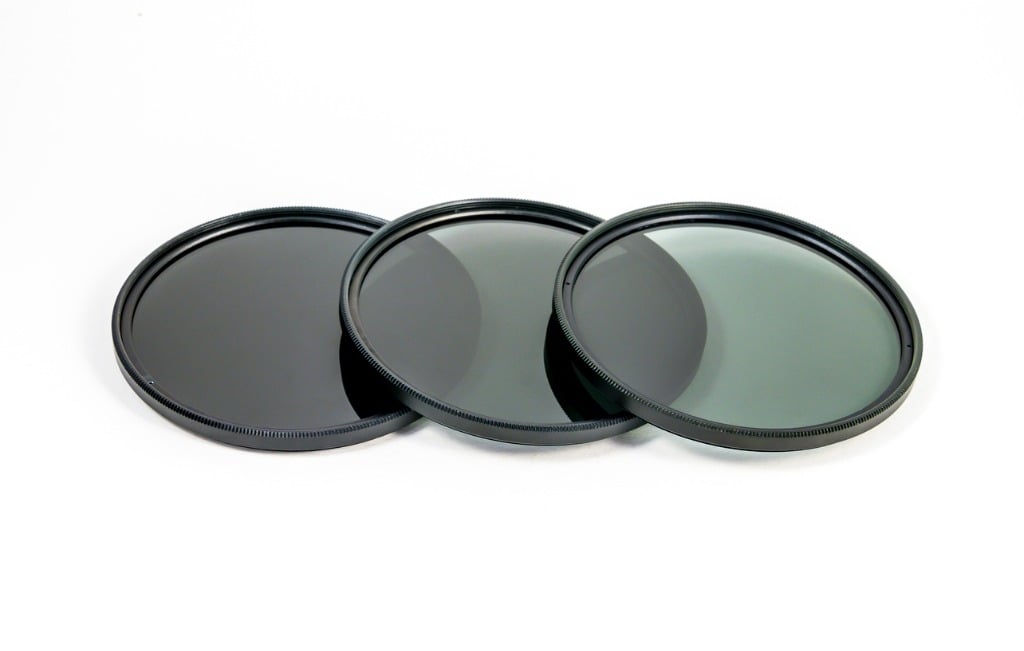
photo byJoecho-16 via iStock
ND filters are optical glass that go in front of the lens (or sometimes behind the lens) and add a colorless density to the light path. In other words, the glass is attenuating the light path without adding any color tint.
So the words neutral and density refer to adding density to the optical path of light with no hint of color, neutral and density. In photographer talk, we tend to refer to them as ND filters as a form of verbal shorthand.
ND filters can be single filters in a screw in mount like a protective UV filter or in large squares or rectangles that fit into a filter holder which can fit a variety of different lens sizes. One other style of ND filters are the specialty rear filter mounts for ultra wide angle lenses that have extremely curved front lens elements that preclude adding filters to the front of the lens.
Here is an example of a screw in lens filter that attaches directly to a lens.
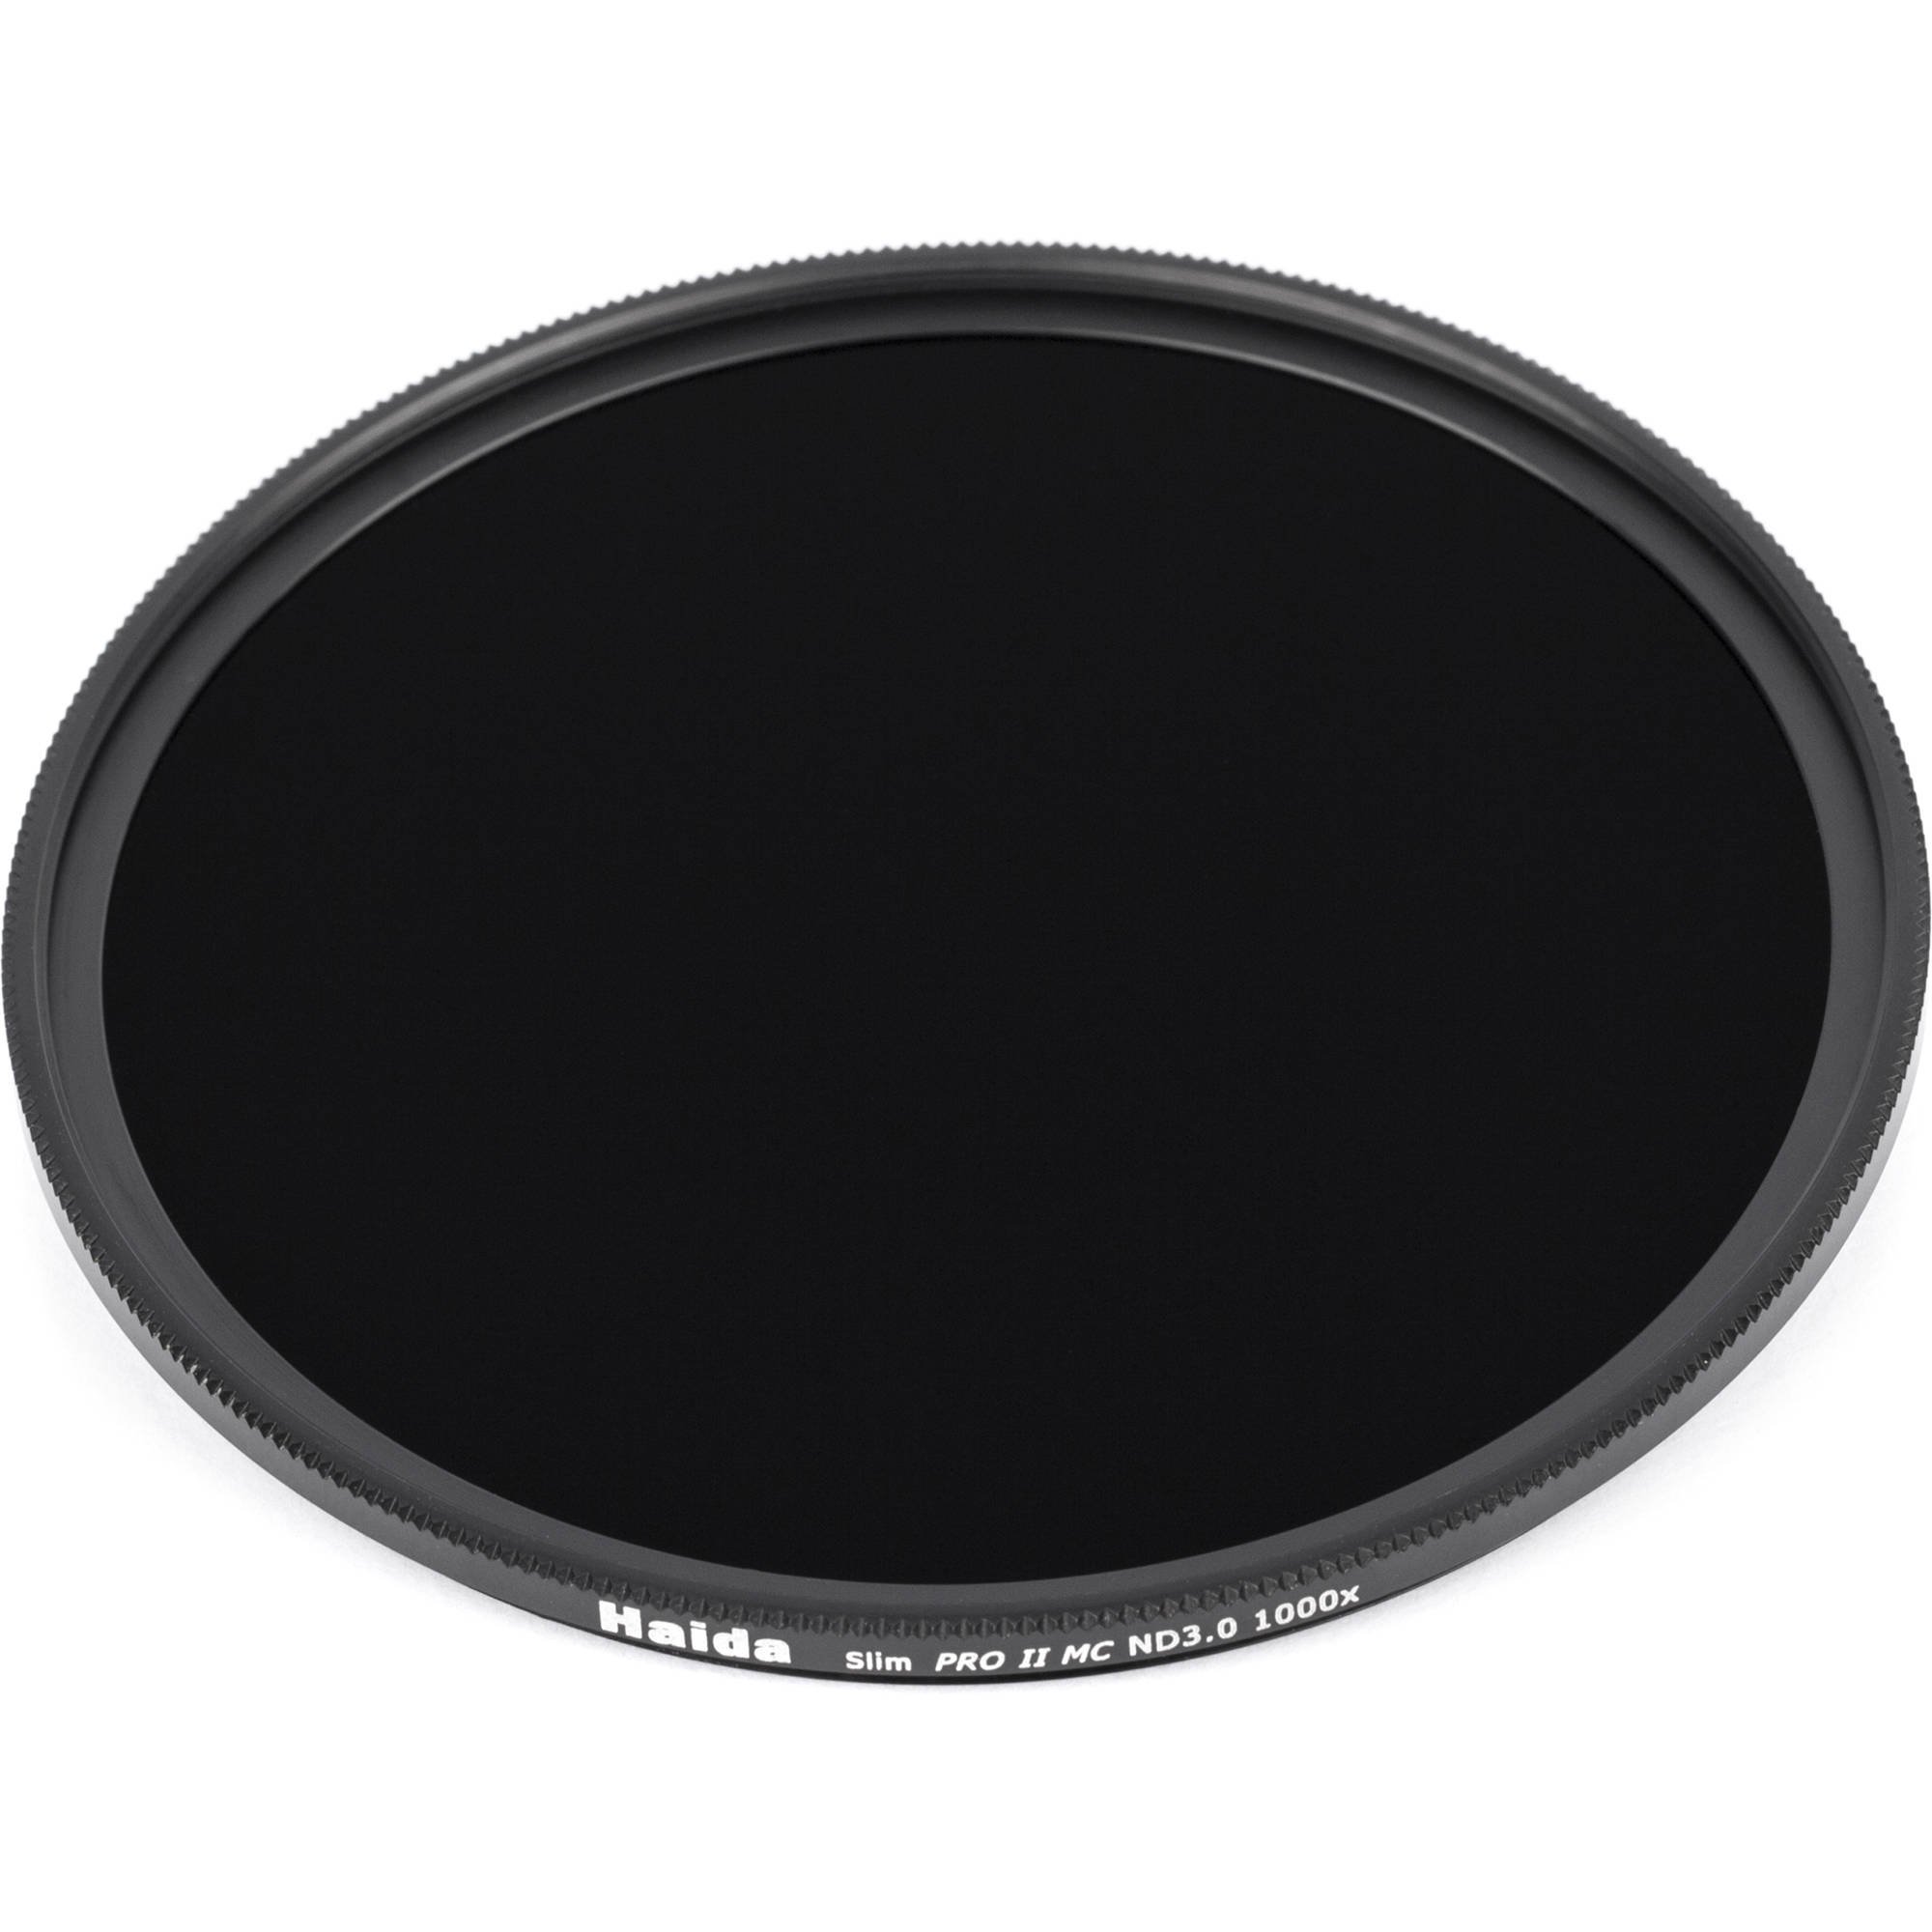
This is the Haida Slim Pro II 10 stop ND 3.0 ND filter in 72mm size such as you might use on a Nikkor Z 24-70mm f/4.0 S lens for the Nikon Z 5 Full Frame mirrorless camera.
How Do ND Filters Work

photo byLorraine Boogich via iStock
Part of learning ND filters for beginners is knowing what the numbers mean. While we are thinking of the stops of exposure, such as 3 stops, 6 stops, or 10 stops, the filters will be marked with numbers labeling optical density that correspond to a logarithmic scale (like many equations in photography).
For instance, the numbers ND 0.3, ND 0.6, and ND 3.0 equal 1 stop, 2 stops, and 10 stops of density. As you get deeper into creative photography, you learn how photographic artists use the science and math of optics and light to accurately predict how making changes to any part of the photographic exposure methods will affect the final image.
Thankfully we don’t have to constantly be consciously thinking of math and science as we go through our photographic techniques and methods. For one, the equations are intuitive, predictable, and understandable. Secondly, much of the math is done for us with basic camera settings and with the amazing automatic systems in our cameras.
ND Filters for Landscape Photography

photo bydanilovi via iStock
Besides the variations of density in ND filters, the construction of them also has differences for how we want to use ND filters in our photography. For landscape photography, graduated neutral density (GND) filters are a useful type.
GND filters have neutral density on one side of the filter, no density on the other, and a transition area in between. The transition area may be very gradual (soft-edge) or rather small and quick (hard-edge). Both are useful for several types of scene lighting scenarios.
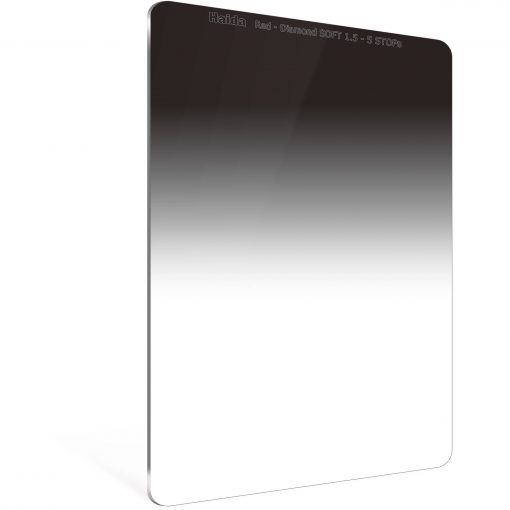
Here is an example of a soft edge, gradual transition GND filter that filters into a filter holder system.
This is what a hard edge, quick transition GND filter looks like. It is also the style that fits into a filter holder system.
By filter holder system, we’re referring to a holder for multiple filters that can be adopted to several different lens sizes and can hold multiple filters at the same time.
Pictured above is the Haida M10 Pro 100mm filter system with a circular polarizer included. A circular polarizer (C-POL) is another of the most useful lens filters for use in landscape photography. It adds its own ND filter light attenuation but also helps tame reflections and increase color saturation.
A filter holder system allows you to use these two fantastic filters at the same time. A landscape photography situation that is fairly common, sunset or sunrise over water, is a perfect example of gaining benefit from mounting a C-POL and a GND filter together.
Learn More:
- What To Look For In a Monopod
- Camera Gear Upgrades With a Lot of Bang for the Buck
- The True Value of a Good Tripod
Using ND Filters for Beginners
photo byprimeimages via iStock
So why do photographers use ND filters? There are several good reasons to use C-POL filters, GND filters, and ND filters for landscape photography. Changing exposure, taming dynamic range issues, and creating long exposure images are a few of the reasons to use ND filters.
Changing Exposure

photo byGu Studio via iStock
The Exposure Triangle tells us that ISO, shutter speeds, and lens apertures or f-stops are intertwined together in creating correct exposure for any given scene lighting values.
So, a scene’s lighting value may result in a combination of 1/500th of a second at f/16 with the ISO set at 400. You might recognize this as a great exposure calculation adaptation of the Sunny 16 Rule on a bright sunny day.
But what if you wanted to use a wider aperture to limit depth of field? Well, you could shorten the shutter speed to 1/8000th of a second which gives you f/4.0 for the lens aperture. And that’s pretty good, but what if the f-stop still gives you too much depth and you really want a very limited selective focus?
You could open up the lens aperture to f/2.0 but you’ve run out of shorter shutter speeds now, so the photo will end up overexposed. In order to achieve the wider lens aperture, you need to attenuate the light with a 2 stop or ND 0.3 filter. This adds enough density to let you change the exposure that extra bit without over exposing.
Taming Dynamic Range Issues

photo byExplora_2005 via iStock
Dynamic range in a photographic scene means how great is the difference from the darkest part of the scene to the brightest. The range of lighting in many scenes can be accurately captured by the digital sensor in our camera.
But sometimes the brightness level range exceeds what our sensor can cause. When this happens, we get little or no detail in either the highlights, or bright spots, or in the shadows, the darker parts.
In this situation, we use GND filters to add density to one part of the scene which balances the entire scene’s dynamic range of brightness to a level that our sensor can handle. This lets us capture detail in bright clouds as well as the darker part of our image such as the foliage in the foreground.
Sunsets and sunrises are probably the common uses for using graduated ND filters for beginners. There are many other situations that can benefit from GND filters, such as architectural photography, beach scenes, and mixed lighting indoors.
The filter holder systems make positioning the filter’s transition area an easy endeavor since we can rotate the filter and move it around inside the image area.
Creating Long Exposure Images

photo bykonradlew via iStock
Some of the most captivating landscape images involve moving water such as waves against a shore, a running stream, or a majestic waterfall. In order to get the longer shutter speeds necessary to blur the motion enough, we need a pretty long shutter speed or exposure time.
With ND filters, we can add enough exposure time, from about 2 stops, which quadruples the time, to 10 stops. If we adjust the ISO and close down the lens aperture along with adding a 10 stop ND filter, we can get shutter speeds measured in full seconds, maybe even minutes, instead of the tiny fractions of a second we’re used to.
Create Beautiful Images with ND Filters

photo byRomanKhomlyak via iStock
As you learn more about ND filters for beginners, you’ll find many uses for them, increasing your joy of using the science and math of optics and exposure to create beautiful art. The best part of learning photography techniques is how simple it can be to create our art once we learn the basics.
Learn More:
We Recommend
On-Camera vs Field Monitors: Which is Best For You?
photo byRattankun Thongbun via iStock
Professionals and other serious videographers often find themselves wanting or needing a better method of viewing than the on camera viewscreen, especially if they shoot with the camera mounted inside a camera cage.
Two common types of videography gear for improved viewing are a field monitor and an on-camera monitor.
Considering on-camera vs field monitors, what type will work best for you?
Why Use Accessory Monitors?
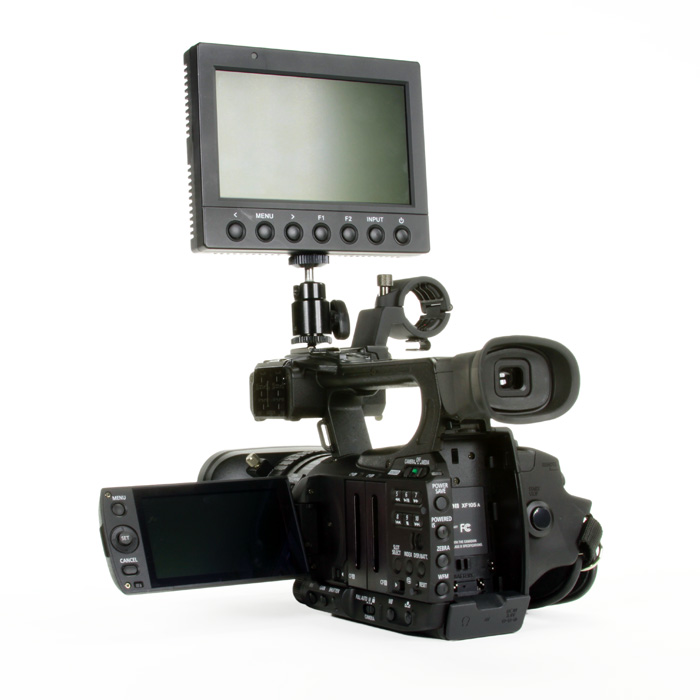
There are several reasons why videographers use accessory monitors. A big reason is because once you put your DSLR or mirrorless camera inside a camera cage, the rear view screen is hard to access and see.
This may not be due to the cage limiting access - most of them designed for a specific camera grant access to all important camera features - but because the camera often becomes just a small part of the entire rig. So, an external monitor is connected to the camera.
Another good reason for using an on-camera monitor or a field monitor is that these monitors have extra features that assist with making videos. The larger size is beneficial for framing shots, for focus checking, and for viewing from a greater distance from behind the camera.
External monitors can also be turned up brighter, which is very helpful when shooting in high ambient light levels. External monitors have an additional benefit useful for shooting in the field - the image can be seen from a greater angle, side to side or up and down.
Differences Between On-Camera vs Field Monitors
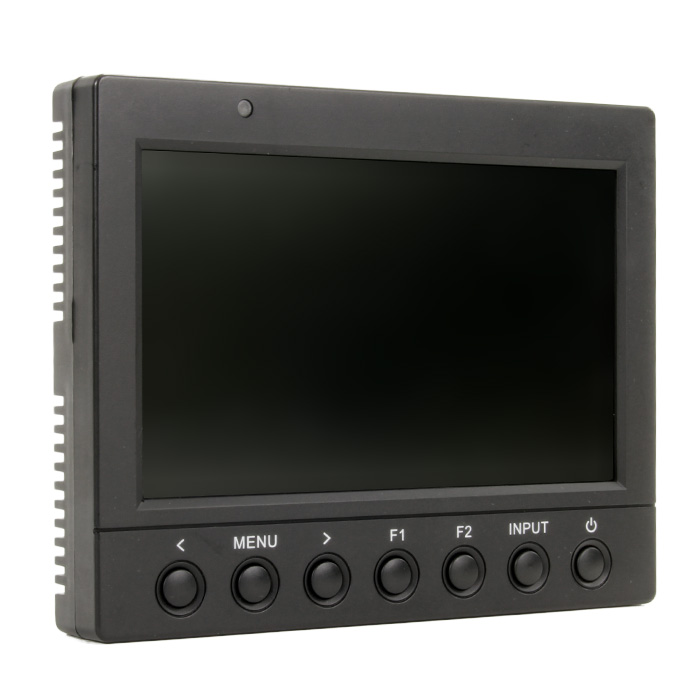
That’s a pretty list of reasons why videographers use external monitors. Now let’s examine the differences of on-camera vs field monitors.
The biggest difference is that an on-camera monitor is designed to be mounted on the camera or camera cage while a field monitor isn’t limited in size and weight in order to fit on the camera.
A field monitor can be mounted anywhere near the camera, on a separate tripod or stand or even on a table. You just need a long enough cable. With wireless video transmission, you aren’t even limited by the requirement to be close enough to the camera for any length of cord.
Because of this difference, a field monitor is not limited in size or in weight, and not even in power requirements since a wirelessly-attached monitor can be plugged into a wall or floor power socket.
Additionally, many field monitors will include extra features for live viewing or for playback. There simply may not be room for the controls of such features on a smaller on-camera monitor.
Learn More:
Best of Both Worlds
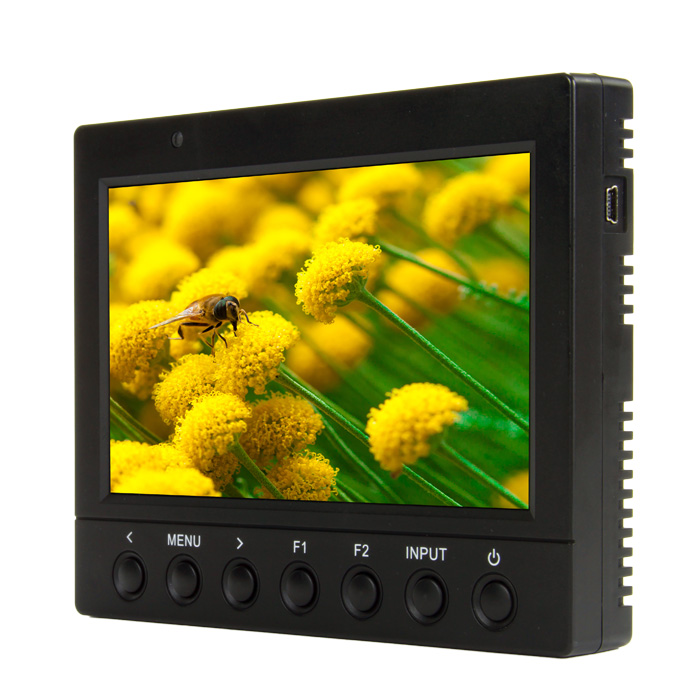
What if, instead of debating with ourselves the benefits of on-camera vs field monitors, we could have the best of both worlds? In other words, a monitor with features and a fairly large size like a field monitor with the smaller weight and battery power options that allow easy on-camera or camera cage mounting.
It does exist, the Ikan VK5 video monitor is an example of one item of videography gear taking the place of multiple pieces of equipment. At 5.6 inches diagonal screen size, this monitor is plenty large for comfortable viewing from a greater distance and for accurately monitoring focus and composition.
The overall size of the monitor stays smaller because it uses a simple row of buttons to access on screen menu controls, allowing all sorts of features while not increasing the size of the casing to accommodate extra inputs.
Battery powered for portability, the Ikan VK5also has the option of AC power via the adapter. Viewing angle of the high resolution screen is comfortable from several degrees to either side or up and down and the brightness of the screen allows for use in high ambient light levels.
Extra features include false color display, DSLR scaling, peaking, clip guide, and multiple inputs. With all of this, it’s still light enough to mount to the camera or camera cage. Plus, the price is very budget friendly, in the same ballpark as high quality LED DMX lights.
Videography Gear Resources
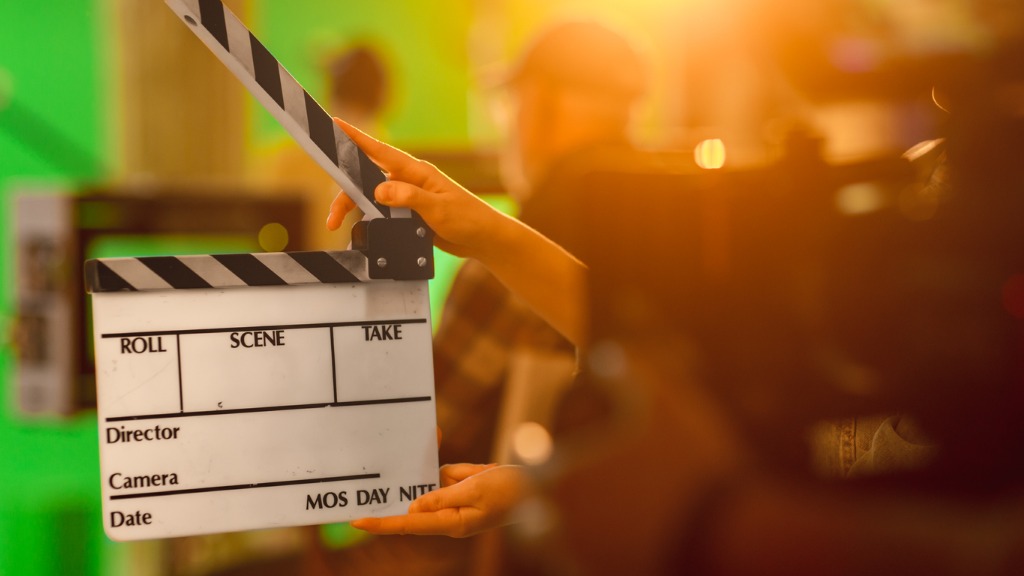
photo bygorodenkoff via iStock
Whenever I’m considering new videography gear, I have a few favorite places I usually go to first. One of them is Ikan. What makes Ikan such a great place to find videography accessories is that the company was founded and is run by people who are photographers and videographers themselves.
Much of the videography gear, lighting, and accessories they market on their website is designed by or completely made by them so they are able to offer to the public very high quality professional videography gear at prices that are lower, sometimes substantially so, than products from other brands.
I’ve done personal tests on a lot of the different gear that Ikan offers, such as sliders, DMX lighting, microphones, video tripods, lens filters, teleprompters, powered stabilization gimbals, and wireless video monitor systems. Many times, I end up liking the gear enough to pick it up for using in my own professional videography projects.
So, whether you’re comparing on-camera vs field monitors, designing a DMX lighting studio, or looking for the perfect handheld gimbal, Ikan is a good site to consider.
Learn More:
We Recommend
Photo & Video Accessories for the Nikon Z7
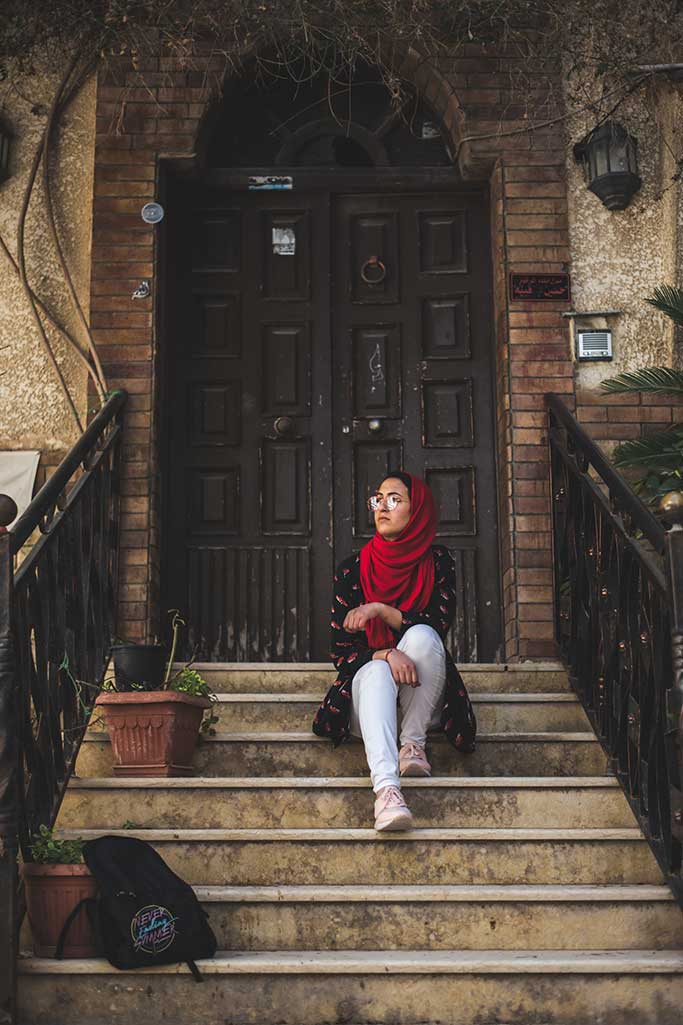
Photo by M.T ElGassier on Unsplash Taken with a Nikon Z7
The Nikon Z7 is one of the most popular cameras from Nikon in the past few years. I know I loved my Nikon Z7, and most of my photographer friends who have one do as well.
But, it can be difficult to sift through the thousands of Nikon Z7 accessories available to the public. You only have so much money to drop on just one camera (despite the little voice in your head saying this isn’t true).
So, we sifted through dozens of Nikon Z7 photo accessories for you in order to come up with a solid list of five must-have Nikon Z7 accessories.
We hope our dedication and research will allow you to get the most out of your Nikon Z7.
Mini Camera Canopy

This is not the first time we have touted the benefits of the Camera Canopy and it won’t be the last.
The Camera Canopy is the modern response to the age-old problem of trying to photograph in the rain, sleet, or snow. The creator of the Camera Canopy got fed up with using outdated rain protection methods like plastic bags, so he made the Camera Canopy.
It is a small plastic shield that attaches to your camera’s hot shoe. It not only protects your camera from the rain, but your lens as well.

While the original Camera Canopy is meant for larger DSLR cameras, the Mini Camera Canopy is made specifically for smaller DSLR cameras or mirrorless cameras, like the Nikon Z7.
Plus, unlike some of the more expensive rain shields available on the market today, you can pick up a Mini Camera Canopy for just $60.
You will never make a better purchase for your Nikon Z7, especially if you are shooting outdoors on a frequent basis.
Ikan E-Image Horizon One Gimbal

If you are looking for the best Nikon Z7 video accessories, then this gimbal is for you.
The Ikan E-Image Horizon One Gimbal allows you to spin 360 degrees on the roll axis, hold up to 8 lbs of equipment, and move 360 degrees on all three axes.
The stabilization on this gimbal is out of this world. It also features a quick release plate that is compatible with all standard 501 PL quick release plates.
One of my major problems with a lot of gimbals available on the market right now is that they have a really low battery run time. That is not the case with this Nikon Z7 compatible gimbal. It can run for up to 12 hours, thanks to its 18650 batteries (which are included, which means no hidden costs).

Of course, this gimbal doesn’t just work with the Nikon Z7. It’ll work with any DSLR or mirrorless camera you own. It features 5 different operational modes, including single-axis and dual-axis follow modes.
It also comes with a phone app that allows you to operate the gimbal from wherever you may be. The phone app includes access to things like motion time-lapse, remote controls and other different adjustments.
The Ikan E-Image Horizon One Gimbal is available for $400 on Ikan.
Editor's Tip: With a mirrorless camera like the Z7, you want a camera bag that's just the right size for mirrorless gear. HEX Brand has tons of options for photographers and videographers that need a well-built and functional bag for their mirrorless systems. From small one-camera sling bags to multi-camera backpacks, HEX has exactly what you need to safely and comfortably carry your gear. But don't take my word for it...scope out your new bag by visiting HEX Brand!
SmallRig L-Bracket
This accessory is one built specifically for the Nikon Z6 and Nikon Z7.
This L-Bracket comes with a base grip extension, but it’s also from SmallRig, which means you’ll find a ton of other accessories that will easily mount to it.
This L-Bracket adds 16.5mm height for additional ergonomic support.
The base plate and the side plate on this L-Bracket are dovetail plates that allow you to mount your camera in either a vertical or horizontal position.
It’s also not one of those frustrating L-Brackets that don’t allow you to access the Nikon Z7 battery or ports when it's mounted to a tripod.
You can purchase the SmallRig L-Bracket for $69.
Nikon EN-EL15b Battery
If you own a Nikon Z7, then you know batteries from Nikon can get really pricey.
This third-party battery is a much cheaper option at just over $50. This is a really great option for photographers who travel frequently and feel like they need an extra battery on hand during their trips, or videographers who burn through multiple batteries in a one day shoot.
You can pick up a Nikon EN-EL 15b Battery on Amazon for $53.
Nikon F to Nikon Z Adapter
Our final Nikon Z7 accessory is this Nikon FTZ adapter.
This adapter allows you to use F-mount Nikkor lenses on any of the Z mirrorless cameras. It’s compatible with over 660 F-mount Nikkor lenses, so you’ll have a much wider variety of lenses to choose from each time you pick up your Nikon Z7.
This is a professional-grade adapter, so it allows any connected lenses to retain image quality, silent shooting and focus peaking.
It’s made of magnesium alloy and is weather-sealed, just like the Nikon Z7, so you don’t need to worry about shooting in inclement weather. It also means the adapter should last as long as your camera does.
You can pick up this Nikon adapter on Amazon for $250.
We Recommend
Photography Business Tip: How to Make More Engaging Social Media Posts

photo byGeber86 via iStock
Social media is a fantastic business tool for photographers and videographers with lots of potential for increasing our profitability. Here are some photography business tips for making engaging social media posts.
First off, you will need to find an audience. There are numerous ways to accomplish this that are discussed in other articles, so I will just say that organic growth is best. Followers such as friends, business partners, and clients will tend to make up your social media audience.
In order to keep your audience and move your social media followers to do something, you need to make engaging social media posts. Let’s look at a few social media tips for photographers.
Speak With Photos

photo byDean Mitchell via iStock
You’re a photographer, people think of images when thinking about you, so a top photography business tip is to use that to your advantage by speaking in images more than in words. You might even think about how you view other people’s social media posts, how often you actually look at the text under the image or video posted.
Much of social media is primarily image driven, meaning that it's the large picture being primarily noticed as opposed to the small text underneath. You may have crafted the perfect ad copy text, but if the follower doesn’t bother to read it, your post isn’t really doing any work for you.
Learning graphic design is a helpful photography business tip that can assist in this. Design your posted social media image to say in a few words what you want to get across in your entire post. If you’re successful, your followers will read the image and then be moved to read the entire post and possibly be motivated to take action.
All Original Content
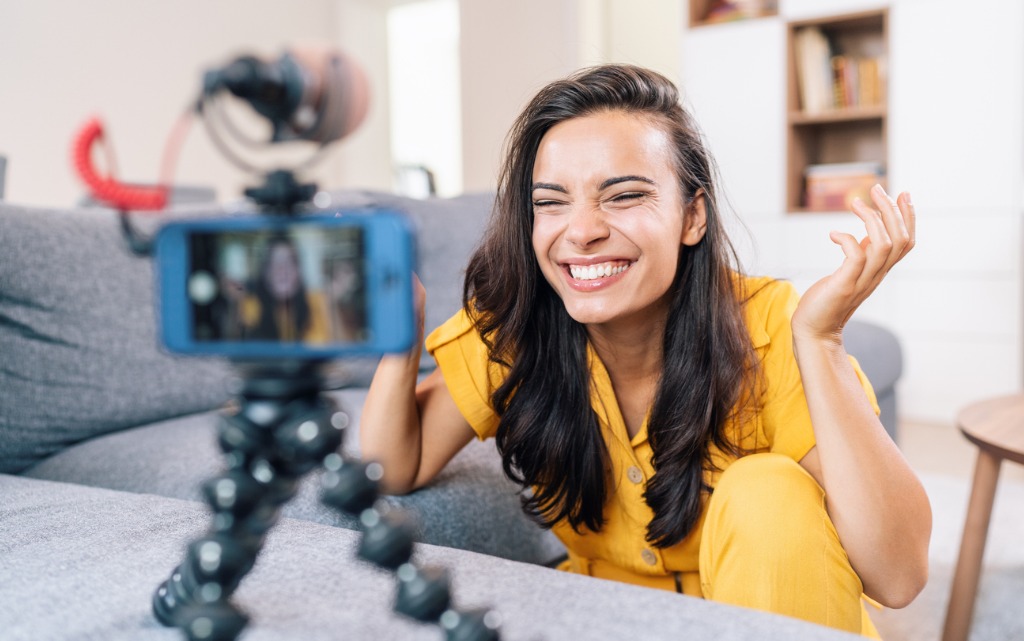
photo byfiladendron via iStock
A major photography business tip for successfully using social media is to only use content you created. In other words, don’t download memes or someone else’s image or design to post on your business site, make the image yourself.
Again, you’re a photographer. Don’t weaken your brand by diluting your social media account with someone else’s work. This would apply to actual photographs as well as any graphic design post.
You can actually use your own images or video footage and your current post processing programs to add informative text to the images and video.
Learn More:
- How To Use Your Camera As a Webcam
- 5 Tips for More Professional-Looking Videos
- Teleprompters Buyers Guide for Beginner Videographers
Use Teleprompter for Video
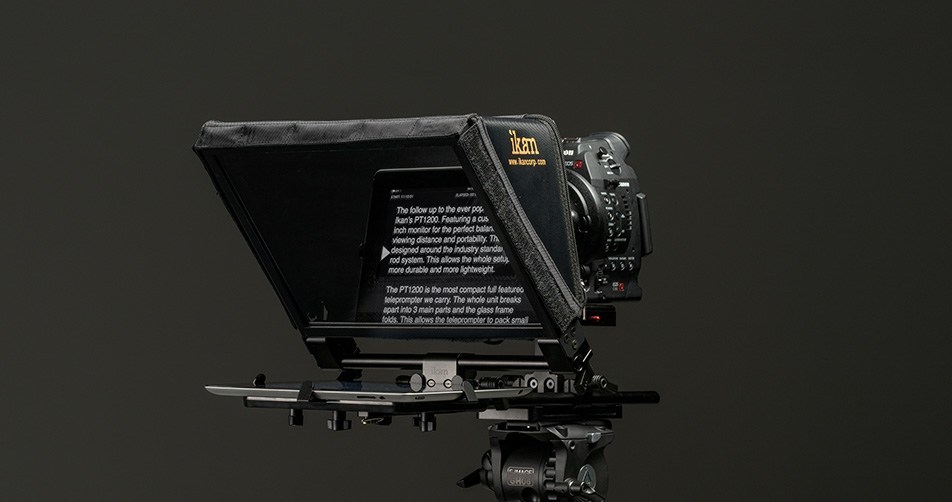
Social media platforms also work with video in addition to still images. Instagram and Twitter allow for short video snippets and on Facebook or YouTube you are able to post longer videos including full length movies and seminars on your own YouTube channel or a blog page you run yourself..
It’s as important for video as it is for still images to present the best quality you can when posting on your brand for business purposes. If your video postings are more like a commercial or infomercial, incorporating a teleprompter into your social media video gear will help you make more engaging social media posts.
You probably will want to use a script, at least in outline form, in order to produce a more professional style video. Teleprompters let you use that script without all that looking down reading which comes across to social media followers as unprofessional.
Thankfully, it’s both easy and cost effective to use a modern teleprompter like the Ikan PT-Elite Pro for creating an engaging social media media post video with your current video shooting setup. Just add your camera and a tablet or large smartphone and you’ll be humming along in your video like Martha Stewart on PBS gushing over her latest thousand dollar cake knife.
Avoid Personal Posts

photo byExtreme Media via iStock
To create more engaging social media posts for your photography business you will want to avoid diluting your brand with posts that are about your family, friends, pets, or lunch.
Admittedly, it’s a fine line to draw at times since so many of us are self employed photographers, either full time or part time. An important photography business tip in general is to have some separation between you as a person and you as a professional.
That’s what branding is all about. Make a name for your work and your art, let that be what people looking at your business social media pages are seeing as your brand and not last Tuesday’s brunch with your Aunt Edna in Kukamonga.
Share Customer Reviews

photo byozgurdonmaz via iStock
When you’re shopping for a professional service or product for your own home or business, who will you trust more: a salesman or a real customer? Social media followers have the same thoughts about that, including you and your business.
If you have some happy customers, ask them for a testimonial that you can use on your web pages or social media accounts. If they let you take a video of them, even better. Be sure to get all the proper releases and don’t edit to change the intent of their review, both of those things will backfire and end up hurting your business unless you follow good business practices and ethics.
Social Media Success

photo byscyther5 via iStock
Social media success for professional photographers and videographers is measured by how many followers engage with your business after seeing the post. Include a call to action of some type and try out these social media photography business tips to make your efforts result in more engaging social media posts.
Learn More:
We Recommend
Plan a Solid Video Shoot With These Pre-Production Tips

photo by izusek via iStock
As with photography, planning and preparation for shooting video is essential.
With a concrete plan in place that includes things like developing an introduction sequence and a signoff sequence, storyboarding the video, and identifying your target audience, you’ll be able to create a cohesive video that is engaging, organized, and meets your specific goals.
Let’s take a look at these and a few other pre-production tasks with which you need to be familiar.
Table of Contents
- Clearly Define the Target Audience
- Create a Script and a Storyboard
- Develop an Introduction and Signoff
- Practice the Script
Clearly Define the Target Audience

photo by Ildo Frazao via iStock
Your first task in planning a video shoot is to identify your target audience. After all, a video directed towards suburban middle-aged dads is going to have a much different look and feel (and much different content) than one aimed at elementary-aged school children.
But more than identifying a general audience based on broad criteria like age, gender, or location, you also need to evaluate higher-level characteristics like:
- Personality type
- Motivations
- Goals and aspirations
- Likes and dislikes
- Needs and wants
Taking these characteristics into account will help you identify a more specific audience to which you can develop and target your video for better engagement.
That’s because using these higher-level characteristics allows you to create a story in your video that is not only more authentic but also more relatable. This will make your video speak to members of the target audience, rather than missing the mark by creating something that tries to please everyone, yet engages no one.
In the video above, learn some tricks for identifying your target audience from Tyson Zahner.
Create a Script and a Storyboard

photo by Extreme Media via iStock
Though some people think they can wing it and make a video on the fly, most of us just don’t have the wherewithal to pull it off, at least not well…
Having a script gives you a blueprint for how to accomplish the goals for the video. Piecing it together can be a long process, but it’s one that should be undertaken if you want to create something that compels people to watch it.
Be careful not to just write something out and accept it at first take. Instead, critically review the script, revise it, and seek input from others to ensure you have a complete guideline for how the story unfolds.

photo by smolaw11 via iStock
Once you have your script nailed down, you need to take planning a step further and storyboard the entire video.
A storyboard is a must-have tool for videographers because it allows you to visually sequence the story and identify the different shots you need to get to make the story come to life.
In other words, the storyboarding process enables you to bring the script to life by sequencing what happens and when. It’s a process during which you can determine if what you have in the script will be possible from a videography standpoint, and if not, allows you to revise the script into something that works.
Storyboarding is also important for identifying where you want to shoot each video sequence, positioning of people in the frame, where you’ll place lights, and so forth.
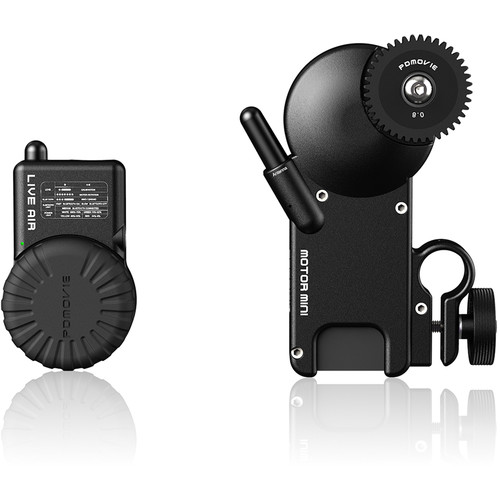
You can also identify the tools you need to make the video look as you’ve envisioned it.
For example, you can use a lens control system like the Ikan PDL-AF shown above to plan for precise focusing within shots on your storyboard.
This completely wireless follow focus system brings control of your lens’ focus to your fingertips and automatically calibrates to the mapping of your lens.
With simple, single-button system settings control, a compact size, and no external power source required, it’s just the videography tool you need to plan each shot’s focus to perfection.
See just how valuable a tool like this can be in the video above by Ikan International.
Of course, you might need other tools like tripods, lenses, sliders, lights, light stands, mics, booms, and so forth, so identifying these and other tools you need during the storyboarding process will save you time and headaches later on.
Additionally, procuring all these tools (whether you rent or buy them) will influence your budget and how far you can stretch your dollar, so planning for these things now, rather than later, will help you create your video in a timely fashion and without busting your budget.
Develop an Introduction and Signoff
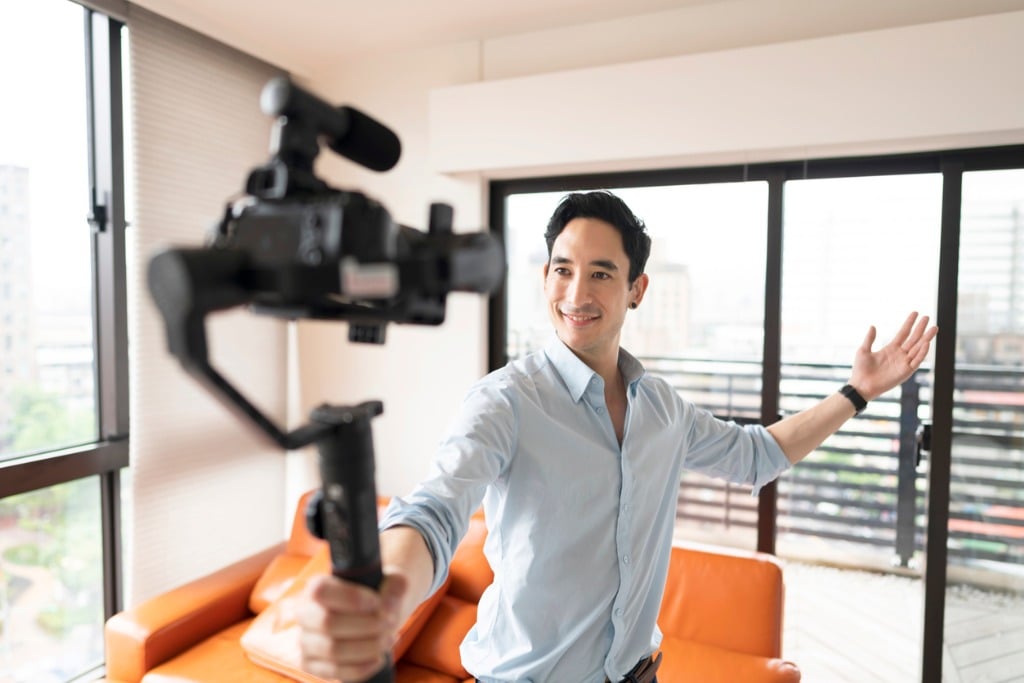
photo by SrdjanPav via iStock
Check any popular YouTube channel and you’ll find that just about everyone has an introductory and signoff sequence.
Having these brief sequences are important for very different reasons.
In the case of an introduction, it helps set the stage for the video while also giving consistency to your videos across your channel. Likewise, with a consistent introduction, you can help people identify the type of content they can expect in the videos you produce.
Signoff sequences are equally as important because they tie up loose ends in the video. If your goal is to sell something or get people to sign up for something, the signoff is a great time to include calls to action to do so.
Again, it helps to have some consistency here from one video to the next, simply because it softens the request to take action - so the video seems less salesy or pushy - but still gets your point across and compels people to act.
Practice the Script

photo by RoosterHDvia iStock
Practicing what you’re going to say in your video is also of paramount importance.
By practicing the script, you’re not only getting comfortable with the wording and sequencing of the script, but you’re also able to identify areas in which you need to change the pacing or intonation, add dramatic pauses, and so forth.
One of the best ways to do this is to load the script in a teleprompter and practice reading the script in a way that’s as natural as possible.
A teleprompter like the Ikan Elite Pro is ideal for videos in which you’re talking directly to the camera.
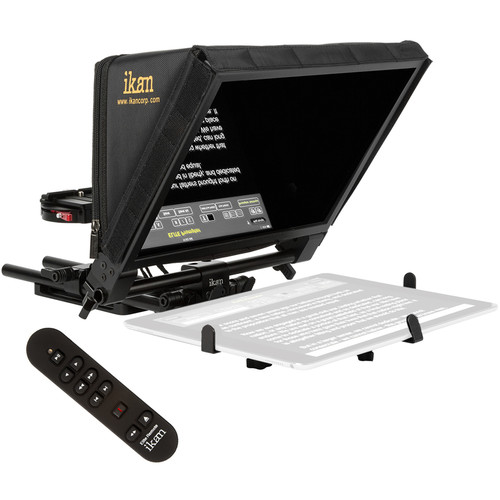
Having a teleprompter aids in much better flow of the script while also helping you keep on track with what information needs to be conveyed (and when).
Teleprompters like the one pictured above support all kinds of tablets, like the iPad Pro and the Surface Pro, just to name two.
What’s more, these teleprompters offer a flexible design that has an adjustable and foldable glass frame and a quick-release camera platform that enables quick setup and takedown.

photo by vm via iStock
Another advantage of having a teleprompter is that it actually allows you to be more authentic. This might seem strange - that reading the script is more authentic - but you’ll find that as you work more and more with the script and reading from a teleprompter, it can help you be more comfortable, relaxed, and more natural in front of the camera, and all of that will lead to a more authentic presence in your video.
There are many other beginner videography tips you can utilize to improve the quality of your videos, but implementing these tips will certainly give you a leg up!
We Recommend
Quick & Simple Video Lighting Tips

Video lighting for many productions can be done surprisingly simply. Follow along for some video lighting tips that are easy to set up and include some very versatile videography gear. Whether in the studio or in the field, lighting for video can be accomplished in several ways.
Enhance Natural Lighting
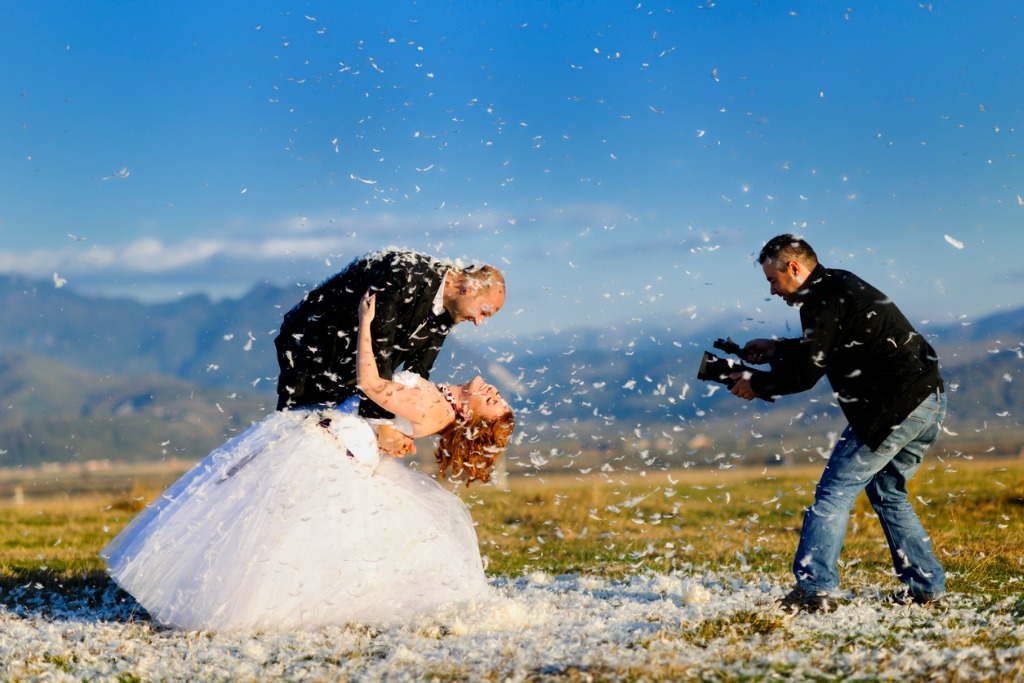
photo bystock_colors via iStock
Just as with still photography, lighting for video can be done with natural or ambient lighting and a few reflectors.
In order to get good video lighting from natural light or ambient artificial light, you will need to watch the angle and intensity of the main light. A high angle of a light source such as the Sun at Noon will cause some unflattering shadows under the nose, eyes, and chin of a person as the main subject.
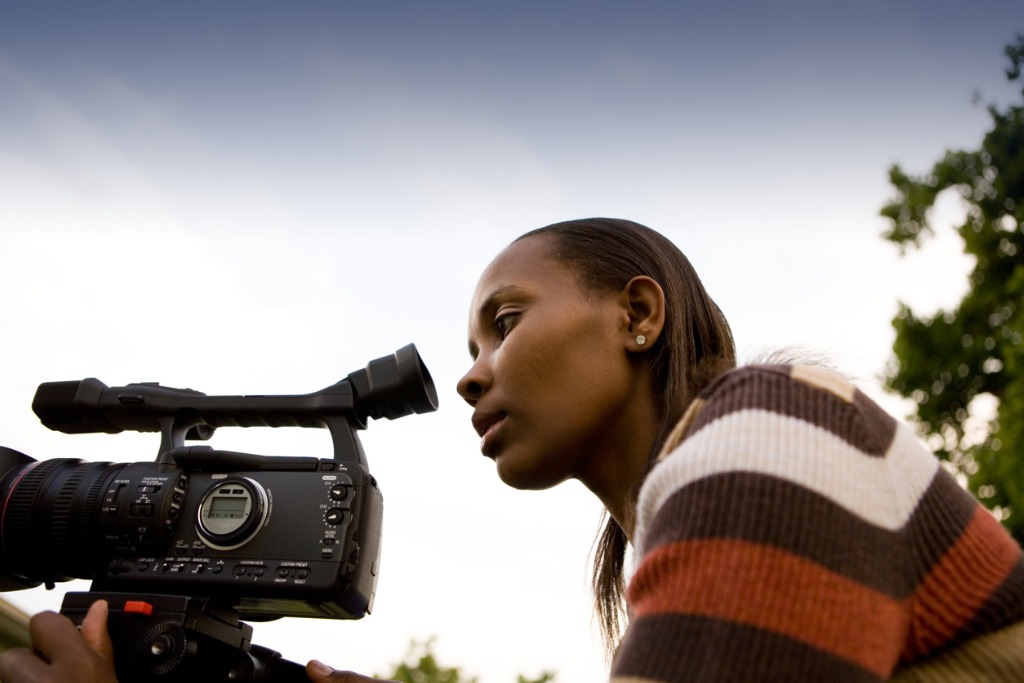
photo byGeorgeManga via iStock
Adding one or two reflectors to redirect light to fill in those shadows will give much more flattering and natural appearance to the person being filmed. This method also works with inanimate objects as the subject.
An alternative that gives you more control over the intensity and color of the fill lighting for video is to add in an actual video light or two as fill lighting. If your video light features include adjustable power levels and color temperature controls then you can seamlessly blend the light in any way you need.
Replace Natural Lighting
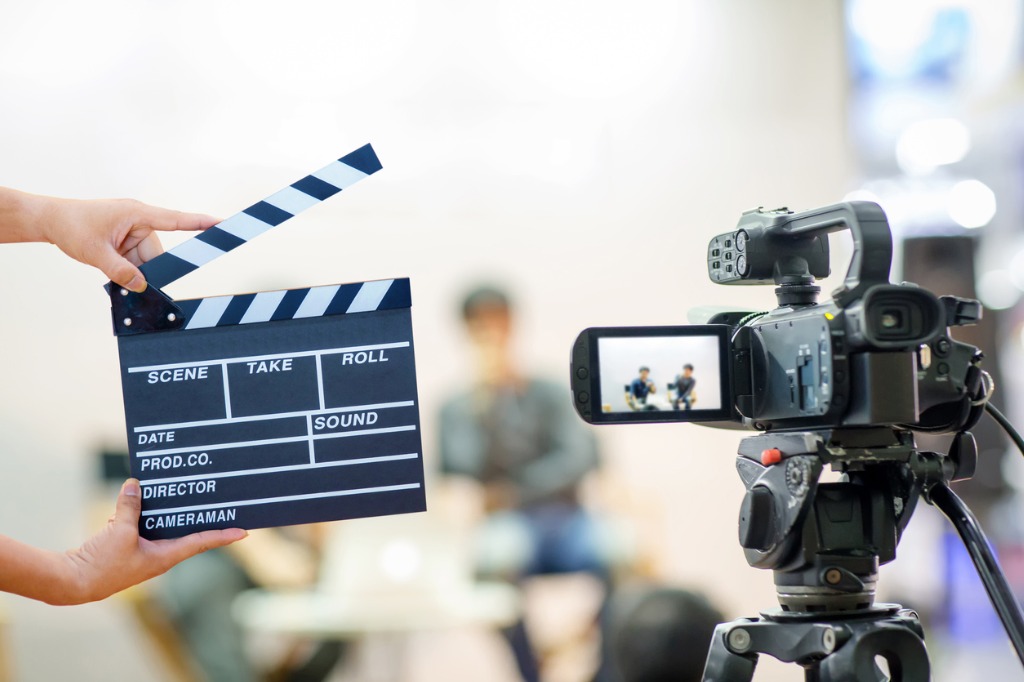
photo bykckate16 via iStock
A wonderful aspect of many high-quality video light features are how powerful they are and that you can adjust the color temperature from warm to cool.
An example of high-quality lighting for video comes from Ikan, manufacturer of high-quality video gear for any budget, the Lyra LCX21 soft panel light with DMX. It is powerful enough to become the main light you base exposure on in many situations indoors or outdoors.
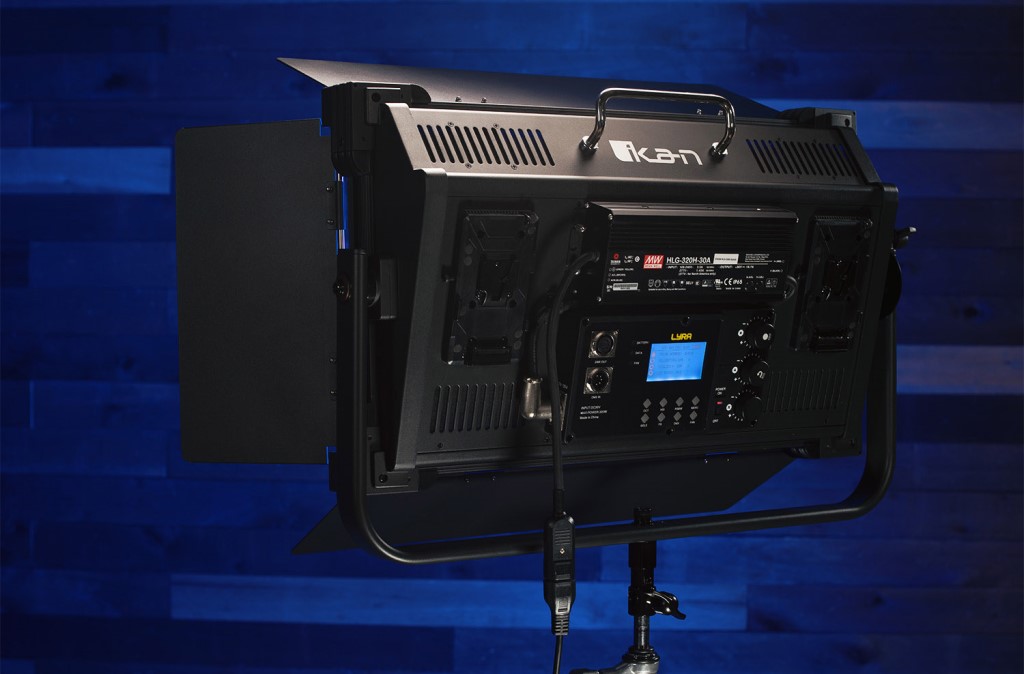
Replacing the natural or ambient light gives you creative control over lighting ratios and color balance but you may sometimes have to find a way to tame extremely bright sunlight or stadium lights. This may include moving to an area of open shade or using an overhead scrim or tent.
Overpowering the ambient light gives you as the cinematographer more options than simply modifying the light, but you need to have a fairly powerful lamp to make this work.
Learn More:
Imitating Natural Light
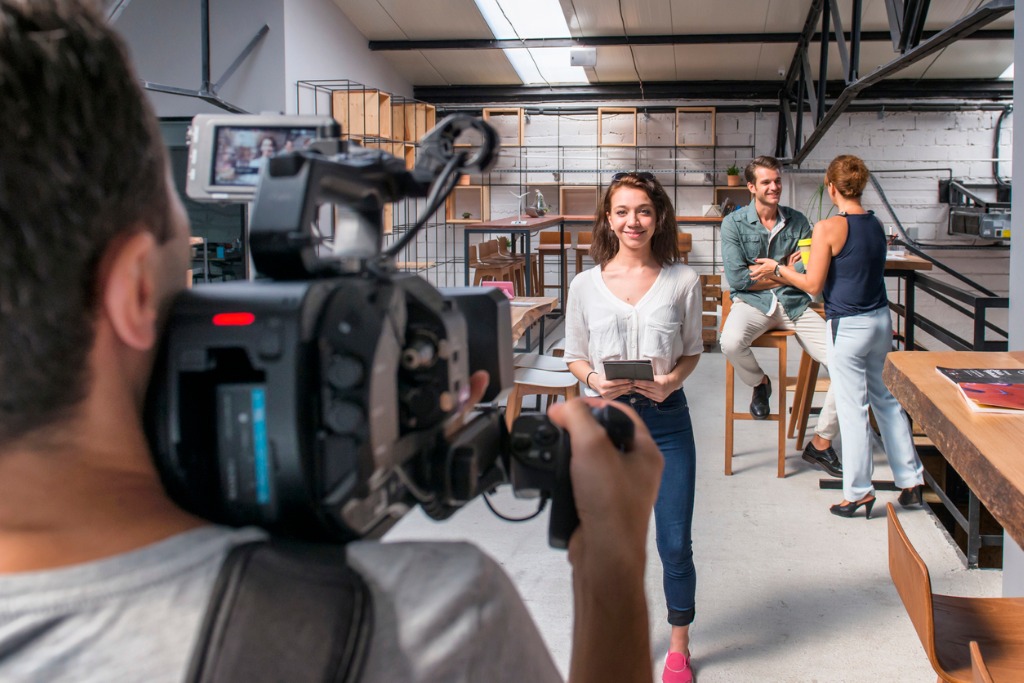
photo bybrightstars via iStock
In your studio, you can take complete control of every aspect of your video production. Video lighting tips for use in your studio may require several lights at once in order to achieve a natural lighting appearance.
Lighting ratios, main light intensity, and light color temperature are factors that will impact your choices for how to light up the scene. Using high-quality lighting for video such as the Ikan Lyra LCX21 panel lights open up quite a lot of creative possibilities for your video lighting tips and techniques.
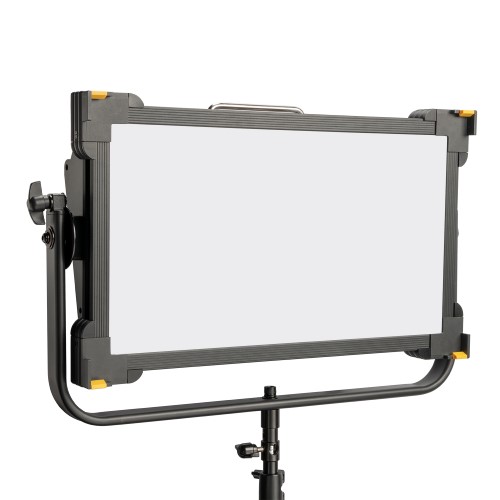
A feature I like in lighting for video studios is DMX control capability. DMX controllers can adjust multiple lights at once and you can even program to change during the scene being filmed, just as natural sunlight may change over time or quickly as a cloud passes by.
Keep It Natural
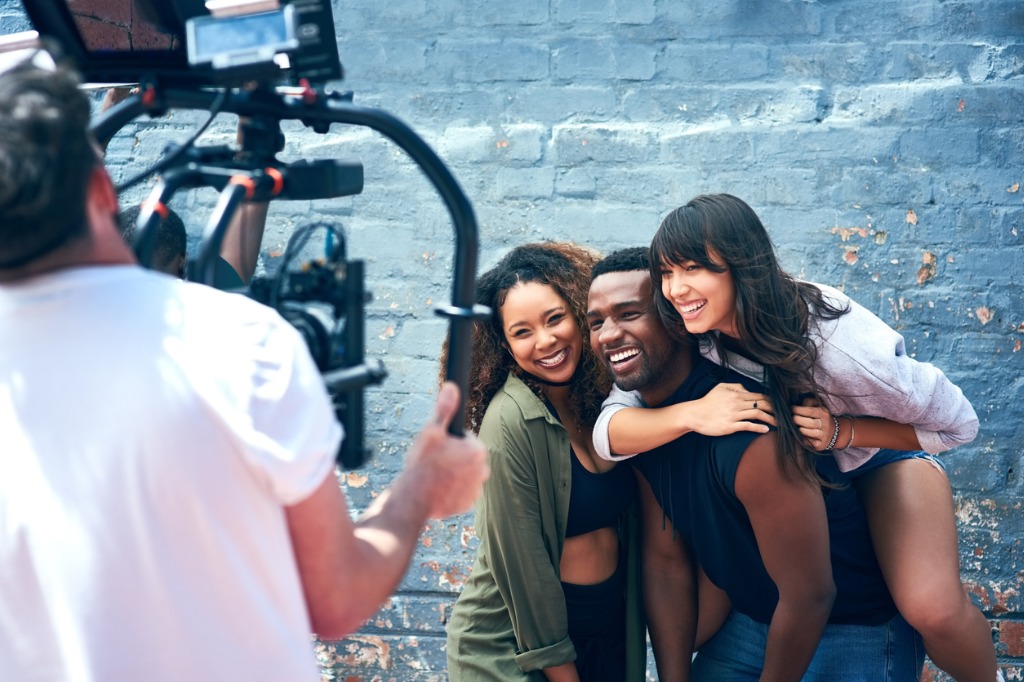
photo byMoyo Studio via iStock
In video productions, a natural look and feel is often a key aspect of creating a believable scene or a scene that a viewer will enjoy watching. High quality lighting for video combined with learning and using video lighting tips and techniques will help you keep your video productions looking natural while being well lit.
Learn More:
- 5 Tips for More Professional-Looking Videos
- Lighting Options for Recording Video at Home
- Top Camera Lenses for Video
We Recommend
Shotgun Mic or Lavalier Mic: Which is Right for You?
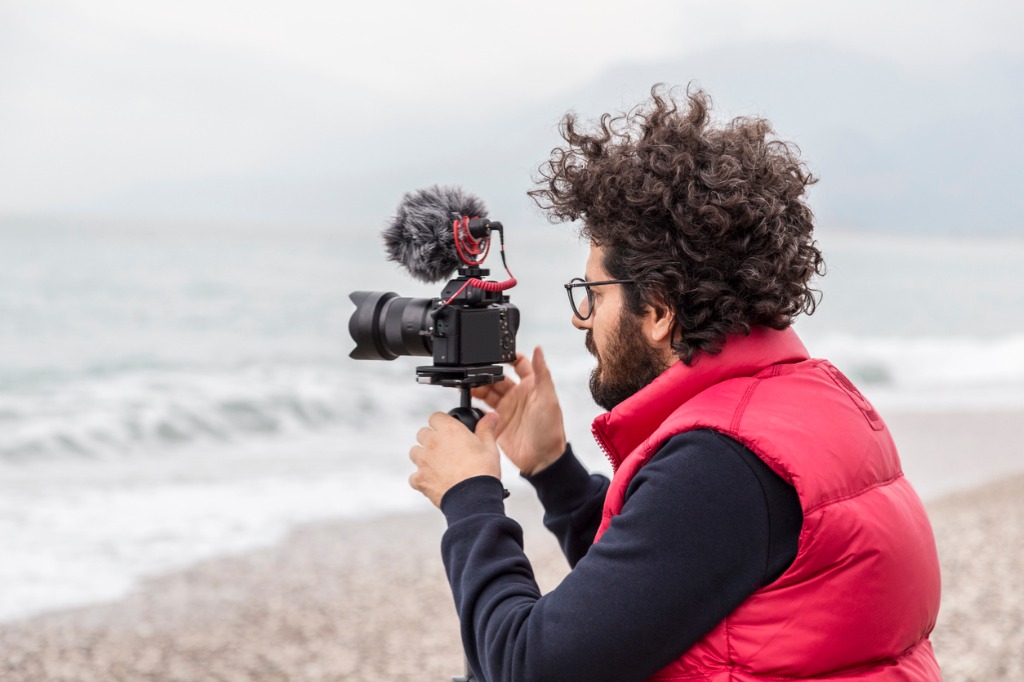
photo byozgurdonmaz via iStock
Once you start shooting video with your DSLR or mirrorless cameras, you start noticing things you want to change in order to capture better videos.
One major need I noticed right away for myself was the audio portion of my videos. Obviously, I needed to upgrade my microphone, which put me right in the middle of the shotgun mic vs lavalier mic debate.
No Debate Zone

Photo by nappy from Pexels
The way I see it, there really is no debate over shotgun mic vs lavalier mic. Both have valid reasons for being used in my video productions. We’ll talk about the pros and cons of each type and then make some recommendations after having the pros and cons of shotgun and lavalier mics compared.
Primarily, the audio I’m talking about is people talking. There are other factors to consider when filming events, journalism, nature, sports, and other things like these. But, if you need to record clear audio of human voices speaking such as in an interview or an instructional vlog, this may be helpful information.
Pros of Shotgun Mics
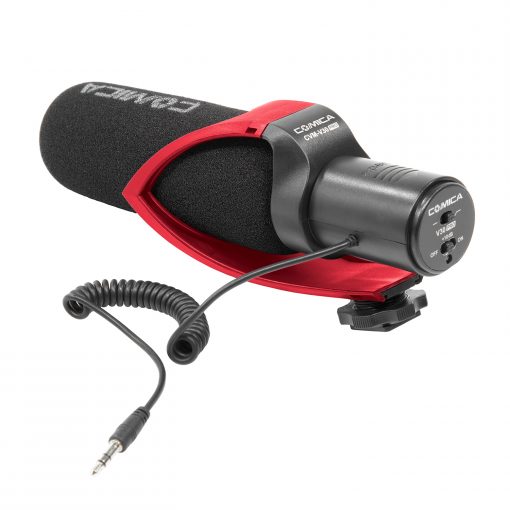
A huge plus for using a high quality shotgun mic for spoken voice video recording is that the microphone can mount directly to your camera. There is also the option with many better shotgun mics to mount on a boom, I’ll give a couple of pointers on that, too.
So, from an ease of use standpoint, a camera mounted shotgun mic is simple and can be handled by the cameraman, so one man operations like this type of microphone.
Most shotgun mics have a nicely defined area of pickup or sensitivity. It’s the pattern that is spoken of in the advertisements or spec sheets. A fairly precise and limited area pattern of what will be heard by the mic works with you mounting on camera in that you pretty much point at your subject just as you are with the lens.
This is handy if you are filming yourself, too, as many instructional YouTube vlogs are. Like a self portrait, set up and point the camera and mic at where you will be, then start shooting.
One of the other pros of shotgun mics involves mounting it on a boom. This lets you get very close to the person speaking, which combined with the limited pattern helps provide some very high quality audio.
Cons of Shotgun Mics
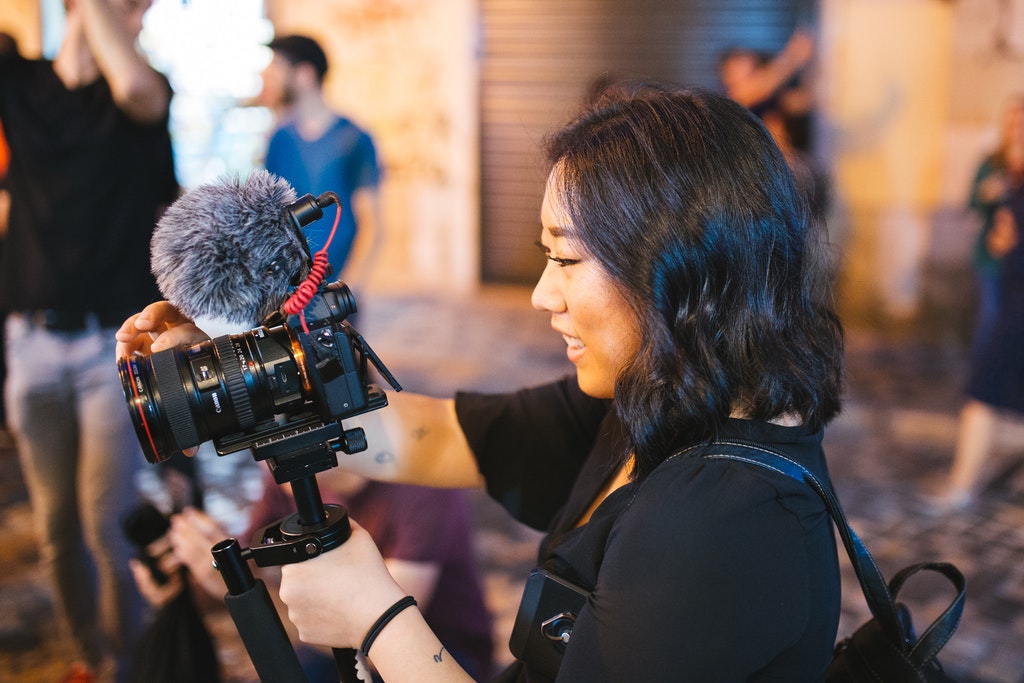
Photo by Fox from Pexels
That limited pickup pattern is great at eliminating much extraneous noise, but it still won’t operate like a telephoto zoom lens does. In other words, if the subject is some distance away from the camera, a shotgun mic may not pull in enough of the audio. A shotgun mic can’t “zoom in” on the sound, that would require a specialty parabolic mic.
One of the other cons of shotgun mics is that if you’re putting one on a boom to physically get closer to the subject, you will need another person to assist or you need to put it on some sort of accessory mount.
Learn More:
- 4 Must-Have Accessories for Shooting Video
- Types of Microphones for Vlogging
- Essential Camera Accessories for Vlogging
Pros of Lavalier Mics
An important reason for using lavalier mics is to place the microphone as close to the source of the audio as possible, in our case physically attaching it to the person speaking. In addition to capturing clean audio from up close, lavaliers tend to eliminate a huge problem with many on camera style mics, wind noise.
Lavalier mics are small, so they can be attached to a necktie, scarf, collar, or shirtfront with ease. The pick up pattern tends to be wide, so precise pointing is not necessary either.
For self-shot video productions, using a lavalier means you can point the camera anywhere for filming while still picking up your speech cleanly and clearly. For recording groups of people, you get super clean sound by placing a lavalier on each speaking subject.
Cons of Lavalier Mics

Photo by Clam Lo from Pexels
The biggest cons of lavalier mics have to do with connecting them to the video recording somehow. If you are recording audio in camera, you either need a cord stretching from the person to the camera or a wireless connection with a transmitter and receiver.
If recording self-shot videos, wired lavaliers are ok, but most videographers opt for wireless transmission. The other option requires even more work from you after the filming ends, and that’s using a separate recording device and editing in the audio feed afterwards.
Recording audio from several people at once will require investing in multiple lavalier mics since each person speaking will need to have their own mic.
Shotgun and Lavalier Mics Compared
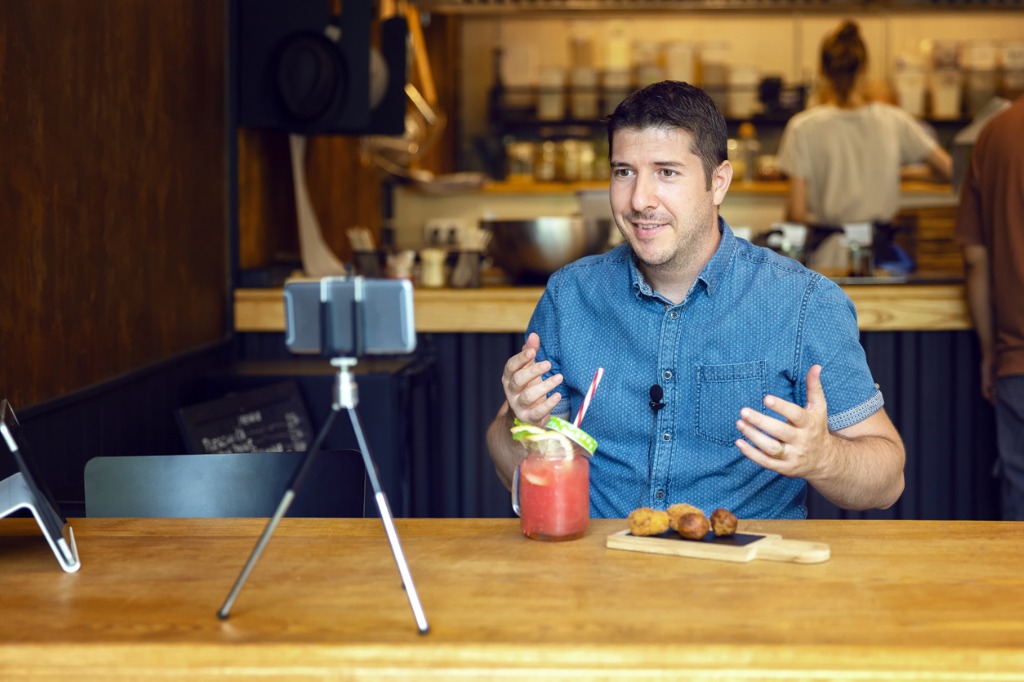
photo byDan Rentea via iStock
With pros and cons for each type of mic, choosing a shotgun mic vs lavalier mics will come down to a shoot by shoot comparison of needs.
Using the cinematography technique of storyboarding, we can usually figure that out well ahead of time. In fact, for some videography shoots, we may switch back and forth between the two types of mic.
And now, for the recommendations we promised:
Comica On-Camera Shotgun Mic
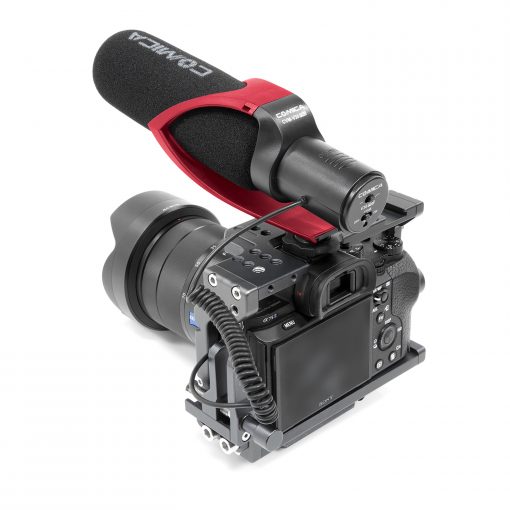
A very good example of a high quality shotgun mic for videography is the Comica On-Camera Shotgun Mic from iKan.
I like to shop iKan for a lot of my specialty videography gear since they specialize in the field and they also manufacture themselves most of the stuff they sell.
The Comica Shotgun Mic has excellent audio characteristics, is made to be rugged, and is also fairly inexpensive for a high quality external mic. It can be mounted directly to the camera, on a camera cage or other mount, or put on a boom or accessory holder.
Comica Wireless Lavalier Mic
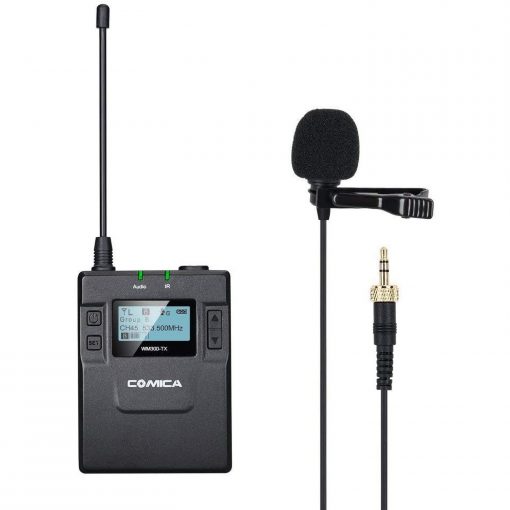
Also from iKan is the Comica Wireless Lavalier Mic system of lavalier mics, transmitters, and receivers. These mics have excellent audio performance and the wireless function works within a range of almost 400 feet.
Lavalier mics, good examples anyways, will require a bit more monetary investment than shotgun mics, but if you need the specific characteristics of lavalier mics, then that’s just part of the equation to factor in.
Once you use these lavalier mics for your first video, you’ll probably be finding ways to include them in most of your productions involving people speaking.
The Debate Is Over
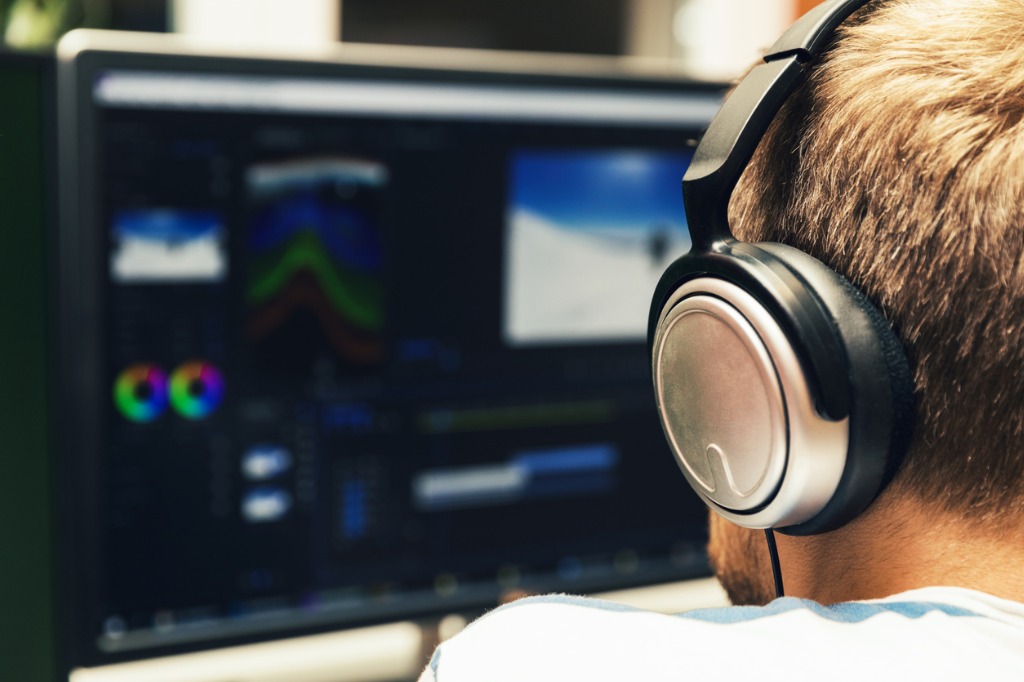
photo byronstik via iStock
So really, there isn’t a debate about using a shotgun mic vs lavalier mics. There are pros and cons for each design. What you do need to do is decide which type of mic will give you the performance and characteristics you require for each particle shoot. You’ll probably be using both types of mics during your varios video shoots.
Learn More:
We Recommend
Simple Tips for Vlogging: How to Create Better Content
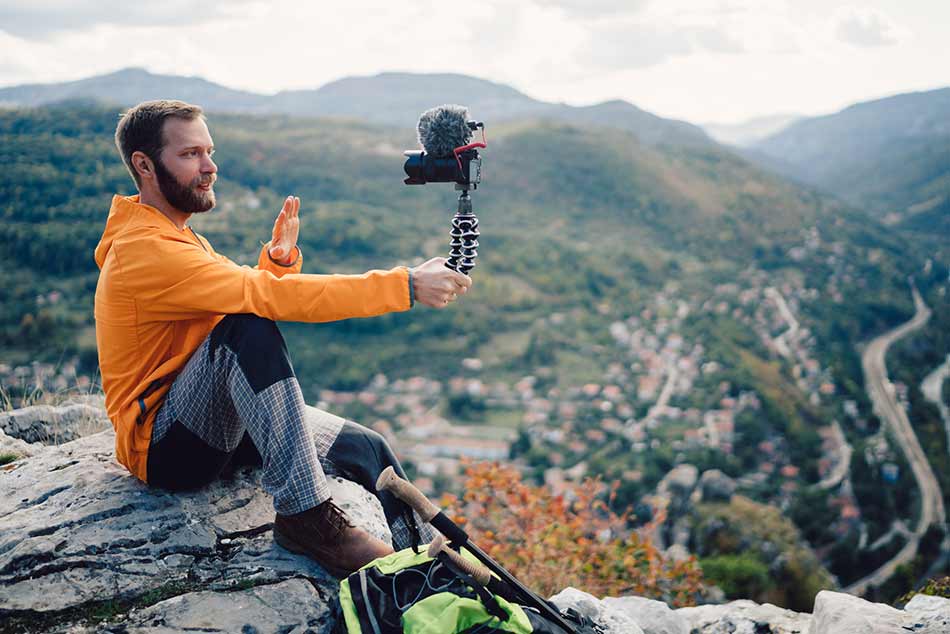 Photo by martin-dm via iStock
The old adage "practice makes perfect" applies to a lot of things, including vlogging.
But when so many people are doing so many things with vlogs, the competition for an audience is definitely stiff.
That means that rather than going the trial-and-error route, you should set yourself up for success by following some tried-and-true tips for vlogging.
Below, check out our quick list of some simple vlogging tips to help you get started on the right foot!
How to Vlog: Learn How to Edit Videos
Let's work backwards and start at the end-product.
The vlogs you post on YouTube or whatever platform you use need to be polished and engaging, and that means understanding how to edit your videos.
Editing isn't just slapping different video clips together and adding a transition between them.
You need to use the editing process to make your videos engaging and dynamic. This means adding an intro sequence, an outro sequence, interesting transitions, weaving in B-roll, and adding music and on-screen effects like titles, to name a few.
Not sure where to get started? Check out the video above by Chris Hau.
Tips for Vlogging: Get the Right Gear
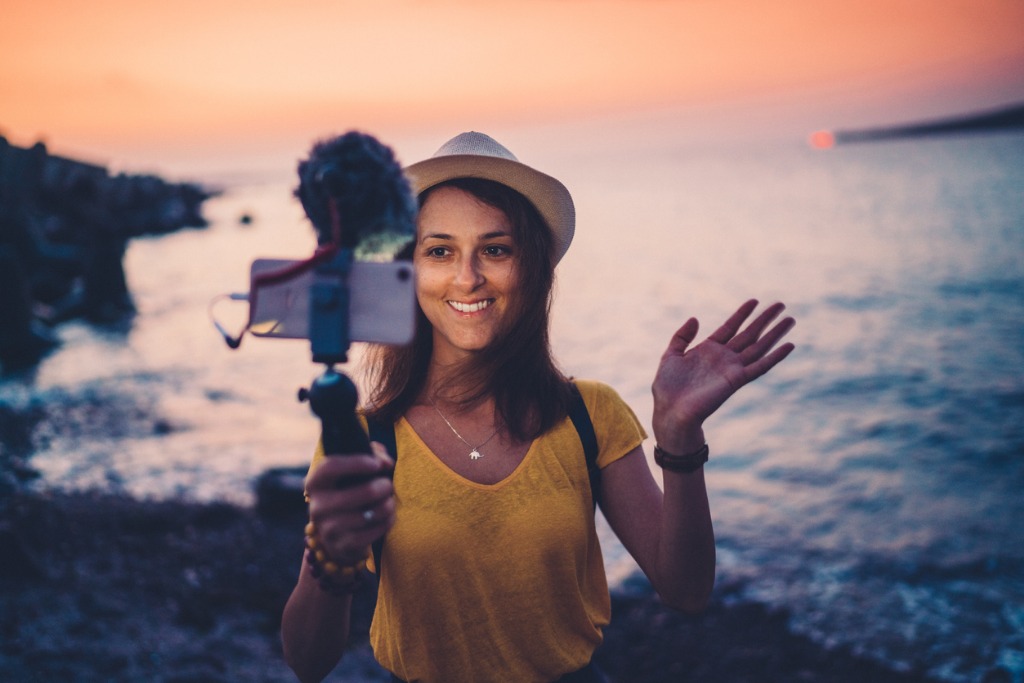 Photo by martin-dm via iStock
Getting geared up for making high-quality videos doesn't mean you need a $10,000 cinema camera and mic booms and all sorts of professional gear.
In fact, many vloggers use little more than their smartphone, a tripod, a light, and an external microphone to create really compelling videos.
If there's one piece of gear advice I bestow on you, though, it's this - get a gimbal.
You've probably seen your fair share of videos where the person in the video is sitting at home or standing outside or otherwise not moving around.
And while there is certainly value in these kinds of setups, your video will have an added layer of interest if you get mobile, and a gimbal will help you do just that.
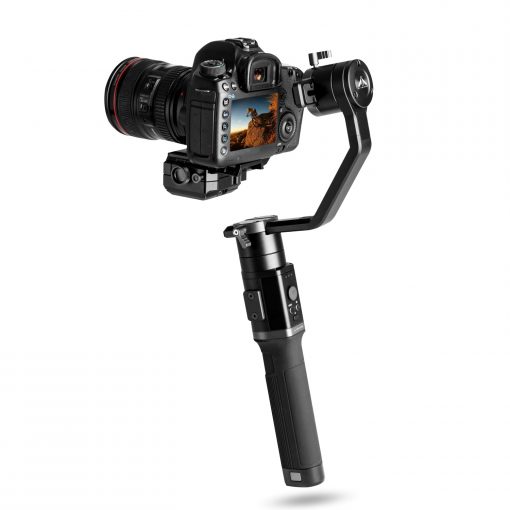
Gimbals are much more than a handheld stabilizer for your camera, too.
For example, the E-Image Horizon One gimbal shown above gives you full 360-degree movements on all three axes.
With advanced steady computing systems, it offers ultra-precise stabilization so you get super smooth footage that your viewers will appreciate.
You can record for 12 hours on the included batteries, so there's no lack of potential for getting incredible footage either!
Add to that a maximum payload of eight pounds and an accompanying smartphone app that allows you to modify the gimbal's settings to your precise specifications, and you have a rig that can greatly expand the creative possibilities for your videos.
See the Horizon One gimbal in action in the video above by Ikan International.
Vlogging Tips: Create a Compelling Story
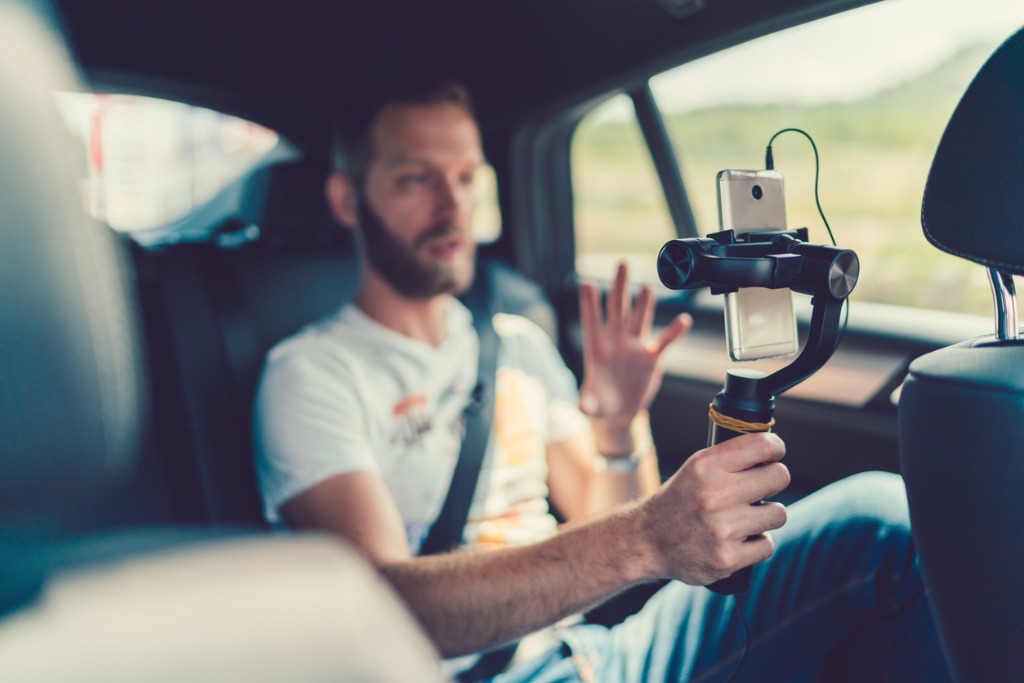 Photo by martin-dm via iStock
Don't just talk at the camera in your vlogs. Instead, come up with a story that will engage viewers and compel them to watch your video from start to finish.
Creating a storyboard with a narrative for the video is a great way to come up with something of interest for your viewers.
The narrative should have three components: the setup, the conflict, and the resolution.
When setting up a video, explain to the viewers what the video is about - what's going on, who's there, what will you be doing, and so forth.
 Photo by jacoblund via iStock
The conflict you present is any simple problem that you'll be addressing, whether it's a "how-to" vlog that teaches people how to do something, you talking about an important issue in the world today, or something in between.
Lastly, you want to bring resolution to the problem. Present ideas, solutions, and so forth. Explain to viewers how you've addressed the issue and what happened as a result.
Granted, each video you make isn't going to be about some earth-shattering problem that you've solved, but this notion of creating a narrative for viewers to follow is a great tool to use to create videos that keep people watching. That's just what you want!
How to Create a Good Vlog: Be Consistent
If your videos have consistency from one video to the next, you'll have a much greater chance of building a solid following with your vlogs.
That consistency needs to appear on multiple levels:
- The type of content you discuss
- The intro and outro sequences
- The amount of videos you publish each week.
Along with that, aim to have a theme for your vlogs. That is, don't upload a vlog and title it "Vlog Day 1," as this tells the audience absolutely nothing about the content of the video.
Likewise, create interesting thumbnails that go along with your theme, again, in the hopes that it will engage viewers and compel them to click on the video to watch it.
Putting in that extra effort to be consistent and have a theme will help you take your vlogging to another level!
Get more tips about how to vlog in the video above by famous vlogger Casey Neistat.
We Recommend
Soft vs Hard Graduated ND Filters

For landscape photography, it’s hard to beat the usefulness of graduated neutral density filters, also called graduated ND filters or GND. There are several types of ND filters, though, soft and hard edge being the two most common. When and how should you use soft vs hard graduated ND filters?
What’s the Difference?

photo bymetamorworks via iStock
Neutral density filters (ND filters) add density to the light path of an exposure. Density means it attenuates light, neutral means it has no color cast. A typical example of ND filters could be either screw in or part of a filter holder system and will be a solid amount of density all the way through.
Graduated ND filters are dense on one side of the filter and clear on the other side and a gradual transition from light to dark. The difference between soft vs hard graduated ND is how quickly the transition is made. If the transition uses a lot of the center of the ND filters, they are soft edge, if the transition is pretty quick, not taking up much room, they are hard edge ND filters.
Most of the graduated ND filters will be in a filter holder system, the filters are square or rectangular and they fit into a holder that allows you to rotate and slide the ND filters into the exact position you need them.
Here is an example of a filter holder system:

In addition to the soft vs hard graduated ND filters, there are also reverse GND with one side having the ND part lighter towards the outer edge in a very soft transition and a very hard edge in the center. Another type is the horizon line ND filter with a dark strip of harde edge right across the center and clear on the outer to sides. One last type are medium edge ND filters.
When to Use a Soft Graduated ND

The Haida Red-Diamond 100x150mm soft edge GND filter for their M10 filter holder system is an example of a high quality GND filter.
What situations do soft graduated ND filters work best? Any scene with one part of the image, either vertically divided or horizontally, that is substantially brighter than the other. This causes exposure balance or dynamic range concerns.
In order to see good detail in the highlights, the shadows, and everything in between, we either need to use the bracket and merge HDR method or we pull down the highlights into a range where we can easily balance them with the shadows with ND filters.
The soft edge comes into play as we examine our scene to see where to place the transition from clear to density of the filter within the scene. If there is not a straight line that differentiates the brighter side from the darker, we use soft edge ND filters.
Examples of a scene that would need soft vs hard graduated ND filters are landscapes with a bright sky but no clear horizon, such as a mountain range or forest. A cityscape would also qualify since these can often resemble a mountain range.
Upside down, a case could be made for using one indoors such as in a cathedral where we want to have good detail on the floor as well as in the vaulted or domed ceiling.
Learn More:
When to Use a Hard Graduated ND

The Haida Red-Diamond 100x150mm hard edge GND filter is what a hard GND looks like. If we would use soft graduated ND filters with scenes that have no clear horizon or dividing line, then when to use a hard graduated ND filter is when the scene DOES have a clear dividing line.
An example that comes to mind is twilight or Blue Hour photography. The sky will be brighter than the ground, so attenuating the sky in order not to lose ground level detail is in order. Sunrise or sunset scenes that have the Sun pretty far from the horizon also work.
So would architectural images, perhaps even used vertically to balance a building in shadow against a sky or other brightly lit buildings. Regardless of the actual scene, the hard edge transition line is placed on the scene dividing line, whether that’s the horizon or some other edge.
When to Use Other Types of ND Filters

For a transition in between soft vs hard graduated ND filters, there are medium edge ND filters, such as the Haida 100x150mm medium edge GND filters that can be used in many other photographic conditions.
For that special situation listed earlier with the Sun right on the horizon during the climax of Sunrise or Sunset, it’s hard to beat the Haida Red-Diamond horizon graduated ND filters, pictured above.
Open Up Your Creativity

photo byswissmediavision via iStock
You already know why graduated and solid ND filters themselves are so useful for landscape photography, using them in a filter holder system opens up all sorts of creative opportunities.
Only polarizer filters might be more valuable in your landscape photography camera bag. As a helpful note, many of the filter hldrs also fit circular polarizers, even allowing you to combine filters together for yet more creative control.
Learn More:
We Recommend
Teleprompter Buyers Guide for Beginner Videographers
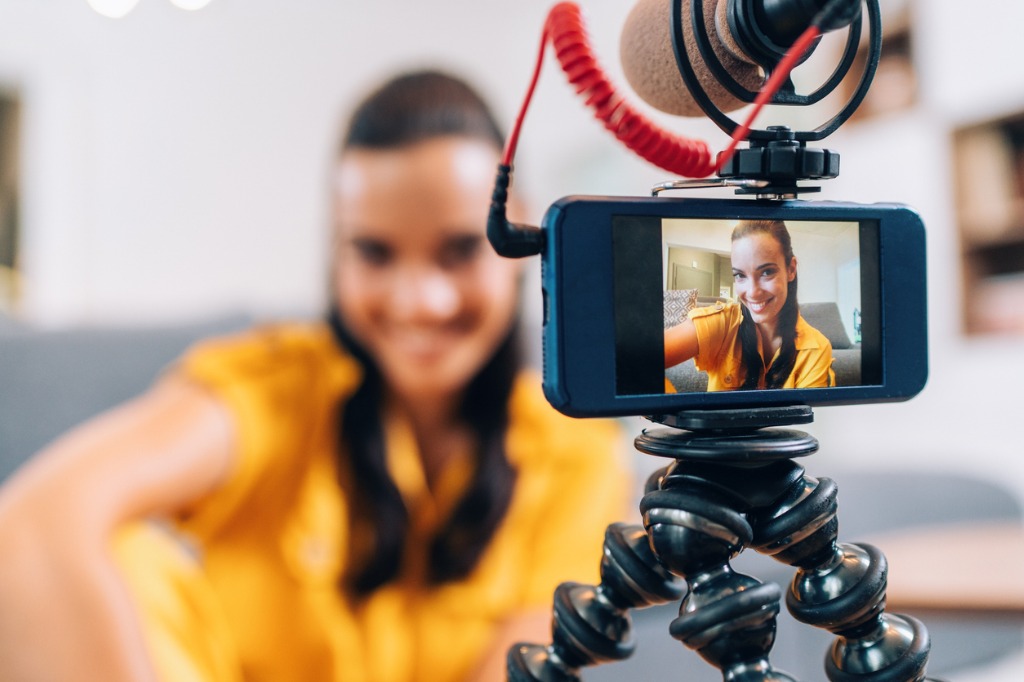
photo byfiladendron via iStock
Whether you’re starting a YouTube channel or are an old vlogging pro, chances are you may find yourself looking for a quality teleprompter buyers guide.
Using a teleprompter for YouTube videos makes you look more professional and puts you a step above your competition. The problem is there are a ton of teleprompter features that most people don’t need and it can be hard to figure out which teleprompters for beginners are actually worth the price.
Our teleprompter buyers guide will walk you through how teleprompters work, a variety of teleprompter features, and the best tablet teleprompters for every price range.
How Do Teleprompters Work?
If you’re looking for a full rundown of how teleprompters work, you can watch the above video by Nate Woodbury.
But, essentially, every teleprompter consists of a piece of reflective glass and a monitor that displays the text. The reflective glass is put above the monitor on an angle so you can read the reflection of your text, but your audience can’t.
The problem with most teleprompters is that they are bulky, which is why purchasing a tablet teleprompter may be the most efficient use of your space. For more info on teleprompter sizing, keep reading.
Recommended Videography Reading:
- How to Shoot Video That Doesn't Suck: Advice to Make Any Amateur Look Like a Pro
- The DSLR Filmmaker's Handbook: Real-World Production Techniques
Teleprompter Features: Choosing the Right Sizing

photo by David-Prado via iStock
I think the most important part of a teleprompter buyers guide is discussing teleprompter sizing because it varies wildly.
For instance, national news stations use prompters that are large enough to be read from a great distance to enable as many shots of the anchors as possible. These teleprompters can be as large as a few feet across.
But, chances are you’re looking for teleprompters for beginners that you could use either in your home or small studio and for this there are two different options: a smartphone teleprompter and a tablet teleprompter.
Honestly, I don’t recommend smartphone teleprompters because they’re much smaller and unless you have perfect vision and can set your camera within a few feet of your face, it’s going to be difficult to read.

If you opt for a tablet teleprompter, like Ikan’s Elite Universal Tablet Teleprompter, you can shoot within 3-6 feet of your camera with ease. Keep in mind that your font size will probably be somewhere between 48-72 points at this distance and so you will only be able to fit around 4-6 words per line.
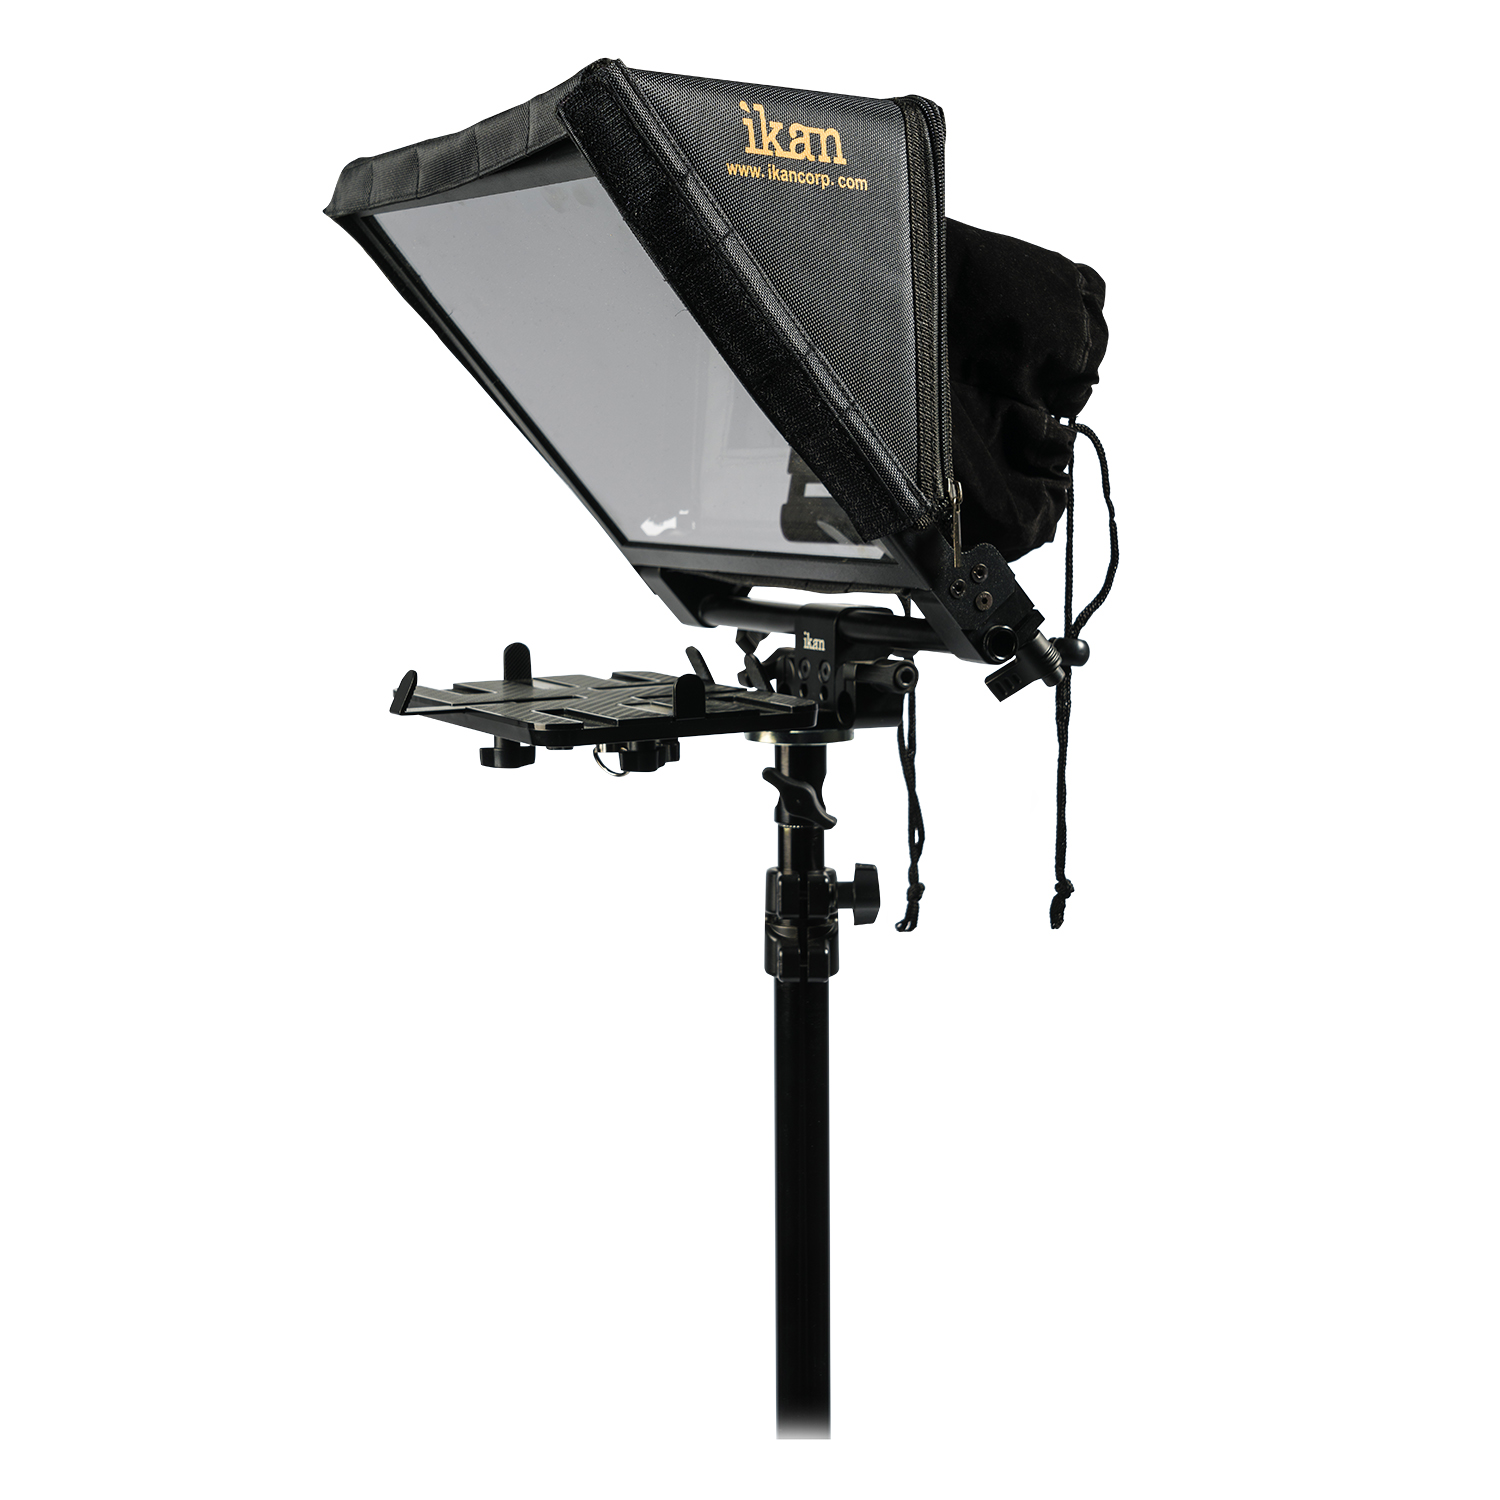
The Elite Universal Tablet Teleprompter works with any tablet from 7.5” x 5” up to 10.5” x 8” and is large enough to allow even people with less-than-perfect vision to read comfortably at a distance.
The Elite Universal Tablet Teleprompter is also one of my favorite teleprompters for beginners because it’s only $430.
Learn More:
- These Vlogging Accessories Will Help Take Your Videos to the Next Level
- Camera Gear Upgrades With a Lot of Bang for the Buck
Teleprompter Features: Choosing the Right Mount

photo by vm via iStock
I can’t tell you how many times I’ve seen a teleprompter buyers guide without information about teleprompter mounts.
Some teleprompters attach to a tripod that allows the camera to then attach to the back of the teleprompter while others attach to the front of a camera rig.
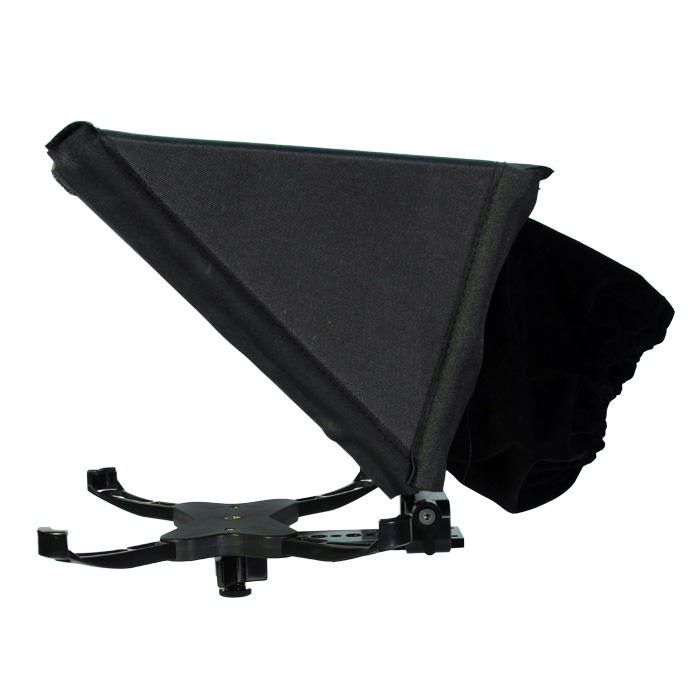
Ikan’s PT Elite UGK teleprompter, for example, is compatible with DSLRs and all small to mid-sized cameras because the cameras simply attach to the back of the teleprompter.
There’s another teleprompter mount that allows you to put your teleprompter on a tripod and your camera on a separate tripod, but this method takes up a lot more room and is thus not great for beginners or anyone working in a small space.
Teleprompter Features: What is it Compatible With?
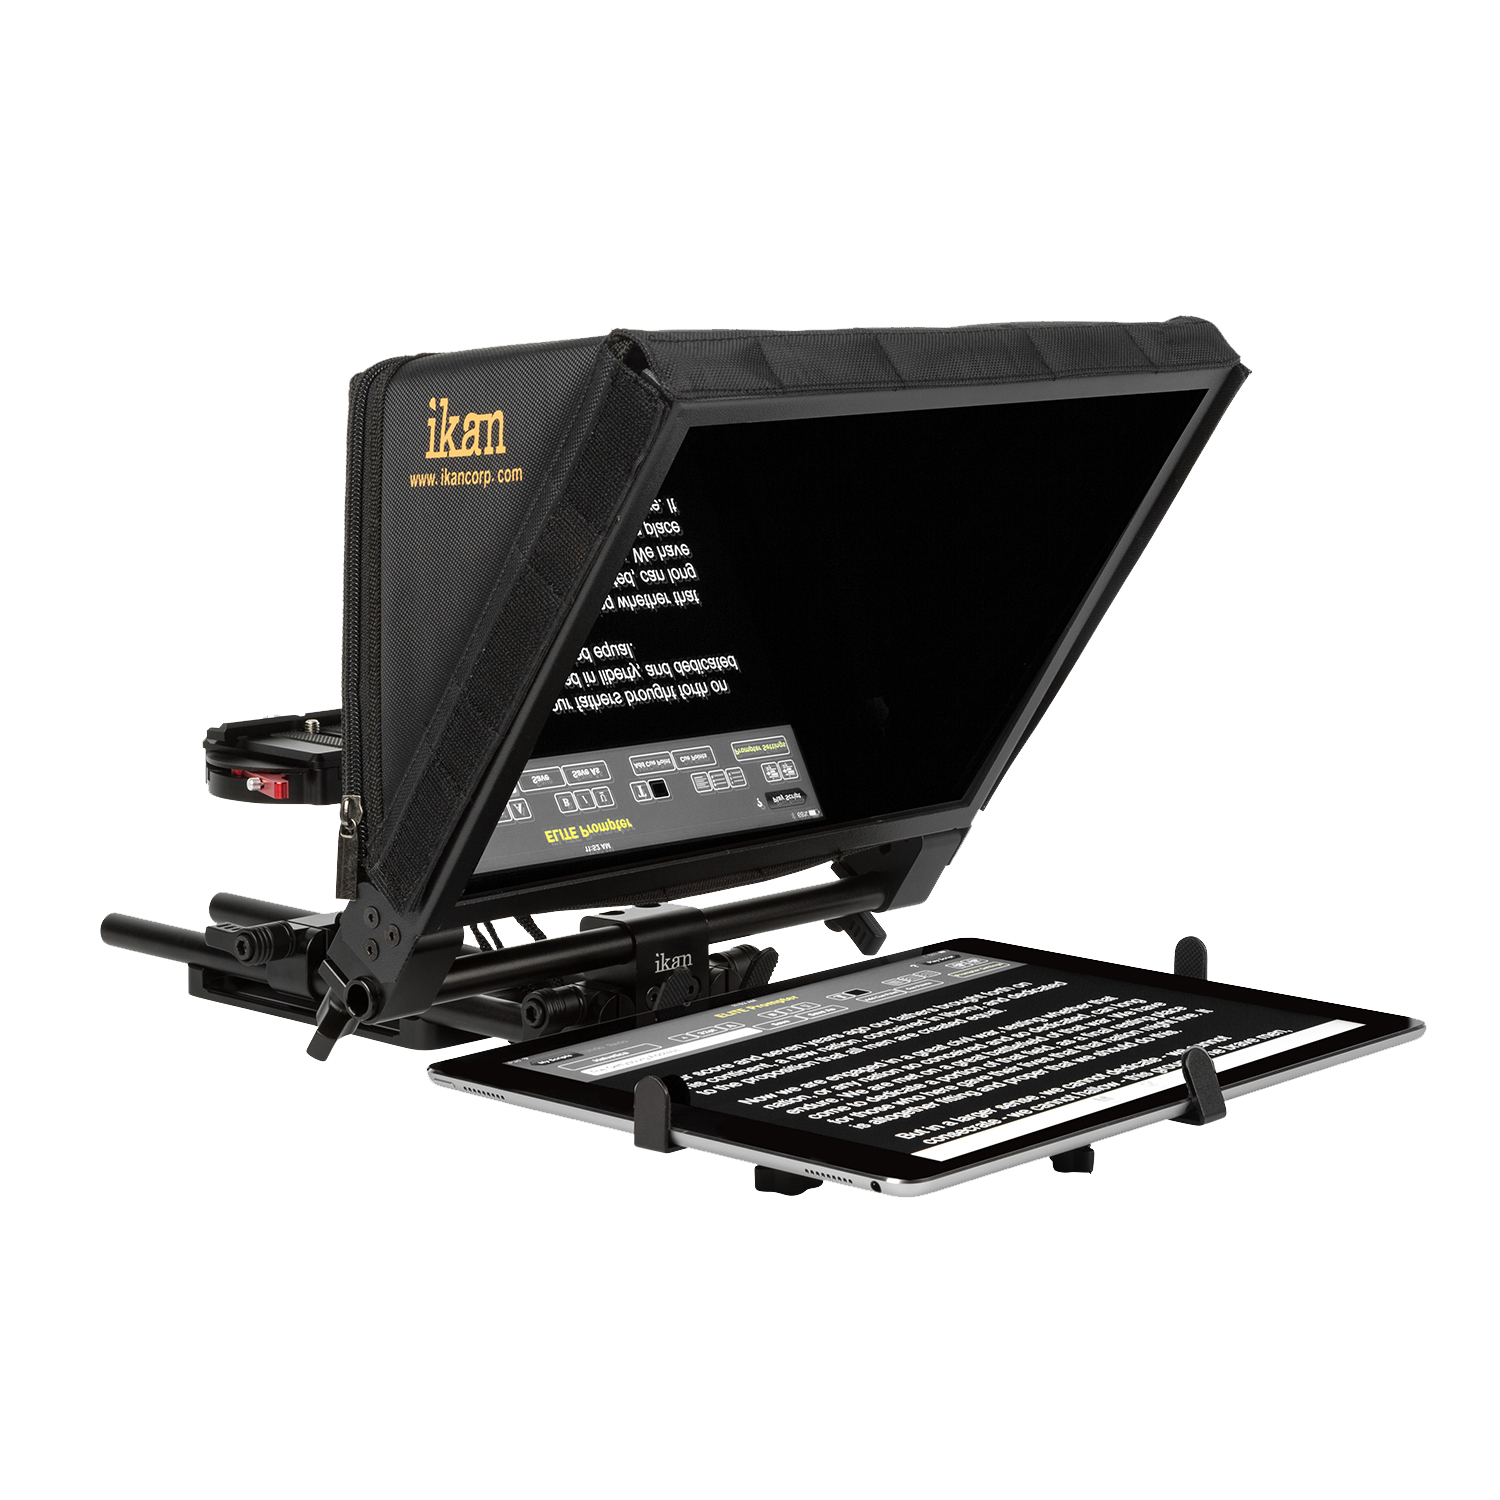
Lastly, I’ve been discussing this throughout, but if you’re looking at teleprompter features then you need to know what it is compatible with. For instance, does it work with your smartphone or a tablet? How big does your smartphone or tablet need to be?
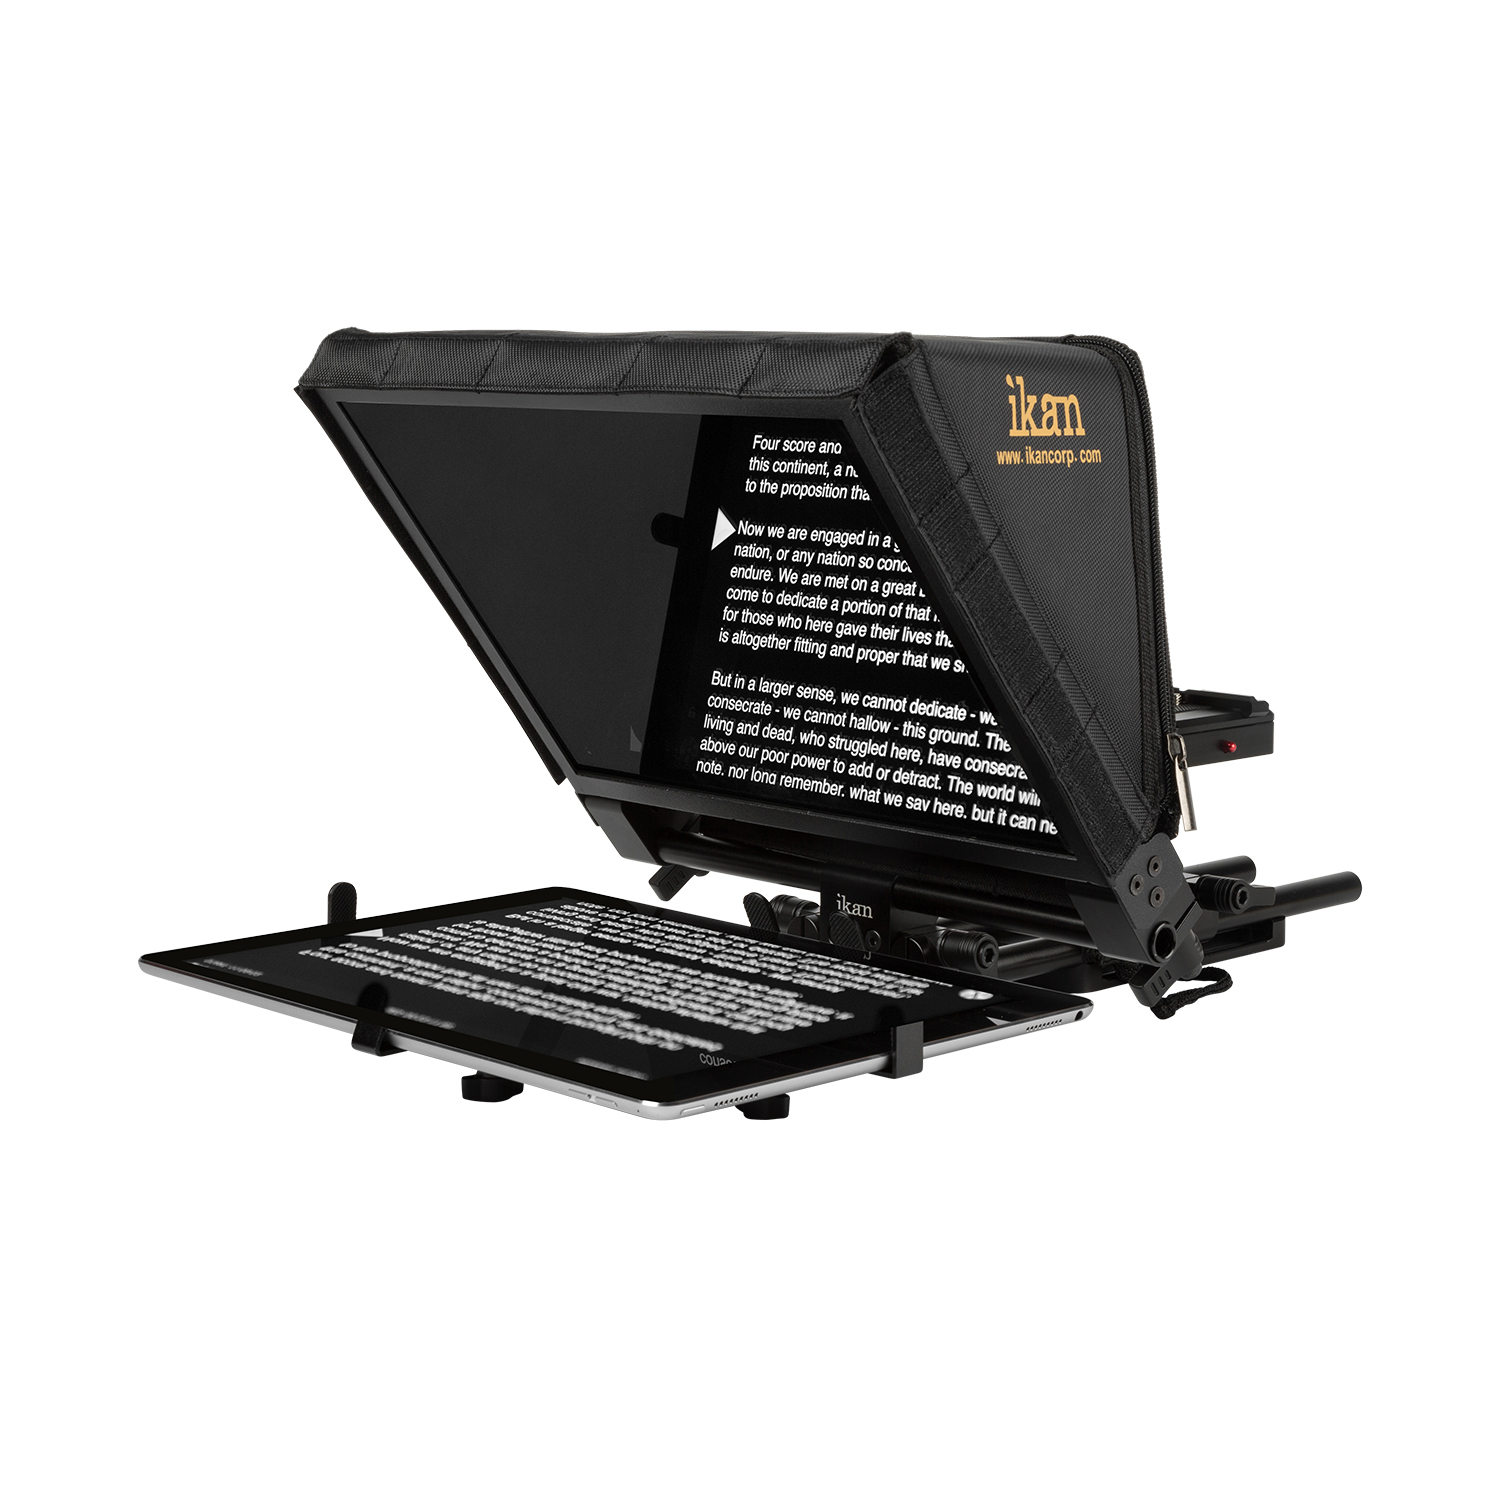
High-quality teleprompters will support a variety of smartphones or tablets. Ikan’s PT Elite Pro, for example, works with iPads, Androids, and Windows tablets. It also supports any tablet between 6” x 9” and 9” x 12”.
Buying a tablet teleprompter that ends up not fitting your tablet is the worst feeling in the world - apart from buying a teleprompter that ends up not fitting your needs.
If you’re going to be spending hundreds of dollars on vlogging equipment, you may as well go with a company you know you can trust. For me, that company is Ikan!
Learn More:
We Recommend
Teleprompter Shopping Guide
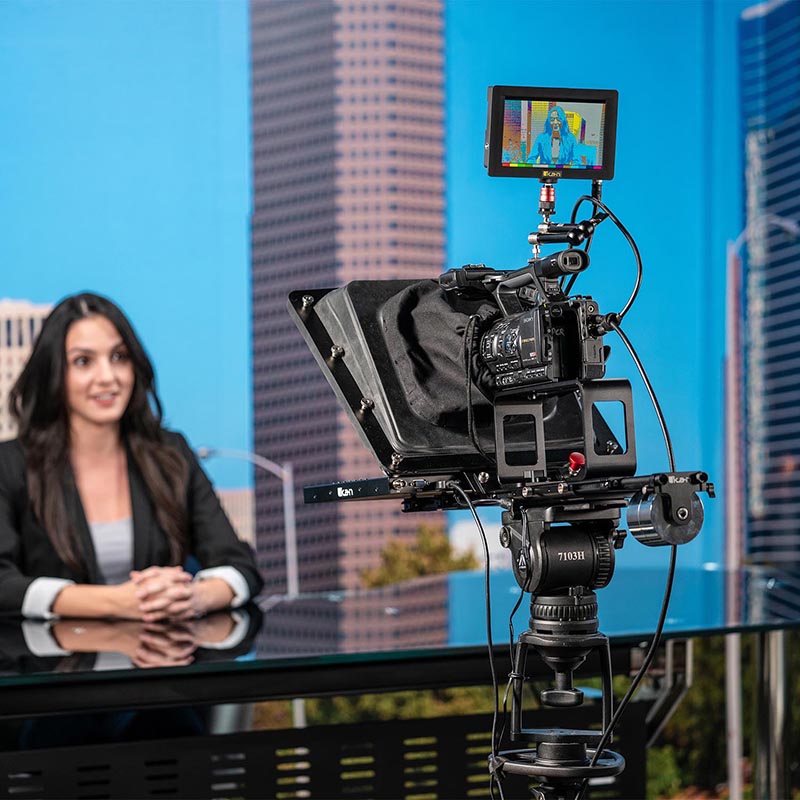
If you're ready to start a YouTube channel or produce other video content, a critical piece of equipment that can elevate the quality of your videos is a teleprompter.
Teleprompters come in all shapes and sizes (and price points), and with so much variety, it can be a little overwhelming deciding which direction to go.
That's where this teleprompter shopping guide comes in...
If you're unsure of what features to look for in a new teleprompter, the guideline below will help.
What is a Teleprompter, and why use one?
The primary reason why you should use a teleprompter is because it results in a much more natural look in your videos.
Rather than looking down at a desk to read what you need to say to the camera, you can look directly at the camera so the audience feels like you're engaging directly with them.
This is exactly why professional newscasters use teleprompters.
And don't be scared that teleprompters are difficult to use or hard to read, either.
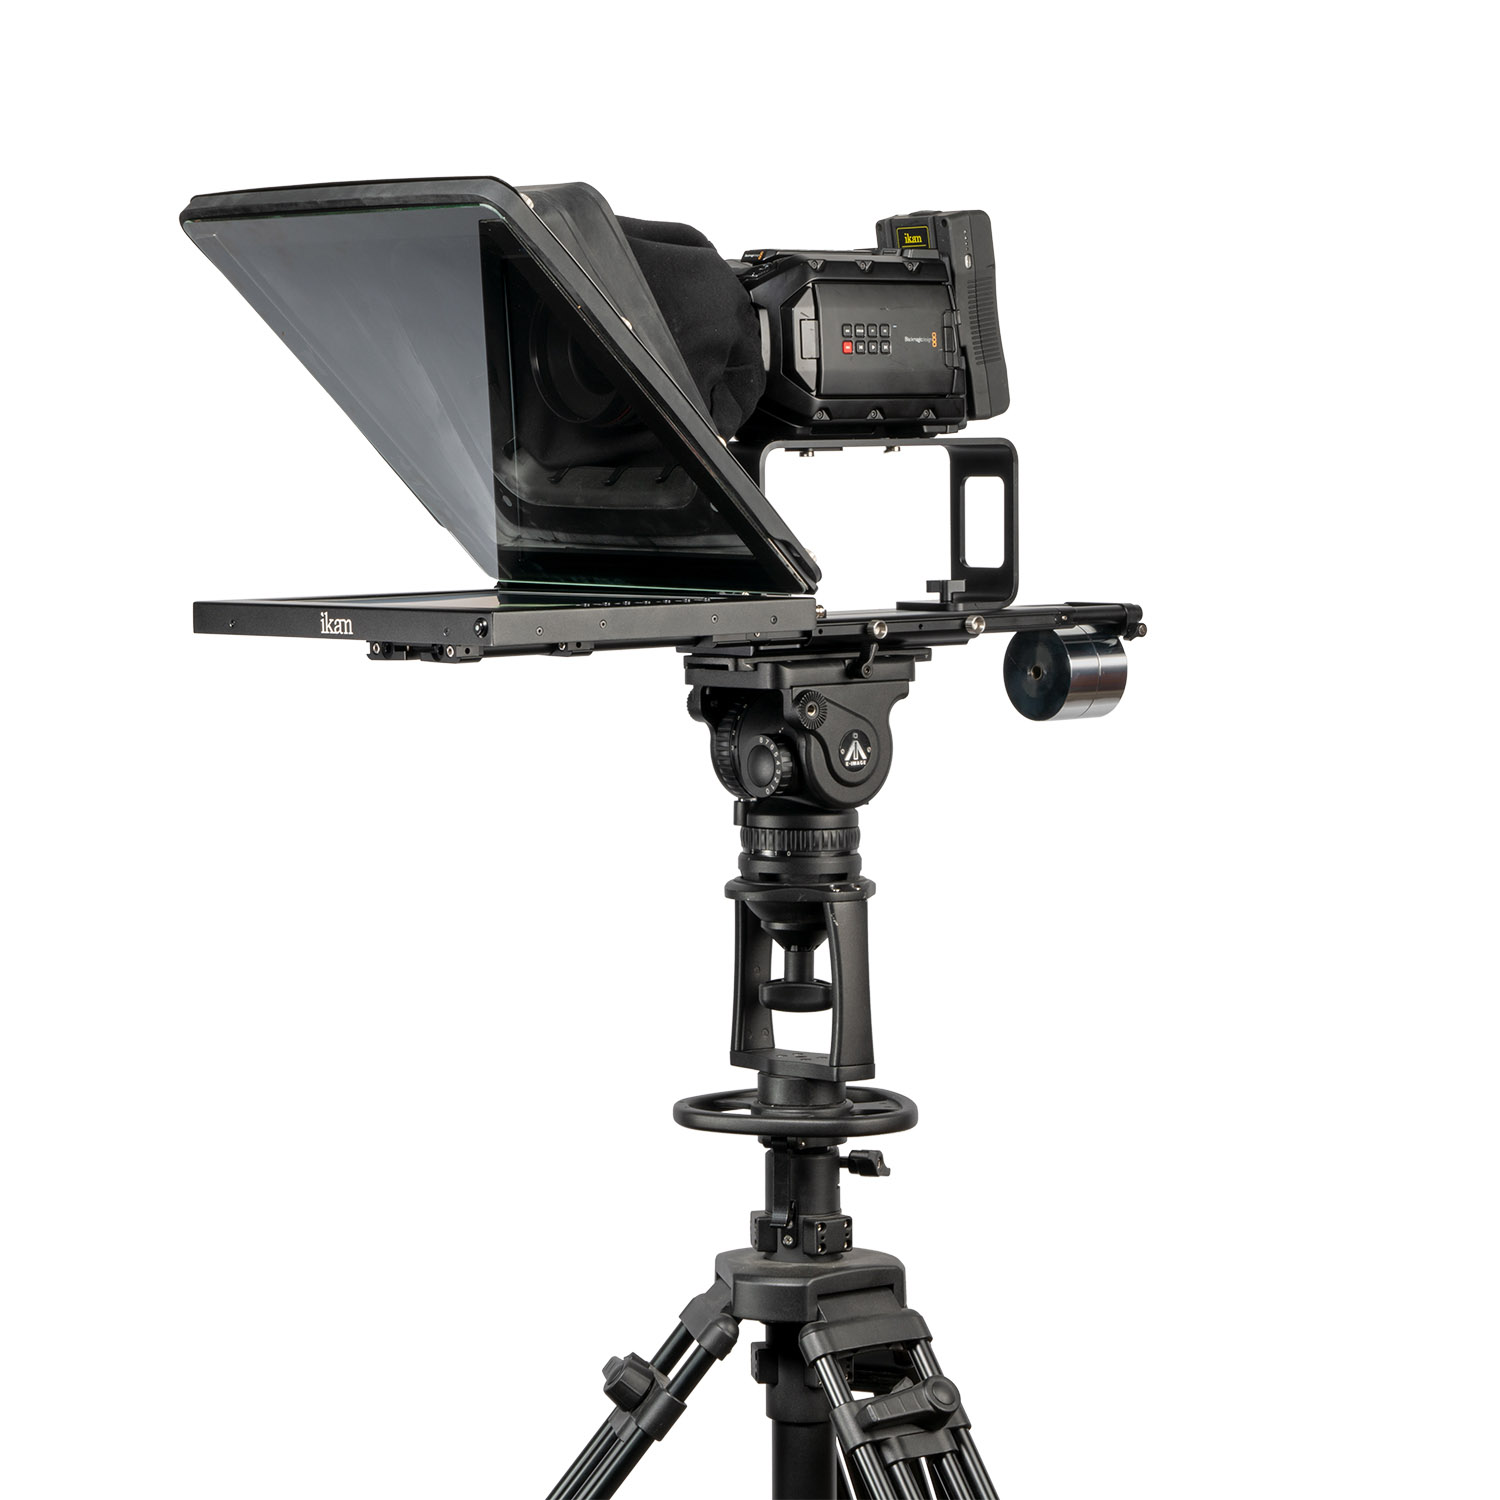
A teleprompter is a piece of glass and a monitor that shows the script you need to read. The glass is reflective, and is placed above the monitor (e.g., an iPad) at an angle so you can read the reflection of the text.
As you read iPad teleprompters like this, the text scrolls to reveal the next lines of text, giving you the ability to read at a very natural and engaging pace.
Again, this enables you to maintain eye contact with the camera. You don't have to memorize what you need to say, either!
Features to Look for in a Teleprompter
Not all teleprompters are made alike, so you'll need to do some investigating about the features that teleprompters offer to you.
I have used Ikan teleprompters for some time now, and have thoroughly enjoyed using them. As such, I'll use my two Ikan teleprompters as examples of the features you might want to look for as you shop for a teleprompter of your own.
Teleprompter Sizing
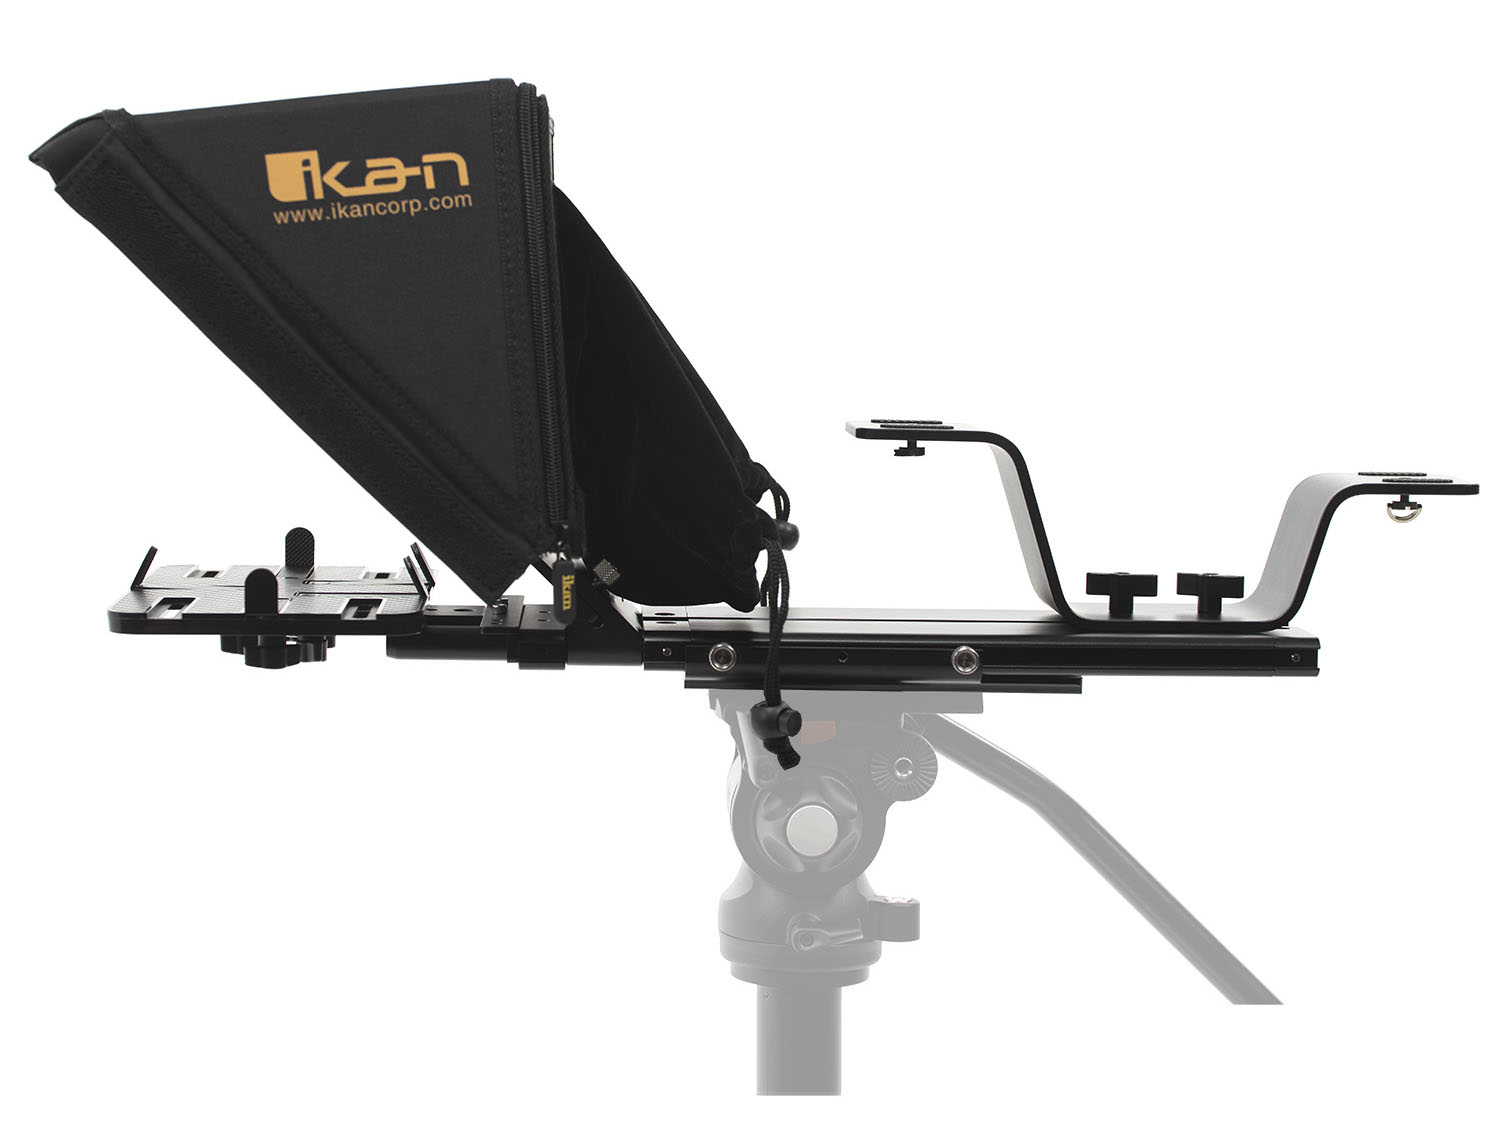
As noted earlier, teleprompters come in all shapes and sizes.
And while the size of the teleprompter might not seem like something you need to worry about, it can greatly influence your workflow.
For example, my first Ikan teleprompter was the Elite Pro 2 Universal Tablet Teleprompter (shown above). At 6.5 pounds and 22 x 10.5 x 12 inches, it's a small, portable teleprompter that takes up very little space in my home studio.
And because it's so small, it's easy to transport to other locations. Sometimes I shoot videos in my backyard, my garage, or even in the field, and this teleprompter works great for those applications. If you envision being mobile and needing a teleprompter that you can take with you, a smaller rig like this is a great choice.
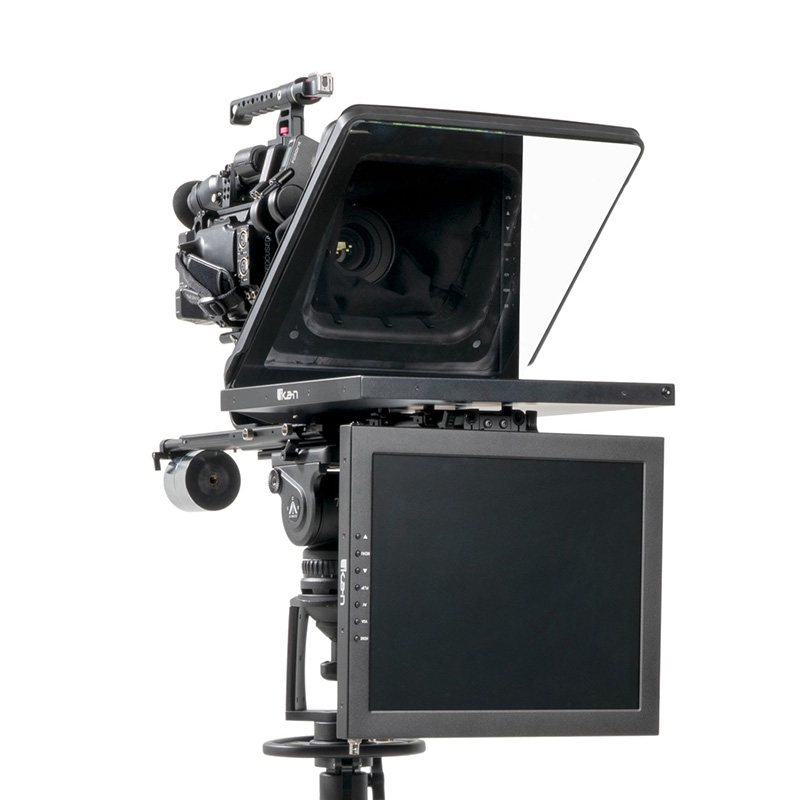
My newest Ikan teleprompter is the Professional 15-Inch High Bright Beam Splitter model shown above.
At 22 pounds, it is significantly heavier than the portable teleprompter I mentioned above. It's also got a larger footprint at 25 x 20 x 16 inches (this doesn't include the space needed for other gear, like a tripod, camera, and lens, of course).
Given its size, this teleprompter is best suited for studio work only. It's not something I'd want to carry with me to a remote shoot.
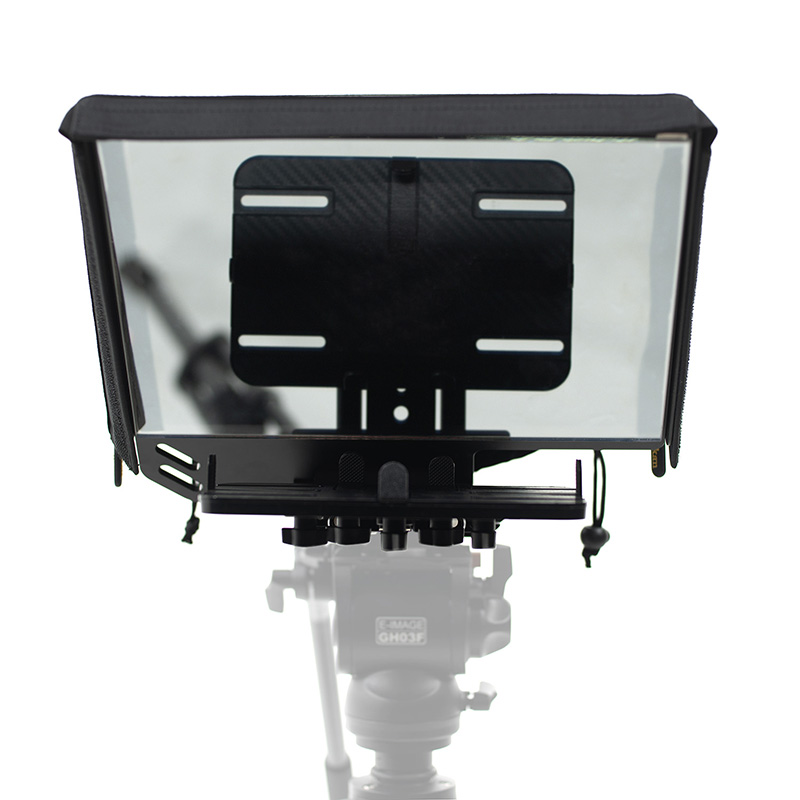
Aside from portability, the sizing of your teleprompter is important with regard to the size of the screen from which you read.
My smaller teleprompter can accommodate tablets up to 9 x 12 inches, which is easy to read from up to about 14 feet away. As you can see above, the tablet simply lays in the tray and the text on the tablet screen is reflected in the glass and back towards me for easy reading.
My larger teleprompter, though, has a 15-inch screen, which gives me larger text to read and the ability to position myself further away, if needed. Of course, I use this teleprompter in my home studio, so I can only be about 8-10 feet away from it due to the size restraints of the studio.
Another advantage of using a teleprompter with a larger screen is that by placing it further from you, you have more room to place cameras, lights, and other equipment. This is just something to consider if you have visions of a large and complex video setup.
Learn More:
Teleprompter Brightness
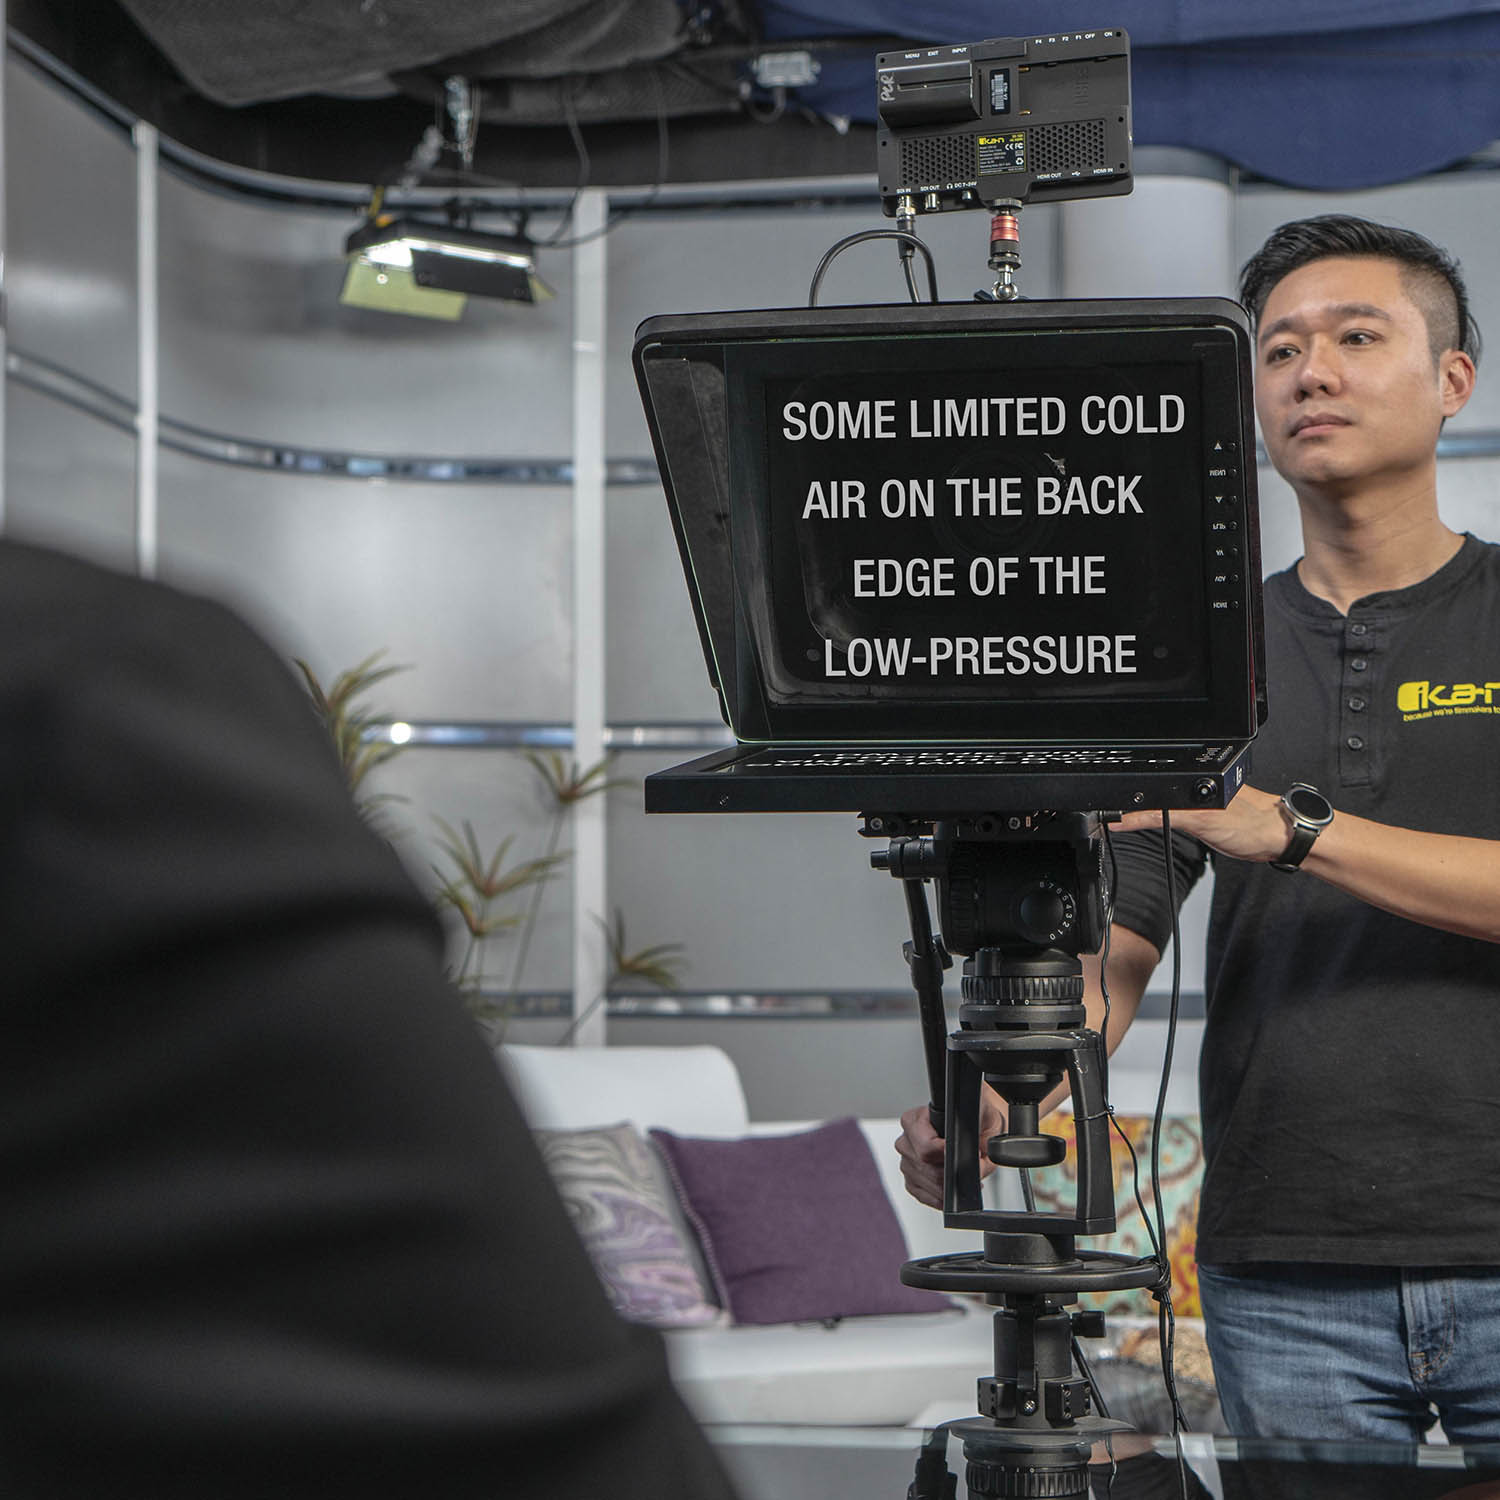
When shopping for a teleprompter, be sure you think about the brightness level of the screen.
When you're recording at home, like I often do in my studio, you'll need a much lower screen brightness than you do when you're out at midday recording in the field.
For field work with a teleprompter, you'll want a display that has 1000 nits of brightness, at a minimum.
In the image above, you can see how a teleprompter works. Additionally, you can see how the brightness of the screen enables the presenter to clearly see what they need to read.
Teleprompter Controls
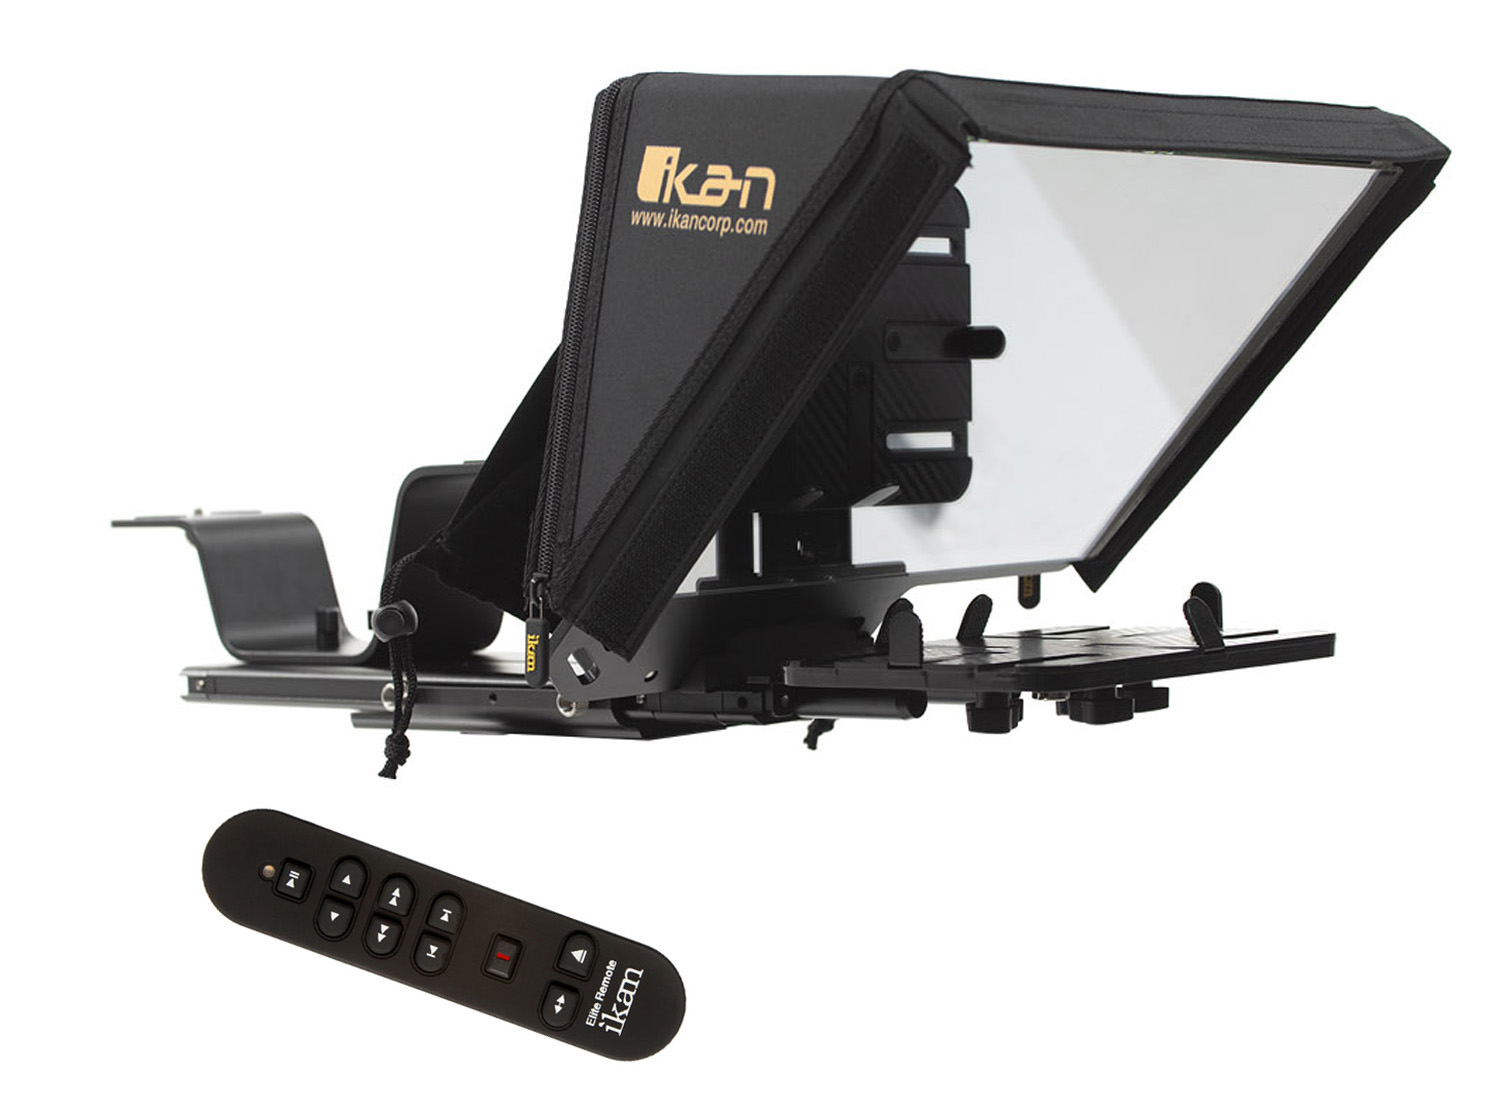
Teleprompters come with a variety of control options, including wired and wireless remotes, hand controls, and even foot controls that move the text on the screen for easy reading.
The way you control a teleprompter is a bit of a personal preference. Some people really like foot controls. Others prefer to use a wired remote. Unfortunately, unless you're able to test these various control methods out ahead of time, there's really no way of knowing what method you prefer before you buy a teleprompter.
My Ikan Elite Pro 2 Universal Tablet Teleprompter has a wireless remote that's super easy to use and allows me to start and stop the teleprompter feed with the push of a button. For working out in the field, a wireless remote like this is a perfect means of controlling the text on the teleprompter.
My studio teleprompter is controlled by a foot pedal. This is ideal for studio work because I can control the text without having a remote in my hand, which would obviously show on screen.
Compatibility With Other Gear
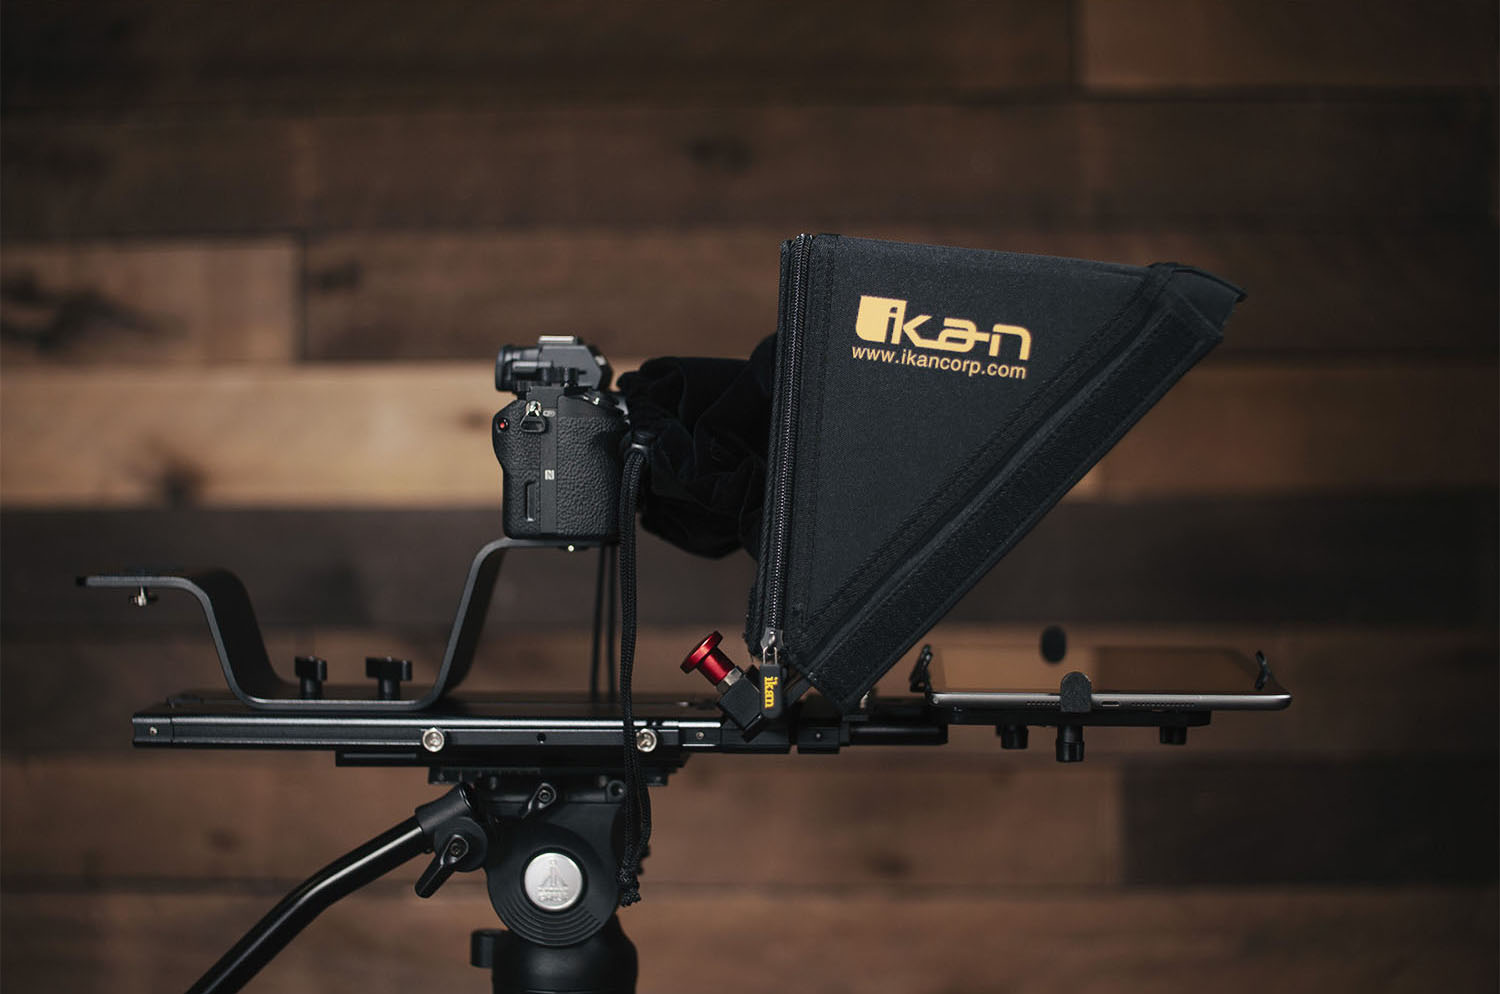
Of course, you want to ensure that your teleprompter will work with your camera, lens, and tripod, too.
The foundation of all of this is your tripod and the tripod head. These items need to be able to support the weight of your teleprompter, camera, and lens all at the same time.
For me, a good tripod is worth spending the extra money for the higher payload capacity. I'd rather have something like the ProMediaGear Pro-Stix 4-Section Carbon Fiber Tripod that set me back $1,300 than put my expensive camera, lens, and teleprompter on a cheap tripod in an effort to save money. Now, you don't have to spend $1,300 on a tripod - there are many excellent options at a lower price point. Just be sure the payload capacity of the tripod and ballhead exceed the weight of all your gear.
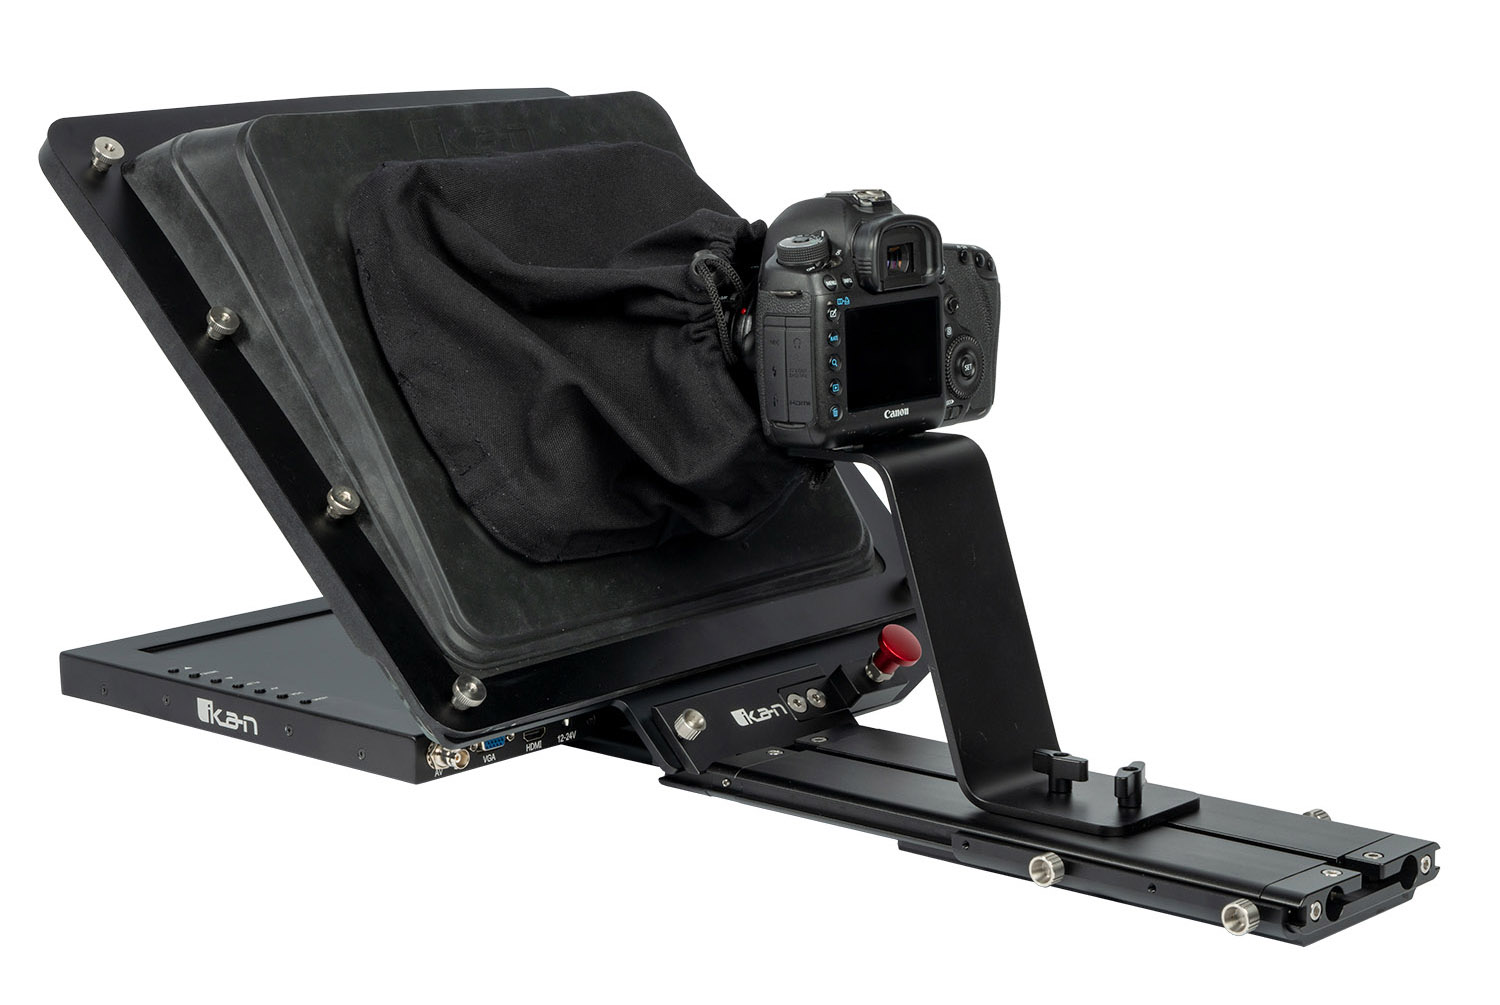
Another component to think about in terms of compatibility is whether your camera and lens will work with a teleprompter.
Not only does this depend on your camera and lens, but it also depends on the mounting system that comes with the teleprompter.
For example, my Professional 15-Inch High Bright Beam Splitter teleprompter from Ikan came with three different camera mounts to ensure that I have flexibility in the camera and lens combinations that I can use with the teleprompter.
Having that flexibility is paramount - it allows you to place the camera and lens at the back of the teleprompter, that way my eye line is right down the barrel of the lens. As noted earlier, this helps give my interactions with the audience that authenticity that's so important, even though I'm reading a script.
Practice Makes Perfect

Photo by David-Prado via iStock
Of course, having all the right gear is going to help you perfect your video productions, but the most important factor is you and your skills and abilities in front of the camera.
Learning how to use a teleprompter takes time and practice, so don't get discouraged if your first few videos using a teleprompter seem a little stiff.
With time, you'll get comfortable reading scripts off the teleprompter and that stiffness will go away and your presentation will be much more engaging and laid back.
But to get to that point, you need to invest some time in learning all about the gear you need to make your video productions happen in the first place.
This teleprompter shopping guide is a good place to start. Be sure you investigate cameras, lenses, tripods, and lighting as well.
Learn More:
We Recommend
The Best of 2019
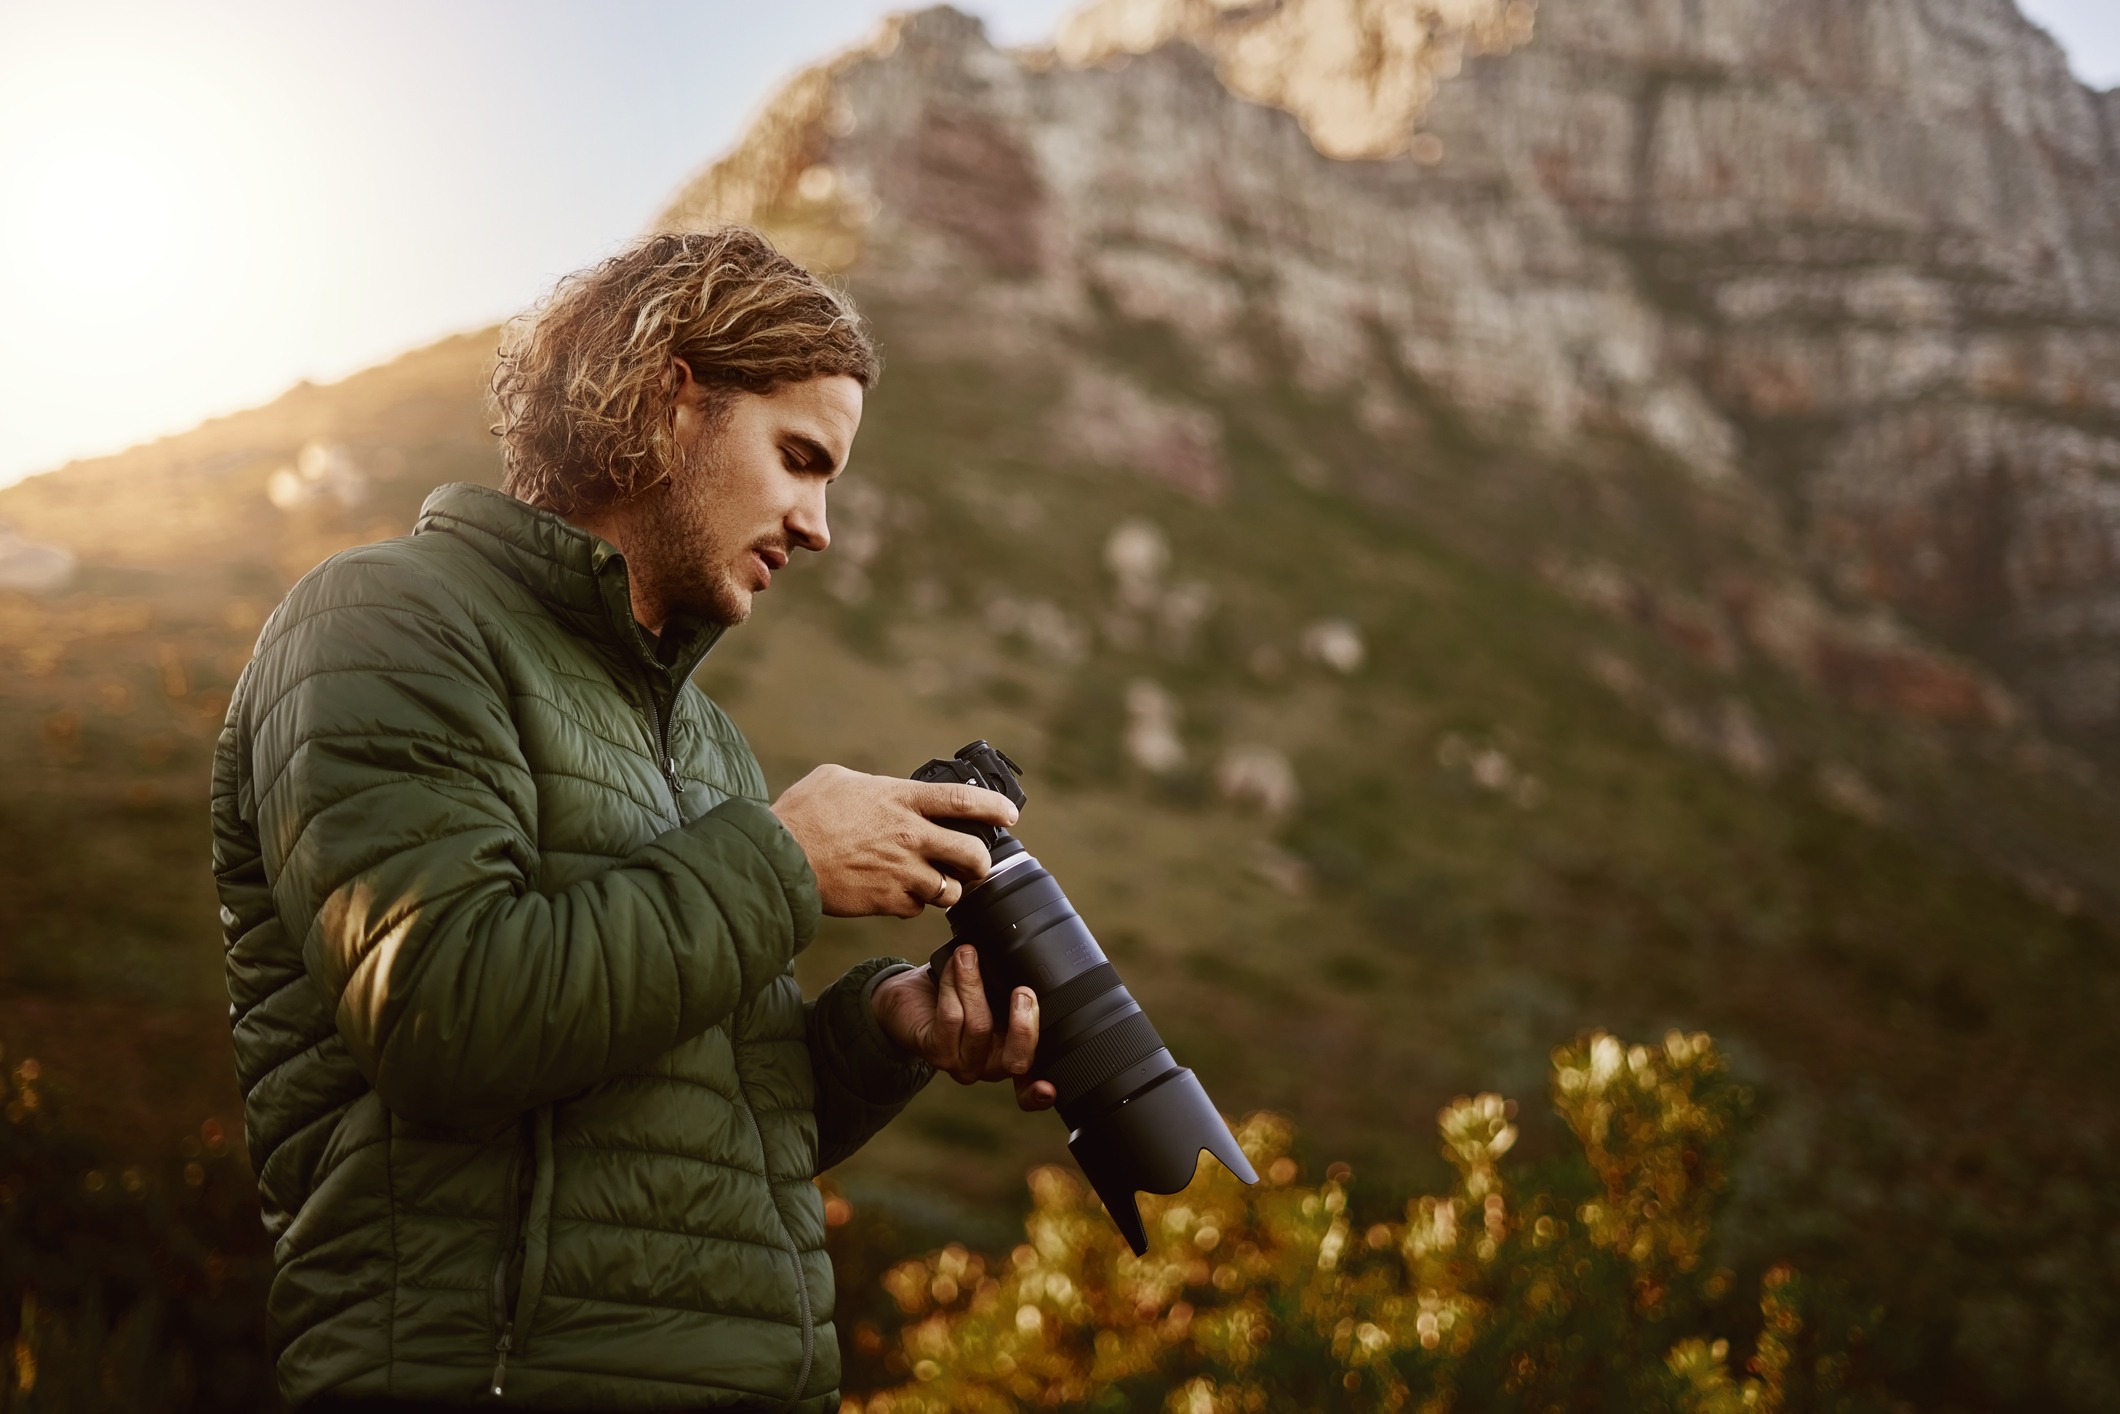 Photo by Lyndon Stratford via iStock
As we near the end of 2019 (and the decade!), it's a prime time to look back on the year in photography.
It's been a crazy year with so many incredible innovations happening. I say that every year, but every year it's the truth!
When I think about the best photography gear, gadgets, products, and services, I think about things that are functional, easy to use, and innovative.
The list I've compiled below is full of products that tick these boxes...
Each item I've included on my Best of 2019 list is something that I have at the very least thoroughly tested or that I own.
With that said, here's a few items that blew me away in 2019.
Argraph Marumi M100 Filter System

One of the hallmarks of the companies featured on this list is that they have all innovated the photography industry in some way.
For Marumi, their claim to fame isn’t just crafting some of the best filter systems available today, but creating filter systems that streamline your workflow in the field.
Marumi’s Magnetic M100 Filter Holder and their line of magnetic filters are just what the doctor ordered for photographers that are sick of sliding filters in and out of their holders.
The M100 filter holder sports a slim 10mm design with strong magnetic attachments that hold the filter in place. The foam gaskets on the filter holder ensure that there are no light leaks to ruin your photos.

If using a circular polarizer, it rotates independently in the filter holder and features water and oil-repellent coatings on both sides that minimizes clean up.
The filter also has anti-static-anti-scratch, and anti-reflection properties that ensure you have the ideal shooting experience.

The other magnetic filters in Marumi’s lineup have the same features, including their graduated ND filters and solid ND Filters.
The graduated ND filters include hard-edge, soft-edge (as shown above), and reverse grads for photographing landscapes with a definite horizon, a variable horizon, and at sunrise and sunset, respectively.

Of course, there are also many different solid ND filters available from 2-stops all the way up to 15-stops.
Like the other Marumi filters mentioned above, these ND filters are made of durable Schott 5270 glass that offers high-definition results.
When photographing landscapes, the quality of light can change from one second to the next. That’s why this magnetic system is so compelling - by reducing the time spent swapping out filters, you can spend more time photographing the beauty before you!
Ikan E-Image Horizon One 3-Axis Gimbal

One of the most pleasant surprises for me this year was just how good the Ikan E-Image Horizon One 3-Axis Gimbal really is.
I use this rig with my Nikon Z7, and it absolutely rocks it in terms of helping me get ultra-smooth, cinematic-looking video.
This gimbal is extremely well built and feels solid and supremely sturdy in your hand.
Granted, my setup doesn't come close to meeting this gimbal's eight-pound load capacity, but I'm sure it could perform just as well if I used a heavier camera and lens package.
The Horizon One has brushless motors that give you ultra-precise stabilization, and with the 12-hour runtime, you can shoot all day long without stopping to recharge the gimbal.
Built into the unit are five operational modes, including my personal favorite, "Dream Follow," which gives you 360-degree spin on the roll axis.
I can't even tell you how many gimbals I've tested and owned over the years - maybe more than a dozen!
And this rig is by far one of the very best.
It's impeccably built, full of features, and easy to use. If that doesn't say "Best of 2019," I don't know what does.
Ikan Onyx Digital Color LED Panel Light

I know what you're thinking...
How can a light be part of the Best of 2019?
Well, as you know, photography is all about great light, and the Ikan Onyx Digital Color Light definitely delivers on that front.
What I've found so impressive with this light is that it has RGB, white, and amber LEDs. And with five color modes, you can use this thing for just about any kind of photo shoot or video shoot.
In fact, in RGB mode, this light gives you independent control over the red, green, and blue LEDs, which means you can literally create millions of different colors to suit your needs and tastes.
Meanwhile, the amber and white LEDs give photographers the option of recreating daylight or tungsten light with incredible accuracy.
This light even has a CCT mode that offers an adjustable color temperature from 2800K up to 10,000K. You simply don't find that kind of range in most lights!
On top of that, the Onyx has a Hue Shift feature of green and magenta lights, giving you yet another option for exerting pinpoint control over the kind of light you have available to you.

Ikan also stuffed the Onyx with eight special effects - like police lights and candle flames - as well as 33 different gels to give you even further light customization possibilities.
Heck, there's even a built-in 1/2-stop diffuser!
This is one of the best lights I've used this year, and the data backs it up - it has a CRI-TLCI rating of 95, so you know that the light it emits is clean and beautiful.
In my opinion, you just won't find a better light, which is why I've included it in my Best of 2019 list.
Exposure Software

I've been a fan of Exposure Software for a long time, and it just keeps getting better and better with more and more tools available that make editing photos a simpler, more streamlined process.
The latest version of Exposure - Exposure X5 - is brimming with innovative and easy-to-use features.
There's a huge collection of "Looks," which give you the power to change the appearance of the image with a simple click.
You can make selective presets too, that way the edits you want to apply only apply to specific areas of the image.
Exposure has all the basic editing tools you could want as well, including nondestructive layers, linear and radial gradients, a brush tool, overlays, creative focus, and more.
In addition to all that, Exposure is also a complete photo manager.
You can apply camera profiles and presets, migrate collections over from Lightroom, use keywords to manage and organize your images, and review images side-by-side for easy comparison.
Exposure also enables you to create smart collections of photos - just add specific criteria you want for the collection (i.e., rating, color label, flag, camera data, f-stop, and so forth) and Exposure will populate the collection for you.
Nice, right?!
One of my favorite features, though, is the 3D color masking tool in Exposure.
Basically, this tool gives you precise control over where an adjustment is applied in the shot. This is thanks to the range of definitions that Exposure uses to define adjustment areas, such as saturation, hue, and luminance.
Because you can target colors of a specific hue, for example, you can apply adjustments to specific areas of the shot, like the sky or to skin tones. You can do all this with just a few clicks, too!
From the intuitive user interface to the powerful editing tools to the suite of support features that help make your workflow smoother, Exposure has everything you need to create your best images. They even offer a free trial to give it a test drive!
Syrp

It's been a great year for Syrp...
They unveiled the Syrp Genie Mini II Linear this time last year to much fanfare.
If you're unfamiliar with this thing, the Genie Mini II Linear is incredibly portable and gives you the option to add motion control to your timelapse and films without lugging around a big, heavy piece of kit.

It can attach to any slider on the market and even cable cam systems up to 328’ in length, so you can quickly and easily upgrade your ability to capture gorgeous timelapses and real-time video.
Additionally, the Genie II Linear is loaded up with features for key-framing, shooting interviews, b-roll and timelapse with future available features including live view, and camera control for ramping exposure, just to name a few. It’s wirelessly controllable as well, via an iOS or Android device.
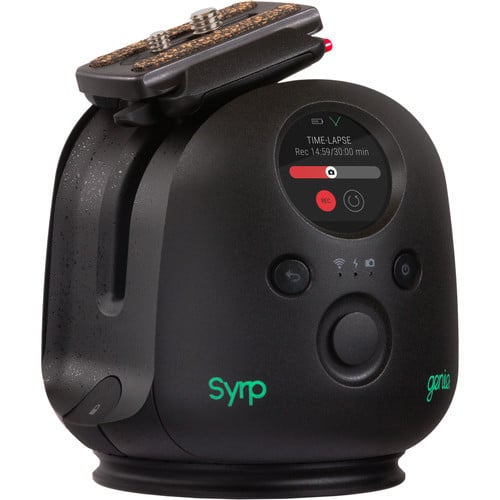
At the same time, Syrp introduced the Genie II Pan Tilt, which gives you an ultra-portable camera motion control that you can carry in your backpack.
You can use it with a tripod for ultra-precise pan and tilt motion control, or if you want three-axis, use it in conjunction with the Genie II Linear for the most powerful 3-axis device on the market.
Like the Genie II Linear, the Pan Tilt offers tons of functionality, including timelapse and real-time video capabilities, key-framing, and much more. With multi-row Panoramas, you can capture high resolution ‘gigapixel’ images and shoot Panoramas all controlled from the app itself.
It also has a built-in screen so you don’t have to use the app if you don’t need it and you want to pack light, not to mention a built-in joystick for quick setup and re-positioning from the device itself. Not bad, right?!
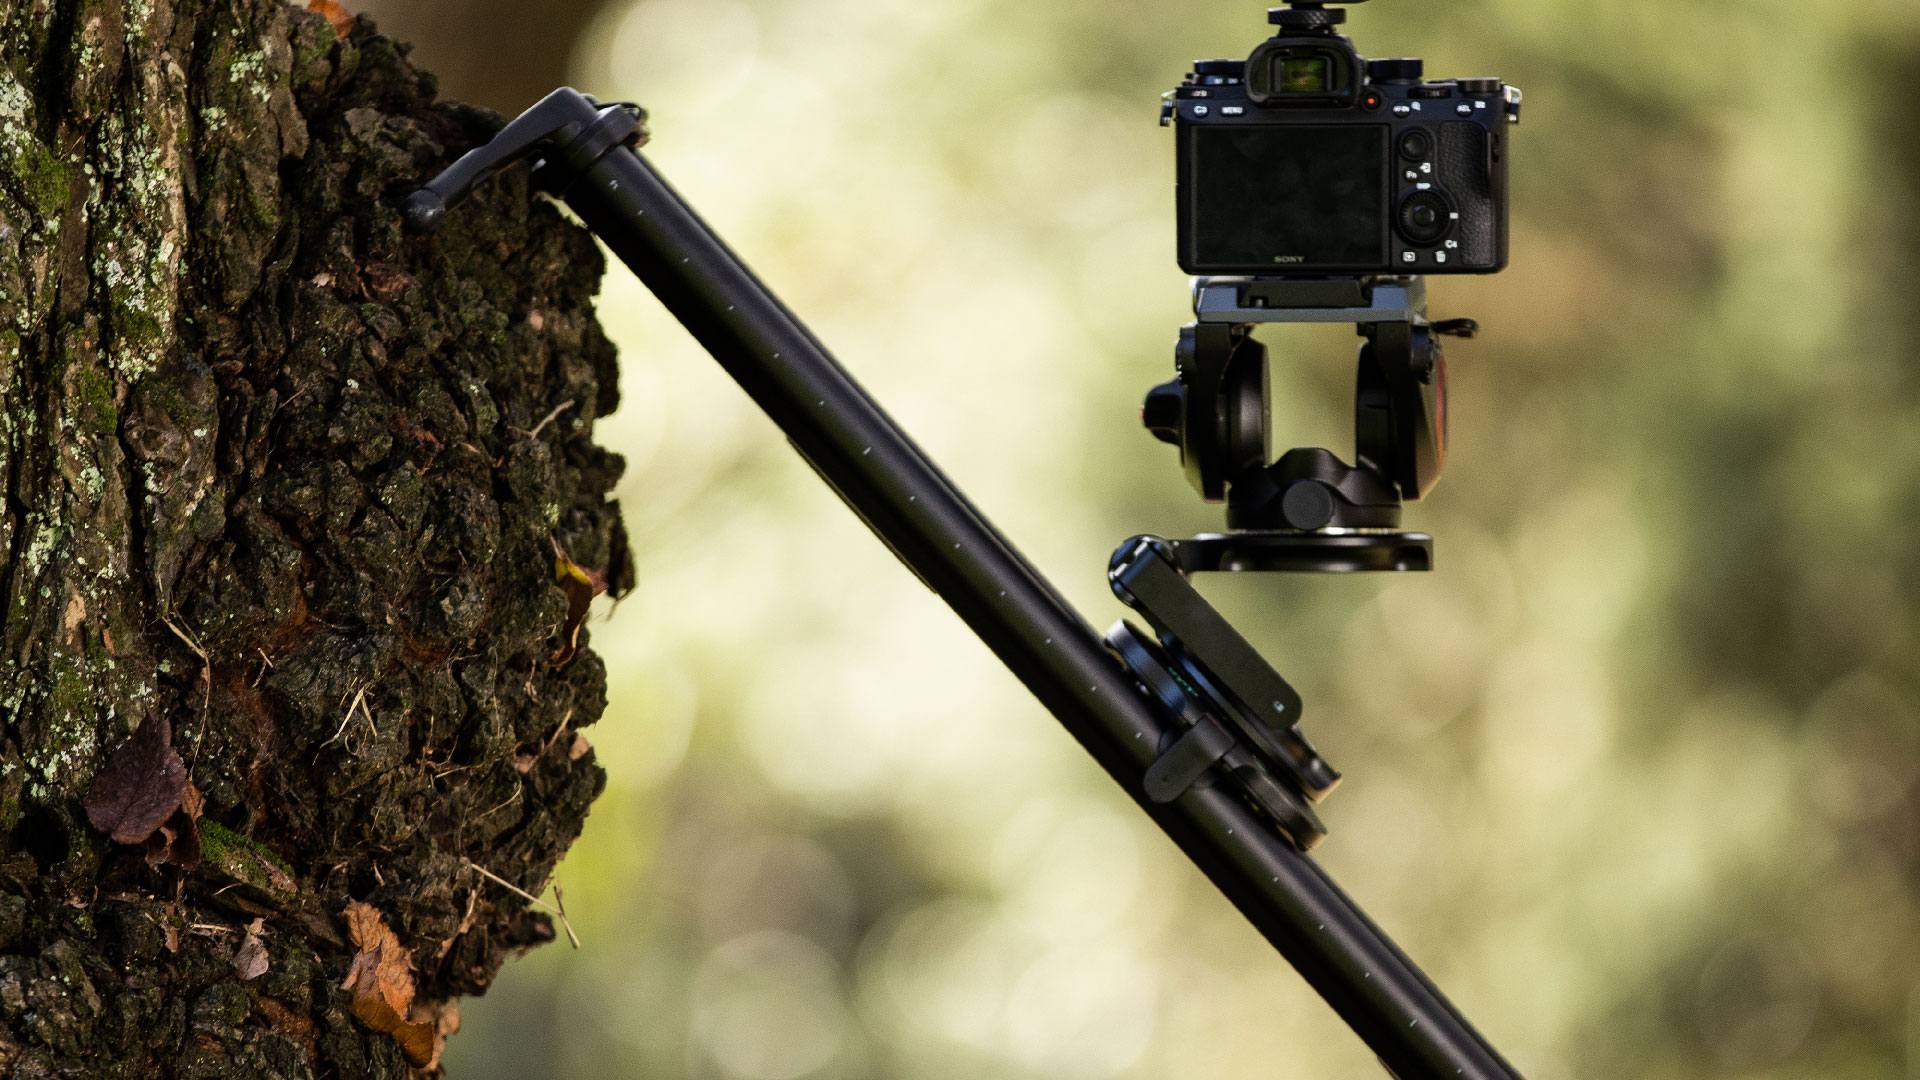
After that, Syrp brought us the Tilt Platform, which allows you to get perfectly level, vertical footage.
It couldn't be easier to use, either...
It requires no tools, has angle markings to help you dial in accurate adjustments, and it has a 3/8-16" - 1/4-20" UNC thread adapter in the base to expand its mounting options.
Just use the easy-adjustable knob to change the lever tension to secure your camera, and away you go!
You can position the Tilt Platform up to 180-degrees, it can be used with motion control or manual sliders, and it'll hold up to 13.2 pounds of gear.
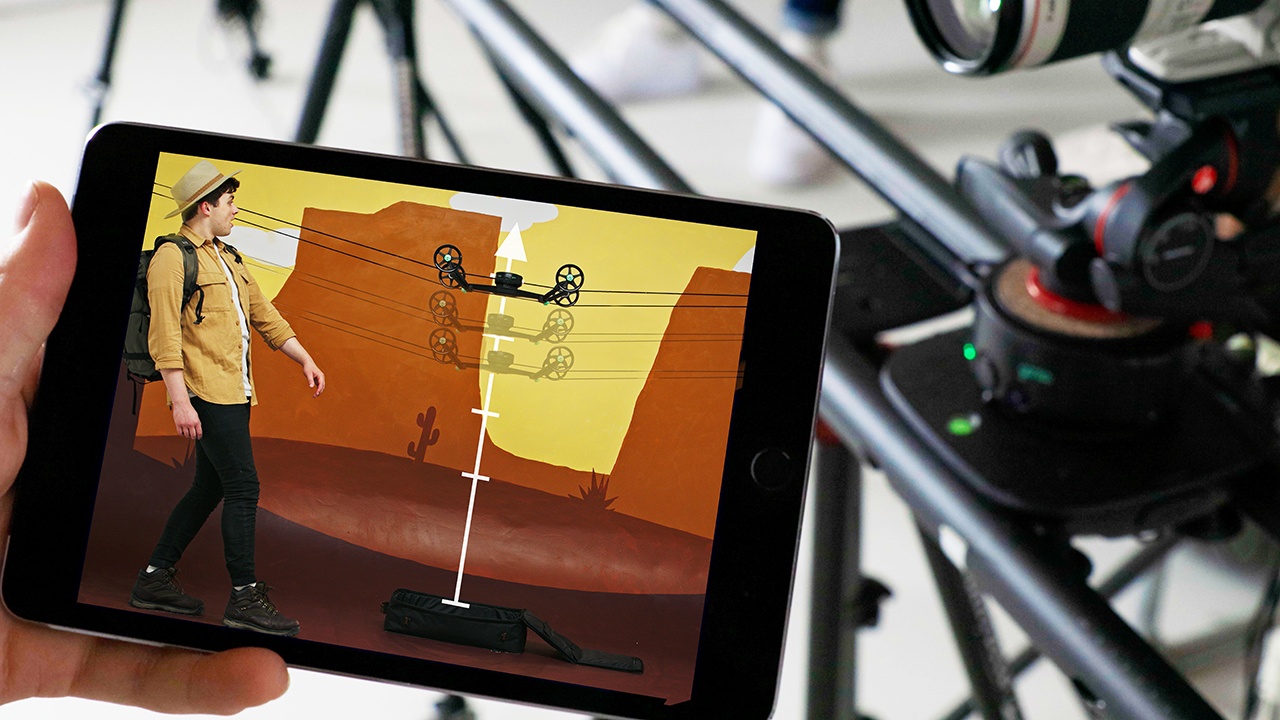
And as if all that isn't enough, Syrp just released a new app feature available through the Syrp Genie II app - stop motion.
This mode allows you to create stop motion videos more precisely (and faster) than ever.
You can set up any desired movement using the app's keyframe editor, and you have complete control over the video's frame rate.
Once you have the motion set up, all you have to do is move the motion controller to each frame and trigger the camera's shutter.
Stop motion videos have never been so easy to make!
Excire

Excire is an innovative product that I became familiar with last year, and I just have to continue singing its praises.
For me, there isn’t much that I hate doing more than manually tagging my photos in Lightroom. That’s why there are thousands and thousands of images in my Lightroom catalogs that aren’t tagged at all.
Until now…

What’s so great about Excire’s products - Excire Search and Excire Search Pro - is that they utilize artificial intelligence to tag your Lightroom photos for you.
Yeah...we’re living in the future, my friends!
Excire Search has 125 common keywords that can be used for tagging your images, so every shot you have of a mountain or a bike or a dog will be organized and easily identified.
Excire Search can obviously be used to search your images as well. Just use the plugin to find the images in your catalog that meet your criteria!

Even better, Excire Search Pro offers over 500 keywords for tagging, so you have even more capability to organize and search your photos.
It includes a keyword transfer function, too, which means you can use Excire Search Pro on your existing catalogs. That means no more hunting around for the images you need, even if you have an enormous Lightroom catalog of tens of thousands of images.
In other words, Excire transfers the keywords it extracts to your Lightroom catalog, and then those keywords can be used in Lightroom as if you had manually entered them.

Needless to say, Excire Search is a fantastic tool for beginner and hobbyist photographers, and Excire Search Pro is a great option for serious photographers and professionals.
It's this kind of innovation I looked for when considering my Best of 2019 list!
PolarPro Summit Filters

PolarPro has built a reputation over the years of developing well-built, high-performance products, and their newest filters are no exception.
The Summit filter system was specifically developed for the rough-and-tumble world of landscape photography.
These filters are built to withstand the rigors of shooting outdoors in harsh conditions while at the same time having a design that makes them incredibly easy to use.
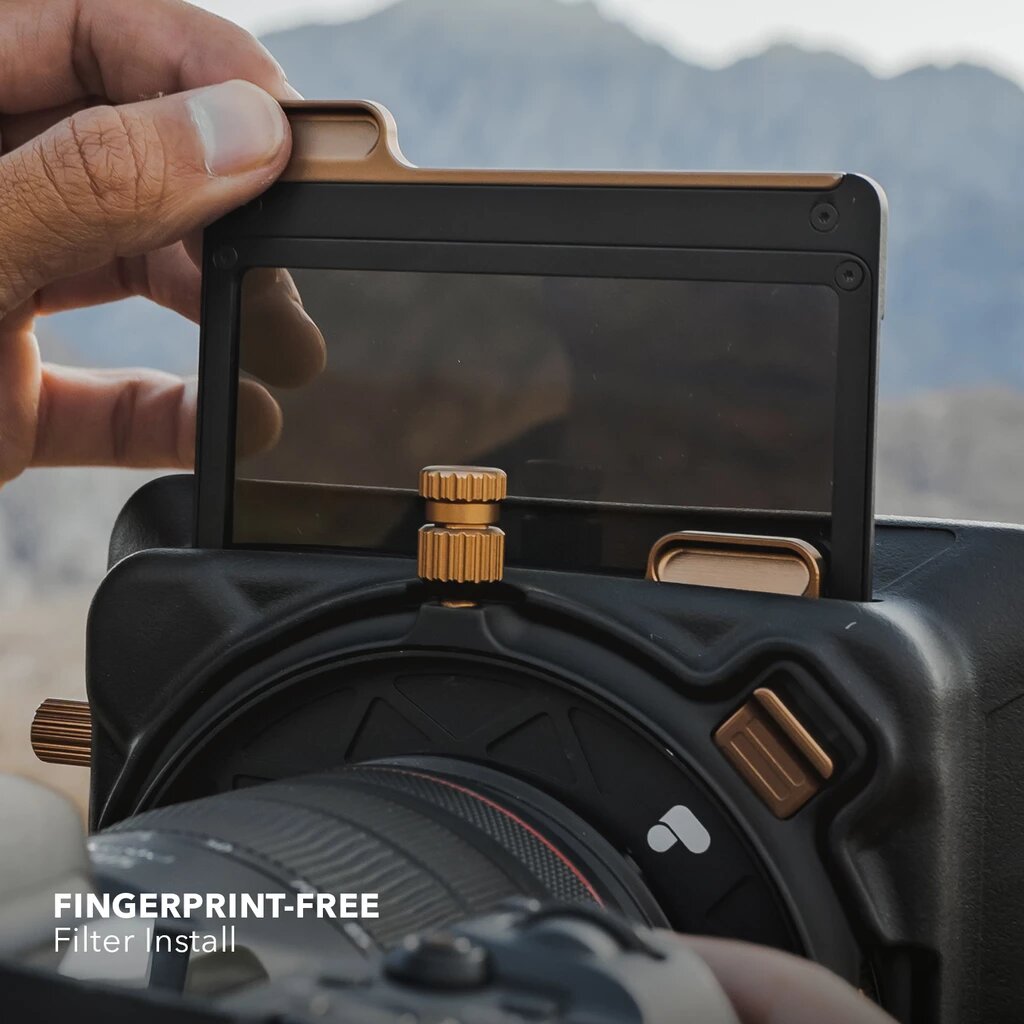
On the one hand, the ND and graduated ND filters have aluminum frames that both protect the filter and help minimize fingerprints getting on the filter glass.
So, not only do you get filters that are more durable, but you also won't spend as much time cleaning the filters to get rid of fingerprints. It's a win-win!
On the other hand, the filters and filter housing feature materials that ratchet up the build quality.
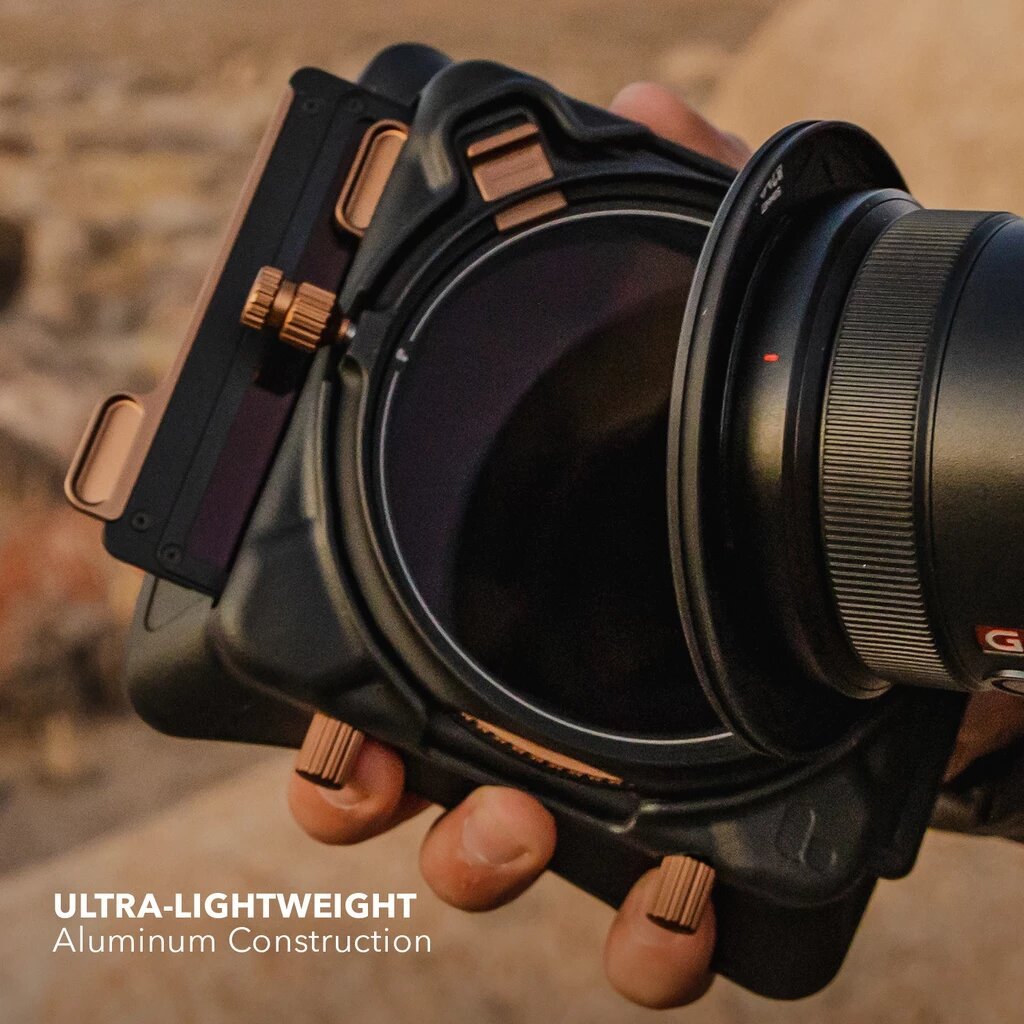
For example, the filters are made of fused Quartz glass with 16 layers of coatings that improve color fidelity and clarity while reducing glare.
As another example, the filter frames are made of lightweight aluminum that helps cut weight in your pack while providing you strong durability for years to come.
Add in a user-friendly design, light-sealed slots, filter locks to lock down the filter position, and the ability to rotate the filter system 360 degrees, and you have the makings of the ideal landscape photography filter kit - one of the best of 2019, in fact!!
Wolverine Data F2D Titan

What’s so great about the Wolverine Data F2D Titan is that it’s an 8-in-1 rig.
In addition to working with slides, 8mm movies, and Super 8 movies, the F2D Titan also works with 35mm, 110, 126, 127, and APS film.
It has a 20-megapixel sensor that turns your analog memories into high-definition digital files at up to 5472 x 3648 pixels.
The F2D Titan makes quick work of scanning, too. In just three seconds, the scan is complete thanks to its speed-load adapters that are perfectly sized to each format of slide or negative that you’re scanning.
You can view the results of the scan on the onboard 4.3-inch color LCD. You can even fine-tune the brightness and color balance settings. If you prefer to see your newly digitized photos on a larger screen, simply connect the F2D Titan to a computer or a TV.
Saving the digitized images is a breeze, too. Just use its internal memory or add your own SD/SDHC memory card.
Better still, you don’t need a computer or external monitor or software of any kind, so this unit is totally self-contained. Just have a power source (via an AC outlet or USB) and you can digitize slides, film, and old movies anywhere you like.
If you’ve got a lot of old memories to digitize, there’s isn’t a better or faster way to do so than with this bad boy! It's simply the easiest, most functional film to digital scanner I've ever tested.
RODE Video Mics
I have several RODE mics, including the tiny shotgun microphone shown above.
The RODE VideoMicro is compact and lightweight, which makes it a perfect pairing for my GoPro.
But don't think that because it's a tiny mic that audio quality is sacrificed. In fact, it has a high-quality cardioid condenser mic capsule so you can get clear, crisp audio.
It's shocking just how good this little guy performs!
Since it's a directional mic, it minimizes sounds from the periphery so your video has focused audio from the subject.
Add to that a thermoplastic suspension structure for minimizing vibrations as you adventure around with your GoPro, and you have the ideal audio companion for the best adventure camera on the market!
For more heavy-duty action, I have a RODE VideoMic Pro.
This shotgun-style mic has a 1/2-inch condenser capsule, which results in ultra-clean audio that's broadcast quality. We're talking about a self-noise level of just 14db!
It has a super-cardioid polar pattern that reduces background noise while ensuring that it captures crisp audio of the source you want to record.
And, unlike lesser microphones, the RODE VideoMic Pro has a Rycote Lyre shock system that creates a buffer between the microphone capsule and electronics and the microphone mount. This, in turn, minimizes the vibrations of the mic and improves the quality of the audio even more.
Add in fantastic sound, easy-to-reach controls, and intuitive operation, and you have the makings of the ideal microphone for filmmaking!
Camera Canopy
I first learned about Camera Canopy last year, and I have to say that over the course of 2019 I've grown to appreciate this unique camera accessory more and more.
Photographers that spend any time outdoors understand that when it rains, it can really put a damper on their ability to get the photos they want. That’s because even weather-sealed gear isn’t completely water-tight.
And trying to manipulate camera controls with a traditional bag-like rain cover for a camera is a huge pain in the rear. That’s why Camera Canopy is a much better alternative.
Camera canopy attaches to a camera via its hot-shoe mount, and then acts like a roof to protect the camera and lens from rain. It even protects the from glass of the lens so there’s no water droplets messing up the shot.
Better still, it’s adjustable for lenses up to 500mm in length.
Camera Canopy also has a mirrorless camera version, so now that I've gone totally mirrorless, I can still enjoy the benefits of having my camera and lens protected by a Camera Canopy.
Just like its big brother, this mirrorless version is extremely easy to mount to your camera, simple to adjust for different lens lengths, and still provides you unfettered access to your camera's controls.
It's simply the best wet-weather camera accessory money can buy!
Hex Brand Ranger Sling Bag
I had an opportunity to head up to Los Angeles a while back and meet the masterminds behind HEX.
It was a fun time looking behind the curtain at their operation, plus I got to bring one of their Ranger Sling bags home to test out.
First impressions are good, to say the least! And that's coming from an admitted bag snob.
For instance, I check the stitching inside and out to see how well put together it is, and with this bag, it’s very well put together.
It’s part of thoughtful construction and design processes that make this bag one of the very best I've used this year.
One of the things I like most about the bag is the collapsible interior dividers - including the bottom divider. This gives you a bag that can not only be customized to your gear for each photoshoot, but you can also fold up or remove the dividers to allow the bag to be packed totally flat for travel inside another bag.
Speaking of customizations, this bag has side adjustable load straps and adjustable bottom carry straps so you can carry even more gear when needed.
This bag is also packed full of pockets to help you keep track of your stuff. There’s a front access organizer for small items, a faux fur lined pocket on the front for your phone or a pair of shades, a faux fur lined pocket for your table, and multiple hidden velcro stash pockets. And the bag sits very well when worn. It’s comfortable and easy to access your gear and really hugs your body.
With genuine Cordura material and YKK zippers with metal pulls, this bag will stand up to use and abuse, too. And since it’s so compact (just 1.3 pounds and 14.5"L x 7.25"W x 4.75"H), you can rock it in the urban jungle without worrying that it’ll be knocking into people as you move from shot to shot.
Something that really stood out to me was that, although the bag is listed at 8 liters, there is no wasted or negative space. In fact, I easily transferred all the gear I would normally carry in my Peak Design 10L Sling into the HEX Ranger Sling. I have to say that I am a big fan of the efficient use of space in this bag and the collapsible potential of the HEX bag certainly gives it a leg up.
With eight liters of storage space, a streamlined design, and looks that don’t quit, this is definitely one of the best products I tested this year!
TravelSchool.Info
 Photo by anyaberkut via iStock
This entry on my Best of 2019 list is a little different from the rest...
Rather than a camera accessory or some kind of service you use to take better photos, TravelSchool.Info makes it on this list because of its innovative approach to education and furthering your ability to make money.
TravelSchool.Info enables you to learn how to harness the power of affiliate marketing all the while traveling the world. Sounds nice, right?
By teaching you how to create multiple revenue streams from affiliate marketing, TravelSchool enables you to earn active and passive income that frees up your time to pursue things that are more fun than working!
Travel School is a comprehensive training program for starting an independent affiliate marketing business. It will take you step-by-step through the process of building a business that is not only wildly successful in the short-term, but can sustain steady growth for the long-term too.
Travel School founder Emilian travels the world with his furry friend, Divak, and is eager to share his knowledge and experience with you and help you build a successful affiliate marketing business that will allow you to quit your traditional job and travel the world like you want!
But Travel School isn’t just a step-by-step training program. Instead, it will change your outlook on what it means to work, and at the same time will be a transformational experience that will change their entire life for the better.
With specific, actionable steps, you will learn how to connect with established brands, develop core marketing skills, and activate multiple income streams to realize their dream of living a life full of travel and freedom.
Not only does Travel School aid in leveraging the credibility of amazing companies, but they will also offer weekly private webinars to keep your loved one motivated and on track toward accomplishing their goals.
Additionally, all training sessions are recorded and available at any time, that way if questions come up down the road or a little extra motivation is needed, the lessons can be easily accessed. There are opportunities to learn and collaborate with other students too!
It’s not often that you have the opportunity to learn how to live a life with more freedom, but in this case, Travel School is does just that!
Octopus.Camera OctoPad
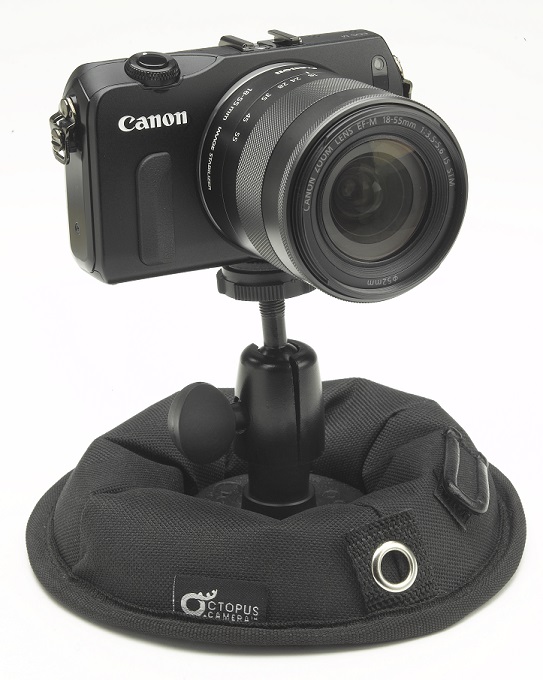
I’m a gear head and I buy and test all kinds of stuff - cameras, lenses, tripods, lights...you name it!
But one of the most pleasant surprises I had this year was the Octopus.Camera OctoPad.
I know what you’re thinking...how can a little weighted support system be all that innovative? Trust me when I say that OctoPad certainly is!
For starters, OctoPad is a much better alternative than suction cup mounts or even mini tripods because it actually stays put.
The weighted anti-slip mat keeps the OctoPad right where you want it, even if it’s on a smooth or uneven surface.
Additionally, OctoPad has a built-in 1/4-20 threaded male bolt for attaching any number of accessories like a microphone or a light. The included ball head also has a 1/4-20 threaded male bolt for accessory attachment.

That means that this little guy is a great option for supporting a compact camera or a smartphone, a GoPro, a microphone, or a light. Plus, it can be used for photo or video work, giving you even more versatility.
It’s easy to use and transport too - there’s a built-in grommet for attaching a lanyard and a cable strap to tuck cables out of the way of your shots.
This is just a well designed product that offers a ton of benefits for photographers and videographers alike. And the best part? It’s priced at just $26.95!
Snaptiles
One of the most innovative products I encountered this year is Snaptiles.
These ingenious patented magnetic photo tile system takes all the fuss and muss out of displaying your photos.
If you want to create a mixed tile array, you can do so in a matter of seconds thanks to the easy mounting system that Snaptiles employs.
All you do is attach the mounting bracket to the wall using four adhesive strips. Make sure to press down firmly for 10 seconds so that it holds tight to the wall. You can snap up to 12 photo tiles onto the first anchor tile. If you really want to have some fun push in the 4 included thumbtacks for additional support. You can then snap up to 30 Snaptiles to the anchor! Not a bad tradeoff for 4 small pin holes if you ask me.
Next, you mount the anchor tile to the wall mount by snapping it into place.
Then, you can add any number of additional photo tiles, which connect together using rare earth magnets. And that’s it!
Now instead of having to put nails in the wall to hang additional photos, you can simply order 4 photo tiles from Snaptiles, add them to your array of mixed tiles, and enjoy your favorite photo (along with all your other favorites in the display).
These tiles are super lightweight so if they fall they won’t break. They are printed onto a premium SBS Acid-Free paperboard using the same printing technology as high-quality photo books. Likewise, the UV protective lamination ensures that the images don’t lose their color over time.
Snaptiles has a unique ability to let you display your photos in a creative and ever-changing way. When it comes to hanging art and your favorite images, being able to swap them out quickly and easily is a huge bonus.
Best of all, four tiles are just $59 with Free Shipping, so you can enjoy four of your favorite images without breaking the bank.
What’s not to like about that?!
Westcott Rapid Box Octa
As photographers, we all know the value of good light for creating compelling photos. And when it comes to modifying light to get the precise look you want, Westcott should be your source.
After all, Westcott has been in this business since 1899, so they know exactly what they’re doing.
In fact, Wescott holds 12 patents and has a product line of more than 600 products, so they’re much more than umbrellas and lights - they’re the go-to for all manner of durable, high-end lighting gear.
It would be impossible to expound upon Westcott’s vast array of products, so I’ll illustrate why they’re included on my list of the Best of 2019 by using their Rapid Box Octas as examples.
I know you’re probably thinking, “Aren’t all softboxes the same?” Well, no, my friend, they aren’t!
Westcott’s Rapid Box Octa, which come in small (26-inch), medium (36-inch), and large (48-inch) versions, are the ideal softbox for modifying speedlites.
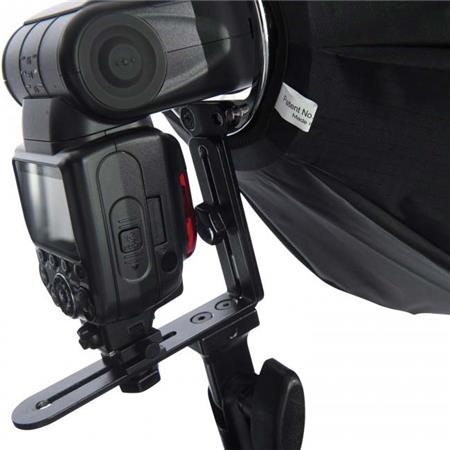
For starters, these things are supremely easy to set up - you can have them ready to go in a matter of seconds, so there’s no long, drawn-out procedure for getting your gear ready for the shoot.
They’re easy to transport as well, given that they are completely collapsible and super lightweight.
But don’t think that because they’re collapsible and easy to set up that they’re somehow not durable. Far from it.
The solid metal framework ensures that these softboxes retain their shape over the course of years and years of repeated use, and the built-in mounting hardware means there’s a snug fit with your speedlite whether it’s a Yonguo, Nikon, or something in between.
In other words, Westcott makes this list of the Best of 2019 not just because they create superb lighting gear, but because they also have a proven track record of innovation when it comes to lighting gear.
Their products are durable and easy to use and show a demonstrated effort by Westcott to think purposefully about design and functionality so you and I have a better user experience.
But don’t take my word for it...see the Rapid Box Octa in action in the video above!
We Recommend
The True Value of a Good Tripod
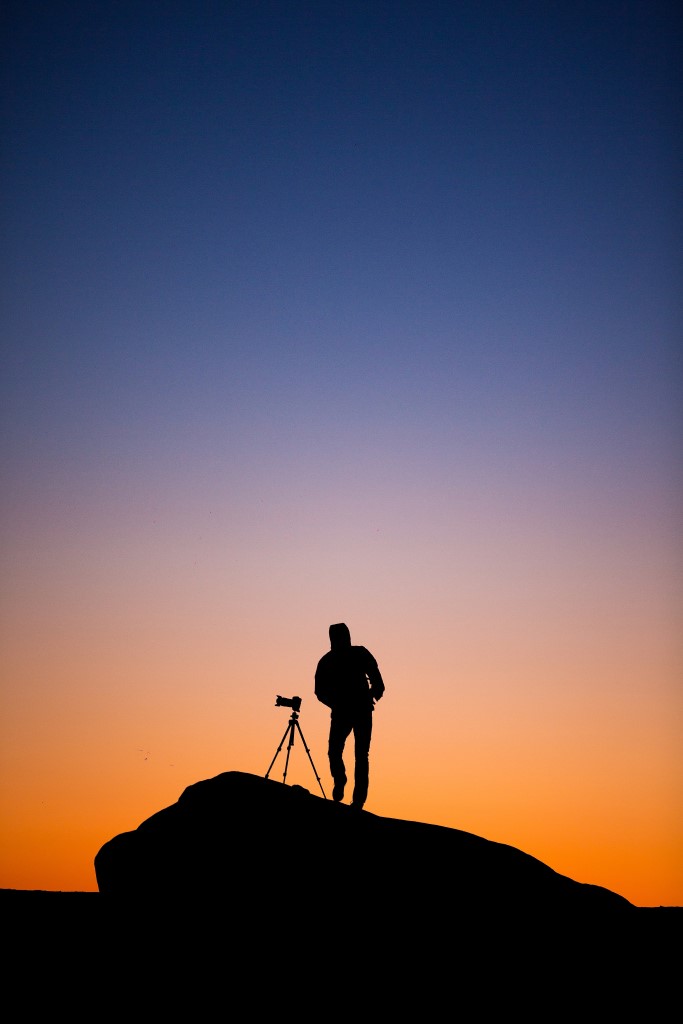
Photo by Braden Jarvis on Unsplash
Sooner or later, a beginner photographer is going to ask the question, “Should I use a tripod?” The inevitable answer to that question then leads to the next question, “What is a good tripod for me to buy?” And finally, “How do I use this tripod?”
Among the top tripods of 2019 and early 2020 is a tripod or two that will work for you. When looking for the best tripods for current cameras, there will be some things in common for DSLR users and for mirrorless users, and there will be some different considerations as well.
Likewise for the various types of photographers. A nature photographer may have different criteria than a portrait photographer, but there is also a whole lot of overlap.
Use a Tripod for Image Sharpness
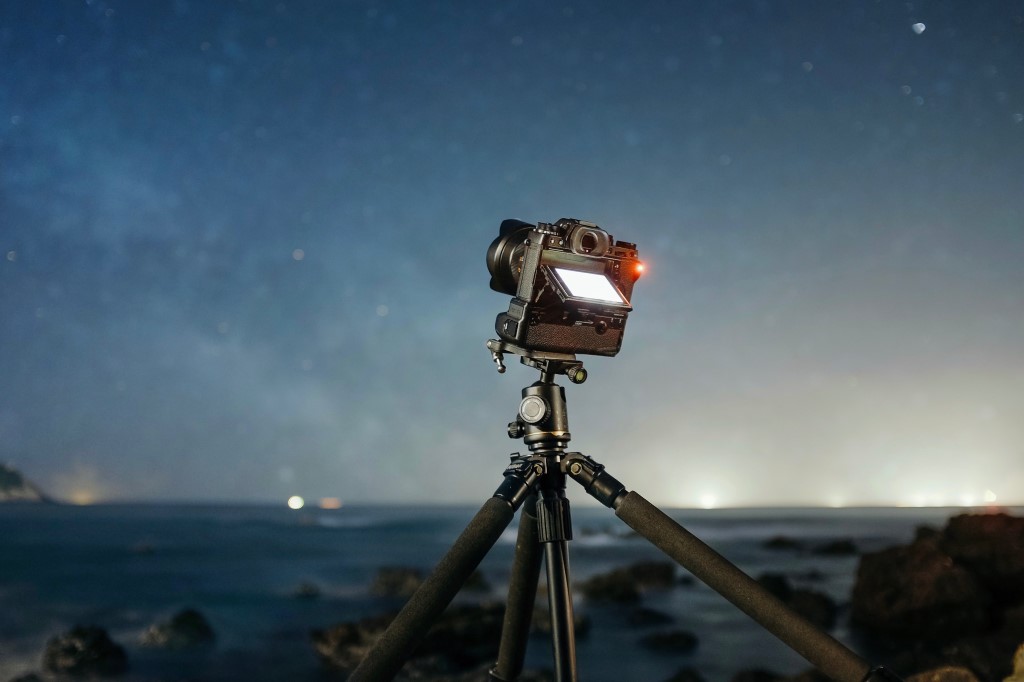
Photo by insung yoon on Unsplash
A good tripod, used properly, will improve the final results for photographers in many situations.
One of the biggest reasons for using a tripod is image sharpness. Anything from slow shutter speeds to heavy lenses can negatively affect image sharpness due to movement. Using a good tripod eliminates camera movement, one of the more common reasons for unsharp images.
Use a Tripod for Special Techniques and Effects
photo byozgurdonmaz via iStock
Other reasons for using a tripod are related to some of the special effects available from modern digital cameras. HDR and panoramic photography both rely on tripods for the best results.
Portraits are another excellent reason to use a tripod. For instance, if you are attempting to employ classic lighting techniques such as Rembrandt lighting or butterfly lighting, having your camera on a tripod makes it easier to set up and makes your results more repeatable.
You may be selling on Etsy, eBay, Amazon, or Facebook Marketplace. The tripod comes in handy here, too. It helps simplify the lighting and arranging the shots, plus ensures excellent image sharpness.
Learn More:
Don’t Forget Video!

I’ll say this as gently as possible: Shaky cam does not make for good video. Even though we could possibly develop a very good technique for holding our camera steady for still images, shooting video makes all movement stand out.
YouTube vloggers can benefit from using a budget-friendly tripod such as the E-Image EK610 (shown above) during their video shoots. Vlog viewers will appreciate smooth, shake free videos that are easy to view, which will lead to more views and subscriptions for your vlog.
What’s the Best Tripod to Purchase?
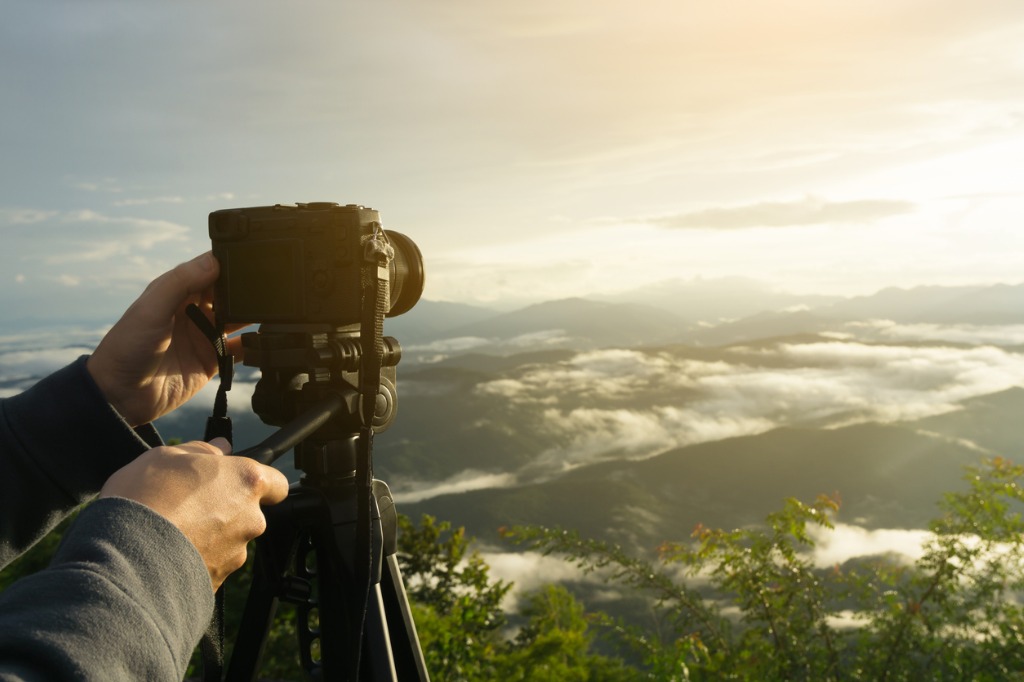
photo byMomolelouch via iStock
It will come as no surprise that there is not going to be one answer to this question. The needs of any two photographers could be wildly different from each other.
For instance, the best tripods for DSLRs may need to be sturdier than the best tripods for mirrorless cameras. Primarily due to size and weight.
A small MFT mirrorless camera with a kit lens may weigh less than my last value meal, so a small and lightweight tripod may be good enough.
DSLRs, including entry level APS-C format cameras, tend to be larger and heavier than their mirrorless cousins, so a more substantial tripod would deliver better results, and will give you peace of mind concerning stability and the safety of your equipment.
Going back to vloggers and other videographers, a tripod such as the E-Image GA752 and a versatile tripod head provides superb stability for larger cameras with heavier lenses.
Other larger camera rigs may include professional and prosumer level full frame format DLSRs or fast super telephoto lenses which can be quite heavy. You don’t want to put a large and pricey rig like that on a small, lightweight tripod.
Learn More:
Types of Tripods
There are several types of tripods that are used in photography, one or more will be the best tripod for your needs.
- General purpose tripods
- Travel tripods
- Table top tripods
- Video tripods
- Monopods
Many times, you can use a tripod for more than one purpose. As an example, you could use a general purpose tripod for both your still photography and for shooting videos. And vice versa. A good tripod for video can be used for most other types of photography.
The best tripods for travel often collapse to a very small size, making suitable for using as a table top tripod.
Photo by Josh Hild on Unsplash
Some of the best tripods for general use are convertible tripods. They have a removable center column that can be used as a monopod.
Many of the better tripods for DSLRs have interchangeable tripod heads. This way, you don’t have to spend double on a video tripod along with a general purpose tripod. Just buy one or the other and then add a different tripod head to round out your capabilities.
How To Use a Tripod

Photo by Artem Sapegin on Unsplash
The most important thing about properly using a tripod is simply to be in the mindset of using one. In other words, get out your tripod and prepare to put it into action.
You will want to make sure your camera is properly mounted and secured to the tripod. A common feature of many of the best tripods is the quick release system. You mount a plate to your camera or lens, and then that plate is attached to the tripod head.
Whether using a quick release system or not, be sure to screw in the stud for a nice tight fit. Snug it up with finger pressure, but avoid over tightening.
Watch your balance. Spread out the legs and try to get the head of the tripod leveled out. This will guard against having the center of gravity too far in one direction so as not to accidentally tip over the entire rig. You can easily level by extending the leg sections, then adjust the tripod head for fine tuning the leveling.
Tripods Are Basic Tools for Good Photography
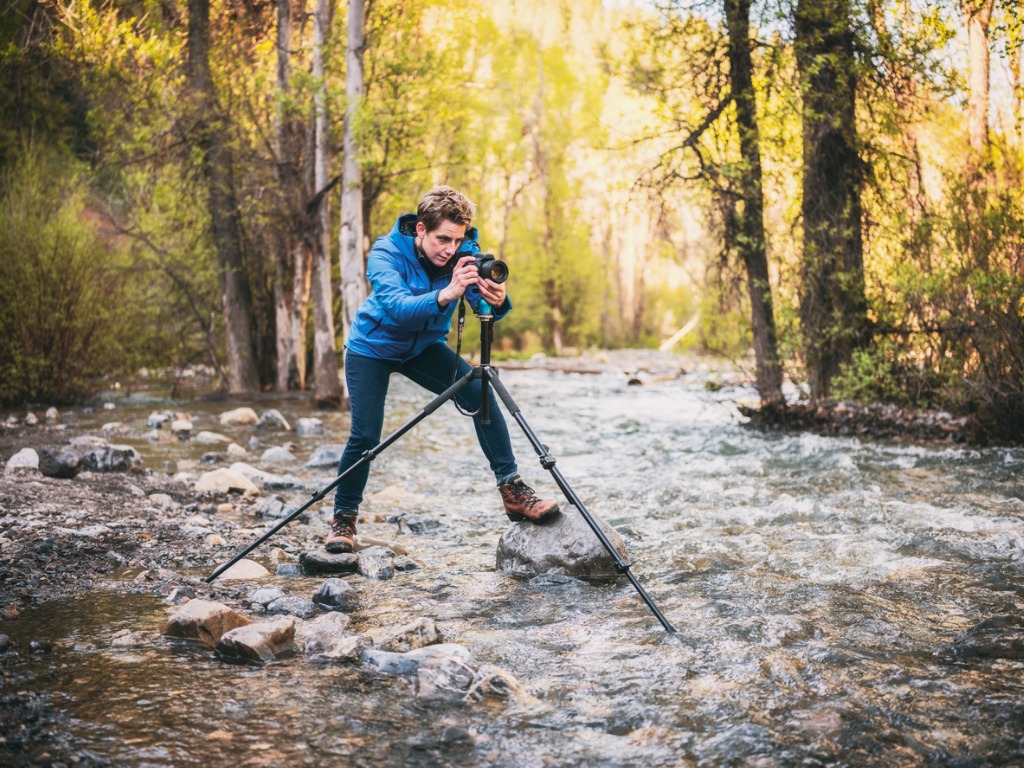
Photo by RichLegg via iStock
One of the best next purchases for beginning photographers is a decent tripod. The best tripods allow you to get the sharpest images possible, employ special techniques such as panoramic photography, and do so without being difficult to use.
Once you get used to a good tripod, you’ll wonder why you waited to get one!
We Recommend
These Accessories Make Smartphone Videos Much Easier
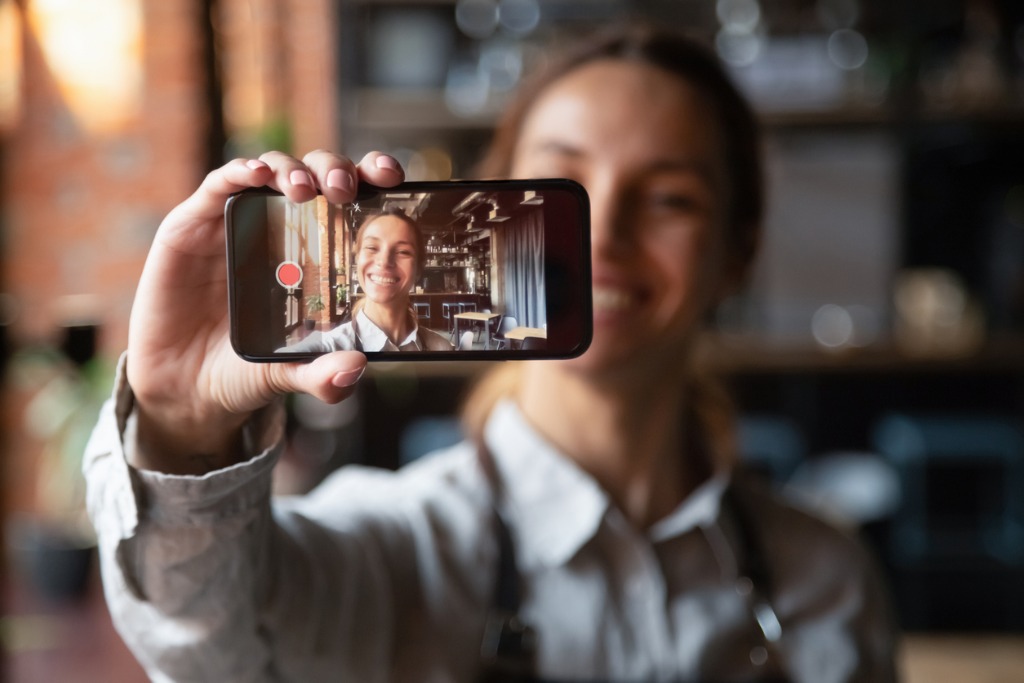
photo byfizkes via iStock
Smartphone videos can be great tools for photographers and videographers to market themselves or offer helpful vlogs and instruction. Plus, good smartphone videos can be fun ways to share personal things with our friends.
As photographers and videographers, we recognize there is great potential for creating outstanding video productions with our smartphones. A few simple smartphone video accessories can make the video even better.
Tips for Smartphone Videos
photo byhocus-focus via iStock
As a public service announcement for anyone taking videos with their smartphones is this #1 basic tip: Horizontal/Landscape orientation, please! In order to get the most out of smartphone video recording, turn the phone on its side instead of recording in vertical or portrait orientation.
In addition to that, record in your best mode if possible, including the audio settings. Also, try to avoid hand holding shakiness which detracts from viewer involvement and enjoyment.
As a final tip, Ikan Professional Video Equipment & Accessories has easy to use, inexpensive gear that can help you with these tips for smartphone videos. Here are four video-related smartphone accessories we found for you, two of them are audio-related and two assist our smooth handling of our phones.
Video Grip for Smartphone
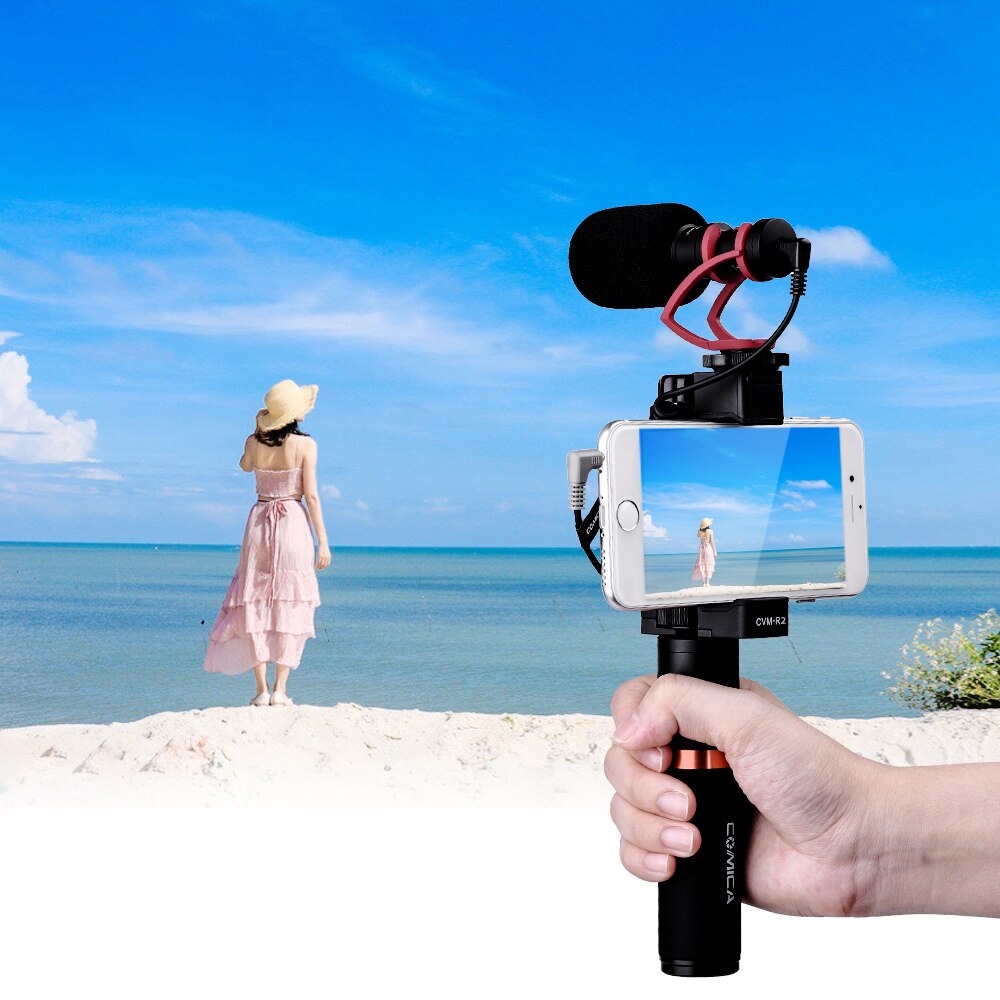
The first of our smartphone video accessories is the CoMica CVM-R2 Video Grip for Smartphone.
This handgrip will assist you to hold the smartphone steadier and in the landscape orientation for smartphone videos that look more professional and are more likely to hold our viewer’s attention. It is two pieces, a phone adapter with adjustment from 2.16 to 3.93 inches which should fit most smartphones currently in use, and a handgrip which attaches to the holder.
Both pieces are made of high-quality aluminum and the phone adapter has silicone pads to grip the phone that won’t mar the finish. The phone adapter part has an accessory shoe on top that can be used for holding a video light or an external microphone. Both pieces have a ¼-20 mount thread for attaching to a tripod or monopod.
3-Axis Smartphone Gimbal Stabilizer
For more steadiness control while recording smartphone videos, we found the FLY-X3-Plus 3-Axis Smartphone Gimbal Stabilizer which is an active, battery powered stabilizer for smartphones or for GoPro style cameras.
Your handheld smartphone videos will be very smooth and fluid with this gimbal stabilizer, which uses a 3-axis brushless electric motor system and a sophisticated built-in computer program to self-level and then smoothly adjust and steady orientation of the smartphone or GoPro action cam while filming.
It uses a rechargeable battery to power the system, and you get two batteries with this package so you can use it for extended video shoots. Operation is extremely simple. Mount the phone, turn on the FLY-X3, level it, and then start recording smartphone videos. It feels a little odd at first, but once you start using this for making smartphone videos, you will want to use it all the time.
Learn More:
On-Camera Directional Mic w/Phone Holder
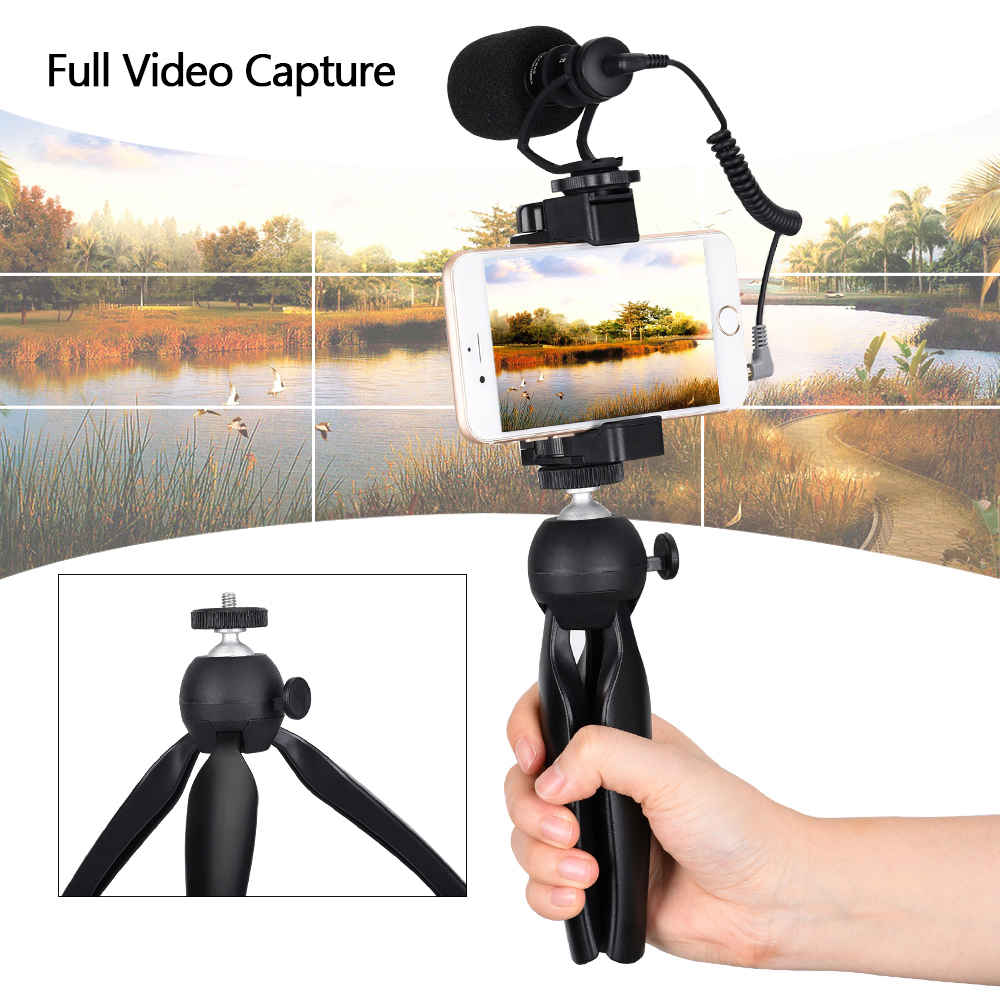
As smartphone accessories go, this one is pretty full featured. The CoMica CVM-VM10-K2 On-Camera Directional Mic w/Phone Holder has everything you need for good audio and steadying the smartphone all in one package.
The microphone resembles a small shotgun style mic and has a directional cardioid pattern to concentrate and record audio from whatever direction you’re pointing your smartphone. It has an audio frequency response range of 80 Hz to 16 kHz, a 3.5mm connector, and a removable windsock.
Included in this smartphone accessories package is a smartphone holder and a small ball and socket head tabletop tripod. Fold the legs up and the tripod can double as a handheld grip.
Omni-Directional Lavalier Microphone
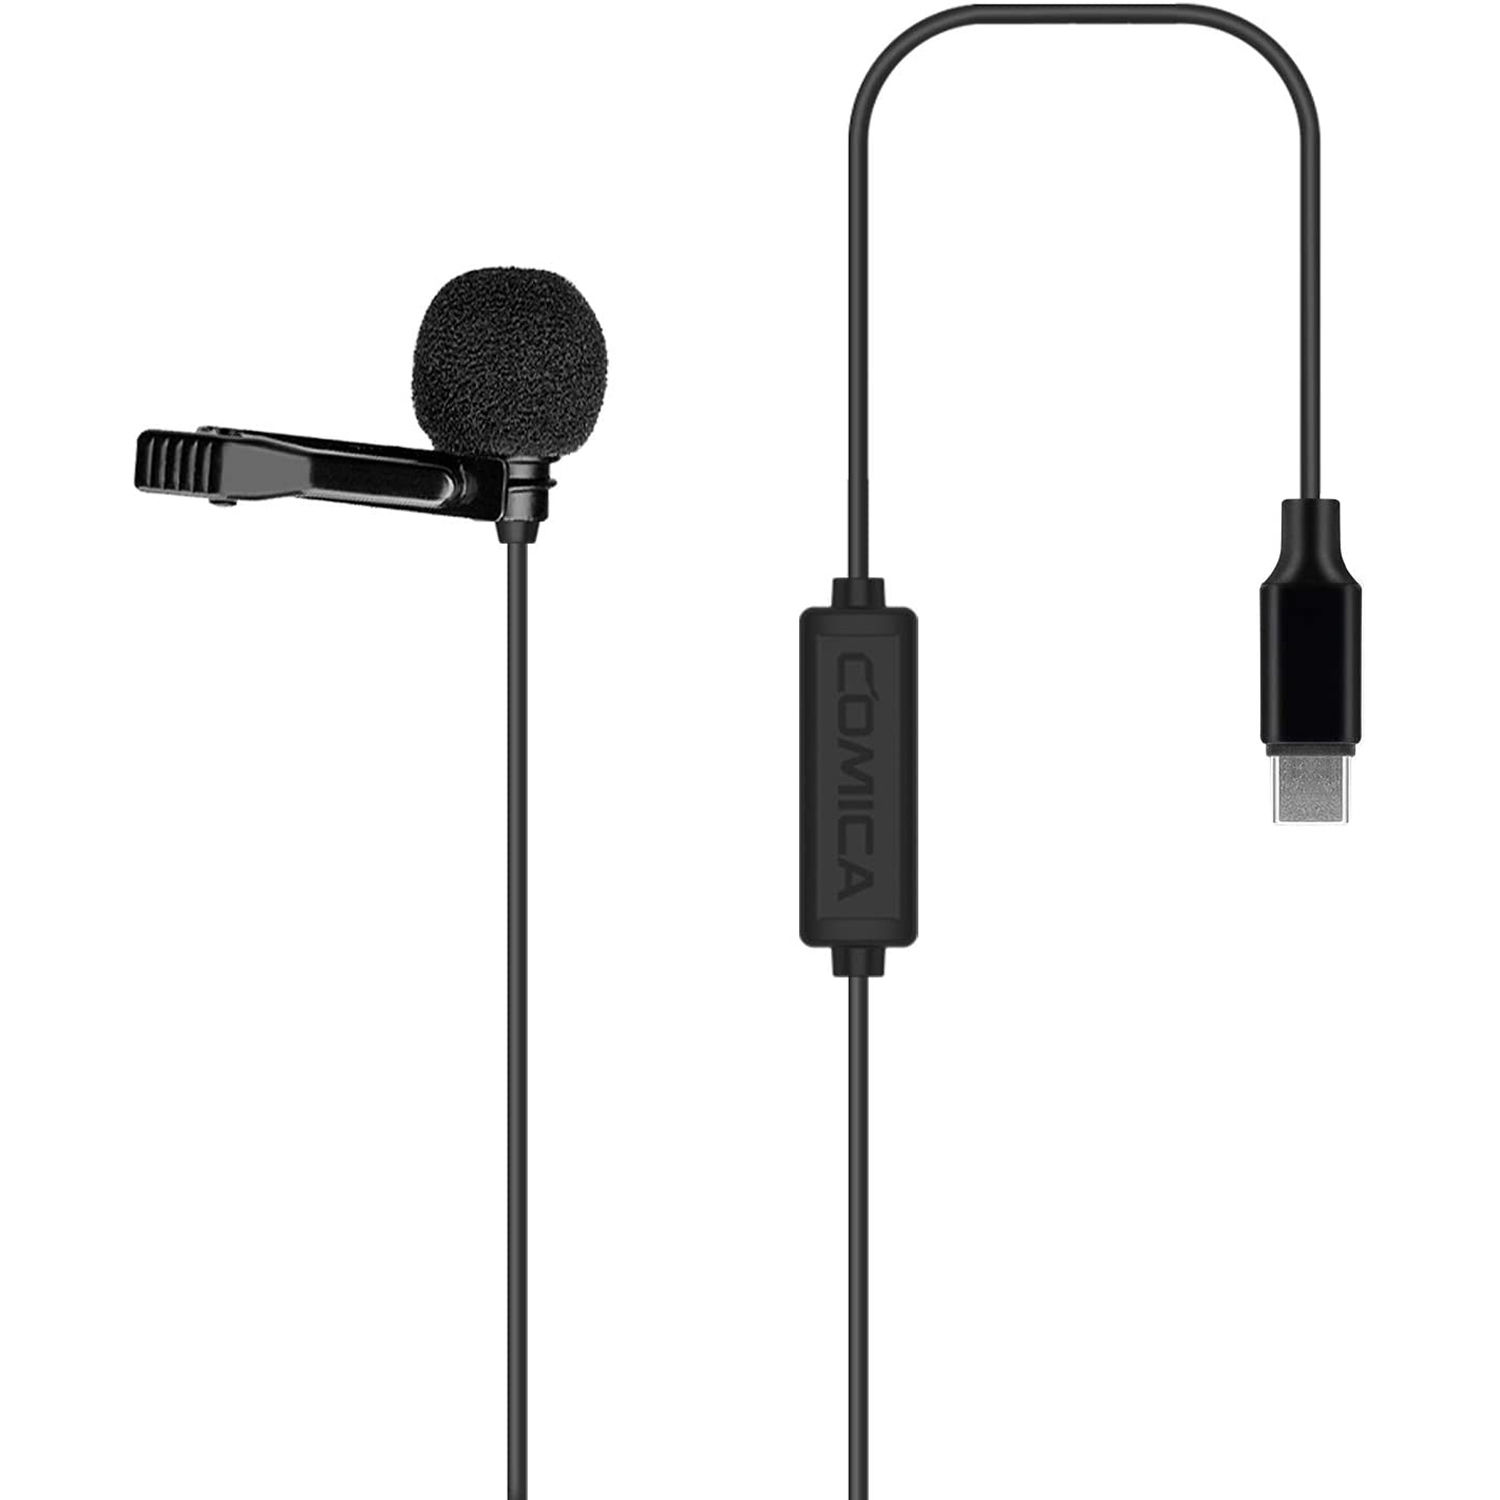
If you are recording your own audio such as in voiceover style while shooting smartphone videos, the CoMica CVM-V01SP Omni-Directional Lavalier Microphone for USB-C Smartphone is an excellent option for superior audio.
You could also use this mic for interviews or for selfie style smartphone videos since the cord measures a generous 14.7 feet in length. It is an omnidirectional pattern and has an audio frequency range of 60Hz to 20kHz for capturing spoken word when mounted near the sound source. A lapel clip helps keep it close to the speaker.
High-Quality Audio and Video
photo byROUDRR, 4JXDJN, RA5IOO via iStock
High-quality audio and video is a vital part of enjoyable smartphone videos. These smartphone video accessories from Ikan will allow you to capture excellent smartphone videos and do so quickly and easily.
Best of all, these accessories are all budget-friendly, so you don’t have to spend an arm and a leg to get high-quality audio and video.
Learn More:
We Recommend
These Vlogging Accessories Will Help Take Your Videos to the Next Level
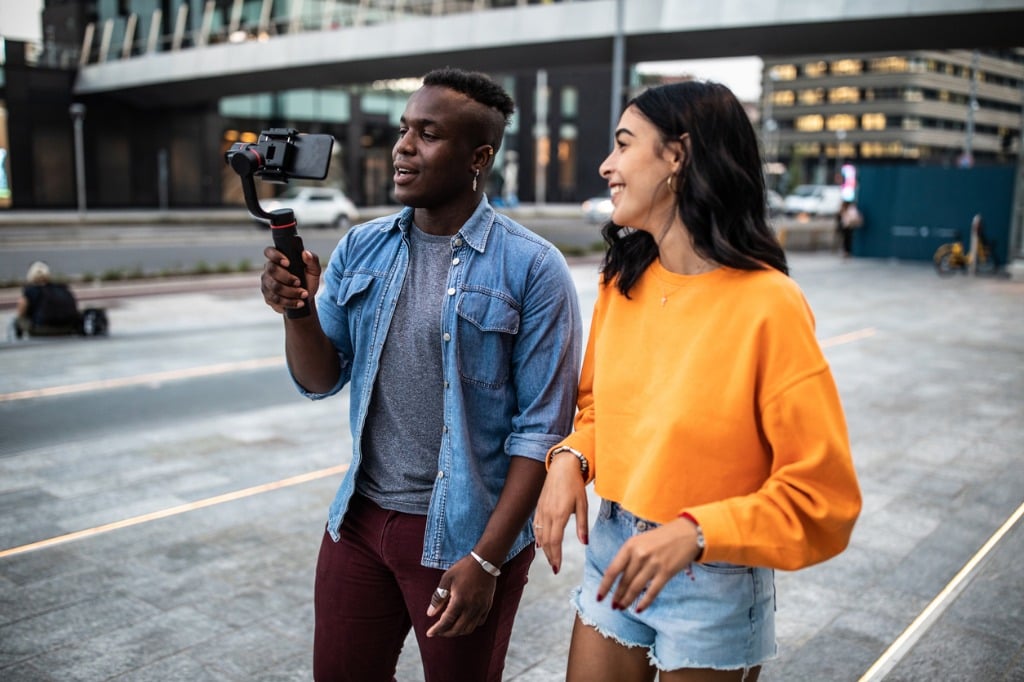
photo by miodrag ignjatovic via iStock
I may have a propensity for picking up vlogging accessories I don’t need, and I don’t think I’m the only one. I’ll see something shiny and feel like I absolutely need it and it inevitably ends up breaking a few weeks down the line.
If you, like me, love vlogging accessories but know you need a basic set-up, then keep reading for vlogging accessories that’ll last you a lifetime.
You Don’t Need Accessories Without a Vlogging Persona

photo by Youngoldman via iStock
Okay, so before I start listing the types of vlogging accessories you absolutely must have, let’s ensure that you are actually serious about your vlog.
You need to be passionate about whatever your vlog is going to be about. People can tell if you’re setting up a vlog just to try and get famous or make money.
You also need to fully understand how you want to present yourself to your audience. This is known as your “vlog persona.” Essentially, you need to figure out whether you want to be humorous or informative or eccentric and so forth.
Before you start your vlog, write down some qualities you want to portray.
Recommended Videography Reading:
- How to Shoot Video That Doesn't Suck: Advice to Make Any Amateur Look Like a Pro
- The DSLR Filmmaker's Handbook: Real-World Production Techniques
You Also Don’t Need Accessories Without an Incredible Camera
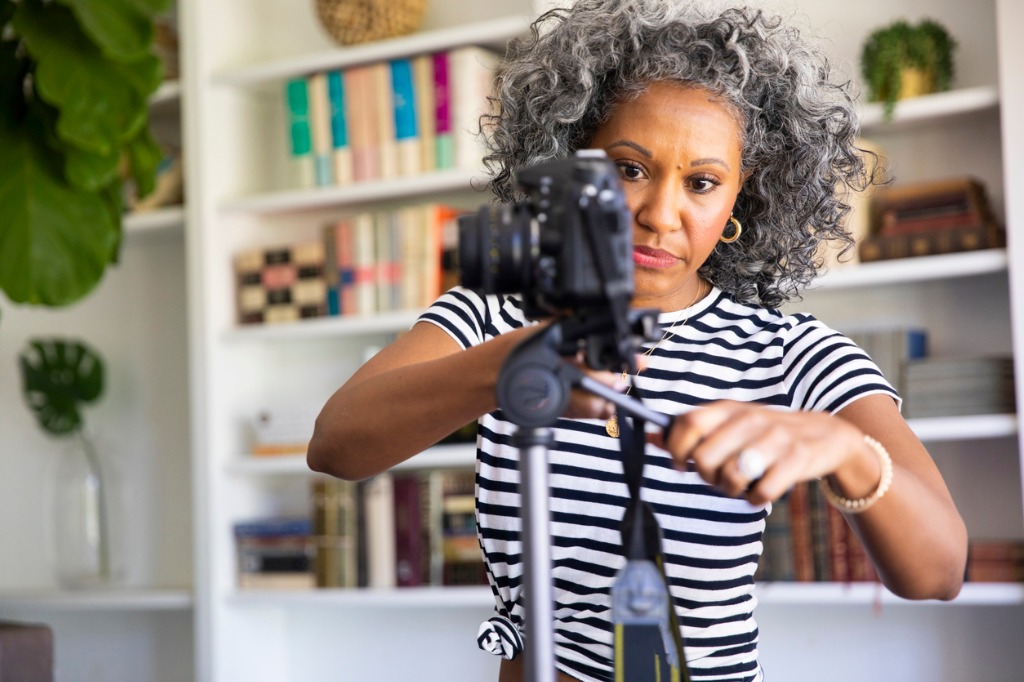
photo by adamkaz via iStock
I also see people purchasing vlogging accessories without having a good vlogging camera, which hurts my heart because you can’t do anything without a quality camera.
So, what qualities should you look for in a vlogging camera?
Firstly, you’ll want to ensure your camera can film 4K video, which will put you ahead of the curve since this is where all cameras are moving. This way you won’t need to upgrade in a few months.
Cameras for vlogging should also have built-in Wi-Fi (to help you upload things on the go) and a “selfie screen” that flips up or out so you can see yourself in the frame.
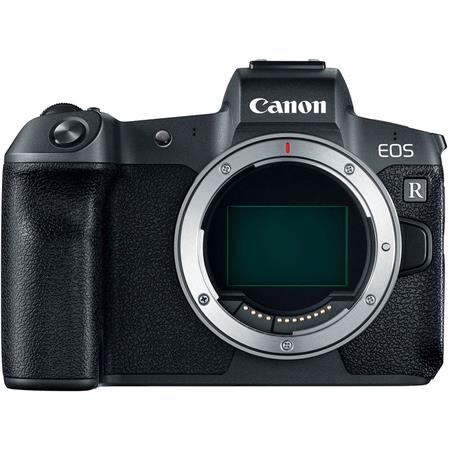
The Canon EOS Ris a good option for those who can spend a little more (it’s got a price tag of $1,800). It has all of the aforementioned features, plus a powerful processor, incredible low-light shooting for travel vlogging, and it’s compatible with a large range of Canon lenses.
If you can’t spend quite that much, then the Panasonic GH5 mirrorless camera is a good option at $1,400. It features all of the qualities cameras for vlogging should have, but it also is built for people who live in ridiculous climates (it’s freeze-proof down to -10 degrees and is splash and dust proof).
And, finally, if you are looking for something cheaper still, then the Sony Alpha a6400 is just $900and still features all the basic qualities you’ll want for your vlog.
Learn More:
- Camera Gear Upgrades With a Lot of Bang for the Buck
- How to Get Top Quality Audio With a Shotgun Mic
Finally, Pick Up These Vlogging Accessories

photo by filadendron via iStock
So, now that you have your camera, or if you’re like me, cameras for vlogging, then you’ll need to start picking out your vlogging accessories. Here are my top picks.
E-Image EK610 Professional Compact Tripod

A good tripod is an absolute must for any type of vlog. It keeps your video stable and allows you to have more control over your framing. But, there are so many tripods for vlogging available that it can be hard to choose.
The E-Image EK610 is a great option for those who want a tripod that will last them a long time, but who aren’t looking to spend hundreds of dollars.
It is made of aluminum, so it’s lightweight for travel. It has a load capacity of 6.6 lbs (which will work with any of the previously mentioned mirrorless cameras with lenses attached for vlogging). Plus, you can adjust the height of this tripod quickly and without hassle.
The E-Image EK610 is available for $130, which is a steal considering you’ll never need to buy a tripod again!
Comica Shotgun Microphone

This is another category of vlogging accessories that I see people arguing over all the time.
Personally, I don’t think you need a handful of microphones for vlogging if you purchase one really good one.
Ikan’s Comica Shotgun Microphone fits the bill. It comes with a low-cut filter function, so you can shoot in crowded places without all of the noise of a crowded place. It’s also shock-resistant so you won’t get awful vibration noise if you’re filming on a train or from a car.
This shotgun microphone also comes with a bonus: a built-in wind muffler to prevent ambient noise.
Ikan’s Comica Shotgun Microphone is available for $55 on their website.
Horizon Pro 3-Axis Angled Gimbal Stabilizer

My most important video accessories have always been gimbals. It’s the one thing I’ll spend good money on, and if you’ve ever shot with a crappy gimbal then you know exactly why.
Ikan’s 3-Axis Angled Gimbal Stabilizer is something I’ve been obsessed with lately. It features 360-degree shooting, an angled roll motor, and a quick release mechanism.
You can purchase the 3-Axis Angled Gimbal for $400, which I understand sounds pricey, but it’s completely worth it if you travel for your vlog or if you forget to charge your accessories (like I do) because it lasts for 16 hours on a single charge.
Onyx Bi-Color On-Camera LED Light
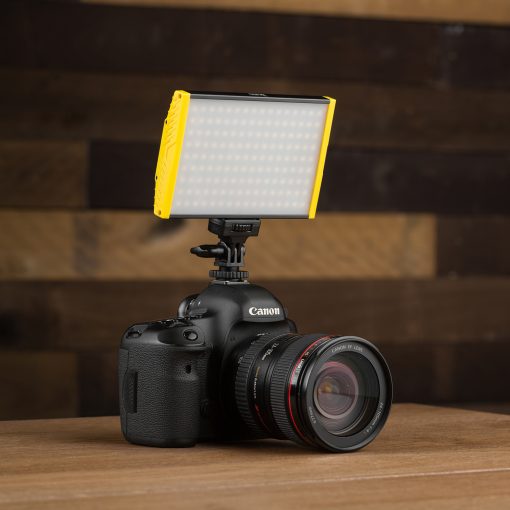
Lights for vlogging are also incredibly important. While you ideally want to shoot with sunlight, this isn’t always possible and a good LED light that you can attach to your camera makes a world of difference for your viewers.
The Onyx Bi-Color On-Camera LED Light is dimmable from 10%-99%, weighs just a half of a pound, and can light up a room from up to 9-feet away.
You can pick up the Onyx Bi-Color On-Camera LED Light for $110.
So, with that you have a better idea of some essential accessories you need to get your vlog going. Now all that’s left to do is work on your vlogging persona, storyboard some video ideas, and start shooting!
Learn More:
We Recommend
This All-New Heavy Duty Tripod is a Videographer's Dream

If you’ve been looking for a heavy-duty tripod, Ikan is proud to announce their new 2-Stage Flip Lock Carbon Fiber Motus Tripod.
Once you add this video tripod to your photography gear, you’re going to wonder how you ever lived without it.
This heavy-duty tripod is perfect for a videographer working out of a broadcast studio, but it is also perfect for a filmmaker working on location.
It holds more weight than many other heavy-duty tripods in its price range and it does so without being incredibly heavy itself thanks to its two-stage carbon fiber leg tubes. Gone are the days of lugging around big, heavy all-aluminum tripods!
If you’re on the market for a heavy-duty tripod, you’ve found the perfect one in this Ikan product.
It Holds Up to 220 Pounds
When I say that it’s a heavy-duty tripod, I’m not kidding. This tripod boasts a payload weight of 220.5 pounds or 100 kilograms. The weight of videography gear is simply no match for this tripod!
It is also very versatile because while it can hold up to 220.5 pounds of equipment, it only weighs 18.7 lbs or 8.5 kg itself. So, you don’t need to worry about dozens of extra pounds of weight.
The tripod also features a height range of 21.9 in-59.6 in or 55.5cm-151cm, so you never miss a shot.
Plus, you don’t have to worry about the fact that this tripod can hold so much weight, since it is incredibly stable. It features an extendable/quick release mid-level spreader that works quickly and smoothly so you can ensure your equipment is always supported.
It Works in Almost Any Terrain
It’s really frustrating how hard it is to find a heavy-duty tripod that is designed for anything other than studio work. A heavy-duty tripod should both be able to support a ton of weight and be able to do so in any terrain. Unfortunately, tripods with both of these features are incredibly rare.
It’s one of the reasons why I was so thrilled to read about the 2-Stage flip Lock Carbon Fiber Motus Tripod. Since it isn’t made entirely out of metal, it doesn’t weigh a ton so that it is really easy to bring with you. It also comes with a carrying bag that is made out of padded nylon to protect your tripod when you’re on the road.
Of course, a lightweight heavy-duty tripod doesn’t mean much if it can’t actually function when you’re on a shoot. It’s why this tripod comes with removable rubber feet. You can use the rubber feet during indoor shoots so that you don’t scuff up the floor and then take them off when you’re heading outside again and need spiked feet once more.
The tripod’s quick-release legs also allow you to keep your equipment secured on any terrain, even rocky or uneven terrain when you’re hiking in the mountains.
Learn More:
It Allows You to Upgrade
Another problem that I’ve come across when searching for a good tripod is that many of them aren’t designed for scaling up your business.
What I mean by this is that I want a heavy-duty tripod that is going to be able to grow with me and a tripod with a really specific ball head compatibility isn’t going to work for me in the long term.
It’s why the 2-Stage flip Lock Carbon Fiber Motus Tripod is designed to be compatible with all professional 100mm ball heads.
It is going to work with the equipment that you have now, but as your business grows and you need to update your gear, it will also work with your equipment in the future.
I don’t know why anybody would spend hundreds and hundreds of dollars on a tripod that they would have to upgrade in two or three years anyways.
It is Seriously Sturdy
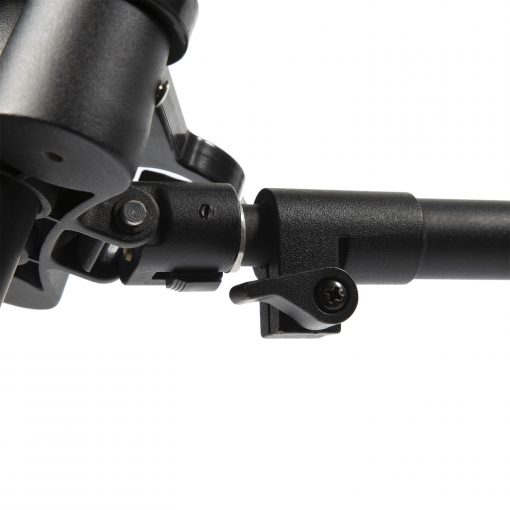
I get that you may lean towards an aluminum tripod as your go-to heavy-duty tripod because it feels so sturdy. As someone who definitely has some anxiety about my videography gear, I understand this.
But, despite the 2-Stage flip Lock Carbon Fiber Motus Tripod’s light weight, it feels like it is going to take care of my equipment. The carbon fiber leg tubes are sturdy but light. The all-metal main body exudes strength and gives you the feeling of durability that you want out of a good tripod.
Plus, even the smaller pieces on this tripod, like the removable rubber feet, feel as if they are of a very high quality.
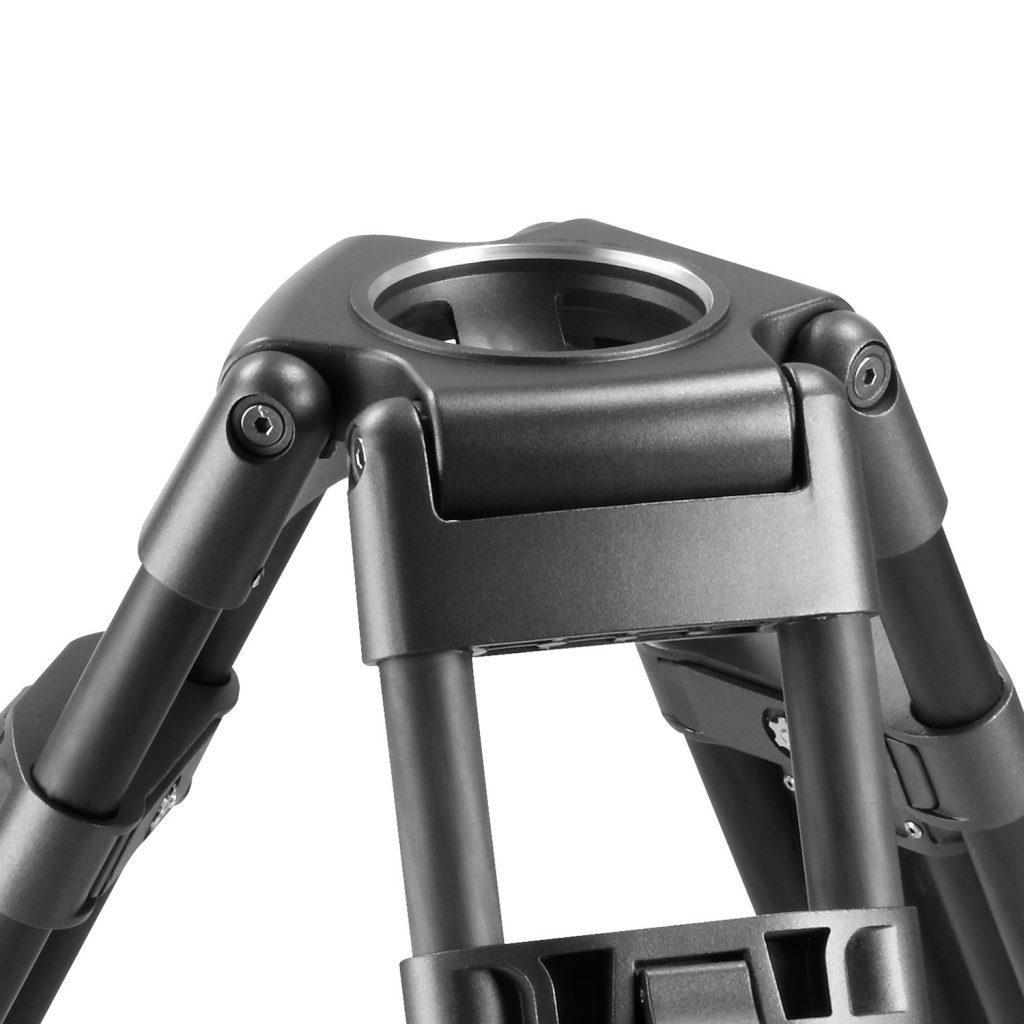
Of course, all of this quality does come at a price. The 2-Stage flip Lock Carbon Fiber Motus Tripod costs $1,000. While this is a hefty amount to spend on a tripod, keep in mind that Ikan guarantees all of their products for 1 year after you originally purchase them.
Besides, isn’t it better to make an investment in a good tripod that will serve you for years and years rather than buying several cheap tripods over the same time period?! This is a you-get-what-you-pay-for situation, and with Ikan, you get a high-quality, well-made, durable product that will be in your camera bag for a very long time!
Learn More:
We Recommend
This Handy Gadget Will Speed Up Your Post-Processing Workflow
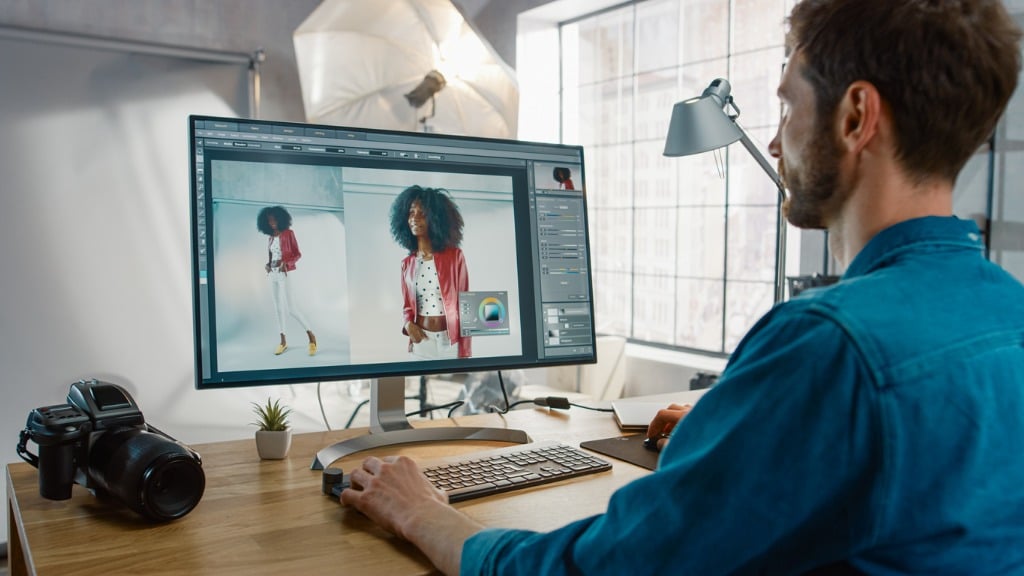
photo bygorodenkoff via iStock
The days of scrunching over your laptop for hours on end, working tirelessly to edit your photos precisely are over.
Ikan’s recently-released Tourbox Photo and Video Editing Controller is the editing tool you’ve always needed but never realized.
The controller simplifies the use of Photoshop, Lightroom and whatever other photo editing software your heart desires by working hand-in-hand with a mouse or graphic tablet to allow you to subtly adjust your photos.
As you can see in the video above, this controller has 11 completely customizable buttons which allow you to adjust the temperature, exposure, and contrast of your photos, to switch between editing tools quickly, and to zoom in and out of your photos with ease.
But, my favorite quality of the controller is that it lets photographers do what photographers do best: focus on their creativity.
You will never again need to be interrupted by complicated procedures or distractions. The Tourbox Photo and Video Editing Controller essentially functions as an extension of your hand, and after using it, you’ll wonder how you ever worked without it before.
Learn More:
Let’s give a huge thank you to Daniel Marchione for doing an unboxing and review of the controller. A few important things to note that Marchione points out are that the controller features rubber grips underneath it, so it’s never going to slide around on you while you’re working.
Additionally, whereas other photo and video editing tools are a lot larger than the Tourbox, you can use this controller with just one hand and you don’t even need to move your hand. Every single button is accessible from one resting position because the entire controller measures 4” by 4.5”.
Plus, Ikan really thought of everything while they were creating this controller. Since the Tourbox plugs into your USB port on your laptop, they installed an additional USB port on the top of the controller to ensure you still have one when you need it.
And, as Marchione points out, there’s no point in having a video and editing tool that is customizable if you can’t play around with how you want your controller to act. Every button can be adjusted with one click of your mouse on the preset list until you understand the exact way you want your controller to function.

As I previously mentioned, the Tourbox comes with two layout presets, one for Photoshop and one for Lightroom, but if you need presets for other software, like Final Cut or Premiere, you can download them on the Ikan website.
So, let’s talk specs.
The Tourbox Photo and Video Editing Controller is compatible with both Windows and macOS. Each button is completely customizable so you can create your own personal presets, just how you like them.
I also wouldn’t be as stoked about this editing controller if it didn’t work with any software, because while Lightroom and Photoshop will always have my heart, I would hate to buy an editing controller that wouldn’t work with a cool new editing software in the future.
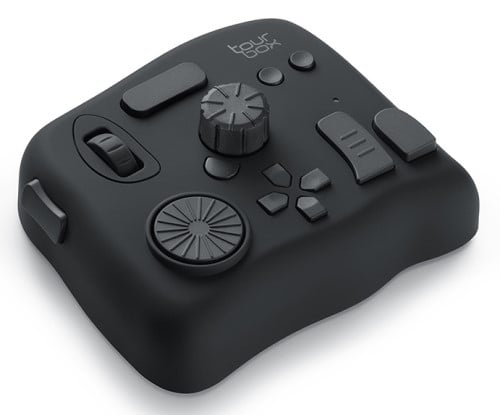
Importantly, it’s also designed ergonomically. There’s no reason to spend $60 on a mouse built with ergonomics in mind to turn around and buy an editing controller that isn’t. It’s slightly larger than your palm to ensure ease of use. Each button is incredibly pronounced. Essentially, it’s built like a modern video game controller.
It weighs 386g or just under 1 lb, so it's definitely not a burden to travel with.
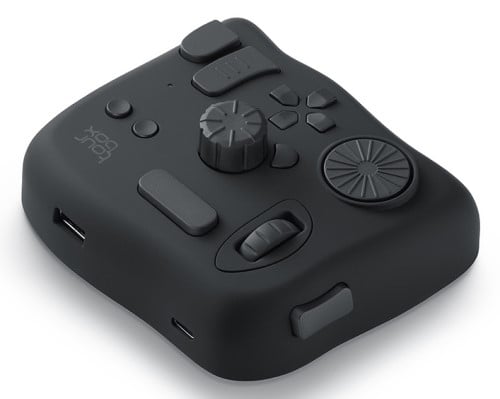
It’s also built to last, which means you can throw it in your backpack, carry it around with you all day, and expect it to function as well as the day you purchased it.
You can pick up your Tourbox Photo and Video Editing Controller from Ikan for just $170 today.
Learn More:
We Recommend
Tips for Better DSLR Video
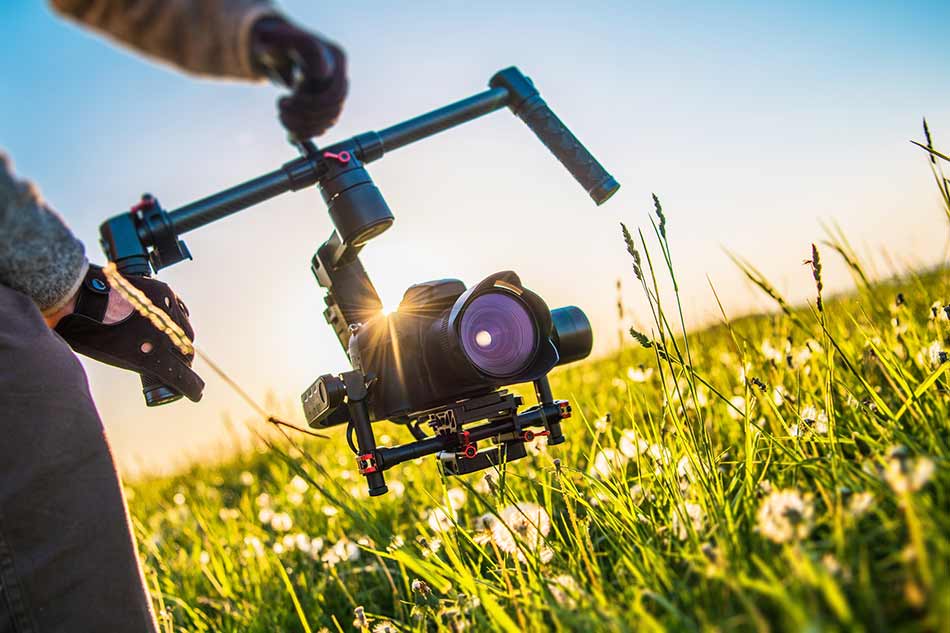
photo bywelcomia via iStock
One of the best features of modern DSLRs is their video recording capabilities.
And while some DSLRs offer better video specs than others, with these tips, you can improve the quality of the videos you produce in short order.
From getting the right accessories to learning how to shoot in manual mode, the following tips will enable you to fulfill your creative vision.
Let’s get started!
Table of Contents
- How to Shoot Professional Video With a DSLR: Stabilize the Camera
- How to Shoot Professional Video With a DSLR: Learn Manual Mode
- How to Shoot Professional Video With a DSLR: Ditch Autofocus
- How to Shoot Professional Video With a DSLR: Invest in Good Glass
How to Shoot Professional Video With a DSLR: Stabilize the Camera

Having a solid, stable base is important for getting clear, sharp still photos. But it’s even more important when shooting video.
After all, you’re recording a moving picture, so if the camera isn’t steady, the footage will give viewers a seasick feeling because the video is bouncing around all over the place.
The simplest means of stabilizing the camera during video recording is to use a tripod.

You can pick up a good video tripod, like the E-Image EK650 shown above, for under $200.
This particular tripod is specifically designed for video shooters and features a fluid head with a 75mm bowl and a fixed counterbalance that enables the head to support up to 11 pounds of gear.
To increase stability, the EK650 has a mid-level spreader and quick leg locks for easy and secure setup.

Tripods like this one offer fixed pan drag, variable tilt drag, and continuous adjustable tilt drag for more precise adjustments to the camera positioning.
It also comes with a GP1 plate that is compatible with various E-Image and Manfrotto heads.
The aluminum legs are strong and sturdy, yet lightweight, so the tripod is easily transportable. There’s even anti-slip pads on the feet to increase stability even further.
It’s virtually impossible to get the highest-quality footage unless you stabilize the camera, so investing in a high-quality tripod like the E-Image EK650 is one of the best tips for better DSLR video.
Editor's Tip: Every great DSLR video needs an awesome soundtrack that adds interest, depth, and helps you tell a better story. One of my favorite places to get audio is Epidemic Sound. They have an incredible selection of tracks, albums, and sound effects that will bring your videos to life. Hop over to Google and search "Epidemic Sound" and see what deals they have going on right now!
How to Shoot Professional Video With a DSLR: Learn Manual Mode
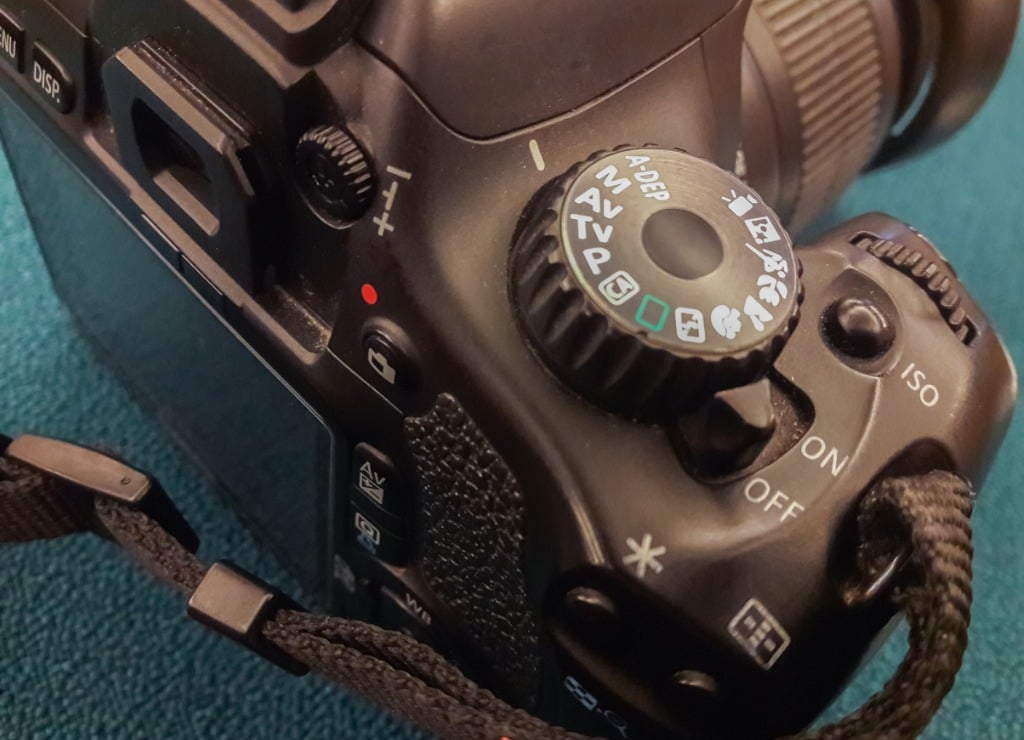
photo by arisara1978 via iStock
Shooting in manual mode when creating videos is a slightly different exercise than when shooting in manual mode for still photos.
First, the shutter speed needs to be double the frame rate. So, if you’re shooting at 24 frames per second (fps), the shutter speed needs to be at least 1/50 seconds.
Of course, this means that if you’re shooting at 30 fps, a shutter of at least 1/60 seconds is needed, and if you’re shooting at 60 fps, the shutter speed needs to jump to 1/125 seconds.
If you don’t follow this guideline, the video footage you take will end up looking choppy, rather than the smooth continuous video footage you want.

photo by Arndt_Vladimir via iStock
On the aperture front, it’s used just the same in video as it is in still photography.
If you want to reduce the depth of field, maintaining the subject in nice, sharp detail but having a blurred background, open the aperture. If you want the entire scene sharp, close down the aperture.
Naturally, if you use a large aperture to blur the background there will be lots of light coming into the lens. Conversely, if you close the aperture down to increase the depth of field, there will be much less light.
To help even out the exposure, you’ll need to manipulate the ISO.
As in still photography, you want to keep the ISO as low as possible to avoid digital noise. This isn’t an issue when shooting with a large aperture, because there’s plenty of light. As such, you can keep the ISO to a minimum.
However, when you close down the aperture, the ISO will need to be increased. A good rule of thumb is to do test footage at various ISO levels so you can determine the absolute lowest ISO setting you can use to get a good exposure with minimal noise.
Get more details on manipulating aperture, shutter speed, and ISO for shooting video in the video above by DSLR Video Shooter.
Learn More:
How to Shoot Professional Video With a DSLR: Ditch Autofocus
I’ll be the first to admit that DSLR autofocus systems are better than they’ve ever been for shooting still photos.
But in most cases, autofocus for shooting video results in the camera hunting for the right focus point if you’re using continuous autofocus.
A better option is to use manual focus so you have total control over what’s in focus and what isn’t.
Manual focus might sound scary, but as this tutorial explains, it’s really not as hard as some people think! If you need to know how to shoot video with a DSLR, learning manual focusing should be one of the first steps you take.
For additional tips on manual focusing for video, check out the video at the beginning of this section by ZY Productions.
How to Shoot Professional Video With a DSLR: Invest in Good Glass
One of the best DSLR video accessories you can get is the best lens you can afford.
After all, the lenses you use for shooting video have more impact on the quality of the footage than anything else - even your camera!
Many experienced DSLR videographers will tell you that the best lenses for shooting video are primes with a large aperture like the Sigma 24mm f/1.4 HSM Art Lens.
The 24mm focal length is ideal for wide shots while the huge f/1.4 aperture enables you to control the depth of field and shoot in low-light situations with relative ease.
The problem, of course, is that this particular lens is spendy at $850.00.
You can shoot excellent quality video with a longer prime lens, say, a Canon EF 50mm f/1.2.
Again, you get an ideal focal length and an even larger aperture than the Sigma lens, but it comes at a price of $1,500.00.

You can use a zoom lens for videography as well, but be sure you invest in a good zoom lens (so, not the kit lens that came with your camera).
A good normal zoom lens for shooting video is the Sigma 24-70mm f/2.8 DG OS HSM Art, which is a cool $1,100.00.
The 24-70mm focal length is extremely versatile and the f/2.8 aperture is large, albeit not as large as the previous two lenses that are mentioned.
Nevertheless, you can expect good image quality throughout its focal range and the optical image
stabilization is a nice bonus.
Of course, not everyone can afford to spend so much money on a good video lens.
For DSLR video accessories like great lenses that cost less, I recommend Lensfinder.
Lensfinder is a marketplace where photographers can buy and sell lenses with the peace of mind that there are fraud protections in place.
What’s more, you can communicate with sellers directly, that way you can ask questions before your purchase.
After the purchase, you can leave feedback so other community members know how good the seller is. There’s even a mediation service in case things go awry!
It’s simply the most secure and easiest way to get your hands on great lenses while saving a buck.

photo by basketman23 via iStock
Ultimately, how to shoot video with a DSLR comes down to many factors, but the ones outlined here are among the most important.
Do yourself a favor and get geared up with a good lens and solid tripod, learn how to shoot in manual mode, master manual focusing, and you’ll be in good shape for fulfilling your creative vision with your videos.
We Recommend
Tips for Teaching Online Photography Classes
photo bycoffeekai via iStock
I enjoy the art and craft of photography and videography. A joy shared is a joy multiplied so for several years I have taught others photography in groups and one on one, in person and online.
Teaching photography through teaching online photography classes is an exciting way to share knowledge and inspiration and can also provide us with an extra income stream.
How to Teach Photography Online

photo byJPWALLET via iStock
Teaching photography online is a fairly straightforward operation open to all sorts of photographers from all the various fields and sub genres of photography. I teach beginner to advanced landscape and real estate photography as well as various tutorials on editing for still images and videography.
Here are a few of the methods, techniques, and tips for teaching photography online I have learned:
- Outline a Script
- Use Props
- Look Them in the Eye (Audience Contact)
- Be Structured But Informal (Relax!)
- Record Excellent Audio (Mics)
- Call to Action (Assignments, Subscriptions)
Outline a Script
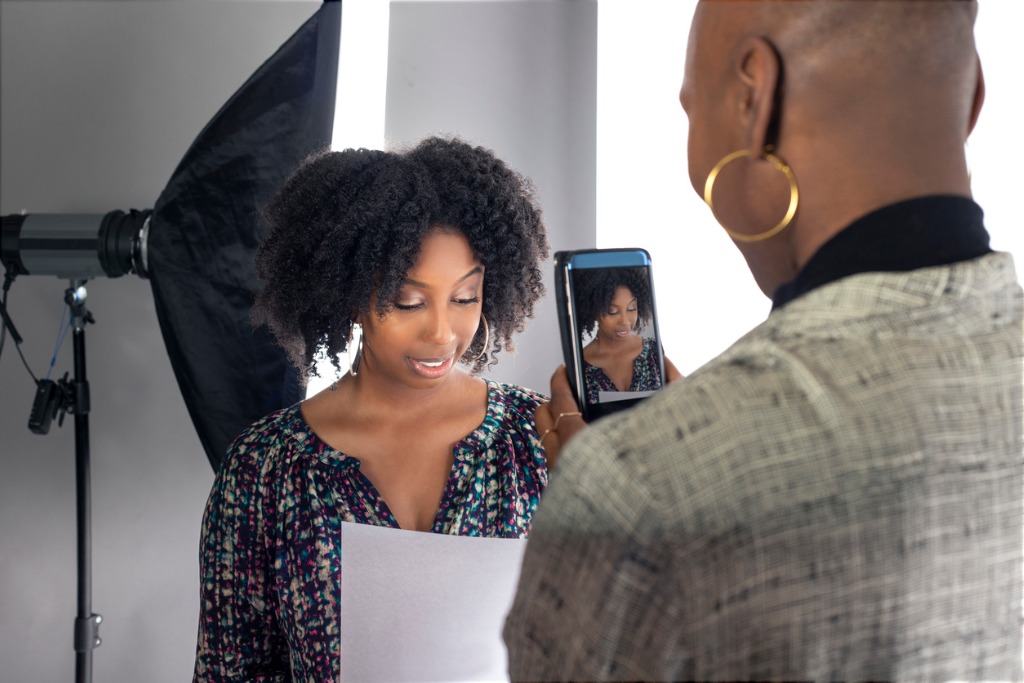
photo byinnovatedcaptures via iStock
You may want to write out a full script or just an outline of one, but teaching photography in any form works best with a plan of what to discuss decided on ahead of time. Think of it as a lesson plan for a teacher, since that’s what you are, a teacher of photography.
Whether teaching photography online or in person, a clear plan of action for us as the teacher is vital for student development and enjoyment. Having the student enjoy the class is a key factor in motivating them to subscribe to our online photography classes. The student also benefits in that most people learn better if the class is fun.
So let your personality shine through as you provide focused instruction. Ad libs are fine, they often make the point better than our carefully structured first draft of a script, but we want to maintain the theme of the class presented, otherwise the students may lose focus themselves and derive no real benefit from our depth of technical and artistic experience and talent.
Which is why I like to craft an outline instead of a word for word rendition and then rehearse it before I record or go on Zoom, Facetime, or Teams. My rehearsal with the outline almost always shows me where I need to either add in something as I ad lib, or when to remove parts that bog down the flow.
My final script outline is very fleshed out and I will read some important parts word for word. In terms of style, we probably want a balance somewhere between Robin Williams stream of consciousness and a tightly produced performance of Othello.
Use Props
photo byRichVintage via iStock
If I were teaching photography in a classroom, I might have a projector set up or maybe a dry erase board to illustrate the points I’m teaching that session. A picture paints a thousand words is the timeless adage, an illustration explained creates a lasting memory.
What props can we use? A camera, of course, or some other photographic or video gear we’re demonstrating such as a studio light, video slider, GND filter kit, or an external mic. That dry erase board we have can be used for difficult to demonstrate ideas such as depth of field, magnification ratios, or the Sunny 16 Rule.
We might want to show some of our own photography to illustrate composition techniques or apparent perspective. If we do this, be sure that the picture enlargement is big enough to show the idea we’re presenting. Teaching photography online via a streaming service might give us options for sharing our screen, or we can edit a file into our video if recording for YouTube or some other platform.
Look Them in the Eye
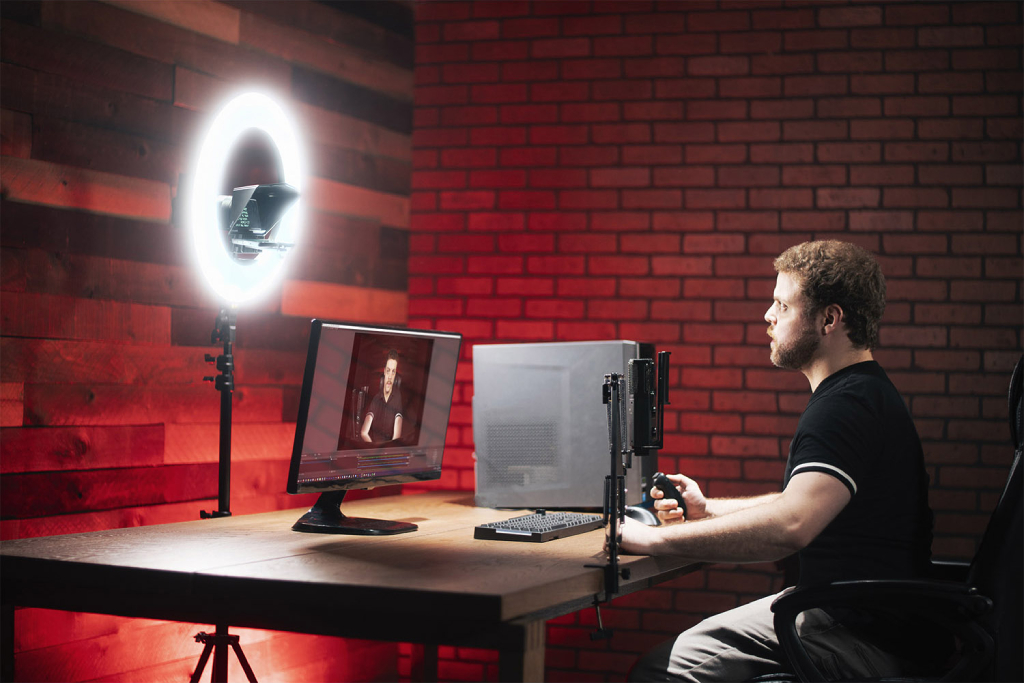
In public speaking courses, this is known as audience contact. Presenting online photography classes, I call it looking at the lens. Engaging the student personally is simple to do in person, just look at them. Teaching online photography classes, you don’t have a student personally right there, but talking directly into the lens accomplishes the eye contact you want.
But, if we’re reading from a script or consulting a detailed outline, how do we maintain eye contact? Same way TV news people do it, teleprompters. If you have a camera and a smartphone, you can use a teleprompter designed by Ikan, the Homestream Smartphone Teleprompter HS-Prompter-RL.
This teleprompter uses your own smartphone or small tablet to enable you to read your script or outline as you look directly at the lens. Even if your script is read word for word. The naturalness of the playback is outstanding when you use a teleprompter. There is a bluetooth remote control that works with the app to let you control the scrolling or you can set it up to crawl automatically at various speeds.
Ikan Corp is always at the top of my short list for videography accessories. They design and make their own gear, so you can find high end equipment at midrange prices. It’s all designed by people who are videographers and photographers themselves, so the features and tools are just what’s needed.
Learn More:
- 5 Tips for More Professional-Looking Videos
- How To Use Your Camera As a Webcam
- What Is a Camera Cage?
Be Structured But Informal
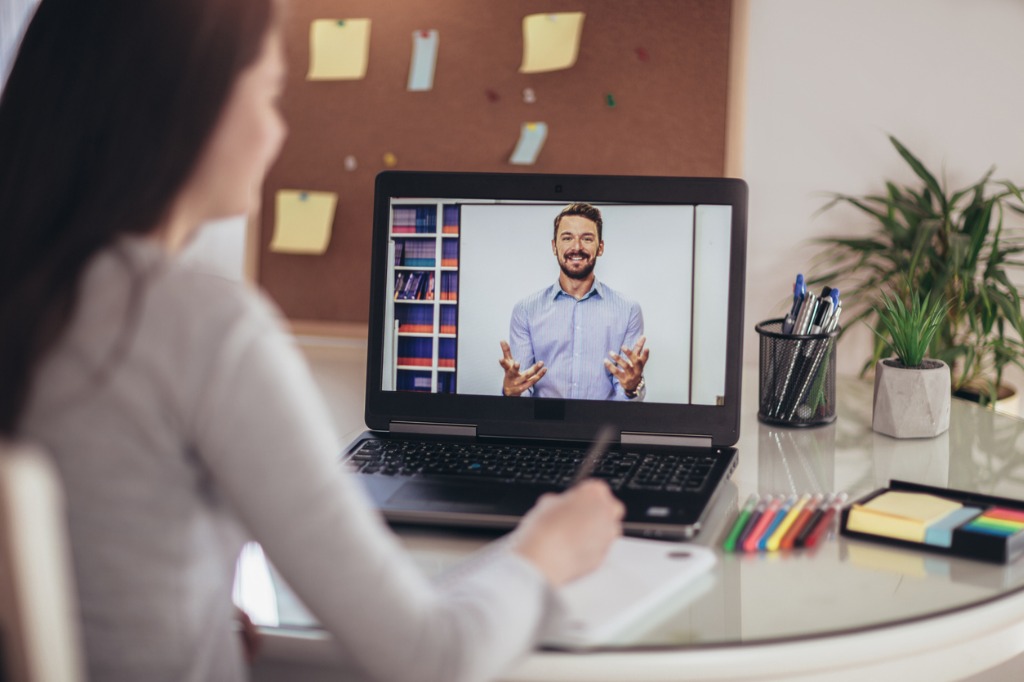
photo byJovanmandic via iStock
This is one of the tips for teaching photography that works online or in person, in a group setting or one on one. It goes back to the script outline and ties in with using a teleprompter in that we won’t lose our train of thought but the student still feels a connection.
If you can do some form of live classroom such as streaming, you could even open up to questions and answers. Be prepared to be stunned, some students will have quite interesting questions.
If they’re paying for your online photography classes, their questions will likely be on point, so don’t worry too much about being thrown a curve. Stick to your time schedule if you use Q&A sessions, some subject matter might need more detailed instruction at a later time.
Record Excellent Audio

This applies to live streaming, too. If the audio from your end is low quality, your students may not enjoy the presentation and they aren’t likely to return. The solution is simple, external microphones.
The built-in mics of our DSLR and mirrorless cameras simply don’t compete with adding external mics. Simple solutions are a camera or camera cage mounted shotgun mic, wired or wireless lavaliers worn on your person, or a boom mic, all of which can also be found made by Ikan Corp.
Editing audio properly for prerecorded online photography classes is a good skill to learn. If you can edit visual art, stills or video, you have the mindset needed for audio editing. You can even do it with some of the same programs for video editing you’re already using, since most of them are A/V editors, A/V standing for Audio/Video.
Call to Action
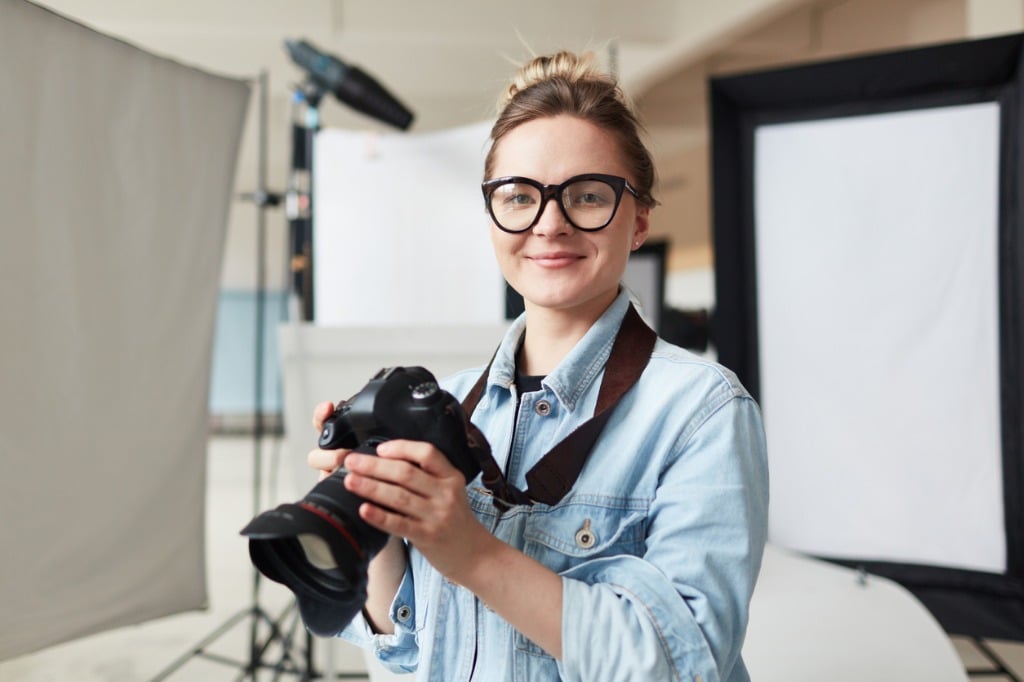
photo byshironosov via iStock
Though the phrase call to action is used in marketing, it applies equally to instruction. If you are charging adequately for your online photography classes, it works for both.
A call to action to get people to come back to you for more instruction can be as simple as urging the student to subscribe to your channel. If you ask for email addresses, that asking is a call to action, too, that can be used to inform former students of new classes.
Another form of call to action that I like to use teaching photography is to outline an assignment for the student to put into practice what they learned. These further learning or homework assignments will help the student to grow and will cement your value as an instructor in their minds, leading to referrals and repeat enrollments.
Share Your Skill and Talent

photo byJPWALLET via iStock
Any photographer or videographer that has any success as an artist or business owner has a valuable commodity for others. Share your art and craft skill and experience as a teacher with an online photography class of your own.
Learn More:
- Types of Microphones for Vlogging
- How To Edit Videos Like a Pro
- Lighting Options for Recording Video at Home
We Recommend
Top 10 Gifts for Photographers Under $1,000 - 2019 Edition

photo bykrystiannawrocki via iStock
The holidays are getting ever closer. That means we all need to get on our game and start making shopping lists for our loved ones.
But if you ask me, photographers are one of the toughest groups of people to satisfy. Many of us are picky and if you aren’t a photographer yourself, you might not know what the best gifts for photographers might be.
So before all the Black Friday sales begin to crop up, consult our list of the top gifts for photographers so you know what to keep your eye out for when holiday shopping really begins to get underway.
Gifts for Photographers Under $1,000: CanvasHQ Prints

If you’re like me, sometimes finding the perfect gift for certain loved ones is a long, drawn-out process that causes tons of stress, and often you still don’t get something that totally blows them away.
I think a lot of photographers fall into this category. We have specific likes, and many of us already have most of what we want or need gear-wise, and what we don’t have is usually too expensive to put on a Christmas wish-list anyway.
But for all those hard-to-shop-for photographers on your 2019 holiday shopping list, I have the perfect solution - a canvas print.

Think about it…
A canvas print is a gift that keeps on giving.
Not only can you immortalize one of your favorite images from your favorite photographer, but you also give them a means to showcase their work in a format that’s drop-dead gorgeous.
I have tons of canvases in my home, the vast majority of which are from CanvasHQ.

Now, I know what you’re thinking - canvas is old school.
Sure, maybe it is, but I’m telling you that these canvas prints from CanvasHQ are mind-bogglingly beautiful. In fact, they go head-to-head with any metal or acrylic print I have in my home.
The attention to detail is just amazing, and the materials they use are top-of-the-line. We’re talking archival-grade canvas, commercial-grade inks that are water and UV resistant, and kiln-dried pine frames to keep everything straight and true.
I love the personality that the canvas texture gives my images. That’s true whether it’s a portrait of my son or a landscape photo.

I’d be remiss if I didn’t mention the customer service you get with CanvasHQ.
These guys are committed to getting it right, so if something doesn’t go as planned, you won’t be hung out to dry.
If you have questions, they’ll answer them. If you have a problem, they’ll fix it. If you need assistance with uploading your photo or even picking the best finishes for your canvas, they’ve got your back.
In the video above, I explain why I highly recommend a CanvasHQ canvas print as the ideal gift for the photographer on your holiday shopping list.
Start shopping for your favorite photographer today on CanvasHQ!
Gifts for Photographers Under $1,000: Holdfast Roamographer
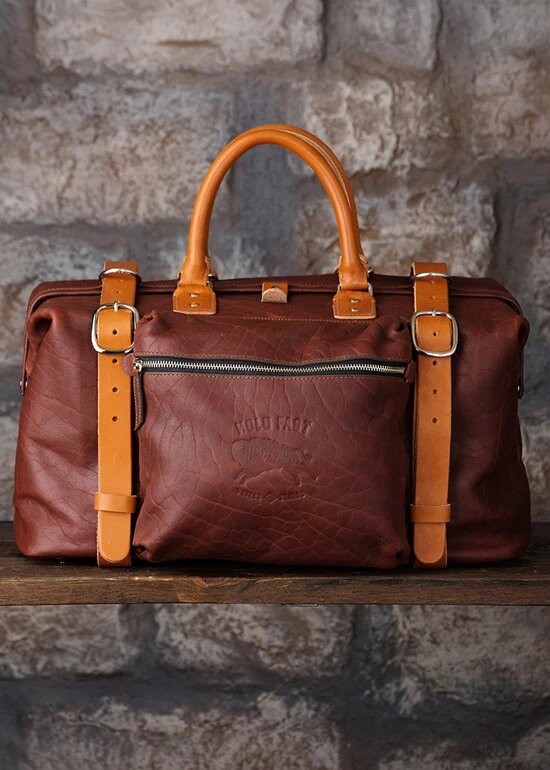
With a $1,000 holiday budget, you can give the photographer on your list a gift that is impeccably designed, highly functional, and way under budget, too.
The Holdfast Roamographer bag is one of the finest leather camera bags on the market. It offers gorgeous aesthetics with an American Bison leather exterior that’s beautiful and rugged at the same time.
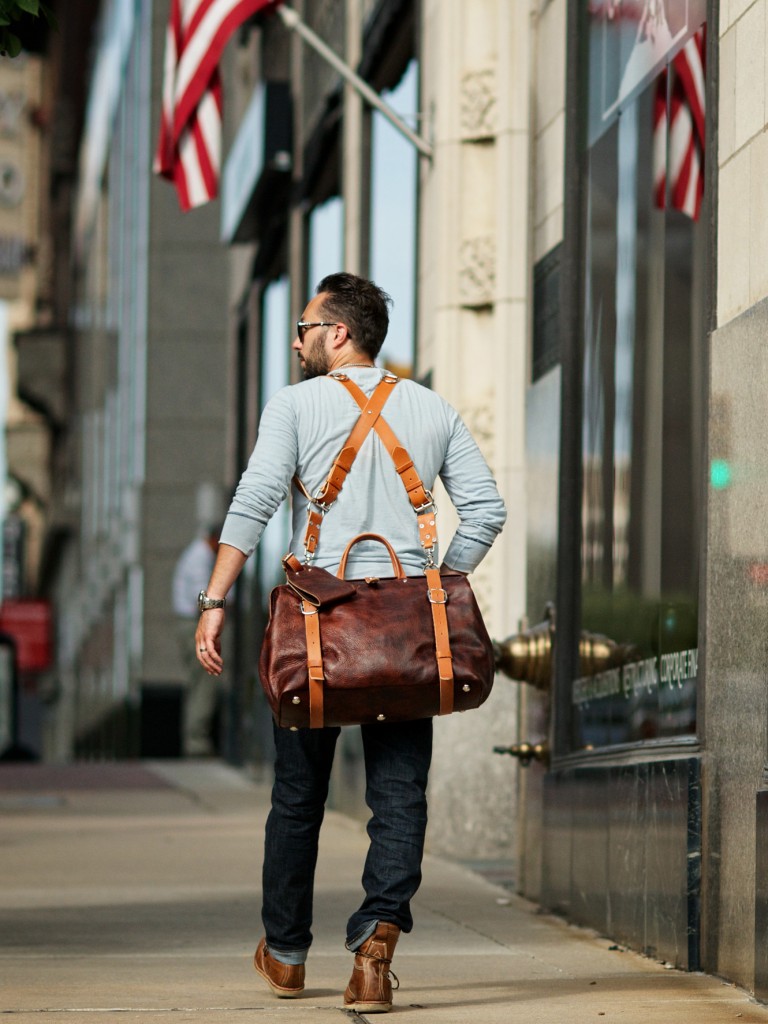
Not only will this leather stand up to the elements and age with grace, but it’s also weather resistant so you can be sure the contents of the bag remain safe and dry.
It’s a big bag and can carry lots of gear, but carrying it is a breeze with an adjustable shoulder strap with a shearling-lined shoulder pad for comfort.
Or, if you prefer, you can carry the Roamographer using the Holdfast MoneyMaker for even more functionality and comfort, as seen above.

The inside of the bag must be mentioned as well.
The removable camera insert means that no matter how much or how little gear your favorite photographer needs to carry, the Roamographer will help them keep it organized.
The padded insert has cubbies specifically for cameras, lenses, flashes, and other accessories, while there’s interior and exterior pockets for other goodies like a phone, car keys, and a tablet.
The insert is removable, too, so on weekends when they’re not on the job, the photographer on your list can use this as a weekend bag, too.
That makes the Holdfast Roamographer a beautiful, functional, and multi-purpose bag!
Learn more about the Holdfast Roamographer
Gifts for Photographers Under $1,000: iMovR Lander Lite Desk
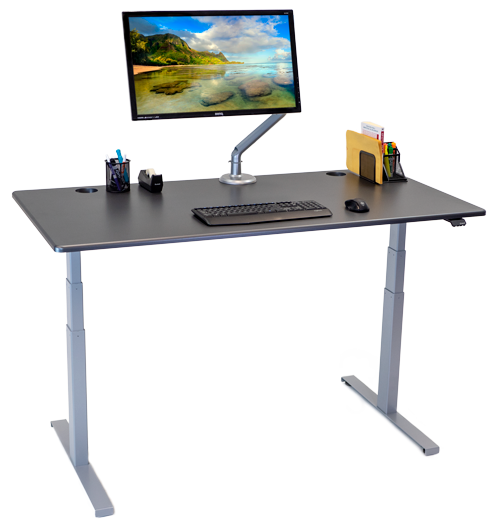
One of the worst parts of the job as a photographer are the long hours spent sitting at your desk, culling and editing images.
But the photographer on your holiday shopping list needn’t sit in discomfort all day long!
The iMovR Lander Lite Desk is the ideal solution, offering both sit and stand options for workers.
I have the Lander Desk in my office, and I can tell you first-hand that it is one of the best investments I’ve ever made for my work life - it’s that good!
The Lander Lite Desk has all the same crazy-good technology as the Lander Desk, but with “lighter” features and a smaller price tag.
For example, this little beauty has a height control paddle with built-in health coach, just like it’s big brother, the Lander Desk. The paddle syncs with your smartphone so you can even move the desk up and down remotely.
Likewise, you can choose from hundreds of size and color combinations so the photographer in your life gets the precise desk they need.
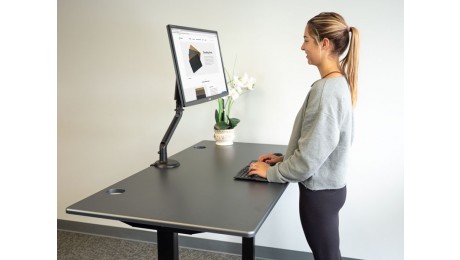
The Lander Lite incorporates whisper-quiet motors, too, with 225 pounds of lifting capacity.
And if you think that standing desks aren’t stable, you’re wrong! The Lander Lite offers the ultimate stable work surface. And since it’s 3-D laminated, the desktop is virtually indestructible.
Best of all, the Lander Lite Desk arrives nearly pre-assembled, so you won’t have to spend your afternoon putting the darn thing together.
Plus, it’s made in the USA, so you know the quality is top-notch!
Learn more about the Lander Lite Desk
Gifts for Photographers Under $1,000: Pre-Owned Sony Alpha a6300 and Sony E 18-135mm f/3.5-5.6 OSS Lens
A great holiday gift idea for the photographer on your list is a Sony camera/lens setup.
By opting for a pre-owned camera and lens, you can save a ton of money while still giving an awesome gift this holiday season.
The Sony a6300 offers tons of features, including a 24.2-megapixel Exmor CMOS sensor, a BIONZ X image processor, 4K video at 30p, HD video at 1080p/120, and continuous shooting at 11fps.
Add to that a spectacular 425-point autofocus system with tracking AF, excellent image quality, and a small, lightweight body, and the a6300 is a perfect gift for a photographer that needs a capable yet highly portable camera.
Pair that with the Sony E 18-135mm f/3.5-5.6 OSS lens, and you've got quite the package!
This lens has an effective focal length of 27-202.5mm to give photographers incredible versatility from wide-angle to telephoto.
It also sports Optical SteadyShot technology, which minimizes camera shake so you can get sharper images when holding the camera in your hand.
With quick and accurate autofocus performance and quiet operation that's ideal for shooting video, this lens is a great choice for still photographers and videographers alike.
All told, this camera and lens combination is under $1,000, so you can give two gifts for the price of one!
Learn more about the Sony a6300 and the Sony E 18-135mm f/3.5-5.6 OSS lens
Gifts for Photographers Under $1,000: Ikan Onyx Digital Color LED Panel Light
Photography requires great light, and while there are many different lighting options out there, few match the creative possibilities that the Ikan Onyx Digital Color Light provides.
It has a RGBWA LED panel that offers five color modes to suit just about any kind of photo shoot.
When in RGBWA mode, the light gives photographers complete control over red, green, and blue LEDs independently. That being the case, the photographer on your list can literally create millions of different colors!
Meanwhile, the amber and white LEDs give photographers the option of recreating daylight or tungsten light with incredible accuracy.
There’s also a CCT Mode that is adjustable from 2800K up to 10,000K. Again, this gives the photographer on your list infinite possibilities for customizing the light for their photos.
Add to that a Hue Shift feature of magenta and green lights, and you’ve got a lighting option that offers supreme matching control when using this light with other LEDs.
On top of all that, the Onyx Digital Color light has eight built-in special effects (a candle flame and police car lights among them), 33 different gels to choose from, and a built-in ½-stop diffuser.
With a CRI/TLCI rating of 95, this light produces gorgeous, clean light that is sure to knock the socks off the photographer on your holiday shopping list.
Learn more about the Ikan Onyx Digital Color LED Light Panel
Gifts for Photographers Under $1,000: Synology DiskStation DS 1019+

It's crucial for all photographers to have a solid backup system, that way if catastrophe strikes - a flood or fire, a break-in, a hard drive failure, and so forth - their precious photos and other files will be safe and sound.
For that task, it's tough to beat the Synology DiskStation DS1019+...
I have this exact model on my desk, and it has proven to be the reliable backup I need to ensure my files are duplicated and safe.
It's small enough that it doesn't take up a ton of room on my desk while also being packed with features that make it an easy-to-use and powerful storage option. Read my complete Synology DiskStation DS1019+ review to learn more.
There are five hot-swappable bays, each of which can accommodate a 2.5-inch or a 3.5-inch drive. If the photographer on your list has TONS of files, they can easily expand that capacity to 10 bays with the Synology DX517.
Aside from the expansion capabilities, the DS1019+ is easy to operate thanks to the intuitive Synology operating system. Even if you've never setup or used a network attached storage device before, this one will be a breeze to use.
In fact, I set it up in just a few minutes with no problems or issues at all.

This unit is power-packed with an Intel Celeron J3455 1.5GHz quad-core processor that’s capable of burst speed of 2.3Ghz.
Add to that 8GB of RAM, built-in applications for video transcoding, read/write speeds up to 225MB per second, tool-free installation for 3.5-inch drives, and the Synology reputation for reliability, and you have the makings of a perfect - and practical - holiday gift idea for the photographer in your life!
Learn more about the Synology DiskStation DS1019+
Gifts for Photographers Under $1,000: Syrp Genie II Linear

If the photographer you’re shopping for is into shooting time-lapse videos (or real-time videos, for that matter), then a perfect gift idea is the Syrp Genie II Linear.
What’s so great about this product is its size and weight - at little more than 5.5 x 5.5 x 6.33 inches and two pounds, this little guy can be easily added to any photography bag for on-the-go motion control.
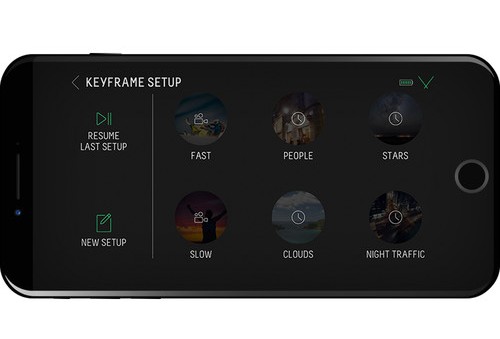
What’s more, the Genie II Linear can attach to any slider on the market, giving your favorite photographer incredible versatility in how they craft their time-lapse setup. It can also attach to cable cam systems up to 328-feet in length.
This thing is also loaded for bear with features that will enable the photographer on your list to create professional-looking videos.
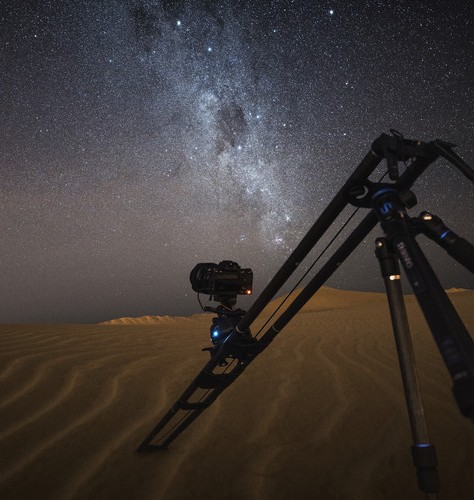
From key-framing to time-lapse video, shooting B-roll to recording interviews, the Genie II Linear can get the job done!
Throw in live view, camera control for ramping exposures, wireless control via a smartphone, and many other intelligent features, this is simply one of the best motion control devices you can get this holiday season!
Learn more about the Syrp Genie II Linear
Gifts for Photographers Under $1,000: Aputure 120d II
Over the years, Aputure has established itself as one of the top lighting choices of photographers worldwide. That’s because of the incredible features and build quality of products like the 120d II.
I use this light in my home studio (you can read my review of it here), and it is far and away one of the best lights I’ve ever owned.
The light it produces is beautifully clean and bright (25 percent brighter than the 120d). Additionally, it has a pleasing color temperature of 5500K.
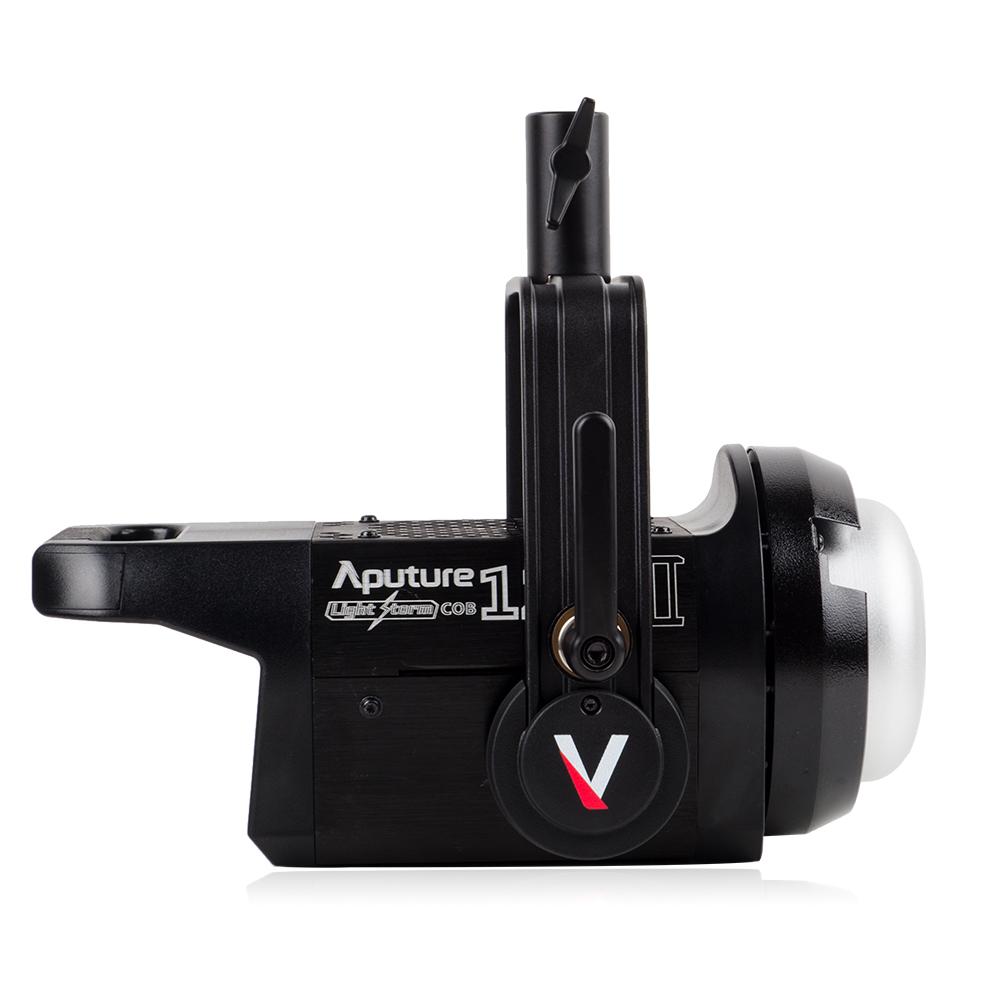
You can control the 120d II using a wireless remote from up to 328 feet away, giving photographers the ultimate in flexibility regarding the positioning related to the subject.
Speaking of flexibility, this light is dimmable from 100 percent down to just 1 percent, so the photographer on your list can dial in the precise level of lighting they need to get the shot.
Aputure has built in all kinds of lighting effects for further creative lighting. What’s more, the redesigned handbrake offers a super secure lock to prevent the light from moving.
That means that when the light is dialed in and positioned, you don’t have to worry about whether or not it will stay in place. That’s the kind of peace of mind photographers want from their gear!
The integrated power and control box make for easy transport while the 18 dB quiet fan won’t distract photographers while on-location. Add in a CRI and TLCI of 97+, and you have a recipe for one heck of a light for the photographer on your list!
Learn more about the Aputure 120d II
Gifts for Photographers Under $1,000: Zeiss Batis 85mm f/1.8 Lens
Earlier this year, I took the Zeiss Batis 85mm f/1.8 for a test drive with my Sony a6400, and I was blown away by the quality of the images I was able to get.
For me, the best feature of this lens is that it is incredibly sharp. A close second would be its extremely fast and accurate focusing.
As you can see in the sample image below, this lens also produces nice bokeh that’s great for portraits.
Additionally, this lens is super lightweight, so you don’t feel like you’re lugging around a huge kit while you take photos. The photographer on your shopping list will surely appreciate that!
The look of the lens is something else, too - it’s sleek design reminds me of the Zeiss Otus lenses from back in the day.
And while some would argue that the streamlined design means it’s not comfortable to use, I disagree.
The big rubber ring offers tons of grip, and the lens feels great in the hand, due in large part to the lightweight design I mentioned above.
The angle of view of 29 degrees is perfect for portraits, and the maximum f/1.8 aperture allows for flexibility in low-light shooting situations.
The floating element design of the lens minimizes aberrations, and since it’s dust and weather-sealed, it can be taken out for shoots in adverse weather without worry that it will be damaged.
In other words, if the photographer on your holiday list is after a fantastic portrait lens, this is it!
Learn more about the Zeiss Batis 85mm f/1.8 Lens
Gifts for Photographers Under $1,000: f-stop Sukha Backpack Master Bundle
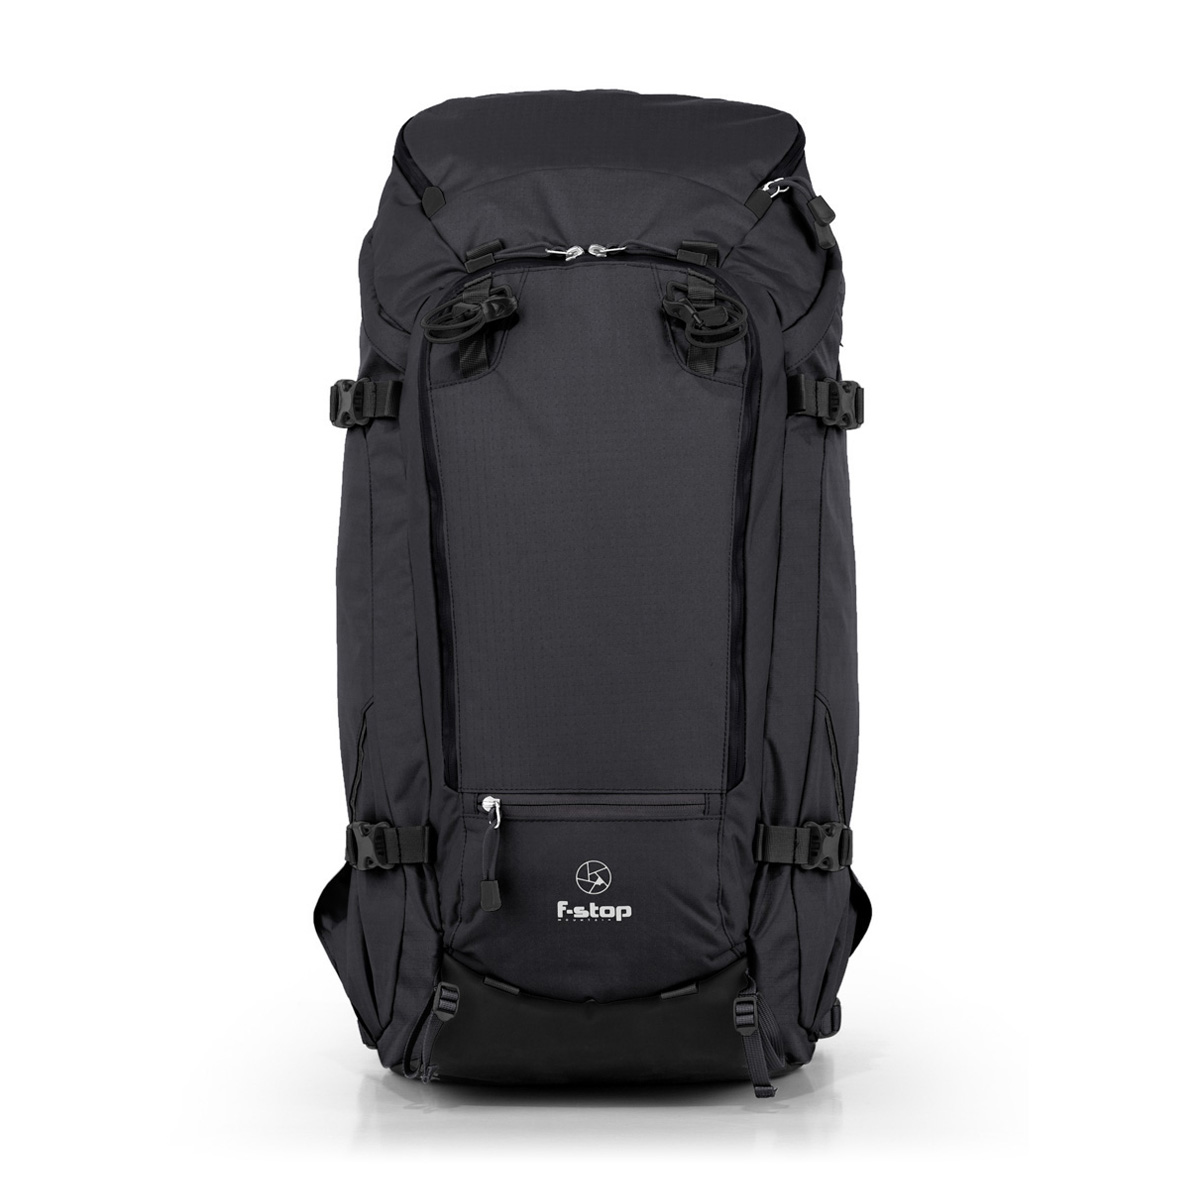
A top-of-the-line camera backpack is sure to score you some brownie points with the photographer on your holiday shopping list…
I have an f-stop Sukha, and to say that this thing can hold a lot of gear is a huge understatement…
In fact, it can accommodate 70 liters of gear, so if your favorite photographer has a ton of stuff or they’ll be hitting the road for a while, this is the bag that they need.
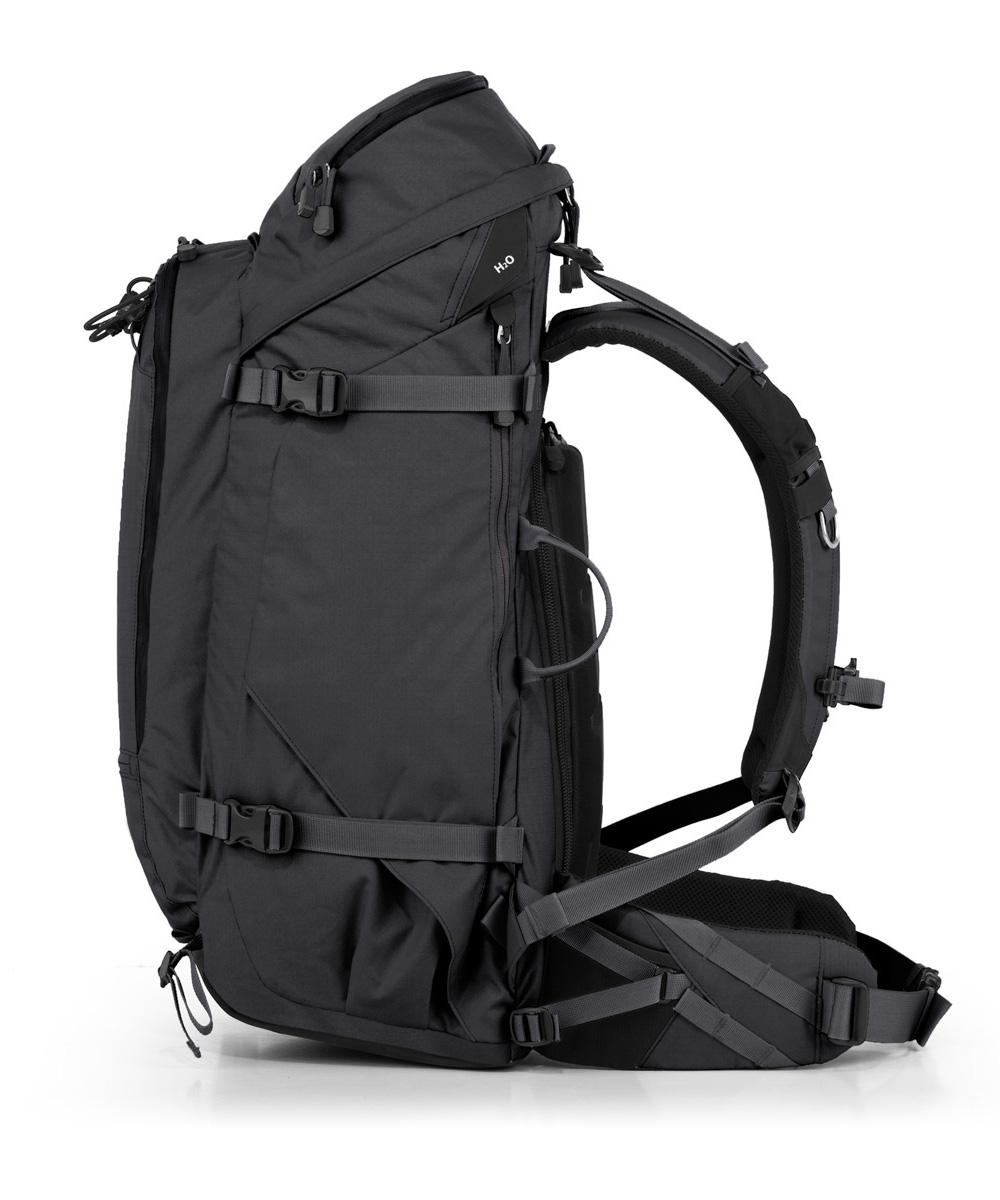
And I know what you’re thinking...big bags like this make a mess of organizing gear. With all that space, everything gets jumbled up and is hard to find, right?
Wrong!
The Master Bundle comes with a wide range of ICUs (Internal Camera Units) that maximize the space in the bag while keeping the gear inside safe, secure, and organized.
From the ultra-small Micro Nano ICU to the big, beefy Pro X-Large ICU, there are six ICU options for a highly customizable interior space.
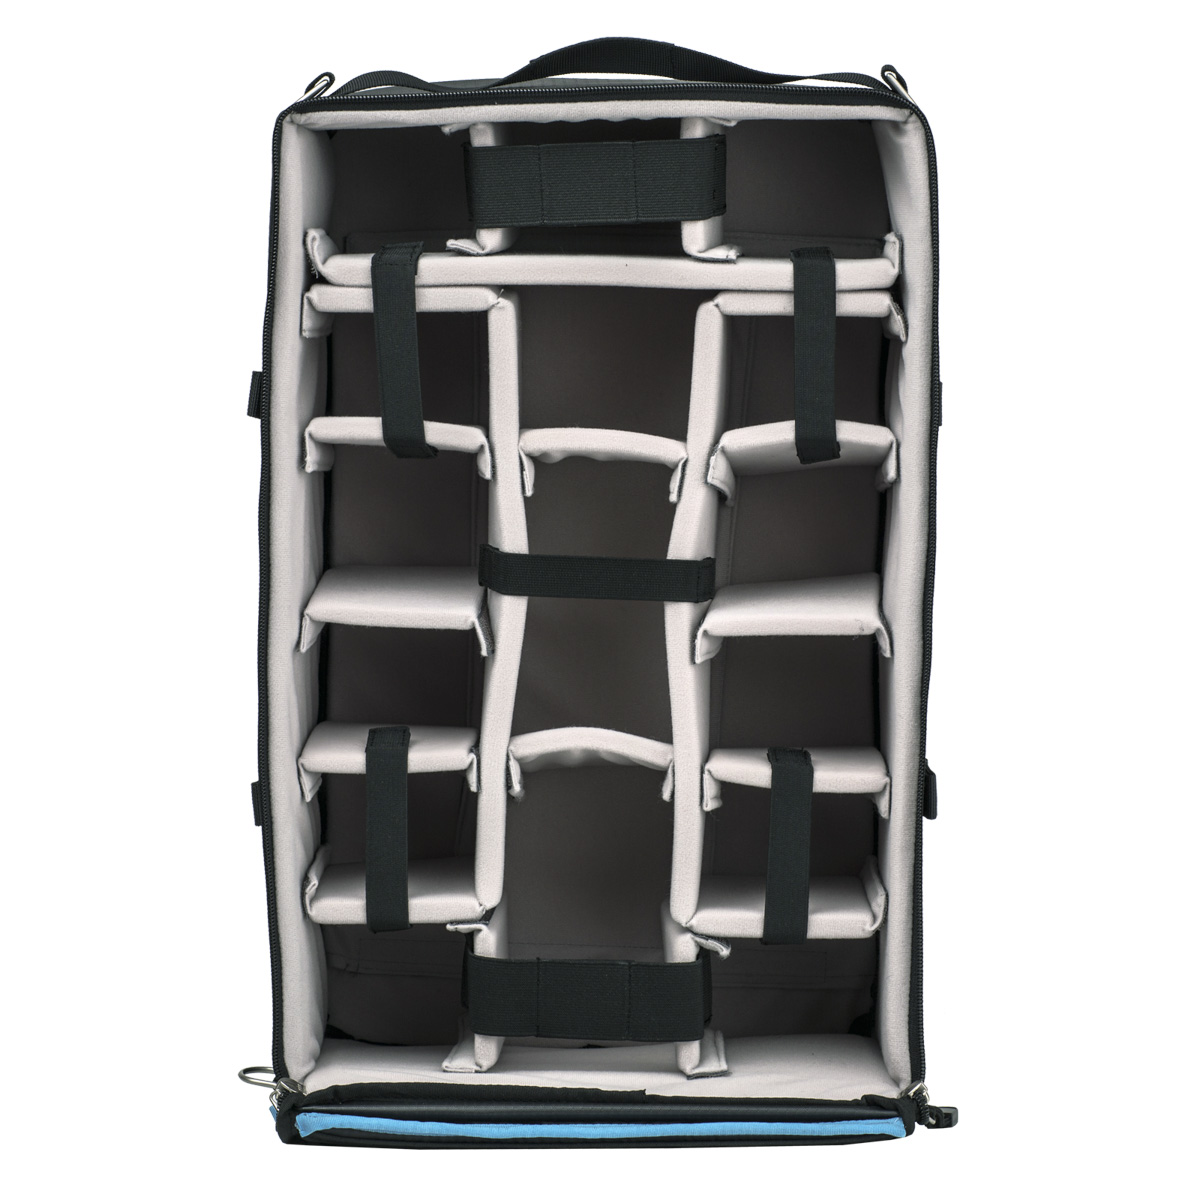
The f-stop Sukha Master Bundle also features goodies like a hydration sleeve, a large rain cover, and a packing cell kit that will keep your clothing nice and organized.
There are three accessory pouches, a Mano pouch, and an ICU gate as well.
And even with all that gear inside the bag, it’s still ultimately comfortable to carry. That’s thanks to the large, cushy should straps that help distribute the weight of the bag over a larger area. The padded waistbelt is a nice touch as well.
Learn more about the f-stop Sukha Master Bundle
Gifts for Photographers Under $1,000: Pre-Owned Canon EOS 7D Mark II
If the photographer you’re shopping for is ready to upgrade their APS-C camera to a higher-end model, the Canon EOS 7D Mark II is a great option.
This professional-grade camera is not only budget-friendly, but it offers some great specs, too:
- 20.2-megapixel APS-C CMOS sensor
- Dual DIGIC 6 Image Processors
- 10 fps burst shooting
- ISO to 16,000 (expandable to 51,200)
- 1080/60p video
- Weather-sealed body

On top of that, Canon implemented its Dual Pixel CMOS autofocus system into this camera, which is a big deal because the Dual Pixel system is usually reserved for Canon’s more expensive cameras.
The autofocus system offers 65 AF points, all of which are cross-type. The camera has six customizable modes for focusing as well, which gives you tracking sensitivity options that improve its performance.
This thing feels like a top-shelf camera too. There's no body flex, the buttons, dials, and switches feel beefy and crisp, and the weather sealing means you can shoot in less-than-ideal conditions without worrying that your camera will be soaked to the core.
In other words, if you want to help your photography loved one step up their game, this camera is an excellent option!
Learn more about the Canon EOS 7D Mark II.
Gifts for Photographers Under $1,000: ProMediaGear Pro-Stix 34 Series Tripod
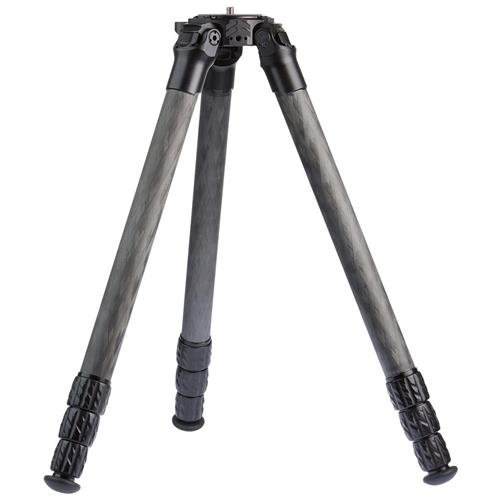
When it comes to the very best tripods money can buy, one has to look to ProMediaGear.
The Pro-Stix 34 Series tripod is my everyday rig, and has been for about the last year or so. To say that it’s the best tripod I’ve ever owned is a massive understatement.
It’s really no contest, either.
Granted, when I first started in photography, I “bargain-basemented” my way through various cheap tripods that didn’t last more than a few months.
But as I got more experienced and had more money to devote to gear, I began utilizing more well-known brands and highly reviewed tripods.

It wasn’t until I started using ProMediaGear tripods that I reached the pinnacle of what a tripod can do, though.
For starters, this tripod can accommodate up to 60 pounds of gear. That might seem like overkill for a photographer, but as I move more and more into videography and have more and more gear to put on the tripod, having an abundance of support is definitely a good thing (and since the apex has a 1/4-20 threaded adapter port, I can easily add more gear when I need to).
Despite having a huge load capacity, this tripod is still easily transportable - it’s just over four pounds and folds down to less than 23 inches.
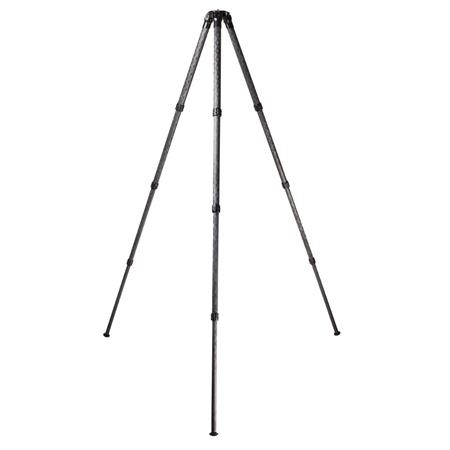
The beefy 34mm legs are made of 10-layer carbon fiber, so they are about as rock-solid as you can get.
The legs have three locking leg angle positions, tension-adjustable leg mechanisms, large molded rubber feet, and integrated stainless steel spikes to boot. In other words, this sucker is rugged and will give you durability for years and years to come.
But beyond the awesome specs and incredible reliability, I appreciate that ProMediaGear makes this and their other tripods right here in the U.S. (in Tinley Park, Illinois, to be exact). Not only that, the folks at ProMediaGear are experienced photographers, and their expertise was crucial in designing this tripod.
From a functionality standpoint, a versatility standpoint, a build-quality standpoint, and so forth, the ProMedia Gear Pro-Stix 34 series is simply the cream of the crop when it comes to the best tripods of 2019.
Learn more about the ProMediaGear Pro-Stix 34 Series tripod
We Recommend
Top 10 Gifts for Photographers Under $250 - 2020 Edition

Photo by franckreporter via iStock
I'm writing this the first week of August, so as you can imagine, it's a little weird talking about holiday gifts.
However, the first seven months of 2020 have flown by - despite the challenging circumstances - so I figured the next four months would be equally as fast. I might as well start naming my top gifts for photographers now, that way you have time to pick up the items you want for yourself or for the photographer on your holiday shopping list.
While $250 might not seem like a big budget for photography-related gear, you might be surprised at what you can find for less than that price point.
Below are ten of my favorite photography gifts for $250 or less.
Gifts for Photographers Under $250: CanvasHQ Print
One of my favorite gifts to give (and to get, while we're at it) is a big, beautiful print.
Personally, I like canvas because of the texture the canvas gives to the print. Besides, a canvas print is something that will continue to give joy to the person that receives it for years and years to come!
Now, I know what you're thinking...canvas is so old-school.
But if you order your canvases from the right printers, you can get something that is beautiful, well-made and looks modern, even if the substrate is perhaps a bit old-school.
I have tons of canvases in my home, the vast majority of which are fromCanvasHQ.
These are some of the best canvas prints I've ever purchased. The sharpness of detail, the color accuracy, and the overall build quality of these prints is next-level good.
Part of the reason for this is the materials CanvasHQ uses. We’re talking archival-grade canvas, commercial-grade inks that are water and UV resistant, and kiln-dried pine frames to keep everything straight and true.
But CanvasHQ isn't just tops in the quality department...
They have excellent customer service that makes you feel heard and as though you're the only customer they have to worry about at that moment.
These guys are committed to getting it right, so if something doesn’t go as planned, you won’t be hung out to dry.
If you have questions, they’ll answer them. If you have a problem, they’ll fix it. If you need assistance with uploading your photo or even picking the best finishes for your canvas, they’ve got your back.
In the video above, you can see how one of my CanvasHQ prints stacks up against similar prints from other printing companies. I think you'll see why I'm so loyal to CanvasHQ!
Start shopping for your favorite photographer today on CanvasHQ.
Gifts for Photographers Under $250: ViewSonic VG1655 Portable Monitor
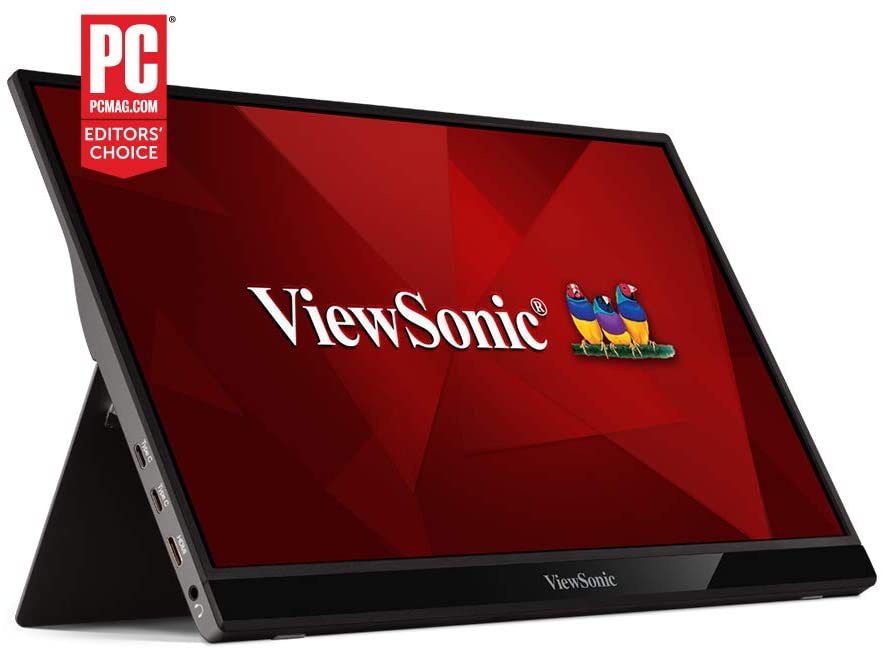
Sometimes you need a bright, portable monitor, and for those occasions, the ViewSonic VG1655 is a great option.
This monitor has a frameless IPS 15.6-inch screen and weighs a mere two pounds. It has two-way power, dual USB-C ports, a stand cover, and a screen protector. It can be used in portrait or landscape orientation.
To help reduce eye strain, the monitor has a blue light filter. The flicker-free technology gives you a beautiful picture to view as well.
You can use this monitor with laptops, PCs, and Macs and comes with a three-year warranty. There are even dual built-in speakers!
Learn more about the ViewSonic VG1655 Portable Monitor
Gifts for Photographers Under $250: Haida NanoPro MC Variable ND Filter
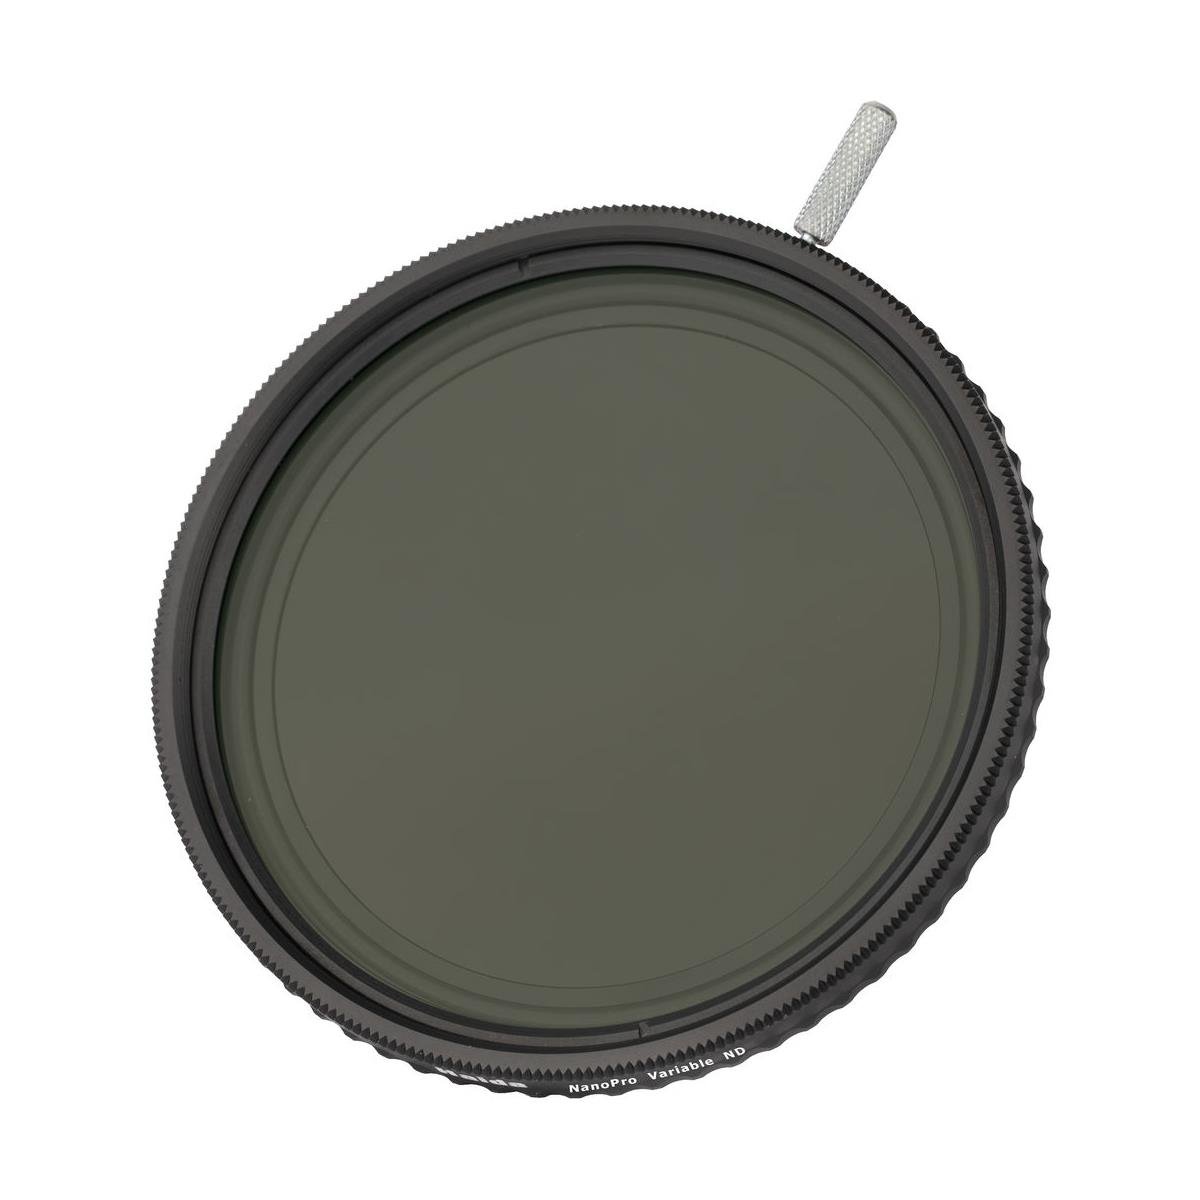
One of the best things about having a variable ND filter in your camera bag is that you can replace multiple ND filters with a single one.
That might not sound like a big deal, but for me (and many other photographers), it's nice to be able to streamline your camera bag and your photography workflow while you're at it.
What's so nice about the Haida NanoPro MC variable ND filter is that you get 4-stops to 9-stops of variability. This allows you to attack all sorts of long exposures in different lighting situations. Additionally, you can increase the aperture to control depth of field for beautiful background blur in your images.
This particular variable ND filter has nano multi-coatings on both sides of the glass that improves beading when the surface comes in contact with oil or water. So not only does it protect the filter glass, but this coating also results in a much more efficient cleaning process.
Speaking of efficiency, Haida included visual cues on the front filter ring that represent the different density values. This helps you dial in the desired density settings both easier and faster, and allows you to repeat the process more easily as well.
Where some variable ND filters reduce the overall clarity and color accuracy of the images you take, Haida has protected against both of these problems by using optical glass. Each surface also includes 10 layers of anti-reflection coatings to minimize internal ghosting and reflections.
You can also use this filter with other filters thanks to the front filter threads. Add in a side lever for easy rotation, a plastic case to protect the filter during transport, and a price WELL below the $250 mark, and you have the makings for one heck of a holiday gift idea for the photographer on your list!
Learn more about the Haida NanoPro MC Variable ND Filter
Gifts for Photographers Under $250: A Pre-Owned Canon EF 50mm f/1.4 Lens
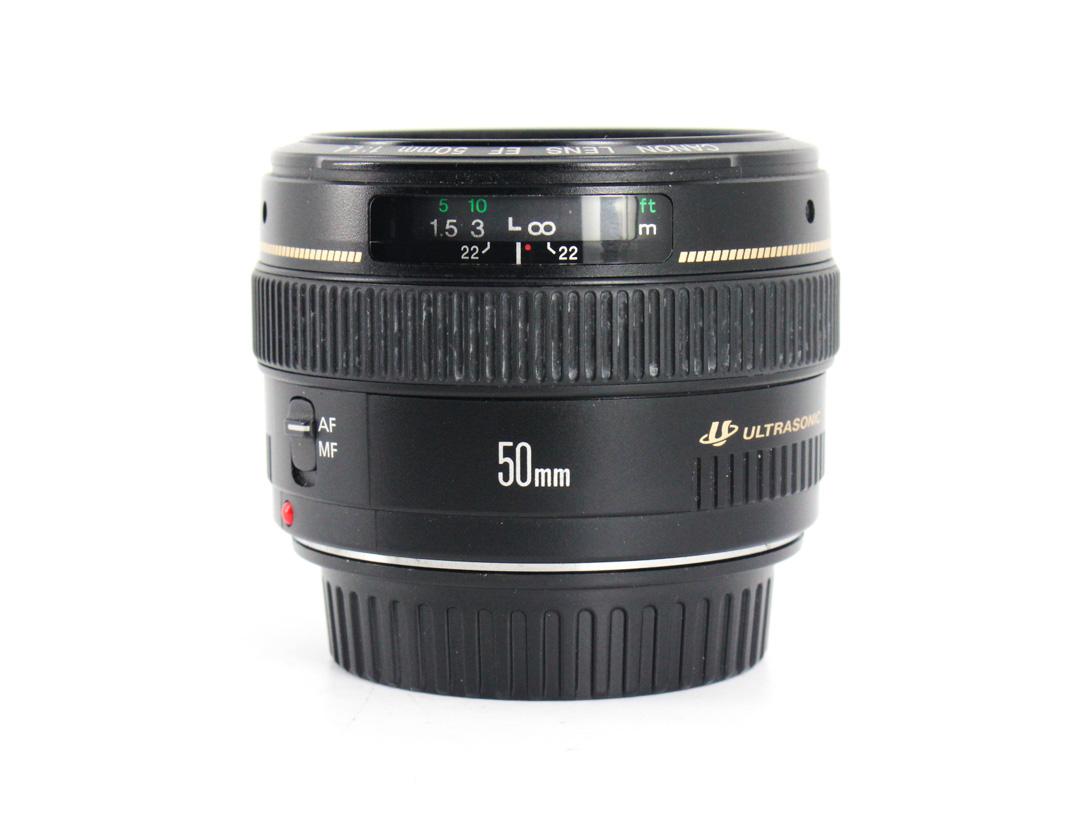
Ask just about any photographer what their first lens purchase was, and they'll say a Nifty Fifty. That makes it the ideal gift idea for photographers this holiday season!
There's a lot to love about 50mm lenses, too...
For starters, it's a great focal length for learning all kinds of photography, from landscapes to portraits and everything in between.
That also makes it an incredibly versatile lens.
In fact, put a 50mm lens on your camera, and you can shoot all day long without ever needing a different focal length. They're even great for shooting video!
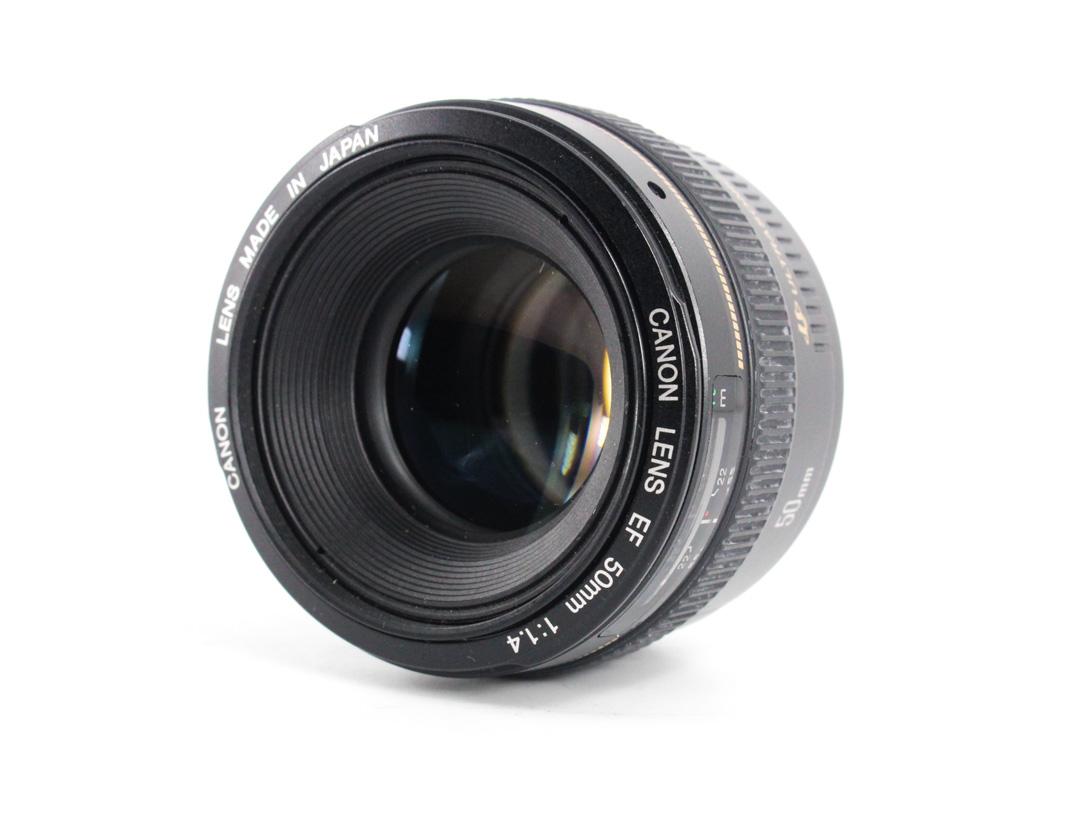
You can find 50mm lenses with large apertures, too, like the Canon EF 50mm f/1.4 USM shown above.
At f/1.4, photographers can more readily shoot in low-light conditions without having to push the ISO too high, which helps reduce digital noise.
Having a large aperture like that is also beneficial for gathering tons of light, that way a faster shutter speed can be used. It's also helpful for blurring the background in portraits to get a more professional-looking shot.
Another benefit of a 50mm lens is that they force you to think more creatively about how you frame up your shots.
That is, since 50mm lenses have a constant focal length of 50mm, there's no zoom to rely on for getting close-up or wider shots.
By using a 50mm lens and "zooming with your feet," becoming a master of composition can be an easier task because you're forced to physically move further away or closer to the subject.
Of course, the biggest benefit of 50mm lenses is the price. These lenses are well-priced so you can bestow a great little lens with tons of functionality and versatility upon your favorite photographer without busting your budget.
That sounds like a win-win deal to me!
Learn more about the Canon EF 50mm f/1.4 lens
Gifts for Photographers Under $250: Holdfast MoneyMaker Solo
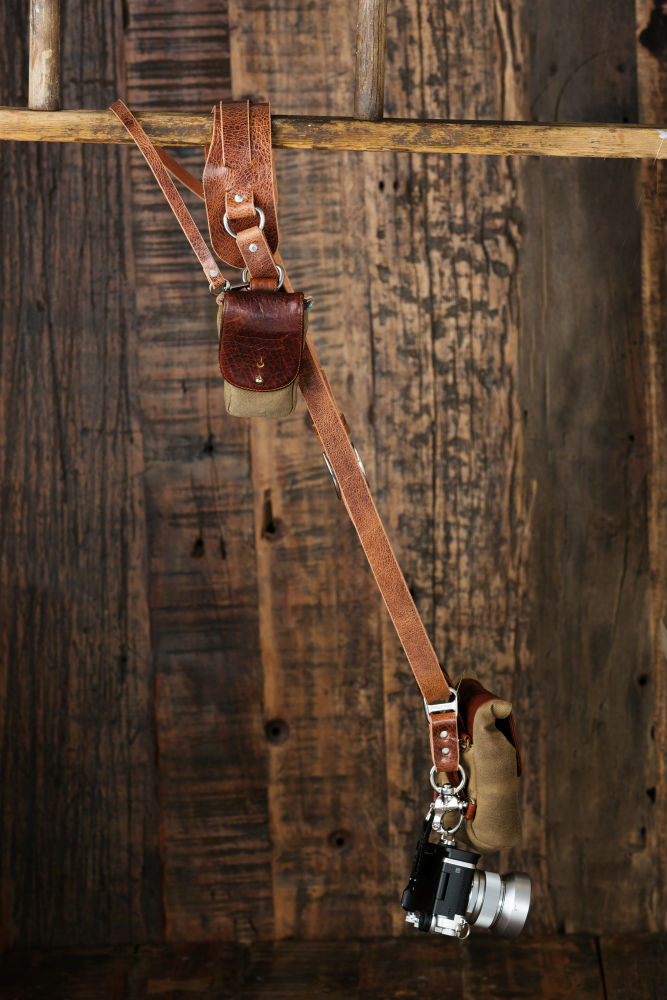 Photo by Brandon Burk
Designed specifically for single camera shooters, the Holdfast MoneyMaker Solo is a perfect choice for the photographer on your holiday shopping list.
The MoneyMaker Solo features impeccable designs and a commitment to quality for shooters that don’t need two or three cameras on their person as the original MoneyMaker provides.
Worn as a sling strap, the MoneyMaker Solo has a big, soft, contoured shoulder strap that ensures that you’ll have a comfortable carrying experience whether you’re only out shooting for a couple of hours or if you’re out shooting for an entire day.
With an integrated stabilizer strap, the MoneyMaker Solo will stay put on your shoulder so you don’t have to worry about it slipping off.
What’s more, you can use the Holdfast Belt Anchor to give the Solo even more stability, it locks the camera to your belt, no more flopping around as you maneuver and bend over while working. Then a quick pull on the release tab as you grab your camera and you’re ready to take the shot!
As well, you can also use all of the Holdfast Gear accessories with the Solo like a Holdfast Cell Phone Pouch or Lens Pouch. See how it all comes together in the video above.

Just like the original MoneyMaker, the MoneyMaker Solo gives you unparalleled freedom of movement so you can get the shots you want without having your gear in the way.
In that regard, the MoneyMaker Solo ticks all the boxes - it’s highly functional, incredibly comfortable, works without getting in your way, and it looks like a million buck!
Learn more about the Holdfast MoneyMaker Solo
Gifts for Photographers Under $250: Insta360 GO
Photographers these days are almost as much about video as they are about still images. And for that reason, a camera that captures video is a must.
But not everyone wants a traditional video camera. That's where the Insta360 GO comes in...
This tiny stabilized camera shoots 30-second or 60-second clips with the press of a button. From those clips, you can find the best still frames if you wish, all with the help of artificial intelligence.
In addition to being stabilized, the Insta360 GO features Hyperlapse, automatic editing, timelapse, and slow-motion capabilities.
Using the Barrel Roll feature, you can adjust the rotation of the shot with a simple swipe. It's also water-resistant and can even withstand a quick dunk in the water.
Transferring files is as simple as plugging the camera into your phone. And with a battery that can handle about 200 shots on a charge, you can amass a lot of images and videos!
Learn more about the Insta360 GO
Gifts for Photographers Under $250: PolarPro Apex Minimalist Tripod
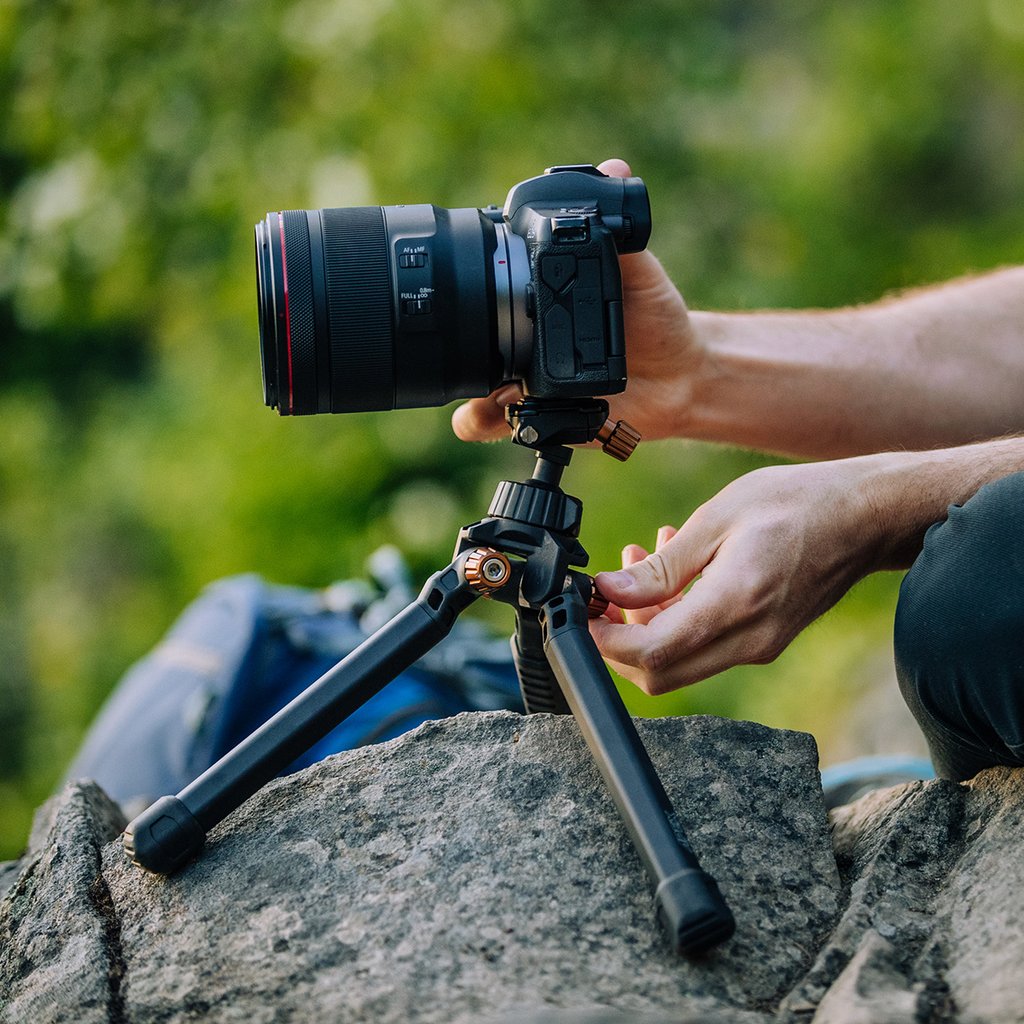
While PolarPro might be better known for their impeccable lens filters, they've expanded their product line to include many other useful tools, like the Apex Minimalist Tripod.
But don't let this tripod's small stature fool you...
It is every bit a PolarPro product with robust construction, superb design, and top-notch functionality.
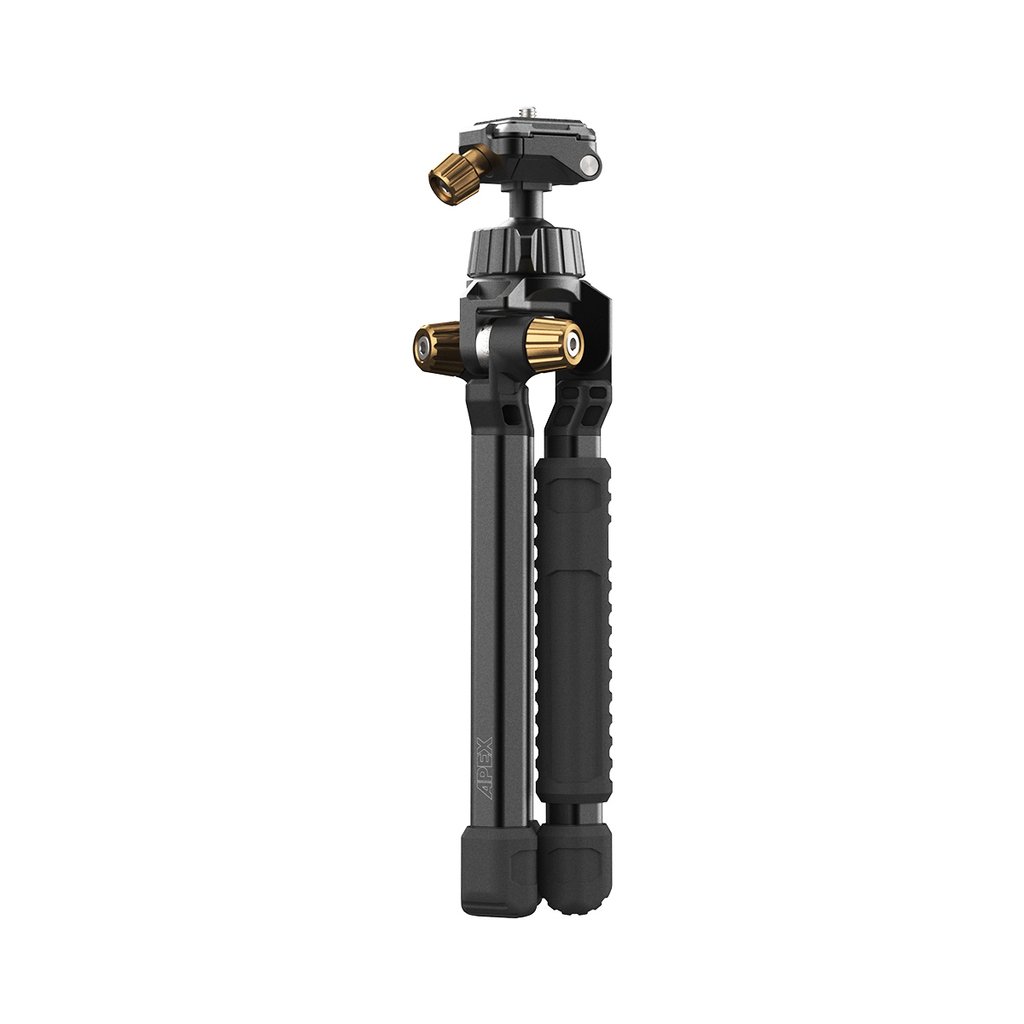
The smaller form factor of this tripod not only makes it a perfect companion for mirrorless or smartphone photography, but it's also a perfect addition to any photographer's travel bag.
The tripod can be completely locked into place by using PolarPro's excellent TiltLocks.
These locks allow you to lock the tripod down in many different orientations, that way you can get the precise shot you envision.
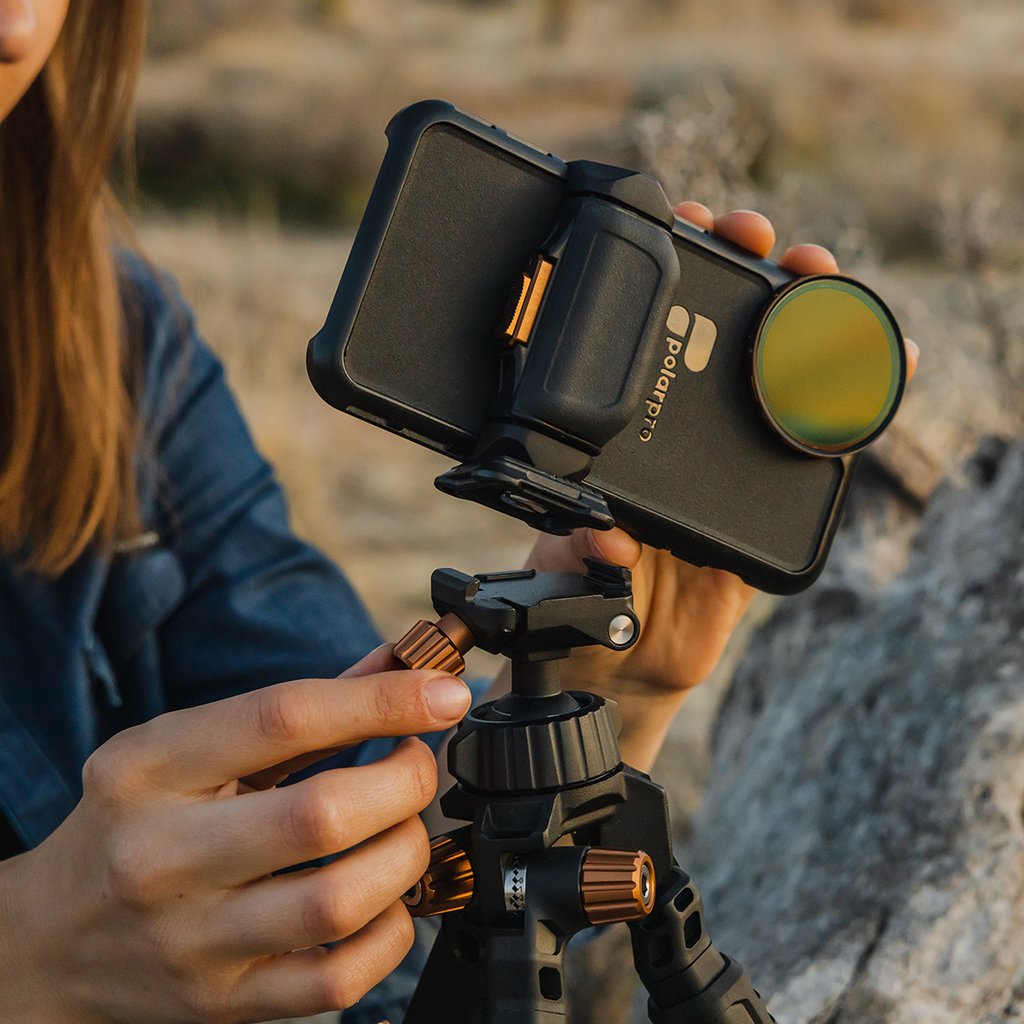
Additionally, this tripod comes with PolarPro's Apex ball head, removable rubber feet with aluminum spikes inside, and a 35-degree angled plate release know, which enables you to hot-swap other tripods and mounts.
And since this tripod is 95 percent aluminum, it's lightweight and durable at the same time.
If the you or the photographer on your holiday shopping list have been itching for a robust, yet small tripod, the PolarPro Apex should be something you take a long, hard look at.
Learn more about the PolarPro Apex Minimalist Tripod
Gifts for Photographers Under $250: H&Y K-Series Filter Holder
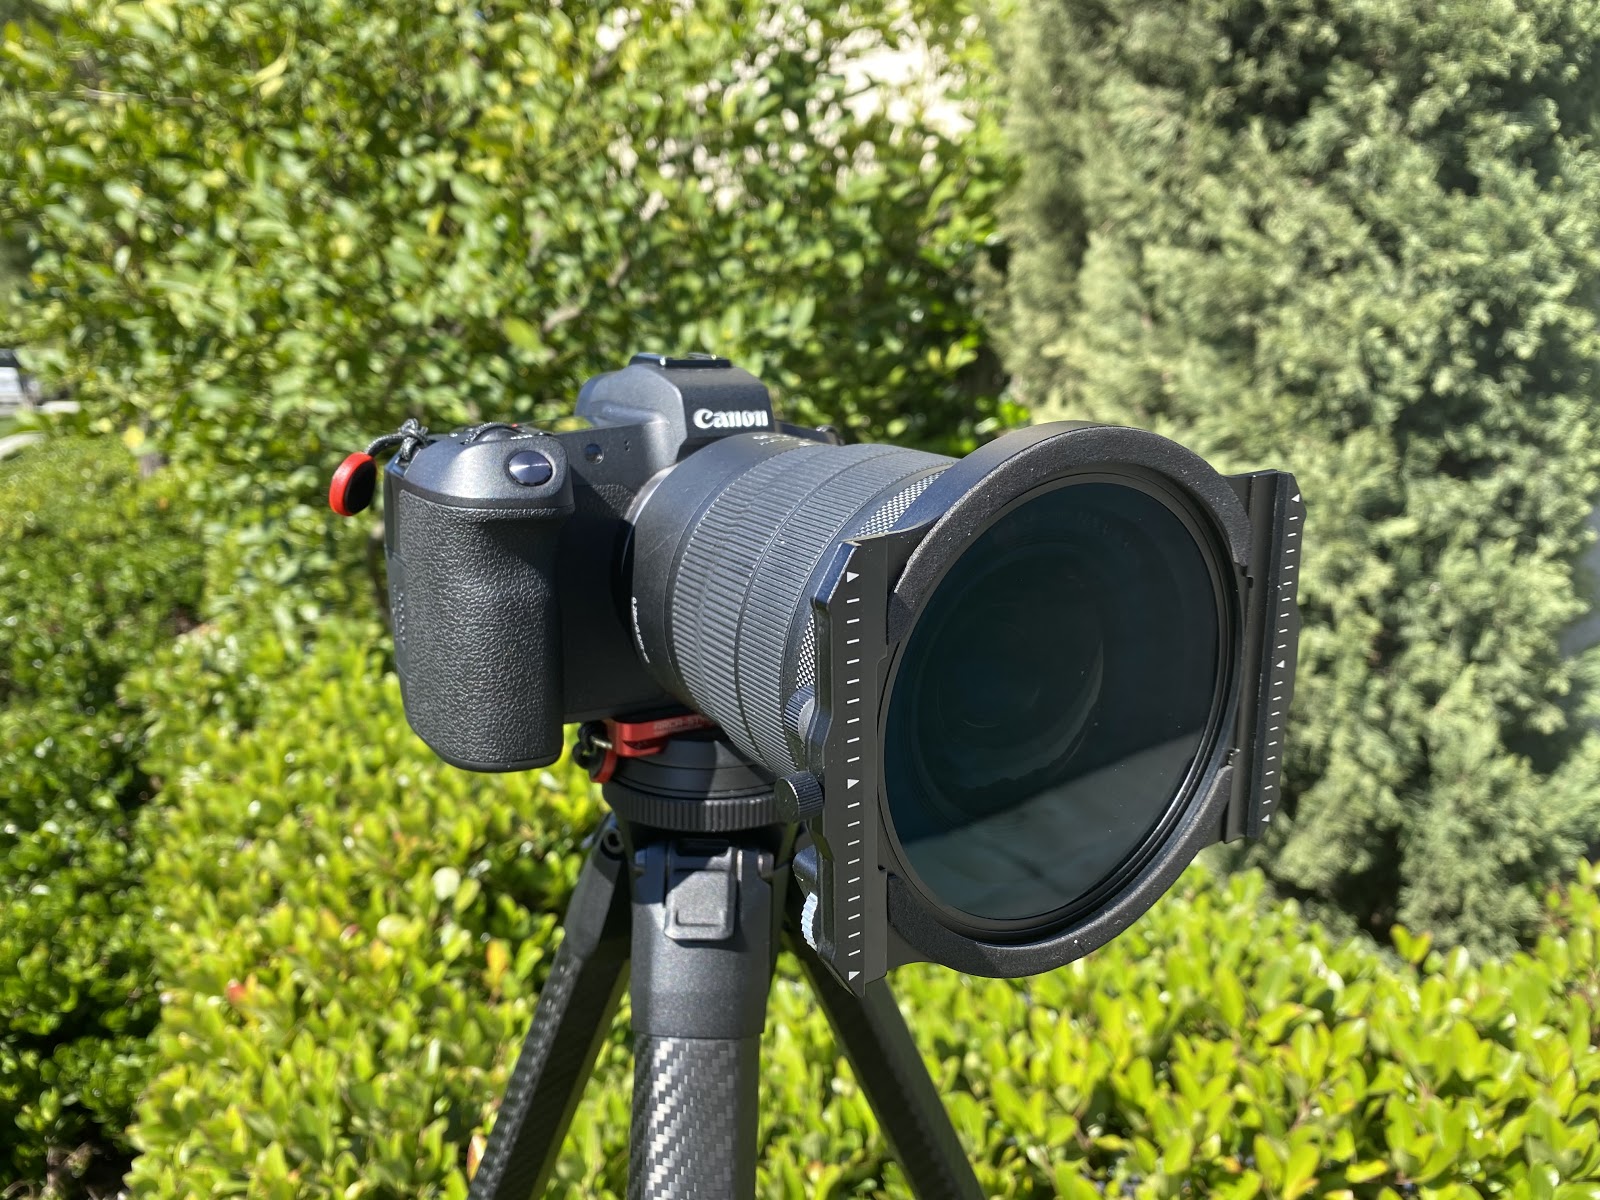
Another top pick for your favorite photographer is a rock-solid lens filter holder.
For my money, it doesn't get any better than the filter holder shown above - the H&Y K-Series.
What sets this filter holder apart from the rest is the quality of construction. Where many filter holders are made of plastic, this one is crafted of aluminum to give you the durability you need without adding unnecessary weight.
This particular holder also comes with a drop-in 95mm circular polarizer that features SCHOTT glass. The glass gets an HD polishing technique that improves light transmission so your images have even more reason to shine.
This circular polarizer also has multiple nano coatings that make it scratch-resistant, oil-repellant, and water-repellant.
Of course, a high-quality filter holder needs to minimize light leaks, and the K-Series is more than up to the task.
There are foam seals that prevent light from leaking in, that way the results you get with your images fulfill your precise vision.
Plus, this is a magnetic holder, so you can use any of H&Y's magnetic rectangular filters (like this one).
This is a filter holder system that's well designed, well built, and worth every single penny. The photographer on your list will love having this bad boy in their kit!
Learn more about the H&Y K-Series Filter Holder
Gifts for Photographers Under $250: HEX Ranger Clamshell DSLR Backpack
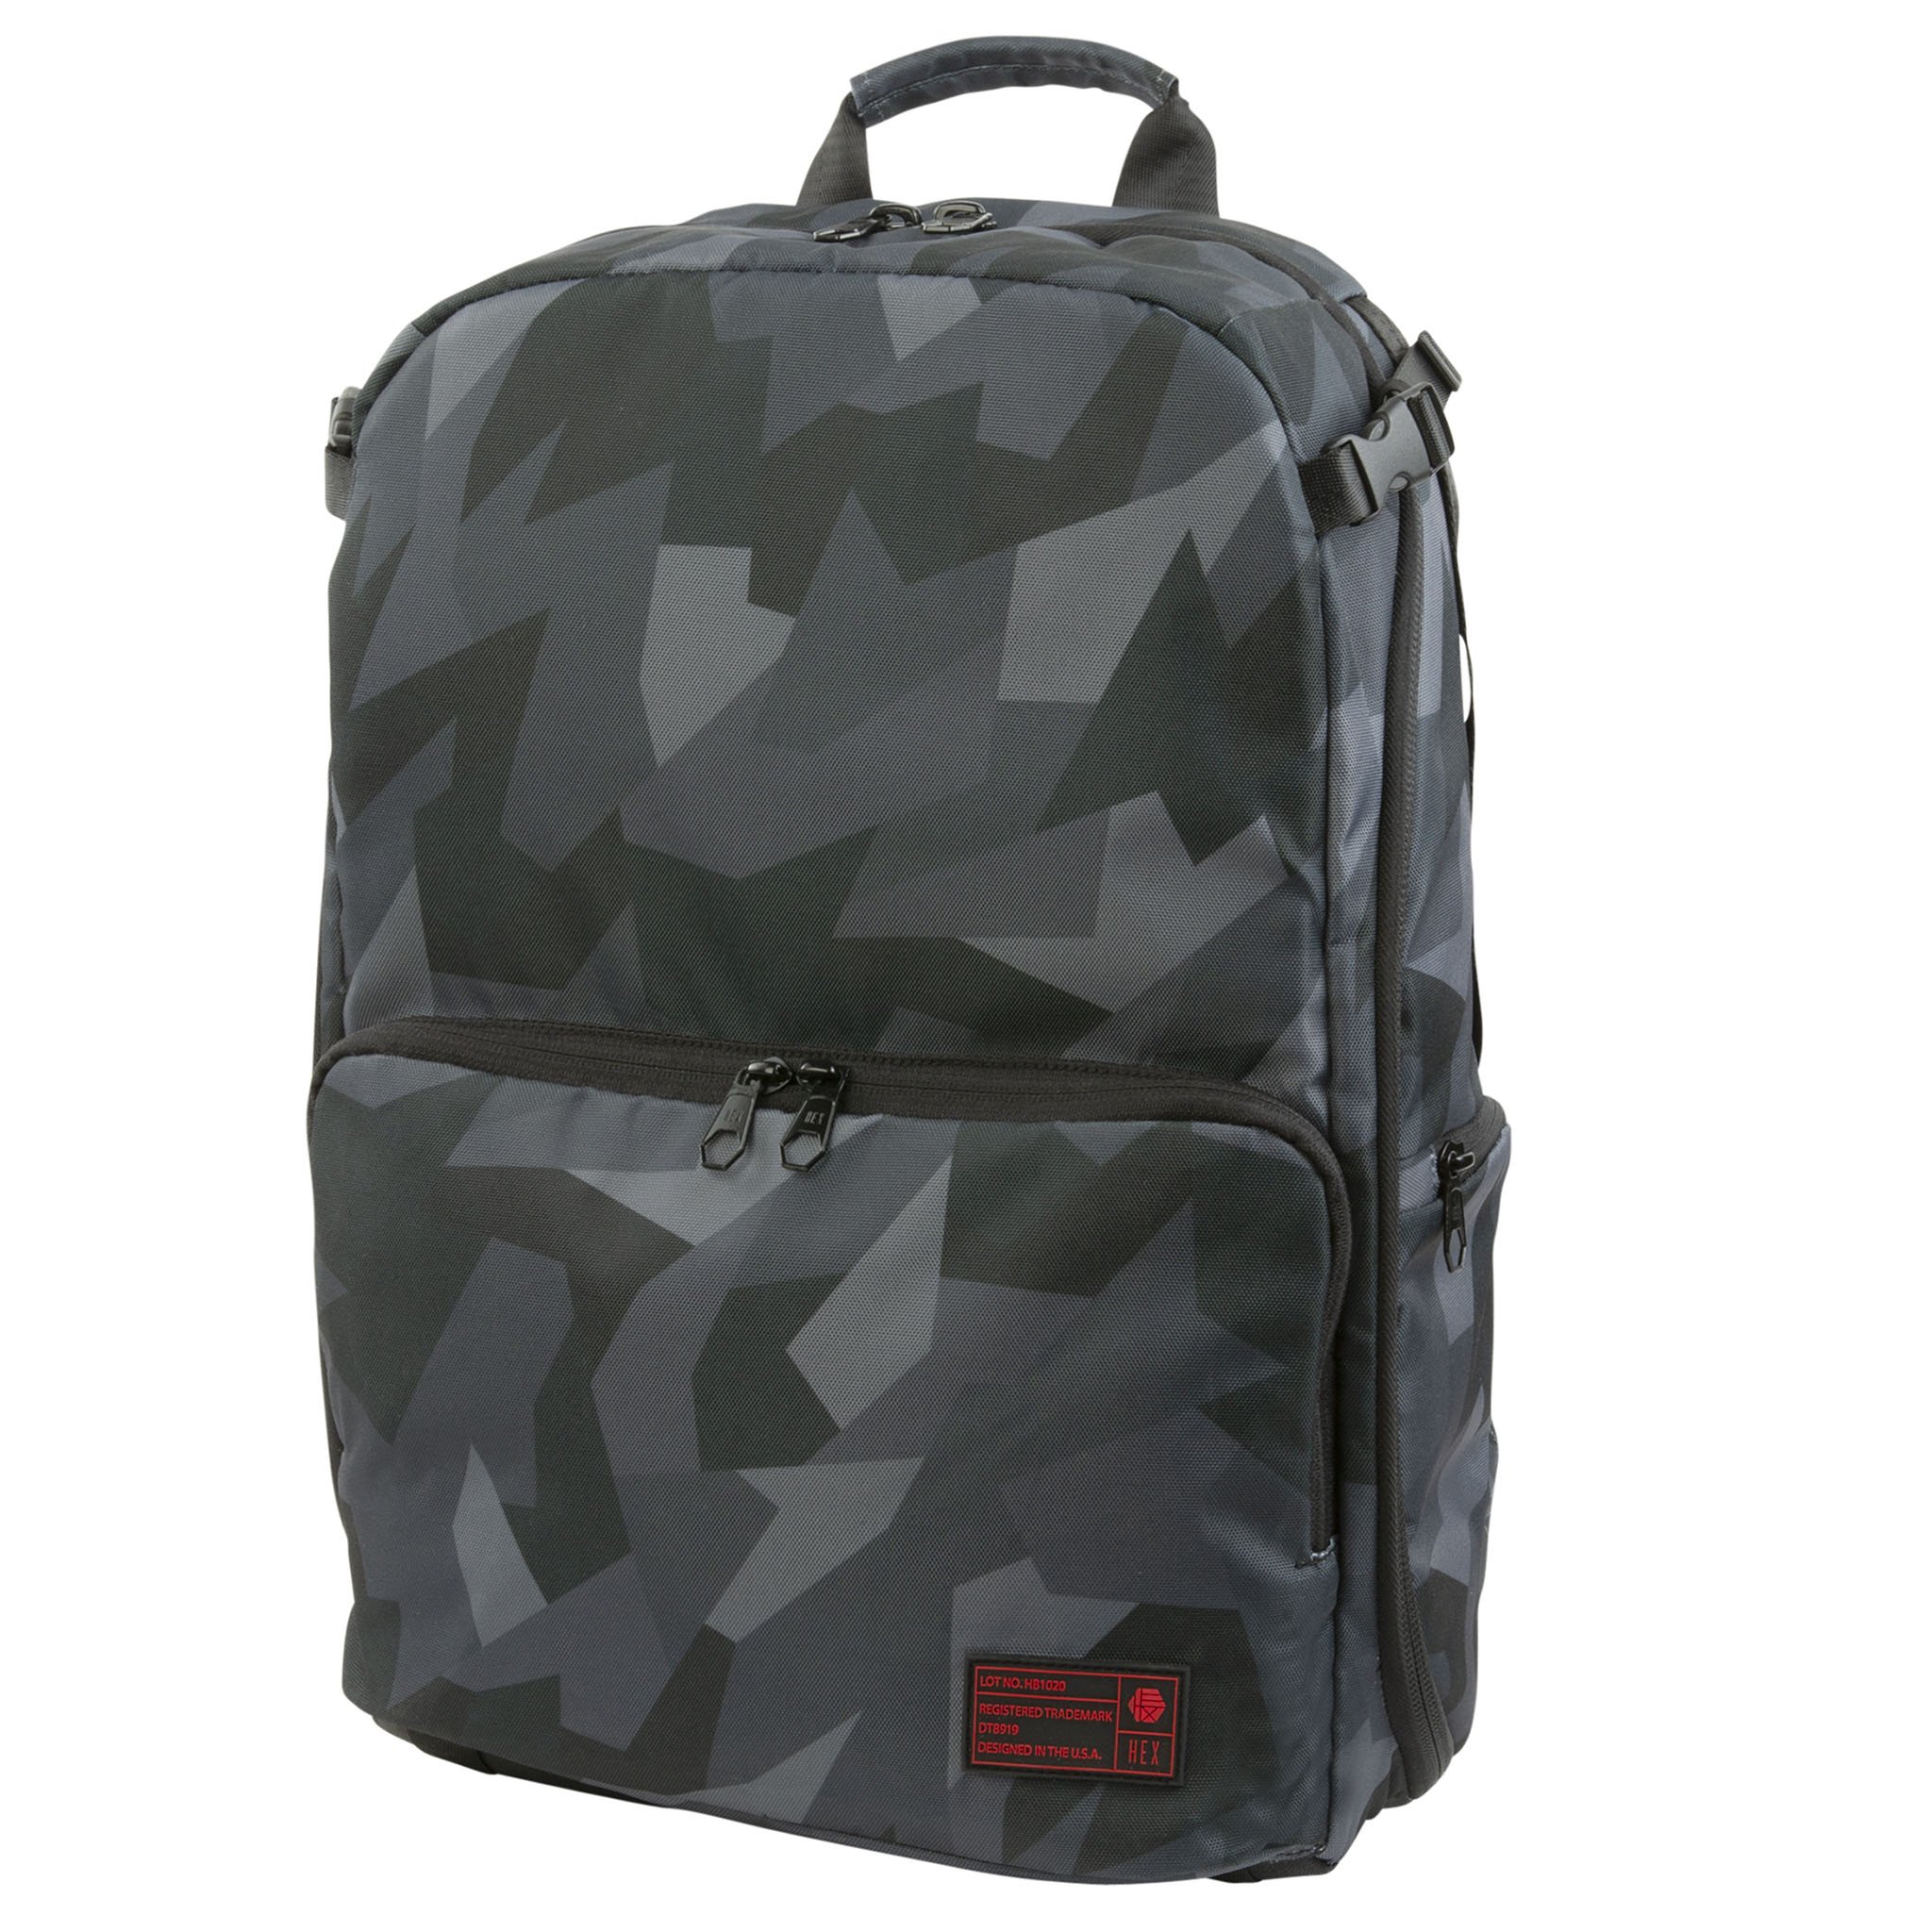
The folks at HEX have a passion for what they do, and it shows in the products they design and create.
I actually have a HEX Ranger DSLR Sling Bag. Talk about a camera bag!
But if the photographer on your list needs to carry more gear than I do, the Ranger Clamshell DSLR backpack is a prime choice.
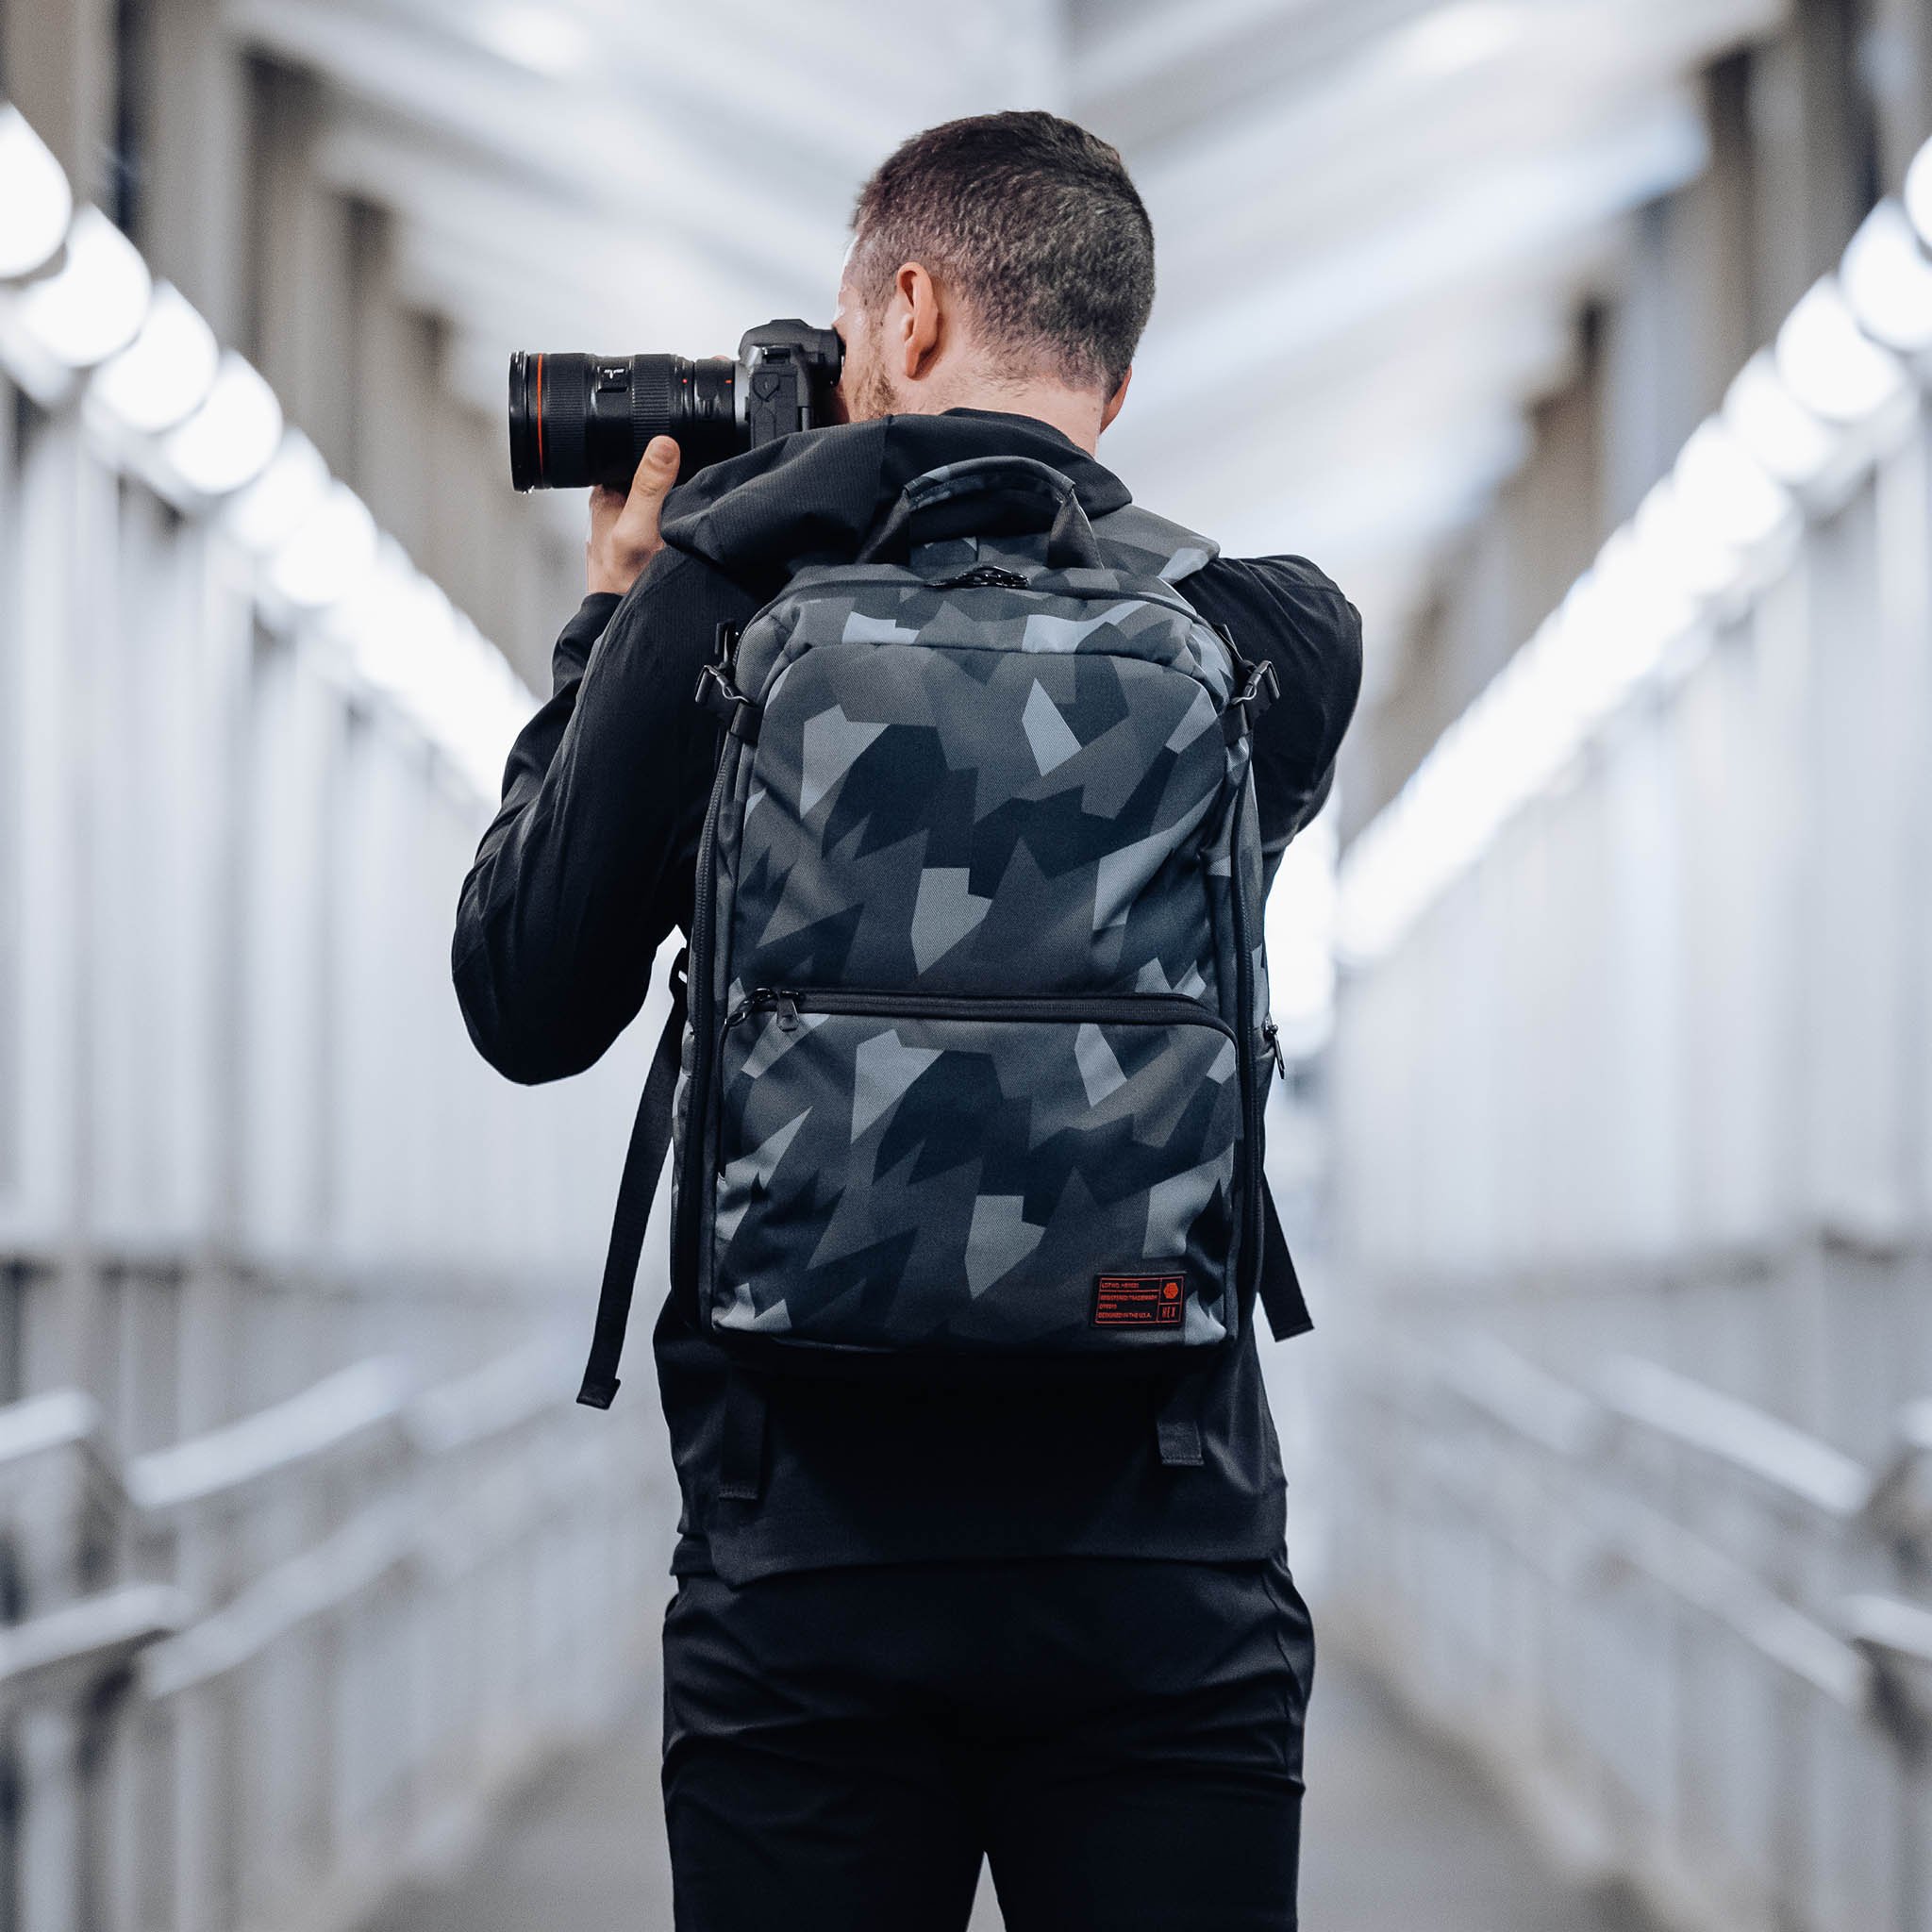
With a capacity of 21 liters, this bag can hold a ton of gear - a DSLR with lens attached, a couple more lenses, a laptop, a drone, and accessories, in fact!
The clamshell design makes it easy to see your gear, retrieve it, and put it away. And with fully customizable inserts, you can make the bag work for you no matter what arrangement of gear you need.
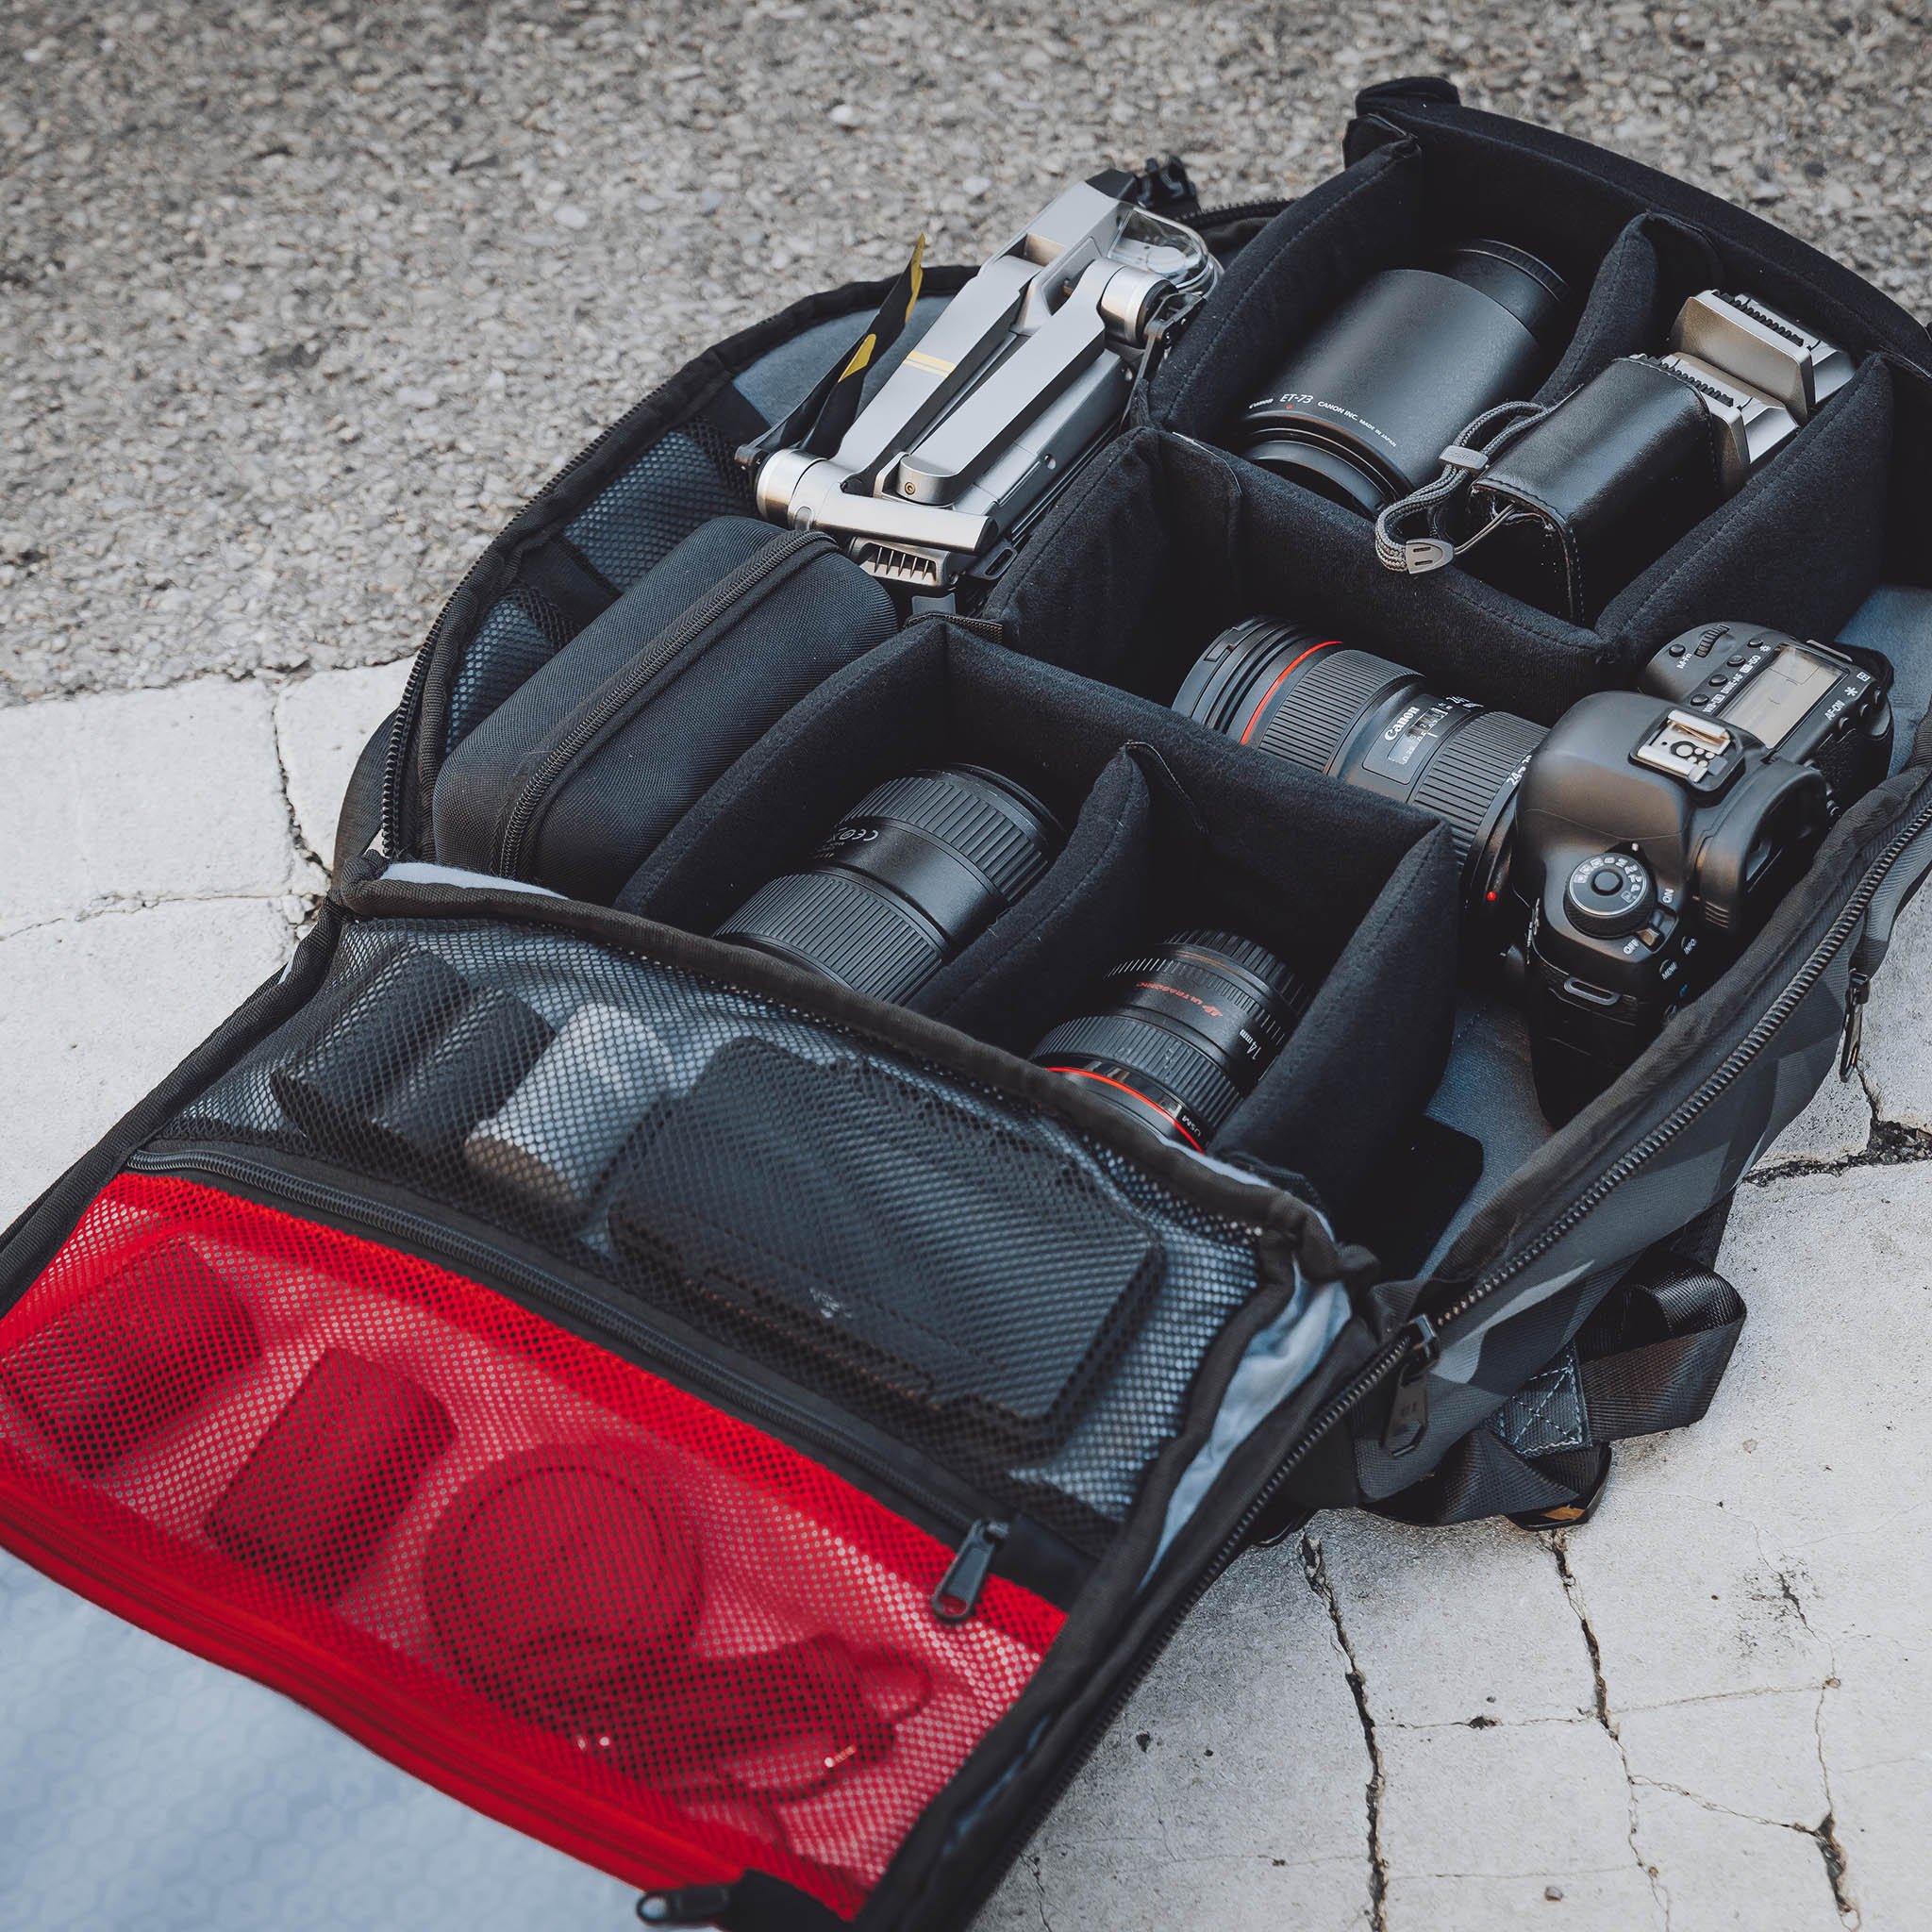
The all-important comfort factor is off the charts, too. It has ergonomic shoulder straps that hug your shoulders and fit perfectly. The air mesh construction will keep your shoulders and back cool as well.
Additionally, HEX included a custom molded and foam padded back panel, that way even when you’re carrying a heavy load, you’ll still be comfortable.
With tripod straps on the bottom, side straps for attaching more gear, a hidden rain cover, a water bottle pocket, and tons of other handy features, this is a bag that the photographer on your list will love, without a doubt
Learn more about the HEX Ranger Clamshell DSLR Backpack
Gifts for Photographers Under $250: EF to E-Mount Lens Adapter
If the photographer you're shopping for used to be a Canon shooter and now has a Sony camera, you can give them this handy adapter that allows them to use their old EF and EF-S lenses on a Sony E-mount camera, like the a6300, a6400, a6500, a9 or a7, among many others.
This adapter has both autofocus function and aperture control, as well as a handy USB port for firmware updates.
You can switch between phase and contrast autofocus modes, and there's EXIF signal transmitting and IS functionality too.
There's simply no easier and more functional way to pair Canon lenses with a Sony E-mount camera!
Learn more about the EF to E-Mount Lens Adapter
Gifts for Photographers Under $250: Artbeat Studios HD Metal Print

Looking for a gift with a ton of visual appeal without it having a huge impact on your bank account? Look no further than an HD Metal Print from Artbeat Studios!
The great thing about an HD metal print is that it can be put just about anywhere in a home or office and immediately draw the attention of anyone that sees it. That’s due to the high-quality materials that Artbeat Studios uses to craft their prints.
For example, you can choose between a glossy or matte finish, where a glossy treatment adds depth to the image and creates a lot of drama and a matte finish eliminates glare and offers a more subtle viewing experience.
What’s more, you can choose from natural or black wood wall mounts, or if you prefer, silver or black aluminum wall mounts to further customize how the print looks. The mounts can be recessed from the edge of the print to give it the appearance that it’s floating on the wall, or you can opt to have the mount flush with the edges of the print to give it a little more depth and heft.
No matter how you choose to customize the print, it’ll be well worth the money!
Learn more about Artbeat Studios HD Metal Prints.
Gifts for Photographers Under $250: Pre-Owned Olympus OM-D E-M10 Mark II
Whether the photographer on your list is just starting out and needs a solid first camera or is more experienced and wants a second camera body that's easy to handle and travel with, the E-M10 Mark II is a great option.
This camera is super small and lightweight, making it an easy addition to any camera bag.
But despite its small size, it's loaded with features that your favorite photographer will appreciate.
It has a 16.1-megapixel micro four thirds sensor paired with an 81-point autofocus system.
This camera has five-axis in-body image stabilization, a native ISO range from 100-25600, and 8fps burst shooting capabilities.
Additionally, this little Olympus offers 1080p HD video at up to 60fps, a beautiful electronic viewfinder, and a 3-inch LCD screen.
This camera is several years old, but still has many top-notch features that photographers today will enjoy. You'll enjoy the small price tag just as much!
Learn more about the Olympus OM-D E-M10 Mark II
Gifts for Photographers Under $250: Amazon Gift Card
![]()
Totally stumped regarding gift ideas for photographers on your list?
Why not go the easy route and get them an Amazon gift card?
Though a gift card isn't exactly the sexiest gift, when the photographer in your family sees that you have given them carte blanche to get what they want, they'll be stoked!
With an Amazon gift card, they can put the card amount towards whatever they want - a new lens, a second camera body, lighting gear, a laptop - you name it!
As far as flexibility goes, there's nothing better to give a photographer than a gift card.
Learn more about Amazon gift cards
We Recommend
Top 10 Gifts for Photographers Under $50 - 2019 Edition

photo byevgenyatamanenko via iStock
Sure, it’s only August, but before you know it, it’ll be December 24th, and you’ll have zero gifts for your favorite photographer.
Why not get a head start this year and scope out a few items that photographers will love?
This list runs the gamut of photography gadgets and accessories, all of which are under the $50 threshold.
See what you can find to impress the photographer on your holiday shopping list!
Gifts for Photographers Under $50: CanvasHQ Print
If you’re like me, sometimes finding the perfect gift for certain loved ones is a long, drawn-out process that causes tons of stress, and often you still don’t get something that totally blows them away.
I think a lot of photographers fall into this category. We have specific likes, and many of us already have most of what we want or need gear-wise, and what we don’t have is usually too expensive to put on a Christmas wish-list anyway.
But for all those hard-to-shop-for photographers on your 2019 holiday shopping list, I have the perfect solution - a canvas print.
Think about it…
A canvas print is a gift that keeps on giving.
Not only can you immortalize one of your favorite images from your favorite photographer, but you also give them a means to showcase their work in a format that’s drop-dead gorgeous.
I have tons of canvases in my home, the vast majority of which are from CanvasHQ.
Now, I know what you’re thinking - canvas is old school.
Sure, maybe it is, but I’m telling you that these canvas prints from CanvasHQ are mind-bogglingly beautiful. In fact, they go head-to-head with any metal or acrylic print I have in my home.
The attention to detail is just amazing, and the materials they use are top-of-the-line. We’re talking archival-grade canvas, commercial-grade inks that are water and UV resistant, and kiln-dried pine frames to keep everything straight and true.
I love the personality that the canvas texture gives my images. That’s true whether it’s a portrait of my son or a landscape photo.
I’d be remiss if I didn’t mention the customer service you get with CanvasHQ.
These guys are committed to getting it right, so if something doesn’t go as planned, you won’t be hung out to dry.
If you have questions, they’ll answer them. If you have a problem, they’ll fix it. If you need assistance with uploading your photo or even picking the best finishes for your canvas, they’ve got your back.
In the video above, I explain why I highly recommend a CanvasHQ canvas print as the ideal gift for the photographer on your holiday shopping list.
Start shopping for your favorite photographer today on CanvasHQ!
Gifts for Photographers Under $50: Holdfast Camera Leash Leather Wrist Strap
Not every photographer wants or needs a neck strap or camera harness, so why not give them the gift of a tough, useful, and gorgeous leather wrist strap?
The Camera Leash by Holdfast is impeccably made and comes in a variety of materials, including bridle leather, water buffalo leather, American bison leather, and python skin. There are also several colors available to suit your favorite photographer’s specific tastes.
This strap is multi-functional, too.
Use it to carry your keys and attach them to a belt loop. Secure a water bottle to your backpack. Use two of them together to carry a third camera on the Holdfast MoneyMaker harness. There’s few products under $50 with that much functionality!
Plus, these things look absolutely incredible with fine details that scream, “I’m handcrafted!”
It’s a photography gift that your favorite photographer is sure to love.
Learn more about the Holdfast Camera Leash
Gifts for Photographers Under $50: Excire Search
Give a gift this year that will make your favorite photographer’s life much, much easier by giving them Excire Search.
This software for Lightroom Classic CC has an AI-powered search engine that supercharges one’s ability to search Lightroom catalogs for photos.
In fact, it allows photographers to search for images by keyword (i.e., “dog,” or one of the other 124 keywords available) or by example, (i.e., by selecting a sample reference image of a boat from Excire’s library so it will find boat photos in the Lightroom catalog).
Additionally, Excire recognizes faces, so photographers can search for images of one, two, or multiple faces, for women or men, children or adults, and so forth.
In other words, Excire Search is the ultimate way to organize and search Lightroom catalogs. That means less time searching for the desired photos and more time actually editing them or taking new photos. What photographer wouldn’t like that?!
Learn more about Excire Search
Gifts for Photographers Under $50: Kenko Nyumon Slim Circular Polarizing Filter
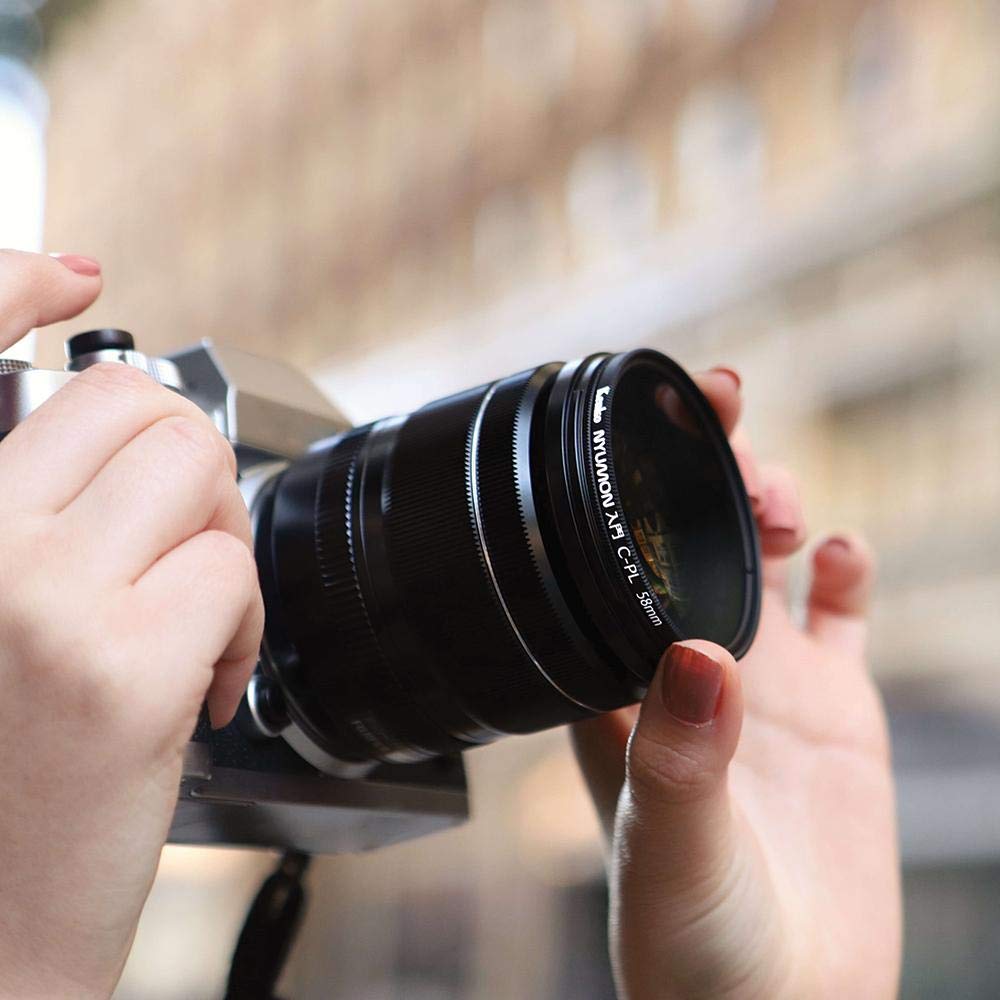
If the photographer on your list primarily takes landscape photos, an ideal gift for them is a high-quality circular polarizing filter.
The great thing about polarizing filters is that they can impact a photograph in many ways:
- They reduce glare off of water and other non-metallic surfaces like wet rocks or plants
- They minimize atmospheric haze so far-off features of the landscape appear more clear and crisp
- They boost the contrast of the sky with a deeper blue atmosphere and whiter clouds
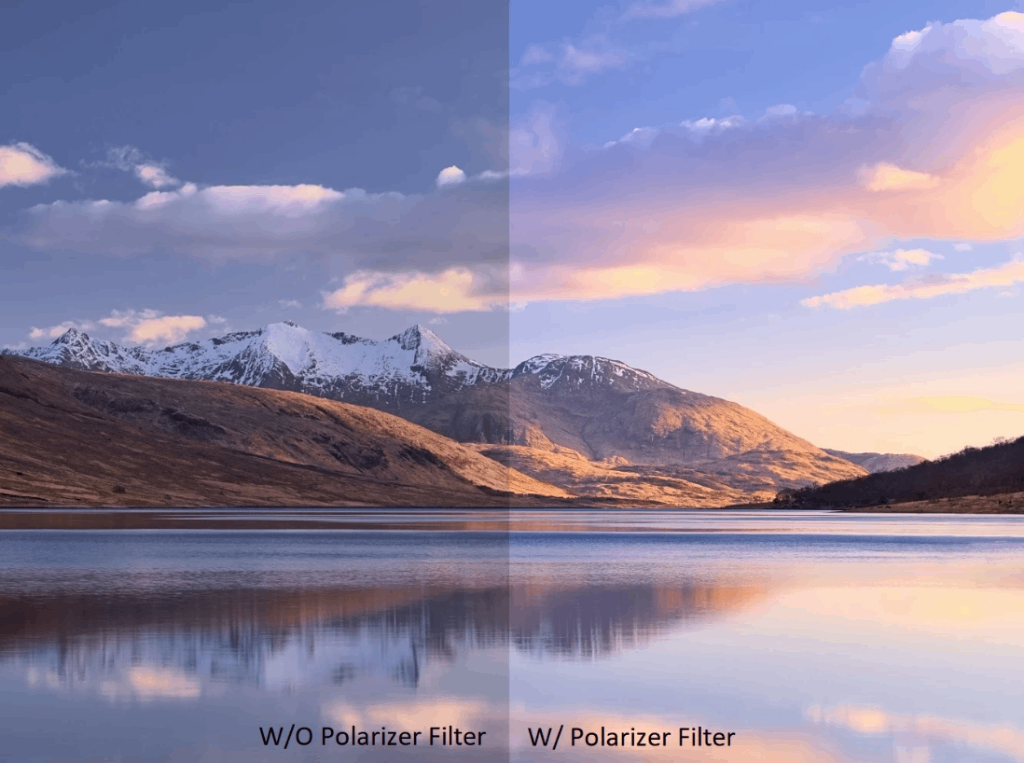
But not all polarizing filters are made alike…
Kenko Nyumon filters are the #1 selling polarizer in Japan because they are crafted of precision optical glass. That means you get optimum performance and control without busting your budget.
Additionally, this filter has a slim mounting ring to prevent vignetting and it has a multi-layer coating that repels dust, water, and fingerprints. What’s not to like about that?!
Learn more about the Kenko Nyumon Circular Polarizing Filter
Gifts for Photographers Under $50: HandlePod 3-Axis Action Cam Mount
Does the photographer on your shopping list like to go out and adventure with their GoPro or other action cam?
I have the ideal gift idea for them - the HandlePod 3-Axis Action Cam Mount.
This ingenious gadget is a comfortable grip for shooting handheld video as well as a handy tabletop stand (or a stand for any horizontal surface for that matter).
Furthermore, it has an integrated elastic cord so you can lash it to stationary objects (i.e., a lamp post) for super steady hands-free recording.
The mount has 360-degree movement so you can capture smooth video and easily position it for the ideal still image as well.
When used as a tabletop stand or lashed to a vertical surface, its four rubber feet keep it in place for anti-slip performance.
Perhaps best of all, it weighs just 4 ounces and fits in your pocket, so your favorite photographer can always have a stabilizing mount with them for their GoPro activities.
Learn more about the HandlePod 3-Axis Action Cam Mount
Gifts for Photographers Under $50: Kenko Puro UV MC Protector Filter
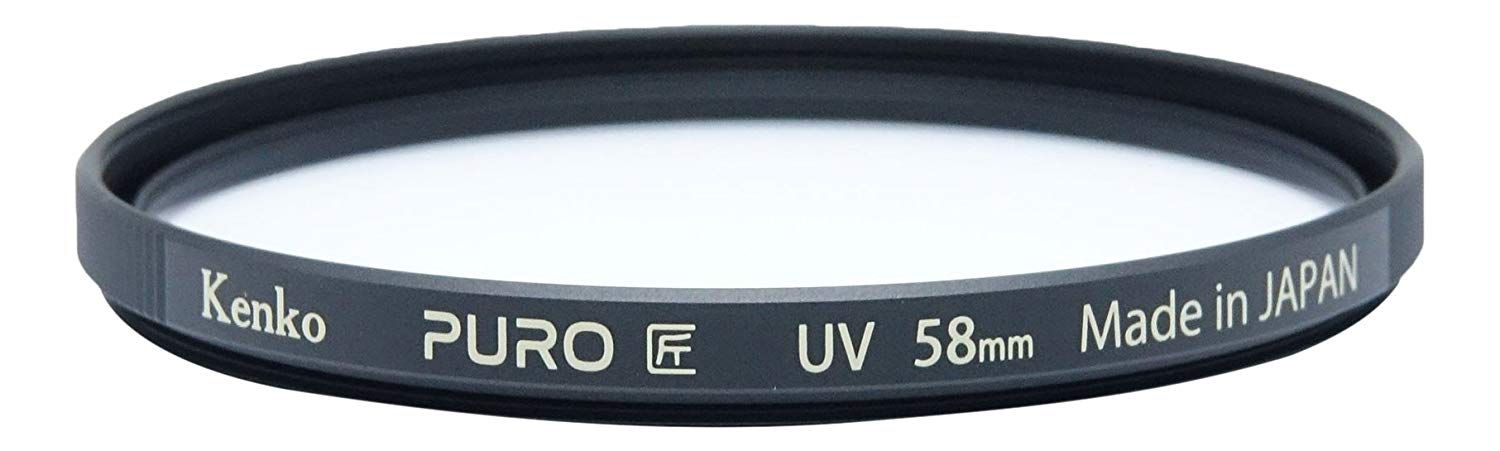
One of the biggest threats to a photographer’s lens is scratches. Add to that dust, smudges, and environmental contaminants, and you have a bevy of things that can negatively impact the front glass element of a lens.
That’s where the Kenko Puro UV MC Protector comes in…
Offered in sizes that range from 37 to 82mm, this UV Protection filter is made of precision optical glass.
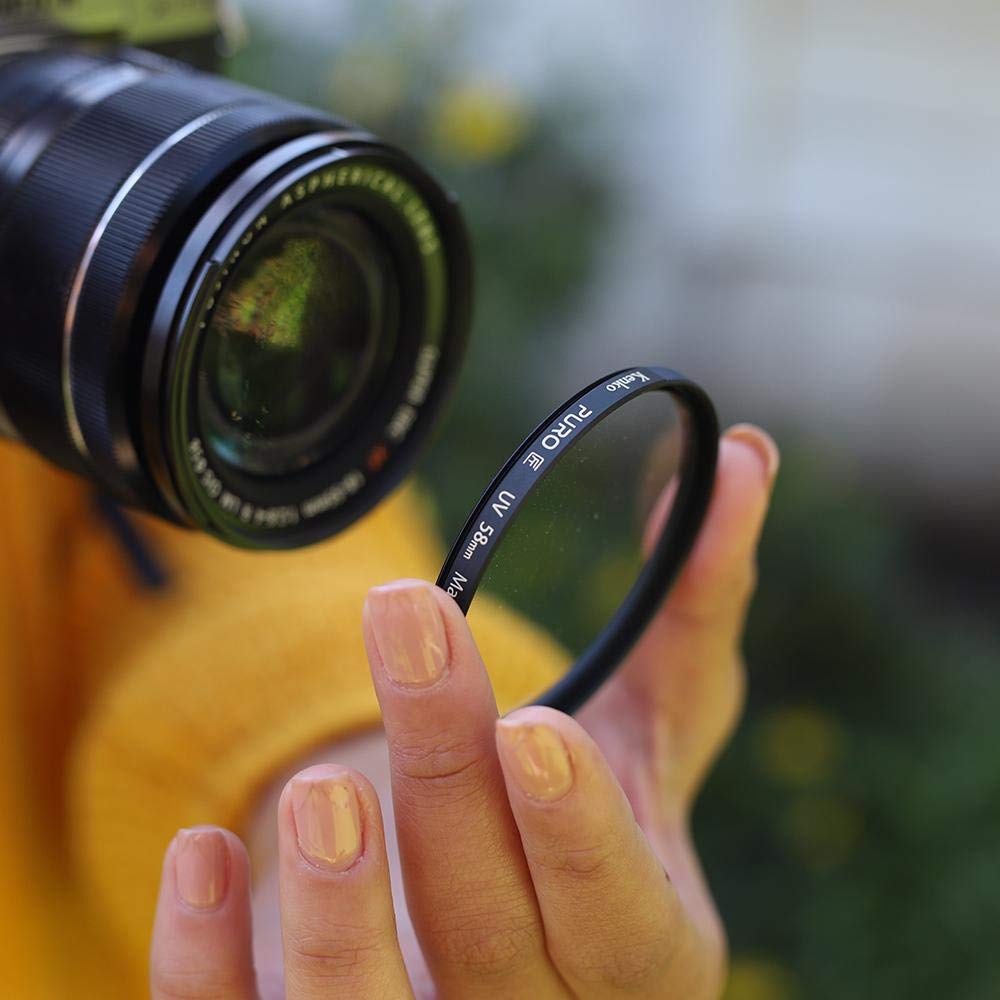
That means that not only does it shield the lens glass from damage, but it does so without negatively impacting the lens’s performance or sharpness.
Better still, the Asahi optical glass has a 16-layer multi-coating that repels dust, water, and smudges while increasing light transmission into the lens.
These filters are easy to clean and have a slim mounting ring so they won’t cause vignetting on wide-angle lenses either!
Learn more about the Kenko Puro UV MC Protector Filter
Gifts for Photographers Under $50: Aputure AmaranAL-M9 Pocket-Sized Light
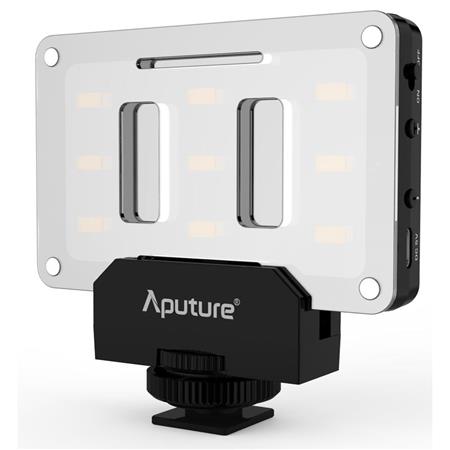
As the name suggests, this little light is perfectly pocket-sized so the photographer on your list can always have clean, daylight-balanced light for photos and videos.
It has nine high-efficiency SMD bulbs that are capable of 900 lux of light, which is more than enough to act as a close-up fill light. It has 9-step adjustable brightness to tailor the intensity of the light to the specific shot too.
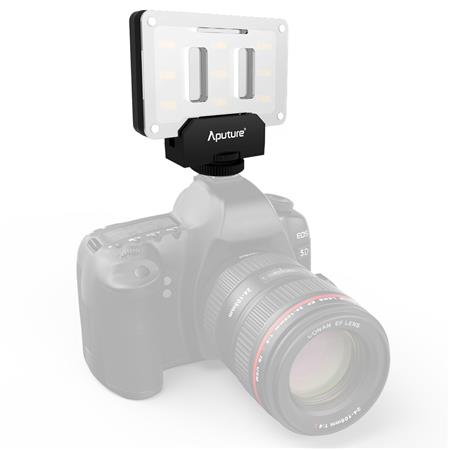
From portraits to macro to video work, this little light offers excellent versatility with a TLCI rating of 95+.
And with an ultra-thin design and a weight of just 4.9 ounces, this light can go anywhere!
Learn more about the Aputure Amaran AL-M9 Pocket-Sized Light
Gifts for Photographers Under $50: Kizoa Online Movie and Video Maker
Since videography is becoming more and more popular with photographers, why not enable your favorite photographer to create high production value movies?
They can do that with Kizoa, an online movie and video maker that makes creating beautiful videos a simple task.
In fact, Kizoa has a vast library of ready-to-use templates so the process of creating a movie is made quick and easy.
What’s more, it offers a library of music, special effects, transitions, texts, and more. It literally takes just minutes to create a video that looks like it took weeks to put together!
Once you’re done with the video, you can quickly and easily share it on Facebook or YouTube, send it to friends and family via email, burn it to a DVD, or download it as a video file in multiple formats including MP4, AVI, MOV, MPEG2, and even GIF.
Gifts for Photographers Under $50: HDRsoft Photomatix Essentials
Ask any photographer, and they’ll probably tell you that the toughest part of photography to master is exposure.
All too often, you get photos that have highlights that are too bright or shadows that are much too dark.
But by using the power of HDR photography - high dynamic range - photographers can combine multiple exposures into a single shot, thereby getting a well-exposed image throughout.
Photomatix Essentials by HDRsoft makes that process super easy with dozens of HDR settings and presets for getting the perfect HDR photo.
HDRsoft has even incorporated multiple HDR styles to give photographers further control over how their HDR images look. Truly, creating eye-catching photos has never been easier!
Learn more about HDRsoft Photomatix Essentials
Gifts for Photographers Under $50: Ikan Stratus 15mm Static Lens Support
If the photographer on your list has a bunch of accessories for their camera, an Ikan Stratus Cage is all but a must.
And to make the Stratus cage even more functional, you can give the gift of a 15mm static lens support this holiday season.
The support attaches to the non-rotating part of a lens and helps support its weight.
With 7/8-inches of vertical leeway, this gadget can support a lens in a number of positions.
It's easy to use, too - one of the 15mm rod mounts is open and angled, so it can be slid onto the rods from above or from the front.
And at $34.99, it's a bargain gift as well!
Learn more about the Ikan Stratus 15mm Static Lens Support
We Recommend
Top 10 Gifts for Photographers Under $500 - 2020 Edition

Photo by Pekic via iStock
With a budget of $500, you can buy some really awesome photography gifts for your loved one this year.
From an awesome large-format canvas print to a drone, a high-quality camera harness to a fantastic tripod, there is no shortage of photography gear you can consider with a $500 budget.
Below, I've listed some of my favorite under-$500 gift ideas for photographers that should be on your list this holiday season!
Gifts for Photographers Under $500: CanvasHQ Print
One of my favorite gifts to give (and to get, while we're at it) is a big, beautiful print.
Personally, I like canvas because of the texture the canvas gives to the print. Besides, a canvas print is something that will continue to give joy to the person that receives it for years and years to come!
Now, I know what you're thinking...canvas is so old-school.
But if you order your canvases from the right printers, you can get something that is beautiful, well-made and looks modern, even if the substrate is perhaps a bit old-school.
I have tons of canvases in my home, the vast majority of which are fromCanvasHQ.
These are some of the best canvas prints I've ever purchased. The sharpness of detail, the color accuracy, and the overall build quality of these prints is next-level good.
Part of the reason for this is the materials CanvasHQ uses. We’re talking archival-grade canvas, commercial-grade inks that are water and UV resistant, and kiln-dried pine frames to keep everything straight and true.
But CanvasHQ isn't just tops in the quality department...
They have excellent customer service that makes you feel heard and as though you're the only customer they have to worry about at that moment.
These guys are committed to getting it right, so if something doesn’t go as planned, you won’t be hung out to dry.
If you have questions, they’ll answer them. If you have a problem, they’ll fix it. If you need assistance with uploading your photo or even picking the best finishes for your canvas, they’ve got your back.
In the video above, you can see how one of my CanvasHQ prints stacks up against similar prints from other printing companies. I think you'll see why I'm so loyal to CanvasHQ!
Start shopping for your favorite photographer today on CanvasHQ.
Gifts for Photographers Under $500: Holdfast Sightseer Camera and Lens Modular System
One of the things that gets in the way of taking great photos is not being able to carry all the gear that you need in comfort. Additionally, problems arise when you aren’t able to easily access your gear when you need it.
The Holdfast Sightseer solves both of those problems for the photography lover on your shopping list this holiday season.
The Sightseer holds a crazy amount of gear for a small bag. That includes up to a 13-inch laptop, a camera with lens attached, two additional lenses, and all the needed accessories inside the bag.
But because it’s a modular system, you can add even more gear by adding Lens Pouches that attach to the exterior of the bag (or you can carry them on the Holdfast MoneyMaker or even on your own belt). That means that the big zoom lens that won’t fit in the bag can be carried safely in a padded Lens Pouch attached to the outside.
Since the Sightseer is a truly modular system, you can mix and match lens pouches as you need to carry as much or as little gear as the situation calls for. What’s more, this system can grow with you as you get more gear - start out lean and mean with just the Sightseer bag, and as more lenses are accumulated, add Lens Pouches as needed.
Better still, because your gear is easily accessible, you don’t have to worry about missing a shot.
It’s easy to carry, too. Just use the two sets of carrying handles, the shoulder strap, or attach it to the Holdfast MoneyMaker dual camera strap for a super easy way to get your gear from point A to point B.
These bags look amazing, too, with a waxed canvas and American Bison leather exterior and an Aztec flannel fleece interior. In other words, the Sightseer is the complete package!
Learn more about the Holdfast Sightseer
Gifts for Photographers Under $500: DJI Mavic Mini
I'll be the first to say that the Mavic Mini can't compete with the Mavic Air 2 or the Mavic 2 Pro. But the Mini wasn't designed to compete with its larger and more capable cousins.
Instead, the Mini is the perfect gift idea for photographers that are just getting into drone photography. It's small, lightweight, and super portable, so it's easy to take on photography trips without taking up a ton of room in a photographer's bag.
Likewise, the Mavic Mini is incredibly easy to fly, and is a superb option for someone that needs to learn how to fly a drone.
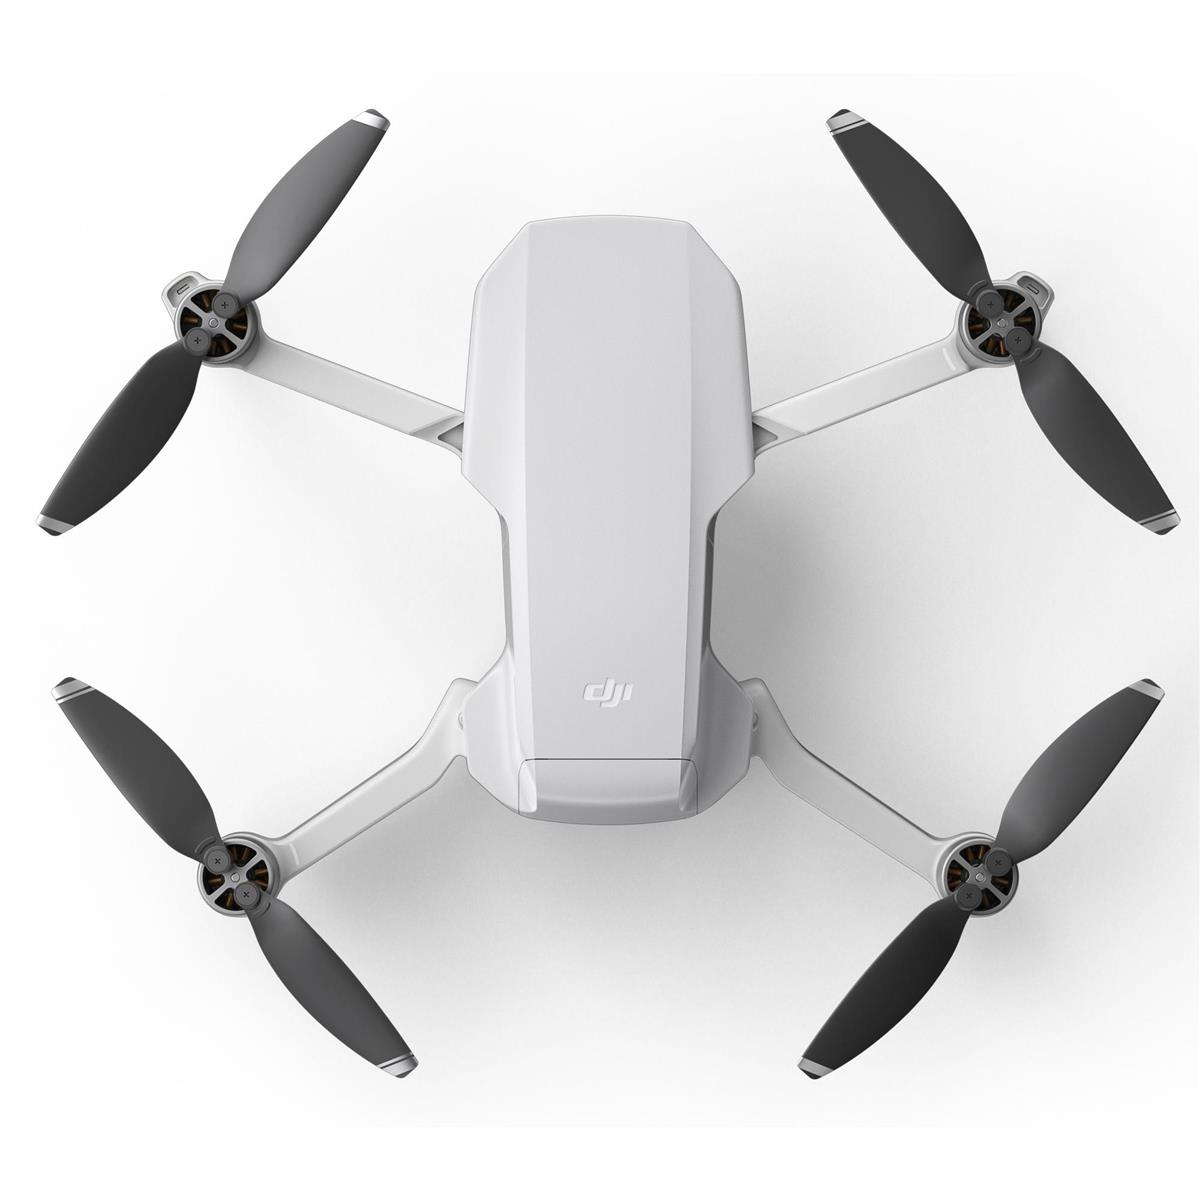
For photography purposes, the Mini can take 12-megapixel photos and shoots 2.7K Quad HD videos.
There's a 3-axis gimbal to provide the camera stability while shooting, in-app creator templates that speeds up the process of creating epic videos, and a flight time of 30 minutes as well.
Additionally, your favorite photographer will love the fact that the Mini comes with the DJI Fly app that gives them an easy-to-understand user interface. There's also a feature called Flight Tutorial to help them get started piloting their drone.
Learn more about the DJI Mavic Mini
Gifts for Photographers Under $500: Insta360 ONE R Twin Edition
I just picked one of these things up and have been so impressed with it that I had to include it on this list of gifts for photographers under $500.
Essentially, the Insta360 ONE R Twin Edition is two cameras in one.
First, you have a 360-degree dual-lens camera that enables you to create those immersive 360-degree videos you see on the internet.
And second, you get a more traditional action cam lens that allows you to use the camera to shoot wide-angle photos and videos.
This is possible because the camera is modular.
There's a "brain" on the bottom, and then you add different components to it as you need.
On top of the cool factor that the modularity provides, you also get top-notch performance...
The camera shoots super 5.7K video in 360-degree mode, 4K wide-angle video in action cam mode, offers FlowState image stabilization, and is waterproof up to five meters.
Additionally, this camera offers hyperlapse and slow-motion modes, an invisible selfie stick, and voice control, among many other features.
If the photographer on your list loves adventures and needs a versatile camera to join them, give the Insta360 ONE R strong consideration.
Learn more about the Insta360 ONE R Twin Edition
Gifts for Photographers Under $500: ViewSonic TD1655 Portable Touchscreen Monitor
This 15.6-inch touchscreen monitor is the perfect companion for a photographer that's constantly on the go.
Weighing just two pounds and measuring .6-inches thick, this lightweight monitor can be easily added to a camera bag for quick transport.
The in-cell capacitive touchscreen gives you a smooth and responsive experience whether you're tapping, swiping, or pinching on the screen. The photographer on your list will enjoy the blue light filter to minimize eye strain, as well as the flicker-free full HD viewing experience.
The monitor comes with a stand and a magnetic cover, so it's an all-in-one tool for on-the-go photographers.
The monitor works with laptops, PCs, and Macs, and comes with a three-year warranty as well.
Learn more about the ViewSonic TD1655 Portable Touchscreen Monitor
Gifts for Photographers Under $500: Peak Design Everyday Backpack V2
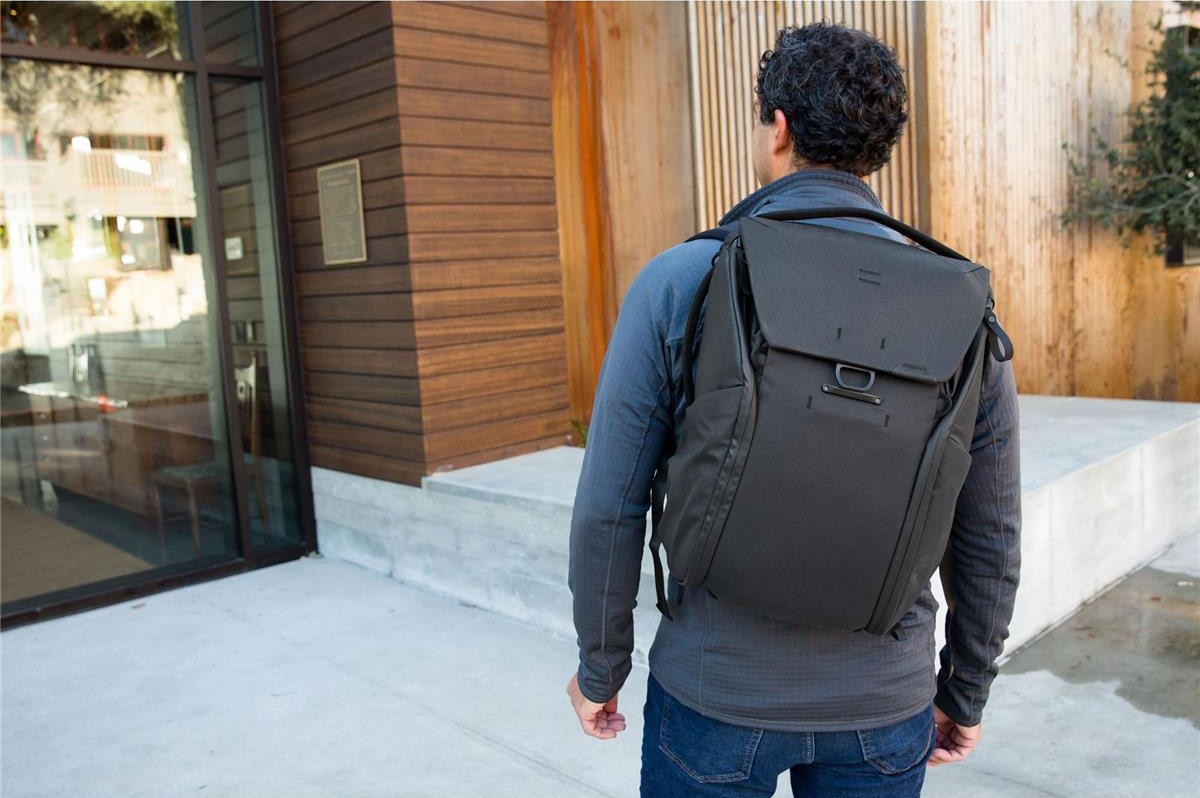
This under-$500 photography gift list wouldn't be complete without an entry from Peak Design, which seems to find ways to improve on their already incredible lineup of camera bags year in and year out.
Their Everyday Backpack V2 is certainly one of the best camera bags of 2020, with features that make it more usable than ever.
Peak Design incorporated MagLatch hardware on the top of the bag so you can open it up and access your gear in a flash.
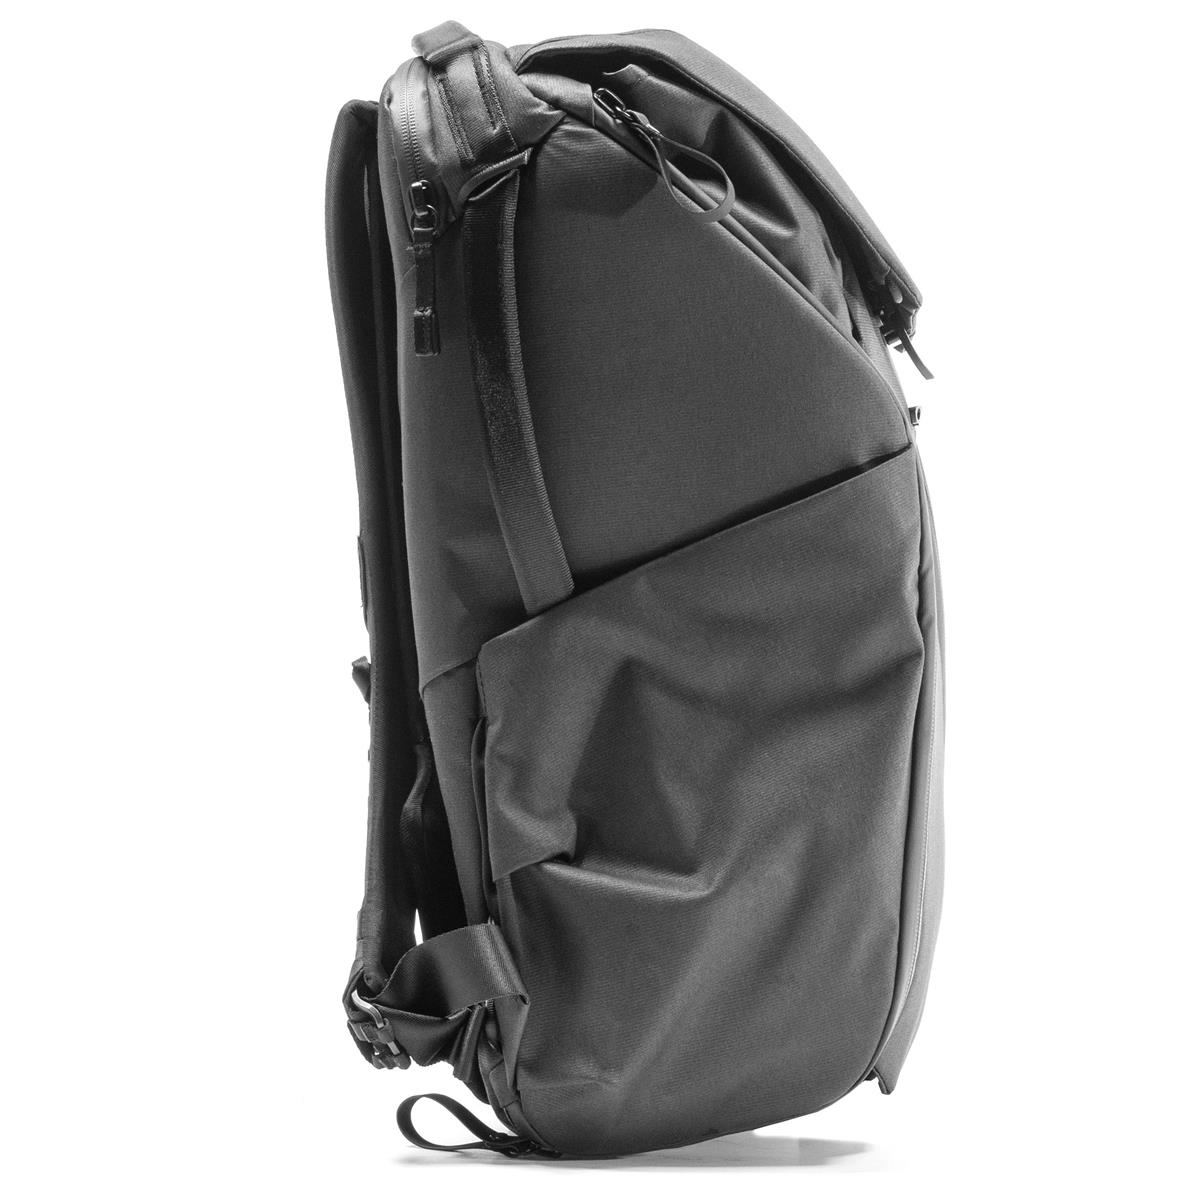
To expand access further, this pack has two side access panels that are secured by weatherproof UltraZips.
The shell of the bag is comprised of 100-percent recycled 400D weatherproofing so your gear stays nice and dry. There's also a handy tuck-away strap system that enables you to lash gear to the exterior of the bag to expand its carrying capacity.
As impressive as the outside is, the inside of the bag offers lots of goodies.
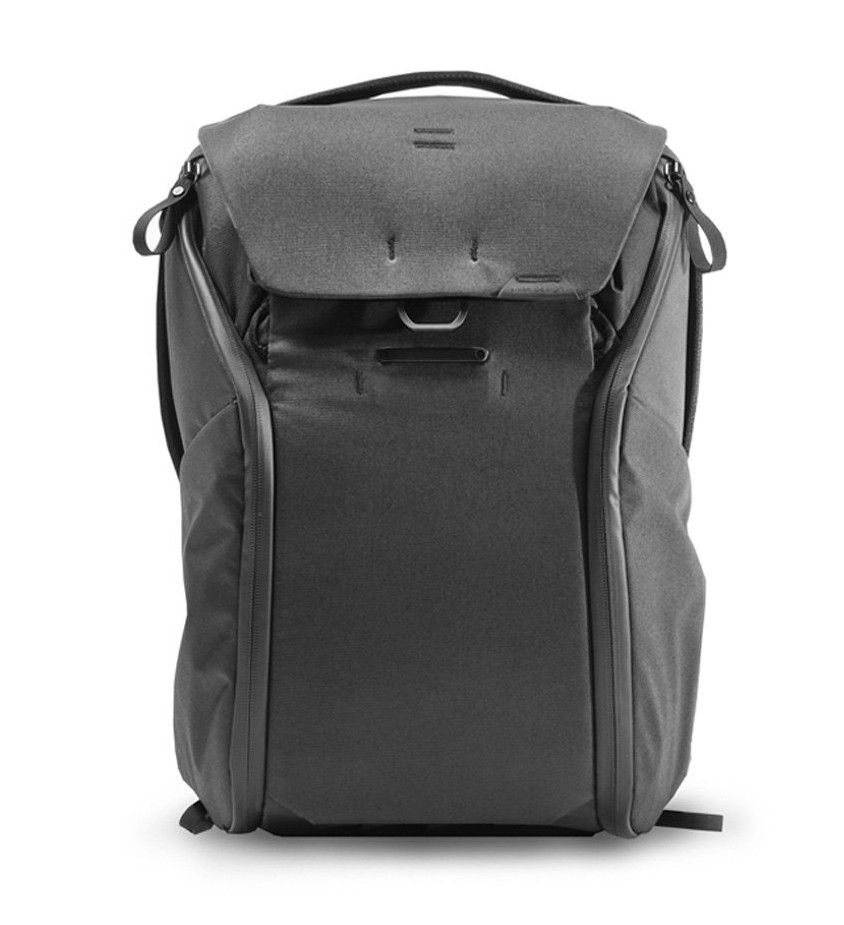
There's dedicated sleeves for up to a 15-inch laptop, numerous internal slip pockets for smaller items, and three configurable FlexFold dividers to help keep your gear organized.
Of course, the FlexFold dividers also help protect your gear by keeping it neatly organized and separated from one another.
The Everyday Bag V2 is available in 20-liter and 30-liter sizes so you can select the right fit for your needs. Both are a great option for urban explorations when you want a backpack with a smaller footprint than the Nomatic bag.
Either way, you'll end up with one of the best bags of 2020!
Learn more about the Everyday Backpack V2 20-Liter or 30-Liter versions.
Gifts for Photographers Under $500: E-Image EK610 Tripod
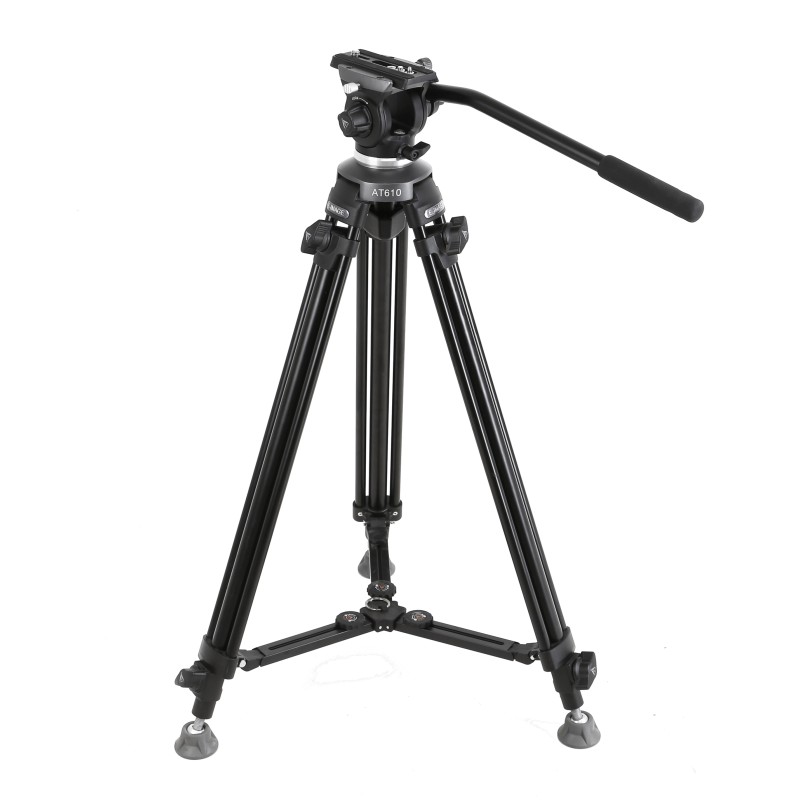
Every photographer needs a reliable tripod in their camera bag, and the E-Image EK610 fits the bill.
Billed as a video tripod, the EK610 provides photographers and videographers alike with exceptional stability thanks to its strong two-stage aluminum legs.
Making adjustments to the tripod is quick and simple thanks to ergonomic leg adjustment knobs and a mid-level spreader that enhances stability.

There's a fixed counterbalance to enhance stability even further, and the included fluid head makes for ultra-smooth panning.
The head can support up to 6.6 pounds, so it's ideal for use with a mirrorless camera, DSLR, or small video camera.
There's even a handy carrying case for the tripod, spreader, and head, so the photographer on your list can easily transport it from one shoot location to the next.
Best of all, this tripod is WAY under the $500 budget mark, so you can give an awesome gift and save some cash at the same time.
Learn more about the E-Image EK610 Tripod
Gifts for Photographers Under $500: ProGrade Digital 325GB CFexpress Type B Memory Card
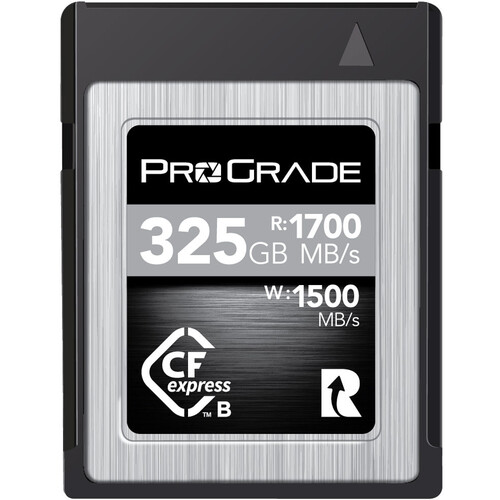
One of the best gifts you can buy for yourself or another photographer this year is a high-powered memory card that can accommodate the huge amounts of data that modern cameras record.
For my money, ProGrade Digital CF Express cards are the perfect option. In fact, I have three of these cards for my Canon EOS R5!
CF Express cards are far faster than UHS-II SD cards, so you can capture 4K, 6K, and in the case of the EOS R5, 8K video with ease thanks to the 1500 MB/s write speed. That lightning-fast write speed is also beneficial for fast burst shooting, that way your buffer clears and you don’t miss any shots.
These cards are backward compatible with XQD devices, too, so after a quick firmware update, you can use these cards on your XQD-enabled camera without issue.
Aside from the huge storage capacity and fast write speeds, these ProGrade cards offer security features that you simply don’t find on all memory cards. They come with laser-etched serial numbers to help prevent counterfeiting. What’s more, ProGrade includes advanced recovery pro software that prevents your photos and videos from being lost to corruption.
ProGrade also offers Digital Refresh Pro software (which is available separately) that refreshes and sanitizes your card to help it maintain peak performance. Open the Digital Refresh Pro software, check the health of your cards before your next shoot, and shoot with confidence knowing that your images and videos are safe and secure on your ProGrade card.
Add in read speeds of up to 1700 MB/s, a minimum write speed of 1400 MB/s, and resistance to extreme temperatures, shock, vibration, and X-rays, and you have the makings of one heck of a memory card.
There are few holiday gifts this small that pack this much punch! If you really want to impress the photographer on your list, give them the gift of a ProGrade CF Express card this year!
Learn more about ProGrade Digital CF Express Memory Cards
Gifts for Photographers Under $500: Podium

This is one of my favorite under-$500 gift ideas because it is a gift that not only keeps on giving, but it could help your favorite photographer elevate their business to the next level.
Podium is a platform that helps you streamline communication with clients. So the photographer in your life that laments how much time they have to spend responding to emails, contact requests from their website, Facebook messages, and so forth, can stay up-to-date with all those things (and more!) without leaving their platform.

Rather than haphazardly staying in touch with clients, Podium allows you to text clients and prospective clients and organizes all those messages in a single dashboard, shown above.
Podium is built on the idea that the best way to get leads and turn prospects into customers is timely, genuine communication. You want to make it as easy as possible for people to ask you questions or find what they’re looking for, and Podium will do just that for the photographer on your list.

I use Podium, and it not only saves me a lot of time, but it saves my photography business a lot of money by ensuring I’m always the first one to respond to potential clients.
Podium even has a feature that lets me invoice clients right from the app so I’m also getting paid more quickly. Not bad, right?!
Gifts for Photographers Under $500: GoPro Hero 8 Black

GoPro is synonymous with adventure photography, and their Hero 8 Black is their best action cam to date.
It can shoot 4K video at 60fps or 1080p at at 240fps for some super slow-motion video.
Its HyperSmooth 2.0 image stabilization is absolutely killer, and will allow the photographer on your list to take the most stable videos they've ever shot.

GoPro added a slew of other upgrades as well:
- Upgraded TimeWarp features with an auto mode that uses sensors to detect motion and adjust the recording speed
- Digital lenses offer multiple field of view settings (SuperView, Linear, Wide, and Narrow)
- Capture presets for popular types of recording with the ability to create and save your own
- LiveBurst photo mode takes 1.5-second images before and after the shutter button is depressed (think Live Photos on iPhones)
- SuperPhoto, GoPro's version of HDR, gets improved image quality
- Face detection, smile detection, and blink detection
- Built-in GPS and motion sensors
- Livestreaming at 1080p

On top of all that, the Hero 8 Black offers many different mods that extend its functionality and flexibility for all sorts of shooting situations.
GoPro also incorporated built-in mounting pins, which negates the need for a frame to connect the camera to accessories.
Plus, the Hero 8 Black is under $350 now, so you can get this for the photographer on your list and not even come close to your $500 budget!
Learn more about the GoPro Hero 8 Black
Gifts for Photographers Under $500: Razer Core X Chroma eGPU
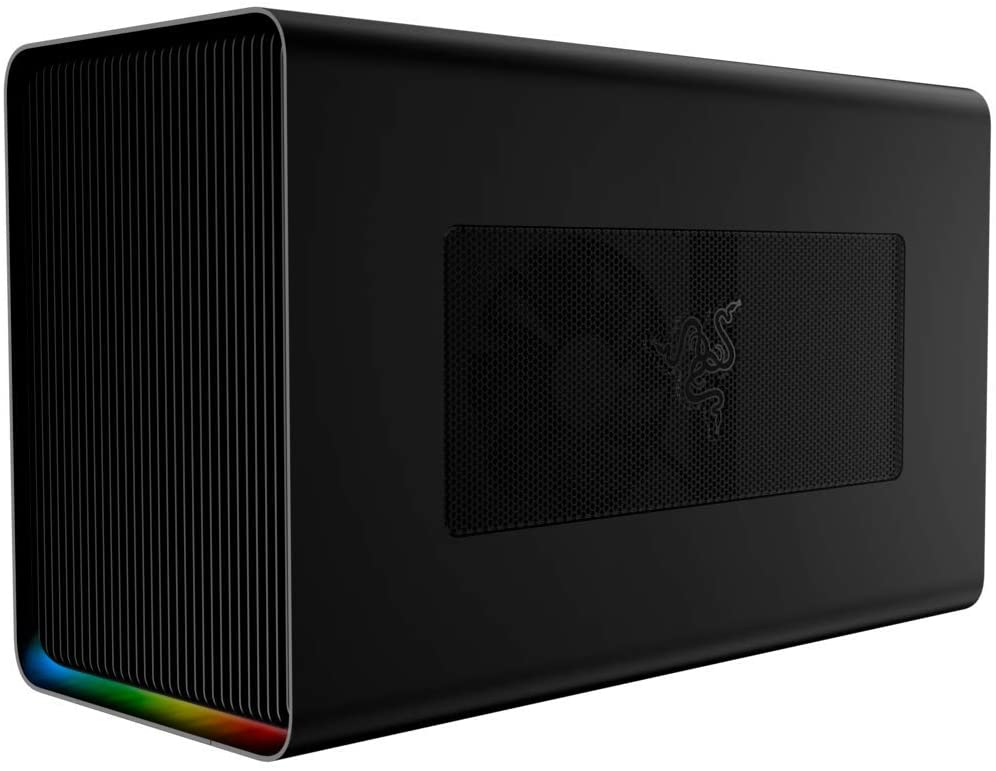
If the photographer on your list already has a laptop that they love but that's lacking in the graphics card department, you might consider giving them the gift of the Razer Core X Chroma eGPU.
This bad boy helps put a supercharge into a laptop's video card, that way you get a true desktop-grade video experience.
It comes with plug-and-play support for a wide range of graphics cards on PCs and Macs.
Though this gadget is intended to give gaming systems a power boost, I've found it to be incredibly helpful for my video editing work. If the photographer you're shopping for does a lot of video work, this eGPU will be a fantastic gift that will help them speed up their video processing workflow.
Learn more about the Razer Core X Chroma eGPU
Gifts for Photographers Under $500: Amazon Gift Card
![]()
Totally stumped regarding gift ideas for photographers on your list?
Why not go the easy route and get them an Amazon gift card?
Though a gift card isn't exactly the sexiest gift, when the photographer in your family sees that you have given them carte blanche to get what they want, they'll be stoked!
With an Amazon gift card, they can put the card amount towards whatever they want - a new lens, a second camera body, lighting gear, a laptop - you name it!
As far as flexibility goes, there's nothing better to give a photographer than a gift card.
Learn more about Amazon gift cards
We Recommend
Top 10 Last-Minute Gifts for Photographers - 2021 Edition
photo byVitaliy_ph via iStock
With just a few days left until Christmas, it's officially time to get your last-minute shopping done.
To help you find the perfect gift for the photographer on your list, we've put together this last-minute gift guide for photographers.
With items of all shapes, sizes, types, and prices, there's something on this list for the photographer in your life!
Best Ever Backdrops Mix and Match Backdrop
As a photographer, I want to get gifts that improve my ability to take photos. And as a photographer with a lot of gear, I also want something that I can tuck away into a drawer here or a cubby there to keep it out of the way.
I want to receive a gift that also has a lot of utility - something that’s easy to use, offers flexibility in terms of how it's used, and something that will last a long time. And that, my friends, is exactly what you get with a backdrop from Best Ever Backdrops.
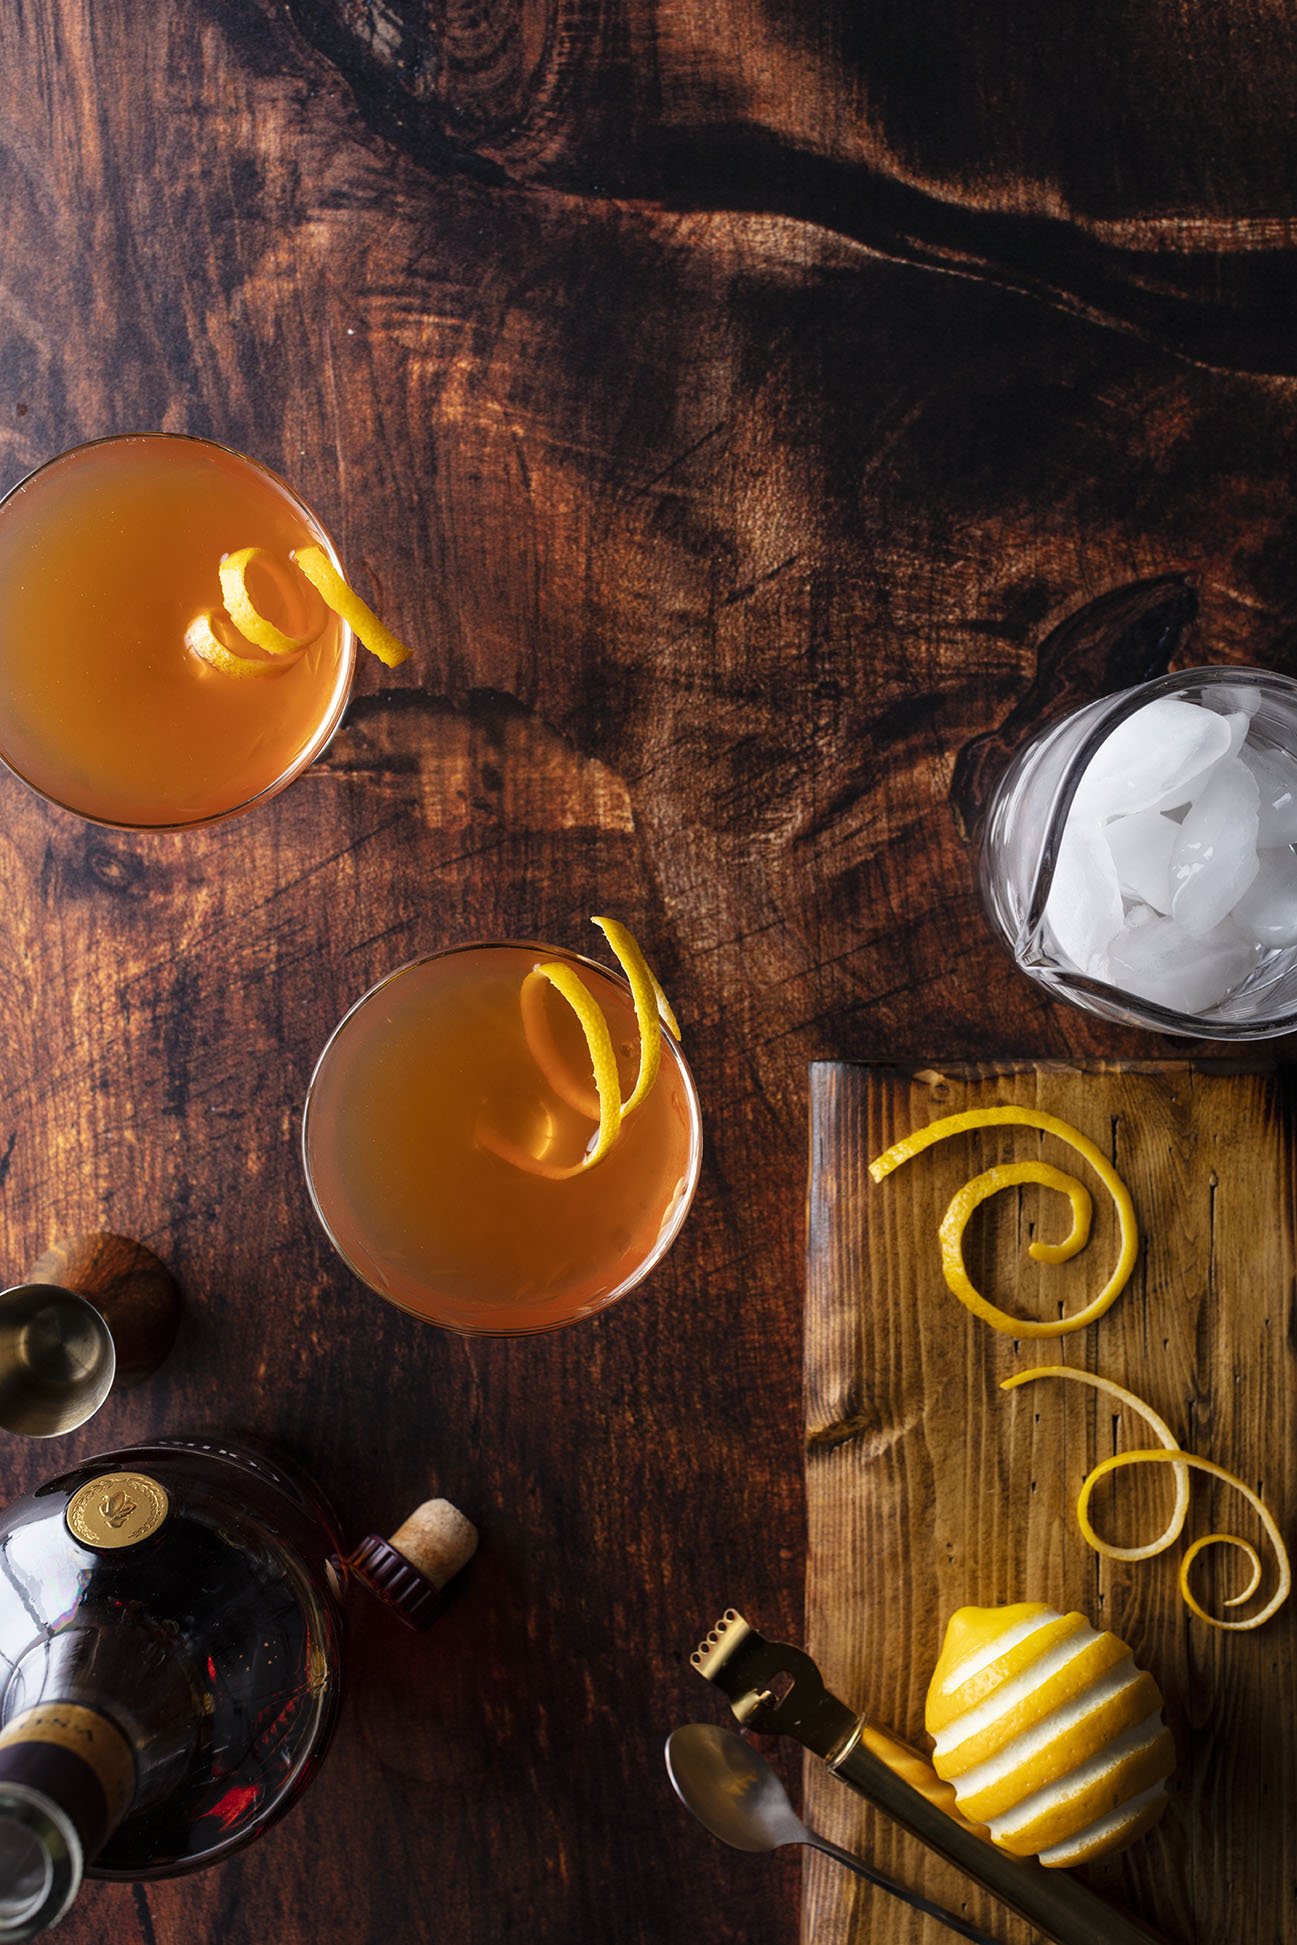
Now, I’m a landscape photographer by trade, but I also love to cook. So I thought, why not give food photography a try?
To create images of food that really make people’s mouths water, I need to set up a home studio that allows me to get the perfect shots. And for that I need a good backdrop.
What I really love about these backdrops is that they tick all the boxes - they look incredible, they’re double-sided to give you two backdrops in one, and they are just 24 x 36 inches and 1/8th of an inch thick, so they’re easy to shove under my bed when I’m not using them.
Additionally, these backdrops are extremely durable, waterproof, and stainproof, so if my food photography shoots get a little out of hand, I don’t have to worry about ruining my backdrops.
Better still, there are dozens and dozens of colors, textures, and patterns to choose from, so you can truly tailor the backdrop to what you think the photographer on your shopping list would like. There’s even free shipping!
Since this is a last-minute gift guide, I’d be remiss if I didn’t mention that these backdrops arrive at your door in just a couple of days, so they truly are an ideal last-minute gift.
It’s hard to beat something that’s so useful, so beautiful, and at the end of the day, inexpensive, too. If you want to wow the photographer on your holiday list, this is the gift to do it!
Learn more about Best Ever Backdrops
Sony a7 IV
The Sony a7 IV is the newest version of the a7 line - so new, in fact, that it’s still in the pre-order phase.
However, any photographer on your holiday shopping list would surely love to have this camera, even if they have to wait a while to get it.
The a7 IV is equipped with a full frame 33-megapixel Exmor R back-illuminated sensor that offers incredible image quality, including better color reproduction and low noise.
Additionally, the sensor is capable of accommodating more than 15 stops of dynamic range, which offers photographers the ability to capture a wide range of highlights and details in the scene.
The Sony a7 IV isn’t just a photographer’s camera, though…
The fast sensor readout enables 10-bit 4:2:2 4K video recording at up to 60p. Likewise, you get full pixel readout with no binning, the option to edit footage in slow-motion at 30p or 24p, and oversampling at 7K
Of course, that’s just the start! The a7 IV offers a host of other features that includes a 3-inch free-angle tilting touchscreen LCD, an OLED EVF, up to 10fps burst shooting, Wi-Fi, Bluetooth, and 5-axis image stabilization.
In other words, this camera is loaded up with goodies that will make your favorite photographer smile from ear to ear!
Learn more about the Sony a7 IV
Atomos Ninja V
If you're shopping for a photographer that wants to try their hand at audio and video production, the 5-inch Atomos Ninja V portable monitor/recorder is a great gift idea.
The Ninja V is compatible with virtually any DSLR or mirrorless camera. Recording is done directly from the camera's sensor, but because it bypasses the camera's internal compression and record time limits, the Ninja V allows you to record for as long as you want. You get 4K 60p 10-bit recording out of the deal, too.
Files from the Ninja V are in ProRes or DNxHR format, which are ready to edit and can be easily stored on an SSD drive.
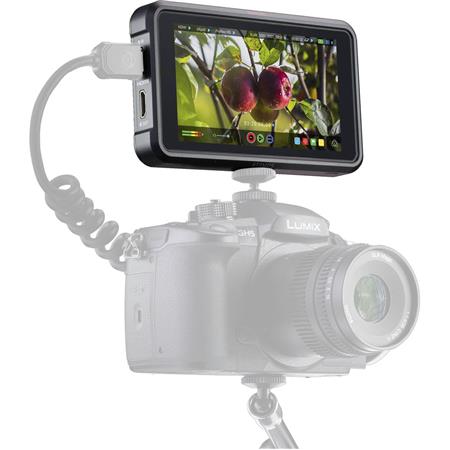
The monitor on the Ninja V is a bright 5.2-inch 10-bit HDR screen that offers 1,000 nits of brightness. The unit is wrapped in a 1-inch aluminum body that's both durable and lightweight.
Additionally, the screen is anti-reflective and offers 10+ stops of dynamic range in real-time from various signals, including Log, PQ, and HLG.
You get one-touch operation, fast playback, slow motion, and frame-by-frame analysis with AtomOS as well!
Learn more about the Atomos Ninja V
Sony ZV-1

The Sony ZV-1 is a compact, 4K camera aimed specifically at vloggers.
It has a 20.1MP sensor, a vari-angle LCD screen that faces forward, and a three-capsule mic with a windscreen as well.
These features make it much easier for videographers to see themselves as they record and capture improved audio as they do it.
But the list of features doesn't stop there...
The camera is compatible with Bluetooth grips that enable easy handheld shooting. There is also a bokeh switch and a product showcase setting that make it easier to defocus the background and highlight products that need to be singled out in a video.
The ZV-1 also comes with a 2.7x optical zoom, enhanced color science for improved skin tones, and real-time tracking that ensures the subject is always in focus.
In other words, if the photographer on your list is ready to get into shooting video, this might be the camera for them!
Learn more about the Sony ZV-1
Westcott FJ400 400Ws Strobe with AC/DC Battery

If the photographer you’re shopping for needs to upgrade or expand their lighting gear, this Westcott 400Ws strobe will be an ideal solution.
This light comes with an AC/DC battery, making it highly portable for use in the studio or in the field. The AC/DC battery offers 480+ full-power flashes with each charge, so photographers get long-lasting use out of it. And with less than a second recycle speed, work can commence quickly!
The FJ400 offers superb color accuracy, has a 9-stop output range, and a stable color temperature of 5500K (+/-150K). There’s an easy-to-use menu system with an LCD color display for making quick adjustments in addition to having both manual and TTL flash modes.
Westcott incorporated other nice features into this light as well. It offers High Speed Sync (HSS) at up to 1/8000s, Freeze Sync up to 1/19000s, Continuous Capture at up to 20fps, and automatic memory recall.
Add to the list mask function, delay function, rear curtain sync, and group and channel assignment, too!
Even better, this light is firmware upgradable via USB-C, so additional features can be added in the future. What’s not to like about that?!
Learn more about the Westcott FJ400 400Ws Strobe with AC/DC Battery
RODE Wireless GO II Microphone
I've used RODE microphones for years, and I can attest to the quality of these mics both in terms of build and audio performance.
The Wireless GO II builds on the success of its predecessor by continuing the tradition of innovation.
It operates in the 2.4GHz spectrum and is compatible with Android and Apple products.
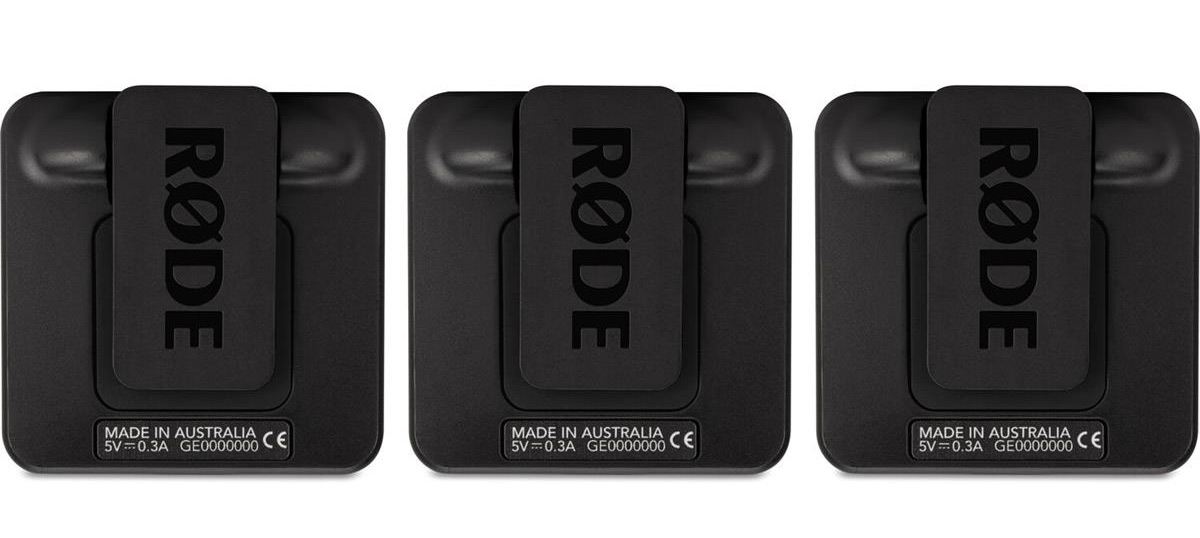
This kit comes with dual transmitters, each of which have an internal microphone and a receiver with a 3.5mm TRS output.
The transmitter and receiver have a USB-C port for charging. These ports can also be used to connect to a computer to get firmware updates.
With completely wireless operation, these mics give you the freedom to move around in front of the camera without worry of tripping over wires. What's more, if you're on camera, there's no wires to try to hide under your shirt.
These little guys simply give you a lot of bang for your buck with professional-quality audio in a tiny package.
Learn more about the RODE Wireless GO II
Rode Microphones RODECaster Pro Integrated Podcast Production Studio
If you're shopping for someone that wants to get into podcasting, then the RODECaster Pro is a great last-minute gift idea.
What's so great about this gadget is that it is fully integrated. That means that photographers can use this to produce podcasts whether they are an experienced podcaster or a beginner.
There are four high-quality microphone channels that can power studio condenser microphones and traditional dynamic microphones as well.
Better still, you can connect microphones to the RODECaster Pro quickly and easily. The device also offers convenient features like one-touch recording and automatic level setting.
The RODECaster Pro also allows you to have remote guests call in for an interview. Doing so is easy - just connect a smartphone via Bluetooth or a TRRS cable and the RODECaster will automatically provide mix-minus audio so the caller doesn't hear an echo.
This unit additionally provides preamps and outputs with Class A circuitry for ultra-low distortion and top-of-the-line gain structure.
There's music, jingles, applause, and other sounds that help give your podcast a more professional sound as well!
Learn more about the RODECaster Pro
RODE Lavalier GO
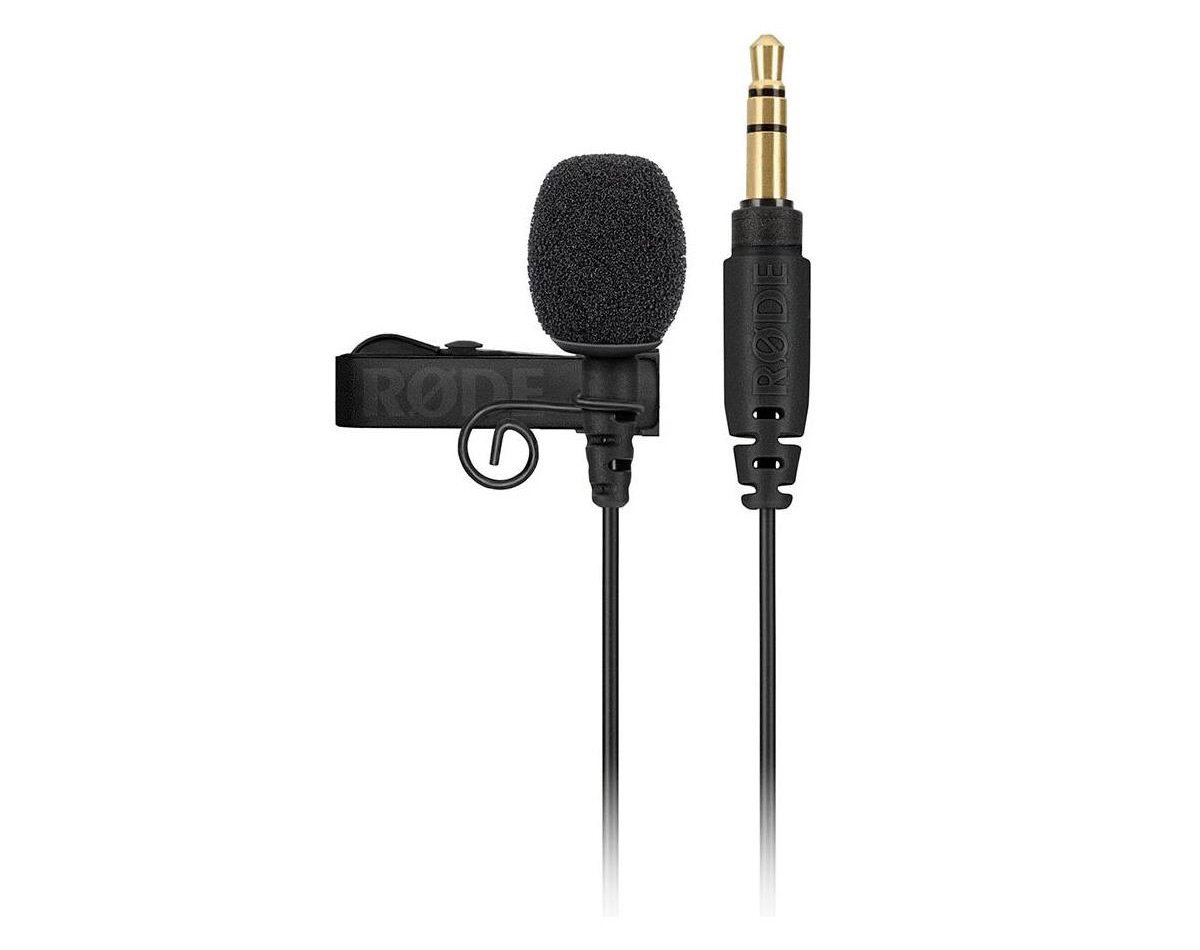
Another prime last-minute gift idea for photographers is the RODE Lavalier GO microphone.
At just $79, this is one of the least expensive items on this list. But don't let the small price fool you - this is a high-powered mic!
In fact, this is a professional-grade microphone that can be used in a variety of situations, from speaking directly to the camera in the studio to conducting interviews in the field and many points in between.
The Lavalier GO has a discreet 4.5mm omnidirectional mic that captures beautifully clear audio - even in less-than-forgiving environments.
It has a 3.5mm TRS connector and is designed to work with the RODE Wireless GO and many recording devices with a 3.5mm TRS microphone input.
The key to getting good video is capturing great audio, and with this microphone, the photographer on your shopping list can do just that!
Learn more about the RODE Lavalier GO
Manfrotto Pro Light Reloader Tough-55
Chances are that the photographer on your holiday shopping list already has a ton of gear. So why not give them a gift that helps them carry that gear safely?
The Manfrotto Pro Light Reloader Tough-55 roller case has four layers of foam on the bottom and convoluted foam on the lid to help protect sensitive photography and videography gear from bumps and bruises when traveling.
When closed, the case creates an airtight compartment. With pull release latches, the case is easy to open, and with padlock compatible points, the case can be easily secured as well. Add in a telescoping handle for making maneuvering the case through the airport a breeze!
One of the most interesting and useful features of this case is that it has optional accessories that can attach or latch onto metal attachment pins on the case.
This means that you can add a laptop bag, a tripod bag, or many other accessories to expand the usefulness of the case.
These cases are dust-resistant and moisture-resistant and are rated to IP67 standards, so they are fully capable of being a photographer's go-to travel case in all sorts of environments.
Learn more about the Manfrotto Pro Light Reloader Tough-55
Ikan Professional 15-Inch High Bright Beam Splitter Teleprompter
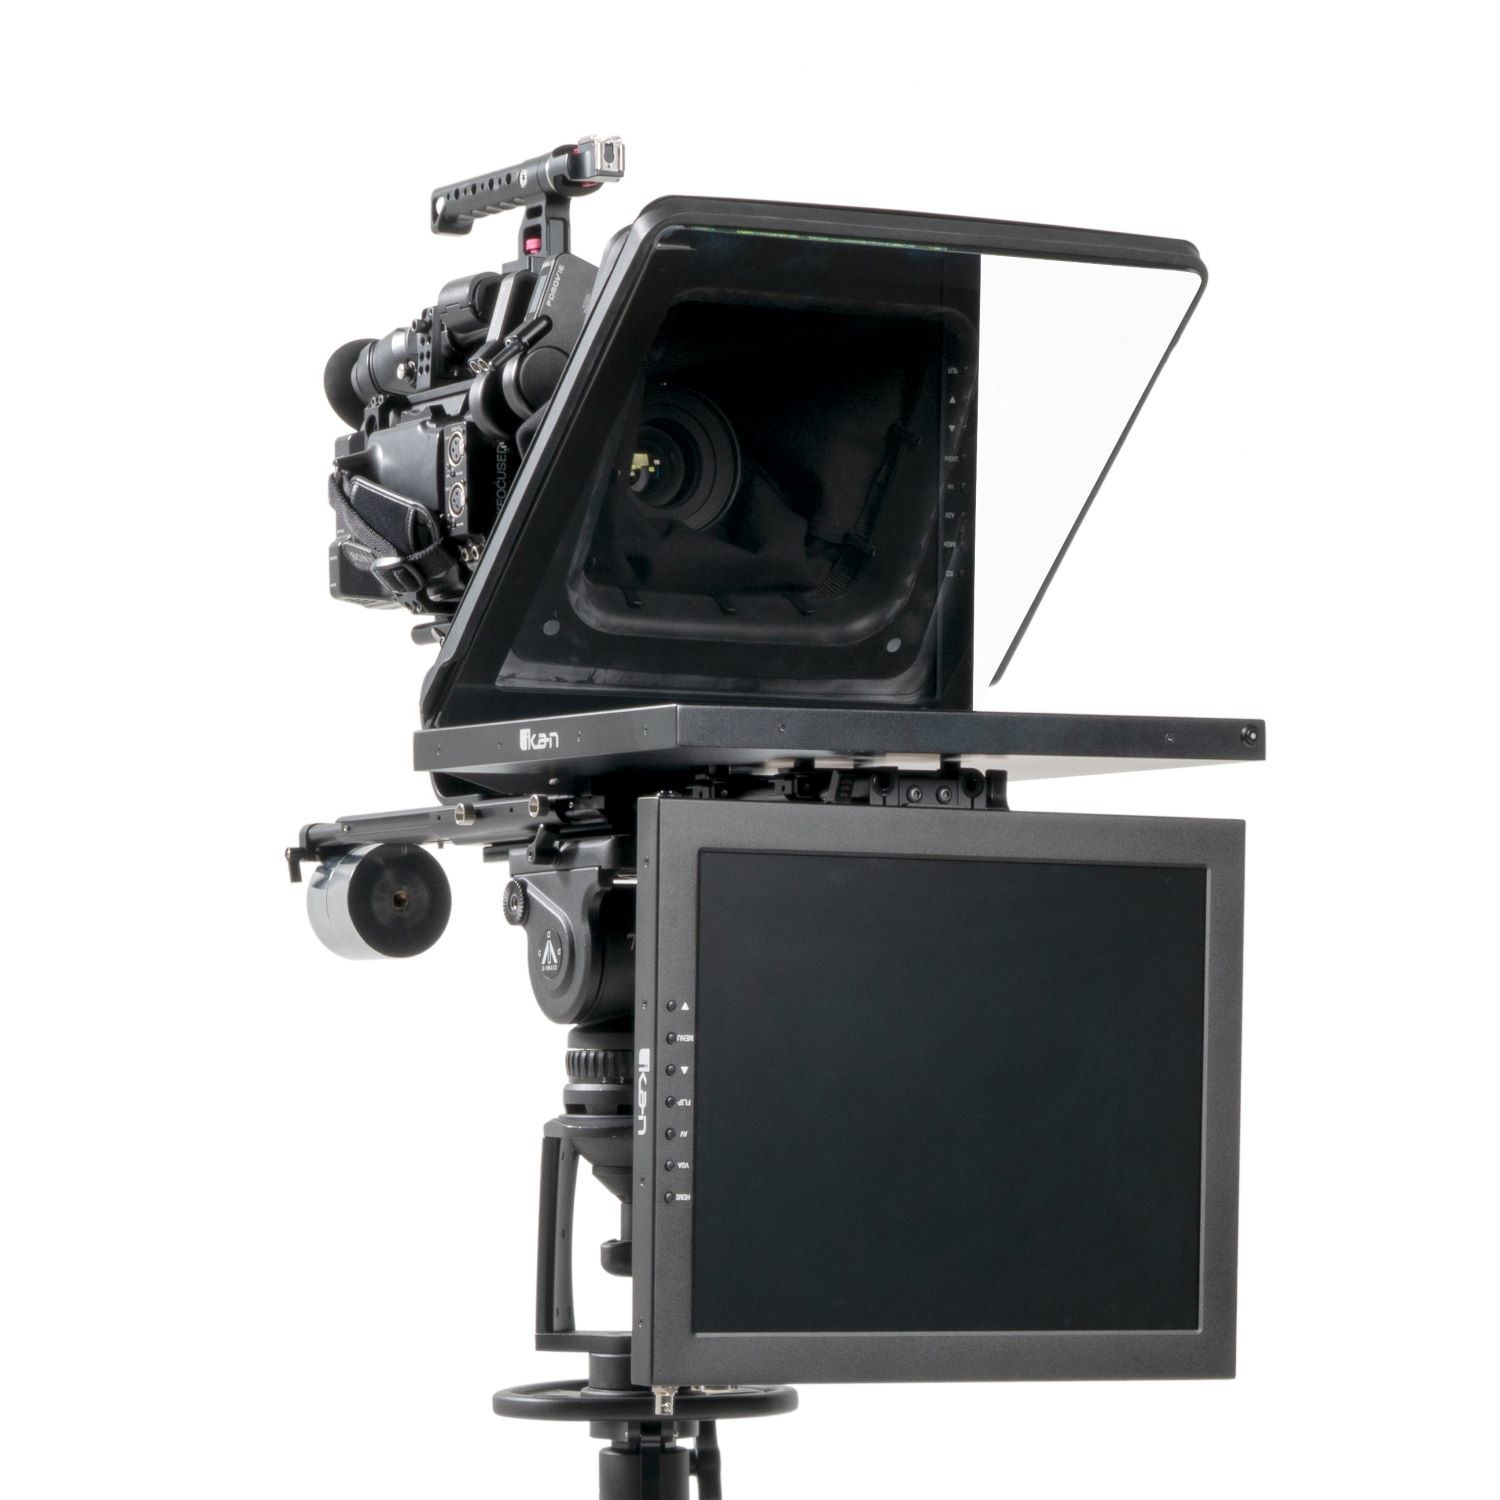
One of the best pieces of kit I have in my home studio is this Ikan 15-inch beam splitter teleprompter.
I do a lot of videos where I'm speaking directly to the camera, so a high-quality teleprompter is critical so I can speak naturally to my audience while maintaining eye contact with the camera.
With a large and bright 15-inch screen, the text on the screen is nice and big so I can easily read it from across the room. Now, my home studio is pretty small, so I'm no more than about eight feet away.

However, if you're shopping for someone that has a larger studio, this teleprompter can be set back much further, allowing for placement of additional cameras, lights, and other gear.
The teleprompter itself is about 25 x 20 x 16 inches and weighs about 22 pounds. These figures are just for the teleprompter, so once you add in a camera and lens, a tripod, and so forth, the entire setup is fairly large. That means it's probably more of a studio setup than something you'd want to travel with.
Still, I've been thoroughly impressed with this rig and can't recommend it enough!
Learn more about the Ikan Professional 15-Inch High Bright Beam Splitter Teleprompter
We Recommend
Top 5 Landscape Photography Accessories You Need in Your Bag

photo byjmatkins via iStock
Landscape photography is one of the basic types of photography that all levels of photographers do. You may be engaged in it as a fine art photographer, or as part of a project, or simply for your own enjoyment as snapshots.
Regardless of the reason for your landscape photography, there are landscape photography accessories and tips that will help you capture amazing outdoor photography images. Some of the nature photography accessories you already have, you simply need a good reason to get them out of your bag or closet.
Polarizer Filter

A polarizer filter is one of the most useful indoor or outdoor photography accessories a photographer can own. It should probably be among your first accessories if you are a beginner to DSLR or mirrorless cameras.
A circular polarizer like the Kenko Puro Slim Circular Polarizer Filter (shown above) is an excellent choice for polarizer filters.
Not only is this polarizer budget-friendly, but it’s also made of high-quality materials that make it a durable investment for the long-term.
Additionally, with 16 layers of multi-coatings, this filter will repel water, dust, oils, and fingerprints, that way you can spend more time actually taking beautiful photos and less time cleaning your filter.

photo by chonchit via iStock
Polarizer filters do so much for your images, too. They can remove or lessen glare and reflections from glass, water, and even the leaves of plants. One of my basic landscape photography tips is to use a polarizer, or at least consider using one, anytime you’re outdoors in sunlight.
By removing reflective glare, you can also eliminate or reduce atmospheric haze effects on your pictures. The results of this can include darkening the blue of the sky and making the clouds pop out from the sky.
Editor's Tip: Get Kenko’s latest updates and access to promos for discounted gear. Click here to sign up.
Sturdy Tripod

photo by shilh via iStock
Tripods are another must have nature photography accessories. You have many options in regards to size, weight, and functionality. The landscape photography tips list leaves a lot of choices open to you.
Travel tripods are generally very lightweight and will fold up compactly enough to fit in your camera bag or backpack. A professional tripod, such as the E-Image EK-610 tripod shown below, is useful for times when you require more stability.

For example, the EK610 has dual-stage aluminum legs that give your camera gear all the support it needs to capture sharp photos. Setup is a breeze too - the twist leg locks are easy to use, making deployment of the tripod quick and simple.
Another feature that sturdy tripods should have is rubber feet with spikes. Rubber feet keep the tripod in place while spikes offer an extra layer of stability on snow, ice, or uneven terrain.

This particular tripod even has a mid-level spreader to keep the legs in place in challenging conditions. In other words, this is a tripod that can do just about anything, just about anywhere!
Whether you opt for more stability or portability, the important thing is to have one with you. Certain styles of landscape photography are best done with a tripod. HDR, high dynamic range, photography and panoramic photography involve shooting multiple images and blending them together. Using a tripod ensures good image registration for stitching the images together.
Learn More:
Remote Release

photo by kamontad123 via iStock
Since you’re using your tripod for additional stability to improve your images, and essential extra landscape photography tip is to use a remote release to trigger your camera. It makes sense to use one to eliminate or reduce any possibility of camera shake.
The mechanical cable has been replaced by wired and wireless remotes. Some remotes also allow controlling other camera functions in addition to releasing the shutter. You may also be able to find a smartphone app for your particular camera, some of which are just like using your camera’s menu from the viewscreen.
Editor's Tip: One of my must-haves in my camera bag is a durable, bright light. For that, I use the LitraTorch 2.0 because it's supremly rugged, small, and portable. It's waterproof too. With 16 LEDs that emit 100, 450, or 800 lumens, you can use it for light painting, to see as you change camera settings, as a torch...you name it! It's simply a versatile, go-anywhere light that any landscape photographer should have in their bag.
Graduated Neutral Density Filter

photo by Ignacio Ruiz Casanellas via iStock
The more involved you find yourself in any style of landscape photography, the more you see a need for extra control over exposure and composition. Putting your camera on a tripod and using a graduated neutral filter is a useful method of taking full control of your outdoor photography.
What happens sometimes is that the foreground requires an exposure that ends up washing out the background or sky. Especially so when shooting in the Golden Hour or capturing sunset and sunrise images.

photo by Steven-Baranek via iStock
A graduated neutral density filter is clear on one side and darkens towards the other side. This lets you have one exposure setting with a balance of light to dark. Once you get used to using one, you’ll find a myriad of situations to put it on your lens.
Among my favorite outdoor photography accessories is the filter holder with square filters version of GND (graduated neutral density) filters. This allows for precise positioning of the filter in relation to the dark and light areas of your composition.
Camera Bubble Level

photo by 1001slide via iStock
Some newer cameras have a built-in electronic level. Accessing the viewfinder grids also works well. If your camera doesn’t have those features, one of the least expensive landscape photography accessories is the hot shoe mounted bubble level.
Operation is so simple. Mount your camera on a tripod, level out the rig with the bubble level. Especially when using ultra wide angle lenses, attempting panoramas, or using a GND filter, having a level camera makes for excellent images.
Learn More:
Camera Bag or Backpack

photo by anyaberkut via iStock
When you decide to start adding accessories and other gear to your initial camera and lens purchase, you need somewhere to put them, some way to carry them out to where to wherever you’re taking landscape photographs.
The old style of ever ready cases, or as I liked to call them never ready, has pretty much been supplanted by lightweight and extremely usable small bags. For nature photographers, many of the best bags are styled as a backpack.

photo by RossHelen via iStock
Backpack style camera bags aren’t solely landscape photography accessories, you will find yourself using your bag for most of your photo excursions. A nice plus about using the backpack style is they seem a little more secure. It’s harder to drop or have taken off of you when the bag is attached to you that way.
Padding or some form of protection is preferred as a bag feature. Your gear needs to be protected from accidental impact caused by dropping or by bumping into things. A soft bag with decent impact protection is perfect. Hard carrying cases are nice for travel or storage, but they are cumbersome for using outdoors in nature or on the street.
Landscape Photography Tips

photo by Oleh_Slobodeniuk via iStock
The most useful landscape photography tips focus a lot on exposure and composition. Practice new techniques and learn all the features of your camera in order to maximize your success in capturing great landscape photographs.
Take your camera off of the fully automatic green dot setting, play around with the special features of your own particular camera. Try out ideas that are new to you. Enjoy creating beautiful art and capturing good snapshots.
Plus, a few good accessories will be very beneficial to have on hand.
We Recommend
Top Accessories for Sony a6300, a6400 and a6500
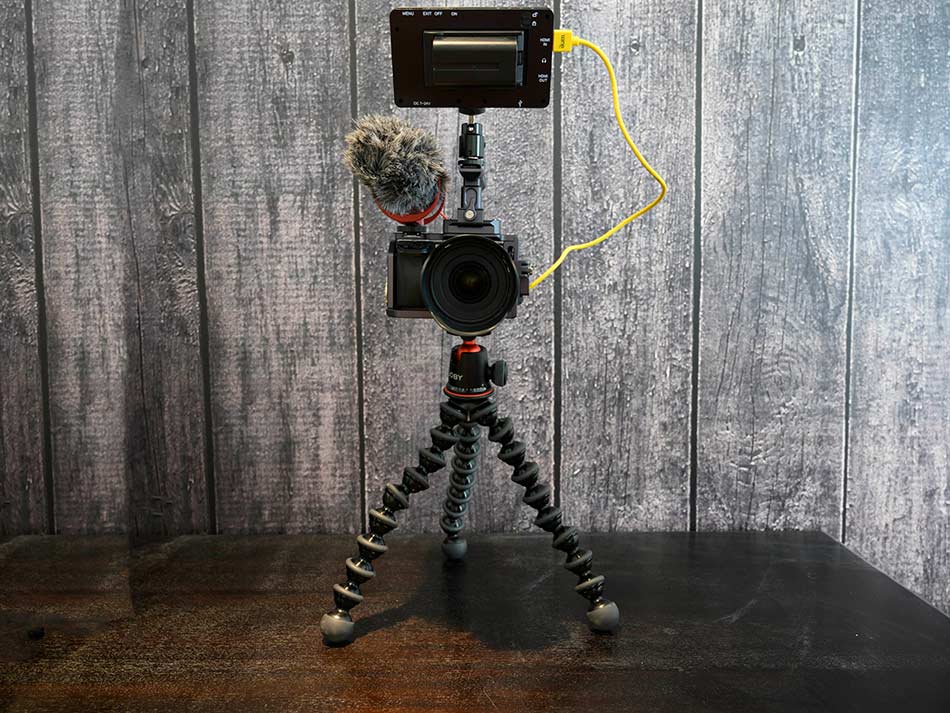
Those of you that know me know that I have been dabbling in video work lately.
I have to say that it's been exciting to use my cameras in a different way and create content that differs so much from what I've always done.
Getting started can be a bit of a bear, though. Having little to no experience in creating video content meant that I wasn't completely sure what accessories I needed to get the job done.
Now that I have slogged my way through, made a ton of mistakes, and now actually have a clue what I'm doing, I thought I'd share my thoughts on a few video accessories that I've found helpful.
I shoot with a Sony a6300, so that's where my frame of reference is coming from. If you have a Sony a6400 or a Sony a6500, these accessories will work for you as well.
Let's get started!
Top Accessories for Sony A6300, A6400 and A6500: Ikan Delta DH5e-V2 Field Monitor
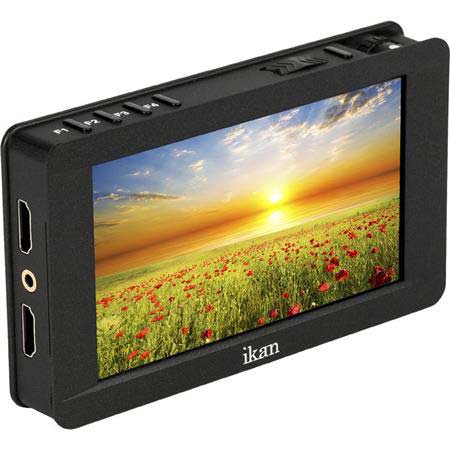
Having a field monitor is a must-have accessory for any videographer so you can actually see what you're filming.
But more than that, a field monitor like my Ikan Delta makes getting the correct focus and exposure miles easier
This rig is small, lightweight, and has stunning image quality. As you can see below, the monitor is crisp and bright, too.
The full HD screen offers 440 pixels per inch for a super clear picture, and the touch capability makes checking menu settings, exploring features, and zooming a breeze.
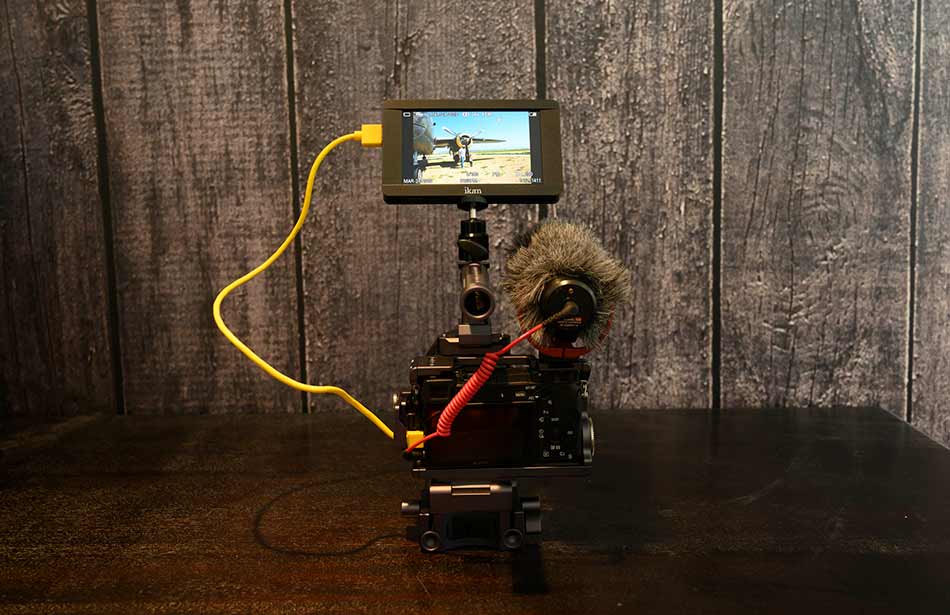
The Ikan Delta is equipped with software features that help me get better shots - guides, a histogram, and audio meters, as well as peaking, zooming, and false color.
This unit has HDMI input and output (with 4K UHD support), a USB port for loading 3D LUTs, and a 3.5mm audio jack as well.
It's the perfect companion for any videographer, but as a relative newbie, I can tell you it's one of the most valuable accessories I've bought thus far.
Top Accessories for Sony a6300, a6400 and a6500: Litra Torch LitraPro
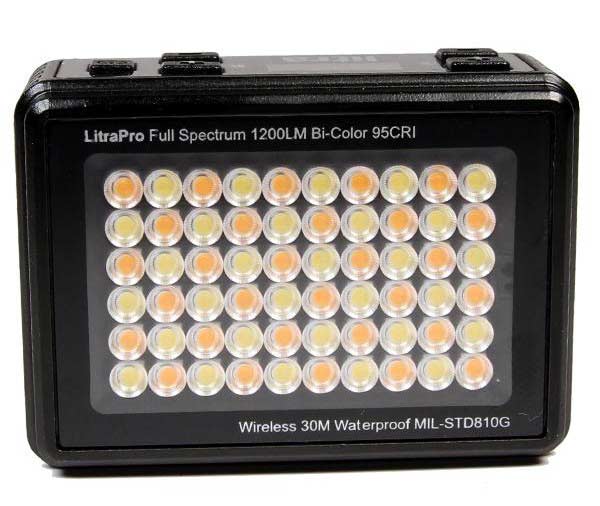
If you want to up the production value of your videos, you need a good light source (and great audio, too...but that's another topic).
The problem with lighting for video is that so many of the options are big, bulky, hot, expensive, or some combination thereof.
That's not the case with the LitraPro LED light...
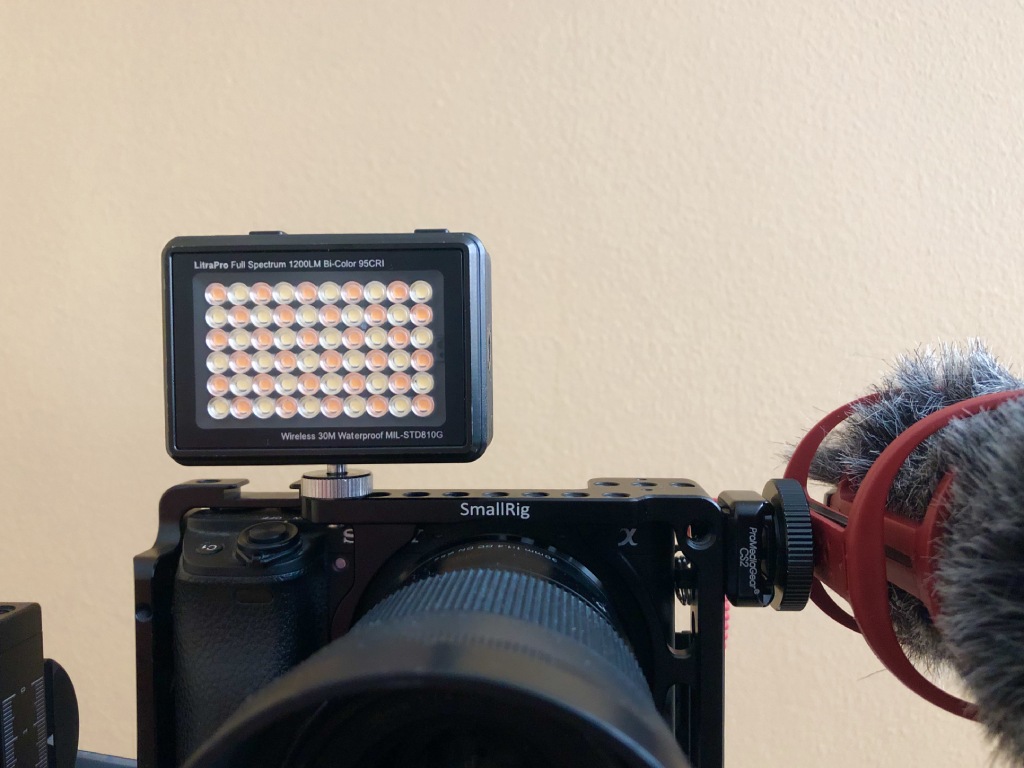
The LitraPro has a whopping 60 LEDs that put out 1200 lumens. It's fully dimmable, too, so you can max it out at 100 percent power or rock it at 1 percent - whatever you need!
This thing puts out gorgeously even and clean light with 95 CRI and a 70-degree beam angle for broad coverage. It's bi-color and has an adjustable color temperature of 3000-6000k to meet your needs.
And, as you'd expect from a Litra Torch product, it's incredibly small and lightweight - just 2.75 x 2 x 1.2 inches and 6 ounces.
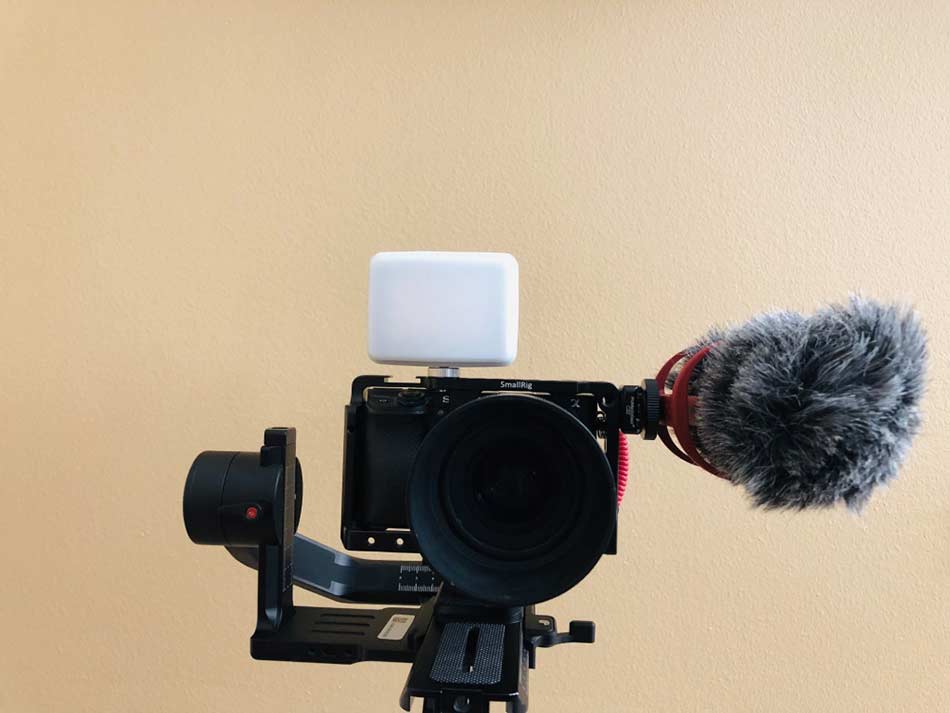
On top of all that, the LitraPro is Bluetooth compatible, waterproof up to 90 feet, and has a 10-hour battery life to boot.
If you need a high-quality light that's easy to use, rugged and reliable, and puts out beautifully crisp light, the LitraProshould be on your radar!
Check out my full LitraPro review for more details.
Top Accessories for Sony A6300, A6400 and A6500: Joby GorillaPod 5K Kit
I waffled back and forth between the Joby GorillaPod 5K and the GorillaPod 3K, and ultimately went the 5K route even because it's Arca-Swiss compatible.
This little guy has been invaluable thus far because it allows me to use it as a tripod or wrapped around an object for stability, as well as a grip when I need on-the-go footage.
It also features Joby's BallHead 5K, which has independent 360-degree panning and 90-degree tilt so you can get the precise positioning you need.
Setup is fast and easy thanks to the Arca-Swiss compatible quick release plate, and with a weight rating of up to 11 pounds, you can stack a ton of gear on it and still have all the stability you need.
Top Accessories for Sony A6300, A6400 and A6500 Ikan Stratus Cage
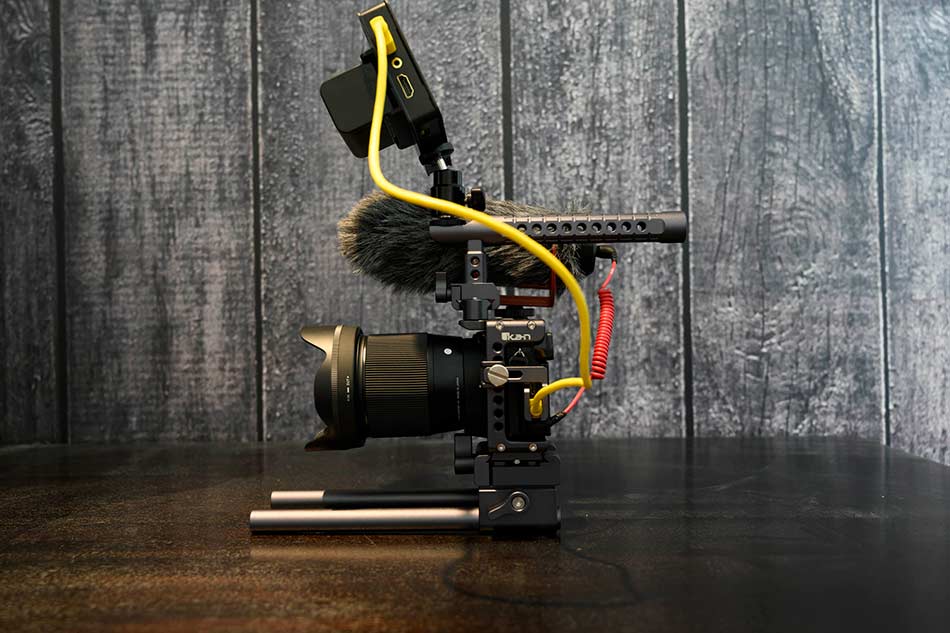
Another top accessory you need for videography is a rock-solid cage.
I chose the Ikan Stratus Cage because it's form-fitted to the a6300 (and a6400 and a6500) so you can add tons of accessories without having a big, cumbersome cage wrapped around your camera.
It's base on an Arca-Swiss plate, so you can mount it directly to an Arca-Swiss compatible tripod.
There are 1/4"-20 and 3/8"-16 threaded mounts all over the cage so you can add all the accessories you need to get the job done. There's a shoe mount and an ARRI rosette for more options for mounting gear.
As you can see above, I just have my field monitor and mic attached to the cage, so I have plenty more room for more accessories down the line.
Top Accessories for Sony A6300, A6400 and A6500: Rode VideoMic GO
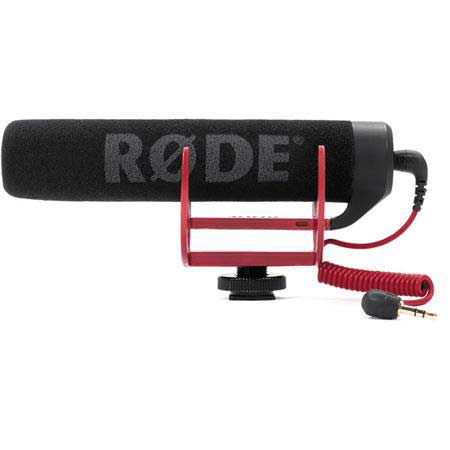
As any seasoned videographer will tell you, your videos are only as good as the audio.
That means that a high-quality mic is a must so that 4K UHD video you shoot has crystal clear audio to go with it.
I chose the Rode VideoMic GO for a few of reasons.

First, Rode has a long-standing reputation for quality and performance, so a Rode mic was a must.
Second, I didn't want to spend a giant amount of money, so I wanted a budget-friendly option that would still get me great results (this mic is $99.00 at the time of writing).
Lastly, I wanted a mic that was compact and lightweight, and the VideoMic GO certainly delivers on that front.
As you can see above, it's not obtrusive in any way, and even though it's a tiny little thing, it still gets me excellent audio that picks up my voice while minimizing surrounding sounds.
Top Accessories for Sony a6300, a6400 and a6500: Shure VP83F Lens Hopper
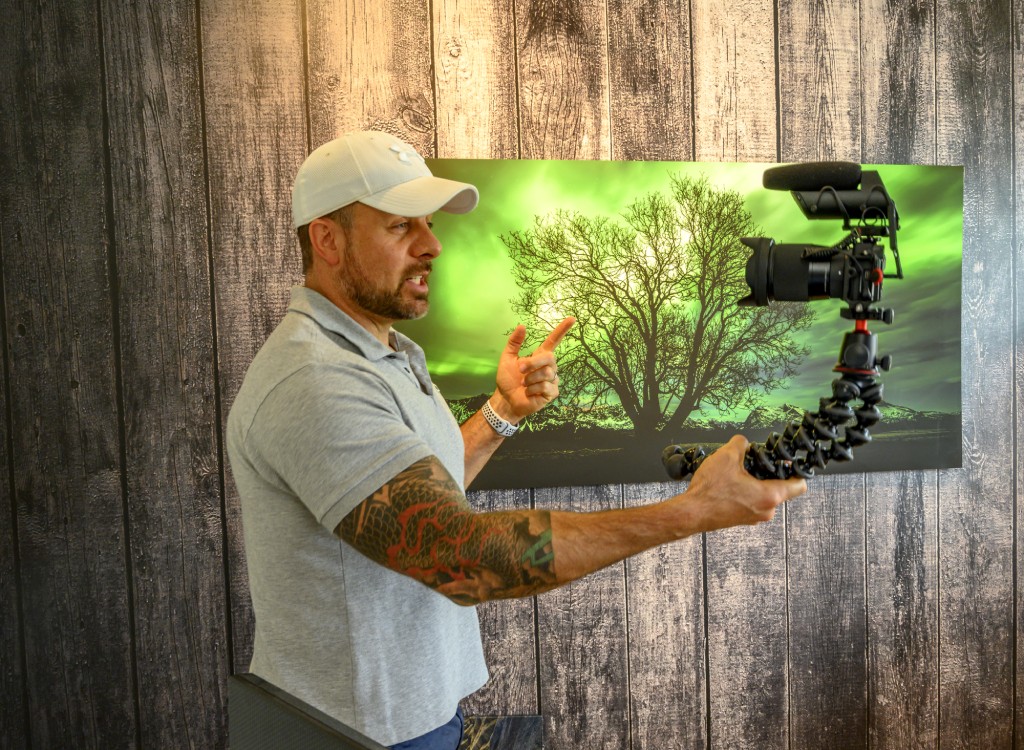
I know I've already recommended a microphone, but the Shure VP83F Lens Hopper is so good that it warrants inclusion on this list.
Though the Rode mic described above is a great microphone, this Shure mic is a step above.
Yes, it's more expensive, but that extra money gets you plenty of extra features...
The biggest benefit of this mic is that it can record digital audio by itself - no need to rely on the camera to do so (though that's an option if you need).

The shotgun design with electret condenser cartridge and integrated shock mounting system offers excellent audio quality with top-of-the-line isolation of unwanted noise.
Additional features include:
- Dedicated audio output so you can monitor audio in real-time
- Low self-noise and high sensitivity with a wide frequency range that results in natural audio reproduction
- Easy access to the MicroSD card for quickly swapping cards
- Highly directional supercardioid/lobar polar pattern that rejects off-axis audio
It runs on two AA batteries, mounts to the hot-shoe on your camera, and comes with a windscreen, too.
If you want to step up your audio game and have the budget to do so, I strongly suggest investing in the Shure VP83F!
Get more details on this fantastic little mic in the video above by Jason Vong.
Top Accessories for Sony A6300, A6400 and A6500: Andycine Hot-Shoe Stand
An unsung hero of the Sony accessory world is a solid hot-shoe stand that you can use to mount accessories like a flash, LED lights, a monitor, and so forth.
For my money, it doesn't get better for this purpose than the Andycine Hot-Shoe Stand shown above and below.
With 176 degrees of viewing angles and 360-degree rotation, this stand makes shooting video a much easier task.
Installation is a breeze as is making adjustments, that way you spend less time messing around with your gear and more time actually making videos.
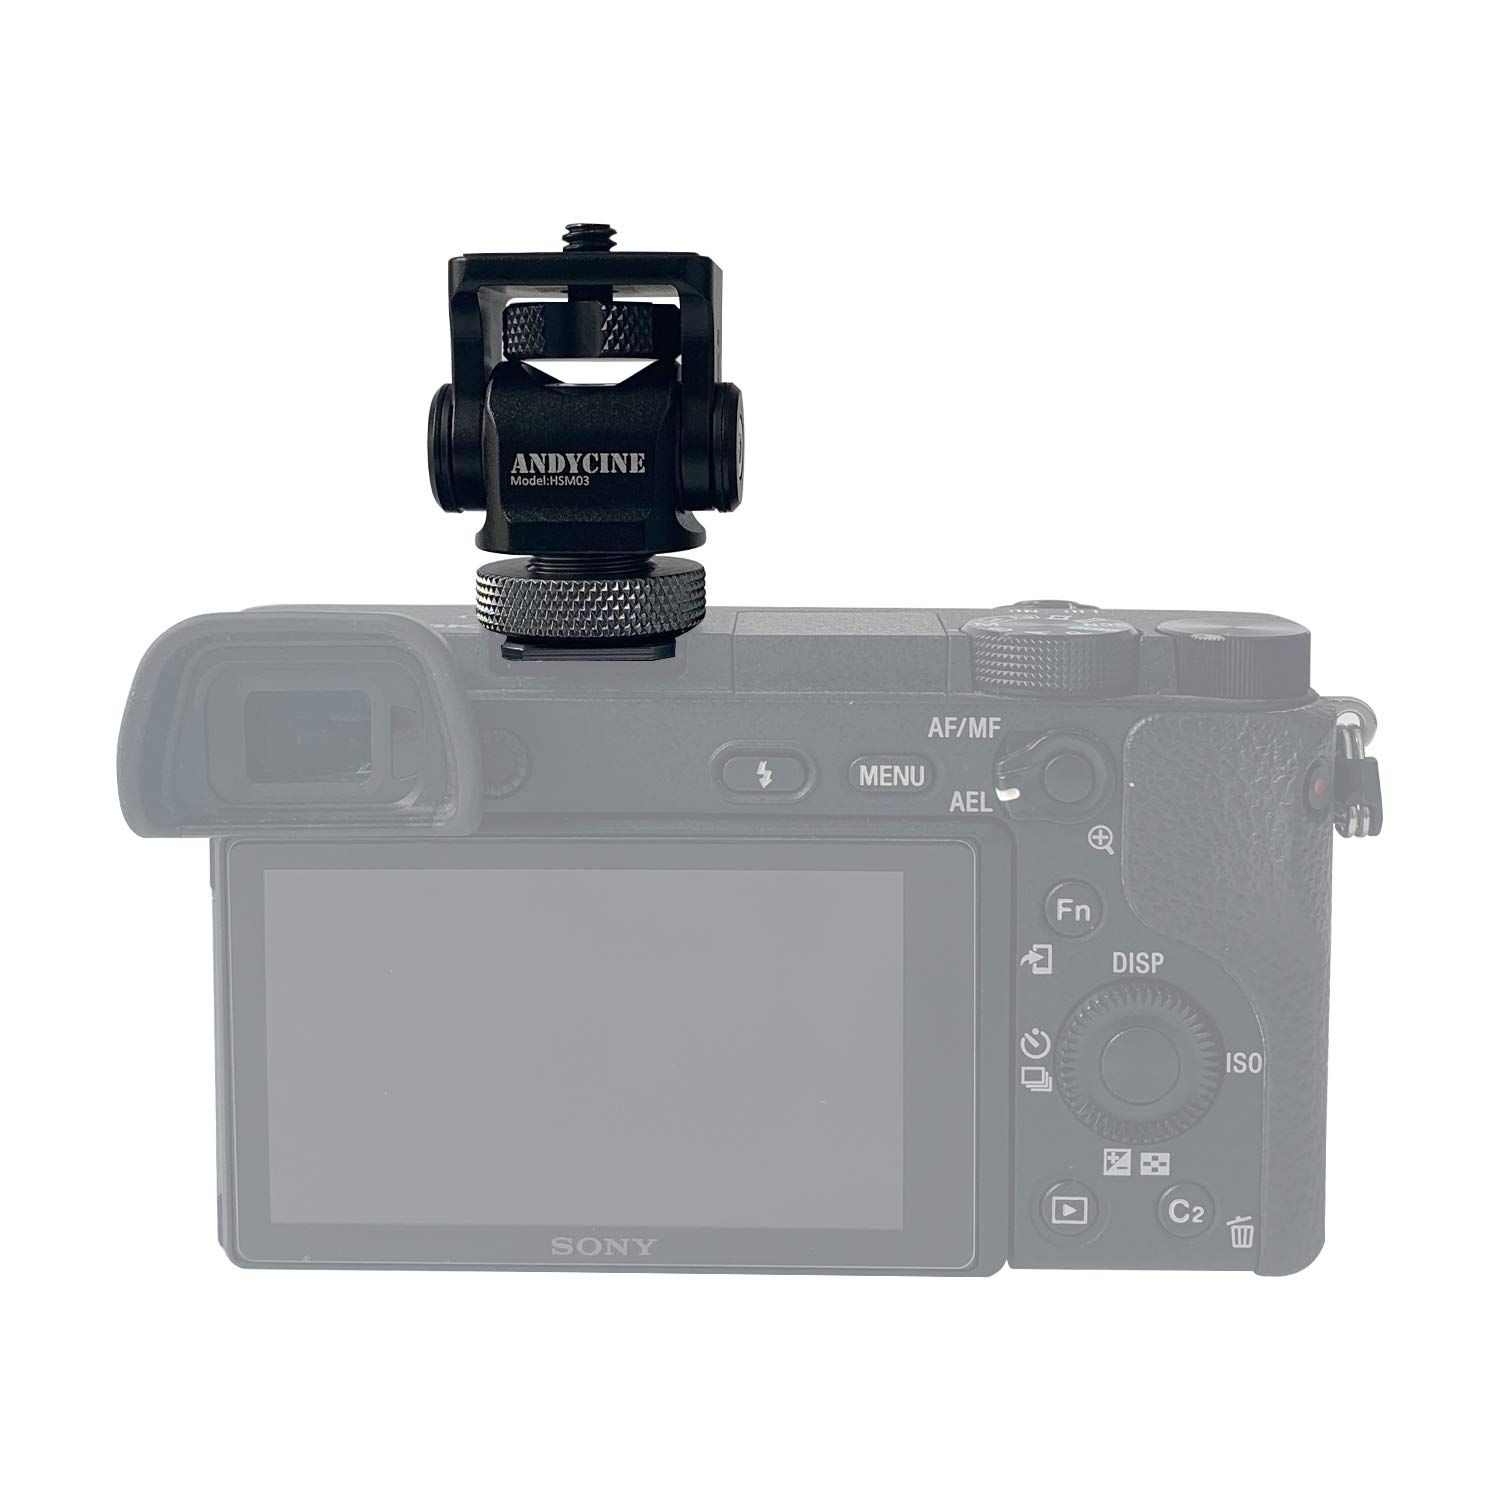
There's an upper 1/4-inch screw for fast attachment to accessories and on the bottom is a standard shoe and 1/4-inch screw so you can quickly attach the stand to your camera's hot shoe or other rigs.
It's small and lightweight, too, so you won't feel like you're carry around a ton of extra weight by adding this little guy to your camera.
Top Accessories for Sony a6300, a6400 and a6500: Good Glass
Just like a microphone enables you to capture the audio that makes your video sing, a high-quality lens will make your camera more capable of capturing footage that makes your videos shine.
But don't confuse "high-quality" with expensive.
Sure, there's tons of really good lenses out there with giant price tags, but that's not the route I chose.
I picked up a Sigma 16mm f/1.4 DC DN Contemporary Lens and a Sigma 30mm f/1.4 version that are absolutely outstanding, and neither one was particularly expensive as lenses go (the 16mm was $400 and the 30mm was $289).
In both cases, these lenses are ultra-light, incredibly sharp, and have stepping motors that enable quick and quiet autofocusing that's so crucial to video.
Additionally, both lenses have a huge f/1.4 aperture, which is great for getting gorgeously blurred backgrounds in my videos and for shooting in low-light conditions.
I've been blown away by the ease of use of these lenses and with the quality they produce when I'm shooting video.
Combined with the other accessories I've highlighted above, I think I have a pretty darn good setup going!
We Recommend
Top Camera Lenses for Video
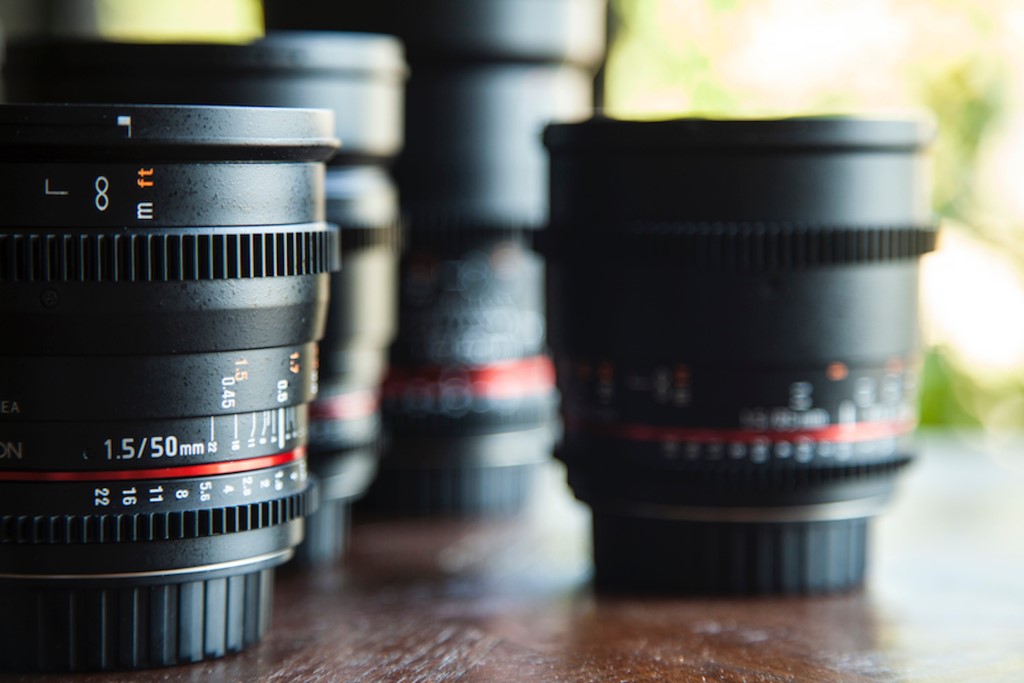
Photo by ShareGrid on Unsplash
Any experienced photographer knows that no matter how good the camera, you need a great lens in front of it to maximize the quality of photos and videos.
That means that if you use a camera that can shoot incredible video with a lens that can’t, your videos will suffer for it.
Thankfully, most lens manufacturers make at least a few incredible camera lenses for video.
I’m only mentioning two lenses each for Sony, Canon and Nikon because, let’s face it, they have the largest share of the market and it’s a great place for you to start your search.
I also tried to highlight the best lenses for video in a variety of price ranges, so whether you’re on a tight budget or not, one of these lenses should work for you.
Canon EF 24-70mm f/2.8
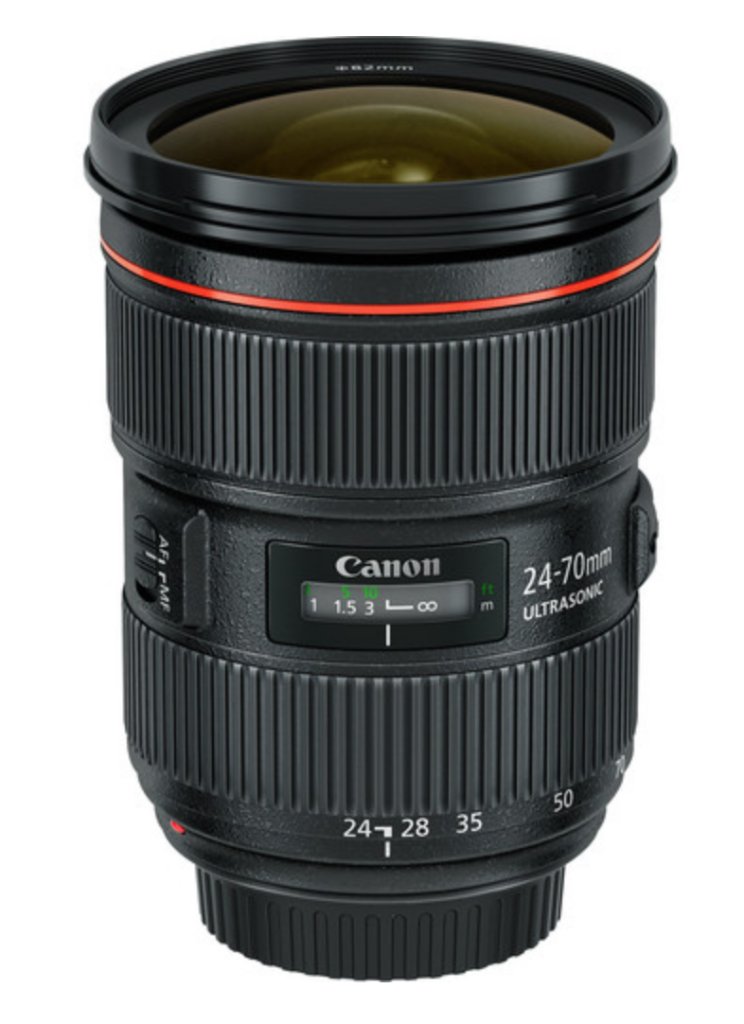
The Canon EF 24-70mm f/2.8 is versatile because of its zoom range. If you don’t know exactly what kind of shoot you’re getting yourself into, one that can handle a wide variety of them is key.
Canon is also widely known for its L-lens technology, which is essentially a way Canon classifies its professional lenses which hold up really well under extreme duress (crazy weather, dust, etc).
If you invest in this best Canon lens for video, you’ll know it will last you a lifetime.
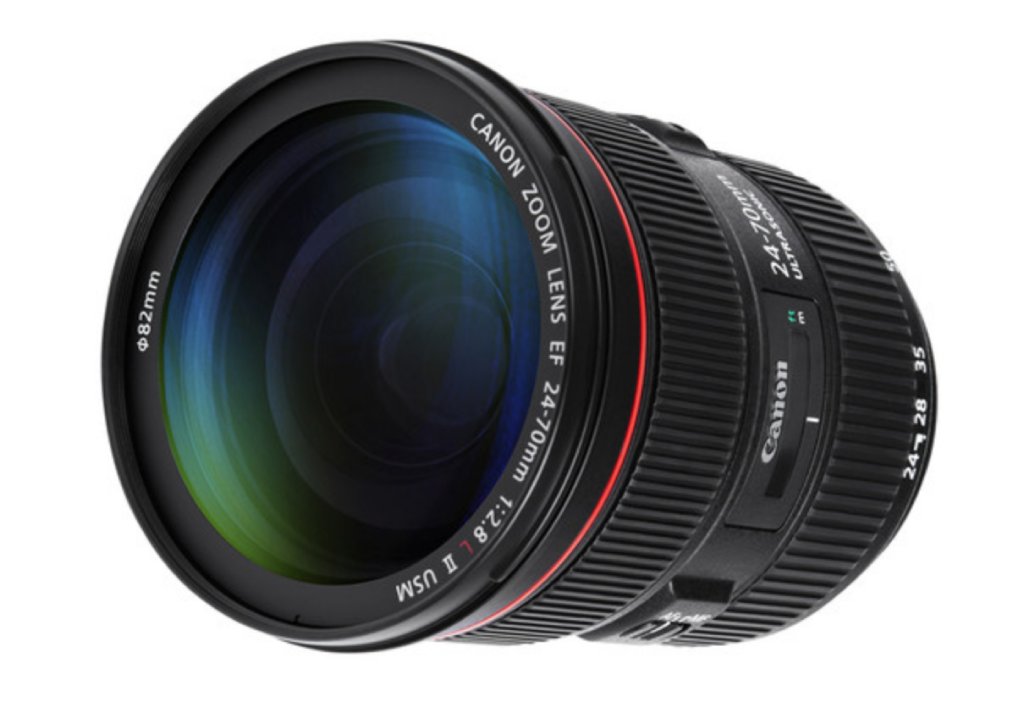
Canon 24-70mm f/2.8 Specs:
- Aperture range from f/2.8-f/22
- 9 rounded diaphragm blades
- Ring-type ultrasonic motor (USM) AF system
- 28.4 oz
You can purchase the Canon 24-70mm f/2.8 on Adorama for $1,600.
Canon EF 35mm f/1.4
This lens, as compared to the last Canon, is designed specifically for top-tier cameras. The 35mm focal length is ideal for making videos.
This Canon lens comes with Blue Spectrum Refractive Optics, which prevents color fringing by dispersing light evenly across the lens. It also aids in improving low-light performance.
Canon 35mm f/1.4 Specs:
- 35mm fixed focal length
- Aperture range from f/4-f/22
- Ring-type ultrasonic motor (USM) AF system
- 9 rounded diaphragm blades
- 26.8 oz
You can purchase the Canon 35mm f/1.4 on Adorama for $1,650.
Quick Tip: Have a micro four-thirds camera but want to use a Canon EF lens? No problem! Just invest in a lens mount adapter like the Ikan Commlite AEF-MFT shown below, and you can use either of the Canon lenses above (or dozens of others) with your micro four-thirds camera.
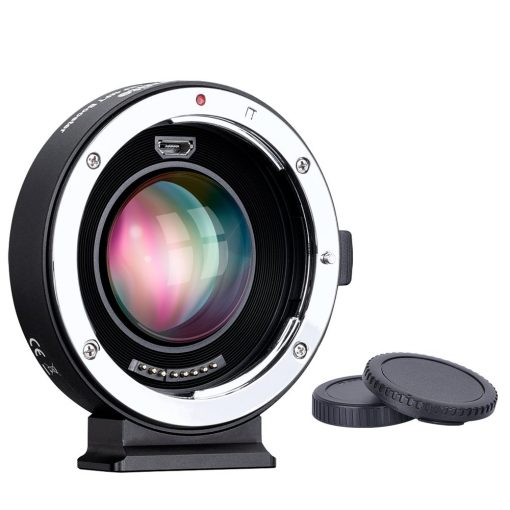
Not only does this lens adapter enable you to use EF lenses, but it also includes handy features like a 0.71x focal reducer booster, autofocus functionality, electronic aperture control, and a built-in IS stabilization function that supports the EF lens’s image stabilization (though continuous autofocus is not available in video mode).
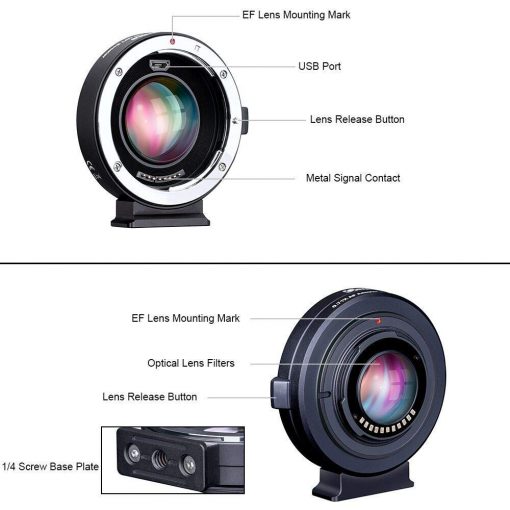
The housing is made of aluminum alloy, so it’s lightweight yet incredibly durable. The ¼ standard thread on the bottom of the adapter lets you mount it to a Stratus cage for additional support or it can be attached to a monopod or tripod.
In other words, this handy adapter will help you open up all sorts of creative pursuits with your videos and does so at a price point that won’t break the bank.
Nikon 50mm f/1.8G

This is the cheapest lens on this camera lenses for video list, but that doesn’t mean it isn't the best Nikon lens for video.
This 50mm lens is perfect for shooting videos where you don’t want any distortion that would come with a wide angle or telephoto lens. That makes it a perfect match for documentary style videos.
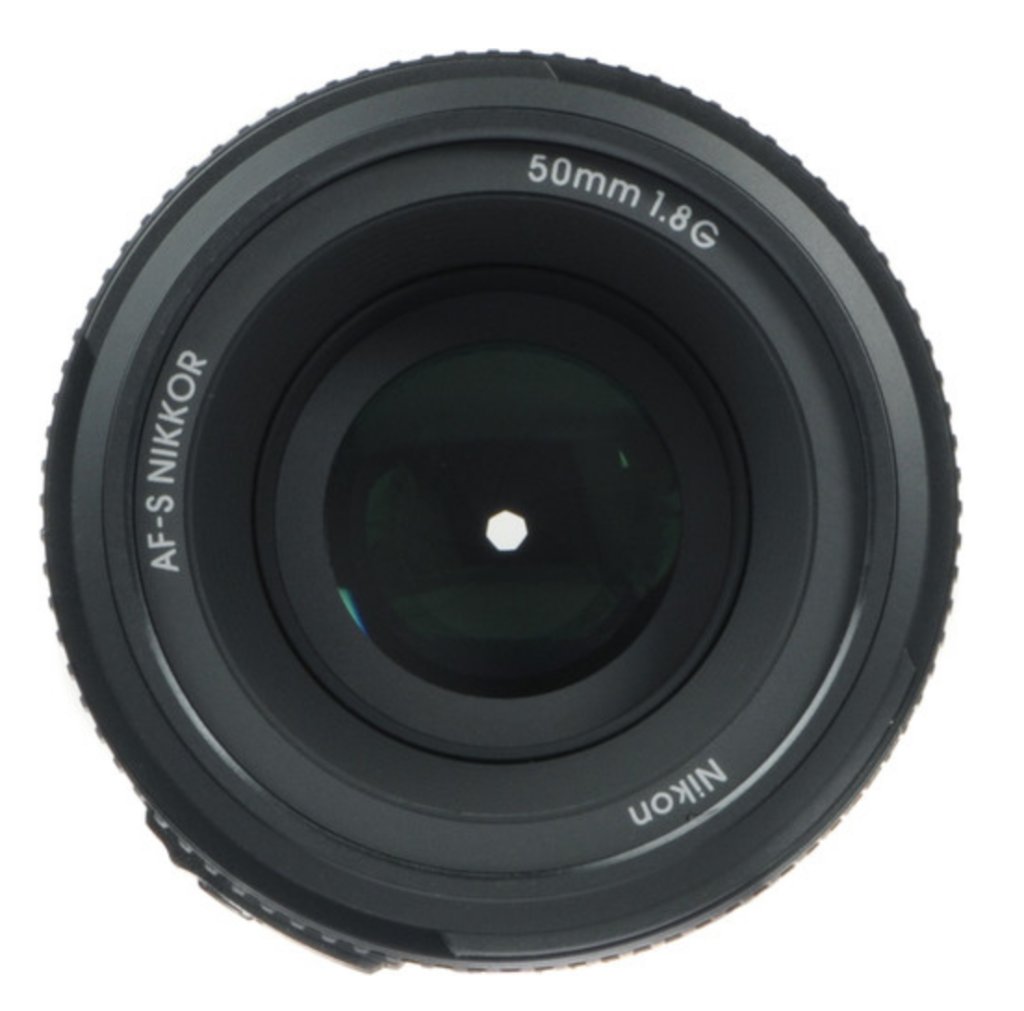
The Nikon 50mm f/1.8G Specs include:
- Fixed focal length of 50mm
- 7 rounded diaphragm blades
- Silent Wave Motor (SWM) for quiet AF operation
- 6.6 oz
You can purchase the Nikon 50mm f/1.8G on Adorama for just $175.
Learn More:
Nikon 24-70mm f/2.8G
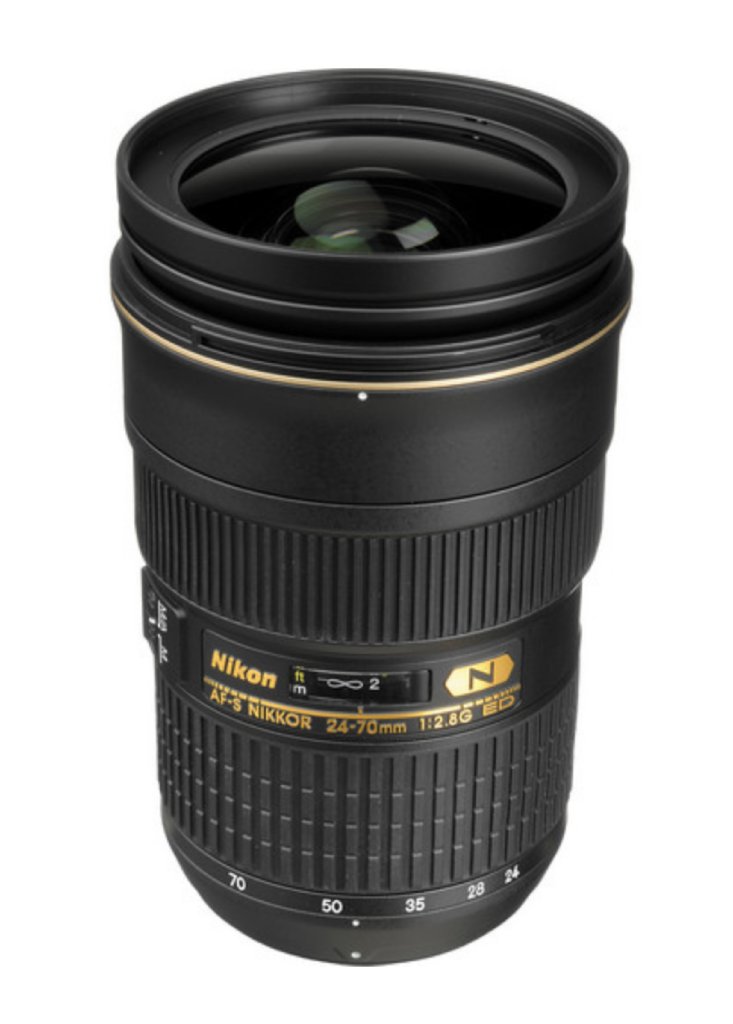
I love the Nikon 24-70mm f/2.8G because it can handle anything. It zooms incredibly quickly in tight spaces, which is excellent for events videographers, and the zooming range allows you to get all of the shots you need, whether they are close-up portraits or wide shots of the whole room.
B&H describes this Nikon as the “workhorse of the pros,” which is a pretty accurate reflection of everything this lens can do.
The Nikon 24-70mm f/2.8G Specs include:
- Versatile standard zoom
- Aperture range from f/2.8-f/22
- 9 rounded diaphragm blades
- 1.25’ min focus distancing
- 2 lbs.
You can purchase the Nikon 24-70mm f/2.8G on Adorama for $1,450.
Sony 16-35mm f/4
The Sony 16-35mm f/4 is the best wide zoom for videographers on our list, but it isn’t incredible for shooting in low-light scenarios due to its fixed f/4 aperture.
It’s got a quick AF, and controlled distortion. It’s built almost entirely out of metal, and I love carrying my Sony 16-35mm f/4 with me overseas because of that durability of construction.
Plus, since this lens has built-in stabilization, you get an extra 4 stops of stabilization if your camera can’t handle it on its own.
The Sony 16-35mm f/4 specs include:
- Full-frame E-mount wide-angle lens
- Aperture range from f/4-f/22
- 7 circular aperture blades
- Min focus distance of .82 feet
- OSS stabilization
- 18.2 oz
You can purchase the Sony 16-35mm f/4 on Adorama for $1,248.
Sony 55mm f/1.8
The Sony 55mm f/1.8 is probably my favorite prime lens for shooting video. For the $1,000 mark, the vignetting at f/1.8 is impressively low, and its lightweight and easy to carry.
Besides, 55mm is a great focal length for all kinds of video pursuits - vlogging, low-light situations, documentaries...you name it!
This lens is super sharp, particularly at the center, even when shooting at f/1.8. The sharpness only gets better as you stop down to f/2.8 and f/4.
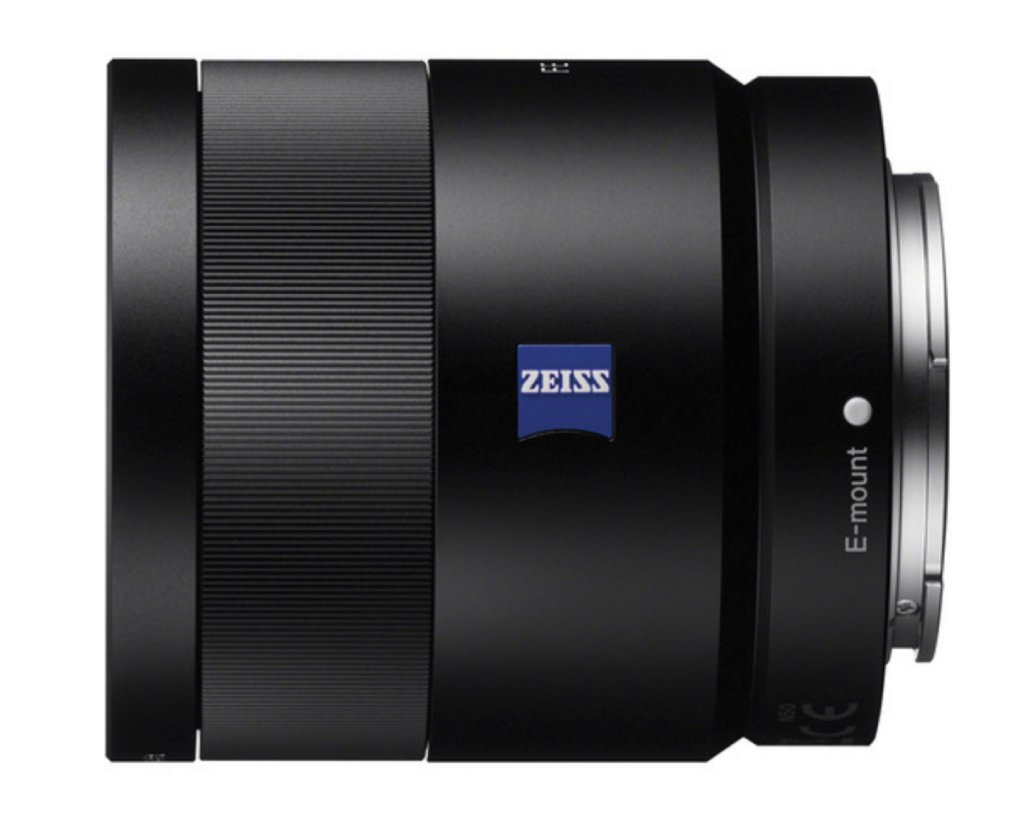
Sony 55mm f/1.8 Specs include:
- Aperture range from f/1.8-f/22
- Min focus distance of 1.64’
- 9 rounded diaphragm blades
- 9.9 oz
You can purchase the Sony 55mm f/1.8 on Adorama for $1,000.
Learn More:
We Recommend
Top Monopods of 2019

photo by Maor Winetrob via iStock
The great thing about tripods is the superb stability they offer. The bad thing is that many tripods are both heavy and bulky - two features that not many photographers really want!
Likewise, some tripods are difficult to set up, and a time-consuming setup process can cause you to miss shots.
Tripods are also banned in some locations, so carrying a big, heavy, and difficult-to-deploy tripod with you won't even do you any good.
The alternative - and it's a good one, if you ask me - is to carry a monopod.
Truthfully, you could stand to have both a tripod and a monopod, that way you can customize your kit to the situation.
But what should you look for in a monopod? And what are the best monopods available today?
Let's find out...
Monopod Features

Photo by Thomas William on Unsplash
The features you want in a monopod aren't any different from those you want in a tripod:
- Load capacity - How much weight can the monopod support? You want to be sure your gear (and future gear) can be supported.
- Grip - Is there a grip, and if so, what's it made of? Rubber grips usually provide more...grip...and they tend to be more durable than their foam counterparts.
- Leg sections - How tall can the monopod be extended? How do the leg sections lock into place? Taller monopods are heavier due to a larger number of leg sections, but they might be more versatile. Leg locks usually come in twist or flip lock form - twist locks offer more security, but flip locks can be faster to operate.
- Head - Does the monopod come with a head? If so, is it a ball head, a video head, a pan head?
- Price - What is your budget?
Take these factors into consideration when shopping for a monopod, and you'll be able to find something that meets your specific needs.
Below, I've listed three top monopods for 2019 that tick all the boxes.
E-Image MC800 Monopod With 630FH Fluid Head

This is the monopod that made me a monopod guy.
I fully admit that I have been a die-hard tripod guy for decades, but I finally saw the advantages of using a monopod thanks to the MC800.
For starters, this monopod offers an 8.8-pound load capacity with the fluid head attached (over 44 pounds without!), which is far more than I need with a mirrorless camera and lens. But having that extra capacity for future reference is definitely nice.
The foam grip is ergonomic, comfortable, and grippy, and thus far has held up very nicely with everyday use. Granted, I haven't had this monopod for years and years, so time will tell how the foam grip performs over the long haul.
It has four carbon fiber leg sections that take it from a minimum height of 31.5-inches up to a maximum height of 82.7-inches. That's a ton of variability in terms of the eye level and perspective of my shots. The flip leg locks offer secure locking for all leg sections too.
The included fluid head - though it is quite large - is absolutely killer. It offers supremely smooth movement for panning with a subject and for shooting video.
At the bottom of the monopod is a fluid base that allows for smooth 360-degree rotation and 180-degree tilting. That's an especially attractive feature that's not found on many monopods. The three deployable feet are a nice touch as well, and give you even more stability when shooting photos and videos.
At $199.99, it's not the cheapest monopod out there, but then again, cheap monopods aren't built this well, nor do they offer this many features.
Dollar for dollar, I think this is one of the very best monopods you can get right now.
Learn more about the E-Image MC800 Monopod With 630FH Fluid Head
Sirui P-326 Monopod

Another monopod worthy of a look is the Sirui P-236 shown above.
With a 22-pound load capacity, it can't match the load capacity of the E-Image monopod, but 22 pounds is still nothing to frown about. That's more than enough capacity for a camera, a big lens, and other accessories like a cage, microphone, on-camera light, and so forth.
The molded foam grip offers cushioning and the ability to hold the monopod firmly while the six carbon fiber leg sections offer up to 60.6-inches of height. This means that most photographers will have to hunch down to see through the viewfinder, which isn't ideal.

This model has silicone twist locks for quick leg extensions and locking which enables you to get set up to get your shots with ease. The fact that this monopod weighs well under one pound also makes it easy to carry around.
There is no head with this monopod, which is part of the reason why it's so inexpensive - $99.90 at the time of this writing.
Learn more about the Sirui P-326 Monopod
Manfrotto XPRO Aluminum Monopod with Fluid Video Head

One of the better aluminum monopods on the market today is this rig, the Manfrotto XPro.
This monopod can safely support up to 11.02 pounds with the included fluid video head.
The long foam grip gives you plenty of real estate for grasping the monopod while the fluid head has a long extension arm that gives you excellent freedom of movement.
With just four leg sections, you'd expect this monopod to have a short maximum height, but that's not the case - it extends up to 80-inches, giving even the tallest photographers a comfortable shooting experience. The beefy flip leg locks are easy to manipulate, but their size does present the possibility of accidentally disengaging the lock if you catch it just right.

The included fluid video head has a built-in counterbalance system for providing improved stability when shooting with heavy lenses. Movement is further enhanced with fluid pan, tilt, and swivel motion of the monopod's base. Like the E-Image monopod, this one has three fold-down legs that offer additional support.
All of these features add up to the biggest price tag on this list - $243.86 at the time of this writing.
Learn more about the Manfrotto XPro Aluminum Tripod With Fluid Video Head
We Recommend
Tripod vs. Monopod: Which is Best for You?
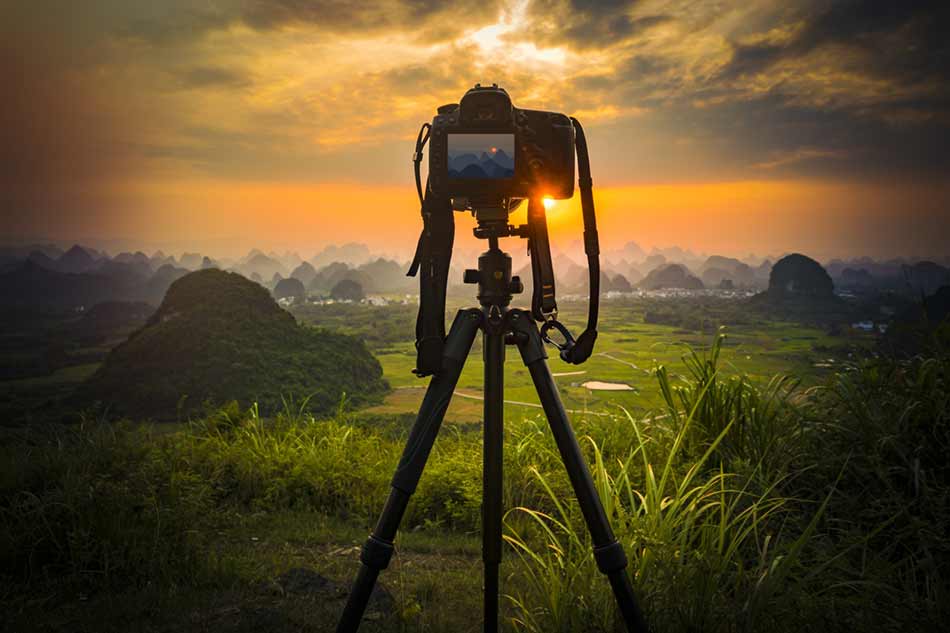
Photo by shilh via iStock
Monopod vs Tripod
The tripod vs monopod argument is age-old, and if I’m being honest with you, I own both.
That’s because both tripods and monopods have their pros and cons. In some situations, a tripod is simply a better choice. But in others, a monopod works much better.
If you can only afford one, then allow me to break down the tripod vs monopod debate for you so you can make an informed purchase.
Pros of Tripods
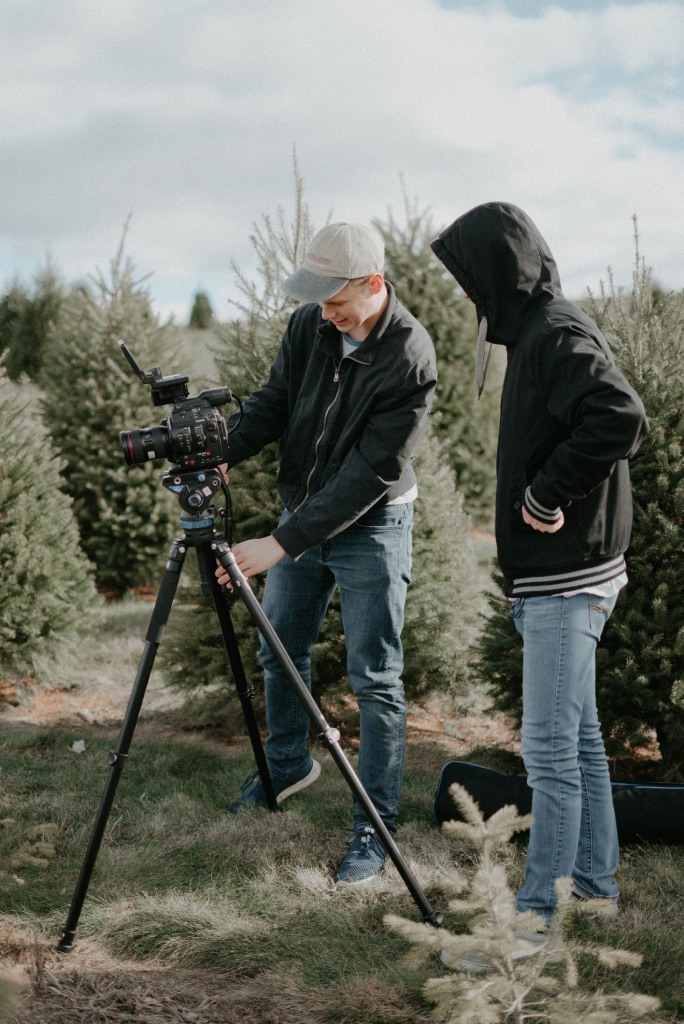
Photo by Austin Pacheco on Unsplash
The number one pro of tripods is that they are steady. It’s hard to go wrong with three legs joined together and capped off with big, rubber feet to keep it in place.
You can set your camera on a tripod, walk hundreds of feet away from it, and use a remote shutter to take photos. There’s no need to be worried that your photography gear might crash to the ground without you there to support it.
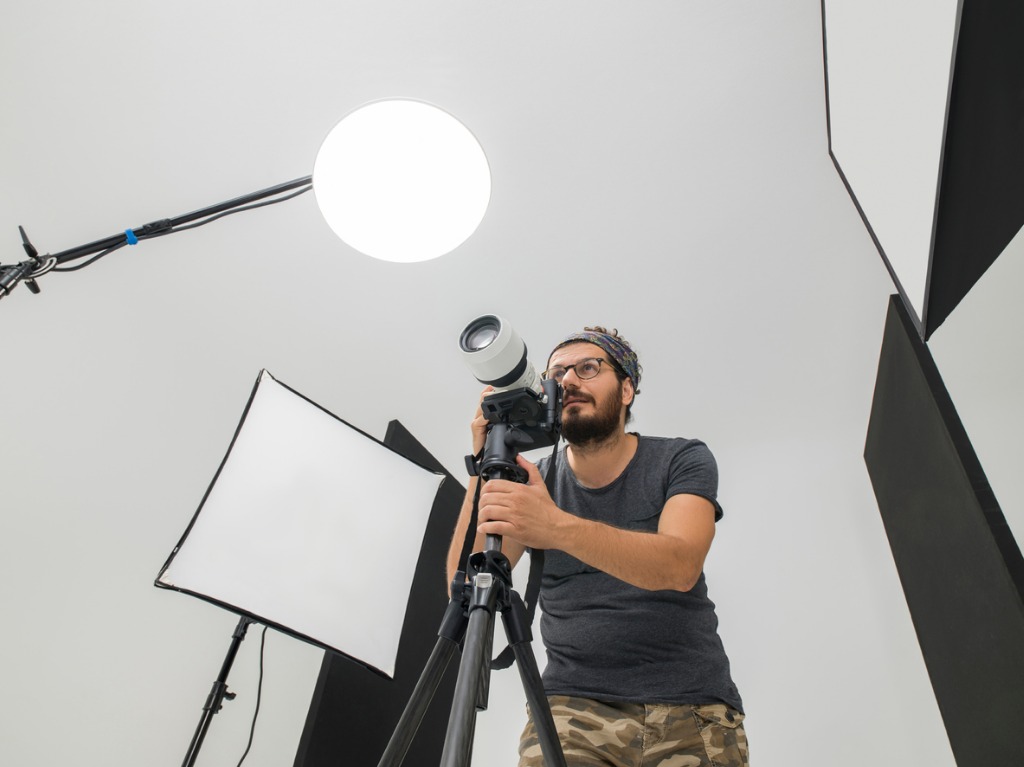
Photo by ozgurdonmaz via iStock
Additionally, if you’re a macro, still life, or studio photographer then there isn’t a tripod vs monopod argument for you: you need a tripod.
A steady hand only gets you so far. To capture tack-sharp images in these contexts, having a tripod is a must.
Tripods also provide the additional steadiness so you can slow the shutter and take photos of beautiful landscapes with blurry water or clouds.
Let’s face it, three is better than one in these cases!

Some good tripods are extremely expensive - like monthly mortgage payment expensive.
Fortunately, you don’t have to spend an arm and a leg to get a high-quality tripod that will work hard for you in the studio or in the field.
I’ve tested a variety of tripods over the years, and one of the best budget-friendly options I’ve tested to date is the E-Image EK610 shown above and below.
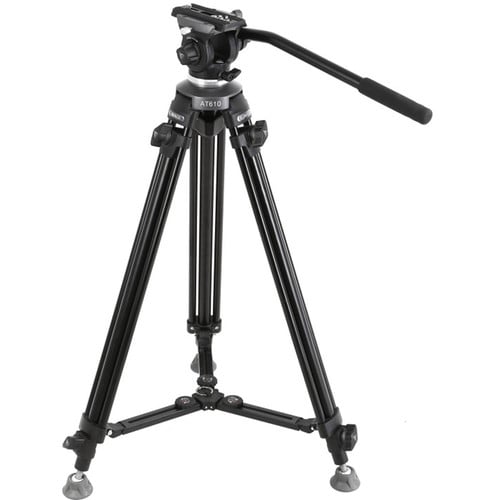
This tripod sports dual-stage aluminum legs that are strong and durable. The legs are easy to deploy, too, thanks to the ergonomic twist leg locking system
It comes with a 65mm half-ball fluid head and supports up to 6.5 pounds of gear thanks to a fixed counterbalance system that keeps everything nice and steady.
You want to be able to vary the eye level of your shots, and the EK610 allows you to do just that with a height range of 28-63.5 inches.
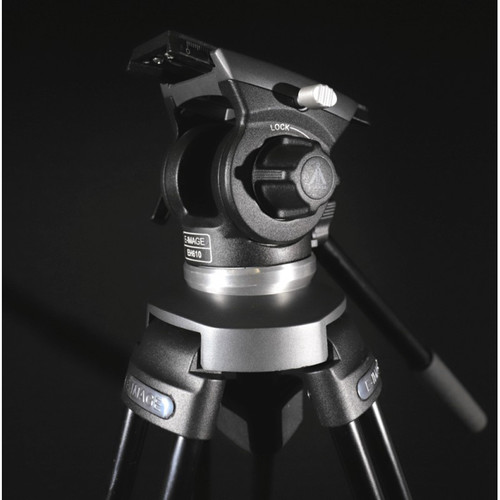
Even if the tripod is at its maximum height, you still reap the benefits of superb stability because of the integrated mid-level spreader that keeps the legs taut and stable.
With large rubber feet and metal foot spikes for added stability, a quick-release camera plate, compatibility with E-image dollies, and an included carrying case, E-Image has thought of everything in this affordable tripod bundle!
Get more details about the E-Image EK610 Tripod
Cons of Tripods

Photo by Erik Mclean on Unsplash
Perhaps the biggest con of tripods is that they can be big, bulky, and heavy. While this isn’t the case for all tripods, by and large, you’re packing around a big rig when you use a tripod.
Tripods are also more time-intensive to use than other alternatives, like a monopod.
While many tripods like the E-Image EK610 discussed above have mechanisms like twist leg locks that make deploying the legs a faster process, setting up a monopod is always going to take less time. In wildlife, sports photography, and other genres in which a second or two can make a difference, a tripod might not be the best choice.
Learn More:
Pros of Monopods

Photo by Thomas William on Unsplash
The number one reason you’re a monopod photographer in the tripod vs. monopod debate is that you’re all about speed and portability.
Monopods are often a better choice for adventurous photographers, like landscape photographers or nature photographers. In these scenarios, they are lighter and easier to use, and you don’t have to worry about adjusting multiple legs to accommodate an uneven surface.
But, another huge benefit of monopods is that they can accommodate a lot of weight.
Ever been watching an NFL game and see those photographers and videographers on the sidelines with their impossibly huge lenses? They’re using monopods in large part for this reason.
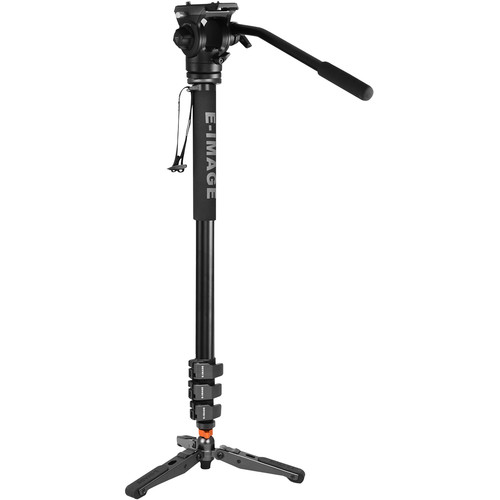
A perfect example of this is the E-Image MA600 Monopod shown above.
This thing will support a whopping 44.1 pounds of gear! Since it weighs just three pounds, that’s quite the payload-to-weight ratio…
And like it’s tripod cousin discussed earlier, this monopod has a multi-stage leg so you can adjust the height of the camera to meet the specific needs of each shot. In fact, it ranges from 25.2-74.8 inches in height.

Some monopods also have a miniature tripod base to improve stability. The MA600 is one such monopod with a 16-inch spread that might just give you that extra edge when you’re taking the shot.
Of course, these are often more affordable than tripods - this one is just $99 - so if you’re on a budget, a monopod might be the best option for you.
Learn more about the E-Image MA600 Monopod
Cons of Monopods
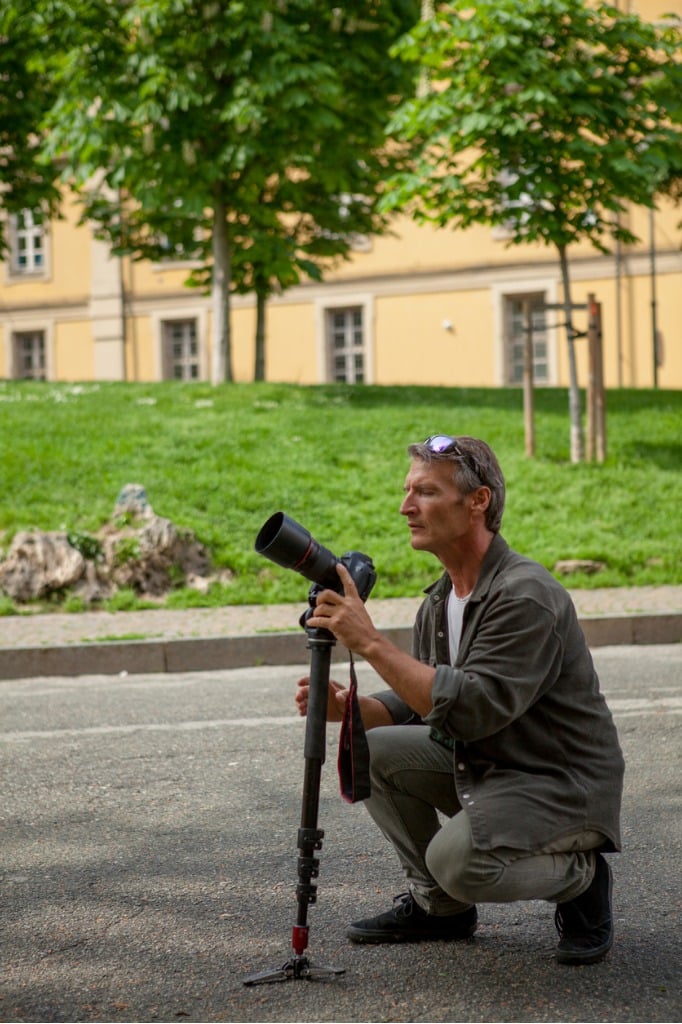
Photo by AscentXmedia via iStock
While some monopods like the MA600 described earlier have their own set of feet, by and large, they have just one point of contact with the ground.
This means less stability than a tripod, and even if the monopod has multiple fold-out feet, you still have to hold onto it so it remains upright.
As a result of that, monopods aren’t well-suited to long exposure photography, so if that’s your game, a tripod should be in your future.
But, if you need something that’s lightweight and easy to carry and helps you stabilize and balance your camera, a monopod is a great choice.
Tripods vs. Monopods Conclusion:
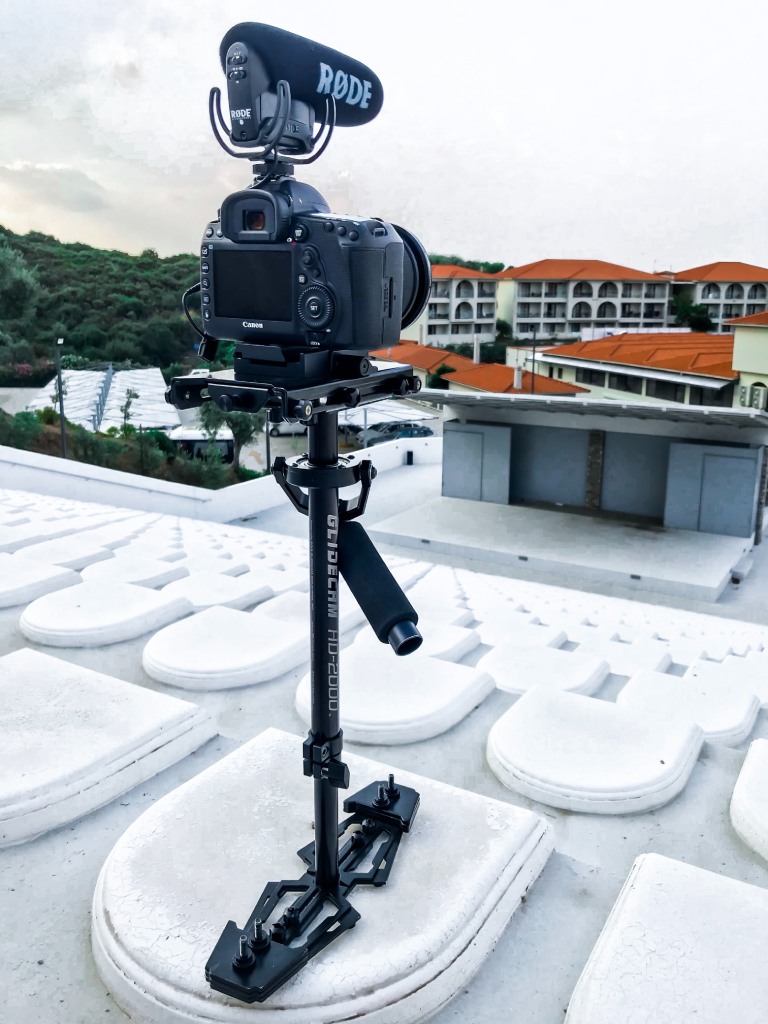
Photo by Jovanni Frenshyte on Unsplash
In conclusion, if you’re a sports or adventure photographer, or you are tired of carrying your heavy camera around all day, you should probably go with a monopod.
They offer the capability of supporting a ton of weight without being bulky or difficult to transport.
Some monopods even have beefy, padded grips for easier handling and multiple feet for additional stability.
But, if you’re a macro, still life, or studio photographer, the stability of a tripod is right up your alley.
Same goes for long exposure photography.
In either case, having a tripod or a monopod is a must for many types of photography. With improved stability of your camera and lens, improved photos won’t be far behind!
Learn More:
We Recommend
Try One of These Ring Lights to Make Your YouTube Videos Shine
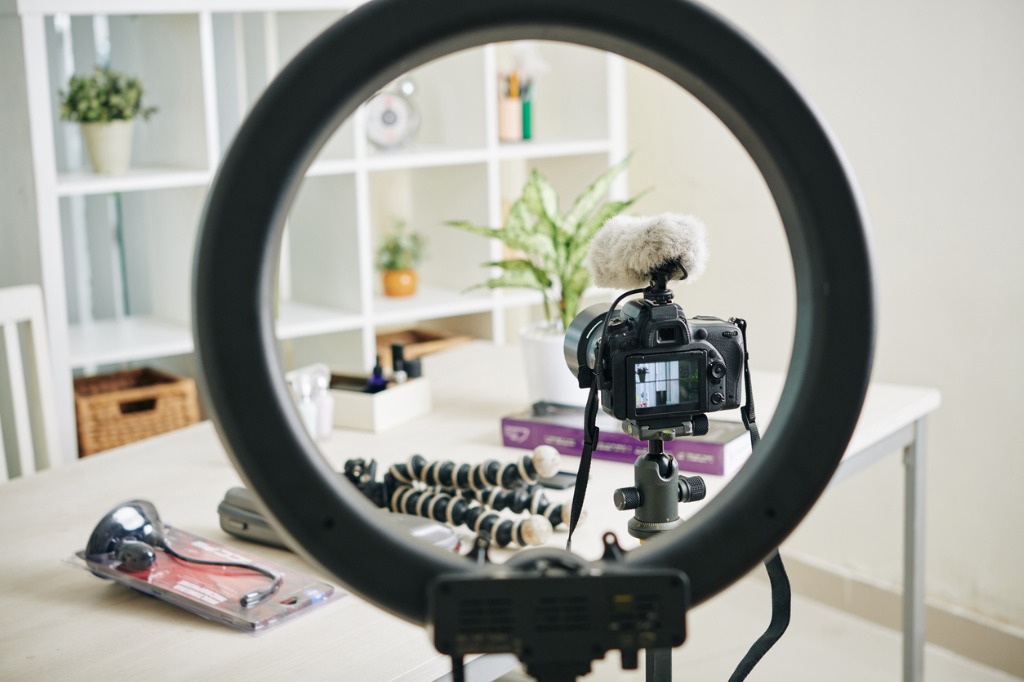
photo byDragonImages via iStock
If you’ve ever used ring lights, then you know they are one of the simplest video lights you can use. And if you’re not in the mood to spend hours reading video lighting tips, then purchasing a ring light may be the best solution for you.
But, the problem is that a lot of businesses have realized people use ring lights for YouTube videos and many of them create pretty awful ring lights. It can be difficult to figure out which ring lights are actually worth your money.
So, we picked out three of our favorite ring lights for every budget for you.
Good Option: Oryon 18″ Ring Light With Phone Mount
The most budget-friendly option on our list is the Oryon 18” ring light with phone mount. This ring light features a 120-degree beam angle, is bi-color from 3200K-5600K, and is 90% dimmable. It softly wraps you in light, thanks to its ½-stop permanent diffuser.

This package also comes with a make-up mirror, a phone mount, and a remote control, so you can remain hands-free during shooting.
And at just $140, you can get high-quality light for your YouTube videos without busting your budget.
Better Option: Oryon 14” Bi-Color 3200K-5600K Ring Light

If you’re looking for a more professional ring light, then the Oryon 14” bi-color ring light may be a better option.
Most ring lights for video will only feature a phone mount, like the first ring light on our list. But, this ring light features a 15mm rod mounting so you can use your professional grade camera with it.
It features the same bi-color, adjustable light and permanent diffuser, but offers a much longer battery life of up to 4 hours.
When you’re working with ring lights for YouTube, you’ll want to opt for a ring light that features a compact stand that you can set up easily and tear down quickly. In this category, the Oryon 14” bi-color ring light prevails.
You can buy the Oryon 14” Bi-Color 3200K-5600K Ring Light for $350.
Best Option: Oryon 18” Bi-Color 3200K-5600K Ring Light With Make-Up Mirror, Light Stand, and Batteries
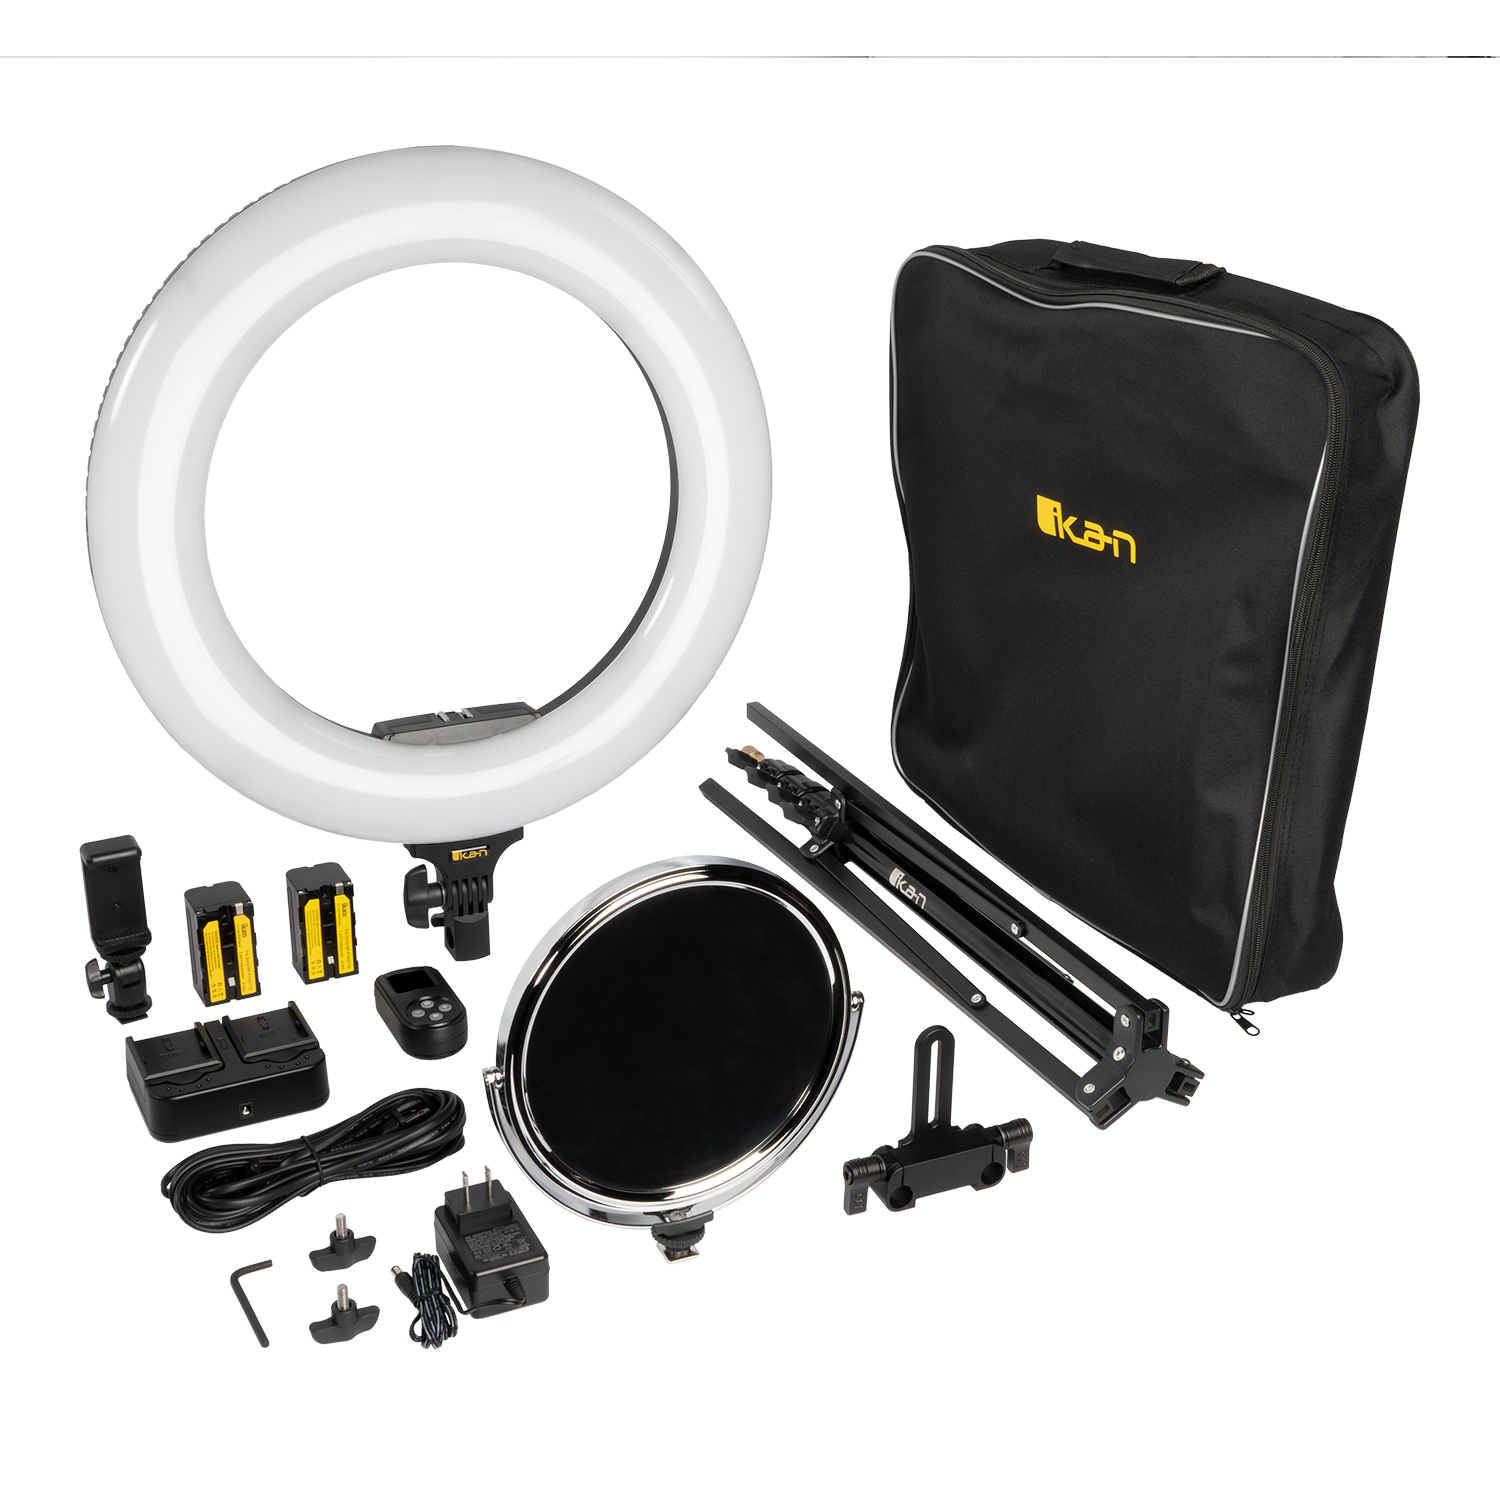
The best option of all of these ring lights is the Oryon 18” Bi-Color Ring Light package that comes with everything you could possibly need for vlogging.
It features the same bi-color 3200K-5600K adjustable lighting, but with better color rendition. It’s CRI and TLCI are both 95.
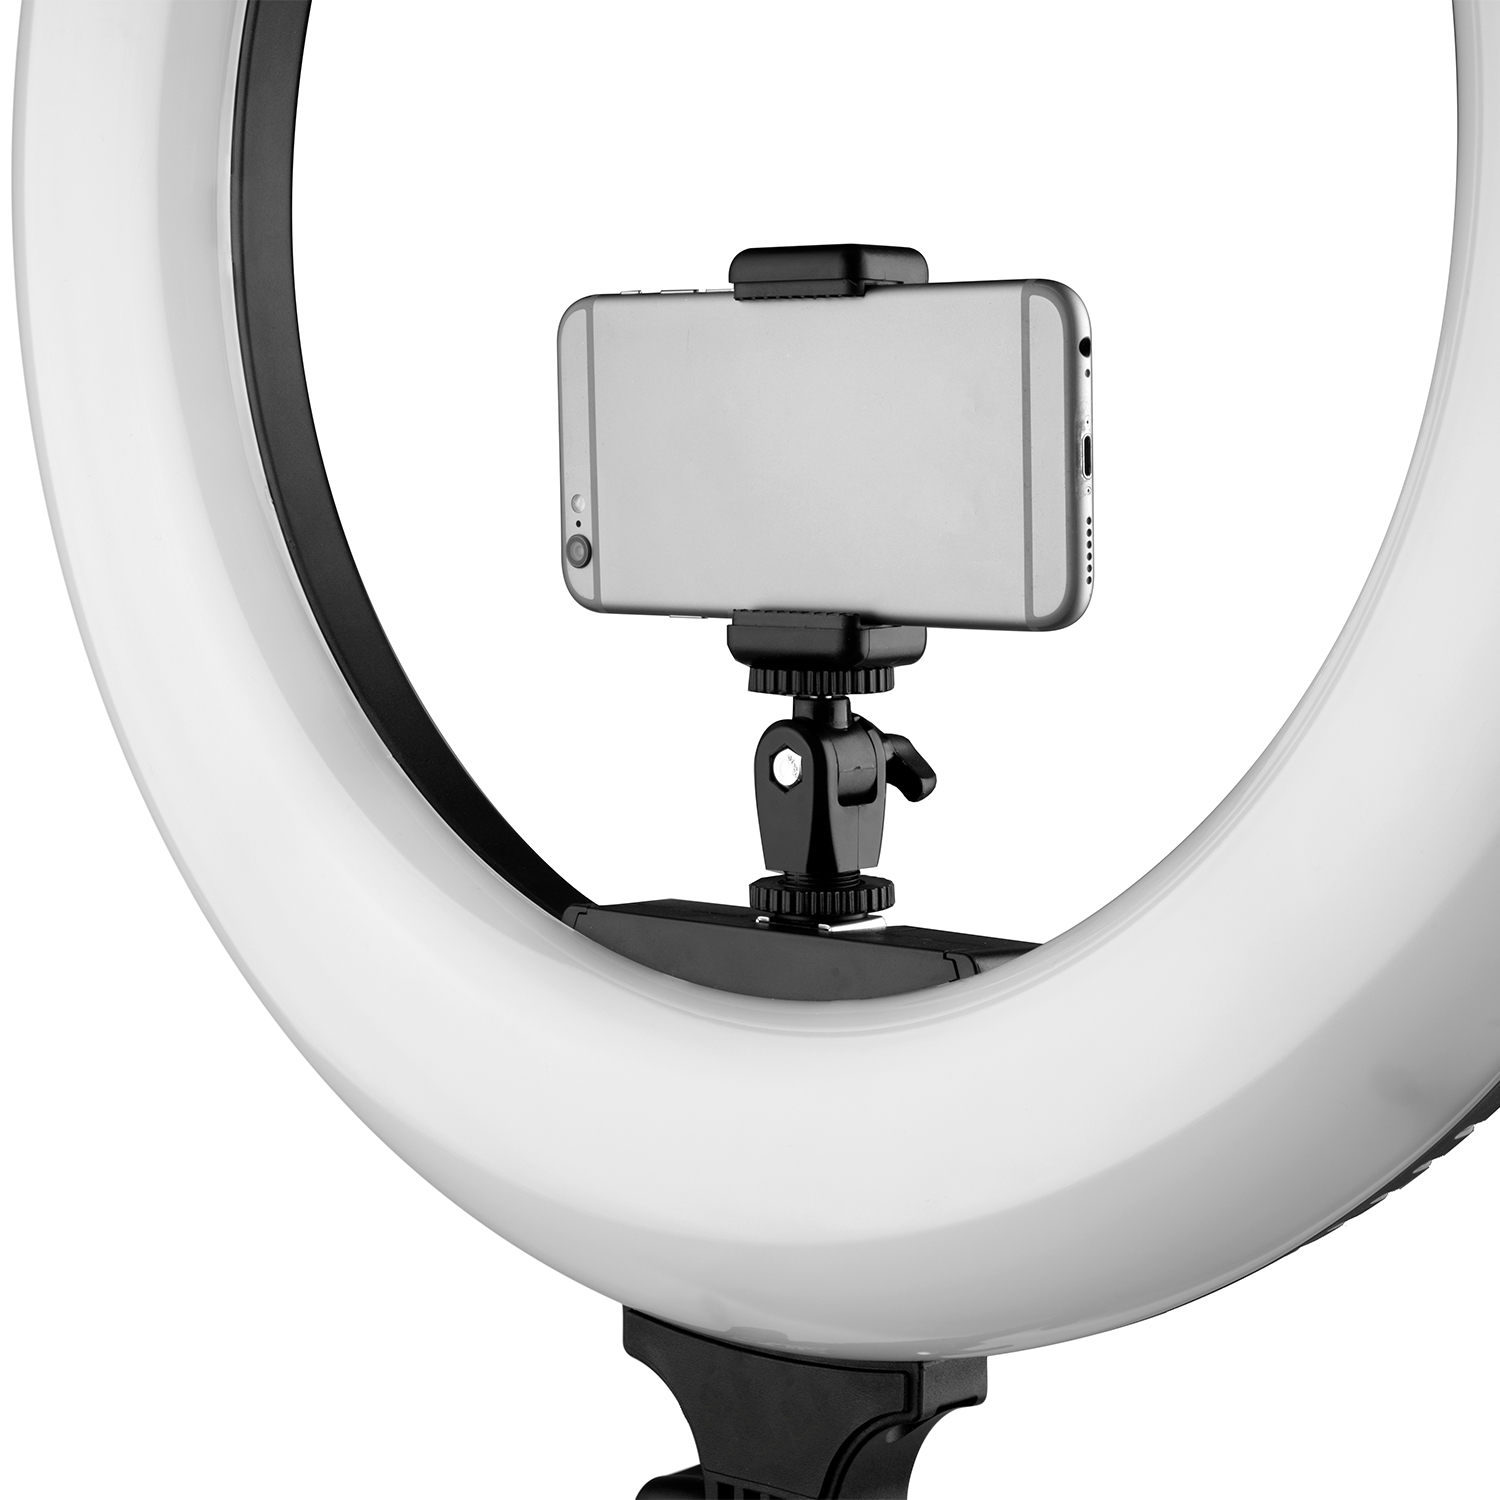
It also allows you to shoot for up to 4 hours uninterrupted and works with any camera system thanks to its 15mm rod mount.
This ring light is large enough to put a mirror inside of it for better make-up application as well.
The mount is also more professional because it lets you adjust the camera to any height.
This ring light is available for $400 on Ikan.
Learn More:
- These Vlogging Accessories Will Help Take Your Videos to the Next Level
- 4 Must-Have Accessories for Shooting Video
We Recommend
Types of Microphones for Vlogging
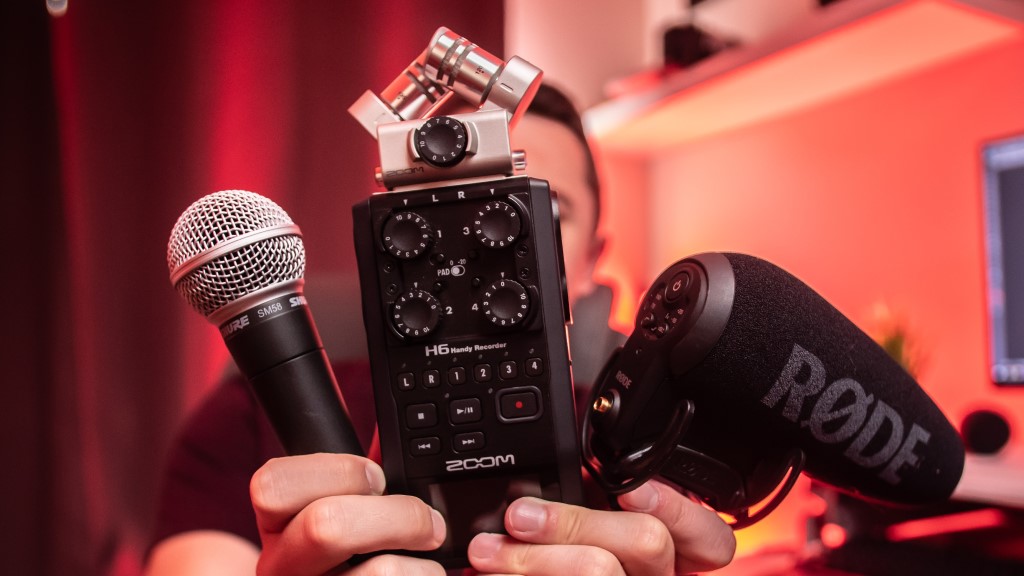
Photo by Tyler Casey on Unsplash
Vlogging is an excellent way to spread ideas, teach things, or promote a cause or product.
As with any audio/visual production, sound is a big part of what makes the video work.
While many videographers and vloggers understand completely how important the visual aspect of their videos are, a huge number don’t give a second thought to the audio quality. Sure, we have an amazing camera, capable of producing superb images and videos, but we should also be concerned with recording very high quality sound, too.
Why You Need a Microphone

photo byfiladendron via iStock
The same camera providing us high resolution imaging also needs to record sound. The only problem is that the built-in mics in our awesome cameras are a compromise for the most part.
In order to fit in our camera, the mics are rather small by necessity. So an external microphone is a great idea for anyone making high quality videos for vlogging and YouTube.
Types of Microphones
The four basic types of microphones for vlogging are lavalier, handheld, desktop, and shotgun. Which of these are the best microphones for vlogging? Each of these types has distinct characteristics which give them an advantage for certain video production needs.
Shotgun Microphones

We’ll start with shotgun microphones, since these are simple to add to most cameras. On-camera shotgun mics are top microphones for YouTube because the set up is as easy as attaching it to the camera.
A mic such as the CVM-V30-LITE-R from Ikan is compact, inexpensive, and offers an upgrade in audio performance that is noticeable the first time you use it. A shotgun mic points in the direction you’re filming, capturing a wider range of audio that the camera built in mic.
It also helps eliminate one of the biggest problems in video recording with a DSLR or mirrorless camera, focus and zoom noise. It is still attached to the camera, but it’s far enough from the motors and cams to greatly reduce noise.
Think of it as similar to how an on camera flash reduces the chance of red eye over the built in flash. In addition, these types of microphones are generally able to capture a wide-range of frequencies. All of that adds up to better sound quality for your videos.
Learn More:
Hand-Held Microphones
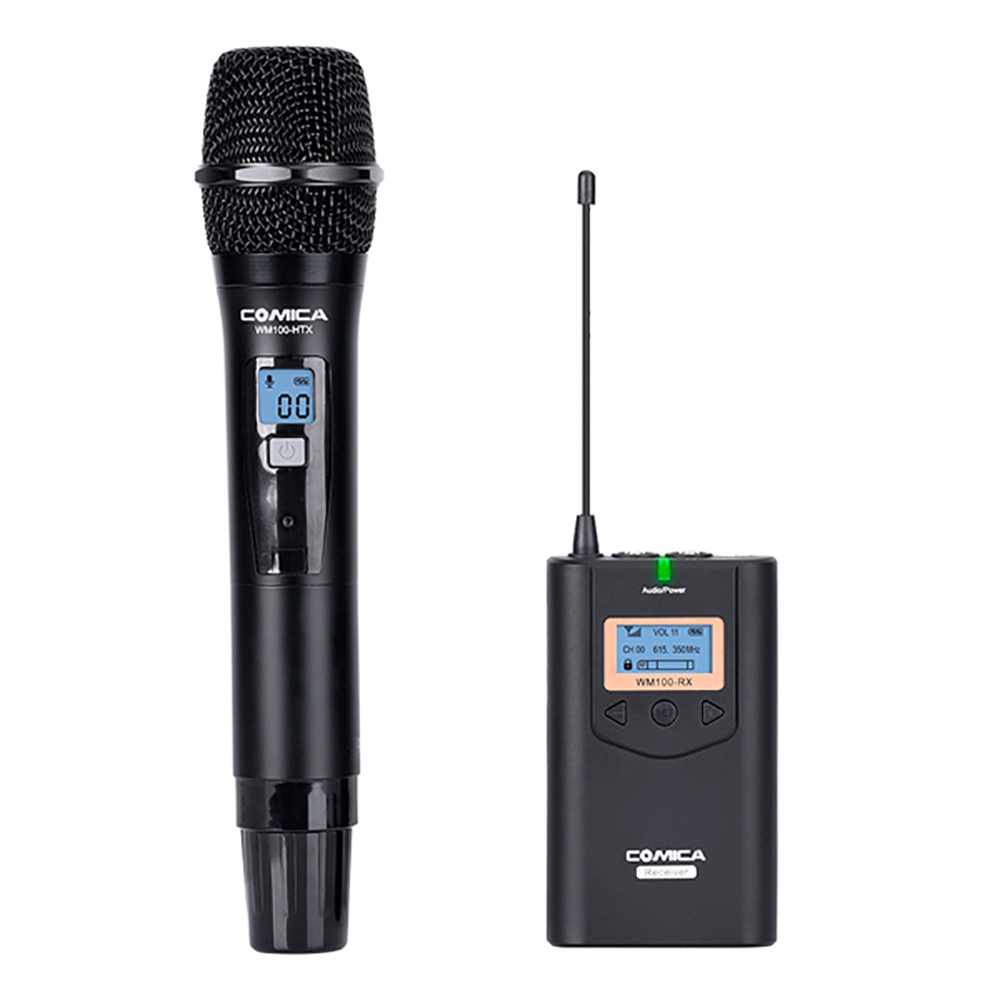
Another type of microphone that is simple to use for vlogging is a hand-held mic. These can be corded or cordless. A wireless mic like the CVM-WM100-HTX shown above is lightweight and has excellent audio performance, making it one of the best microphones for vlogging.
Wireless microphones require a receiver, too, so these are generally not an inexpensive choice. When combined with a mixing board, these types of microphones are great for YouTubing live musical performances.
Desktop Microphones
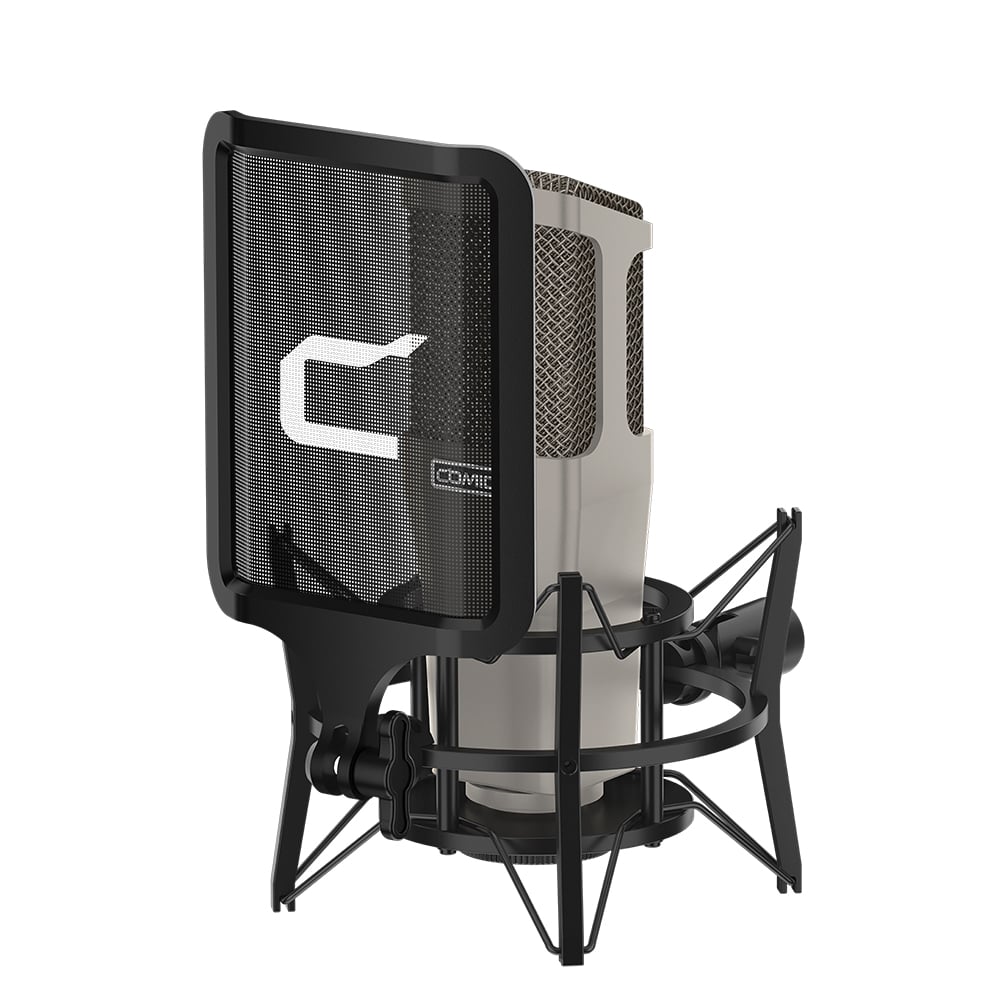
Among the top microphones for YouTube interviews or a monologue style of vlog is the desktop microphone. Many of these have studio-level audio performance that is truly outstanding and yet still are relatively budget friendly.
If you’ve ever watched a late night talk show on TV, this is the type of microphone you see sitting on the desk of the host. Our friends at Ikan have the STM01 desktop mic.
What makes this one of the best microphones for vlogging is its superior audio performance. You need to plug this into some sort of mixing board, but the performance is outstanding.
The dynamic range, low electronic noise, and recording patterns are superb. What it means to you as a YouTube vlogger is being to deliver the best audio to complement your high-quality video.
Lavalier Microphones
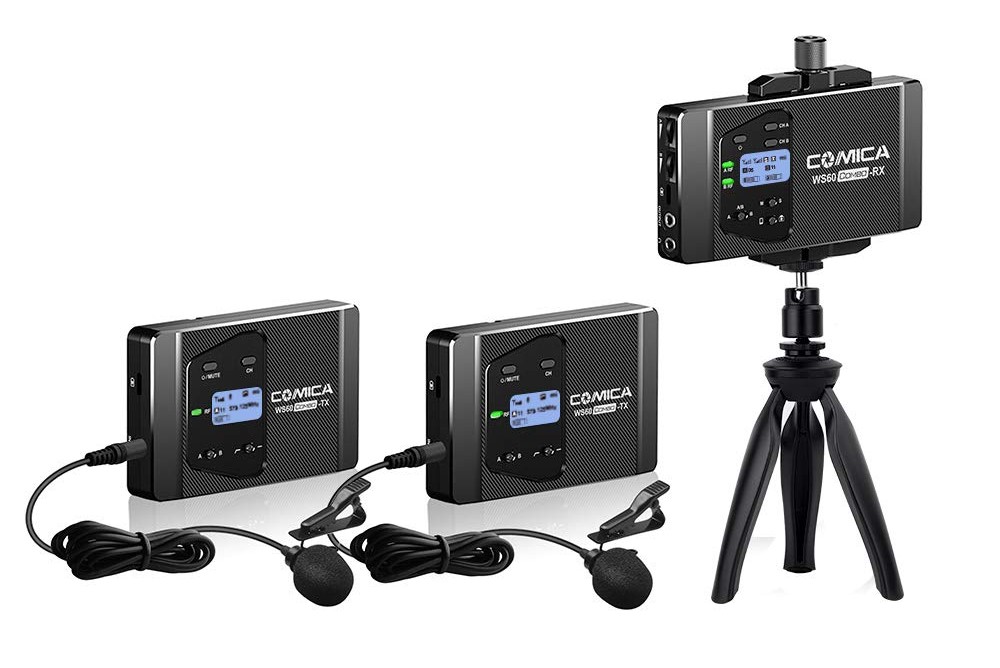
A lavalier mic is small enough to attach to a lapel or a shirt or blouse. Wireless transmission allows your subject to be heard even if they are not yet in the field of view of your framed shot. Prices can add up quickly, but lavalier mics are possibly the best microphones for vlogging with multiple subjects.
A combination kit like the CVM-WS60-COMBO has two mics with transmitters and one receiver that can be mounted to the camera. Any vlogger recording multiple people will find a kit like this a top choice for vlogging.
Great Audio Makes Awesome Videos
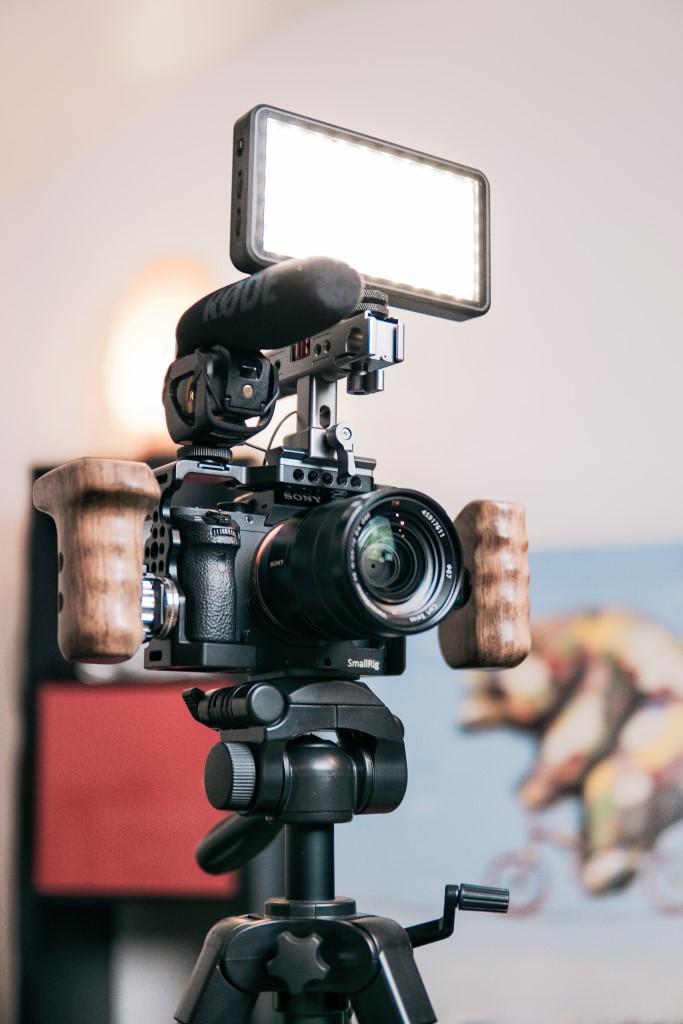
Photo by lucas Favre on Unsplash
The best microphones for vlogging not only increase the audio quality of your recordings but will also free up your creativity when vlogging or filming for YouTube.
You’ve already invested in sharp lenses, color correct lights, and a great tripod, try out one of these top microphones for vlogging and YouTube. You will be amazed by the results, as will your viewers and subscribers.
Learn More:
We Recommend
Types of Portrait Lights

photo byRawpixel via iStock
The types of portrait lights you will use for your own portrait photography lighting configurations will vary depending on several factors.
Whether you’re shooting in a studio or on location, whether you want dual usage capability for video lighting, your budget for lights for portrait photography, and how sophisticated or simple you want your setup to be will all influence the types of portrait lights you use.
Portrait Lights Guide
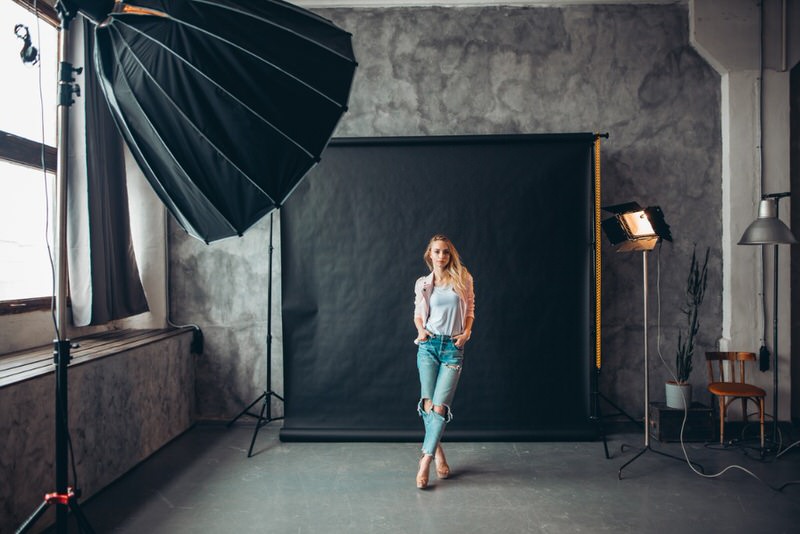
photo byphotographer via iStock
You can use this list of types of portrait lights as a portrait lights buyer’s guide or as a guide for how to adapt what you already own as lights for portraits or a mix of new and old.
The types of portrait lights we’ll highlight are:
- Panel Lights
- Fresnel Lights
- On Camera Lights
- Soft Boxes
- Ring Lights
Panel Lights
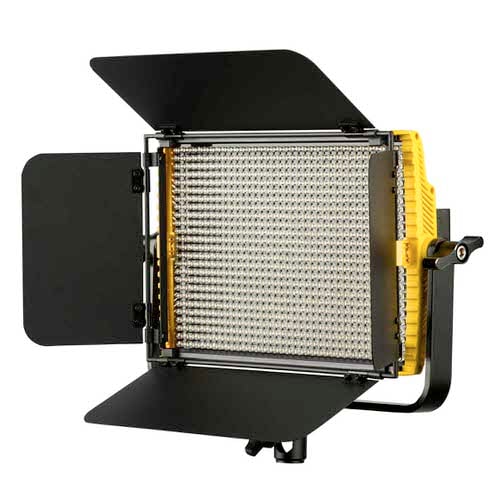
Panel lights are among my favorite lights for portraits and for doubling up as the perfect videography lights. Current panel lights are almost always LED bulbs, which is great for all sorts of photography.
LED panel lights may be A/C powered or a mix of battery and plug in. The battery power option for many panel lights makes them suitable for use in your studio or for on location. Since they’re LED bulbs, battery life is fantastic, though I always carry extra batteries for all of my equipment.
LED panel lights are also usually variable in power and color temperature. This allows you to blend them with any ambient light for on location portrait photography lighting. You can add different light modifiers to many panel lights such as barn doors, grids, and colored gels.
These types of portrait lights are super versatile, about the only downsides to using LED panel lights are that they tend to cost a little more than simple lights and they get a little hot, even the LED bulb versions, since they have a lot of bulbs.
As an example of these types of portrait lights, look at Ikan for the Onyx OYB5 Half X 1 LED light. It has battery or plug in power options, adjustable color temps and power levels, and a CRI rating of 96. CRI is a rating of the quality of the light emitted, 90 to 100 is very well suited for all types of photography.
- Panel Light Pros: versatile, high CRI, good for general photo and video use.
- Panel Light Cons: large size, can get warm, a little higher priced.
Fresnel Lights
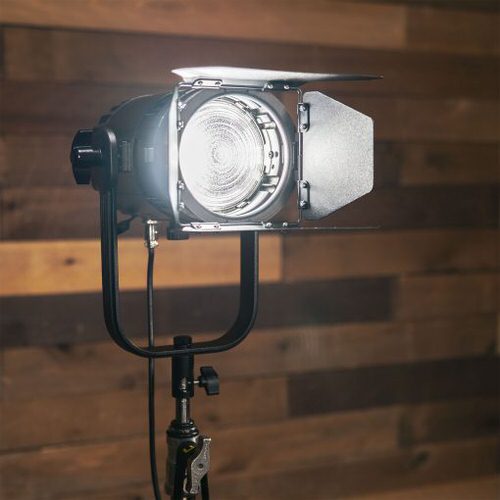
Fresnel lights (pronounced fruh- nell or fray-nell, it’s a French word) are focusable lights for adjusting the width of the cone of light emitted. A fresnel light is often part of a system of lights though you could use one all by itself for some shots.
A fresnel light uses a lens in front of the bulb that is moved back and forth to focus the shape of the cone of light it emits. The LED versions of these types of portrait lights are easier to work with, I think, than the traditional HMI lights found in many movie or TV studios. LED fresnel lights are less expensive, cooler operating, and smaller and lighter than HMI fresnel lights.
The Stryder SFB150 LED fresnel light from Ikan is one example of these types of portrait lights that is within the price range and operational abilities of many portrait photographers. It has a light cone ranging from 30 to 65 degrees so it can be used in many situations.
- Fresnel Light Pros: controllable light cone shape, high intensity.
- Fresnel Light Cons: high heat output, relatively expensive.
Learn More:
On Camera Lights

I guess we could include flash units in this category, but I’m sure a lot of you are very much like me in regards to lighting choices in that we like lights with dual use capability, for photos and videos, so I tend to concentrate on continuous lights for portraits and other types of photography.
Battery power and LED bulbs are king here, since this style of light needs to be highly portable, lightweight, and have accurate color. An on camera light is very usable in environmental or outdoor portraits with high ambient levels in that it gives definition and consistency in facial detail.
From Ikan, you can find several models similar to the ILED144 on camera LED light. Not as powerful as larger, off camera lights, but very portable.
It is easy, though, to get unflattering results when relying on one as your sole or dominant light source because of the straight on view of the lamp. Also, you need to be careful not to put too much on your camera’s accessory shoe because of increased risk of damage.
- On Camera Light Pros: extremely versatile, low price, portable.
- On Camera Light Cons: lower power, strain on camera, possibly unflattering.
Soft Boxes
A soft box is a housing that diffuses the light from whatever bulb it’s mounted to, from a strobe, a CFL bulb, or LED bulbs. The soft box is a much larger area of light emitting to the subject, which softens the light compared to a point source. Additionally, the softbox material is often diffusing as well.
You can add a specially made softbox for a specific light, such as the Chimera for the ILED144 posted earlier, or find a generic one for almost any style of light you already have. Since the large area is part of what makes a softbox a softer light, you do have to deal with a bit of unwieldiness at times, especially when setting up outdoors.
- Soft Box Pros: soft light quality, usable with a variety of light types.
- Soft Box Cons: large, lowers light output.
Ring Lights
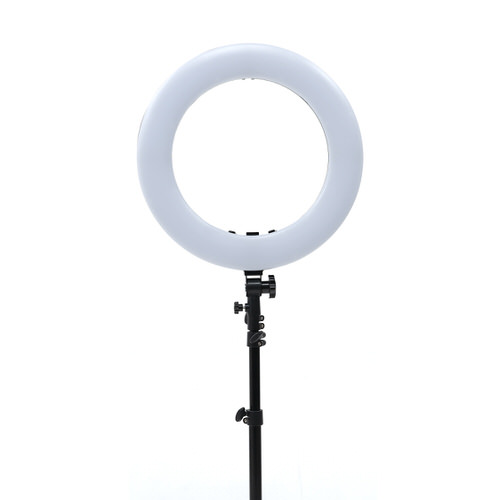
A ring light is one of the most specialty use of all of the types of portrait lights, but they are beneficial for a lot of subjects, including portraits. Besides offering shadowless lighting when used close up, they can be added to a portrait lighting configuration for a nice catch light for the eyes of your subject.
A ring light kit with everything you need to use one in a studio or on location is the Oryon 18” RLB48-M2 Kitwith the ring light, batteries, remote control, light stand, and carrying case. After using it for portraits, try it out for your small product photography.
- Ring Lights Pros: shadowless light for close ups, catch light for 3/4s or full length.
- Ring Lights Cons: low power, specialty use mostly.
A Full Kit
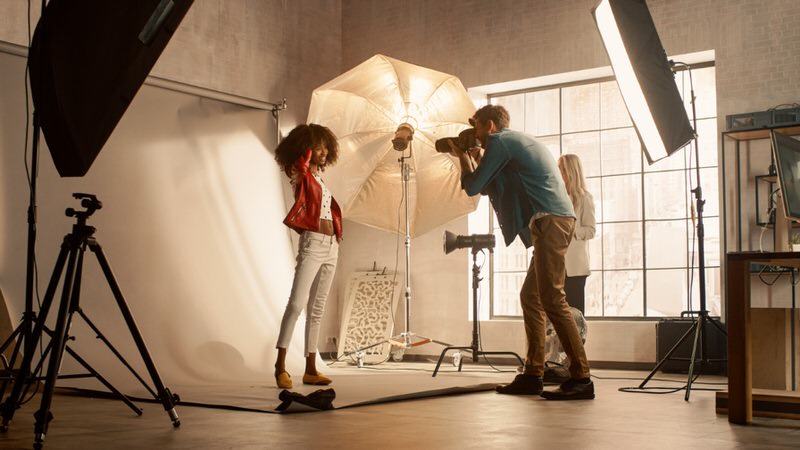
photo bygorodenkoff via iStock
Personally, when it comes to lights for portrait photography, I like to have all five of these available to me. Sometimes I will use each of these types of portrait lights for one lighting configuration, though I’m usually using just two or three.
Choose and use what makes sense for your photography needs. As you use them for creating outstanding portraits, also try them out for your video productions to get the most out of your lights and cameras.
Learn More:
- Budget-Friendly Real Estate Photography Gear
- The True Value of a Good Tripod
- Tips for Better DSLR Video
We Recommend
Types of Tripod Heads
photo bygolubovy via iStock
When you’re shopping for tripods, one thing you should consider is tripod heads. Many tripods come with one anyways, but not all tripod heads are made alike.
There are a ton of types of tripod heads too. While videographers may need to understand these tripod heads the best, still photographers can still greatly benefit from understanding the difference between tripod heads.
So, I decided to build a tripod head comparison to walk you through the benefits and detriments of each type, as well as to recommend good options for each.
Fluid Head
One of the most popular types of tripod heads are fluid heads. Fluid head tripods use liquid to create a hydraulic system within the head to ensure you can move the head with great ease.
For this reason, fluid heads are one of the most popular tripod heads for videographers. Fluid heads prevent your camera from shaking and allow smooth tracking. They come with a long handle to ensure you don’t accidentally prevent the head from working properly. If you purchased a cheaper fluid head, you can always make it work much better by sliding a piece of PVC piping over the handle to make it longer.
Fluid heads are also usually heavier to allow videographers to work with heavier cameras.
Fluid heads also have a pretty sophisticated counterbalance system to keep your camera at whatever angle you set it at.
Of all the types of tripod heads, fluid heads are typically the most expensive, so if you are a still photographer on a budget, you could probably opt for a pan/tilt head instead.
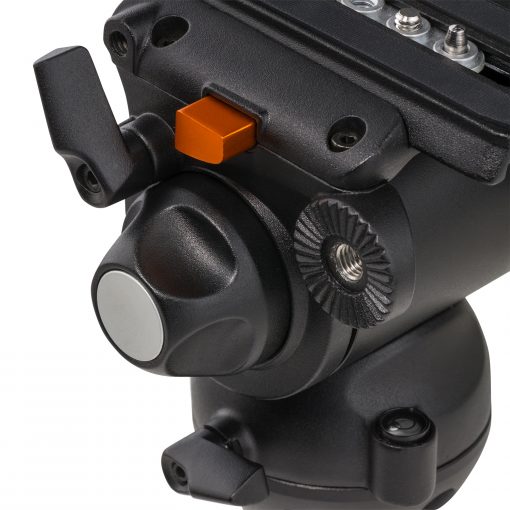
Ikan’s 75mm Pro Fluid Video Head (shown in the images above) is a great option for professional videographers. It can hold up to 11 lbs of equipment, it comes with separate pan and tilt locks, and is priced very competitively at $160.
Ball Head
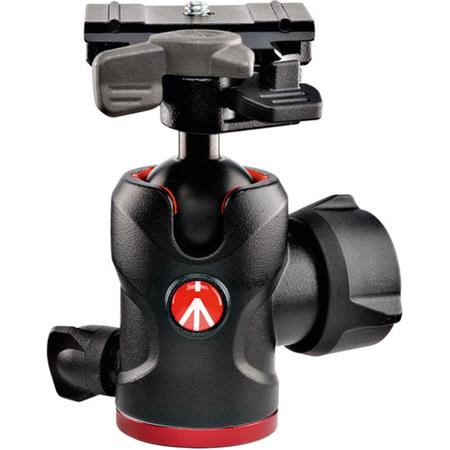
A ball head is known for one specific trait: it can rotate 360 degrees with great precision. But, of all of these tripod heads, ball heads come in the widest array of quality. If you don’t know what you’re looking for, you can end up with a ball head that doesn’t function the way it should.
When you’re looking for a ball head, you want to find one that locks tightly. If you hit your camera during shooting, you’ll want your ball head to prevent as much shake as possible.
You’ll also want to make sure that your ball head allows you to pan and tilt fluidly, quickly release your camera, and carry as much equipment as you want.
For this reason, I believe Manfrotto’s 494 Aluminum Center Ball Head is one of the best ball heads on the market.
It can carry up to 17.6 lbs of equipment, features one of the best quick release plates I’ve ever had the pleasure of working with, and comes with a 10-year warranty.
You can pick this ball head up for $80 on Adorama.
Learn More:
Pan/Tilt Head
If you’ve ever worked with any of these tripod heads, you’ve likely worked with a pan/tilt head because they’re everywhere.
Pan/tilt heads are typically the most affordable tripod head. They feature 3 different axes for horizontal, vertical and panning motions. So, pan/tilt heads are great for precision photographers because they allow you to line up angles down to the centimeter.
Pan/tilt heads are also one of the most user-friendly types of tripod heads.
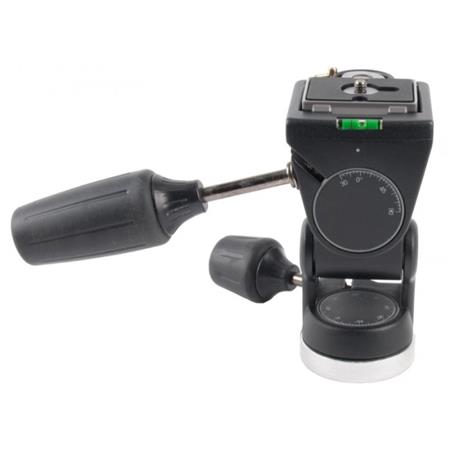
When you’re shopping for a pan/tilt head, you’ll want to look for clamps that tighten progressively to ensure your heavy equipment can be handled well.
Whereas most tripod heads come with bubble levels, these are an especially important quality for a pan/tilt head. Make sure there are at least a few of them and that you can read them easily when your camera is mounted.

Pan/tilt heads can also get pretty bulky. It will cost more, but a tripod head that allows you to unscrew the handle will be easier to carry.
I work with Studio Assets Magnesium 3-Way Pan/Tilt Tripod Head. It costs just under $60, can carry 7.5 lbs of equipment and features an easy-to-read bubble level. Plus, it’s relatively small at 4” x 5”.
Gimbal Head
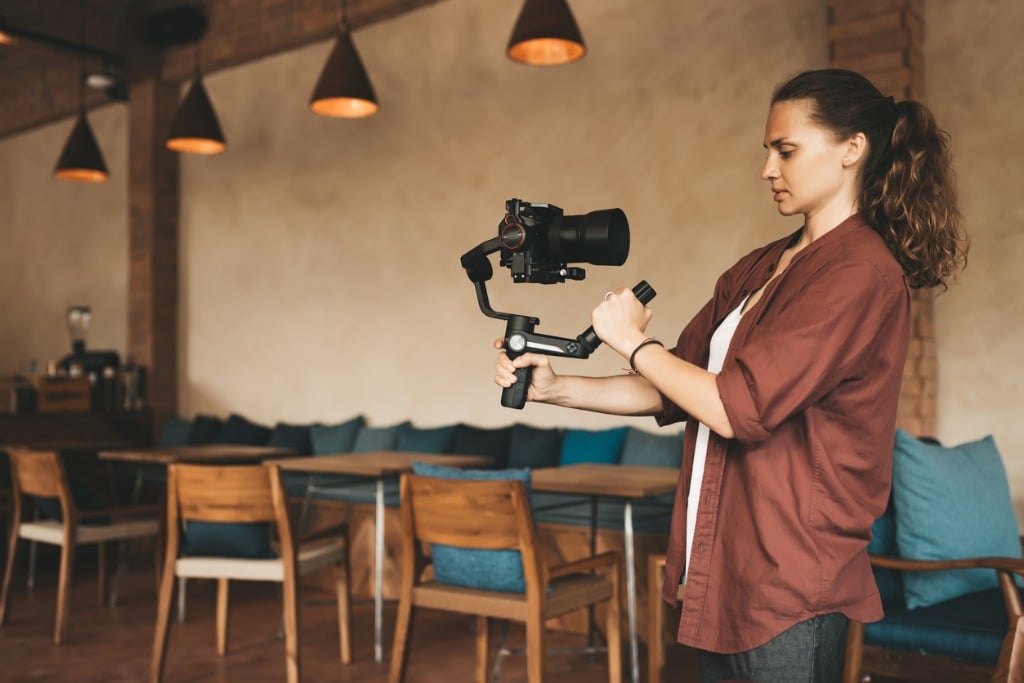
photo byNatalie_magic via iStock
A gimbal head is built specifically for photographers and videographers who are working with heavy cameras and lenses. Instead of fighting gravity, a gimbal head works with your camera gear to find its natural center of gravity.
Sports or wildlife photographers use gimbal heads for this exact reason. You can track action quickly while still supporting heavy equipment.
Most gimbal heads don’t come with a fluid cartridge, although gimbal heads with a fluid cartridge are available if you don’t want your head to move too easily.
When you’re looking for a gimbal head, you’ll want one with vertical adjustment. This isn’t a requirement, but
Wimberley’s WH-200 Gimbal Tripod Head II is one of the best in class when it comes to gimbal heads.
This gimbal head uses an elevated tilt mechanism with an adjustable platform to ensure the camera’s center of gravity perfectly lines up with the tilt axis of the head. What this means in practice is that you can move the heaviest equipment with just one finger.
And since Wimberley heads are built for telephoto lenses, you can carry up to 20 lbs of equipment with it.
All of this doesn’t come cheaply, as the Wimberley WH-200 Gimbal Tripod Head II is $600, but you’ll also get a 5-year warranty with your purchase.
Pistol Grip
The final tripod head in this tripod head buyer’s guide is a pistol grip, or a joystick head. A pistol grip allows you to squeeze a handle to adjust the position of your camera. In this way, your camera can move pretty similarly to the way it would on a ball head.
Pistol grips can be a little tricky to use while tracking subjects, so they’re best for still shots.
This is why Vanguard’s ALTA Magnesium Alloy Pistol-Grip actually pairs pistol grip technology with a ball head, so that you can track fast-moving objects.
It comes with a remote shutter release, can carry up to 13.2 lbs of equipment, and can pan 360-degrees.
You can purchase this pistol grip for $165 from Adorama.
Learn More:
We Recommend
Video Slider Buyer's Guide
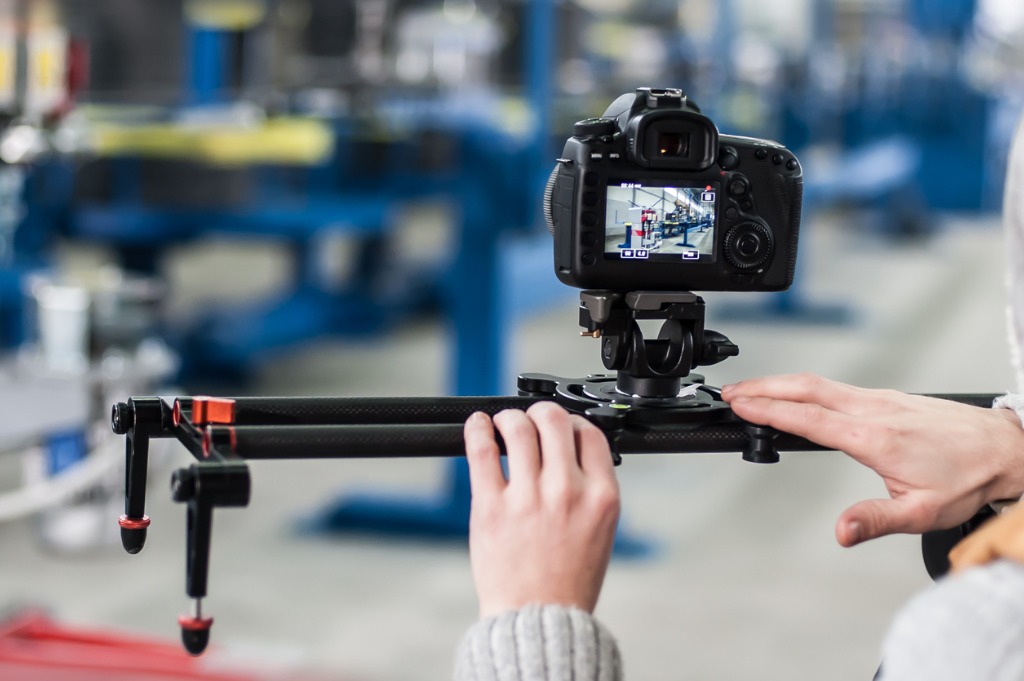
photo byguruXOOX via iStock
As a videographer, you know the importance of controlling motion in your videos. You don’t want unnecessary motion such as camera shake or jerky panning, but you do want smoothly controlled motion so that the recording isn’t so static.
In addition to video tripod heads, dollies, and drones, adding a video slider to our videography gear set results in more options for controllable motion.
What are Video Sliders?
PHOTO BYNISARA TANGTRAKUL VIA ISTOCK
Sliders for video are a track that allows the camera to move smoothly along the rails. Think of it as an elevated train for your videography gear. A mount or holder for the camera is fitted to rails which can be self supported with its own feet or mounted to a tripod or other support.
The holder gets moved along the rails by means of a motor, hand powered gears, or moved by our hands. The motion is along one plane. Depending on what direction your camera is facing, and the orientation of the slider, this plane can be side to side horizontally, up and down vertically, front to back, or a diagonal angle.
In the video above, you can take a quick look at a couple of video sliders and see how they work.
What are the Benefits of Using a Video Slider?
photo byziggy1 via iStock
Sliders for video add in that crucial aspect that is missing from most videos made by beginner videographers, controlled motion. As a photographer, we usually do everything we can to prevent motion. For comfortable viewing of videos, we actually want to ADD motion.
But we want to add it in a controlled manner. A video slider is the perfect videography accessory to accomplish this goal. For a detailed discussion on why motion in our videos is important, take a look at this PhotographyTalk article and the subheading of shot length and scene length.
As with many video tips, you get out of the slider what you put into it, so we’ll offer a short video slider buyer’s guide to consider.
Learn More:
- 5 Tips for More Professional-Looking Videos
- Tips for Better DSLR Video
- How to Shoot Quality Video Footage
Features to Look for in a Video Slider

photo bybrightstars via iStock
Length of travel, how the movement is done, how the camera is attached, and how the video slider mounts are all important considerations, but the one feature I consider most important is how smoothly it operates.
I found two video sliders from Ikan that have extremely smooth movement and are in two different price points, one medium priced and one very reasonably priced for beginner to intermediate videographers.
I like shopping for video accessories at Ikan, since they design and manufacture what they sell, offering lower prices for high quality equipment. The designers are also active videographers and cinematographers themselves so they bring that wisdom and their in the field working experience to everything they design.
Belt Driven Slider
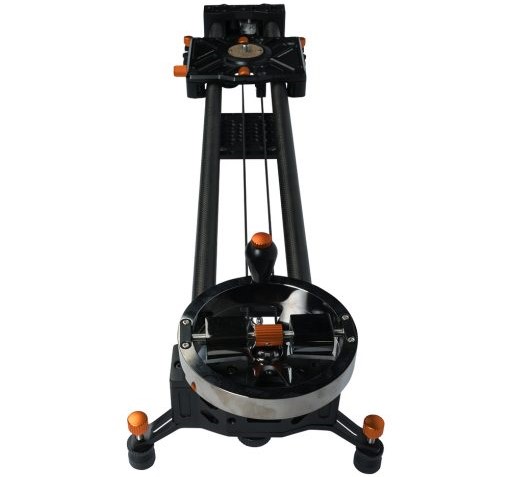
First, let’s look at the E-Image ES150 extendable belt driven video slider by Ikan. The movement is incredibly smooth and it’s driven by a belt drive with a hand crank. There is an optional motor drive for the belt that is smartphone app controlled and can be pre programmed for various operations.
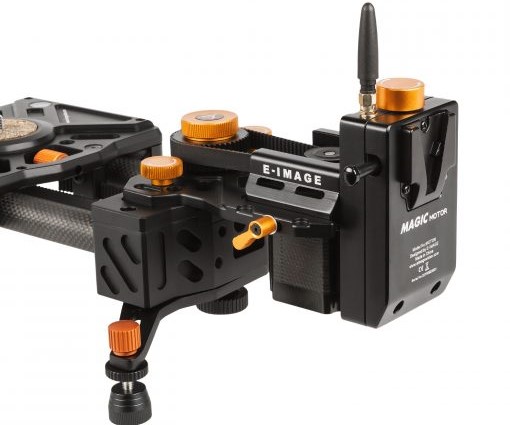
The basic configuration has a travel distance of 23.5 inches for the camera mount and it is expandable by adding an extra set of rails for a total travel of 51 inches. Total weight is 8.5 lbs for the base unit and 10.5 lbs with the extension added.
It is very reasonably priced for its features and quality, being about the price of a better entry level DSLR. Adding the optional motor drive doubles the cost but also adds all of those remote features and completely hands free operation.
Basic Low-Cost Slider
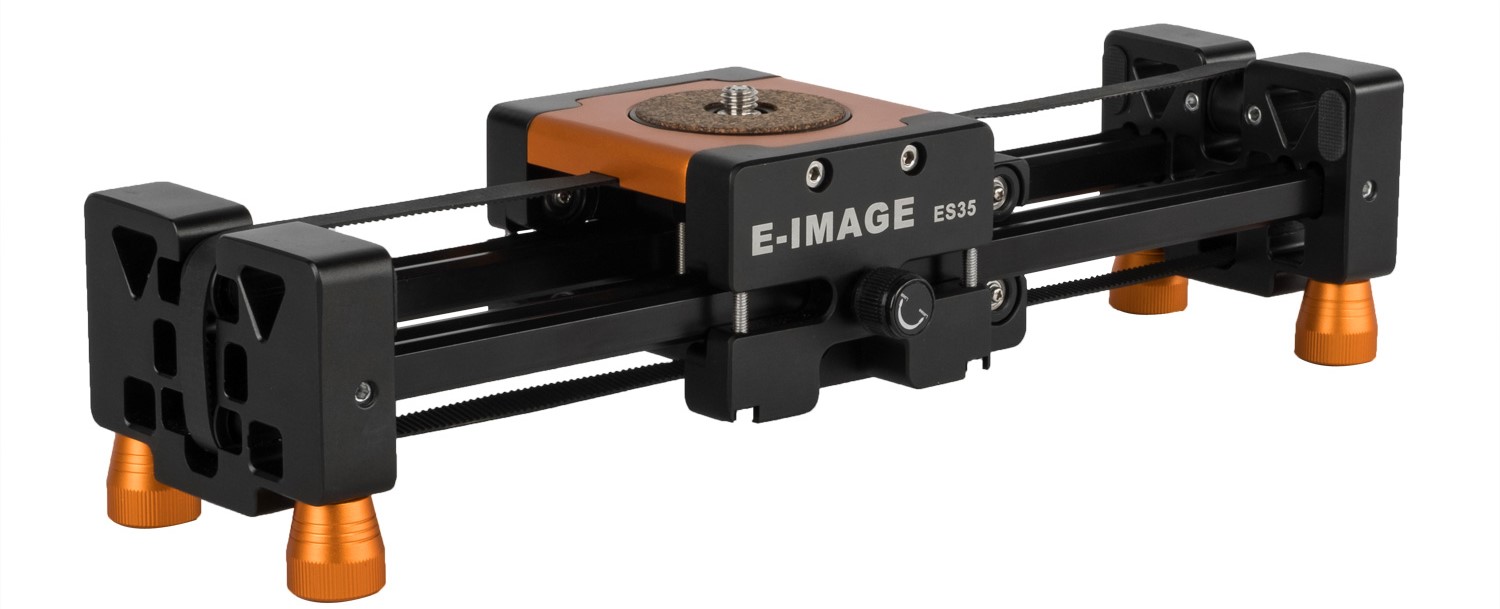
Next item is the E-Image ES35 video slider that is moved by hand and has friction control for controlling the movement and 17.5 inches of total travel when mounted on a tripod. It’s that tripod mounting that allows for the wide range of travel in such a small slider, using a unique motion designed by Ikan.
The movement is so smooth it’s hard to believe how low cost this video slider is, around the same price as a decent video light or tripod. To step up into the better video that your DSLR or mirrorless camera is capable of, you’ll want to invest in a few high quality accessories.
Sliders vs Dollies
Why not just add a low cost dolly to our video tripod instead of using a video slider? The difference between video sliders and dollies is that dollies are basically wheels for your tripod while video sliders move the camera while mounted on the tripod or sanding on its own feet.
There are definitely lots of uses for tripod dollies but they are not totally interchangeable with video sliders. A dolly is very useful for longer lengths of movement and for incorporating certain types of multiple movements into your video shots.
If you had a good fluid head video tripod, a video slider, and a dolly for your tripod, then with practice you could accomplish quite a few interesting movements.
More Video Tips

photo bydpmike via iStock
There are so many helpful video tips we’ve seen that can improve your videos, save you time, and save you money. As you get deeper into the fascinating and awesome world of advanced videography and cinematography, keep looking for hints, tips, and explanations of videography techniques.
We’ve shared many here with articles covering video editing, video lighting, and other video accessories, so add this video slider discussion to your list of tips to improve your videography. And please pass along any tips and ideas of yours to us. We’re looking forward to more and more fun with video.
Learn More:
We Recommend
Video Tripod Buying Guide
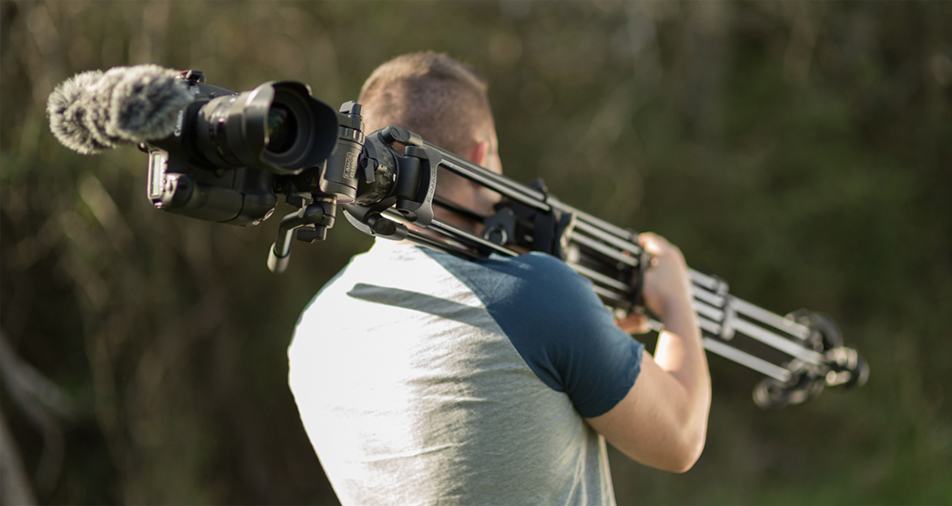
A good video tripod is one of the most important pieces of video equipment you can have beside your camera and lens. A video tripod can be more important than lighting, since you can use the video tripod in situations where you may not need lights.
Choosing the right video tripod for your needs and showing you what to look for in a video tripod is what this video tripod buying guide will help you do. There are so many options for tripods of any type, and any tripod can be used for video, but the ones designed specifically as a video tripod are better for shooting video.
Video Tripod Features
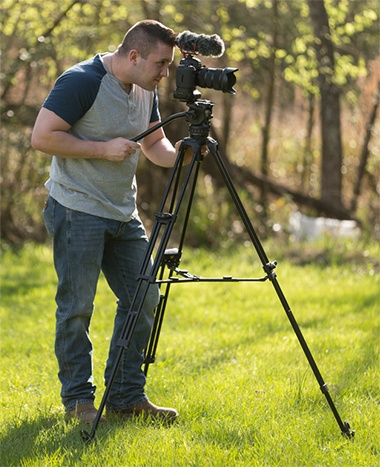
Since we are specifically looking at tripods for video productions, it’s a good idea to know what to look for in a video tripod, what features make a huge difference and what features make a little bit of difference.
- Main Features: Tripod Legs, Tripod Heads
- Other Features and Accessories: Quick Release, Dolly, Arms, Spreader, Feet
Tripod Legs
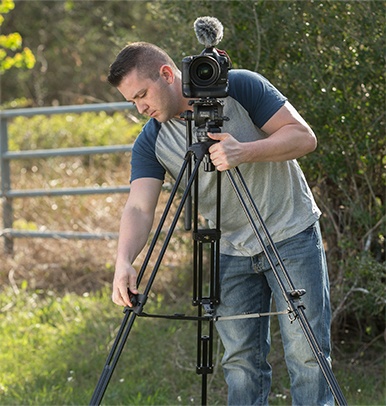
The main two features of any tripod are the legs and the head. All of the other features and accessories relate to them in one way or the other.
The legs of a video tripod can be fixed or adjustable in height and can be constructed of various different materials. Carbon fiber and aluminum are the two most common materials with wood being a distant third.
Adjustable legs can be tubular or other shapes and can be locked by twist mechanisms or levers. The legs can also be single tubes or twin tubes, with single tubes being able to be made very lightweight and twin tubes more stable though they are often quite a bit heavier.
Video tripods are made differently than regular photographic tripods in that there is no center column but rather a bowl that adjusts by about 15 degrees or so to level out the attached video head.
A good example of the twin tube leg design for a video tripod is the GA752 2-Stage Aluminum Tripod from Ikan, manufacturer and retailer of high quality video accessory equipment.
Learn More:
Tripod Heads
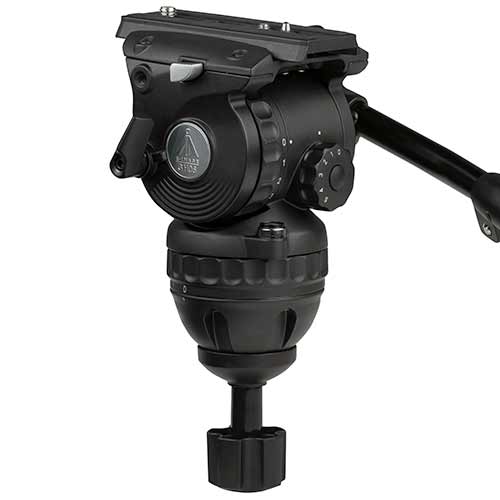
In the video tripod kit listed above, the twin tubed legs are paired with the GH06 Pro Fluid Head with quick release.
A fluid head is preferred by many videographers as opposed to using a regular pan and tilt head or a ball and socket head as you probably have on your regular tripod for still photography. What makes a fluid head different is how it moves. The movement is dampened by a heavy oil so that pans and tilts made while shooting are very smooth.
Some fluid heads have adjustable drag, changing how much resistance is in the fluid dampening of the desired movement. Counter balance is another useful adjustment on fluid heads that works in conjunction with the drag for smoothing out any deliberate movement.
Quick Release
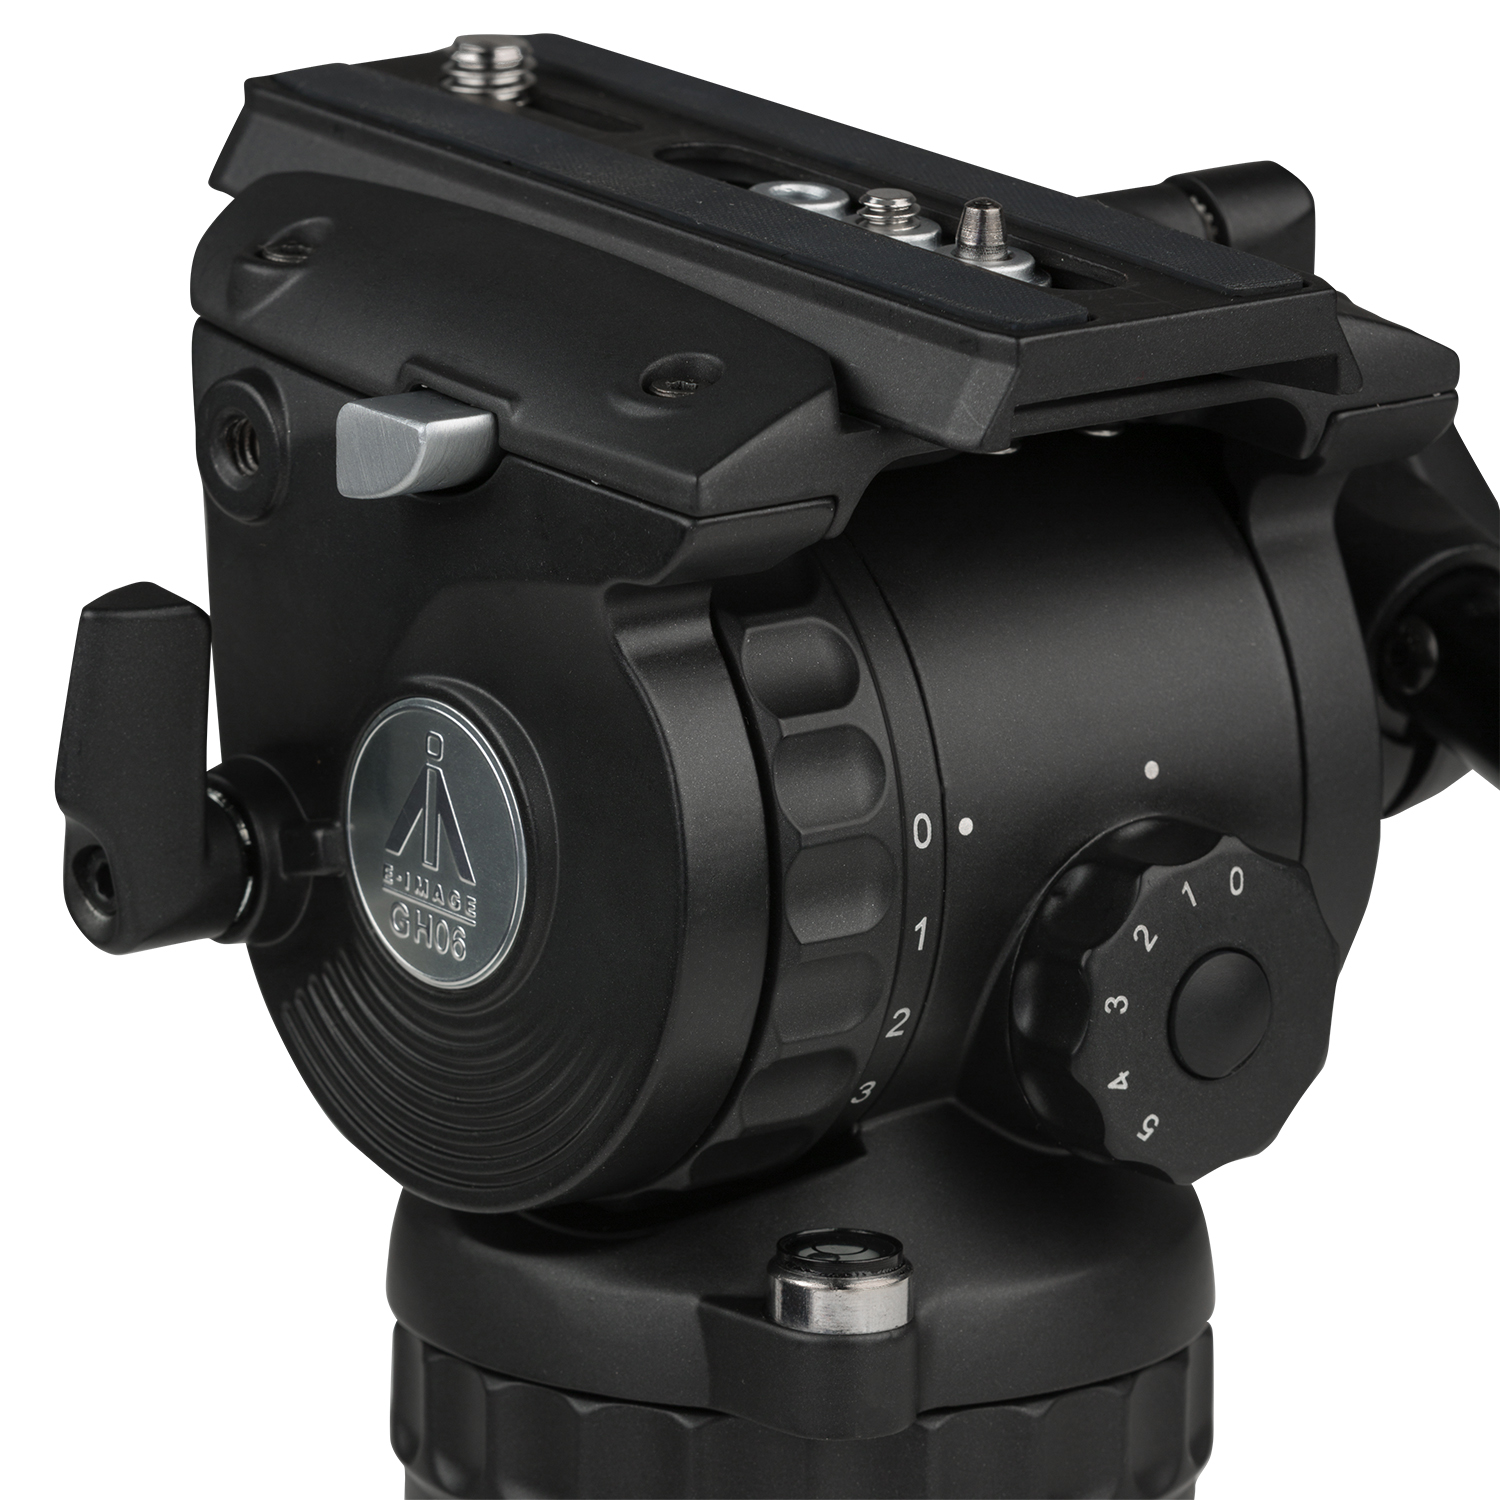
The purpose of quick release systems is to allow you to quickly release the camera from the tripod and reattach it quickly and securely. It doesn’t do us much good if the quick release on our video tripod isn’t secure and stable.
Thankfully, every quick release I’ve ever tested on Ikan’s video tripod kits are completely secure when mounted on their video tripod. The quick release on the GH06 head included in the GA752 kit is called Easy-Lock Camera Plate System and it works very easily besides being entirely secure.
Spreader, Dolly, Feet, Arms
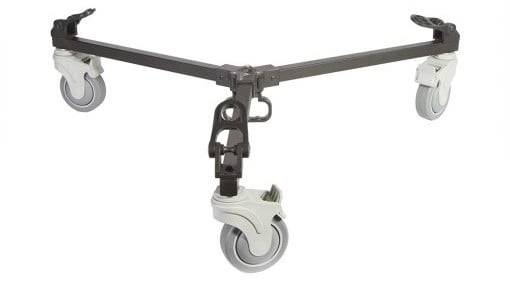
These last few accessories and features of video tripods either make the rig more secure and stable or make your video production jobs go easier.
The GA752 legs come with a removable spreader which can lock the legs together for a more stable base. The spreader being removable is a nice added feature because with the spreader, you can adjust the legs independently for setting up on uneven ground.
A rolling dolly, the EI-7004, makes studio or location video shoots go a little smoother when you need to make camera movements other than pan or tilt. The feet of the GA752 are removable to put it on the dolly or you can use the rubber feet which retract to spikes for outdoor use.
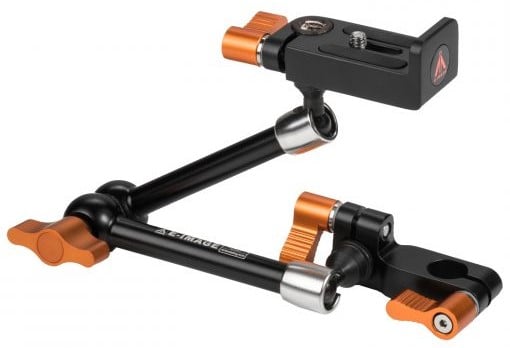
A nice additional capability for a professional level tripod is the ability to attach an extra arm, such as the EI-A47 11” Articulating Magic Arm, so that you can mount other video accessories such as an extra video monitor or small LED lights.
The Video Tripod for You
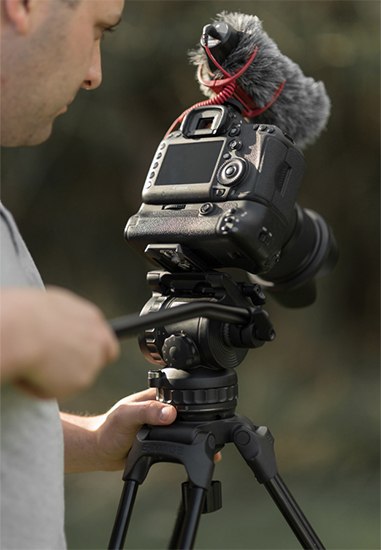
What video tripod you decide on is going to be based on what your budget is, the size video tripod you need, and what video tripod features you require. Have a look at the other video tripod kits from Ikan to find one that works for you.
Learn More:
- Composition Tips for Shooting Video
- How To Edit Videos Like a Pro
- 4 Must-Have Accessories for Shooting Video
We Recommend
Video Tripod vs Photo Tripod: A Quick Guide
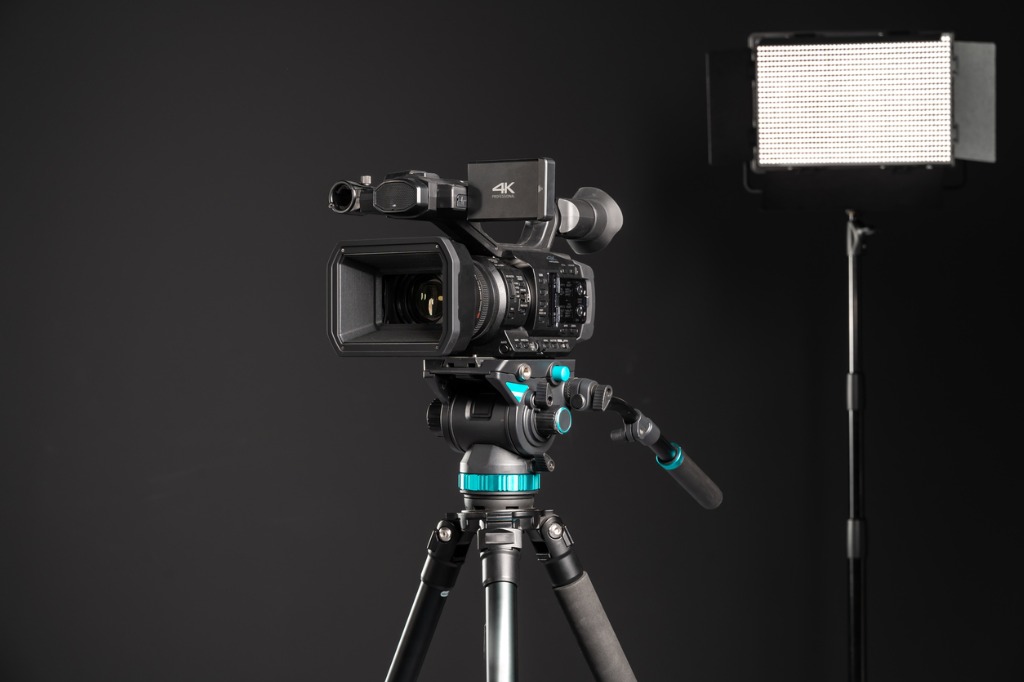
photo byMedia Trading Ltd via iStock
As a videographer, or a still photographer getting into the fantastic video capabilities of your digital camera, you may be wondering what is the difference between a video tripod vs photo tripods.
As a quick tripod buyer’s guide for videographers, we’ll talk about the differences and similarities between video and photo tripods so you can make the right choice.
Similarities Between Video and Photo Tripods
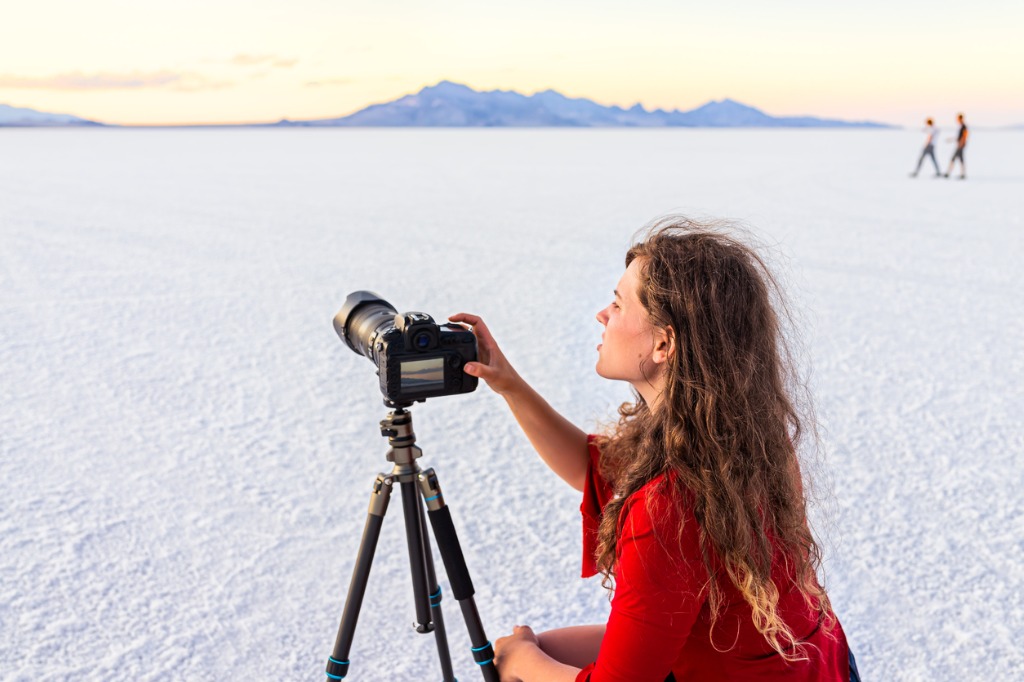
photo byablokhin via iStock
Tripods have legs and a head. The types of heads and types of legs of a video tripod vs photo tripod might look very much the same at first glance.
The primary purpose of a photo tripod is to provide a stable platform and keep things still. A video tripod also provides a stable platform but with a significant difference.
Differences Between Video and Photo Tripods
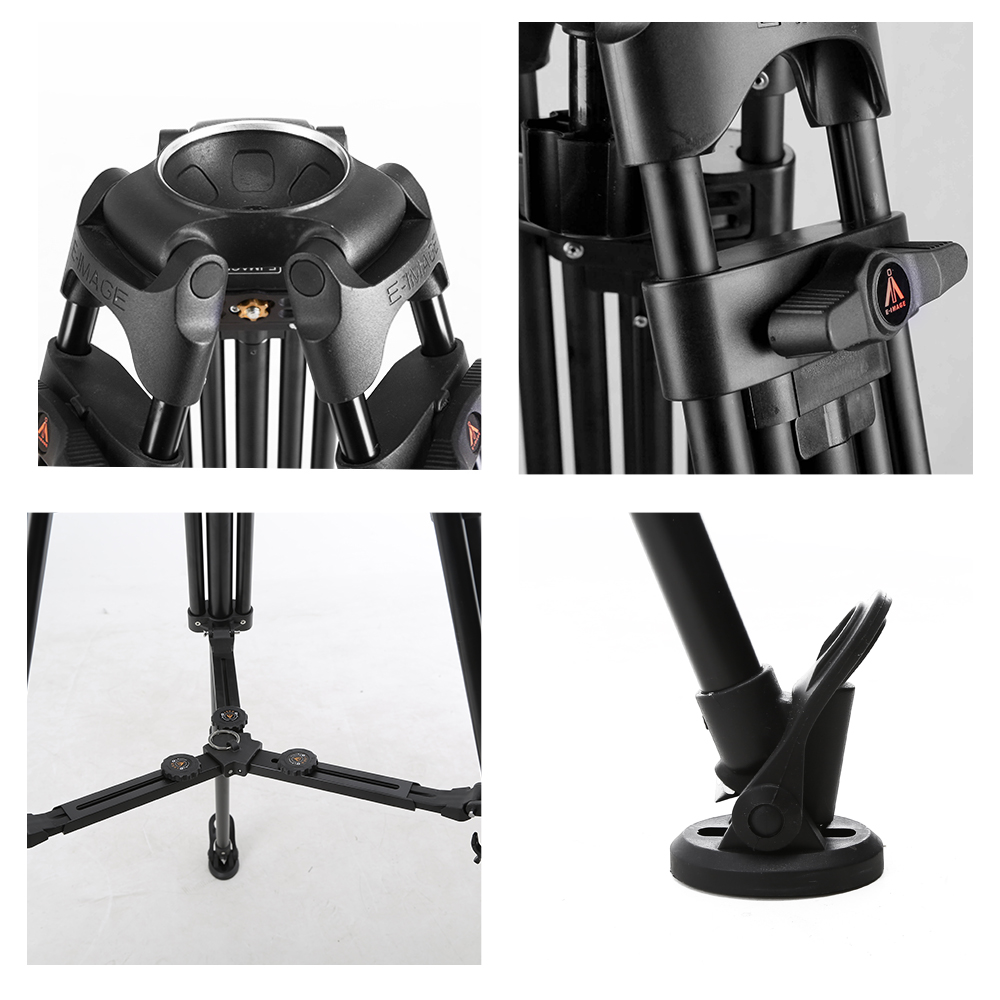
When looking at video tripod features compared to photo tripod features, the things that stand out are the design of the tripod heads and that a video tripod doesn’t have a center column.
These two video tripod features provide the videographer with a stable platform and the ability to move smoothly. And that’s the biggest difference of a video tripod vs photo tripod, videography adds motion and a tripod for video cameras needs to allow controlled motion.
Video Needs Motion

Since a video is basically the same as a motion picture or cinematography, motion is at the heart of this artform. And that’s the main reason why we choose a video tripod when shooting video, even if we already have a great photo tripod.
The center column is replaced by a bowl and the head is designed for smooth, controlled movement. Let’s examine a typical high quality video tripod from a video accessories company and learn about these important video tripod features.
Learn More:
Ikan EK650 Video Tripod with Fluid Head

The legs are going to provide stability and the fluid head will give you smoothly controlled motion. So let’s look at the legs. The Ikan EK650 Video Tripod has twin tube legs and an adjustable mid-level spreader for a superb level of stability.
It has a 75mm bowl for mounting the fluid head. Video tripods don’t have a center column like photo tripods do. All height adjustment is made by the legs. The bowl lets you level out the camera after you get it as close to level as possible with leg adjustment.
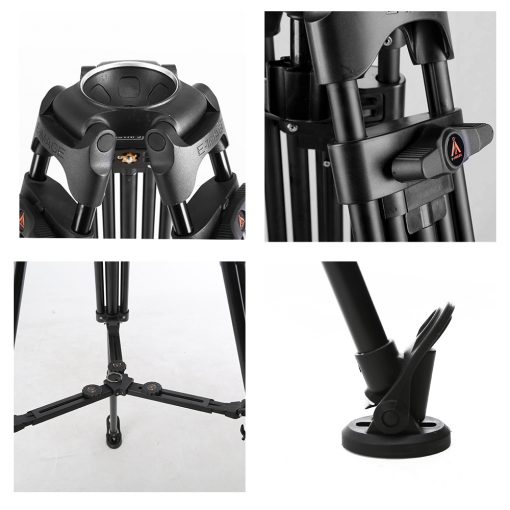
Not having a center column is actually a plus for videography and not the limitation our still photography oriented mind might think it is. A center column adds a possible cause of unwanted movement when making use of the larger fluid head or possibly a slider with fluid head. The twin tube tripod legs prevent flexing while panning or tilting while filming.
A fluid head uses a dampening fluid to smooth out motion of tilting or panning during shooting. The fluid heads generally don’t have a provision for flipping the camera into portrait orientation since that would weaken stabilization and you won't film video in portrait orientation anyways.
Fluid heads tend to have a long handle for moving the rig in a panning or tilting motion. The Ikan EK650 has adjustable levels of drag for how much dampening is in use and a large quick release plate for a very secure attachment.
Video Tripod vs Photo Tripod
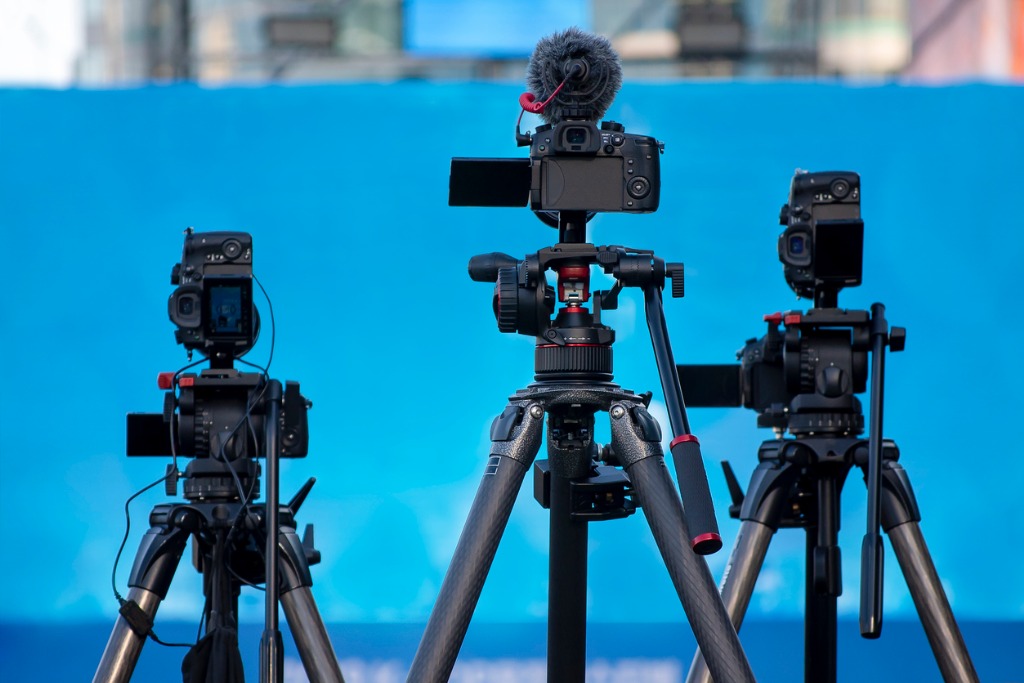
photo byJae Young Ju via iStock
Our photo tripod is a great tool for all sorts of still photography but for the best videography results, we should use a video tripod. Adding a fluid head to a photo tripod will work but the added stability of twin tube legs and a bowl replacing the center column dramatically increase the stability of our videography rig while filming with panning or tilting motion.
Check out all of the video tripods available from Ikan, from very budget friendly models to high end professional models. Ikan designs and makes the videography and cinematography accessories they sell so they can offer extremely high quality and fully capable gear at lower prices than other brands. It’s one of my favorite stores for professional video accessories.
Use this video tripod buyer’s guide to help you narrow down what type of tripod to get for your own videos. When considering a video tripod vs photo tripod, it is a good idea to have a different tripod for each use since the features or each type are important for their intended use.
Learn More:
We Recommend
What is a Camera Cage?

Photo by Stephan Müller from Pexels
As photographers and videographers involved in serious videography, you have probably seen or searched for a camera cage. Along with such vital accessories as external microphones, video lighting, and filters, a camera cage can simplify your workflow.
So, you won’t get better video from a camera cage, but using a camera cage can allow you to be able to capture the best video footage possible. We will cover three questions. What is a camera cage? What are the benefits of camera cages? How do we use a camera cage?
Camera Cage? What’s That?

A camera cage is a mounting system. Shooting high-quality video, you have likely found yourself wishing you had more spots on your camera to attach certain video accessories. An external video light competes for mounting spots with your shotgun mic or external monitor.
We could use a bracket for some of this, but a camera cage offers a couple of extra features. Stabilization and specialty mounted tools are part of what makes camera cages good ideas for shooting advanced videography.
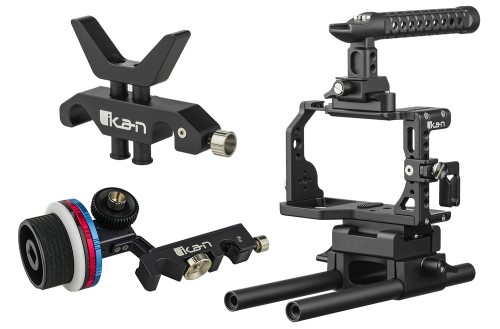
As an example of a basic camera cage usable for modern DSLRs and mirrorless cameras, the Ikan Stratus cage has the shape and functionality that make camera cages beneficial videography tools.
You’ll notice that the camera will fit inside the main body of the cage, and the cage itself is then used to mount all the other useful accessories you want for smooth video recordings. Nothing actually fits on the camera, eliminating stress on vulnerable camera parts.
Learn More:
Benefits of Camera Cages

Photo by Kyle Loftus from Pexels
An immediate benefit of using camera cages is extra stability. Using interchangeable lens cameras for videography gives us great video recording capabilities. But since most of these cameras were designed primarily around still photography, the form factor doesn’t lend itself to holding comfortably and steadily while shooting video.
One of the benefits of camera cages is that it instantly changes the form factor to something more appropriate to video. Additionally, the cage gives you mounting points that balance the sometimes heavy accessories used in serious videography.
Accessories like a video monitor would put a lot of stress on the built in accessory shoe on the camera. And then it takes up the spot you want for a shotgun mic. The camera cage solves that problem, too.
How to Use a Camera Cage

Using camera cages automatically transforms your production thoughts to a different level. Whether that’s a higher level or not depends on how you make use of the tools at your disposal.
A camera cage doesn’t actually do anything on it’s own. It’s what allows you to do smoothly and effortlessly that’s the important thing.
Going back to the Ikan Status camera cage, if you add a lens support and follow focus system, you can mount the entire rig on a quality video tripod and perform advanced video techniques with ease.
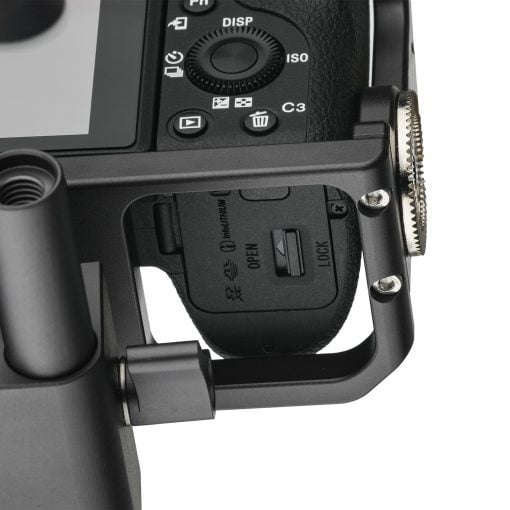
Follow focus is a technique used to keep the subject in focus while dollying or tracking the camera. In larger productions, this is a separate job from other camera operations. In our one man studio operations, we need a little help from well designed accessories.
The bottom rods and added lens support also give us a steadier platform for lens filter systems and matte boxes. Matte boxes are a staple of serious video and cinematographic production to control lens flare and for other optical tricks used in movie production.
Camera cages like the Ikan Stratus also mount and unmount rapidly and securely from tripods with quick release systems, making them ideal for rapid changes of point of view or to change from a static view to an immersive view.
While using the camera cages as handheld devices, the top handle gives a much more comfortable way to hold the camera rig for better, smoother video footage.
Create Better Video Footage
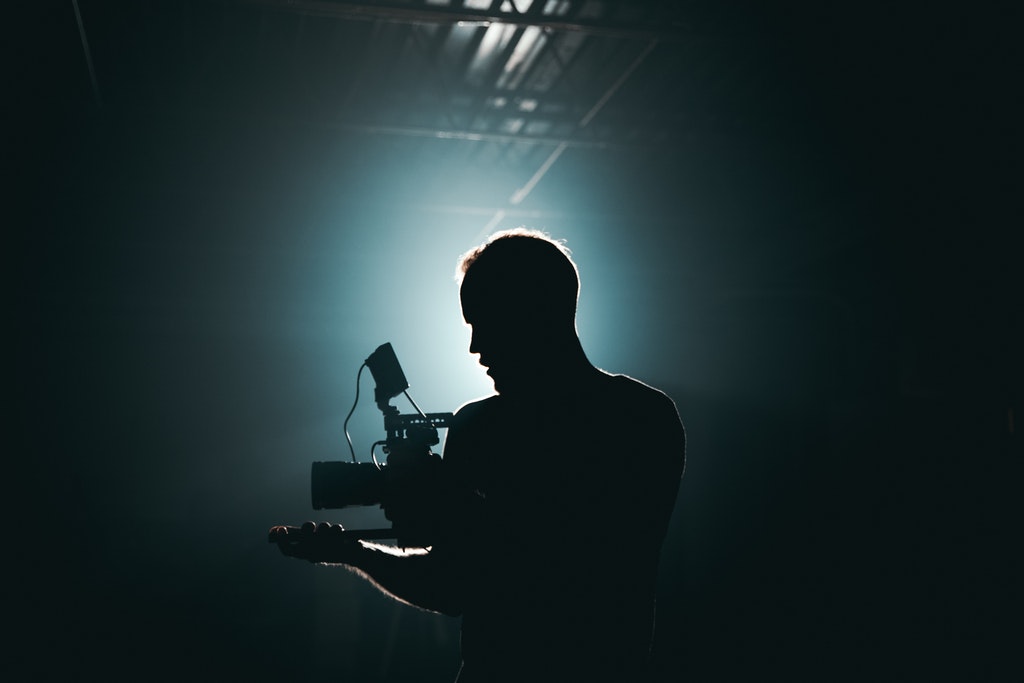
Photo by Kyle Loftus from Pexels
As I said at the start, using camera cages, or any other photography or videography tool, won’t make you better. But certain tools and accessories lend themselves to easing our workload and giving us a better workflow.
Having a better workflow for videography often results in freeing our mind to be more creative and also it helps keep us focused on important aspects of our craft such as exposure, composition, and lighting, which does tend to result in better work from us.
So, in a way, I guess we could say that some accessories and tools help make us better videographers. But only if we already know what makes great video, great stories, and something others will like watching.
Camera cages don’t do anything other than hold stuff for us. But sometimes, that’s all we need to free us up to make better videos.
Learn More:
We Recommend
What is a Follow Focus System?
photo byinnovatedcaptures via iStock
A follow focus system is a helpful tool for professional videographers to ensure accurate focus and smooth focus transitions while recording. The origins of follow focus systems go back decades and were first incorporated into film based cinematography.
What is a follow focus system for? Why would a current videographer using the latest in digital technology need a follow focus system when autofocus is so good? Do we really need to know how to use a follow focus system? Good questions. This follow focus system tutorial will provide some answers plus tips and ideas.
What Is a Follow Focus System?

photo bybrightstars via iStock
If we were on a set for a major motion picture, digitally captured or on film, there are job descriptions that sound foriegn to us. These jobs are usually something that we end up doing ourselves in our smaller or even one person professional videography operation.
For instance, listed in credits will be cinematographer, the person arranging the lighting, key grip, a person physically putting equipment (including lights) in place, and a camera operator, the person running the camera.
A credit you have wondered about is focus puller. This is the person that adjusts the focus of the lens. It’s an important job when focus has to change during the take. For instance, when the panning, dollying, or slider action changes camera to subject distance or the subject changes from one to another in the same take.
A follow focus system is a mechanical, electronic, or hybrid tool used to do the focus pulling for us. Depending on the size of your professional videography operation and the complexity of the shot, you could choose to operate the follow focus system yourself or assign it to a crew member.
Do You Need a Follow Focus System?
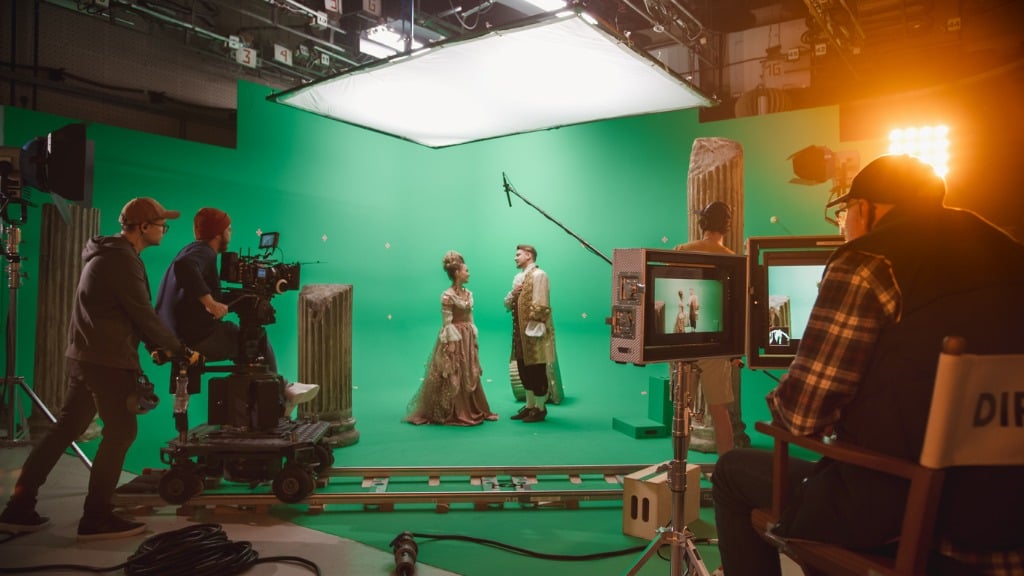
photo bygorodenkoff via iStock
In other words, what is a follow focus system for? Video and cinema is different from still imaging in that it shows motion as motion. Since things are in motion, the camera, the subject, or both, focusing distance will change.
We could try to rely on our camera AF system to keep up with all of this motion, but sometimes the subject distance changes in ways that fools even the best auto focus. Also, the demands of the scene may require changing from one subject or area of interest to another, oftentimes in very spots in the field of view.
Shooting in low light or for selective focus techniques also puts a strain on our focusing if relying on AF alone. You don’t want the AF to be hunting for focus when the action has already changed to another part of the field of view. So, a follow focus system allows focus to follow the action in a predictable and controlled manner.
Learn More:
- 5 Tips for More Professional-Looking Videos
- Plan a Solid Video Shoot with These Pre-Production Tips
- Tips for Better DSLR Video
How to Use a Follow Focus System
Let’s look at a commercially available follow focus system and see how we might incorporate it into our own productions. My favorite professional video accessories manufacturer Ikan makes a reasonably priced model, the PD Movie PD4-S3 Remote Air Pro.
This model provides a lot of usability. It is 4 pieces, 3 motor units and the controller. There are actually 3 different motors supplied with the kit so you can use the one controller to change focus, zoom, and lens iris control.
Part of what makes this follow focus system so useful is the small size of the motors and the fact you can control all at once. With a matte box, filters, and other things attached to our camera and camera cage, being able to smoothly operate these functions while filming is a huge advantage.
Just as we opened up our creativity and enhanced the viewability of our production with DMX lighting and a motorized slider, adding a follow focus system will enable our finished videos to look more professional and be more enjoyable to watch.
Remote Air Pro in Action
The PD Movie PD4-S3 Remote Air Pro from Ikan is a joy to use. Attach the motors as directed to the zoom, iris (lens aperture), and focus rings of the lens, and either mount the controller to the cage and wire it to the motors or use the controller wirelessly with or without a remote monitor. There is also a smartphone app that can be incorporated into your workflow.
The controller has a focus wheel that can be used for fine focus control as well as large quick actions. It is very intuitive since you simply turn or twist the wheel. The iris and zoom are controlled by rocker switches which also have adjustable speeds.
Below are a couple of short videos that show basic operation. Other videos are on the Ikan website for further explanation, hints, and tips.
Professional Results
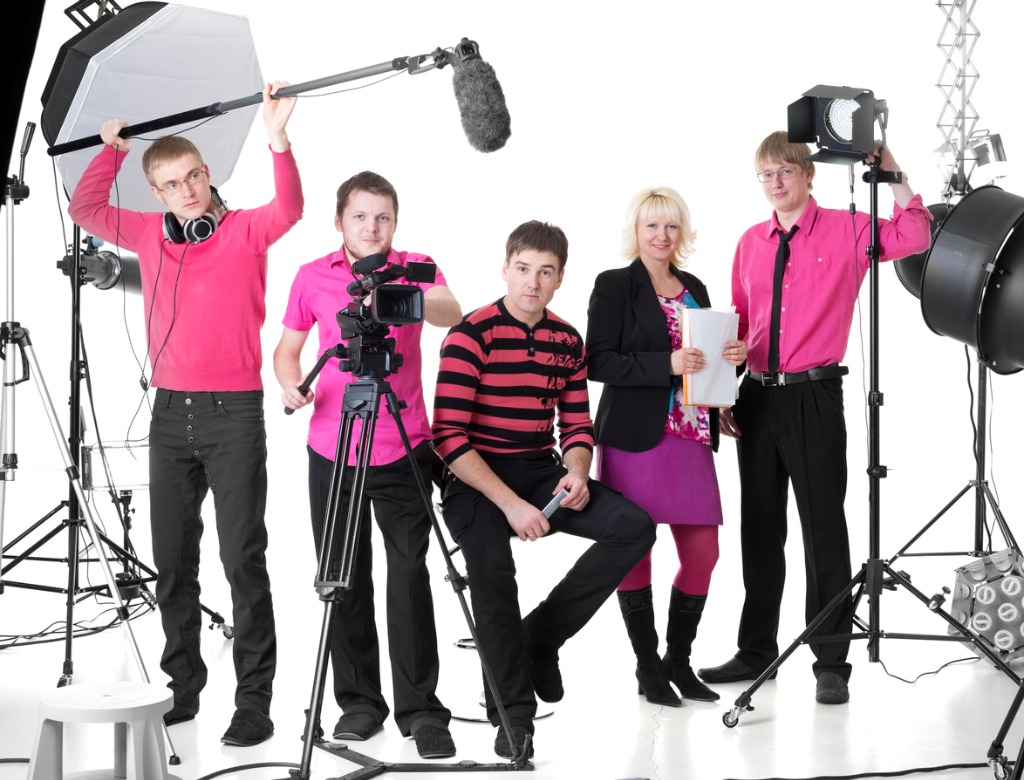
photo byproxyminder via iStock
The goal of adding any equipment, programs, or new techniques to our professional videography operation is to maximize our results. The closer we can get our own productions to mimic the output of major motion picture studios or TV shows, the more professional looking our results are.
If our videos appear more professional, this pleases the clients, makes the videos more enjoyable to watch, and hopefully increases our good reputation and demand, which can be leveraged to a successful video production business.
A follow focus system is just one peice of the puzzle leading to superior results. Lots of hardware and software is involved in crafting a great video, whether it’s a wedding, a commercial, an in house training video, or pure entertainment.
Using these tools properly to transfer our creative vision into a superior product is the role of our creative minds and learning good practices and techniques.
Learn More:
We Recommend
What is DMX Lighting?
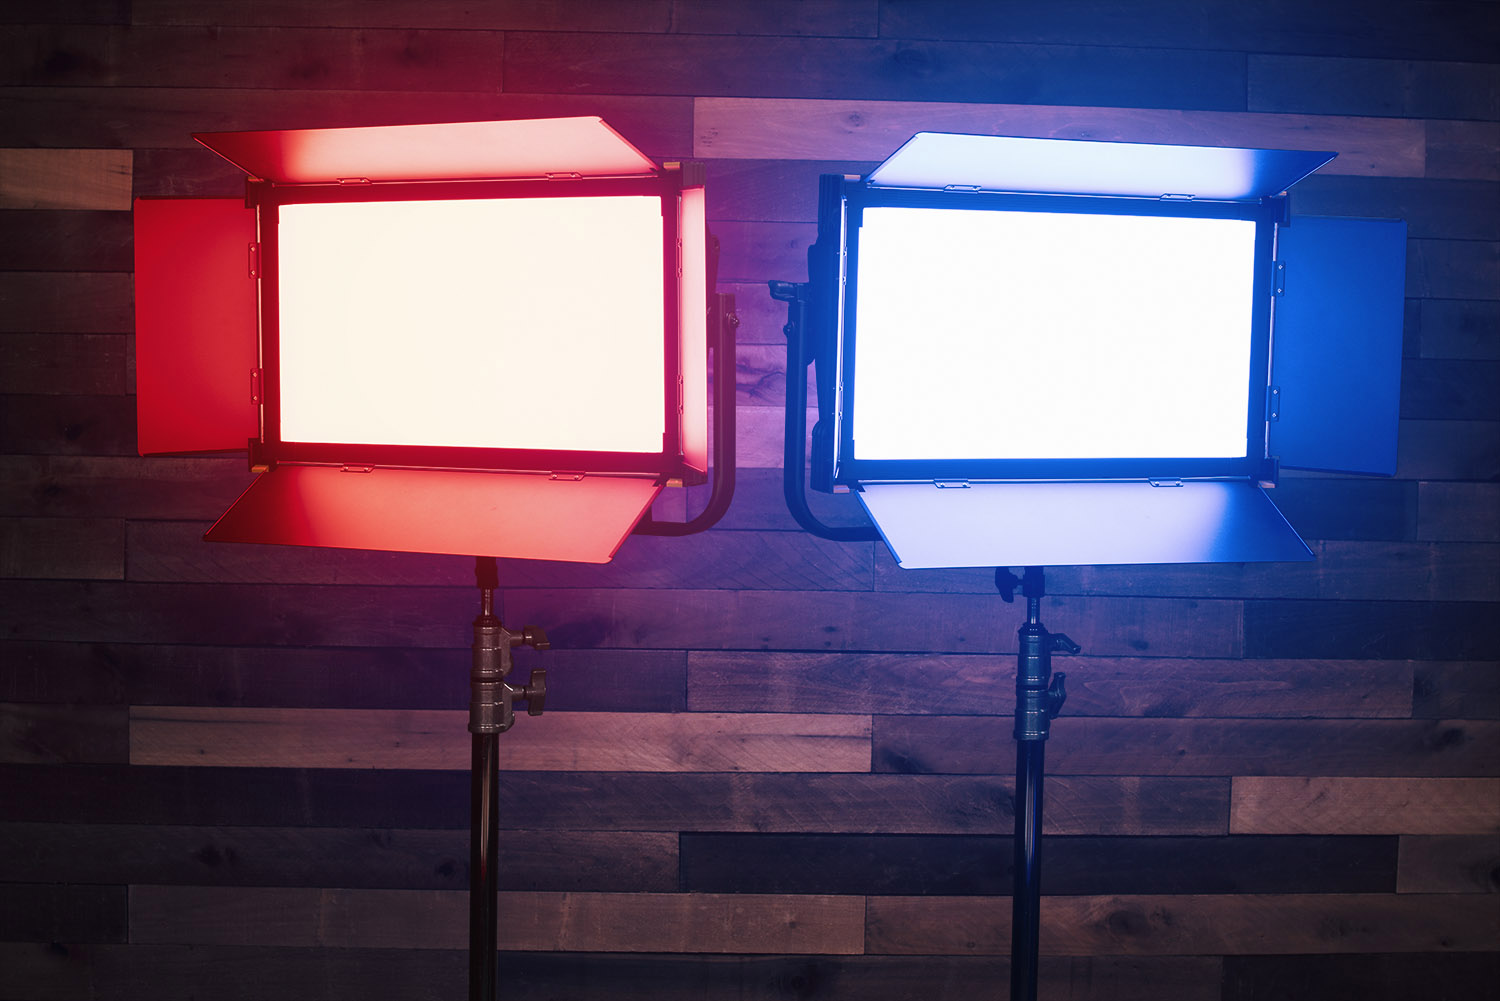
Making good videos and still images requires the ability and capacity to control what is being captured and recorded. Lighting is a huge factor in most situations, especially important for making videos that are engaging or entertaining.
Regarding studio lighting, you may have come across DMX lighting. What is DMX lighting and how can it help us with our own video or still imaging projects?
What Is DMX Lighting Anyways?
photo bygrandriver via iStock
DMX is not a brand name or a rap star, it is a digital standard for lighting and effects control. DMX stands for digital multiplexing. This standard allows compatible lighting or other machines to be controlled by a central board. DMX supports 512 channels per fixture of control and since it is digital, you can wire units in series as opposed to snaking a separate cord for each device back to a control panel.
So, DMX is not a special effects machine or a specialty sound mixer, but rather a method of connecting and controlling lighting and other effects that is digital in nature and simple to connect.
Learn More:
- 5 Tips for More Professional-Looking Videos
- Lighting Options for Recording Video at Home
- How To Use a Follow Focus System
DMX Lighting Benefits
photo byDerekJWalker via iStock
DMX lighting benefits us in several ways. DMX lighting for photography of still images eases up our studio workflow, especially when working with models or in making portraits. Sometimes, we need to add models to our product photography for clarity of purpose or for lifestyle images. DMX lighting gives us centralized control over all the changes required for the various images.
DMX lighting for videography is where we really feel the positive DMX lighting benefits in regards to simplifying our workflow. Since we have things in motion, including the recording (hence the term ‘motion picture’ still applies), we optimally want a method of lighting control that won’t require us to either pause the action or work arounds for ensuring non performers don’t show in the view.
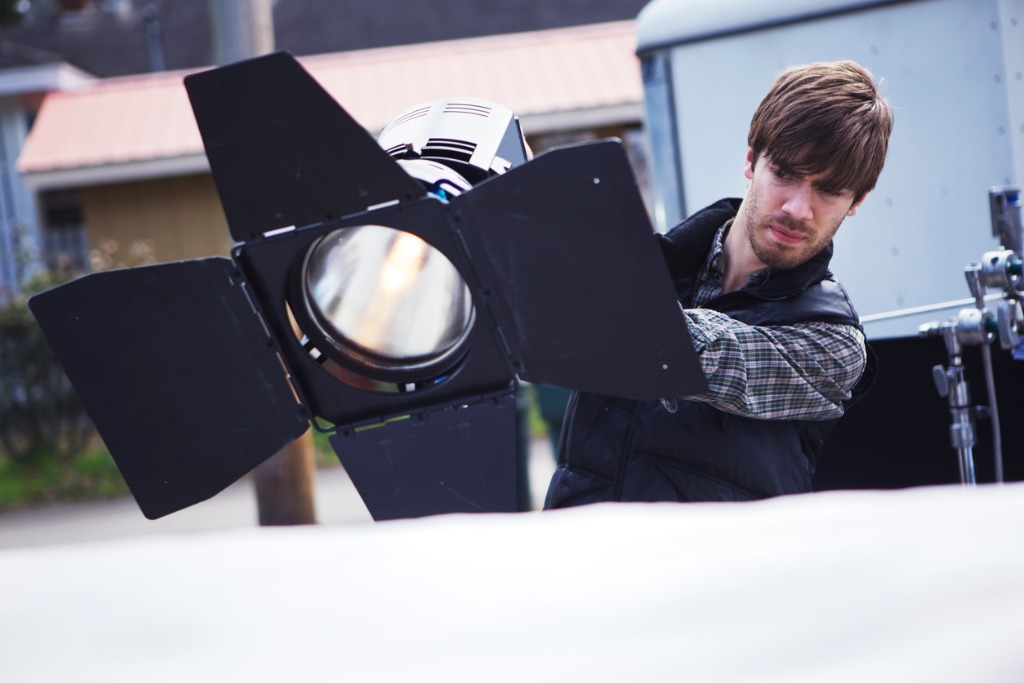
photo bybjones27 via iStock
Setting up all of our lighting and effects with DMX lighting control lets us make all of the changes from a centralised console, avoiding pausing production or working around non on screen people. Some DMX lighting consoles even allow for preprogramming all of the adjustments.
This centralized control can open up our creativity as well. Imagine being able to mimic the effect of cloud passing over the Sun while a character is engaged in a touching soliloquy. Or, dimming light on one part of an object and turning on a light on a different part when the instructor moves on to that next part in a training video. There are lots of possibilities for creative filmmaking made available with DMX lighting.
Equipment Choices
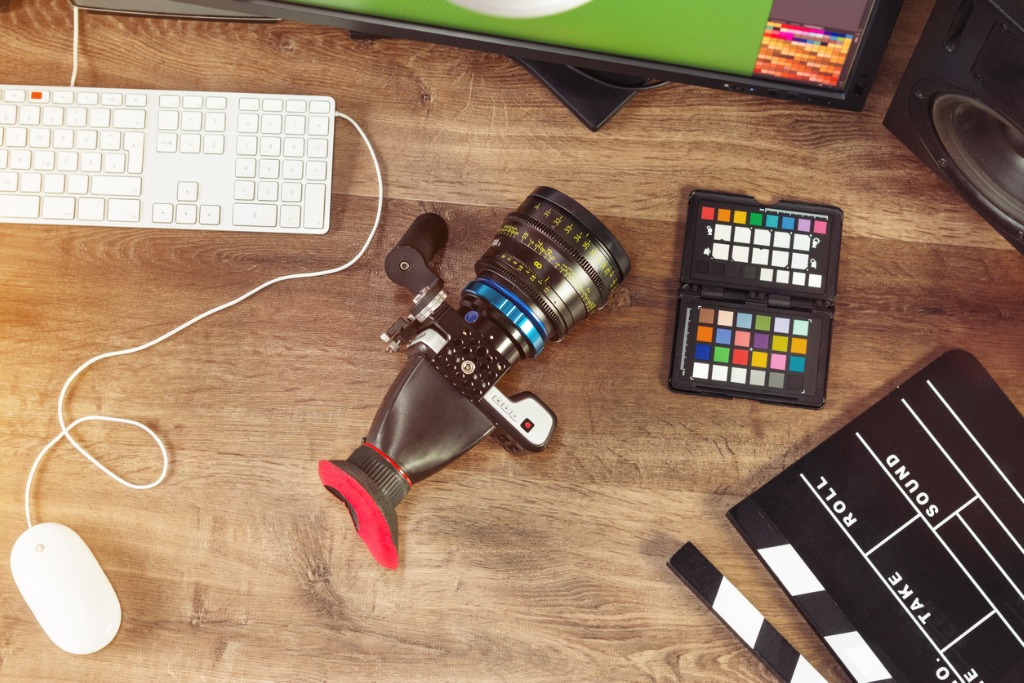
photo byaudioundwerbung via iStock
Obviously, to take advantage of all that DMX lighting control offers, we will need to have compatible equipment. What do we need for DMX lighting? We will want to have lights that can be controlled by a DMX lighting console and we will need a console or controller of some sort. There are multiple great options in both of these categories.
When choosing new equipment for professional video production, I like to see what Ikan Corp. has available. Ikan is a manufacturer and retailer of high end video production accessories and lighting. Since they make what they sell, you can often find amazing gear at lower than expected prices.
Lyra LCX21 Soft Panel Light
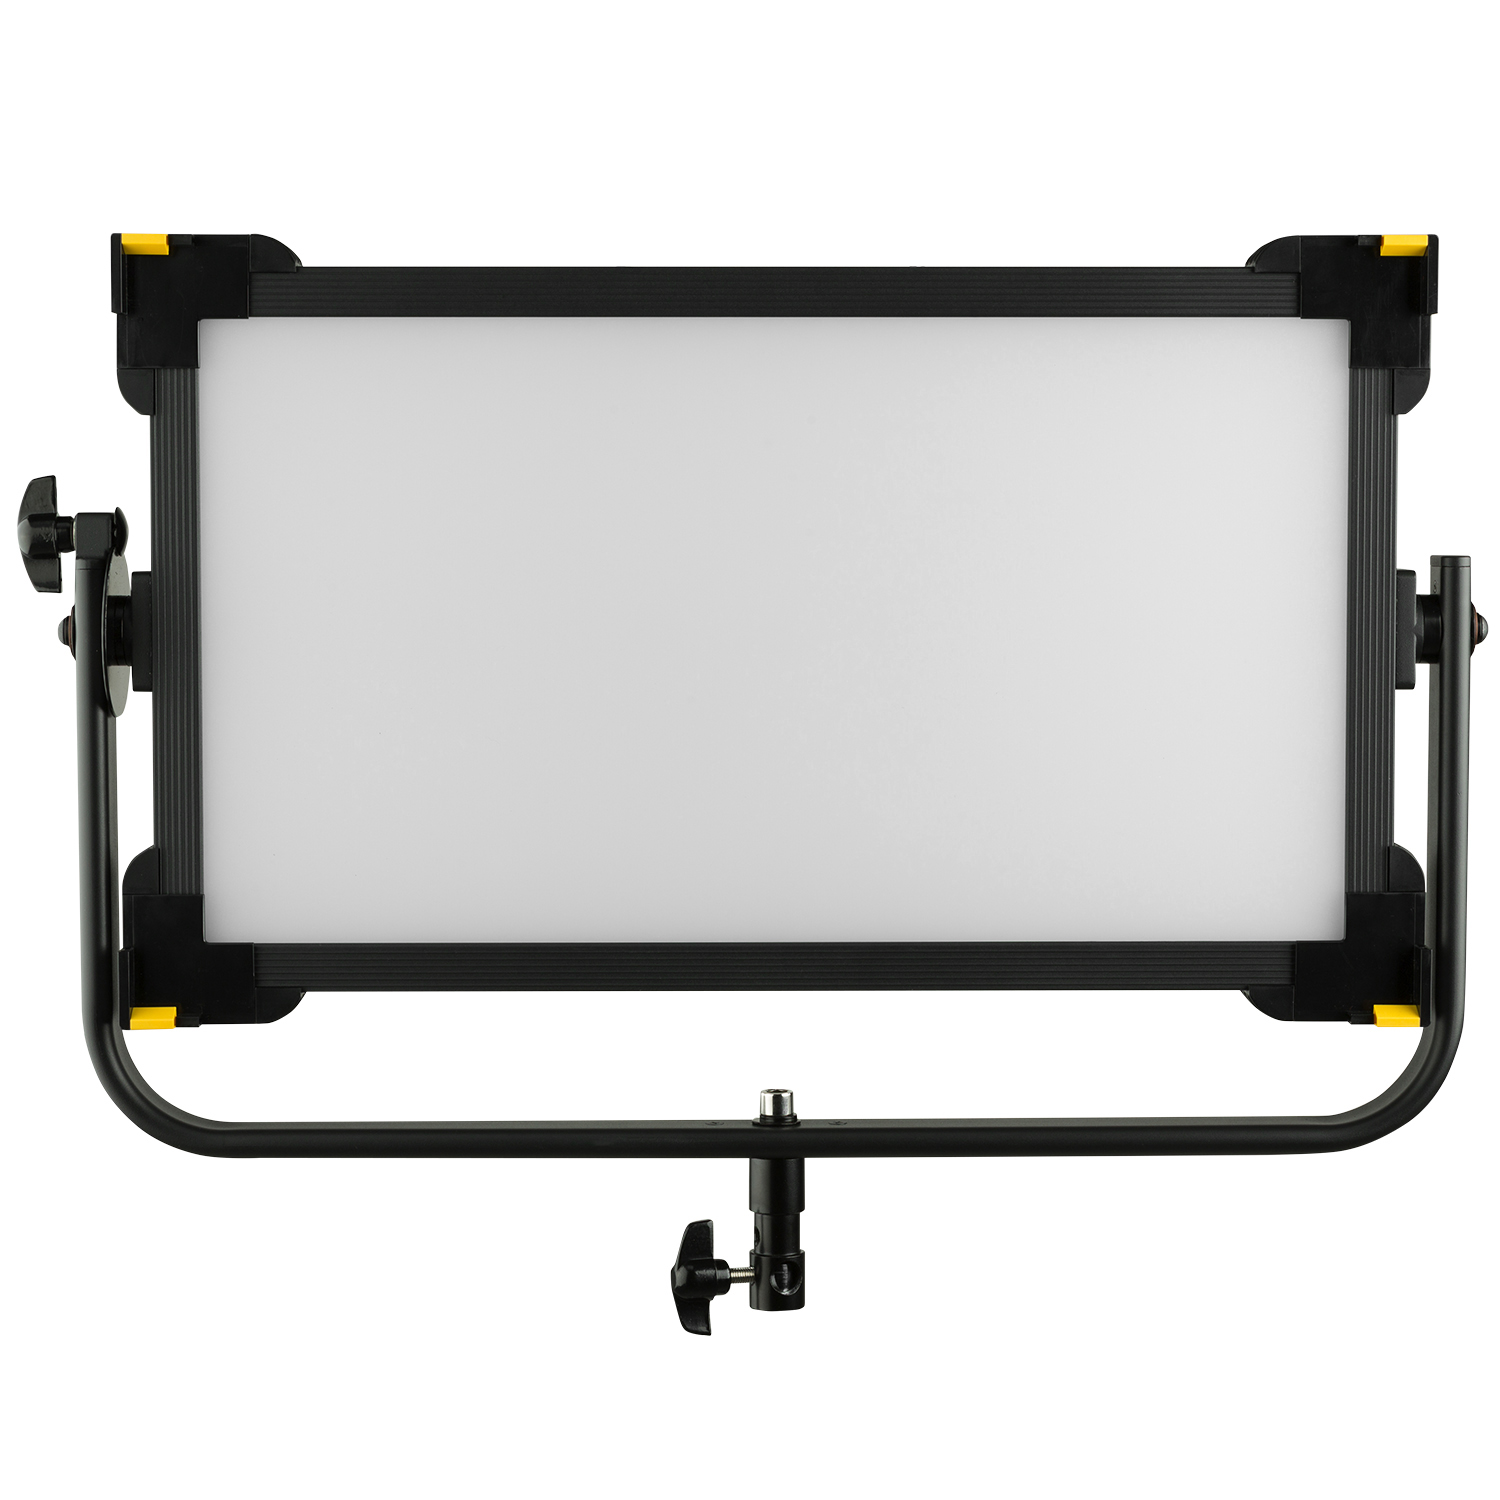
This is an example of a very good video light with lots of DMX control options as well as excellent general lighting quality and characteristics. The Lyra LCX21 Soft Panel Light has a CRI of 97, uses LED bulbs for versatile control and low heat, variable color temperatures from 2800K to 10,000K, special lighting effects, heavy duty construction, and can be powered by either AC or batteries.
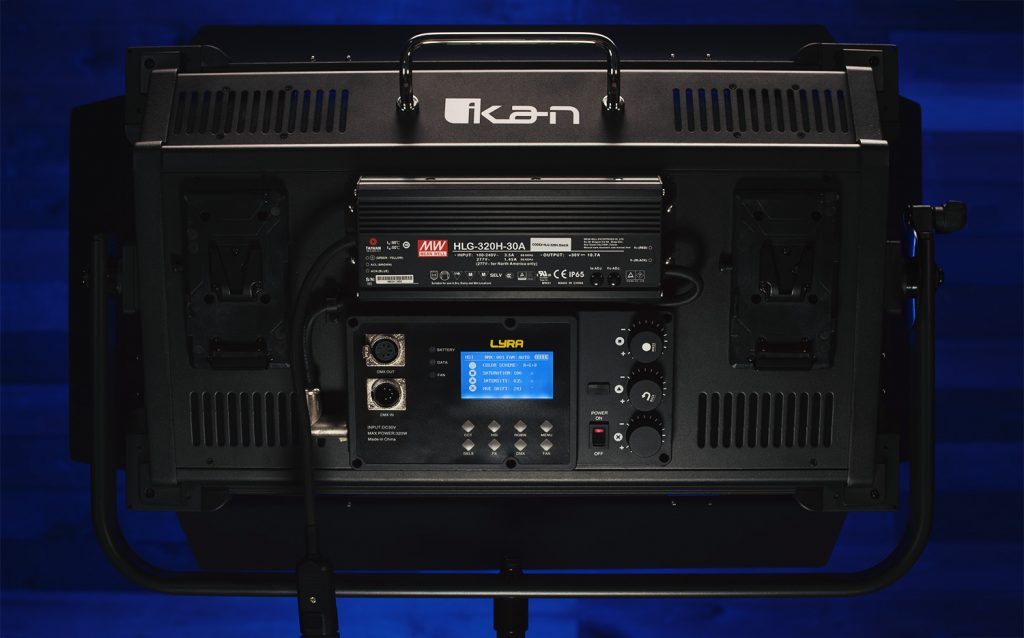
The lights can be controlled either by a DMX lighting console or by the switches, dials, and menu on the light itself. This light is very bright and is adjustable in several aspects of color for blending in with ambient lighting or with other lights you already own.
Ikan IDX-096 DMX Console
For controlling multiple fixtures and lights, the IDX-096 DMX Lighting Console from Ikan provides 96 channels of light dimming and can be programmed for 4 pages of 24 scenes each. Additionally, you can program fade and chase times, you can even plug in DMX enable audio for changing options to the beat of a soundtrack.
What Is DMX Lighting Good For?

photo by AaronAmat via iStock
So, what is DMX lighting good for? It allows you as a photographer or as a filmmaker videographer complete control over lighting changes without ever touching the lights or getting in the way of a scene. DMX lighting will open up new avenues of creativity as it eases your workflow
Learn More:
We Recommend
What is Fresnel Lighting?
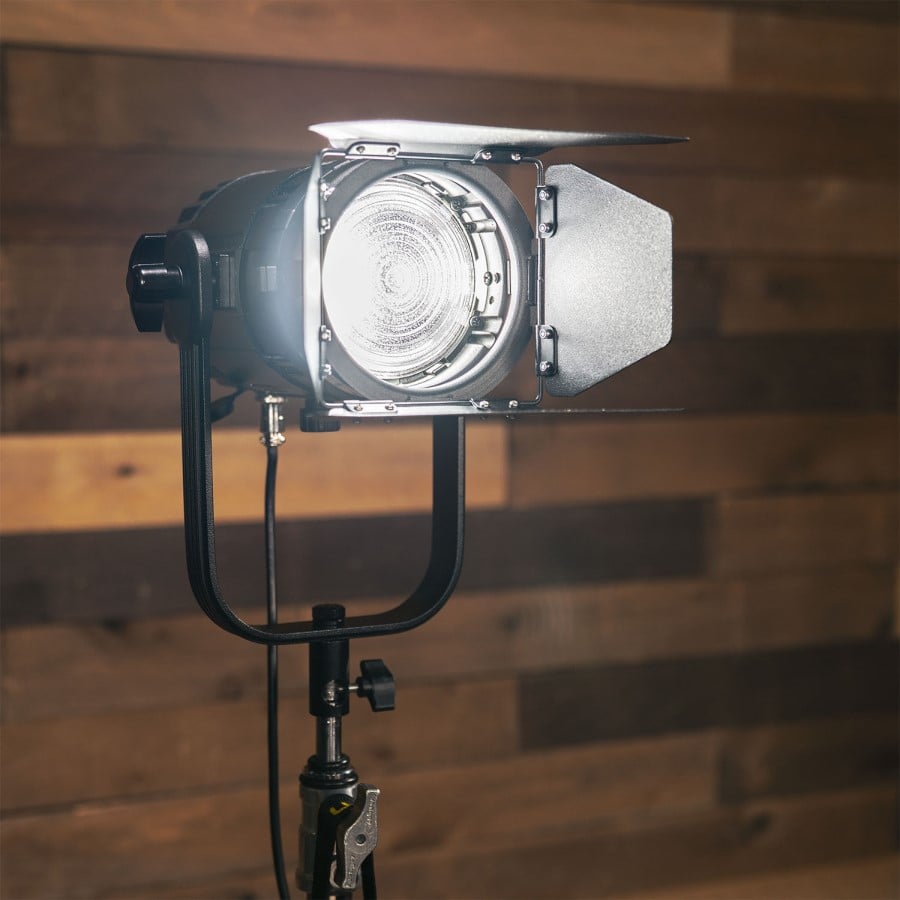
Fresnel lighting is used in multi-light configurations for video or still photography studio use, or it can be used as a single light for these. It is a very common light for TV or cinema but can also be found in the lighting gear for portraits or product photography. What is fresnel lighting and why should you consider it?
What Is a Fresnel Light?
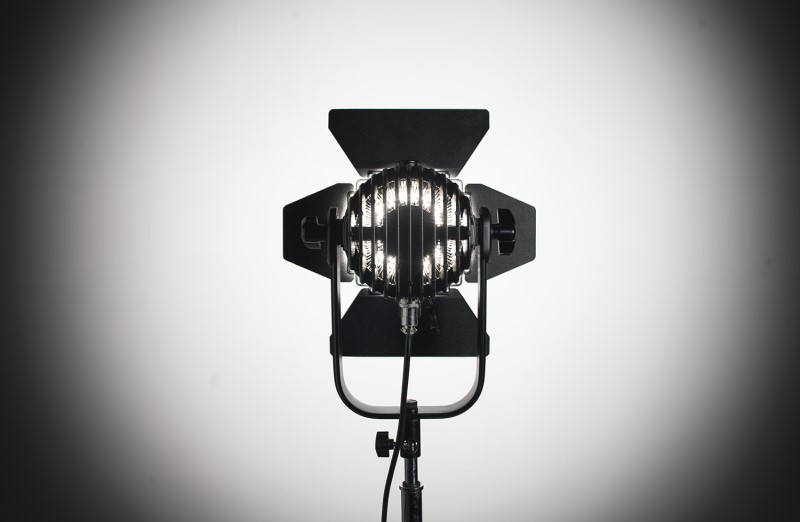
A fresnel light is a focusable light, in other words, the shape of the light cone can be varied. How fresnel lights work is that a lens is in front of the bulb which can be moved back or forth which either spreads out or narrows the beam of light emitted.
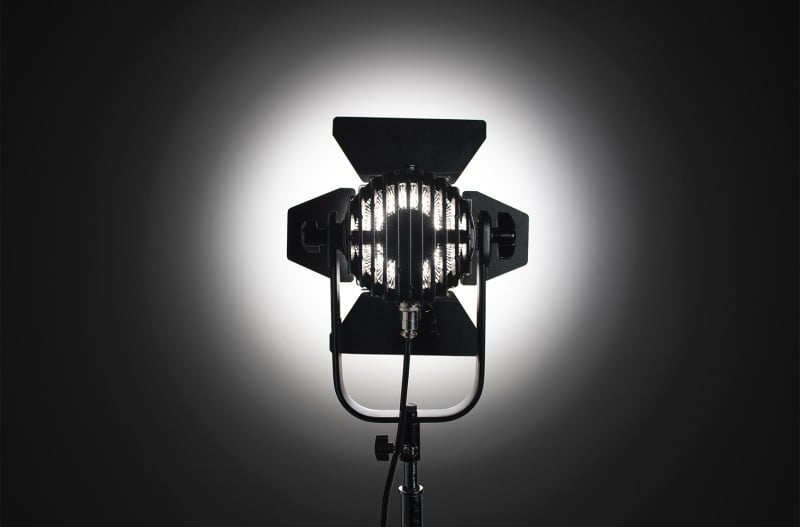
The lens is what makes the light special. Instead of a thick piece of glass or plastic, a thinner element is used and concentric rings are cut or formed into the lens. The rings allow the light to be changed without requiring a highly convex shape.
Since you’re not imaging through this lens, the obvious issues of distortion and sharpness this might cause aren’t an issue. By the way, fresnel is a borrowed word, French in origin. So it’s pronounced fre-nell or fray-nell and not frezz-nel. Just a helpful hint when shopping for one or asking about one.
What Do You Use Fresnel Lights For?
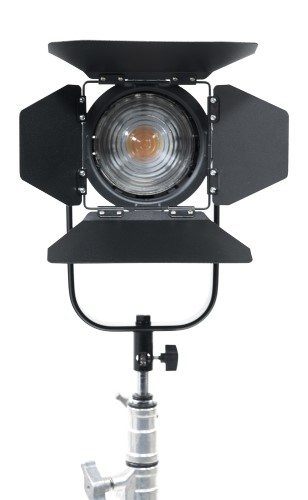
Since we know how fresnel lights work and what is fresnel lighting, now we want to talk about what do you use fresnel lights for.
Fresnel lights are a staple of television studios and film sound stages and they can be found in many portrait studios, too. Since the light cone can be adjusted from wide to narrow, you can make a wide variety of lighting configurations without even moving the lights.
Adjusting the fresnel while also physically moving the light and adjusting power levels can vary the set up a huge amount. Fresnel lighting techniques take advantage of this variation available.
A wide cone of light might be used as the primary light with a tightly focused light as a hair light and a medium wide light cone for fill. This is a perfect setup for portraits but is also extremely useful for all types of commercial product photography.
Learn More:
Types of Fresnel Lighting
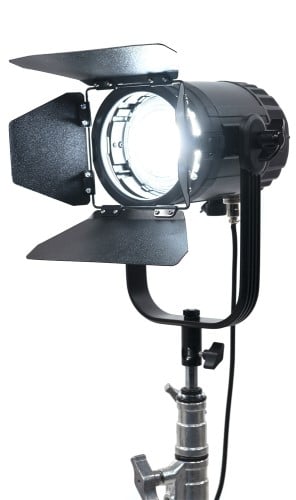
Many newer photographers and videographers may feel that the high-end fresnel lights are too big, too hot, or too expensive for them. These concerns are real issues since the tungsten bulb lights do run very hot, so hot that many of them have fans built into them. These tungsten fresnel lights are also relatively expensive compared to regular floods.
Once color correct LED bulbs were adapted to photo and video lights, a lot of these issues were eased. LED fresnel lights are smaller, cooler to operate, and significantly less expensive than most high-end tungsten fresnel lights.
As a case in point, take a look at the Stryder Fanless Bi-Color LED Fresnel Light from the video light and accessory manufacturer Ikan. Since Ikan designs and makes their own equipment, they are able to provide extremely high quality lights for less money than comparable equipment from other brands.
After seeing these lights with their high CRI, adjustable color temperature, and moderate price, you’ll be asking yourself “what is fresnel lighting not doing in my gear?”
Other features of the Stryder Fanless Bi-Color LED Fresnel Light are the ability to use AC power or batteries, DMX control, fanless cool operation, and a light cone adjustable from 15 to 65 degrees. A bank of these lights tied together with DMX is one of the best solutions for a full featured photo and video studio.
Create a Full Featured Studio

Any photographer or videographer outfitting or upgrading a studio should look into DMX lighting control, LED studio lights, and LED fresnel lights. These new technologies give us incredible control and lower prices than traditional tungsten lights while maintaining extremely high quality.
Use your fresnel lights for video productions, portraits, small and large products, and whatever other styles of imaging you’re engaged in. So, what is fresnel lighting? It’s very versatile and adaptable and deserves consideration for your own studio.
Learn More:
We Recommend
What to Look For in a Monopod
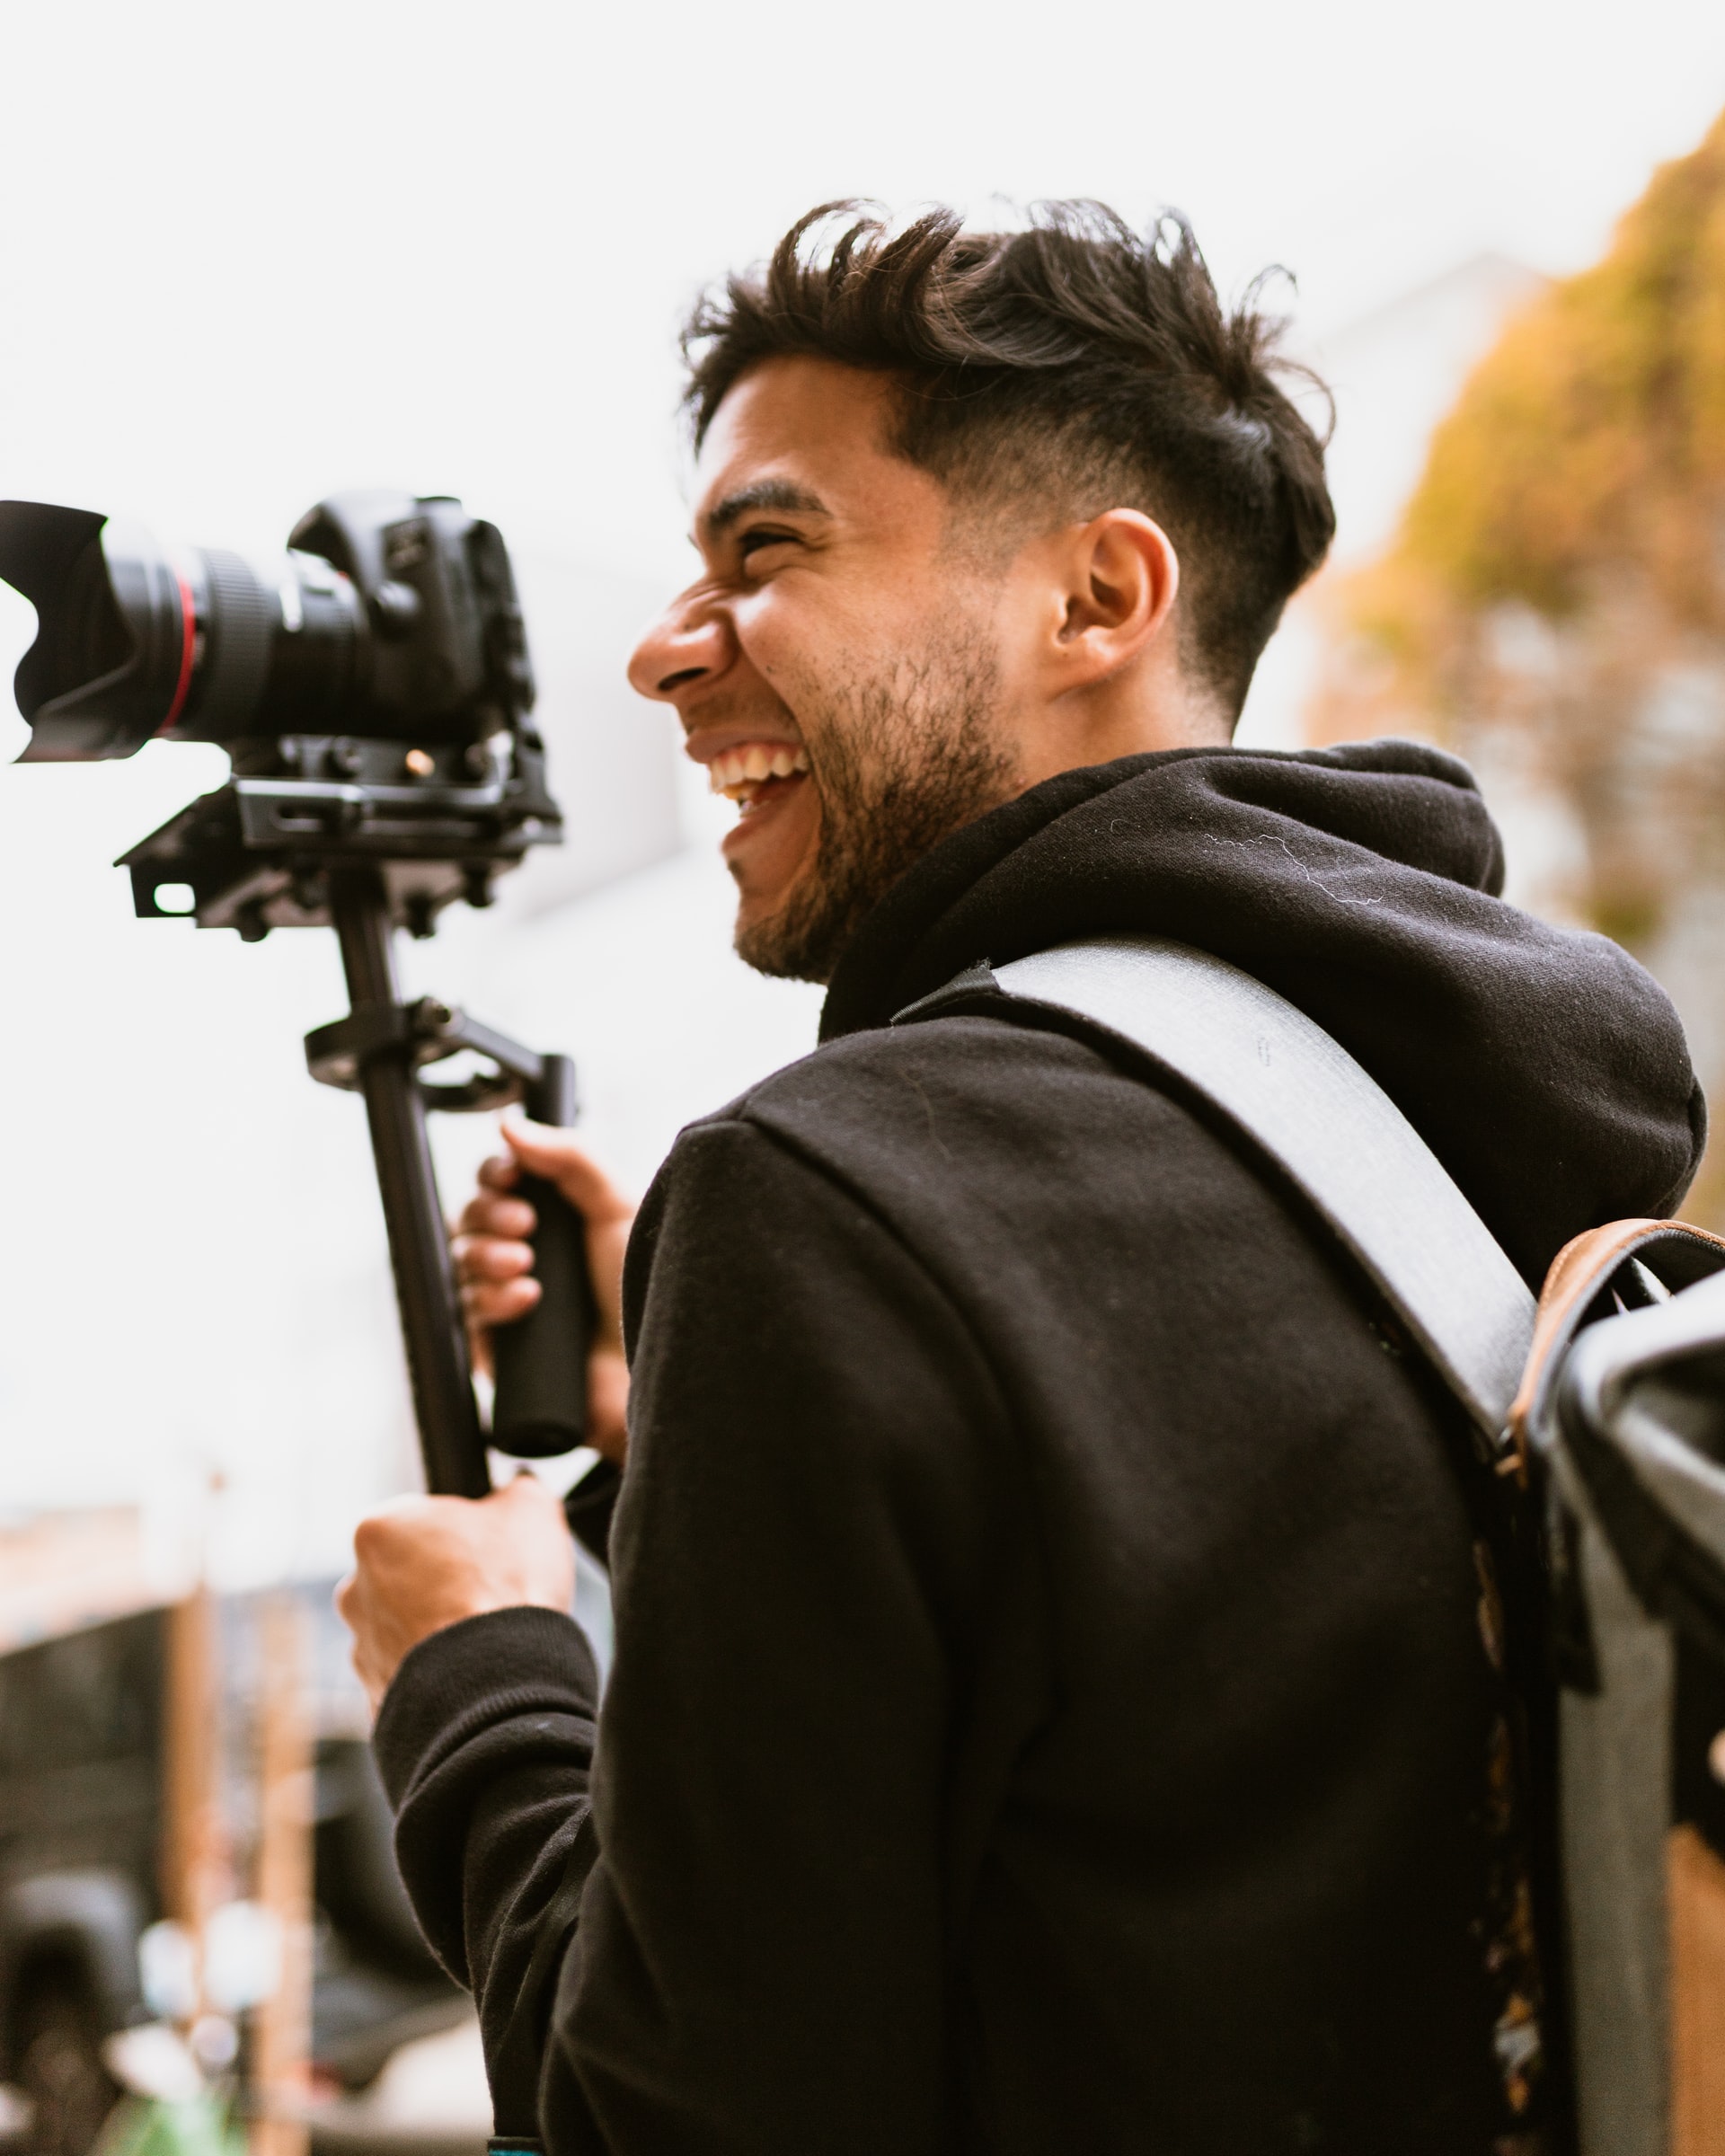
Photo by Nathanael Deck on Unsplash
I have a lot of photography friends who wrongly assume that they don’t really need a monopod because they have a tripod and, “Don’t they do the same thing?”
While it’s true that both monopods and tripods are used to stabilize your camera, there’s a reason sports photographers use monopods while other photographers use tripods. Monopods are lighter and they take up less room (room that needs to be dedicated to other photographers in a stadium, for instance).
Monopods also still fulfill the needs that a tripod does, too. For example, they enable you to not grow ridiculously sore after a few hours of shooting because they provide the stability for your shot rather than you.
Besides, monopods tend to be smaller and lighter weight than their tripod cousins, so if you’re looking to run and gun and need to cut the weight of your gear, a monopod is a great option.
Features to Look For
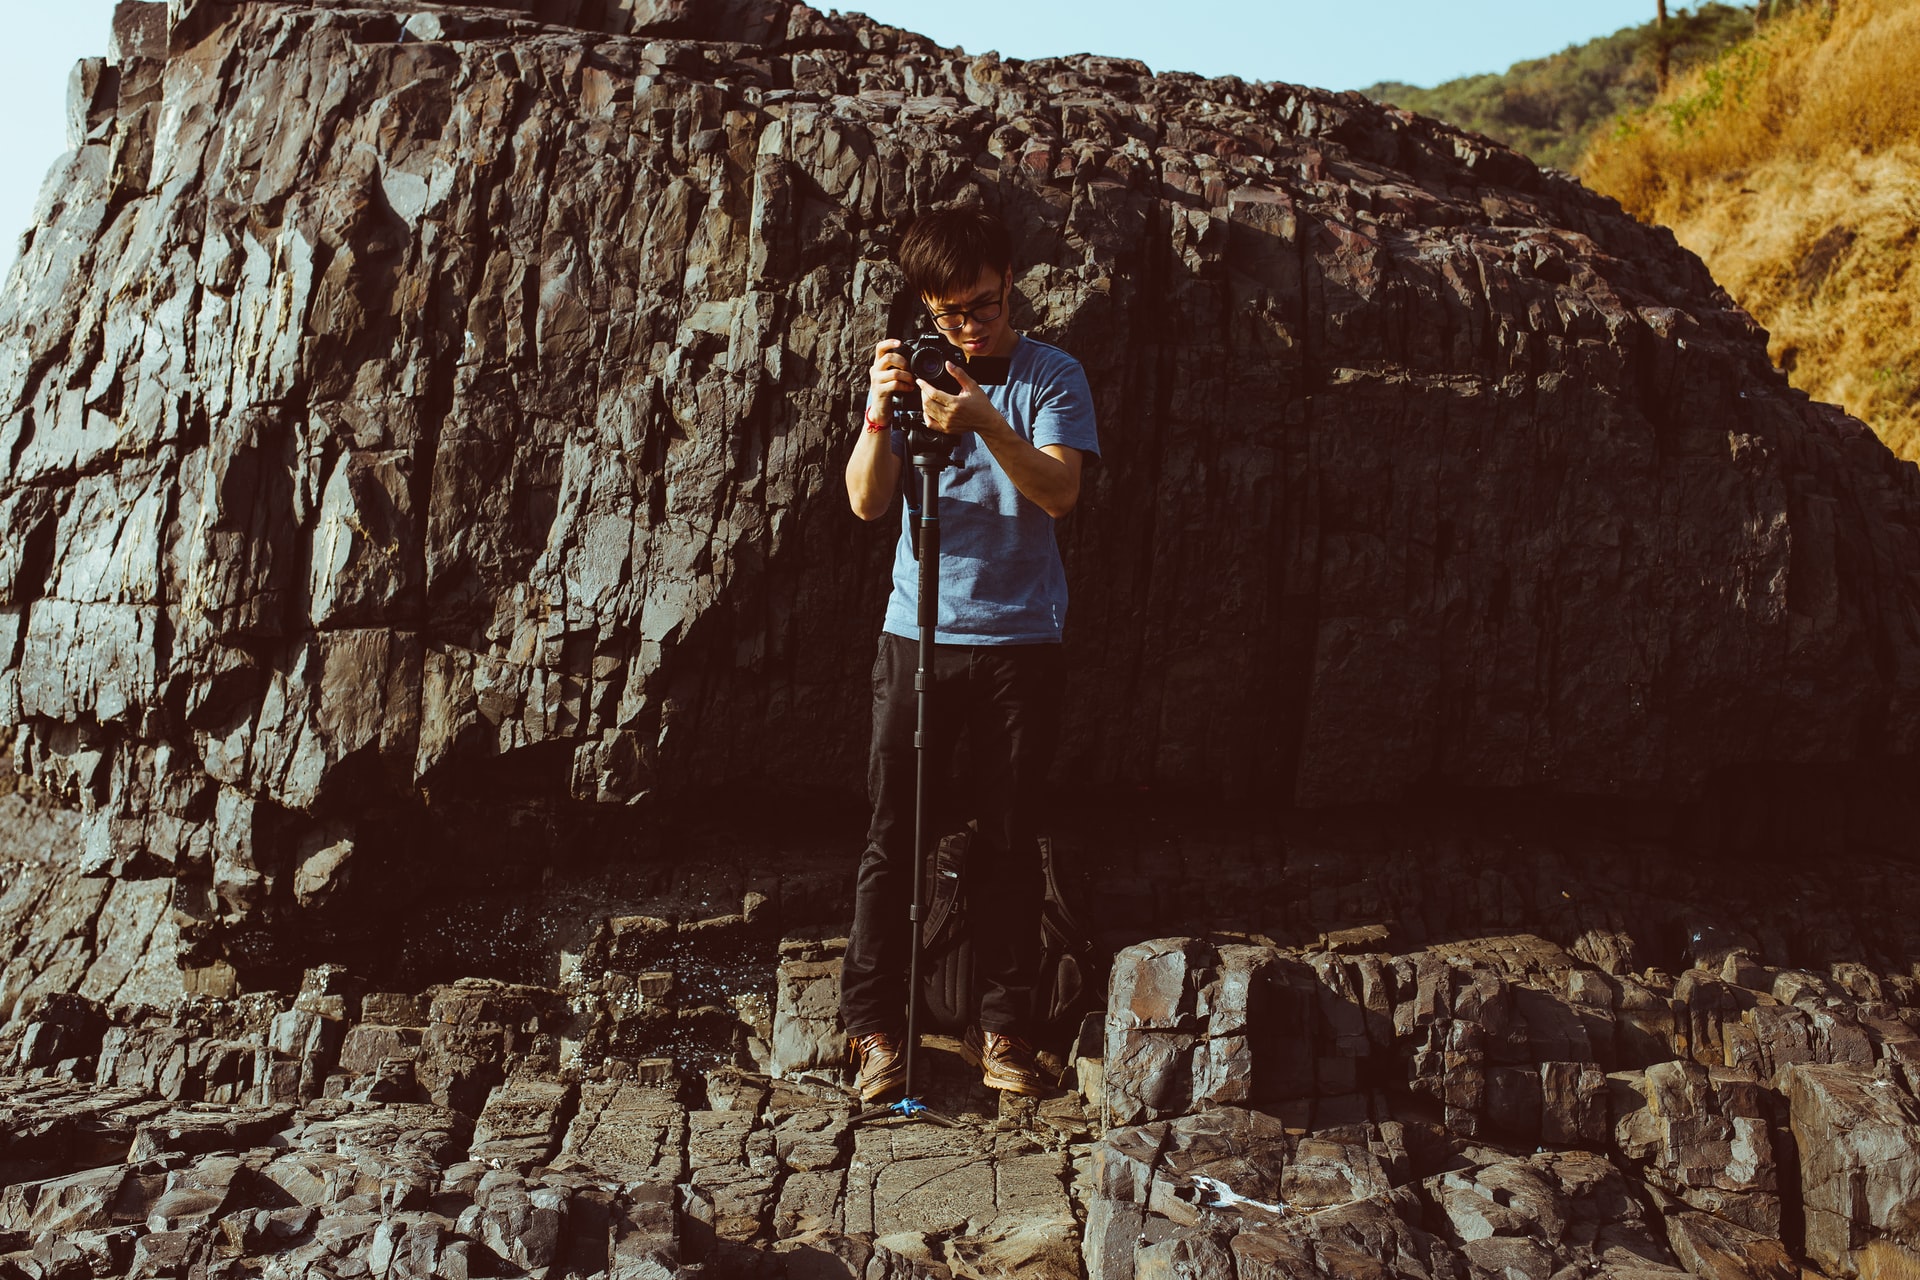
Photo by Thomas William on Unsplash
So, now that you’re convinced you need to buy a monopod, what monopod features should you be searching for?
Firstly, your monopod should have the largest maximum load rating possible. Just because you are currently shooting with a tiny mirrorless camera and a kit lens doesn’t mean you won’t need to shoot with a pro-spec DSLR with a massive lens down the line.
This isn’t to say that you need to spend money on a pro-grade monopod if you’re never going to be a professional photographer. But, if you have designs on improving your photography, investing in gear that can grow with you over the years is the obvious choice.
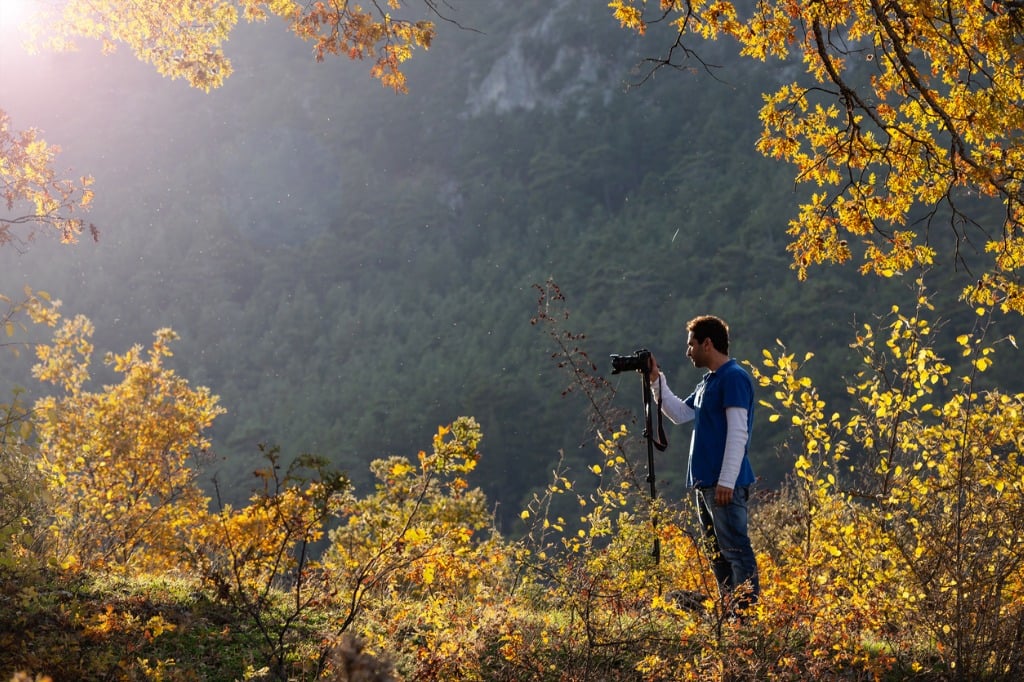
photo by selimaksan via iStock
Another feature my favorite monopod buyers guide talks a lot about is the monopod’ feet. Tripods are so stable because they have three legs, but that doesn’t mean your monopod can’t be stable. If you opt for a monopod with feet you’ll be able to have a lot more stability for your shooting.
Finally, make sure your monopod is made of carbon fiber or aluminum. Both of these materials are strong, light and can handle being in inclement weather. If you’re searching for the lightest monopod available, opt for carbon fiber.
For the purposes of this monopod buyers guide, we opted to use Ikan products because their monopods are known for quality, functionality, and versatility while being cheap enough for photographers (spending $500 on a monopod is ridiculous for your average photographer!).
Recommended Photography Reading
- National Geographic Photo Basics: The Ultimate Beginner's Guide to Great Photography
- Photography: The Definitive Visual History
- Read This if You Want to Take Great Photographs
E-Image 4 Stage Aluminum Monopod (Budget Option):
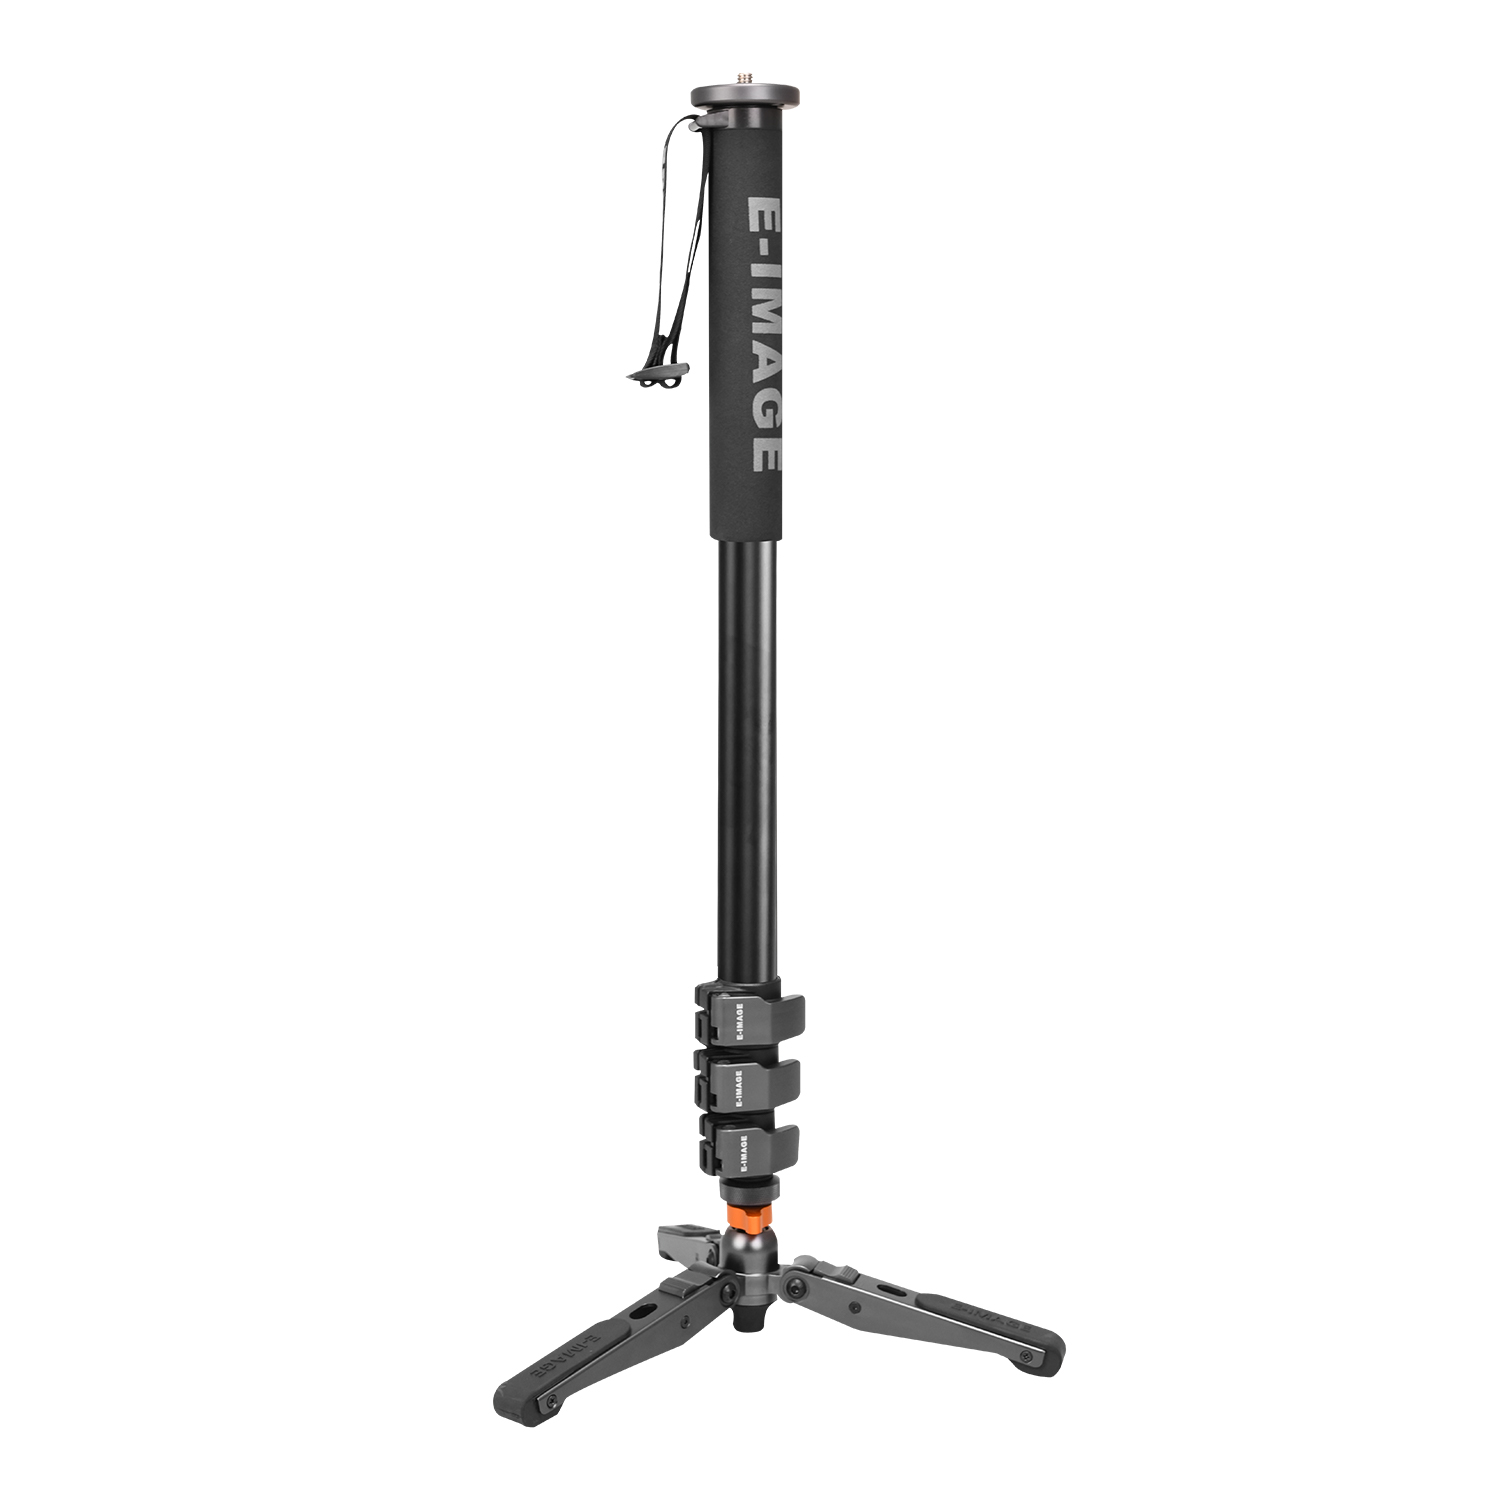
If you’re new to the monopod game, then this beginners’ model would be perfect for you. It’s made of aluminum and weighs just 3 lbs on its own so you’ll never get tired of taking it everywhere with you.
It can support up to 44.1 lbs of equipment, which I doubt you’ll ever fully use, and adjusts between 25.2” and 74.8”.
The best part of this budget monopod is that you can purchase it for just $100.
E-Image 4 Stage Aluminum Monopod With Fluid Head (Mid-Range Option):
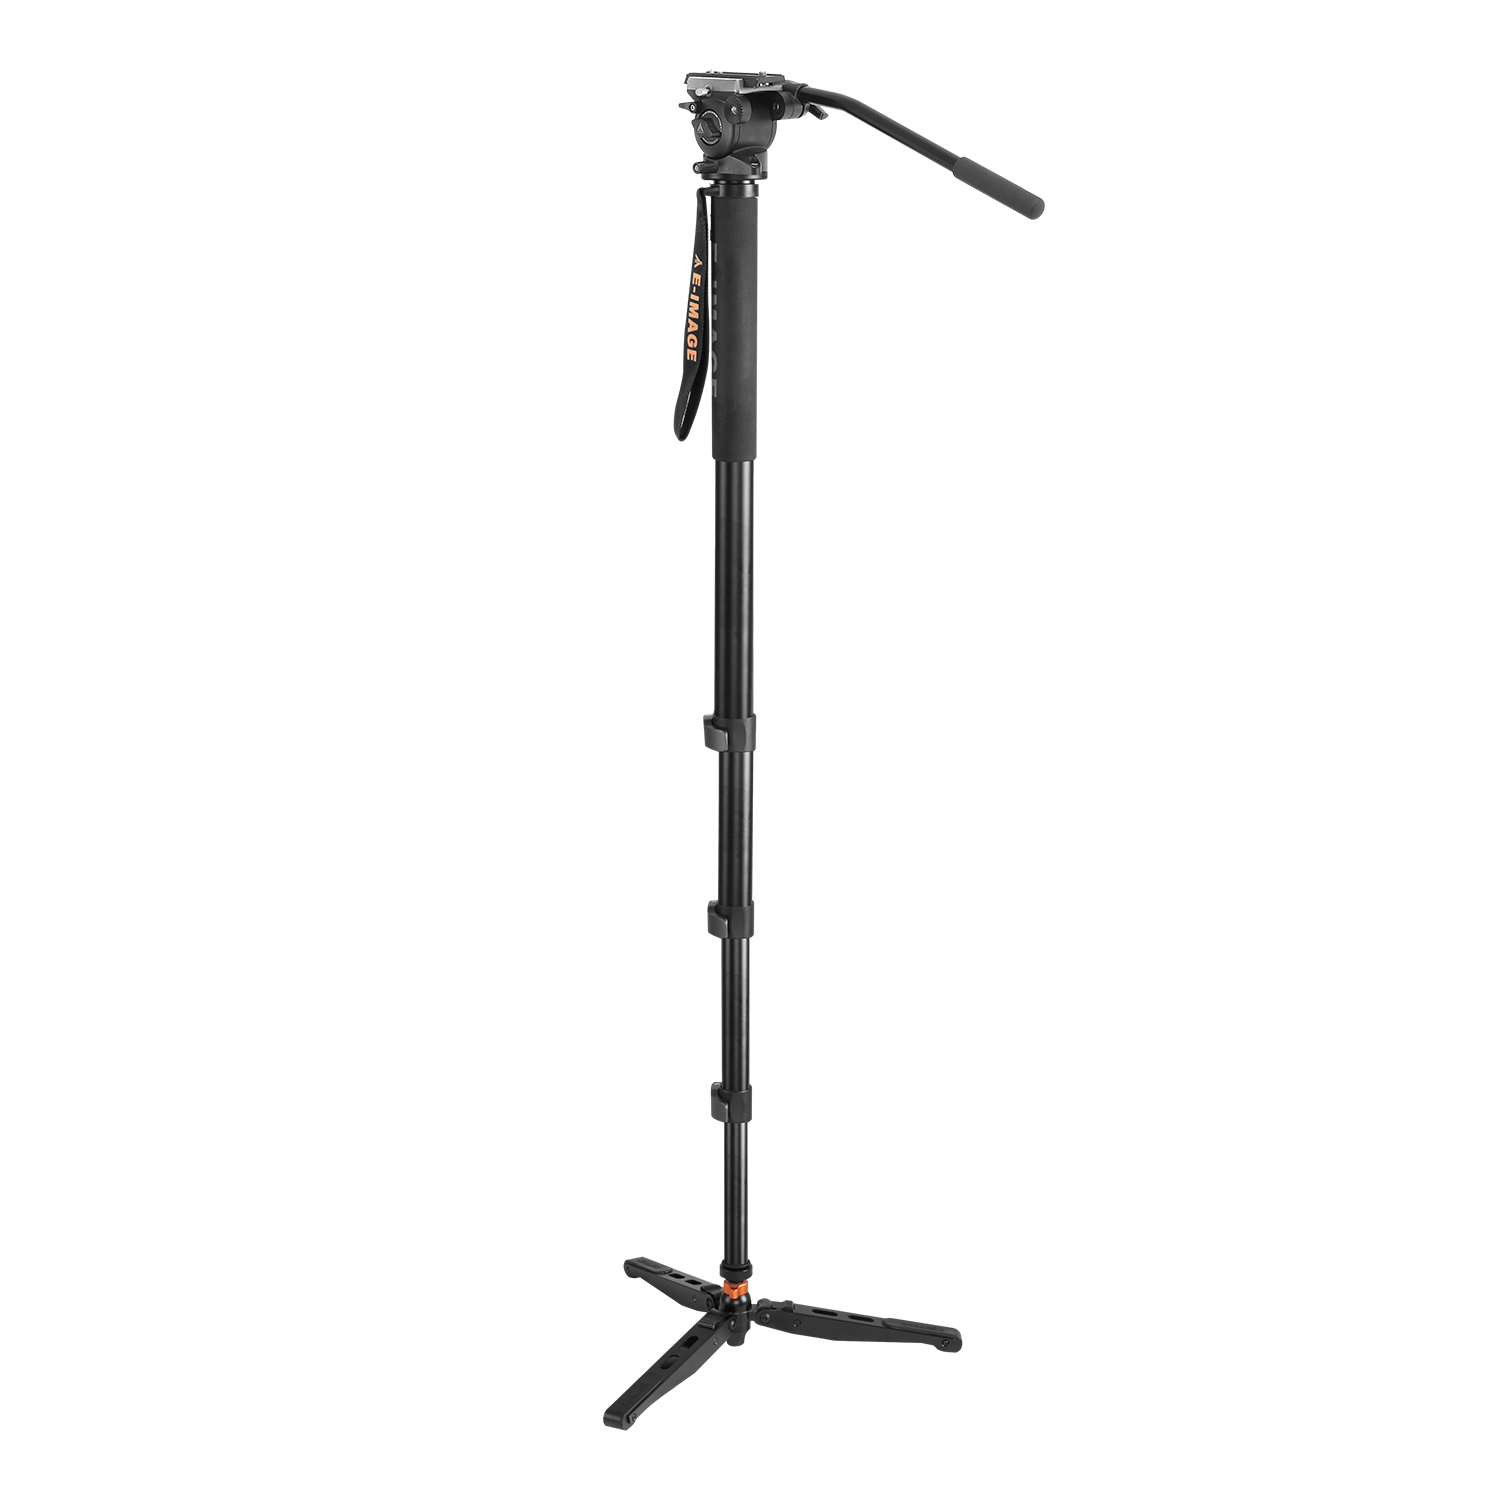
This 4 stage aluminum monopod is (obviously) made of aluminum, so it’s going to be a little bit heavier than a professional-grade model at 6.2 lbs.
It can hold a maximum of 8.8 lbs of equipment and can be adjusted from 31.5” to 82.7”, which is plenty of adjustment for even the tallest photographer.
What I really love about this monopod, though, is that it features 3 retractable feet for maximum stability when you need it, basically removing any reason for you to own both a tripod and monopod.
If you’re looking for a monopod that you can grow into as a photographer, then this 4 stage monopod is a great option for you at $160.
Learn More:
- These Vlogging Accessories Will Help You Take Your Videos to the Next Level
- 5 Gadgets to Upgrade Your Mirrorless Camera
E-Image 4 Stage Hands-Free Carbon Fiber Monopod With Fluid Head (Pro Option):

If you need a monopod with just a little more oomph, then Ikan’s 4 stage carbon fiber monopod is a great option.
It weighs just 4.9 lbs, which is a lot lighter than many other professional monopod models, while still being able to support up to 6.6 lbs. You can adjust its height from 32.5” to 73.6”.
It’s fluid head has a tilt range of -40 degrees to 80 degrees and allows you to swivel a full 360 degrees for incredible video.
As a bonus, this monopod features a foot lock so you don’t need to be worried about any equipment safety problems while shooting.
The E-Image 4 Stage Hands-Free Carbon Fiber Monopod is available for $220.
Learn More:
We Recommend
What to Look for in an On-Camera Monitor for Video
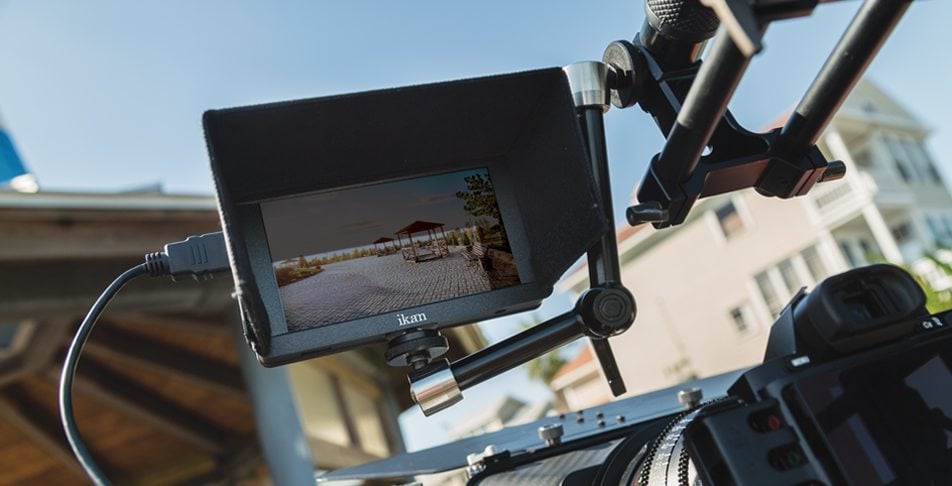
Using your DSLR or mirrorless camera for video projects is a great way to capture excellent quality raw footage with a compact rig. Current digital cameras have absolutely fantastic video recording capabilities. Among the most useful videography accessories for DSLR and mirrorless is an on-camera monitor for video.
Why You Need an On-Camera Monitor
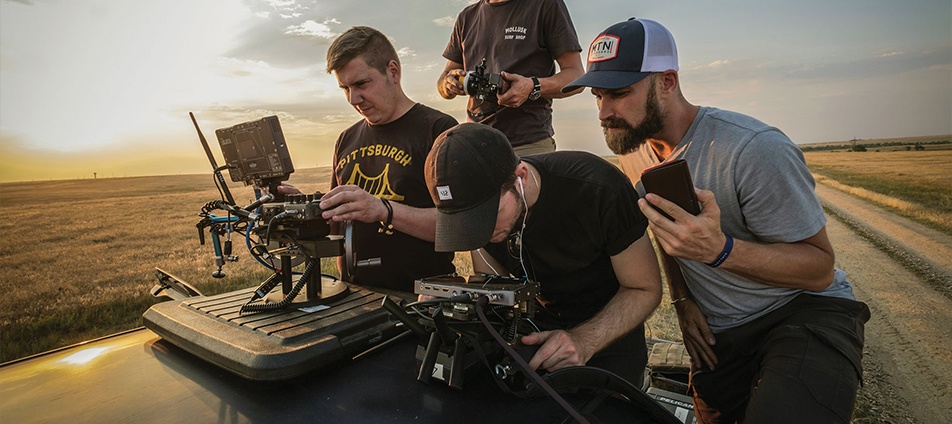
There are a host of reasons why an on-camera monitor is a great investment for DSLR and mirrorless shooters.
Larger Size
Perhaps the primary reason to use external monitors for video recording with your Full-frame, APS-C, or MFT camera comes down to size of the viewscreen. An external monitor’s screen offers a larger view of what you’re recording than either your camera viewfinder or rear view screen.
When comparing viewscreen sizes, it’s important to keep in mind that screen sizes are measured diagonally. So, while it might sound like your new camera has a giant 3.1” rear viewscreen, it really isn’t that large compared to what’s available as external monitors for video.
Better Battery Life
Extended battery life is another reason to choose an on-camera monitor for video. When using your camera’s video mode, the rear screen is switched on as the default with most cameras. Having the screen on while shooting video sucks up a lot of power, but what’s the alternative?
Well, provided your own particular camera has the option to do this, turn off the camera screen while recording and view the external monitor which has its own batteries.
Increased Brightness and Viewability

One of the nicest perks of using video accessories like an external monitor is the ease of visibility due to having a brighter, sharper, bigger screen. When shooting outdoors in bright sunlight, the camera viewscreen can be very difficult to see.
External monitors for video have great brightness adjustments plus many of them have built in or included sun screens. Both factors give you better viewability while shooting.
Recommended Videography Books:
- How to Shoot Video That Doesn't Suck: Advice to Make Any Amateur Look Like a Pro
- The DSLR Filmmaker's Handbook: Real-World Production Techniques
Shows Extra Information
Many of the better external monitors for video show lots of extra information in an easy to view manner. On the larger screen, you can keep track of exposure by monitoring the histogram and you can also see an audio strength meter. Set the monitor for false color to see certain details or follow focus peaking and exposure clipping.
All of this information is vital in order to control it and create the best video footage possible. Some of it is able to be displayed on the camera viewscreen, but it shows up better on the bigger screen of the external monitor.
Stay On Top of Audio
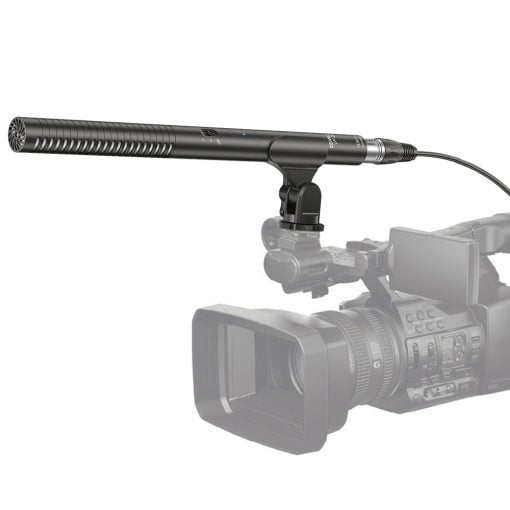
Besides the audio meter you can put on screen, most external monitors for video have an audio jack that can let you monitor the actual feed being recorded.
Since audio is an essential part of most video footage shot by our DSLR or mirrorless cameras, keeping on top of it while recording allows us to be able to control it better. The result is better raw video with less time needed in editing.
LUTs Are Useful
Another fantastic tool for videographers is being able to apply LUTs or Look-Up Tables. A LUT is a preset, more or less, that changes the RAW video feed into whatever the LUT is designed to look like.
In order to use this tool to the full, you will need to loop through the monitor to record separately, which is another good feature to look for. Some external monitors for video also have recording capability. That does tend to add to price and weight, though.
Learn More:
Choose the Features You Need
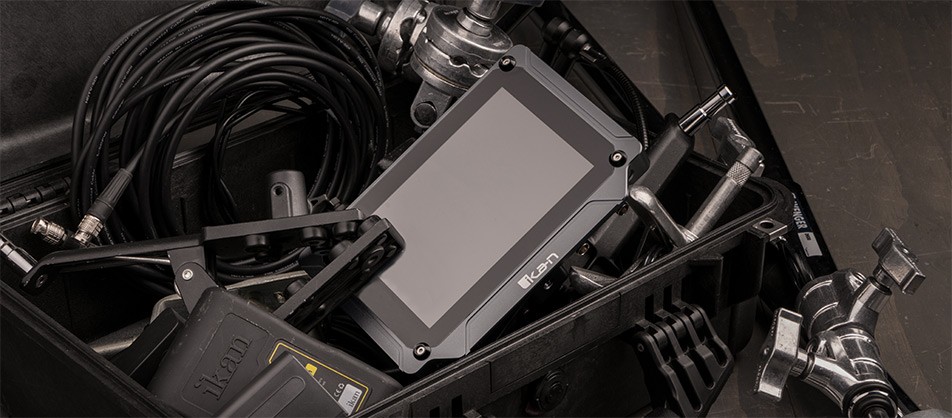
As with cameras, lenses, and other accessories, there are a wide variety of options for accessory on-camera video monitors. The options include the features mentioned above plus size, weight, and price.
Here are several outstanding external video monitors that may work for you:
Ikan Delta DH5e-V2 5” On-Camera 4K HDMI Monitor

From Ikan, maker of high-quality video accessories of every kind, comes the compact DH5e-V2 5-inch monitor.
When it comes to videography and cinema accessories, it’s hard to beat what Ikan has available.The company is run and staffed by people who have a passion for filmmaking themselves, so the products they bring to market are feature packed, high-quality, and budget-friendly.
The DH5e-V2 is a 4K HDMI monitor with a great mix of features that allow you to be in control of your video. It is pretty compact and lightweight, so it readily fits on top of your camera by means of the accessory shoe or you can attach it to a bracket.
Powered by its own camcorder-style battery, it shows audio meter, histogram, focus peaking, and other functions. It has HDMI in and out, so you can apply the included LUTs in your recording, and an audio jack for live sound monitoring. It is also very attractively priced for photographers jumping into serious videography for the first time.
Ikan Delta DH7-V2 7” High Bright 4K HDMI Monitor
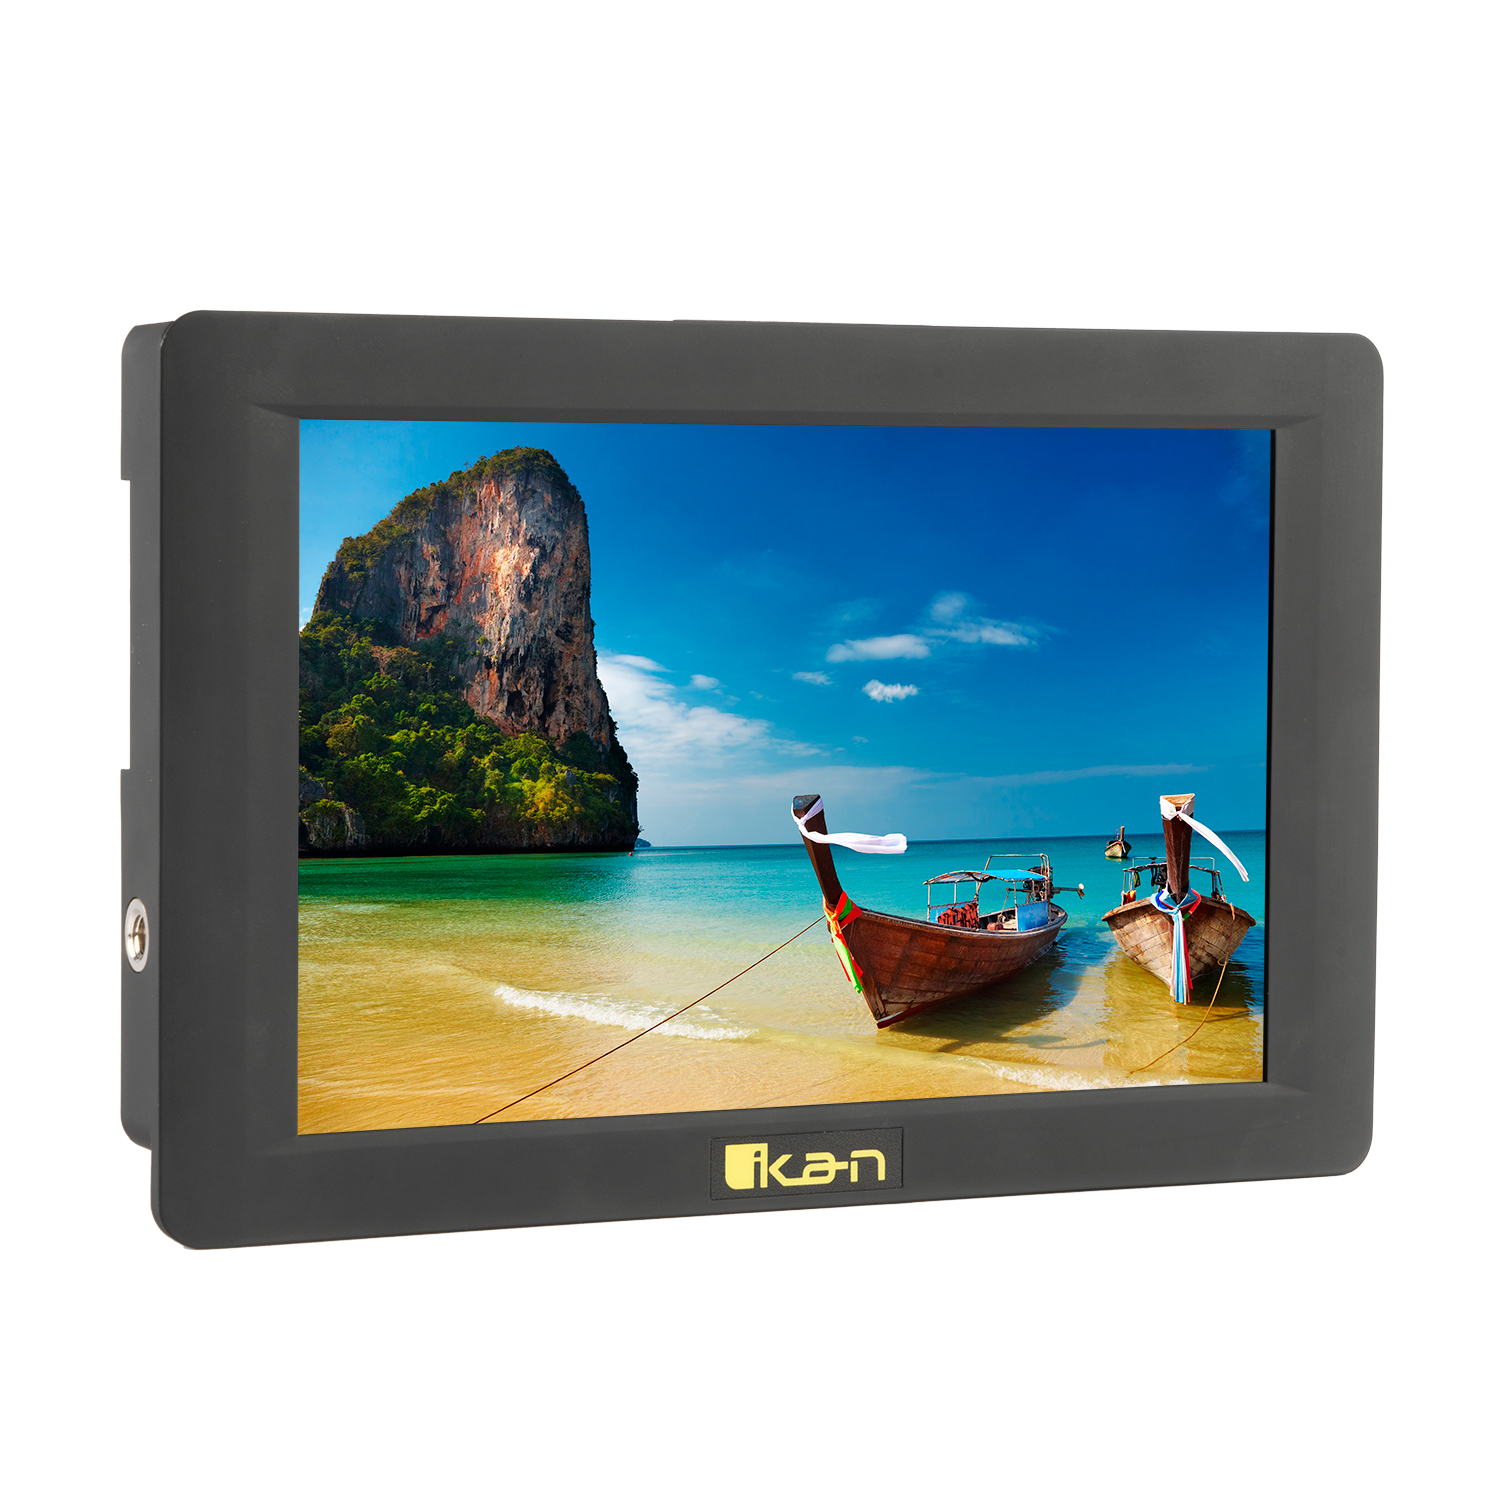
Slightly larger is the DH7-V2 High Bright monitor that boasts a 7” screen and added brightness with outstanding color rendition.
In addition to extra level of screen brightness, resolution, and color fidelity, the DH7-V2 has a USB port that can be used to load extra LUTs besides what comes preloaded. HDMI in/out/thru gives you professional capabilities including applying the LUTs to your recording.
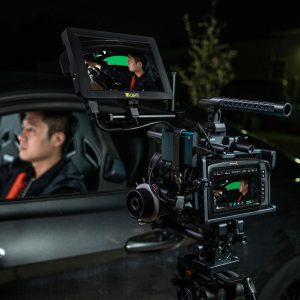
It has dual battery slots for extended filming time and is relatively lightweight for such a large screen size. Compared to the average size of camera view screens, this 7 inches feels like a large screen TV set. It’s a little bit more expensive than the 5'' monitor, but still very budget friendly.
Ikan Saga S7P Super High Bright 3G-SDI Touchscreen Monitor
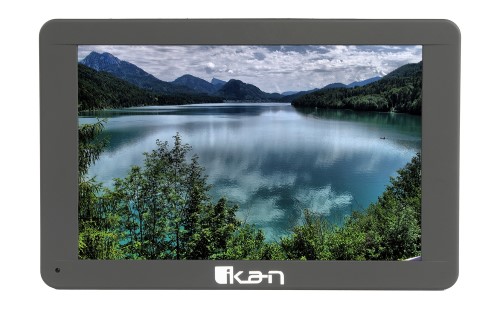
The Saga S7P is an external monitor with professional functionality while still maintaining a relatively decent low price point. Sure, it costs about three times what the 5” DH5e-V2 does, but it adds features and functions from professional level recording equipment.
One of the biggest features is the extra in/out/thru for 3G-SDI in addition to 4K Ultra HDMI. This lets you match this monitor with profesional level audio and video recording gear for absolutely superb raw footage.
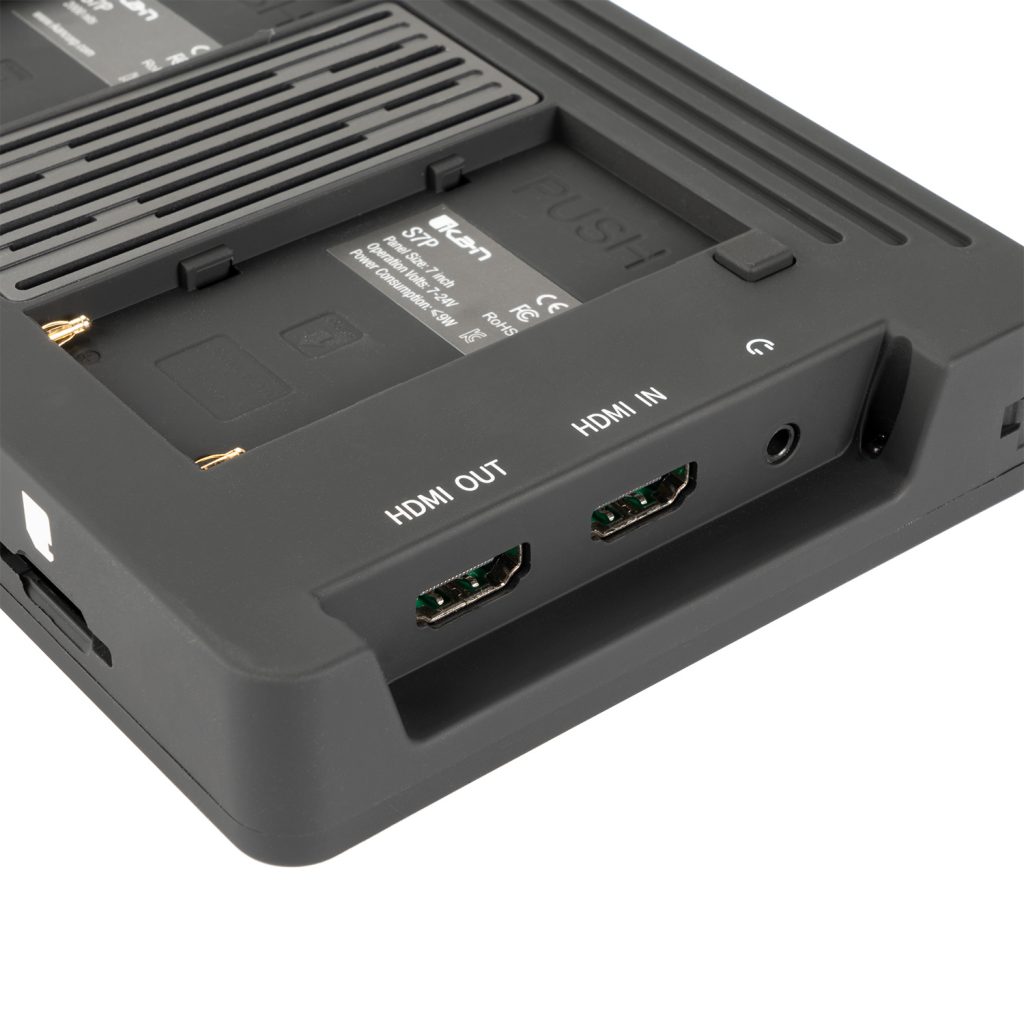
Also upgraded when opting for this monitor is an SD slot for loading LUTs, increased brightness, resolution, and color quality, plus several more on screen tools. The extra tools include Waveform, RGB parade, vectorscope, and pixel to pixel added to the meters already mentioned in the other monitors.
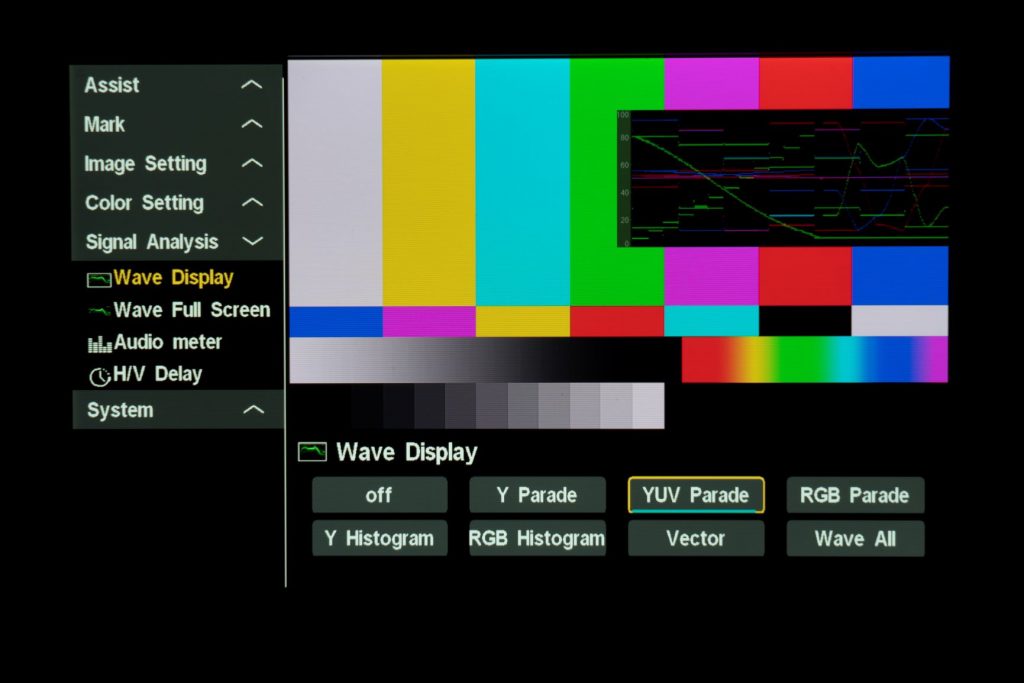
It also uses dual camcorder style batteries for extended use and adds a very user friendly touch screen for controlling features and functions. If you don’t like touch screens, use the scroll wheel to access the tools.
Upgrade Your Video
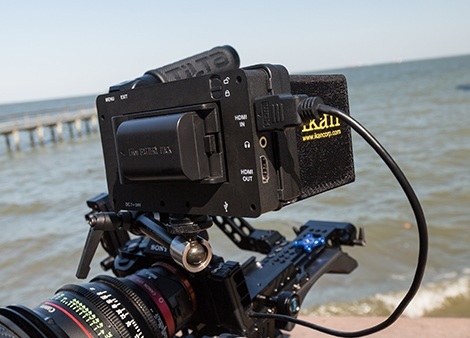
Making use of videography accessories like an on-camera monitor for video won’t automatically make you a video superstar. What external monitors actually do for you is open up all the possibilities you have already in your new DSLR or mirrorless camera.
Being able to clearly and comfortably see everything happening in your raw video and audio means you can control it better. Try a video monitor out for yourself and see what I mean!
Learn More:
We Recommend
When to Use a Graduated ND Filter

photo byvalio84sl via iStock
A graduated ND filter, also called GND or graduated neutral density filters, are handy tools for making better landscape images and other types of photos. If you have looked at them and wondered when to use a graduated ND filter and what the different types do, please keep reading.
Graduated ND filters for landscapes are found in three main styles: Hard-Edge Graduated ND, Soft-Edge Graduated ND, and Reverse Graduated ND filters. We’ll cover what the differences are and in what situations each type helps.
Soft-Edge Graduated ND Filter
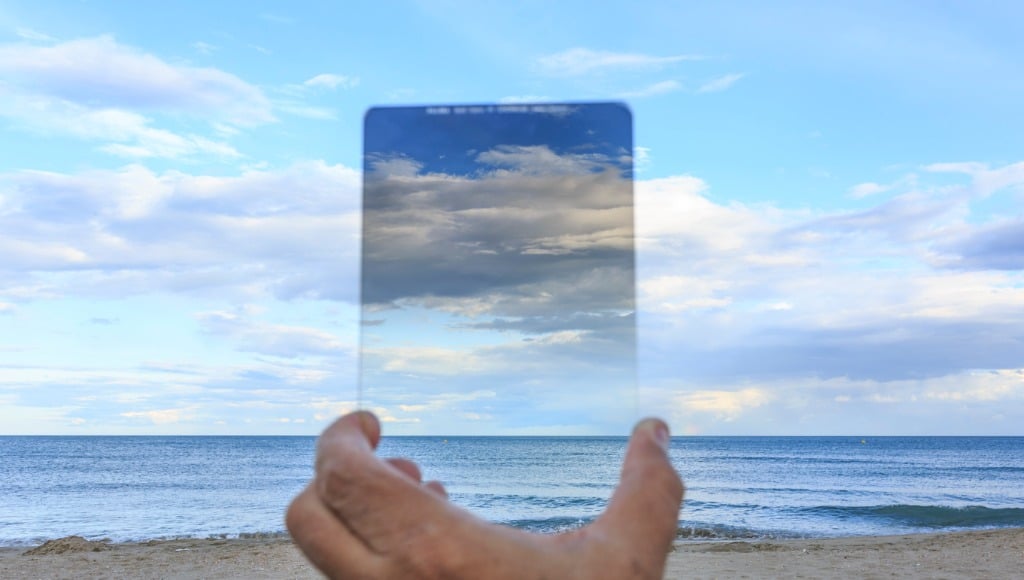
photo byIgnacio Ruiz Casanellas via iStock
This is probably the graduated ND filter I end up using the most often primarily because it is very simple to employ and there are so many situations in which to use one. All graduated ND filters are dark in part and clear in the other, it’s the transition area that changes among the 3 types.
A soft-edge graduated ND filter has a very gradual transition from clear to dark, making the placement of the filter a simple thing. Take a look at the image above to how gradual the transition is.
I use a lot of Haida M10 Filters from Ikan Corp in my landscape photography work as they are high quality and have beneficial features. You use the filters in a filter holder which can hold several filters at once.

The graduated ND filters are rectangular instead of square or round so that you can adjust their position in the holder as needed and the holder can spin around the axis of the lens, too so your placement of light to dark can be precise.
When do we use a graduated ND filter with a soft-edge transition? Any time we have a scene with a large dynamic range that we want to balance out in exposure, we can block out some light intensity from one part of it.
A scene with a bright sky and relatively foreground is one example that springs to mind. When there isn’t an element within the image with a distinct boundary between light and dark, a soft-edge ND filter is the answer.
This can apply to more than landscape photography, cityscapes, architectural, even product photography might benefit. Remember also, the transition area for any graduated ND filter doesn’t have to be a horizontal line. It can be in the vertical plane or even diagonal.
Hard-Edge Graduated ND Filter

Any time the transition in the scene from light to dark is narrow or perhaps a line is when to use a graduated ND filter with a similarly narrow transition. These are labeled hard-edge graduated ND filters. By the way, there are also medium-edge ND filters, but I find them not as useful as either hard or soft. You might find that you prefer the medium-edge, though.
All of what we discussed about soft-edge graduated ND filters applies to hard-edge filters except for the placement of the transition line. With a hard-edge graduated ND filter, a straight line such as a horizon, a wall, a shoreline, a building edge, and so on is the prime spot for where to place the transition.
Remember, it can be horizontal or vertical, but it’s probably more likely to be a horizontal line. Using the graduated ND filters in a filter holder system makes it a simple operation for exact placement since you can spin the filter holder around and slide the filter from side to side or up and down.
As just one example of when to use a graduated ND with a hard-edge transition is an ocean or lake scene with beautiful clouds in a relatively bright sky. In order to keep detail within the cloud formations while not underexposing the foreground or anything else that’s not bright sky, we place the ND part over the sky with the clear part underneath and the transition line on the horizon.
LearnMore:
- What Is a Camera Cage?
- Types of Tripod Heads
- 5 Landscape Photography Accessories You Need In Your Bag
Editor's Tip: Carry your filters (and all your other gear) in complete organization and style in the new Nomatic x Peter McKinnon Everyday Backpack and Sling. These bags are true to form for Nomatic - they're impeccably designed, durable, and the height of functionality. From weather-resistant exterior materials to loads of storage and organization solutions inside to an incredibly comfortable carrying experience, these bags are precisely what you're looking for to accompany you on your landscape photography adventures. Check them out on Kickstarter to get all the specs and details!
Reverse Graduated ND Filters
I have found the perfect use for when to use a graduated ND filter with the variation from light to dark reversed, sunset and sunrise. As a disclaimer, I didn’t invent that use, I read it in a photography blog years ago and quickly put it into practice myself.
If you look closely at the image of the reverse graduated ND filter above, you will notice that the transition from clear to density is a hard edge but it’s different from other hard-edge ND filters in that the darkest density is right at the transition and then it gradually lightens towards the outer edge.
This is perfect for a sunset or sunrise with a sky above the Sun full of beautiful colors or those colors in clouds above the Sun. In order to capture those colors without washing out the exposure and still get detail in whatever is on the ground or ocean, we need to subject light value selectively by using a reverse graduated ND filter.
There is an even more extreme type of filter for sunrise and sunset or other similar lighting conditions, the horizon ND filter. This filter is probably a little too much specialty use for most of our photography that needs a graduated ND filter, but when you do run into that specific situation, it is probably the only filter that will do exactly what we want to accomplish.
Filter Holder Systems
The best way to make use of any of these graduated ND filters is in a filter holder system. A system like the Haida M10 professional filters we've been highlighting allows for the most versatility of exact filter placement.
A filter holder system consists of a holder with adapter rings to mount to various size lens diameters and round, square, and rectangular filters that can fit in the holder, often several at once. This lets you use a C-POL filter along with a GND, for instance, when capturing that mountain scene or sunset at the beach.
A filter holder system also makes sense for using professional filters since you only need to buy one size of each type of filter because the adapters let you use them on all your lenses. So instead of investing double or triple purchase for each lens, you can make the most of your filter budget.
These filter holder systems with full ND filters are also perfect for 4K video since we can have more control over the rolling shutter and lens apertures to capture exactly what we want to capture.
Once we have these filters, we will find many ways to use them in all sorts of photographic and videography situations.
Learn More:
We Recommend
Why You Need a Camera Cage
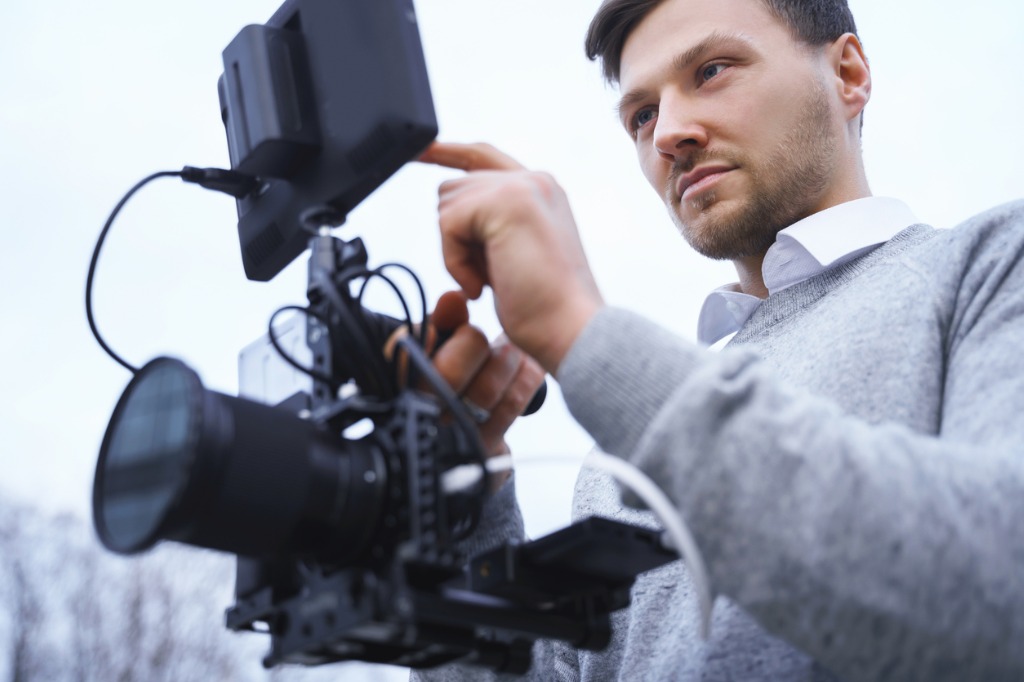
photo byJun via iStock
A camera cage for your video camera is a great accessory for anyone shooting a lot of video whether pro, semi-pro, or amateur.
When you see the benefits of camera cages, you’ll be able to decide why you need a camera cage for your own camera.
What is a Camera Cage?
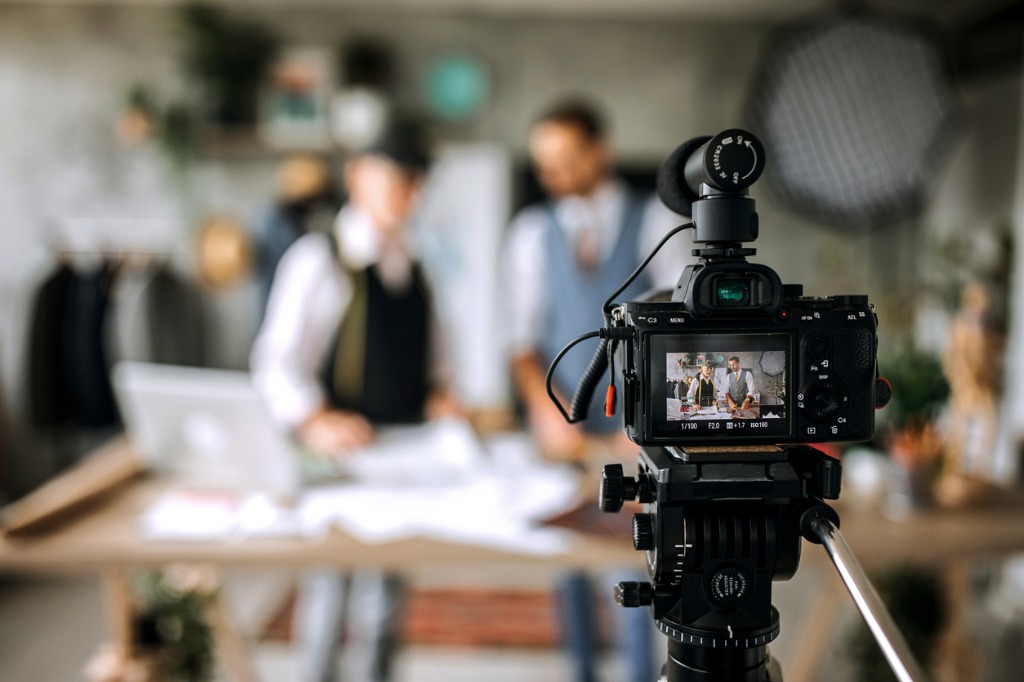
photo byPekic via iStock
A camera cage is a grip, mount, bracket, and/or housing for your camera that serves multiple purposes including protecting your camera, allowing better hand held use, and providing multiple mounting points for video accessories.
There really aren’t any universal camera cages since there are so many styles and sizes of cameras used for videography, though there are some that can be used or adapted to a variety of cameras.
Protects Cameras
photo bymcsdwarken via iStock
Shooting video involves a lot of things going on all at once, accidents will happen. Worst case scenario, your camera falls or you drop it, a camera cage can provide an extra layer of protection.
When you drop a camera and lens, the most vulnerable parts of the rig are the camera to lens mount and the top plate accessory shoe. Cameras will not always fall in the most beneficial orientation, but are very likely to fall in such a way as to break the top plate hot shoe or wrench the alignment of the lens mount.
For top mounted accessories, it doesn’t even have to be a fall, but regular handling of the camera while having top heavy accessories attached can result in camera damage including breaking of the accessory shoe.
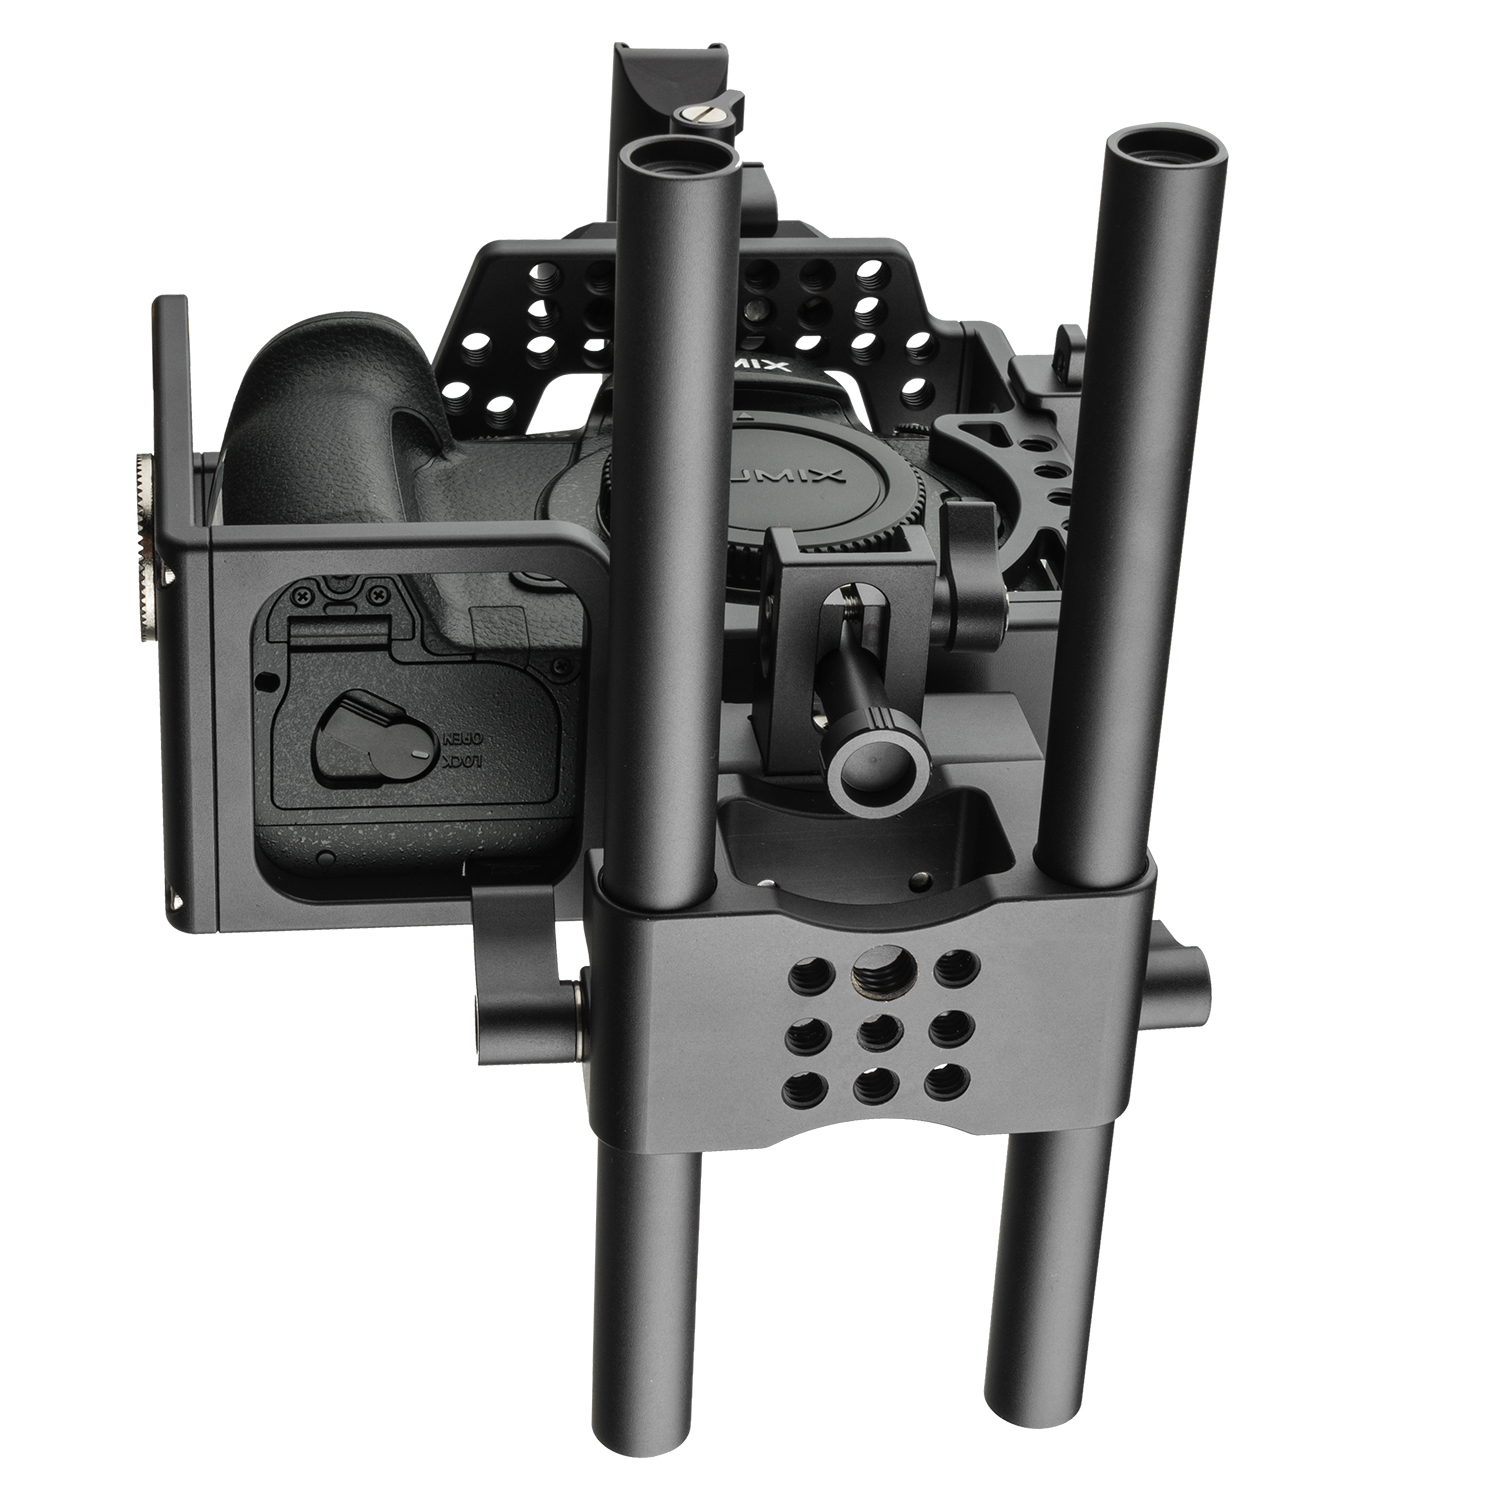
So the way a camera cage protects your camera is preventing the camera from impacting the lens first and also by removing any top heavy shoe mounted accessories from the camera itself by mounting them to the camera cage instead.
A good example of a camera cage that protects in both ways is the Ikan Stratus STR-GH5 complete cage with frame, rods, top handle, clamps, and base. It fits the MFT format Panasonic GH-5 and GH-4 digital cameras which are a favorite of many videographers wanting high quality video in a compact camera.
Learn More:
Improves Hand Held Use
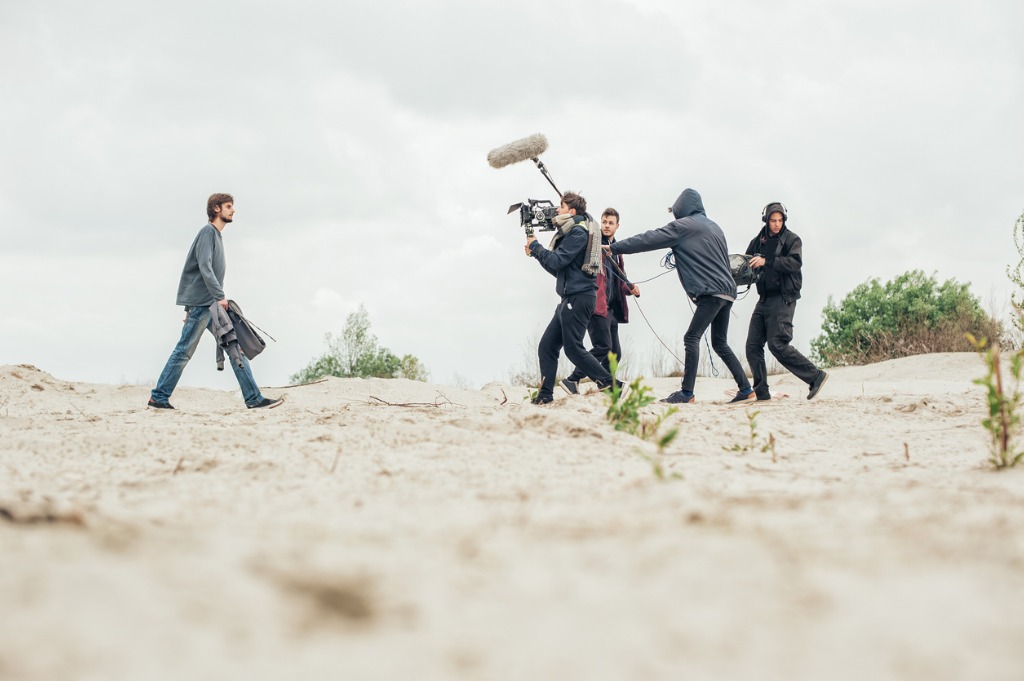
photo byguruXOOX via iStock
Once you mount a large aperture zoom or prime lens on your smallish camera or start adding multiple accessories to any size DSLR or mirrorless camera, you pretty much change the ergonomics of the camera significantly.
That fantastic camera grip built into the body becomes virtually useless for hand holding the camera with a large zoom lens, video monitor, matte box, and external microphone attached. Camera cages often have multiple ways to ease your hand holding burden, either by having a shape that is better for all that stuff or by allowing handles to be added.
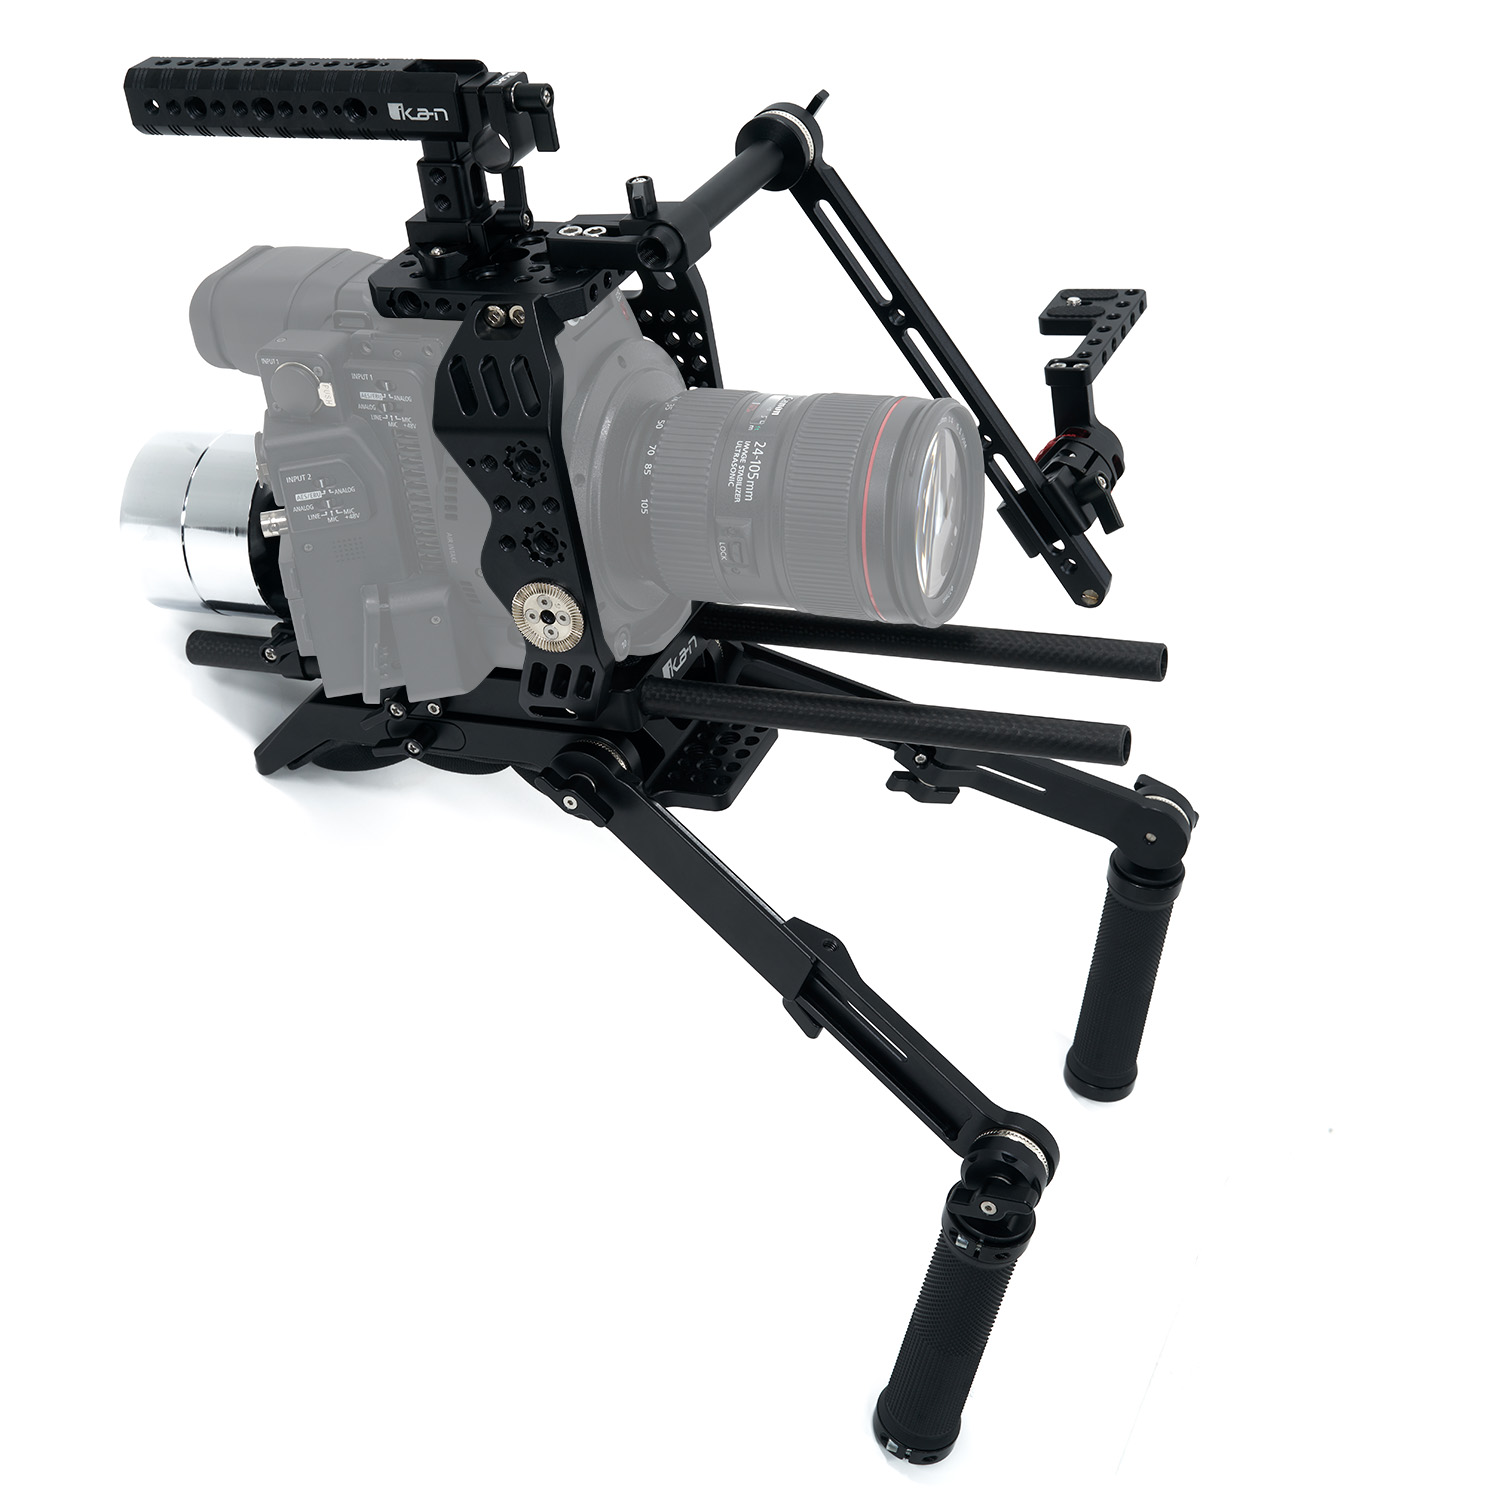
The camera cages designed for high end digital video cameras are very hand holding friendly, as well as the cages intended for DSLRs and mirrorless cameras.
The Ikan STR-CINE-C200-RIG is a good example of a camera cage designed for the higher end video cameras, in this case the Canon C200 and C200B cine cameras. These Canon cameras are meant to be used either on a tripod, with a grip mounted, or in a cage, so they are not the best at hand holding.
Using this cage, it is extremely comfortable and stable to shoot while holding the camera yourself. In case you’re wondering, all the camera cages I’ve seen are capable of being tripod mounted, usually with an ArcaSwiss style plate or some other quick release.
Multiple Mounting Points
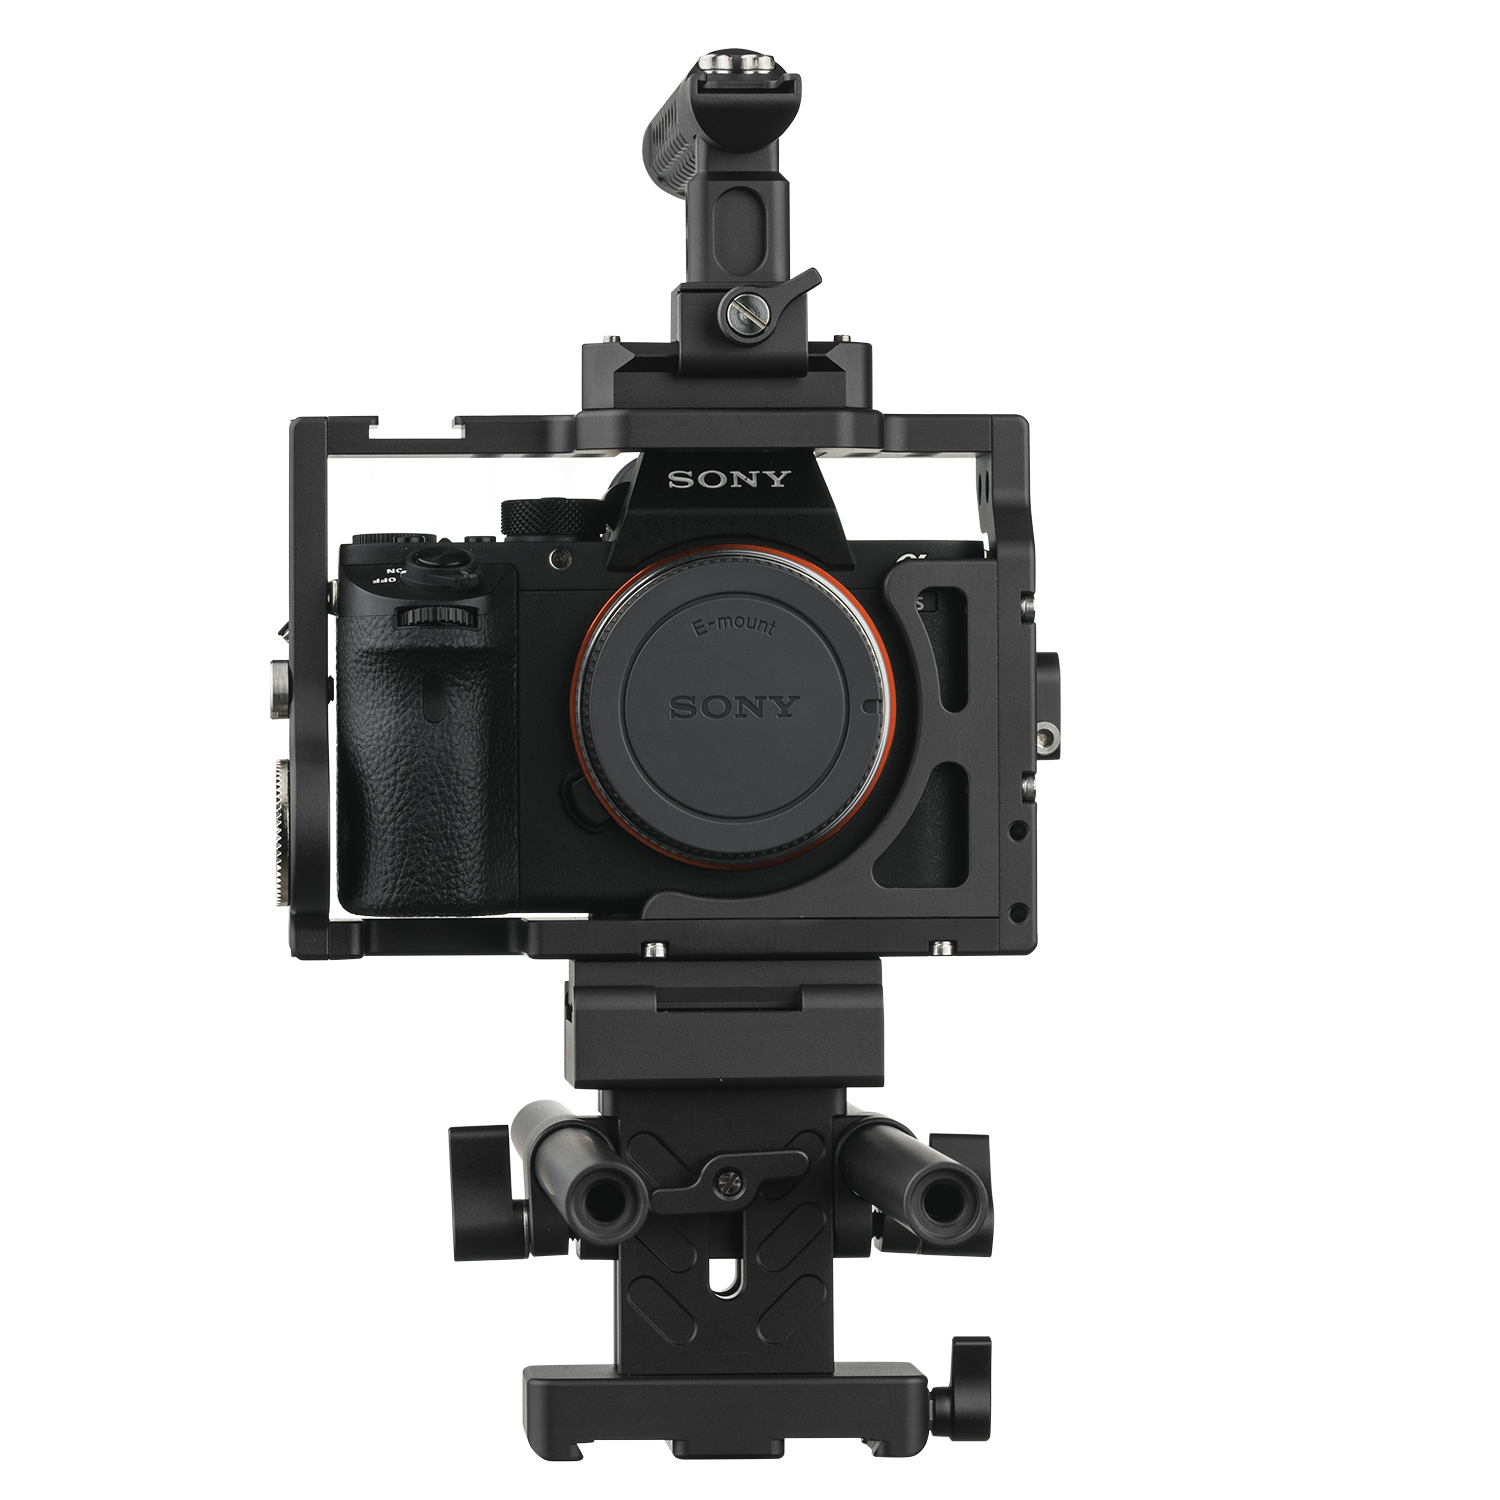
If you try adding accessories to your DSLR or mirrorless camera, you will soon run out of room for securely mounting multiple large items. An external monitor, wireless lavalier receiver or shotgun mic, a light, and transmitters for wireless video are all competing for the tiny space available on the top hot shoe.
If you mount a multi-bracket up top, you’re now in danger of breaking the shoe with too much weight. The camera cage provides all the extra mounting points you could want plus the points are very secure and don’t stress the camera at all.
A camera cage will also make it easier to attach and use lens accessories, too. Rails for mounting a support for large lenses, a follow focus device, or a matte box are part of the design of many camera cages.
A good cage for the purpose of mounting needed accessories to a smaller camera is the Ikan STR-A7II-KIT with a follow focus device. The Sony A7II is one of the smallest full-frame format cameras available and it has excellent video capability, so using one for creating high quality video is a good idea. Mounting all the needed devices to the camera cage makes it an even better idea.
Other Benefits
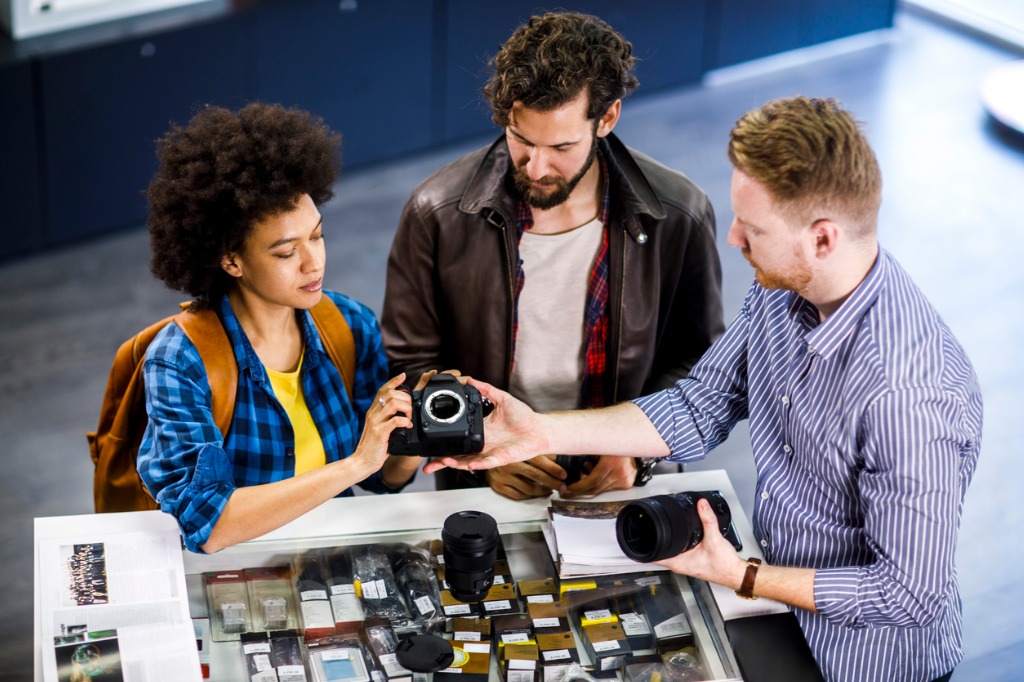
photo byEXTREME-PHOTOGRAPHER via iStock
The other benefits of camera cages aren’t as huge, but they still make a good case for using camera cages. What are the other benefits of camera cages?
One extra benefit is that by protecting your camera, you increase the possible resale or trade in value of your fine camera. You cannot ask for premium prices for a camera that’s been damaged, but minor cosmetic blemishes that don’t affect functionality will also lower the maximum price you can get back from your investment.
That’s why camera resellers have rating systems for their cameras with “like new” always being the highest priced of any one model. A “beater” camera may work fine, but you can’t ask for “like new” prices for one when upgrading gear.
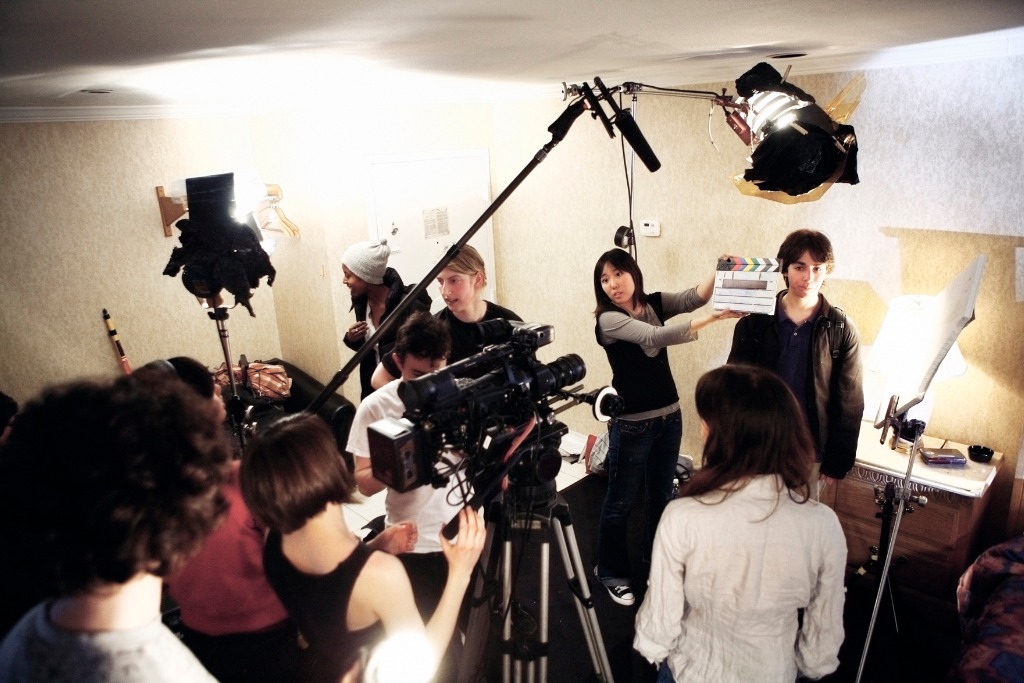
photo bybjones27 via iStock
Another benefit of camera cages sounds silly at first, but it’s very real. You just look more like a “real” cinematographer or videographer when you use a camera that looks more professional.
You and I both know that has nothing to do with reality, but to the average person, taking direction from a professional vs taking direction from someone that looks like the Uncle Bob Photographer will have better results.
Camera Cages for Specific Cameras
photo bynicoletaionescu via iStock
There is no universal camera cage, at least, not one that will actually do the jobs described above. Shop for a good one, a camera cage will make your videography workflow smoother and give you all the benefits you want from using a camera cage.
Learn More:
- How To Transmit Video Wirelessly
- Photo & Video Accessories For the Nikon Z7
- What To Look For In an On-Camera Monitor for Video
We Recommend
Why You Need a Field Monitor
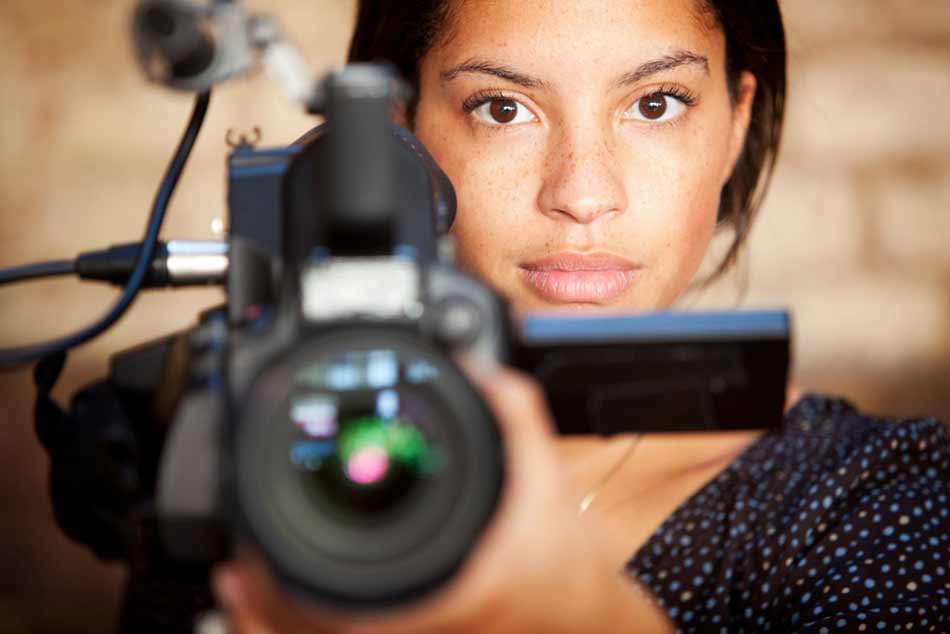
photo by ContentWorks via iStock
There are several good reasons why you need a field monitor for video, especially if you are making serious videos or video work for profit. You may already have an external monitor on your camera rig to supplement the small rear viewscreen on most of the mirrorless and DSLR cameras used for high-resolution video. What we’re looking at today is a field monitor for video, separate from the camera rig.
What are the advantages of a field monitor, an external monitor for video? There are several, so I’ll list a few of the benefits and advantages for using a large field monitor in addition to what you’re already doing. I’ll also show you a large field monitor I found for my own productions.
Atlas AX17 17” 4K Monitor
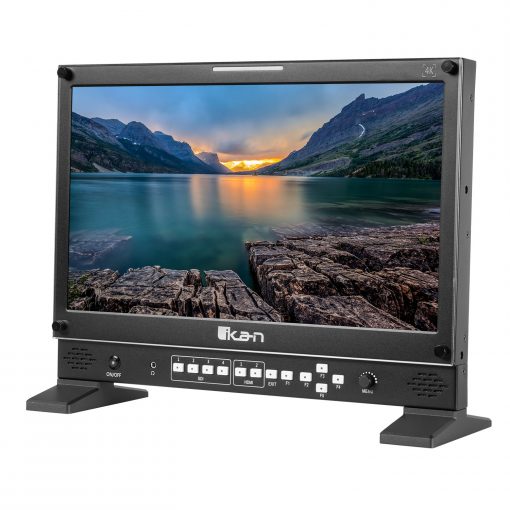
This is a native 4K monitor from Ikan, a video accessory manufacturer and retailer of high-end equipment for professional and other serious videographers and cinematographers. The Atlas AX17 is very large and is bright, clear, and easy to see in all lighting conditions.
The display can be full screen, split side by side, or split 4 ways as a quad view. There are options to rack mount the field monitor or attach it to a light stand or some other type of mounting. In a rack mount, you can easily pair it with any other equipment, such as wireless video receivers, audio or video recorders, DMS controls, or other items for professional video productions.
It has very good color and is very sharp, which fits in well with the advantages of a field monitor for video that I’ll list below.
You See Everything Better
This is one of the biggest reasons for using an external monitor of any kind. It’s not just the focusing that is improved, but with a much larger screen on an external monitor for video, you will quickly grasp any changes that you need to make in focus, composition, camera placement, or subject posing.
Other Crew Can See Clearly

photo bybjones27 via iStock
Working on a large scale video production, you likely have more than a one man show going on. In addition to the cameraman, others can benefit from a large, clear view of what’s being filmed, including the director, focus pullers, lighting techs, makeup artists, continuity assistant, sound engineers, and other production assistants. Being able to see what is going on can ease up and speed up everyone’s workflow.
Learn More:
Easy To See Frames
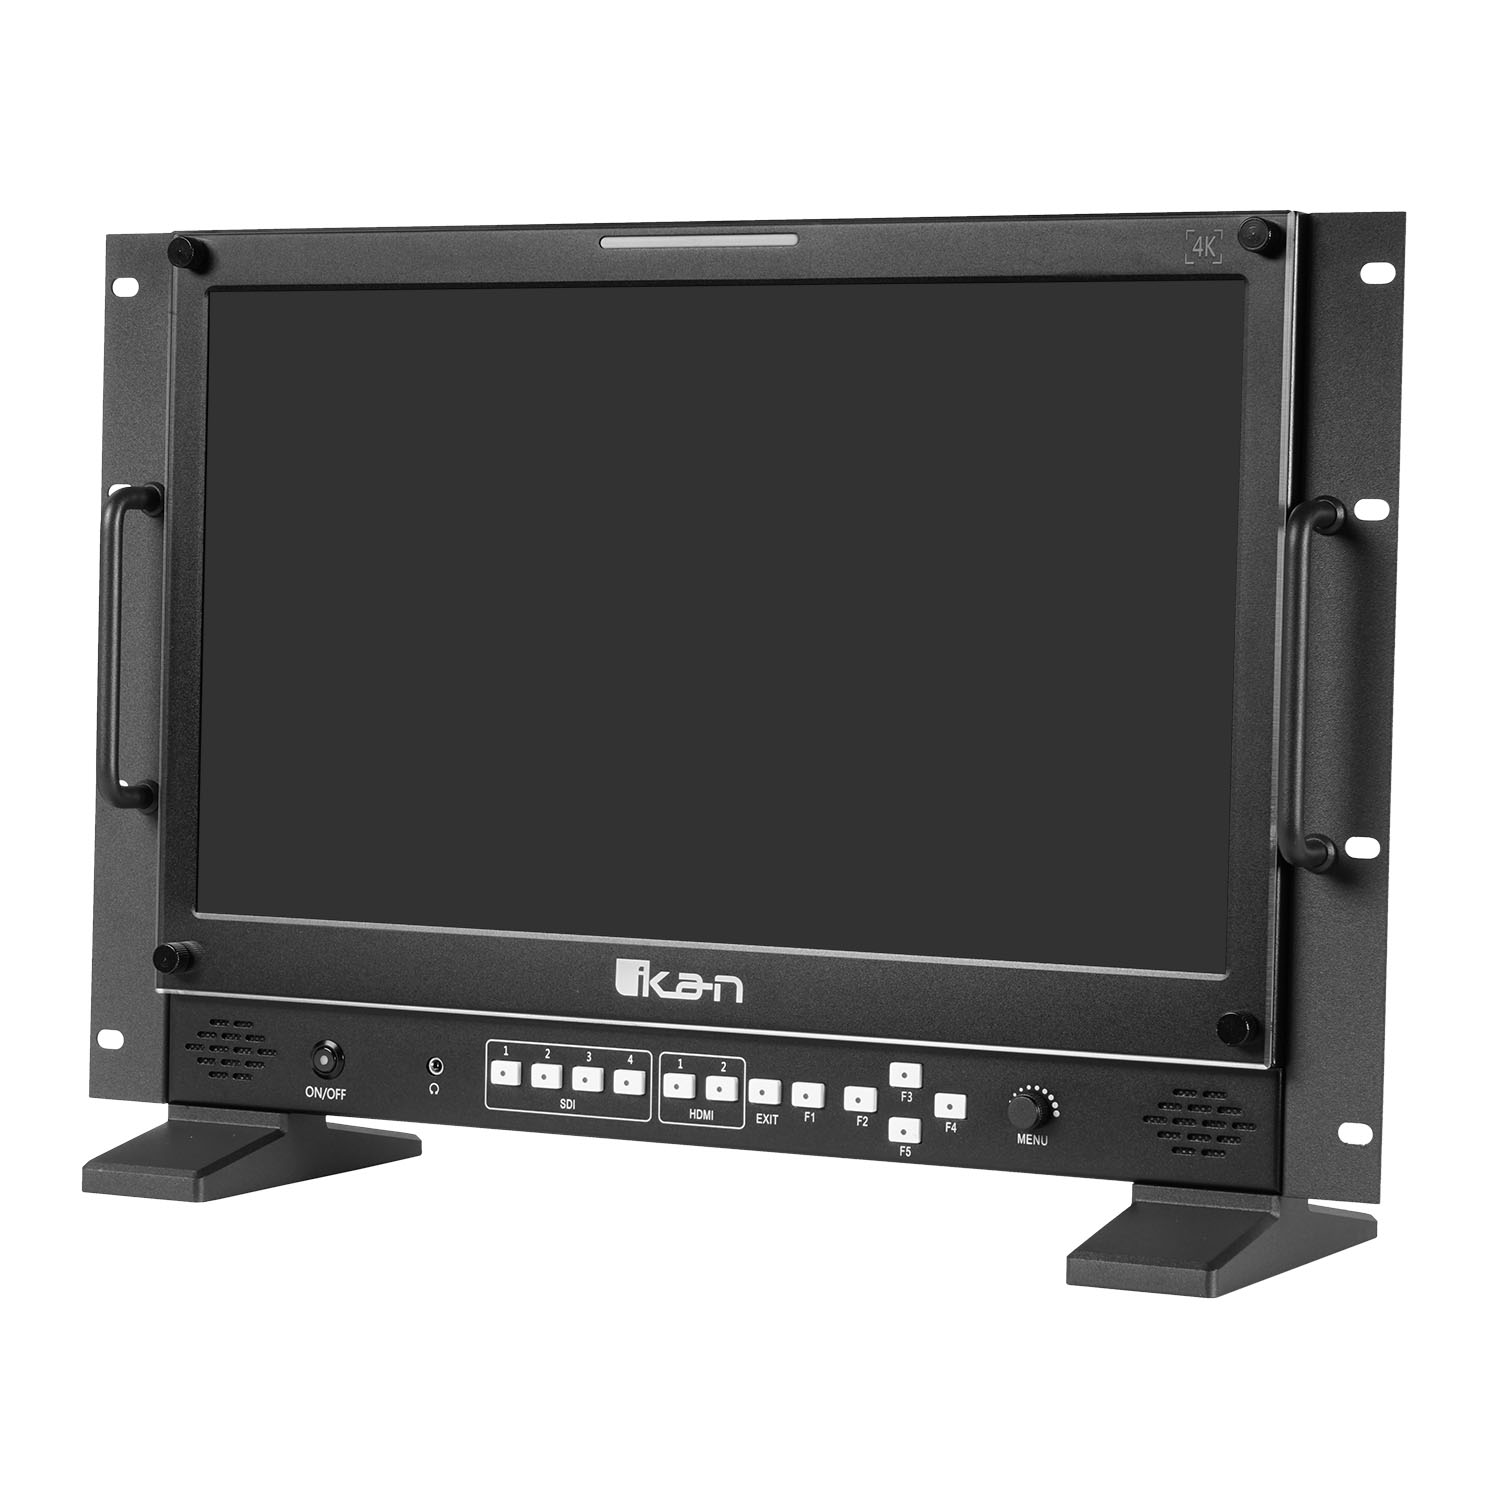
You may be shooting in a different format such as 4:3, 16:9, 1.85:1, 2.39:1, or an older classic format like 1.375:1 format. On a smaller viewscreen, you might have an overlay of the format, but it is quite a bit more visible on an external monitor.
Clear View In Bright Ambient Light
Camera viewscreens can be very difficult to see in bright ambient light. A larger external monitor with a deep sunshade will show the view of what’s filming clearly with great contrast.
See Shutter Speed Effects
photo byinakiantonana via iStock
When you change shutter speeds in video, you can inadvertently add odd motion effects to the finished video. It isn't always easy to tell what motion effect is coming through when viewing on a small screen. The large screen size of a professional production field monitor will show these very well.
Custom Color Profiles
Shooting with a custom color profile is pretty standard for many professional videographers, but the camera viewscreen generally won’t show you the results of a custom profile, a field monitor is able to let you see these custom profiles as you shoot.
Access To Other Features
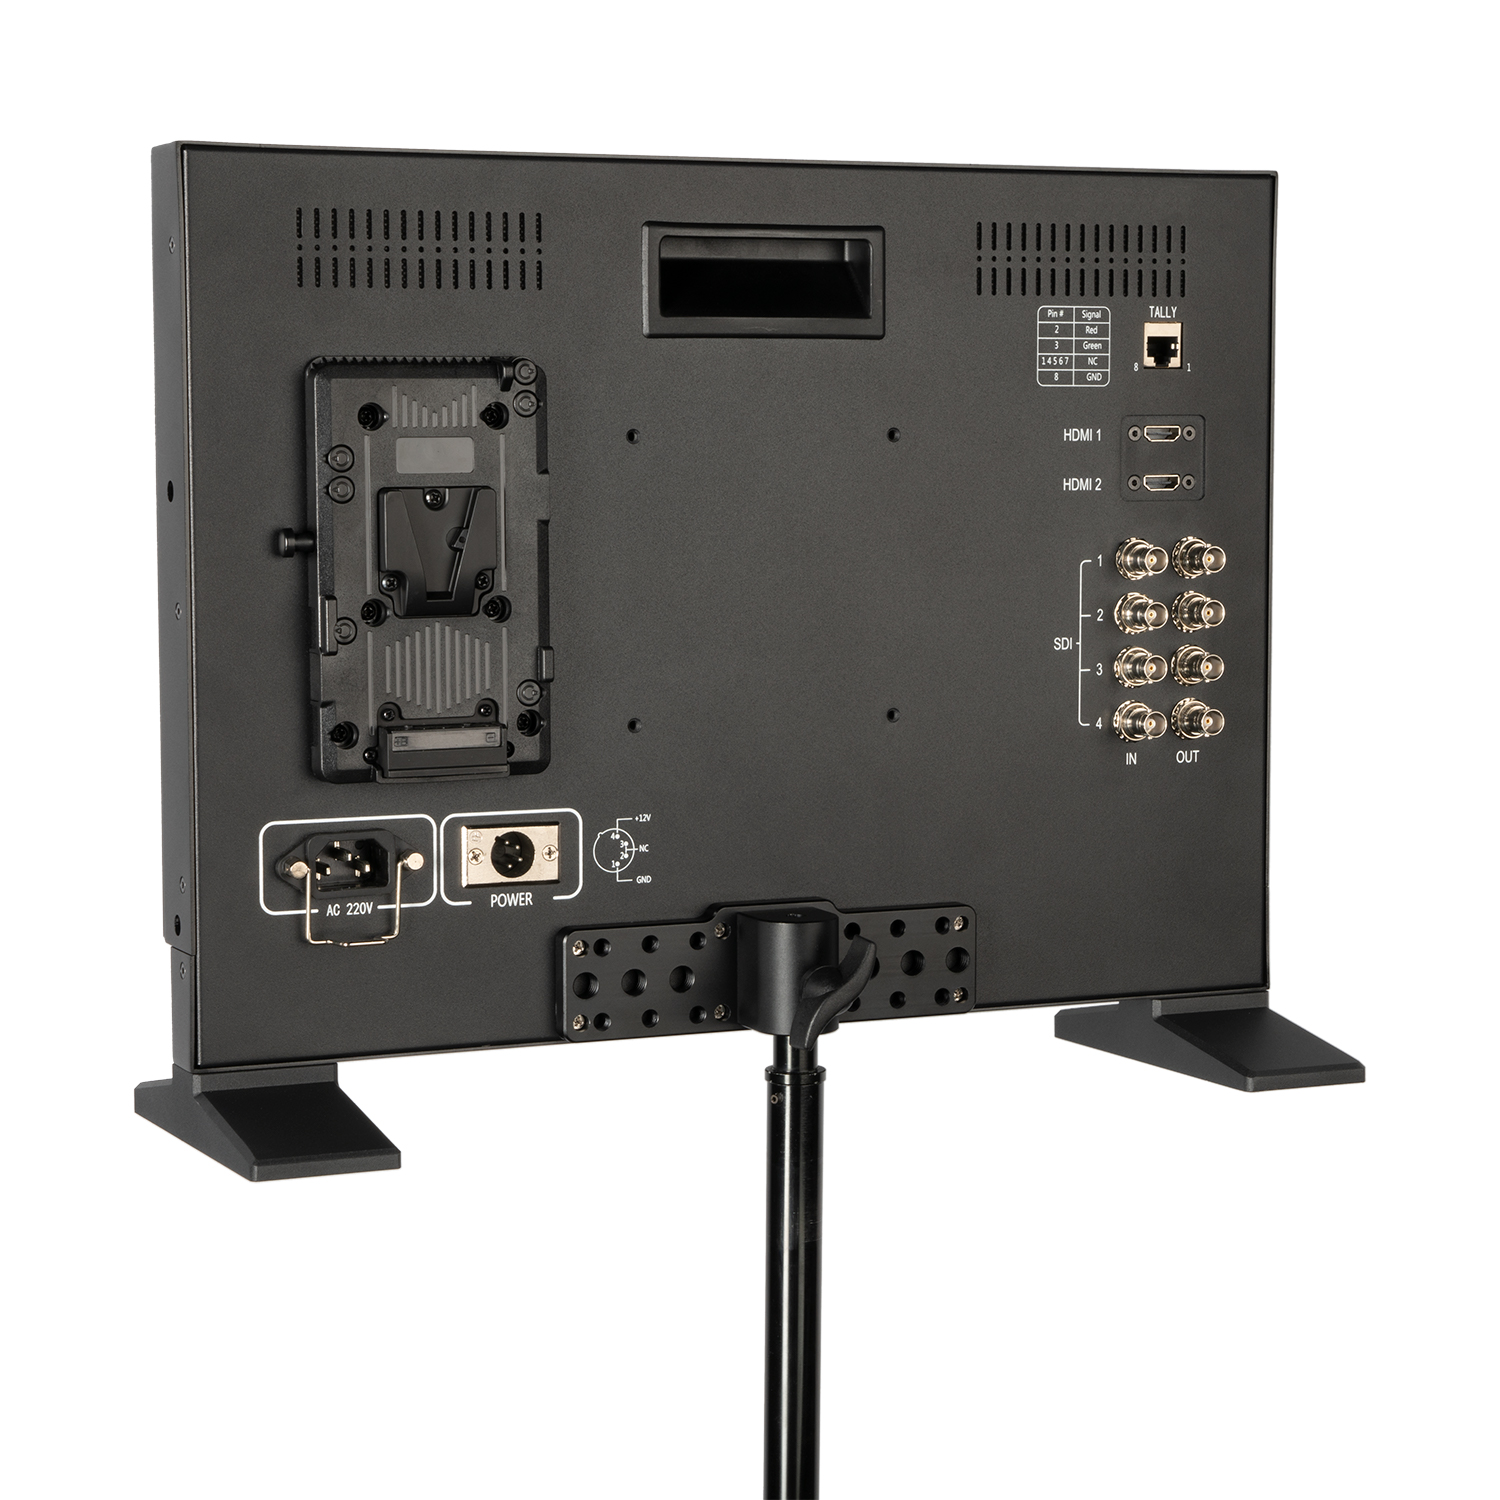
Other features such as false color monitoring, anamorphic un-squeezing, flicker detection, underscanning, peak monitoring, and other things aren’t even options on smaller viewscreens, but a large field monitor often has features we didn’t even consider before but which make professional video production go more smoothly.
Do You Need a Field Monitor?
photo bymagical_light via iStock
Professional videographers and cameramen working with large crews will find that a large external monitor for video will give you access to beneficial features and make everything easier to see for everyone working on the project.
Learn More:
We Recommend
Why You Need a Jib for Your Videos
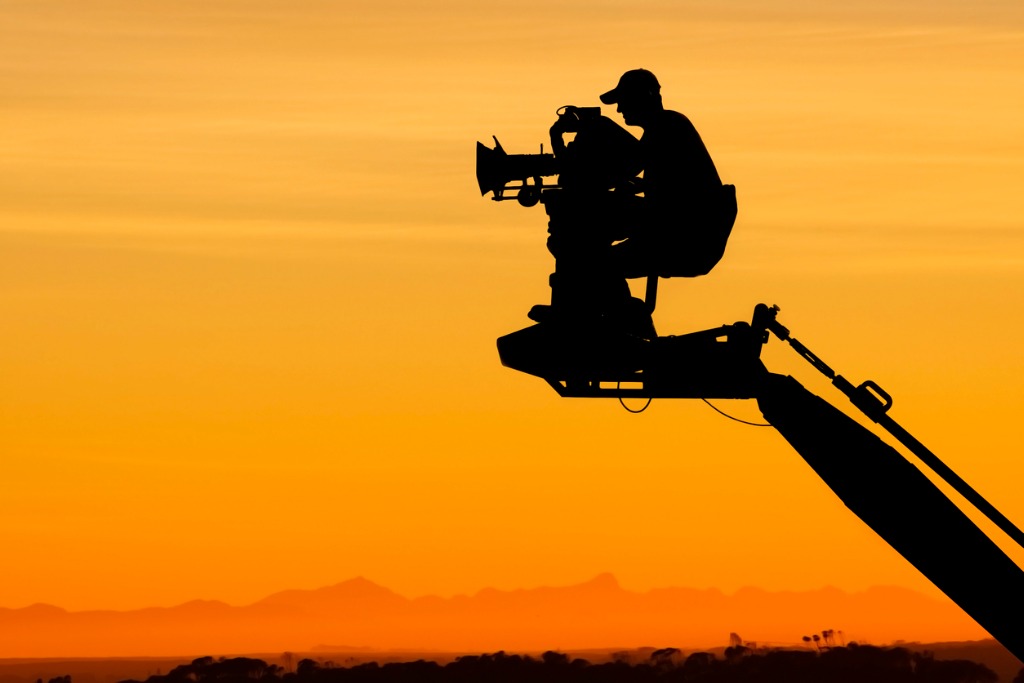
photo bysculpies via iStock
How to make more professional-looking videos is a concern for our one or two-person operations and is a good reason for why you need a jib for some productions.
The benefits of jibs are similar to other controlled movements that we can employ to raise the interest and entertainment levels of our videos. Why you need a jib and other videography tips is an interesting subject to consider.
Basic Camera Movements

photo bybrightstars via iStock
When shooting video, we’re often very concerned with limiting camera movement, which is one of the reasons why we invest in quality video or cinematography tripods.
I’ve come to appreciate that there are two things that will take a viewer right out of a video and they are jerky camera movements and poor audio. It seems that viewers are very forgiving about things in our videos but those two issues will have them quickly leaving our YouTube channel or Instagram Reels.
There are exceptions, of course, for artistic license, but that type of technique has to be very well designed and executed in order to work out.
So, when we want to add any camera movement to our videos, it is much better off to have it be a controlled motion. Here is a short list of some of the controlled motion techniques or equipment used in videography: static (no movement), panning, aerial/drone, tilt, zoom, dolly, crane/jib, handheld gimbal, and slider.
Some of these are made with our video fluid or geared head, but some of the other movements use additional equipment which is why you need a jib, slider, dolly, and so on.
Crane Shots
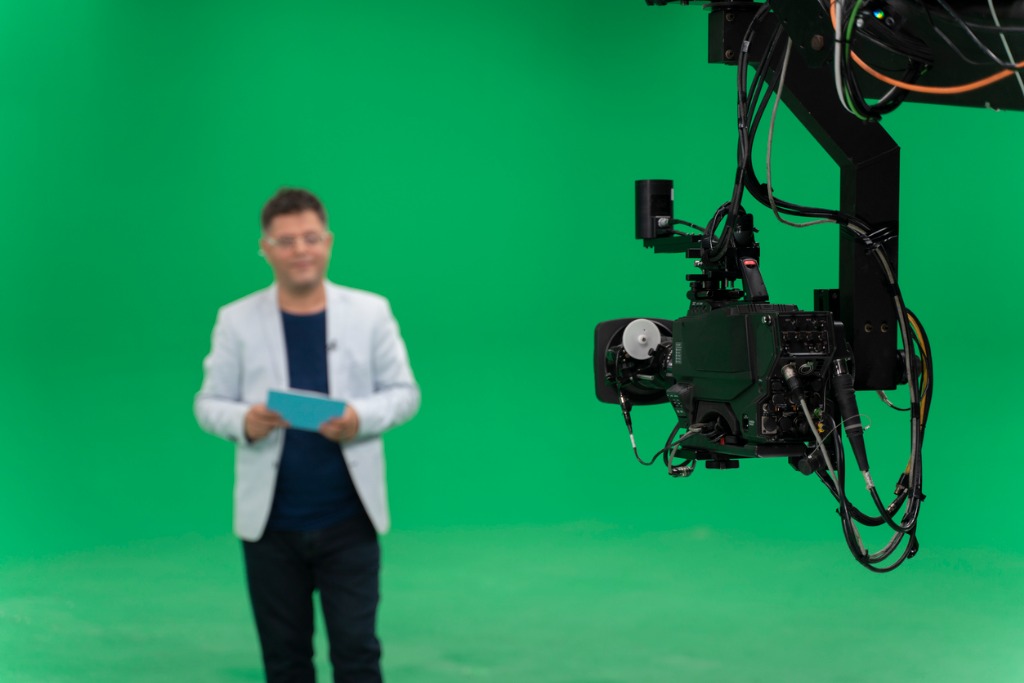
photo bybatuhan toker via iStock
Jibs are another name for cranes as used in cinematography and videography. You may have seen large motorized cranes on a movie set or perhaps on a TV show about movie-making. Some are the size of construction equipment and provide those interesting establishing shots which transition from a high vantage down to our eye level.
We can make use of the same movements on a smaller scale by using a sturdy video tripod or camera stand and a small to medium-sized jib.
Learn More:
Benefits of Jibs
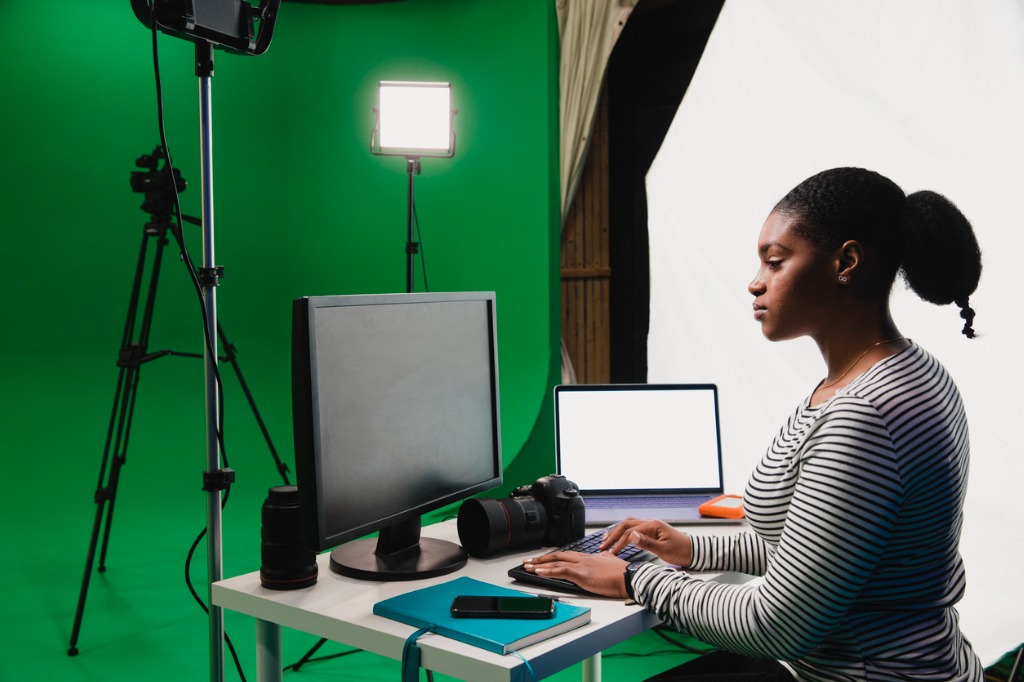
photo byDGLimages via iStock
One of the great benefits of jibs for our own productions is they add this crane shot style of motion without requiring us to rent one of the earthmover-size cinematography camera cranes. Also, since they are moderately sized, we can use them in our own small studios or on location in many types of places.
A jib like that can also be used for high-level shots without movement, we don’t have to add movement for that point of view. The jib will then make positioning the camera rig a simple process.
Jibs can also take the place of a drone in some circumstances, such as when we want to add a complex motion like raing up in level while also moving to the side a bit. You might try it both ways, with a jib and with a drone to see what best suits the shot you designed.
How to Use a Jib
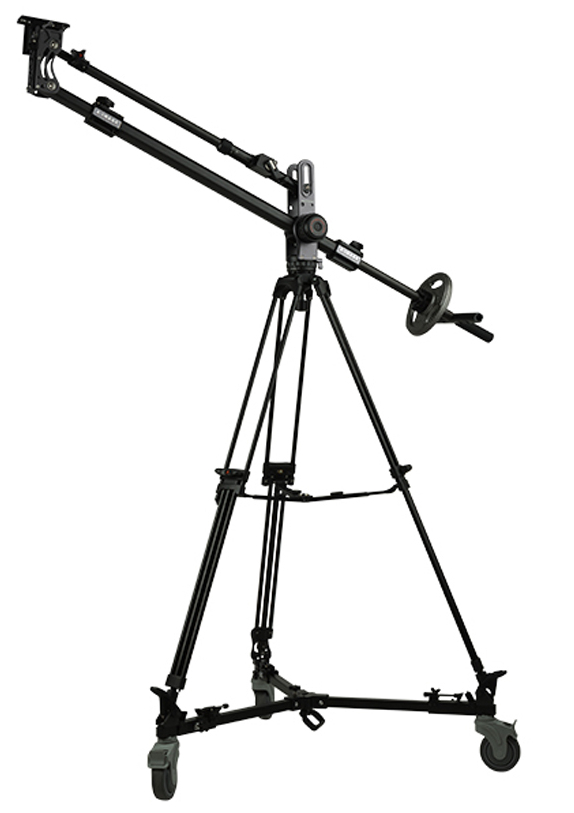
Well, that’s why you need a jib for your videography, next is how one actually works.
A jib like this one will mount on your tripod and has movements that pan side to side as well as moving up and down. There is a counterweight on one end and the camera attaches to the other. The counterweight is part of what makes the movement a smooth, controlled movement.
The part of the jib that the camera attaches to might also have additional movement capability for keeping the camera rig parallel to the ground as it moves.
photo byBrianAJackson via iStock
One thing I’ve noticed when using jibs, dollies, sliders, and similar gear is that I definitely need an external video monitor, either attached wirelessly or with a long cable. Some focus pulling may be in order too when using a jib, but you can also probably set your depth of field to cover the small changes introduced by a small jib.
Smooth, controlled camera movements can add a lot of interest and entertainment value to our videography work and are part of how to make more professional-looking videos.
Learn More:
We Recommend
Why You Should Use a Teleprompter for YouTube Videos

photo byDeagreez via iStock
What is the purpose of your YouTube video presence? Communication. Whether our vlog is about a hobby we enjoy, our business interests, or some sort of cause (big or little), clear communication of what we have to say and show. Clear communication is why you should use a teleprompter.
There are two aspects to consider regarding the importance of teleprompters for YouTube. One is avoiding mistakes leading to time wasting retakes and the other is creating an intimacy of apparent eye contact for viewers.
Best Teleprompters for YouTube
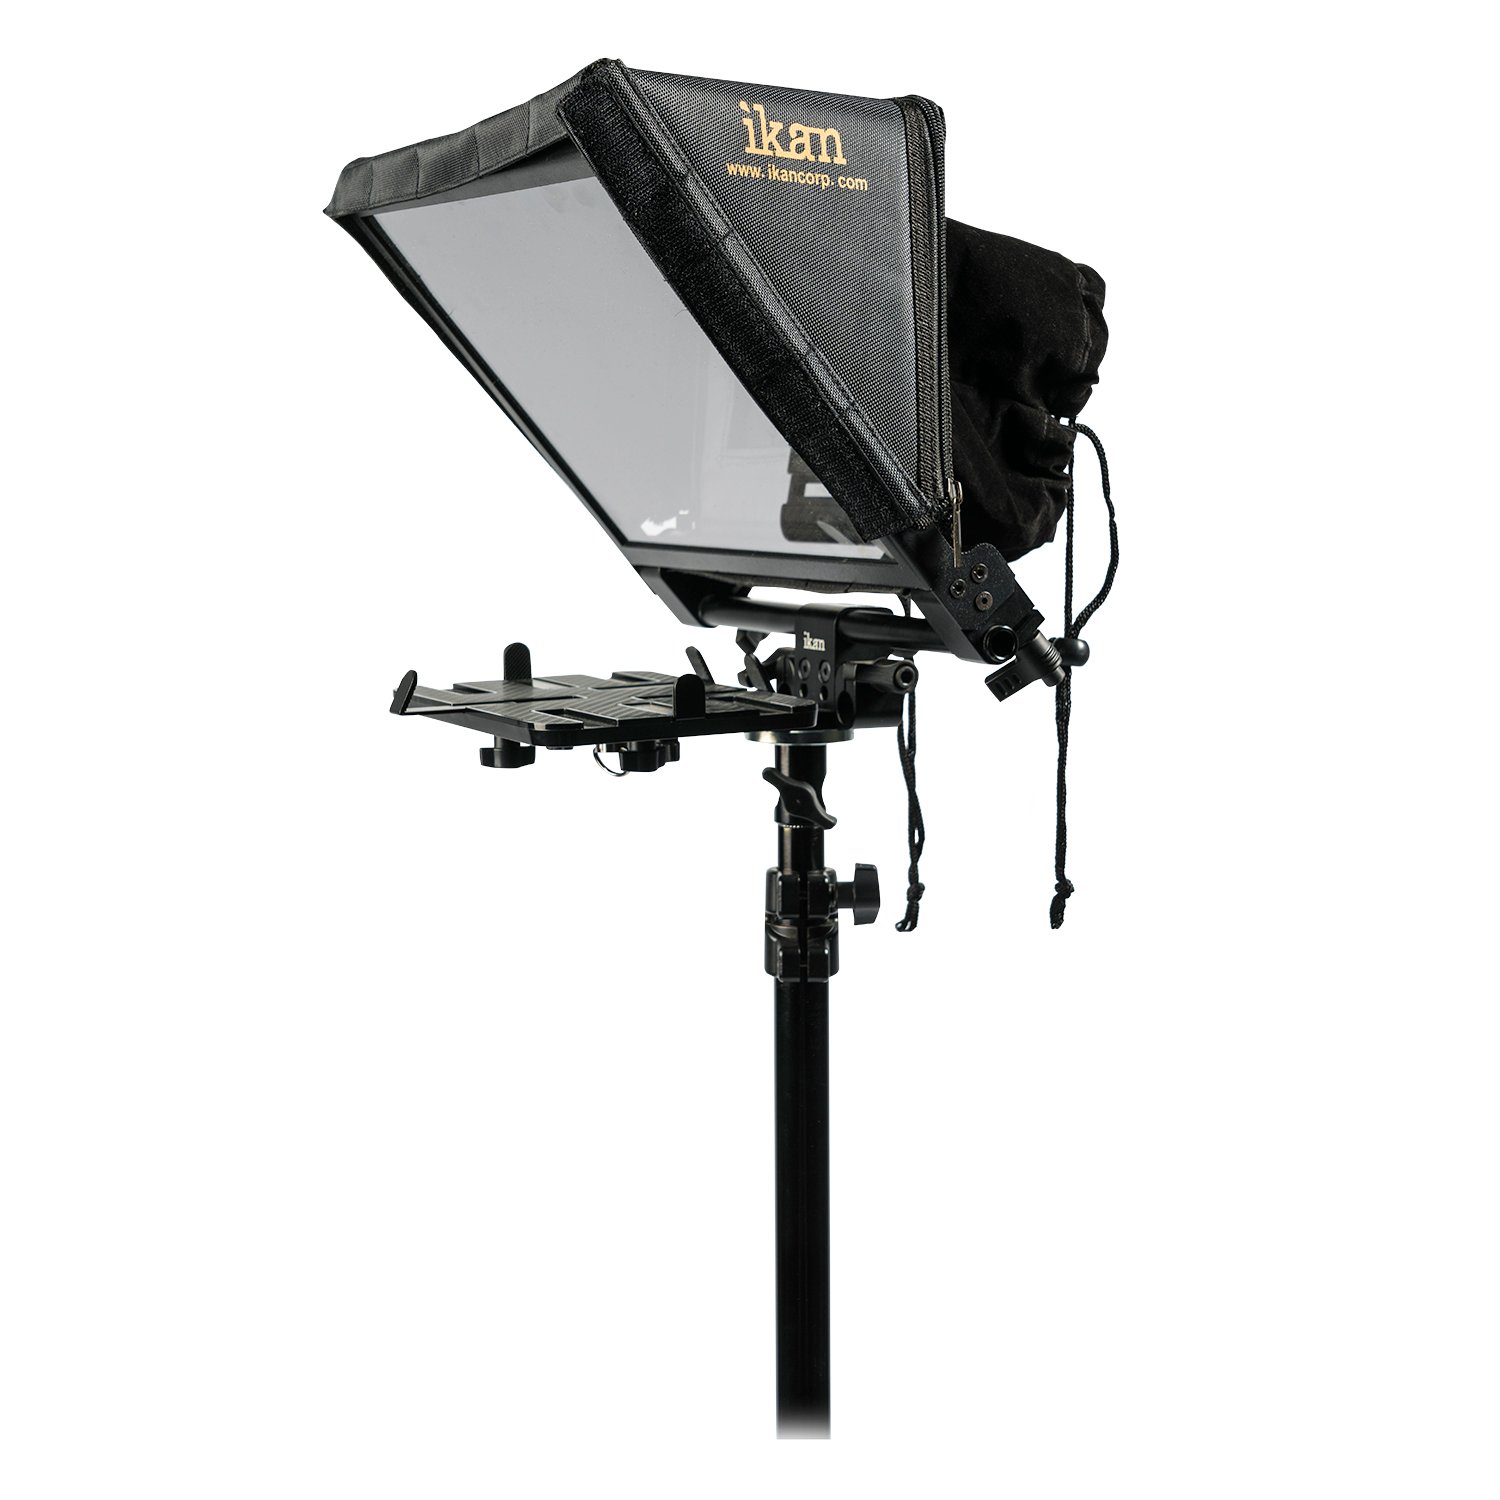
We could invest a whole lot of money in all sorts of videography accessories and there are good reasons for investing in high quality equipment for our videography and vlogging. Good equipment won’t guarantee that our videography is good, but using the right gear can often open up opportunities for us to create superior video.
The best teleprompters for YouTube videos are the new style of tablet teleprompters. Tablet teleprompters are accessible to virtually anyone who has the capability of recording and uploading video to the internet.
One excellent example of why you should use a teleprompter is the very high quality and reasonably priced Elite Universal Tablet & iPad Teleprompter from the video accessory manufacturer Ikan.
Ikan designs and makes their own equipment, providing serious videographers with options previously out their price range. New innovations are also made continuously by the developers at Ikan to ensure you get the features you need for making superior video.
So now let’s look a little deeper at those two reasons for why you should use a teleprompter, avoiding mistakes and creating eye contact.
Avoid Mistakes

photo byPixelsEffect via iStock
A good script is essential for a smooth video, especially when presenting instruction or for promoting a business or a cause. We don’t have to write out every single word, but we could. Other options are an outline, either detailed or sparse and fluid.
The advantages of using an outline or full script is that you won’t leave out important details or skip steps that are needed. It would be like if you were painting a beach scene watercolor and realised near completion that you had forgotten to treat the paper.
With a script, you have the steps in front of you. You can still improvise within the script or outline if that’s your style, but one of the best YouTube video tips for any type of vlog is to use a script and teleprompters.
Learn More:
- 4 Must-Have Accessories for Shooting Video
- Types of Microphones for Vlogging
- How To Edit Videos Like a Pro
Eye Contact

photo byvitranc via iStock
How do you make eye contact when you can’t see your audience? By making lens contact. Another of the best YouTube video tips is to look into the lens as you’re speaking. Then, when the video is viewed, the effect to the viewer is that you are making eye contact with them.
Eye contact is also a great reason why you should use a teleprompter. The importance of teleprompters is that if your audience feels connected to you, you are more likely to accomplish your goal for your video, whether that’s sales, instruction, motivation, or entertainment.
Tablet Teleprompters
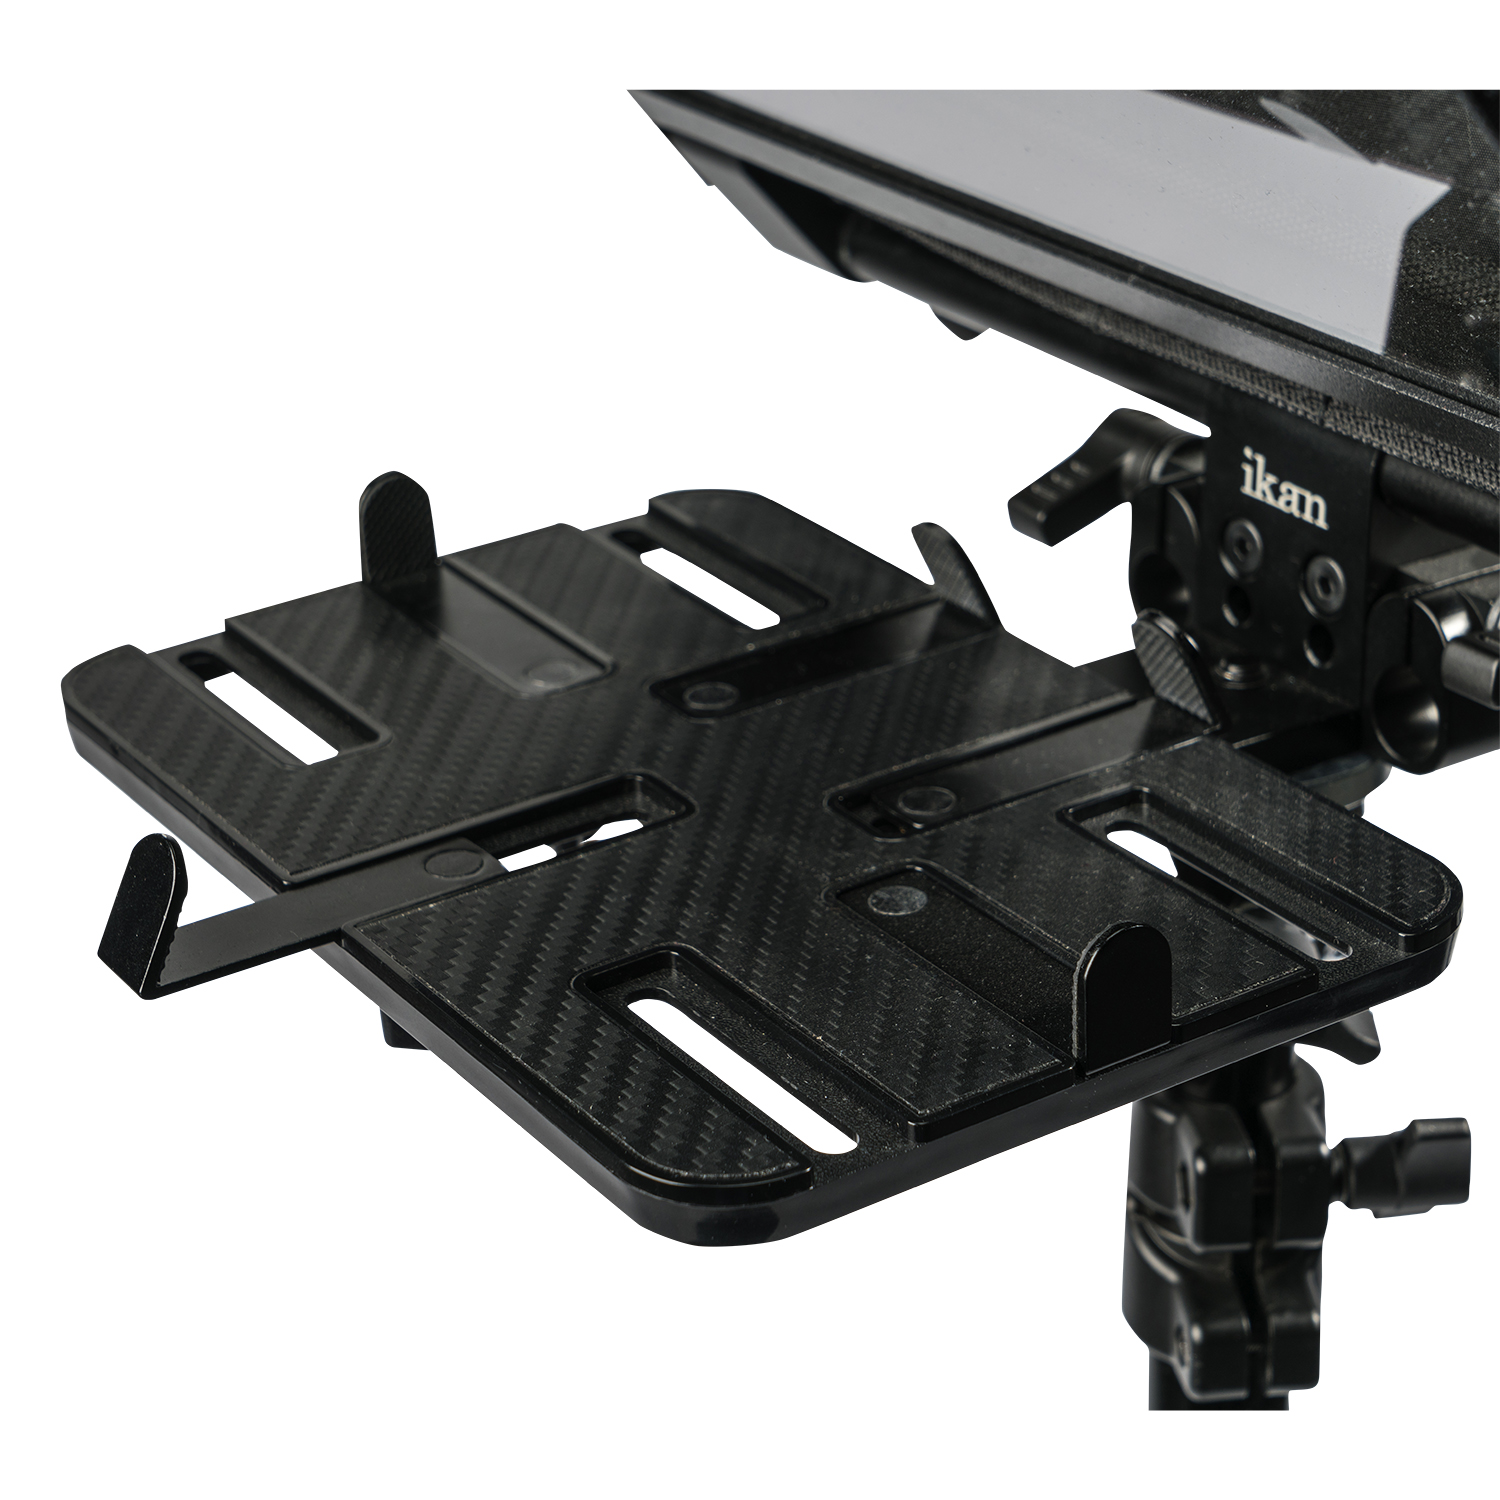
For most YouTubers, the best teleprompters to use are tablet teleprompters. These teleprompters for YouTube are simple to set use, easy to use, and are very cost effective.
The Elite Universal Tablet & iPad Teleprompter from Ikan is a tablet teleprompter that lets you use your own tablet from Apple, Android, Windows, or Fire in sizes from 6x9” to 9x13” or any size in between.
It consists of a holder for the tablet, an angled mirrored glass, and a bracket and hood for attaching to the camera lens. You record right through the glass that is reflecting the script to you so you can maintain 100 percent eye contact should you desire. All material used, from the strong aluminum frame to the optical glass are extremely high quality.
As a bonus for your YouTube video tips, it can be a bit unnerving or even intimidating to have 100 percent eye contact throughout the entire video. Just as in real life, look away every now and then to preserve some naturalness. Especially if you are demonstrating something should you change where you’re directing your vision from time to time.
Best Teleprompters for YouTubers
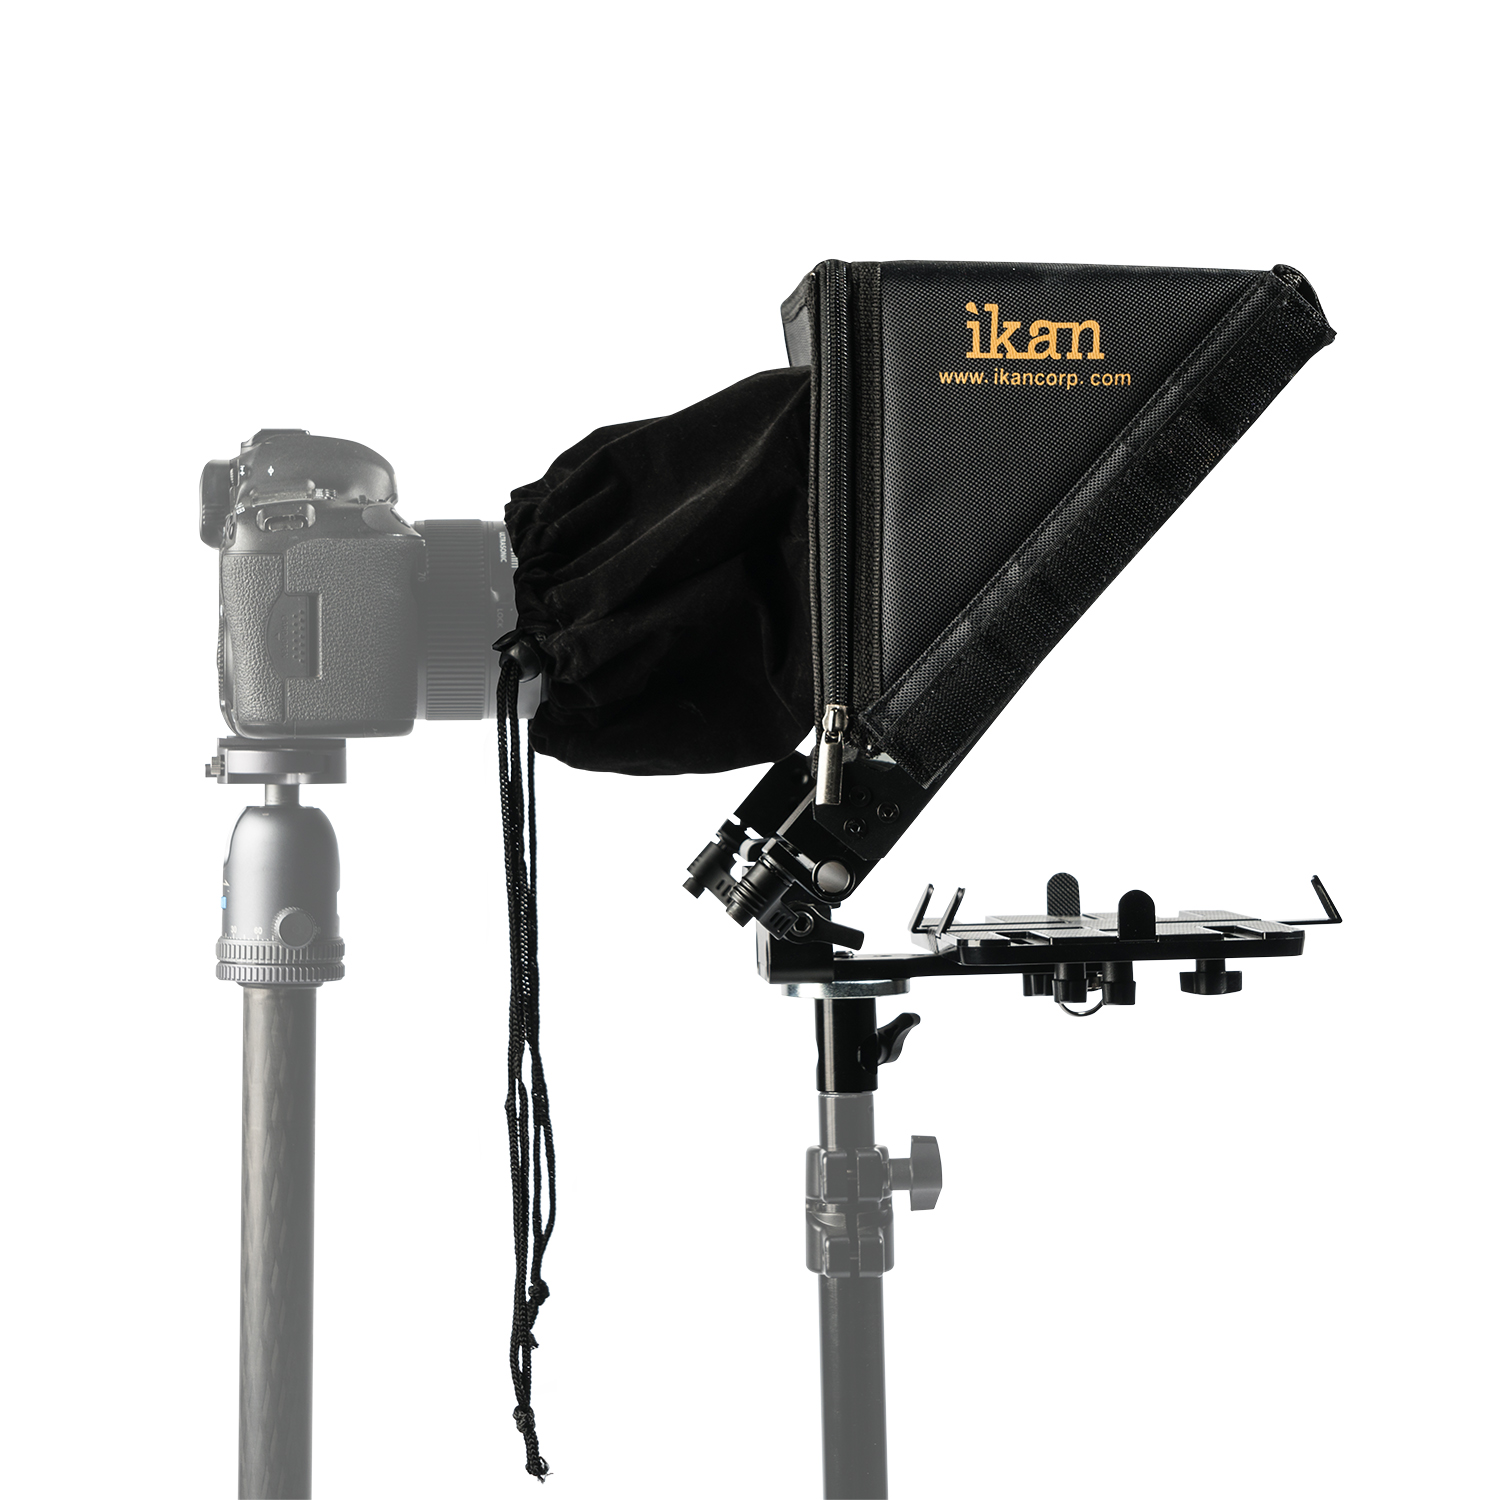
Tablet teleprompters like the Elite Universal Tablet & iPad Teleprompter are also great for YouTubers for another reason, price. Just because we feel a need for an addition or upgrade to our video equipment doesn’t mean we have to spend a huge stack of money on it.
Tablet teleprompters of high enough quality to be reliable and not affect the optical quality of our videos aren’t pocket change, but spending about the same as for a good light or nice lens isn't out of reach for serious YouTube vloggers.
As part of your videography gear bag, being able to maintain eye contact and avoid time wasting mistakes are two excellent reasons why you should use a teleprompter for your YouTube videos.
Learn More:
- How To Shoot Quality Video Footage
- Simple Tips for Vlogging: How To Create Better Content
- Plan a Solid Video Shoot With These Pre-Production Tips
We Recommend
Why You Should Use Canon EF Lenses on Your EOS R Camera
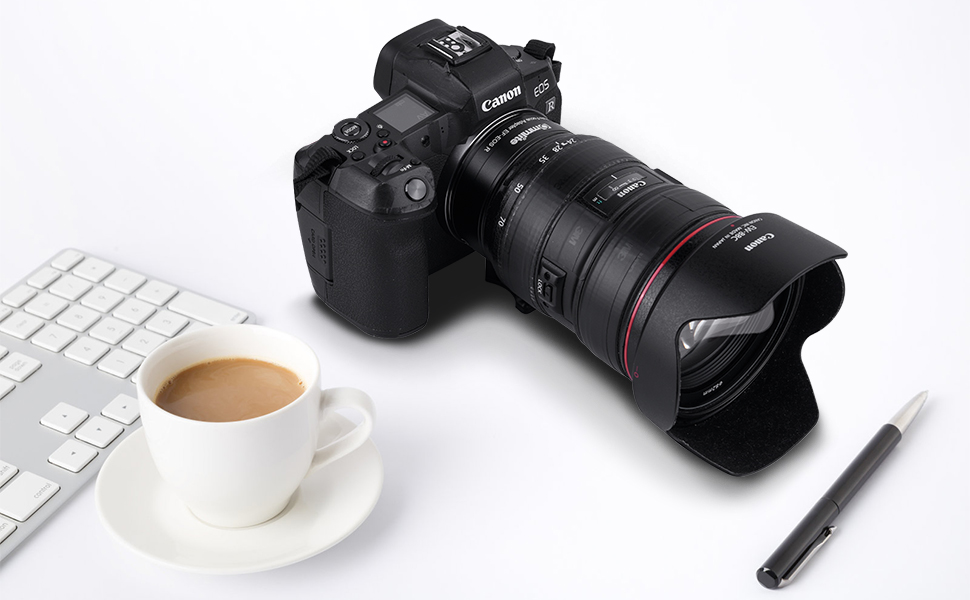
You’re looking at the features and form of that fantastic new EOS R series from Canon and would like to justify the purchase of one or the other of these new models. But, you’ve been caught up in gear acquisition syndrome (GAS) before, and besides, you’ve got all of those Canon EF lenses already.
One of the best aspects of upgrading to a mirrorless camera as a DSLR user is that we don’t have to ditch all of the lenses we already have. Since the flange to film plane distance is almost always less in regards to our previous camera and lenses vs mirrorless, an adapter can usually be made to fit DSLR lenses on mirrorless bodies.
EF-RF Adapter
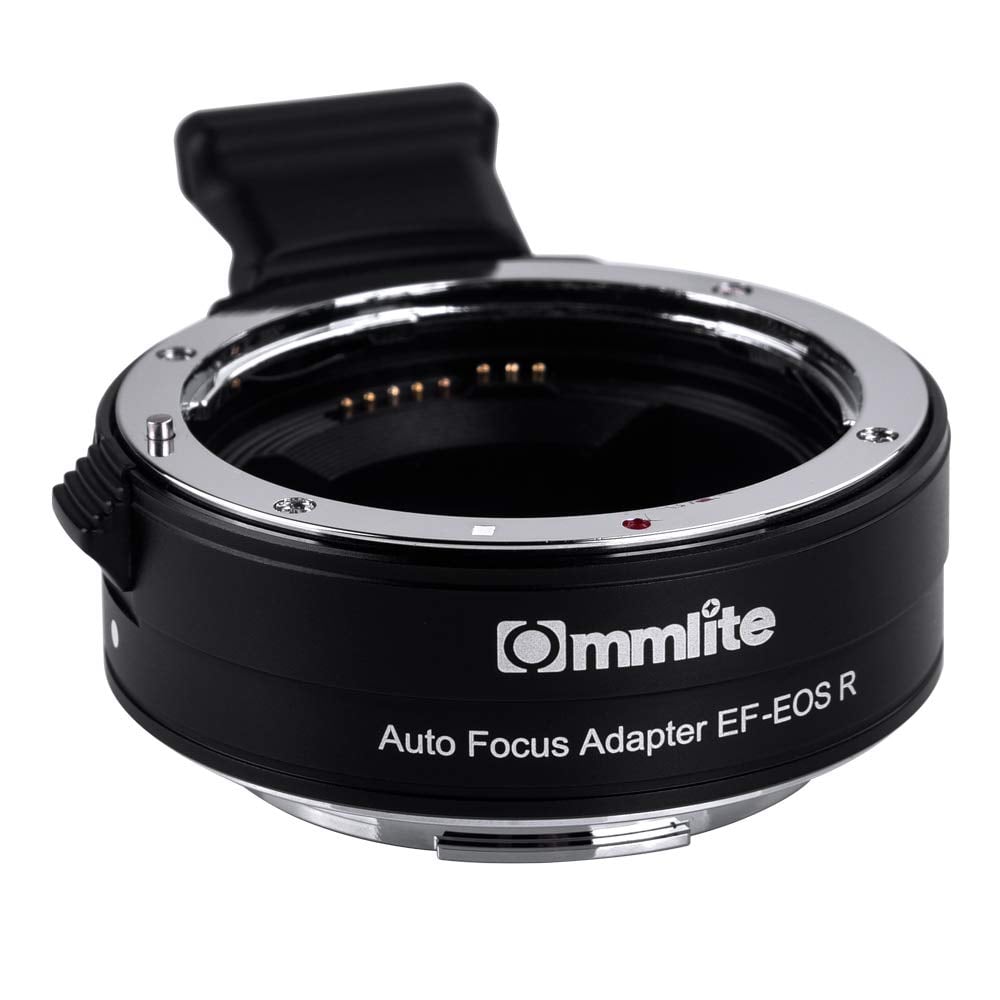
To cut to the chase for Canon users, with an EF-RF adapter you can use EF lenses on EOS R bodies. Besides the fine Canon brand adapters, various 3rd party manufacturers are making high quality EF-RF adapters.
Since Canon EOS R cameras are excellent video cameras as well as still cameras, one manufacturer to consider is Ikan Corp, designer and manufacturer of high quality and innovative videography and cinematography accessories and solutions.
Ikan designs and makes their own equipment meaning you can get amazingly high quality and fully capable gear for prices that are very reasonable. Their Commlite EF-RF Lens Adapter (CM-EF-EOS-R) adapts your existing Canon EF lenses to fit and function on EOS R bodies.
Adapts All Functions
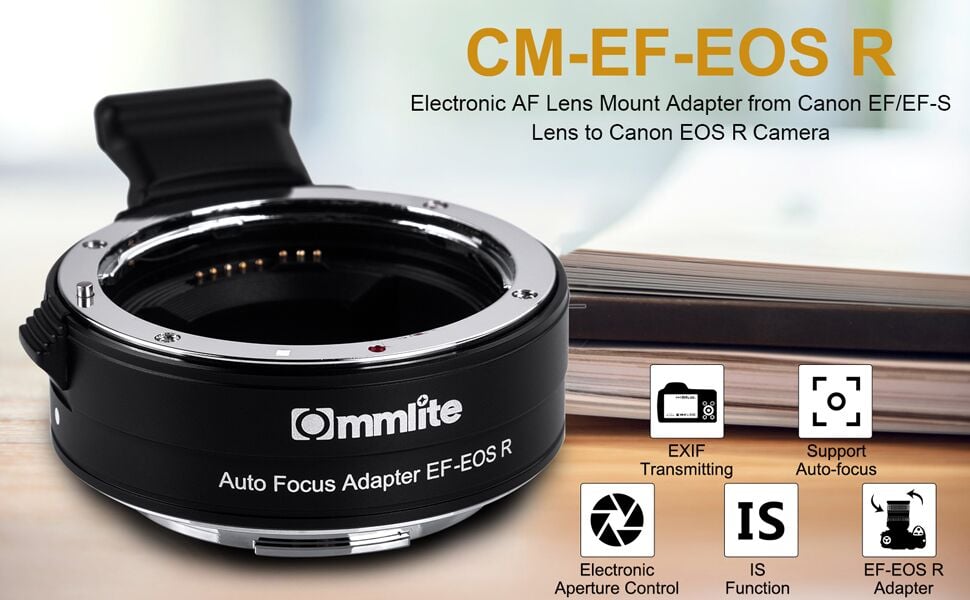
Canon EF lenses were quite revolutionary when the EOS system was introduced in the 1980s as these were the first series of lenses for 35mm SLR photography that had 100% electronic communication between camera and lens.
The AF systems for Nikon and Minolta SLRs, a couple of the major players along with Canon, Pentax, and Olympus at that time, had lens mounts that were a hybrid of mechanical and electronic interaction. Instead of adapting AF and electronic information transfer to their FD lens mount, Canon decided to build an all-new system from the ground up.
All Canon EF lenses have a lens mount with no moving parts, no mechanical information transfer or actuations. It’s all electronic. Canon EF lenses have motors which adjust focusing and lens aperture or f-stop.
Learn More:
Electronic Communication and Actuation
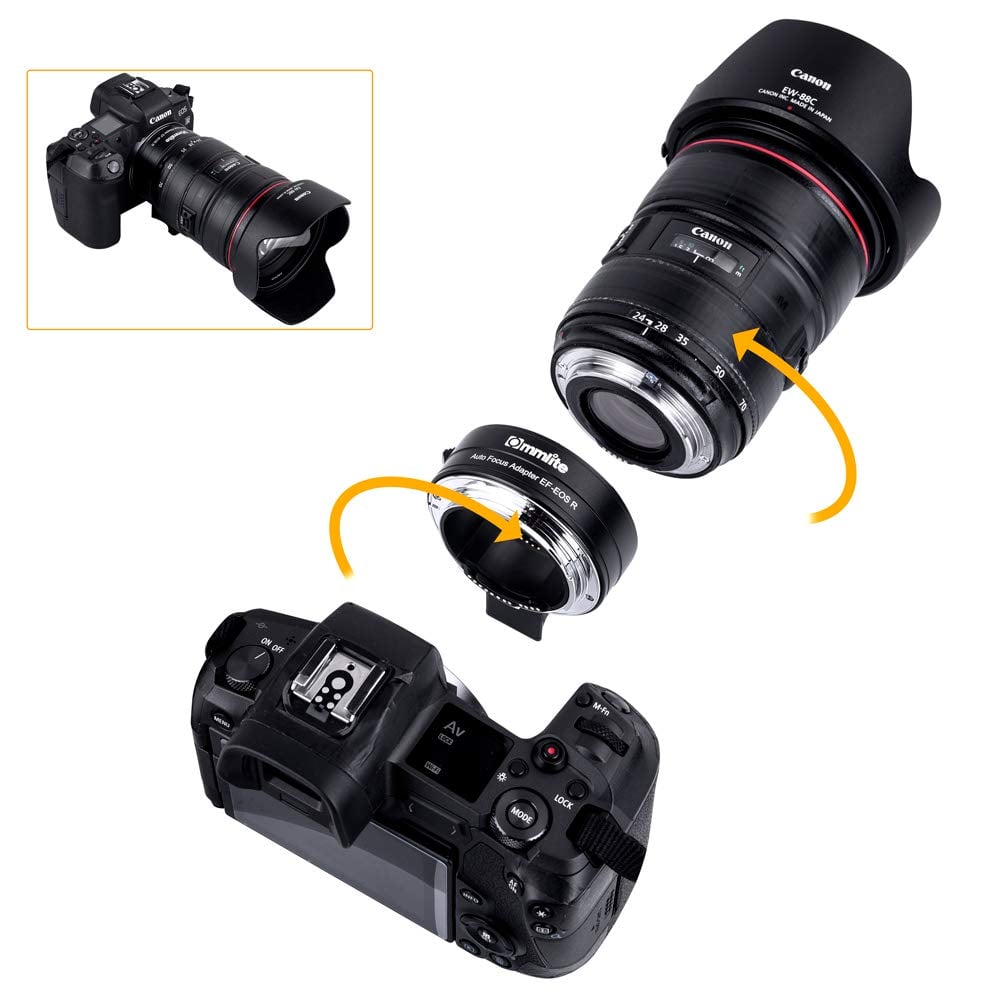
The actual settings are directed and communicated back and forth between camera and lens. So not only does the camera tell the lens what to do for focusing and aperture, but the lens tells the camera what is actually going on inside the lens, including what focal length it is, all of which allows for Canon’s superb automatic flash control.
As we moved into digital photography, this information told back to the camera became part of the EXIF information recorded along with the digital image which is also useful in post-processing. So, it really is a big deal to make sure that all communication still happens if we use EF lenses on EOS R cameras with an EF-RF adapter.
The Commlite EF-RF Lens Adapter from Ikan preserves all of these important functions and lens to camera electronic communication so it’s not much different from using Canon RF lenses on the EOS R cameras. It even continues support for Canon’s IS image stabilization functions.
Benefits of EF Lenses
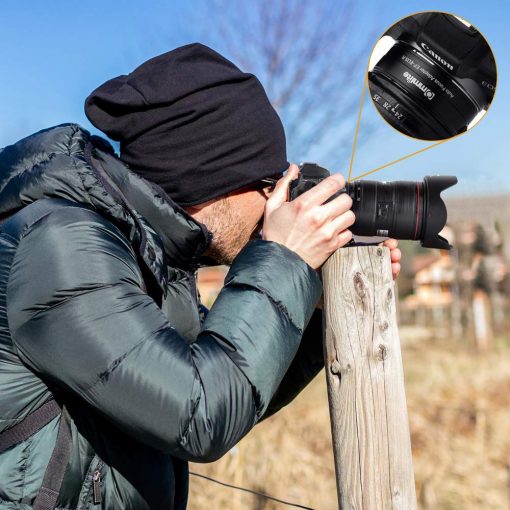
We already mentioned not losing use of your existing lenses on an ESO R camera, but there are some other benefits of EF lenses on R bodies. The new Canon RF lenses are fantastic and we don’t want to discourage getting them, but there are still some focal lengths and lens types under-represented as of right now in the RF lens mount.
Some lens types in EF mount you will find very useful on an EOS R camera are fisheye lenses, cinema lenses, long telephoto zooms, and fast super telephoto primes. In addition to the Canon EF lenses, the Commlite EF-RF Lens Adapter will also adapt 3rd party lenses such as Tamron and Sigma EF mount lenses to the EOS R camera.
High Quality Adapter
You don't want to pair an inferior piece of equipment with your amazing new camera and your high quality Canon EF lenses, which you won’t have to worry about with the Commlite EF-RF Lens Adapter.
It is made of aluminum alloy, has gold plated electronic contacts, a standard lens release button, and has a ¼-20 thread machined in with a removable tripod mount adapter also included for mounting to camera cages, monopods, nodal mounts, and tripods.
Bottom line: go ahead and pick out your new Canon EOS R camera regardless of how many Canon EF lenses you already have. Your current lenses will fit and operate just fine on your new camera.
Learn More: